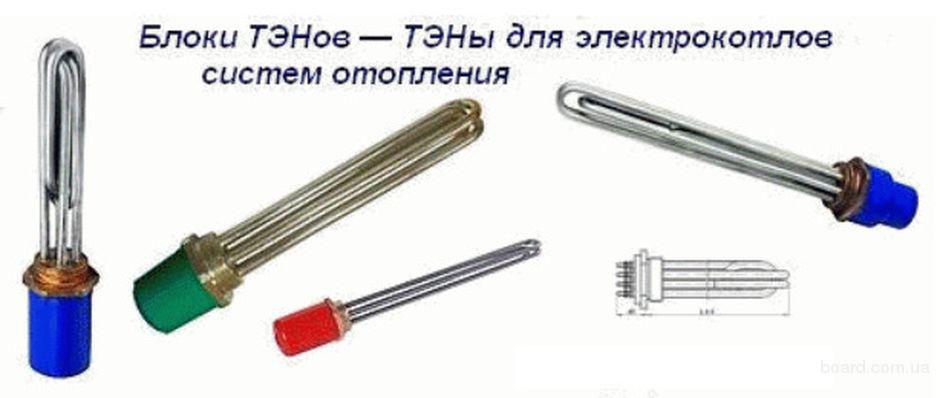
- The device of bimetallic batteries
- Criteria for choosing radiators
- Ways to connect radiators
- Making a homemade radiator
- Assembly, connection, pressure testing of the radiator
- Other articles in the section: Radiators
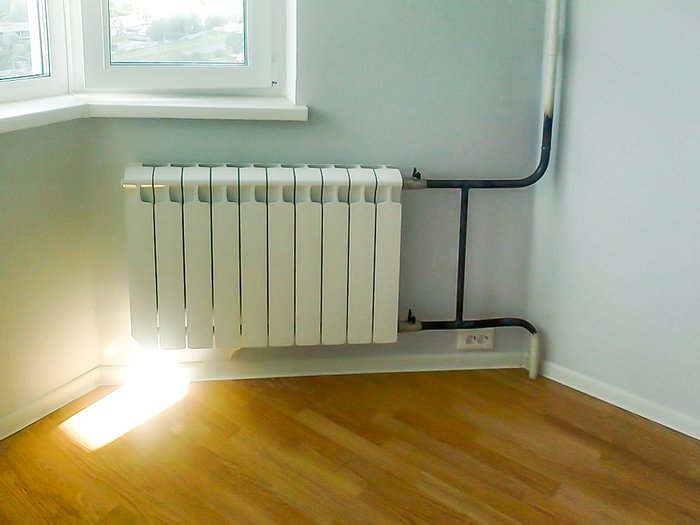
- Battery installation
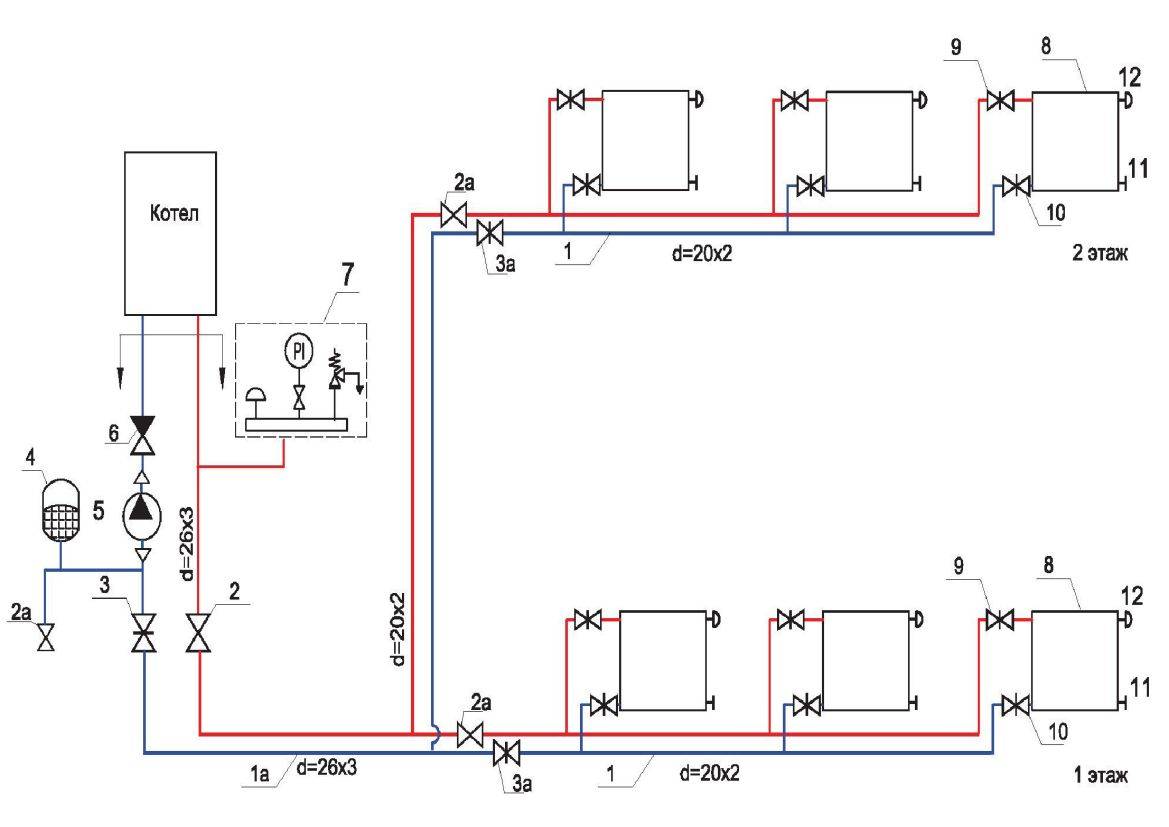
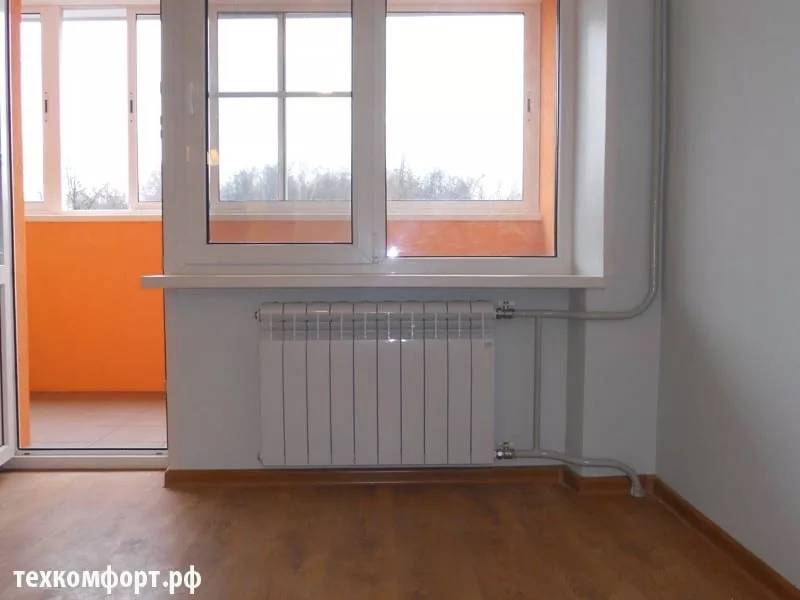
- Radiator connection diagram.
- Marking the wall for brackets
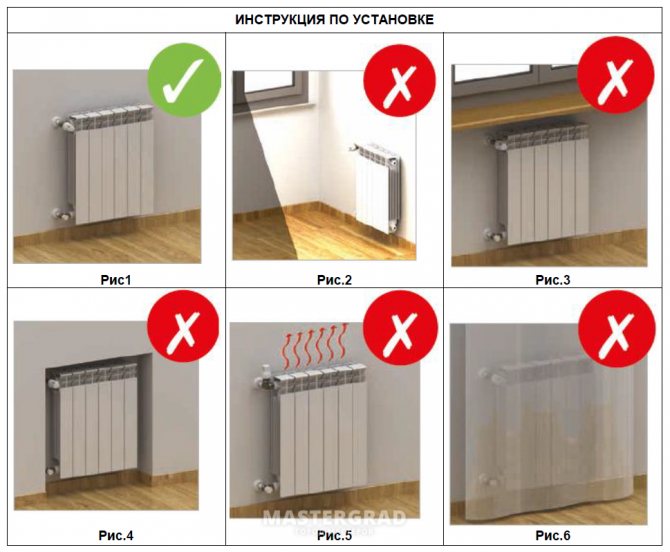
- Choosing a place and method of installing a radiator
- Coolant circulation methods
- Do-it-yourself battery installation recommendations
- Radiator installation
- Trial
- Introduction
- Heating radiator piping options
- Binding with one-way connection
- Binding with diagonal connection
- Strapping with saddle connection
The device of bimetallic batteries
As the practice of recent years has shown, of the listed series of radiators, bimetallic models are the most efficient and reliable. They have a clear advantage over other materials, which are:
- high resistance to corrosion;
- a wide range of operating temperatures and pressures;
- simple possibility of changing the heat transfer of the device by changing the number of assembled sections;
- low inertia during heating and cooling;
- a small amount of coolant required for filling;
- low weight, facilitating installation;
- affordable for most people.
It should also be noted the ease of installation of bimetallic radiators.Due to the presence of standard fasteners, this process will not cause structural damage and will ensure high-quality fixation of heating equipment.
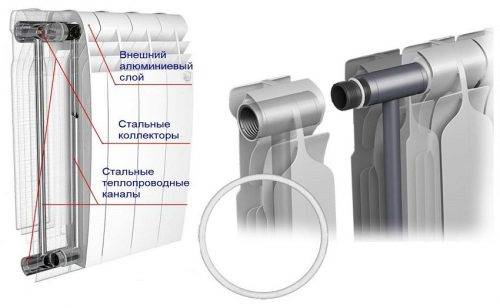
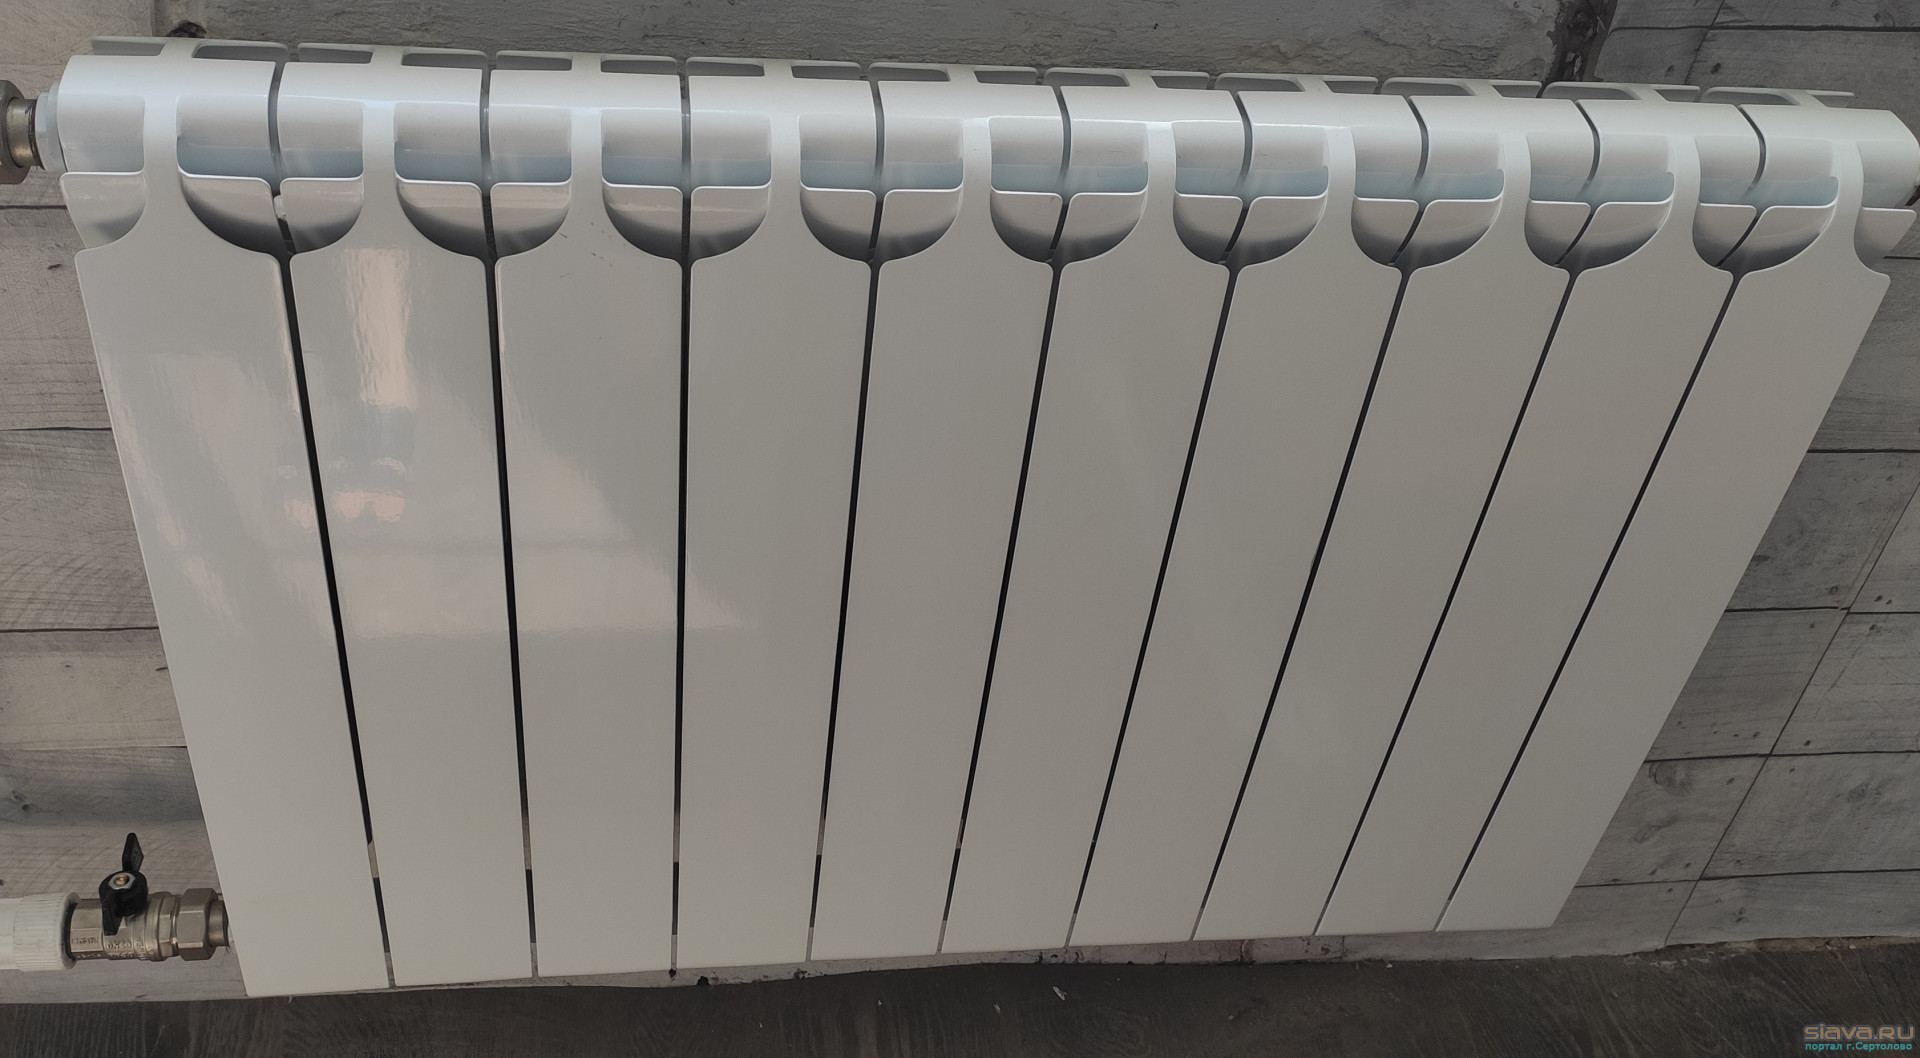
The design of bimetallic batteries consists of a set of sections. When assembled, such a package consists of two horizontal pipes connected by vertical hollow ribs through which the coolant circulates.
To increase the heat transfer of the heater, the outer surface of the fins and pipes is increased due to additional planes. The sections are connected to each other by means of hollow nipples with double-sided thread, provided that a sealing gasket is installed.
To protect against corrosion, the inner surface of the sections is covered with a protective layer of aluminum alloy. The outer metal surface is painted according to the technology of thermal application of powder polymer paints. This gives the products a beautiful appearance and ensures their durability.
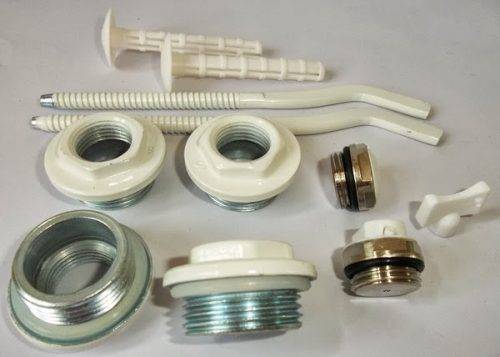
Before you install a bimetallic heating radiator with your own hands, you need to purchase a set of 4 special plugs. Two of them have a ½ inch internal thread, the third must be without a hole, and one has an air outlet device installed
When buying a kit, you should pay attention to the direction of the thread - there should be two right and two left
Criteria for choosing radiators
When choosing bimetallic batteries, it initially becomes necessary to decide which type of structure to prefer - monolithic or sectional.
The second option is the most popular on the market. The sectional type of batteries attracts buyers in that, if necessary, it is possible to add a certain number of links or, conversely, reduce them.The method of calculating their number does not cause difficulties.
Monolithic structures have the best technical characteristics in terms of reliability under any operating conditions. They have a margin of safety in many respects, which is not always required under certain conditions of use. At the same time, the cost of this type of device is somewhat higher compared to other models.
The market offers a wide range of different devices. In this series, among the popular foreign brands, models of Russian manufacturers also occupy a worthy place. Among foreign radiators, German, Italian and Chinese are popular.
Most European high-quality heating appliances are produced in Italy. Among the Italian models, one can distinguish such types as GLOBAL and Sira.
The line of bimetallic radiators "Global" is represented by four main series:
- Global Style - suitable for window sills located at any height;
- Global Style Plus - have a slightly increased size and power;
- Global Sfera - the upper surface is made in the form of a sphere;
- Global Style Extra is an improved and improved model in its series.
Among the radiators of this company, the Global Style Extra model is the most popular, which is distinguished by high mechanical strength, resistance to water hammer, temperature fluctuations, and corrosion protection. Devices are used in multi-storey buildings. The estimated price of one link is 700 rubles.

Prices for bimetal radiators Global
bimetal radiators Global
Batteries of the Sira model range are distinguished by high resistance to sudden pressure surges and water hammer, as well as a significant warranty period.
Sira radiators are represented by the following models:
- Sira Competitive;
- Sira Gladiator;
- Sira RS Bimetal;
- Sira Alice;
- Sira Primavera;
- Sira Omega.
In the domestic market, Chinese-made batteries are represented by Oasis radiators. Products have international certification, have good technical characteristics. Users note high technical performance, long warranty period, low prices.


Prices for bimetallic radiators Oasis
bimetallic radiators Oasis
Rifar radiators are in the greatest demand among buyers of domestic products. The products of this manufacturer are represented by a wide range of various bimetallic devices, among which there are sectional and monolithic models, which are not inferior to world analogues in terms of technical characteristics.
The Russian market is constantly replenished with high-quality Russian-made heating radiators, including bimetallic ones, that meet modern operating requirements.
For example, SNPO Teplopribor has been releasing a new model Teplopribor BR1-350 since 2016. The stores offer Russian radiators Halsen BS with a working pressure of 25 atm. and warranty period up to 20 years.
Models of radiators "Revolution Bimetal" brand "Royal Thermo" are produced in Russia and are available in two versions:
- Revolution Bimetall 500. The height of the heating device is 564 mm, the depth is 80 mm, the center distance is 500 mm. Heat dissipation - 161 watts. Available with an even number of sections - 4, 6, 8, 10 or 12.
- Revolution Bimetall 350. They have a center distance of 350 mm, a height of 415 mm, and a depth of 80 mm. Heat dissipation - 161 watts. An even number of sections in the device is from 4 to 12.

All models are presented on the Russian market, they are sold in specialized stores.
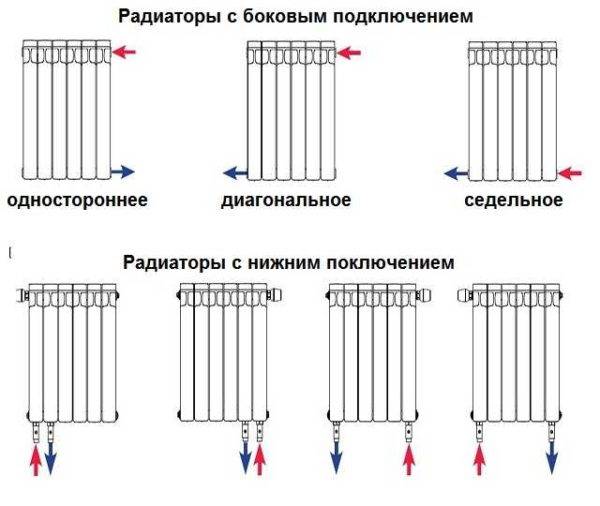
Ways to connect radiators
In addition to the heating circuit, it is important to choose the right way to connect the batteries to the heating circuit. There are the following connection options:
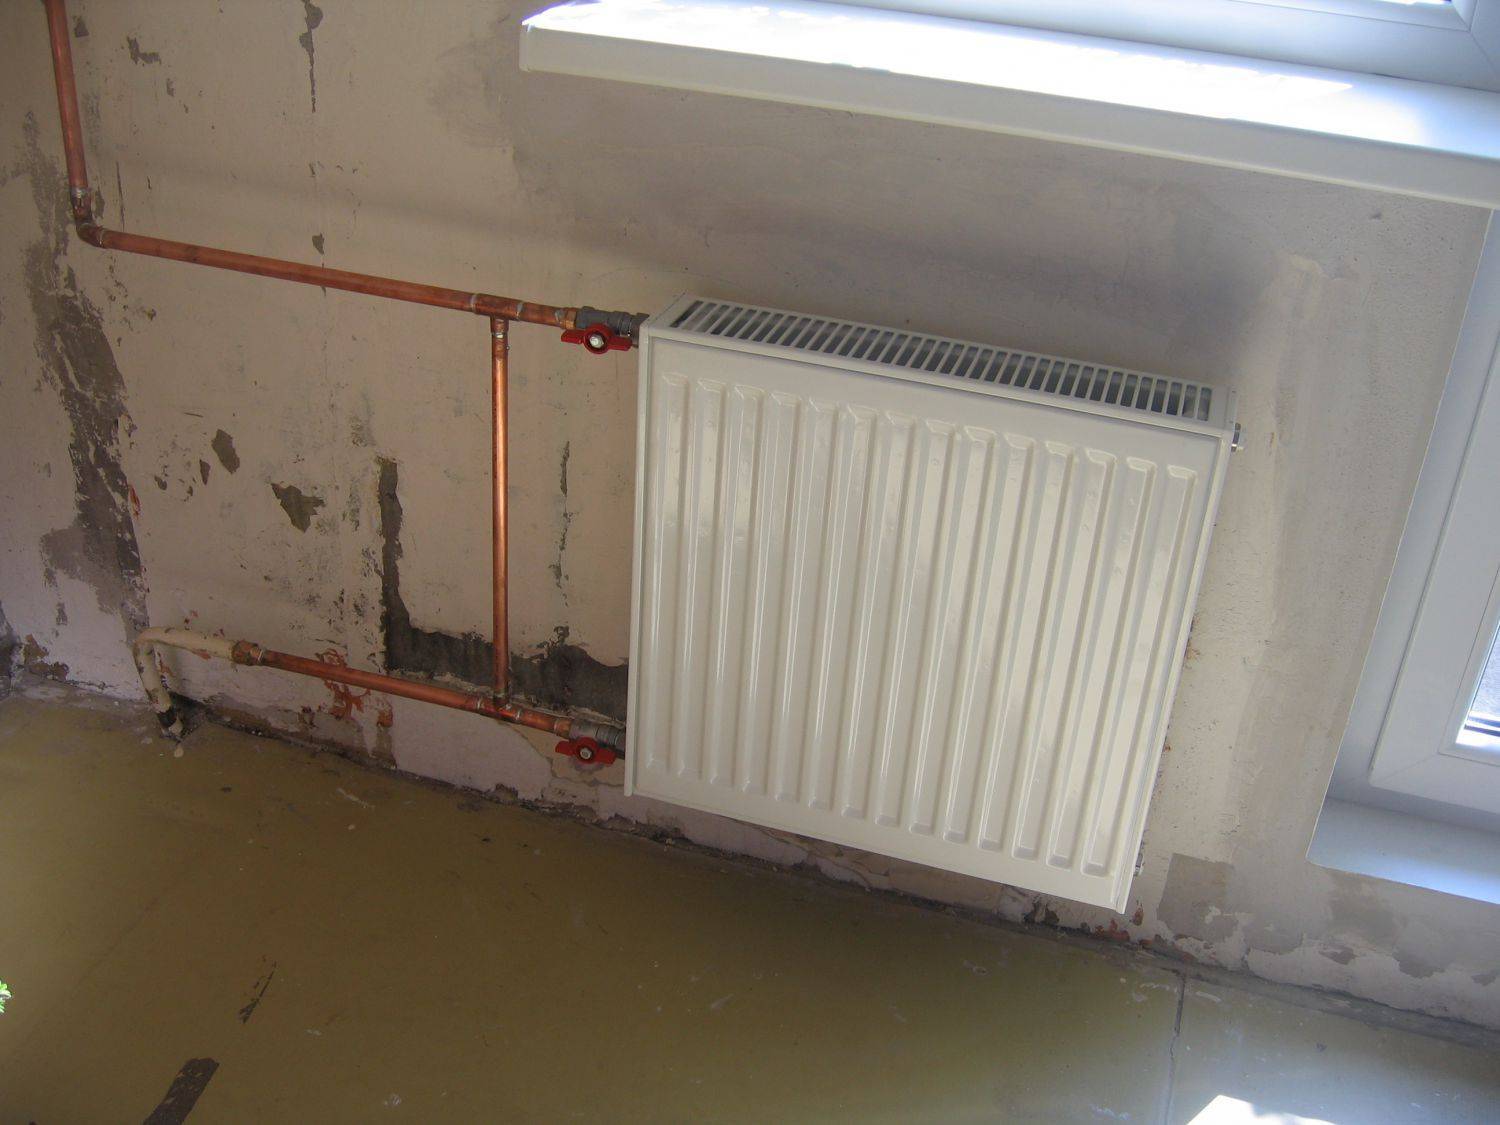
- lateral. It is in demand in apartments of multi-storey buildings, where the pipe decoupling is built vertically. With a lateral connection, the upper branch pipe of the battery is connected to the pipeline through which the heated coolant is supplied, and the lower one is connected to the return. If you do the opposite, then the efficiency of the heating device decreases by 7%. Lateral connection is used for batteries in which the number of sections does not exceed 12-15;
- diagonal. With this connection, the direct pipeline is connected to the upper radiator pipe, and the return pipe is connected to the lower pipe located on the opposite side. The diagonal method is characterized by maximum efficiency, since it provides uniform heating of the heater and heat transfer over its entire surface. It can be used to connect heating devices with a large number of sections. However, this option complicates installation and further maintenance. Therefore, instead of 14-16 sectional bulky structures, it is advisable to use 2 radiators, which consist of 7-8 sections.
The least demanded is the bottom connection, which is usually used when installing a single-pipe circuit, where radiators are connected in series. To avoid heat transfer losses, the number of sections is increased in batteries remote from the boiler or a circulation pump is used.When choosing the second method for solving the problem of uneven heating, it should be taken into account that the system becomes volatile.
Making a homemade radiator
Let's see how to make a heating battery with your own hands using the example of a sectional radiator. We will heat a large room, so we need a large radiator, three meters wide, consisting of four pipes. For assembly we need:
- Four pieces of pipe three meters long (diameter 100-120 mm);
- Sheet metal for the construction of plugs;
- Ordinary metal water pipe for jumpers;
- Fittings - since the radiator turns out to be large, you need to give it additional rigidity;
- Threaded fittings.
Of the tools you will need a grinder (angle grinder) and a welding machine (gas or electric).

We cut off the plugs, jumpers and pipes of the desired length. Then we cut holes for the jumpers and weld them. The last step is to weld the plugs.
If the pipe was intact, we cut four pieces of three meters from it. We process the edges of the pipes with a grinder so that the trim is smooth. Next, we cut out eight plugs from a piece of sheet metal - we will later insert fittings into two of them. We cut the water pipe into pieces, the length of which should be slightly larger than the diameter of the pipes used (by 5-10 mm). After that, we start welding.
Our task is to connect four large pipes with jumpers. To give additional rigidity, we add jumpers from reinforcement.We place jumpers from the pipe near the ends - here you can retreat by 90-100 mm. Next, we weld our plugs to the end parts. We cut off the excess metal on the plugs with a grinder or welding - as it is more convenient for anyone.
When carrying out welding work, special attention should be paid to the quality of welds - the reliability and strength of the entire radiator depends on this.
Radiator connection diagrams:
1. Side connection;
2. Diagonal connection;
3. Bottom connection.
Next, proceed to the installation of threaded fittings on the side plugs. Here you need to decide how the coolant will flow - based on this, you can choose a diagonal, side or bottom connection scheme. At the last stage, we carefully clean all our connections with a grinder so that the radiator acquires a normal appearance. If necessary, cover the radiator with paint - it is desirable that it be white.


When everything is ready, you can start testing the radiator - for this you need to fill it with water and inspect it for leaks. If possible, pressurized water should be supplied, for example, connect a radiator to the water supply. When the check is completed, you can proceed to install the radiator in the heating system.
Today, heating systems are laid using plastic pipes of small diameter, using circulation pumps to move the coolant. Therefore, it is necessary to ensure high-quality fasteners for the radiator so that it does not break the pipes. It is best to hang it on a few metal pins driven into the wall, or mount it on metal floor supports.
Assembly, connection, pressure testing of the radiator
- Before installing the radiator, unscrew the plugs that are located at the top and bottom at the ends of the battery. They must be unscrewed, as they are made of plastic, and they cannot withstand the temperature in operation.
- Instead of plastic plugs, Mayevsky taps and steel plugs, as well as shut-off and control valves, are installed on the radiator. Installation of cranes and fittings is carried out depending on the installation scheme.
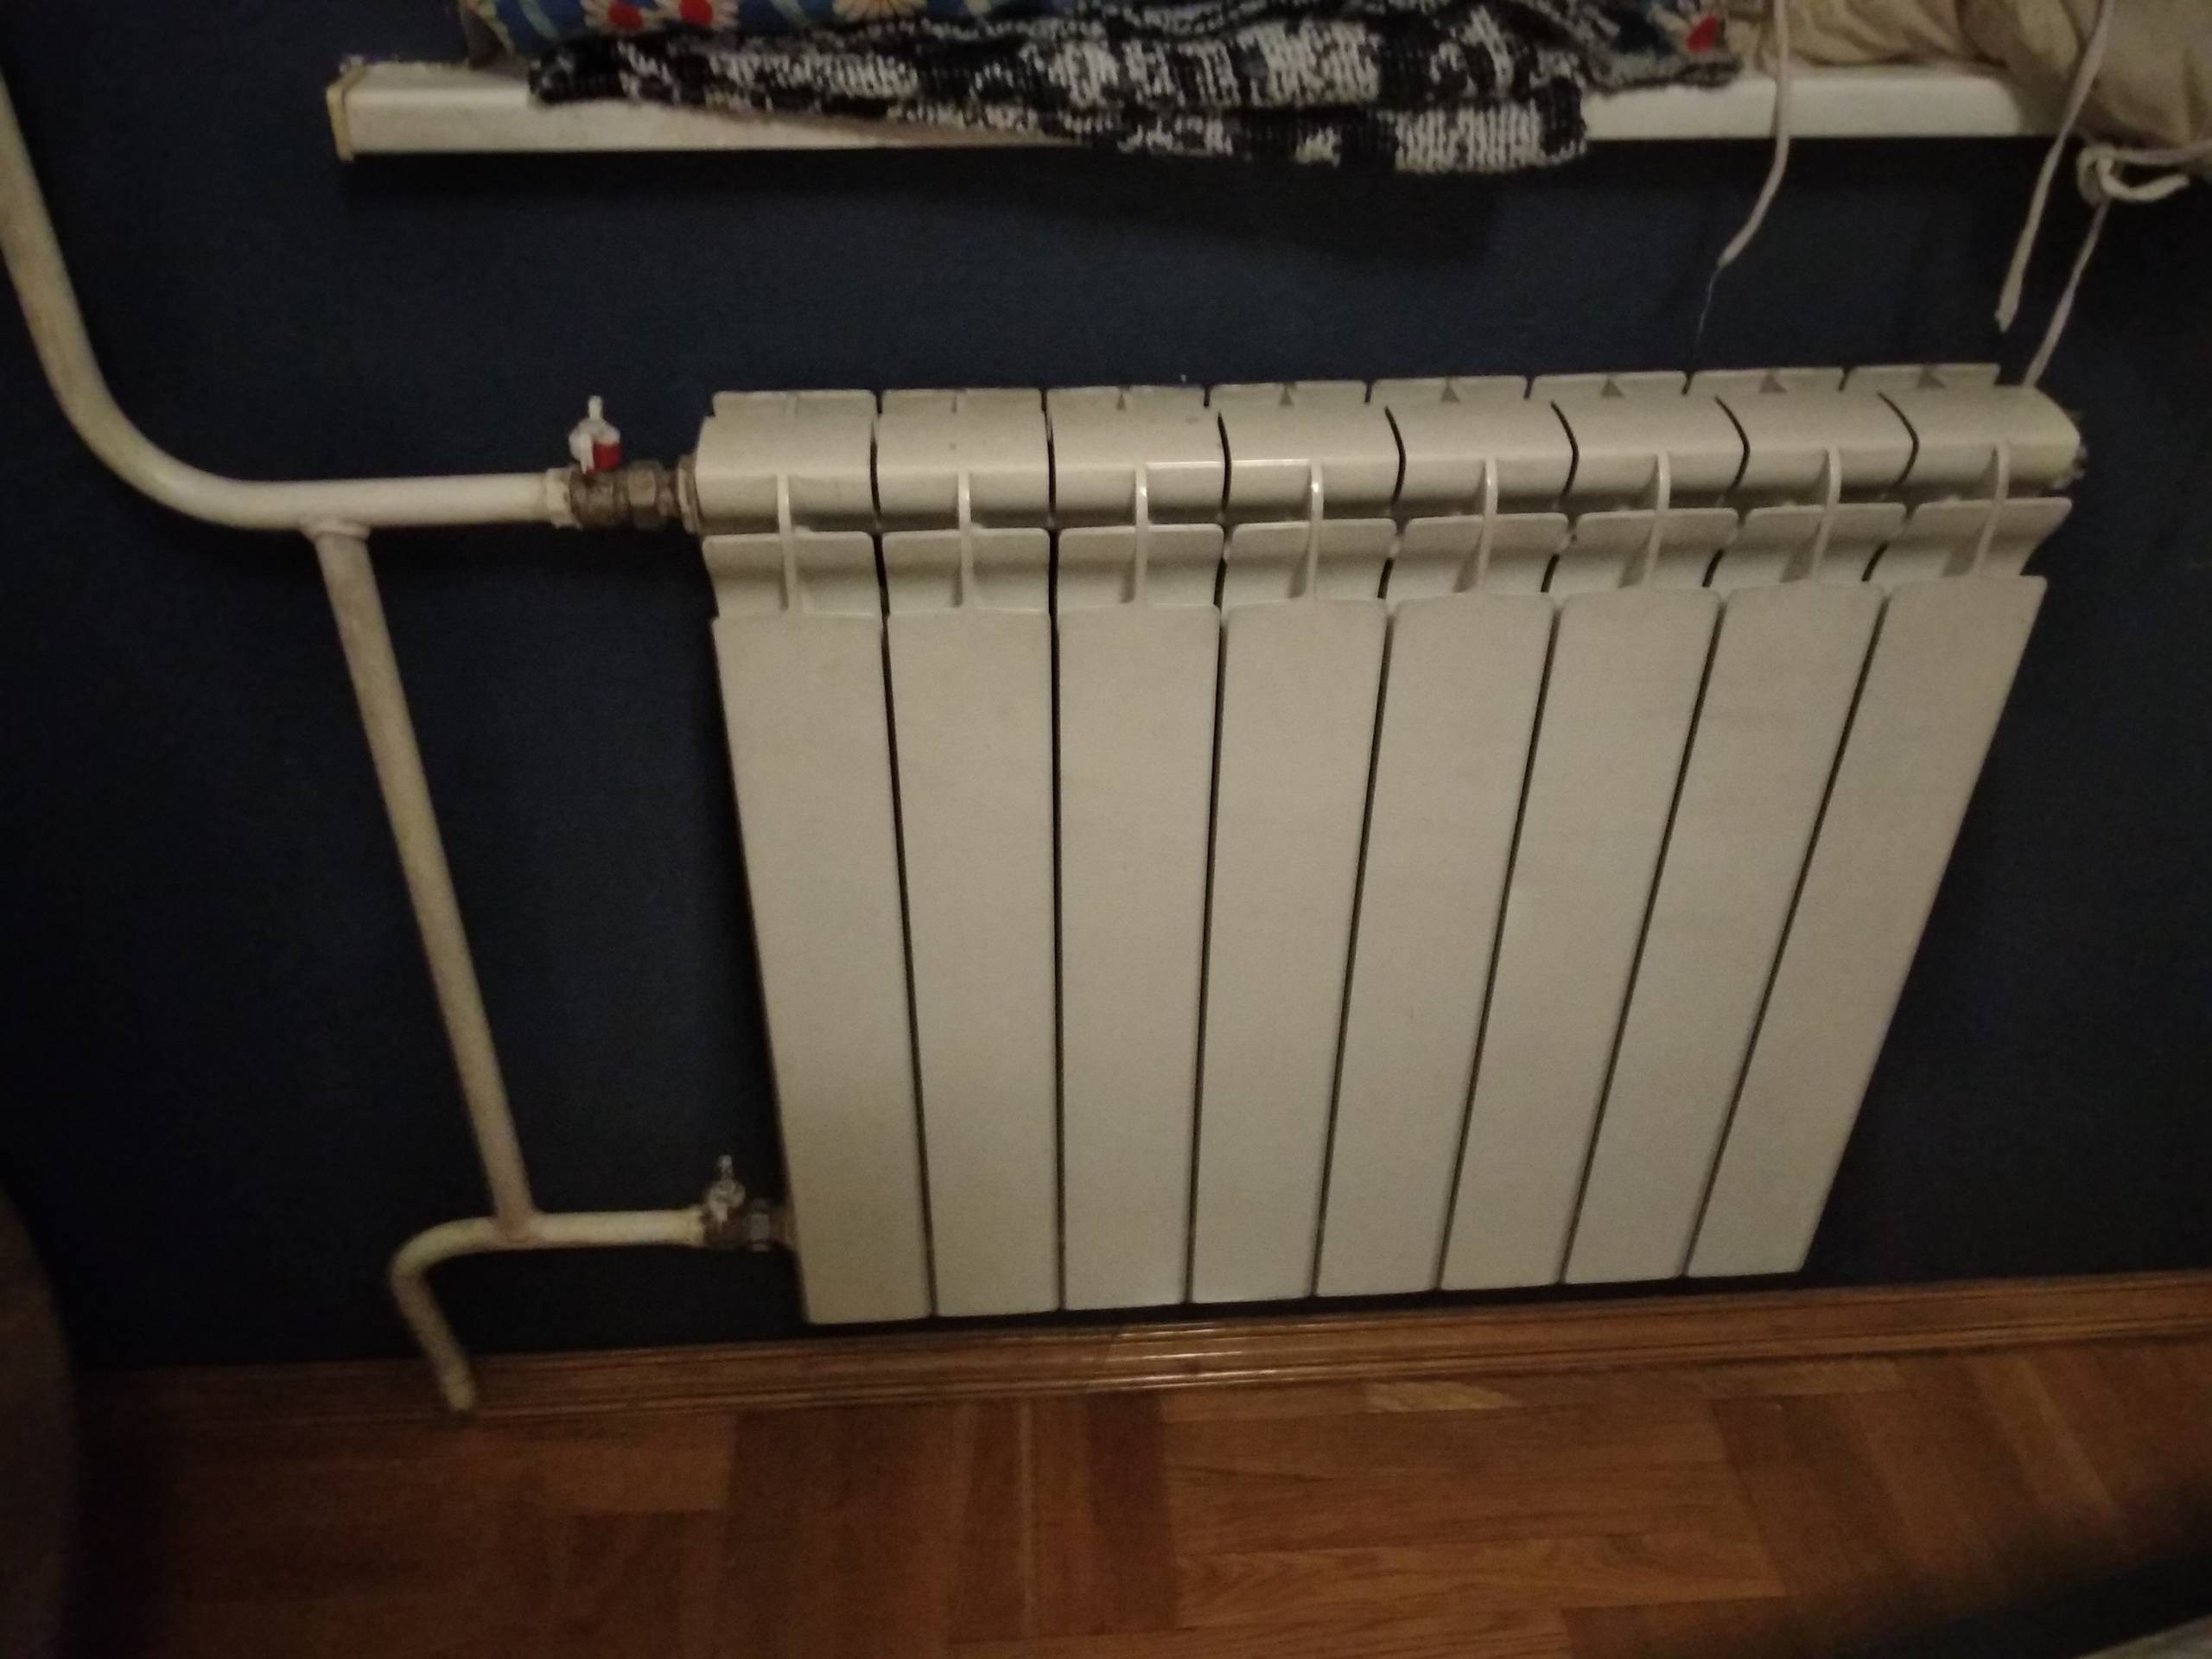
- Now that the radiator is assembled, it is hung on brackets and connected to the heating pipes with spurs. Before connecting, you need to check the installation level of the radiator.
- After connecting, pressure testing (checking) of the connection connections is carried out and then heating is started.
Note. In apartment buildings, the pressure in heating systems reaches 10 atmospheres, and when heating is turned on / off, water hammer is not uncommon. Therefore, it is recommended to install bimetallic radiators with a pressure of up to 16 atmospheres in apartments, and it is better to use steel and aluminum radiators in private houses and cottages.
Other articles in the section: Radiators
- Calculation of sections of heating radiators
- Installation of cast iron radiators
- Types of modern radiators
- Types of heating radiators: what types of heating radiators exist
- Cast iron radiators: description and characteristics
- Plate radiators: accordion radiator options
- Installation of water heating radiators in the floor
Battery installation
The recommendations of heater manufacturers explaining how to properly install the battery contain the following sequential steps:
- first, if there are old radiators, they must be dismantled. Previously, water is drained from the heating system;
- then make markings for mounting new devices;
- install the bracket and hang the battery with the regulator. To make sure that the fastener is reliable and that it will withstand the battery, one person should lean on it with all the weight;
Instructions for installing heating batteries on video:
Radiator connection diagram.
Taking into account the variety of options for laying risers and room shapes, as well as the presence of upper and lower coolant supply through risers, bimetallic radiator connection schemes are a separate story that is voluminous in content.
It is only important to note that due to the narrow channels of the vertical collectors of bimetallic radiators, they are sensitive to the direction of the coolant supply and, as indicated in the instructions of any manufacturer, it is important to connect the radiators in such a way that the cooled coolant always leaves the lower collector. With top feed, a standard side connection scheme is obtained.
But with bottom feed and side connection the cooled coolant will exit the upper collector, while the vector of the gravitational pressure of the cooling coolant will be directed downward and prevent forced circulation from the side of the pumps, which leads to incomplete heating of the radiator, as a rule, only the first 2 sections work.
Therefore, with a lower supply, a bimetallic radiator should be connected either according to the bottom-bottom scheme.

Or according to a universal scheme, which does not depend on the direction of the coolant supply in the riser.

A feature of the universal scheme is the need to install a larger diameter pipe opposite the upper radiator outlet, in which, due to the principle of Bernoulli's law, increased pressure is created causing the coolant to flow into the upper radiator manifold.
You can read in detail about all the wiring diagrams for bimetallic radiators in my article “How to install a bimetallic radiator correctly” on my website, where I give examples of more than 50 different options from my practice.
Artist choice.
As it becomes clear from this article, a heating radiator installer must have a serious amount of knowledge, skills and tools for the quality provision of this service, taking into account all the above nuances. I also want to note that, taking into account the specifics of Internet marketing in the market for services for replacing heating radiators in apartments, unfortunately, there are a large number of unscrupulous performers, which I did a detailed review in my article comparing several proposals of those present at the request "replacing radiators" in the top 10 Yandex, the article "It's expensive for you!" on my site in the Master's Blog. Be careful.
Moderator of the Heating section, forum City of Masters, Sergey @k@ Olegovich, techcomfort.rf.
Marking the wall for brackets
Marking algorithm for radiators up to 10 sections. Two brackets at the top along the edges, one at the bottom in the middle.
- Measure the length of the window opening, mark the middle point on the wall (under the windowsill).
- Draw a vertical line from the marked point down to the floor.
- Mark a point (A) on a vertical line at a distance of 10 cm from the window sill.
- Draw a horizontal line through the marked point (A).
- Measure the distance between the top brackets on the radiator.
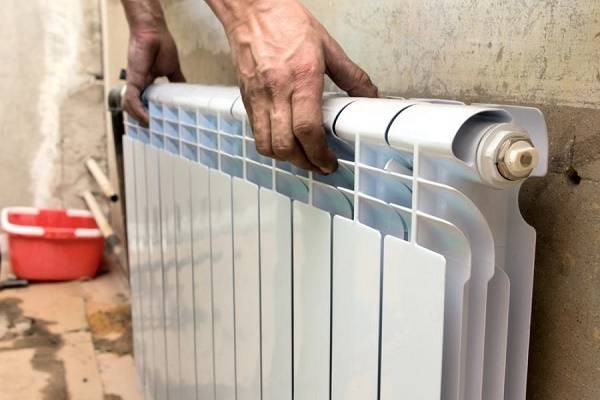
Photo 3. Choosing a place on the wall where the radiator will be located, determining the method of fixing the upper brackets.


- Set aside on both sides of the point (A) on a horizontal line segments with a length equal to half the distance on the radiator.
- Set aside on the central vertical line a segment from the point (A) down 50 cm long - the installation location of the bottom bracket.
- Drill holes for brackets. Hold the drill strictly horizontally so that the drill in the wall does not go sideways.
- Hammer the dowels, screw the brackets to the required distance from the wall.
Choosing a place and method of installing a radiator
The options for connecting heating radiators depend on the general heating scheme in the house, the design features of the heaters and the method of laying pipes. The following methods of connecting heating radiators are common:
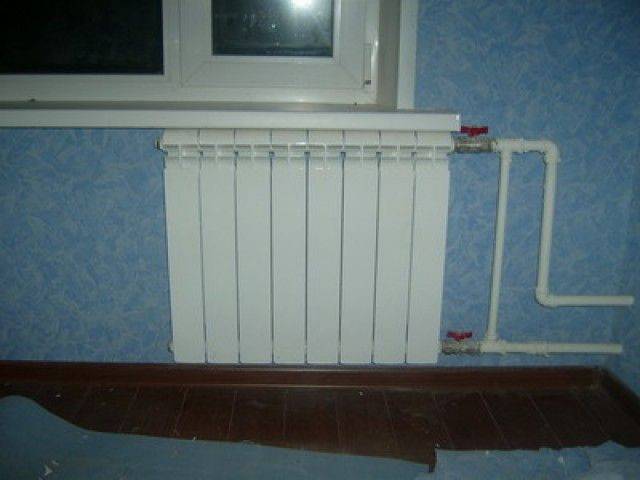
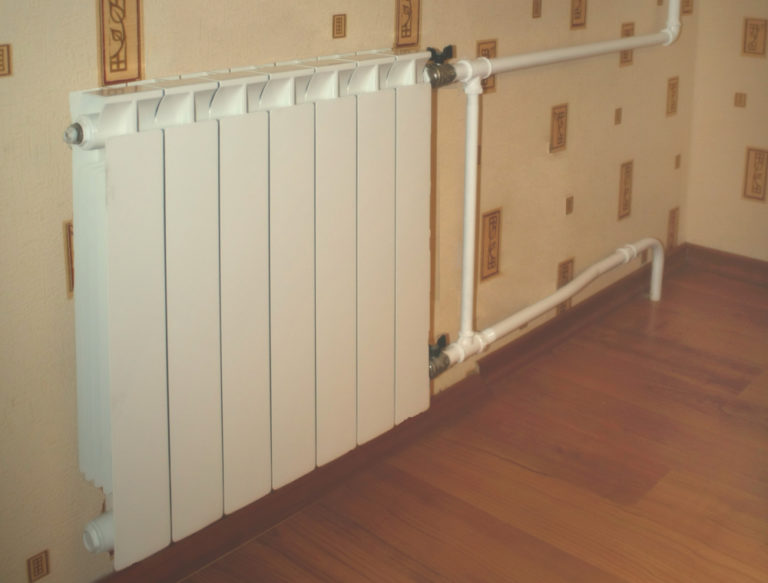
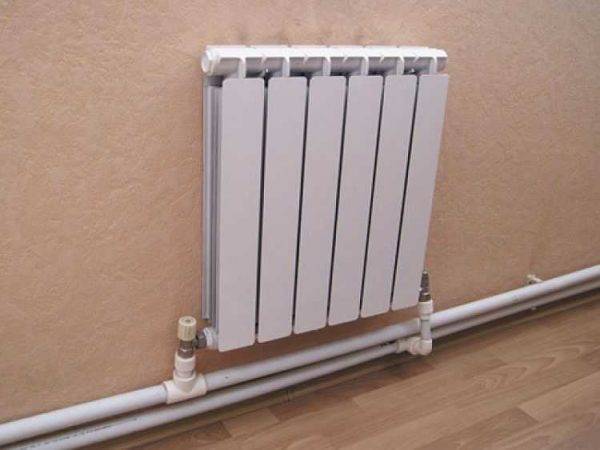
- Lateral (unilateral). The inlet and outlet pipes are connected on the same side, while the supply is located at the top. The standard method for multi-storey buildings, when the supply is from the riser pipe. In terms of efficiency, this method is not inferior to the diagonal one.
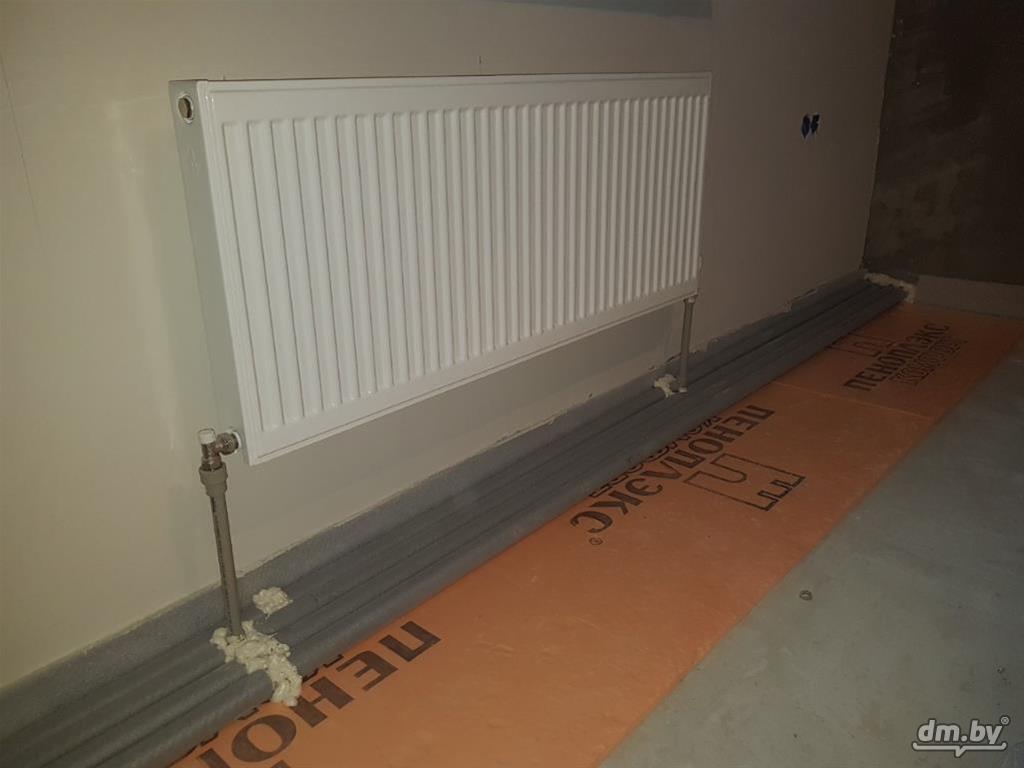
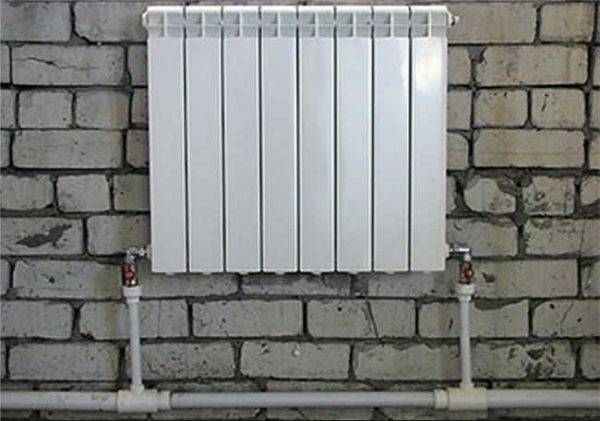
- Lower. In this way, bimetallic radiators with a bottom connection or a steel radiator with a bottom connection are connected. The supply and return pipes are connected from below on the left or right side of the device and connected through the lower radiator connection unit with union nuts and shut-off valves. The union nut is screwed onto the lower radiator pipe.The advantage of this method is the location of the main pipes hidden in the floor, and heating radiators with a bottom connection harmoniously fit into the interior and can be installed in narrow niches.
- Diagonal. The coolant enters through the upper inlet, and the return is connected from the opposite side to the lower outlet. The optimal type of connection, providing uniform heating of the entire area of the battery. In this way, correctly connect the heating battery, the length of which exceeds 1 meter. Heat loss does not exceed 2%.
- Saddle. The supply and return are connected to the bottom holes located on opposite sides. It is mainly used in single-pipe systems when no other method is possible. Heat losses as a result of poor circulation of the coolant in the upper part of the device reach 15%.
WATCH VIDEO
When choosing a place for installation, several factors are taken into account that ensure the correct operation of heating devices. Installation is carried out in the places least protected from the penetration of cold air, under window openings. It is recommended to install a battery under each window. The minimum distance from the wall is 3-5 cm, from the floor and window sill - 10-15 cm. With smaller gaps, convection worsens and battery power drops.
Typical mistakes when choosing an installation location:
- Space for installation of control valves is not taken into account.
- A small distance to the floor and window sill prevents proper air circulation, as a result of which heat transfer decreases and the room does not warm up to the set temperature.
- Instead of several batteries located under each window and creating a thermal curtain, one long radiator is chosen.
- Installation of decorative grilles, panels that prevent the normal spread of heat.
Coolant circulation methods
The circulation of the coolant through pipelines occurs in a natural or forced way. The natural (gravitational) method does not involve the use of additional equipment. The coolant moves due to a change in the characteristics of the liquid as a result of heating. The hot coolant entering the battery, cooling down, acquires a greater density and mass, after which it falls down, and a hotter coolant enters in its place. Cold water from the return flows by gravity into the boiler and displaces the already heated liquid. For normal operation, the pipeline is installed at a slope of at least 0.5 cm per linear meter.
Scheme of coolant circulation in the system using pumping equipment
For forced supply of coolant, the installation of one or more circulation pumps is mandatory. The pump is installed on the return pipe in front of the boiler. The operation of heating in this case depends on the electrical supply, however, it has significant advantages:
- The use of pipes of small diameter is allowed.
- The main is installed in any position, vertically or horizontally.
- Less coolant required.
Do-it-yourself battery installation recommendations
- Before starting work, it is necessary to block the flow of coolant in the heating system at the inlet and outlet, or make sure that there is no liquid in the pipeline.
- Even before starting the installation, you need to check the completeness of the radiator. It must be in the assembled state. If this is not the case, we take a radiator key and assemble the battery according to the manufacturer's instructions.
The design must be absolutely hermetic, therefore, abrasive materials cannot be used during assembly, as they destroy the material of the device.
When tightening fasteners, one should not forget that both left-handed and right-handed threads are used in bimetallic devices.
When connecting sanitary fittings, it is extremely important to choose the right material. Flax is usually used along with a heat-resistant sealant, FUM tape (fluoroplastic sealing material) or Tangit threads.
Before starting installation work, you need to carefully plan the connection scheme. Batteries can be connected in a diagonal, side or bottom pattern
It is rational to install a bypass in a single-pipe system, that is, a pipe that will allow the system to function normally when the batteries are connected in series.
After the installation is completed, the system is turned on. This should be done by smoothly opening all the valves that previously blocked the path of the coolant. Too abrupt opening of the taps leads to clogging of the internal pipe section or hydrodynamic shocks.
Following the opening of the valves, it is necessary to release excess air through an air vent (for example, a Mayevsky tap).
Batteries can be connected diagonally, sideways or at the bottom. It is rational to install a bypass in a single-pipe system, that is, a pipe that will allow the system to function normally when the batteries are connected in series.
After the installation is completed, the system is turned on. This should be done by smoothly opening all the valves that previously blocked the path of the coolant.Too abrupt opening of the taps leads to clogging of the internal pipe section or hydrodynamic shocks.
Following the opening of the valves, it is necessary to release excess air through an air vent (for example, a Mayevsky tap).
Note! Batteries must not be covered with screens or placed in wall niches. This will drastically reduce the heat transfer of the equipment. Properly installed bimetallic heating radiators are the key to their long and trouble-free operation.
If you have any doubts about the ability to install them yourself, it is better to contact specialists.
Properly installed bimetallic heating radiators are the key to their long and trouble-free operation. If you have any doubts about the ability to install them yourself, it is better to contact specialists.
Radiator installation
Assembly is carried out in the following order:
All parts of the battery are assembled together: plugs, gaskets, plugs, locking taps
When assembling, it is necessary to pay attention to the direction of the connecting thread - right or left. The right thread is twisted clockwise and is usually applied on the right side of the device, and the left thread is counterclockwise and applied on the left
All connections are laid with thermal paste or tow to prevent leakage. If necessary, a Mayevsky crane and a thermostat are attached to the radiator.
Markings are applied to the wall for the installation of fasteners for the heating radiator. The marks must be applied in such a way that the battery is located strictly horizontally. Mounting fittings are installed according to the markings.
A heating battery is hung on the fixture.The device should sit tightly on the fasteners, without the slightest swing or movement. With the help of a level, compliance with the horizontal placement of the radiator is checked.
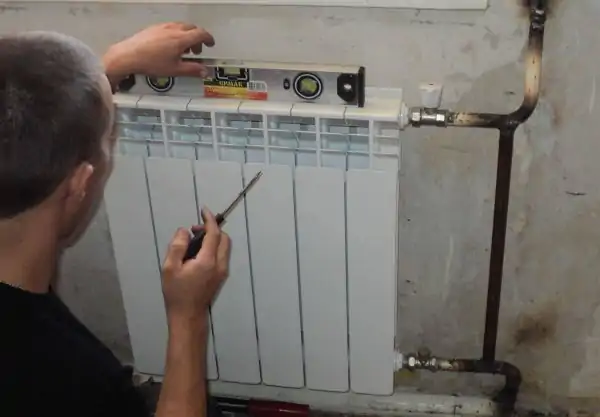
Photo 3. Checking compliance with the horizontal placement of the radiator using the building level.
- The radiator is connected to the heat pipes. Depending on the type of battery and the type of pipes, various American flange connections can be used.
- After completion of all work, the protective film is removed from the bimetallic radiators.
Trial
After completing the installation of the radiator, it is necessary to test it:
- Open the taps and let the coolant into the system.
- Visually check for leaks.
Attention! Most often, leaks occur in the places of threaded connections, but it is also possible to find a defective section with fistulas or cracks. The places of leaks in the joints are additionally stretched.
The places of leaks in the joints are additionally stretched.
Before the start of the heating season in apartment buildings, the heating system is tested under high pressure - pressure testing. During this period, it is better to stay in the apartment and check for additional leaks in the installed device.


Introduction
Many today either try to replace the heating system, or attach an additional one to it. Many difficulties can arise here: where to start installation, which radiator to choose, and much more.
Any radiators should be installed in places where there is the most heat loss, and such places are usually located under windows, but in some cases radiators are installed in a convenient place. Before starting the installation, the radiator must first be purchased.The most popular are two types of radiators: aluminum, steel, bimetallic or cast iron. These radiators will waste little water, and also have a long service life, beautiful appearance and light weight.
Not all heating radiators have an attractive appearance, and beautiful radiators are often closed to improve design. Products covering the radiator are called a screen. They are most often made of wood or wooden materials. You can buy a ready-made radiator screen or order a wooden product in a special workshop. For example, in the carpentry workshop "Amurles", a site that makes wood products to order in Moscow, which also performs wood-like interior decoration.
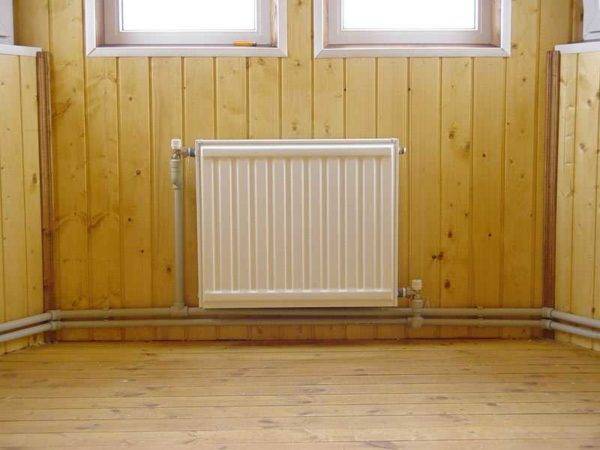
Heating radiator piping options
Installation of heating radiators implies their connection to pipelines. There are three main connection methods:
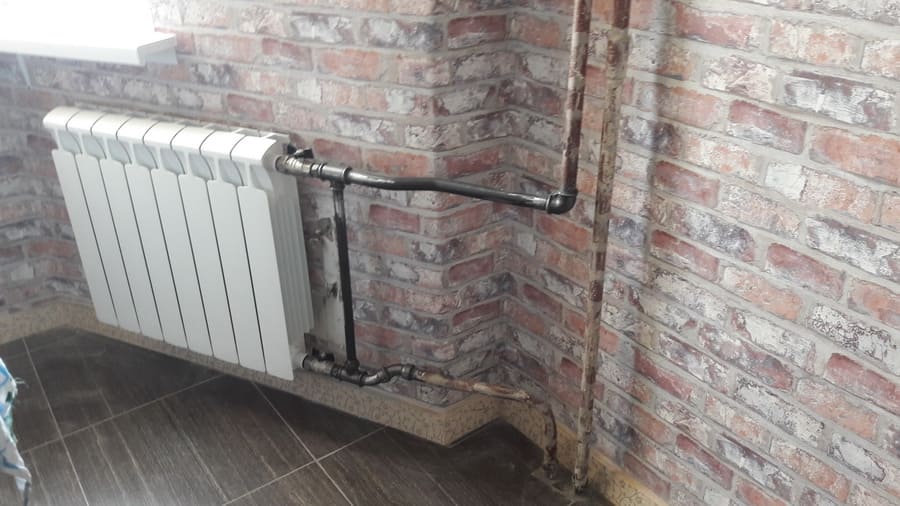
If install radiators with bottom connection, you have no choice. Each manufacturer strictly ties the supply and return, and its recommendations must be strictly followed, because otherwise you simply won’t get heat. There are more options with lateral connection (read more about them here).
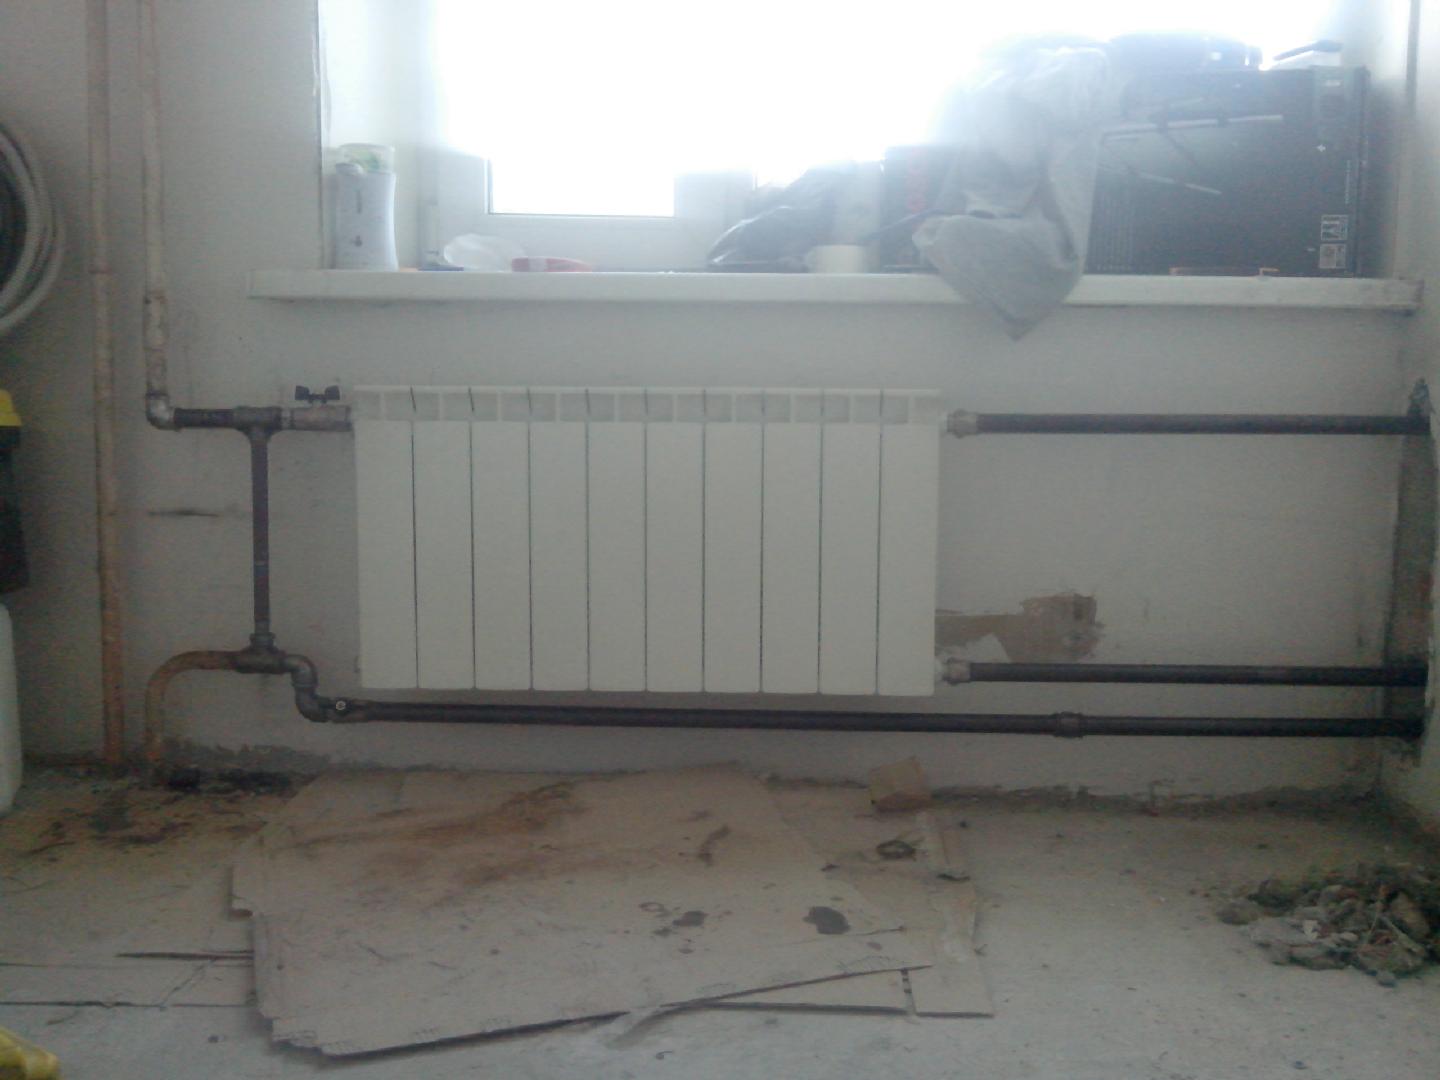
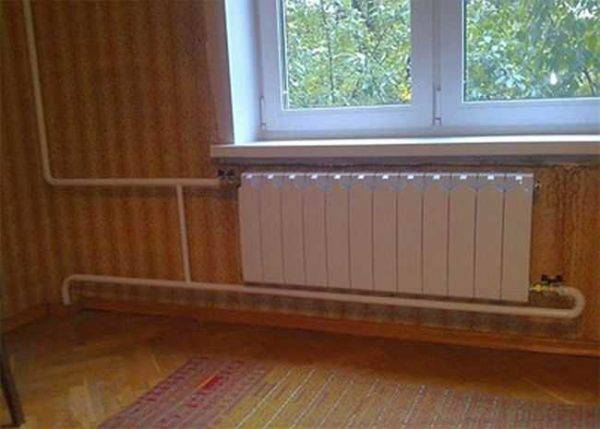
Binding with one-way connection
One-way connection is most often used in apartments. It can be two-pipe or one-pipe (the most common option). Metal pipes are still used in apartments, so we will consider the option of tying the radiator with steel pipes on the spurs. In addition to pipes of a suitable diameter, two ball valves, two tees and two spurs are needed - parts with external threads at both ends.
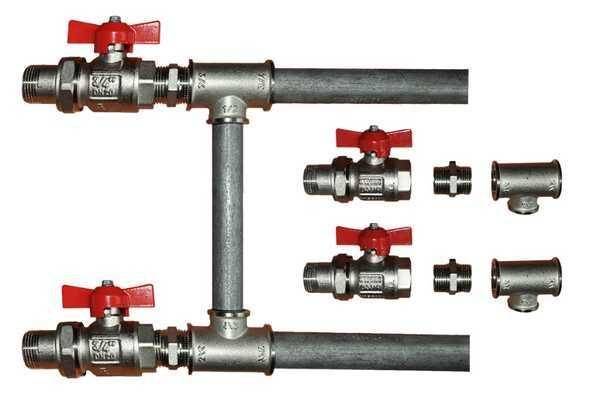
Side connection with bypass (one-pipe system)
All this is connected as shown in the photo.With a single-pipe system, a bypass is required - it allows you to turn off the radiator without stopping or lowering the system. You can’t put a tap on the bypass - you will block the movement of the coolant along the riser with it, which is unlikely to please the neighbors and, most likely, you will fall under a fine.
All threaded connections are sealed with fum-tape or linen winding, on top of which packing paste is applied. When screwing the tap into the radiator manifold, a lot of winding is not required. Too much of it can lead to the appearance of microcracks and subsequent destruction. This is true for almost all types of heating appliances, except for cast iron. When installing all the rest, please, without fanaticism.
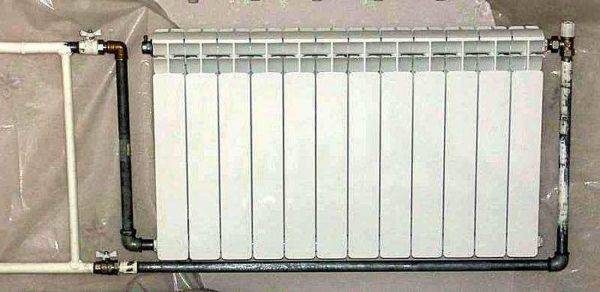
Option with welding
If you have the skills / ability to use welding, you can weld the bypass. This is what the piping of radiators in apartments usually looks like.
With a two-pipe system, a bypass is not needed. The supply is connected to the upper entrance, the return is connected to the lower one, taps, of course, are needed.
One-way piping with a two-pipe system
With lower wiring (pipes are laid along the floor), this type of connection is made very rarely - it turns out inconvenient and ugly, it is much better to use a diagonal connection in this case.
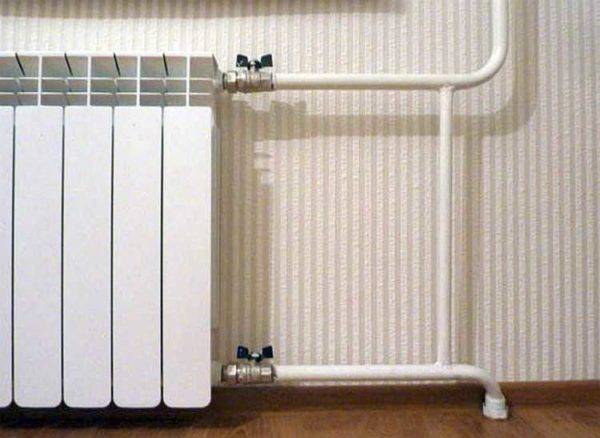
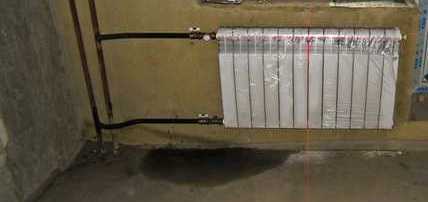
Binding with diagonal connection
Installing heating radiators with a diagonal connection is the best option in terms of heat transfer. She is the highest in this case. With a lower wiring, this type of connection is implemented easily (example in the photo) - supply from one side at the top, return from the other at the bottom.
With two-pipe bottom wiring
With a single-pipe system with vertical risers (in apartments), everything does not look so good, but people put up with it because of the higher efficiency.
Coolant supply from above
Please note, with a one-pipe system, a bypass is again required.
Coolant supply from below
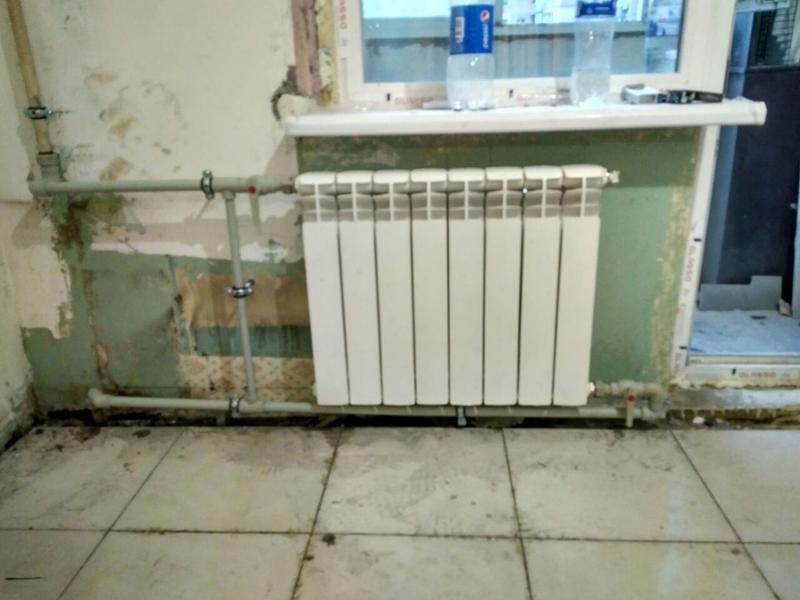
Strapping with saddle connection
With lower wiring or hidden pipes, installing heating radiators in this way is the most convenient and most inconspicuous.
With a two-pipe system
With saddle connection and bottom single-pipe wiring, there are two options - with and without bypass. Without a bypass, the taps are still installed, if necessary, you can remove the radiator, and install a temporary jumper between the taps - a drive (a piece of pipe of the desired length with threads at the ends).


Saddle connection with one-pipe system
With vertical wiring (risers in high-rise buildings), this type of connection can be seen infrequently - too large heat losses (12-15%).