- Replacing a heating radiator with freezing pipes
- Wrong placement
- Work procedure
- Replacing radiators
- How much does it cost to replace heating batteries
- Wrong choice of radiators
- How to organize a connection
- Connection to polypropylene pipes
- Connecting the battery to the metal cable
- Replacing heating batteries in an apartment in a new building
- Heating distribution manifold
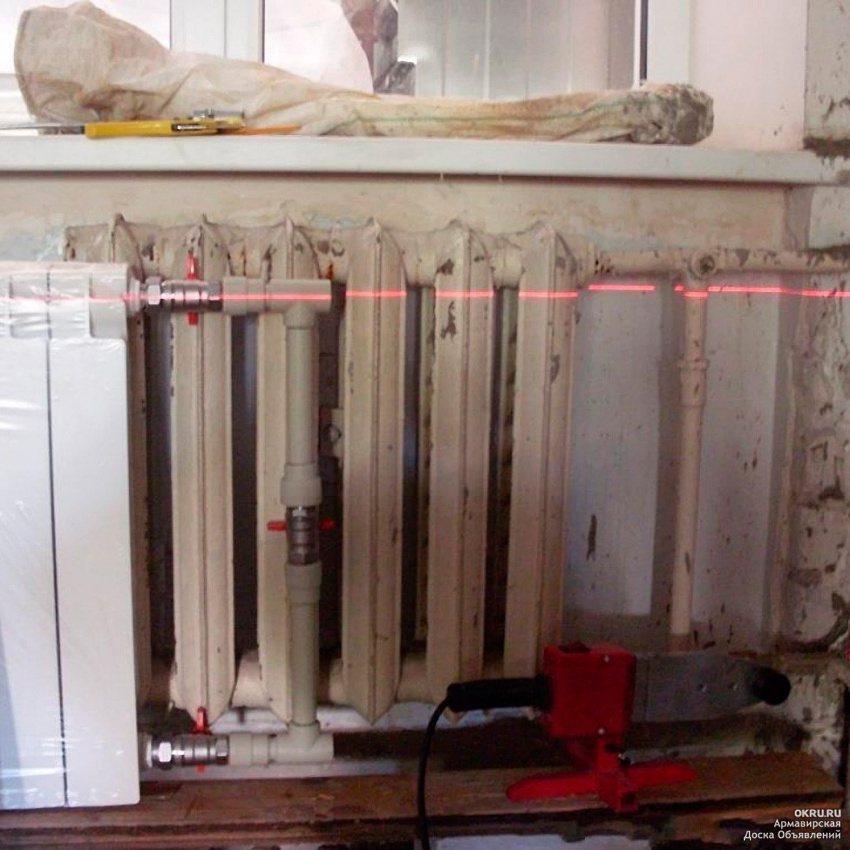
- Replacing heating batteries for welding
- Some interesting tips
- What is needed for installation
- Mayevsky crane or automatic air vent
- Stub
- Shut-off valves
- Related materials and tools
- How to connect a bimetallic radiator?
- What pipes to choose for mounting radiators?
- Installation of radiators
- Where and how to place
- Test work
- How to install
- wall mount
- Floor fixing
- Conclusion
- Video
- Total costs
Replacing a heating radiator with freezing pipes
If necessary, all repairs can be carried out even at the height of the heating season. To do this, the specialists of our company use a special technology that does not require shutting off the riser and allows you to replace the heating radiators in the apartment without additional permission to drain the water.
Separate sections of pipes that need to be changed overlap so that the coolant does not circulate in them.Then they are frozen, a special ice plug is created. In this way, it is possible to replace heating radiators in autumn or winter.
Contact our specialists right now to get detailed advice on all your questions or order a measurer visit. We will replace the pipes in the apartment quickly and efficiently, at a reasonable price.
3.1 Price for vertical heating radiators Zehnder
4.1 Depth of tubular Arbonia radiators
5.1 Arbonia radiators in the apartment
6.1 Prices for the replacement of heating pipes entering the apartment
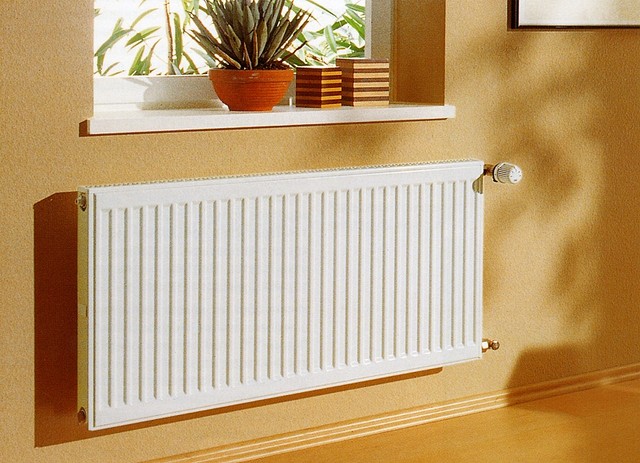
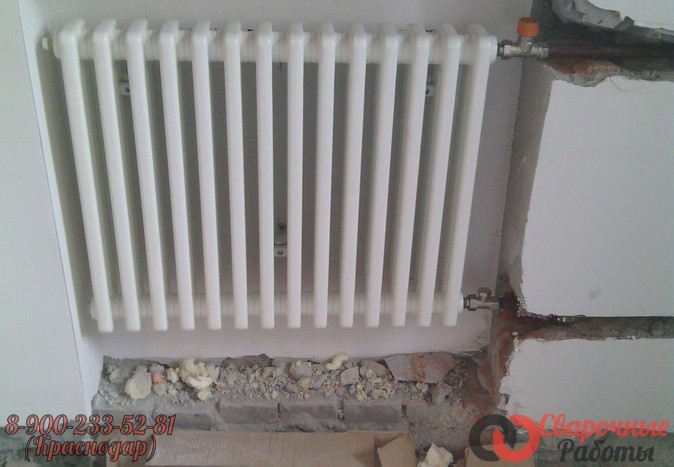
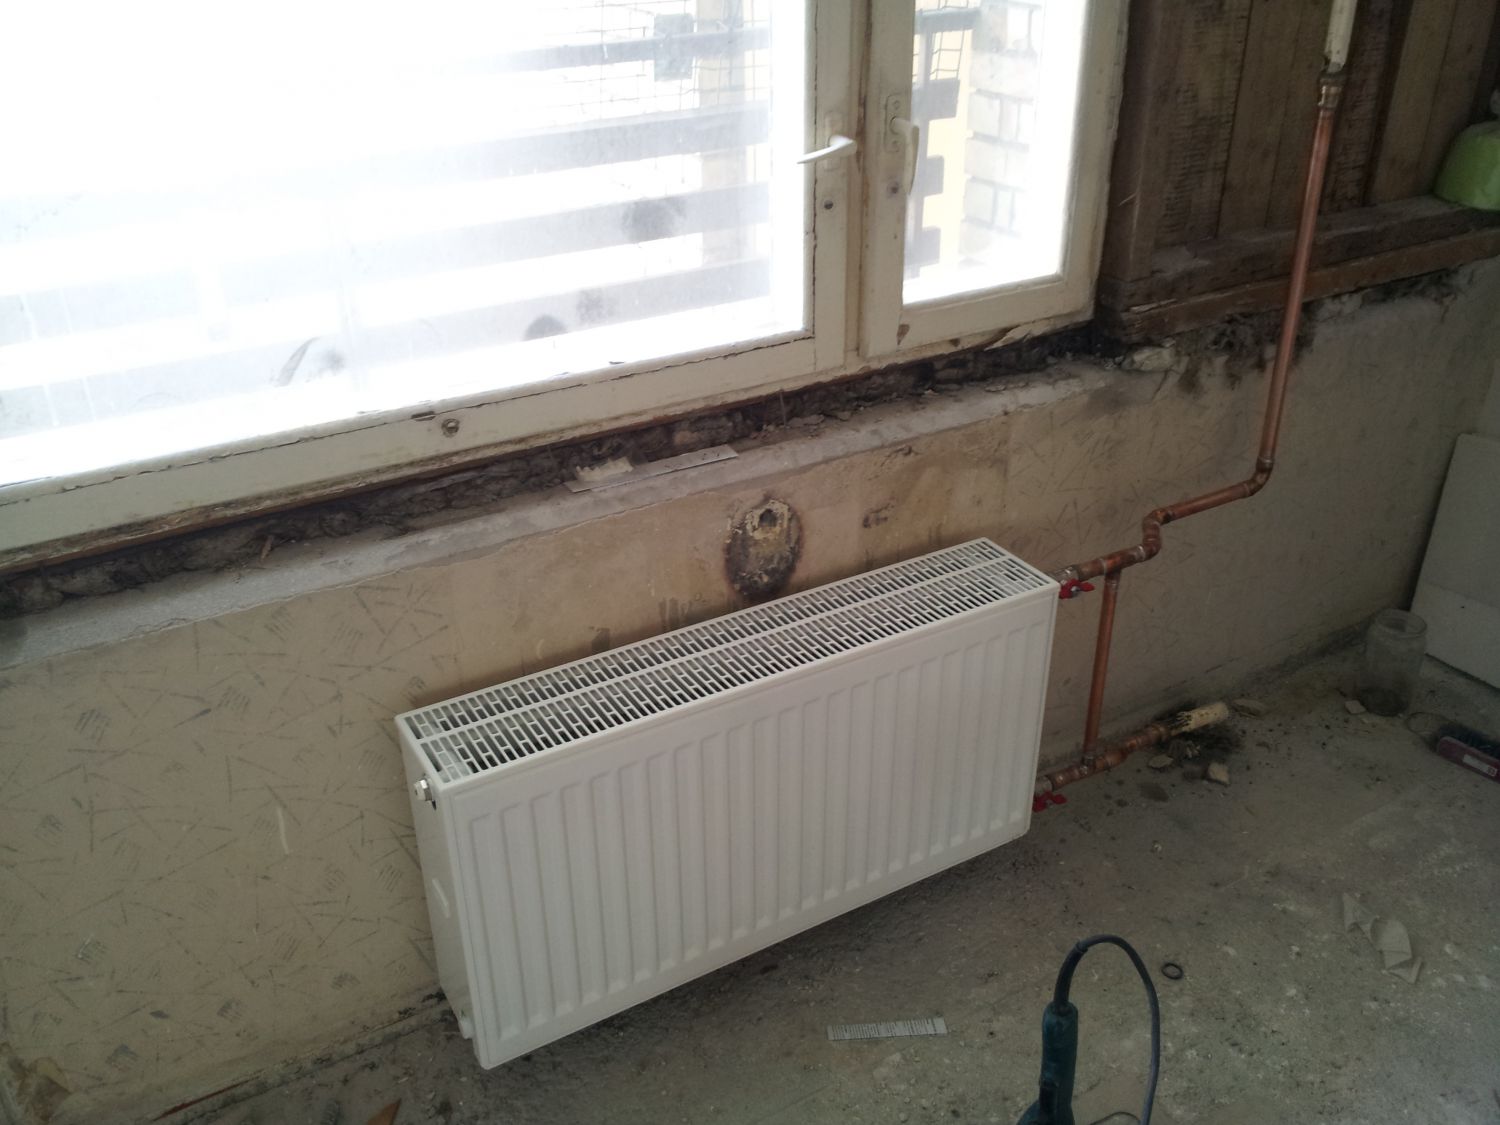
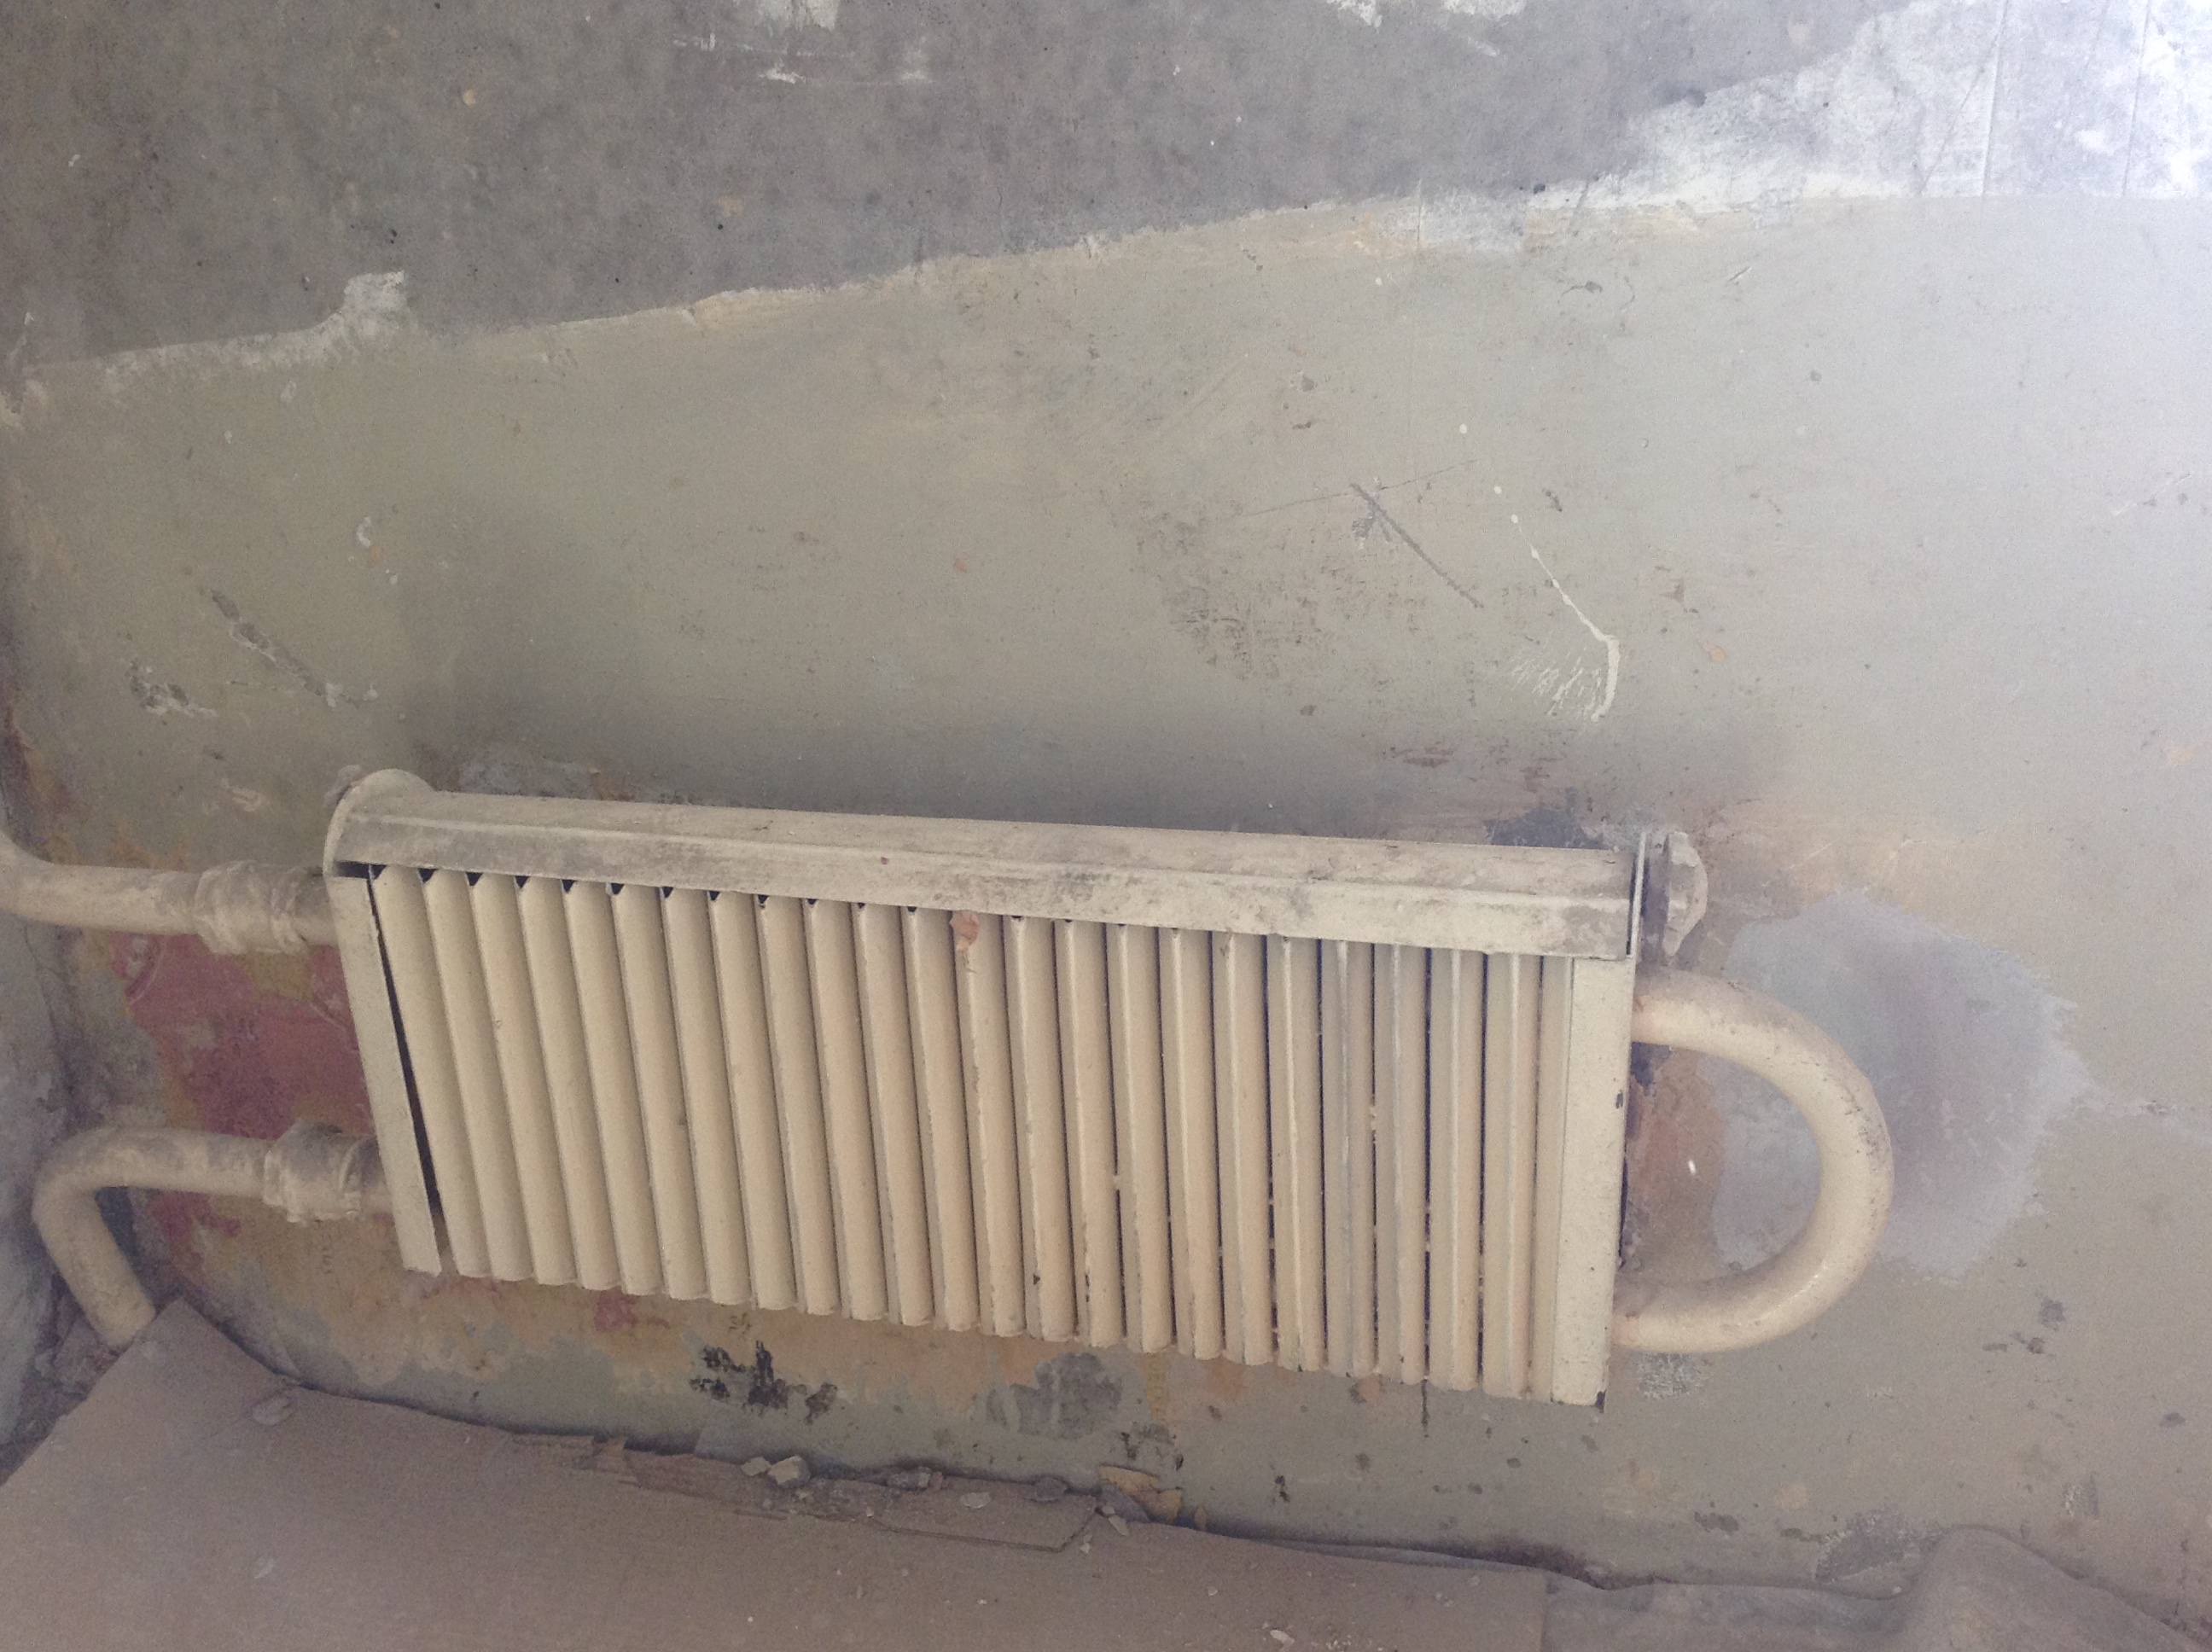
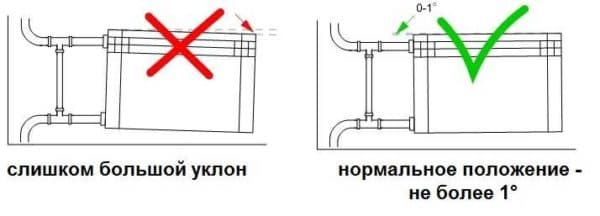
Wrong placement
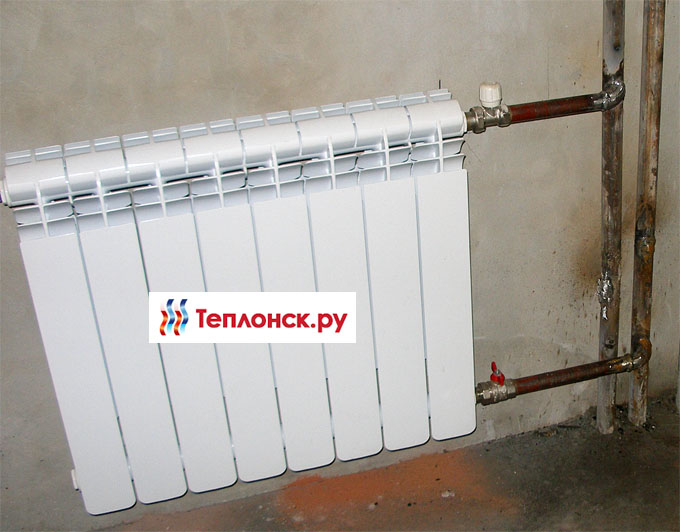
A very common mistake is the incorrect distance of the installed radiator from the wall. When the heating pipes are too close to the wall, the radiator has to be installed just as close. As a result, the wall is heated more than the room air, which is not circulated behind the radiator, which means that warm air flows are significantly weakened. The use of reflectors in this case does not help much.
The distance of the radiator from the wall should be about 2 cm, this is the best option.
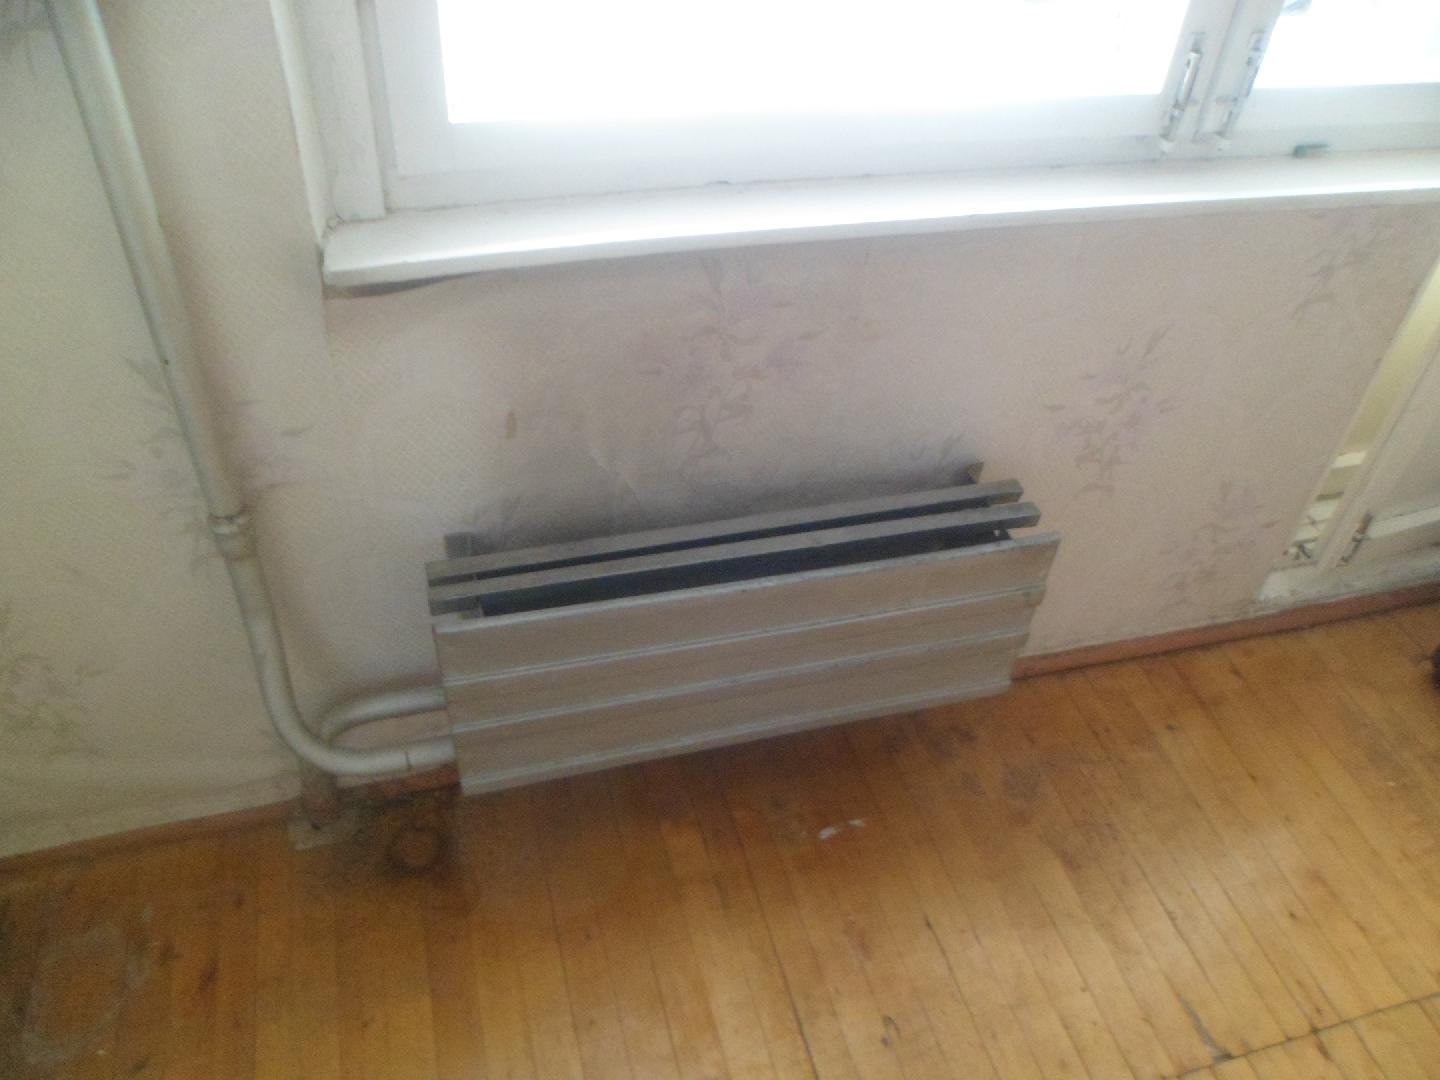
Of great importance is the height of the radiator. If you install it close to the floor, the air circulation from below will also be disturbed. Yes, and for a laminate, for example, such overheating is clearly harmful. Do not place the radiator high under the windowsill. In this case, the upper flows are already stopped.
Recently, it has become fashionable to install decorative elements on radiators, especially those installed in a niche. This design also limits the flow of warm air and significantly reduces the efficiency of the radiator. It is better to refuse such beauty. You can also paint cast iron radiators so that the design looks attractive.And the aluminum structures themselves are distinguished by a good design. Their coloring is even selected taking into account the color scheme of the room walls.
If the replacement of the radiator in the heating system is made without these errors, the efficiency and durability of such structures will increase for sure. You should not save on the invitation of the master - trained specialists will perform the work better and faster. It should also be taken into account that the overspending of the heating fee if the radiators are installed incorrectly will also be significant.
Read also:
Work procedure
To properly replace heating radiators in an apartment, you must:
- Coordinate the alteration with the maintenance service.
- Purchase the necessary materials.
- Perform pre-assembly of nodes.
- Prepare tools.
- Arrange with the team (if you do not plan to do the work yourself).
- To issue an alteration in the housing office, to decide on the date of the work.
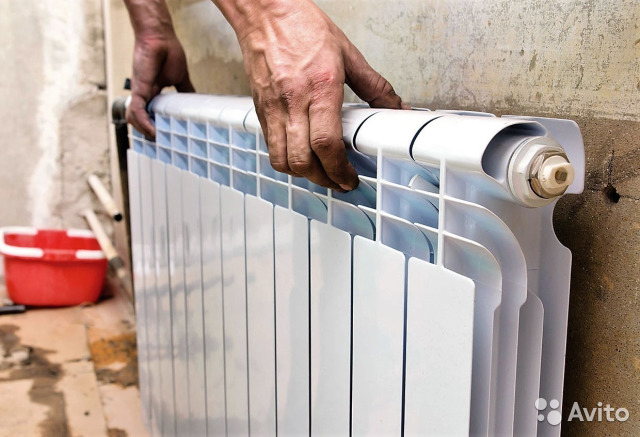
- Dismantle old radiators.
- Install brackets.
- Hang new batteries.
- Connect to heating pipes.
- Check system operation.
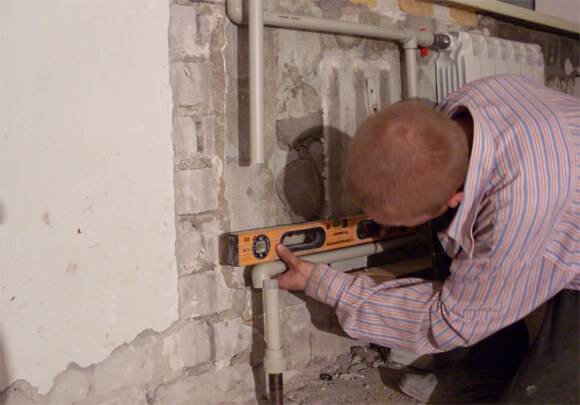
During the preliminary assembly of the units, all the necessary elements are installed: plugs, gaskets, Mayevsky taps, etc. In addition, you can mark up in advance in those places where the pipes will be cut off. In this case, you should use a plumb line and a level so that the new radiator becomes even.
If the supply pipes also require replacement, these elements must also be prepared: cut off pieces of suitable length, attach tees, etc. All this is done in order to quickly complete the installation after draining the water from the heating system.Such a measure will be more than relevant if the need to change old batteries arose during the heating season.
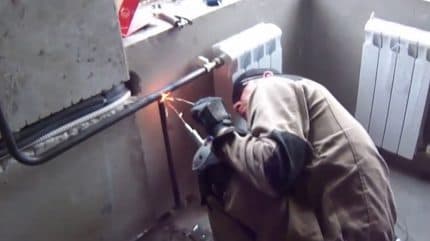
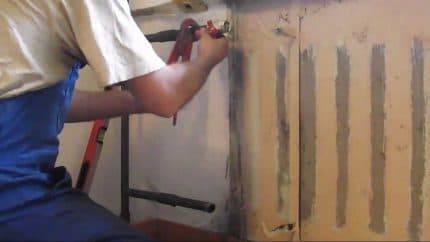
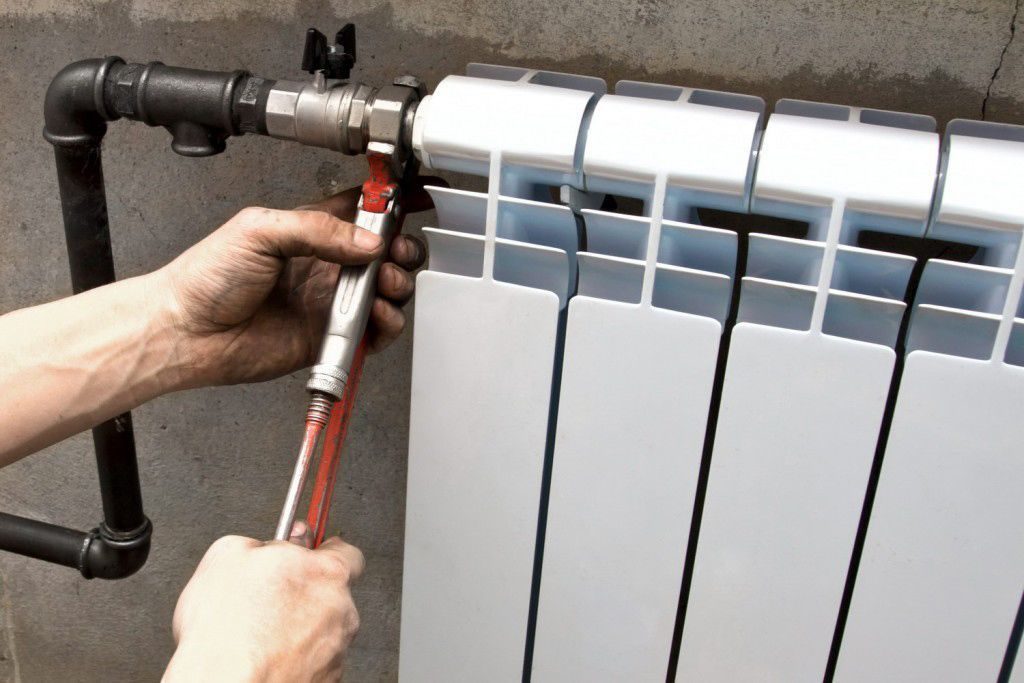
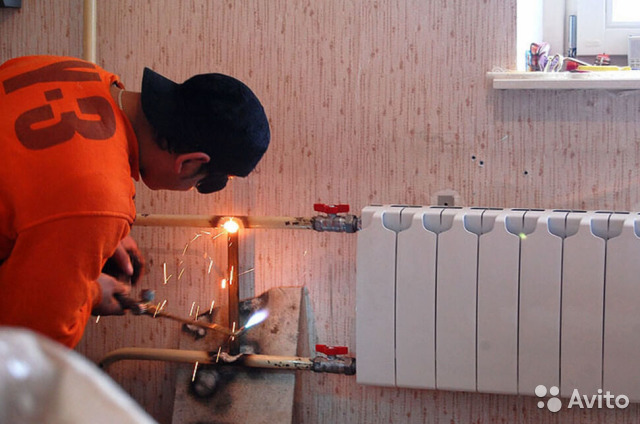
Welding is used to replace metal pipes. At the edges of the structures, threads will need to be cut to securely connect them to the radiator
The procedure for dismantling old batteries depends on whether the pipes also need to be replaced. If you want to save the supply lines, you will have to carefully unscrew the old battery
At the same time, it is important to keep the squeegee - a sufficiently long thread on the edge of the pipe. The radiator is fixed with a nut and a coupling that will have to be unscrewed
The procedure can be quite complicated. If the parts do not move, you can try to loosen the connection with anti-corrosion compounds. In the most extreme case, the radiator is simply cut off with a grinder. There should be at least 10mm of thread left. Burrs should be removed from it.


If it is decided to leave the old steel pipes, then the dismantling of the radiator must be carried out carefully so that the threads on the spurs remain intact
If it was not possible to save the drive, you will have to increase the pipes, as well as cut a new thread. The removed locknuts can later be reused when installing a new radiator. Dismantling the radiator is much easier if the pipes are also replaced. In this case, they are simply cut off in a suitable place. This is usually where the system turns towards neighbors above and below.
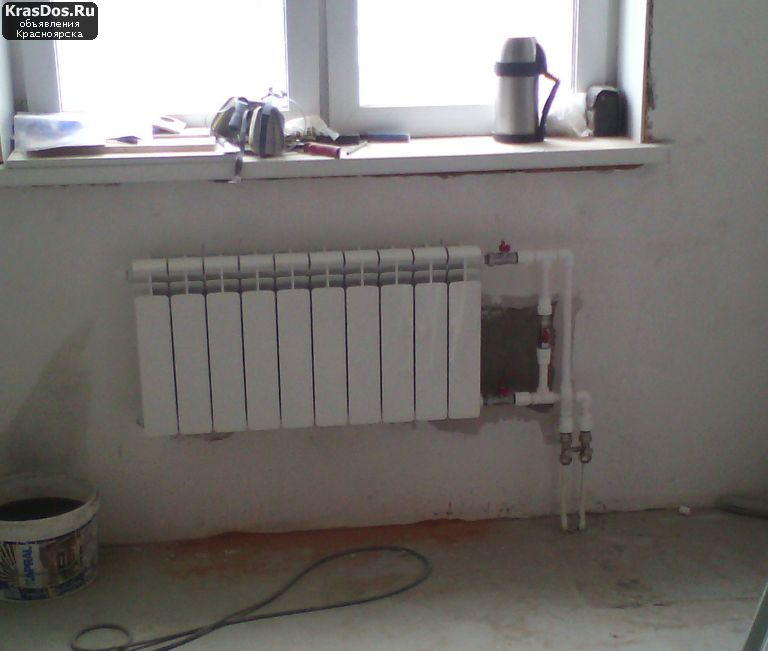
Now you need to install the brackets, and then hang a new radiator on them. At this stage, sometimes it is necessary to adjust the length of the supply pipe. It remains to restore the threaded connection
It is very important to seal properly. For this, linen or plumbing thread is usually used.
Some masters do not recommend using FUM tape on such connections. The sealant is wound clockwise so that it forms a cone growing from the edge of the thread. Then the connecting nut is screwed on. If part of the seal remains outside, this is normal. But its layer should not be too thick.
This kind of work generates a lot of waste. They are best done during major repairs, after the windows are installed.
To achieve maximum tightness, sometimes the seal is impregnated with paint, after which the lock nut is screwed on. Then the protruding insulation is also impregnated with paint. A water-based composition is not suitable for these purposes. After the paint has dried, it is very difficult to unscrew the connection.
At the end of the connection, the protective film is removed from the radiator. You should also check the position of the air vent. Its hole should be directed upwards. To check the quality of work, you need to ask plumbers to pump water into the heating circuit under pressure.
It is better to remove the film in which the new radiator is packed after it is installed so as not to accidentally damage the coating.
This will allow you to identify and immediately eliminate leaks. During operation, it does not hurt to observe the radiator for the first time, as well as check the condition of the connections to make sure that they do not leak.
Replacing radiators
The best heating radiators for an apartment: classificationWorking pressure in the heating system - standards and tests
Other options include:
- operating temperature - 135 degrees;
- heat transfer of one section - 196 watts;
- The warranty period provided by the manufacturer is 25 years.
Replacing a heating radiator in an apartment - process managementBut, if one of the apartment owners wants to have a more accurate result, then the following data is used:
- thermal power per cubic meter of room volume - 40 watts;
- the presence of a window increases the need for heat consumption by 100 watts, and the door leading to the street - by 200 watts;
- if the room is corner or end, or the apartment is located on the outer floors, a coefficient of 1.2 - 1.3 is applied;
- depending on the region where the house is located, the heat output obtained in the calculations is multiplied by 0.7 - 0.9 (warm climate) or 1.2 - 2.0 (cold climate).
How to install heating radiators in an apartment - a quick guideThe calculation order is as follows:
- required thermal power - 4x5x2.7x40 \u003d 2160 watts;
- the presence of a window adds 100 watts - 2160 + 100 = 2260 watts;
- location on the first floor - 2260x1.3 = 2938 watts;
- with a regional coefficient of 1.5, it turns out 2938x1.5 = 4407;
- since the heat transfer of the section is 180 watts (4407: 180 = 24.48), 25 sections are needed, which can be divided into several batteries.
How much does it cost to replace heating batteries
| Bimetallic radiators, price for 1 section | |
| Radiator Rifar Monolit 500 | 880 rub. |
| Radiator Rifar Monolit 350 | 870 rub. |
| Rifar Base 500 Radiator | 700 rub. |
| Radiator Rifar Supremo 500 | 930 rub. |
| Radiator Global Style Extra 500 | 890 rub. |
| Radiator Sira RS 500 | 890 rub. |
| Prices for replacing heating radiators in an apartment subject to the purchase of radiators and components from us | |
| Mounting on a thread, subject to the purchase of radiators and accessories from us | |
| From 2 radiators or more | 2500 rub. |
| 1 radiator | 3500 rub. |
| Diagonal connection (bypass system) | 3500 rub. |
| Installation by welding, subject to the purchase of radiators and accessories from us | |
| From 2 radiators or more | 4000 rub. |
| 1 radiator | 5000 rub. |
| Diagonal connection (bypass system) | 5000 rub. |
| Painting a set of pipes with a riser in 2 layers | 700 rub. |
| Painting set of pipes from the riser to radiator in 2 layers | 500 rub. |
| Riser loopback price | |
| Looping the riser on the thread (material: 2 couplings, locknut, pipe up to 1 m with squeegee, flax, paste) | 2000 rub. (our material +1000 rub) |
| Welding riser loop (material: pipe up to 1 m) | 3000 rub. (our material +500 rub) |
| Standards for connecting batteries to a heating system | |
| Standard 1 (pipes 1/2″-3/4″ up to 2 m, fittings up to 4 pcs, barrels, threads, linen, paste) | 1500 rub. |
| Standard 2 (Bugatti taps with AM 1/2″-3/4″ - 2 pcs, barrels, threads, linen, paste) | 2900 rub. |
| Standard 3 (Bugatti taps with AM 1/2″-3/4″ - 2 pcs, pipes 1/2″-3/4″ up to 3 m, bypass, fittings up to 4 pcs, barrels, linen, paste) | 3900 rub. |
| Standard 4 (cranes Bugatti with AM 1/2″-3/4″ - 2 pcs, pipes 1/2″-3/4″ up to 6 m, bypass, fittings up to 6 pcs., Americans up to 2 pcs., barrels, flax, paste) | 4700 rub. |
| Prices for the installation of customer radiators | |
| Thread mounting | |
| From 2 radiators or more | 3500 rub. |
| 1 radiator | 5500 rub. |
| Diagonal connection (bypass system) | 5500 rub. |
| Weld mounting | |
| From 2 radiators or more | 5000 rub. |
| 1 radiator | 7000 rub. |
| Diagonal connection (bypass system) | 7000 rub. |
| * Coordination in the DEZ, UK or HOA |
replacement of heating radiators in your apartmentPrice calculator
ATTENTION, THE PROMOTION IS ONLY UNTIL THE END OF THE MONTH! The cost of one section of the radiator when ordering installation from us will be only 540 rubles *!!! *check the model of the radiator with our operators by phone
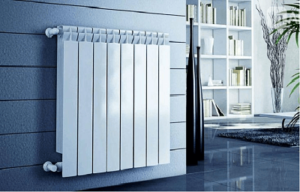
Wrong choice of radiators
A common mistake is a mismatch between the type of radiators and the pressure of the heating system.
Radiators are of several types:
- cast iron - until recently they were the most common for standard apartments, they are distinguished by a large volume of water circulation, respectively, good heating, their high cost can be attributed to the disadvantages of such radiators;
- metal - they are usually used in one-story private construction, they simply cannot withstand the pressure of the coolant in multi-story buildings, but radiators are made of ferrous metal, so they are relatively inexpensive;
- aluminum - they are also inexpensive, easy to install, have a high heat transfer, but also do not withstand strong pressure;
- bimetallic - a two-layer "sandwich" made of aluminum and metal, this option is quite suitable for high-rise buildings, but it is notable for its high cost.
So in private houses you can get by with metal or aluminum structures, but it is better not to use them in high-rise buildings.
How to organize a connection
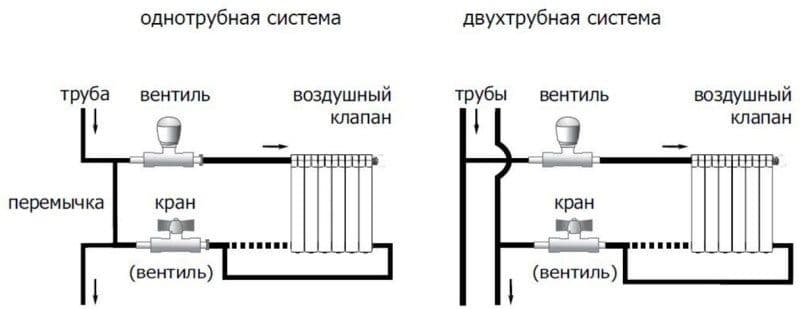
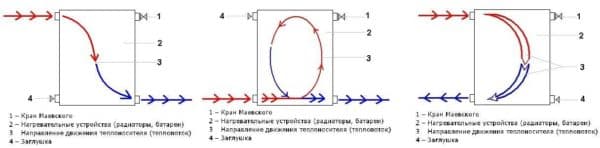
The next step in the process is choosing the connection type. The following methods are most effective:
- Lateral one-sided - the inlet is connected to the upper branch pipe, and the outlet is on the same side of the battery, but to the lower branch pipe. The option provides excellent heat dissipation, but is suitable for batteries consisting of 12 sections.
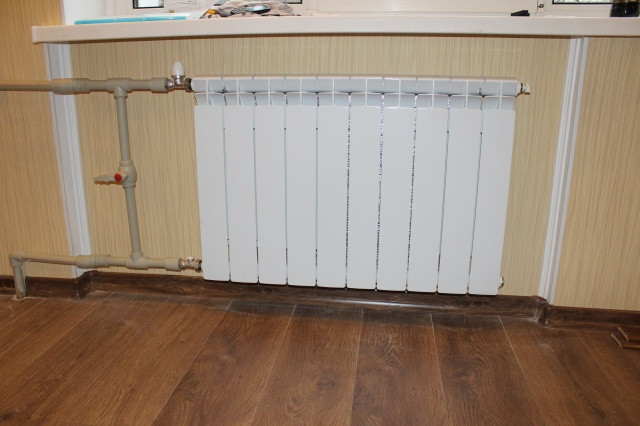
- Lower - both directions are connected to the lower pipes of the heater from different sides. The method is ideal for hidden pipe laying.
- Diagonal - the supply is carried out through the upper branch pipe, and the outlet - on the other side through the lower branch pipe. The method is used to connect devices with more than 12 sections.
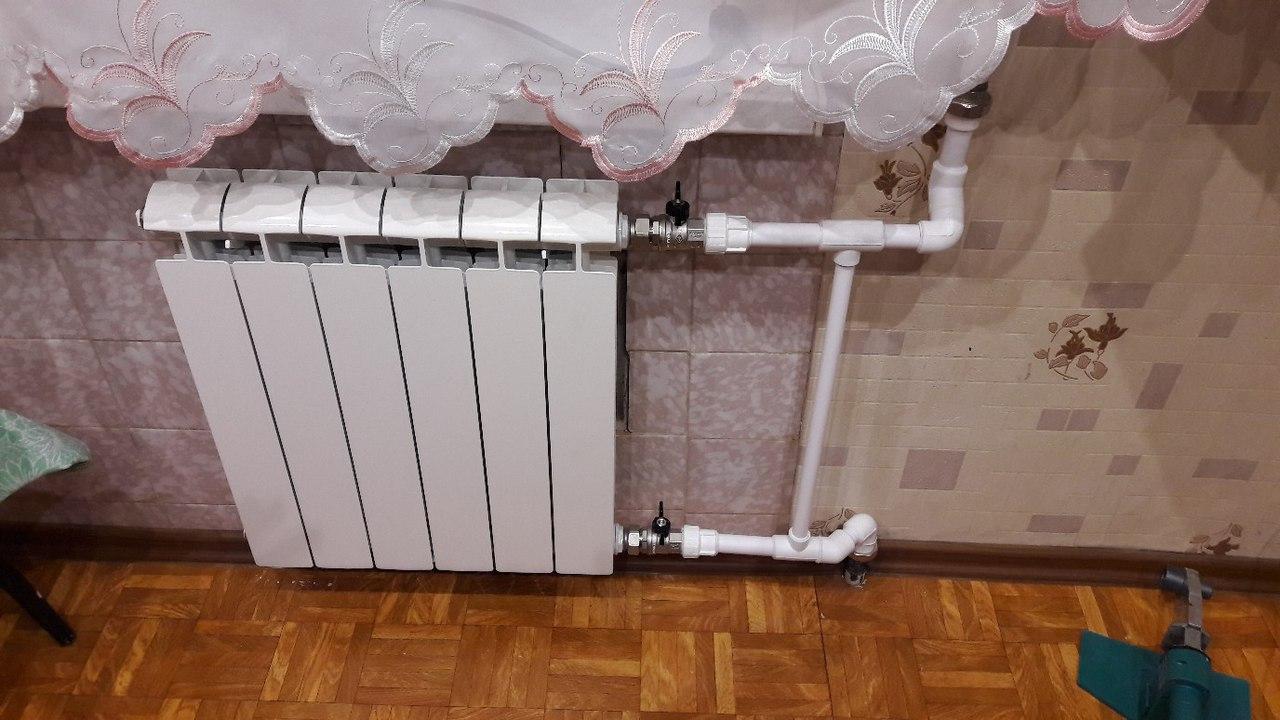
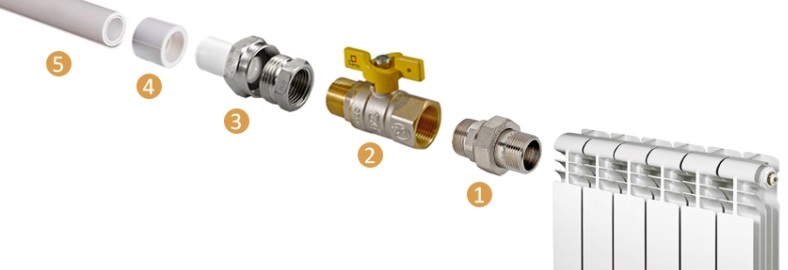
Connection to polypropylene pipes
For the correct installation of radiators with propylene heating pipes, you will have to acquire a special soldering iron. The connection is implemented using two technologies:
- In the case when the radiator valve is propylene, the connection is made by soldering directly to the connection. Next, unscrew the “American” metal limit switch from the tap and screw it into the radiator futorka. For tightness, FUM tape or linen winding is used. As a result, the “American” must be assembled again and tighten the cap nut with a wrench.
- If the radiator valve is made of metal, then a combined split-type coupling with an internal thread is used to connect with a plastic piping. It is similar in principle to the “American”, but the union nut is adapted for soldering. Through the connecting fitting, the plastic part of the coupling is soldered to the underwater pipe. After that, the coupling must be disassembled, and the metal part with winding should be screwed onto the valve. Assemble the coupling and tighten the union nut.
Connecting the battery to the metal cable
Many homeowners who want to know how to properly install a heating radiator are worried that when working with metal pipes, a welding machine and related skills in using it may be required. We hasten to reassure - nothing like this is needed here, everything is done on threaded connections. To do this, on the just cut section of the eyeliner, threads are cut using a die. The process execution technology is as follows:


- Cut the supply pipes with a grinder so that the cut line is clearly perpendicular to the axial line of the pipe.
- Clean the end of the pipe from corrosion or paint and make a chamfer with a file.
- Apply lubricant to the cutters of the die cutter and the pipe section.
- Put the head on the chamfer and center it.
- Using a gas wrench, turn the head clockwise.
- For a quality connection, you should get a threaded section equal to the long part of the drive.
As a result, it is necessary to screw the lock nut and the coupling onto the finished thread, and aligning the axes of the ball valve and the liner, overtake the coupling from the liner to the valve body. The process uses winding or FUM tape. Next, a winding should be screwed onto the thread near the coupling and the lock nut should be overtaken. After the final fixation of the stopcock or temperature regulator, it is connected to the radiator futorka through the "American".
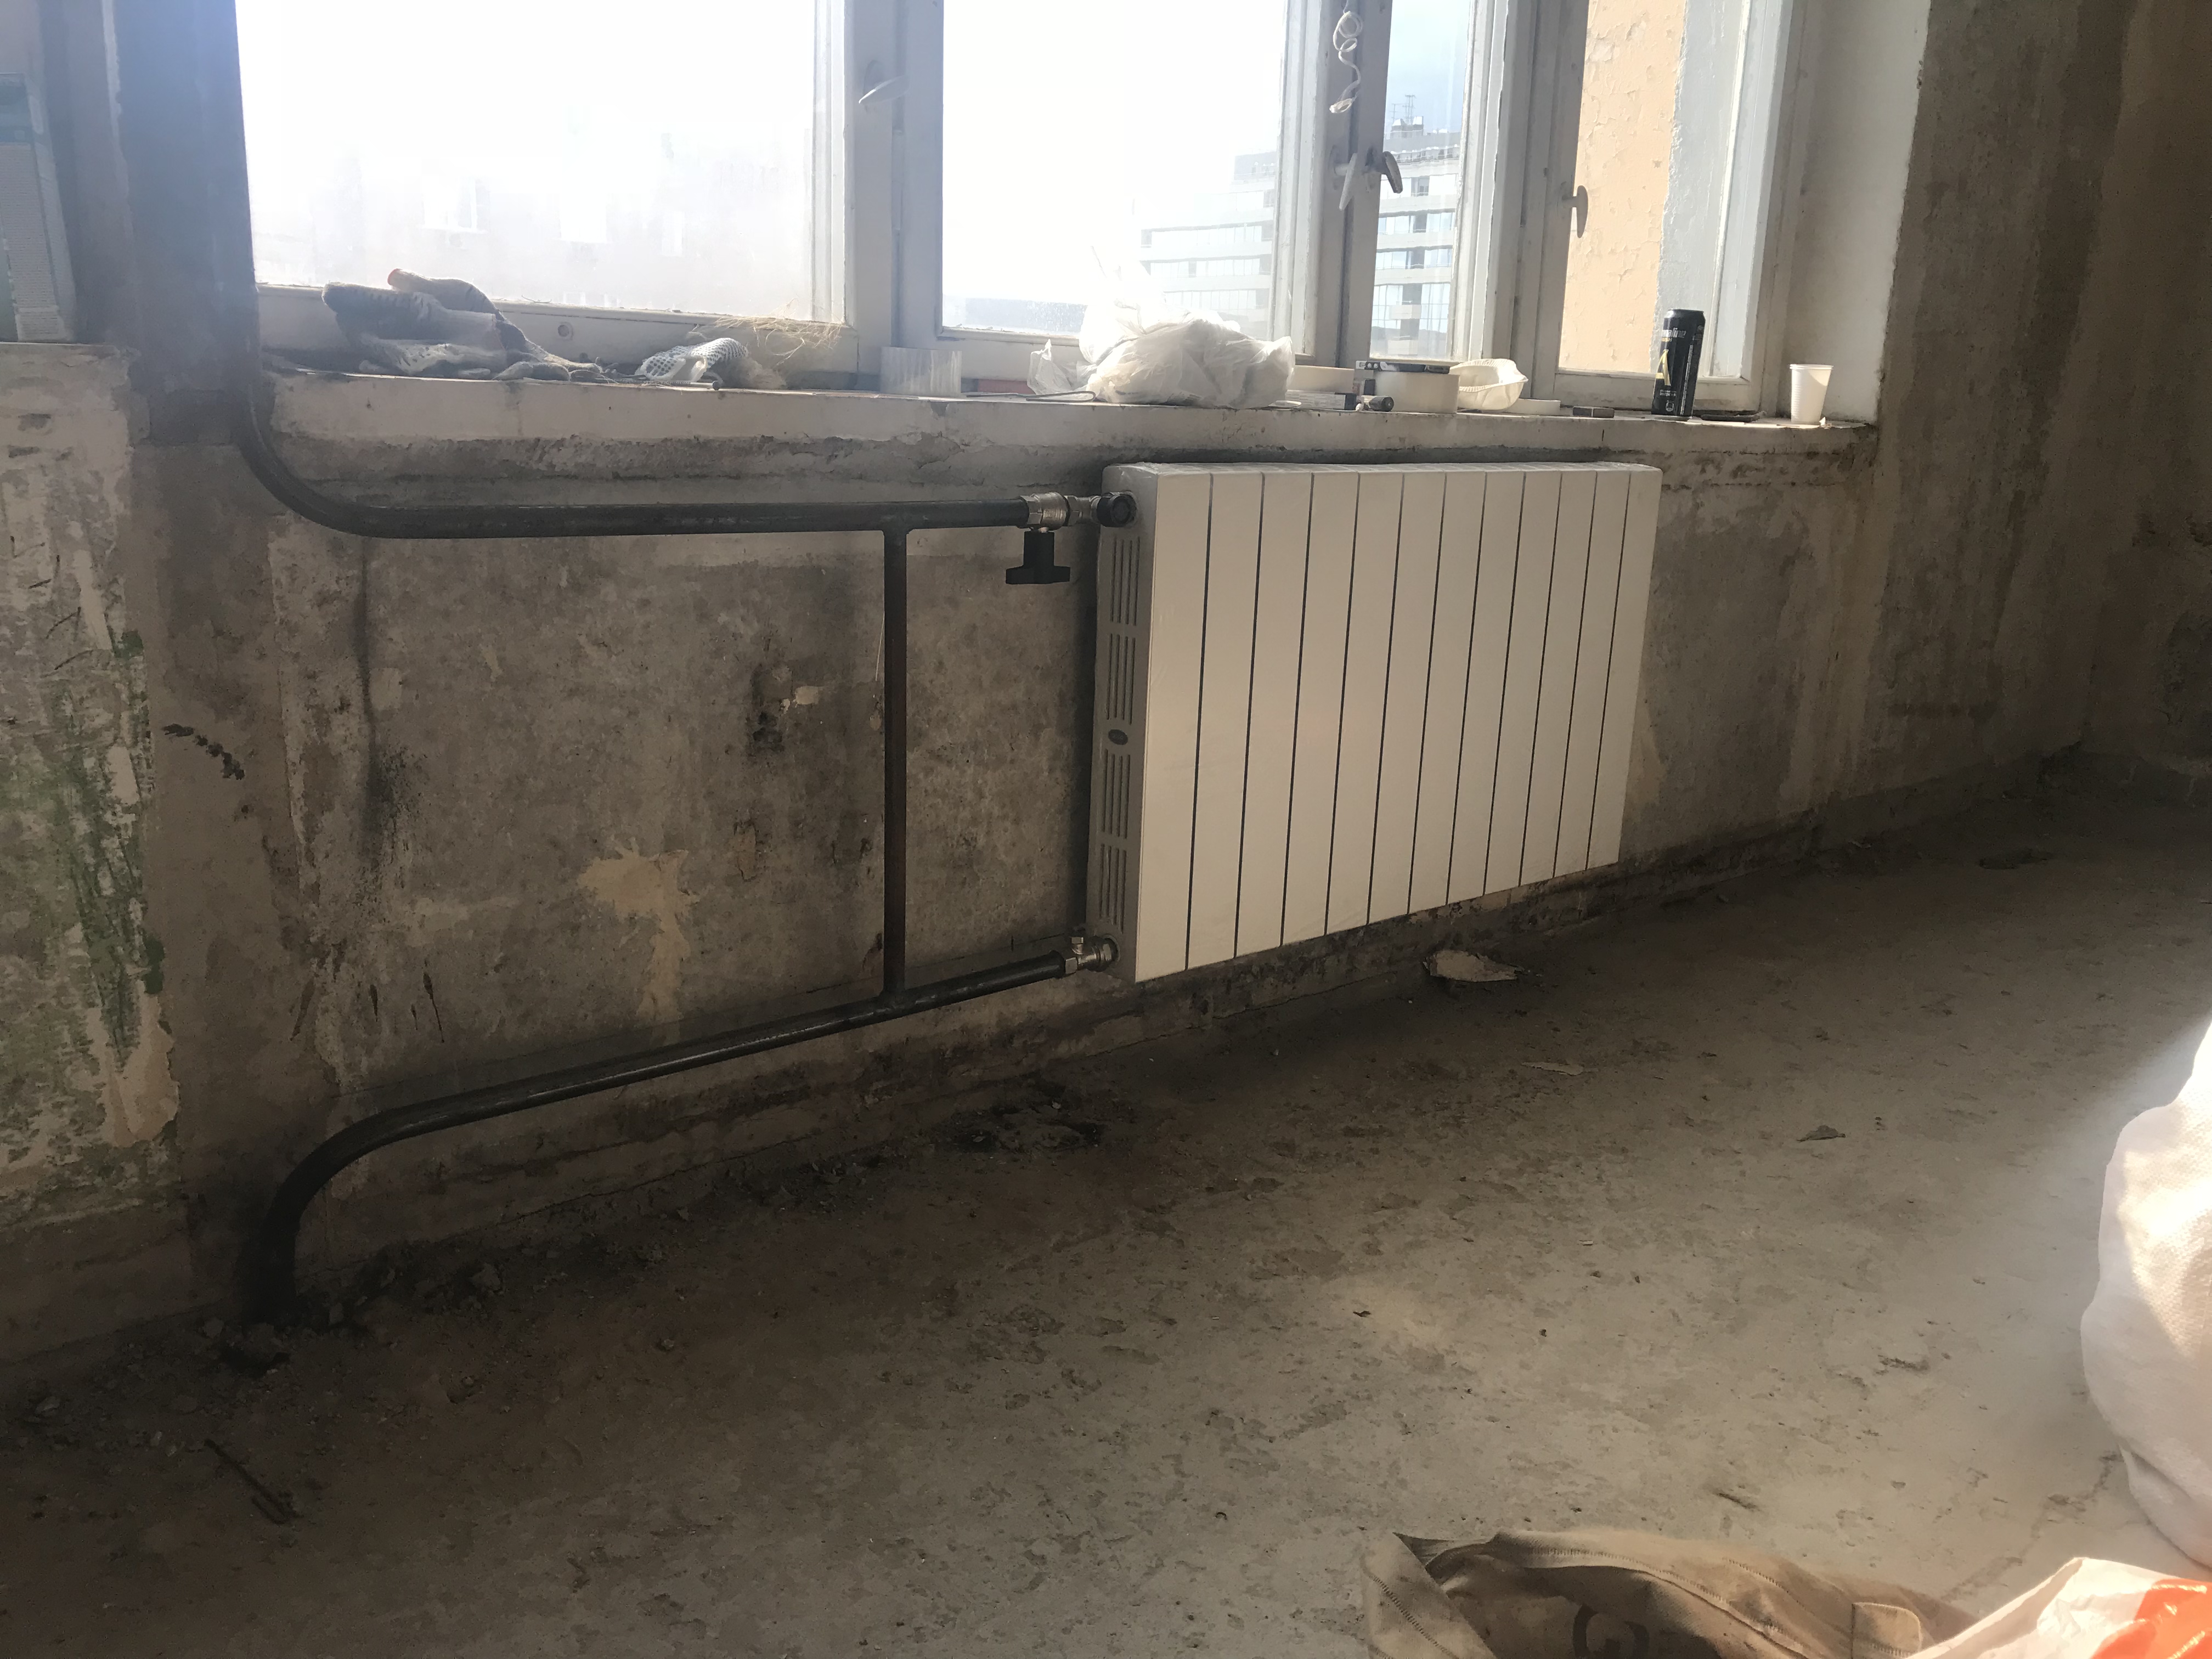
Replacing heating batteries in an apartment in a new building
Happy owners of new housing also have to solve many problems in the arrangement of the apartment. One of the key stages is the installation of heating in a new building. As a rule, such services are used in the event that the option for the location of the radiator provided by the developer or the material used is not satisfactory.
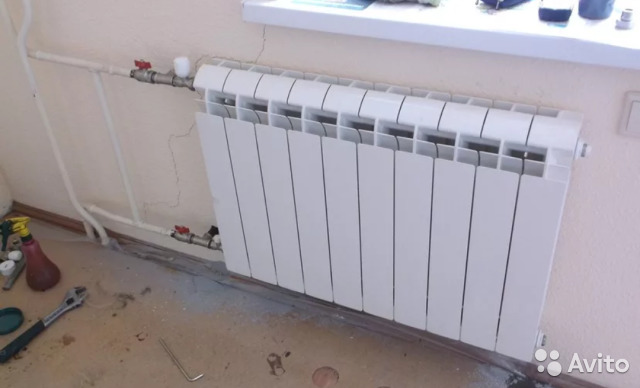
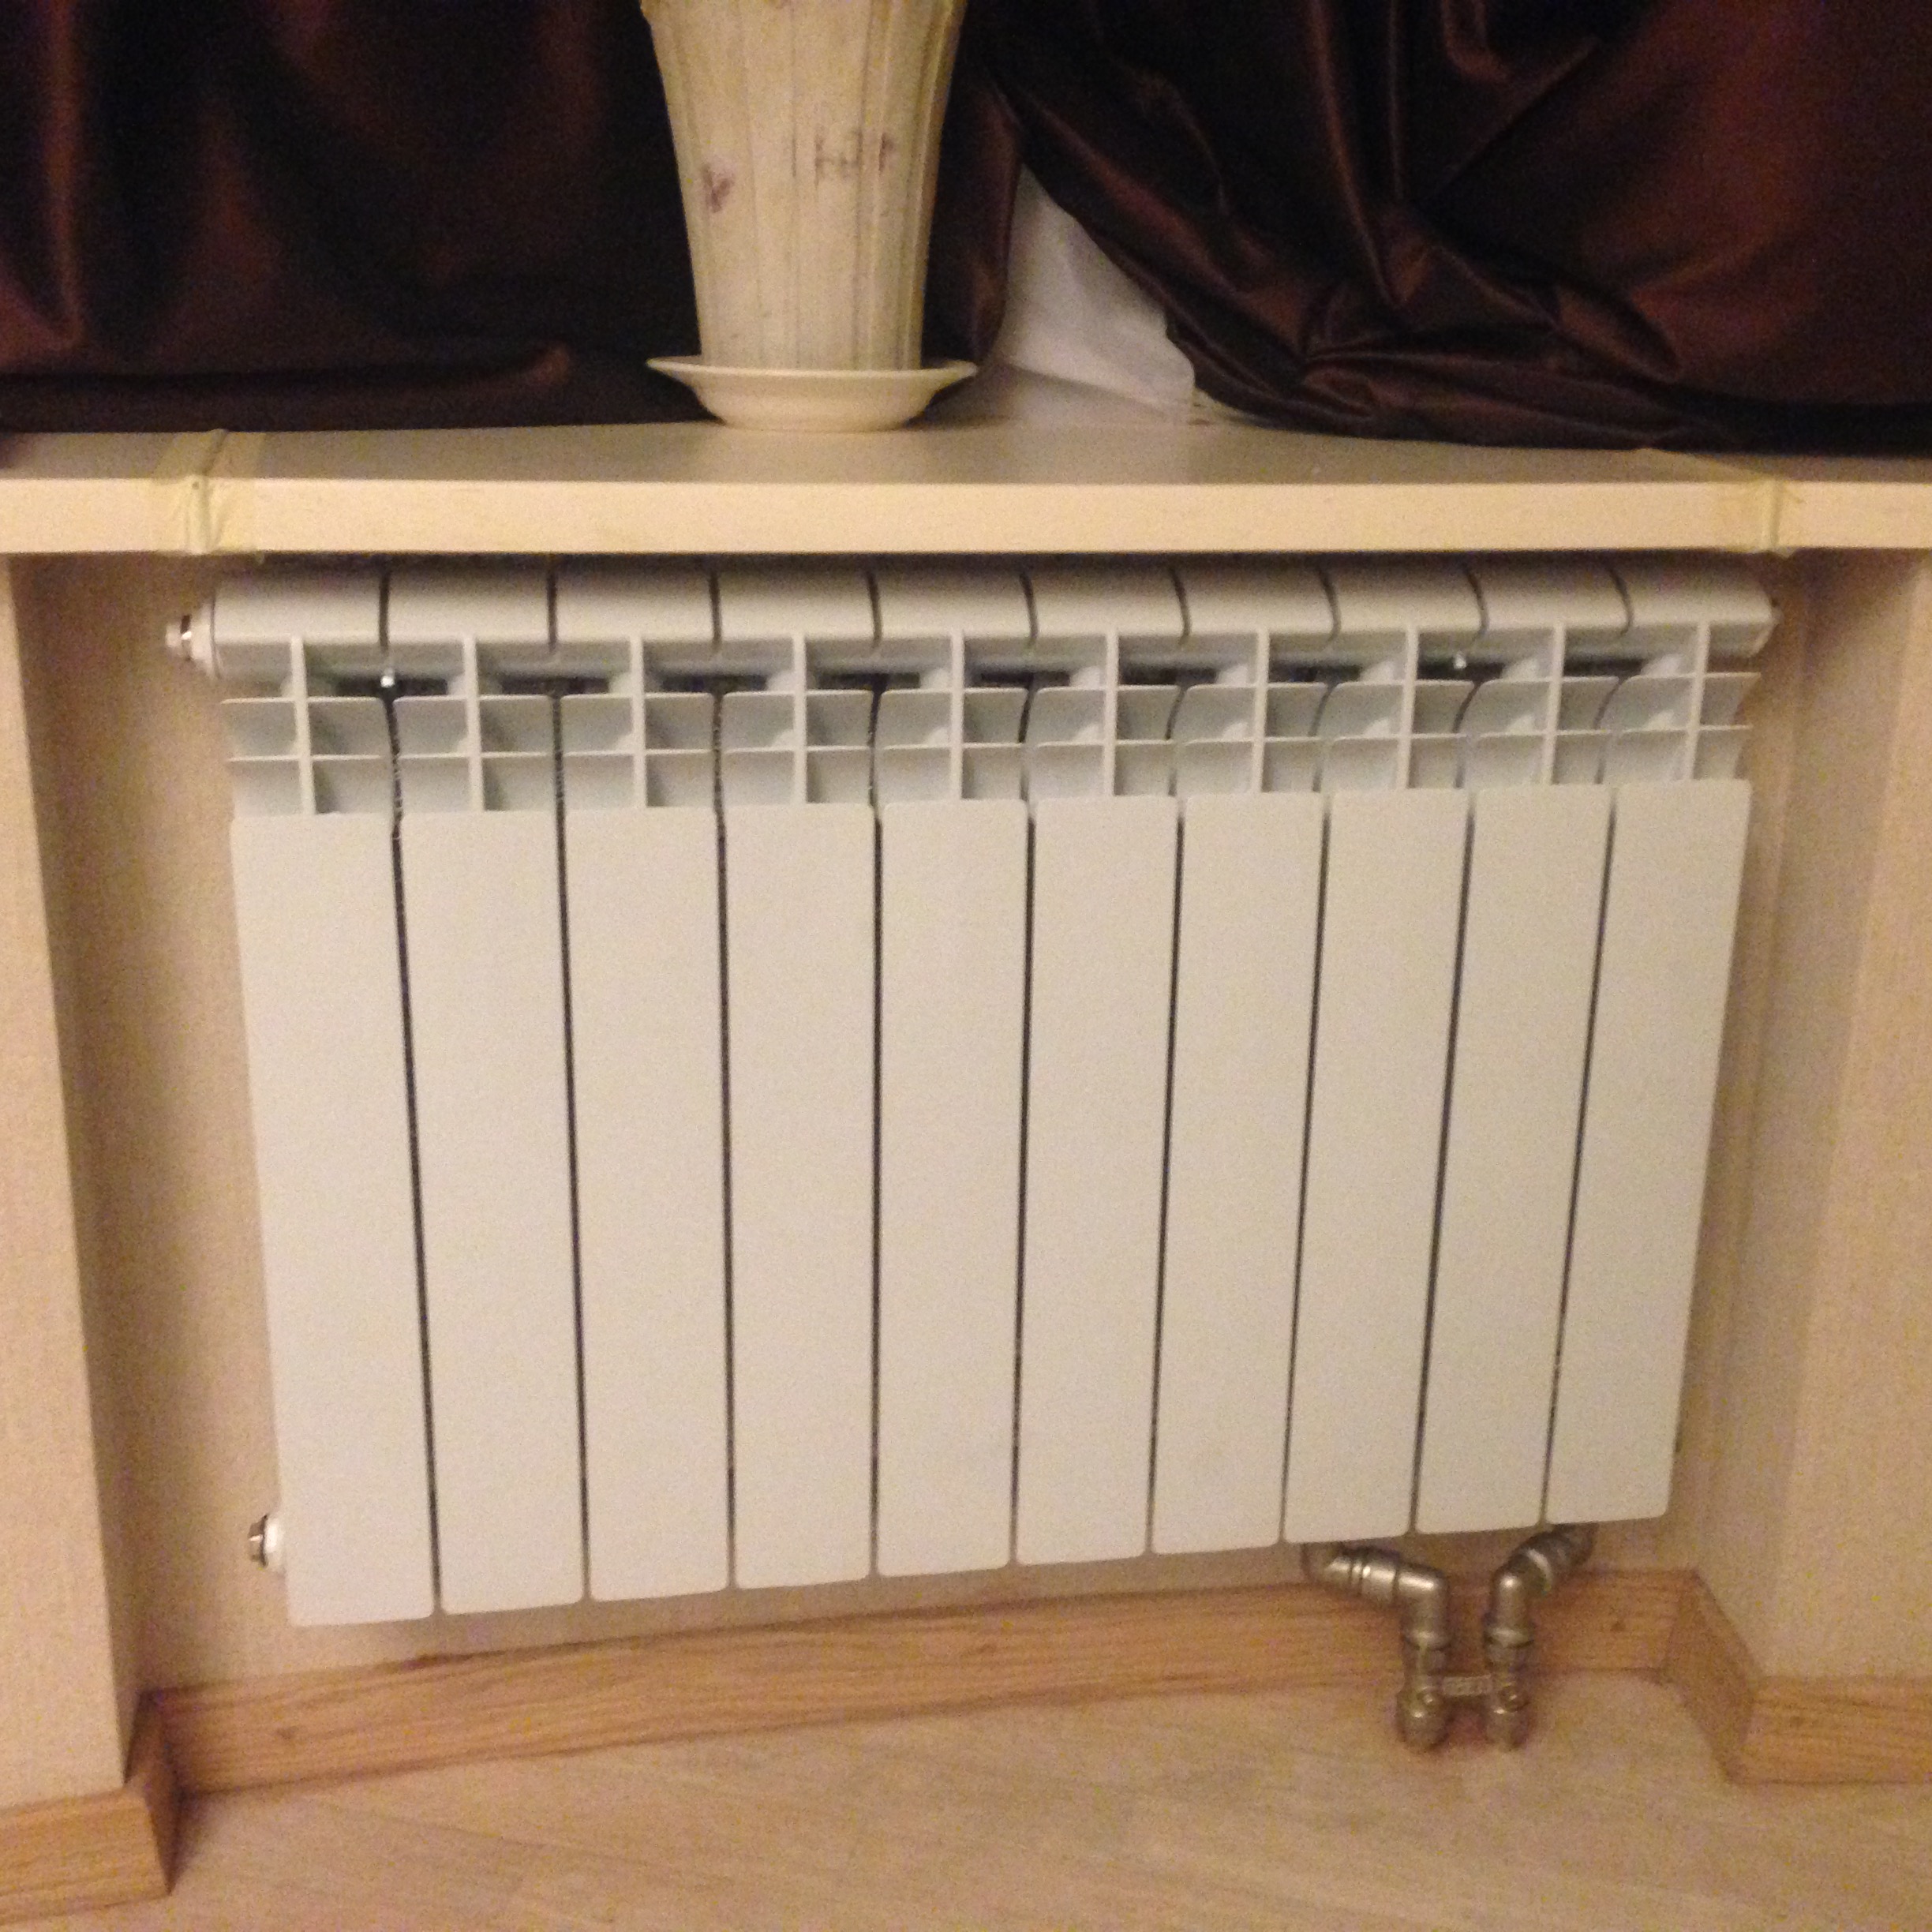
| Bottom Connection Corner Rehau | Arbonia Vertical Battery Installation | Installing the Rifar Monolit Battery | Mounting the Zehnder battery from the wall | Connecting the battery from the floor | |
|---|---|---|---|---|---|
| A photo | 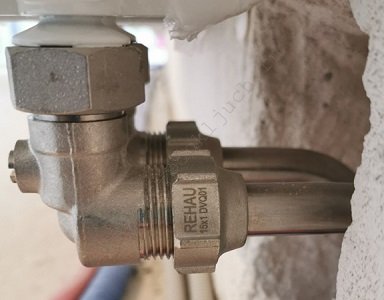 | 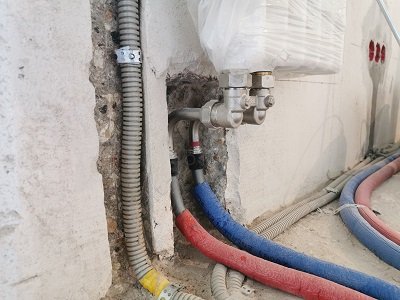 | 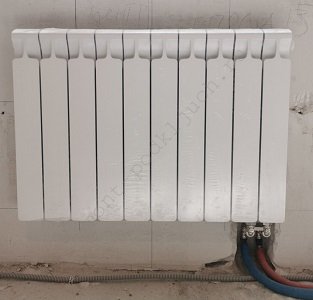 | 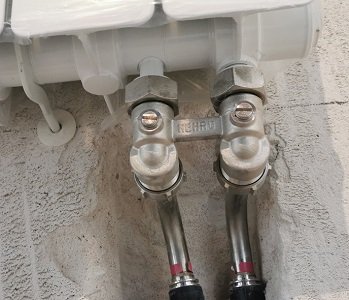 | 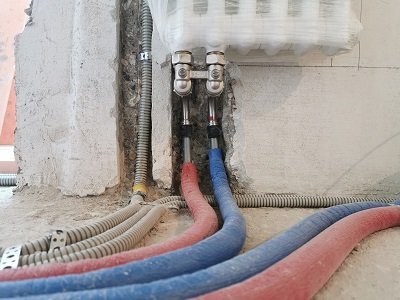 |
| Connection | corner knot | corner knot | corner knot | corner knot | corner knot |
| Advantage | Aesthetic look. Easy to clean the floor. | Aesthetic look. Easy to clean the floor. | Aesthetic look. Easy to clean the floor. | Aesthetic look. Easy to clean the floor. | Aesthetic look. Easy to clean the floor. |
| Installation price | 8000 rubles | 8000 rubles | 8000 rubles | 8000 rubles | 8000 rubles |
| Strobe cost | 1000 rubles | 1000 rubles | 1000 rubles | 1000 rubles | 1000 rubles |
Replacing heating pipes in an apartment is increasingly being done using a beam wiring system. In this case, a collector group is installed, with the help of which it is possible to regulate the supply of coolant and its pressure, which allows you to set the temperature at individual points of consumption at your own discretion.
When using beam wiring, replacing heating in a new building involves installing a manifold cabinet and Rehau XLPE pipes. They can be mounted in niches or walls, which will not reduce the efficiency of heating the room and the safety of the entire system. Often used to organize a warm water floor. At the same time, the price in Moscow for batteries is much lower than the cost of steel or cast-iron radiators. PVC pipes are completely repairable, withstand high pressure and high temperatures, and the smooth inner surface does not overgrow with deposits from the constant circulation of the coolant over time.
Additionally, it is possible to replace radiators in a new building. Steel or cast iron models can be replaced with modern bimetallic ones, which will provide greater efficiency in heating the room.
Heating distribution manifold
To ensure the radial laying of pipes from the riser to the radiators, a special comb is used with many leads for connection. The distribution manifold can be made of brass, steel, copper, polymers. The number of circuits can also be different (from 2 to 12). Turning to our specialists to replace heating batteries in an apartment, you will receive detailed advice on how to choose all the necessary materials, including a suitable distribution manifold.
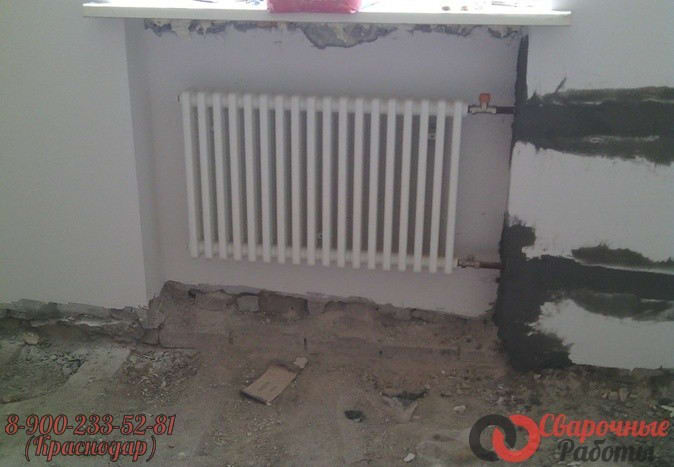
Replacing heating batteries for welding
Welding seams are in no way inferior in strength to a solid pipe. They are not afraid of vibrations and mechanical loads. However, the replacement of batteries with welded joints is a somewhat more difficult task from a technological point of view. It includes the following steps.
- Evaluation of the scope of work.
- Selection of radiators and pipes.
- Dismantling of the old heating system.
- Installation of pipes using welding equipment.
For exact information on the price of these works, please contact the specialists of our company right now. In the coming days, we will come to the site to assess all the features and nuances of the task at hand.
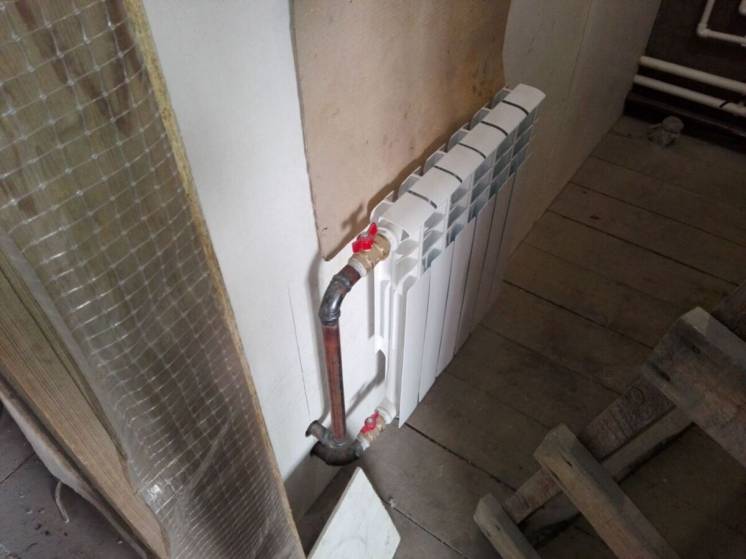
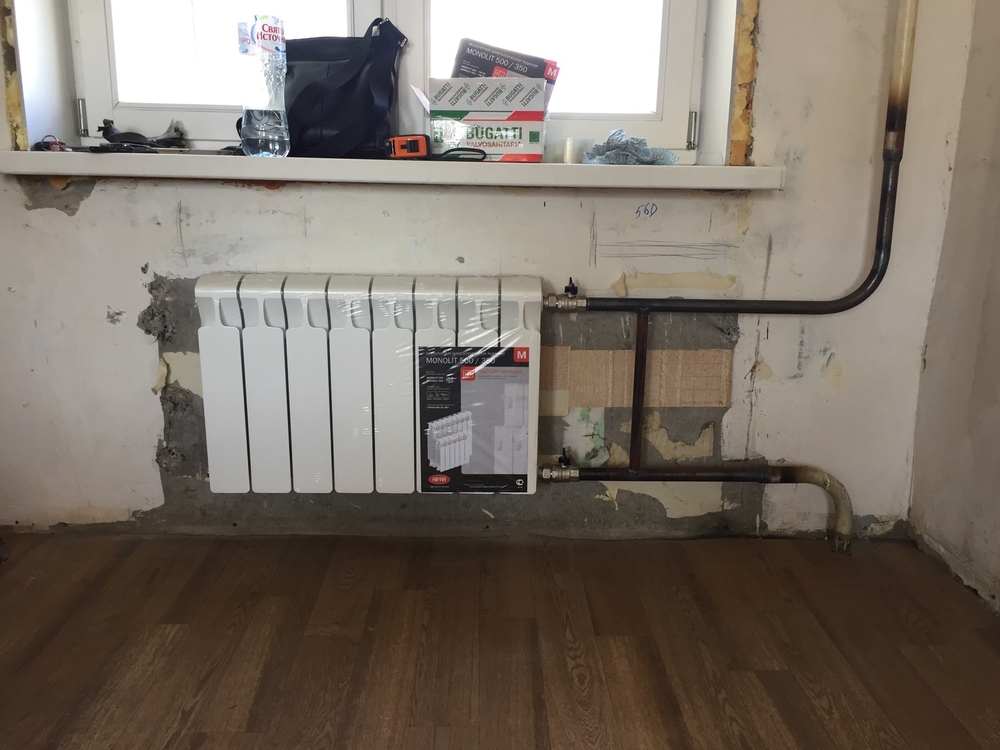
| Replacing heating batteries | Threaded connections for heating pipes | Corner connection for multiflex radiators | Replacing heating batteries for welding | |
|---|---|---|---|---|
| A photo | 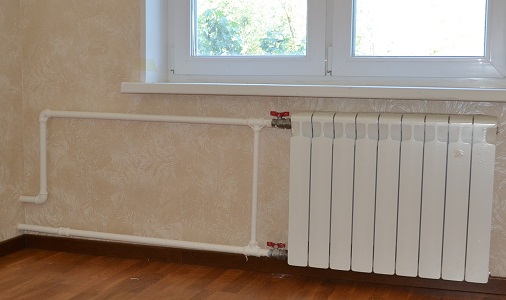 | 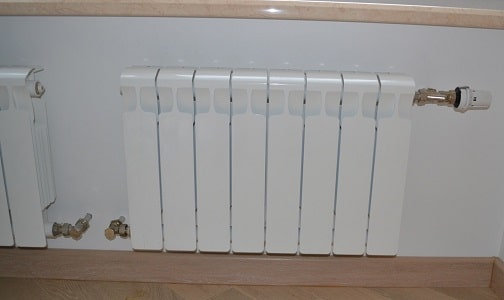 | 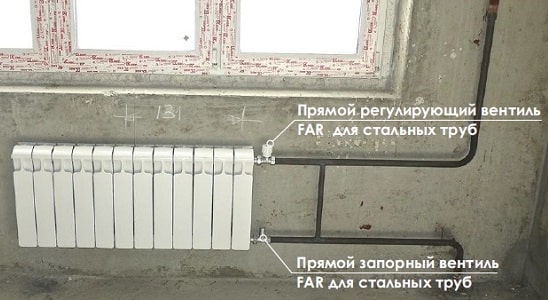 | |
| Price of work | 9000 rubles | 7000 rubles | 7500 rubles | 8000 rubles |
| Riser shutdown price | 1000 rubles | 1000 rubles | 1000 rubles | 1000 rubles |
Some interesting tips
If the decision is made to change the used batteries, it does not hurt to think about installing a faucet, conventional or with a thermal head. In the first case, you can manually adjust the coolant flow, in the second, this will be done automatically. But if a thermostat is installed on the radiator, it does not need to be covered with a decorative screen.
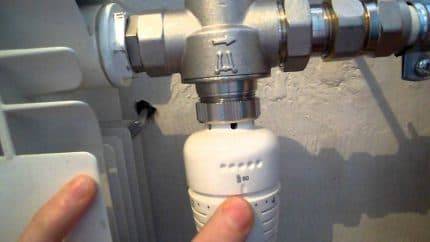
The thermal head on the stopcock makes it possible to change the amount of coolant so that the temperature in the room is always high enough
This will lead to data distortion when measuring temperature. It should be noted that thermostats can only be installed with single-pipe systems.In any case, at least stopcocks must be installed at the inlet and outlet of the radiator, if they are not available.
This will allow the radiator to be disconnected from the system in order to be cleaned or replaced, regardless of the season. The thermal power reflected in the data sheet of the battery does not always correspond to the declared one. If you increase the number of sections by 10%, you can improve the situation.
What is needed for installation
Installation of heating radiators of any type requires devices and consumables. The set of necessary materials is almost the same, but for cast-iron batteries, for example, the plugs are large, and the Mayevsky tap is not installed, but, somewhere at the highest point of the system, an automatic air vent is installed. But the installation of aluminum and bimetallic heating radiators is absolutely the same.
Steel panel ones also have some differences, but only in terms of hanging - brackets are included with them, and on the back panel there are special metal-cast shackles with which the heater clings to the hooks of the brackets.
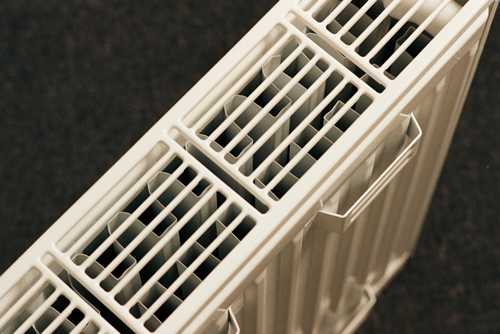
Here for these bows they wind up hooks
Mayevsky crane or automatic air vent
This is a small device for venting air that can accumulate in the radiator. It is placed on a free upper outlet (collector). Must be on every heater when installing aluminum and bimetallic radiators. The size of this device is much smaller than the diameter of the manifold, so another adapter is required, but Mayevsky taps usually come with adapters, you just need to know the diameter of the manifold (connecting dimensions).
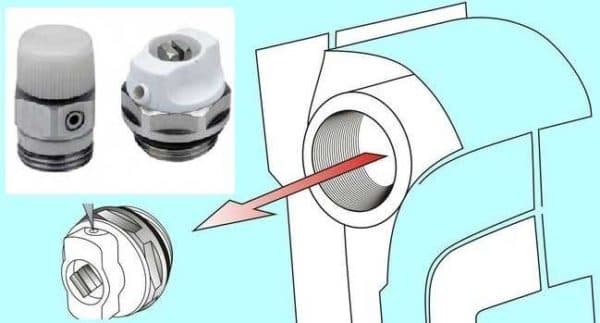
Mayevsky crane and method of its installation
In addition to the Mayevsky tap, there are also automatic air vents.They can also be placed on radiators, but they are slightly larger and for some reason are only available in a brass or nickel-plated case. Not in white enamel. In general, the picture is unattractive and, although they deflate automatically, they are rarely installed.
This is what a compact automatic air vent looks like (there are bulkier models)
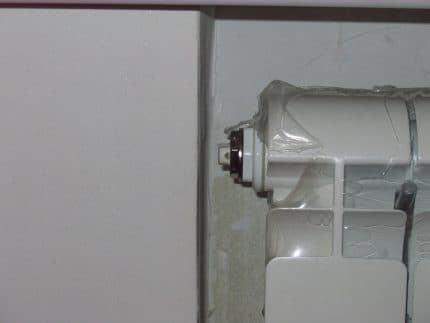
Stub
There are four outlets for the radiator with lateral connection. Two of them are occupied by the supply and return pipelines, on the third they put a Mayevsky crane. The fourth entrance is closed with a plug. It, like most modern batteries, is most often painted with white enamel and does not spoil the appearance at all.


Where to put the plug and the Mayevsky tap with different connection methods
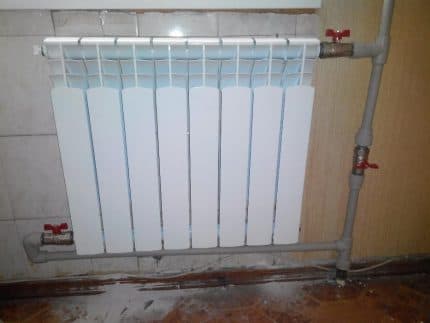
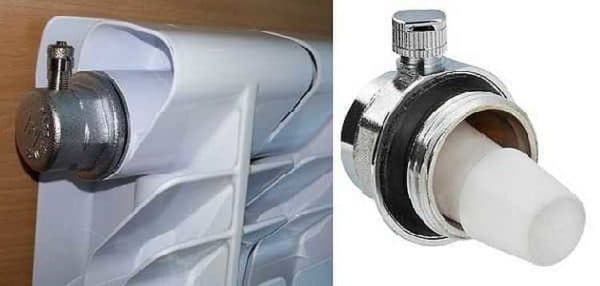
Shut-off valves
You will need two more ball valves or shut-off valves with the ability to adjust. They are placed on each battery at the input and output. If these are ordinary ball valves, they are needed so that, if necessary, you can turn off the radiator and remove it (emergency repair, replacement during the heating season). In this case, even if something happened to the radiator, you will cut it off, and the rest of the system will work. The advantage of this solution is the low price of ball valves, the minus is the impossibility of adjusting heat transfer.
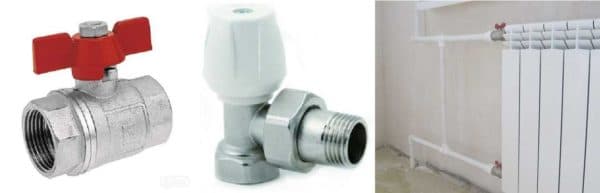
Taps for heating radiator
Almost the same tasks, but with the ability to change the intensity of the coolant flow, are performed by shut-off control valves. They are more expensive, but they also allow you to adjust the heat transfer (make it smaller), and they look better outwardly, they are available in straight and angular versions, so the strapping itself is more accurate.
If desired, you can put a thermostat on the coolant supply after the ball valve.This is a relatively small device that allows you to change the heat output of the heater. If the radiator does not heat well, they cannot be installed - it will be even worse, since they can only reduce the flow. There are different temperature controllers for batteries - automatic electronic, but more often they use the simplest one - mechanical.
Related materials and tools
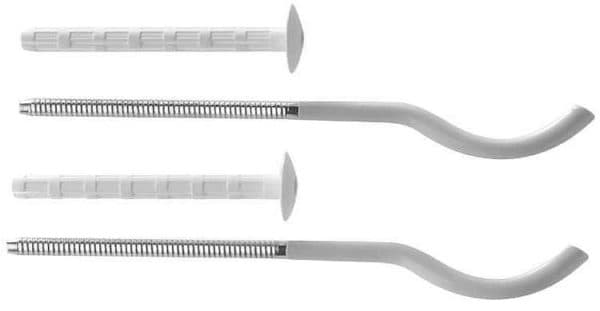
You will also need hooks or brackets to hang on the walls. Their number depends on the size of the batteries:
- if the sections are not more than 8 or the length of the radiator is not more than 1.2 m, two attachment points from above and one from below are sufficient;
- for every next 50 cm or 5-6 sections, add one fastener from above and below.
Takde need a fum tape or linen winding, plumbing paste to seal the joints. You will also need a drill with drills, a level (a level is better, but a regular bubble one is also suitable), a certain number of dowels. You will also need equipment for connecting pipes and fittings, but it depends on the type of pipes. That's all.
How to connect a bimetallic radiator?
Very often, and in the fall almost daily, on the most popular forum in Runet on the topic of installation, topics or messages appear with the question of problems connecting bimetallic radiators in apartments, and I am very sorry that in our time, when there is access to any information on the network, there are many people are faced with this problem by turning to “specialists” to replace radiators, who have no idea how this installation is performed.And the question is not only that the radiators do not warm up completely or completely, which casts doubt on the feasibility of such a replacement, but also that the installation is also often carried out with serious violations of the design conditions of the heating system, which seriously affect on its reliability, thus the life and health of residents is at serious risk. In this topic, through the posted photos of my work, I will try to give simple tips on how to connect radiators so that all building codes are observed and new heaters are fully warmed up.
What pipes to choose for mounting radiators?
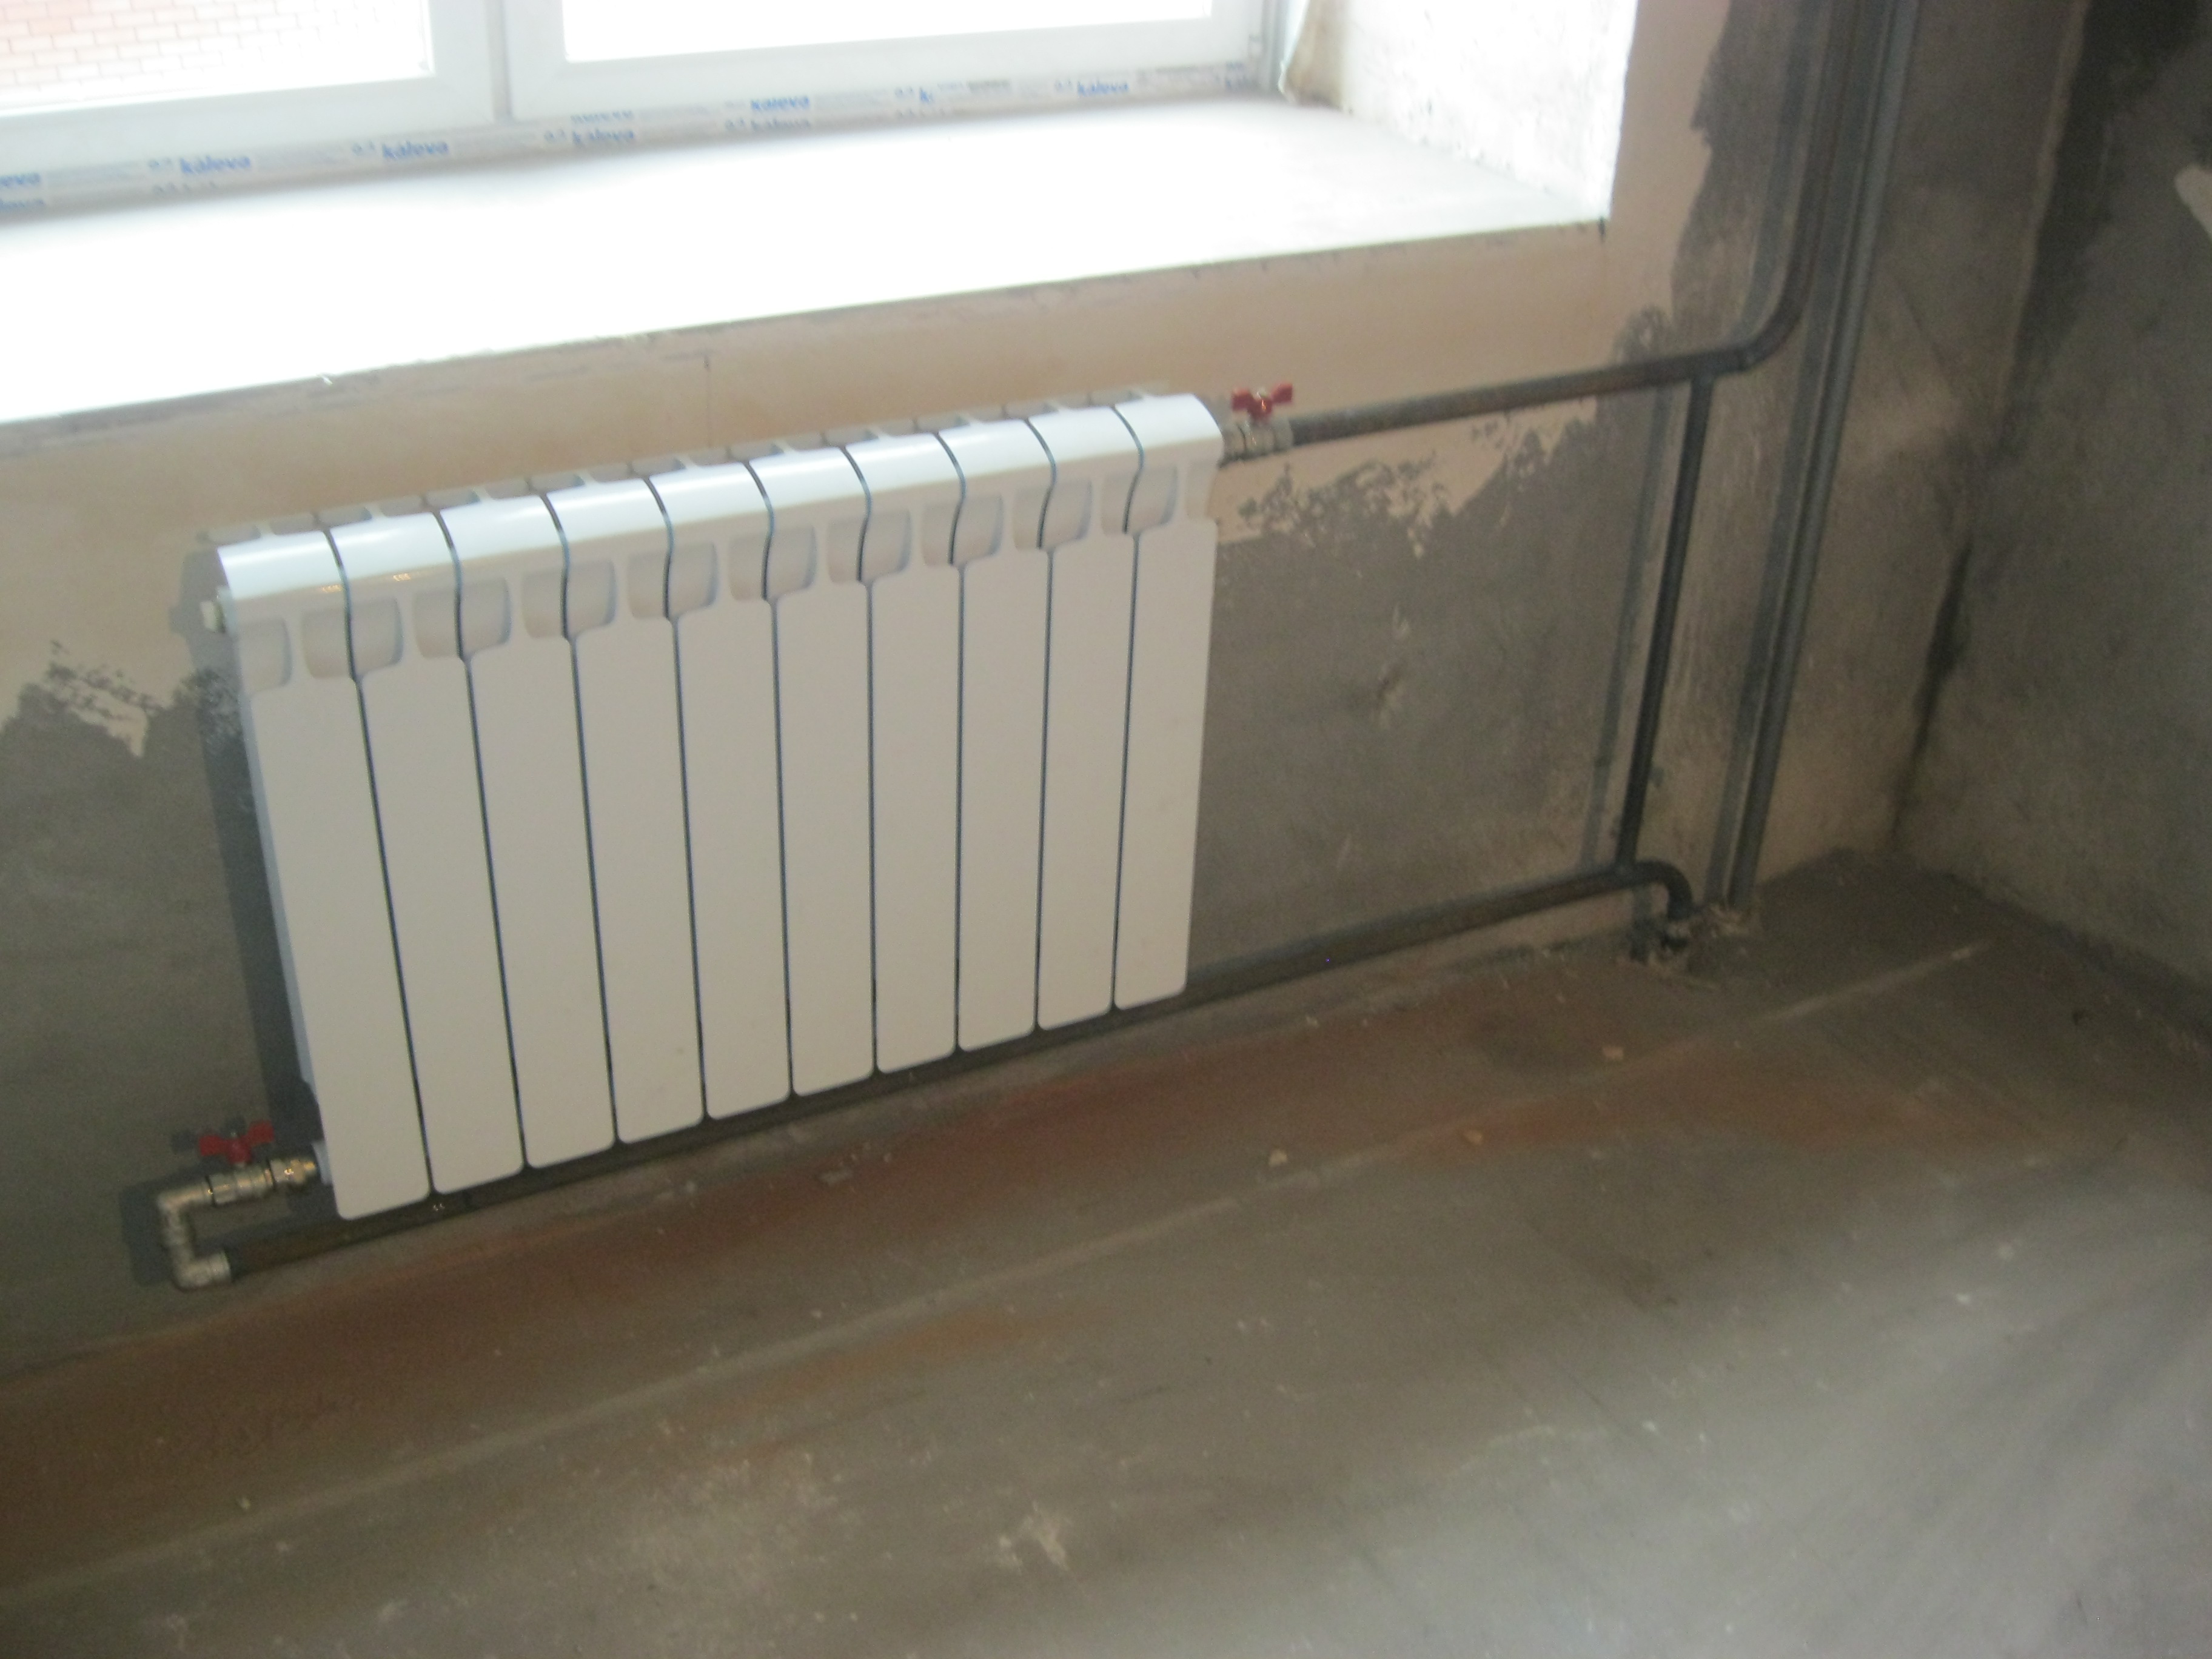
Firstly, I would like to immediately decide on the type of pipeline material that the new radiator is connected to: if in the house, according to the project, the heating system risers are made of a steel black pipe, then the leads to the radiator must be made of steel. Options made of plastic pipes (polypropylene, metal-plastic) are significantly inferior in reliability to a steel pipe and are categorically unacceptable in systems designed from steel, especially with open laying, which is unacceptable according to the requirements of SNiP, connecting a radiator with copper pipes and stainless steel pipes, I personally consider it inappropriate for economic and aesthetic reasons, as well as due to a decrease in the reliability of the pipe due to the significantly smaller wall thickness.
Secondly, it is necessary to determine the type of connection for the pipeline, it is difficult to argue that gas welding is optimal, both for reasons of reliability (with threaded connections there is always a weak spot-squeeze) and from the aesthetic side due to the absence of threaded fittings
It is also important that the risers mounted by the builders of the house rarely differ in the correct geometry relative to the walls and floor, while gas welding, the installers can easily correct all the irregularities left by the builders
Installation of radiators
Installation of radiators is carried out in this way:
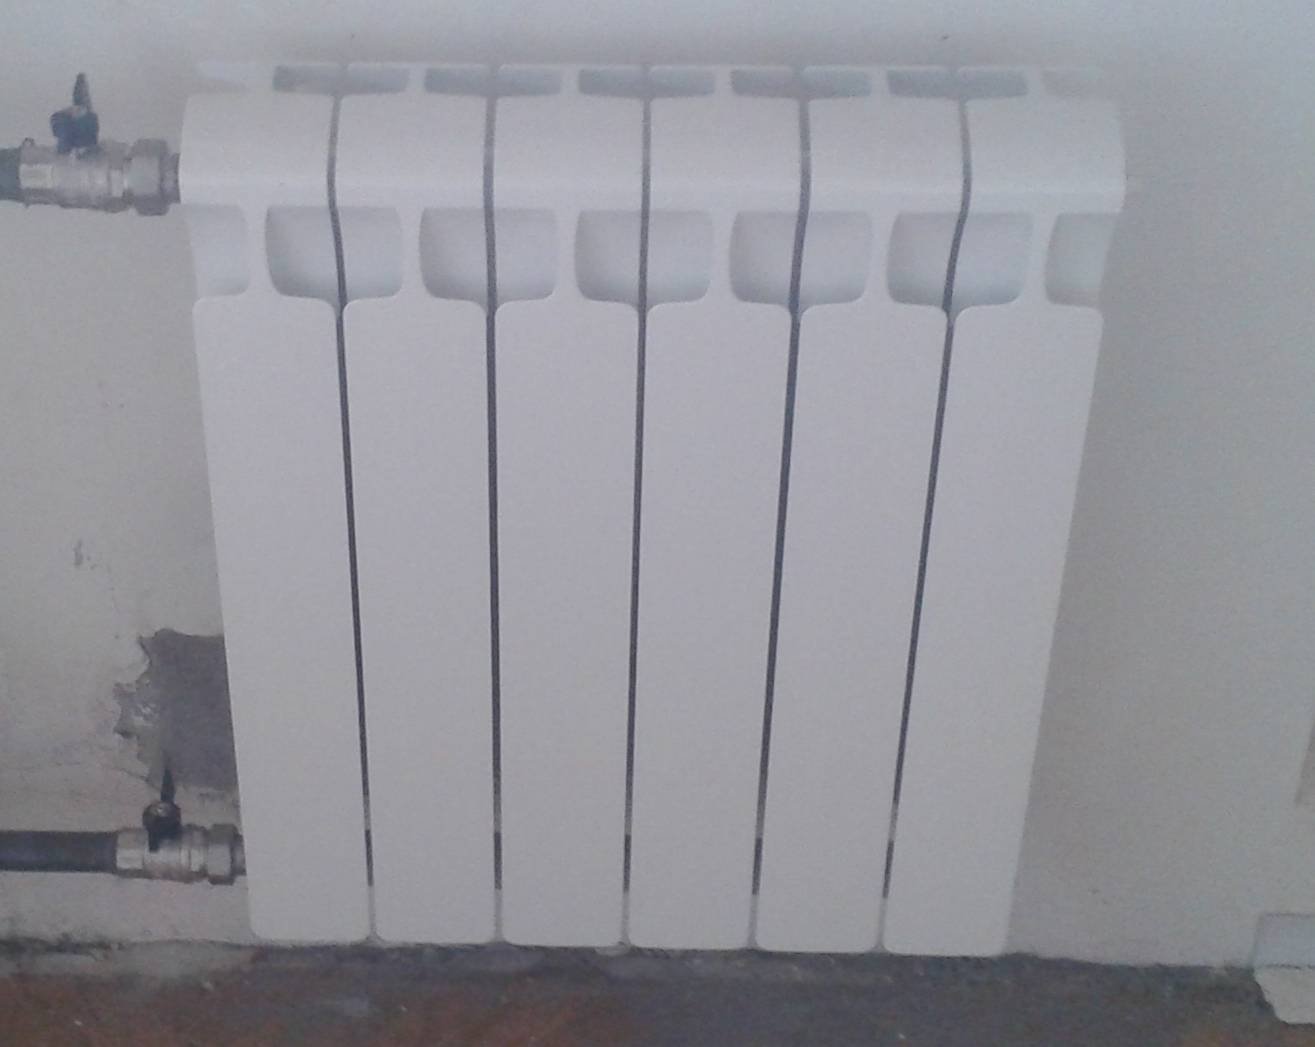
- the device is hung strictly according to the level, while depending on the type of brackets, one or another method of fastening is used. In the absence of brackets, the wall is drilled to a depth of 8-10 cm using a 9.5 mm drill and a dozen reinforcement is driven into the hole. When the radiator is installed, the fittings are cut in place and bent up;
- for bimetallic radiators, the standard plug cross section is 25 millimeters, so the thermostat and valve are screwed using adapters. In order to ensure the sealing of the connection, linen with a sealant or paint is used. The thermostat head is mounted horizontally so that warm air from the piping does not pass through it;
- from below and from above on the riser and on the valve with a thermostat, an adapter is mounted on the pipe;
- in order to connect the corrugated pipe to the fitting, it is inserted into the hole and the nut is clamped with an adjustable wrench, at the same time the silicone sealant reliably compresses the ribbed surface. The eyeliner is also carried out according to the level, but it should not be located strictly horizontally, since a minimum slope is necessary to prevent air from the heating system and radiator.
Replacing the heating system in the apartment, details on the video:
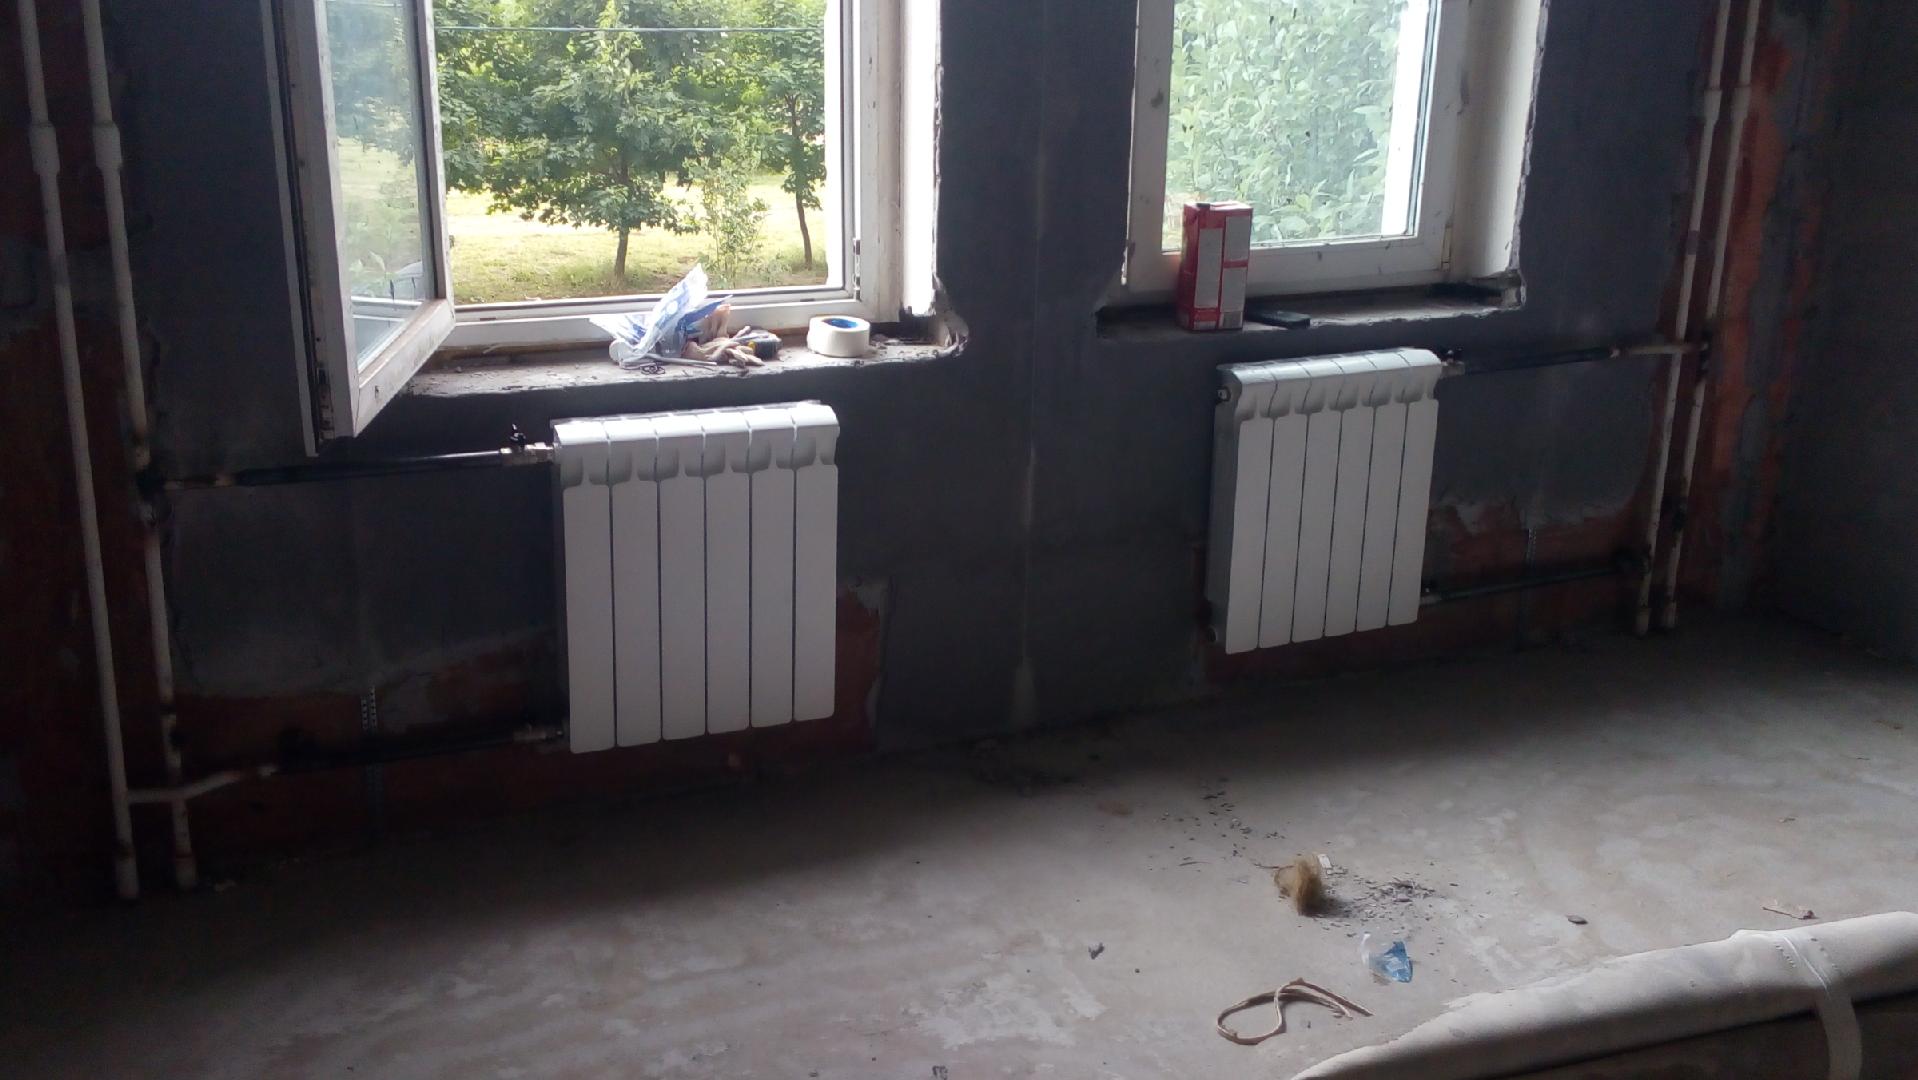
Where and how to place
Traditionally, heating radiators are installed under the window.This is necessary so that the rising warm air cuts off the cold from the window. To prevent the glass from sweating, the width of the heater must be at least 70-75% of the width of the window. It needs to be installed:
- in the middle of the window opening, tolerance - 2 cm;
- distance from the radiator to the floor - 8-12 cm;
- to the windowsill - 10-12 cm;
- from the back wall to the wall - 2-5 cm.
These are all recommendations, the observance of which ensures the normal circulation of warm air in the room and its efficient heating.
How to choose polypropylene pipes read here.
Test work
The initial check is carried out under a slight pressure to see if a leak appears somewhere. If a defect is found, the coolant is turned off, and work is carried out to eliminate it.


At the next attempt, water is supplied to the system under normal pressure and remains in it for a couple of hours. When they pass, you need to check all the joints for leaks.
Without special skills, sometimes it is difficult to dismantle and build up new sections correctly the first time, so the stage of checking the quality of the work done cannot be ignored. In general, if you have all the tools and follow the sequence of work, you can even connect two aluminum radiators together with your own hands.
Often, residents of houses and apartments are faced with one very serious problem - despite the systematic supply of a coolant of the required temperature, there is a lack of heat in the house, and staying in it causes some discomfort. To solve this problem, you will need to increase the heating radiator.What is this kind of work? The essence of this procedure is to add sections to the radiator, due to which a comfortable temperature in the home will be achieved.
Sections to the radiator are added if you need to heat a large room
First you will need to find a key for radiators, you must have it - if for some reason you cannot find it, then you need to borrow it from a friend or neighbor, or go to the store to buy a new one. So, with this key, you must remove the radiator, depriving it of connections to the heating system. Next, we take it to the bath and direct water into it.
Without a special key, adding sections will be unrealistic.
There are a large number of cases when the tenants of the apartment complained about the insufficiently comfortable air temperature in the dwelling, and the culprit was an elementary clogging of the radiator, which did not allow it to work "at full strength". But if you sent water to the radiator, and it passes through its channels without obstacles and comes out clean, without having a cloudy appearance, then it’s not a clogging of the heating device. Help in this case can only be provided by adding sections, in which, by and large, there is nothing complicated and difficult if you approach this task responsibly.
How to install
Now about how to hang the radiator. It is highly desirable that the wall behind the radiator be flat - it is easier to work this way. The middle of the opening is marked on the wall, a horizontal line is drawn 10-12 cm below the window sill line. This is the line along which the upper edge of the heater is leveled. The brackets must be installed so that the upper edge coincides with the drawn line, that is, it is horizontal.This arrangement is suitable for heating systems with forced circulation (with a pump) or for apartments. For systems with natural circulation, a slight slope is made - 1-1.5% - along the course of the coolant. You can’t do more - there will be stagnation.
Proper installation of heating radiators
wall mount
This must be taken into account when mounting hooks or brackets for heating radiators. Hooks are installed like dowels - a hole of a suitable diameter is drilled in the wall, a plastic dowel is installed in it, and the hook is screwed into it. The distance from the wall to the heater is easily adjusted by screwing and unscrewing the hook body.
Hooks for cast iron batteries are thicker. This is fasteners for aluminum and bimetallic
When installing hooks for heating radiators, please note that the main load falls on the top fasteners. The lower one serves only for fixing in a given position relative to the wall and it is installed 1-1.5 cm lower than the lower collector. Otherwise, you simply will not be able to hang the radiator.
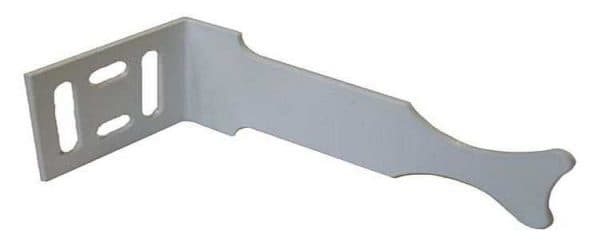
One of the brackets
When installing the brackets, they are applied to the wall in the place where they will be mounted. To do this, first attach the battery to the installation site, look where the bracket will “fit”, mark the place on the wall. After putting the battery, you can attach the bracket to the wall and mark the location of the fasteners on it. In these places, holes are drilled, dowels are inserted, the bracket is screwed onto the screws. Having installed all the fasteners, the heater is hung on them.
Floor fixing
Not all walls can hold even light aluminum batteries. If the walls are made of lightweight concrete or sheathed with drywall, floor installation is required.Some types of cast iron and steel radiators come with legs right away, but they do not suit everyone in terms of appearance or characteristics.
Legs for installing aluminum and bimetal radiators on the floor
Floor installation of radiators from aluminum and bimetallic is possible. There are special brackets for them. They are attached to the floor, then a heater is installed, the lower collector is fixed with an arc on the installed legs. Similar legs are available with adjustable height, there are fixed ones. The method of fastening to the floor is standard - on nails or dowels, depending on the material.


Conclusion
To install heating radiators with your own hands, you do not need to undergo any special training or have a specialized education. It is enough to remember the nuances of installation, watch a few videos from experienced craftsmen and you can get to work. The only caveat: batteries should be securely fastened, especially cast iron ones. A drawdown or breakage of the bracket will lead to the outflow of coolant, sometimes quite hot.
Video
How to choose the right replacement option:
Detailed master class:
Overview of common mistakes:
Total costs
So, the full calculation for replacing the heating battery in the apartment turned out like this:
| Naming of expenditures | Cost, rub |
| Purchase of a bimetallic heating battery | 3640-00 |
| Purchase of pipes and accessories | 1330-00 |
| Rent a soldering iron for pipes | 300-00 |
| Shutdown of the heating riser | 500-00 |
| Total: | 5770-00 |
As you can see, the main cost of the entire operation to replace the heating battery in the apartment falls on the cost of the heating radiators themselves. If you hire an organization and do all the same work, the cost will immediately increase at least 3 times.
We can say that the operation of replacing heating batteries is not a very complicated process.The main thing is to think well, prepare and do it carefully.
Good luck to everyone and less troublesome repairs.