- Principle of operation
- How to connect a heated towel rail to the riser in the bathroom?
- How to install a water heated towel rail with your own hands
- Connection options
- Dismantling the old
- Conclusion and welding of pipes
- How to make a bypass in front of the device, installation of American women and taps
- Installation on polypropylene pipes with all fittings
- Disposal of the old drying plant
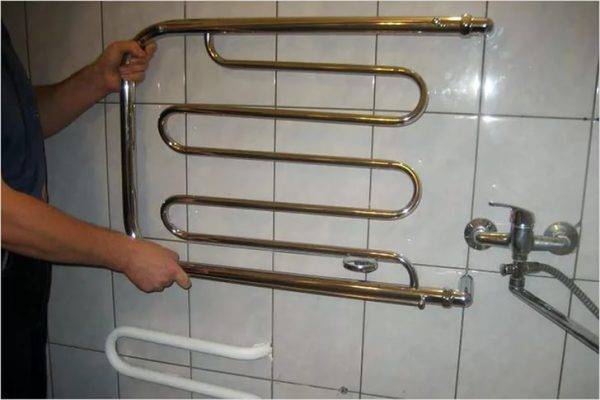
- Moving the dryer to another wall
- water variety
- Electric towel warmer type
- Rules for connecting a heated towel rail
- Connecting a water heated towel rail to hot water or central heating
- Riser installation
- Self-installation of a simple configuration
- Technology of working with the model "Ladder"
- Insertion into the centralized heating system
- Installing a heated towel rail in the bathroom
- Installation and connection
- At what height do they hang
- How to accurately make holes in a tile
- How to make a hole for the socket and install it
- wall mount
- Connectivity technology
- Materials, tools
- Installation of a water heated towel rail
- Connecting electrical equipment
Principle of operation
There are 2 types of heated towel rails - water and electric. Many apartments have pipes that are connected to heating. Their disadvantage is that drying can be carried out only during the heating season.Electric models are deprived of this minus - they can be turned on only when the need arises. In addition, they are easy to install and can be placed anywhere in the bathroom.
The heated towel rail is a curved pipe through which hot water constantly circulates. At the same time, the flow is directed from the upper floors to the lower ones, therefore, the pipes of the residents of all apartments have the same temperature. The main requirement is the same diameter of the pipes on the riser and the heated towel rail.
How to connect a heated towel rail to the riser in the bathroom?
There are two ways to connect a water heated towel rail to a riser. If you have a riser with hot water, the heated towel rail crashes into it. Less commonly, a heated towel rail is connected to the heating system, but this is not advisable, since in this case the device will be hot only during the heating season, and the rest of the time it will not be of any use, except as a hanger. Towel dryers are electric and water. The article will talk about water ones, since electric ones do not require a tie-in to the riser and are installed as a floor heater, powered by the mains.
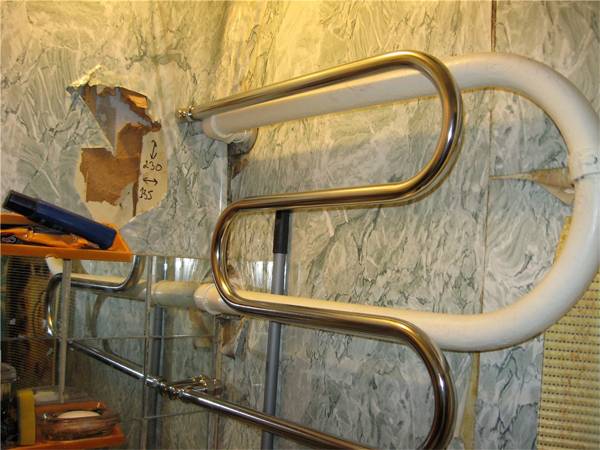
Before connecting a water heated towel rail to the riser, it may be necessary to dismantle the old heated towel rail that was already installed in your apartment before. Please note that before you connect the heated towel rail in the bathroom, you will have to go to the HOA and agree on turning off the hot water riser. Only after it is turned off will it be possible to begin work on dismantling the old heated towel rail and properly connecting the heated towel rail to the riser.In order to properly connect the heated towel rail to the riser, you can use several schemes
- Serial connection. The heated towel rail is connected to hot water supply. To do this, a branch is made from the pipe with hot water that goes to the mixer and the heated towel rail is connected there. The disadvantage of this method is that slightly warm water will come out of the tap.
-
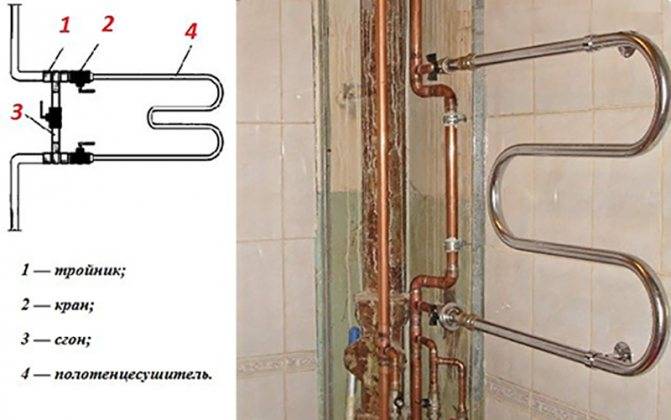
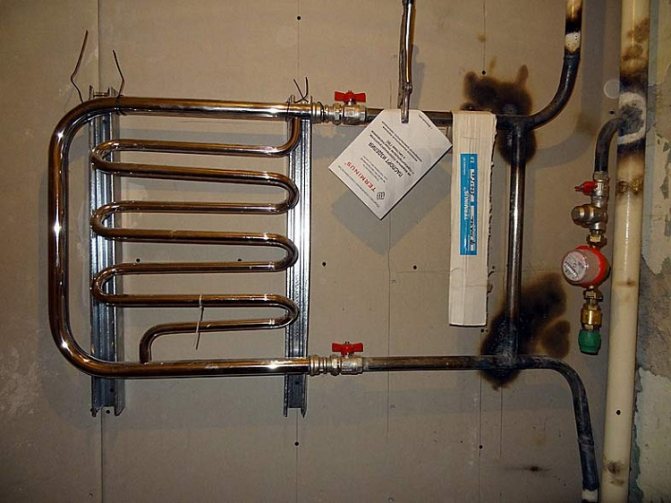
Parallel connection This method is a more correct connection of a heated towel rail. To the riser, the heated towel rail cuts into a straight line, then there is no heat loss. Correctly connect the heated towel rail in the bathroom by first installing special taps on the pipe to which it is connected. This will allow you to regulate the temperature in the device and also facilitate its removal if necessary.
It is worth noting that the water inlet to the heated towel rail should be at the top, and the outlet at the bottom, since water flows through the device from top to bottom. Often, when connecting a heated towel rail to a riser in the bathroom, it is necessary to partially or completely change the riser. To do this, the pipes must be connected to each other.
For mounting a heated towel rail, it is most convenient to use pipes made of metal-plastic. It is convenient to connect it due to the presence of threaded fittings, and it can also be soldered. The pipes must be the same width as your utility pipes.
It is better to replace the entire riser, then you will not have to make many joints that may then leak. New heated towel rails often have a fitting, in order to install such a detachable coupling with an internal thread. In the future, such a heated towel rail will be easy to remove and install
In order for the heated towel rail to work correctly, it must be positioned horizontally.Install Mayevsky's faucet. This is done in order to prevent the formation of an air lock in the heated towel rail. Otherwise, it will not be able to function.
How to install a water heated towel rail with your own hands
The installation of water-type equipment is different from the installation of electric heated towel rails.
There are several schemes for tie-in equipment.
Below is a detailed process for installing a water heated towel rail with your own hands.
Connection options
You can install the device in two ways:
- Connect to the heating system. In such a situation, after removing the old device, the installation of special taps, bypasses, American women is required. The equipment is connected in parallel with the heating system.
- Connect to hot water system. The dryer is cut into the water supply system, connected in series. This is done directly inside the apartment itself, no additional work is required. There is one nuance of such a connection - this is a decrease in the temperature of hot water.
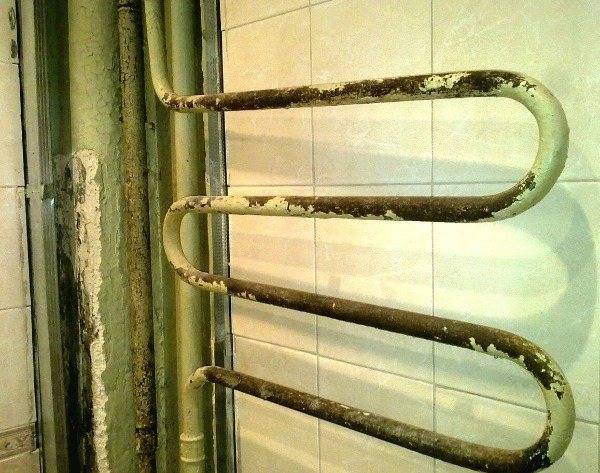
Dismantling the old
The first thing to do is to dismantle the old equipment, but it is important to coordinate your actions with the Housing Office so that you can turn off the riser. Dismantle the equipment as follows:
- If the device does not form a single structure with the hot water main and is connected using fixing elements, then they are unscrewed.
- If the coil is welded to the riser, then a grinder is used to trim it. This must be done in such a way that the remaining part of the pipe is sufficient for threading.
- In one and the other case, the last step is to remove the dryer from the brackets.
Reference! The height of the riser cutout must be greater than the distance between the nozzles of the new device by the length of the used couplings, fittings, which will be required later to install the bypass.
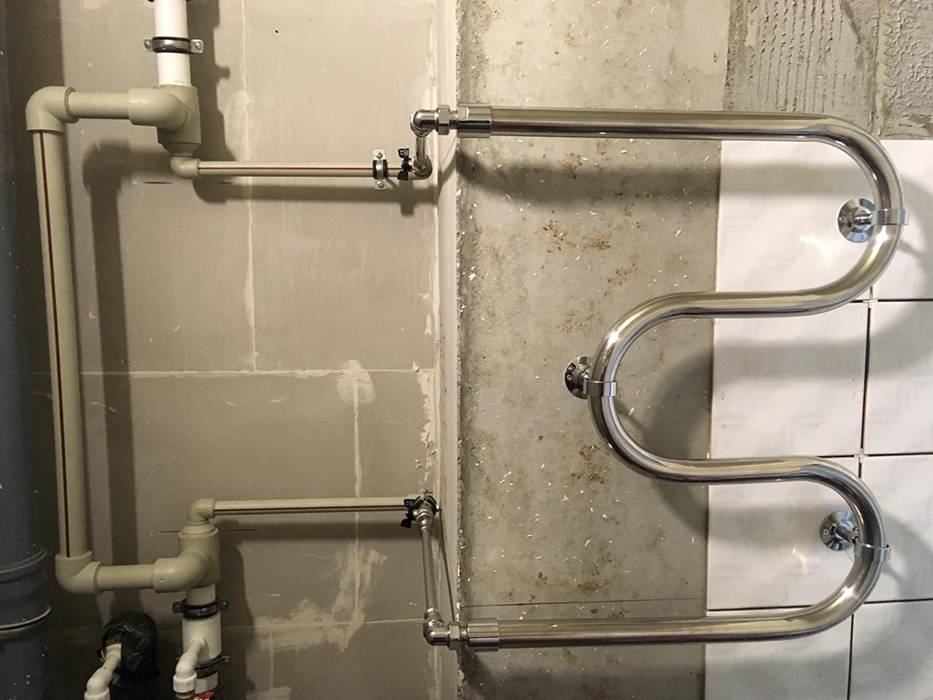
Conclusion and welding of pipes
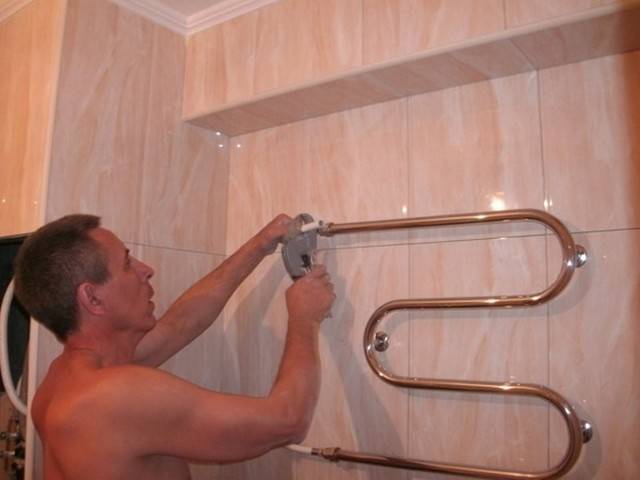
To connect the device to the water supply system, it is recommended to use polypropylene pipes
In the process, it is important to carry out high-quality welding or soldering pipes to the water supply
Certain skills are required to carry out such work. The connection of pipes with a coupling is carried out immediately after working with a soldering iron. It is recommended to bring the temperature of the soldering device up to 260 °C.


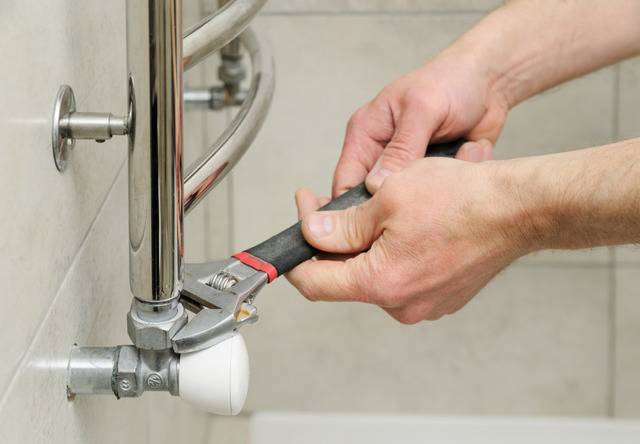
How to make a bypass in front of the device, installation of American women and taps
To install a bypass, you will need to make threads on the end sections of the pipes. If, after removing the previous device, the thread remains, then it is enough to clean them and drive them away with a die. This will improve the connection. If there is no thread, it is cut with the help of such a die. After preparing the pipes, the installation of shut-off valves is carried out using welding. Any stopcocks, Americans or bypasses are installed in the same way.
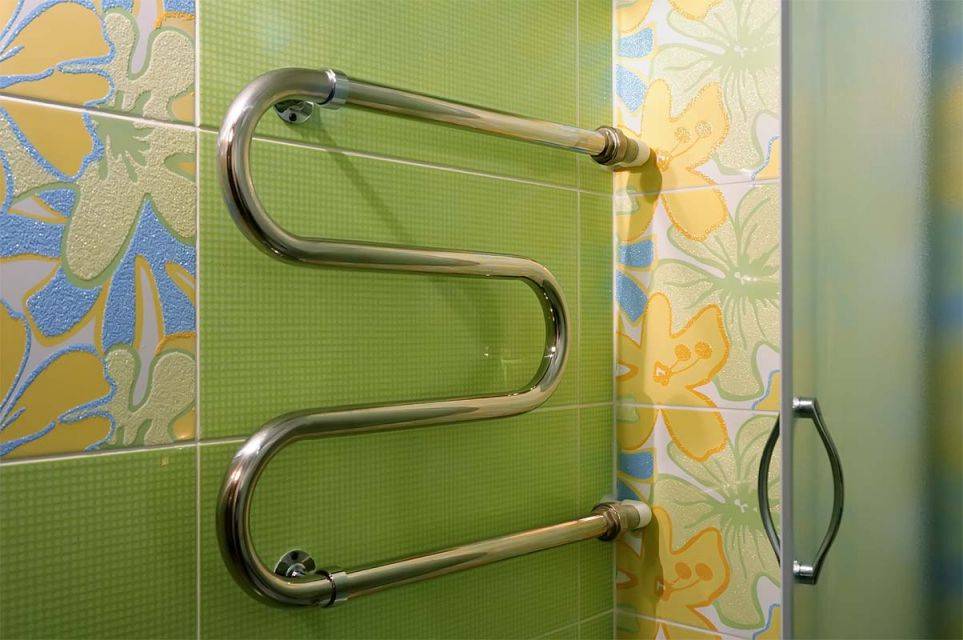
Installation on polypropylene pipes with all fittings
Installing the appliance and attaching it to the wall is the last thing to do. Work is carried out according to the following scheme:
apply markings under the brackets;
holes are prepared and dowels, brackets are inserted into them, screwed to the dryer;
fix the dryer with screws;
fittings are used to connect equipment to polypropylene pipes, while it is important to wind a sealing linen winding around the threaded connection for a reliable connection and prevention of leaks.
Important!
When fixing the coil to the wall, it is important to do it evenly and observe the horizontal position of the device.
Disposal of the old drying plant
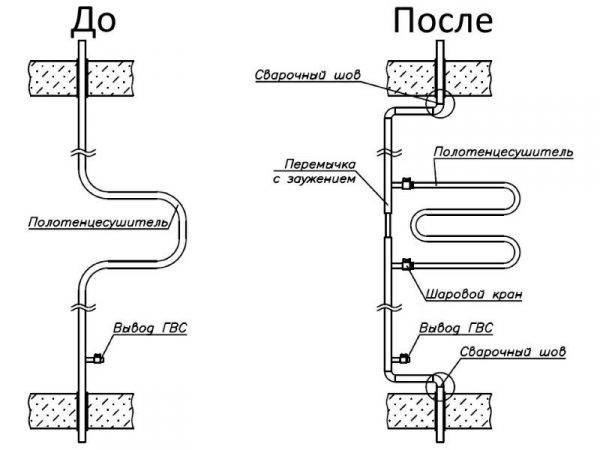 Towel dryer replacement scheme
After all, if a sudden leak forms in the pipe, the emergency service will not arrive immediately, and the liquid that has run in during this time may well damage not only your repairs and equipment in the bathroom, but also simply flood the neighbors living below you.
In fact, a jumper is an ordinary PVC pipe, which is most often mounted vertically at the connection points (input / output) of the heating riser to the heated towel rail. At the same time, ball valves (the so-called shut-off valves) are fixed at the ends of the heated towel rail itself, which, if necessary, will block the flow of hot liquid passing through the entire structure without disturbing the circulation of the main riser in the system.
Moving the dryer to another wall
Towel dryers are categorized according to the way the surface is heated:
- hot water flowing inside the line;
- using oil heated by a spiral connected to the electrical network.
water variety
To install a water heater, you must:
- Determine new equipment attachment points and mark the wall in accordance with the dimensions of the dryer.
- Turn off the water supply in the apartment or house. It is recommended to notify neighbors in advance about a temporary shutdown of water supply (for example, by placing an announcement on the door to the entrance or in the elevator car).
- Cut pipes with a grinding wheel or unscrew the mounting flanges (depending on the condition of the threaded connections).
- Loosen the screws holding the heater mounting brackets to the wall. Seal the holes in the tile with cement mortar or cover with decorative elements.
- Lay lines to the installation site of the equipment. If steel elements are used, then the parts should be connected by contact welding or special threaded couplings, the connection points are sealed with tow or synthetic tape. Plastic lines must be connected by soldering using a special tool. Ball valves are provided in the channels for supplying and discharging liquids, there is a jumper (bypass) in front of the valves, which allows you to keep the circulation of water when the towel dryer is turned off.
- Connect the heated towel rail assembly with couplings; a special “American” type connector is used to switch the metal line to the plastic pipes. The coupling is screwed onto the thread on the heated towel rail, and then soldered to the polypropylene lines.
- Install the mounting brackets that you want to fix on the wall surface with dowels and screws. Use an electric drill or punch to drill holes.
- Supply water to the lines and make sure there are no leaks. If water drops are found, the elements must be connected again.
- Close the water mains with a decorative box, in which inspection hatches are provided (for example, for access to valves). If the room is being renovated, then the pipes are embedded in the walls and covered with tiles.
Electric towel warmer type
The electric towel warmer is not connected to the water supply, which simplifies the transfer procedure. Since the equipment is connected to a 220 V AC mains, the installation point is located at least 600 mm away from faucets or shower heads. A socket with a waterproof housing equipped with grounding contacts is mounted on the wall. The power circuit is provided with an automatic fuse and RCD protection.


Electric towel warmer.
Algorithm of actions when installing an electric heated towel rail:
- Remove the heater from its old place, seal the holes in the partition with decorative plugs or fill with tile grout.
- Mark the fixing points on the wall surface. It is recommended to mount the heater at a distance of at least 950 mm from the floor surface and at a distance of 750 mm from the edges of furniture installed in the bathroom.
- Drill holes; for processing tiles, a special drill with a carbide tip is used.
- Install plastic dowels in the channels, and then screw the fasteners of the heating equipment with screws.
- Connect the power supply and check the performance of the heater in different operating modes. Do not operate the equipment with a leaky casing or a faulty temperature controller.
Rules for connecting a heated towel rail

- The device of domestic manufacturers is purchased. It is adapted for insertion into a pipeline with hot water, complies with GOSTs. But apartment dwellers face such a limitation in the choice. The owners of houses can carry out the installation of a heated towel rail from foreign manufacturers.
- To avoid electrolytic corrosion, elements from different materials are not used in the same system. The manifestation of this phenomenon will provoke the rapid destruction of the device.
It is allowed to connect any dryer material to plastic pipes.
- If the connection goes to the central heating, then the operating period is limited to the heating period. The electric model or the combined dryer works all year round.
- The power of the dryer drops by 10% if the connection is made to the system pipes at the bottom.
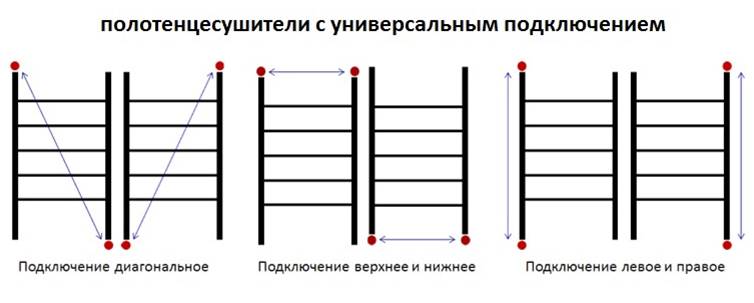
- The “ladder” model with a center distance of 0.5 m is connected diagonally, a heated towel rail is installed from the side or along a vertical plane.
- When installing a heated towel rail in the bathroom is carried out in the current system, the distance between the outlets is taken into account. The issue of landing distance is not raised during the overhaul of the room or in the new building.
- It is recommended to consider the pipe diameter of the device and the system where it will crash. Pipes of different diameters are interconnected by adapters. It is possible to avoid an accident from their incorrect connection. The diameter of the pipes of the device is selected so that they are not less than the pipes of the system. Otherwise, high fluid pressure in narrow places will create an emergency.
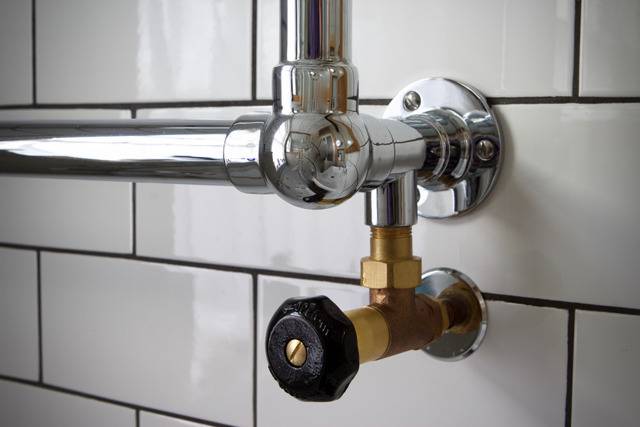
- "Americans" are used as a connecting detachable element between the dryer and the riser. Then the device can be quickly and easily removed from its place.
- So that in case of an accident it is not necessary to stop the liquid in the common riser, ball valves and a bypass (jumper) are installed on it. This will allow you to turn off the liquid supply only to the heated towel rail, there will be no stop in the rest of the apartment.
- It is impossible to install shut-off valves on pipes up to the bypass and on the jumper itself. If the condition is not met, then there will be problems in the drying operation. The circulation of the liquid along the riser will begin to fall, its temperature decreases. The main problem that one has to face is the decrease in water pressure along the line of its supply in the apartments of neighbors.
- The device is mounted in accordance with SNiP at a height of 1.2 m from the floor level.
- A distance is maintained between the wall cladding and the device, which depends on the diameter of its pipes. So, for example, for a coil with a cross section of up to 2.5 cm, the recommended distance is 3.5 and 4 cm. For a model with a cross section of 2.5 cm, the distance is from 5 to 7 cm.
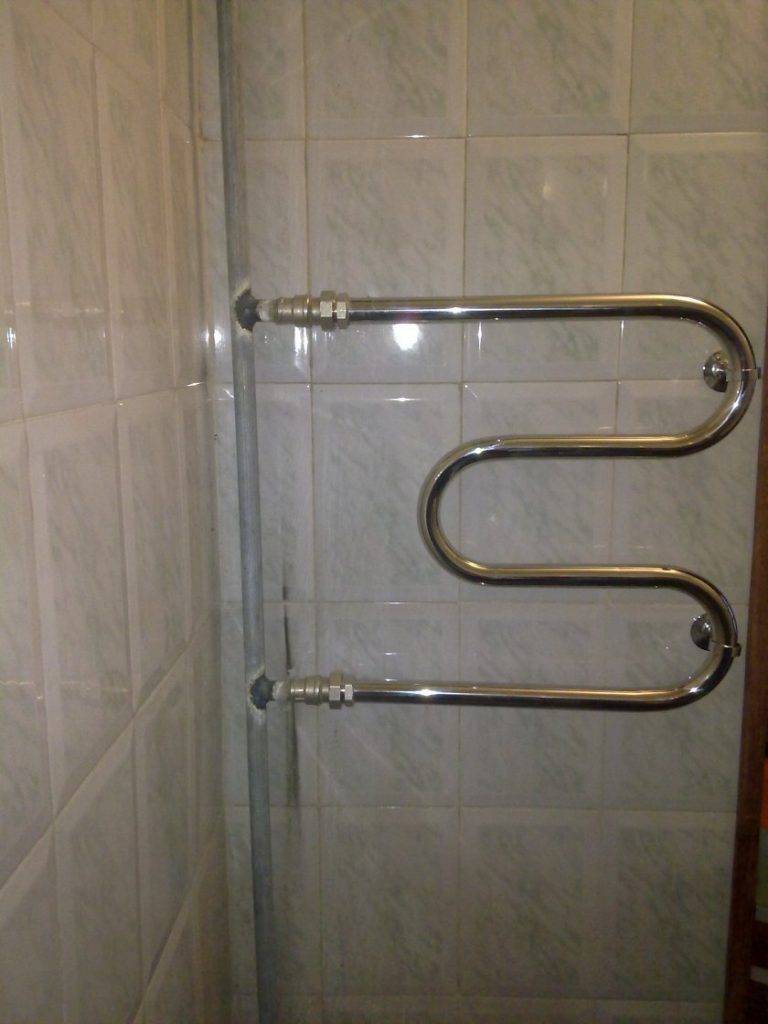
Connecting a water heated towel rail to hot water or central heating
Towel dryers can be connected to a hot water supply (DHW) or heating system. The first option allows you to dry bath accessories throughout the year, because. hot water is not turned off for the warm season. The pipes of the dryer heat up only when the coolant is used up, so the device cools down completely overnight.
Copper and brass heaters must be marked as galvanized and suitable for standpipes.
Riser installation
The tie-in of the dryer is performed in the following sequence:
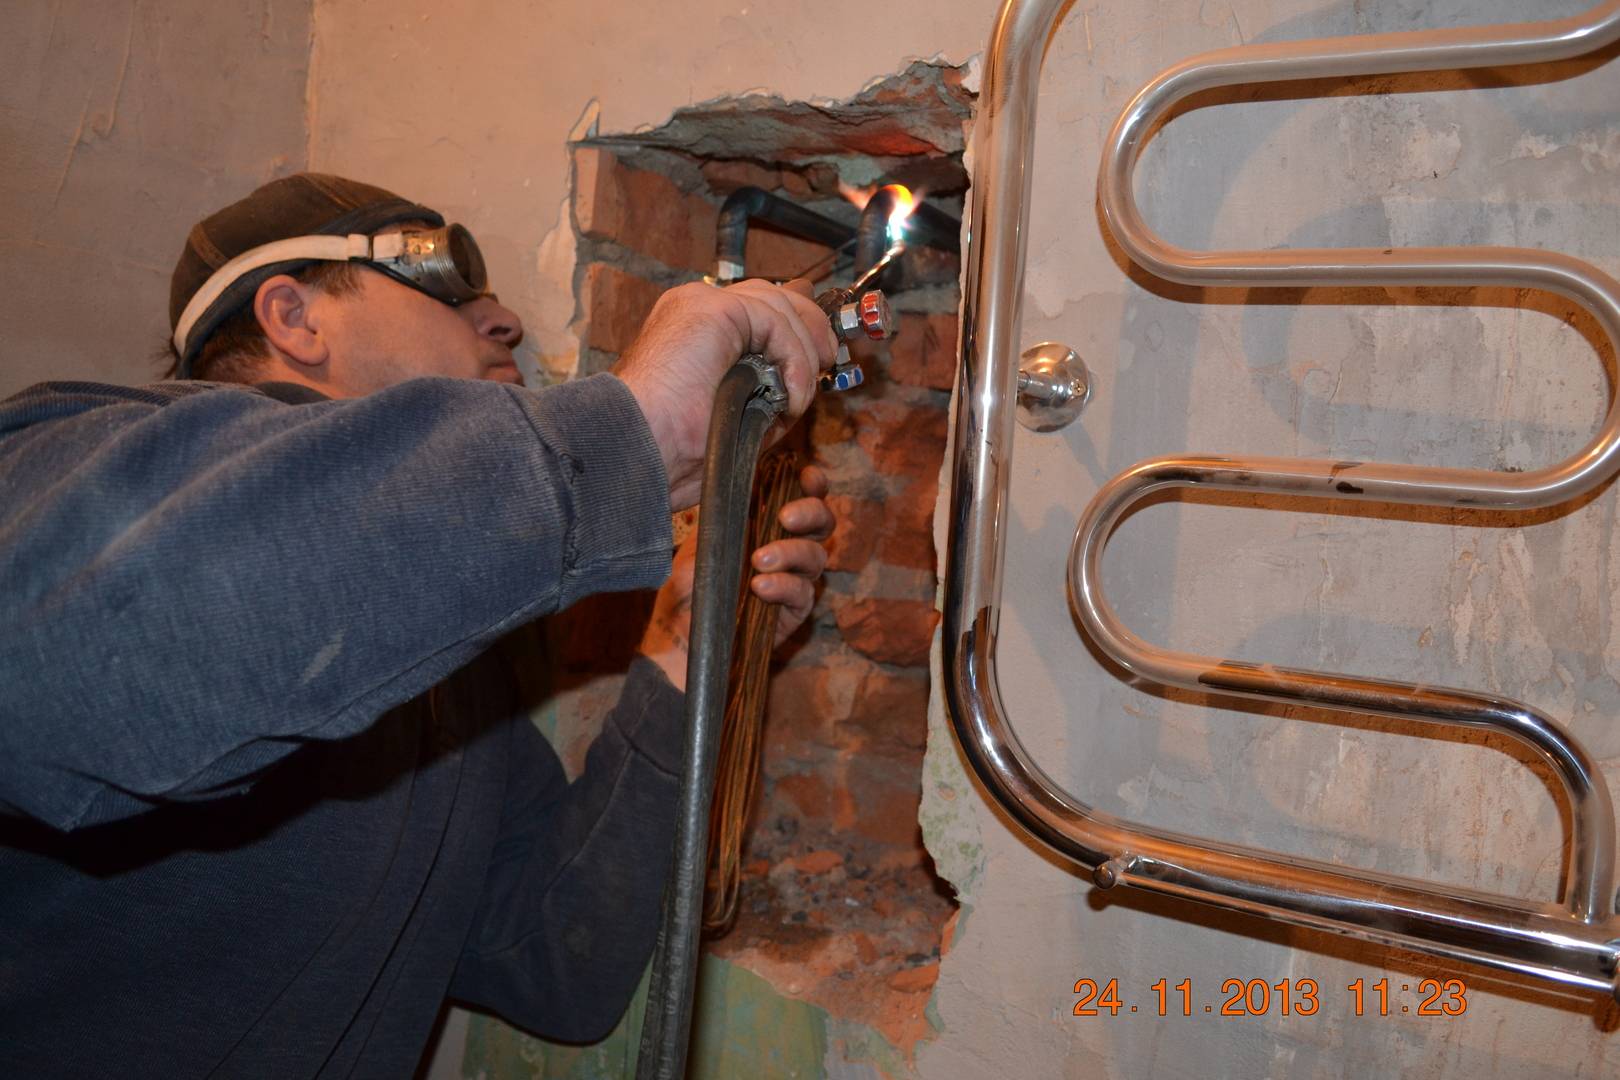
- Preparation of materials and tools.To install a water heater, you will need an adjustable wrench, a grinder, threading dies, a low-speed drill, telescopic brackets, dowels and screws, American taps, a Mayevsky tap (for air release), straight and angle fittings (depending on the type joints), sealant and sealant for joints. The system itself is assembled from a heated towel rail, a bypass jumper and several nozzles, the length of which is selected depending on the layout and location of the device.
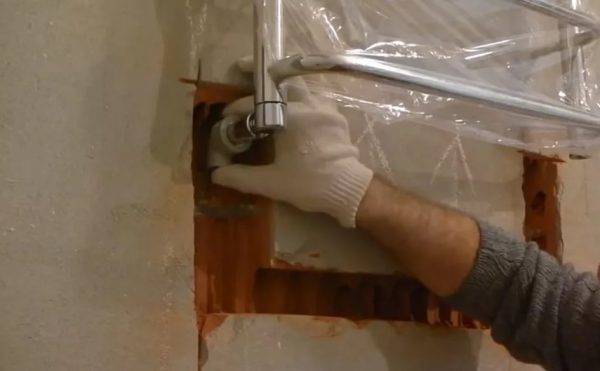
- Dismantling of old equipment. Work to remove the old device and / or install a new one will require permission from the management company (MC). Her employee closes the common DHW or heating riser for a regulated time. If there is an old dryer, it is removed from the threaded connections or cut off, and then removed from the mounts (brackets). If the device is only planned to be installed, then a gap is cut out in the riser, which is slightly larger than the width of the heater.
- Preparation of bends and jumpers, laying tiles. Ball valves are mounted on the outlets after the bypass. You can also fix the system before finishing the room, but in this case, the thickness of the glue and tiles is added to the distance to the wall.
- Mounting markings. It is performed taking into account the slope of the outlets, the horizontal position of the heater and the distance between its parts. After checking the markup, you can drill holes, screw in dowels and install brackets.
It is recommended to install a towel dryer during the overhaul of an apartment or when replacing a water riser. This will allow you to choose more reliable material options and a convenient connection scheme.
Self-installation of a simple configuration
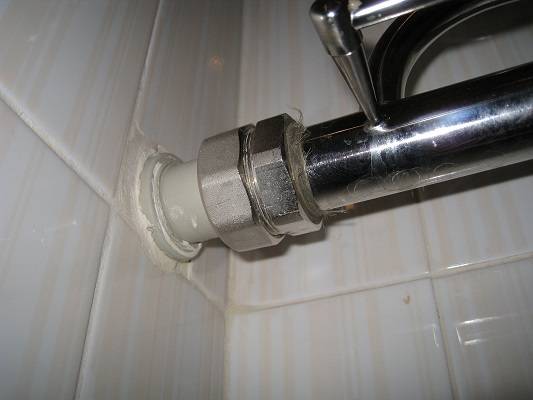
Installation of the coil is carried out after completion of the preparatory work. Branch pipes, corners and fittings are connected to ready-made outlets. Each connection is sealed with fum-tape or silicone gasket.
Installation of the heated towel rail is carried out simultaneously on the outlets and installed brackets. The device is fixed with screws.
Upon completion of the work, the system is tested for performance and tightness. The DHW or heating riser is temporarily opened by filling the heater with water. If the connection is made correctly, then it circulates freely in the system, the joints do not get wet, and the metal surface remains hot.
Before you mount the system with your own hands, you should watch training videos with instructions for installing the dryer (step by step and with all fittings).
Technology of working with the model "Ladder"
For heated towel rails of the "ladder" type, mainly lateral and diagonal mounting schemes are used. For bottom connection it is possible to install swivel angles and additional nozzles on the bends, which will allow pipes to be brought in from the side.


Insertion into the centralized heating system
Insertion into the heating system can only be performed outside the cold season. To do this, you will have to obtain permission from the management company, shut off the riser and drain the cold water.
To prepare the taps, it is better to invite a master from the Criminal Code. The presence of a document with a list of work performed will allow you to relieve yourself of responsibility in the event of an accident. The risk of leaks on the towel warmer itself is minimized by shut-off valves after the bypass.
A significant drawback of tapping into the heating system is a delayed leak test.
Installing a heated towel rail in the bathroom
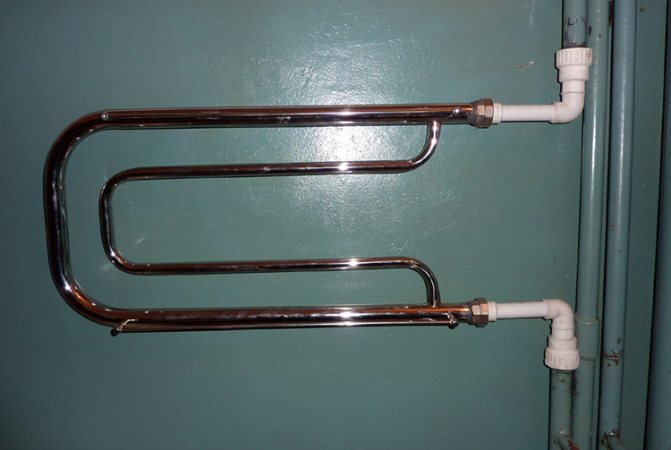
If the hot water or heating system is made on the basis of aluminum-reinforced polypropylene pipes, then the tool for threading is replaced by a soldering iron, and from the tool you will additionally need a pipe cutter or a hacksaw. We do not consider the principle and technology of welding polypropylene pipes, since this is the topic of a separate article. If you use the side connection of the heated towel rail, then all work is carried out according to the above method. This fits standard "U" or "M" shaped systems.
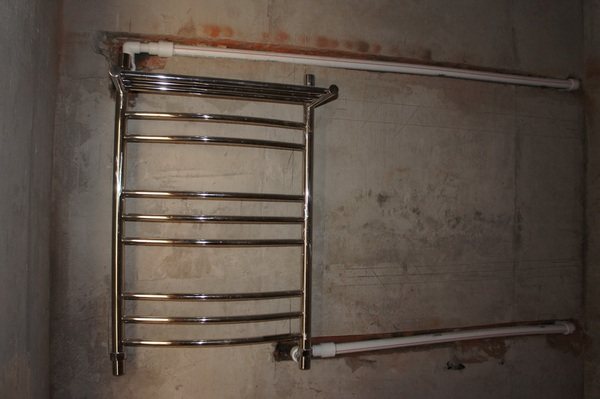
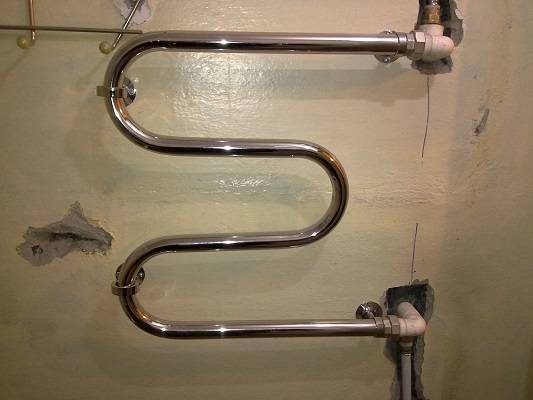
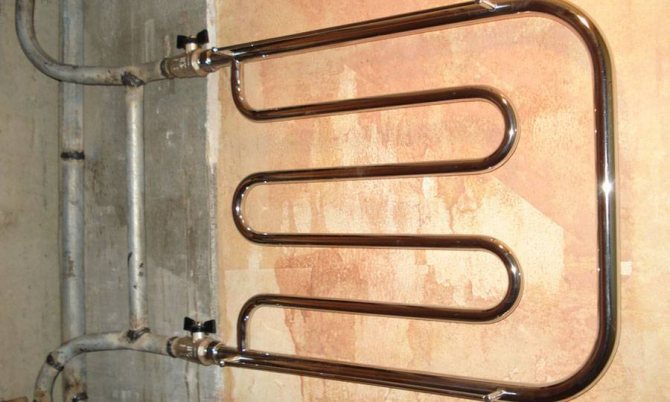
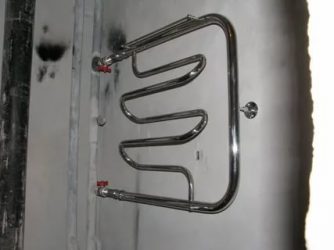
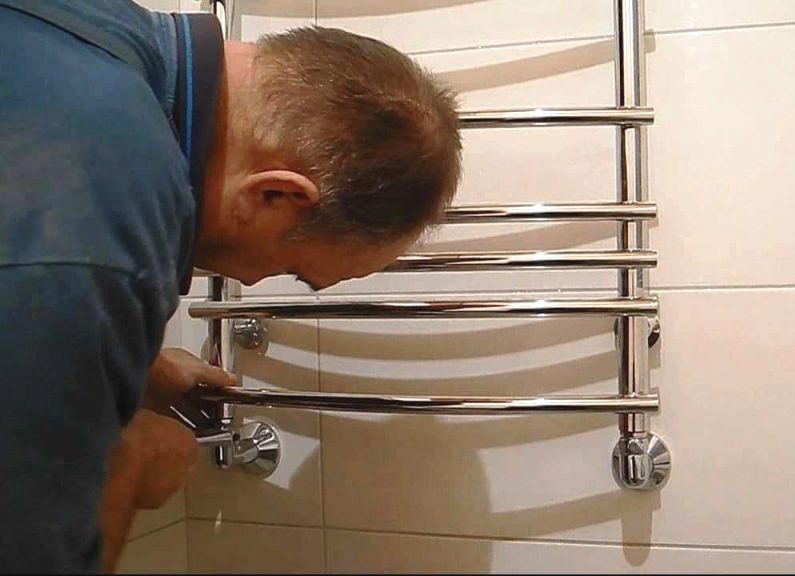
If a heated towel rail is installed in the bathroom of a different type, then there may be several connection options. Consider possible options for connecting a dryer in the form of a ladder. These are two parallel pipes, between which several "steps" pass. The entire structure is made of chrome-plated stainless steel. Vertical pipes have four threaded holes into which plumbing elements are screwed, depending on the connection scheme. It:
- Two taps at hot water connection points
- Mayevsky crane (air vent). It allows you to release air from the system, preventing the flow of water.
- Stub
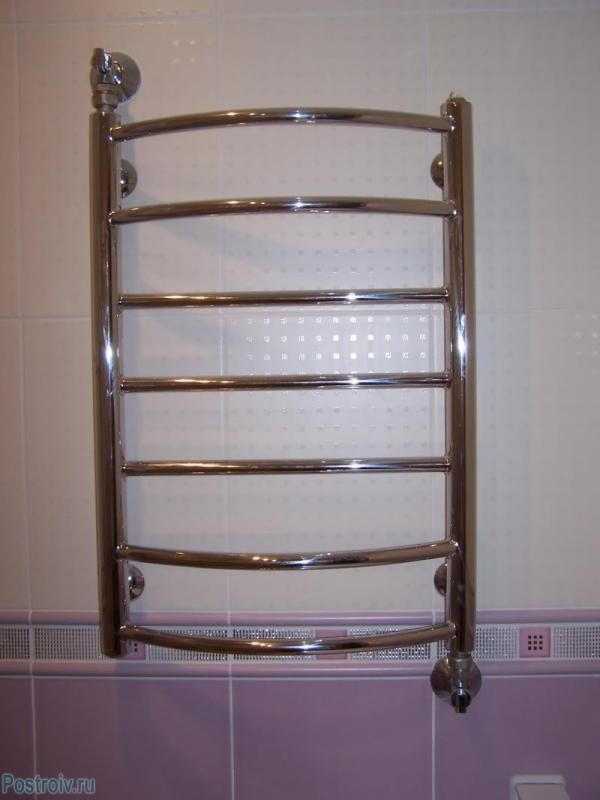
Towel rail in the form of a ladder — Photo 07
Installation and connection
The space in the bathroom is divided into four zones:
- Zero - direct contact with water (bath or shower).
- The first is a shower. The distance above the bathtub or the volume of the shower cabin along the perimeter is 10-15 cm, where there is a risk of a large amount of splashes. You will need a device with at least IPx7 protection.
- The second is coverage around the 1st zone in a circle, from 60 cm long and along the height of the bathroom. Small chance of vertical splashes. Suitable electrical equipment with protection IPx4 or more.
- The third is a segment outside the second zone, a relatively reliable place for installing an electrical device and connecting to a network with splash protection and the mandatory installation of an RCD.
Attention! If you use an electric dryer connected to the mains or with a thermostat installed on the plug, then the length of the wire is important. The socket must be installed in the 3rd zone, and the heated towel rail must be placed in the 2nd or 1st zone, depending on the degree of protection of the housing
It is better to place the heated towel rail in the third zone so that splashes do not fall on the device
The socket must be installed in the 3rd zone, and the heated towel rail must be placed in the 2nd or 1st zone, depending on the degree of protection of the housing. It is better to place the heated towel rail in the third zone so that splashes do not fall on the appliance.
At what height do they hang
- The main point in the location of the equipment is moisture protection.
- The installation of the device is carried out at a distance of at least 120 cm from the floor, it is necessary to retreat from the plumbing equipment by at least 60 cm.
- An electric heated towel rail can be placed above the washing machine, but in such a way that there is no interference with loading laundry when the lid is located frontally.
- When positioning a ladder-type dryer, you need to take into account the height of an adult for free access to the top rung.
How to accurately make holes in a tile
If possible, place the appliance near the ventilation grill or between the door and the hood. To fix the heated towel rail, two to four points are provided.
These are plates or brackets with holes for fasteners, which are covered with a decorative cap. The most commonly used dowels for screws 6x60.
In order to install an electric heated towel rail on the tile, it is necessary to take into account the order of drilling holes in the tile:
with a marker you need to mark the points on the tile;
carefully beat the enamel at the marked point with a drill at low speeds or use the tip of a file for this;
if it is not possible to beat the enamel, then a piece of adhesive tape should be glued to the drilling site so that the drill does not slip during operation;
drill a tile in an unstressed mode;
drill the wall in puncher mode with the greatest pressure;
after all the holes have been formed, plastic dowels are inserted into them or clogged with a soft mallet.
Important! If the installation was carried out before laying the tiles in the bathroom, then you should pay attention to the rules for laying cables and installing sockets in wet rooms.
How to make a hole for the socket and install it
To do this, you must perform the following steps:
- using a drill, make holes for fasteners, dowels are mainly used;
- strip the ends of the wires from insulation;
- install dowels in the prepared span;
- pass the wires through the holes with rubber plugs;
- connect the bare ends of the wires to the outlet;
- fix the socket housing on the wall, fix it tightly;
- tighten the fixing bolts;
- Apply power to the outlet and check operation.
wall mount
The markup is done first:
- Attach the heated towel rail or mounting plate to the wall so that the main parts of the appliance are at the permitted height.
- Mark the position of one top fastener.A plumb or level is useful here, then from the marked point you need to draw a vertical and horizontal line directly in the level.
- Attach the heated towel rail so that the place of the first marked fastening coincides, and also combine 2 adjacent fasteners with lines, mark their positions on the wall.
- Using a plumb line and / or level, determine the location of the fourth attachment point, then complete the markup to the correct rectangle. For safety, check whether the last mark is accurately determined by again attaching the heated towel rail.
- Drill holes according to marks. Now everything is ready to fix the device.
Connectivity technology
The sequence, feature of work depends on the type of heated towel rail. A great difficulty is created by the simplest - water drying, minimal labor - electrical devices.


Materials, tools
After buying a dryer for towels, reading the instructions and choosing a connection method, materials and tools are prepared. The required set includes:
- pencil, tape measure;
- Mayevsky crane, coupling, 2 tees;
- fasteners, brackets;
- knife, soldering iron for PVC pipes;
- screwdriver, hammer;
- tow, FUM tape or plumbing thread;
- wrench;
- PVC pipes;
- level;
- fittings - straight, angled;
- Ball Valves.
Installation of a water heated towel rail

This is the most common type of structure connected to a hot water supply system. Connecting a heated towel rail in this case will not create difficulties for those who know how to handle tools. A possible first step is to dismantle the old product. In this case, first turn off the hot water supply and remove the old structure. If it is not available, then the work is carried out according to the following scheme:
- Using a building level and a pencil, on the wall indicate the areas intended for attaching the dryer. Do not forget about the required slope of the eyeliner (from 3 to 10 mm).
- Shut off the hot water supply. Install, fix the heated towel rail.
- A jumper-bypass is mounted, tees and ball valves are installed at the ends of the pipe.
- With the help of fittings, taps are connected, their direction is regulated.
- Install Mayevsky's tap for drying towels.
All connections are sealed with tape (tow). After checking the tightness, turn on the water supply, then test the quality of the joints again.
Connecting electrical equipment

This dryer can be installed in any room where there is an outlet. In this case, the structure is attached to the wall, and then connected to the mains.
Since the level of humidity is always high in the bathroom, special attention is paid to safety standards:
- grounding in the apartment is a mandatory condition;
- install only hidden insulated wiring, safe sockets;
- the use of an RCD is a necessary measure.
The installation of electric heated towel rails also has its own requirements:
- the lower part of the structure must be at least 200 mm from the floor;
- the distance from the dryer to the washbasin or bathroom must be at least 600 mm, to the furniture - 700 mm;
- between the heated towel rail and the wall you need to leave 300 mm.
The electrical outlet must not be in close contact with hot towel dryer circuits. This option is usually chosen for private houses.


