
- Security measures
- Installation of cast iron pipes
- Carrying out work
- Removing the apartment system
- How to replace a cast-iron sewer with a plastic one?
- How to dismantle a cast iron pipe
- Removing the cast iron pipe
- Dismantling the tee
- Installation of internal wiring
- Cutting a cast iron pipe - step by step instructions
- Additional Recommendations
- Removing an old toilet
- Installation of plastic pipes
- Repair of a cast-iron sewer pipe
- Start and sequence of repairs
- Mounting
- Pipe production
- Repair work on the street
- What are the reasons for the formation of cracks and holes in the slate
Security measures
When installing a cast-iron pipeline, care must be taken when handling such products. Cast iron is distinguished by reliability and durability during operation, but it is a fragile material, which manifests itself during transportation and installation. During cutting, small pieces of metal may break off.
When they enter the pipeline, they contribute to a decrease in the clearance. In addition, fragments can get into the face, injure the organs of vision. For this reason, it is recommended to wear a protective screen or goggles while working with cast iron communications.
During cutting, small pieces of metal may break off. When they enter the pipeline, they contribute to a decrease in the clearance. In addition, fragments can get into the face, injure the organs of vision. For this reason, it is recommended to wear a protective screen or goggles while working with cast iron communications.
If pipe cutting is carried out in a room with installed plumbing fixtures and furniture, it is necessary to maintain their integrity. To do this, before starting dismantling, cover all objects with a dense cloth.
Installation of cast iron pipes
In general, pipes made of cast iron are now rarely installed by owners of country houses due to the shortcomings described above. Especially if it is decided to install the sewerage on their own, since working with cast iron products requires a certain amount of experience. In principle, the installation of cast-iron pipes does not differ from the installation of pipelines made of other materials.
Installation of cast iron pipes
To begin with, markup is made in those places where the pipes will be installed.
In addition, it is necessary to decide on the method of fixing the pipe to the wall.
The simplest option is to use clamps that are installed on the pipeline below the pipe junction. At the same time, adjacent fasteners should not be separated from each other by more than a distance equal to ten times the diameter for horizontal pipes, and 1-2 m for vertical risers.
Fastening to the wall with clamps
With the help of clamps, it is possible to make a rigid and non-rigid connection. In the first version, the metal clamp is tightened tightly, and a rubber gasket is placed between it and the pipe, in the second, the gasket is not used, and the bolt on the clamp is not completely tightened. Both cases will help to avoid creating stress inside the pipes.
The distance from the wall to the risers should be at least 0.4 cm.
According to another method of fastening pipes are laid, hiding them in the wall.To do this, according to the markings, a channel is first ditched in the wall, the width of which should be slightly larger than the diameter of the pipes in order to avoid stress and damage to the pipe.
Sewer pipes in the wall
Before laying in the resulting groove, the pipe is wrapped with a soft cloth, and, if necessary, in a heat-insulating material. After that, you can plaster the wall with a pipe. This installation allows you to hide the sewer.
After choosing the method of fastening, you can proceed directly to the installation.
Step 1. Prepare the installation system (attach clamps or make a strobe).
Step 2. Assemble the pipeline. The connection method depends on whether the pipes are socketed or not.
The socket connection is made as follows:
Socket connection
- the smooth end of the pipe is wrapped with a resin tape twisted into a 80 mm bundle;
- the pipe with the wrapped end is inserted into the socket of another pipe;
- using a narrow wooden spatula and a hammer, the tourniquet is hammered into the socket so that the sealant occupies 2/3 of the connection;
- check whether the gap between the socket and the pipe inserted into it is the same;
- a sealant is poured on top, which can be asbestos cement, sulfur, cement mortar or expanding cement.
Cement and asbestos cement are used when it is necessary to obtain a rigid connection.
Connection of two cast iron pipes
The installation of socketless pipes differs only in the principle of connection, carried out using a strong steel clamp, on the inner surface of which a cuff is inserted. To do this, the pipes are joined together, and the joint is fixed with a clamp. Now for the arrangement of domestic sewage, plastic pipes are increasingly being used, which are much easier to install.But in old houses, before this, it is necessary to dismantle the cast-iron sewer. How to put plug for sewer pipe, you can calculate in our article.


Carrying out work
The dismantling of the old sewage system includes several main stages: dismantling the intra-apartment piping, removing the cast-iron riser pipes and dismantling the tee (cross).
Removing the apartment system
When carrying out a major overhaul, it is advisable to completely disassemble the wiring (to the kitchen and other devices). If the joints are made very firmly, then it makes no sense to waste time disconnecting all the elements.
It is simply cut as close as possible to the socket of the outflow of the tee using a pipe cutter or grinder. Difficulties with disassembly may arise if the pipes were previously masked by floor coverings - they will have to be carefully removed. Even worse, if the pipes got under the concrete floor screed. In this case, you will have to work with a puncher, a chisel (chisel) and a hammer.
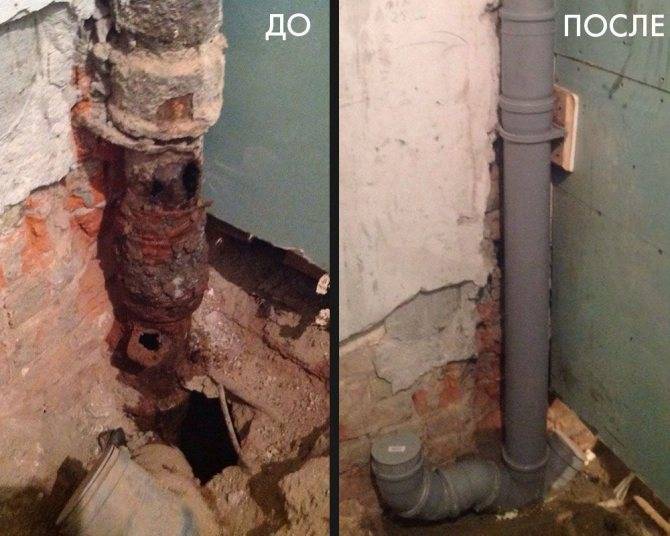
How to replace a cast-iron sewer with a plastic one?
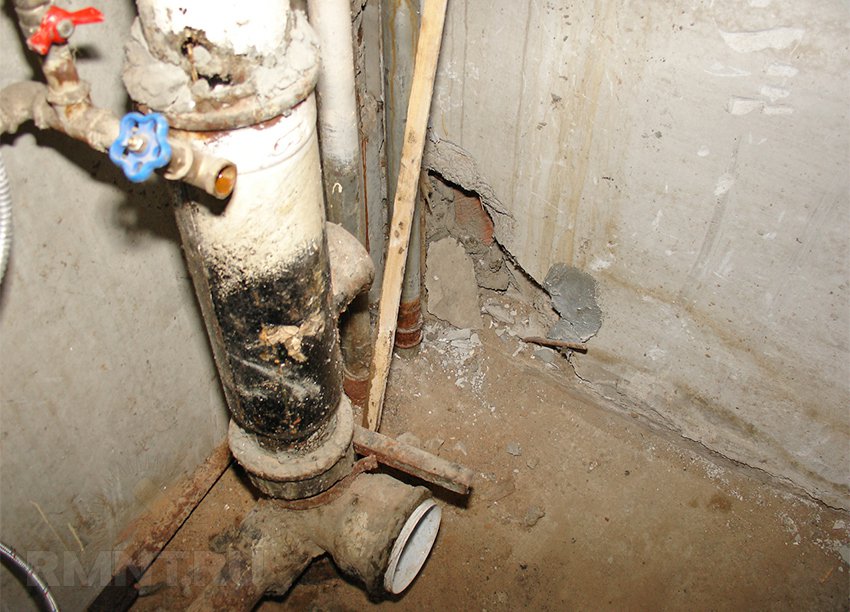
In all houses built in the Soviet era, it is necessary to change the pipes, in particular the sewer riser. All equipment has an expiration date. The pipes wear out, cracks appear on them, and drains seep through them and the stench spreads into the room. It becomes impossible to live in such an apartment.
To prevent the situation from reaching such a state, as soon as a leak is suspected, it is recommended to make a replacement sewerage on plastic.
 replacement of cast iron pipe with plastic
This should be done by service organizations, since it is very difficult to replace a cast-iron riser. However, it is possible to do it with your own hands.
How to dismantle a cast iron pipe
If the pipe is “welded” to the wall or floor with sulfur or aluminum, it will be very, very difficult to destroy such a coating.
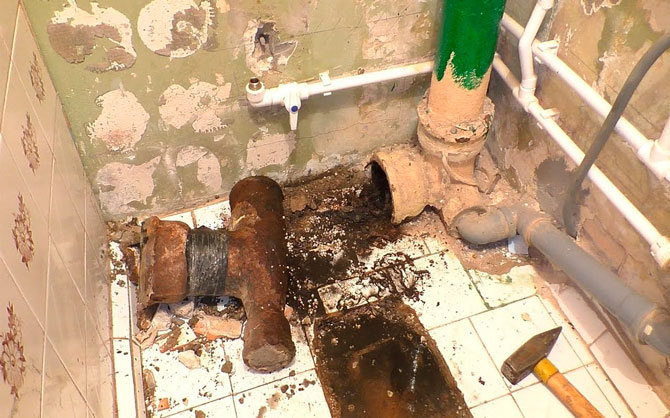
To get started, you must first turn off the water supply to the apartment. Then you need to free the bathroom from unnecessary items that you can damage during work. This includes a sink, washing machine, laundry basket, and more.
Next, you need to disconnect the drain tank from the water supply and dismantle the toilet bowl itself. Problems can also arise here, since Soviet toilets were screwed to the floor to the conscience, in other words, tightly.
Try to unscrew the bolts that attach the toilet to the floor and remove it from its place. If you succeed, consider yourself half done.
Now comes the turn of the pipes themselves. Cast iron, as you know, does not differ in particular strength, therefore, at some distance from the riser, you can simply break the old pipe with a hammer. It is much more difficult to remove the remnants of pipes from the old riser and clean them before installing new ones.
To dismantle pipes, you may need:
- Hammer with rubber or plastic tip.
- Chisel
- Burner or blowtorch
- Mask
Quite a strange combination, isn't it? However, a gas mask is necessary to comply with safety regulations if the joints of the sewer pipes in your bathroom are filled with sulfur.
The easiest way to remove sulfur is to heat it. However, when heated, the sulfur mass releases toxic substances into the air, which are extremely harmful to a person inhaling.That is why it is better to protect yourself in advance with a gas mask.
So, dismantling must begin at the place of greatest distance from the riser. Here, most craftsmen do not suffer with a burner, but simply break the pipe with a hammer. This is much easier, but can cause some complications.
Make sure that pieces of pipe do not fall into the sewer passage when broken. They can cause a serious blockage in the sewer, which will be much more difficult to get rid of than getting rid of old pipes.
With a hammer, you can destroy the pipe to the very cross, inserted into the riser. Here it is somewhat different and filled with gray much more.
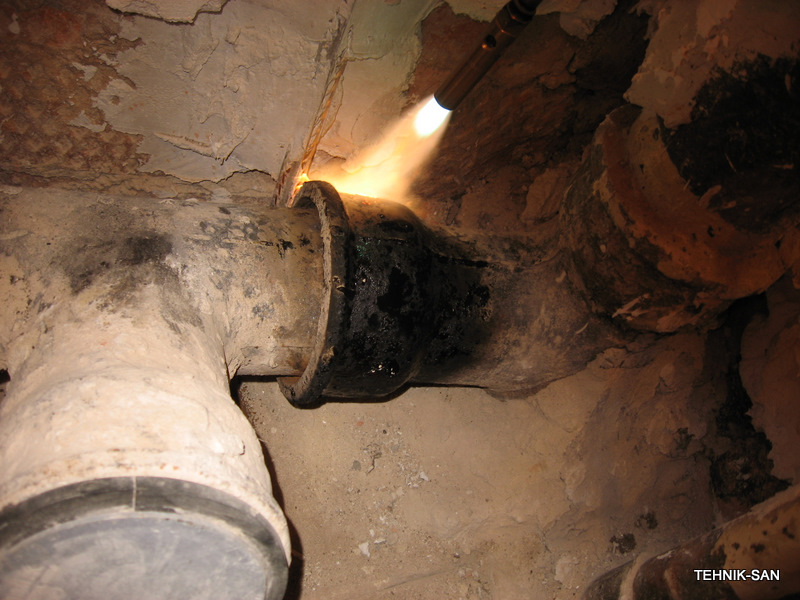
To free the pipe and cross from the layer of sulfur, you need to heat it. The impact of a burner or a blowtorch can last for several hours, while harmful substances will be constantly released.
Before starting heating, isolate animals and households, cover furniture or other furnishings in the immediate vicinity of the riser, put on a gas mask.
During the heating process, you can easily chip off lumps of sulfur until the pipe is sufficiently clean. Now, the cross, inserted into the riser, must, if possible, be loosened and removed from the riser.
The dismantling of the old pipeline is carried out to the maximum. That is, pipes are removed as much as possible, and others are mounted in their place.
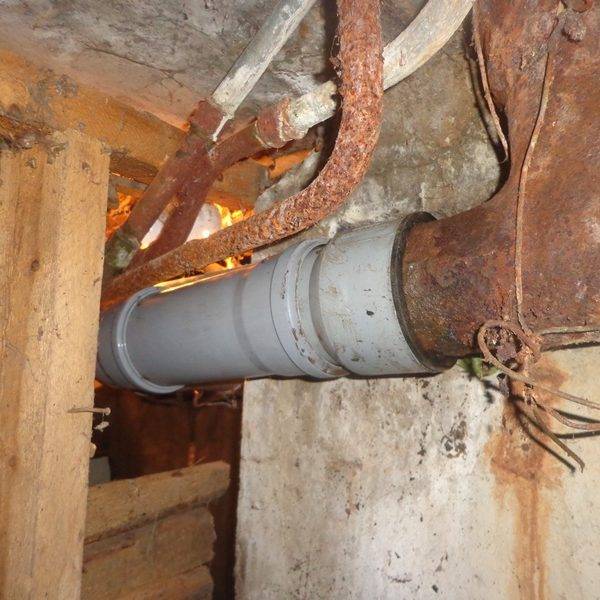
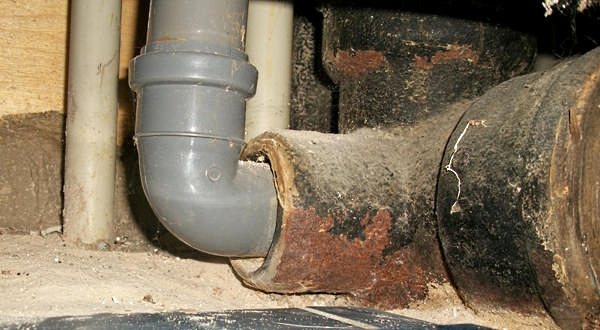
Connecting a new PVC pipe to an old cast iron riser will require some skill to work with. Please note that you must clean the junction as much as possible from the same sulfur and rust.


To facilitate the work, use a special coupling, which is specially designed for connecting cast iron pipe and PVC pipe.
If you have any questions, take a look at ours and ask them there. Our experts will help you understand the intricacies of good construction and repair.
From time to time, the pipeline wears out under the influence of mechanical stress and it is necessary to replace the sewer pipes in the apartment. Most often, residents of old houses face such a problem, where over the years cast-iron pipes rust, cracks appear and leaks occur.
To change the drain lines, you must first properly dismantle the old pipes. Successful completion of the task requires the availability of appropriate plumbing tools and the necessary components.
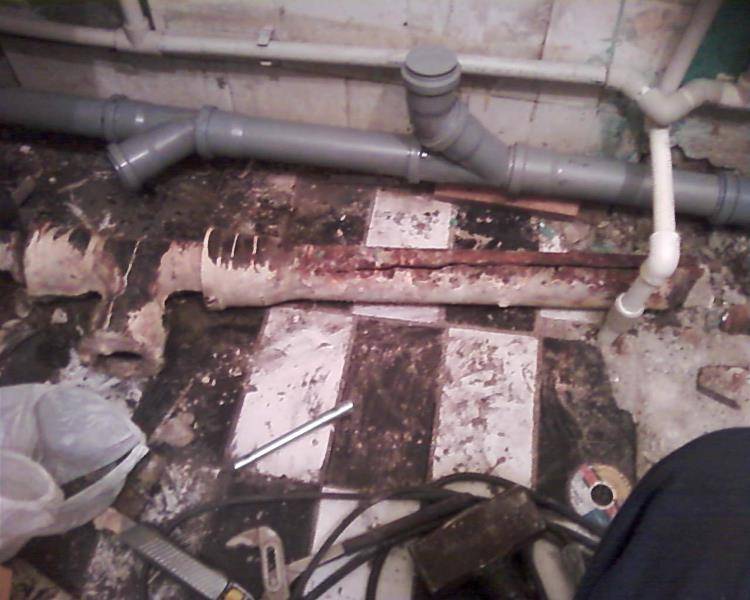
Removing the cast iron pipe
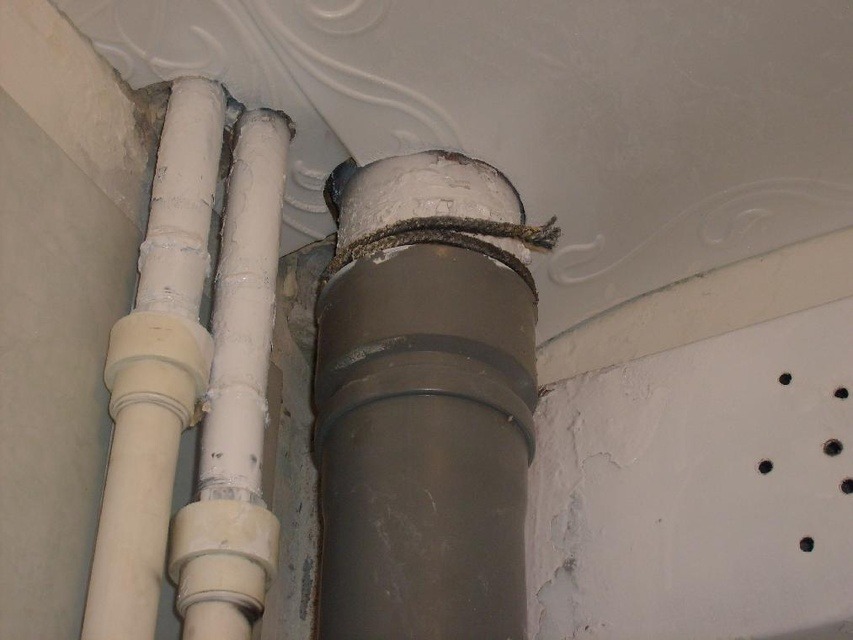
The dismantling of the riser begins with the removal, located between the tee and the ceiling. First, an annular gap is made on top of the section. To do this, at a distance of 12-16 cm from the ceiling, using a grinder, a cut is made in the pipe with the rest of the wall of about 3-5 cm.
An incomplete cut is needed to prevent jamming of the tool with a possible vertical movement of the column. Then, stepping back 9-13 cm down, a similar cut is made, parallel to the first. The ring between the cuts is carefully knocked out with a hammer or wedges.
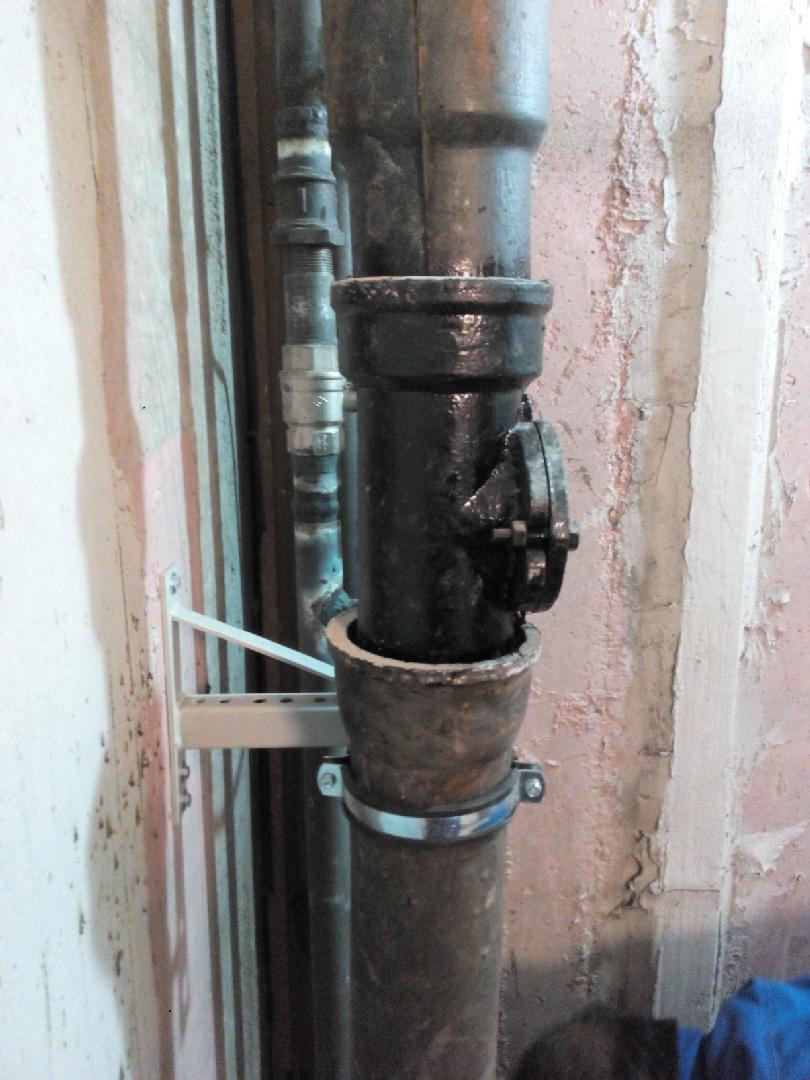
The next step is sawing the cast iron section from the bottom. For its implementation, an incomplete cut by a grinder is made at a height of 50-70 cm from the upper socket of the tee. The clamps securing the section to the wall are removed (they can simply be cut off with a grinder). The pipe is broken by swinging or hitting with a hammer at the place of incomplete cut and removed from the column.
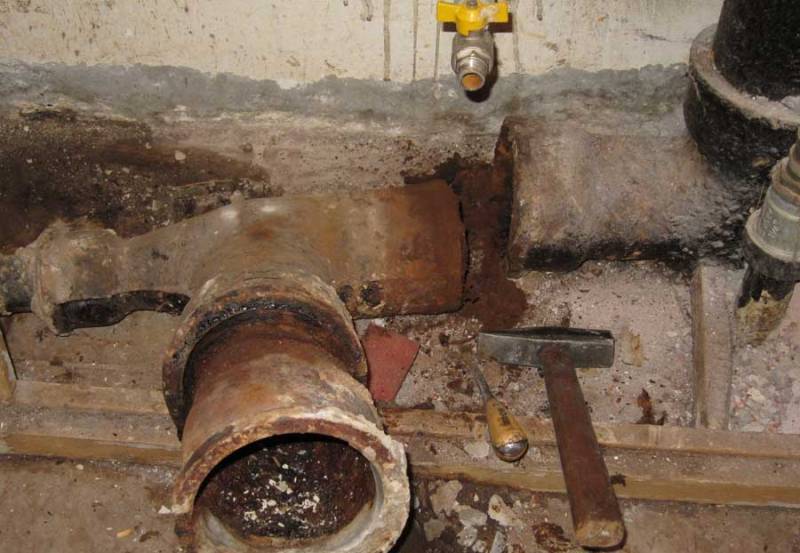
Dismantling the tee
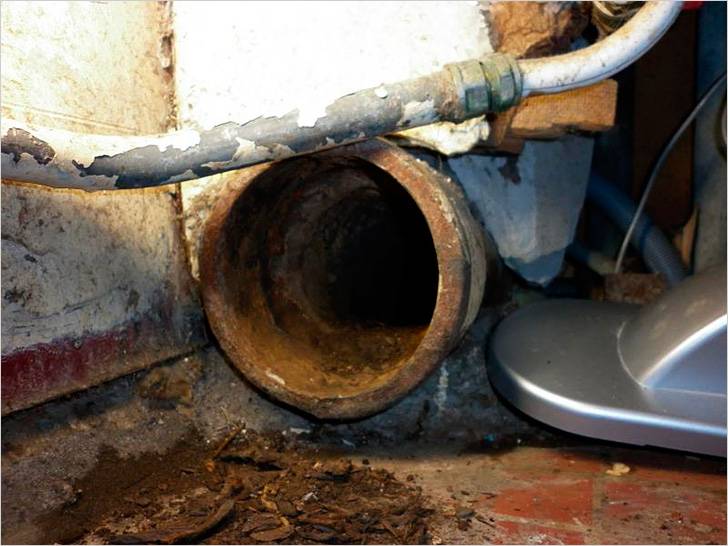
The most important operation of the entire dismantling of the old sewage system is the removal of the tee from the socket of the lower section of the riser
As noted, there is an important condition: this bell must not be damaged. The simplest dismantling options are used when filling the joint with cement mortar. First, an attempt is made to separate by loosening
First, an attempt is made to separate by loosening.
A crowbar is placed in the hole of the rest of the pipe, with its help bending forces are created in different directions. Most often, such loosening destroys the cement bond, and the tee can be removed from the lower socket. When the joint is destroyed, the ingress of large cement pieces into the pipe should be eliminated, that is, the cement is removed from the socket with a screwdriver or chisel.
If loosening did not lead to a positive result, then a more time-consuming method will have to be applied: the cement mass is destroyed with a chisel and a hammer
Given the brittleness of cast iron, this procedure should be carried out very carefully, and the impact force should be applied away from the walls of the socket. The goal is to provide a gap between the tee pipe and the socket walls. As cement pieces break off, they are immediately removed from the joint area
As the cement pieces break off, they are immediately removed from the joint area.
The most difficult method of dismantling has to be used when filling the joint with sulfur. Such a composition is very durable and does not lend itself to the destruction methods described above. In this case, heating of the joint area is most often used with a gas burner or a blowtorch. The work is carried out by two people. One worker warms up the joint, and the other loosens the tee.
When the mass is melted, the tee is easily removed from the socket
Such work takes place when very harmful gases are released, which means that precautions must be taken (respirator and goggles)
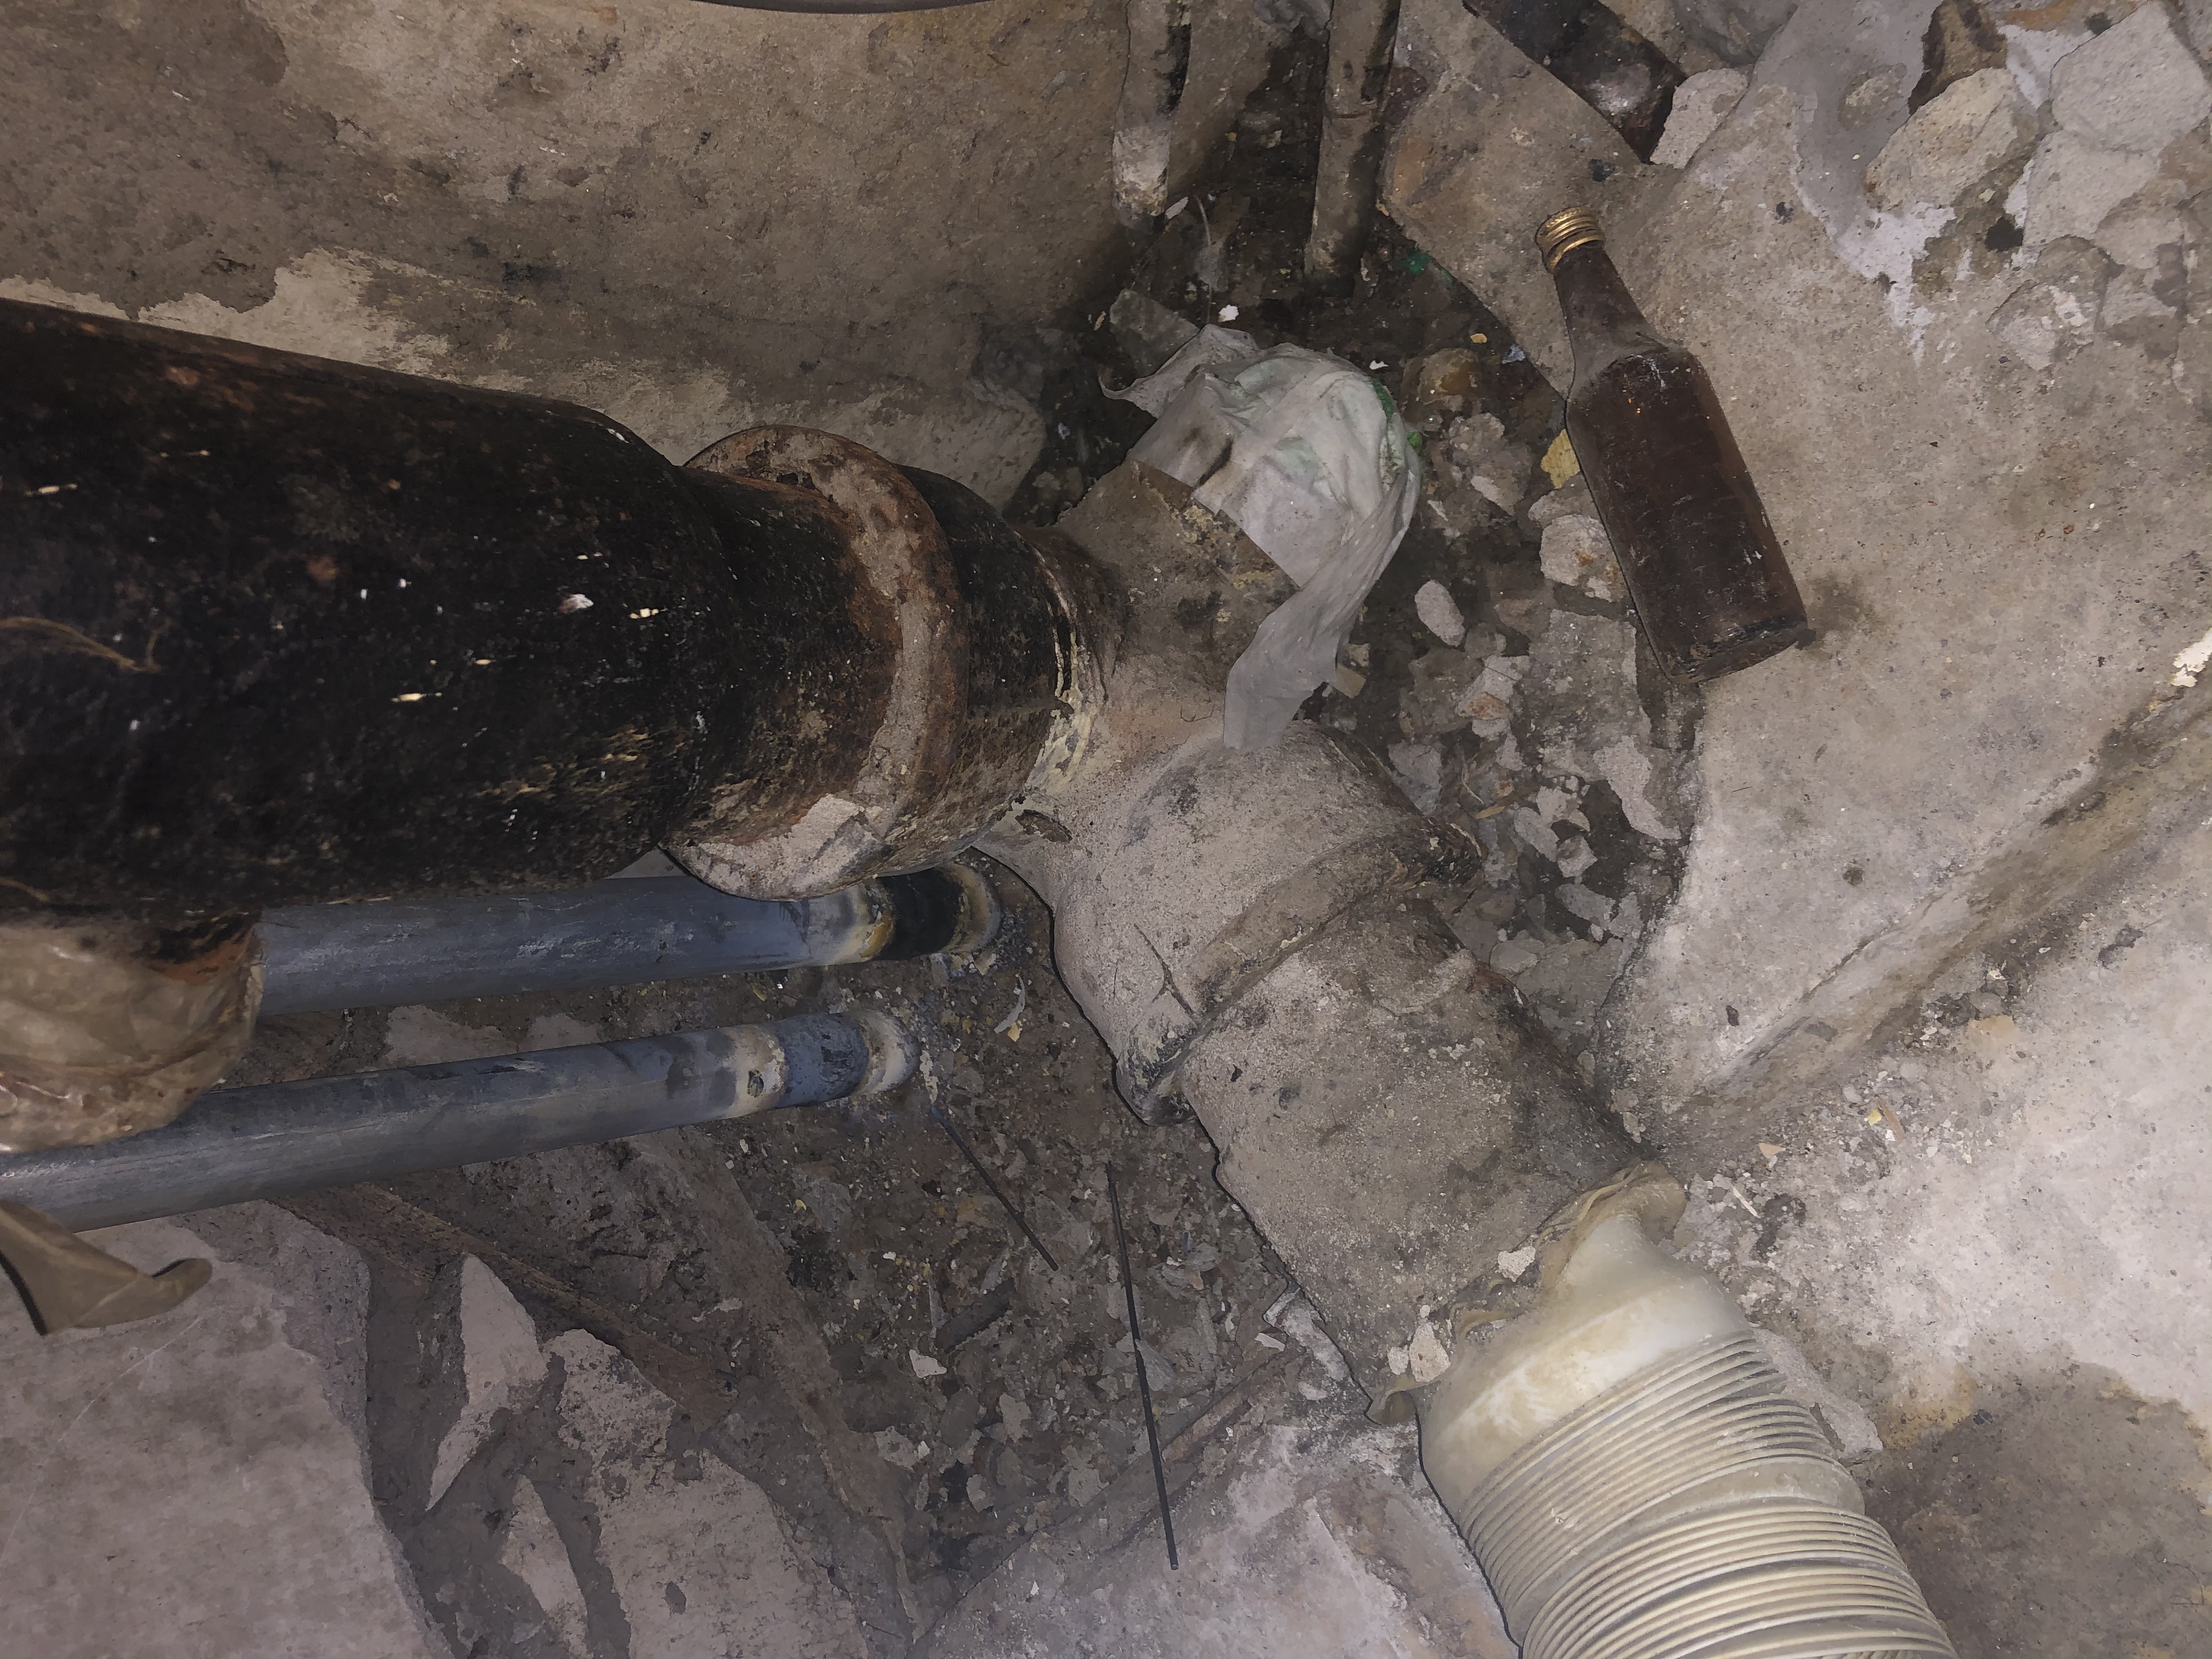
Finally, extreme circumstances may arise when it is not possible to remove the tee from the lower section in any way (it is impossible to use heating, especially strong pouring and other non-standard situations). In this case, the most undesirable option is used - the tee is cut off at a height of about 5-6 cm from the socket. The end of the rest of the pipe is carefully aligned, and subsequently, when installing plastic pipes, you will have to use a coupling.


If the installation of new plastic sewer pipes is planned, then it is impossible to do without the rather laborious dismantling of the old cast-iron sewer. This process can cause a number of difficulties, so you should prepare in advance to solve problems that arise.
When a person makes major repairs in his apartment, then such a type of work as replacing the sewer system is one of the main ones. This is due to the fact that in most cases cast-iron pipes are installed in residential premises.
Which tool will be used to dismantle the sewer elements with your own hands depends on the material used for embossing.
Basically on hand should be:
Caulking tool
- grinder - used to cut a piece of pipe;
- cutting, grinding discs;
- protective mask, goggles, headgear (in case of chasing pipes connected with sulfur);
- blowtorch - required for heating;
- hammer, screwdrivers of various lengths and thicknesses;
- pipe wrench;
- chisel.
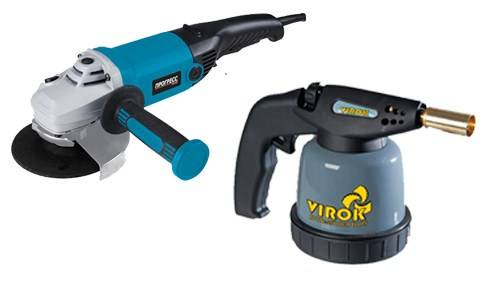
Bulgarian and blowtorch
If you are dealing with cast iron elements, then the arsenal should include: a puncher, a chisel / steel wedge, a crowbar or a nail puller, a pipe cutter, an iron bucket filled with water.
Before you start work, it does not hurt to draw up an action plan, which depends on how the sewer pipes are connected.
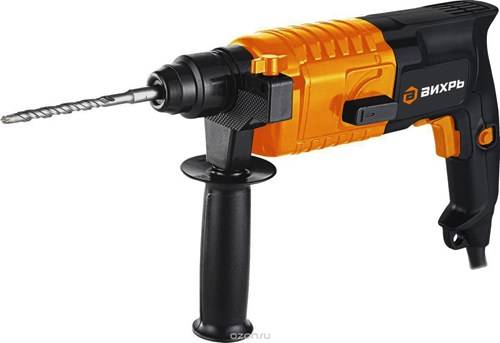
Perforator
Installation of internal wiring
After the installation of the riser, it is necessary to change the internal wiring in the apartment. The work rules include the following recommendations:
- Wiring is carried out from the central riser to plumbing fixtures (toilet, sink).
- It is necessary to install not only rigid, but also movable elements of the pipeline. The movable elements made of corrugated pipe relieve the internal stress of the system.
- The sockets should be positioned towards the movement of waste water, this reduces the risk of leakage.
- Sewerage should be installed with a slope towards the drainage.
- To drain water from the toilet, a pipe with a diameter of 110 mm is used.
- For all other plumbing fixtures, a 50 mm piping must be used.
After the installation of the wastewater disposal system, the drain tank is connected and a test run is performed. The correct operation of the cistern depends on the proper connection to the toilet and the tightness of the connection to the supply pipe. There are also models of a cistern that must be fixed to the wall. All necessary components for installation are usually supplied with the equipment. Also, the cistern device can be hidden inside the plasterboard structure, which will add aesthetics to the restroom.
Compliance with simple recommendations for laying a network for drainage guarantees the reliable functioning of all plumbing fixtures in the apartment, the absence of leaks, extraneous noise and odors. If there are difficulties in carrying out the work on your own, you can call qualified specialists.
Cutting a cast iron pipe - step by step instructions
So, we found out that although cast-iron pipes are not popular today, they are still occasionally found in sewer systems. The instructions below will help you cut the cast iron pipe if there is a need for repair / installation work.
For work you will need:
- goggles;
- marker for metal surfaces (you can use chalk);
- hacksaw, as well as blades for it;
- saw equipped with a chain clamp.
Table. Master class on cutting cast iron pipes.
Steps, photo
Description of actions
Step one
First, let's look at how to cut a pipe using a chain saw. First of all, mark with chalk the line of the future section
It is important that all lines are as even as possible.
step two
Next, wrap the cast-iron pipe with a chain (also try to do this as evenly as possible). It is also recommended to make sure that the maximum number of cutting discs fit on the product.
Step Three
Press the handles so that the saw wheels cut into the pipe
It is possible that this will need to be done several times until the pipe is completely cut. In addition, the pipe may need to be rotated slightly during cutting, especially if it has not been secured.
Step Four
Perform similar actions on all the required places that you previously marked with chalk.
Step Five
Another cutting method is the use of a hacksaw. Place the long blade into the machine, fix it. Most of these blades contain diamond / carbide inclusions designed to work with hard metals.
Step Six
Mark the places for future incisions. The lines, as in the previous method, should be as even as possible, and the pipe should be held firmly in place. If possible, ask someone to hold it.
step seven
Having set low speeds on the hacksaw, proceed directly to cutting. It is important that you do not try too hard, otherwise the blade can easily break.
Additional Recommendations
In order for the sewer system to work without failures, the installation of the toilet must be done correctly. The following recommendations should be followed:
- Do not forget to withstand the slope of the sewer system. It is 3-5% in the direction of the central riser. That is, for each meter of pipe length, a slope of 3-5 cm is made. This will avoid stagnation of wastewater.
- It is better to change the toilet bowl after the repair is made in the toilet. With inaccurate work, the faience bowl is easy to break.
- If you need to install a bidet - this device is installed on the same level as the toilet.
- The replacement of sewer pipes is carried out simultaneously with the installation of revisions. Hatches are installed in easily accessible places, the passage to which is free.
After installing the toilet, check the reliability of the connections and the performance of the drain. Subject to the technology of work, problems with the operation of the bathroom should not arise.
An easy way to dismantle a cast-iron tee with your own hands, how do sewer pipes get clogged? Watch this video:
Removing an old toilet
To dismantle the old toilet, first disconnect it from the water supply and sewerage. Since in Khrushchev the device was fixed with cement mortar, it will have to be broken. To do this, use a perforator


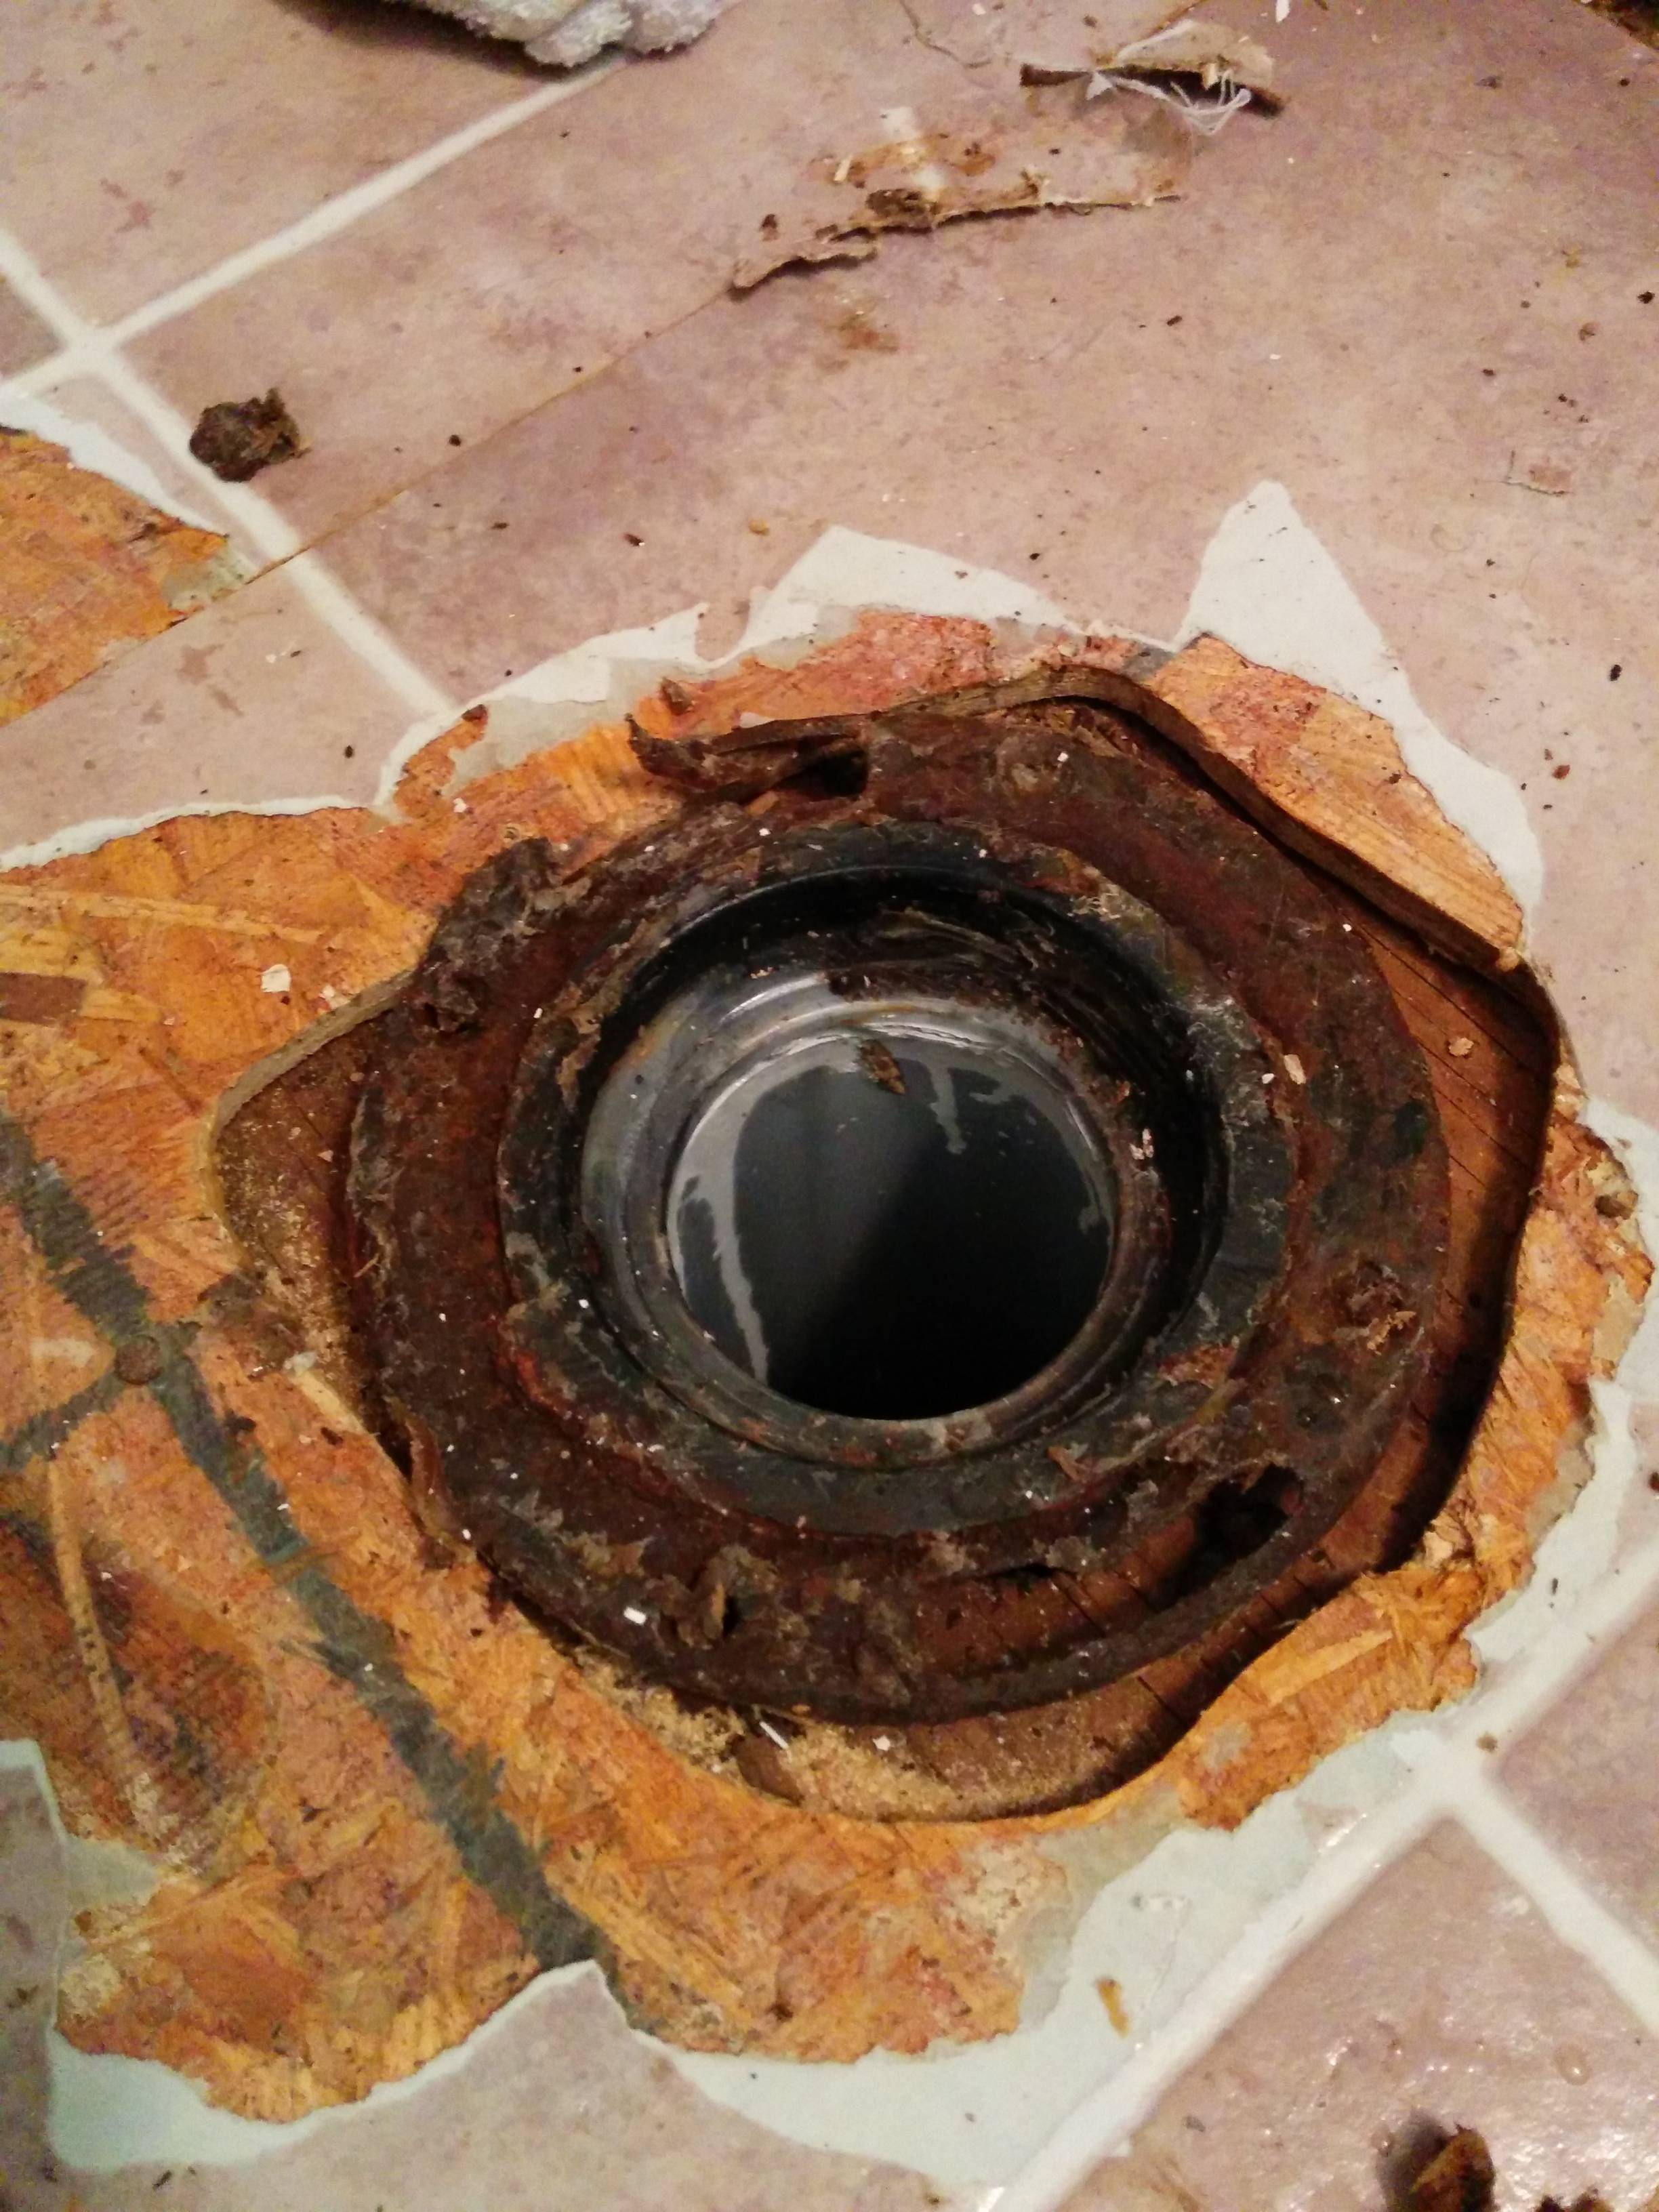


You also need to pay attention to the fact that the joint between the tee and the drain neck is sealed with cement
Demolition work includes the following steps:
- Disconnecting the tank from the water supply. To do this, close the shut-off valve. The rest of the liquid is drained.
- Removal of the cistern, toilet lid, seat.
- Dismantling the drain, which is inserted into the cast iron tee. It is broken with a hammer. It is not recommended to hit the cast iron, so as not to split it (if the tee remains in place).
- Removing fragments of the toilet bowl from the cement screed.
Drain the remaining liquid from the siphon. If the cast iron tee is damaged or has served its time, it is replaced. In addition, it takes up too much space, which is unacceptable. for a small bathroom.
Removing the tee. The tee is removed carefully, gradually swinging it so as not to damage the riser itself
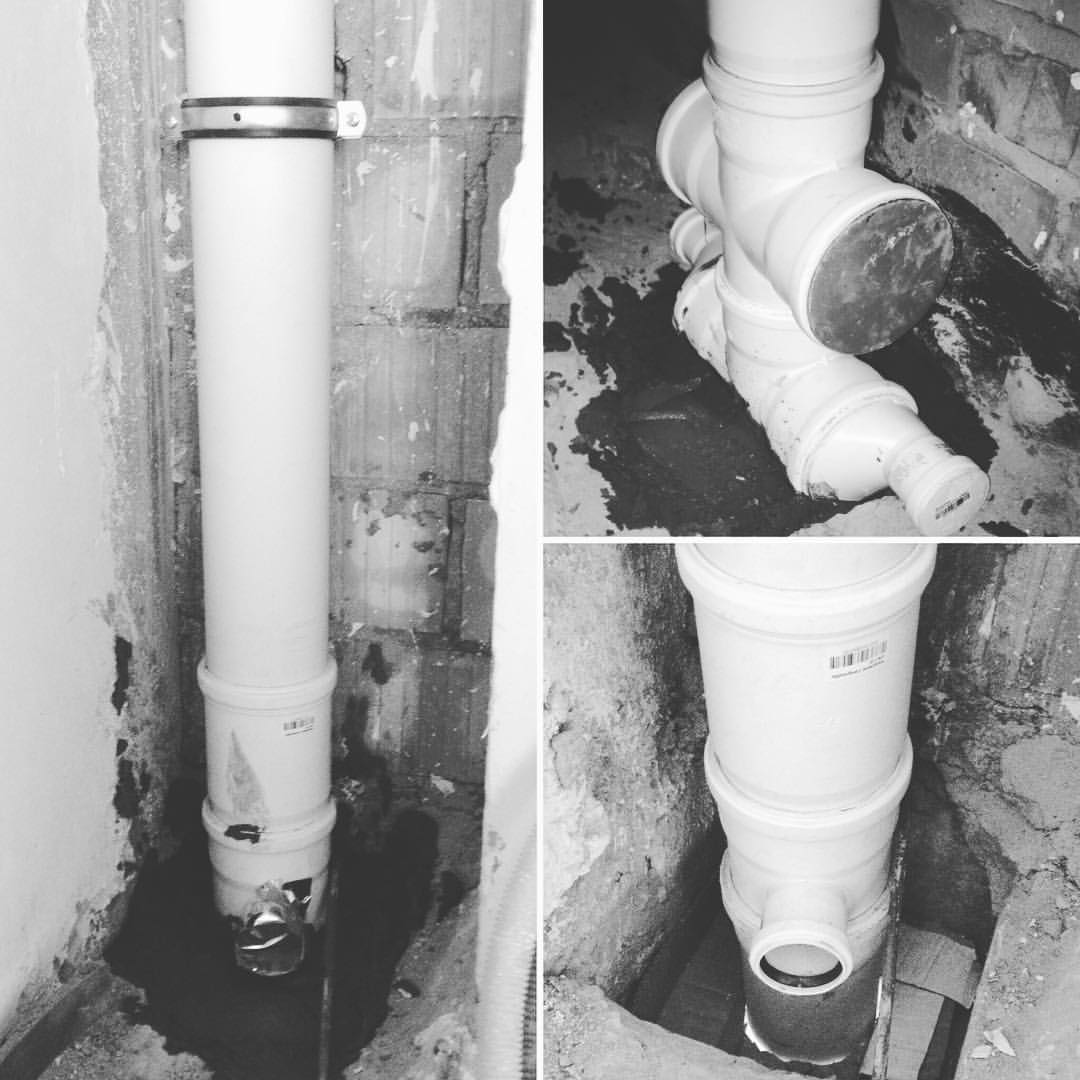
Installation of plastic pipes
When installing a plastic riser, 3 rules must be observed:
- You need to install in the right direction - from the bottom up.
- The sockets should be directed towards the flow of water.
- A plastic product rarely sits tightly in an old socket. You have to use linen winding and silicone sealant for sealing.
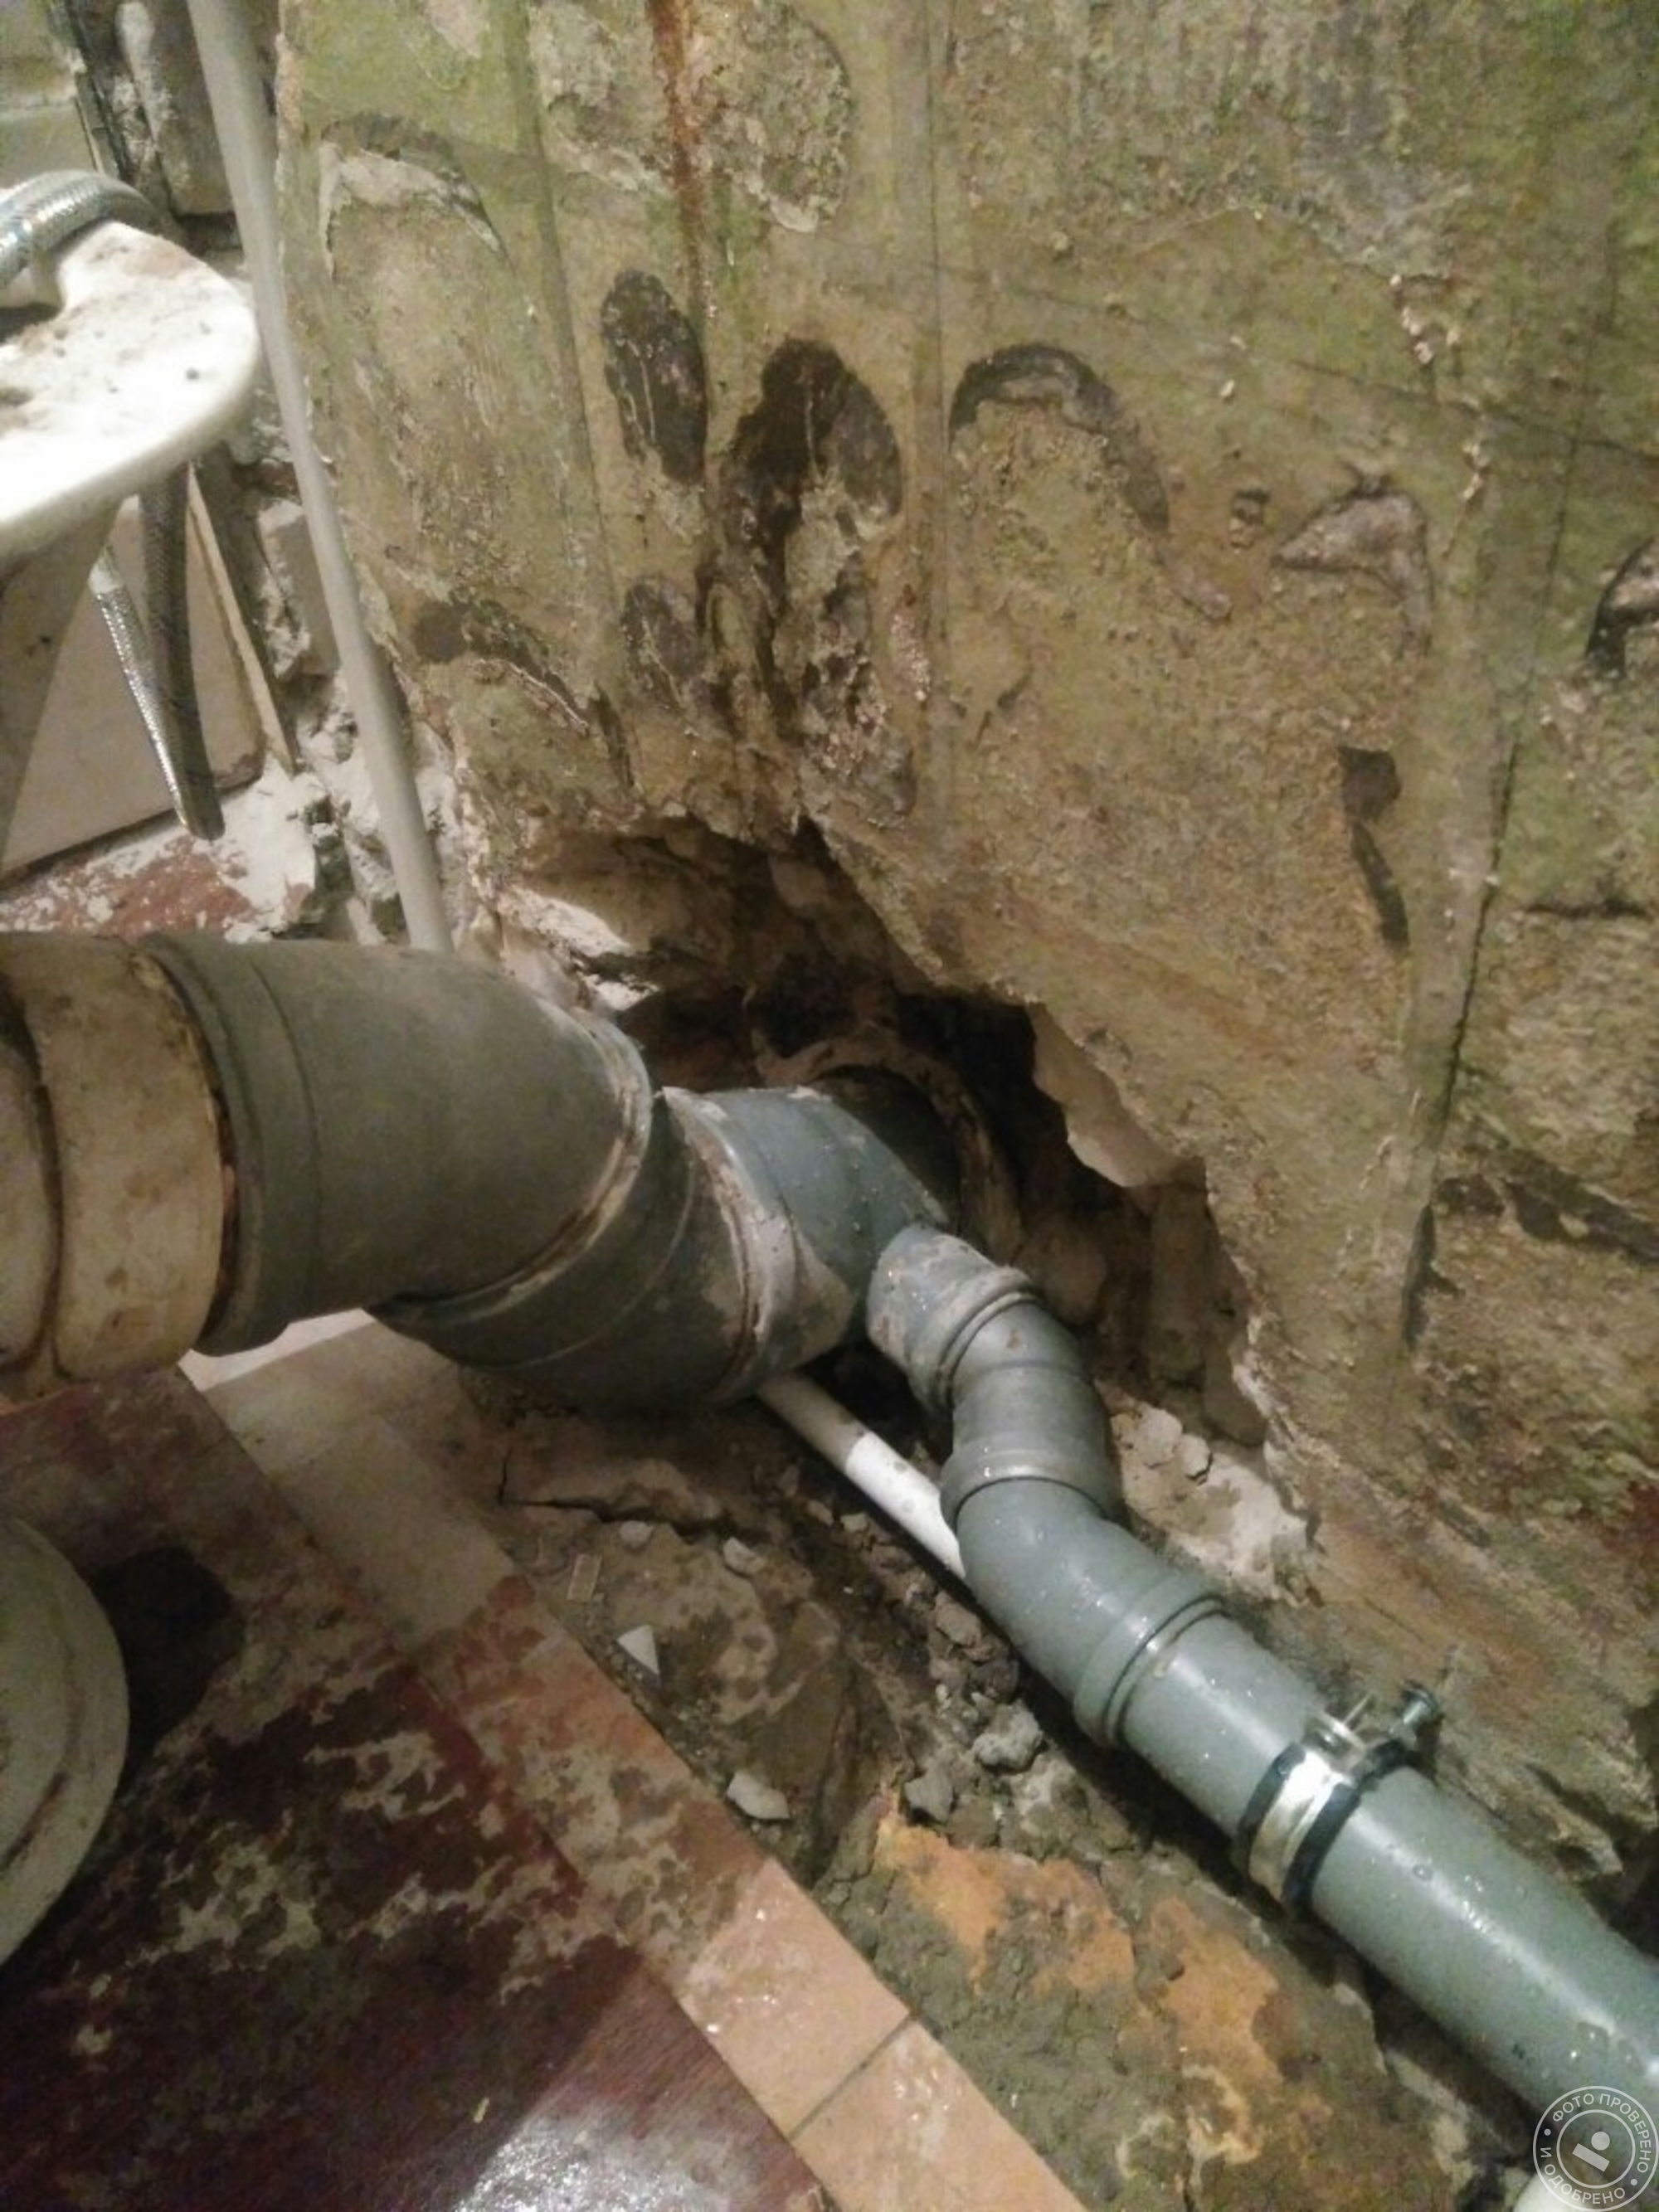
Sealing cuffs are installed at the joints of the pipes. To make it easier to work, you just need to lubricate the surfaces with liquid soap.Plastic pipe with a diameter of 110 mm must be cut to length as precisely as possible. A chamfer is made at the end. A rubber adapter is inserted into the socket of the lower pipe, and a plastic pipe is inserted into it. Mountings in the amount of 3-4 pieces are preliminarily mounted in the wall. After connecting the plastic and cast iron fragments, they are sealed and tested. If you don't see any leaks, you've done a good job.
Plastic pipes must be insulated to improve sound insulation. Smooth surfaces well convey the knocks of various objects that have fallen inside, the sound of wind and rain. Even underground sounds from the operation of the subway can be carried by plastic pipes into the house.
The task of soundproofing is to minimize the vibration of risers and pipes. You can use special products that have noise absorption. They are made of plastic and mineral powder. As a result of the alloy of these substances, a material similar to cast iron in structure appears. It is expensive and not everyone has the opportunity to purchase it. The service life of such products is no more than 20 years.
Plastic products are insulated with damper clamps and polyurethane foam plates near the ceiling and floor. Polyurethane foam or polystyrene wrap risers and wiring. You can use polyethylene foam for this purpose, but it is short-lived.
Replacing a sewer line is hard work. But even a beginner can handle it. You need to have desire, patience and accuracy.
Repair of a cast-iron sewer pipe
If a cast-iron pipe leaks in the toilet, then immediately make repairs. This process depends on many factors, the main of which are:
- strength of the pipeline line;
- defect size;
- the presence of longitudinal chips and cracks.
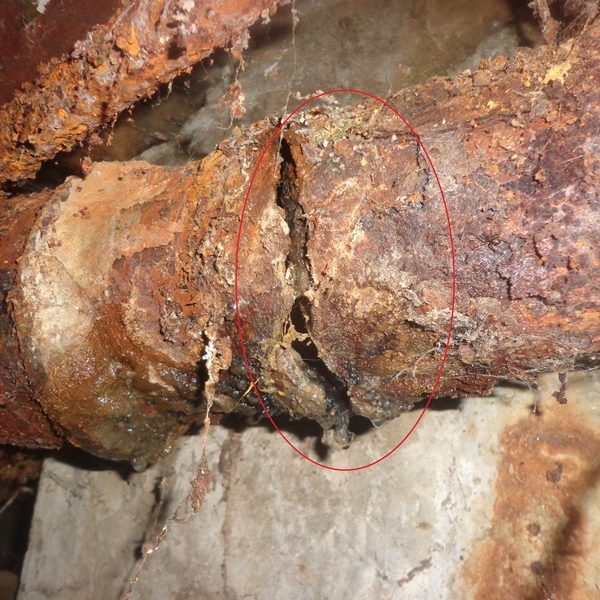
The fact that the pipe burst may indicate:
- the appearance of an unpleasant odor in the sewer system;
- the presence of smudges on the outside and joints of the pipes.
If a leak is detected at the point of entry into the pipe (as a result of a poor-quality connection at the transition point of the siphon or drain hole), then the problem is solved by:
- gasket replacement;
- pulling up the connection elements;
- inlet seal.
And how to repair a cast-iron pipe when a leak is found on the structure itself? In this case, it should be carefully examined for the size of the defect. If there are small holes or cracks in the pipe, then for the repair it is possible not to dismantle it. Otherwise, the damaged area will have to be removed.
Start and sequence of repairs
The easiest way to dismantle a cast-iron sewer is to cut it with a grinder or gas cutter. But it is unacceptable when repairing with the involved risers of neighboring apartments or replacing the toilet. Some of the problems are eliminated if the method of chasing is known in advance, but more often it is found out in the process of disassembling the system. Before starting work, the water supply line must be turned off. In general, chasing cast-iron pipes with your own hands takes place in the following sequence:
- Visual inspection of the sewer and clarification of the degree of complexity of the work.
- Determination of the minting method by tapping the cork.
- Directly chasing the sockets of sewer pipes.
- Cleaning up the remaining area.
- Replacing a new section and hiding the seams of the joints.
Mounting
Before starting work, all structural elements should be purchased:
- Sealant - a rubber cuff that provides tightness at the joints when replacing a tee in a sewer riser.
- Plastic tee.
- Sewer pipe marked with the size of the tee.
- Compensators with a diameter that matches the size of the pipe - the base.
- Pipe adapters, collars, fastenings.
- Branches, sockets.
- Protective equipment: respirator, gloves, goggles.
The replacement process begins with the installation of a rubber cuff in the socket of the pipe. For this, a cross or a tee is inserted. For a tight connection, the end face is washed with a dense layer. Additionally, it can be treated with a silicone mixture applied to a linen winding.
Next, the pipes are cut into calculated pieces, a chamfer is removed from the end. The exact length is determined by inserting the product into the nozzle. The resulting structure is inserted into the pipe located in the upper floor.
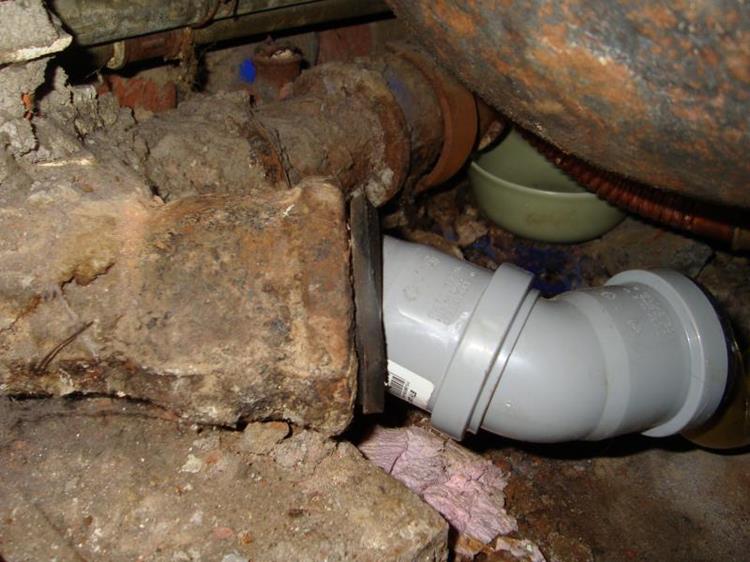
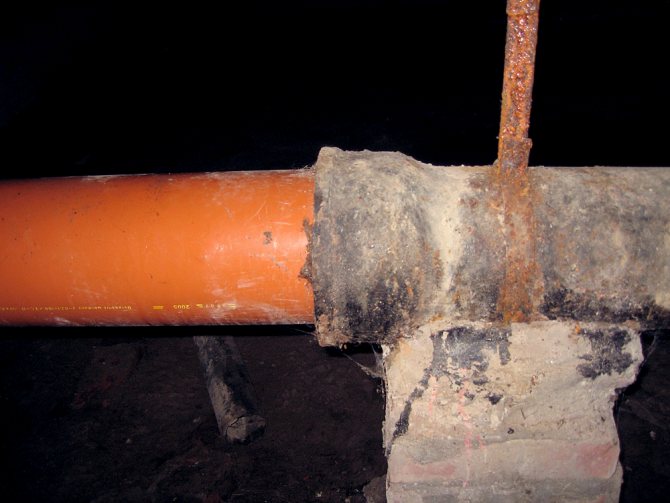
Sliding couplings are used to tightly dock the cast-iron section with the plastic one.
At the final stage of assembly, the installation of gaskets, couplings, cuffs is carried out. Fasteners, clamps are clamped. The joints are checked. Mounting foam fills the voids between the ceilings. The capacity of the assembled system is tested.
Pipe production
Cast iron is a material produced from the processing of iron ore. The difference in making iron and steel is the high amount of carbon. For the production of high-quality cast iron products, two methods approved by the guest are used:


- Continuous casting method. The manufacturing process consists in pouring liquid material into a mold, in which it changes consistency. In the mold, cast iron hardens and is drawn into pipes of the required parameters.
- Centrifugal casting method. Liquid iron is placed in rotating molds until solidified. This method can produce pipes of almost any plane with symmetry. The wall thickness depends on the mass of liquid iron.
Pipes of our generation are distinguished by a beautiful shade, additional protective treatment on the inside and outside.
Repair work on the street
If it becomes necessary to repair a cast-iron pipe that is placed on the street, then you can use the same methods that were described above. However, it is desirable to make additional fixation of the joined cast-iron pipes so that deformations in the soil do not open cracks. If the pipe is adjacent to the septic tank, then the above methods may not work. The design of the septic tank is subject to seasonal fluctuations, and this can destroy the integrity of the repaired connection.
In this case, first of all, liquid glass is used, which is poured from above in large quantities with mastic, which is used for gluing joints in panel houses. In principle, the mastic on its own perfectly seals the cracks, therefore, if liquid glass is not available, then you can do without it. However, it is still better to seal with it, it is more reliable.
Almost all Soviet buildings are equipped with cast-iron sewer communications, since such pipes are durable and resistant to wear. But the cast iron pipeline requires the right approach to use and dismantling.
Unlike drain pipes, which can last for decades, connections inside a home may need to be replaced sooner. Also, interventions in the sewer system may be forced when installing a washing machine appliances or bathroom remodeling. To do it by the rules, it is not necessary to call and wait for the master, all the work can be mastered by the owner himself, if he knows how to handle elementary tools. Dismantling the sewer should not take much time, but dismantling old products is more difficult. Let's figure out how to properly dismantle cast iron pipes.
What are the reasons for the formation of cracks and holes in the slate
For the correct selection of the method by which repair work will be carried out, it is first necessary to find out what caused the damage. Thanks to this, it will be possible to seal holes in the roofing material in such a way that after a short time period this defect does not reappear.
Due to the rather high fragility of slate, its damage occurs for a number of the following numerous reasons:
Impact loads. The reason is inaccurate walking on the roof.
Technological marriage. During the production of the material, the hydration of the cement base is carried out in conditions of insufficient moisture, which is why the slate does not acquire the optimal level of strength. As a result, such sheets are easily covered with cracks even under the influence of minor loads, and repair work in such situations is pointless.
Long period of operation. Basically, the service life of the roofing material is relatively short and reaches only 10-12 years, after which cracks and other damage begin to appear on its surface.
Careless transportation and storage.Because of this, defects cannot always be identified initially, but they become clearly visible when walking on the laid sheets of slate on the roof
In order to avoid the formation of damage to the slate, care should be taken not only during installation, but also throughout the entire process accompanying this process (during transportation and storage before installation work).
Wrong coverage. In such a situation, problems can arise if the sheet waves are partially on the roof without being supported by the rail.
As a result, with this method of installation, the formation of a crack can occur when walking carelessly on the roofing material or when a heavy tool and branches of nearby trees fall on its surface.
Use of unsuitable fasteners. Among the fairly common mistakes is the use of ordinary nails to fix the roofing material without the presence of rubber gaskets. In addition, damage appears in cases where slate is laid without first drilling holes in dry sheets for hammered fasteners. If they are not done before driving in nails, very oblong and dangerous cracks, as well as small holes, can occur in the coating.
Note! To avoid possible damage to the slate during the seasonal expansion of the metal, the holes in it must be made slightly larger than the fasteners used. They should not be greatly increased so that water does not leak during precipitation, additional protection from which rubber gaskets provide.
- Inappropriate roof pitch. As a result of laying slate on such a roof, water stagnation can be observed.
- Rough material surface. For this reason, snow regularly accumulates on slate in the winter. Under the influence of warm sunlight in the spring, the snow cover begins to melt, and as a result, the water flows down. Above the eaves, the roof is always colder, the snow does not melt very quickly and the flowing liquid re-turns into ice, under the influence of which the slate is slowly destroyed.
- Sudden temperature changes. Because of them, the material begins to acquire microcracks.
- Cutting sheets with insufficient knowledge and experience. The most difficult thing is to cut slate in situations where it is necessary to carry out work close to the edge or extreme wave, as well as when making a hole for the pipe. In this case, it is possible to close holes in the roofing material from the last factor only during the installation of a double patch.
Note! With extremely careful handling of slate, you can significantly reduce the likelihood of cracks and holes, to eliminate which you will need to carry out repairs or even replace the sheets.
In addition, quite often cracks in slate appear due to non-compliance with the production technology of the material at different stages:
- During the preparation of the mortar, a smaller amount of cement is added than required.
- Production in artisanal conditions without the use of high-quality equipment and a number of other nuances.
- Use of short asbestos fibers.
- Poorly executed processing of finished slate sheets.
In order to avoid the purchase of low-grade roofing material, it is best to give preference to products from manufacturers that have proven themselves in the market.


