- Benefits of using plastic
- Noise isolation and causes
- Installation of soundproofing
- Features of the plastic elements of the system
- Pipeline selection and required tools
- Dismantling of the old sewer
- Pipe installation
- Moments of dismantling cast iron
- Caulking of the pipeline with sulfur compound
- Cement bonded pipeline caulking
- Dismantling features
- Replacement of water pipes
- Replacement of sewer pipes
- Dismantling of old pipes
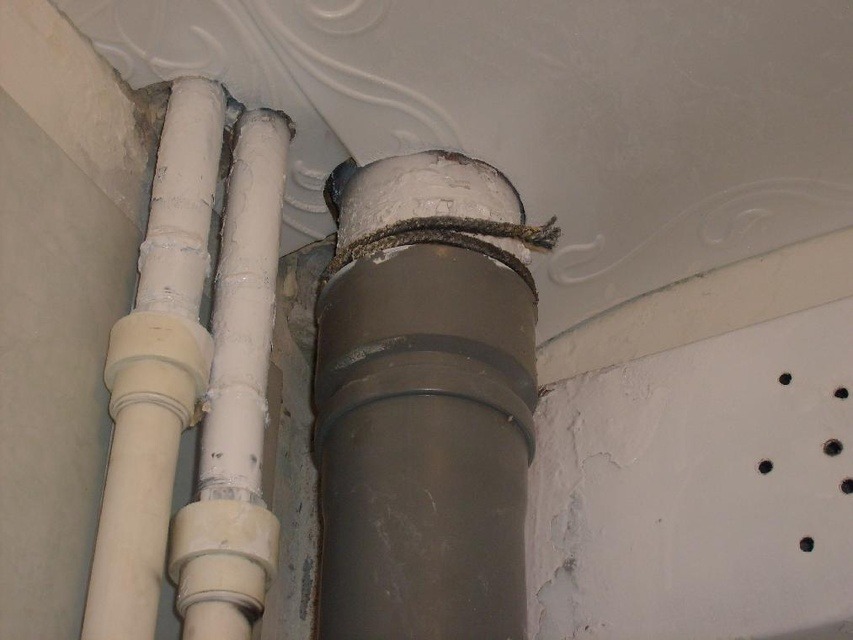
- Dismantling the riser
- Types of rubber cuffs for connections
- Connection step by step
- A set of tools and materials
- Work progress
Benefits of using plastic
The best option for replacing cast-iron sewer pipes will be plastic products
Since most of the housing stock was built back in the days of the USSR, that is, in the 50-60s, the resource of the cast-iron sewerage system has been exhausted, and the system needs to be replaced. Despite the strength of the pipes, they have already lost their capacity. This leads to the fact that the system often becomes clogged, and it is very difficult and troublesome to clean the cast-iron sewer. That is why the old cast iron system is being replaced. Moreover, this procedure is not a tribute to fashion and new modern materials, but a vital necessity, which is caused by the strong wear of networks.
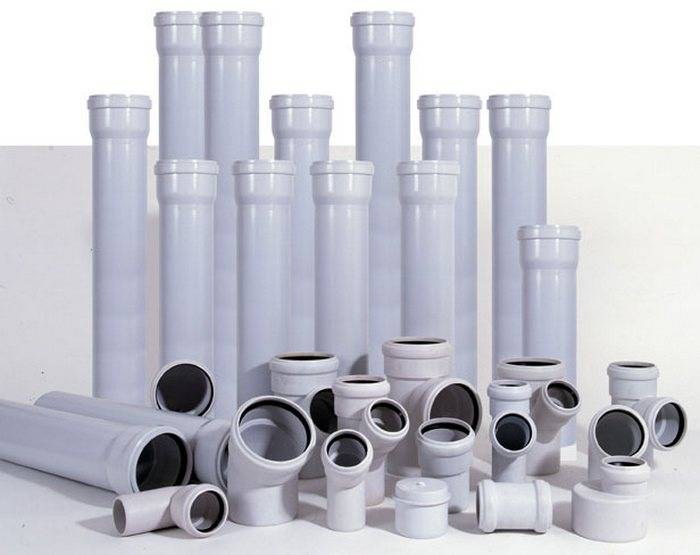
The best option for replacing cast-iron sewer pipes will be plastic products. Most apartment owners choose plastic sewerage, because it has a lot of advantages:
- The wall resistance to fluid flow is much less, so the frequency of clogging is much lower.
- Products made of polyethylene are lightweight, which greatly facilitates their installation and transportation.
- You can even install a plastic sewer with your own hands, since the installation rules are quite simple. You can see the installation process in the video at the end of the article.
- For installation, you do not need to buy expensive special equipment.
- To make tight connections, there is no need to use special sealing cords and different putties.
- Polyethylene is not afraid of corrosion, which guarantees the durability of pipes.
Among the disadvantages of PVC pipes, it is worth listing the following:
- Plastic products are afraid of excessive heat. If you drain water at a temperature of 60 degrees for a long time, then the pipes can be deformed. They can withstand exposure to a liquid at a temperature of 90 degrees only for a short time.
- In addition to the fear of heating, the disadvantages include poor sound insulation of plastic pipes. Therefore, if you decide to change cast iron pipes, which are distinguished by good sound insulation, for plastic pipes, be prepared for the fact that you will have to additionally soundproof the riser or sew it into a special box.
Tip: If you do not want to use plastic, then a cast-iron ductless sewer may be suitable for you.Thanks to innovative technologies, modern cast-iron sewer pipes have a special coating that increases the stability of the pipeline and reduces the resistance of the walls to the flow of water.
Modern socketless cast-iron sewerage is mounted using special clamps, which are equipped with elastic rubber gaskets. Installation of pipes is carried out quite quickly. Deposits are practically not deposited on them.
Noise isolation and causes
Of course, PVC and polypropylene pipes are much better than cast iron pipes. They last longer, have an aesthetic appearance and are much cheaper. However, they have one major drawback. This is noise. At first, even experienced specialists did not know how to deal with this. But today, as soon as pipes are installed, they begin to deal with noise and sound insulation. It's not hard at all to do this on your own. Therefore, do not be afraid! Having done such work, you will forget what the noise from the pipe is.
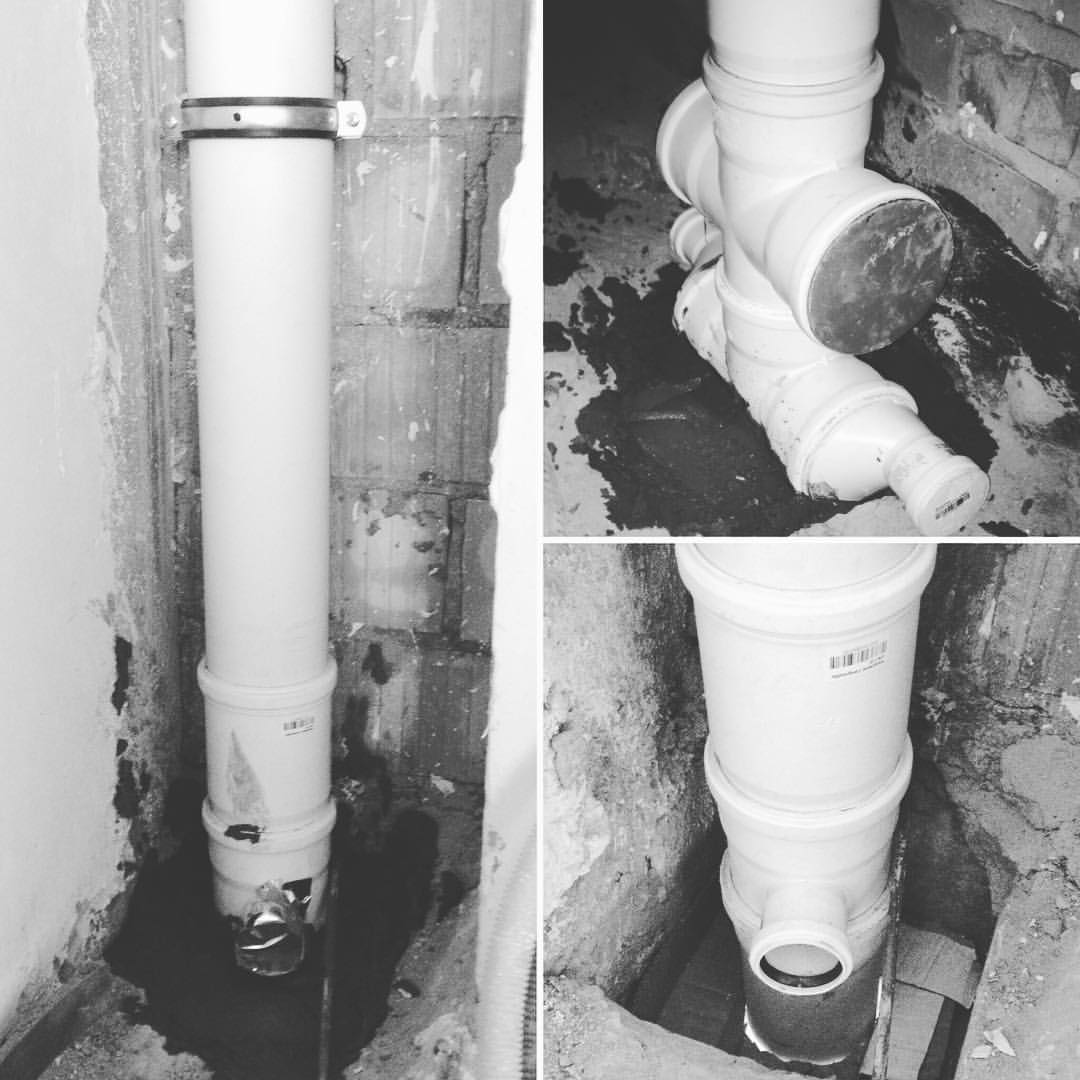
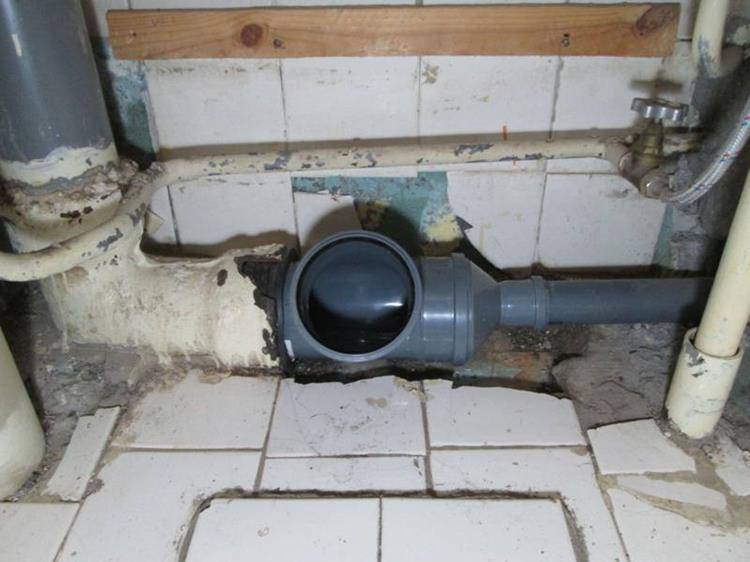
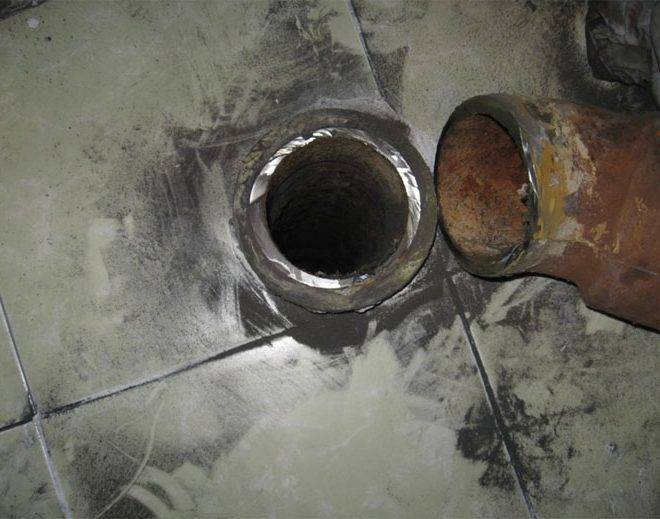
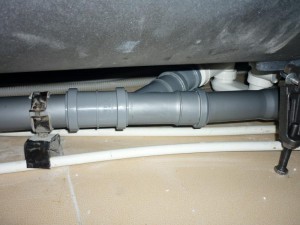
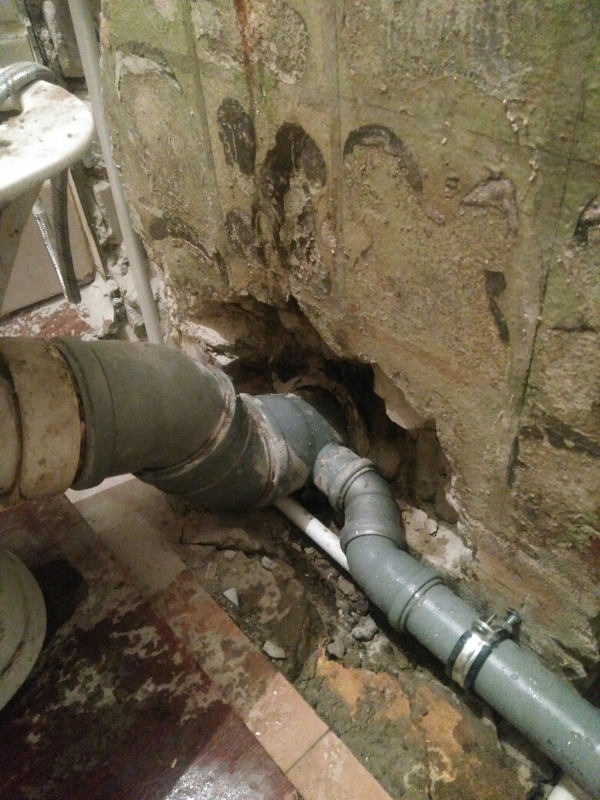
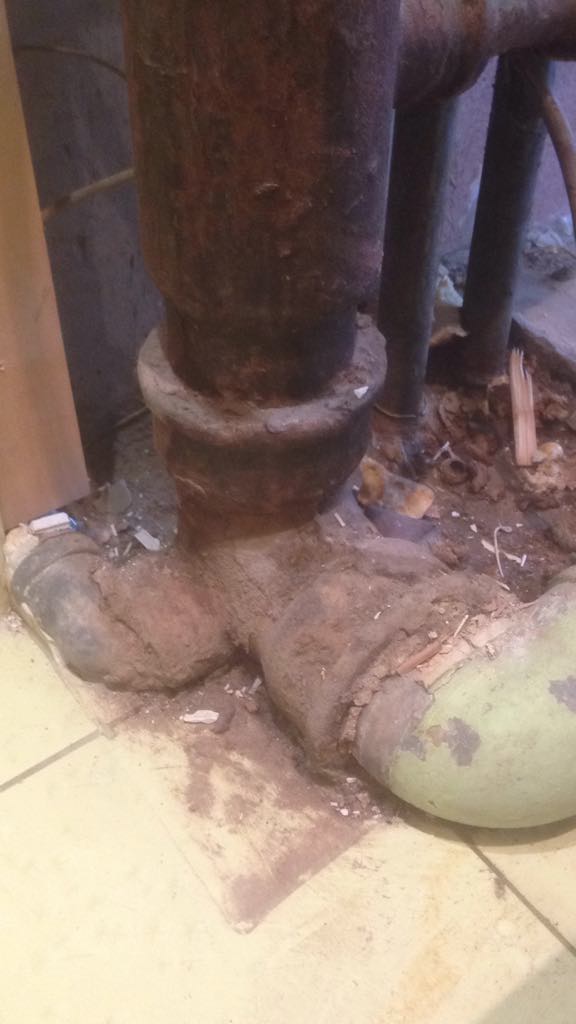
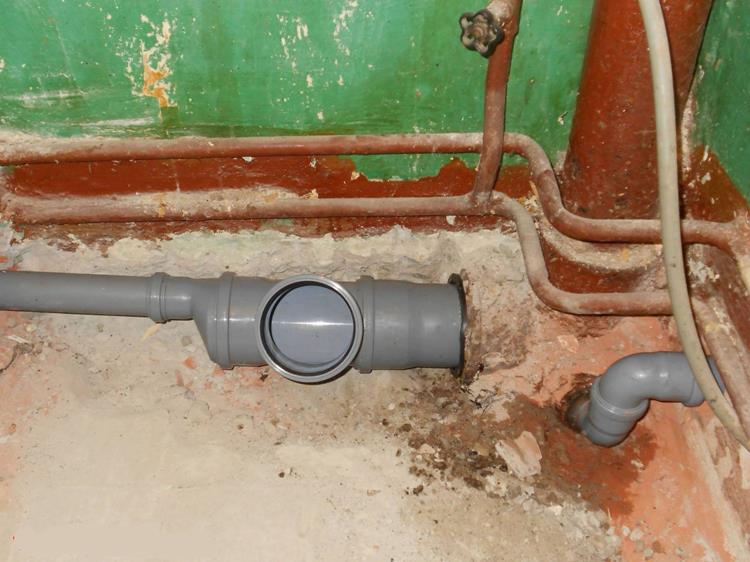 installation of a plastic pipe with a check valve and connection with a cast-iron riser pipe
One way to achieve the effect of soundproofing does not yet exist. Therefore, different ones are used, depending on the design, acoustic features and the presence of certain materials.
Why do cast iron pipes make no sound, while modern plastic pipes are so noisy? After conducting special studies, several causes of extraneous sounds from the riser were revealed. Among them are:
- impact sounds occur when the contents hit the walls of the pipes, making noise;
- atmospheric phenomena occur when the wind howls, the sound of rain or even hail;
- resonance manifestations appear during the transmission of extraneous noise;
- vibration sounds are transmitted from the whole structure, the movement of underground transport, and so on.
Recommended reading: How to move the sewer to another room
The pipe itself, due to its shape, suggests the possibility of perception and transmission of different nature of sounds. But the material from which it is made is also important. Those cast-iron risers that still stand in old buildings do not make noise for this very reason. After all, it is not completely metal. It is an alloy that consists of different grains that differ in composition and properties. Thanks to this, sound absorption is ensured, as the grains rub against each other and reduce vibration.
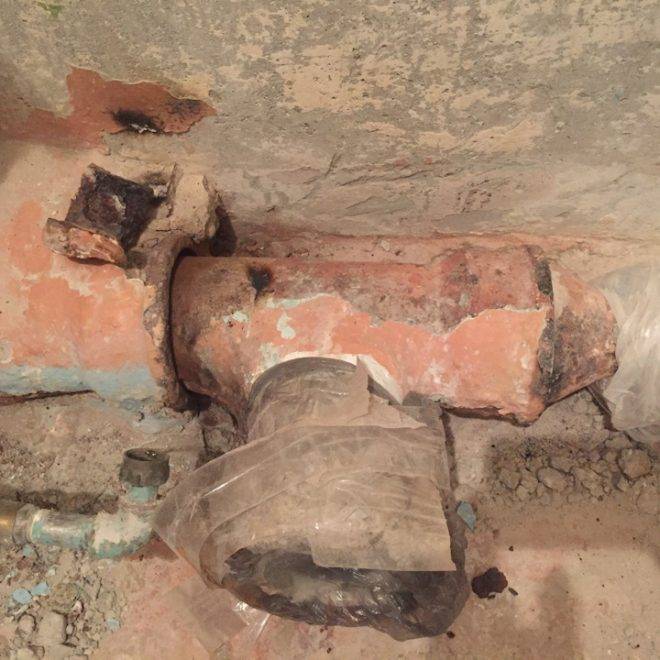
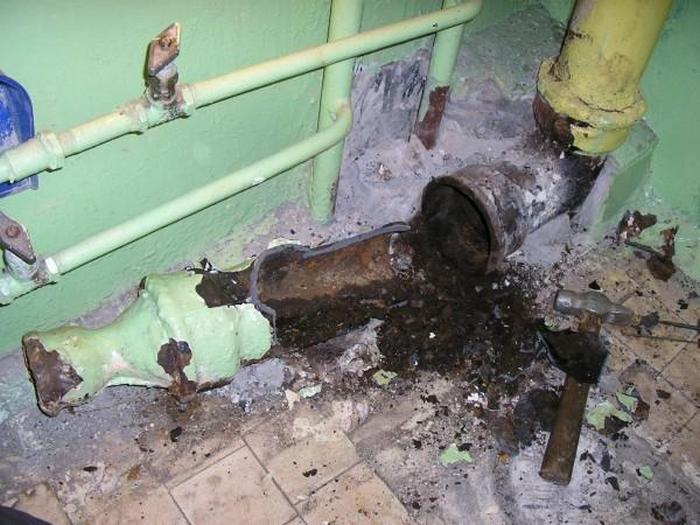
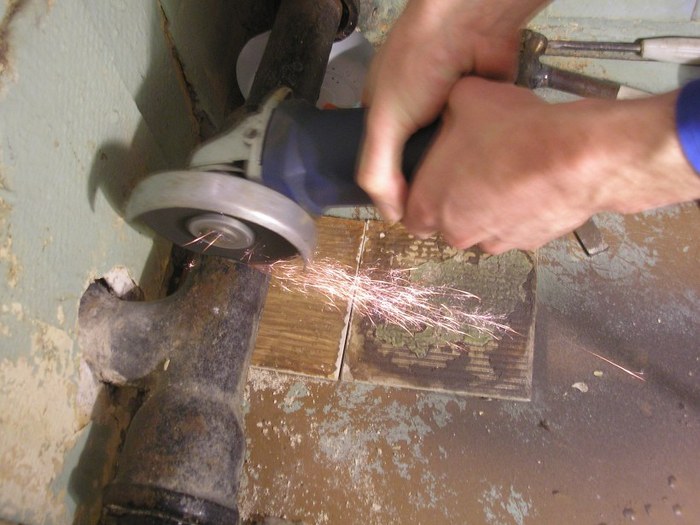
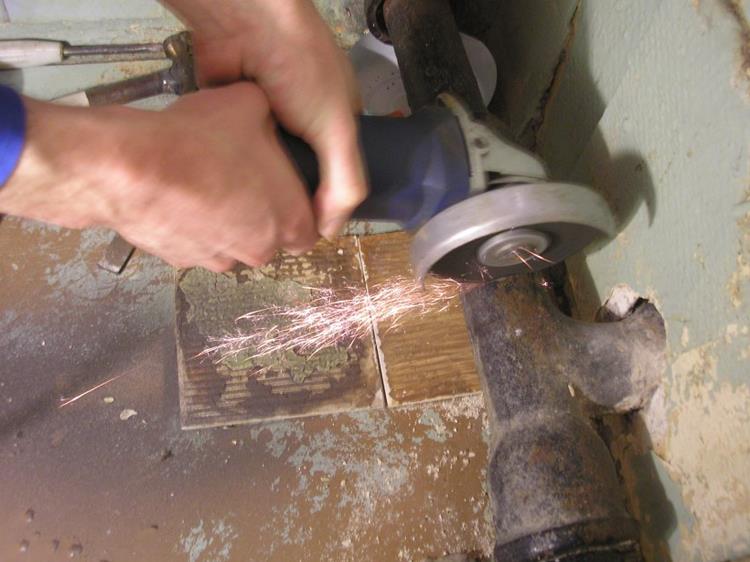 cutting an old cast iron pipe
In addition, such pipes are coated from the inside, which in itself plays the role of an excellent sound insulator, despite the fact that the movement of wastewater slows down.
Installation of soundproofing
The main task of soundproofing in an apartment is to minimize noise and, if possible, dampen vibration.
The ideal option is to purchase special noise-absorbing pipes. Some companies manufacture and install such risers. They include plastic with the addition of mineral powder. This provides a material having properties similar to cast iron. However, these pipes are expensive and may not be affordable for many. In addition, their service life, as a rule, does not exceed twenty years.


Therefore, plastic pipes are mainly used for replacement, followed by insulation from noise and sound.
They are isolated from the walls with damper clamps, and from the ceilings - with polyurethane foam plates.
In order to eliminate unpleasant gurgling in pipes, polyurethane foam or polystyrene foam is used.Both the riser and the wiring are wrapped around so that sound is not transmitted.
In addition, you can use polyethylene foam, but such material is extremely short-lived and can begin to sour and even stick after the very first hot summer.
Replacing a sewer riser is a difficult job, but even a beginner can handle it. However, if you are not confident in your abilities or the pipes in the house are very rusty, then it is better to resort to the help of specialists and entrust the work to them, because otherwise you risk flooding both your apartment and your neighbors from below.
Features of the plastic elements of the system
It is believed that the replacement of cast iron sewer
pipes on plastic allows you to get more stable in work
sewerage. In general, this opinion is correct. Positive qualities of plastic
pipelines:
- light weight, no load on load-bearing structures;
- smooth surface, less risk of fatty deposits;
- simplicity, high speed of installation;
- durability;
- resistance to corrosion;
- the presence of a complete set of additional elements;
- the ability to change pipes with your own hands;
- attractive appearance.
Disadvantages of plastic elements:
- high noise level;
- relatively low strength;
- high coefficient of thermal expansion of the material.
The presence of flaws does not scare
users. Replacement
cast-iron sewerage to plastic is becoming the norm. Only in some
houses still have old pipes, which have not yet reached the turn.
Plastic elements outperform alternatives
types in all respects. They are cheap, allow you to get any configuration
systems. Users consider the assembly speed, the presence of
any accessories.
Pipeline selection and required tools
In old houses, all pipes were installed from cast iron, including sewer pipes. Of course, this is a very durable and reliable material, but it also has its own shelf life. Therefore, sooner or later, the time comes when it needs to be replaced.
Modern risers are made of even more durable material, which is also lighter and more aesthetically pleasing. Masters recommend switching to this more practical material. Steel or galvanized pipes will need to be replaced in ten to twenty years again. But if you make a replacement for polypropylene or polyvinyl chloride, then their operation is guaranteed for up to thirty to fifty years. And often it stretches over an even longer period.
And if, along with the replacement, you also take care of good ventilation, which can be purchased complete with pipes, then you can simply forget about sewer odors.
Since it is necessary to replace the cast-iron sewer with a plastic one in a multi-storey building, they first shut off the water. Therefore, the work is done as quickly as possible.
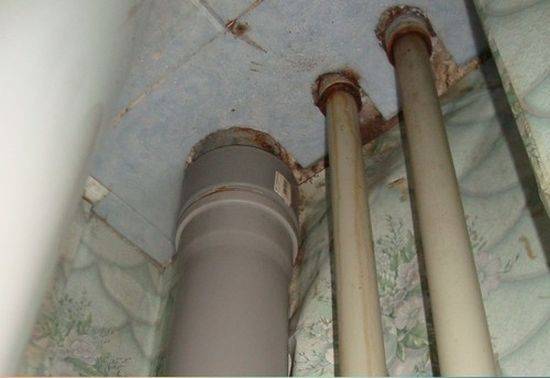
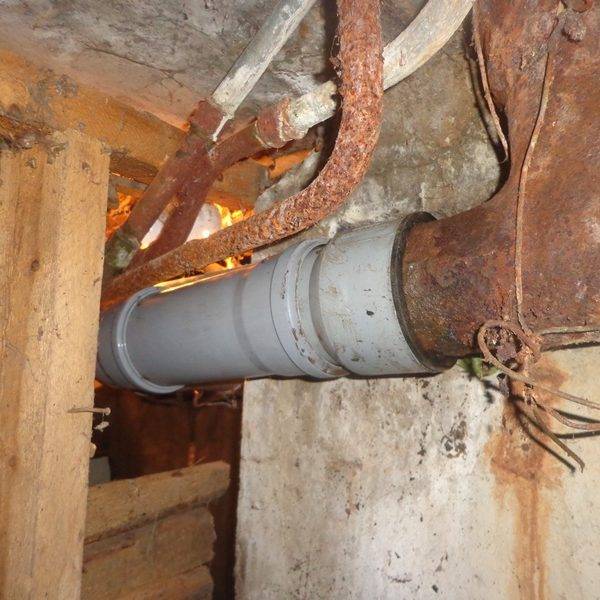
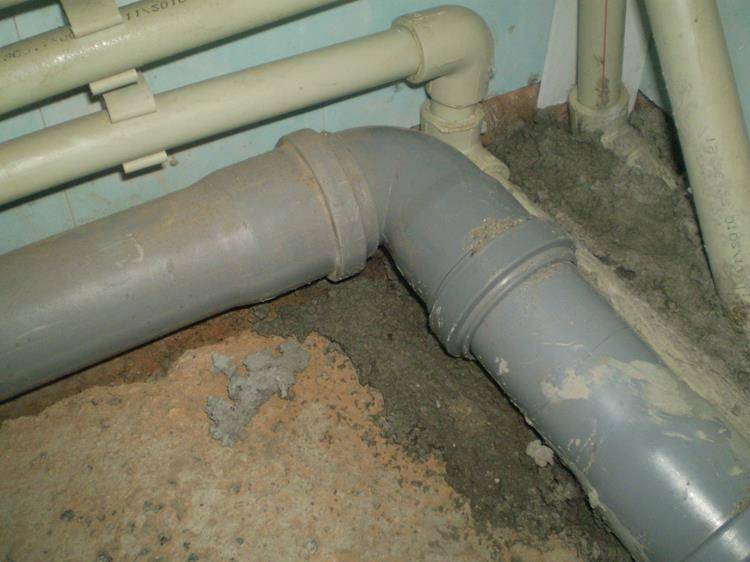
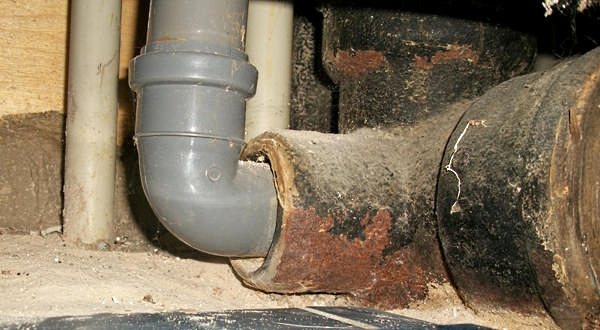
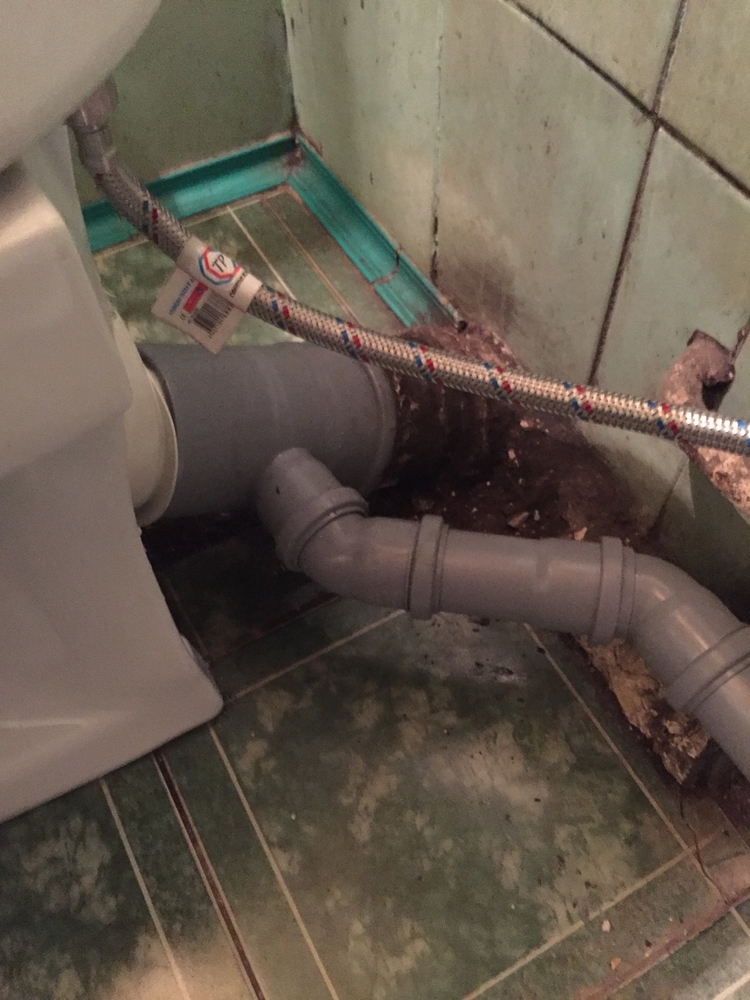
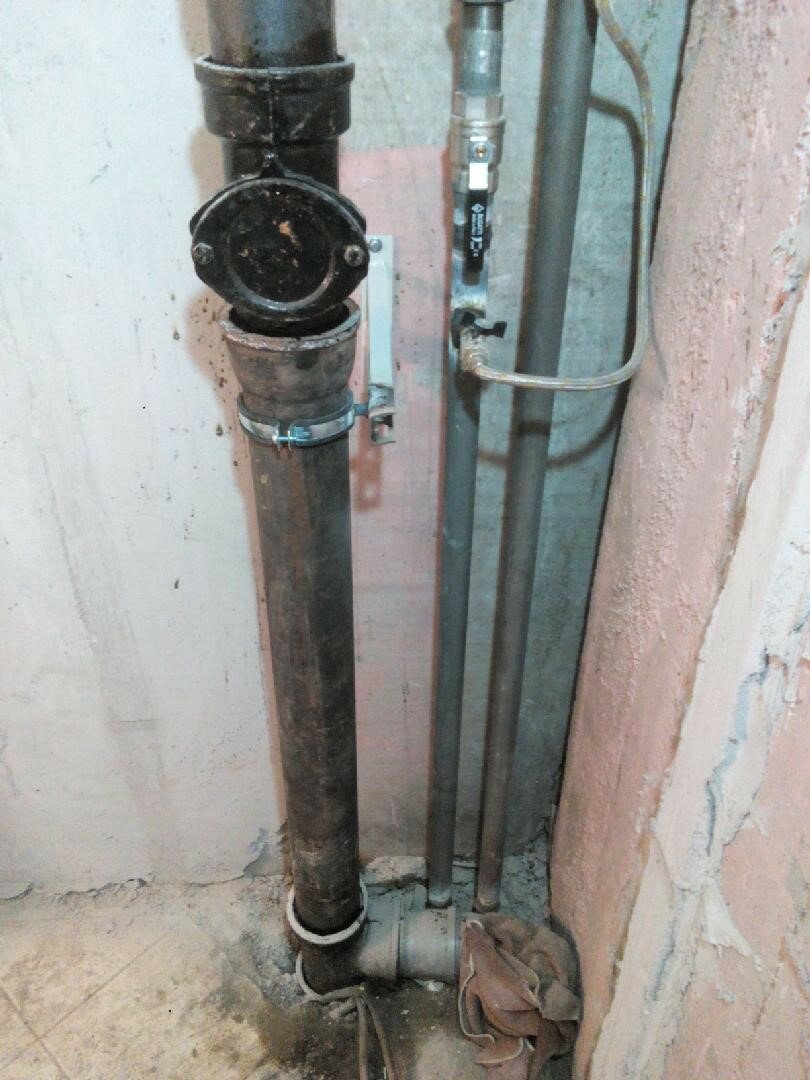
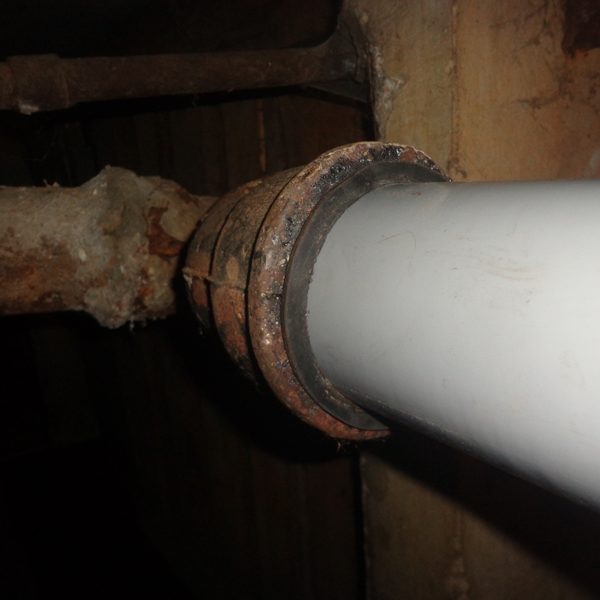
 connecting a new plastic sewer pipe with an old cast iron
Also, neighbors from above are warned not to use the toilet and water, otherwise everything will be sent to your apartment, and the neighbors below will be flooded.
To dismantle the sewer riser, the following tools are required:
- Bulgarian;
- nail puller;
- a large screwdriver to remove small items from the system;
- chisel;
- perforator;
- a hammer;
- scrap;
- grinder;
- film for covering the pipe hole;
- apron, gloves and goggles for personal protection.
Dismantling of the old sewer
Having decided on an independent replacement of the riser, it is best to negotiate with the neighbors so that, if necessary, they can provide access to the apartments. However, in most cases, the replacement takes place exclusively in your apartment between the floor and ceiling.


Step-by-step instructions for removing the riser are as follows:
- A distance of ten centimeters from the ceiling surface and eighty from the tee is calculated. Two cuts are made by a grinder. The depth should be half the diameter of the pipe.
- A chisel is applied to the upper notch and beaten with a hammer. Then repeat the same manipulation below. The blows must be applied with sufficient force to split the pipe so that the middle part is removed.
- The pipe from the ceiling is closed with a polyethylene film.
- When disassembling the lower part, consisting of a tee and other fittings, arm yourself with a nail puller or crowbar to loosen the fasteners. Then remove the fitting. But, basically, this requires additional work with a perforator. With it, the cement on the fasteners is removed.
- Cement is chipped off with a chisel or screwdriver, and then the tee is removed. If it didn’t work out, the fitting is cut off with a grinder, retreating up to three centimeters from the socket.
- In the remaining places, all contaminants are removed and the cast iron is cleaned with a grinder.
Pipe installation
After removing the old pipeline, you must immediately install a new one so as not to cause unnecessary inconvenience to neighbors. But they begin the process, like the previous one, by checking all the tools necessary for this.
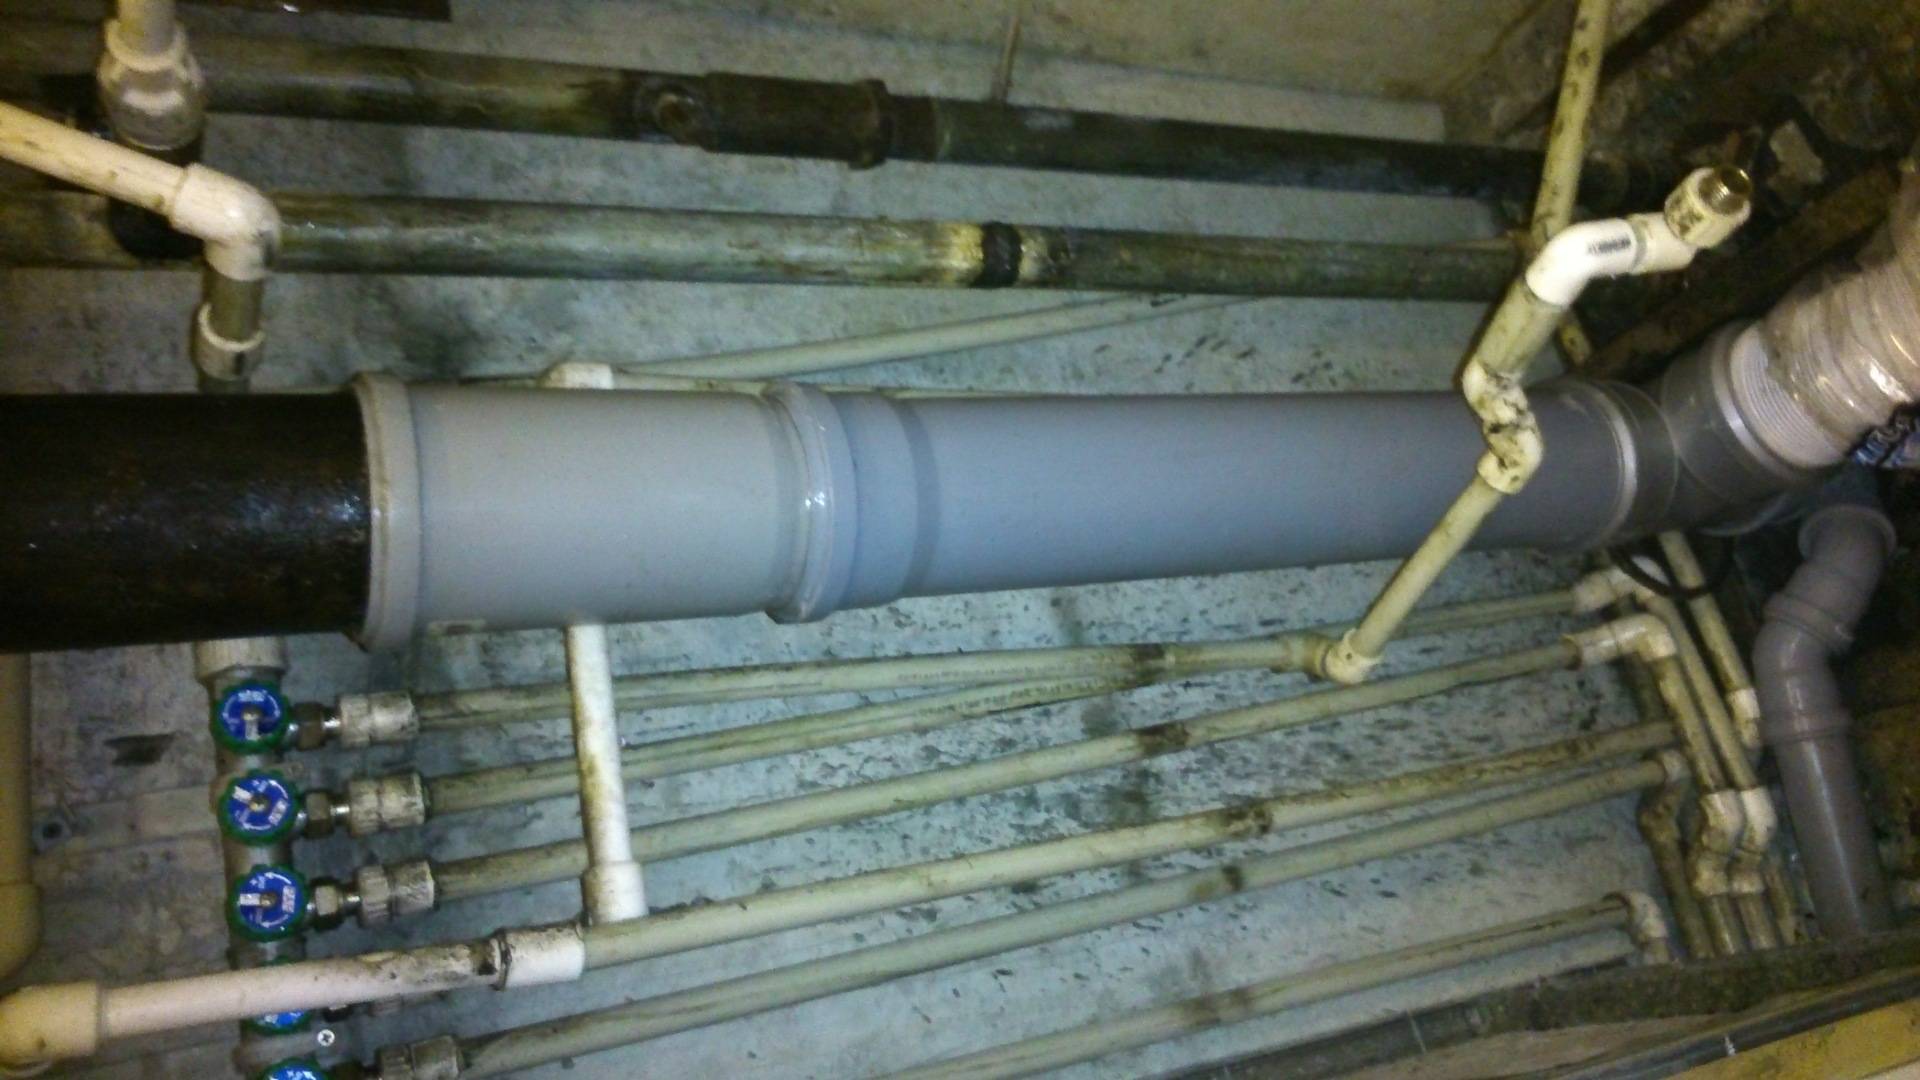
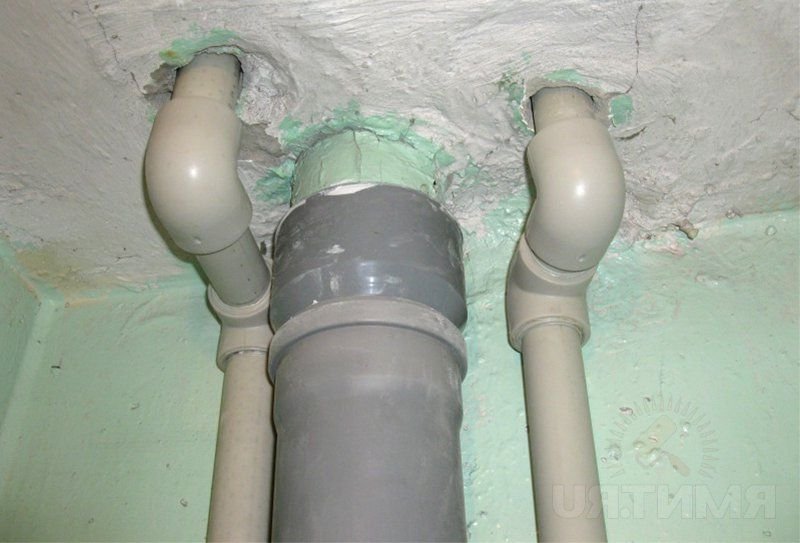
 fixing the plastic pipe to ensure the desired slope angle
The following equipment is required for installation:
- pipes with a diameter of one hundred and ten centimeters;
- outlet tee of the same material as the riser;
- rubber sealing cuffs to fix the fasteners between protruding cast iron stumps and a plastic pipe;
- branch pipe for transition from cast iron to plastic and vice versa;
- pipe fittings;
- soap used to facilitate entry into the mounts, that is, a kind of lubricant;
- vertical building level.
Installation takes place in the reverse order compared to dismantling:
- Rubber cuffs are inserted into the pipe cut.
- Attach the adapter from above, and the tee from below. All parts must be fastened as tightly as possible to ensure maximum tightness. With the free movement of the tee, the connection is sealed with silicone sealant or linen winding.
- The plastic riser is fixed with clamps. If the ceiling height is standard, then they usually manage with three pieces: for the top, bottom and middle. If it is high, then you need to purchase additional connections.
- The system is pre-assembled.
- A pipe must be lowered into the tee to connect plastic and cast iron.
- Each mount is lubricated with silicone sealant and waiting for it to solidify.
- Then turn on the water and check the pipe connections for leaks. If everything is in order, then this part of the work can be considered completed.
Moments of dismantling cast iron
With a complete replacement of the structure with a plastic one, you can not do extra work and just smash everything with a hammer. This is quite easy to do, because cast iron is considered a brittle material. However, if only part of the pipeline needs to be dismantled, the work must be done more carefully.
Before dismantling the cast-iron sewer, it is necessary to inspect the entire system to determine the area that will be repaired.Then be sure to turn off the water supply so that the drains do not enter the sewer. Further disassembly is carried out in stages:
- The part of the pipe located below the connection is cut off.
- The pipe is separated from the socket. The embossing methods will be discussed in more detail.
- If you remove the connection just does not come out, use a blowtorch or make surrounding cuts 20 mm long.
When carrying out procedures, it is imperative to use all protective equipment due to the injury risk of this work.
Caulking of the pipeline with sulfur compound
- turn off the water;
- disconnect the hose leading to the toilet;
- remove the toilet itself by unscrewing the bolts;
- clean the bathroom of appliances and furniture.
To determine whether sulfur was really used when connecting pipes, you need to bring a blowtorch to the seam. Under the influence of high temperatures, sulfur melts, accompanying this process with an unpleasant odor.
When parsing cast-iron sewer pipes, work begins from the farthest corner. The element must be broken with a hammer. It is better to use a tool with a plastic or polymer base, because the sewer can become clogged due to metal nozzles. Having found the cross leading to the riser, it is necessary to loosen it as much as possible.
Then you need to prepare a blowtorch or gas burner. At least two people should be involved in heating up the connections. While one warms up and melts sulfur, the other must loosen the structure. When doing this, be sure to use gloves and other protective equipment.
When the connecting substance is completely melted, the crosspiece can be removed from the riser.At the same time, you should be very careful, you need to remember to remove the remaining sulfur, and then let the riser cool thoroughly. If the cast iron structure is too strong, you can always make a few cuts near the pipe that needs to be removed. This will make the extraction process easier.
Cement bonded pipeline caulking
To start dismantling, you need to cut off part of the pipe. In this case, it is worth retreating at least 30 cm from the junction. The hardened cement is removed with a hammer, which must be beaten with a screwdriver or a chisel inserted into the hole. All procedures should be performed as carefully as possible so as not to damage the socket.
When joints will be freed from cement, you need to try to loosen the main pipe. In order not to process the sewer with a blowtorch or a burner, it is necessary to remove the cable, but if this cannot be dispensed with, it is necessary to heat it up strongly or use a specialized key. For example, for a 50 mm pipe, tool Nos. 3 and 4 are used.
The crosspiece is located below on the main riser. To remove it, you can simply use a hammer with a screwdriver. At the same time, for some time, you need to lightly tap on the tee itself in order to form a small gap between it and the pipe. Then you need to penetrate this opening, pry off the tee and remove it. It will take a lot of time to carry out these manipulations, in addition, this method is ineffective.
The next option is to use a blowtorch or burner. Dismantling is much faster, but the price for this is an unpleasant smell that takes a long time to disappear. First of all, you need to cut the socket of the cross. Then a heating device is placed in the pipe.A metal shield is applied to the upper part of the pipe in order to be able to regulate the draft inside the riser. When heated, you need to start swinging the pipe and, as soon as possible, remove the dismantled tee.


You can also use a grinder. To do this, you must first cut off parts of the tee, leaving a small piece in the pipe. Then put a medium-sized disk that could freely get inside, and cut through the remaining parts of the structure with a grinder, knocking them out with a hammer.
Dismantling features
And you need to start the replacement with the dismantling of old cast-iron pipes. When working with this material, you should be aware of its fragility. This is a particularly important aspect when dealing with older systems. Therefore, when dismantling, you should use personal protective equipment: goggles, a respirator, gloves and other items.
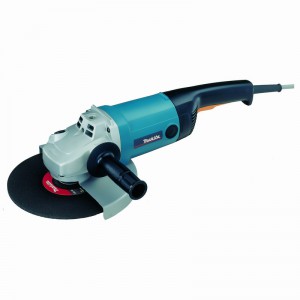
Bulgarian for cutting pipes
Also, when hitting a pipe with a hammer, the flying fragments can not only harm human health, but also clog the sewer. Therefore, for these purposes it is better to use a wooden or rubber butt.
Great if you can dismantle the old system to the riser. If for some reason this cannot be done, you can use an adapter from cast iron to plastic pipe.
As a rule, an angle grinder is used to cut cast iron. A hacksaw can serve as a replacement, but it will be much slower.
Replacement of water pipes
Most often, cast-iron pipes are changed to plastic ones, which have excellent characteristics, are easy to install and use. At the same time, their cost is quite attractive.
Replacement of water pipes
It all starts with the development of a plumbing scheme. And then the work is carried out in several stages:
- It is necessary to turn off the water along the riser, disconnect plumbing fixtures. Next, you can dismantle the old pipes: cut and remove their ceilings.
- Then the next stage of replacement is performed. Pipes of the required length should be cut, taking into account the drawn up diagram, using a pipe cutter. In this case, do not forget about the depth of the fittings. If there is a distance of 30 cm between them, the pipe should be cut 33 cm, adding 1.5 cm of fit for two fittings.
- Welding process. You need to put a nozzle on the soldering iron and heat it up to a temperature that takes into account the diameter of the products and the equipment used.
- The fitting and the plastic pipe must be put on the nozzle, held for 5 to 10 seconds, then removed and connected to each other. In this case, some time is given for cooling - no more than two minutes.
- Welding is performed from the main riser, then the taps are soldered. After that, wiring is carried out for all rooms: toilet, bathroom, kitchen. Pipes can be attached to walls using special clips.
Replacement of sewer pipes
You can also replace sewer pipes with your own hands. Everything is done in the same way as in the case of replacing the water supply. Therefore, you need to start with a diagram.
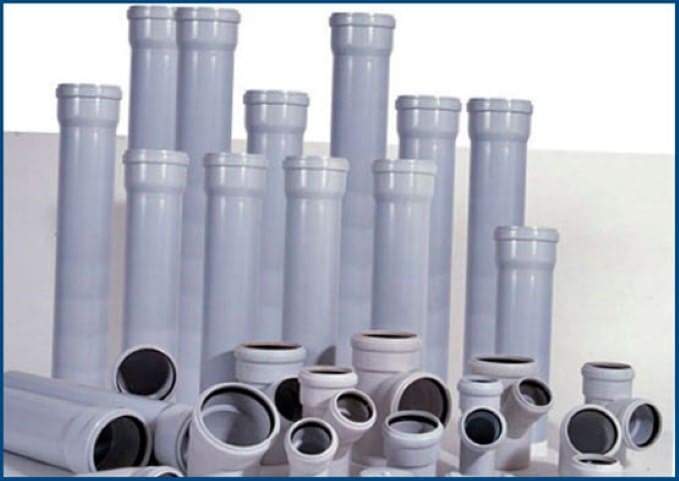
Sewer plastic pipes
And then the steps of the procedure are as follows:
- We turn off the water supply, dismantle the old sewer.
- Pipes that are far from the riser can be dismantled with a hammer. A grinder should be used near the riser. From the socket you need to retreat about 10-15 cm.
- Next, the product needs to be shaken and pulled out of the tee. Care must be taken to ensure that the socket is not damaged.
- Then we insert a rubber cuff into it using a sealant.
- The first water intake point is the toilet. Therefore, installation must begin with this device.It also uses sealant. It is necessary to ensure that there are no fractures.
- For other points in different rooms, installation is carried out similarly.
- When installing, you should make a slope towards the riser - about five degrees.
If the wear of the plumbing and sewer cast iron systems is very high, then it is better to work at the same time. This simplifies installation and reduces preparation time.
Dismantling of old pipes
If the sewer is to be replaced, then it is first necessary to dismantle the cast-iron pipeline
If the sewer is to be replaced, then the cast-iron pipeline must first be dismantled. It is worth noting that this task is not an easy one, since a special cement-based composition was previously used to connect sections of cast-iron pipes. Over the years, the joints do not loosen, but rather become stronger and stronger, so chasing cast-iron pipes with your own hands is not an easy task.


Particular difficulties arise when replacing a common house sewer riser. Moreover, they are not associated with the installation of plastic pipes, but with the dismantling of the old cast-iron system. The thing is that in Soviet times, sulfur filling was used to connect the cast-iron pipes of the riser. As a result, the resulting connection has incredible strength, and it is sometimes very difficult to disassemble it.
Important: to get rid of the sulfur fill, you can use the burning method. To do this, use a gas burner or a blowtorch.
All work must be carried out in a gas mask, since toxic sulfur fumes are released during the burning process.
If you change the riser only near your apartment, then you need to be very careful not to cause the destruction of the pipes that pass through the floors from neighboring apartments. Otherwise, you will have to change them, and this is an additional cost.
The process of dismantling the old sewage system is best done in the following sequence:
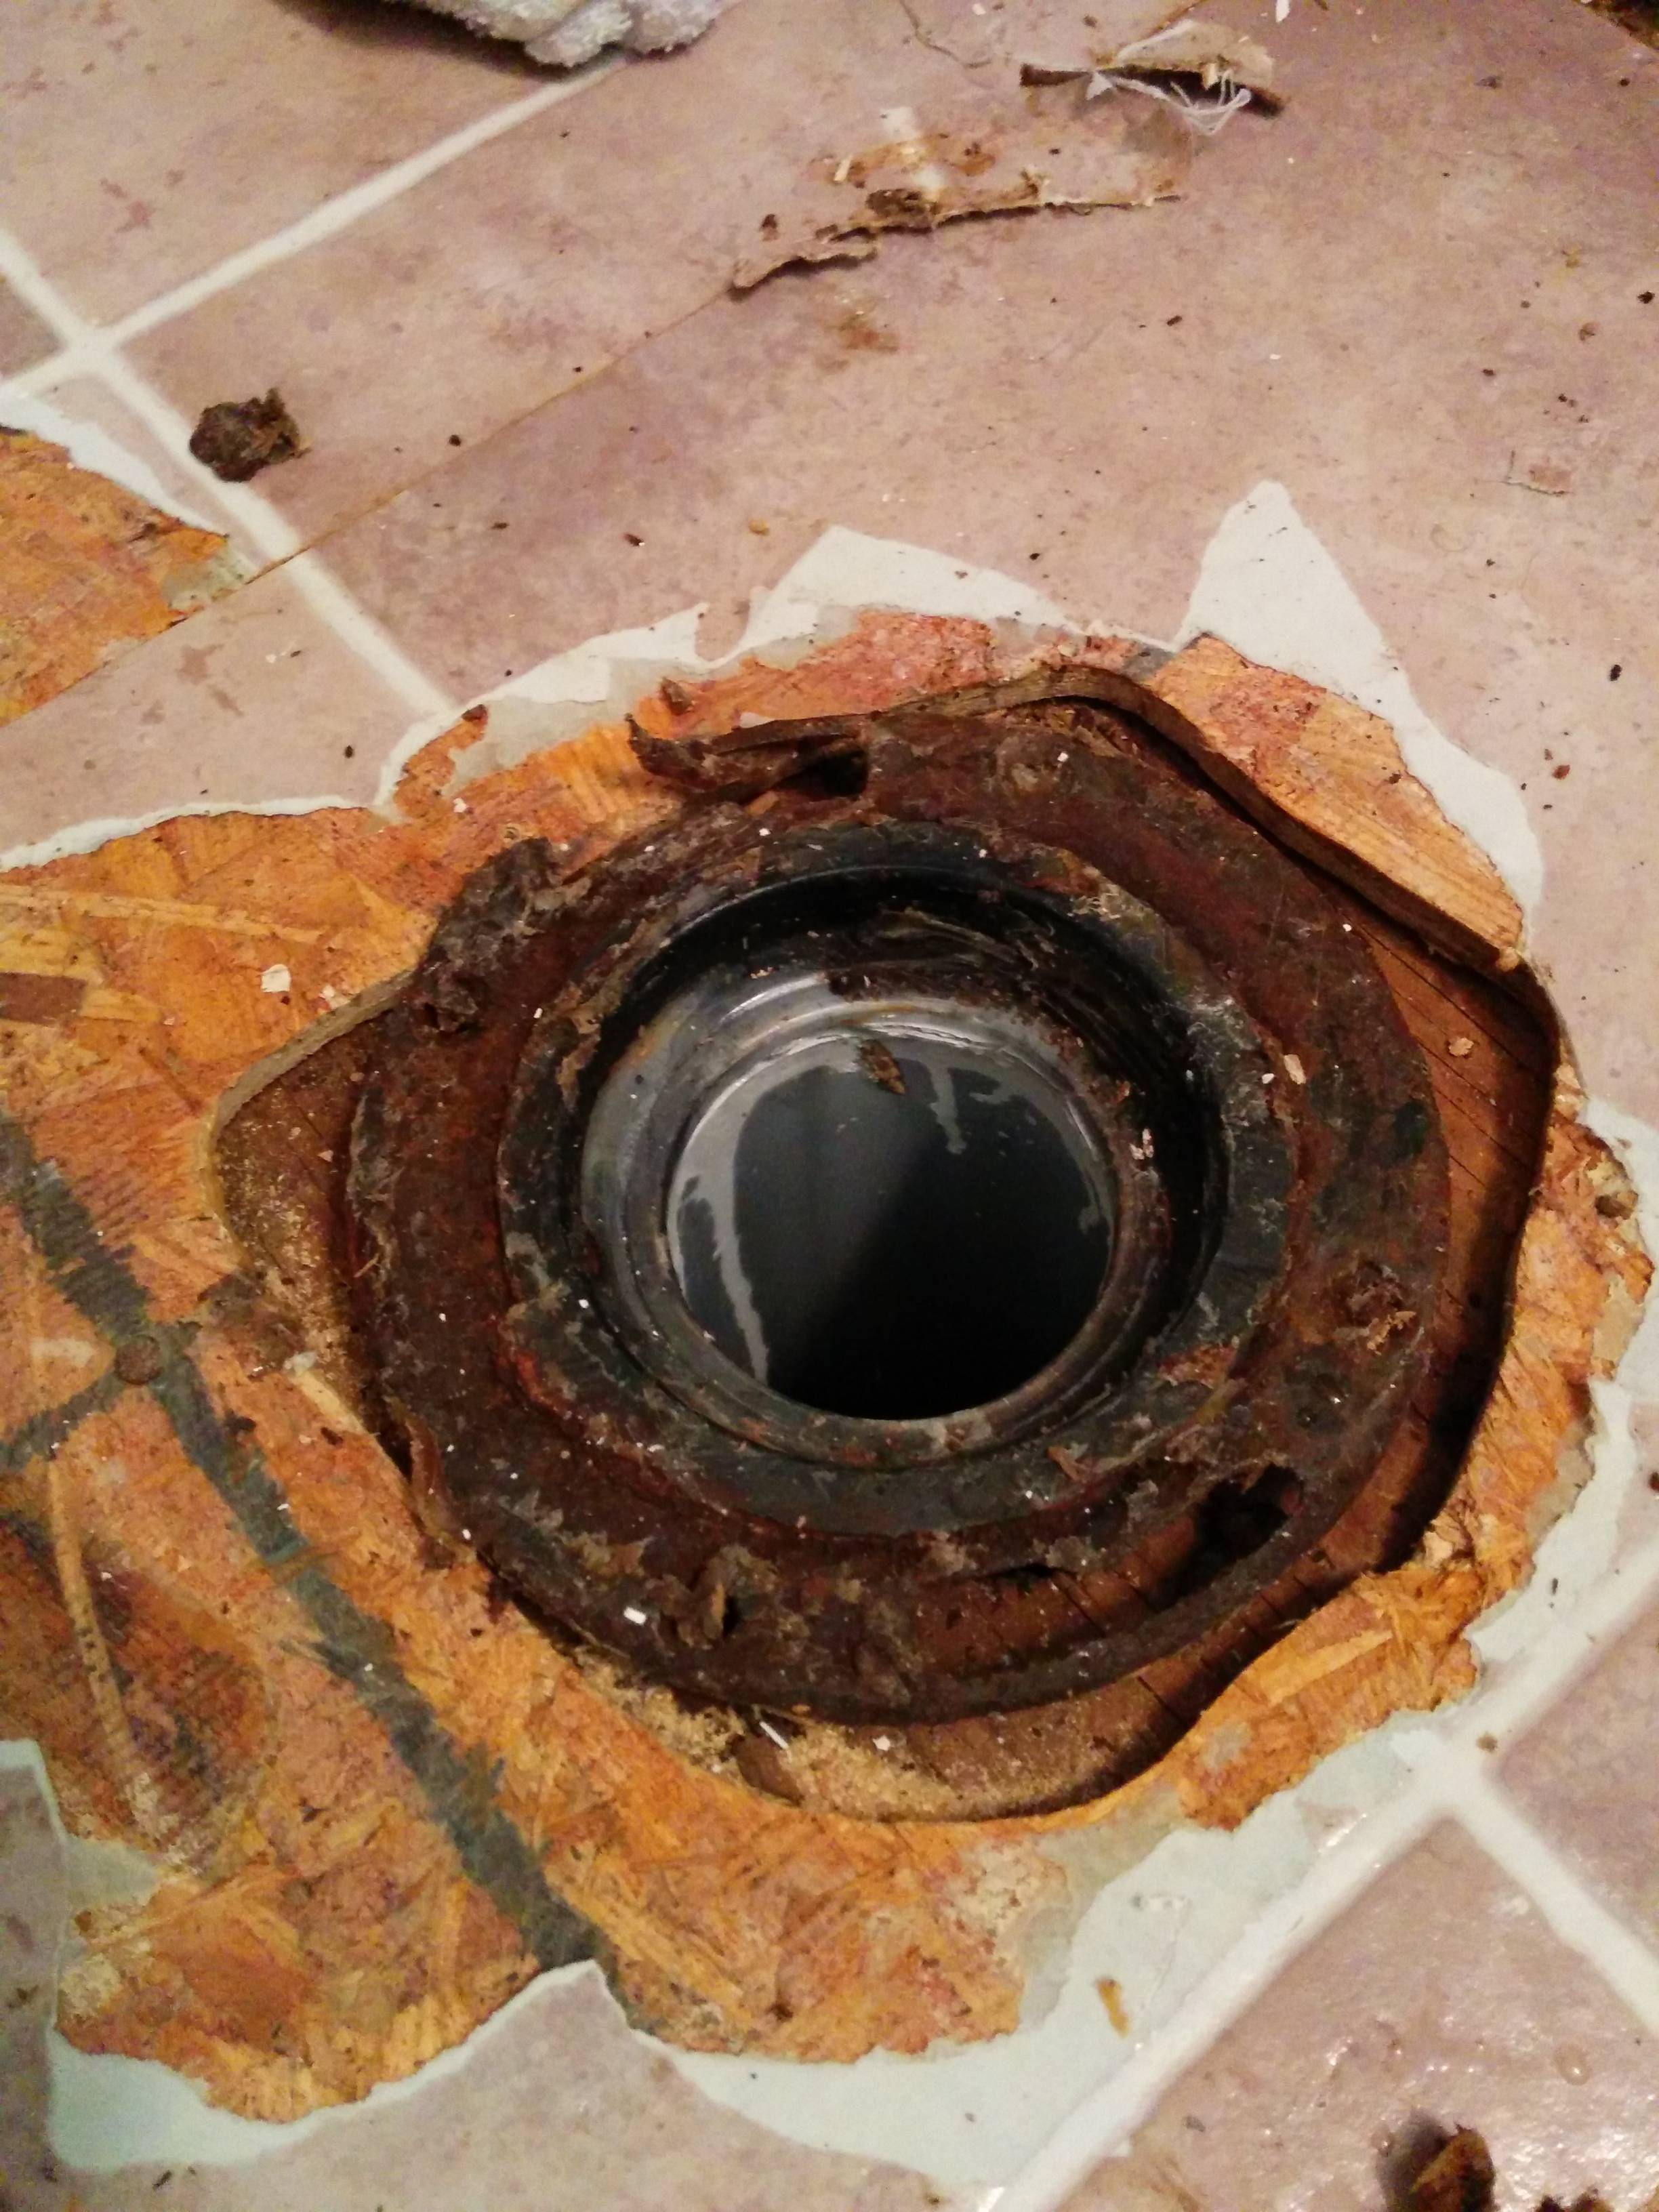
- To prevent damage to plumbing fixtures, disconnect sewer pipes from washbasins, bathtubs, and toilets.
- If the toilet is installed on a cement joint, then it is most likely not possible to carefully remove it to disconnect the pipes, so it is better to immediately break it with a hammer and remove it piece by piece.
- After that, you can start dismantling, starting with short sections of the pipeline. To begin with, the connecting putty in short knees is removed. To remove the putty, you can use a screwdriver or cut the pipes with a grinder.
Dismantling the riser
Before dismantling the riser, it is necessary to warn all neighbors from above so that they do not drain water into the sewer
Before dismantling the riser, it is necessary to warn all neighbors from above so that they do not drain water into the sewer. For reliability, you can turn off the water. To disassemble the old riser, you will need:
- pipe cutter or grinder;
- chisel for removing individual parts of pipes;
- a screwdriver will help to open the connections;
- a hammer will allow more loosening of the system segments;
- crowbar and nail puller;
- with the help of a perforator, pipes can be easily embossed;
- polyethylene film for plugging sewer holes;
- the grinder will prepare the remaining sections of the old pipes for the installation of a new system;
- individual protection means.
Further actions for dismantling the riser are performed in the following sequence:
- The upper file with a grinder should be performed, stepping back from the flow of 100 mm, and when making the lower file, we retreat 80 cm from the tee. Both above and below, two files must be made, the depth of which should not exceed half the diameter of the pipeline.
- We apply a chisel to the upper file and hit it with a hammer. Then we do the same with the bottom notch. It is worth hitting with sufficient force to split the pipe along the notch. After that, you can easily remove the middle section of the pipeline.
- Using plastic wrap, plug the hole in the pipe sticking out from above.
- To disassemble the lower segment of the riser with a tee and fittings, you should use a crowbar. Using this tool, you need to loosen the connections in the tee. If this does not help, you will have to use a perforator to break the cement at the junctions. Now you can remove the tee.
Important: if the punch does not help to remove the tee, you will have to cut the fitting with a grinder. In this case, it is necessary to deviate from the socket at least 30 mm
- Cast-iron pipes sticking out from above and below must be prepared for the installation of a plastic riser. For this place, they are cleaned with a grinder, all contaminants are removed.
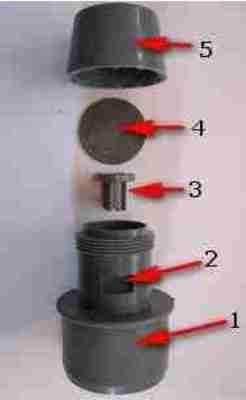
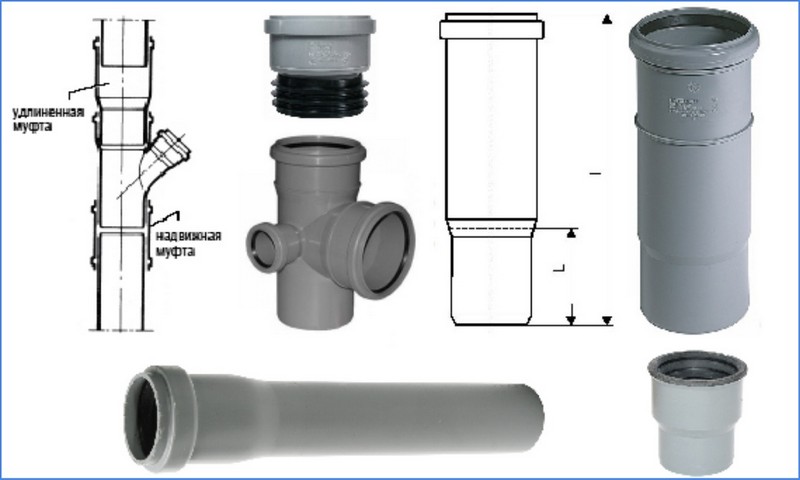
Types of rubber cuffs for connections
When carrying out repairs in houses of old buildings, it often becomes necessary to make a tap from some modern plumbing fixture to a cast-iron sewer riser.
For the convenience of performing work, there are several types of PVC adapters, using them, you can lay a pipeline of any configuration.
Sleeves for connection are sold in specialized stores
Types of PVC adapters:
- Transition clutch.
- cross;
- Tee;
- bypass;
- Compensator.
But when installing pipes, it is often necessary to connect pipes from different materials. Often you need to switch, for example, from a cast iron to a plastic pipe. Then the adapter will require a rubber insert (cuff).


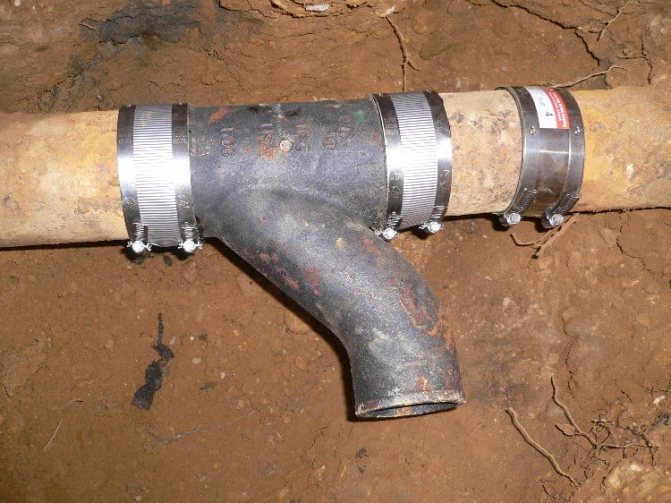

Types of rubber cuffs:
- Cuff inner transition. It is usually inserted into the socket of a cast-iron pipe. Then a plastic pipe of the required diameter is inserted.
- Outer cuff. Its cross section must correspond to the diameter of the cast-iron socket, then there will be no need to use a sealant.
If there is no socket in the sewer, an external adapter will be required. It can be used to connect. Then it will be possible to continue the installation of the rest of the plastic sewer system. Elements of plumbing, without which it is almost impossible to lay communications, are adapters for pipes for water supply, heating and sewerage. All problems arising during the repair process for connecting and distributing pipes of different diameters are solved practically without restrictions with the help of PVC adapters.
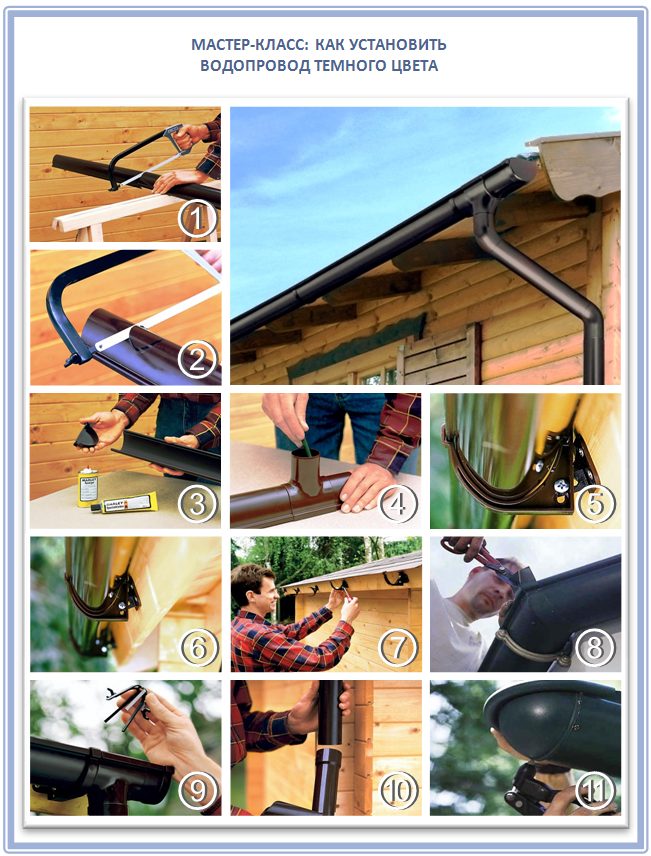
Connection step by step
Let us consider in more detail the work on the flange connection with our own hands. First of all, it is necessary to prepare for the operation: determine the dimensions and types of flanges, materials, and select a tool.
A set of tools and materials
To dismantle the cast-iron pipeline element, you will need:
- a mallet with a rubber nozzle (you can easily split brittle cast iron with an ordinary hammer);
- grinder for cutting cast-iron parts of the pipe.
For the installation of the structure you need:
- welding machine;
- pipe cutter for plastic;
- plastic pipes;
- flange;
- appropriate seal;
- crimp sleeve for polymer pipes;
- to clean the end of a cast-iron pipe - a file or a cleaning disc for a grinder;
- screwdriver with sockets for bolts or socket wrenches of a suitable size.
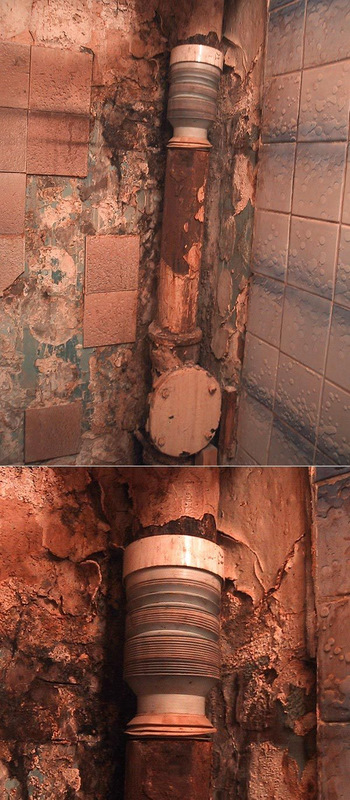
Work progress
- Bulgarian cut off the desired size of the end of the pipe.
- They clean it from notches with a file or a special disk using a grinder.
- A flange is welded to the end of the cast-iron pipeline.
- The compression sleeve is put on the plastic part of the structure, and its flange part is bolted to the flange of the cast-iron pipe. A sealing gasket (ring) is placed between them.