- Requirements for a built-in hood and its placement
- Technical parameters of built-in hood
- Principle of operation
- Shape and design
- By air handling power
- Location
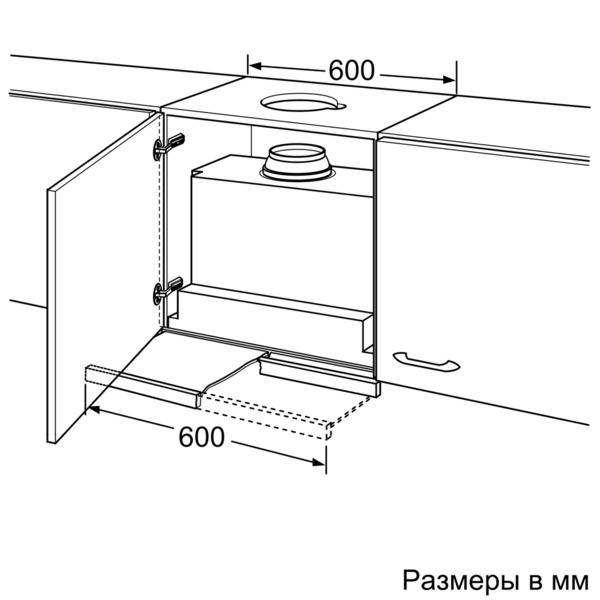
- The size
- Rules for the location of built-in hoods in the kitchen
- Special recommendations for corrugation installation
- Performance
- Step by step installation instructions
- Prices for laser levels
- Where to do
- Noise level and hood performance - what does it depend on?
- Features of the design and choice of built-in exhaust device
- Built-in hood
- How to install on your own
- Features of choosing an air duct
- TOP 5 best built-in hoods
- Proper installation of a kitchen hood with your own hands
- Installation steps
- Why do you need a kitchen hood
Requirements for a built-in hood and its placement
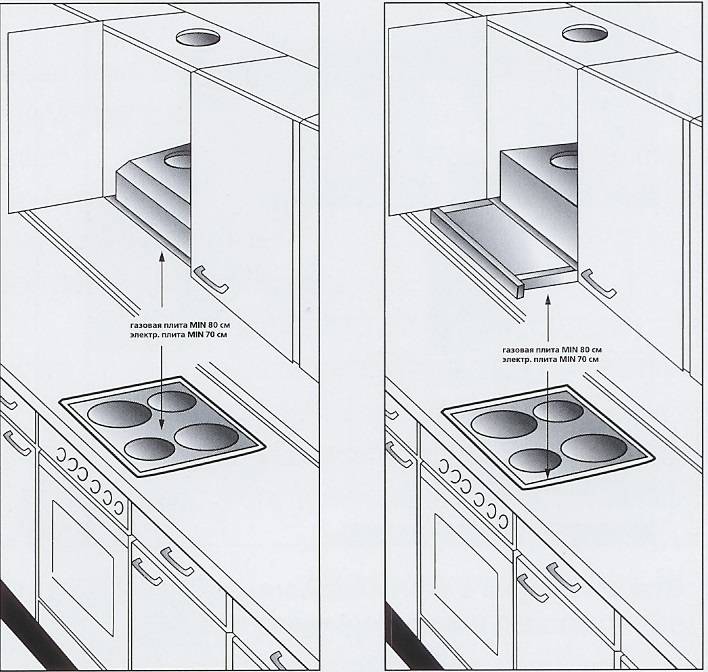
Based on the rules and regulations for the installation of electrical appliances, the hood is mounted directly above the stove.
Installation is carried out at a height of 60-80 cm from the stove, which meets the requirements of fire safety.
Depending on the area of \u200b\u200bthe room, the power of the ventilation equipment is selected.
The dimensions of the device must correspond to the required parameters of the wall cabinet.
Technical parameters of built-in hood
To choose the right ventilation equipment for the kitchen, you need to understand the design features of the proposed models.
Principle of operation
Units are divided into several types.
- Flow-through, with the help of air ducts, they are connected to the house ventilation system.
- Recirculation (autonomous), purify the air with the help of replaceable filters.
- Combined, use two methods of air purification.
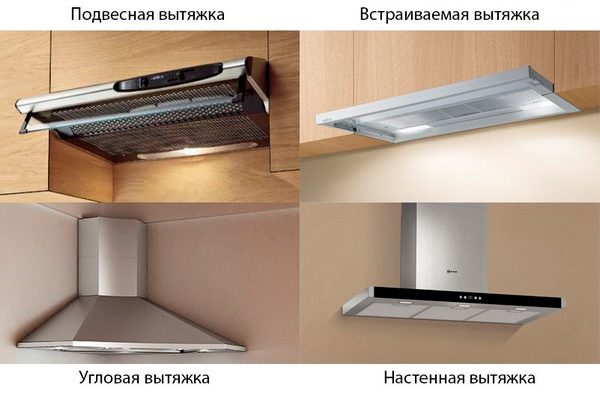
Shape and design
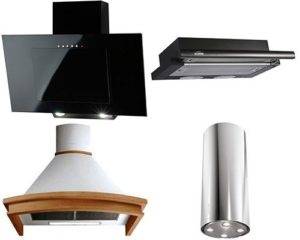
- Suspended. Such units are installed separately or under the kitchen cabinet. They can work when connected to a central ventilation system or standalone.
- Dome. Powerful, relative to other designs, ventilation equipment, designed for large kitchens. Works only if there is a central ventilation system.
- Island. T-shaped hoods, usually of high power, require connection to the house ventilation system.
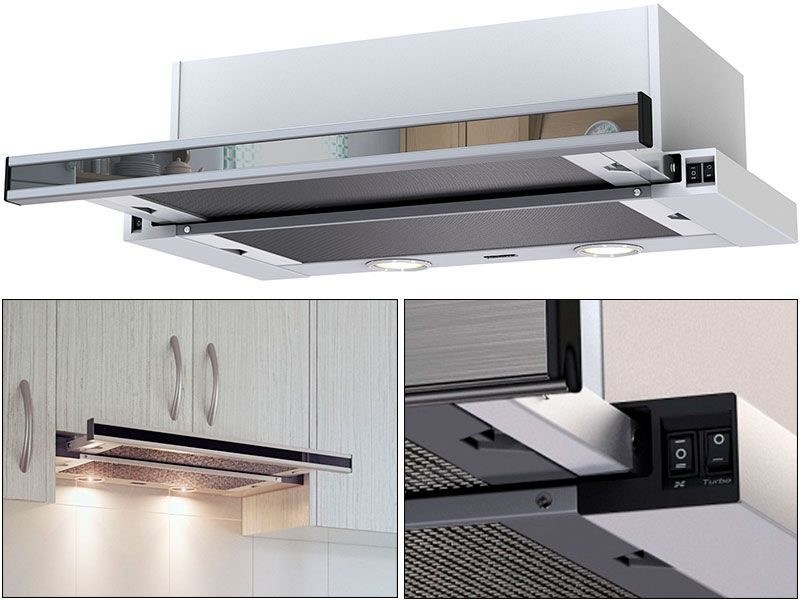
- Embedded. A popular type of equipment, has versions with different capacities. Installation inside the furniture allows you to fit the unit into the interior of the kitchen.
By air handling power
Ventilation equipment is divided as follows.
- Low-power installations - up to 700 cubic meters / hour.
- Medium productivity - up to 1500 cubic meters / hour.
- Powerful - over 1500 cubic meters / hour.
The exact figures for power sharing are not regulated by regulatory documents, so the performance value is taken conditionally.
Location
Built-in units are horizontal and vertical.
More in demand for operation and installation in the kitchen is a horizontal version.
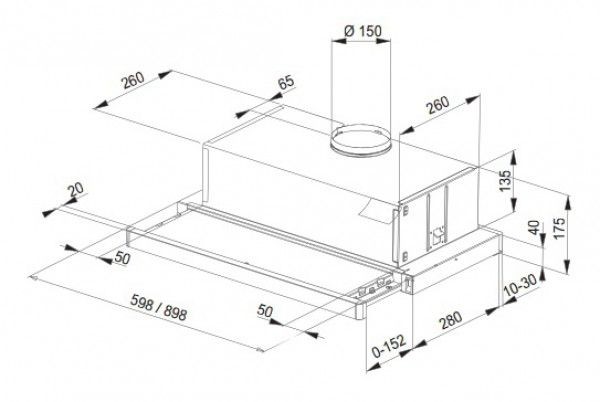
The size
Built-in hoods are 45, 60 or 90 cm wide. These values correspond to the standard dimensions of hanging cabinets.At the same time, the actual width of the outer part of the unit is made a few millimeters smaller for ease of installation with adjacent shelves.
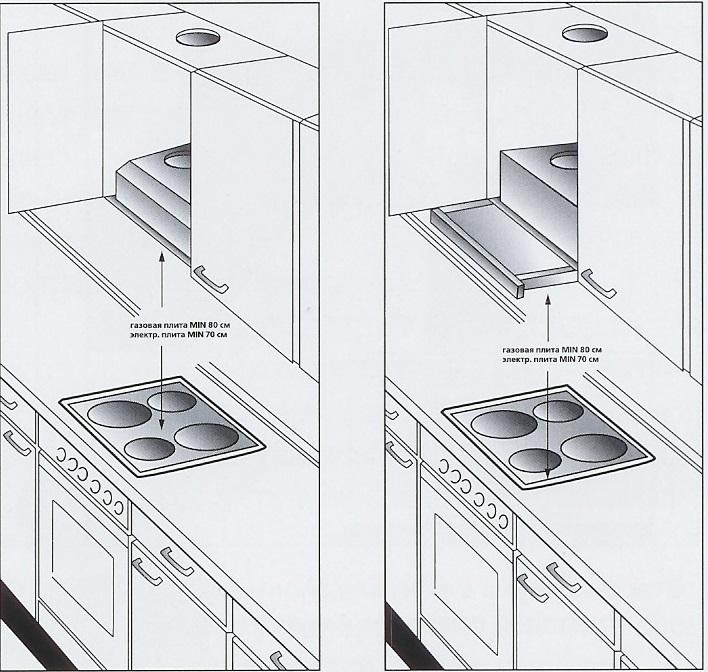
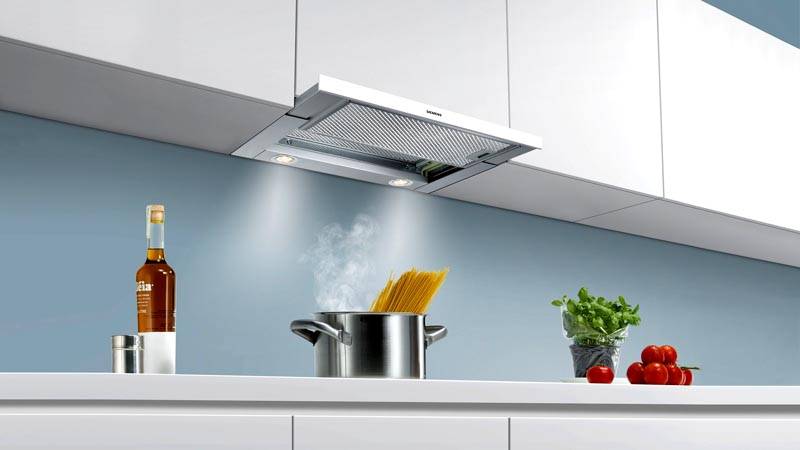
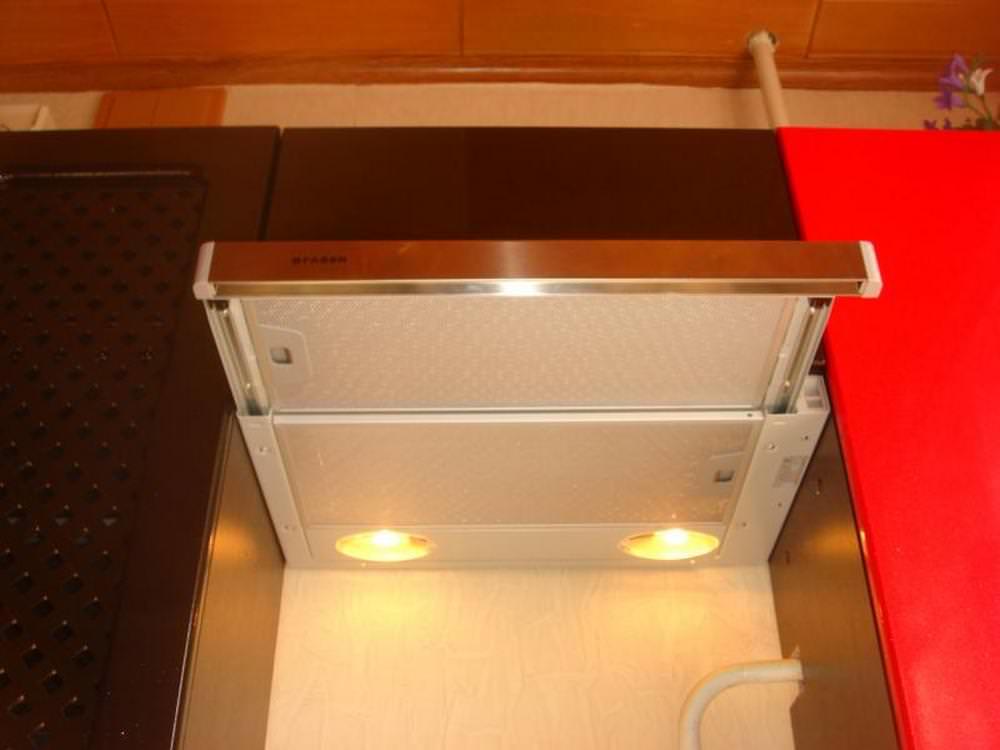
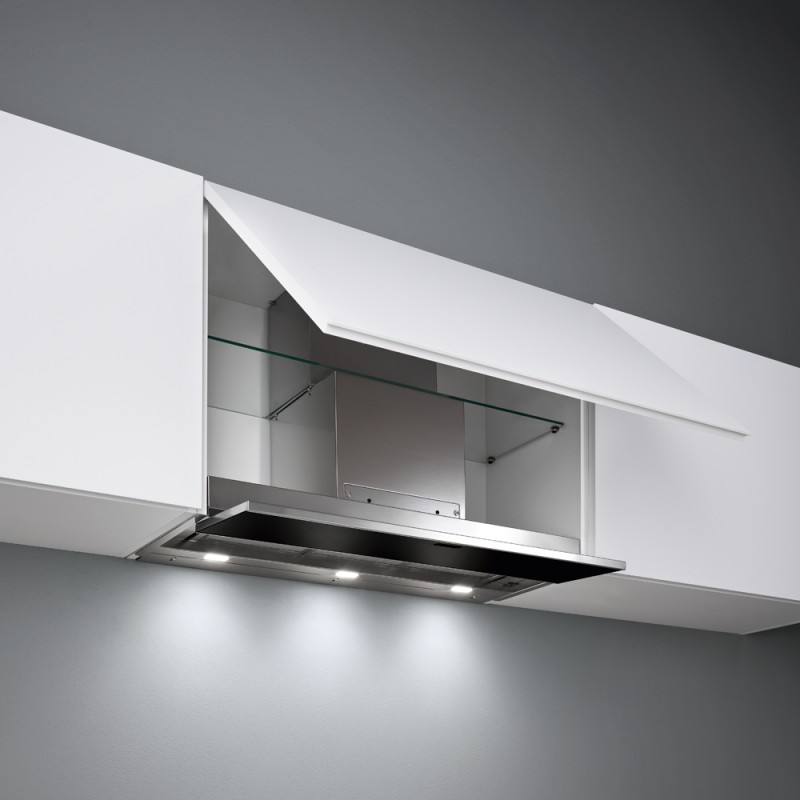
Some models of built-in hoods have a telescopic retractable air intake plane. This design allows you to increase the lower working area of the equipment in the cooking process. The comfort of using such a design is considered by the consumer individually.
Rules for the location of built-in hoods in the kitchen
In this case, you can correct the location of the plate. It should be as close as possible to the opening of the house ventilation system. Removing to the side, even by several tens of centimeters, will entail a complication in the design of the air outlet channel, which will occupy the internal space of the suspended shelves.
The lack of central ventilation at home allows you to move the stove and built-in hood to a convenient place.
The main requirement of the hood is the need to install directly above the stove.
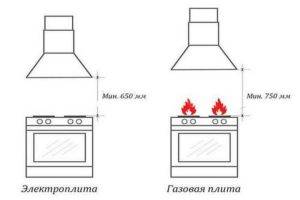
The installation height depends on the type of slab and has limiting minimum allowable values:
- for gas stove 75 cm;
- for electric - 65 cm.
To connect to the electrical network, a 220 V socket with grounding must be installed near the installation site of the hood. All kinds of extension cords, terminal blocks or twists must be excluded for the safe connection of ventilation equipment. The socket is mounted inside the kitchen cabinet or next to it.


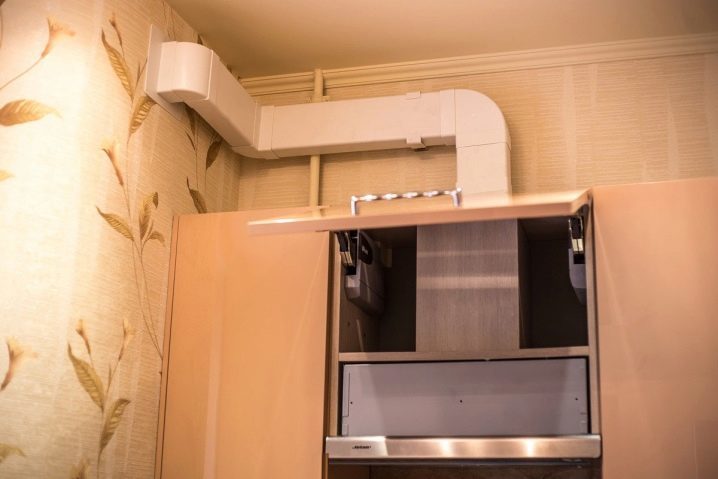
Special recommendations for corrugation installation
- If the vent is located above the stove, then an adapter will be needed to connect the hood and the ventilation system.
- If the distance is large, an air duct is required in the form of a plastic pipe, preferably with a circular cross section. Often use corrugated. You may need elbows and an adapter to connect.
- During installation, the corrugation must be stretched so that there are no unnecessary folds. They increase the noise during the operation of the air cleaner.
- The corrugation is fixed on the branch pipe with the help of clamps.
- Air can be vented optionally to the ventilation shaft. Often the owners of houses make a hole with a puncher in the wall and bring the pipe out into the street.
In order to make the correct size hole in the wall, it is necessary to measure the diameter of the vent at the back of the hood. Using a saw, an even rounding of the hole is attached. The inner insulation is removed and the duct plug is attached.
In principle, that's all the advice on how to install a built-in hood. Naturally, it is convenient to carry out installation simultaneously with the installation of a new kitchen set.
Performance
For a favorable atmosphere, it is not enough to correctly select the dimensions of the equipment relative to the stove, you also need to decide on the performance.
This indicator is measured in m3 / h. The calculation takes into account the area of \u200b\u200bthe kitchen and the height of the ceilings. According to the norms, the air should be updated 10-12 times per hour. It is required to increase the resulting number by 20-30%: this is considered a power reserve.
So for a room of 12 square meters. m and a ceiling height of 2.7 m, a capacity of at least 500 m3 / h is required (12 x 2.7 x 12 x 1.3 = 505.44).
In order not to have to make complex calculations yourself, see the table.
Step by step installation instructions
To complete the work you will need:
- jigsaw;
- screwdriver;
- perforator;
- Ruler and pencil;
- laser level.
Prices for laser levels
Laser level
It is also necessary to prepare a cabinet in which the hood will be installed.
Hood installation:
-
According to the template that comes with the delivery, holes for fasteners and the center of the outlet for the air duct are marked.
Hole preparation
-
A drill with a 5 mm drill drills holes for self-tapping screws and for cutting a hole with a jigsaw. It is cut exactly along the line marked with a compass from the center marked on the template.
Cutting a hole for an air duct
- An adapter is put on the hood for the subsequent connection of the duct.
-
The hood is inserted into the cabinet, fastened with screws into the prepared holes, and the adapter is inserted into the outlet.
Hood mount
- If you plan to install a shelf, it is attached to the top of the hood and at the same time fixed to the walls of the cabinet.
- Connect the power supply, install filters.
-
Install the connecting duct. If a flexible metal conduit is used, drill several holes for the clamps and fasten it to the wall with their help. Installation of plastic piping is more difficult, as you will have to cut straight sections exactly to the size of the wall, insert corners or bends and cut straight sections again. The process is simple, but requires precision and accuracy.
Air outlet installation
Silicone sealant
-
The air duct is connected to the ventilation outlet using a special adapter or ventilation grille.
Hanging a locker
The technology for mounting the hood depends on its design, features and other parameters.Deviations from the described installation process are possible due to the type of kitchen set, the configuration of the room or other factors. The installation instructions are attached to the hood, you should carefully read it and learn the features of the work. The main condition for success will be accuracy and attentiveness. If everything is done correctly, the result will please the user and his family members.
Where to do
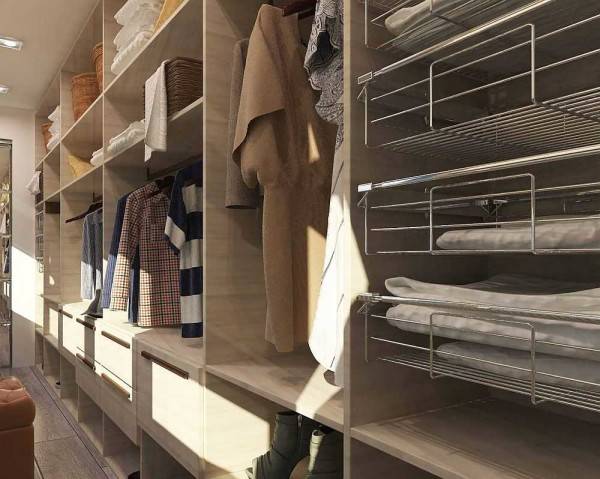
Even in small apartments there are “appendicitis” that cannot be used normally. Here in such a place you can make a dressing room.
Another popular option is storage. In this case, everything is generally simple. You remove everything superfluous, change the doors and install the appropriate content: racks, racks, baskets, shelves.


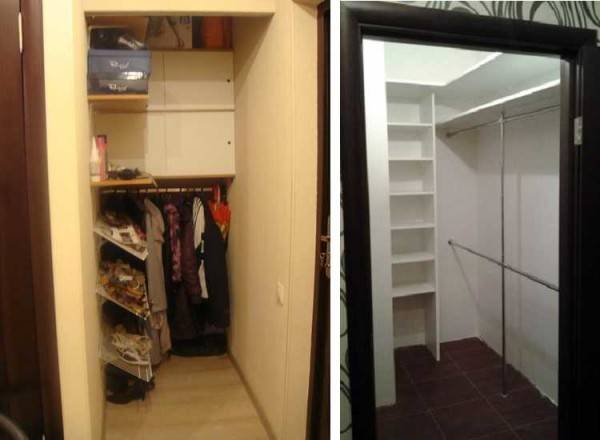
Wardrobe room from the pantry
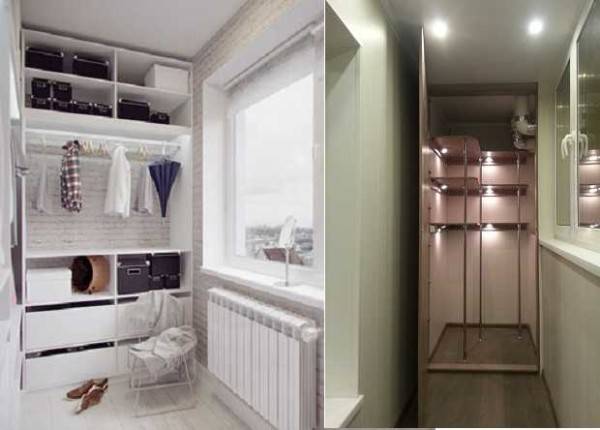
If there is nothing like this in the apartment, they fence off part of the room - the end or corner - you need to look at the layout. The corner dressing room is good because it allows you to use the most difficult areas to equip, namely the corners. Especially if there are closely spaced doors in two adjacent walls. This zone is considered “dead”: you can’t put anything there except for a small corner shelf: everything will interfere. Approximately the same option - two windows or a window and doors.
Corner dressing room
If the area turns out to be too small, it is possible to increase it a little, making the wall not even, but with the middle extended a little. The area of \u200b\u200bthe room will not greatly decrease from this, but much more things can fit.

A way to slightly increase the area
They are also made on the loggia - by making part of the glazing opaque or by building a wall. Only here you can’t do without warming - it’s unpleasant to put on cold things in winter.
Dressing room at the end of a balcony or loggia
The second option is suitable for wide loggias. In them, shelving can be placed along a long wall.
Balcony option
In the corridor or hallway, a corner or “appendicitis” is also blocked out, if the layout allows. Here everyone can decide only on the spot: there is a place for this or not.
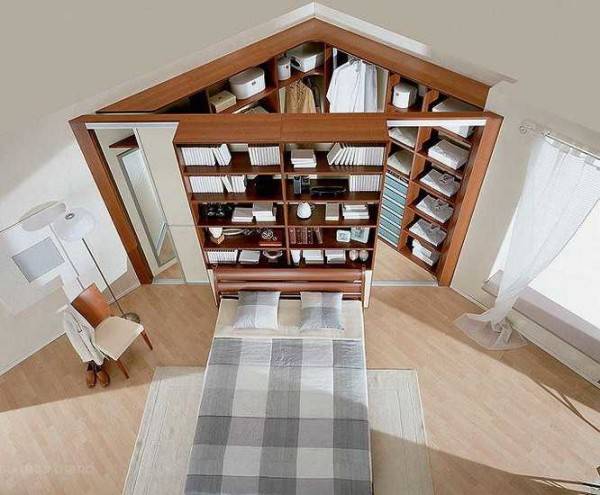
Most of all, a dressing room is appropriate in the bedroom. It’s just the best place to store things: in the sense that it’s more convenient to dress here. Therefore, for these purposes, part of the room is fenced off. In this case, a partition is needed and most often it is made of drywall. This technology has long been known and worked out to the smallest detail. It won’t take much time even in the absence of experience: a maximum of two or three days for assembly and finishing.
If you make a partition from GKL or GWP in accordance with all the rules, you will need double cladding, and these are “eaten” centimeters, or even meters of area. Therefore, most often they are sheathed only on the outside, but with two sheets with overlapping seams. When assembling the frame, do not forget to make reinforced racks for fastening the door. With a single cladding, bare profiles remain inside, but it is convenient to hang shelves-baskets for things on them. If you plan to do so, then take them with a thick wall: so that they normally hold weight.
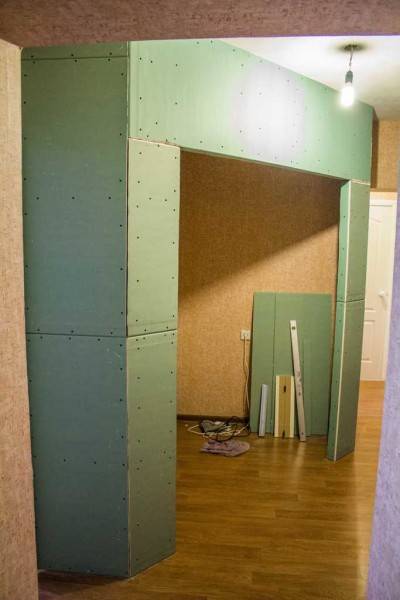
Drywall partition for dressing room
The partition can also be made from laminated chipboard or OSB, MDF boards. This is an option for those who do not like to mess with putty. But you need to choose a lamination that will fit into the interior without any problems.
Development
Noise level and hood performance - what does it depend on?
The most important thing is efficiency, that is, the amount of air that the hood can clean.It is calculated in cubic meters per hour (m3/h). Properly selected equipment is able to filter the air in the room at least six times per hour. Therefore, before choosing a model, you need to calculate the cubic capacity of the room (area x height).


In the kitchen connected to the living room, you also add living room area to the cubic capacity. For example, in a kitchen with a volume of 25 m3, the optimal performance at the initial capacity will be 150 m3 / h, at the average - 225 m3 / h, and at the maximum - 300 m3 / h.
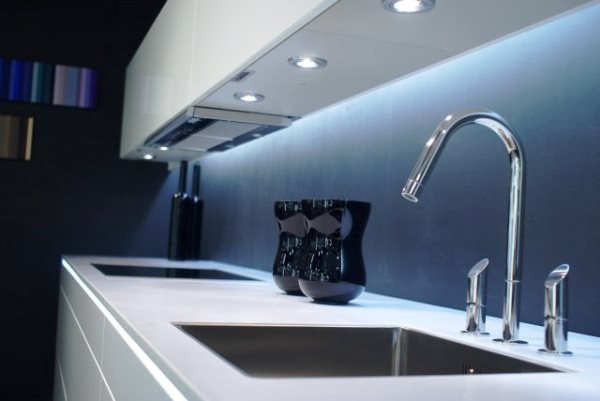
Second: volume. The hum and annoying sounds of equipment can effectively hinder food preparation and sometimes even drown out conversation in the kitchen. Fortunately, the permissible noise level of the hood is calculated - at medium power it should not exceed 50 dB. And finally, lighting. It is best to choose a model with LEDs - they will last you longer and also consume less electricity.
Features of the design and choice of built-in exhaust device
Efficient circulation throughout the house and in the kitchen in particular is impossible without the installation of special exhaust technology
In this case, one should take into account the size of the room, the interior and decide on priorities: is it important to get productive or low-noise equipment. A built-in hood combines both requirements, this is its main advantage.
However, a significant disadvantage is the inflated price, which is due to design features. So, the exhaust device of this variety is equipped with a turbine, which practically does not produce noise, but at the same time allows the equipment to work efficiently.

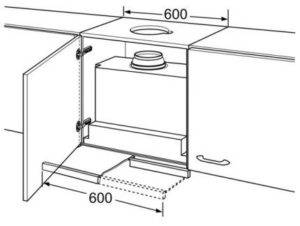
Built-in hoods for the kitchen can have different overall dimensions, which makes it possible to choose almost any model for cooking surfaces with a width of 45, 50, 60, 80, 90 cm. The most common type of such hoods is horizontal models that are attached to a wall cabinet or box. But there are also built-in vertical kitchen hoods, which are mounted directly in the wall. However, this will require creating a niche, which is a time-consuming and sometimes costly process.
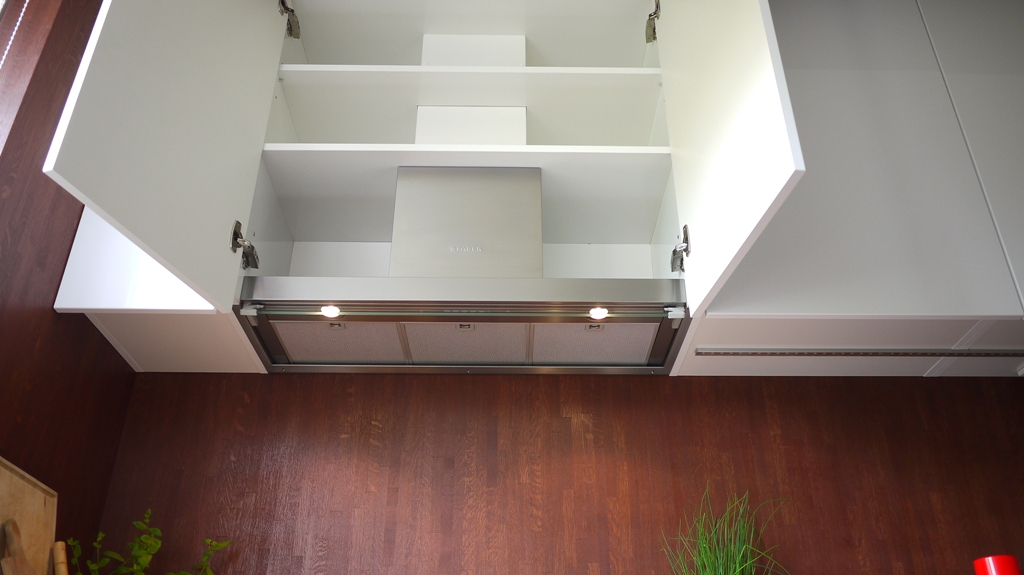
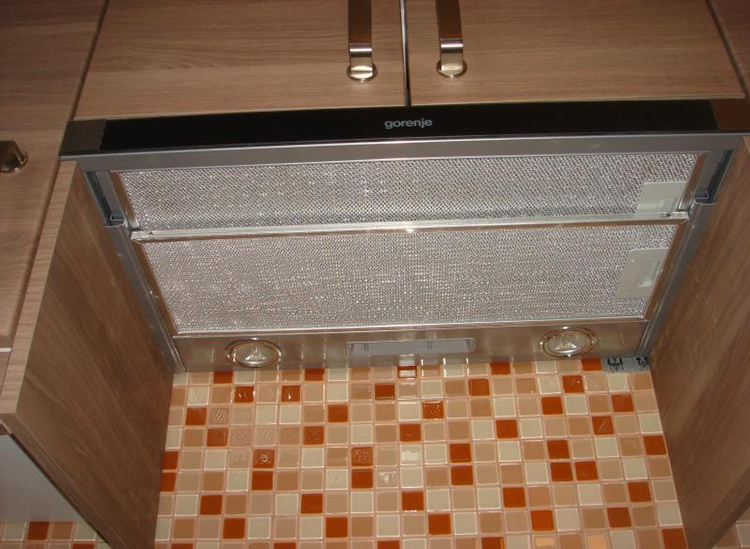
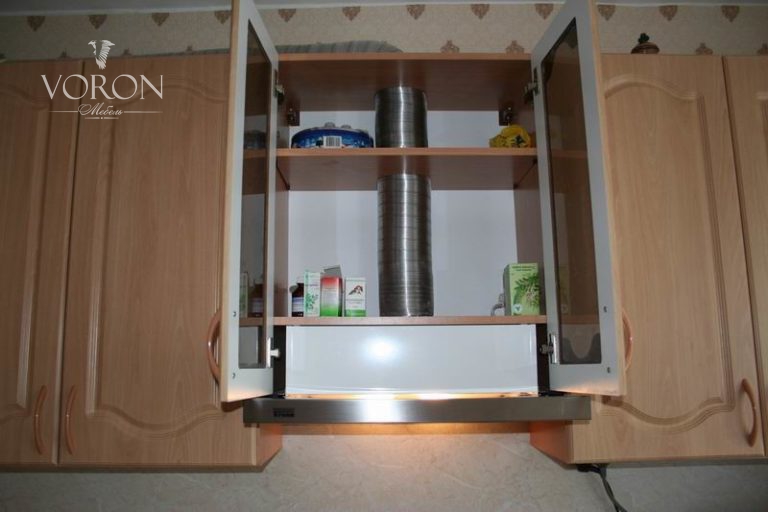
All models of built-in exhaust technology contain a grease (or grease) filter as one of the elements. Built-in extractor cupboard over stove starts work at the moment when its retractable part is located directly above the stove. To do this, the design is equipped with movable elements. The grease filter is built into the retractable part of the device. There are models that operate in two modes of operation: recirculation and exhaust. The first of these requires a carbon-based filter.
In addition to everything, an equally important feature is the compliance of the wall cabinet with the dimensions that the built-in hood for the kitchen has 60 cm. Otherwise, you will have to make a special box to hide the built-in appliances inside
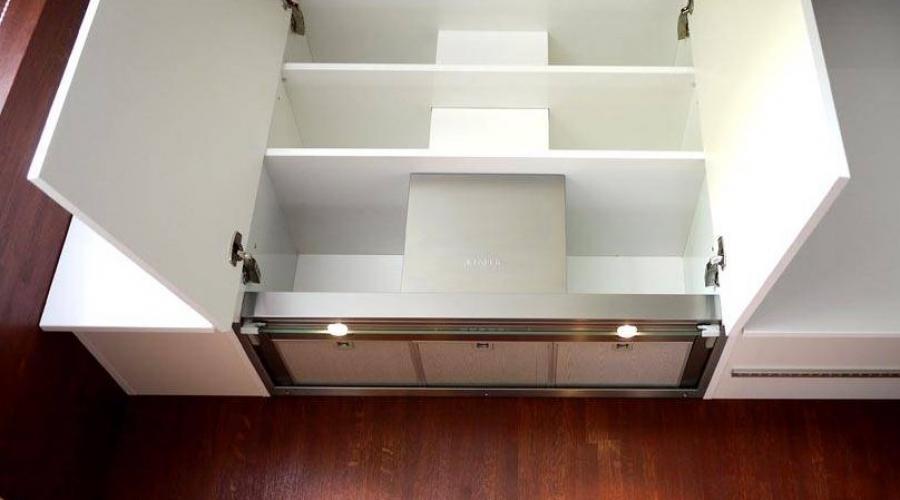
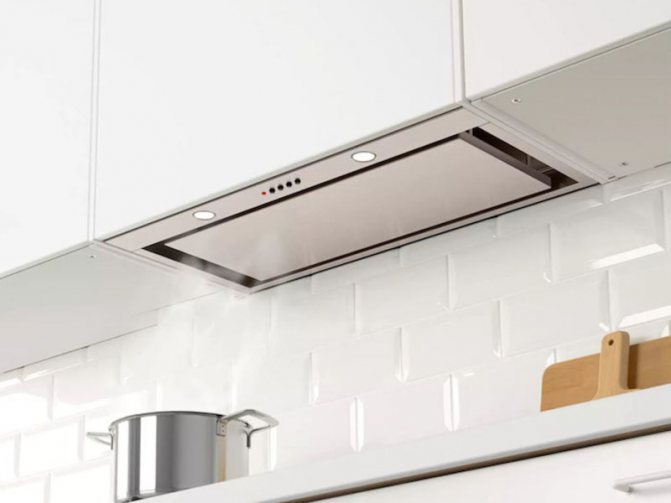
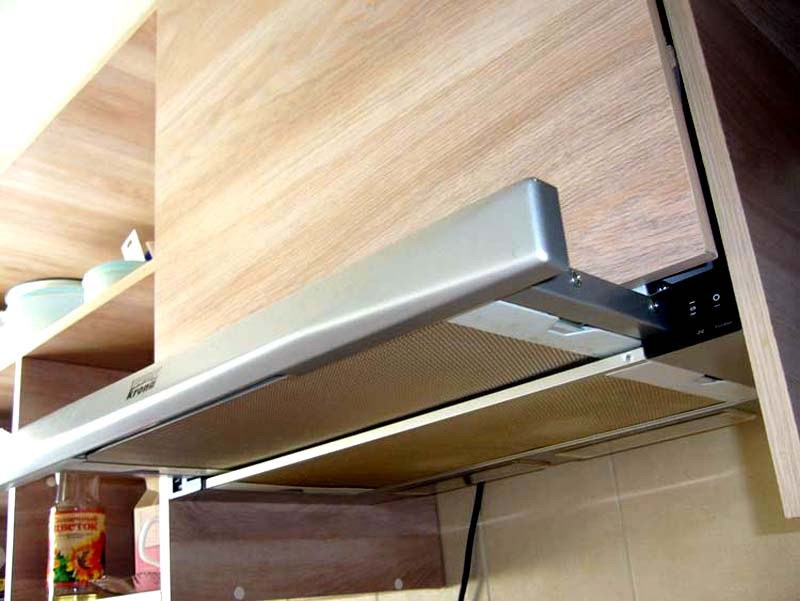
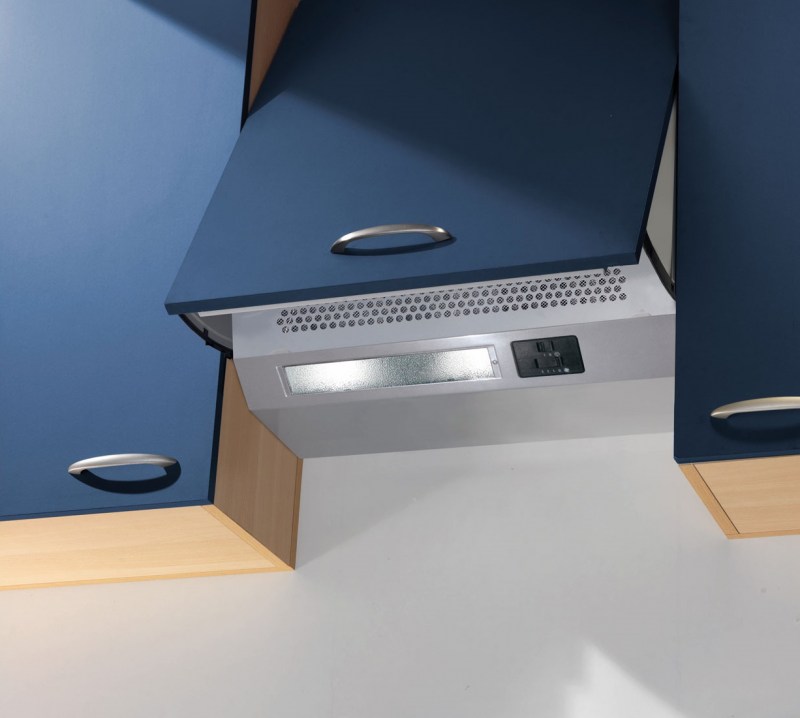
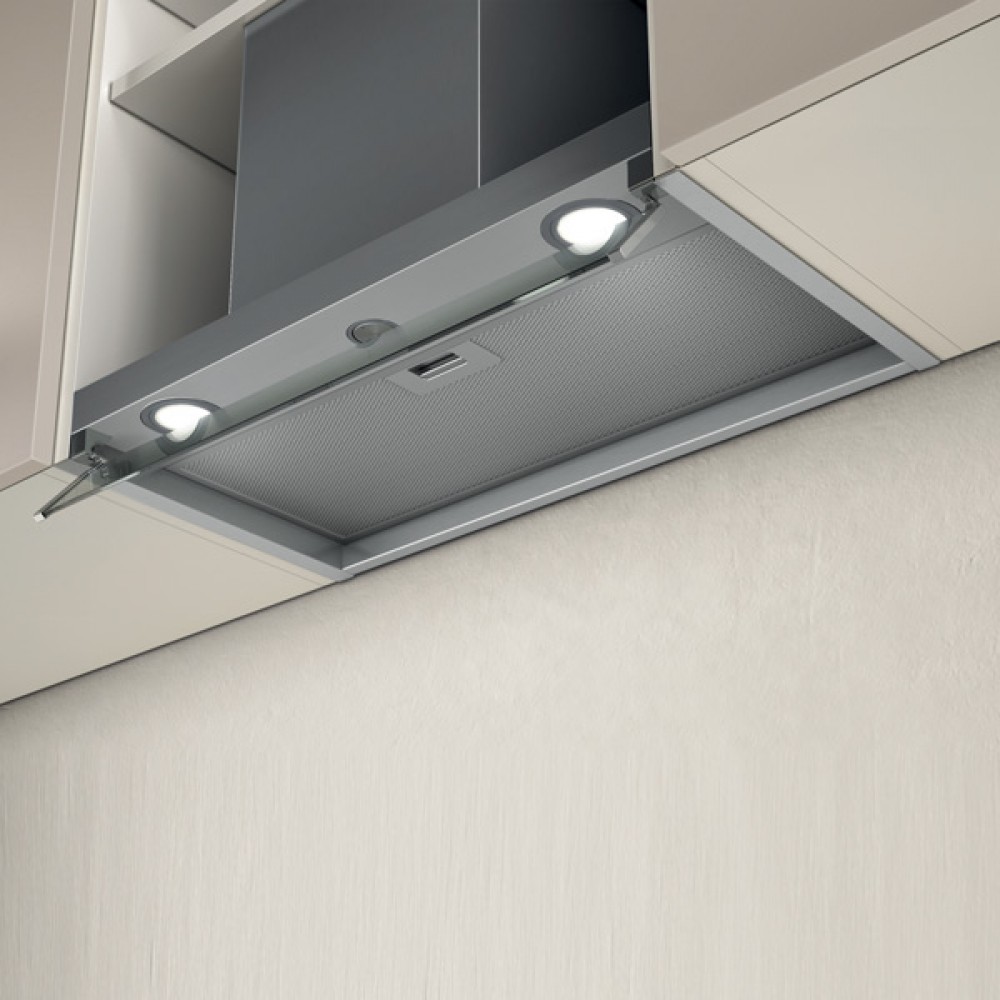
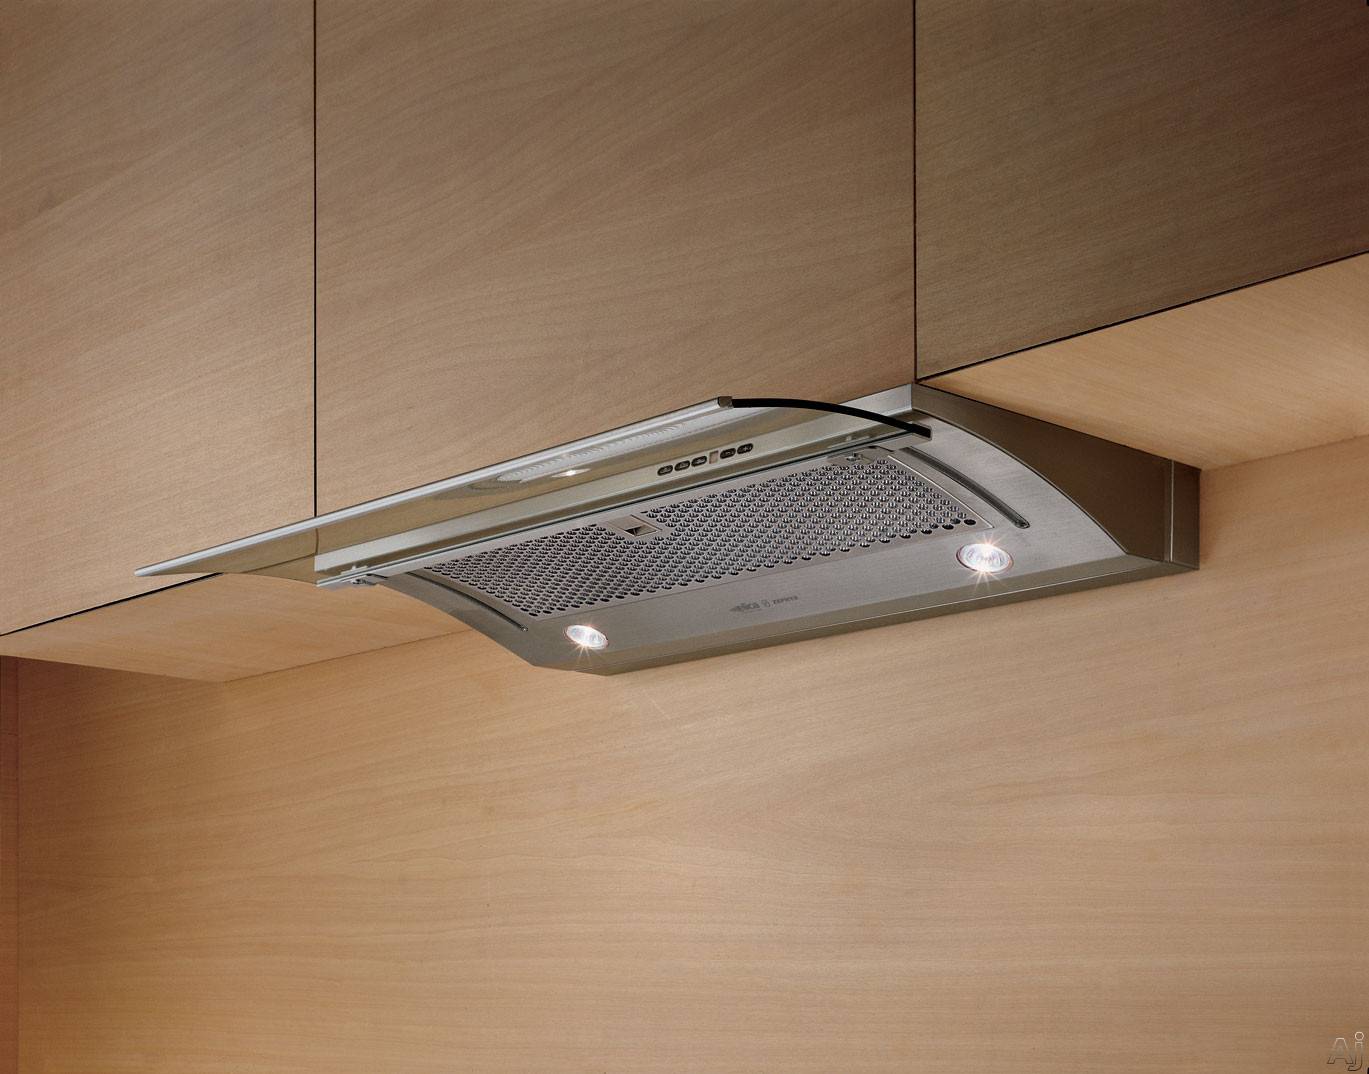
Built-in hood
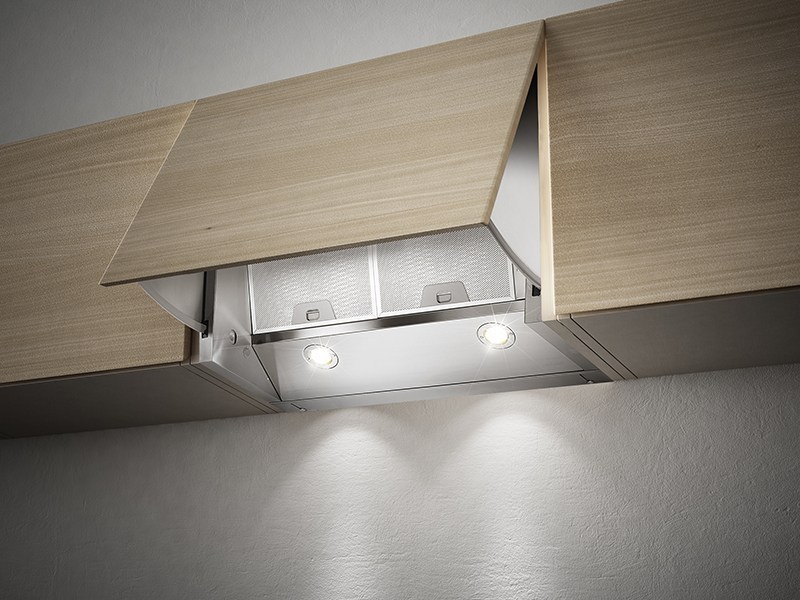
 Built-in hood option
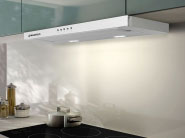
A built-in hood in the cabinet, as well as other types of equipment - a kitchen sink, stove or hob, oven and dishwasher - are installed in the furniture in such a way that it does not stand out from the general ensemble.
The hood body is completely or partially closed by a special cabinet. Inside the case there is a fan and filters, and outside - a working surface with an air intake, a coarse filter, lighting fixtures and a control panel.
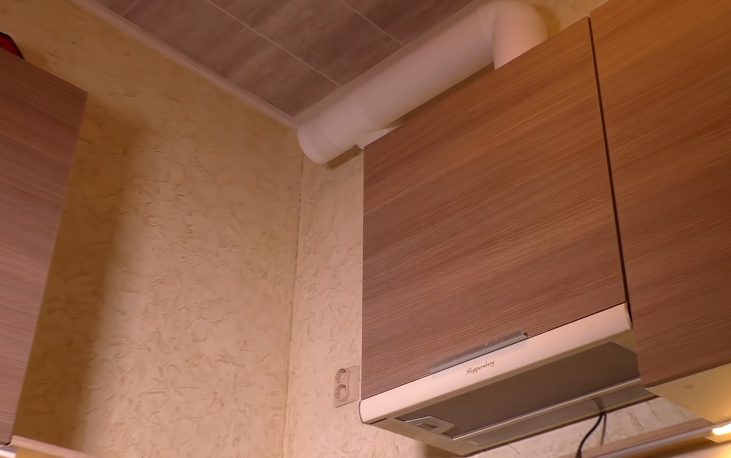
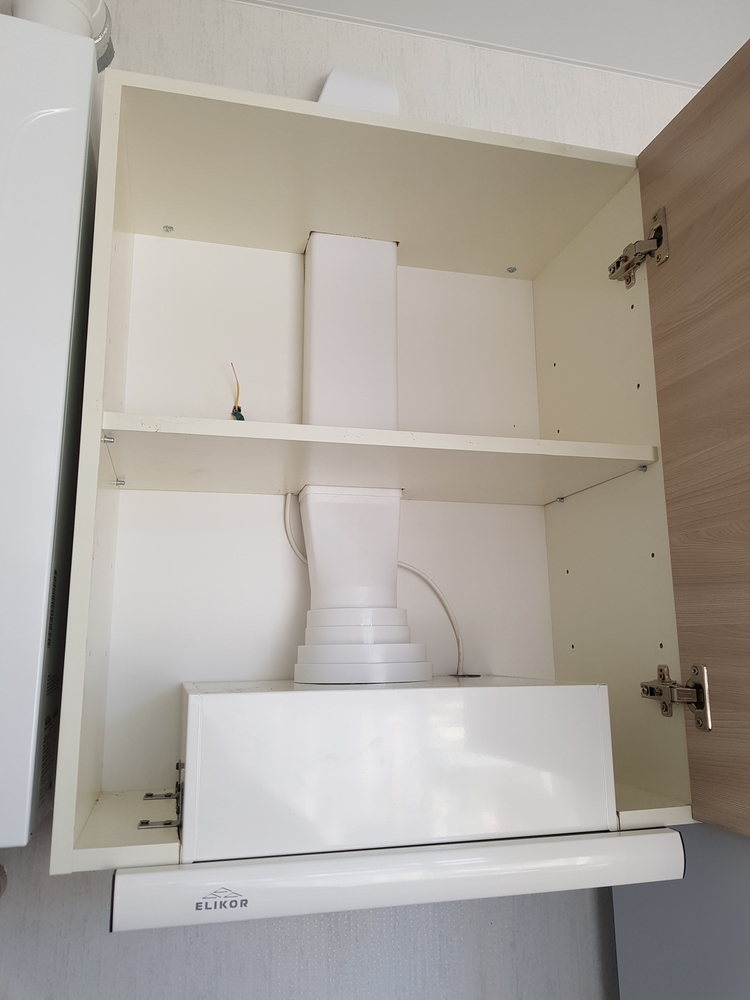
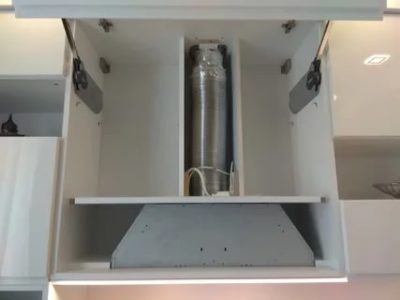
The furniture facade also hides the air duct connecting the hood and the ventilation duct, where steam and soot are discharged.
In most cases, this technique is a separate structural element, and the furniture facade acts as a decorative part that masks the equipment.
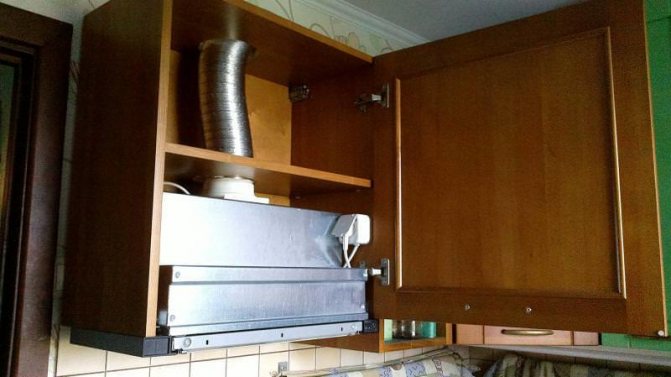
How to install on your own
At the first stage, it is necessary to decide whether to dismantle the old cabinet in order to replace it with a box specially created for exhaust equipment, or to manage with the least losses and simply slightly modify the existing wall furniture. Measurements of the body of the purchased device will help here. If its dimensions exceed the width of the wall cabinet, then you will have to equip the box. In the case when a hood built into a 50 cm cabinet is installed, then most often these dimensions are suitable for most kitchen "walls".
For example, a built-in hood for a kitchen of 50 cm provides that a hole corresponding to this value in width will be cut out in the furniture. The top of the cabinet must also be modified, and a cutout must be made for the air duct, which will connect the outlet of the exhaust device and the ventilation window in the wall. But often not a round corrugated duct is used, but a plastic rectangular ventilation duct. In this case, the installation of a built-in hood in a cabinet implies a rectangular cutout in the upper part of the furniture body.
The first step at the stage of attaching all the elements to each other is the installation of the exhaust device directly inside the cabinet. Usually the installation of a built-in hood occurs by attaching the back of the case to the wall. To do this, an additional cut-out must be provided on the corresponding side of the cabinet.
The main nuance that should be taken into account is the ability to move the panel, that is, after fixing the housing, the movable part of the exhaust device should move freely.
Installation of a built-in hood in the cabinet from the side of the air duct attachment should not be carried out “tightly”. This means that it is enough to fix this connection with a clamp
This is done with sufficient force to ensure maximum tightness, but it is important to maintain the possibility of dismantling the structure, since these elements will periodically have to be disconnected from each other in order to clean the system from deposits of dirt particles.
Features of choosing an air duct
When deciding how to build a hood into a cabinet with your own hands, you need to make a choice of the type and material of the ventilation duct. The most suitable for the kitchen are the following varieties:
- corrugated air duct;
- plastic duct of rectangular or round section.
Installing a built-in hood in the kitchen is most often a consequence of the need to save space. Therefore, it is not advisable to purchase a round ventilation duct, since a rectangular box will take up much less space. Further, the advantage of the plastic channel is the better throughput, which is provided by smooth walls.However, installing a do-it-yourself built-in hood using corrugations, despite the increased noise effect during operation due to the corrugated wall structure, does not require knees, which in turn eliminates the likelihood of air flow turbulence in the exhaust system.


When installing a corrugated duct, it should be remembered that it must be placed in a stretched form, since contaminants will linger in slots and cavities along the entire length of such an air duct. A clear advantage of this type of material is the absence of the need to purchase additional adapters, since the corrugation lends itself well to deformation and a rectangular shape can be obtained from a round section with a small application of finger force. Thus, each of the types of ventilation ducts has advantages and disadvantages, respectively, it is impossible to provide certain recommendations on which one to choose, since the decision must be made by the owner of the home, based on all the parameters of the premises and equipment.
TOP 5 best built-in hoods
I recommend that you pay attention to this model. She is expensive, but believe me, you will never regret it.
Elica Hidden IXGL / A / 90 - the first place in our rating gets a copy worth 41,500 rubles. Provides two cleaning methods, good performance (1200 m3/h) and built-in LED lighting. There are 4 speeds and touch control.

Pros:
- high efficiency;
- inconspicuous;
- works quietly;
- LED lamp.
Minuses:
expensive.
4 more popular models:
- Elikor Integra for 3,820 rubles.
- Lex Hubble for 7,390 rubles.
- Krona Kamilla for 5,950 rubles.
- Krona Kerry for 4,060 rubles.
Proper installation of a kitchen hood with your own hands
An important part of the installation is to calculate the distance from the hob to the hood, so that it complies with regulations and does not interfere with cooking. Built-in models are not attached to the wall, they are mounted in the kitchen cabinet itself
After the installation is completed, fix the protective cover on the body, which will hide the air ducts.
Built-in models are not attached to the wall, they are mounted in the kitchen cabinet itself. After installation is complete, attach a protective cover to the housing, which will hide the air ducts.
The screen of the exhaust system must be slightly wider in size than the stove so that the combustion products are completely absorbed by the hood.
Installation steps
Detailed installation steps are shown in the table.
| Step | Stage | Description |
| 1 | Preparatory work | Find the right tool and prepare the surface for work. |
| 2 | Checking the contents | Remove the hood from the package and check its integrity and the presence of all parts (screws, brackets, clamps, wires). If there are no damages, and there are enough structural elements for installation, then proceed to the next step. |
| 3 | markup | Using a level, tape measure and pencil, draw two lines on the wall. One of them is vertical, it goes from the center of the plate to the attachment point. The second line is horizontal, it draws the boundary of the working surface of the system. In the instructions, look at the fixation diagram and designate the location of the brackets. |
| 4 | System mount | If the hood is hung on the wall, then drill holes in it according to the intended template with a depth of at least 50 mm.Then insert 10 mm dowels there and screw in the self-tapping screws, but not completely, but so that there is a small distance left for hanging the device and fix the hood on them. If the device is circulating, then you just have to insert the filters inside. If the hood is built-in, then remove the bottom shelf of the cabinet and, according to the marking, drill 4 holes in the corners and a hole in the center for the air duct (according to its diameter). Drill the same holes in the center in other shelves so that the pipe passes through the cabinet into the ventilation shaft. Install an adapter on the pipe to connect to the ventilation box. Fasten back the bottom shelf of the cabinet and fix the hood screen. Install filters if the system is circulating. |
| 5 | Air duct installation | One of its ends is connected to the adapter, and the other - to the ventilation shaft. |
| 6 | Power connection | To connect the system to the mains, the most ordinary socket is suitable. If the device is built-in, place the socket under the cabinet. Since the kitchen is a place of high humidity, buy an outlet with a protection class starting from IP44. And so that you do not get shocked, be sure to make a ground. |


Why do you need a kitchen hood
The process of cooking is accompanied by the active release of odors, water vapor, small particles of fat, oils, soot and other suspensions. They fill the atmosphere of the kitchen and spread to adjacent rooms, gradually filling the entire apartment. These particles have a negative effect:
- There is an unpleasant odor that is poorly tolerated by allergy sufferers.
- Small suspended particles settle on furniture, carpets, are absorbed into upholstery, clothes and other things.
- All white or light surfaces are covered with a layer of grease, soot and other layers that are difficult to clean.
In order to prevent the spread of emitted harmful particles throughout the apartment, only an extractor hood is used in the kitchen. It creates some rarefaction of air, which contributes to the inflow from neighboring rooms or from the street through leaks in window blocks. The air flow inside the kitchen is organized, preventing the penetration of unwanted components from it into adjacent or adjacent rooms. These functions are provided by the exhaust ventilation duct, which is available in a typical kitchen and is a ventilation outlet under the ceiling. It passes inside the walls and is output through the roofing to the street. The difference in external and internal pressures creates a natural draft, which contributes to the constant removal of exhaust air, which cleans the atmosphere of the kitchen from emitted harmful substances.
Ventilation pipes on the roof
However, modern air exchange conditions are seriously hindered due tofor the widespread use of plastic windows and sealed doors. The possibility of a constant influx of fresh air is practically excluded, only during ventilation a fresh stream enters the apartment. The natural draft used in the ventilation ducts is not able to work without replenishing the air volume. As soon as the rarefaction of the kitchen atmosphere reaches a critical point, the air outlet stops, depriving the kitchen of the necessary air exchange. Harmful and unwanted components begin to spread throughout the apartment, spoil its microclimate, and destroy the comfort of residents.
The solution to the problem is the installation of a forced hood.It works in a predetermined mode and does not depend on external conditions, which allows you to organize a stable and controlled air exchange.
Exhaust dome for the kitchen
The need to install the hood is dictated by another circumstance. Initially, in old brick houses, the ventilation duct for each apartment was built separately. With the introduction of prefabricated housing construction, to simplify the production of concrete slabs, they began to make one, common ventilation duct with vents on each floor. This made it possible for the installation of an exhaust hood on the lower floor to create increased pressure in the air duct, and the air begins to follow the path of least resistance - it enters the apartments on the upper floors. The force created by natural draft is less than the pressure from the hood, the aerodynamic resistance of the channel squeezes the air flow along with harmful components into the apartments of the upper floors. Therefore, they also have to install hoods in order to remove unwanted air exchange products from their homes, not only from their own production, but also from the apartments on the lower floors.
It must be taken into account that the throughput of the ventilation duct is limited and does not allow the removal of too large volumes of air. To increase the productivity of the channel, it will be necessary to increase the exhaust pressure, which for residents of other floors will cause harmful components to enter the apartment.
Air handling units for the kitchen


