- Material Features
- Working with Liquid Acrylic
- Bathroom renovation with acrylic liner
- The essence of the technique
- Runs and flows
- Bathroom renovation 5 less details.
- Bath preparation
- How to remove a chip on an acrylic bath
- Surface preparation
- Removing a chip on the surface of an acrylic bath
- How to prepare the surface?
- Coating process
- Restoration with glass or filling bath
- Video - Restoration of a bathtub with liquid acrylic using the "pouring" method
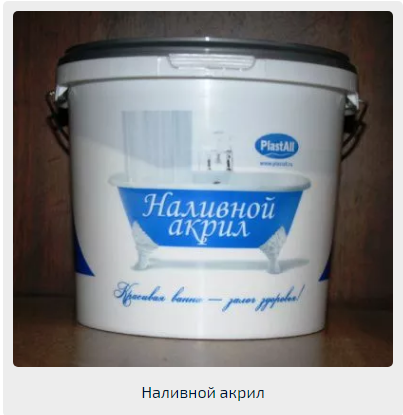
- Bulk acrylic prices
- Features of acrylic coating and its care
- Types of baths and methods for repairing damage
Material Features
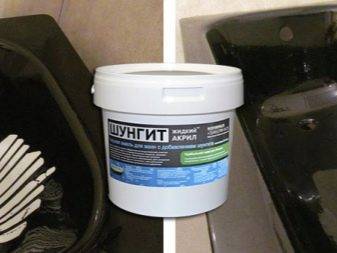
To solve the problem of restoring the worn or damaged surface of cast iron and metal baths, the so-called liquid acrylic is used - a polymer material made from acrylic and methacrylic acids with the addition of certain polymer components to their composition. Polymethylacrylates have been produced by the chemical industry for more than half a century, and they were originally created as the main composition for the production of organic glass. Today, various components are added to this composition, thanks to which the production of acrylic sanitary ware and facing material has become possible.Acrylic materials today have firmly won their niche in the sales market and have gained increased popularity due to the fact that products made from them are very lightweight, durable in use and easy to process.
Restoration of the inner surface of an old bathtub can be done in various ways, for example, using special paint and varnish coatings, but the service life of such a restoration is not long. The most stable results during operation can be obtained if the old font is repaired with liquid acrylic: this material has an increased adhesive ability to metal surfaces and cast-iron bases, and also creates a durable working layer when applied, which has a thickness of 2 to 8 millimeters.
Using an acrylic composition, restoration work to restore the surface of the bath can be carried out without fear of damaging the bathroom tile. In the process of work, acrylic does not emit harmful components with a pungent odor into the atmosphere, it quickly polymerizes under the influence of air, and special devices and additional components are not required when working with this material. The finished acrylic composition contains a base and curing agents. After treatment with liquid acrylic, the surface of the bath becomes resistant to mechanical and chemical influences, and most importantly, it has an anti-slip effect, which is its feature and distinguishing feature compared to other materials.
Working with Liquid Acrylic
To begin with, the polymer base is mixed with a hardener.
Advice. It is necessary to knead the mixture for no longer than 10-12 minutes, otherwise, in the end result, unhardened liquid acrylic will remain on the surface.
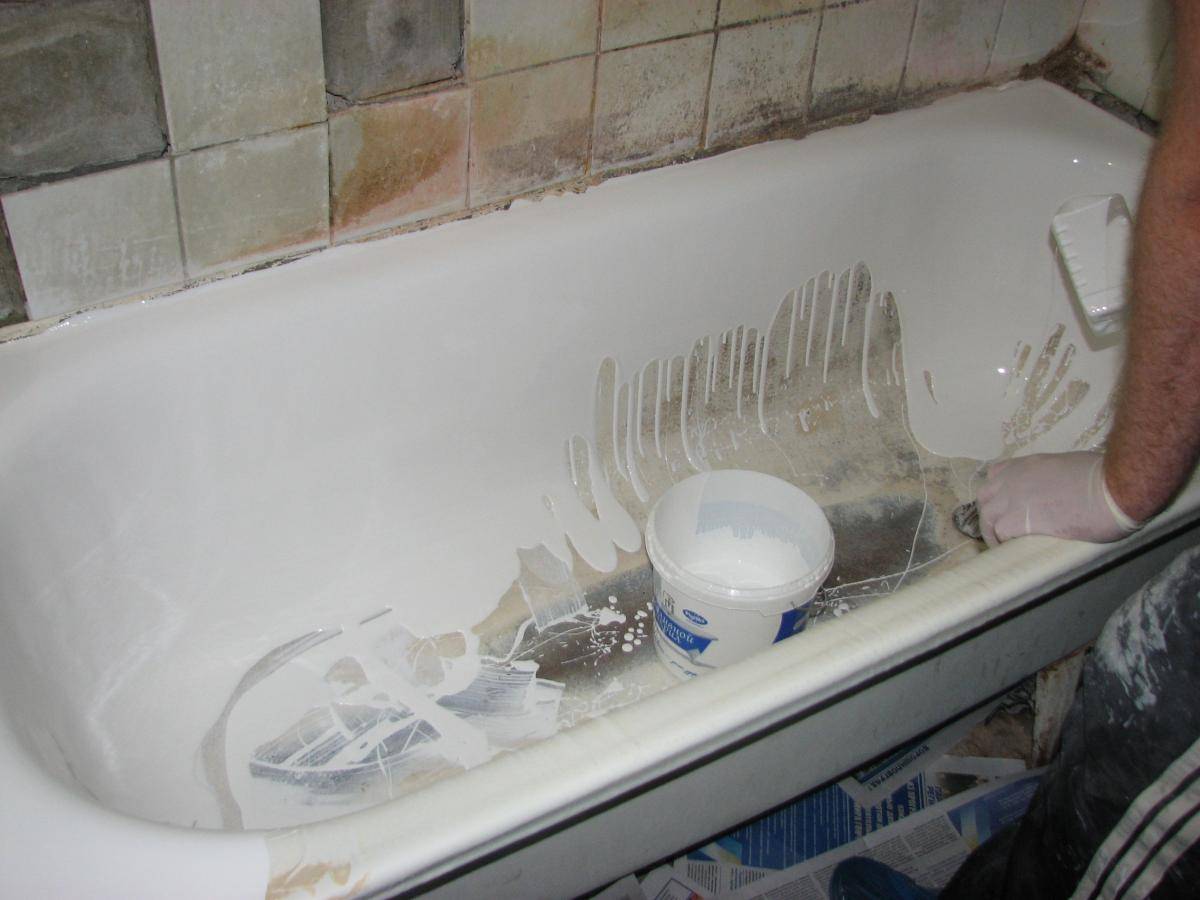
The finished polymer mixture is first applied along the perimeter of the bath in a uniform thick layer.
At the same time, it is important that the acrylic flows freely along the side surfaces of the bathtub. The second tier begins to be applied from the middle of the side slopes
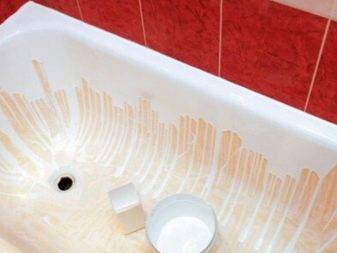
Allow the substance to flow freely along the sides of the bath, all small irregularities will be eliminated by themselves.
A thick layer of acrylic may accumulate on the bottom of the tub. The excess with a spatula must be moved into the drain hole, and the surface should be leveled. By the way, do not forget to first disconnect the siphon, otherwise all the acrylic will harden in it.
Advice. All smudges and irregularities of bulk acrylic will disperse by themselves. No need to try to equalize them.
After painting the bathroom, the room is closed. You do not need to go there until the acrylic is completely dry.
Those who decide to restore the bathtub with liquid acrylic generally give positive feedback to this method. It is noted that the restoration completely solves the problem of replacing the old bath:
- snow-white coating;
- no need to take out the old bath and remove the tiles in the bathroom;
- the bath becomes warmer;
- repair work is carried out in a short time;
- restoration is not accompanied by dust and dirt;
- it is cheaper than buying a new bath;
- the appearance is preserved for a long time.
People praise bulk liquid acrylic and advise their relatives and friends. As expected, there are also negative reviews. Mainly:
- the coating is swollen;
- six months after the restoration, the coating cracked and yellowness appeared.

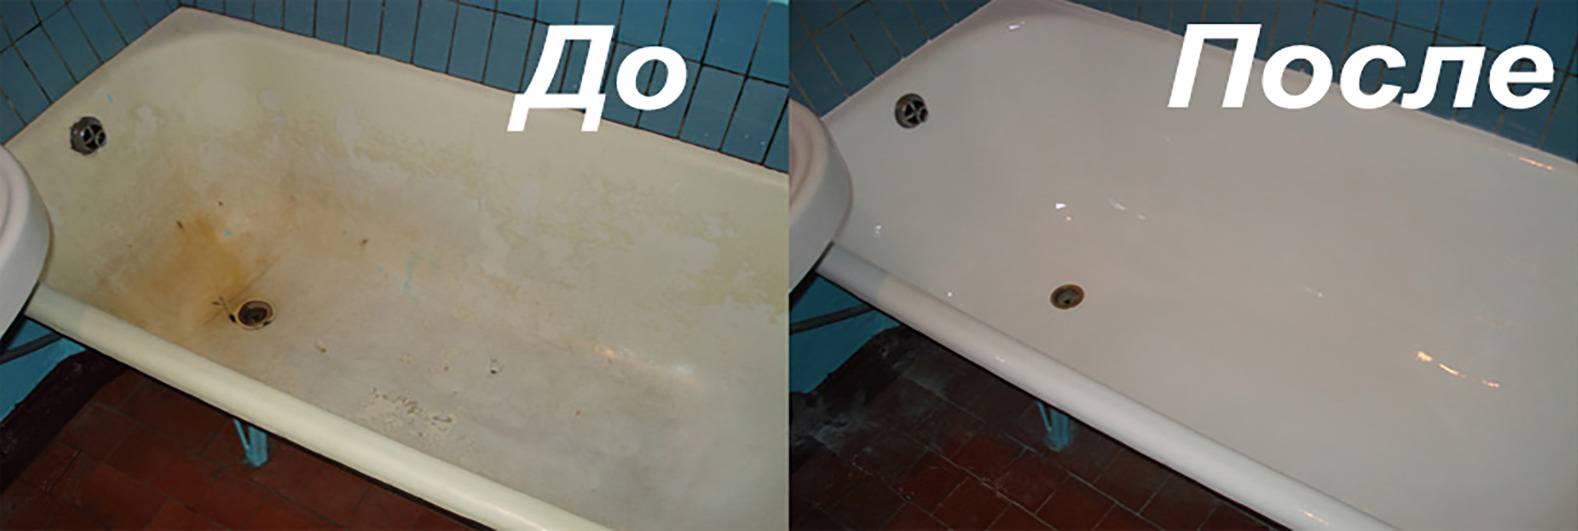
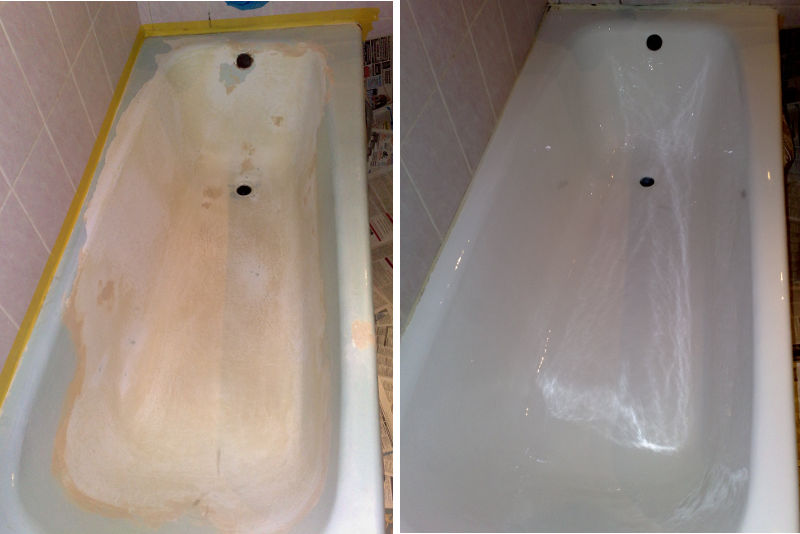
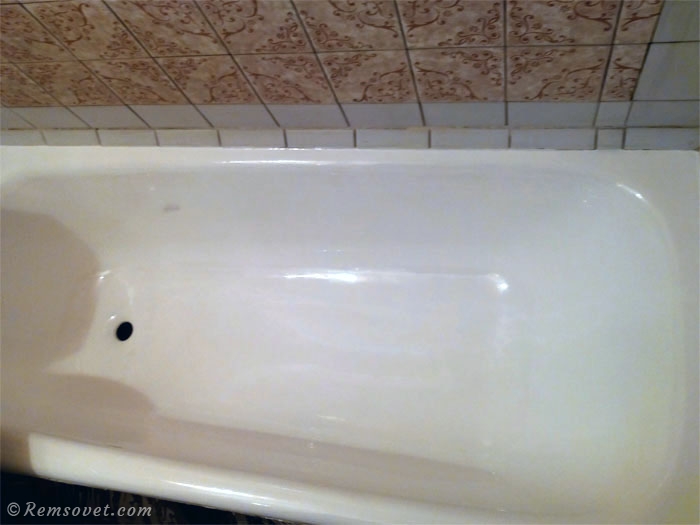
Most owners note a significant improvement in the appearance of the bath after restoration with acrylic
Analyzing all the negativity, experts argue that people get poor-quality coverage only if all the rules for applying liquid acrylic are not followed.Restoration of bathtubs with liquid acrylic in accordance with all the rules will not have negative consequences.
As for the high cost of bulk acrylic, one can object. For the cost of this work, you can afford to buy only the cheapest fiberglass bath. This bath will sag under the weight of the body and cool quickly. In addition, the dismantling of the bath will entail the repair of the entire room. So, to each his own!
Of course, there are pros and cons to restoring a bathtub with liquid acrylic. With proper application and further operation, self-leveling acrylic will serve for many years.


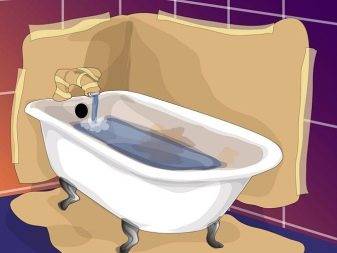
Bathroom renovation with acrylic liner
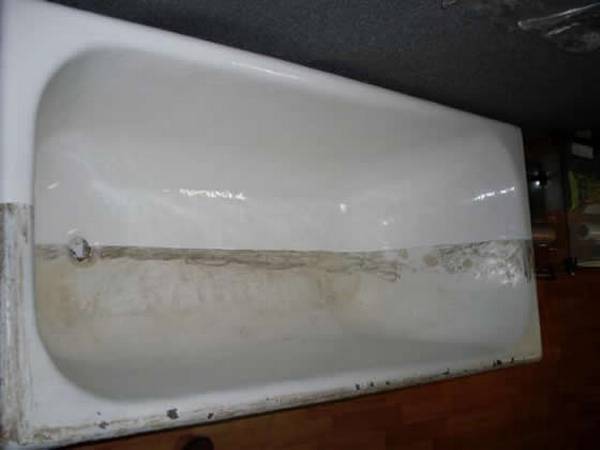
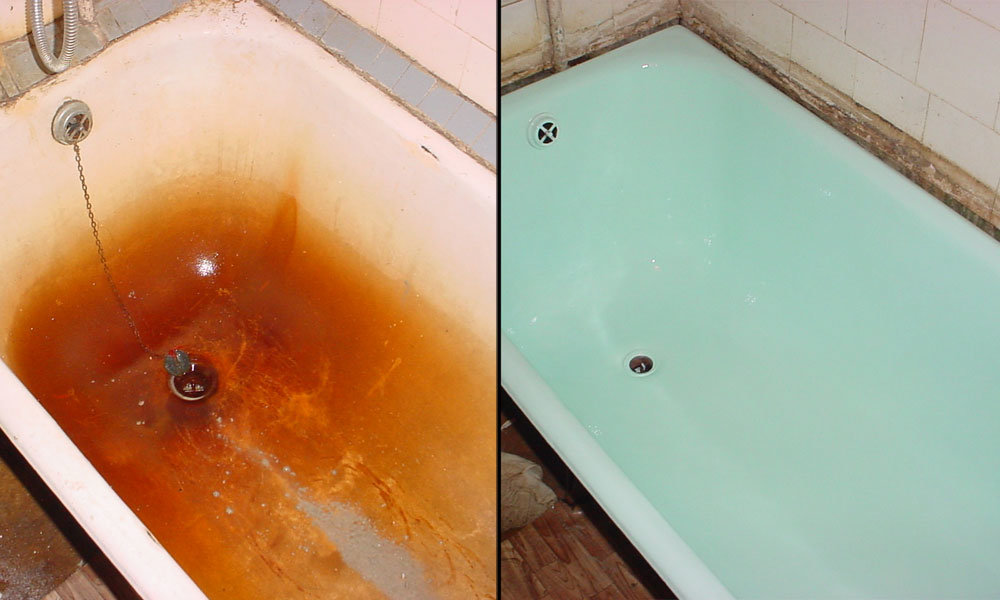
Is your old bathtub outdated, worn out, scuffed and rusty? It is not at all necessary to change it; you can restore the cast-iron bath.
Restoration of cast iron do-it-yourself bathtubs the “bath to bath” method can also be done by everyone. The surface cleaning stage is similar to the previous ones.
Further:
- Remove the top and bottom water drains.
- Holes for plums are cut in the acrylic liner, the edges are trimmed if necessary, that is, a fit is made.
- A two-component polyurethane foam is applied to the surface of the bath.
Apply foam to the surface of the bath
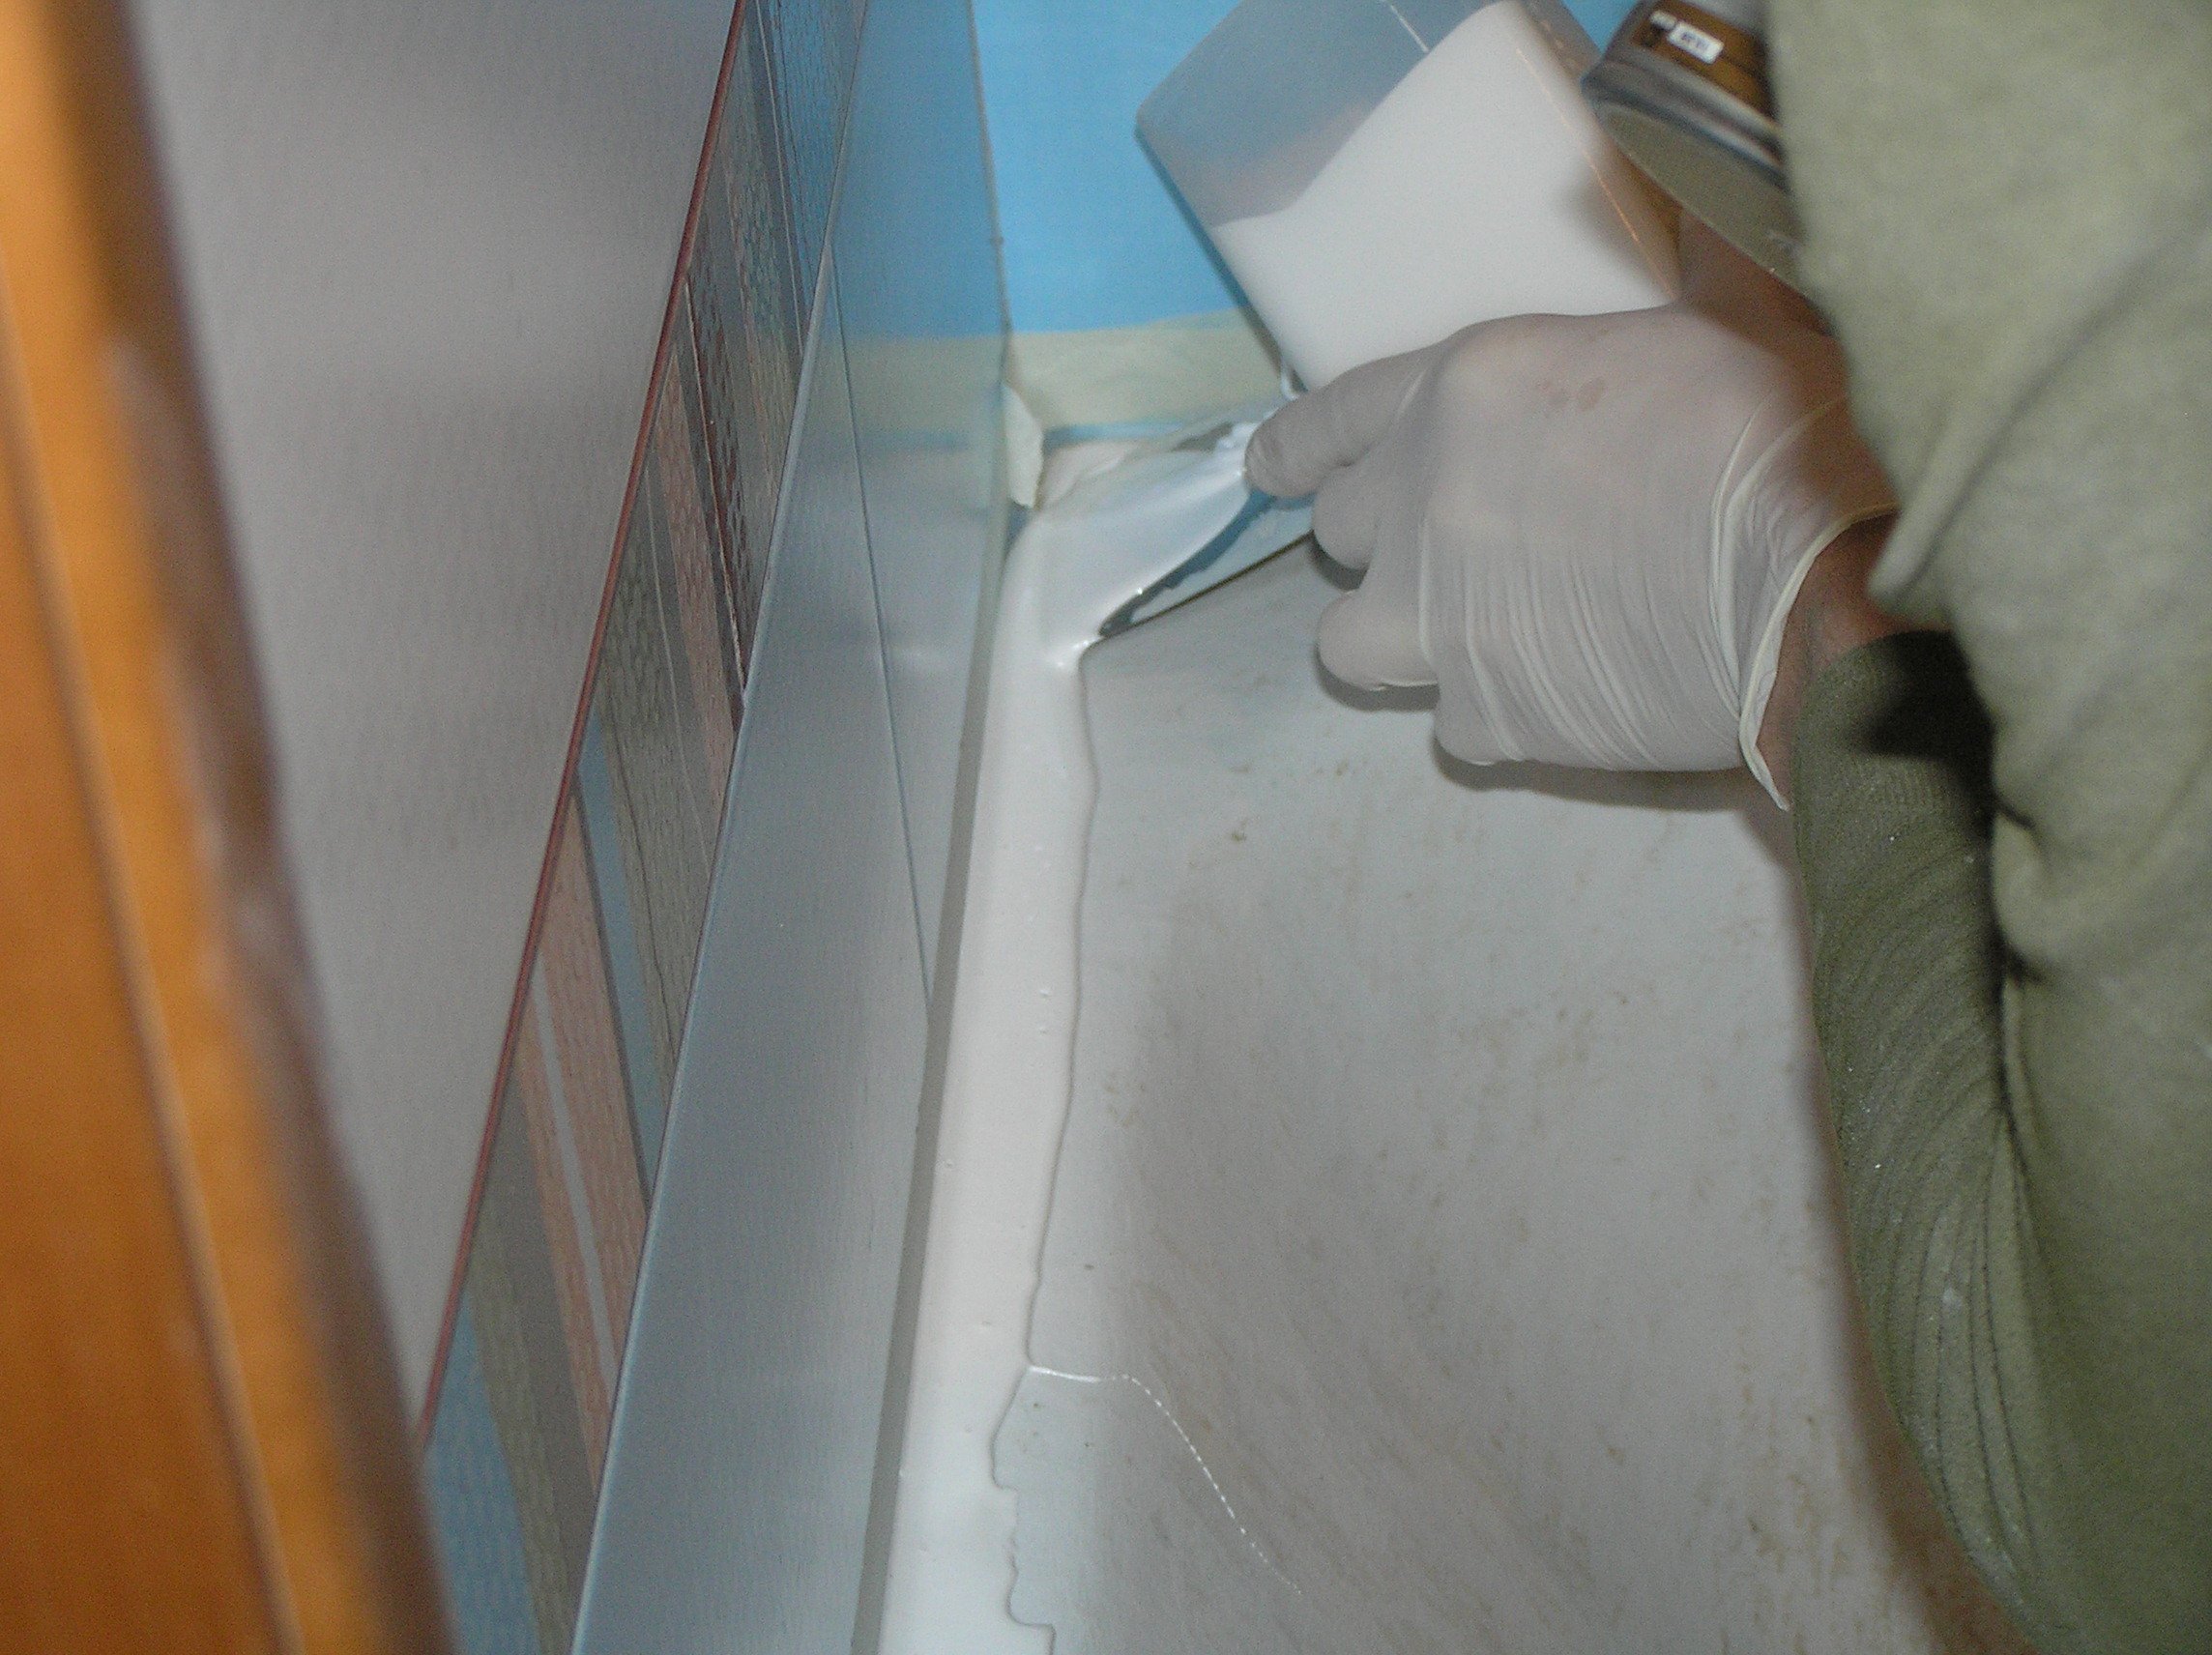
Sealant should be applied around the drains and at the junctions at the edges.
Next, you should install the liner in the bath - thus restore the old coating.
Installing a liner in the bath
We install water drains and fill the bathtub with water in order to achieve optimal adjoining of the liner to the bathtub.
Filling the bath with water
After 8-12 hours, the restoration is completed, you can start using it.
Summing up, we can safely say that it is not necessary to change the old bathtub for a new one.After all, there are ways to give her a new life - a second youth.
Whether it is the restoration of bathtubs with acrylic, enamel or with the help of an acrylic liner - it is up to you to choose the restoration method.
Good luck!
The essence of the technique
Bath restoration DIY acrylic has three ways:
- surface coating with acrylic insert,
- restoration of an old bathtub with acrylic,
- by applying an enamel layer.
The technology of restoration of bathtubs with bulk acrylic is a set of simple steps. At the beginning, liquid acrylic is prepared in accordance with the manufacturer's instructions. Further, the resulting mass is poured with gentle movements along the edges of the tank. The mixture spreads in a thin layer over the surface. After the stated time, the layer hardens and the procedure is repeated. The result is a completely renewed surface without cracks and chips.

The advantages of restoring the font with your own hands are obvious.
- Acrylic coating of the bathtub levels the surface.
- Acrylic holds temperature well. If the old bathtub is made of cast iron, its heat-conducting properties are fully preserved.
- The polymer has a high level of wear resistance. Thus, you can not only update the surface. The old product is added at least 5 - 6 years of operation.
- The comfort of taking hygiene procedures is no less important. Acrylic gives a pleasant tactile sensation.
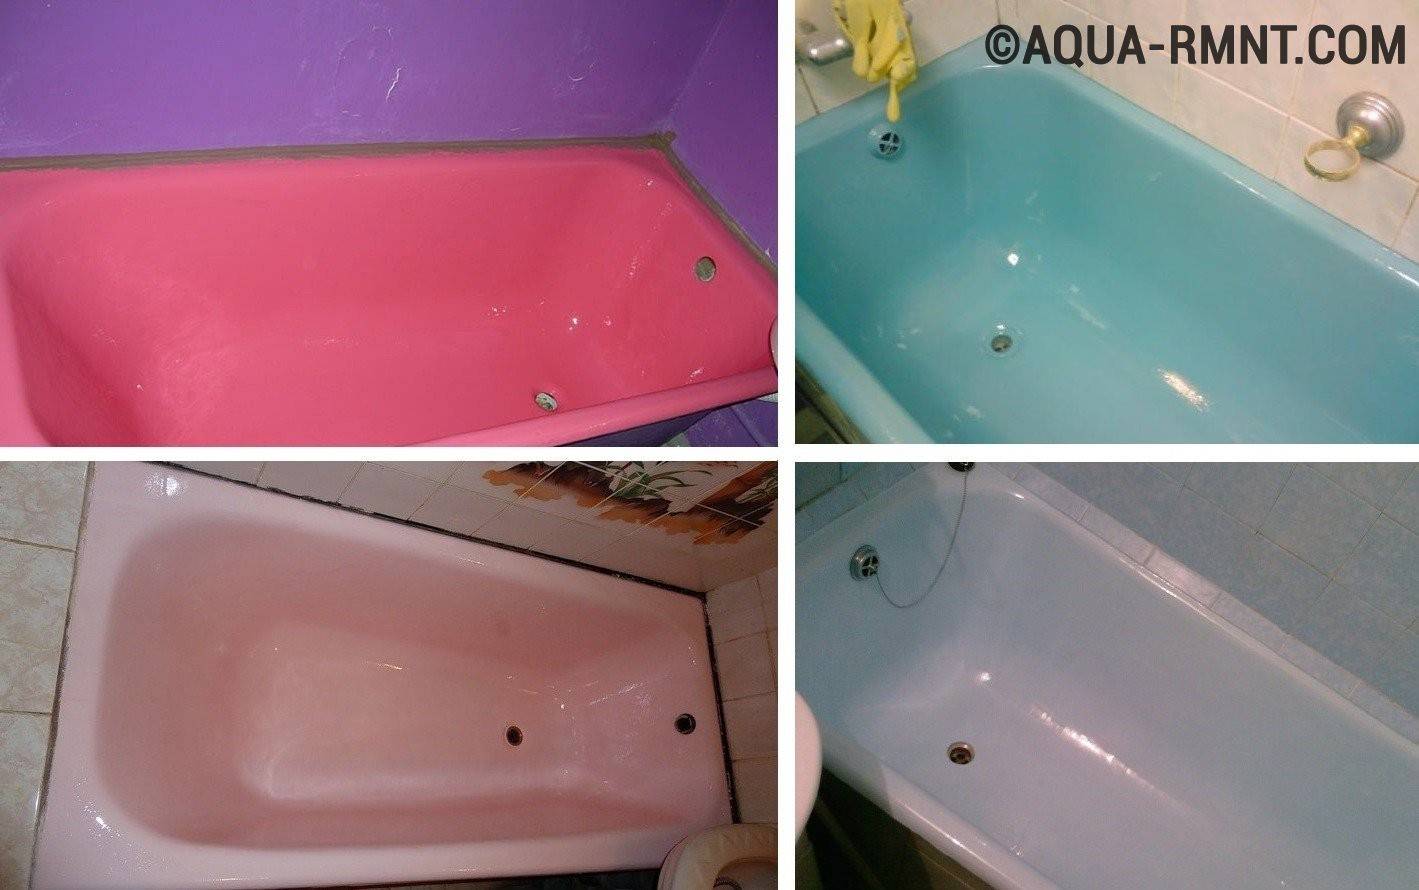
- There are tonal products on sale - you can paint the bath in any color.
- The benefit from making a decision in favor of an acrylic bath cover with your own hands will be 20 - 30%.
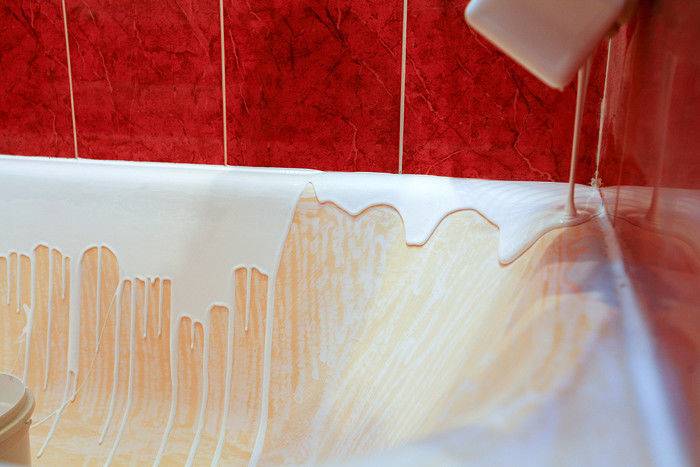
Runs and flows
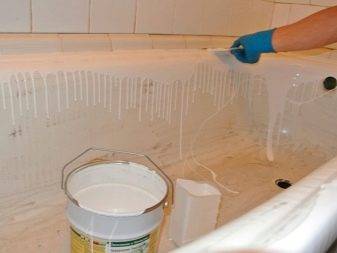
In cases with epoxy enamel and liquid acrylic, streaks or sags may form.Therefore, it is worth monitoring these coatings, when enameling after 15 minutes, and when coated with acrylic after 5 minutes.
It is very easy to remove streaks, you need to smear them with a brush in an upward motion. The influxes are cut off after drying with a mounting or painting knife. Sometimes required installation of new cuffs or shims in drain piping because the drain holes are getting narrower and the wall thickness is getting thicker.


In conclusion, we can say that in appearance, the acrylic liner wins the advantage. But, in terms of practicality, if it is installed in a steel bath, it will last 2 times less than the prescribed period.
Therefore, when restoring a steel bath, it is better to choose enamel or liquid acrylic. This method of updating the bath will cost you many times cheaper.
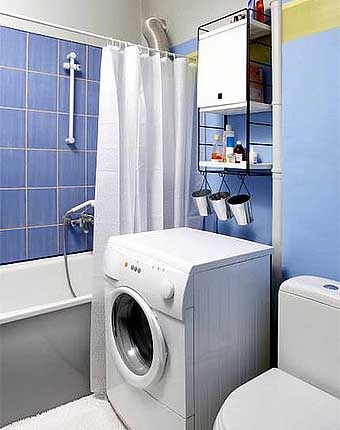
Bathroom renovation 5 less details.
A large number of bright details in the interior of this bathroom visually reduced its size.
Therefore, during the redecoration, the walls were repainted to match the tiles, only a little lighter. At the top of the wall, a wide light strip was added to match the ceiling, which expanded the space above. Also, a horizontal yellow line was made along the painted wall, also in order to expand the space. The shower curtains have been replaced with white ones, symbolizing cleanliness and tidiness. The curtain under the bathroom was replaced with a matte plastic screen. On the floor, instead of multi-colored paths, there are also white bathroom rugs. Old bathroom cabinets have been replaced with new ones with both open and closed shelves. Such a locker will allow you to put infrequently used things behind the door, which also visually lightens the space.
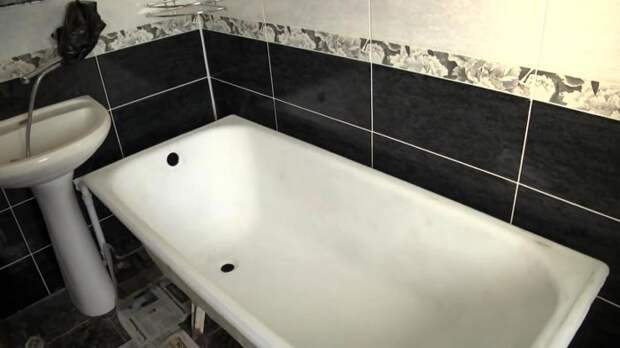
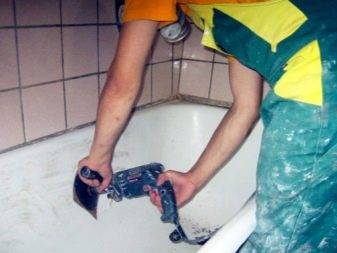
Bath preparation
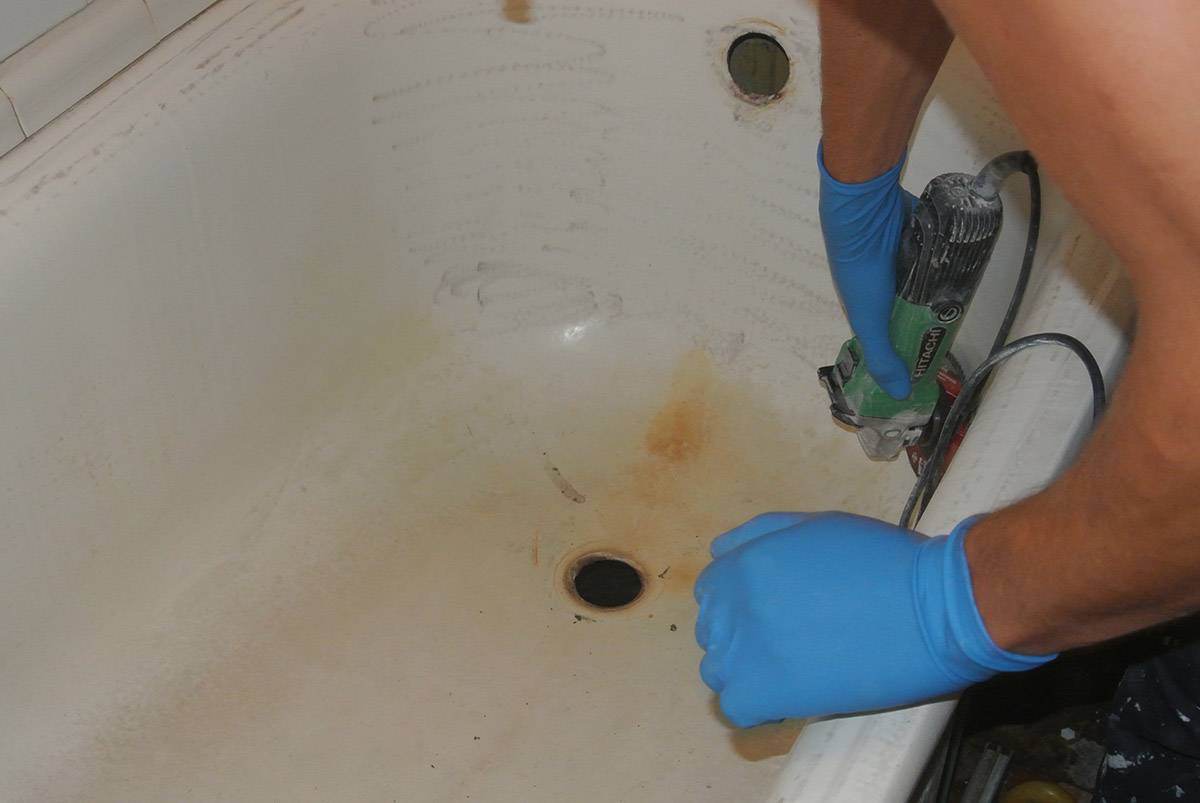
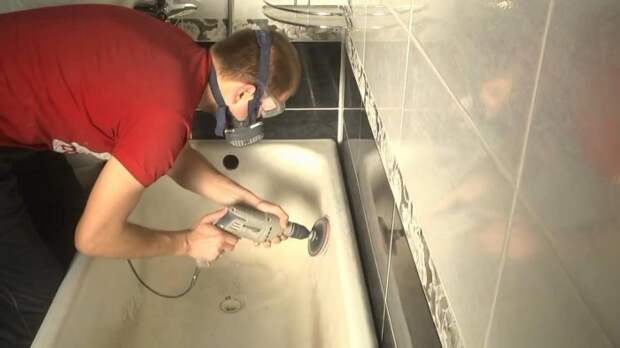
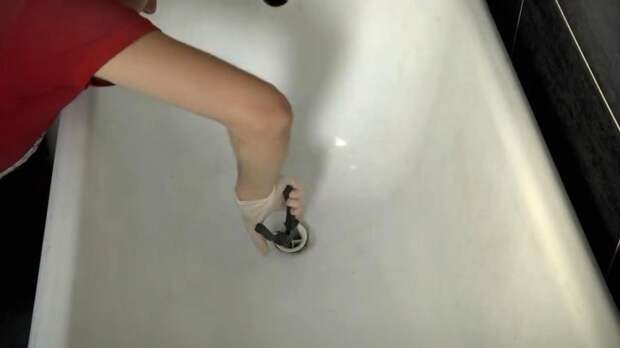
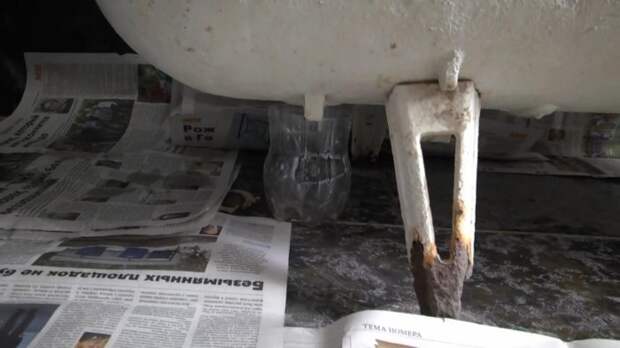
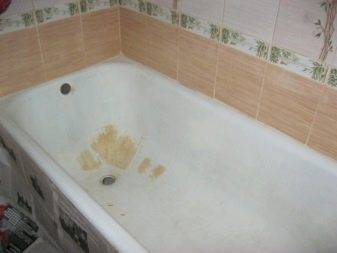
The appearance and service life of the applied coating will depend on the quality of the preparation. First, the overflow and drain are removed. A grinder or a drill with a grinding nozzle must carefully treat the surface of the bath.
For this, sandpaper for rough work 40-N or 32-N (according to GOST 3647-80) is used. Emery will help remove the resulting water deposits. The surface after grinding should be rough to ensure good adhesion of liquid acrylic.
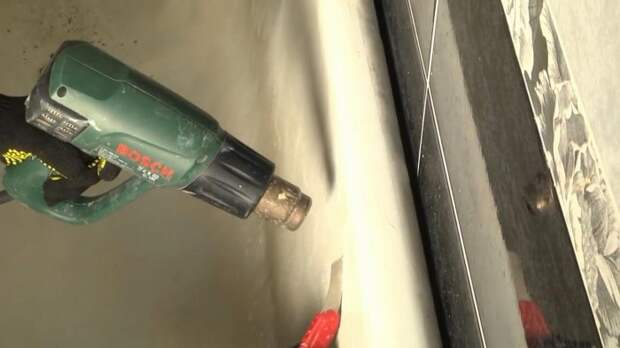
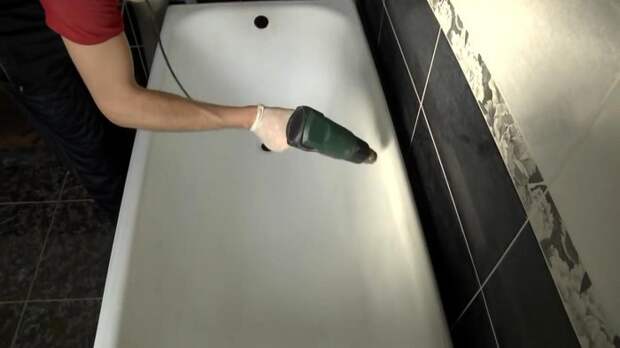
Note: non-factory enamel, applied earlier for the restoration of the bath, is removed with a clerical knife after heating with a hairdryer.
The bathtub needs to be cleaned and washed off the remnants of debris. Then the surface is treated with a sanitary ware cleaner - the poured agent must be spread with a sponge over the entire surface of the bath, including the installation site of the removed overflow.
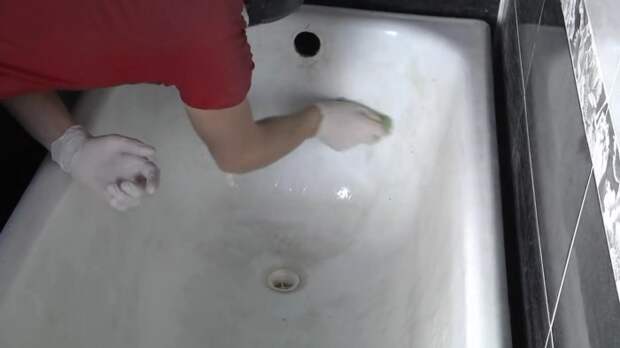
The bath is washed again and left to dry.
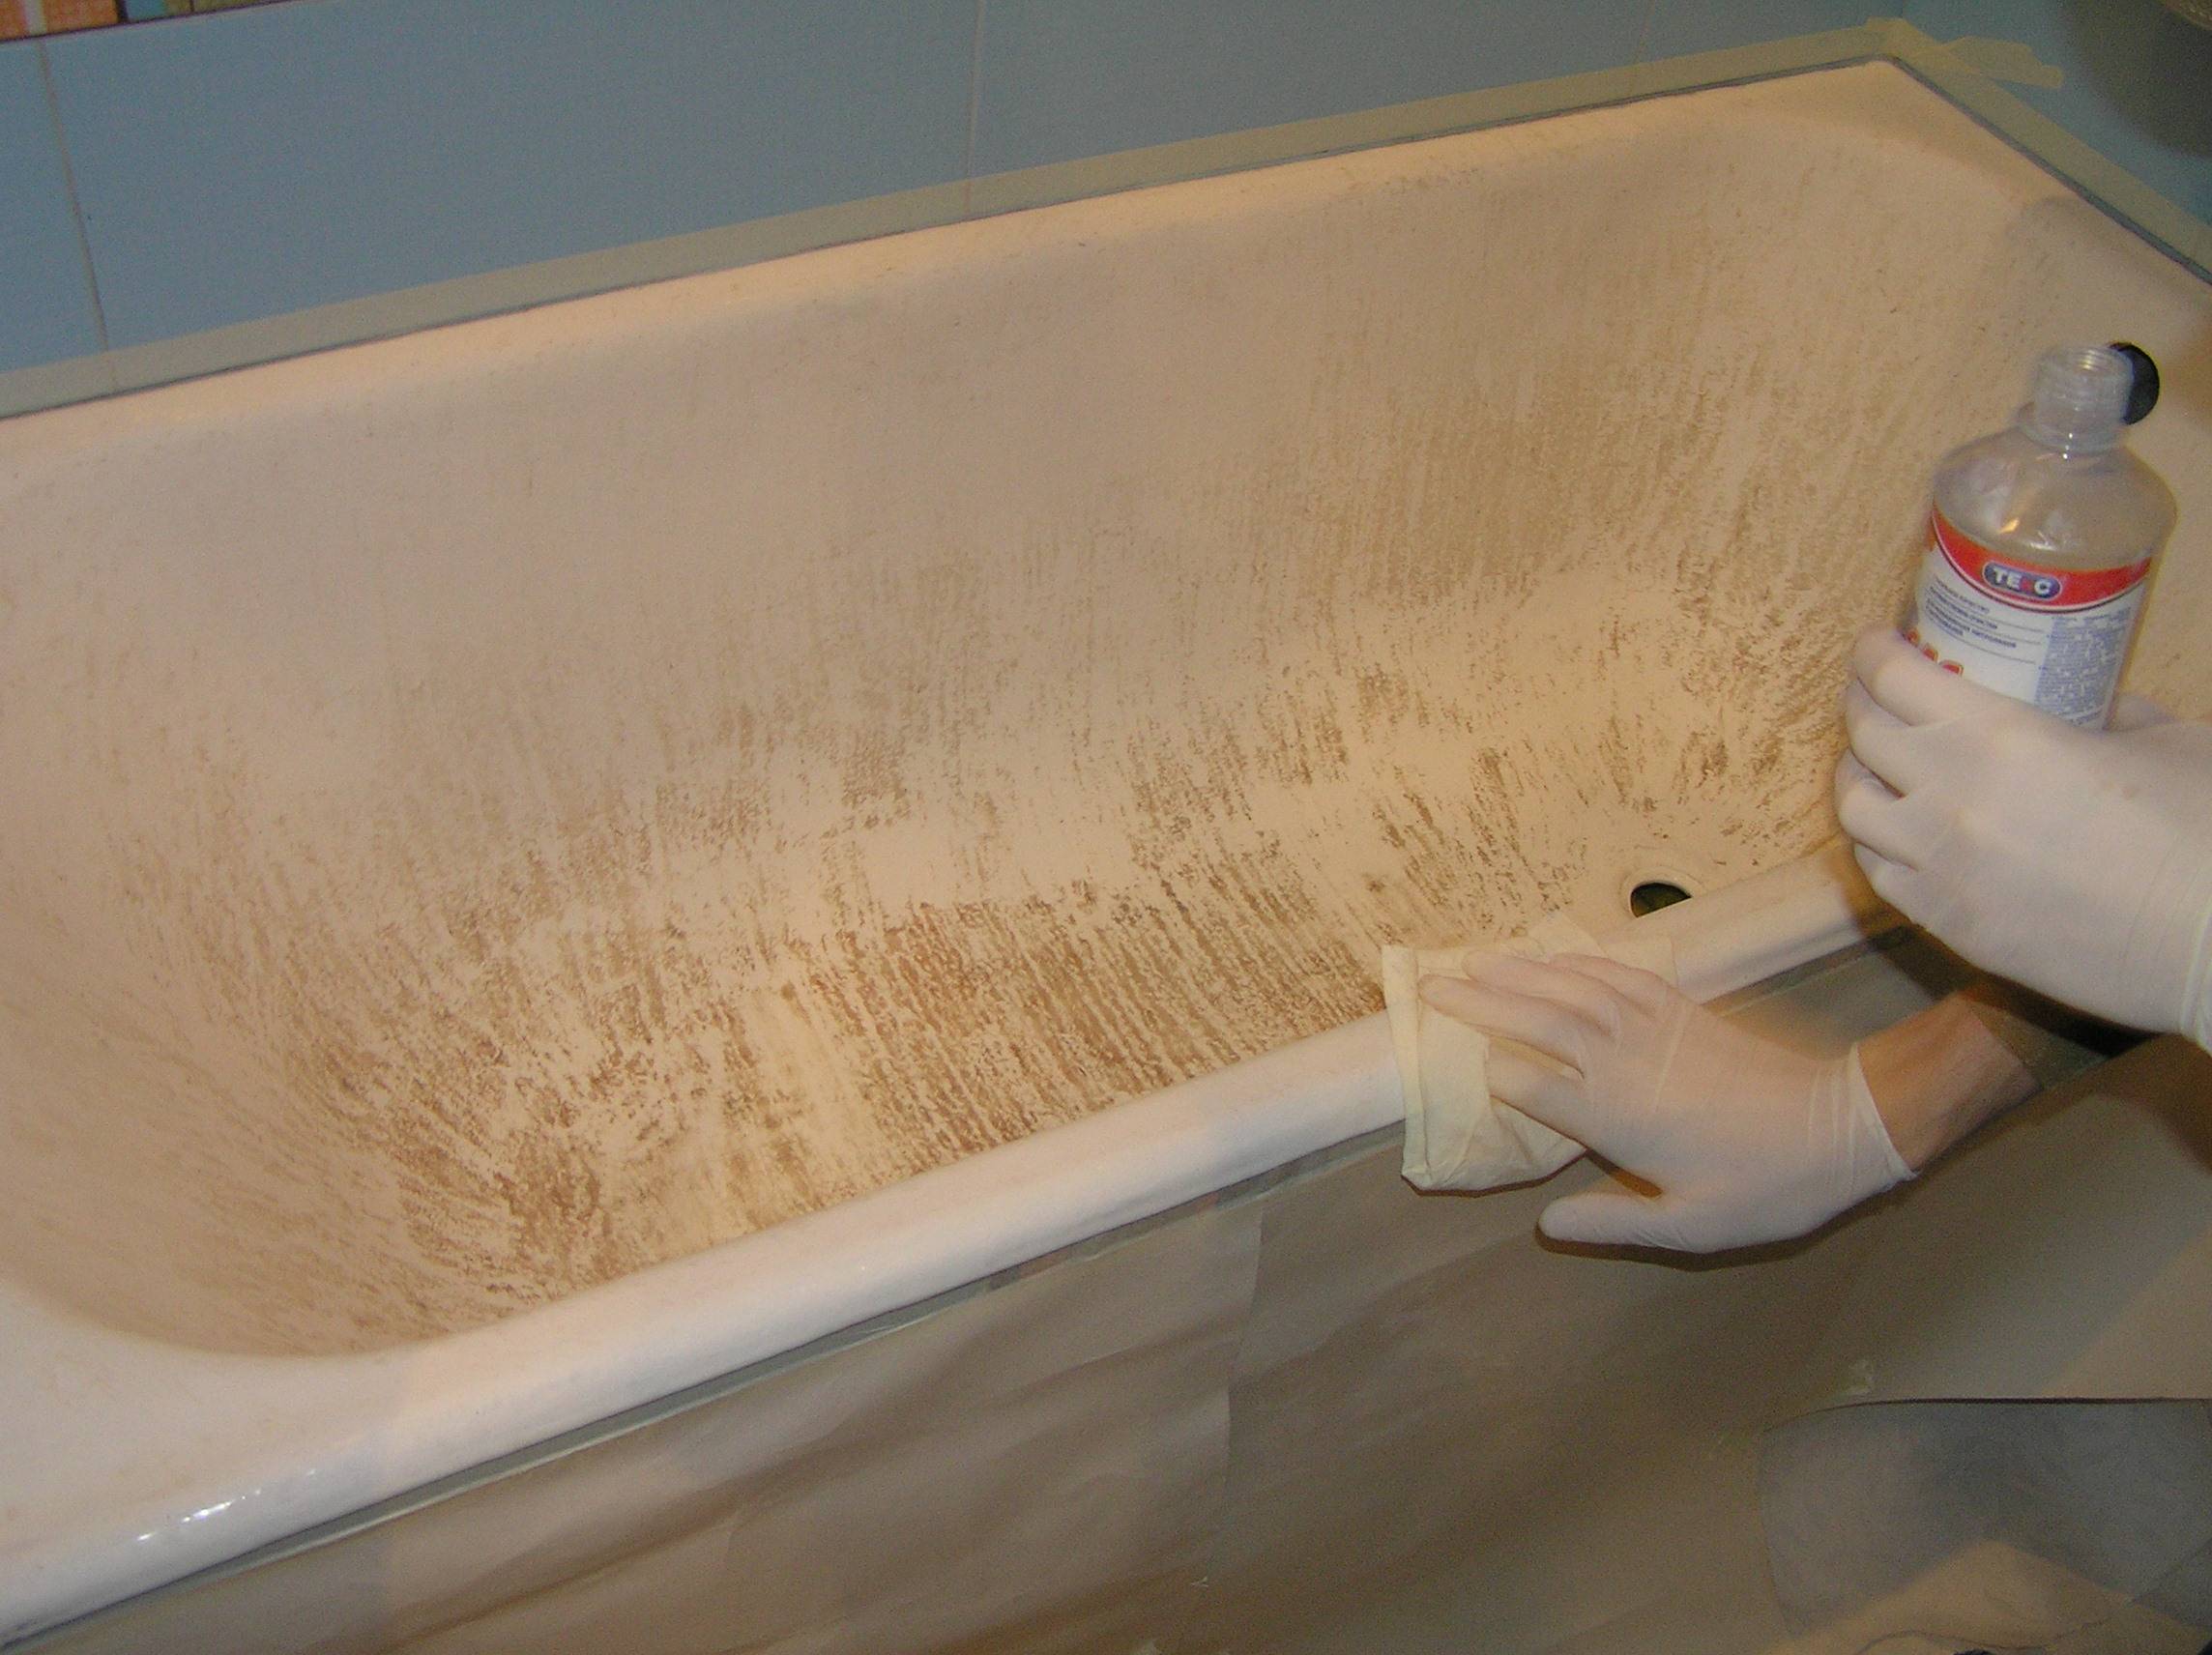
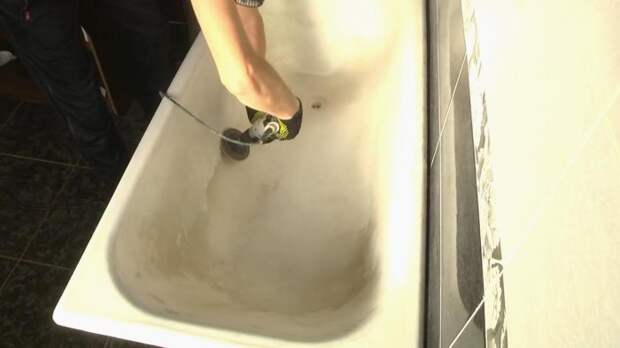
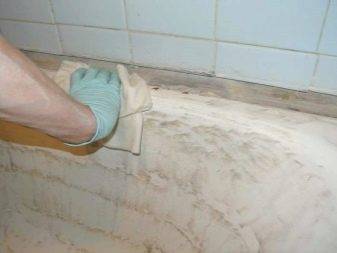
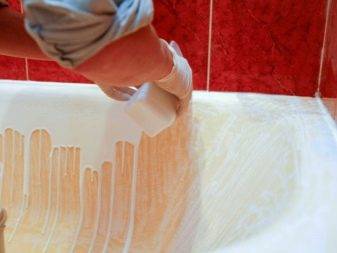
After drying, proceed to the next important stage of work - degreasing. Soda is poured into the bath and carefully rubbed with coarse sandpaper over the entire surface.
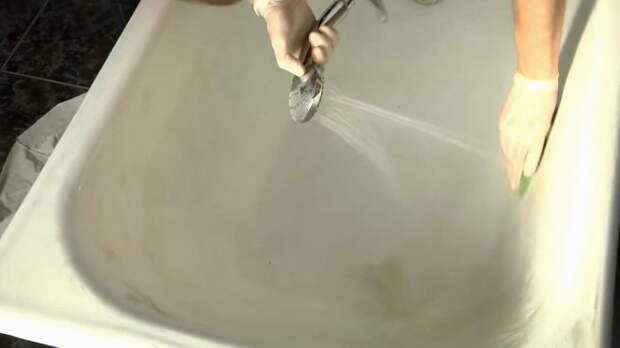
Maybe degreasing will need to be done not once, but two or three times. You have to work with gloves. Then the bath is thoroughly washed with a jet of water from the shower.
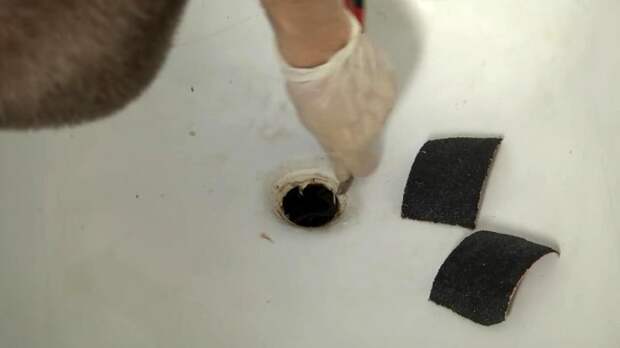
Before starting the next step, you need to remove the siphon.
The installation site of the siphon must be cleaned, degreased and rinsed from soda residues.
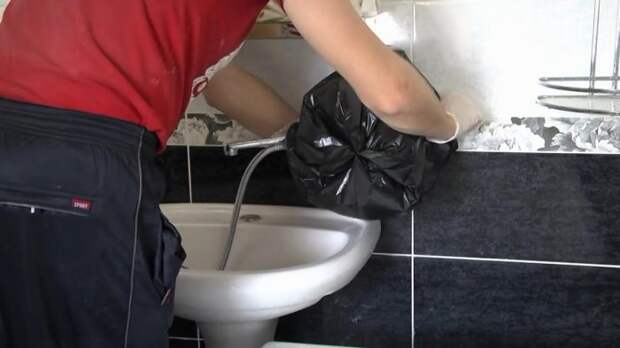
The faucet and shower are covered with a bag and fixed with adhesive tape - water should not get on the applied layer of bulk liquid acrylic until it dries completely. Tiles and shelves above the bathroom rag are cleaned of dust particles. Sanding dust must not be allowed to get on acrylic.


After completing this step, the bath must be thoroughly dried with a hair dryer.
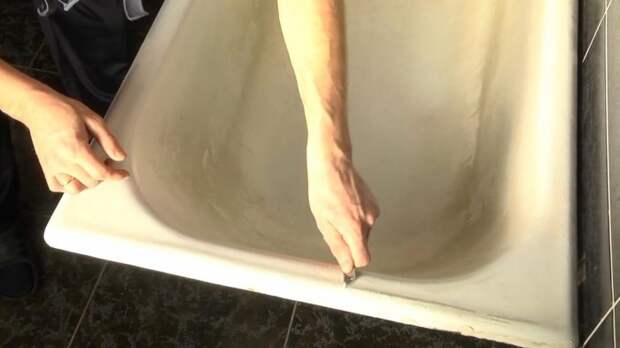
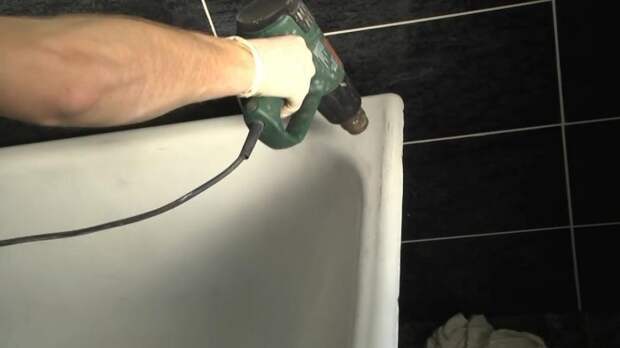
Particular attention is paid to places where water can collect: the joints of the tiles and the bathtub, under the side, which is installed at the junction of the tiles and the bathtub. It is better to remove the side and restore the bath without it.
The cement joints at the junction with the bathroom are well dried with a hair dryer.
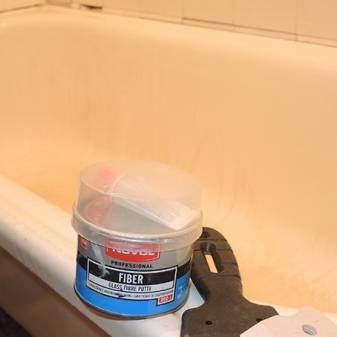
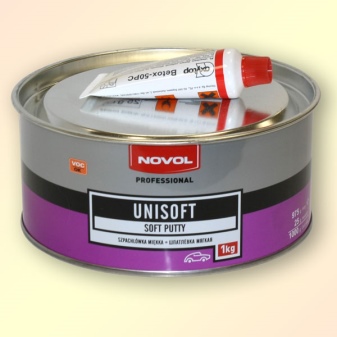
To eliminate defects in factory enamel (cracks, chips), a quick-drying automotive putty is used.
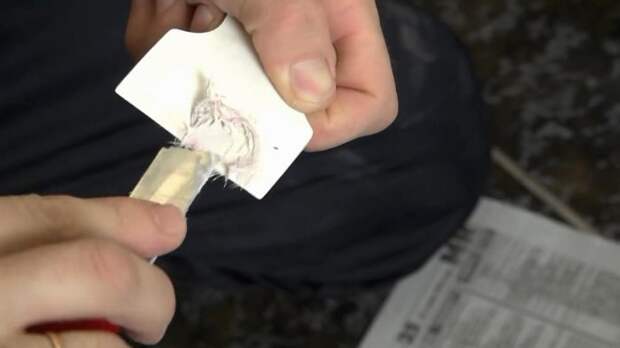
The composition is stirred and applied with a rubber spatula to the damaged areas, after which it is allowed to dry.
While the putty dries, cover the floor under the bathroom and the tiles at the joints with polyethylene or newspapers, which are fixed with adhesive tape.
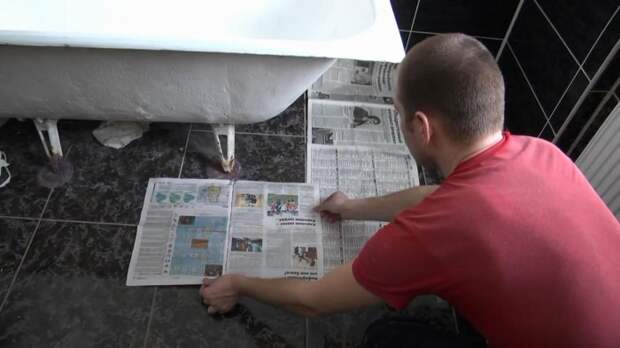
So when pouring, liquid acrylic will not spoil the floor and wall tiles. After the putty dries, these places are covered with fine sandpaper. A vacuum cleaner removes dust particles from the bath.

With a degreaser (acetone) wipe the places of putty cracks and chips. It is also necessary to wipe with acetone the places where the overflow and siphon are installed. A container is placed under the drain hole (you can use a cut plastic bottle). Excess liquid acrylic will drain into this container.
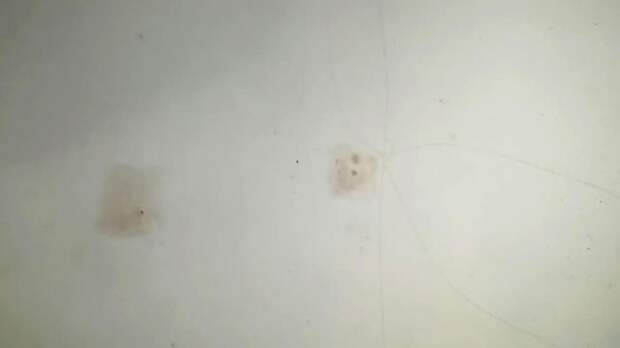
How to remove a chip on an acrylic bath
First of all, it should be understood that a chip is not a scratch and simply polishing the damaged area will not work. In addition, deep defects often become a breeding ground for fungus, mold and bacteria, so restoration work is a must.
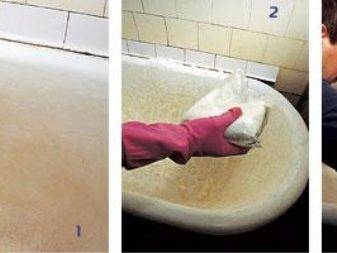
Surface preparation
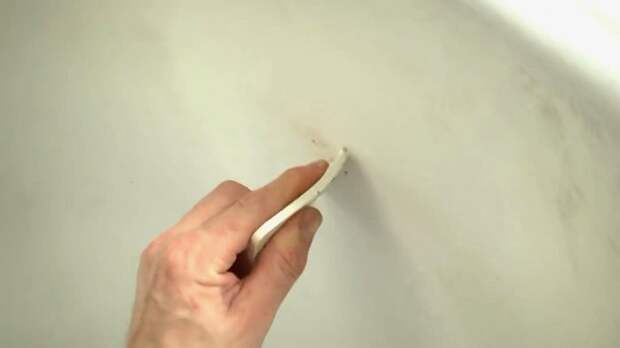
First of all, the area where the defect is found must be prepared. Otherwise, no one can guarantee you that the chip will not appear again after a short time.Surface preparation is as follows:
- Clean the area with sandpaper, starting with a large fraction and ending with a smaller one.
- The chip must be thoroughly washed using detergents with a disinfecting effect. This is done in order to completely remove the dirt.
- Next, the area should be degreased to remove fat from the surface. If you ignore this stage of preparation, then it is likely that the putty that you will apply simply will not "adhere" to the acrylic.
- At the end of all preparatory work, the surface of the bath must be dried very well. To speed up, you can use a hair dryer or dry rags.
Once you have done all the activities, you can proceed directly to the removal of the chip on the acrylic bath.
Removing a chip on the surface of an acrylic bath
A masking pencil is not suitable for removing this type of damage, since they will not be able to repair the pothole itself. To restore the evenness of the surface, you will need special repair kits. As a rule, they all have the same equipment, and it includes:
- liquid acrylic (different shade);
- hardener - added to acrylic to increase the hardening property;
- sandpaper for grouting;
- polishing paper;
- degreaser;
- epoxy glue for repairing small scratches.
Of course, the repair kit may differ in content, but, as a rule, this is a standard kit that includes all the necessary components. Additionally, in the repair kit you can find a special rubber spatula for the convenience of applying liquid acrylic.


Further, the principle of work is as follows:
- dilute acrylic with hardener, according to the instructions;
- apply the mass to the damaged area flush with the surface of the bath, evenly distributing it with a spatula;
- equalize the mixture as much as possible;
- cover with a film (usual food, reinforced to the wall with adhesive tape is suitable);
- leave to dry completely, but not less than 24 hours;
- remove the film and degrease the surface (for example, with alcohol);
- polish the area.
In conclusion, we can say that removing a chip on an acrylic bath is certainly not an easy task. Nevertheless, if you approach this issue correctly and responsibly, then you can restore the appearance of the bath in less than three hours.
How to prepare the surface?
Before you begin the restoration of a cast-iron or metal bath, certain preparations must be made without fail.
- Disconnect all plumbing fixtures, but leave a drain for water. Later, it will also need to be removed, and a container should be placed under the drain hole of the bath to collect acrylic material, which will drain there during the work. If the bathtub has a tiled lining, then the drain can not be dismantled, but sealed with tape, and the cut-out bottom from a polyester disposable cup can be placed on top to collect excess acrylic.
- The tiles on the wall must be protected with a wide strip of masking tape, and the floor around the bathtub must be covered with polyethylene or newspaper sheets.
The next step will be to prepare the surface of the bath, which must be properly cleaned with sandpaper and dried. In the event that there are chips and cracks on the surface of the bath, as well as deep scratches, all the old enamel coating will have to be completely cleaned.To facilitate this task, it is most convenient to use a grinder or an electric drill with a circle of abrasive materials. As a rule, when performing such work, a large amount of fine dust is formed, so cleaning the surface must be done in a respirator and goggles.
After the surface of the bowl is cleaned, all dust and fragments of the old material must be removed and the walls of the bath should be washed with a damp sponge. Now the surfaces must be allowed to dry and only then treated with a solvent to remove residual grease. If for some reason it is not possible to use a solvent, it can be replaced with a thick paste made from ordinary baking soda. After treatment, the soda will need to be completely washed off with hot water.
Upon completion of the degreasing process, all cracks and chips on the surfaces of the bath must be treated with automotive putty and wait for it to dry completely. Automotive putty is used for the reason that its hardening time is much shorter than that of other types of putties, and the adhesiveness with metal is quite high.
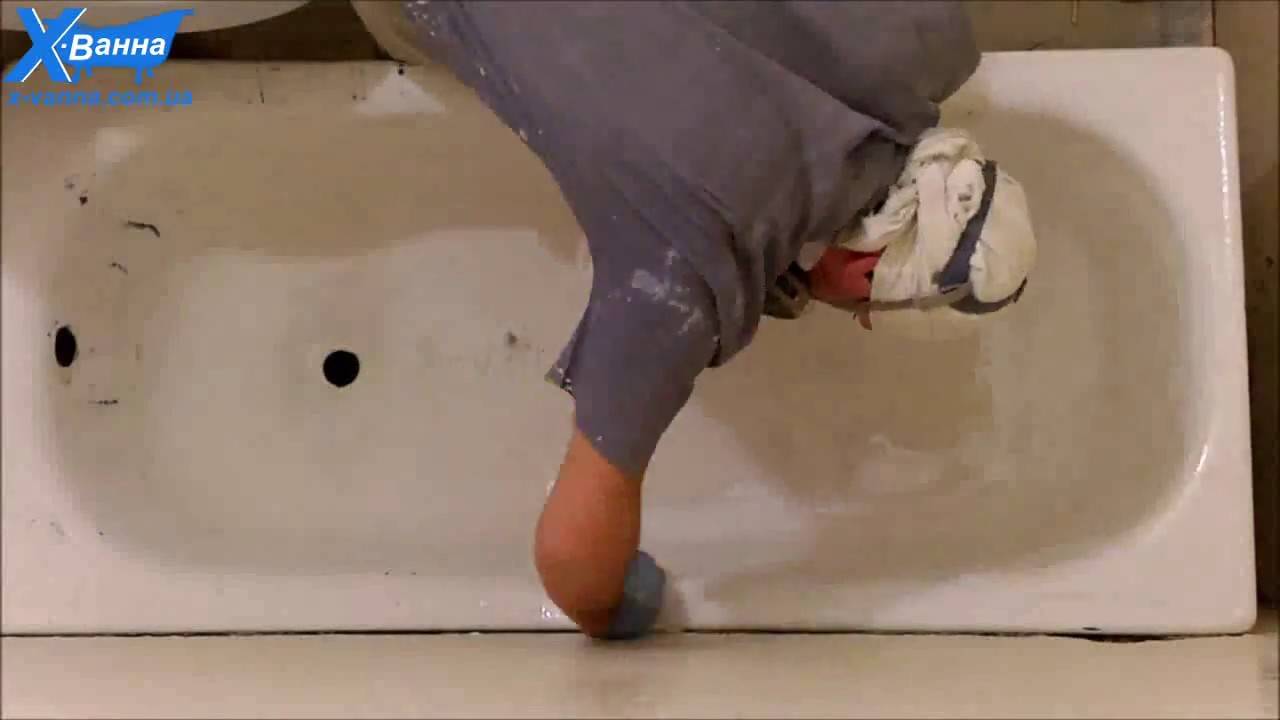
Coating process
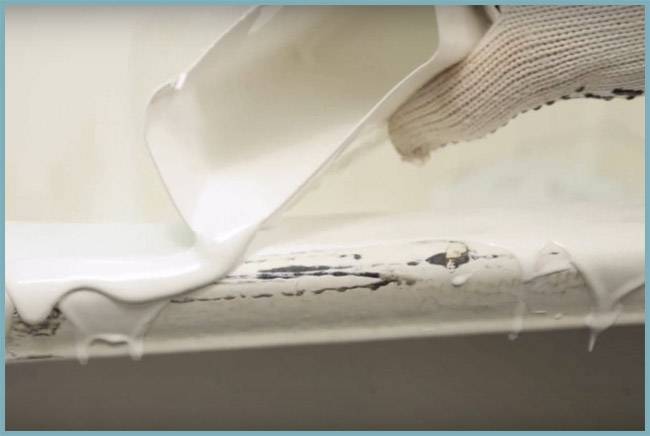
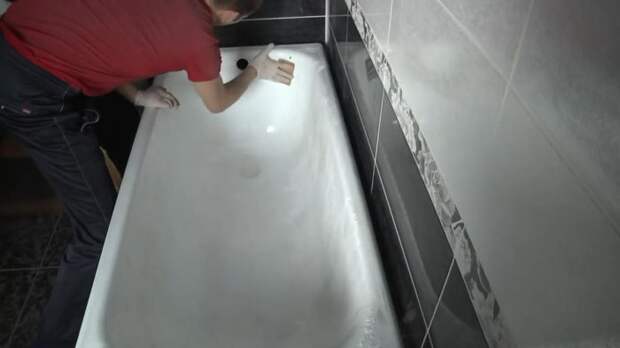
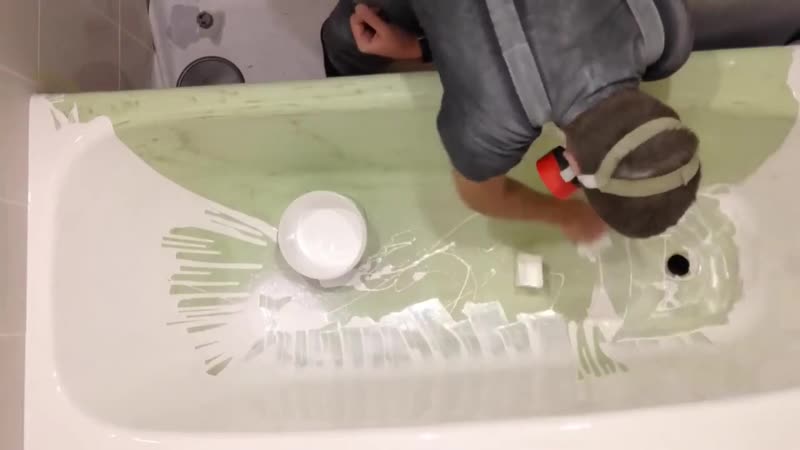
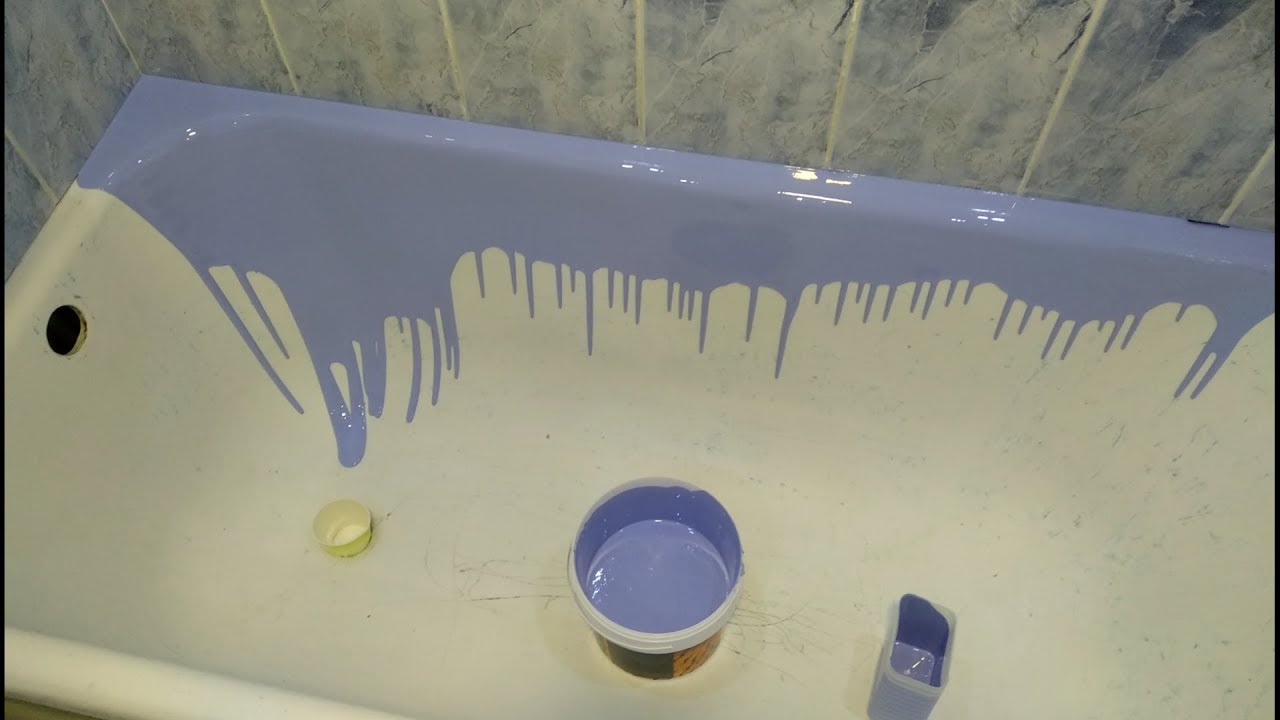
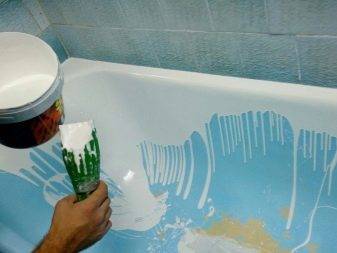
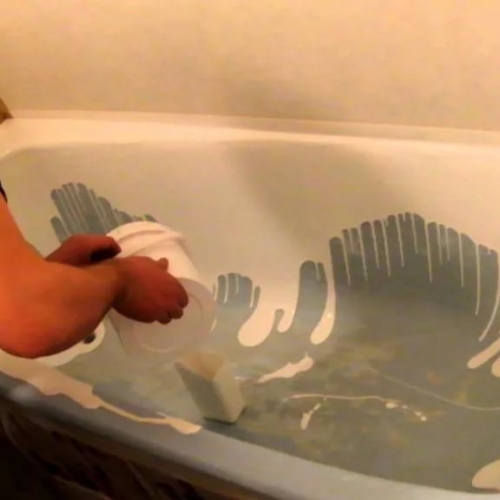
Before starting work, the acrylic composition must be kept for a certain period (usually this time is 15–20 minutes), which is indicated in the instructions for the material, and only after that restoration can begin. The process of applying liquid acrylic to the surface of the bath is that the prepared mixture is poured onto the walls of the bowl from top to bottom, and then the filling is leveled with a spatula, and the resulting streaks are removed. To do this, the composition is poured into a container with a small spout or into a deep volumetric glass with high walls.
Experts advise to collect a sufficient amount of material in the container for pouring acrylic. This is to cover as much surface area as possible in one pass. The fact is that excess acrylic will drain through the drain hole in the bath, and when you pass the same area again on the surface to be treated, volume smudges and sagging can form, which are quite difficult to level with a spatula without damaging the resulting layer.
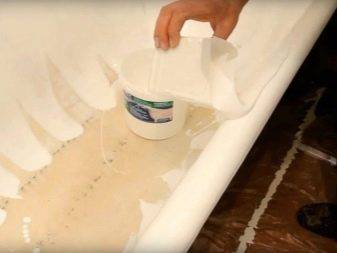
Initially, it is required to fill in the sides of the bath, bordering the wall. At the same time, the material is poured out in an even thin stream, distributing it evenly and avoiding gaps. Then the filling surface is carefully leveled with a narrow spatula with a soft rubber nozzle (using a metal spatula without a nozzle is prohibited). After that, you need to cover the outer side of the bath using the same technology.
When applying a liquid acrylic mixture, it is important that it covers the old surface by about half, and the material layer is from 3 to 5 millimeters. This completes the painting of the first circle.

Next, you need to paint the walls of the bath along their perimeter. To do this, acrylic should also be poured onto the walls in a thin stream until the entire bath bowl is completely covered. At this stage, the coloring of the perimeter and bottom of the bowl is complete. Now you need to use a spatula with a rubber nozzle to even out all the influxes and achieve an even distribution of acrylic along the bottom of the bowl. Acrylic should be leveled with light tangential movements, in no case going deep into the material, as well as missing the bottom and walls of the bowl.The material evens out small irregularities during the polymerization process on its own, and all excess acrylic will drain through the drain hole into the container that you placed under the bottom of the bath in advance.
Restoration with glass or filling bath
Bulk acrylic is also a two-component mixture, which will need to be prepared by mixing the components in the proportions recommended by the manufacturer. The mixture does not have a strong smell, which is a plus. After hardening and drying, acrylic has increased resistance to abrasion. Stakryl spreads itself, and the process of its application is simple. True, skill is required, although this material does not dry too quickly. If you act slowly, you will avoid possible mistakes.


The step-by-step instruction looks like this:
- Mix the solution by combining the two components. The resulting substance must be homogeneous.
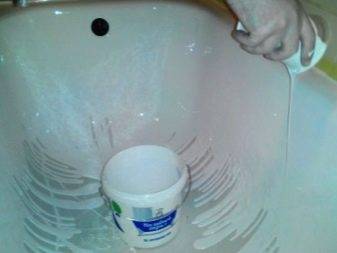
- Fill a small glass and start pouring the glass onto the top of the bead. As soon as the drip reaches half the depth of the tub, slowly move the container around the perimeter, constantly adding the mixture.
- Repeat everything described in the previous paragraph, only now pour acrylic from the middle of the depth of the bath. Saving is not worth it. All excess will gather at the drain and pour into the prepared bowl.
If bubbles appear, they are smoothed out with a soft rubber spatula or brush. Such a surface will dry for 4 days. Better check what is written in the instructions. Even if it visually seems that the acrylic has hardened, this does not mean that the treated plumbing can be used. The drying time depends on the temperature.
So, for "Stakril Ecolor" the norms are as follows:
| Curing and drying time | Air temperature in the room |
| 36 hours | +25 degrees Celsius |
| 42 hours | +20 degrees Celsius |
| 48 hours | +17 degrees Celsius |
It is not necessary to artificially raise the temperature with the help of heaters and a heater. This will most likely damage the finish. Forcing natural processes will not work without loss of quality. It is also impossible to work at too low temperatures. The manufacturer gives all recommendations in the manual and description of the application.
Video - Restoration of a bathtub with liquid acrylic using the "pouring" method
This is not just a master class from a professional. A video showing how to restore the appearance with bulk acrylic will be a good help. Also see the post about bathtub enamel restoration with your own hands. Save the link, subscribe to the newsletter. Then, as soon as it's time to act, you will have a personal teacher. All stages are shown in detail, and you will not make mistakes. This means that the surface will be even, smooth, shiny.
Bulk acrylic prices
Before you update the bathroom, be sure to draw up an estimate. It will not be too complicated, and the final amount will not scare you. However, only by comparing the costs, you can decide on the choice of restoration method.
So, the prices for the most popular two-component glass compositions are given in the table:
| Name of bulk acrylic | The weight of the material in the package, kg. | Bathroom volume, cum. m. | Packing cost, rub. |
| Plastal Premium 24h. | 3,0 | 1,5 | 2100-2300 |
| Stakryl Ecolor 24h. | 3,4 | 1,5 | 1600-1800 |
| Stakryl Ecolor 16h. | 3,4 | 1,5 | 1700-1900 |
| Plastal Premium 24h. | 3,4 | 1,7 | 2300-2500 |
Features of acrylic coating and its care
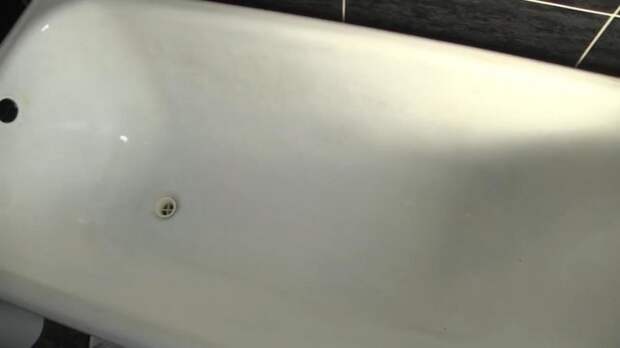
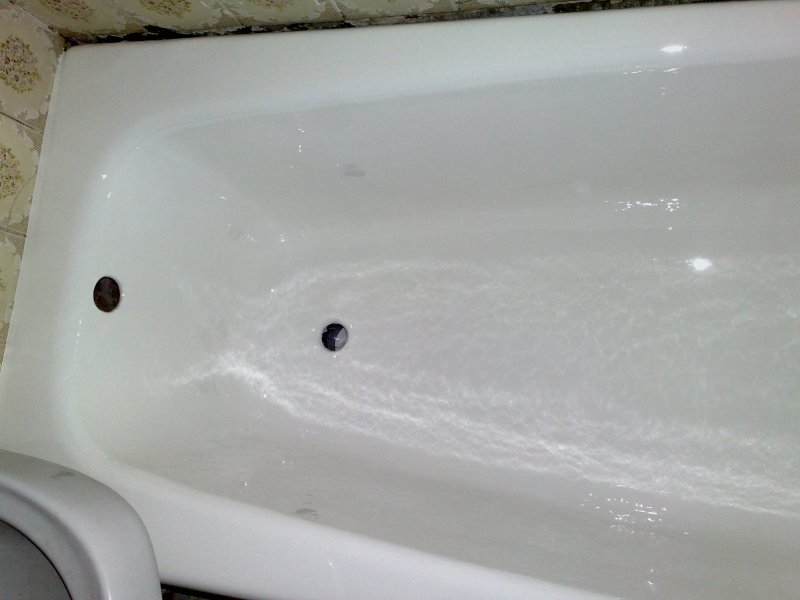
The technologies are different, but the result - a poured acrylic bath - is the same: a bath with a coating that has such physical properties as
- wear resistance (up to 15-20 years),
- low thermal conductivity (and this means a more comfortable preservation of water temperature),
- spectacular and dazzling surface smoothness, pleasing to the eye and skin, and associated with it, ease of care.
Features of the care of an acrylic bath
Acrylic fears:
- falling onto heavy objects
- hit with pointed objects
- warp deformations
- abrasive cleaning powders
- aggressive chemicals
- colored or colored detergents (such as sea bath salts)
However, care is also simple: to remove dirt from the bulk bath, it is enough to use a soft fabric texture with any light gel-like or creamy detergent.
Another important advantage of acrylic is a rich color palette that can be selected, ranging from a variety of colors to their subtlest shades, because the color is obtained by adding color to liquid enamel. Liquid acrylic for old bathtubs can give not only a new surface, but also a new color, which is convenient when renovating an entire bathroom.
Types of baths and methods for repairing damage
- Acrylic.
- Cast iron.
- Wooden.
- Steel.
- Glass.
- From natural stone.
Wooden, glass and natural stone models are almost impossible to restore on your own. Too big a risk, permanently spoil the surface.
Another thing, bathrooms with an enamel surface. Their restoration will not require large costs and effort. The main thing is to start the recovery process immediately, without delay.
- Repair any chips on acrylic surfaces immediately. Any damage allows moisture to enter the material and can ruin the acrylic bowl.
- Rust.Regardless of what material the font is made of, rust on it can appear on almost any type of coating.
- Scratches. Most often, acrylic and cast iron products suffer from scratches. A scratch on an acrylic surface is much more dangerous than on a cast iron one. A deep scratch that is not repaired immediately can grow larger and lead to a split, breakage of the bottom or walls of the bowl.
- Split. The real problem with "acrylic" bathtubs is that the bottom or walls are too thin.
- Through hole. Can appear in a bowl of any material. If you can repair chips and scratches on your own, then with a through hole, you cannot do without the help of professionals in restoration. You can only try to put the insert on your own.


