- What else you need to consider when repairing cast iron bathtubs
- Restoration. Methods
- Restoration. Methods
- Insert application
- 1 Enameling - why do many refuse it?
- Advantages and disadvantages of enameling
- Technology features
- 2 Enameling process - giving a glossy surface finish
- "Bath to bath" or acrylic liner
- How to repair a chipped enamel?
- Bathtub enamel restoration
- Polishing instructions
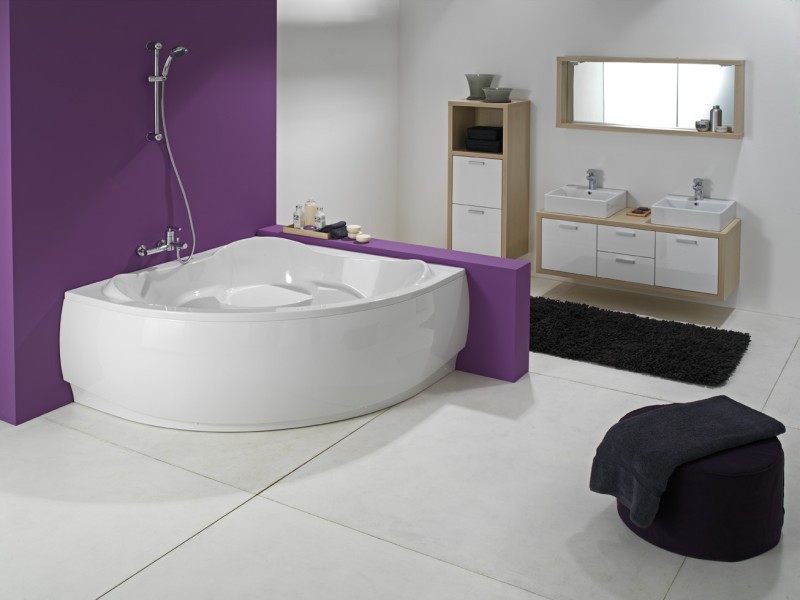
- Hydromassage bath
- Restoration with acrylic inlay
- Bathtub enameling
What else you need to consider when repairing cast iron bathtubs
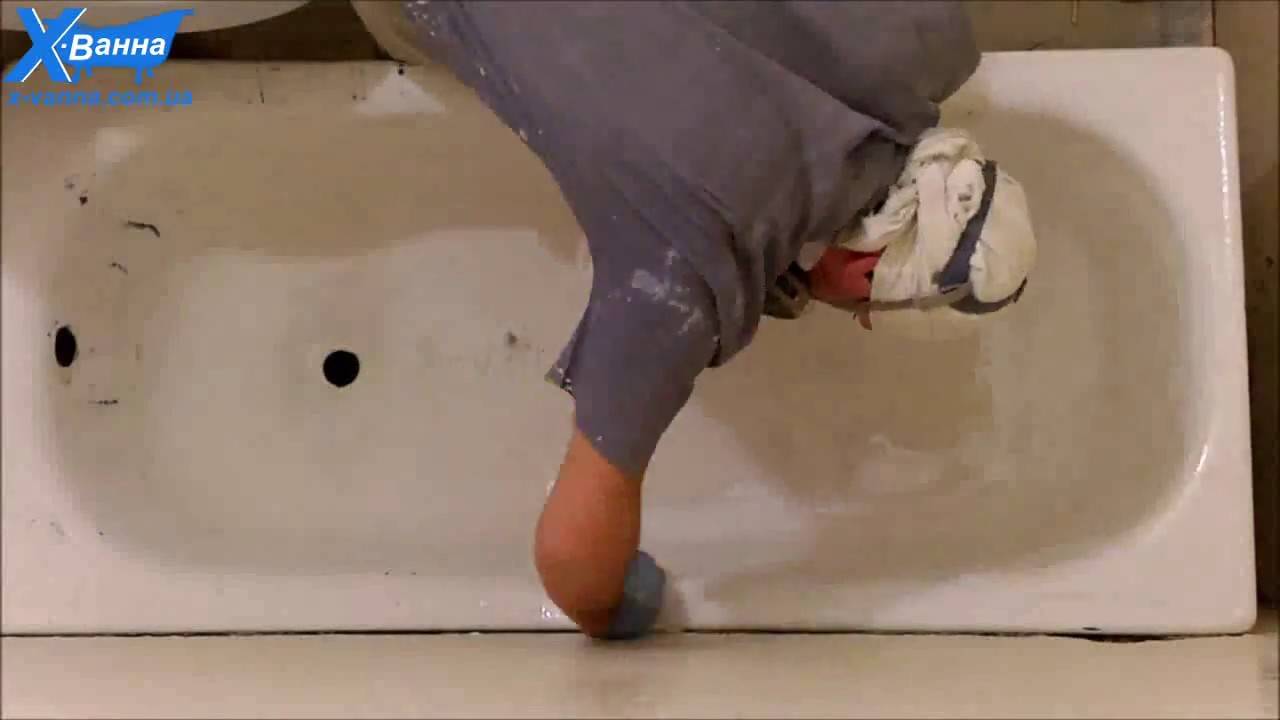
Choose the right time of the year when you will carry out repairs. It is desirable that it be warm and dry outside, since windows should be kept open during the restoration of the bath. It is advisable to send small children somewhere far away from the apartment so that they are not harmed by the smell of the products used.
Be sure to purchase a respirator, and not the usual "Petal", but a professional one, with an organic absorber. You can use a gas mask.
Stock up on a thick oilcloth or rubberized apron and rubber gloves, at least three sets.
Take a flute brush with a size of 70-90 mm, made of natural bristles. It would not be superfluous to purchase two brushes at once, because if one of them gets dirty, it must be thrown away immediately.Make sure that the brushes do not come into contact with something greasy: any exposure to enamel with fatty substances will negate all repairs.
You will need acetone or thinner #646. do not use solvents based on saturated hydrocarbons, such as white spirit - they are absolutely not suitable for working with bath enamel.
Stock up on rags that do not leave a lint on the surface. Suitable fabrics:
- Coarse calico, repeatedly stretched;
- Cotton fabric;
- Flannel;
- Microfiber cloths (these are used to wipe glasses).
Restoration. Methods
Restoration can be done in a variety of ways, including:
- application of two-component enamel. The two components are the hardener and the enamel itself. The mixture is applied to the surface like regular paint;
- filling the bathtub with acrylic (glass). After grinding and thorough degreasing, the bathtub is filled with acrylic. After 2 days, the updated plumbing is completely ready for use;
- bathtub-to-tub installation. This method consists in installing an acrylic liner that is completely identical to the old bathtub. The liner is attached with glue or foam and allows you to use the restored bathroom for a long time.
Restoration. Methods
Restoration can be done in a variety of ways, including:
- application of two-component enamel.
The two components are the hardener and the enamel itself. The mixture is applied to the surface like regular paint; - filling the bathtub with acrylic (glass).
After grinding and thorough degreasing, the bathtub is filled with acrylic. After 2 days, the updated plumbing is completely ready for use; - bathtub-to-tub installation.
This method consists in installing an acrylic liner that is completely identical to the old bathtub.The liner is attached with glue or foam and allows you to use the restored bathroom for a long time.
Insert application
The easiest, but also the most expensive way to restore a cast-iron bathtub is to use a special liner. It is made in factories, so when buying, you must carefully check the dimensions. The restoration process itself will look like this:
- the inner surface of the bath is thoroughly cleaned of contaminants and degreased;
- then we insert the purchased liner into the bath, while checking the coincidence of the drain holes;
- we cut all the edges in the shape of the bathroom;
- after fitting, the liner is removed from its place. Its outer side and the inner surface of the bath are coated with special glue. Then the insert is installed in its place. After this, the joints must be additionally sealed with the same glue or sealant.
After sticking the liner, the bath is filled with cold water and left for a day. This method of restoration is the easiest and everyone can do it, of course, if finances allow.
1 Enameling - why do many refuse it?
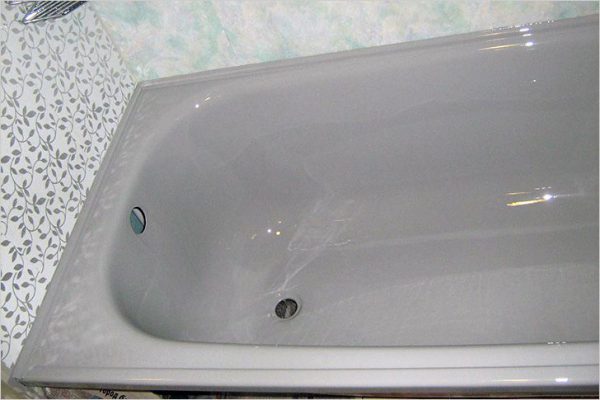
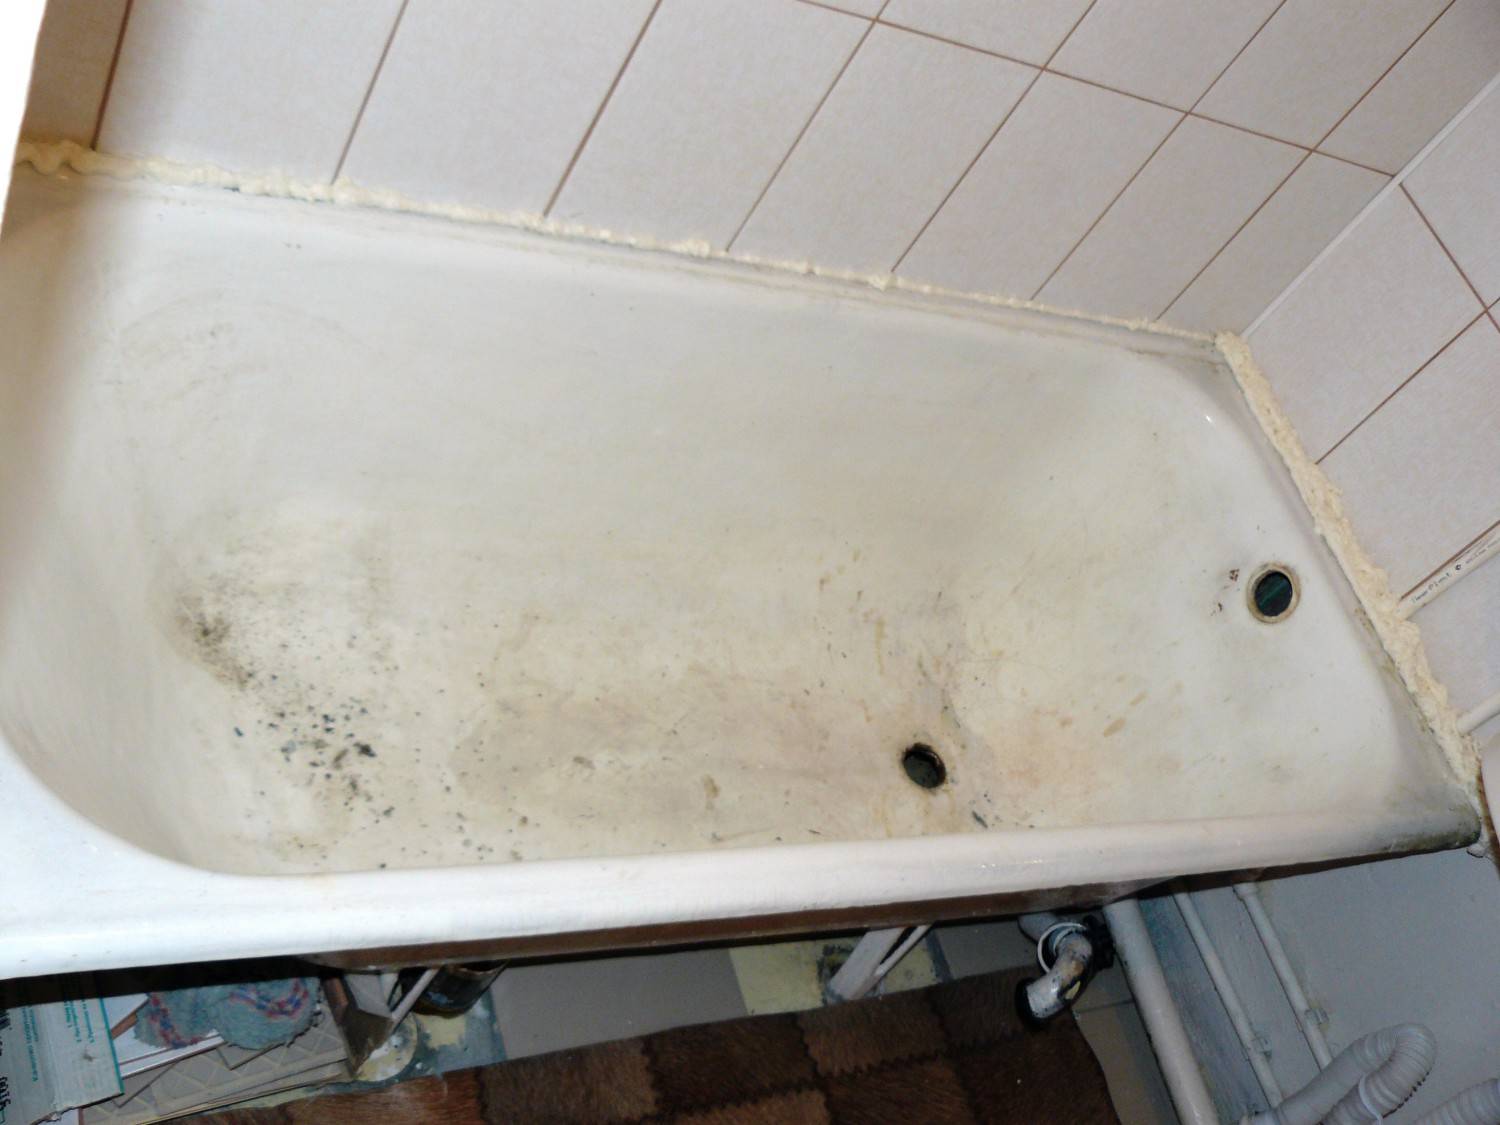
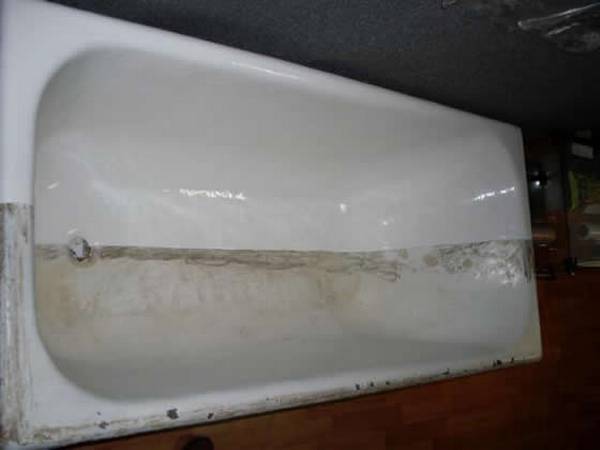
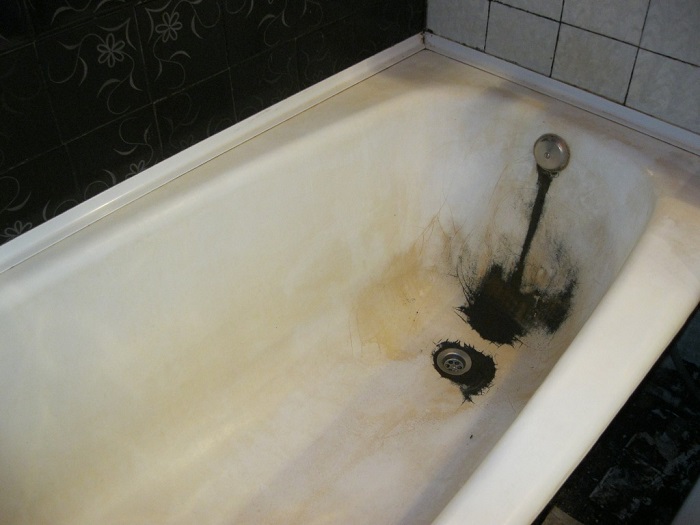
Enameling with a brush is a budget option that allows you to restore the original appearance of your bath. Liquid enamel gives the surface a new sound, it becomes absolutely smooth and glossy. However, after the restoration of the enamel of the old bath is completed, it needs special care. It is forbidden to put or drop heavy objects on such a surface, wash it with abrasive powders and sponges, household chemicals containing aggressive acids, only gel-like compounds and pastes. Is this restoration suitable for any cast iron bath? Unfortunately no.Enameling can only be used if the bath has lost its visual appeal, has become rusty, dull, and roughness has appeared. But if there is a chip on the enamelled bath, deep cracks, cavities and scratches, this option will not work for you.
The most budgetary way to restore cast-iron bathtubs is enameling with a brush
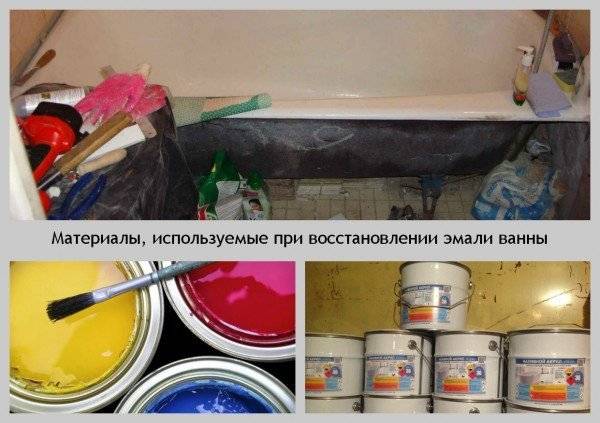
To add shine, paints and varnishes based on epoxy resins are used. Usually the base and hardener are included in the kit, both components are thoroughly mixed before use, and the working mixture is ready. To restore the enamel in the bathroom, use the proven mixtures of Epovin, Epoxin or Reaflex. Additionally, for work, you will need to purchase a high-quality brush made of combined fibers, sandpaper and powder for cleaning the surface and, of course, a respirator. Such paints and varnishes can emit toxic fumes, so do not risk your health. Enameling of the bath is done both with your own hands and with the involvement of a professional.


The advantage of such a restoration is its low cost and the possibility of repeated application of enamel when it is deformed. The rest are some cons. The coating will last no more than 5 years, after which cracks will appear on the enamelled bath, the top layer will begin to peel off and turn yellow. Unlike factory conditions, the bath after enameling is not sent to a drying oven, where hardeners and impurities are removed from the enamel. Therefore, enamel coating at home loses its appearance and strength over time.
Advantages and disadvantages of enameling
The advantages of enameling are as follows:
- The desire to save.Most often, a complete replacement of a bathtub with chipped enamel is not needed. After all, if the option of replacing the bathroom is chosen, in addition to the purchase, dismantling work, transportation of the old bathtub and connection of the new one are coming. In this regard, it is much easier and cheaper to carry out repairs.
- Replacing a bathtub is most often impossible when it comes to a rented apartment. If the bathtub is in poor condition, and you live here for a long time, restoring the bathtub enamel is the best way out.
- Restoration work can be carried out as many times as necessary.
- Enamel coating can be created under the general color background of the bathroom.
- Restoration takes less time compared to a complete bathtub replacement.
- During the dismantling of the bath, tiles most often suffer. The application of enamel does not pose any threat to the tiles.
Note! A well-done renovation results in a shiny white tub that looks like new. Attractive appearance will remain for a period of 12 to 36 months
Enameling also has disadvantages:
- After repairing with a brush, traces and fragments of hairs may remain on the coating (especially in cases where a new tool was used to apply the enamel).
- The service life of the coating, even with the most careful care, does not exceed 5-6 years.
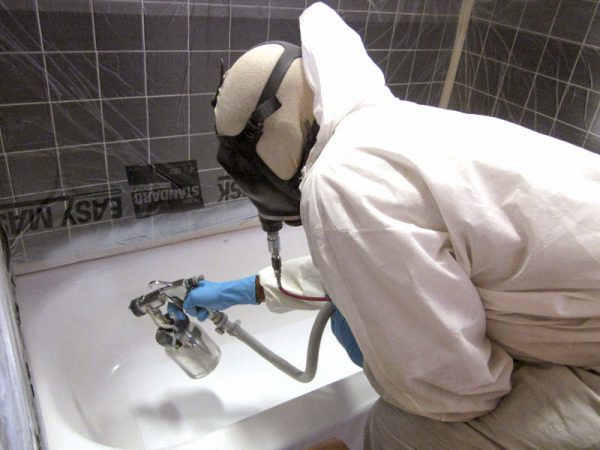
Note! Compared to traditional enameling, spraying is a method that provides a better finish.
Technology features
Do-it-yourself enameling repair of a cast-iron bathtub is a simple and effective way to restore the appearance of the product. With minimal financial investment, it allows you to refuse to replace the old washing container, reducing the cost of repairing the bathroom.
This operation can be successfully performed with your own hands, if you follow the technology of applying enamel. Enamel technology at home has the following features:
With the help of polyester enamel, you can give the bath not only white color
This paint for restoring old cast iron bathtubs comes in a wide range of colors including blues, beiges, pinks and greens.
Enamel restoration technology at home allows you to perform repairs without turning off the sewerage and water supply.
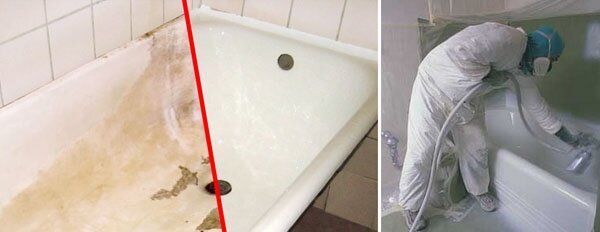
Comparison before and after restoration
For staining with polyester enamel, you can not even dismantle the bowl.
Before enameling, wet cleaning is carried out in the bathroom, all unnecessary is removed, household appliances are covered with a film.
It is necessary to clean and enamel the bowl in a respirator, protective clothing and a mask.
It is important to wait for the enamel to dry completely before using the bowl so that the new coating polymerizes and becomes stable.
However, this small minus is offset by an inexpensive price, ease of application and durability of the result.
Experienced craftsmen claim that this method of restoring a cast-iron bath has only 1 drawback - the drying time. However, this small minus is offset by an inexpensive price, ease of application and durability of the result.


2 Enameling process - giving a glossy surface finish
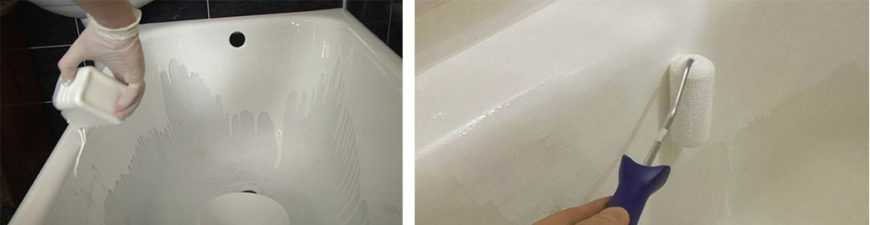
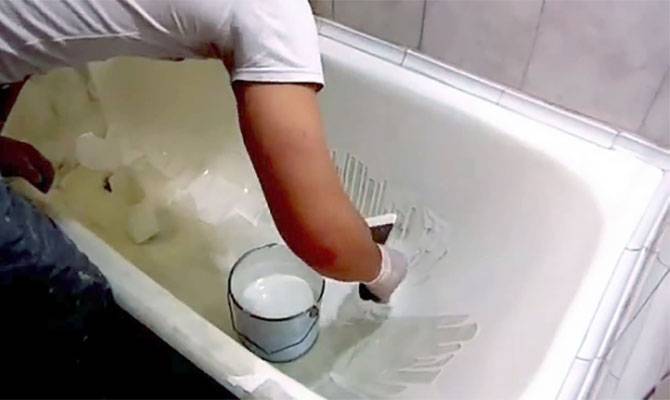
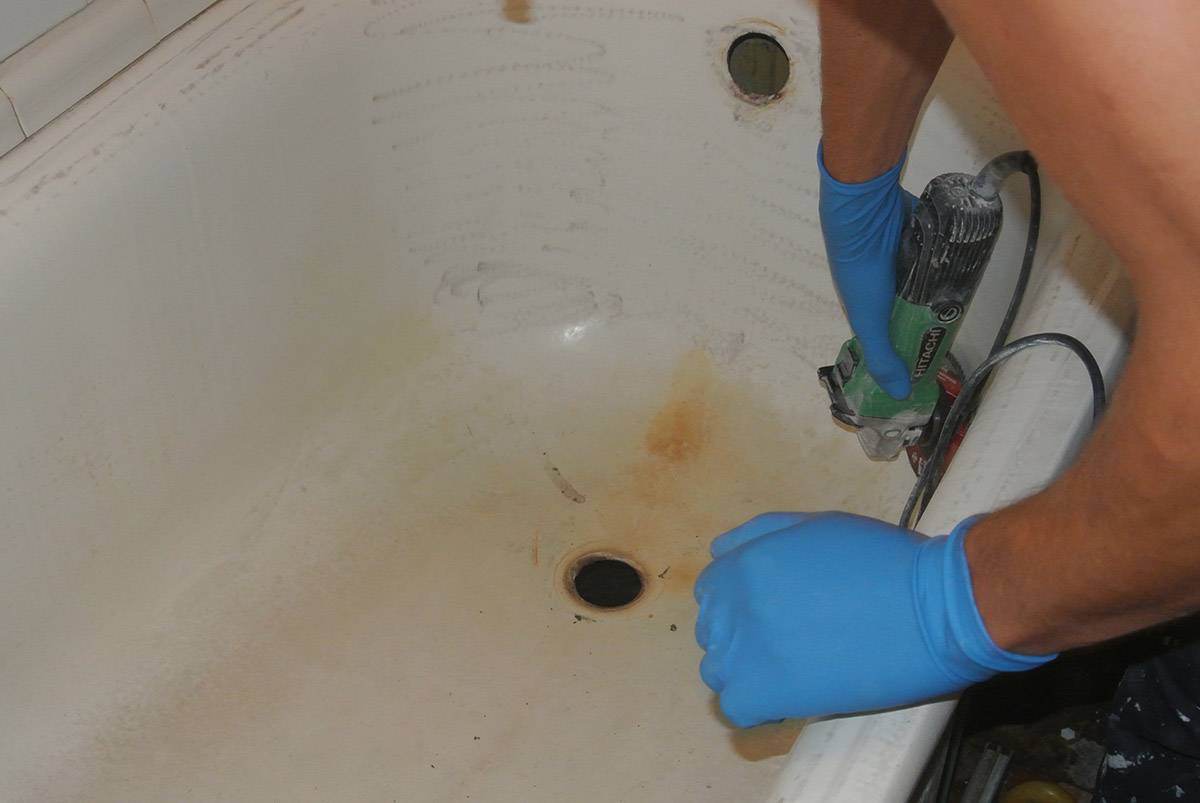
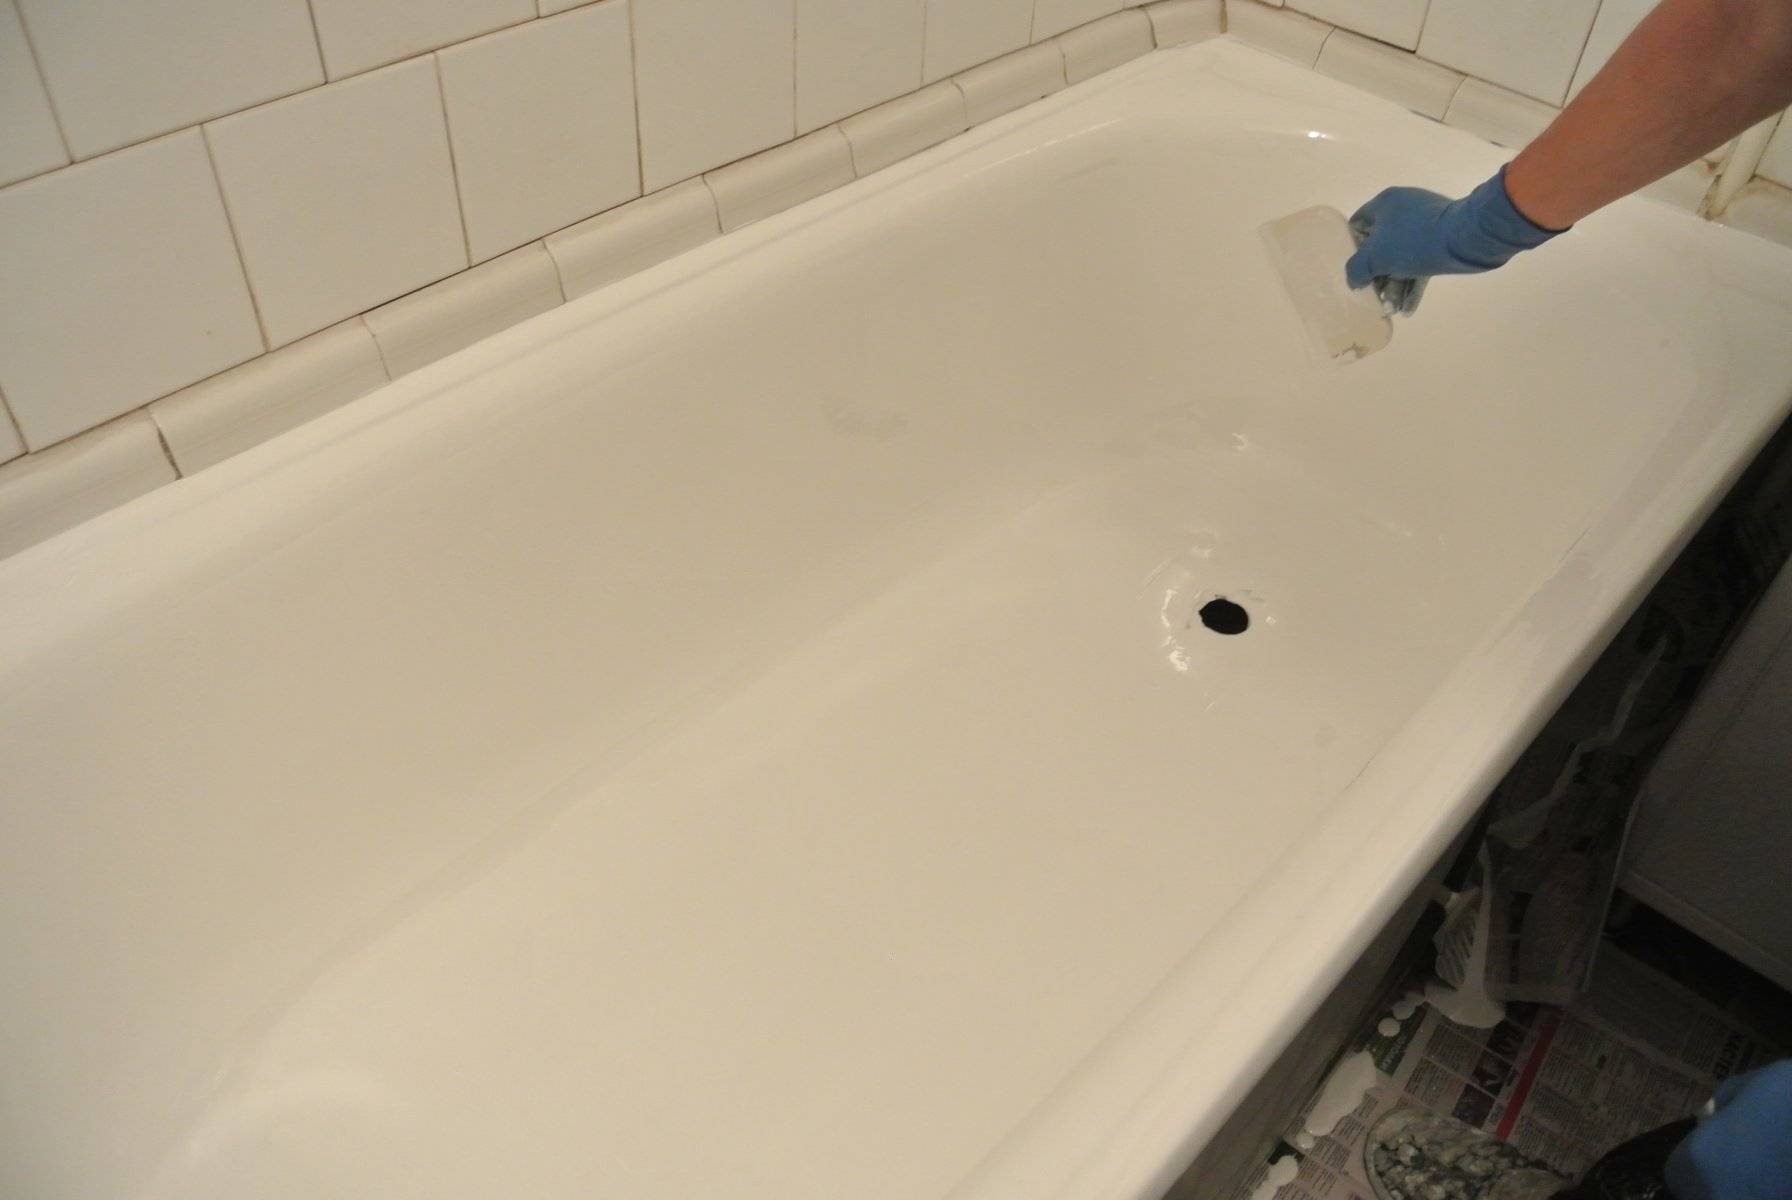
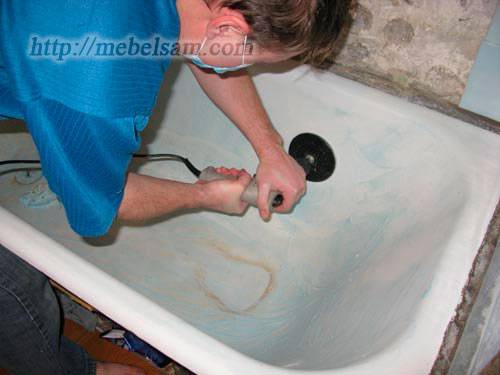
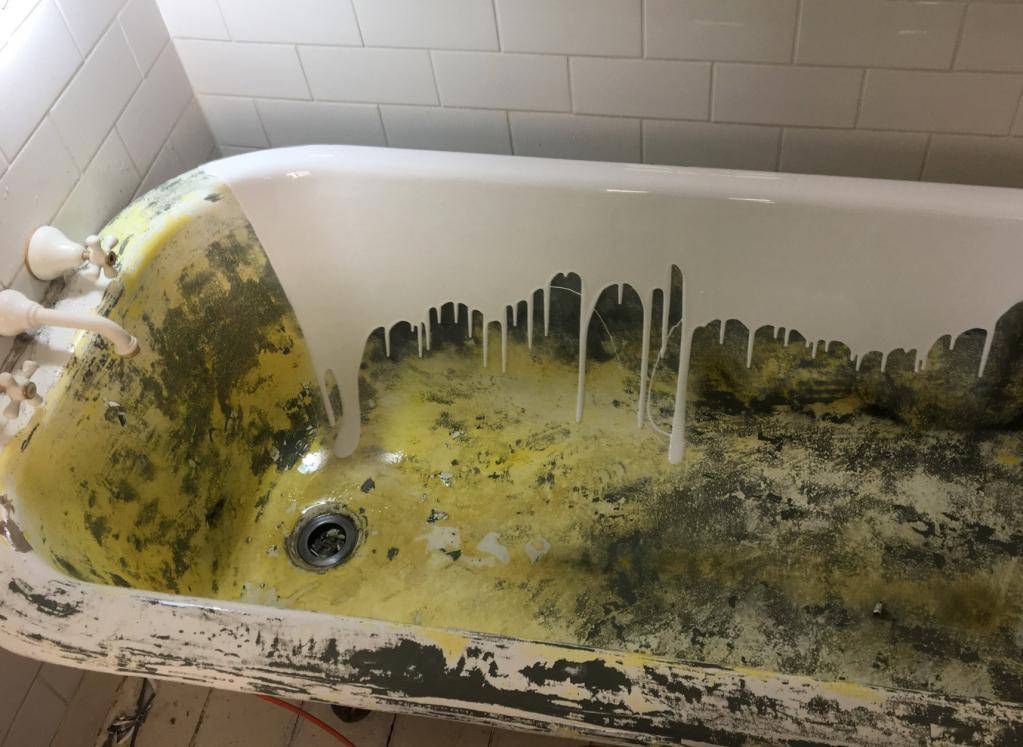
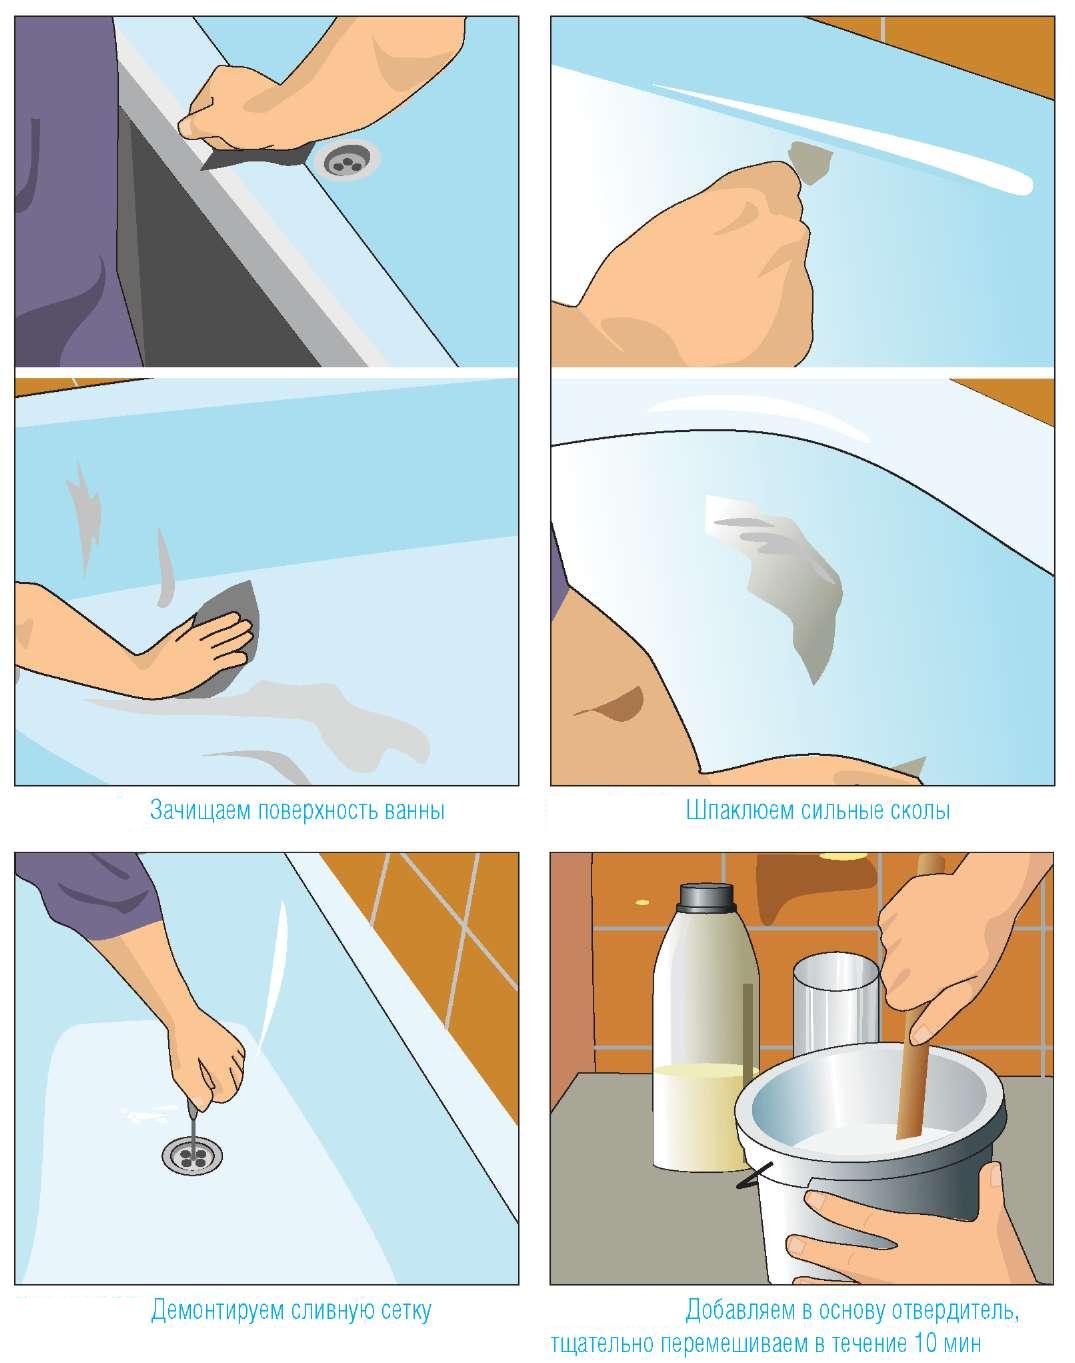
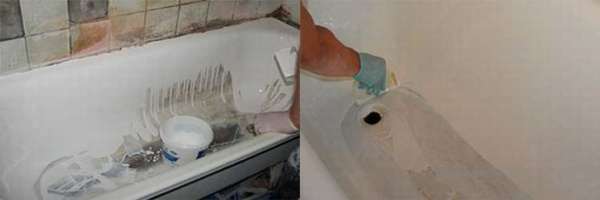
The first stage is preparatory. The quality of subsequent work will depend on it. The main goal is to achieve the most clean surface from stubborn grease, dirt and roughness that can disrupt the final result.Prepare a cleaning powder, you can use ordinary baking soda or household chemicals based on it, such as Pemolux. Instead of soft sponges, use sandpaper, which will help you deal with dirt more effectively. For reliability, you can walk with a drill with a grinding wheel or a grinder. If you are new to this business, we advise you to abandon the grinder, so as not to violate the integrity of the surface, the enamel will not mask the cavities. When the bath is prepared, rinse it thoroughly and let it dry completely. To speed up the process, you can use a hair dryer, it will take a day to dry naturally. Next, we dismantle the old siphon and go over the entire surface with a vacuum cleaner without a nozzle, making sure that there are no specks and dust left on the surface.
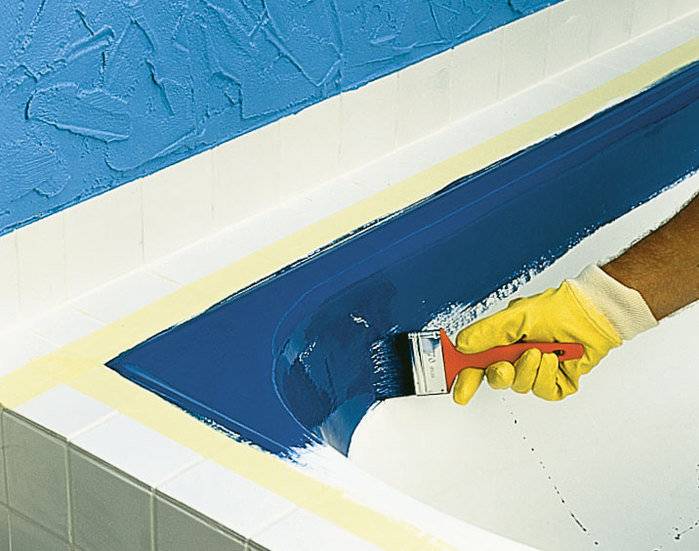
Enamel is applied over the entire surface of the bath in several layers
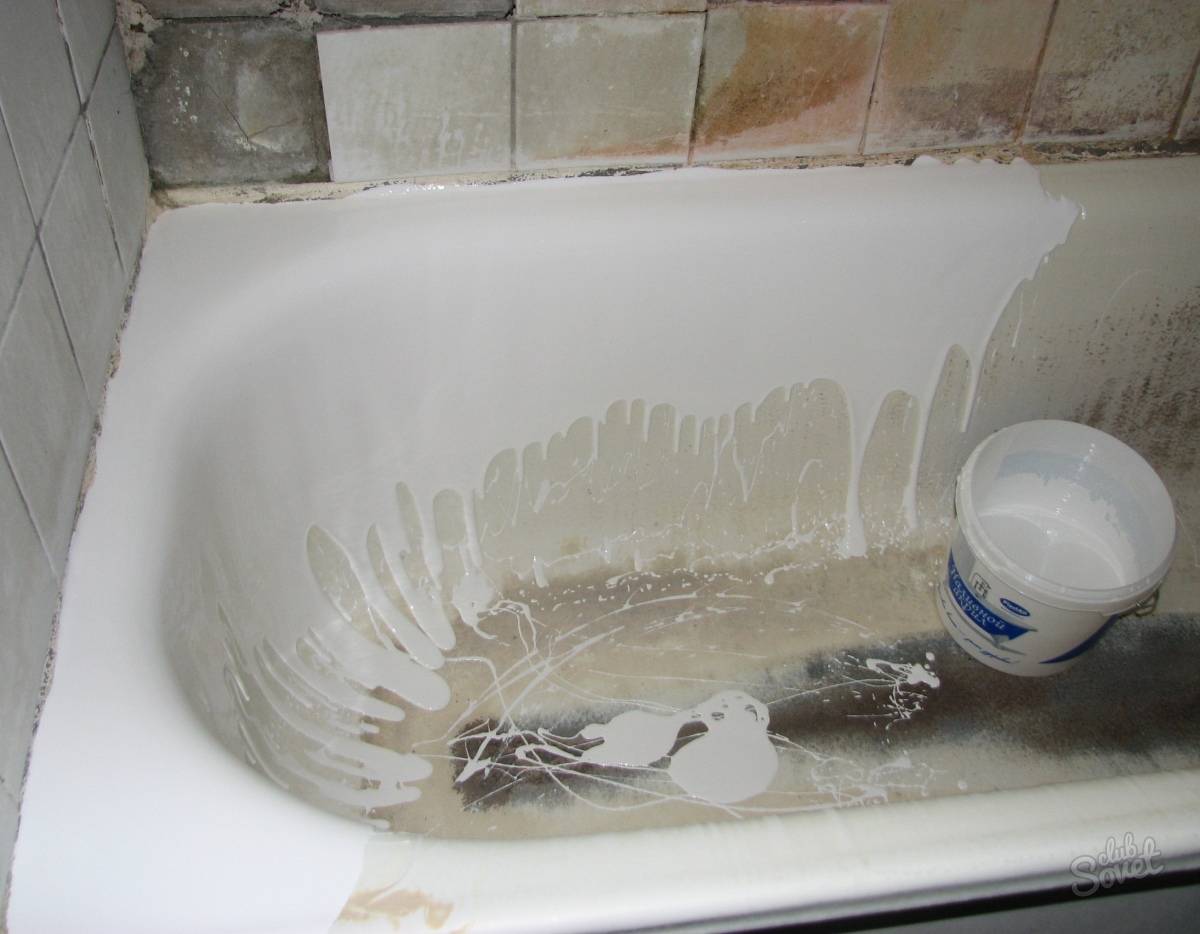
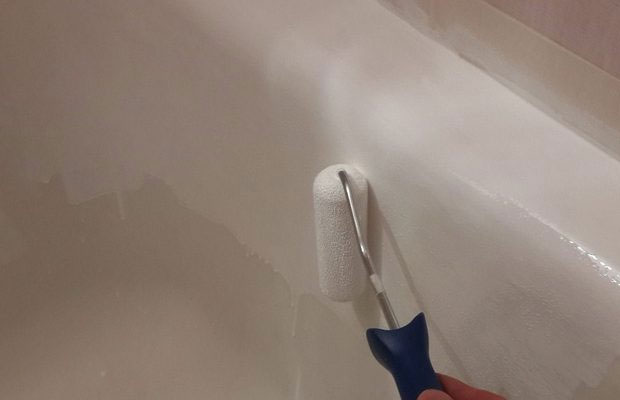
We proceed to the preparation of the composition for application. To restore the quality of your bathtub enamel, carefully read the manufacturer's instructions. After mixing, we divide the composition into two equal parts, for applying the first and second layers. We proceed, dip the brush into the enamel and evenly apply the base layer over the entire surface of the bath. We start work from the sides and gradually move to the center. The ultimate goal is to get even coverage and fill the pores as much as possible. You do not need to wait until the first layer dries, immediately apply the second. In this case, the movement of the brush is carried out from the center to the edges of the bath, the irregularities are smoothed out as much as possible.
We leave the bath for 20 minutes, after which we level the resulting streaks from the middle to the edges, until the enamel has time to grab. There will be leaks in any case, the main thing is to eliminate them in time. You may need to repeat the procedure.When the composition stops flowing, the restoration of the enamel on the old cast-iron bath can be considered complete. When the bath is completely dry (3-4 days), we screw the siphon into place, having previously removed the hardened enamel hanging from the technological hole.
"Bath to bath" or acrylic liner
Acrylic liners
If you do not want to carry out hygiene procedures for several days, using a basin or visiting a bath, then the method of inserting an acrylic liner will suit you perfectly. The process of self-restoration in this way takes no more than three hours, and you can use the bathroom the very next day.
In addition, the liner made of durable sanitary acrylic significantly reduces the thermal conductivity of the bath, as a result, the water cools very slowly.
For the best result, it is important not only to choose the right size liner, but also to correctly distribute the adhesive composition (foam and sealant from Henkel). bath measurements bath measurements bath measurements
bath measurements bath measurements bath measurements
Step 1. Armed with a screwdriver and a grinder, we dismantle the strapping elements.
Dismantling the strapping
Step 2. Preparing the bath to install the liner. We clean the entire surface with sandpaper, a grinder, remove debris with a vacuum cleaner and degrease the surface. Wipe any drops of water dry. This measure is necessary to improve the adhesion of the adhesive foam to the plumbing.


Step 3. The liners are transported with a technological edge, which we carefully cut with a grinder before installation.
Step 4. After the edge is cut, insert the liner into the bath and mark the technological holes.To do this, draw circles with a marker, sticking your hand under the bathtub and circling the drain and overflow holes.
Acrylic insert in the bath
Step 5. According to the marking, we drill technological holes.
Step 6. Apply two-component foam and sealant. We insert a bottle of sealant into the gun and distribute it around the drain and overflow holes. Next, we take the foam, we introduce a special composition into the balloon with a syringe, which will not allow it to swell excessively. From bottom to top, we apply foam in stripes to the bottom, walls, sides of the vessel being restored.
Foam application
Step 7. We insert the acrylic liner into the bath, gently press it with our hands, leveling it. Remove excess sealant and foam.
Installing the liner
Step 8. We make the installation of the siphon (strapping).
Step 9. We fill the bath with water so that the foam, while solidifying, does not force out the light liner. The next day, you can drain the water and use the updated bathroom.
Fill the bath with water and leave for a day
In your free time, you can install a decorative screen under the restored bath, as well as protective bumpers on the edges that come into contact with the walls.
Before starting hygiene procedures, do not forget to remove the protective film from the insert.
How to repair a chipped enamel?
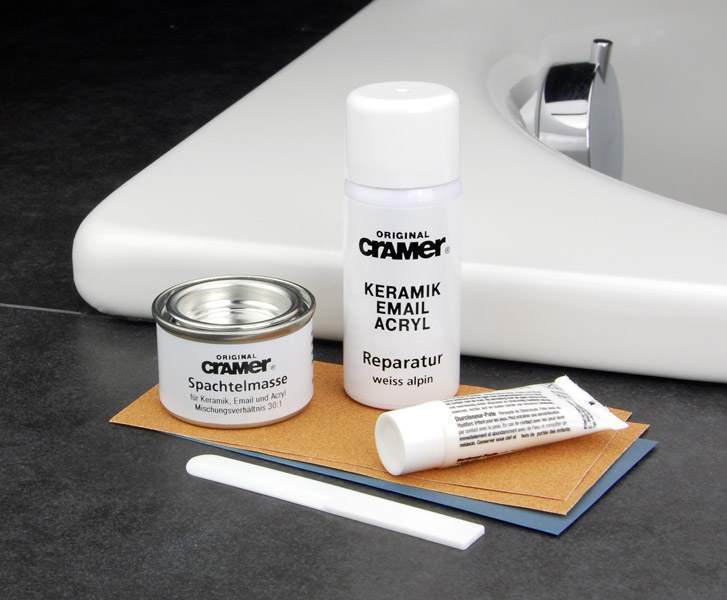
Repair kit for enamel restoration
It is best to entrust the repair of bath enamel to professionals, especially when it comes to steel or cast iron bowls. But if repairing chips in the bathroom seems simple to you, you can do it yourself. So, how to repair a chipped bathtub? There are many options:


- Install the finished acrylic liner. This option is suitable if the enamel in the bathroom did not just break off, but the hole turned out to be too large to be repaired with improvised available means.
- Repairing a chip with a porcelain patch.
- Repair damage with dry whitewash and glue.
- Dot enameled bowl.
- Complete replacement of the inner layer of the coating by pouring acrylic.
How and how to fix a chip in a small bathroom? You can choose the first two options.
- Porcelain patch is an old-fashioned way that can be applied to any type of bowl. First you need to collect fragments of a cup or plate made of porcelain in a color that matches the bath cover.
- degrease a chip on an enamelled bath (you can use gasoline);
- clean the area with sandpaper;
- grind porcelain into powder;
- apply epoxy glue to the resulting damage to the enamel;
- powder with porcelain chips and level with a spatula.
- Dry whitewash and BF-2 glue are mixed to a paste-like mass, and after sanding and degreasing the chipped area, the paste is applied with a brush. But there is another option, how to restore chipped enamel:
- smear the place with a thin layer of glue;
- powder with whitewash, level;
- repeat the operation of leveling the layer of new enamel to the level of the general coating.
Applying paste and cleaning the surface before painting
- degrease the sanded place of the chip and allow to dry;
- apply the enamel with a brush and distribute as thinly as possible;
- Apply another layer of enamel and let dry again.
After you need to give time for complete drying (about a day) and rinse the bath bowl with hot water.
Now you know how to repair enamel in three ways. But the problem of how to restore chipped enamel is not as difficult as, for example, fixing a crack in the wall or bottom of an acrylic bathtub.
Bathtub enamel restoration
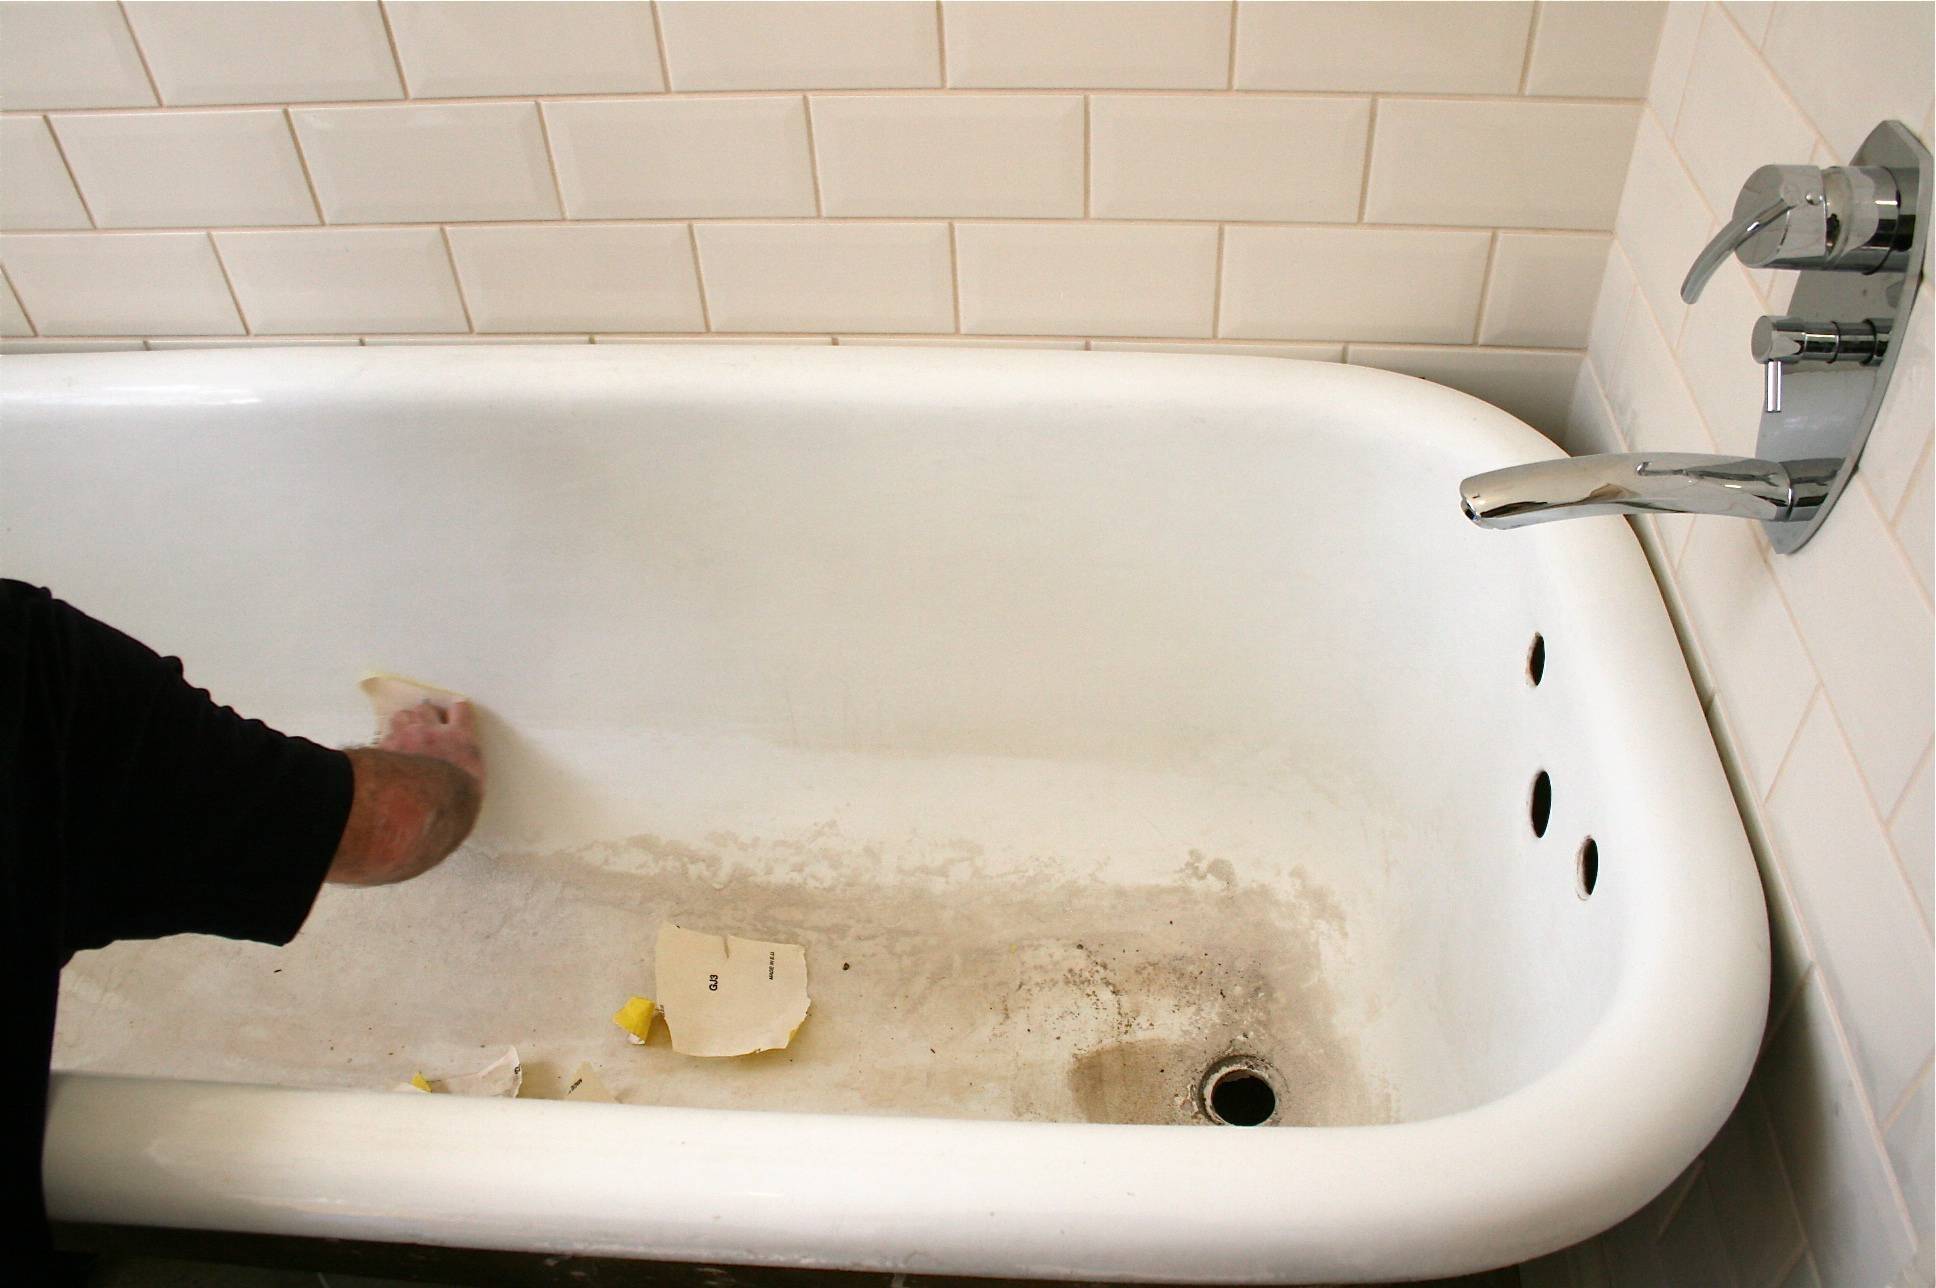
If your cast iron tub has suffered only because it has become dark, rough, and rusted in some places, then applying a new coat of enamel may be sufficient. In order to make these works, you will need the following:
- Drill and a special nozzle for it, which will help remove the old coating;
- Oxalic acid;
- Surface degreaser;
- Enamel;
- Brush or roller for applying a layer of enamel.
The sequence of the process for the restoration of an old cast-iron bath is as follows:
-
- First of all, clean the entire surface of the bath from old enamel. A drill with a special nozzle will help you with this. You can use a metal brush, but in this case, the work will take longer, besides, you can damage the surface, and we don’t need it.
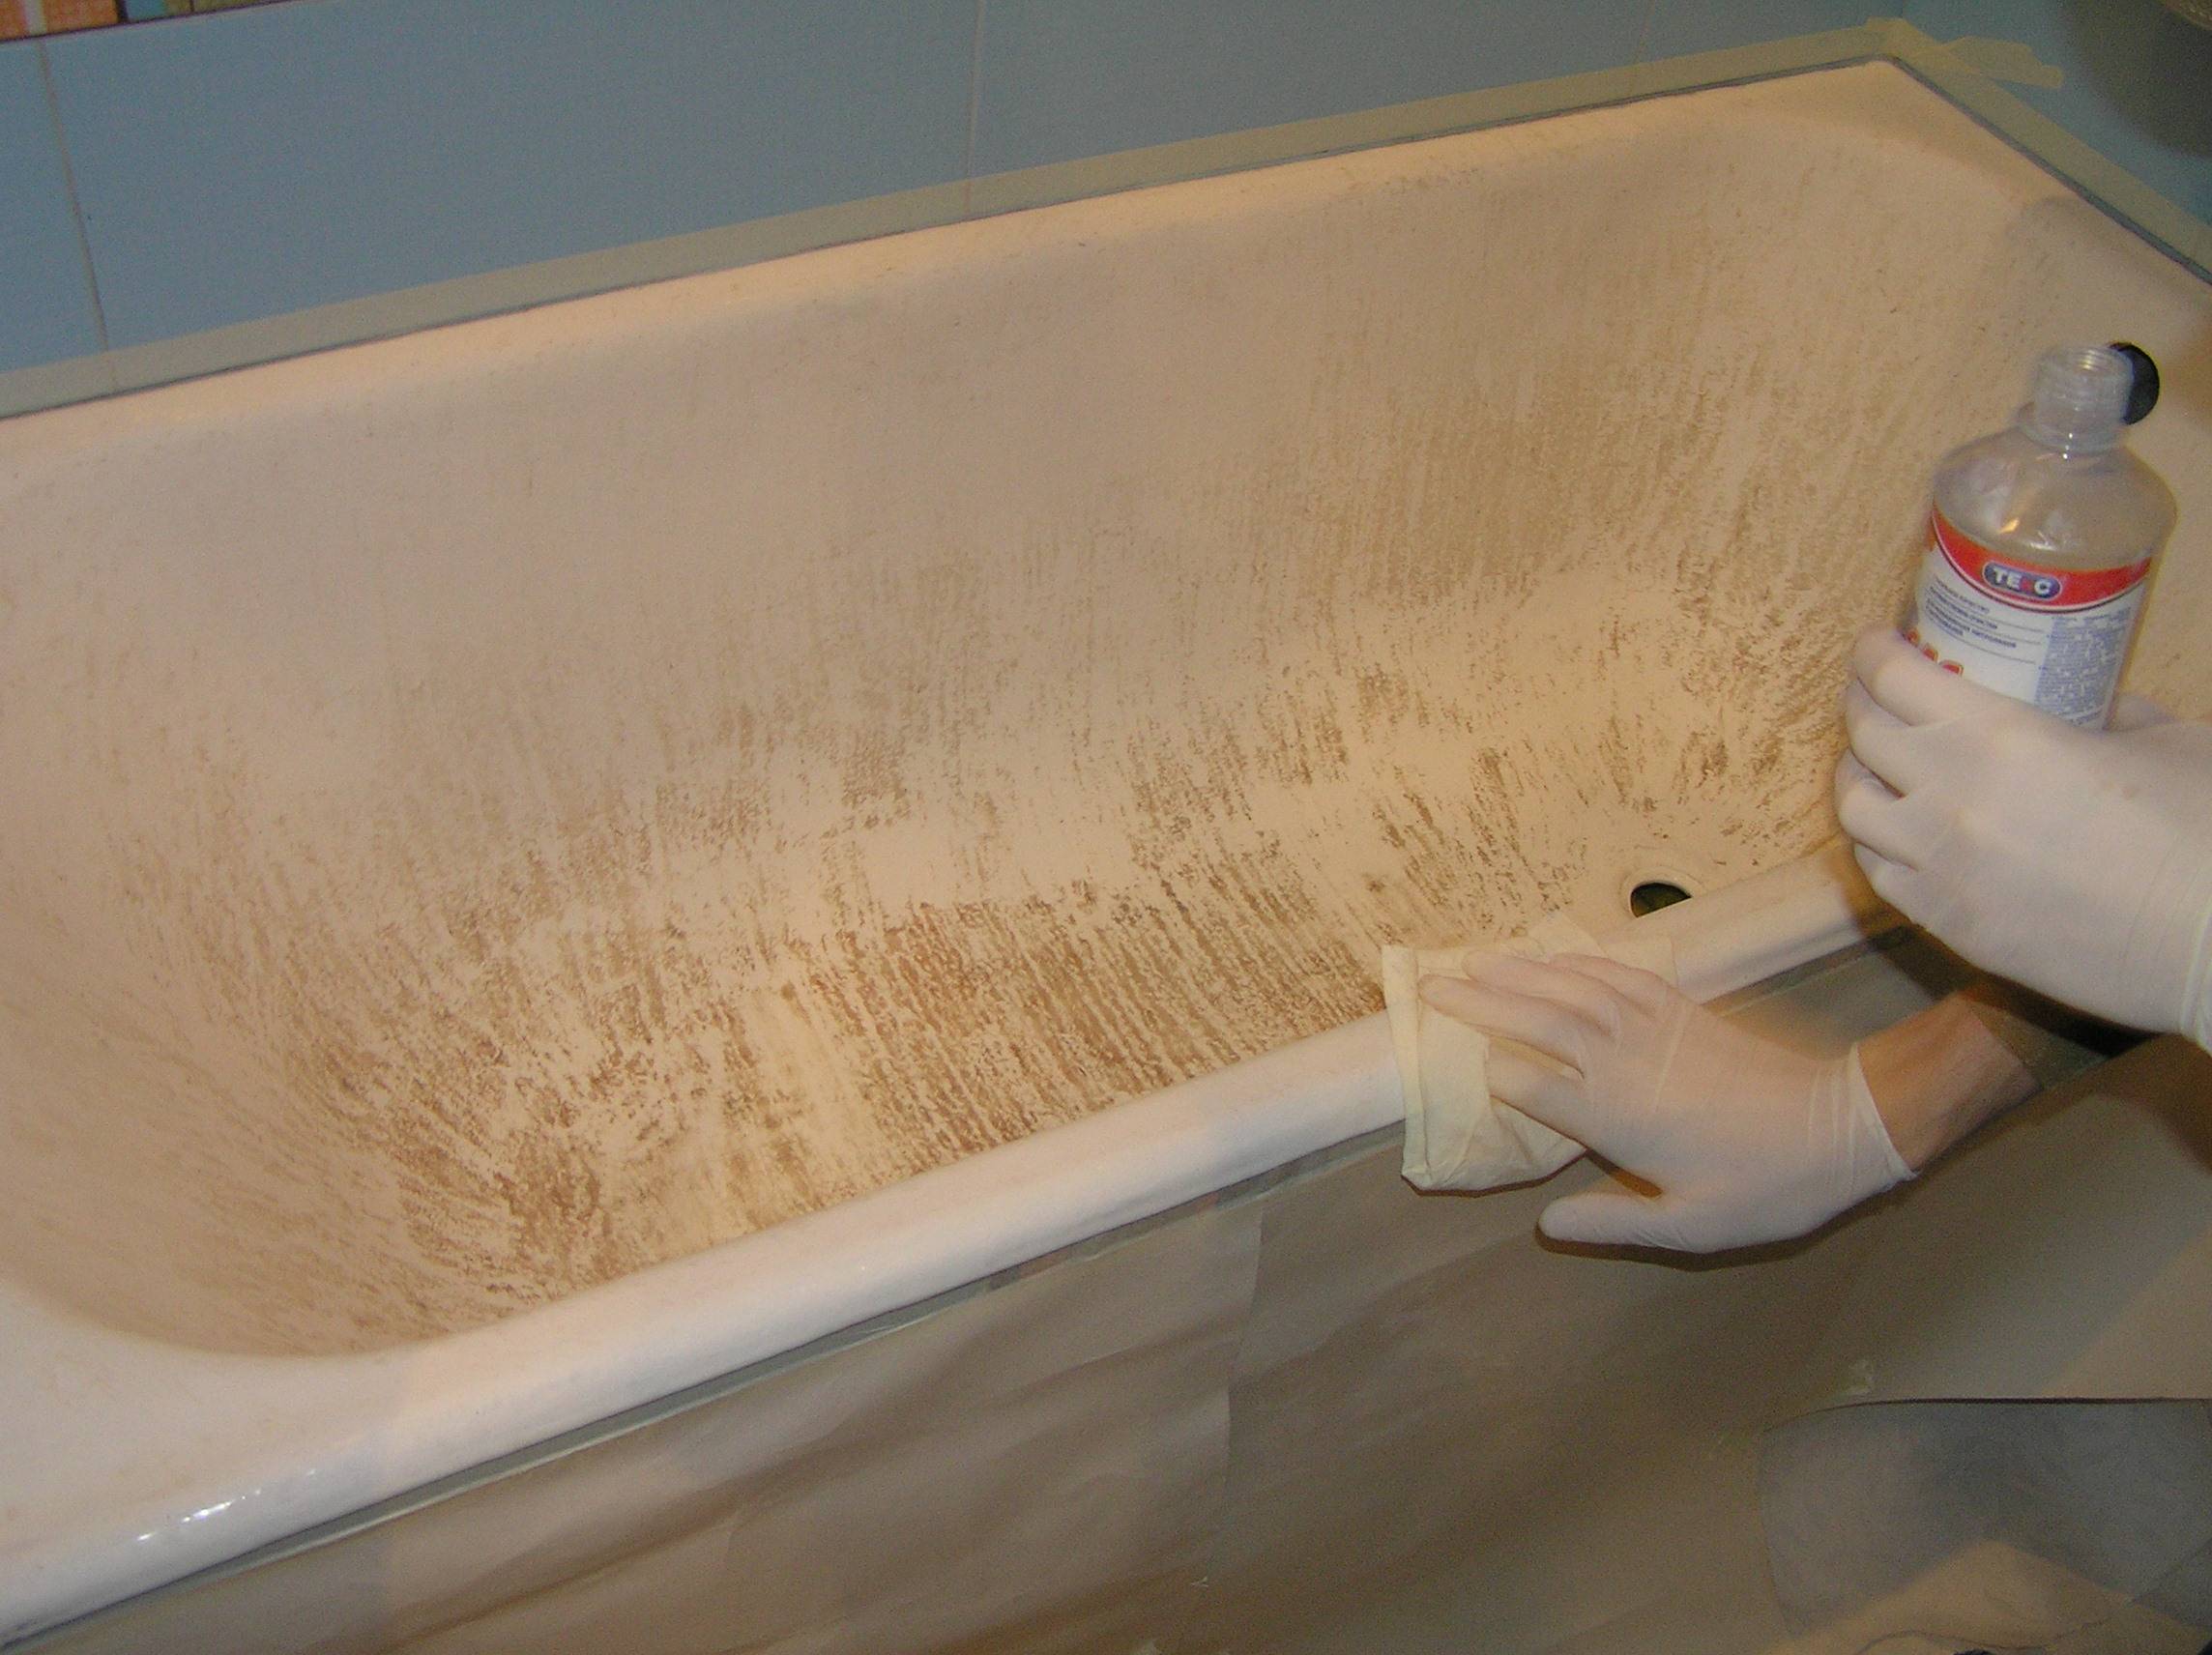
- If there is a water stone (hardened deposits of lime) on the surface with old enamel, oxalic acid will help get rid of it. Thoroughly wipe the bathtub with it in damaged areas. Remember to use protective gloves.
- After the surface of the bath is free from plaque, clean it of dust and degrease it. To make it easier to do this without contaminating surrounding surfaces, cover everything except the tub with sheets or newspapers.
- Now fill the bath with hot water and leave for 10 minutes. Drain, wipe thoroughly and dry the surface.
- Prepare the enamel for application by mixing the hardener and base element. Apply the first layer on the prepared and dried surface, leave to dry for half an hour. Apply the second and third coat in the same way. The fourth layer of enamel will be fixing, after its application, the restoration of the bathroom is completed.
This method has some advantages. Firstly, you can choose the color for the bathtub of your own choice. Secondly, the restoration of a cast-iron bath in this way is very easy to do on your own, even if you do not have special skills in such work.
However, there are also disadvantages. Due to the cleaning of the old layer of enamel, a lot of dust is generated. In addition, hand coating does not compare with factory enamelling. After repair, such a bathtub will require careful handling, and a new coating is unlikely to last more than 2-3 years.
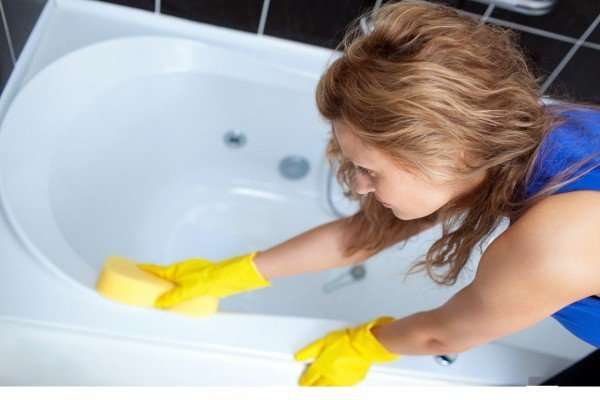
Polishing instructions
Enamel bath stains will disappear if rubbed with toothpaste.
- The bath should be cleaned with a sponge dipped in water with a small amount of detergent added. It is not recommended to use products with abrasive components, formaldehydes (formic acid), ammonia, washing powder. Such detergents may dull its surface.
- Detergent is evenly applied to the surface of the bath for 10 minutes. After this time, the surface is wiped with a damp sponge and rinsed with water. If the contamination is quite strong, then the procedure will have to be repeated.
- Wax polishing is applied to the walls and bottom of the bath and gently rubbed with a soft cloth.
- Stubborn stains can be removed from enamel with detergents, toothpaste or silver polish. A small amount of any of these products should be applied to a soft cloth and rub the stain.
- Scale stains are removed with lemon juice or vinegar.
- The aerosol is sprayed onto chrome parts and washed off with a stream of water, then wiped dry.
- To remove small scratches from the enamel, the acrylic bath is washed, the scratch is processed with sandpaper, then an abrasive polish is used, and lastly, a wax polish.
Hydromassage bath
To keep the hot tub clean, it is recommended to carry out a general cleaning once a week.
To polish your hot tub:
- Fill the bathtub with warm water with detergent dissolved in it. Run the hydromassage system for 5 minutes. After turning off, leave the water in the bowl for another 10 minutes. After that, drain the water.
- Once again fill the bowl with clean water and turn on the hydromassage for 5 minutes to rinse the bath. Drain the water and continue polishing in the previously described order.
The entire work on updating the enamel will take about 3 hours, and the result will last for 10 years. During the polishing process, a layer of acrylic with a thickness of about 0.2 mm is removed from the surface. This will practically not affect the strength, since the bath has a thickness of 7 mm.


Restoration with acrylic inlay
The third way to repair is to install an insert or "bath in a bath". It is impossible to make an insert at home, it is made industrially and is an insert that repeats the shape of the bath itself. This is an easy and quick way to renovate a bathtub yourself. But it also has disadvantages:
- Installation requires the removal of the bottom row of tiles to secure the bead of the insert.
- The impossibility of repeating the exact shape of a cast-iron bathtub with an insert. This is due to the fact that cast iron is a complex material for molding and has various depressions and protrusions, which, when the liner is installed, provoke the formation of voids. All this negatively affects the quality of the new bath.

Bathtub enameling
Do-it-yourself bath enameling is a feasible procedure for any owner
To understand how to restore the enamel of the bath, you need to pay attention to the condition of the container
Repairing a cast-iron or steel bath with enamel is justified if there are no deep chips and cracks. Otherwise, the enamel, even applied in 2-4 layers, will not hide serious damage.
How to restore a cast-iron bath yourself at home? When choosing how to paint the bathtub inside, preference should be given to high-quality epoxy enamel from trusted manufacturers, guided by the following criteria:
- The choice of enamel application method: brush, roller, aerosol or bulk method. The most acceptable are the application with a brush or bulk, since the roller can give an unnecessary porous texture, and aerosol spraying can be used only in case of repair of individual areas.
- Completeness of a set for restoration of a covering. It is convenient to purchase a kit, which includes everything you need for repairs - enamel, auxiliary components, application tools and compositions for preparing the bath.
Self-enamelling of the bath takes place in two stages: preparatory work and enameling.


