- Preparing a Surface for Protective Coatings: A Comparison of Process Features
- Preparation for repair
- Necessary materials
- Chip removal
- How to remove a chip on an acrylic bath
- Surface preparation
- Removing a chip on the surface of an acrylic bath
- How to restore an acrylic bath
- How to restore the acrylic coating of the bath?
- How to polish an acrylic bath?
- How to paint an acrylic bath?
- Acrylic insert
- Sizing
- Installation work
- Advantages and disadvantages
- Using porcelain chips
- Advantages and disadvantages of acrylic coating
- Restoration instructions
- Training
- Restoration instructions
- Restoration with liquid acrylic
- Restoration with liquid acrylic - the advantages of the method
- Restoration with liquid acrylic - cons of the method
- Recommendations for choosing liquid acrylic
- acrylic coating
- Surface preparation
- Acrylic pouring method
- Cons of acrylic coating
- Coating service life
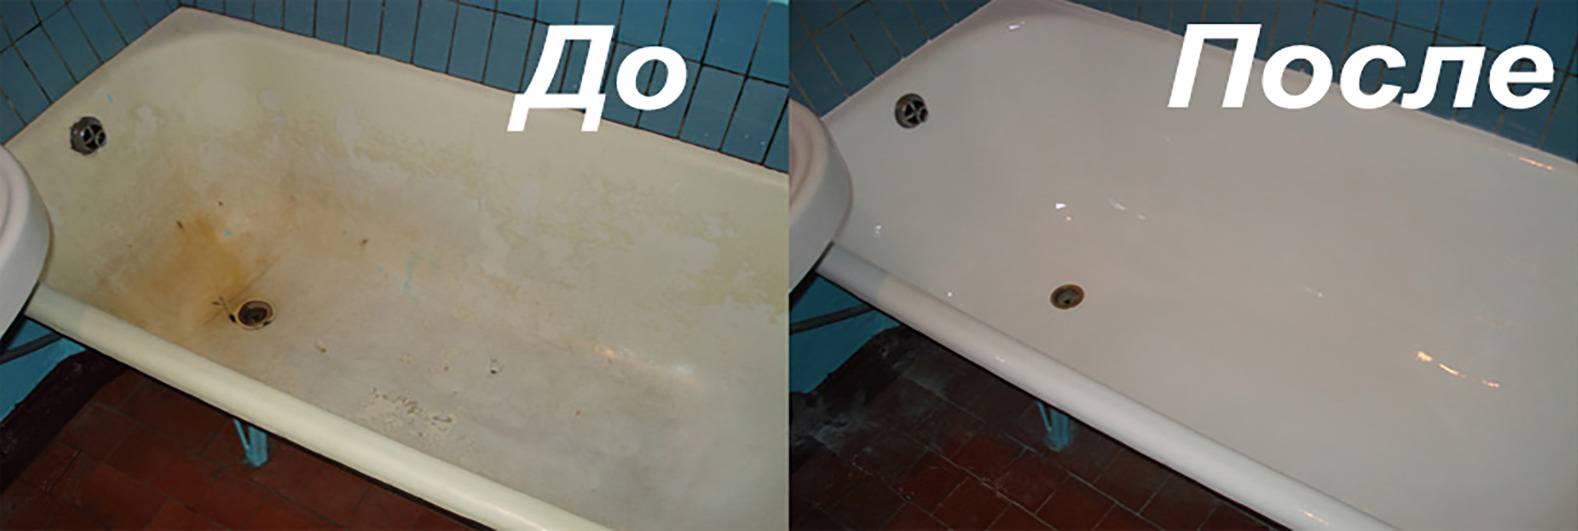
Preparing a Surface for Protective Coatings: A Comparison of Process Features
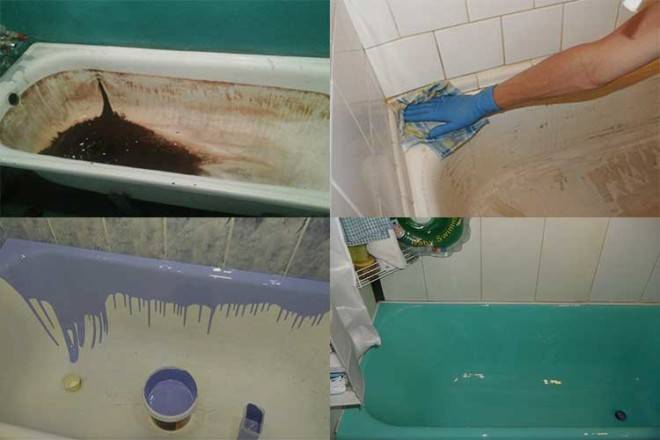
To cover enamel bath at home, you first need to make its surface clean. For this, oxalic acid is used. She rubs the bottom and walls of the bath. After dissolving the dirt and fat, the bath is washed.Then the enamel is cleaned with an electric drill with special nozzles for abrasive wheels. The cleaned surface is rinsed with hot water and dried with a hair dryer. After that, start painting.
You can choose any acrylic color
In order to cover the bathtub with acrylic, it must be cleaned and dried. For washing use acid or soda. Along the way, the remains of enamel paint are removed if the coating has already been restored with it. The clean bath is then dried with a hair dryer. And only then proceed to repair the bath with acrylic.
If restoration with bulk acrylic is used, then this process is more correctly called something else, since the resulting coating has nothing to do with enamel
Preparation for repair
Preparation is a very important step that should not be missed. The quality of the repair and its service life will depend on its implementation. As mentioned earlier, the chip must be repaired immediately. If this is not done, rust may form and must be removed. If the chip is fresh, then this stage of preparation can be missed.
- Rust removal. To do this, you will need such improvised tools as a knife, needles, a screwdriver. They can be used to remove rust. You can also use a special tool to remove it, which is sold in household chemical stores. If it is not available, then a regular cleaning agent will do. After all the manipulations, the chip cleaned of rust must be rinsed well with water.
- Pollution can also be removed with the help of household chemicals. It must be remembered that such products should not contain abrasives.
- After complete cleaning, the repair site is well washed and thoroughly dried with a hair dryer. The surface must be perfectly clean and dry.
- Degreasing is a necessary procedure, without which the durability of the seal will significantly decrease. Degreasing is carried out with acetone, then dried again with a hairdryer.
On this preparation can be considered completed. All photos and the preparation process can be seen in this article or in the gallery of our website. After that, you can start repairing the chipped bath enamel. This can be done in several ways and using various materials, which will be described below.
Bathtub restoration - step-by-step work on removing chips from a bathtub
Necessary materials
- The main and most necessary material is auto-putty. It takes a little, and its color should be as light as possible. There is a special putty for fiberglass that will work just as well. Its advantage is heat resistance, but its price is higher.
- Sandpaper. It also needs a little, a maximum of 1-2 sheets. It should be small, you can take the cheapest one.
- Special aerosol designed for the direct repair of chips. Its color should match the color of the bath itself. The price category does not matter, but if it is possible to choose a better model, then it is better to choose an aerosol with heat and water resistance.
- Instead of an aerosol, you can use bath enamel. It will already have all the necessary characteristics.
- Abrasive polishing paste. Necessary for the final stage to mask the traces of repair.
In order not to buy all the components for repair separately, you can immediately purchase a ready-made kit for repairing chips. Such kits usually include the following components: putty, spatula, sandpaper, aerosol and / or enamel.
How to repair a chipped enamel in the bathroom - using a ready-made kit or individual materials - does not matter.
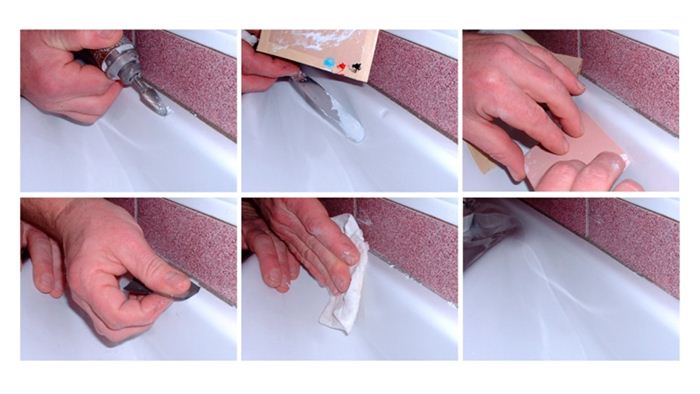
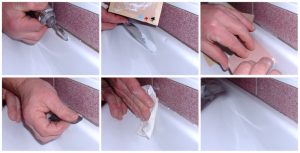
Chip removal
Putty preparation. To do this, you need to mix the resin and hardener, while the resin should be thirty times more. The mass is mixed with a spatula and immediately applied to the chip. At the same time, it must be well tamped. You can put a little more than you need: all the excess can be removed first with the same spatula, and after hardening, smooth out with grinding. If the quantity is not enough, then, most likely, the repair will have to be carried out again.
We eliminate chips in the bath
How to remove a chip on an acrylic bath
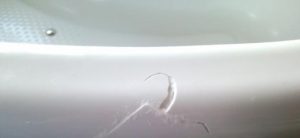
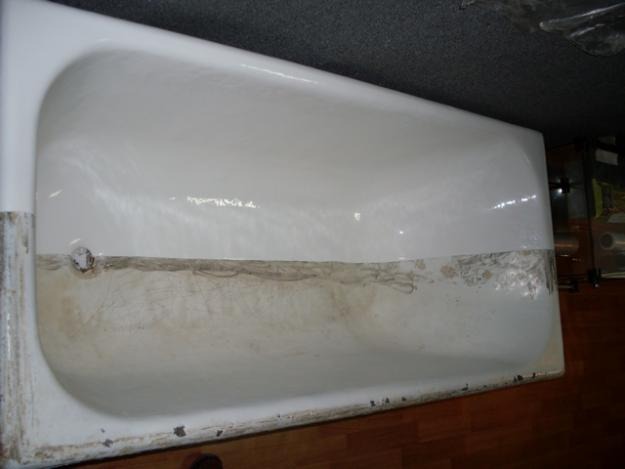
First of all, it should be understood that a chip is not a scratch and simply polishing the damaged area will not work. In addition, deep defects often become a breeding ground for fungus, mold and bacteria, so restoration work is a must.
Surface preparation

First of all, the area where the defect is found must be prepared. Otherwise, no one can guarantee you that the chip will not appear again after a short time. Surface preparation is as follows:
- Clean the area with sandpaper, starting with a large fraction and ending with a smaller one.
- The chip must be thoroughly washed using detergents with a disinfecting effect. This is done in order to completely remove the dirt.
- Next, the area should be degreased to remove fat from the surface. If you ignore this stage of preparation, then it is likely that the putty that you will apply simply will not "adhere" to the acrylic.
- At the end of all preparatory work, the surface of the bath must be dried very well.To speed up, you can use a hair dryer or dry rags.
Once you have done all the activities, you can proceed directly to the removal of the chip on the acrylic bath.
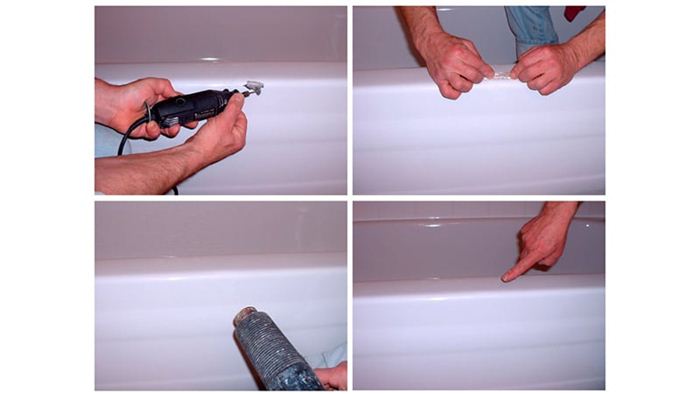
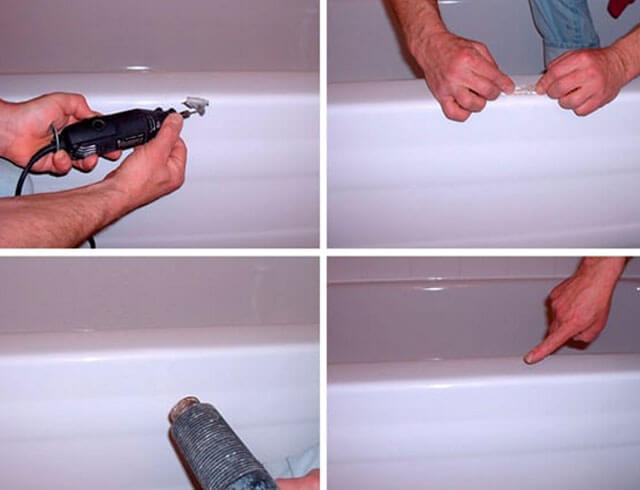
Removing a chip on the surface of an acrylic bath
A masking pencil is not suitable for removing this type of damage, since they will not be able to repair the pothole itself. To restore the evenness of the surface, you will need special repair kits. As a rule, they all have the same equipment, and it includes:


- liquid acrylic (different shade);
- hardener - added to acrylic to increase the hardening property;
- sandpaper for grouting;
- polishing paper;
- degreaser;
- epoxy glue for repairing small scratches.
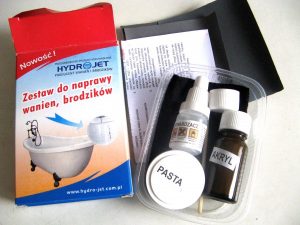
Of course, the repair kit may differ in content, but, as a rule, this is a standard kit that includes all the necessary components. Additionally, in the repair kit you can find a special rubber spatula for the convenience of applying liquid acrylic.
Further, the principle of work is as follows:
- dilute acrylic with hardener, according to the instructions;
- apply the mass to the damaged area flush with the surface of the bath, evenly distributing it with a spatula;
- equalize the mixture as much as possible;
- cover with a film (usual food, reinforced to the wall with adhesive tape is suitable);
- leave to dry completely, but not less than 24 hours;
- remove the film and degrease the surface (for example, with alcohol);
- polish the area.
In conclusion, we can say that removing a chip on an acrylic bath is certainly not an easy task. Nevertheless, if you approach this issue correctly and responsibly, then you can restore the appearance of the bath in less than three hours.
How to restore an acrylic bath
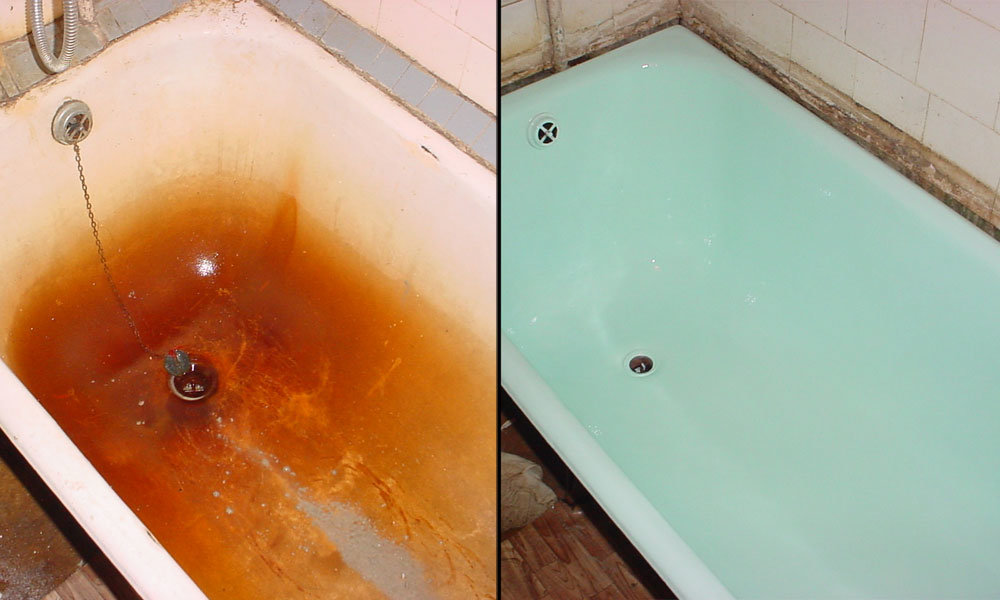
Restoration of an acrylic bathtub is one of the most common everyday problems, since even the most modern and high-quality acrylic bathtub is subject to wear, mechanical damage during operation and corrosion.
So how do you get your bathroom back to its original shine and newness? Let's take a look at this question.
How to restore the acrylic coating of the bath?
Restoring a bathroom with liquid acrylic should proceed on its own, subject to the following instructions:
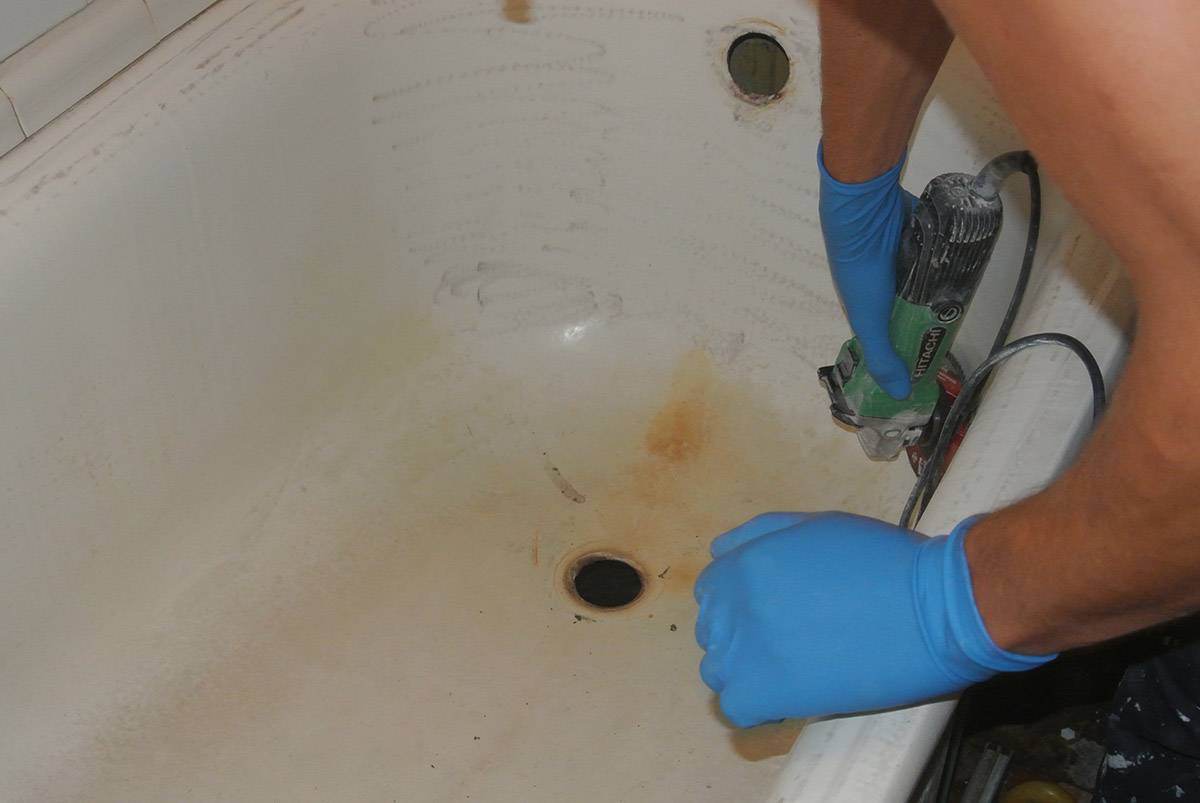
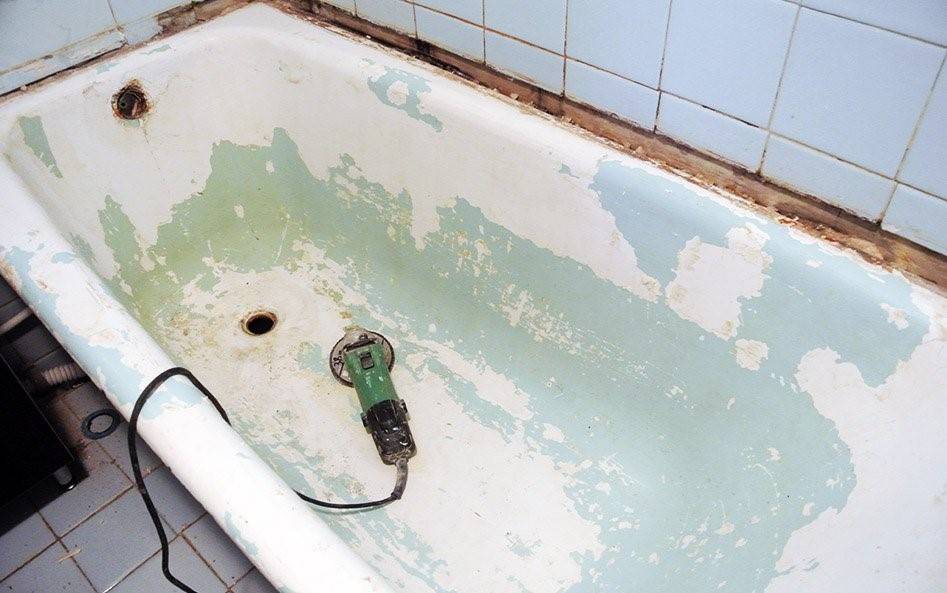
Before applying liquid acrylic to the surface of the bath, it is necessary to clean it from the top layer of rust (if any) and grind the surface of the bath with a drill with a grinding nozzle or sandpaper
When grinding, special care must be taken.
It is necessary to wash off the top layer of dirt left from the bathroom grinding.
It is required to degrease the surface of the acrylic bathtub with soda or a special solvent.
In the event that there are cracks or chips, it is necessary to putty the surface of the acrylic bath in place of these defects.
To apply liquid acrylic, you first need to warm the surface of the bath with hot water, since acrylic lies only on a warm surface.
The top and bottom drains are dismantled, or sealed so that the acrylic does not enter the sewer. Substitute special dishes.
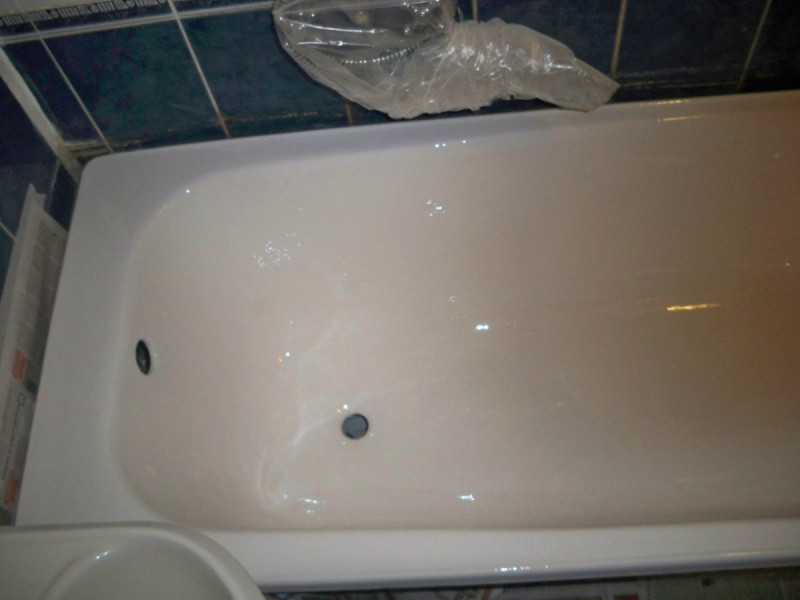
Starting to restore with liquid acrylic .. If you did everything right, then the appearance of your bath will be perfect and there will be a feeling that your acrylic bath is brand new
If done right, your bathtub will look perfect and feel like your acrylic bathtub is brand new.
How to polish an acrylic bath?
Acrylic bathtubs are becoming increasingly popular. They are elegant, easy to fit into the interior and unpretentious in care, so even if minor defects in the form of scratches appear on the surface of acrylic baths, they are very easy to restore and polish, so that the appearance will return and your acrylic bath will be like new.
In order to polish your acrylic bathroom, you need to stock up on the following: wax polish, vinegar or lemon juice, chrome spray, detergent, silver polish, toothpaste.
To polish the surface of your acrylic bathyou must follow the following instructions:
If the acrylic bathtub is not heavily soiled, then it is necessary to apply a detergent or cleaning agent with a sponge on its surface and leave for 10 minutes.
In this case, the top layer of dirt will be removed, but if there are traces of heavy dirt on the surface, then silver polish is indispensable.
Traces of scale are removed with acetic or citric acid. In the event that scratches appear on the walls of the bath, it is necessary to wipe the bath in the places of the defect with an emery cloth, and then apply a layer of abrasive gel to this place, wipe the damaged area and wipe it dry.


After that, you need to apply a wax polish, wipe the surface and leave for a few minutes. If your acrylic bath has a layer of chrome fittings, then you need to wipe the bath with an aerosol and leave for 5 minutes, then rinse cold water jet.
How to paint an acrylic bath?
Probably, everyone faced in his life with the problem of repair, restoration and painting of the bathroom.It is worth remembering that, first of all, the issue of painting and restoration should arise in the absence of a desire to dismantle or replace the bathroom.
The bathroom should be replaced if there are holes, chips and cracks on its body, and if the appearance has deteriorated over time, but there are no mechanical damages, the bathroom can simply be painted. Special techniques are used when painting acrylic bathtubs.
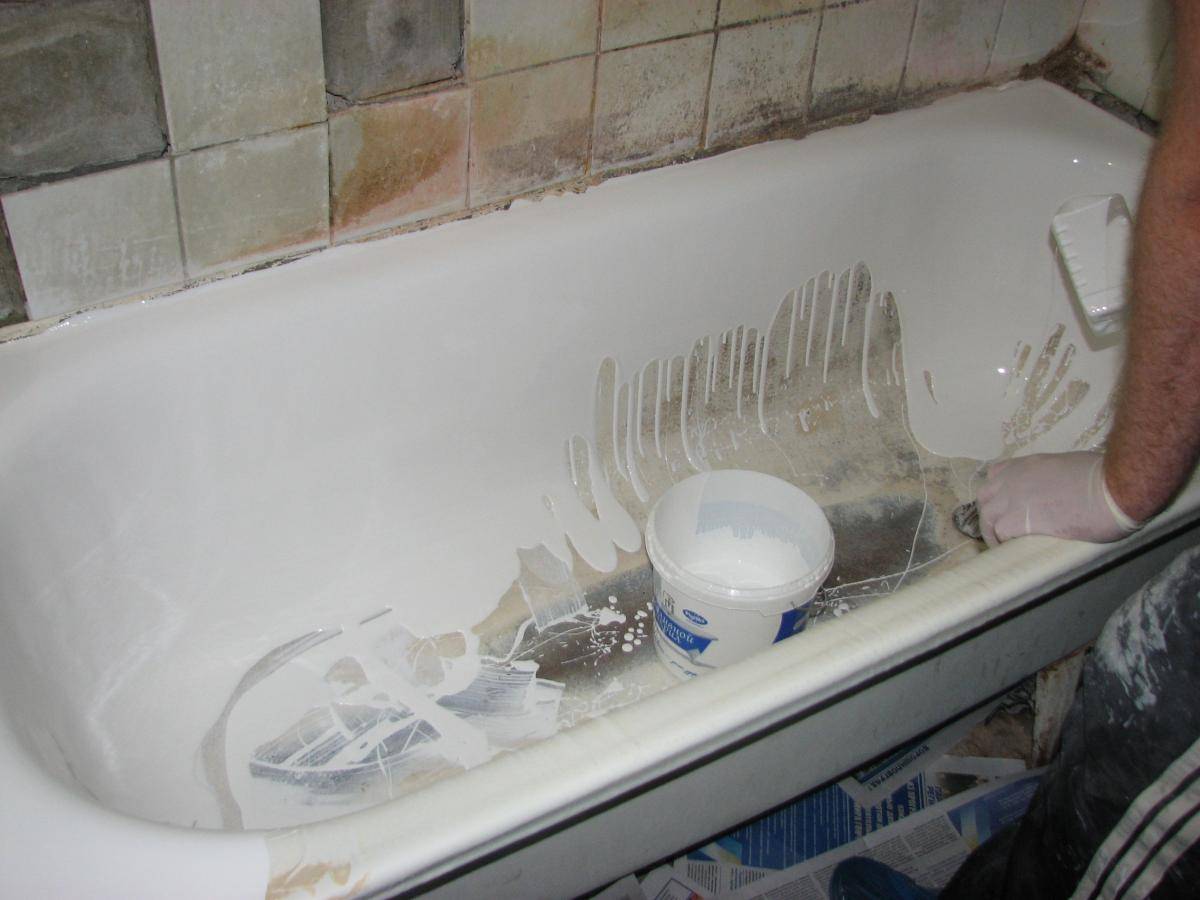
Then, with a special construction gun, acrylic paint for restoration is applied, which can be bought at any major hardware store, and after the surface has dried, a special paste is applied.
It is applied to give a shiny effect and give the acrylic bathtub an updated, refurbished look.
In no case should an acrylic bathtub be painted with other chemical compounds using a roller or brush. In this case, the top layer will peel off, or over time, all the paint will fall off the surface.
Acrylic insert
You can become the owner of a beautiful and hygienic bath in a more accessible and simple way. Acrylic insert makes it possible to quickly and efficiently complete repairs in the bathroom. Installation of a durable acrylic coating does not take much time, and the bath can be used in a few hours
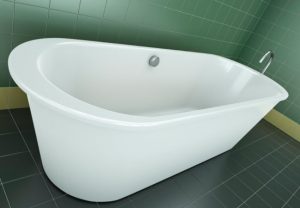
When choosing an insert, it is important to consider the quality of the material, its size, as well as the method of installation. Acrylic insert is only suitable for standard sanitary ware
Sizing
Before buying an acrylic insert, you will need to take measurements from the bath, even if it has a typical size.
- The main length of the bath is determined from the outer sides.
- The length of the bowl is an internal measurement without sides.
- Width in the area of the drain without sides.
- Back width also without sides.
- The depth of the bowl is measured directly at the drain point.
Based on these measurements, a sales assistant in a specialized store will be able to select a suitable copy of the insert.
Installation work
Installing an acrylic liner you can start in the bath without special preparation of the old coating. But it is better to process the surface with sandpaper to give it a roughness - this will help improve the adhesion of the clamps. Then it is necessary to correctly mark and cut the liner, insert it into the bath and circle the places of the drain holes and the line of the sides with a marker. Using a jigsaw, the acrylic tab is cut according to the prepared marks. A non-expanding mounting foam is distributed on the old surface, it is applied in vertical and horizontal stripes at a distance of 10-12 cm. The surface of the bath should look like a kind of foam mesh. Also, stripes are applied to the sides of the bath. Around the drain holes, sealant or silicone is processed. Now you can install the acrylic liner and return the siphons to their place. Immediately after installation, it is necessary to fill the bathtub with water and leave it in this form for several hours.
Advantages and disadvantages
Acrylic liners have a structure that provides them with strength and reliability. High-quality materials in their production, and proper installation make it possible to speak with confidence about the advantages of this type of bath restoration. A refurbished bathtub with an acrylic insert increases heat capacity and aesthetic appeal. Such a coating is resistant to chemicals, and ease of installation requires only basic skills in the construction business.Some consumers are afraid to purchase an acrylic liner due to the reduction in bowl volume. But this decrease is so insignificant that it cannot bring discomfort during the bath. The disadvantages of the acrylic liner include the need for dismantling. If the liner is installed without repairing the bathroom, in some cases it is necessary to remove the wall tiles at the junction of plumbing. Failure to follow the basic rules of installation can lead to water leakage in the gap between the old and new coating. Such a bathtub will very soon become unusable and either its complete replacement or the installation of a new liner will be required. The top layer of acrylic in the liner, despite its excellent strength, can be damaged if basic operating rules are not followed.
Having studied all the possible ways to restore the bath, you can choose the option you like, based on personal preferences. The most inexpensive way to improve the appearance of plumbing is enameling. But he also has a lot of shortcomings. Most often, this material is used in the repair for the further sale of the apartment. Covering the surface of an old bathtub with acrylic is perhaps the most reliable and durable method. Even the high price and the likelihood of prolonged drying does not deter buyers. The main thing is to correctly fill the acrylic, using the instructions. Acrylic insert in the bathtub is a cross between these two methods. When choosing this option, you should really evaluate your construction capabilities, and if you don’t have the necessary skills, it’s better to spend some money and use the services of professionals. By the way, this also applies to the first two methods of restoration.Independent work reduces repair costs, but specialized firms will do it professionally and efficiently.
Using porcelain chips
To use this method of repairing a chipped bathtub enamel, you must donate a porcelain cup or saucer. In this case, you should choose dishes that match the color of the bathroom. Since most of the sanitary containers are white, the cup should also be white.
Work to eliminate a defect in the form of a crack or chipped enamel in the bathroom is carried out in the following order:
- The problem area on the enamel coating of the bath is carefully degreased. To do this, you can use kerosene, gasoline, white spirit and other similar means.
- Then the damaged area is treated with sanding paper and degreased again to remove fine dust.
- A porcelain cup or saucer of a suitable color is broken, and the fragments are ground until fine crumbs are obtained.
- Next, take the epoxy glue and mix its components according to the instructions indicated on the package.
- The finished composition is applied to the damaged area.
- Porcelain chips are poured over the glue and the mixture is leveled with a spatula.
- The epoxy composition is left until the final solidification, which takes about 2-3 hours. After this time, the sanitary container can be operated normally.
This method is suitable not only for removing chipped bath enamel, but also in the case when restoration of worn enamel is required.
Advantages and disadvantages of acrylic coating
Some masters still doubt whether to give preference to acrylic or to restore the old bath using traditional enamels. Restoration of a product with the help of one or another material has its pros and cons.


Advantages of acrylic restoration:
- Ease of application. There is no need for special painting tools, you can carry out restoration work yourself.
- The ability to use the bulk method to obtain a smooth coating without streaks and streaks.
- High adhesion to the bath surface.
- Long service life of the product after restoration (more than 20 years).
- High strength.
- Hygienic (acrylic surface does not retain dirt and facilitates the care of the sanitary ware).
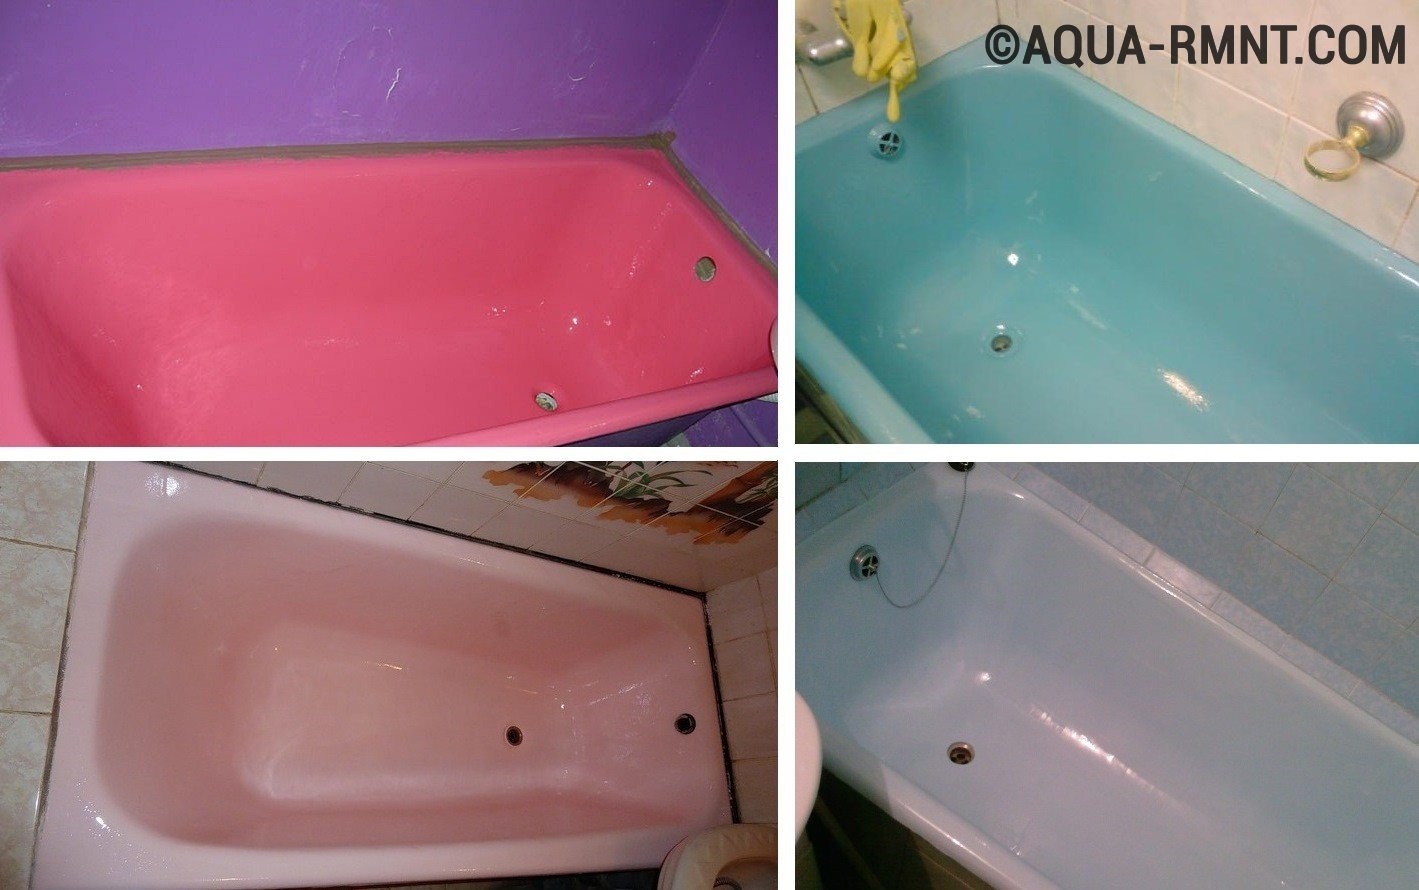
- Possibility of tinting (bath during restoration can be made in any color).
- Increased thermal conductivity (acrylic retains heat well, and due to this property, the water poured into the bath will cool longer).
- It does not have a specific smell, which persists for a long time after restoration.
Cons of acrylic as a material for covering the bath:
- Low resistance to chemical and abrasive household chemicals. After restoration, the bathtub can only be washed with gentle detergents.
- Duration of polymerization of acrylic. Due to the long curing period after application of the composition, the product cannot be used for several days. In order not to experience domestic inconvenience, you can install an acrylic liner. Restoration with the help of an insert takes place within a day, but the price for restoring the product will be higher.
- The high price of the material for restoration. This is a conditional defect. It is enough to take into account the ratio of the price of a new bathtub and the service life of the coating, and the benefits will become obvious.Even installing an inlay, which will cost approximately 30% of the price of a new bathtub, will be profitable.
 The scheme of the acrylic liner in the bath
For those for whom the inconvenience associated with restoration of an old liquid bath acrylic, outweigh all the advantages of the material, it is recommended to insert a polymer liner. Like any restoration method, inserting an acrylic liner has its pros and cons. The benefits include:
- Ability to withstand high mechanical loads.
- Damage resistance. The liner has a higher density compared to the bulk coating, and it is almost impossible to damage the insert.
- Quick installation. With a little skill in carrying out such work, even a home craftsman can insert an insert.
The disadvantages include:
- Acrylic liner can be made only by the method of industrial polymerization of the material, and if the manufacturing technology is violated, the properties of the polymer may be deteriorated. It is impossible to visually identify defects on the product - errors will be detected only during operation after installation.
- Difficulty in installation. The insertion process has many important nuances, and if they are neglected, the life of the product can be reduced. For example, if the gap between the bathtub and the inserted acrylic mold is not well filled with polyurethane, then cracks may appear on the material during operation.

Restoration instructions
The quality of the final result depends on the quality of all stages of work.
Tools:
- drill, power matters: the more powerful, the better;
- nozzle for mixing the composition of small diameter - about 5 cm;
- building hair dryer to quickly dry the bath (you can get by with a household hair dryer);
- sandpaper waterproof paper No. 60-80;
- a screwdriver for unscrewing the drain;
- pliers for the same purpose;
- automotive putty with fiberglass - to eliminate large potholes and holes up to 15-20 cm in diameter;
- spatulas - used to stir putty;
- rubber spatulas for spreading the mixture;
- baking soda - for washing the bath;
- several pieces of latex gloves;
- hammer and chisel, if you need to remove the cast-iron drain;
- acrylic and hardener - a 1.5 m bath will take 3 kg of base and 400 g of hardener.
Training
Everything else is taken out of the room. Check the ceiling for cobwebs and dirt. It needs to be cleaned so that dirt from the ceiling does not fall on the damp coating.
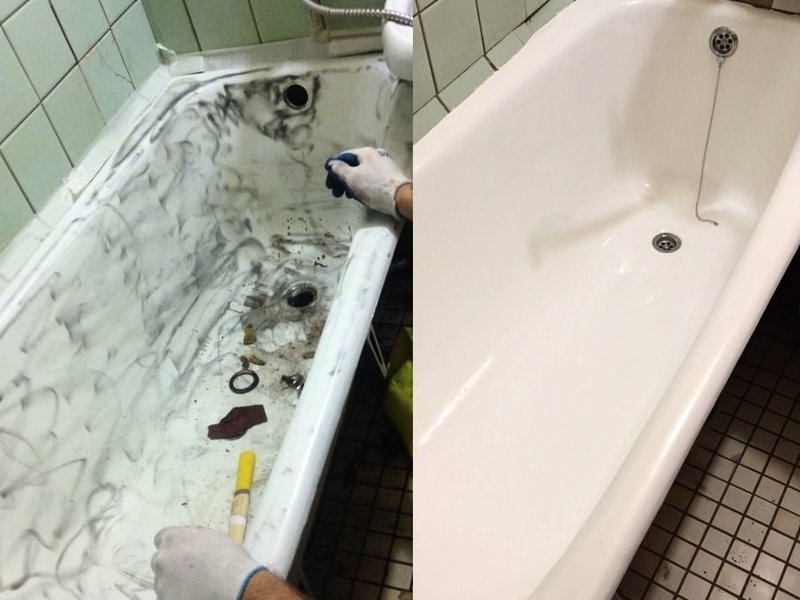
The surface of the old bowl must be prepared before covering it with acrylic, and only then the mixture is distributed in bulk. Preparation includes a thorough stripping with soda.
The purpose of the work: removal of pollution, corrosion, delamination. Due to the processing, the surface becomes rough, fat-free. This means that the adhesion of liquid acrylic to the bath improves.
Processing is carried out with any abrasive tool - a grinder, sandpaper manually.
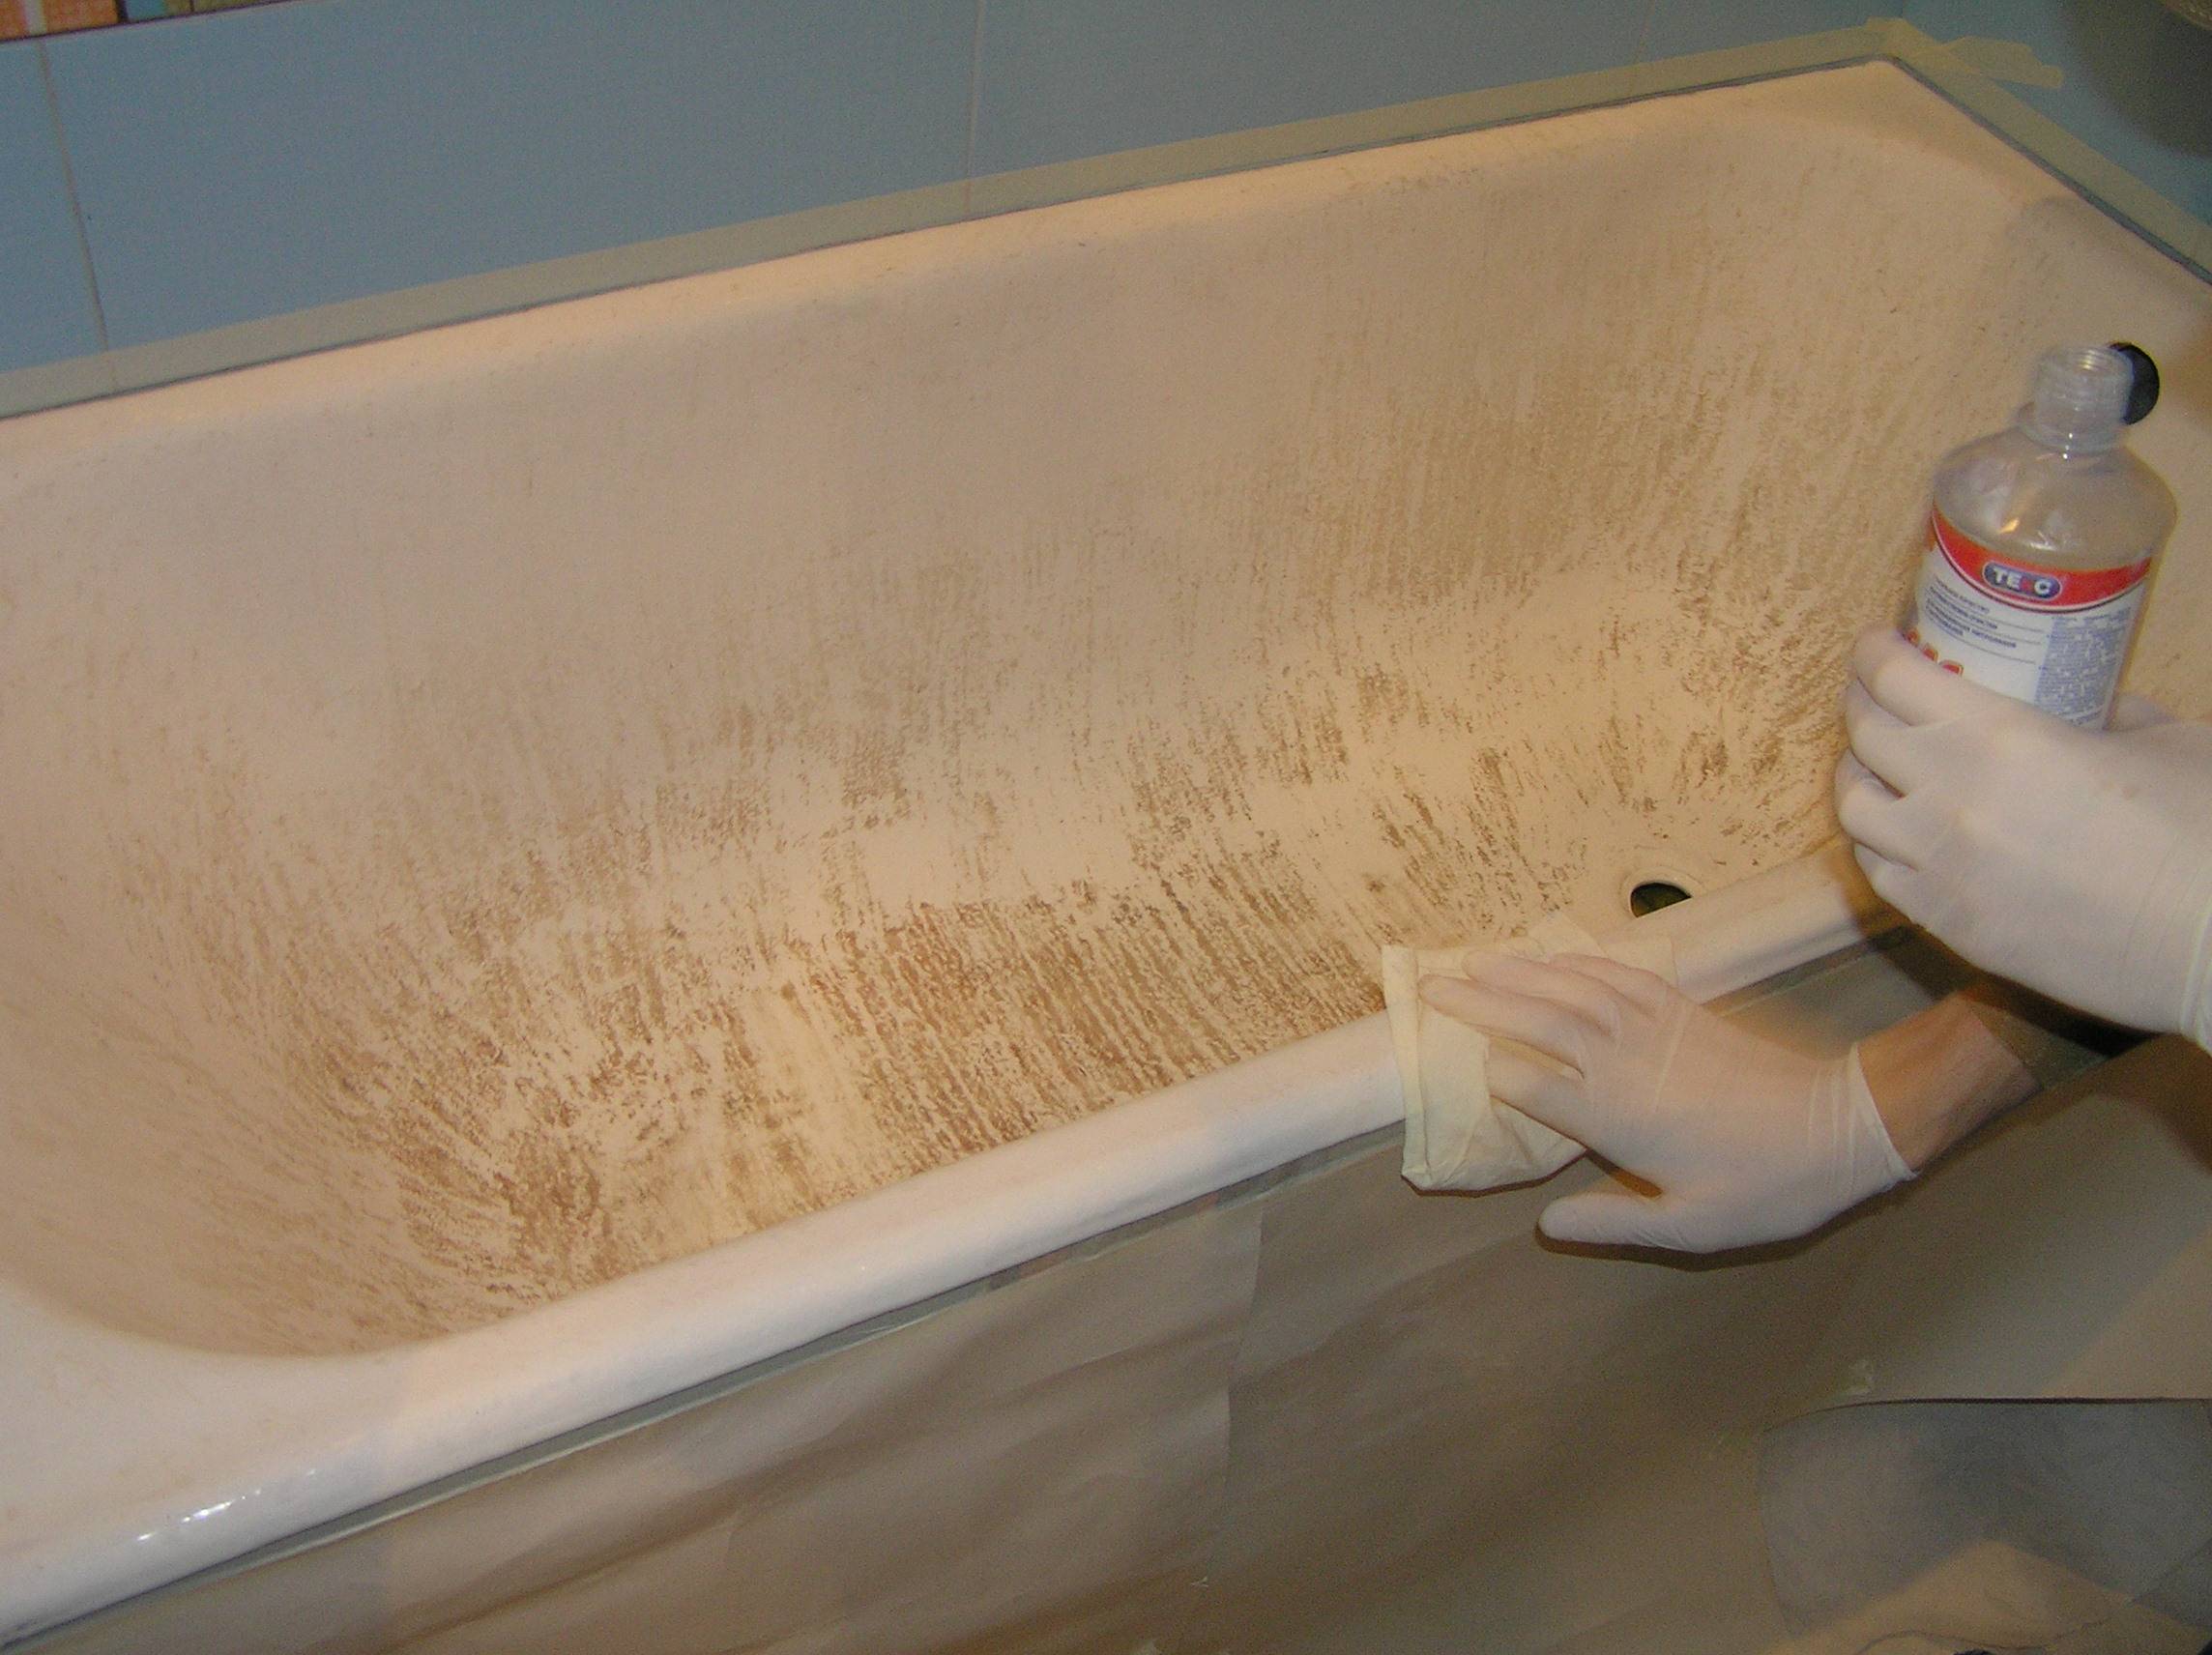
The surface is then thoroughly washed to remove any remaining dust. It is recommended to do this operation twice, observing how the surface is wetted. If dry islands remain or water collects in drops, then the surface is poorly processed, and you need to go through the problem area with soda and sandpaper. Instead of soda, acetone can be used as a degreaser.
Before drying the bowl, remove the siphon and overflow. After restoration, it is desirable to replace them with new ones. They also dismantle the shower hose with a watering can and the gander.The holes are wrapped with a rag and a bag is put on top of the mixer so that water does not drip into the bath.
After grinding, the surface is dried with a hair dryer, warming the bowl for 30 minutes. If moisture remains, the acrylic will not stick.
Then open a can of putty and mix a small amount of the composition with a hardener using two spatulas. It is necessary to knead the putty in small portions, because it hardens in just 2-3 minutes. Covers chips and cracks. Especially carefully you need to putty potholes on vertical surfaces. After 20-30 minutes, it is necessary to wipe the puttied areas with sandpaper.
Then all the debris is blown off the surface with a hairdryer or wiped with a rag. A container is placed under the drain hole, the floor is covered with newspapers. On this preparation can be considered completed.
Restoration instructions
Having prepared the bath, proceed to the preparation of the repair composition. Open a jar of acrylic, removing the remnants of the substance on the lid and sending them to the container. With a rubber spatula, remove the composition from the walls into a bucket and wipe the spatula with a rag. This is done so that pieces of unmixed acrylic do not subsequently fall into the repair composition.


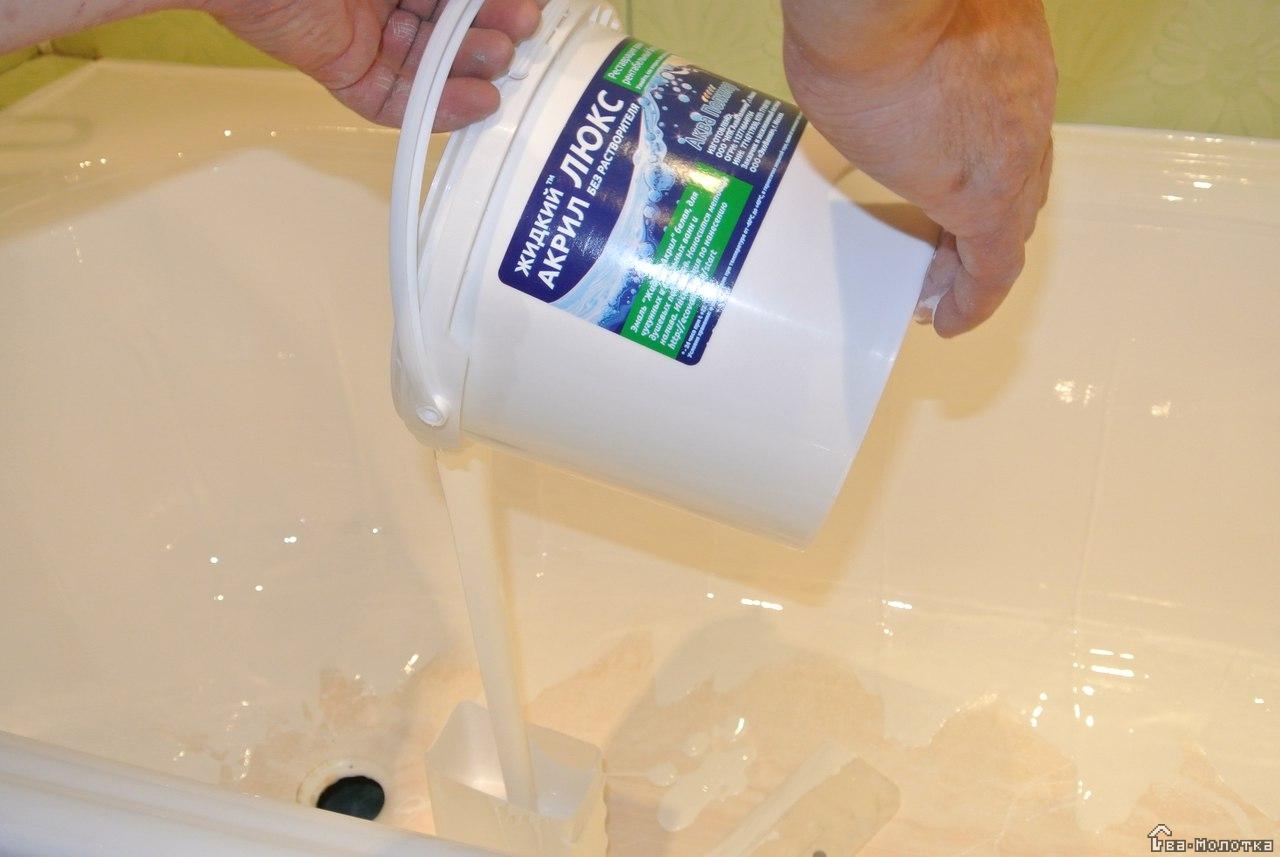

The hardener is poured into a jar. They take a drill and, clasping the bucket with their legs, at low speeds begin to knead acrylic, collecting from the walls and bottom. The batch lasts about 10 minutes. Then the composition is left alone for 5 minutes. The life of the material is 70 minutes, then it will thicken and lose fluidity.
Then the mixer is disconnected from the drill, making sure that the dirt from the cartridge does not get into the composition.Another 5 minutes knead the composition by hand.
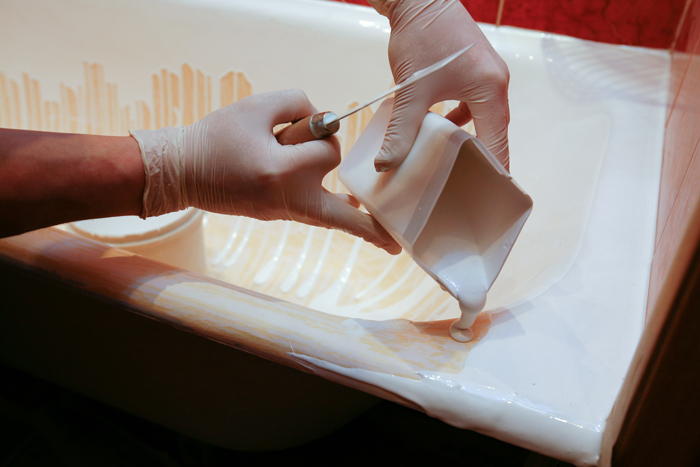
The drain hole is plugged with a plastic cup. A jar of acrylic, carefully wiping its bottom, put in the bath. The whisk is pulled out and put there. Part of the composition is poured into a disposable glass with a volume of 0.5 liters.
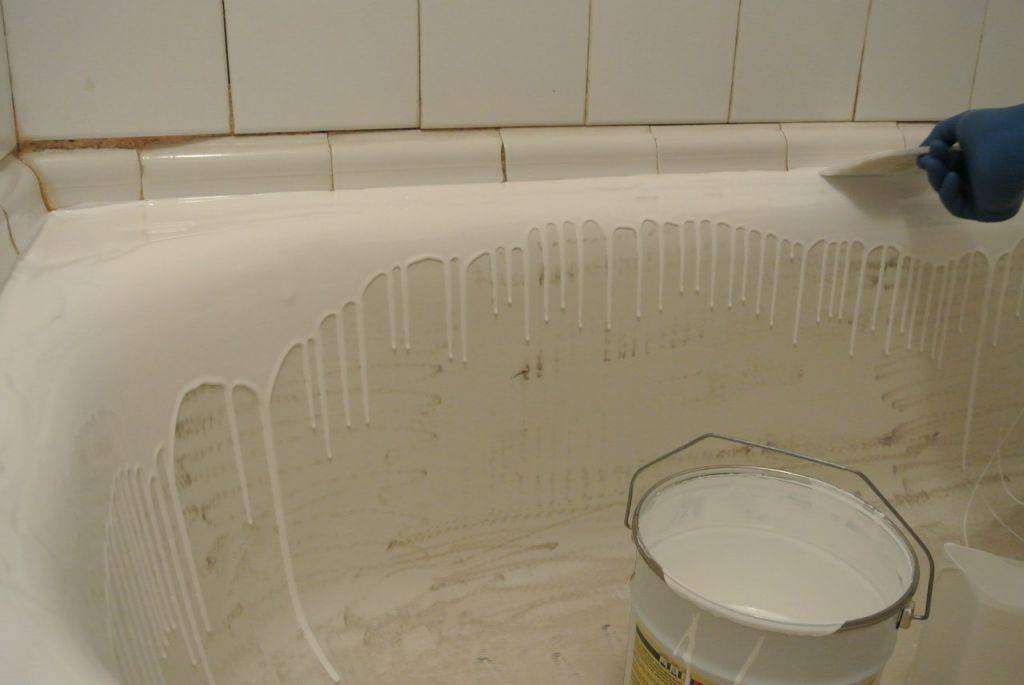
The finished mixture is poured along the edge of the board, starting with far left corner (for right-handers). The front wall is poured last, when the entire vertical surface near the wall is already filled. The outer edges are poured over so that the composition flows towards the floor. When all the mixture from the bucket has been used, it is turned over and left in the bath for the time being. Using a plastic spatula, form the sides: scoop acrylic from the bottom and coat the unfilled areas. Then fill the vertical surface of the bowl. The bucket and nozzle are removed from the bath. It is impossible to collect the rest of the material from the bucket.
The resulting streaks are removed with a spatula, scooping acrylic from the bottom and stretching it into bald spots with vertical movements. The material accumulated around the drain and on the bottom at the sides is distributed over the entire bottom.
Leave the bath until the acrylic is completely dry.
Restoration with liquid acrylic
If your bathroom does not fit into the standard dimensions, then installing an insert on it will not work. In this case, you can use the method of restoration with liquid acrylic, or as it is also called - glass. And the method itself is called - the method of the bulk bath.
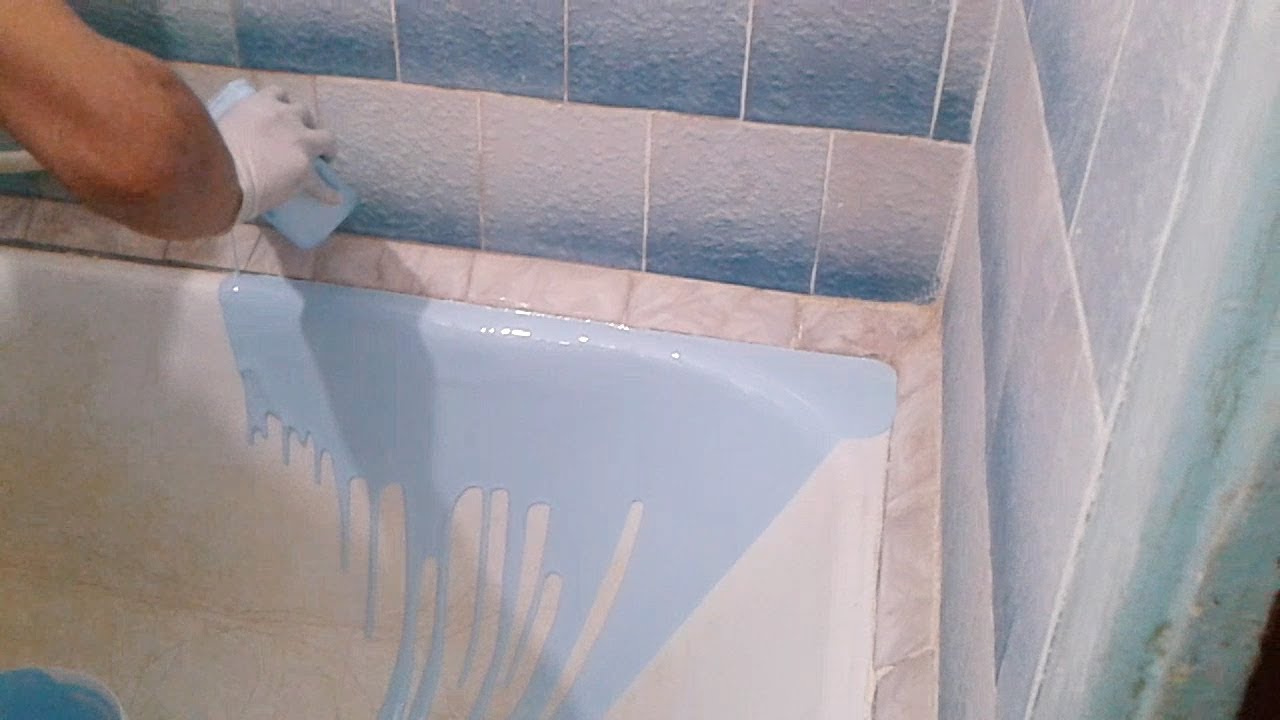
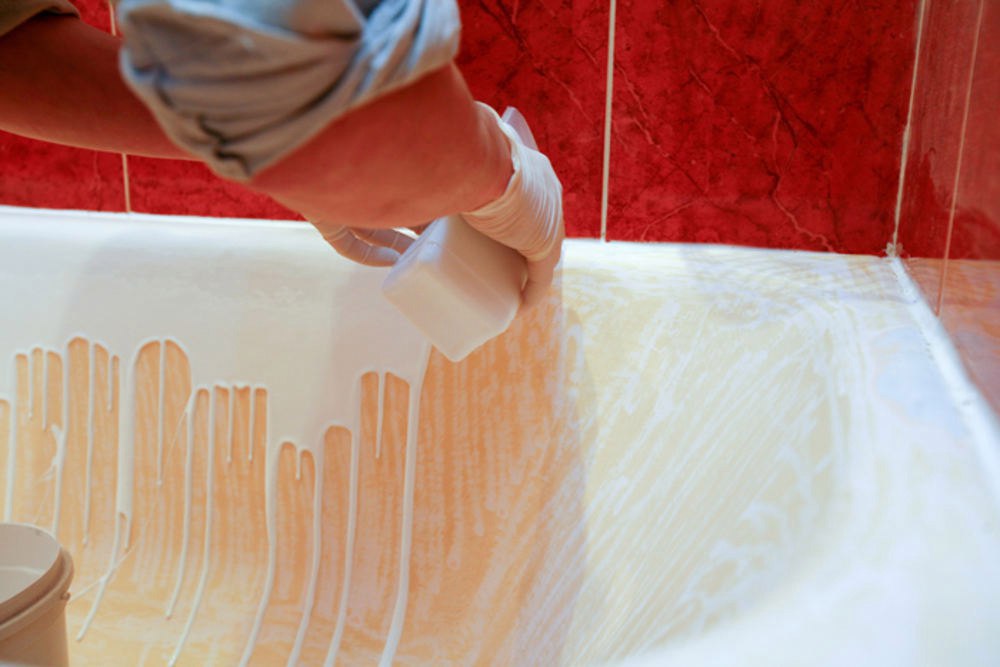
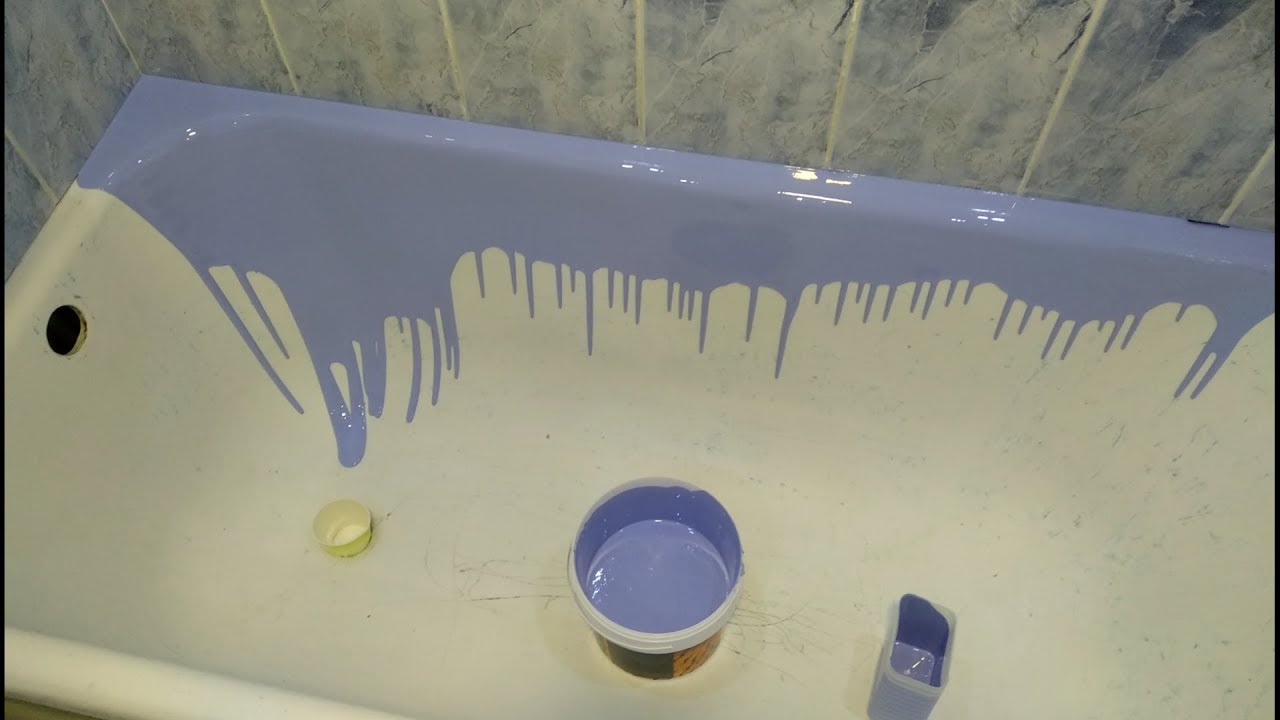
Many people think that this is the same as enameling a bathtub, but this is not the case. According to the manufacturers, the material used is the same as for the manufacture of the acrylic liner, only in liquid form, and it is distributed over the bath using the “pouring” method, and not with a brush: acrylic is applied to the walls by even dripping.
Restoration with liquid acrylic - the advantages of the method
- No adhesive backing.
- High-quality liquid acrylic does not turn yellow.
- Resistance to household chemicals.
- Both cast iron and metal bathtubs can be restored.
- There is no need to dismantle the tile, even if it is adjacent to the bath.
Restoration with liquid acrylic - cons of the method
- The need to dismantle the drain devices.
- If the bath has factory irregularities, acrylic will completely repeat them.
- The time for complete drying of the layer can be significant.
The reliability of such a restoration, like any finishing work, largely depends on the quality of the materials and the technology of the work. If mistakes were made during application, this may result in the formation of bubbles with subsequent violation of the glass layer.
In addition, many experts point out the inadmissibility of overheating such a layer. When exposed to too high temperatures, the top layer can also be damaged.
It should be borne in mind that stacryl is a fairly new material, and manufacturers quite often adjust the formula for its manufacture in order to “improve quality”, however, according to experts, this sometimes backfires. Therefore, it is better to use already proven material that has positive reviews.
Recommendations for choosing liquid acrylic
Before you buy acrylic paint to create enamel, it is recommended to take into account the advice of experienced professionals. They include:
The best restoration acrylic will have a wide range of uses. It can be used on both steel and cast iron surfaces.


The drying time of a good composition is about 3 days. If the instructions indicate more than 5 days, this indicates the presence of chemical bailiffs in the composition of the product.

The viscosity of the composition. If the mixture has a too liquid consistency, then during application, the risk of many bubbles appearing increases, which will later form defects on the enamel surface. A quality mixture has a thick consistency.

Composition color. Quality products have a snow-white tint. If the liquid has a light beige or yellow color, this indicates that it has not been stored properly. The use of such a mixture for restoration is prohibited. In the future, dark stains may appear on the surface of the enamel.


acrylic coating
Restoration of a bathtub with acrylic is an order of magnitude more expensive than the above method. But still, this is a more reliable and durable way to improve the appearance of plumbing, as well as give it new properties. The advantages of acrylic coating can be safely attributed not only to excellent strength and smoothness. The updated bath will have a low thermal conductivity, allowing you to maintain the required water temperature. A smooth surface eliminates excessive sticking of dirt, such a bath, even after 10 years, will not acquire a yellowish tint. And the ability to choose the desired color of acrylic, ideally combined with the interior of the bathroom, will be another significant plus.
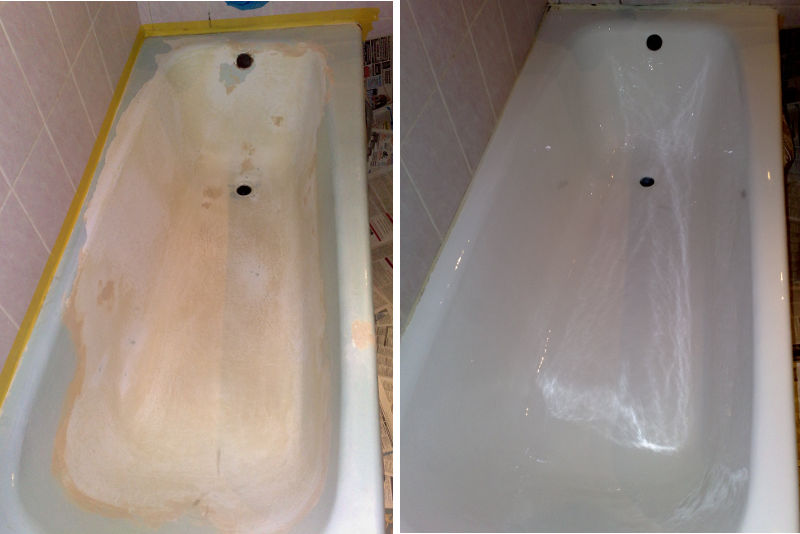
Surface preparation
Restoring a bathtub with liquid acrylic also requires cleaning the surface of the old layer of enamel. The technology is the same, but after degreasing and rinsing with warm water, it is necessary to treat large damage with a quick-drying putty. Also, before the procedure for pouring acrylic, you should remove the siphon to drain the water, and substitute a small container under the hole formed.Minor scratches can not be covered with putty, acrylic fills them in the process of pouring, creating excellent adhesion with the old coating.
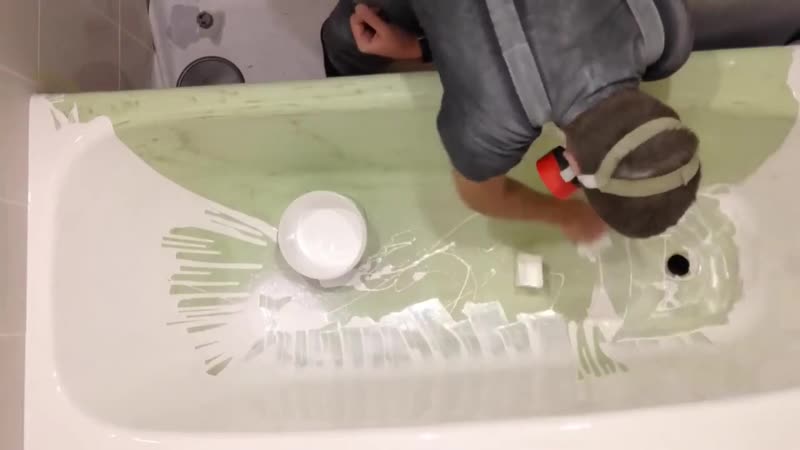
Acrylic pouring method
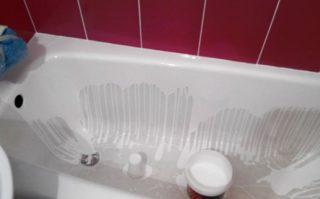
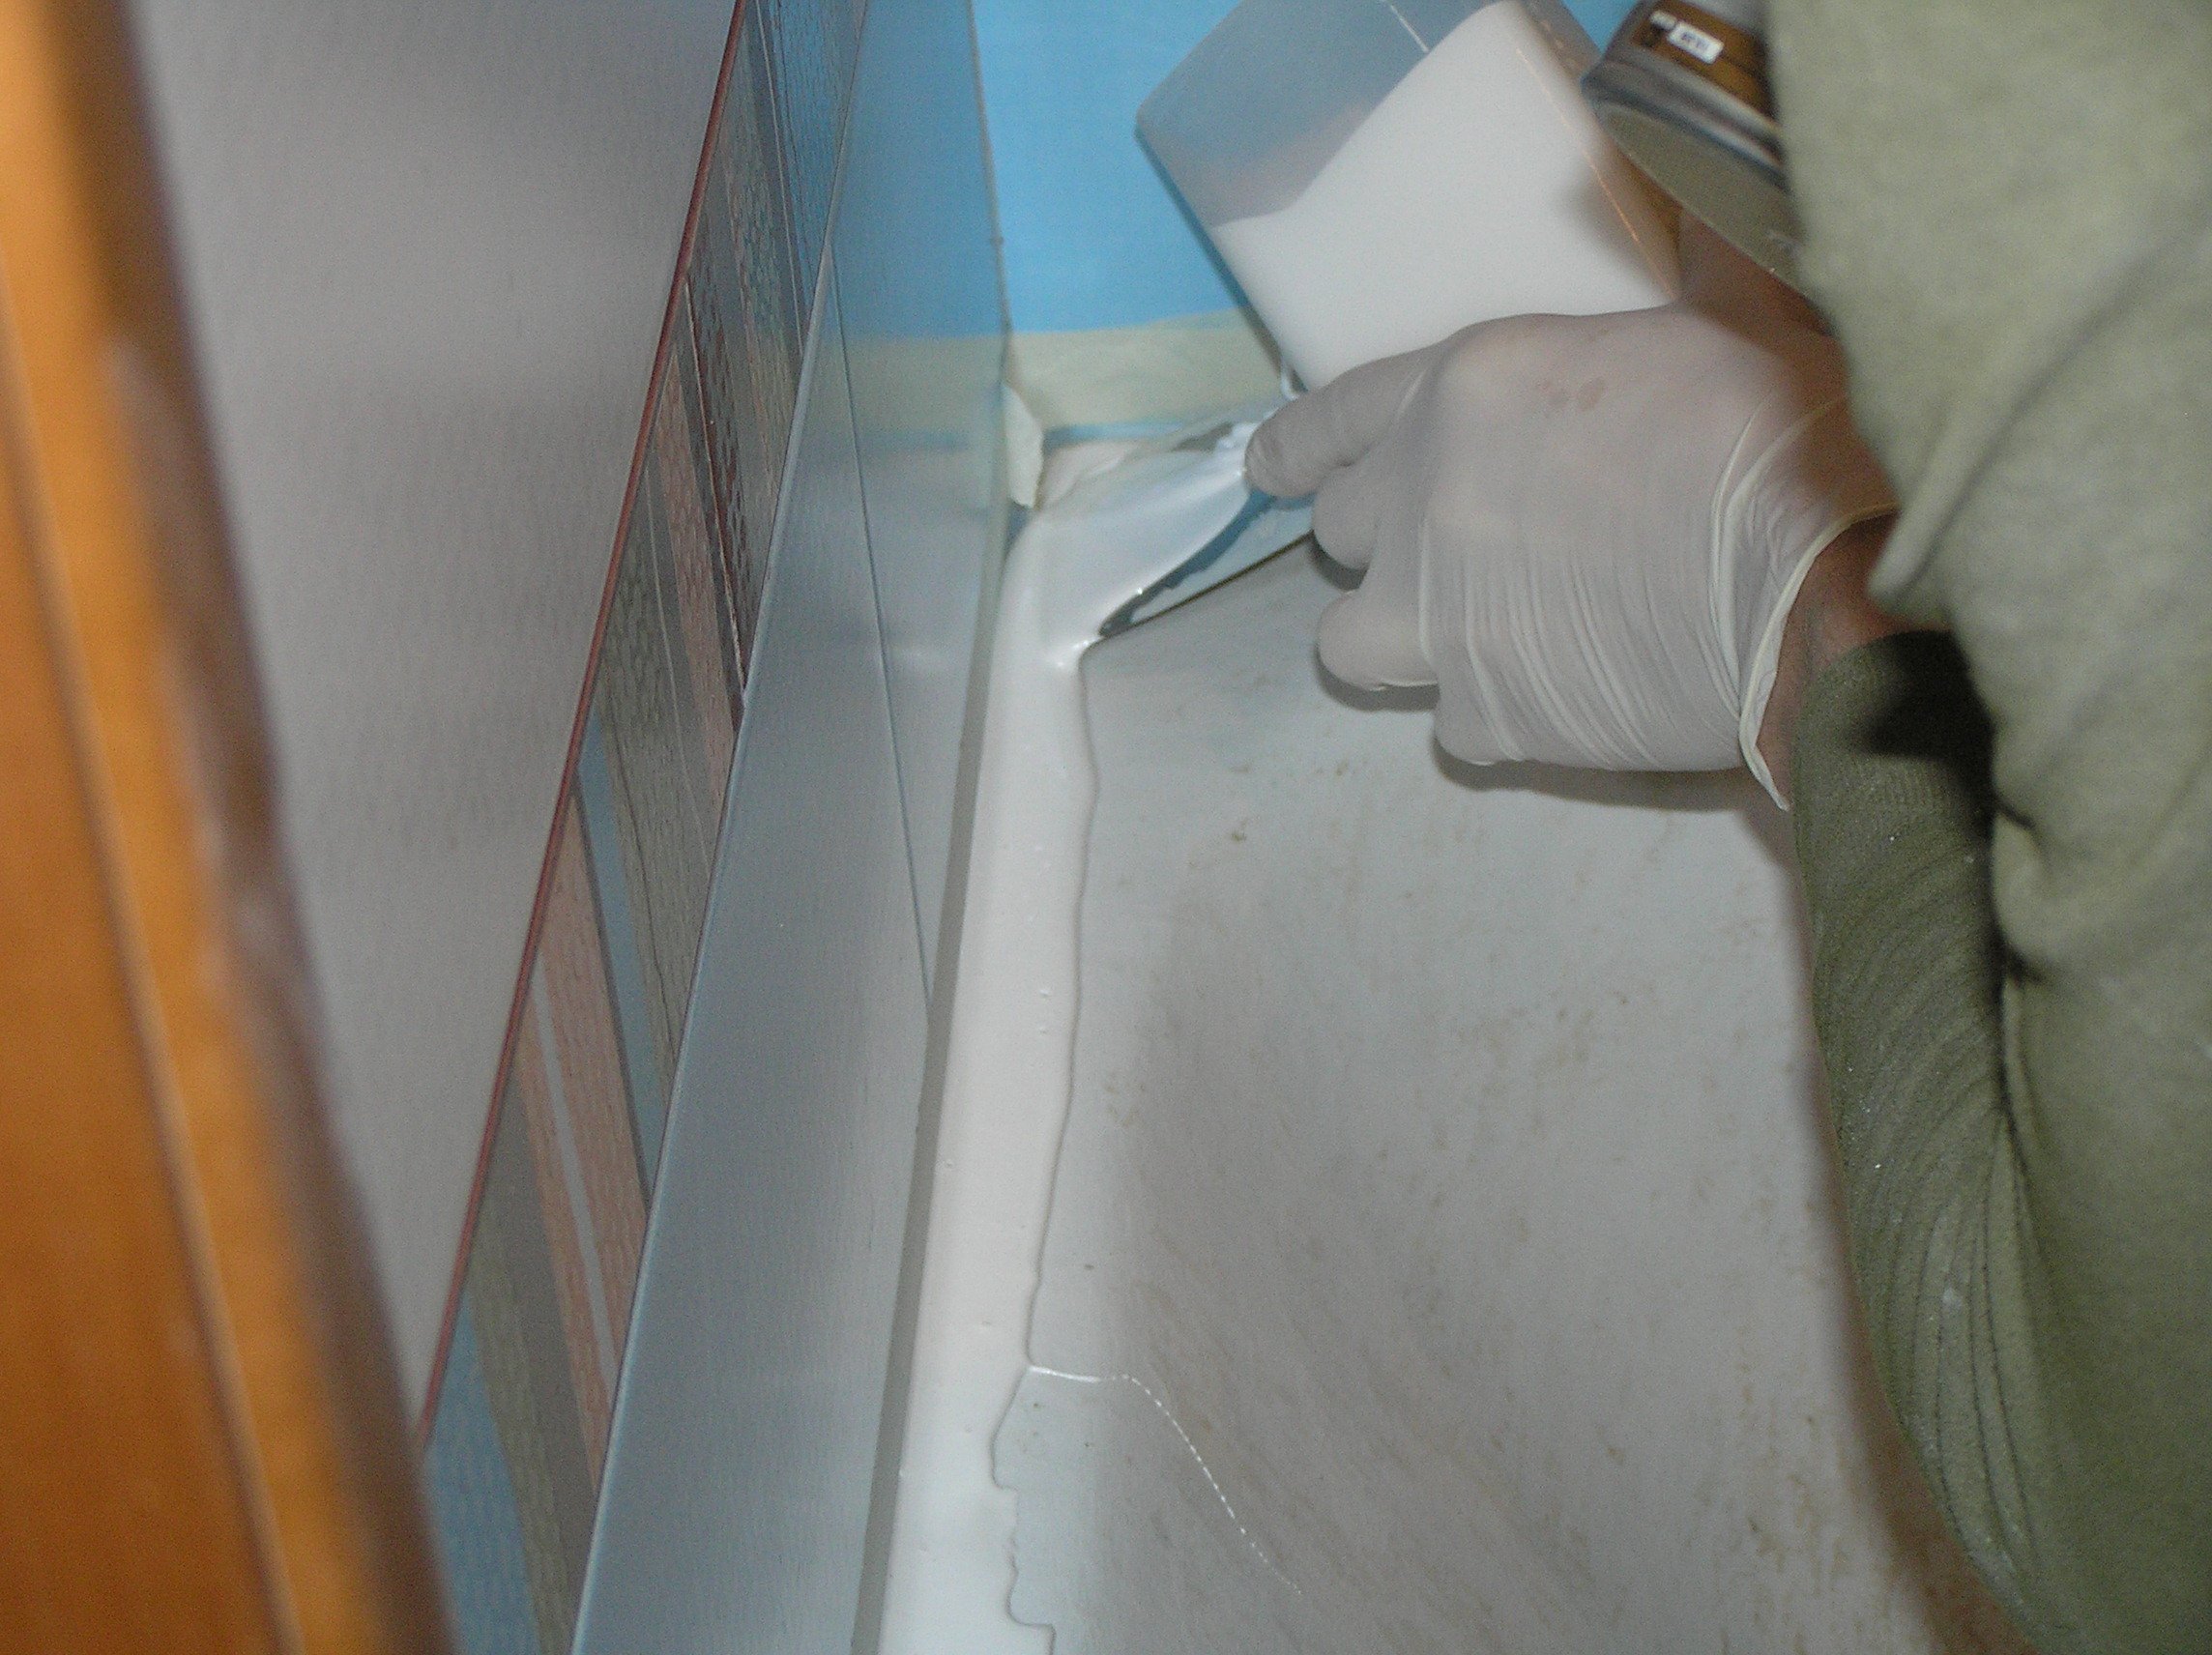
Liquid acrylic can be used to restore both cast iron and steel bathtubs, the process technology is the same. After preparing the bath, heat the entire surface of the bath with hot water. Thus, ideal conditions are created for the effective adhesion of acrylic paint to the cleaned surface. Then prepare a solution of two components, strictly following the manufacturer's instructions. The mixture must be mixed until a homogeneous consistency. For convenience, it is recommended to pour part of the mixture into a smaller container, and process the bath from it. Acrylic pouring should be started from the sides, passing continuously the entire perimeter of the bath. A thin stream should create an approximately 4-5 mm layer of acrylic, gradually flowing down to the middle of the walls of the bath. The next step is to pour acrylic from the middle of the walls, the jet flows down to the very bottom
It is very important at this stage not to try to correct the resulting irregularities, as well as pour more acrylic on top. This material itself is able to properly distribute over the surface. The bottom of the bath, filled with acrylic, should be leveled with a soft spatula, while removing excess liquid through the drain hole
The bottom of the bath, filled with acrylic, should be leveled with a soft spatula, while removing excess liquid through the drain hole.
Cons of acrylic coating
- Acrylic will not fix factory defects in an old bathtub;
- You can use the bath for its intended purpose only after the coating has completely dried (after about 1 week).
Coating service life
Acrylic coating has good strength and stability, it rarely cracks and scratches. But still, as with any plumbing, careful care is necessary. First of all, strikes on the acrylic surface of heavy objects should be excluded, otherwise serious damage will appear that is unlikely to be repaired. After taking a bath, it is recommended to immediately remove dirt from the surface, as well as wipe it dry. Severe contamination requires the use of abrasive products, and they are contraindicated for acrylic baths. For cleaning, it is better to use a regular gel-like dish detergent. Also, soaking laundry with bleaches or dyes is best done in a basin, and not in a bath.


