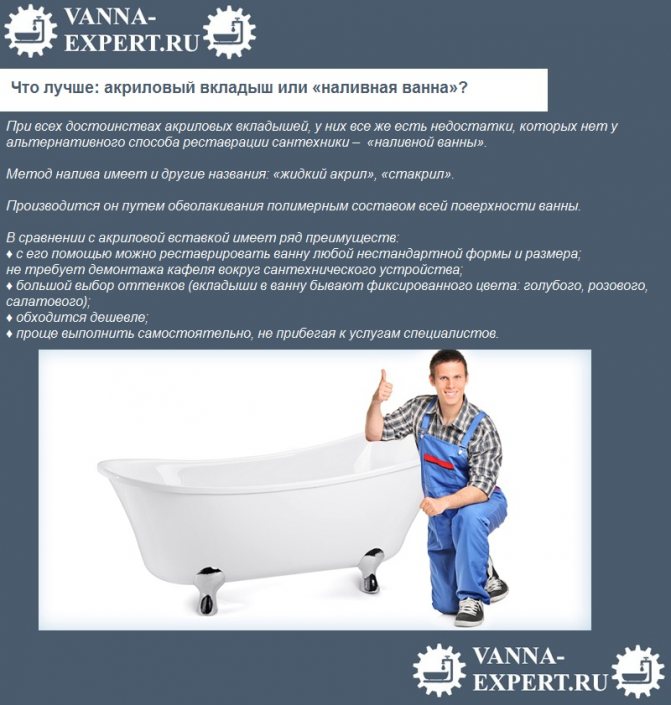
- Restoration with liquid acrylic
- Technology
- Advantages and disadvantages
- Video: bathtub restoration with liquid acrylic
- How to install
- DIY Bath Restoration Tips
- Beginner Tips
- Tab manufacturing technology
- Bathtub restoration with enamel: pros and cons
- How to enamel a bathtub?
- Step by step installation instructions
- How to choose an acrylic liner, what to look for
- Bulk restoration method
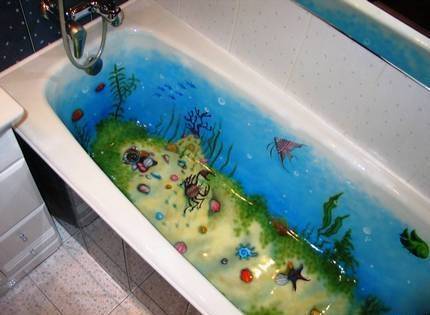
- Painting
- Briefly about technology
- Advantages and disadvantages
- Enameling with "Stakryl" in stages
- Features of the filling method
- Cost calculation
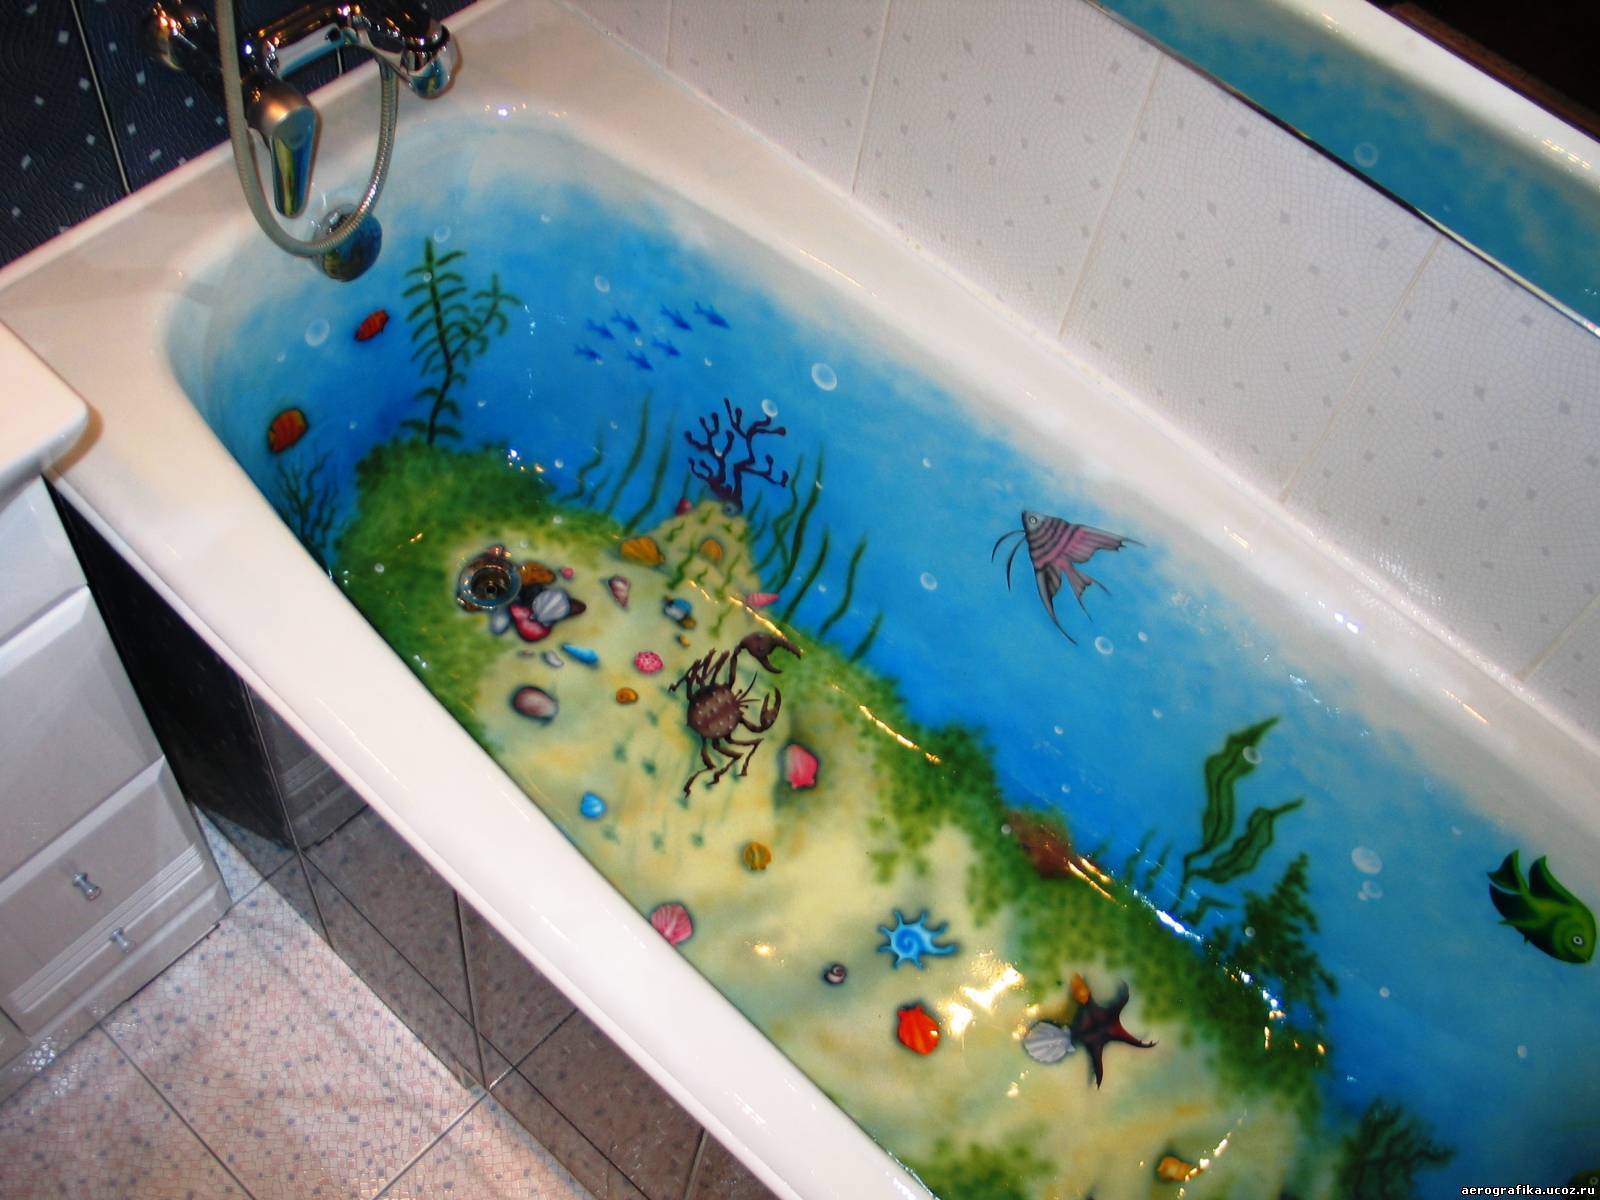
Restoration with liquid acrylic
As the name implies, the main component of the restoration in this case is liquid acrylic. Since it is not applied to the surface of the bath with a brush, but in fact acrylic is poured over the walls, this method is also known as the "fill bath".
Technology
As in the previous case, the restoration process with liquid acrylic consists of two stages: preparing the bath and applying acrylic.
If the preparation stage practically does not differ from the process described above, then the application of acrylic itself has certain features.
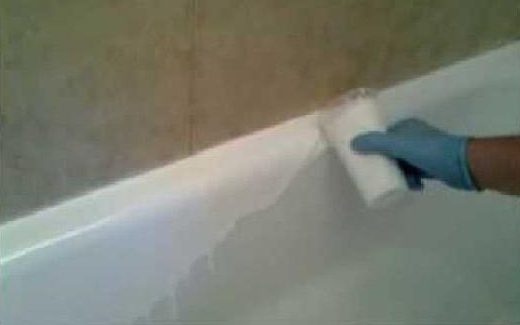
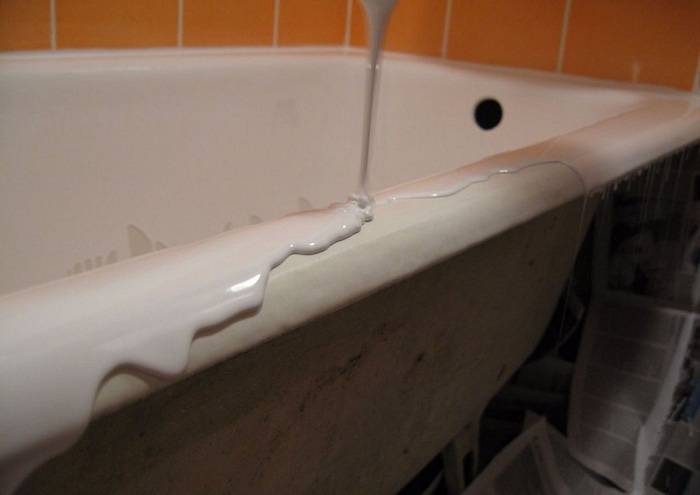
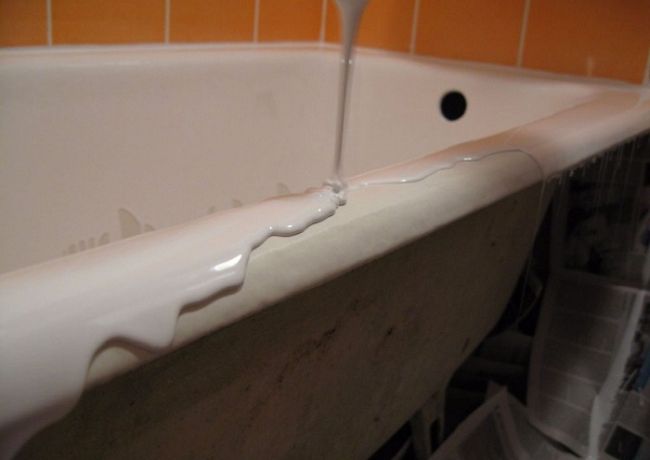
Unlike paint, acrylic is not applied with a brush, but simply poured over the sides of the tub.
After the binder is added to liquid acrylic (it comes with the material itself), acrylic is applied to the walls of the bath not with a brush, but in bulk. Simply put, the solution is simply poured from a small container around the edges of the bath, allowing it to drain inward. After that, acrylic is evenly distributed over the entire surface using a special rubber spatula.
Advantages and disadvantages
Restoration of a bathtub with bulk acrylic is relatively inexpensive, which, undoubtedly, can be considered one of the advantages of this method. But unlike painting, bulk acrylic stays on the surface of the bath much longer, moreover, in case of scratches or chips on it, they can be easily removed using inexpensive “repair kits”.
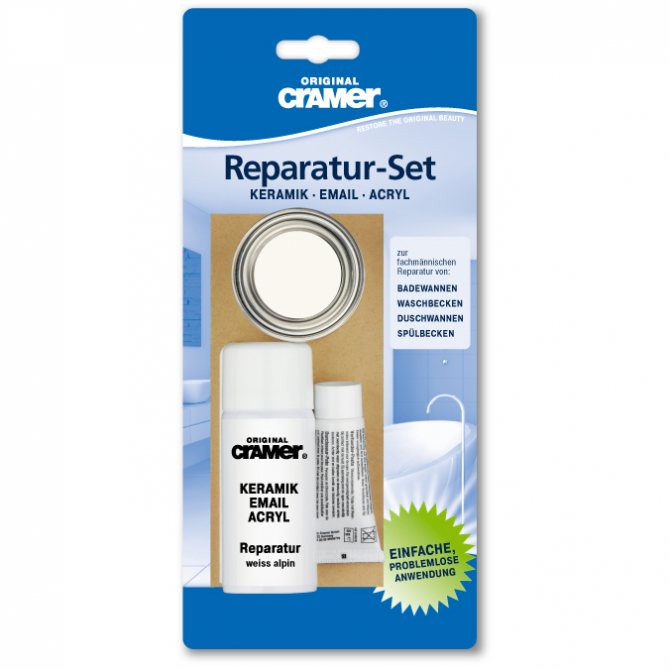
With the help of an inexpensive repair kit, chips and scratches are removed without a trace.
And another undoubted advantage of liquid acrylic is a wide selection of colors.
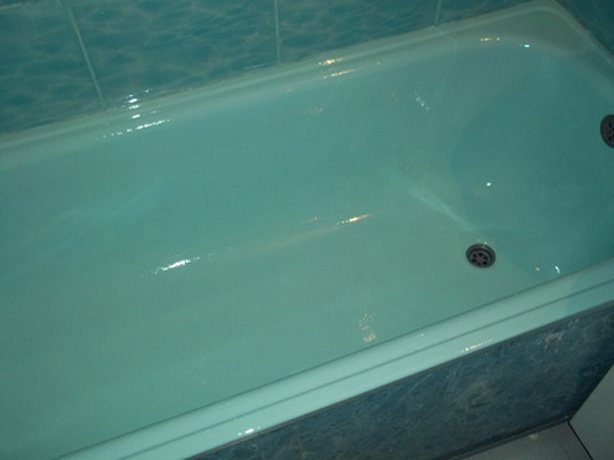
A wide choice of colors of self-leveling acrylic allows you to give the bath almost any color.
The disadvantages of this method can be considered a rather specific technology for applying acrylic, which, for all its seeming simplicity, a person without experience may not be able to cope with. In addition, acrylic dries for a rather long time, so after application it will be possible to use the bath not earlier than in 3-4 days.
Conclusion: restoration with bulk acrylic can be called the "golden mean". On the one hand, it is relatively inexpensive, and on the other hand, it allows you to get quite acceptable results. In addition, in some cases, for example, when it comes to "non-standard" bathtubs, self-leveling acrylic is the only way to restore.
Video: bathtub restoration with liquid acrylic
In order to visually get acquainted with the technology of "bulk bath", we bring to your attention a short video.
How to install
Installation rules:
- insert for each product is selected individually. It must exactly fit the size and shape of the bath;
- first you need to decide on the color and make the necessary measurements;
- before installation, it is imperative to carry out appropriate preparatory measures - clean the coating, rinse, dry and, of course, treat it with a degreasing agent;
- then glue or mounting foam is applied to the base and the liner;
 Preliminarily, glue or mounting foam is applied to the bath
after that, the insert is placed in the product and tightly pressed against its base;
during gluing, special attention should be paid to the drain hole, it must match exactly;
as soon as everything is glued, you need to create a press, for this, water is drawn into the bath with an insert and left until the glue has completely hardened.
Still, this procedure is quite difficult to perform with your own hands, so it is advisable to turn to specialists who will do everything efficiently and correctly.
DIY Bath Restoration Tips
When restoring a bathtub by pouring, listen to some tips:
when applying a mixture of acrylic, precautions must be taken. It is best to wear rubber gloves on your hands;
it is also advisable to use a respirator, although the paint does not have strong pungent odors, it will still be useful;
Be sure to stock up on a respirator and rubber gloves
- further care of the bulk bath will help increase its service life. Therefore, care should be started immediately after recovery;
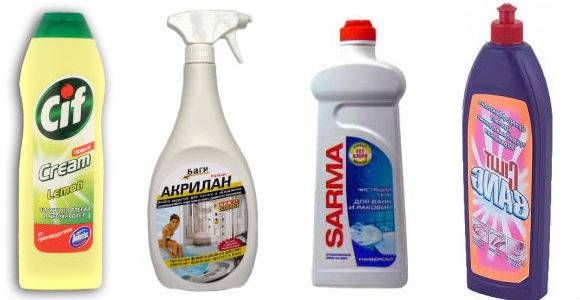
- be sure to rinse the product after bathing. To do this, you can use a soft brush and powder;
- if ingrained and hard-to-remove stains appear on the surface, then special detergents for acrylic coatings should be used;
- after taking a bath, it must be wiped dry;
- you need to make sure that the shower and the faucet do not leak, this will prevent rust and other unpleasant consequences.
All these recommendations will help to extend the life of the coating of the bulk bath, and it will not lose its attractive appearance even after repeated use.
Beginner Tips
Listen to the advice of experts before proceeding with the restoration of the bathroom:
- for beginners in this matter, before proceeding with the restoration with their own hands, it is advisable to watch special videos that fully describe the process of pouring acrylic into the bath;
- a detailed study of professional work will help prevent serious shortcomings and errors;
- curing time depends on the selected material. Acrylic mixtures are divided into quick-drying, which allow you to start using the product already on the first day, and ordinary ones. Conventional mixtures completely dry out on day 4 and are highly durable;
- for bulk restoration, it is recommended to purchase Stakryl. It is the easiest to work with it, its cost is not so high. And the quality is much better;
- it is not advisable to dilute the acrylic mixture too liquidly, otherwise its quality will be much reduced;
- the liquid composition will be applied in a thin layer, which will eventually lead to rapid wear of the product.
Now you do not need to throw away the product if it has turned yellow, and cracks, chips, rust have appeared on the coating. After all, it is not always possible to find a worthy replacement, especially if the old bathtub is made of cast iron or durable steel material. It is enough just to make the restoration of the old coating. Currently, the construction market offers a huge range of durable, quality bath mixtures that will protect it from destruction. And knowing the rules of the bulk method, you can do everything yourself.


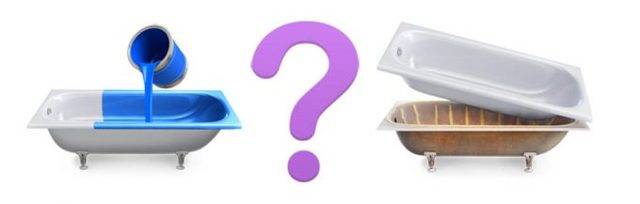


Tab manufacturing technology
The acrylic inlay used to restore the look of an old bath looks like a slip-on cover. It allows you to return the lost performance to the plumbing tank in a matter of hours.
This restoration option has been used for several decades by Americans, Europeans, and for 2 decades by our fellow citizens. This is an affordable and convenient way to get the desired result without unnecessary dirt.
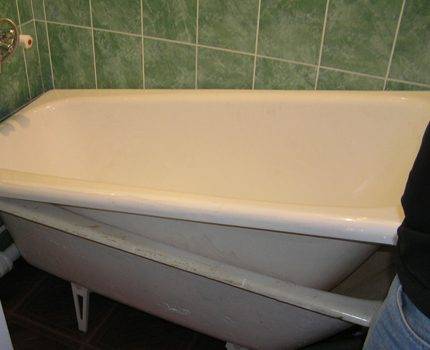
This technology involves putting on a thin liner on a powerful frame made of an old bathtub that has lost its visual appeal.
The most important thing about an acrylic liner is its quality.
Therefore, when choosing this product for home, you need to pay attention to manufacturers with a good reputation. Otherwise, even a conscientious installation will not save the situation - the insert may burst after a month of operation
On the sanitary ware market, liners made of the following materials are presented:
- medical acrylic;
- two-layer plastic - ABS / acrylic;
- ordinary plastic;
- technical acrylic.
Ordinary plastic and technical acrylic are used by unscrupulous manufacturers.They present their blanks as quality products at an affordable price. But such savings will come out sideways in a month or two.
Plumbing medical acrylic (PMMA) has been replaced by a two-layer one for the last couple of years. The matter is that ABS/acrylic material possesses the best operational qualities. So, it is more impact resistant compared to fragile acrylic.
The technological process of manufacturing inserts is complex and requires the skill of a master and the availability of expensive equipment. In artisanal conditions, the production of quality products is impossible.
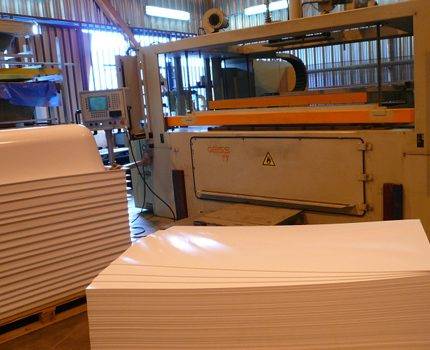
The plant has all the necessary equipment from foreign manufacturers. Material, also use foreign, hygienic requirements
For the manufacture of liners, a single-color sheet of cast acrylic with a thickness of 0.6 cm is taken and, under the influence of vacuum and high temperature, they give it the desired shape on the machine. For molding, special molds made of aluminum or a synthetic composite are used.
Two-layer plastic is inherently a monolithic material that can be molded in the same way as pure acrylic.
It is important that the thickness of the acrylic layer is 0.5 cm or more. Indeed, in products with a 2 mm layer, the operational surface is quickly damaged
The vast majority of foreign manufacturers and all domestic ones use ABS/PMMA material. The upper hygienic layer has dirt-repellent and antimicrobial properties, and the lower one ensures the reliability of the product.
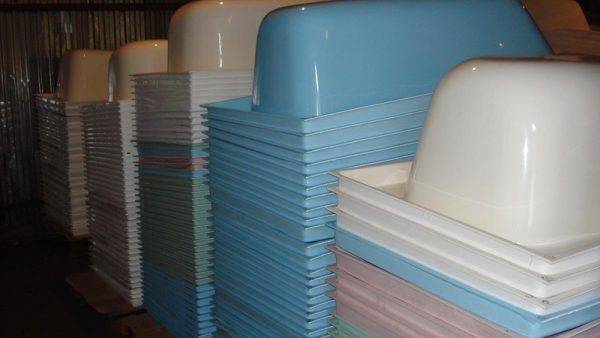


The shape of the old bath is important. Not all models can be purchased with an acrylic liner
Large factories have up to 20 different dies for the production of inserts for the most common cast iron and steel products.If during the measurement process it was found that the bath is non-standard, then you will have to choose an alternative upgrade option.
Factories produce only a certain number of liners. After all, the cost of the form itself is quite high, so making it to order for each client is unprofitable.
Do not trust private manufacturers who promise to make an insert for a specific model. It will be very expensive and no one can vouch for the quality of the product.
Also, in the case of a non-standard model, you can not buy a slightly smaller insert. According to the “bath in bath” restoration technology, it should be like a second skin worn over an old product.
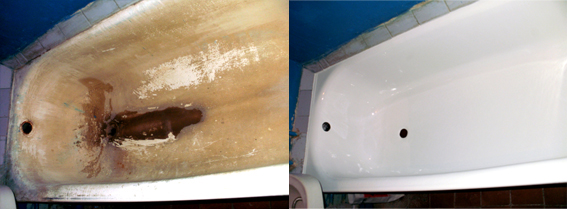
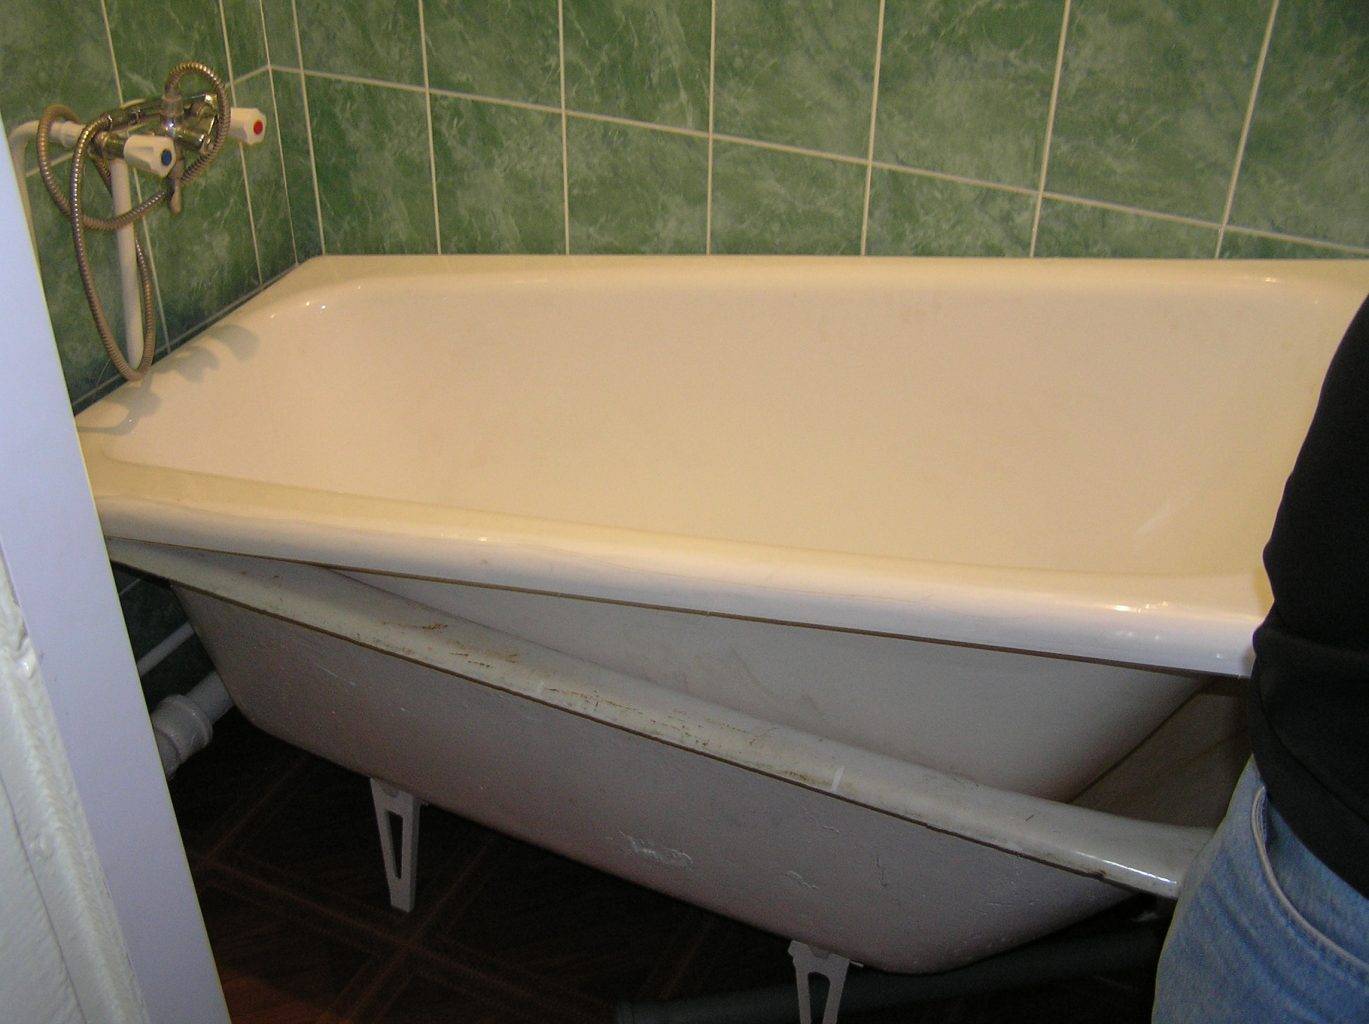
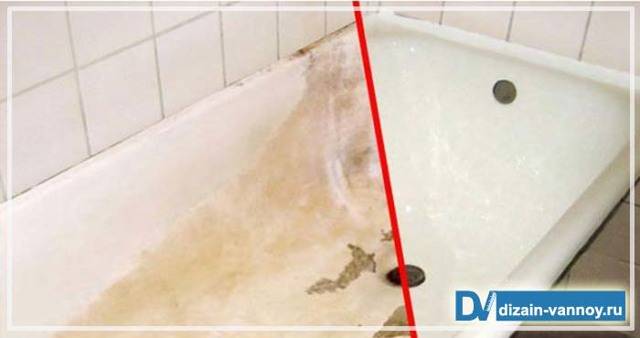
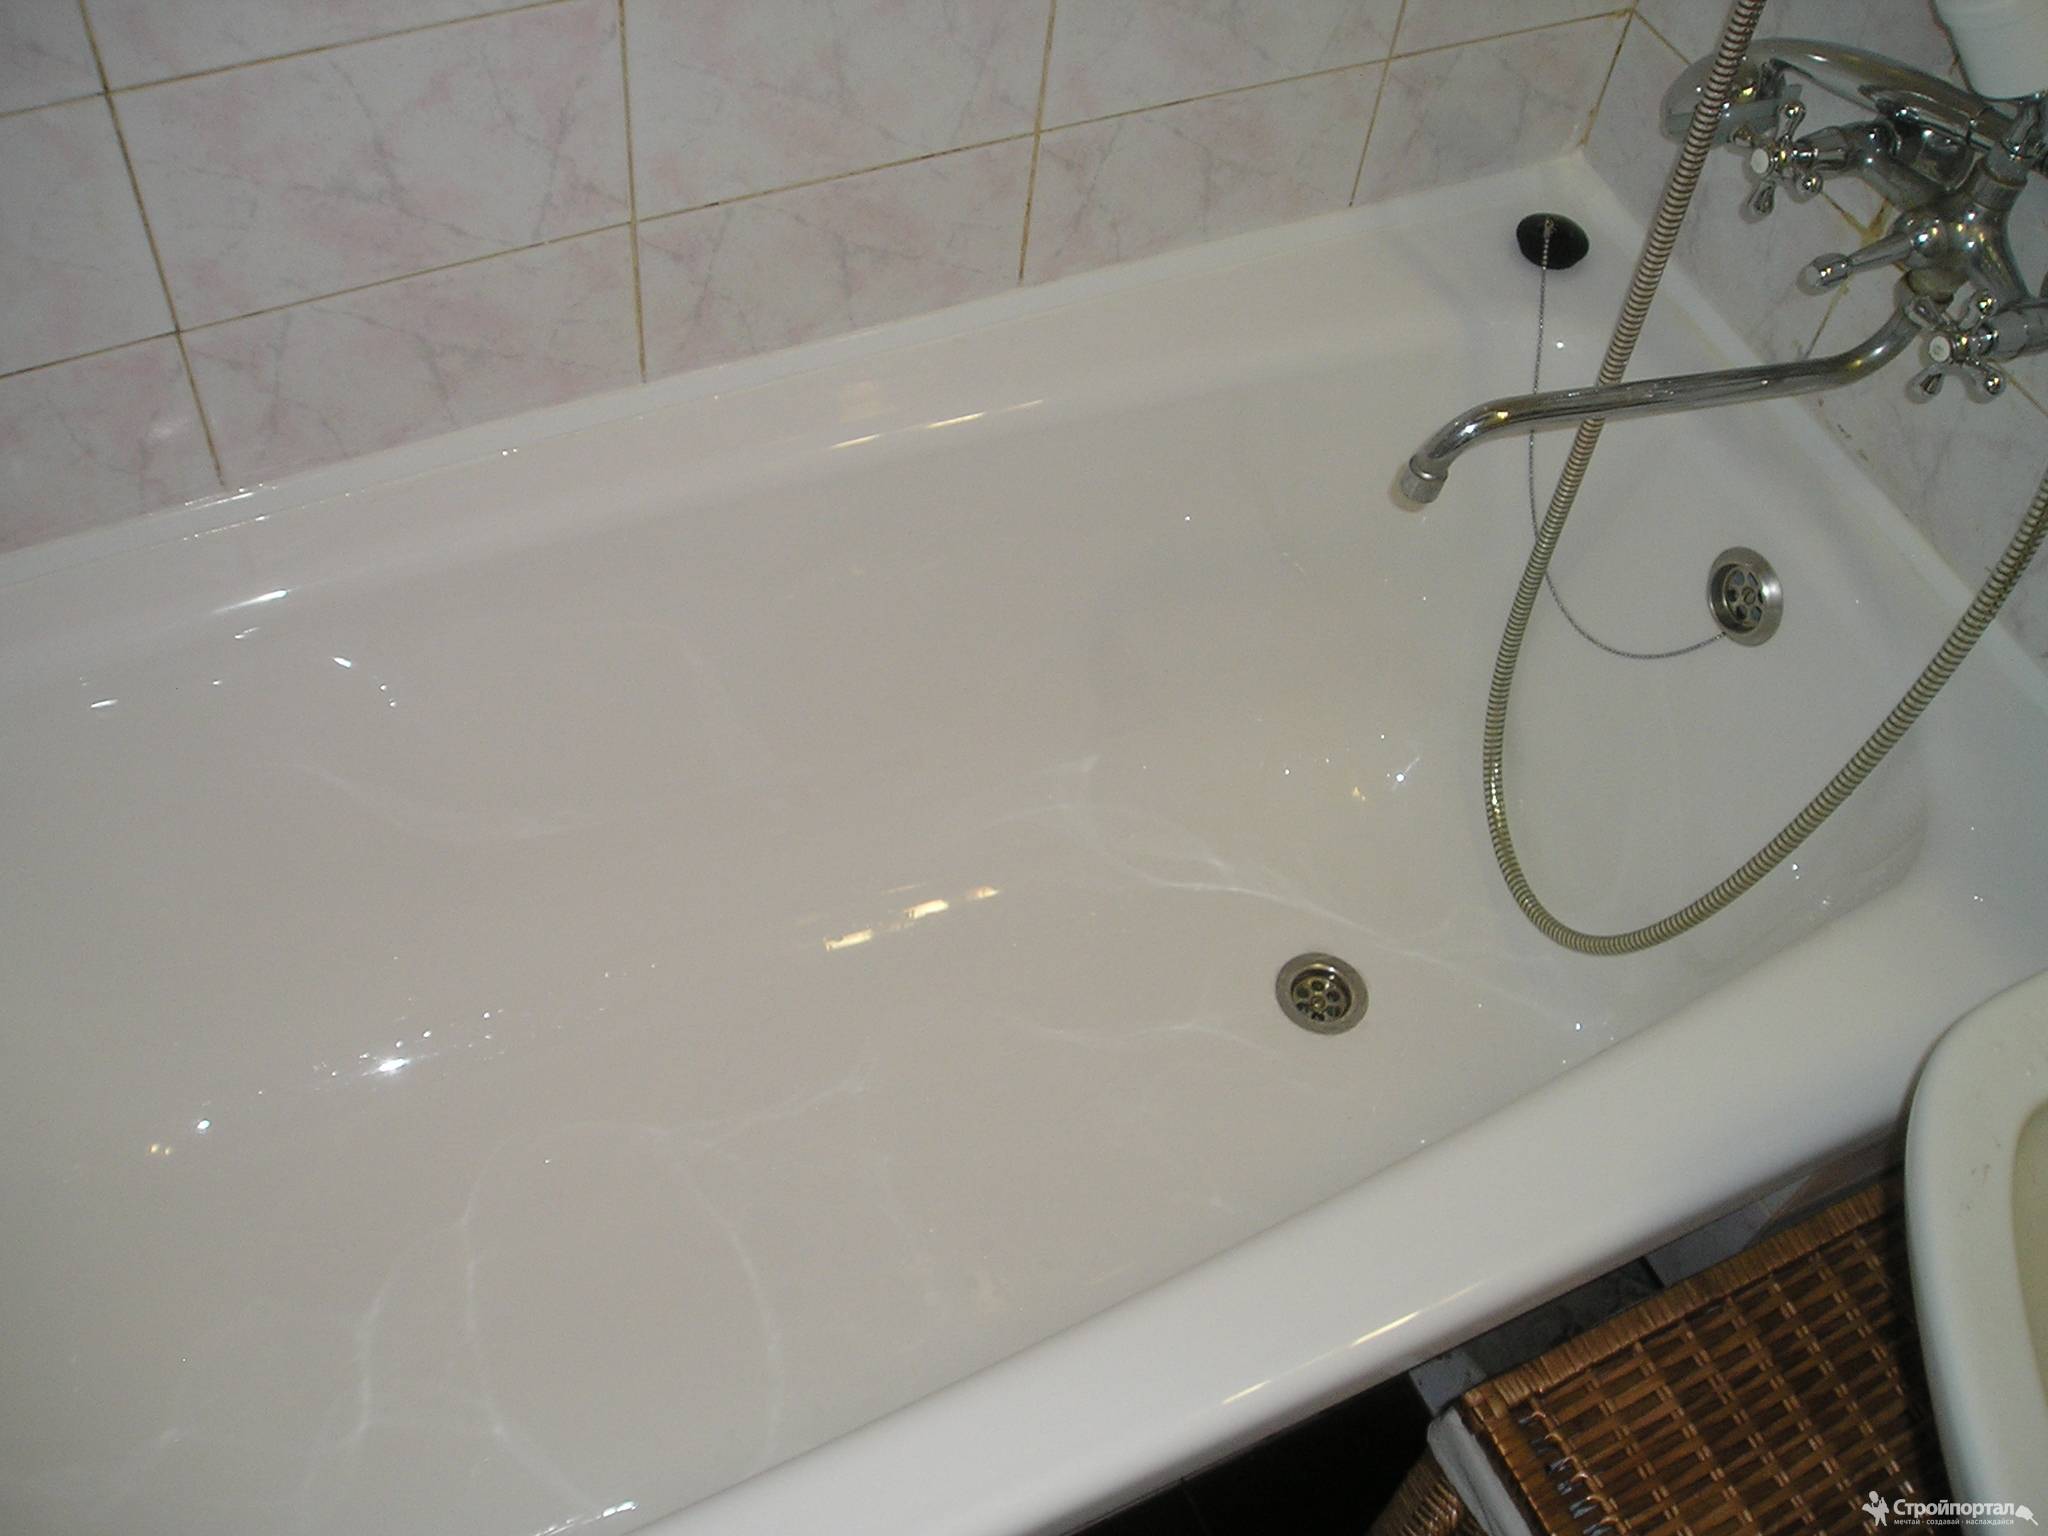
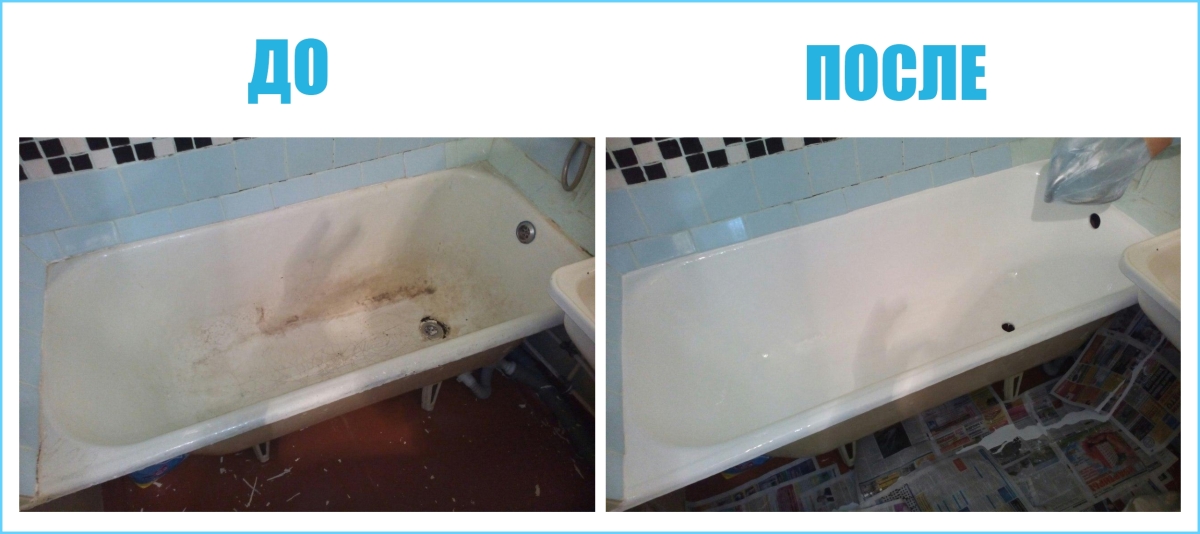
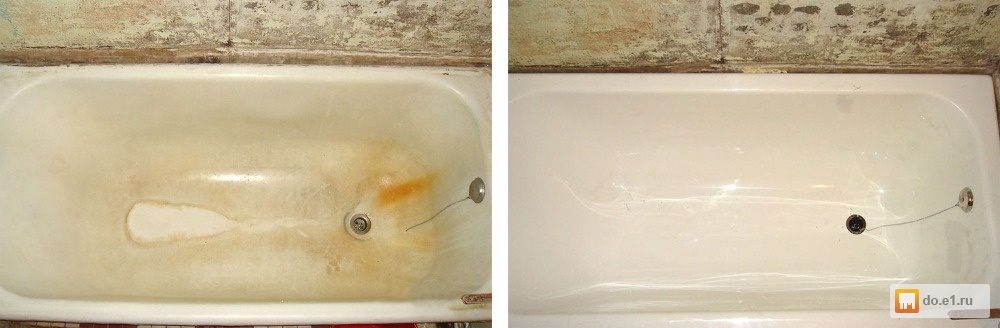
Bathtub restoration with enamel: pros and cons
The coating applied to a metal or cast iron bowl at the factory wears out quickly. And after a couple of years, the bath becomes rough and loses its luster and snow-white appearance. Cast iron and metal bathtubs are often restored independently with the help of special enamel. This method of restoring plumbing also has several advantages:
- economy;
- chemical resistance;
- low level of wear;
- the possibility of applying several layers;
- fast work completion.
The disadvantages of enameling a bath include:
short service life of the bath - no more than 5 years;
the need for special precautions and protection when painting, since the enamel has a very pungent odor.
How to enamel a bathtub?
First you need to prepare a set of materials and tools:
- brushes 6 to 8 cm wide;
- roller;
- acetone;
- hardener;
- measuring glass;
- primer for metal;
- acetic or oxalic acid;
- gas mask or respirator;
- protective glasses.
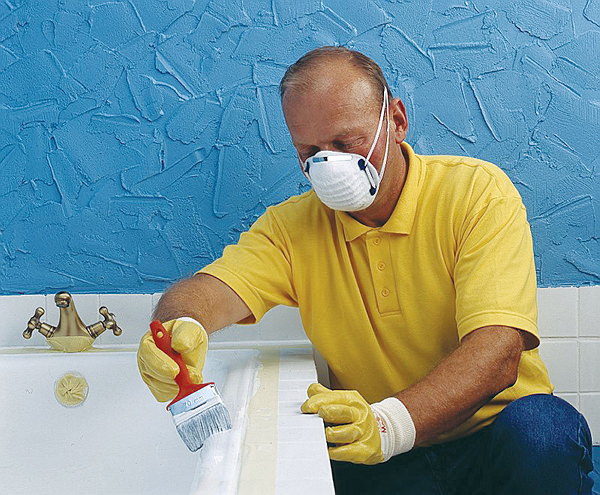
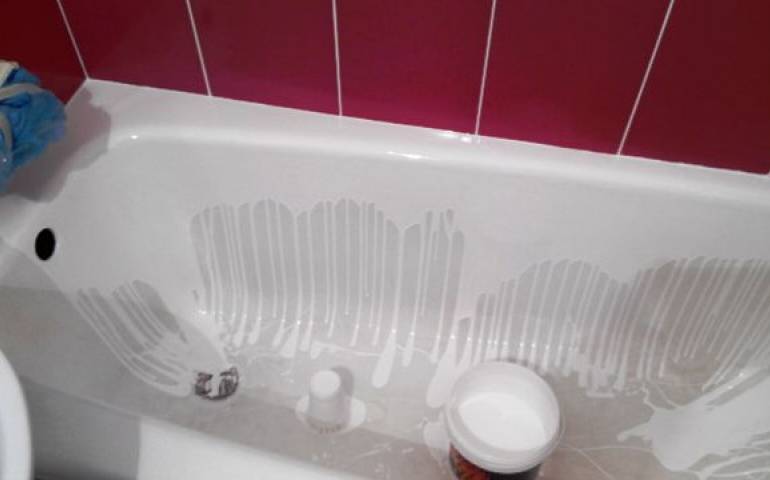
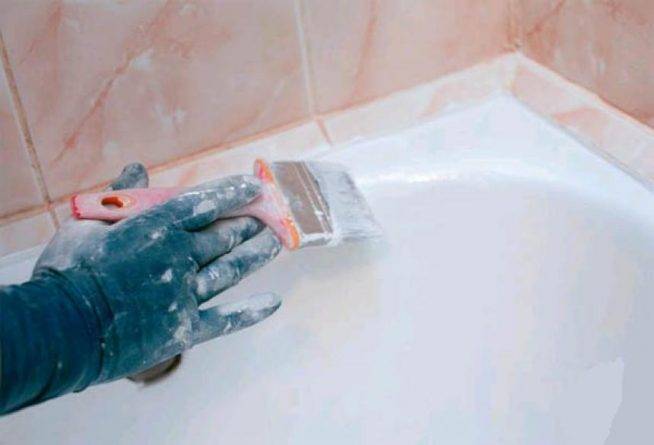
The technology of coating the inner surface of the bathtub with enamel is more complicated than the technology of applying acrylic. The difficulty lies in the fact that before applying the enamel, the surface must be as smooth as possible, so it must be thoroughly polished in advance. In addition, you should try to do the work very carefully, avoiding the formation of smudges, and quickly, until the enamel has had time to dry.
The process of restoring an old bathtub with enamel includes 4 stages:
- Thorough cleaning of the base of the bowl and applying a primer to it.
- Preparation of all components intended for applying the first layer of enamel by brush or roller.
- Complete drying of the material and subsequent application of enamel in several layers.
- The final polymerization of the enamel takes about 24 hours.
These are the methods of bathroom restoration that exist today, and which one to choose is up to you.
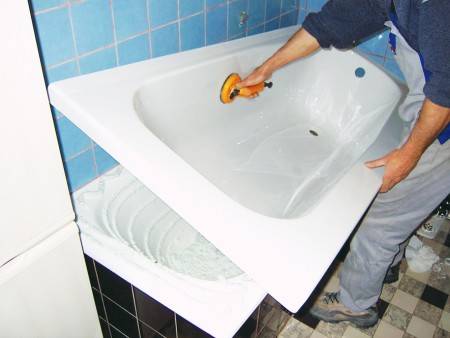
Step by step installation instructions
Theoretically, you can install the liner with your own hands. But you will have to carefully prepare for work.
Perform the installation step by step:
Clean the old surface with a puncher, sandpaper - it is important to remove the remnants of mounting foam, sealant.
Dismantle the drain system - the container should be completely free.
Carefully clean the surface - so the "grip" of the liner will be better.
Attach the liner to the bath, marking the borders of the sides, drain holes.
Apply mounting foam evenly, and around the perimeter - a layer of sealant.
Press the insert firmly.
Install a siphon.
Fill the bowl completely: the water will act as a press that will allow the liner to stand up firmly.You need to leave the bath in this form for 15-20 hours, and then you can safely begin to operate .. At first glance, there is nothing complicated in the technology
But still, it is better to entrust the matter to the master: he will be able to immediately foresee and eliminate the nuances that may be unfamiliar to an inexperienced person.
At first glance, there is nothing complicated in technology. But still, it is better to entrust the matter to the master: he will be able to immediately foresee and eliminate the nuances that may be unfamiliar to an inexperienced person.


How to choose an acrylic liner, what to look for
The cost of acrylic liners, although much lower than new plumbing, is not enough to buy them several times, in case the chosen model does not fit
Therefore, first of all, it is important to correctly take measurements from an already installed bath. And even if it is a standard size, reinsurance will not be superfluous
To select an insert, you need 5 basic measurements.
To accurately select the insert, you need to take 5 measurements
- full bath length. The measurement is taken along the outer edge of the bathtub.
- Internal length. Determine the maximum length of the bath bowl, excluding the width of the sides.
- Inner width at the drain. Determine the width of the bowl directly above the drain by measuring the distance between the side walls, without taking into account their width.
- Inner width at the back. Find the place of maximum expansion of the bowl from the back of the bathroom and measure its width, excluding the sides.
- Bath depth. The metering is determined in the area of the drain.For a more accurate result, it is recommended to put a flat straight board or rail across the bathtub on its sides and measure from it strictly perpendicular to the drain.
The bath can be straight (the width at the drain corresponds to the maximum width of the bath) or ellipsoidal (the width above the drain is less than at the back). According to the available measurements, the seller consultant will be able to offer a suitable option. In cases where such a model is not currently available, as a rule, it is brought to order. It happens that the plumbing does not meet standard dimensions, then the acrylic liner cannot be installed in the bathroom, as is the case if the plumbing is bricked or a finishing material that is not planned to be removed.
When choosing a manufacturer, you should pay attention to the quality of finished products. Inexpensive liners, for example, made in China, often have a thickness of no more than 2 mm and after installation, swelling and cracks are guaranteed
While more expensive certified products are not only durable, but also hygienic. The optimal thickness for acrylic liners should be in the range of 5-6 mm. Only then can we talk about the strength, reliability of the design and long service life.
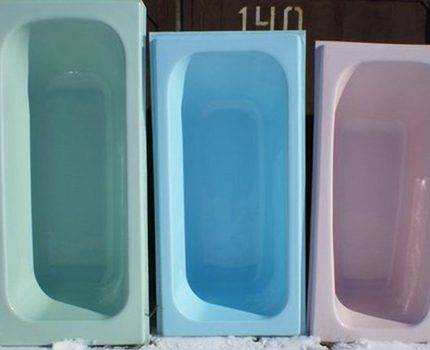
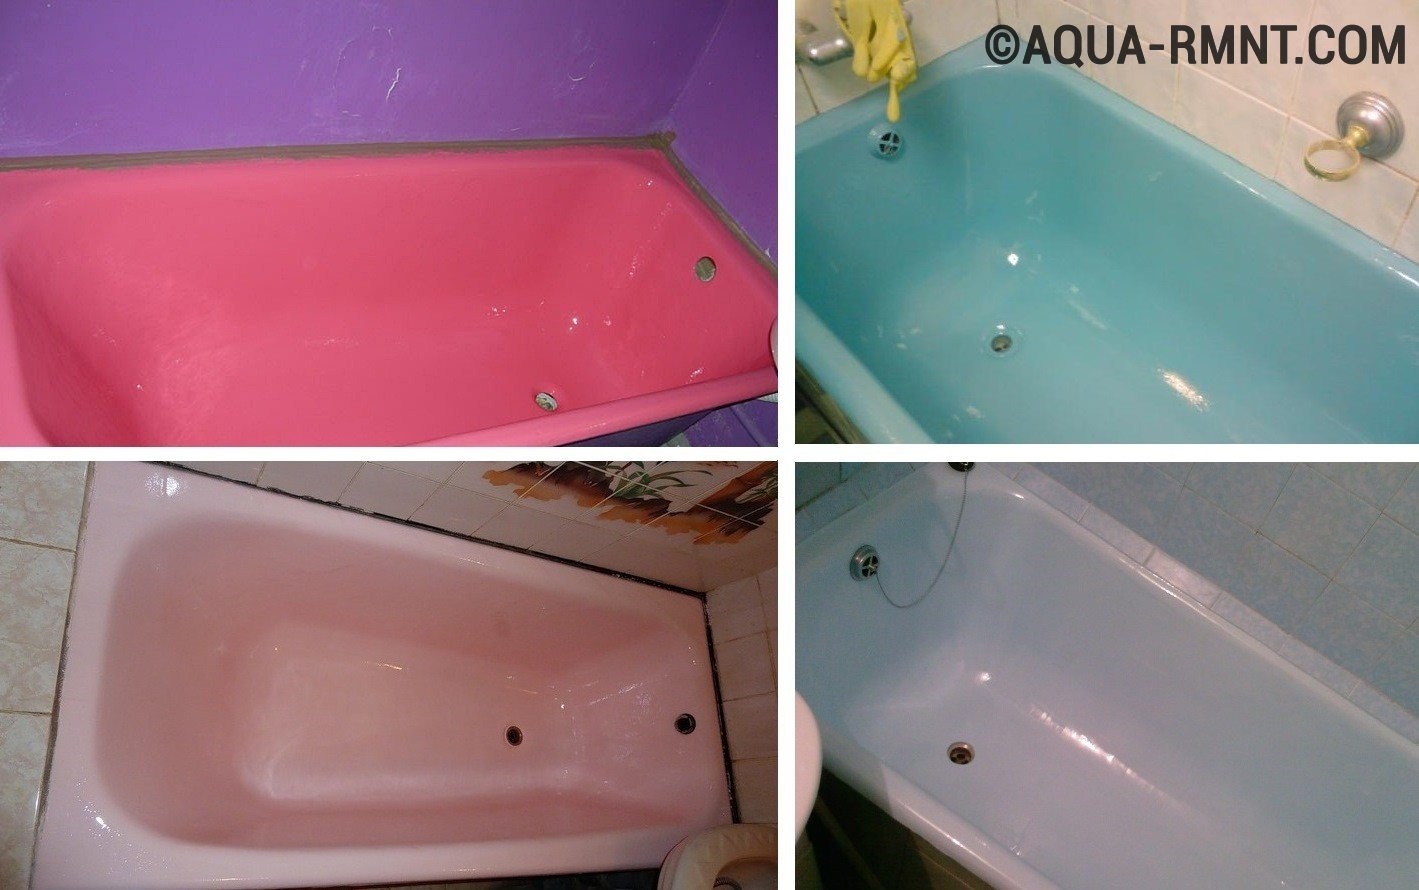
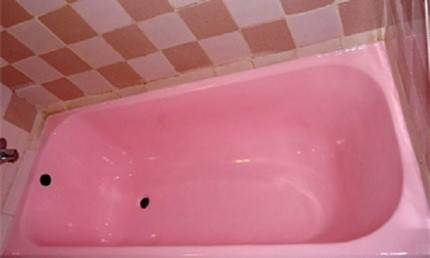
Some manufacturers offer inserts in several color options, usually there are four of them: blue, green, pink and traditional white.
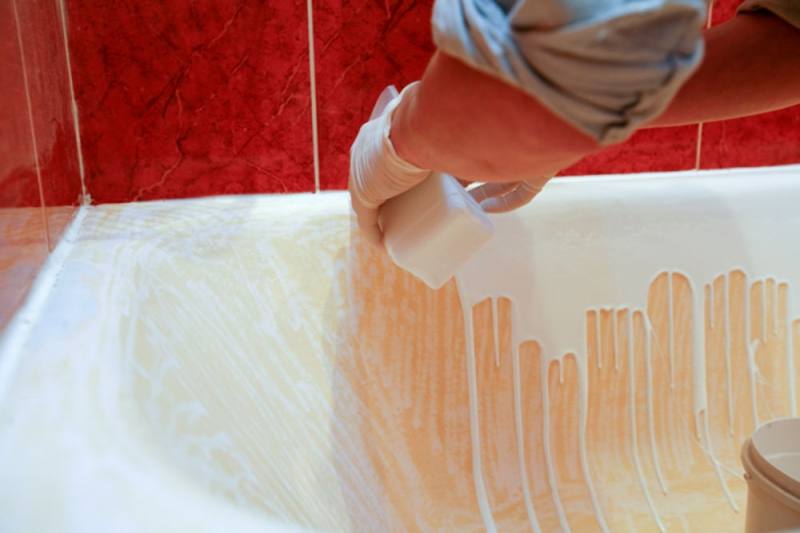
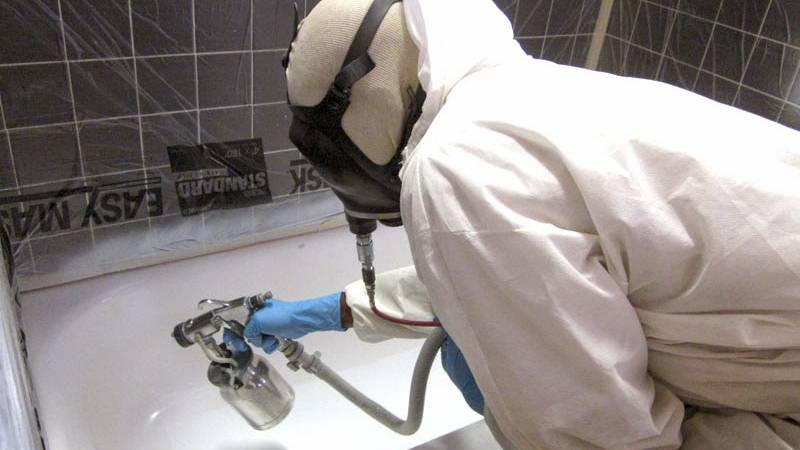
Bulk restoration method
You can find out exactly how this method of restoration is implemented by getting acquainted with this video:
For poured restoration, stacryl or liquid acrylic is used. Both of these materials have found wide application and their fans. Glass has been used in restoration work for more than ten years.But liquid acrylic dries faster. Both materials are not applied with a roller or brush, but are poured onto the surface.
 The bulk method of bath restoration is being improved day by day: not only white material is used, but also colored
Advantages of the method:
- bulk coating will significantly extend the life of your bath;
- the material from which the bath is made, as well as its configuration, do not matter;
- the useful volume of plumbing practically does not change;
- you don’t have to remove the decorative tiles adjacent to the bath: just cover its surface with masking tape so as not to inadvertently stain it;
- the coating material will completely hide the minor defects of your bath.
But this technology also has some drawbacks that you should be aware of in order to make an informed decision.
The disadvantages of the method:
- acrylic dries quickly because it actively evaporates, but it is these fumes that are dangerous to human health: in the process of performing work and until this material has completely dried, it is better not to enter the bathroom;
- before performing work, the siphon must be removed, otherwise it will have to be thrown away;
- the pouring procedure will require more material than the process of applying enamel with a brush.
Among other things, such a restoration will not only not eliminate significant defects in the coating, but will make them more noticeable.
 If your bathroom is made in a certain style, then airbrushing can be a real find for you.
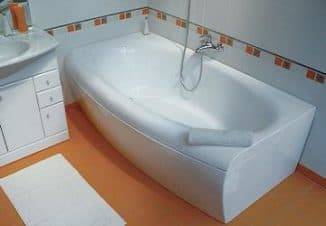
Summing up, we can say that both methods are good for a cast-iron bath. If the tub were steel, then the liner method would be preferable.You will have to independently choose the restoration method that is more suitable for you, based on the advantages and disadvantages of each, which we described above.
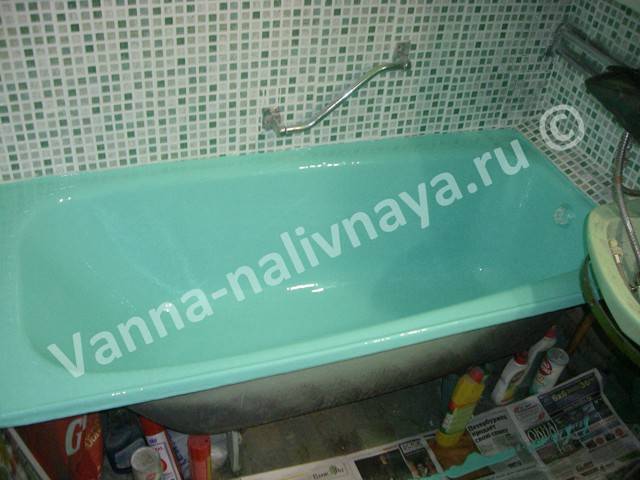
Painting
The easiest and most inexpensive way to update an old bathtub is painting (enamelling). Of course, ordinary oil paints are not suitable for this purpose. The bathtub is painted with special paints based on enamel. Such paints are sold either in aerosol packages or in the form of a two-component composition, which you have to mix yourself and apply with a brush or spray gun.
 Two-component paint, although less convenient to use, but it gives a much better result than spray paint.
Briefly about technology
Painting a bathtub with your own hands is a fairly simple process. It consists of two main stages: preparing the bath and painting it directly.


Preparation includes degreasing the bath, cleaning the surface and final washing.
Degreasing must be carried out using strong detergents. Naturally, in the process of their application it is necessary to use protective rubber gloves.
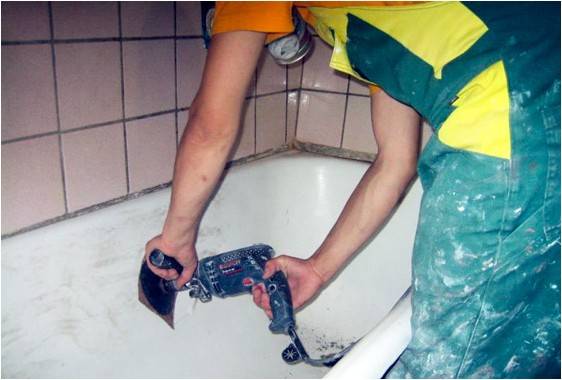 Stripping is best done using a special nozzle on the grinder or drill
When the bath is prepared, proceed directly to the painting process. The paint is diluted and applied to the bath in two, but preferably three layers. You can do this with a regular brush, but to get a smoother surface, it is better to use an airbrush.
 You can apply paint to the bath with a regular brush.
Advantages and disadvantages
The main advantage of painting a bath can be considered low cost and the ability to do all the work yourself. But this is where the "pluses" of painting, perhaps, end. The disadvantages include the short life of the new coating, the inability to achieve a perfectly even and smooth surface of the bath, as well as a rather long restoration process (when painting the bath in three layers, the total duration of work can be more than three days).
Conclusion: painting is more of a “temporary measure” than a full-fledged restoration. So we can recommend it only in those cases when in the near future you are going to do a full renovation of the bathroom and either completely change the old bath or restore it in a more efficient way.
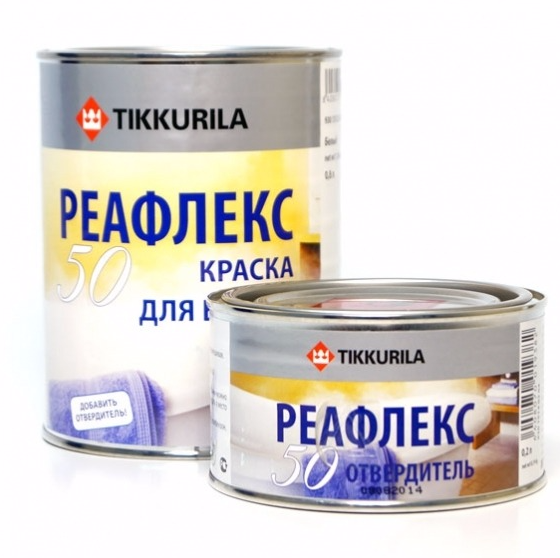
Enameling with "Stakryl" in stages
Selection of tools. We prepare only special devices, in no case a brush or a roller.
Preparation of "Stakryl" according to the instructions. In its original state, it is represented by two components: a thick acrylic base and a liquid hardener. Mix well before restoration. The resulting working mixture should be viscous, fluid and hardening after some time after application. The source material must be of high quality and fit in time.
Distribution of material in the bath
The process will require care and caution.
On average, bulk bathtubs of a standard size require about 3.5 kg, dry out in 4 days.
Acrylic is poured slowly, first on the upper edge, in a thin stream, so that it flows down and fills the entire surface. Immediately fill in the gaps that were left uncovered. "Stakryl" evenly falls on the surface, forming a layer of the desired thickness (2-8 mm).
Features of the filling method
Do not rush to part with the old cast-iron bath, the strength of which, by the way, is much higher than all modern analogues. If you properly restore this plumbing, it will serve you for many more years without the need for replacement. In addition to the acrylic liner, there is a method of so-called bulk acrylic (liquid glass), when the composition is poured directly onto the walls of the bath, and then flows down, covering the side surfaces. The final stage is the uniform distribution of the composition along the bottom with a spatula.
Thanks to this technology, the thickest layer is formed in the most vulnerable part - below. Due to the fact that the liquid mixture has the ability to level itself, the coating is smooth and uniform. The service life of this method is approximately 15-20 years.
In this case, you do not have to dismantle the bath, in addition, removing the tiles around it is also not required. However, the process of applying liquid acrylic is quite laborious and requires a certain perseverance.
Of course, this method also has its downsides. Let's say cleaning the bathroom before applying the composition is a very noisy and dirty process. The compositions for application themselves smell very unpleasant, the drying period is about two days, after which the smell persists for a long time. The resulting layer of acrylic is very thin, therefore, it is sensitive not only to mechanical damage, but also to various chemical cleaning agents.
It is worth noting that here you will need a truly qualified specialist who can carry out the entire procedure quickly and accurately.It is impossible to pour acrylic evenly without certain skills, so you can only spoil the bath. Therefore, you should only contact professionals.
Cost calculation
Installation cost includes:
- The price of the insert is up to 5,000 rubles.
- Surcharge for color - a bright bath or an unusual shade will cost 300 - 1000 rubles more.
- Installation cost - depends on the region, but usually does not exceed 30% of the price of the liner.
- The cost of related operations is the removal of enamel from the base bowl, the dismantling of the tiled rim, the sealing of gaps between the bathroom and the wall, etc. The price depends on the region, each type of work can cost from 200 to 800 rubles.
Insert selection - procedure:
- Measure the base bowl. The length is measured on the outside of the side. Width - inside the bath, always on both sides. To determine the depth, a ruler is placed on the sides above the drain and the distance from it to the drain is measured.
- Determine the profile of the insert, it must match the bowl. For example, if the tub is elliptical (the headboard is wider than the "legs"), the insert should be the same.
Do not install the "ellipse" in a straight (with equal ends) bath, filling the cavity with foam. Such a design will be vulnerable: too thick a connecting layer is deformed, moisture penetrates into it.
-
- Among the inserts that are suitable in size and profile, choose the desired color and order the installation.


You can first select the insert, and then find the master who will perform the installation. However, it is better to buy an insert in the same place where its installation will be ordered. Masters will work with the material familiar to them, so the installation will turn out to be of high quality and fast.
You can learn about the features of installing an acrylic insert in a bathtub by watching this video:
When you begin to accept the work of the master, pay attention to the edge of the side. She shouldn't be spicy.
The dimensions of the sides are often adjusted to the bathtub, this is normal. However, the edge must be processed. And this article will tell you which bath to choose.


