
If you heat a private house with gas, you need good ventilation. This is important not only for supervisory authorities, but also for your own safety! Below you will learn all about the requirements for a ventilation duct for a gas boiler in a private house, as well as its installation.

Requirements for ventilation in a private house
On average, the ventilation of a boiler room in a private house should update the air 3 times per hour. In practice, much depends on the type of boiler.
So, for example, the approximate proportion of burned gas and oxygen is 1 to 10. That is, if to obtain 1 kW of heat it is necessary to burn 0.12 m3 of gas, and the boiler is 12 kW, then it burns about 1.44 m3 per hour gas. Following the proportion, 14.4 m3 of oxygen will be needed.
In this regard, there are only 4 main requirements:
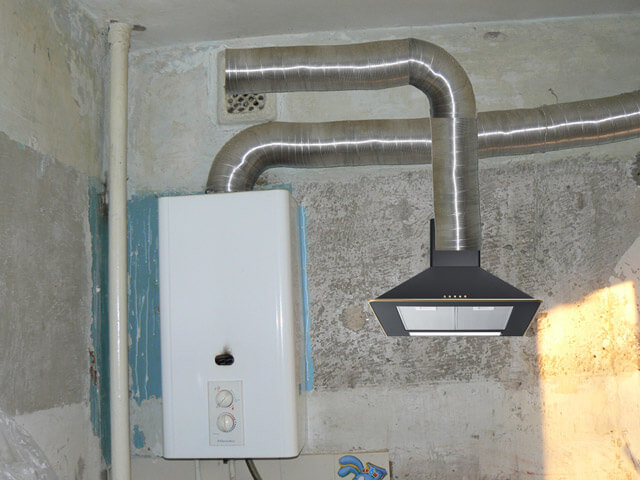
- Ventilation is installed below the gas boiler.
- The exhaust air duct is installed from above.
- A non-return valve must be present in the supply channel. This is necessary to prevent reverse air draft.
- The diameter of the exhaust channel must clearly correspond to the parameters of the boiler, which is indicated in the instructions for the equipment.
Ventilation device for a gas boiler house in a private house
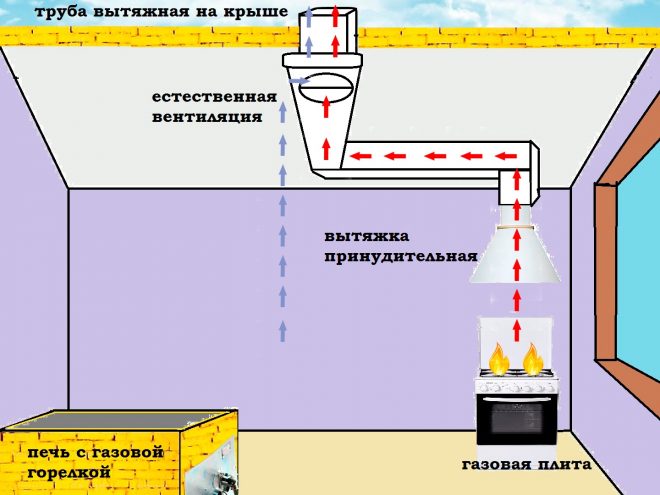
natural ventilation
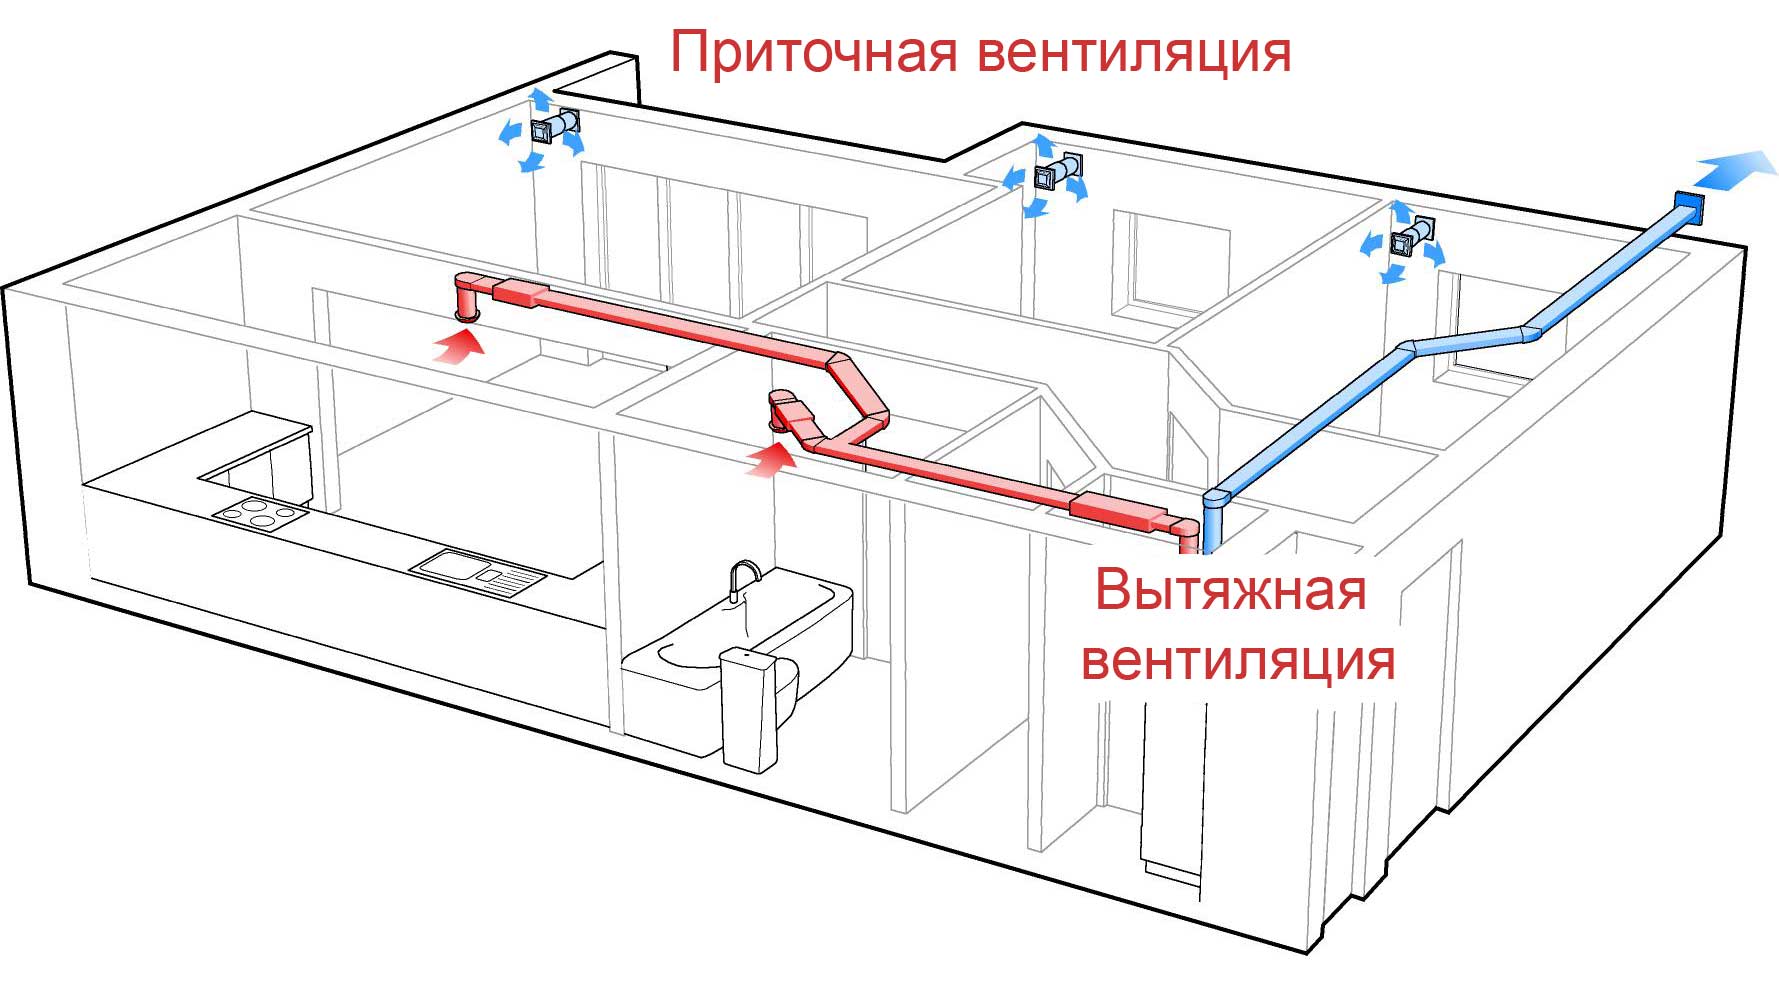
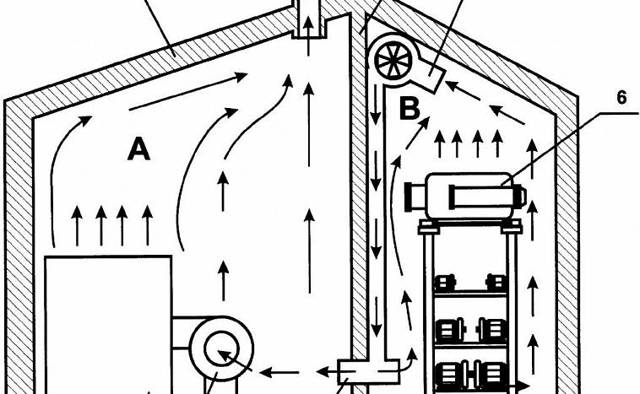
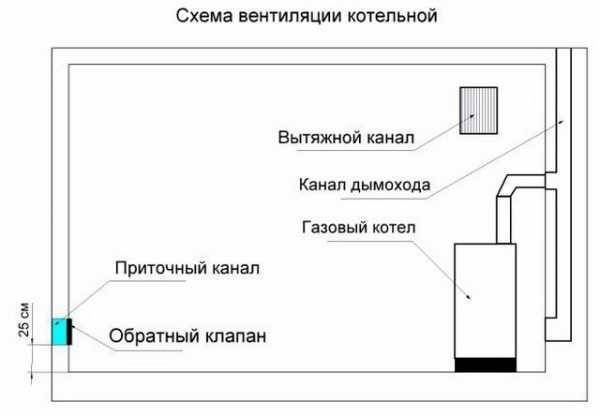
Natural ventilation for a gas boiler in a private house is natural because it uses the natural laws of physics for air circulation. In this case, fans are not used, and the hood is formed by the temperature difference.

The supply opening (fresh air enters through it) is mounted at a distance of 30 cm from the ground. The hood is formed under the ceiling, as in the diagram.
Natural ventilation is suitable if:
- The house is located on a hill.
- There are no other tall buildings or trees nearby.
- Equipment power is low. For large boiler houses, this option is of little use, because. circulation will be weak.

Please note that the above requirements are complex. If at least one item does not fit, natural ventilation is prohibited!
Forced
Forced ventilation in a boiler room with a gas boiler uses fans to artificially inject and remove air. It can be combined with natural if the private house is small. In this case, only an exhaust fan is needed, and the inflow can be passive.
It is possible to use forced ventilation in the boiler room of a private house in all cases when natural ventilation is unacceptable.
How to choose the material for the hood
Before you make ventilation in the boiler room, you need to study the available materials for construction.
Brick
Its only advantage is durability. On average, it will last about 50 years, because.it cannot be broken, and it is not sensitive to corrosion.
On the other hand, he also has enough shortcomings:
- Difficulty of installation. You will have to lay out the ventilation ducts in a private house for a gas boiler, wait for them to dry, look after the docking and evenness of the masonry.
- Low heat capacity. The gas will not be able to properly heat the brick, which will lead to the formation of condensate, which will also destroy it.
Ceramics
Also not the best material. Ceramic, like brick, heats up very poorly, which will lead to condensation. However, the installation of a moisture trap is allowed here.
If the ventilation duct in a private house for a gas boiler still warms up, the ceramics may crack. In addition, it does not survive temperature changes well, so additional insulation is a must!
Mounting heavy ceramic pipes is not much easier than brick ones. In addition, they are very fragile.

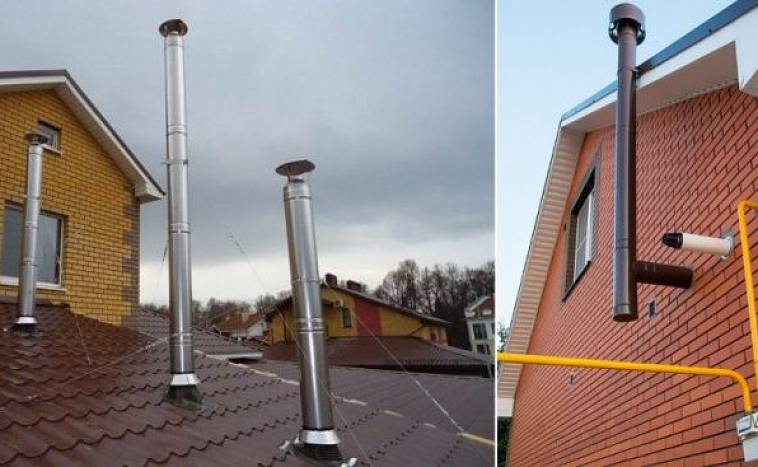
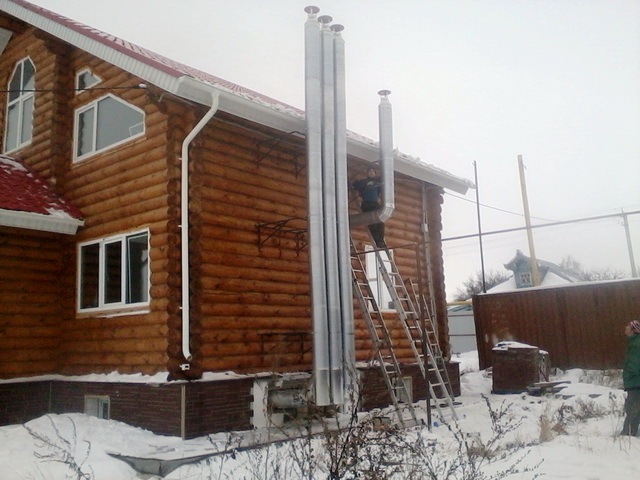
Metal
Special heat-resistant stainless steel pipes are the best option for gas boilers. They are much lighter than brick and ceramic ones, they are easy to install and are not afraid of condensate. In addition, you don’t have to assemble anything - they are ready for installation from the store.
Of the shortcomings:
- Price. It will be more expensive than brick, but cheaper than ceramics.
- Life time. They will probably live less than a brick, but no complaints.
Calculation of ventilation of the boiler room
So, ventilation in a private house for a gas boiler is calculated in accordance with the rules of SNiP. They will help determine the diameter of the hood in the gas boiler house of a private house.
For example, here is the calculation of air exchange for a room with a width of 5 m, a length of 6 m and a ceiling height of 2.7:
- First you need to find the volume of the room.To do this, you need to multiply all the indicators: 5 x 6 x 2.7 = 81 m3. This is the volume of the given room.
- Now we need to take into account the air exchange. To do this, the actual height must be subtracted from the ceiling height standard (6 m), multiplied by the penalty coefficient. And add 3 meters: (6 - 2.7) x 0.25 x 3 = 3.825.
- To get the diameter of the hood for a gas boiler in a private house, you need to multiply one indicator by the second: 3.825 x 81 \u003d 310 (rounded).
So, you got the air flow rate per hour. Now carefully study this table, regulations SNiP. In the case of the example, the diameter should be about 355 mm.
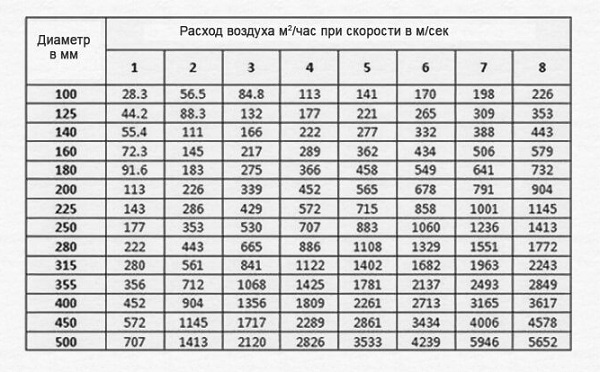
For "low-power" boilers up to 30 kW, a different calculation scheme is used, but according to the standards, a standard diameter of 130 mm is allowed. If you are not satisfied with the efficiency of the hood for a boiler in a private house, increase the diameter.
Step by step installation instructions
natural ventilation
The natural exhaust for a gas boiler in a private house is installed as follows:
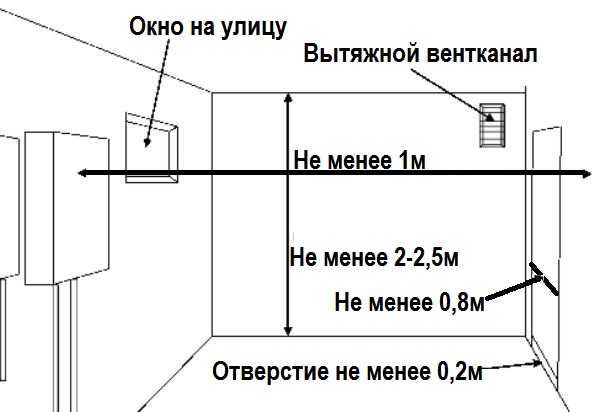
- First, mark up the holes. You can use this scheme.
- Attach the pipes to the marked places and circle with a pencil.
- Make seats with a perforator, as close as possible to the outlined contour. It is necessary to make holes at an angle of 60 degrees so that condensate drains.
- Insert a pipe wrapped with thermal insulation and sealant into the hole.
- In addition, put a check valve in the hood so that there is no back draft.
Forced
The instruction is similar to the pipe installation stage. Then proceed like this:
- The pipe must be sealed and installed. Additionally, use a sealant so that the fan performance does not drop.
- Install the fan in the pipe and fix it with self-tapping screws.
- Next, you need to connect it. As a rule, it works from 12/24 volts, so you will need an additional power supply.
- Install the exhaust grille.
This completes the installation process.


