- Preparing for the process
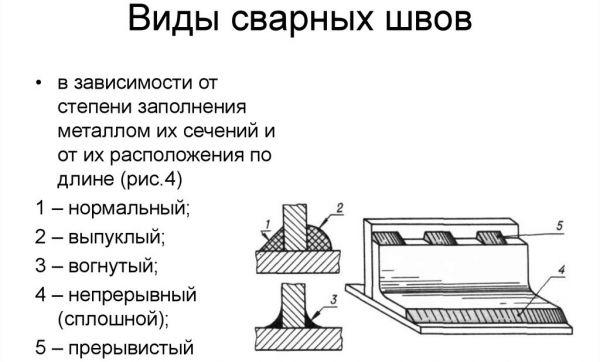
- Types of welds and joints
- Welding of steel pipes
- Pipeline assembly
- Selection of suitable electrodes
- How to choose an electrode?
- About the types of welds on pipes
- Do-it-yourself electric welding
- How to cook pipes: technology
- What is necessary?
- Tools
- metal pipes
- Useful tips and possible mistakes
- How to choose the right electrodes for pipe welding
- Selecting Mode Options
- Minimum current modes depending on the brand of W-electrode
- The sequence of applying layers when welding by one fixed joint welder
- Direction and sequence of laying the root layer
- Selection of electrodes
- Experts advise
- How to weld profile pipes with your own hands: recommendations from professionals
- How to connect to a common water main
- Tool selection and equipment setup
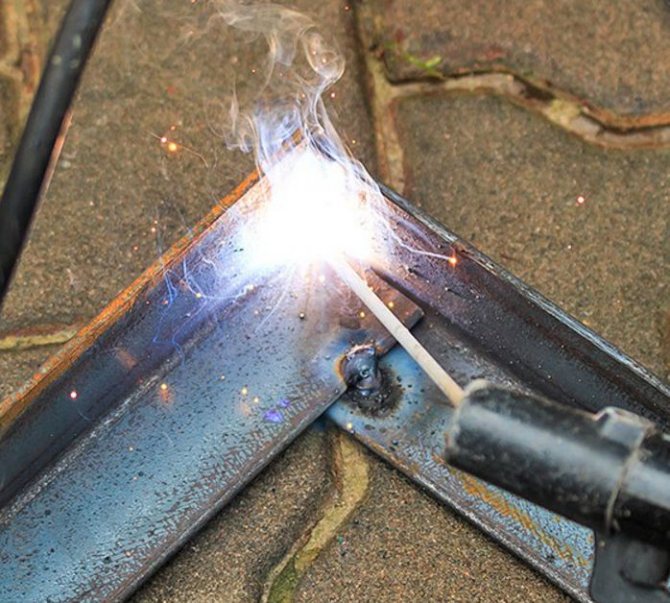
Preparing for the process
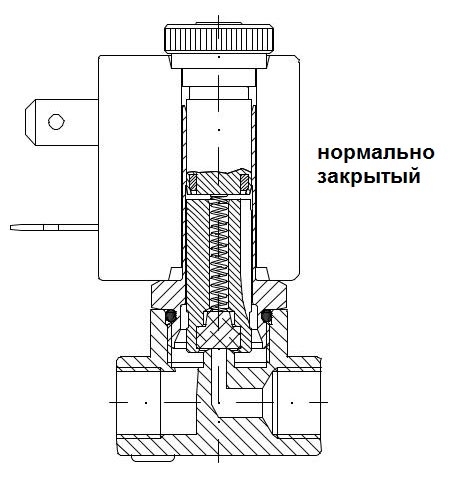
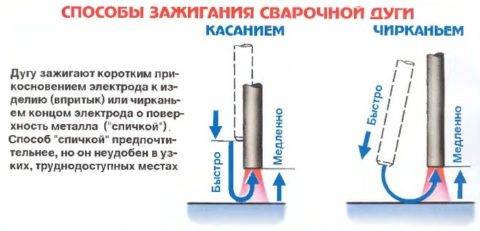
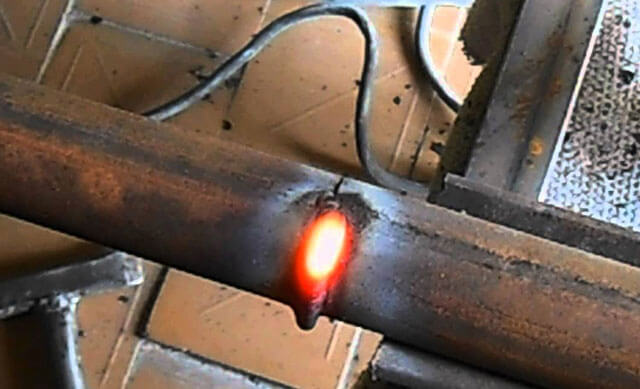
Before starting welding, it is necessary to make sure that there are no combustible materials and explosive substances nearby. If there are any, it is better to protect them with some non-combustible material and put a container of water next to it just in case. The surfaces and edges of the pipes near the weld must be deburred. Then you need to securely fix the ground, and check the integrity of the cable. The required current is set on the transformer of the welding machine in accordance with the thickness of the pipes to be welded.After that, go to ignite the arc by slowly moving the electrode at a distance of 5 mm from the surface of the pipe at an angle of approximately 600, as a result of which sparks should appear. Then the electrode must be moved to the place of welding, keeping it at the same distance from the pipe.
In most cases, for rotary joints, the current on the welding machine with an electrode thickness of 3 mm and a pipe up to 5 mm should be in the region from 100 to 250 A, and non-rotary - 80-120 A.
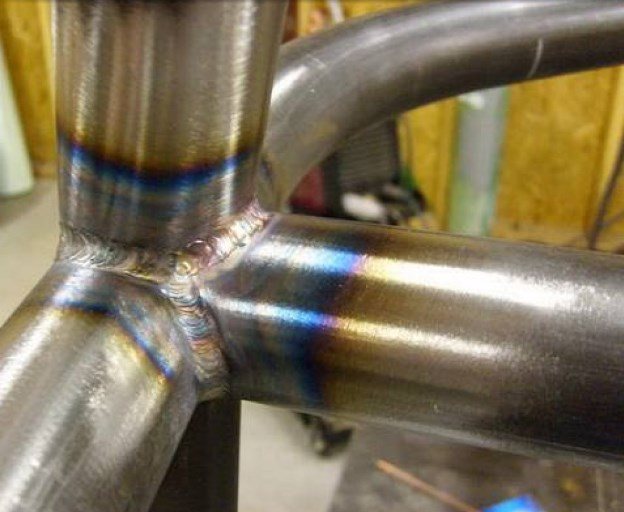
Types of welds and joints
Depending on the relative position of the pipes are connected:
- end-to-end, when the ends are adjacent to each other;
- in Taurus, if the pipes are arranged in the form of the letter T;
- at an angle when it is necessary to change direction by 45 or 90˚;
- overlap by expanding the end of one pipe and putting it on another.
Depending on the possibility of access to the joint, the connection is made:
- Horizontal seam if a vertical section of the pipeline is mounted.
- Vertical with a horizontal position of the pipeline.
- Ceiling when the joint is welded from below. Such a seam has to be applied during the repair of the heating system when replacing the emergency section.
- Pipes are welded at the bottom when installing new systems, when it is possible to turn them so that the electrode is on top of the joint.
Welding of steel pipes
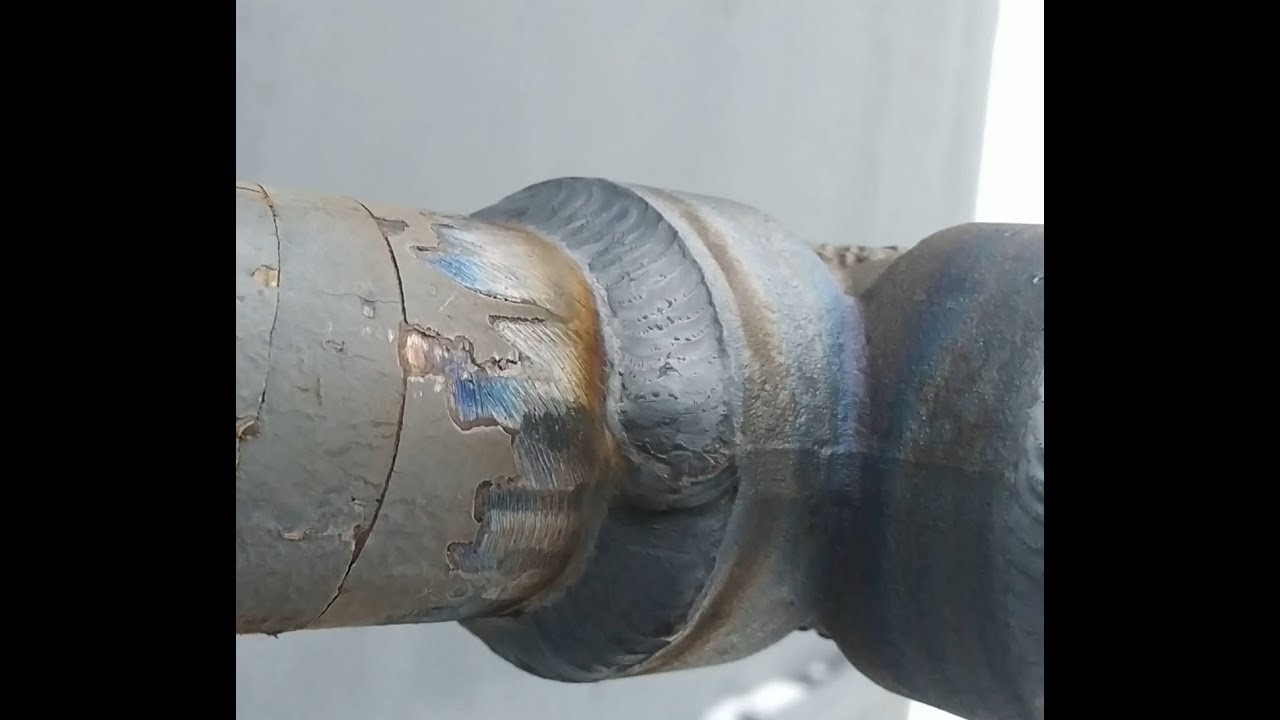
Welding of round pipes is carried out with a continuous seam. That is, if the process started from one point, then it must end on it, without tearing the electrode from the surface to be welded. When welding pipes of large diameter (over 110 mm), it is impossible to fill the seam with one electrode. Therefore, it is necessary to use multilayer welding, where the number of layers is determined by the thickness of the pipe walls. For example:
- If the wall thickness is 6 mm, then two layers of metal are sufficient.
- 6-12 mm - welding is done in three layers.
- More than 12 mm - more than four layers.
Attention! Multi-layer welding is made with one requirement. Allow the previous layer to cool before applying the next layer.
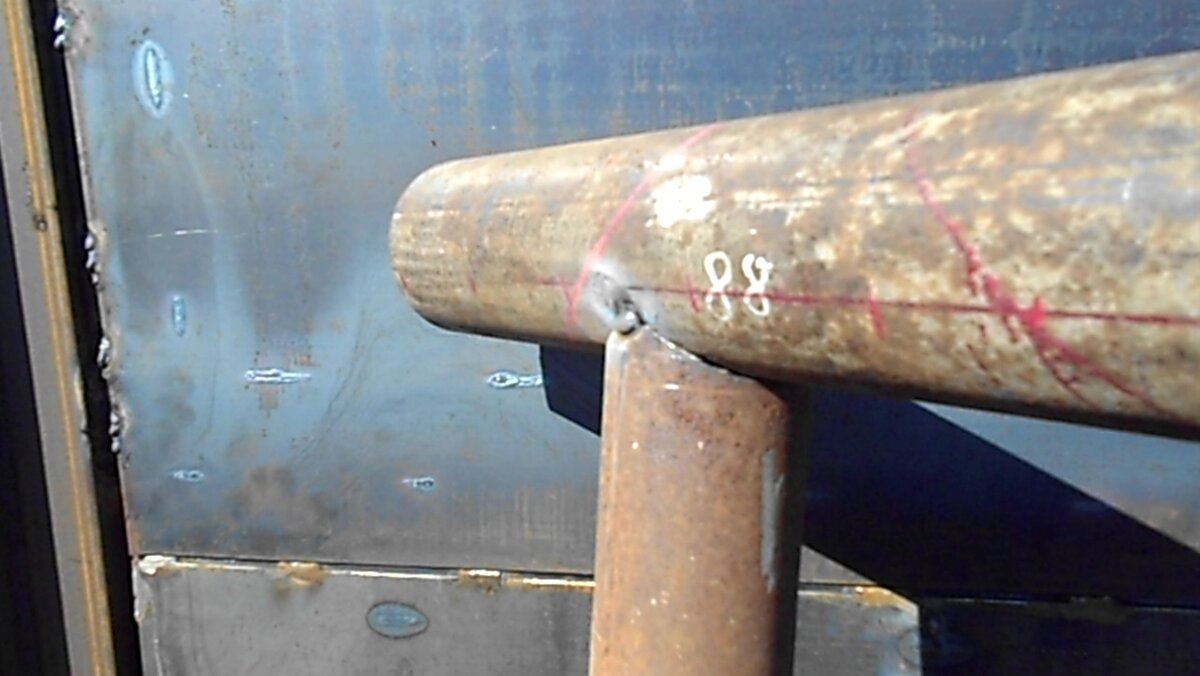
Pipeline assembly
Before welding pipes, in order to simplify the task, it is necessary to assemble the welding joint. That is, install the pipes according to the design of the assembly, clamp them so that they do not move or move. Then the tack is made. This is when spot welding is done in one place, if the pipeline is assembled from products of large diameter, then tack welding can be done in several places.
In principle, everything is ready, you can cook the pipeline. It would seem that this conversation about welding could be completed. But for novice welders, it is just beginning, because the welding process associated with the assembly of pipelines is a large number of nuances. Here are just a few of the ones you need to take into account.
- Pipes with a thickness of more than 4 mm can be welded with a radical seam, this is when the metal fills the space between the edges to the full depth, and with a roll, when a roller 3 mm high is formed on top of the seam.
- When connecting pipes with a diameter of 30-80 mm with a vertical seam, the technology is slightly different from the bottom location of the seam. First, the volume of 75% is filled, then the rest of the space.
- With multi-layer welding technology, a horizontal seam is welded in two layers so that the next one is applied in the opposite direction than the previous one.
- The connection point of the lower layer must not coincide with the same point of the upper layer. The lock point is the end (beginning) of the seam.
- Usually, when welding pipes, the latter must be turned all the time. They do it manually, so you need to know that the optimal turning sector is 60-110 °. Just in this range, the seam is located in a convenient place for the welder. Its length is the maximum, and this allows you to control the continuity of the suture connection.
- The most difficult thing, according to many welders, is to turn the pipeline immediately by 180 ° and at the same time maintain the quality of the weld. Therefore, with such a turn, it is recommended to change the welding technology. That is, first the seam is boiled to a depth of up to 2/3 in one or two layers. Then the pipeline is rotated 180°, where the seam is filled completely in several layers. Then again there is a turn of 180°, where the seam is completely filled with the metal of the electrode. By the way, such joints are called rotary.
- But there are also fixed joints, this is when the pipe is welded to the pipe in a fixed structure. If the pipeline is located horizontally, then it is necessary to weld the joint between its parts, dividing it into two parts. Welding starts from the bottom point (ceiling) and moves to the top. The second half of the joint is welded in the same way.
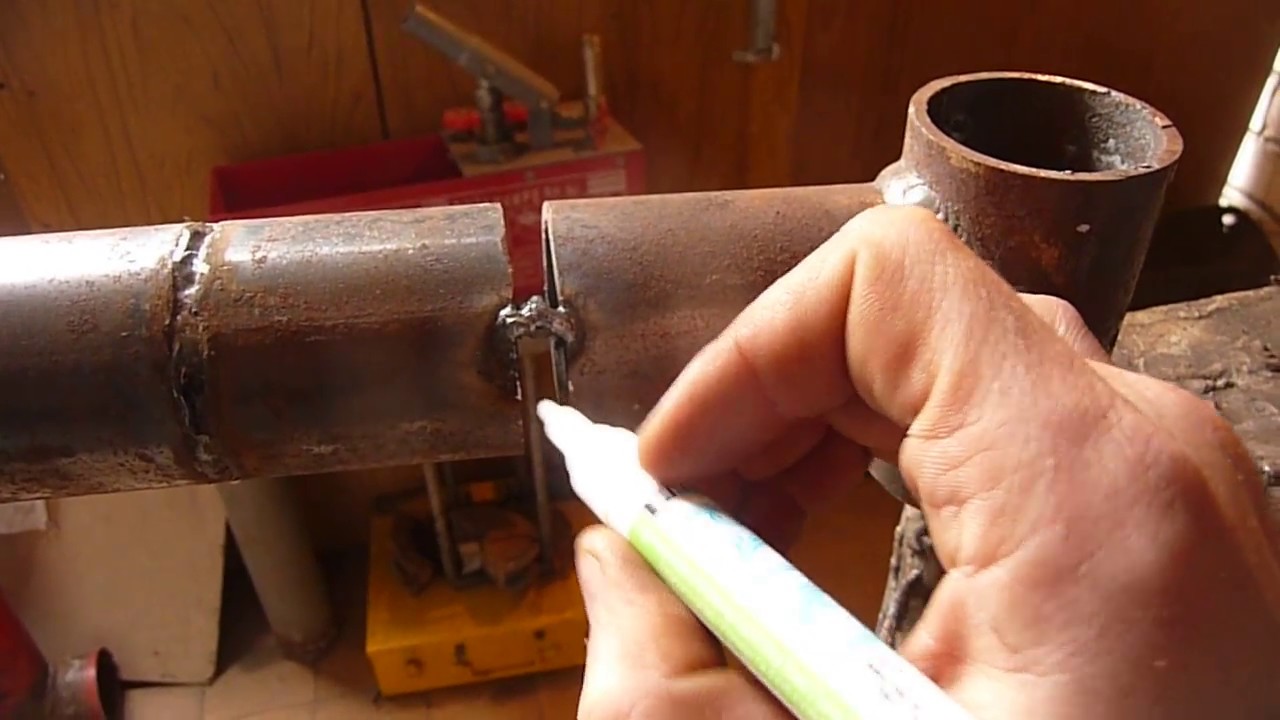
And the last stage in pipe welding technology is the quality control of the seam. It must be tapped with a hammer to bring down the slag. Then visually check for cracks, gouges, chips, burns and no penetrations. If the pipeline is intended for liquids or gases, then after assembly, water or gas is launched into it to check for leaks.
The welding process is actually a responsible event. And only the experience of a welder can guarantee the quality of the final result the first time. But experience is a thing. We offer to see video - how to cook steel pipes.
Selection of suitable electrodes
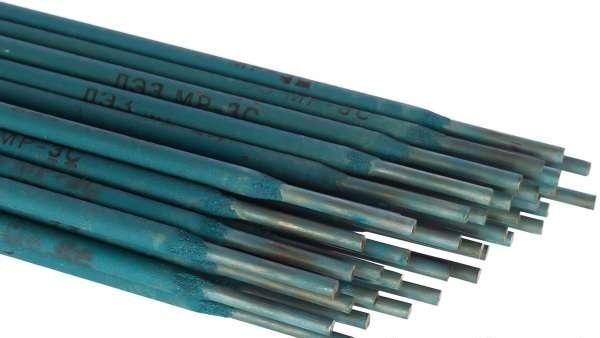
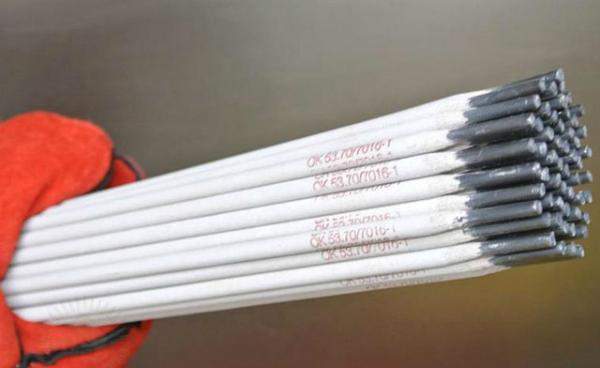
Consumables are required for welding metal products. The reliability of the seams, the tightness of the pipeline depends on its quality. The electrode is a metal rod coated with a special composition. It maintains a stable electric arc, participates in the formation of a welded joint.
The rods are classified according to the type of core and outer coating.
Based on the first sign, the following types of consumables are distinguished:
- With an infusible core. For the manufacture of the rod, tungsten, coal or graphite is used.
- With melting insert. The core is a wire, the cross section of which is chosen depending on the welding technology.
Based on the type of coating, the electrodes are divided into the following groups:
- Cellulose coated (C). The rods are used when welding pipes of large diameter, for example, when installing water, gas, oil pipelines.
- Rutile acid (RA) coated. Products are used to obtain neat welds. Under the influence of an electric arc, the joint is covered with a thin layer of slag, which is easily removed mechanically. RA electrodes are used when laying heating and water supply systems.
- Rutile coated (RR). When using such rods, uniform seams are obtained. The slag formed during operation is easily removed. Rods of this type are used when creating corner joints, welding an additional layer.
- With rutile-cellulose casing (RC). Such electrodes make it possible to connect pipeline elements lying in any plane. They are often used to create long vertical seams.
- With basic cover (B).Universal rods are used for welding any metal structures operating in extreme conditions. The connection does not crack, does not collapse over time.
How to choose an electrode?
Before welding pipes by electric welding, you need to select a suitable electrode, since the level of quality of the seam, and, accordingly, the duration of the pipeline's operation, strongly depends on its choice. It is an iron rod coated with a special layer for welding. The electrodes differ in the amount of coating and the thickness of the rod. For pipes, rods with a thickness of 2 to 5 mm are used. The coating can also be from 3 to 20% of the total weight.
But the more coating, the more slag is formed, which is a non-metallic compound that significantly loses its strength properties after cooling, based on this, it is necessary to find some compromise when choosing.
Depending on the thickness of the pipe, the electrodes are selected as follows:
- When the wall thickness of the welded pipes is less than 5 mm, an electrode with a thickness of 3 mm is selected.
- With a thickness of more than 5 mm, an electrode of 4 or 5 mm is selected, depending on the required degree of welding and the thickness of the seam.
- In the multilayer method of forming a weld, in most cases 4 mm electrodes are used.
Based on this, it is necessary to know how to choose the right electrode, which ensures sufficient passing current. A dry crackle of the arc without additional noise can serve as a guide.


About the types of welds on pipes
When connecting communication lines in this way, the following options for installing metal structure elements are used:
- Placement of pipe sections end-to-end. The edges in the described case are opposite to each other.
- T-joint. With this technology, the segments are placed perpendicularly, forming a semblance of the letter "T".
- Overlap. In this case, the end of one pipe is flared, after which it is put on the edge of the other.
- Corner joint. 2 elements are placed at an acute or right angle with respect to each other.
When welding heating pipes by electric welding, the following types of seams are formed:
- horizontal, with vertical placement of connected parts;
- ceiling, with the installation of the electrode in the lower part of the treated area, above the head of the welder;
- vertical, located on the risers of the pipeline;
- lower, in which the welding rod is installed above the edges to be machined.
When welding steel pipes, the segments are mounted only end-to-end. The seam is welded through the entire thickness of the metal.
Do-it-yourself electric welding
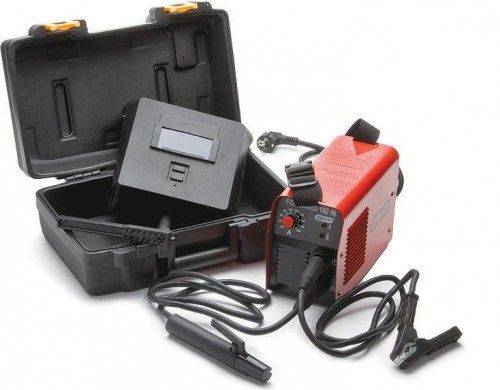
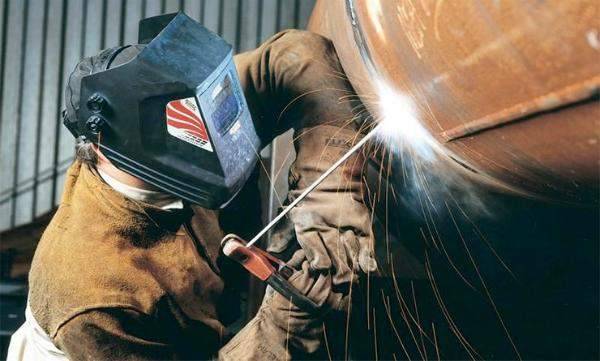
In everyday life, arc electrode welding is most often used, since it is the simplest and most affordable method and is used for any arrangement of pipes. The source of energy here is an electric arc, and the carrier is an electrode. Household devices used for electric welding are characterized by low power, are not bulky and operate from single-phase wiring.
- Welding transformer - converts the alternating current of the network into direct welding current. Easy to handle, but does not sufficiently stabilize the arc.
- Rectifier - has a higher arc stability.
- Inverter - converts AC to DC through the inverter module, features arc stability and low weight.

Electric welding is carried out using consumable and non-consumable electrodes. The former participate in the process, supplying particles for the formation of a seam. Beginners are advised to use solid electrodes with a consumable coating.
The diameter of the electrode, as well as the type of apparatus used, and the actual welding method depend on the characteristics of the product: material composition, wall thickness, diameter, and so on. When working with heating pipes or water pipes, if we are not talking about main structures, electrodes with a diameter of 3 mm are most often used - for electric welding of products with a wall thickness of up to 5 mm. If the parameter is larger, or it is required to form a multilayer seam, then the electrode diameter should be 4–5 mm.
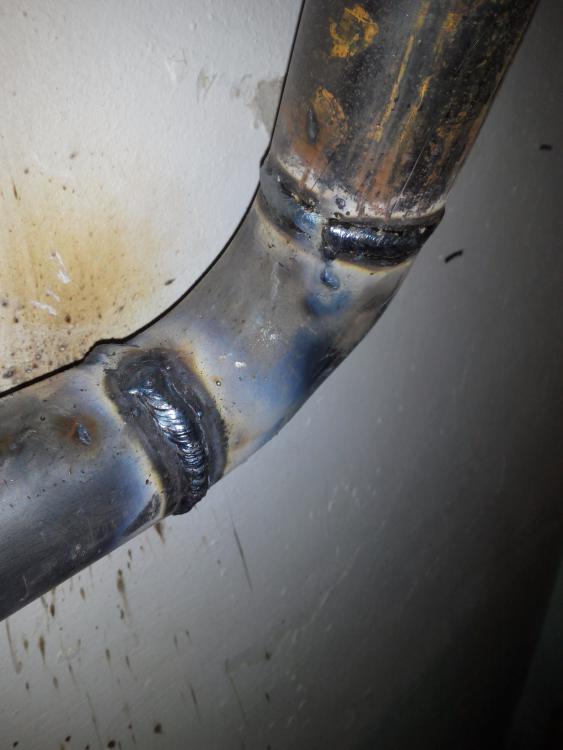
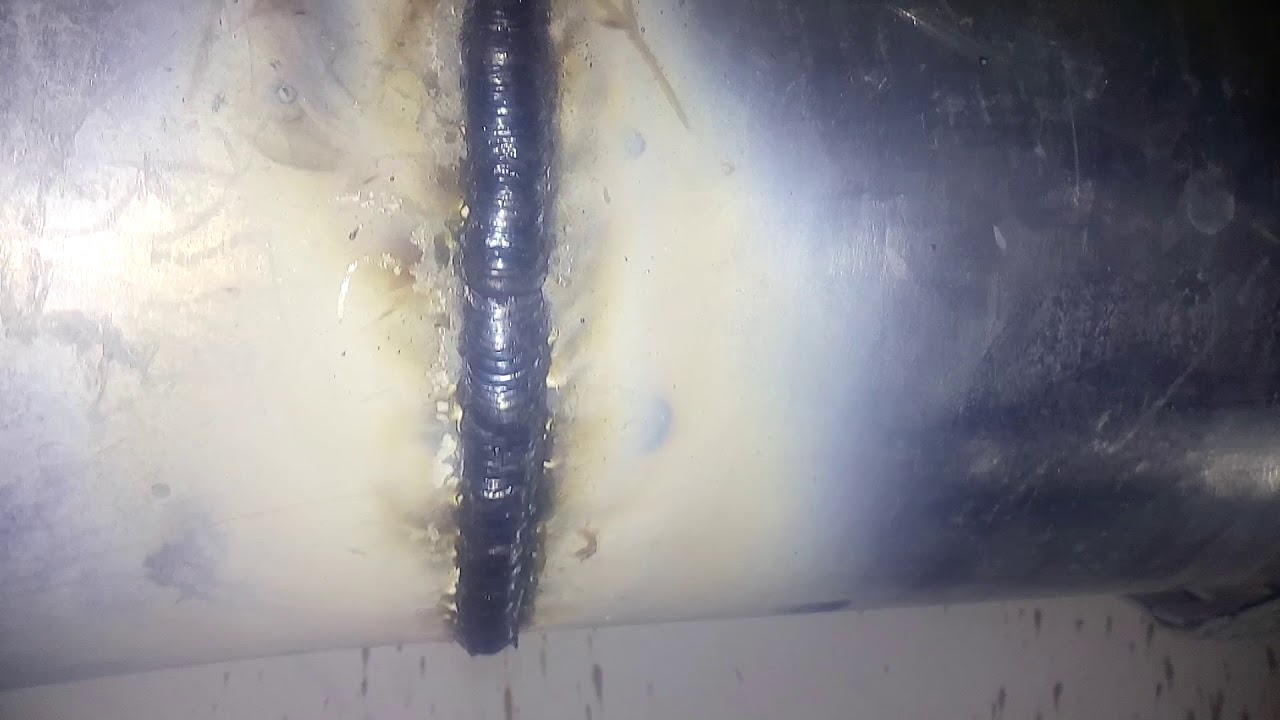
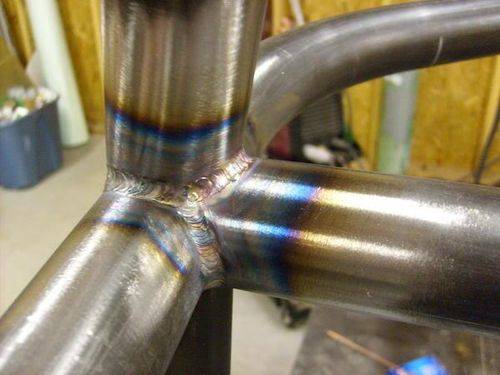
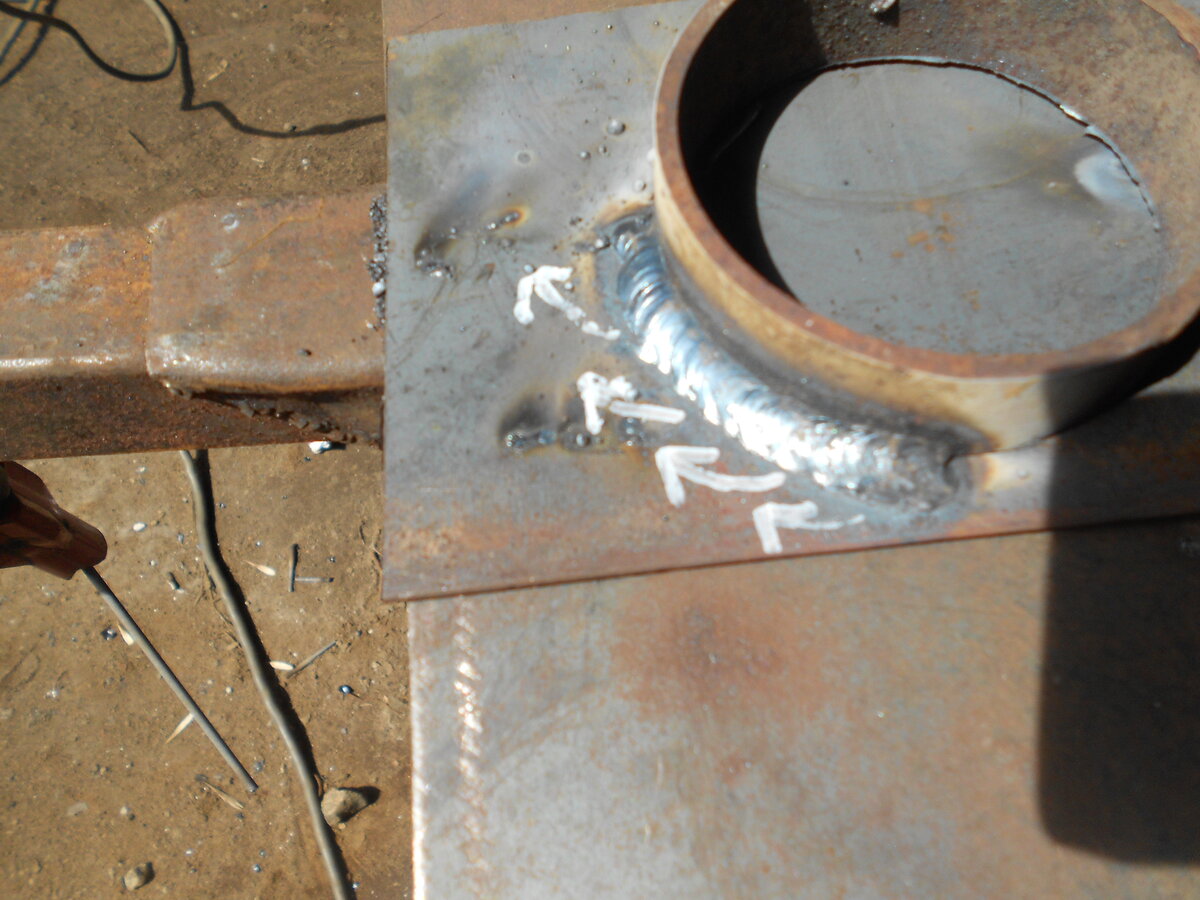
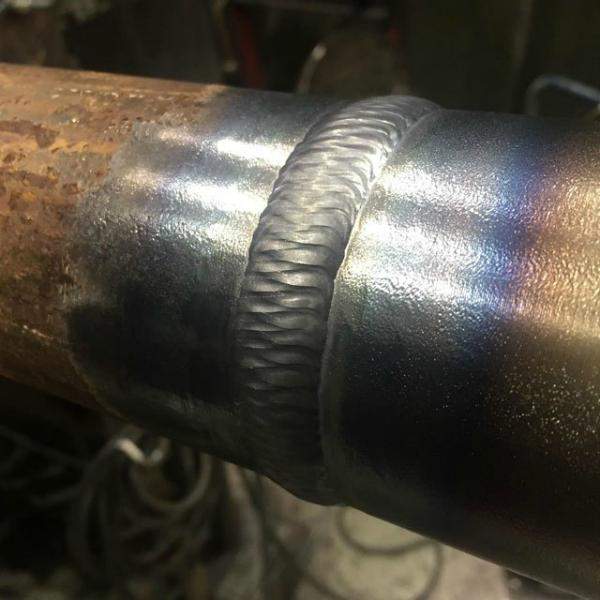
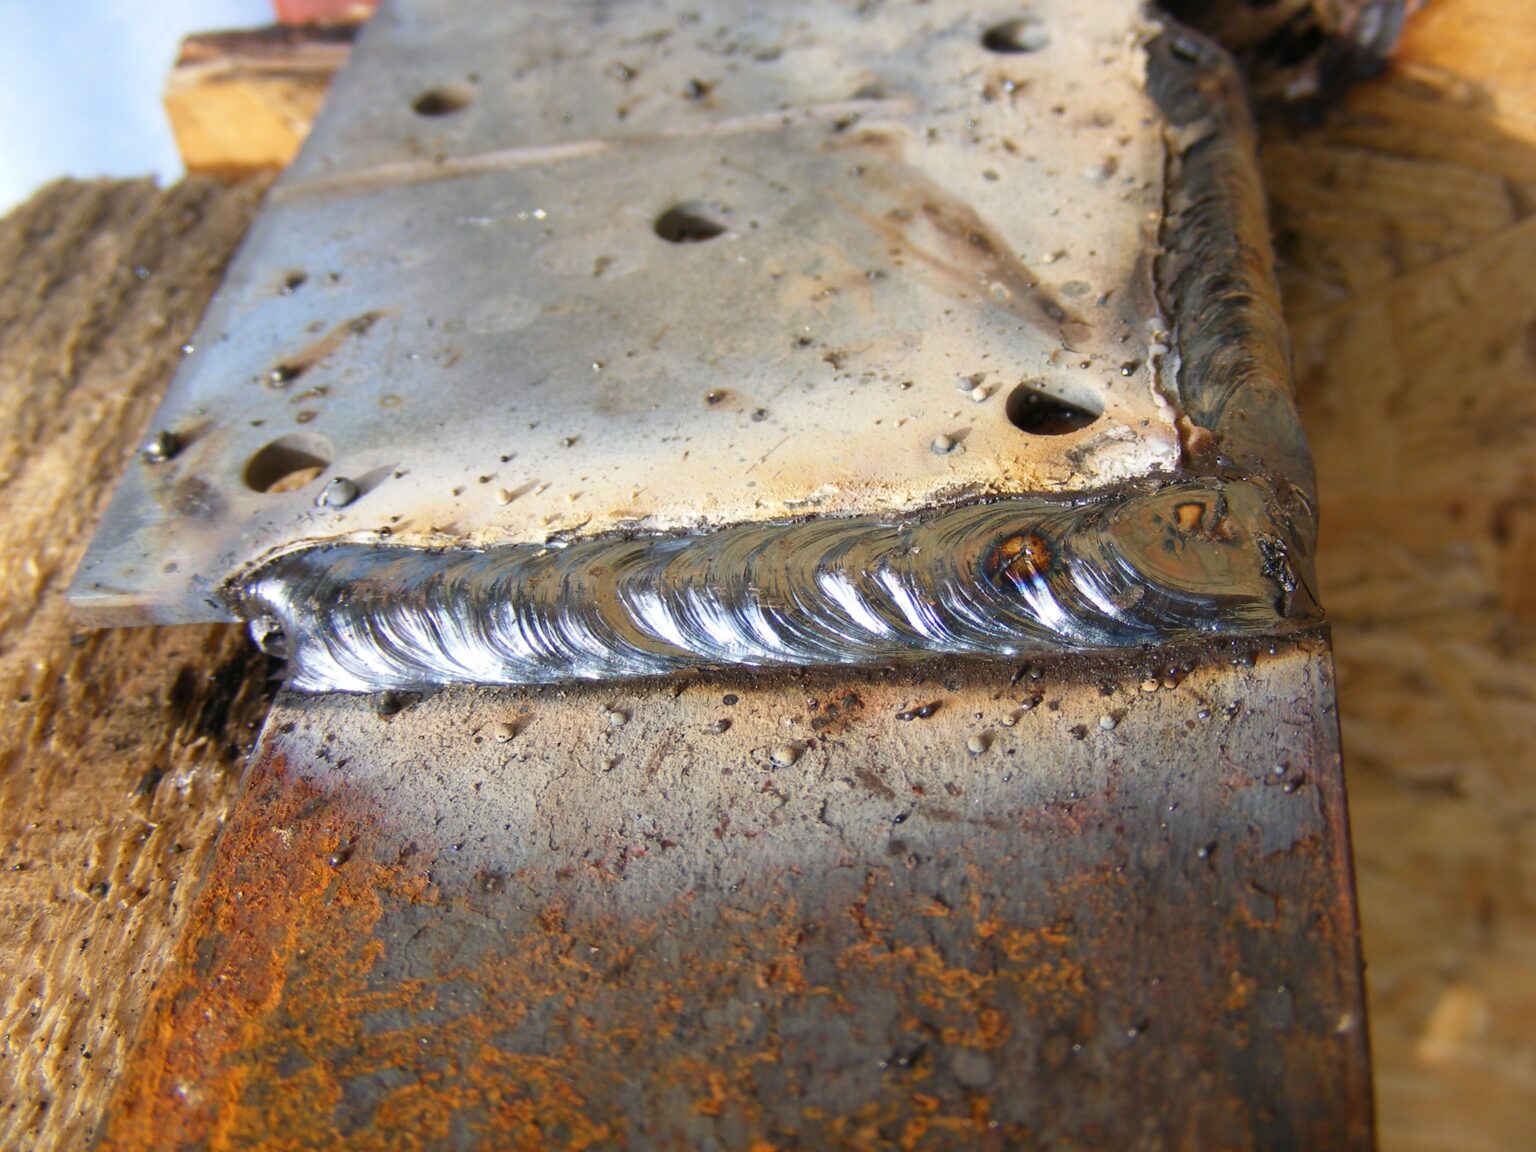
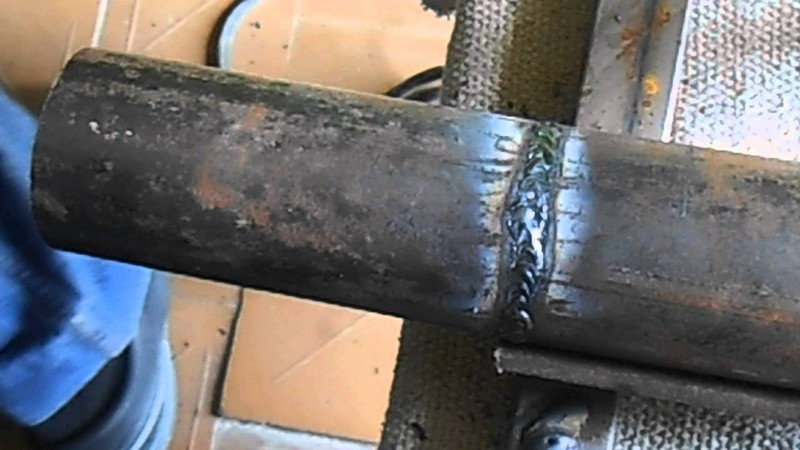
The seams are distinguished as follows: the lower ones are the lightest, the horizontal ones are around the circumference, the vertical ones are along the pipe, and the ceiling ones. The nature of the seam is determined by the location of the connected elements. It can be applied multiple times. So, for example, with a thickness of more than 6 mm, 2 sutures are required. The photo shows a continuous seam.
How to cook pipes: technology
Before welding, water pipes are cleaned - especially the inner surface, if the edge is uneven, then the ends are straightened or cut off. Then the edges, both on the inside and on the outside, are cleaned to a metallic sheen. The width of the plot is at least 1 cm.
With a large diameter or wall thickness, it is recommended to preheat - the zone is at least 0.75 cm. In this way, the appearance of hardening structures is prevented.
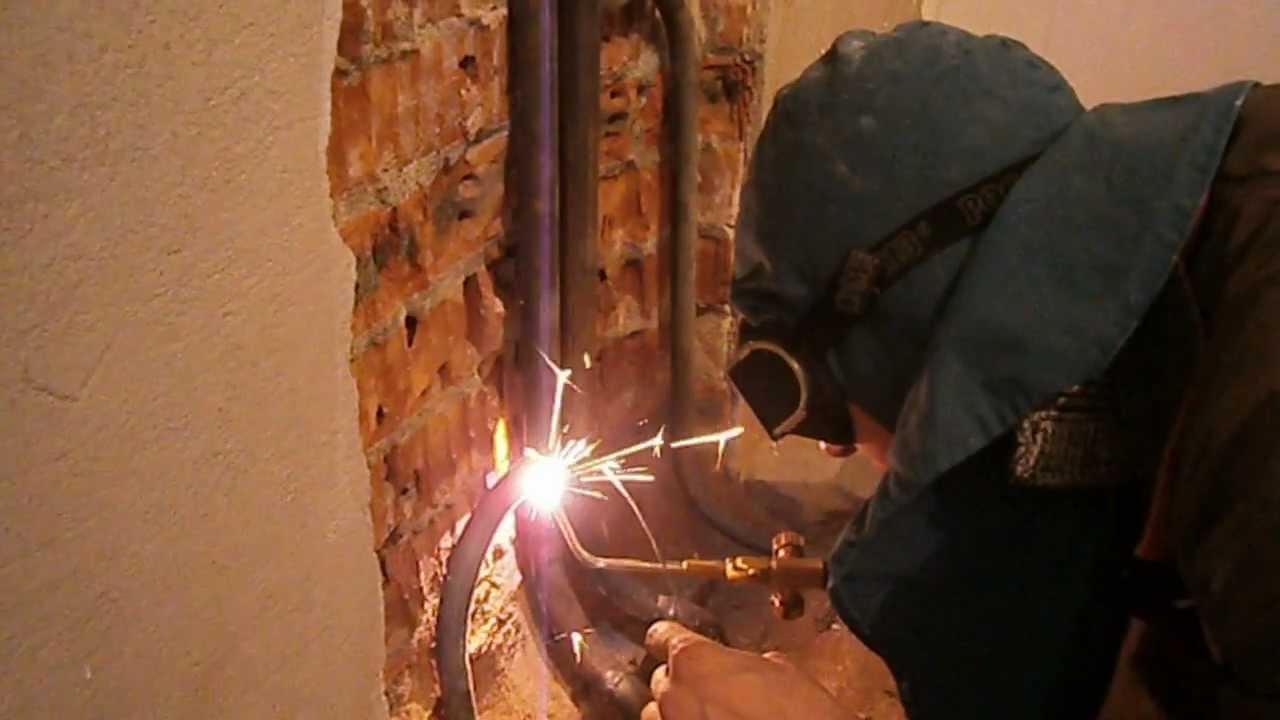
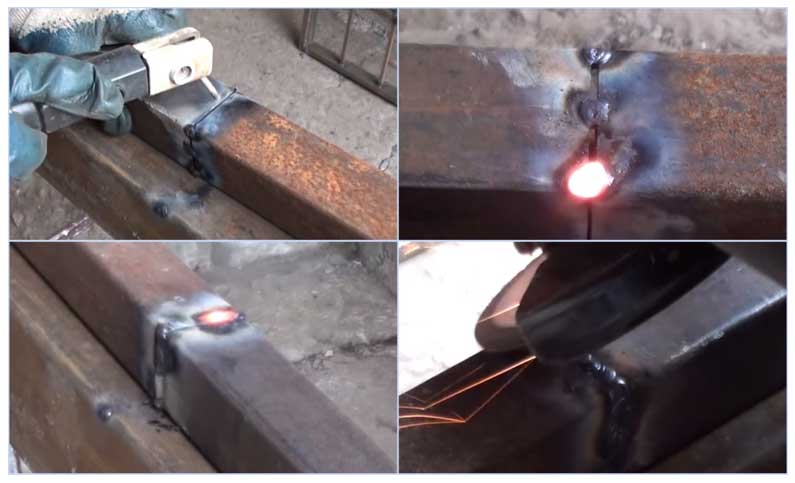
- The electrode is inserted into the holder of the device, the current supply is activated - for this you need to strike the rod on the metal. The current strength is determined by the wall thickness of the product.
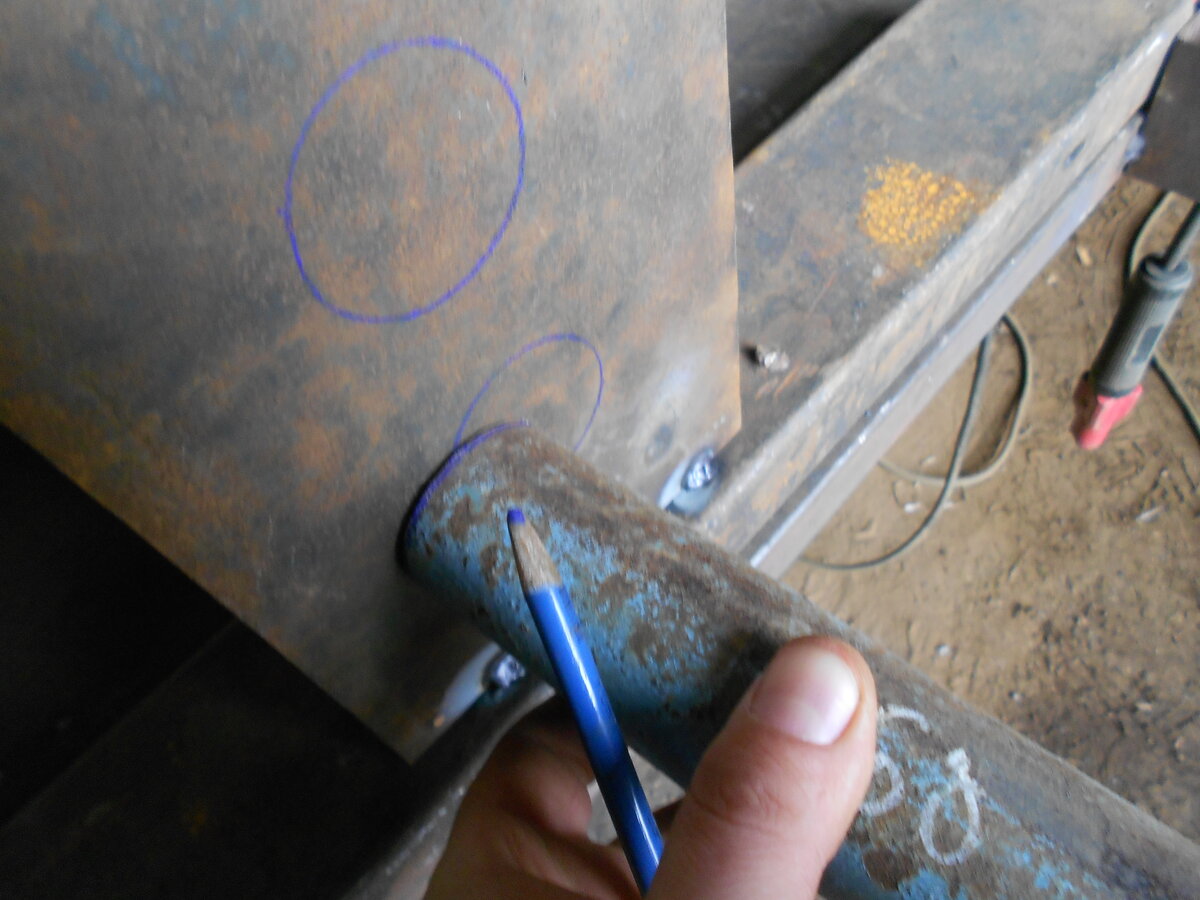
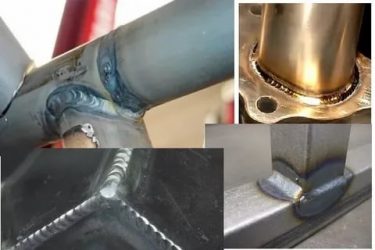
- After the appearance of the arc, the electrode is held at the junction at a distance of at least 3 and not more than 5 mm. The most convenient is the angle of inclination of the electrode to the plane of the site at 70 degrees, as shown in the photo.
- The seam is applied not with an even motion, but with an oscillatory one, simulating the distribution of metal through the joint to both edges. The trajectory is different - crescent-shaped, zigzag, but as a result, a dense narrow roller is formed at the junction.
- After cooling, slag is knocked off with a hammer. If the wall thickness is large, a second and even a third seam is applied with the obligatory removal of slag before each next stage.
- With a thickness of more than 8 mm, the first seam should be welded in steps: the circle is divided into sections, the fragments are welded first through one, and at the second stage - the remaining ones. Then a continuous seam is applied on top.
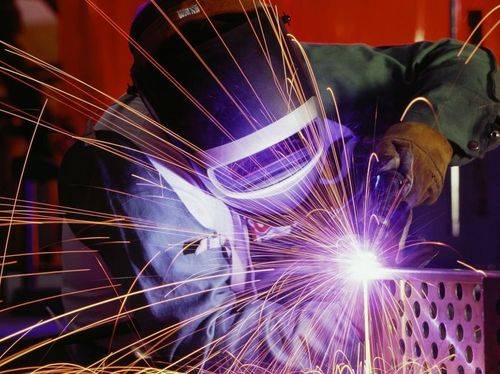
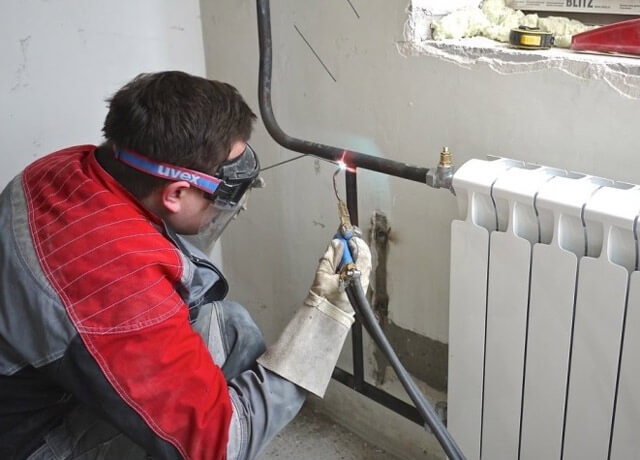
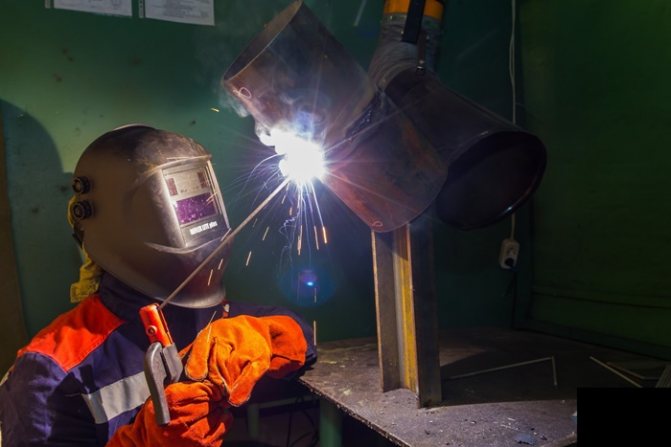
Welding work is dangerous: splashes of hot metal, high temperature of the arc, its brightness are a serious danger. Therefore, it is necessary to cook water pipes or for heating in compliance with safety regulations: it is imperative to use a protective shield or mask, canvas gloves, a suit or gown made of thick fabric - tarpaulin is best. During electric welding, it is necessary that there is a bucket of water nearby and a blanket or piece of tarp.
The video on how to cook water pipes is described in more detail.
What is necessary?
Successful welding requires two components: equipment and skills. Moreover, the second point is no less important than the first.An exception may be, perhaps, only welding using electrical fittings, since the simplicity of the technology allows even a non-professional to make a high-quality connection.
In all other cases, the participation of a specialist is desirable. We must not forget that a violation of the tightness of the weld in the heating system can lead to very unpleasant consequences (damage to property, including someone else's, burns, etc.).
Tools
The set of tools and equipment necessary for the production of welding work is determined depending on the type of pipes used to equip the heating system, as well as the chosen welding method.
First of all, it is a manual welding machine.
Insulating a balcony requires knowledge, and you can fill it up in our article on how to insulate a balcony with foam plastic. Detailed wiring diagram for aluminum radiators here.
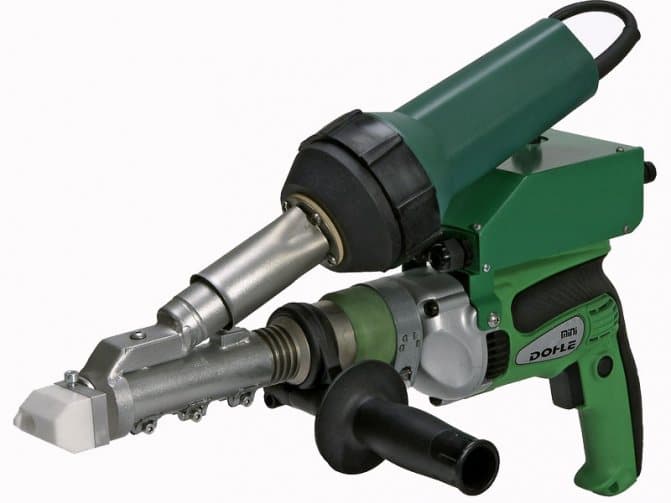
A device for connecting polypropylene pipes is also sometimes called a soldering iron. For domestic needs, a device with a power of 650 watts is quite suitable. It can be used to connect plastic pipes up to 60 mm in diameter. Nozzles are included with the device.
When using electrical fittings, a special device is also required to connect them. In addition, a roller pipe cutter, a positioner, special devices for removing oxidation and centering pipes, a knife, a hammer, as well as consumables (couplings, electrical fittings, etc.) can be useful in the process.


Welding of metal pipes is carried out using an electric or gas apparatus. For cutting, a "grinder" or a cutter is used. In addition, you will need the usual equipment of a welder: a mask, a canvas suit, gloves, asbestos, a hammer, electrodes, wire, etc.

metal pipes
To connect the components of the metal heating system, the method of electric welding is used. Before you cook heating pipes, you need to get metal electrodes. They conduct electricity and play the role of "additive" to fill the weld. Starting the connection, individual pipe sections are cleaned of sand, dirt and debris. All the deformed ends noticed at the same time must be aligned or cut off. To implement arc welding, the edges of the parts are cleaned to a width of at least 10 mm. To switch pipes around the circumference, it is necessary to observe a continuous mode. To weld heating pipes by electric welding, as a rule, a different number of layers is used.
This directly depends on how thick the walls of the heating pipes are:
- 2 layers - with a thickness of not more than 6 mm.
- 3 layers - 6-12 mm.
- 4 layers - more than 12 mm.
Slag must be removed from each laid layer before laying the next. The starting layer is laid by the method of stepped surfacing. In the future, continuous surfacing of softened metal is used. Along the course of the joint, it is necessary to distribute the stepped surfacing into several gaps, using the “one-by-one” method.
When organizing a heating circuit, laying the first layer is especially important. If a marriage is allowed, such a site is eliminated and superimposed anew. Carrying out the overlay of subsequent layers of welding, it is necessary to evenly rotate the pipe along its axis. When implementing each subsequent layer, small displacements are made by 1.5-3 cm from the beginning of the previous one. The final surfacing must be joined to the main surface, and be smooth and even.
Useful tips and possible mistakes
To properly cook heating pipes, one should not neglect the recommendations of specialists:
- it is more convenient to weld hard-to-reach places with a bent electrode, using a mirror for control;
- when changing the electrodes, the suture continues with a 1.5 cm covering of the already applied one;
- the quality of the welded joint will improve if the upper seam is performed in the opposite direction from the lower one, ending it in a different place;
- direct polarity when welding with direct current provides better heating of the metal than reverse polarity.
The reason for the appearance of defects is often the inattention of beginners and the self-confidence of experienced welders. For example, even a slight deviation of the seam to the side leads to a violation of the tightness of the connection. Changing the length of the arc during welding ends with the formation of voids and lack of penetration
Beginners do not notice these nuances, and experienced ones believe that such trifles should not be paid attention to. For reasons beyond the control of the welder, defects are formed due to poor-quality equipment and pipe material
How to choose the right electrodes for pipe welding
Welding electrode - a metal or non-metallic rod made of an electrically conductive material, designed to supply current to the workpiece being welded.
First, some information about the properties of the electrodes themselves will not hurt. Structurally, the electrode is a thin rod made of metal. It is coated with a special coating for welding.
In principle, electrodes come in different diameters - the more material applied to the rod, the thicker it is.Moreover, the electrode coating not only participates in the welded joint, but also protects the electrode from oxygen, ensures uniform arc burning.
Sometimes it happens that during operation, slag floats up and creates a film that prevents the metal from absorbing air. This will have a negative impact on the quality of the weld, because oxygen and nitrogen, which are contained in the air, make the weld in the metal brittle.
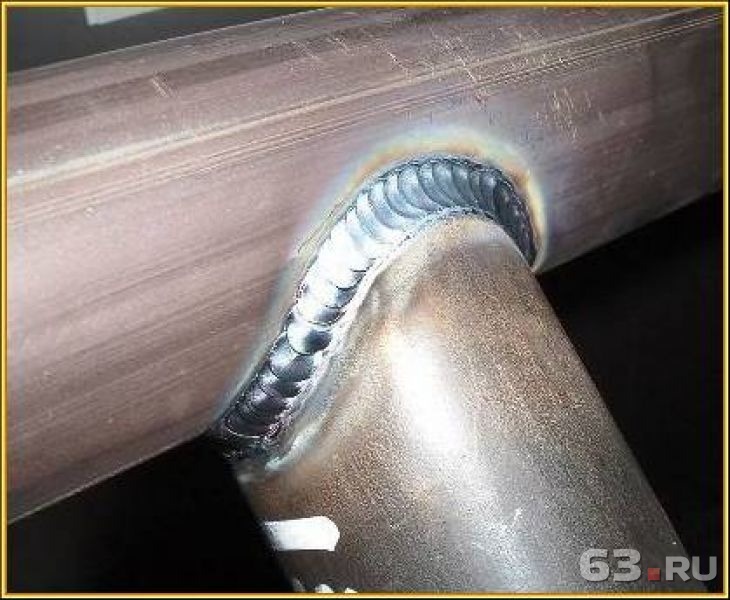
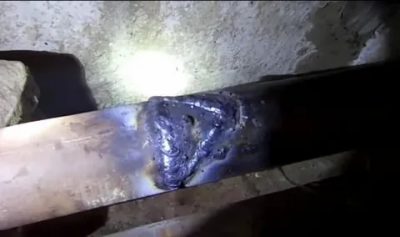
An experienced welder is very familiar with this problem. In this case, after the slag has cooled, it can be removed simply by applying short but precise blows with a hammer or an electrode. Under no circumstances should slag be left inside the seam! Otherwise, a fistula will form in it, which will lead to depressurization of the connection. The main task is to obtain an even and tight seam. An experienced welder performs it in the form of horseshoes or figure eights. The slag will be displaced with each new pass. When the slag is completely removed, the seam will not only be strong, but also beautiful.
As for what diameter to choose an electrode for welding, everything here will depend on the thickness of the joint. If the pipes are small in size, then electrodes with a diameter of 3 mm can be purchased. These can be used for pipes with a wall thickness of 2 to 5 millimeters. If the pipes are thicker-walled - up to 10 mm, then the electrode will need to be purchased thicker.
Properly selected electrodes, even when working on inexpensive welding machines, will allow you to weld any metal at a high professional level.
In order to carry out a multi-layer weld, it is recommended to use a 4 mm electrode to begin with - so that a greater depth of the weld can be created.
Selecting Mode Options
The welding current is selected: for single-pass welding - depending on the thickness of the pipe wall, and for multi-pass welding - based on the height of the roller, which should be 2 - 2.5 mm. Welding current is assigned at the rate of 30 - 35 A per 1 mm of electrode diameter.
The arc voltage should be as low as possible, which corresponds to short arc welding.
The welding speed is adjusted as follows. so that the penetration of the edges and the formation of the required weld dimensions are guaranteed.


The shielding gas consumption depends on the grade of steel being welded and the current regime (from 8 to 14 l/min).
Filler wire with a diameter of 1.6-2 mm is selected according to the grade of steel being welded (see the article Welding consumables).
W-electrode diameter, mm
Additive diameter, mm
Welding current, A
Arc voltage, V
Gas consumption, l/min
Minimum current modes depending on the brand of W-electrode
W-electrode diameter, mm
DC current (A) polarity
Alternating current, A
Welding begins immediately after the installation of tacks, which must be remelted during the first layer. In hard-to-reach places, the first root weld can be performed without filler wire, if the gap and edge mixing do not exceed 0.5 mm, and the edge blunting is not more than 1 mm. The exception is pipe joints made of steels 10 and 20, which must always be welded with an additive.
The sequence of applying layers when welding by one fixed joint welder
The arc should be ignited and extinguished at the edge of the pipe or at an already applied seam at a distance of 20-25 mm from the end of the seam. The argon supply is stopped 5–8 s after the arc breaks.
Welding of pipelines from high-alloy, especially corrosion-resistant, steels is performed with protection of the root of the weld, either by supplying argon inside the pipe, or using FP8-2 flux paste.
When welding high-alloy steels, a number of conditions must be observed:
- minimum current modes;
- short welding arc;
- maximum welding speed without interruptions and reheating of the same metal section;
- avoid transverse vibrations of the burner;
- filler wire should be fed evenly so as not to create splashes of molten metal, which, having fallen on the base metal, can later cause corrosion pockets
On thick-walled (more than 10 mm) pipelines with a diameter of more than 100 mm from low-carbon and low-alloy steels, the root weld is welded using the argon-arc method without remaining backing rings.
Welding should be carried out in a reverse step method in sections no longer than 200 mm. The height of the root joint must be at least 3 mm. In this case, it is necessary to ensure smooth transitions to the pipe surface.
Direction and sequence of laying the root layer
Argon arc welding is also used when a backing ring is welded in pipes made of carbon and low alloy steels. The ring is tightly, but without tension, installed in the pipe, leaving a gap between the ring and the inner surface of the pipe no more than 1 mm. The ring is tacked from the outside with a fillet weld 15-20 mm long with a leg 2.5-3 mm to pipes with a diameter of up to 200 mm in two places, and a larger diameter in three or four places.
Tacking, regardless of the steel grade of the pipe and backing ring, is performed with filler wire Sv-08G2S with a diameter of 1.6-2 mm. The backing ring is welded with a single-layer fillet weld with a 3-4 mm leg with the same additive.
Tacking and welding of the backing ring is done without preheating, regardless of the steel grade and pipe wall thickness.The exception is pipes made of steel 15Kh1M1F with a wall thickness of more than 10 mm - the end of such a pipe is heated to 250 - 300 ° C.
There are few real specialists in arc welding of steel pipes. This work requires filigree precision and a lot of practice. Root weld welding is the most critical step in the process.


Professional pipe welding
- Welding machine for polypropylene plastic pipes: how to choose a tool, equipment, video, reviews
- Welding polypropylene pipes: video instruction, heating temperature and time, soldering technology, how to weld plastic fittings correctly
The most high-quality connection of steel pipes of any size is provided by electric arc welding. The parts to be joined are melted under the action of an electric discharge. The article contains visual lessons on welding.
Selection of electrodes
The first thing you need to perform welding work on heating pipes or other structures is electrodes. Not only the reliability of the obtained welds and the tightness of the system, but also the process of performing work will depend on the quality of this consumable.
An electrode is understood as a thin steel rod with a special coating, which allows for a stable arc in the process of electric welding of pipes, and is involved in the formation of a weld, and also prevents metal oxidation.
According to the type of core, there are such electrodes:
- With non-melting center. The material for such products is graphite, electrical coal or tungsten.
- With melting center. In this case, the core is a wire, the thickness of which depends on the type of welding.
As for the outer shell, the many electrodes that are found on the market should be divided into several groups.
So, the coverage can be:
Before starting work, we recommend that you consult with your familiar welders about the type of electrodes they prefer to use. In each case, these will be different brands, because a large number of brands can be available for sale, and different from city to city.
Experts advise
Vadim Bodrov, electric welder: Over time, each welder develops his own "handwriting". It consists of alternating the translational direction of the seam, longitudinal and transverse. Although in theory each of these methods of leading a seam is intended for its own case, in practice, welders often use all three at once. Sooner or later, even a beginner will learn to “feel” the material and, on an intuitive level, will understand in which case to use one or another type of seam.
Nikolai Alexandrovich Kozyrev, electric welder: Even if the task seems to be extremely simple, and the proposed seam is utterly elementary, in the case of pipes, you should not relax. It is enough just to take the seam a little to the side - and this can cause a violation of the sealing of the joint during operation. So working with the pipeline will require maximum concentration.
How to weld profile pipes with your own hands: recommendations from professionals
In order for the welding process to go without force majeure, you need to follow some tips:
the correct choice of the welding temperature regime, depending on the wall thickness, will avoid deformation and profile burning;
if it is important to preserve the internal lumen of the pipe, care should be taken to avoid getting molten metal inside the pipe;
at the end connection, high voltage occurs at the corners of the profile;
to get practice, you can practice welding pipes on unnecessary parts or segments.
This article will help beginners in welding learn how to weld a profile pipe correctly and perform work at a high level.
How to connect to a common water main
Before crashing into a water pipe under high fluid pressure, familiarize yourself with three technology options that vary depending on the material of which the pipes are made (they can be polymer (PP), cast iron, galvanized steel).
For polymer center track tapping into a pressurized water pipe looks like that:
- A trench no less than one and a half meters in size is excavated, the area where the work will be done is exposed, and a trench is being dug from it to the house;
- At the end of the earthmoving work, a saddle is prepared for tapping into the water supply system - this is a collapsible crimp collar that looks like a tee. The straight outlets of the saddle are divided in half, and a valve is installed on the vertical outlet to shut off the pressure. A pipe is drilled through the tap with a special nozzle for tie-in. The most reliable saddle scheme is collapsible welded. It is easy to divide such a clamp into two halves, assemble it over the tie-in section, and weld it to the main route. Thus, the clamp for tapping into the water supply is welded into the body, providing a reliable and absolutely hermetic water supply to the dwelling;
- The pipe is drilled with a conventional drill and an electric drill.Instead of a drill, you can use a crown, but the result is important, not the tool;
- A through hole is drilled until a jet of water comes out of it, after which the drill is removed and the valve is closed. For safety reasons, at the end of the drilling process, the electric tool is replaced with a hand drill or a brace. If you drill a hole not with a drill, but with a crown, then it will automatically ensure the tightness of the drilling site. In addition to these options, there is a solution using a special cutter, which is rotated by an adjustable wrench or an external brace;
- The last stage of the tie-in to the central water supply is the establishment of your own water supply, laid in a trench in advance, and connecting it to the central route with an American compression coupling.
For complete control of the insertion point, it is advisable to equip a revision above it - a well with a hatch. The well is equipped as standard: a gravel-sand cushion is made at the bottom, reinforced concrete rings are lowered into the trench, or the walls are laid out with bricks. Thus, even in winter it will be possible to shut off the water supply if it is necessary to repair it in the house.
For a central water supply pipe made of cast iron, a saddle tie-in looks like this:
- To tap into a cast-iron pipe, it must first be thoroughly cleaned of corrosion. At the very place of drilling, the top layer of cast iron is removed by a grinder by 1-1.5 mm;
- The saddle is built into the pipeline in the same way as in the first paragraph, but to completely seal the joint between the pipe and the crimp, a rubber seal is laid;
- At a further stage, a shut-off valve is attached to the clamp nozzle - a valve through which the cutting tool is inserted.
- Next, the body of the cast iron pipe is drilled, and do not forget about the need to cool the cut site, as well as change the crowns in a timely manner.
- A hole is drilled for tapping into the main water supply with a hard-alloy victorious or diamond crown;
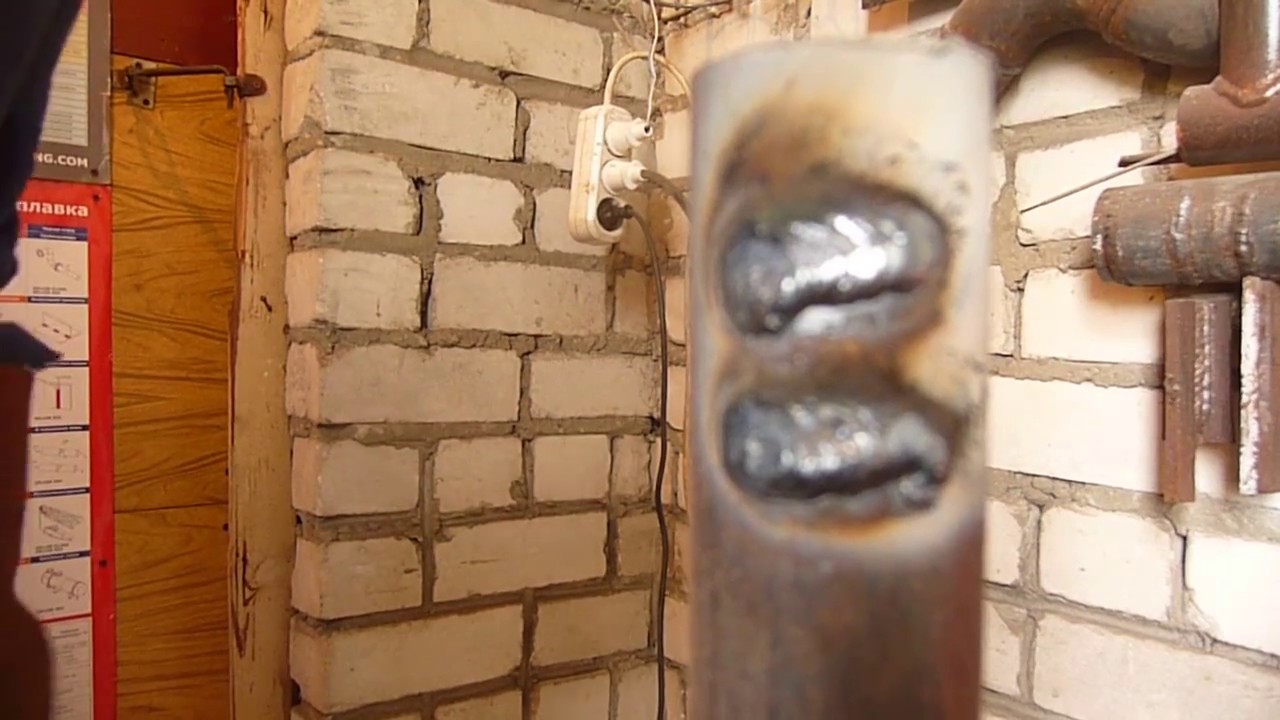
- The last step is the same: the crown is removed, the valve is closed, the insertion point is scalded with special electrodes.
Steel pipe is slightly more ductile than cast iron pipe, so the pipe insertion is carried out according to a technique similar to the solution with a polymer line, but the saddle is not used, and before how to make a cut in a galvanized steel water pipeline, the following steps are implemented:
- The pipe is exposed and cleaned;
- A branch pipe of the same material as the main pipe is immediately welded onto the pipe;
- A shut-off valve is welded or screwed onto the pipe;
- The body of the main pipe is drilled through the valve - first with an electric drill, the last millimeters - with a hand tool;
- Connect your water supply to the valve and the pressurized tie-in is ready.
Tool selection and equipment setup
Despite all the difficulties, working with pipes under pressure is quite feasible. The main thing is to correctly adjust the operating modes and choose the right tools.


For example, the best electrodes for welding water pipes are as follows:
SSSI 13/55. Universal elements that allow repairing pipes made of steel, regardless of the degree of alloying and carbon content.
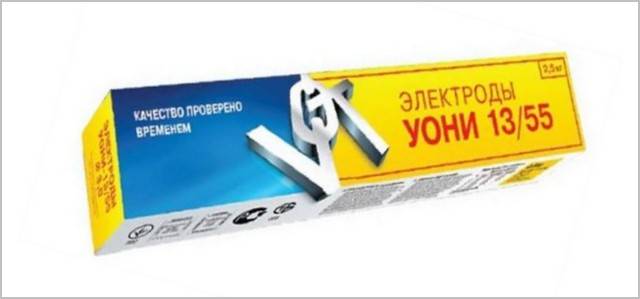
The formed seam is characterized by an optimal combination of strength, ductility and toughness, withstands high operating loads without the formation of repeated fistulas and destruction.Beginners may be afraid that the electrode sticks to the metal during operation, but getting rid of this is very easy, you just need to lengthen the arc.
In a few minutes of work, you can develop a good skill, feel all the subtleties and advantages of the electrode.
MGM-50K. New development optimized for pressurized pipes.
The main feature is that a gas bubble is formed around the arc, pushing steam or liquids aside, which improves the conditions under which welding is carried out, facilitates the task, and allows you to achieve the desired result.
The electrode is suitable for both high carbon steel and low alloy steel pipes. It is allowed to work on contaminated surfaces and metal that already has signs of corrosion damage.
Watch an interesting video, which electrodes are best used for pipe welding:
It is also useful to adhere to the following recommendations:
- Increasing the current strength will help to achieve the necessary stability of the arc, the likelihood of sticking of the electrode will decrease due to the fact that the weld metal cools quickly and sticks to the base.
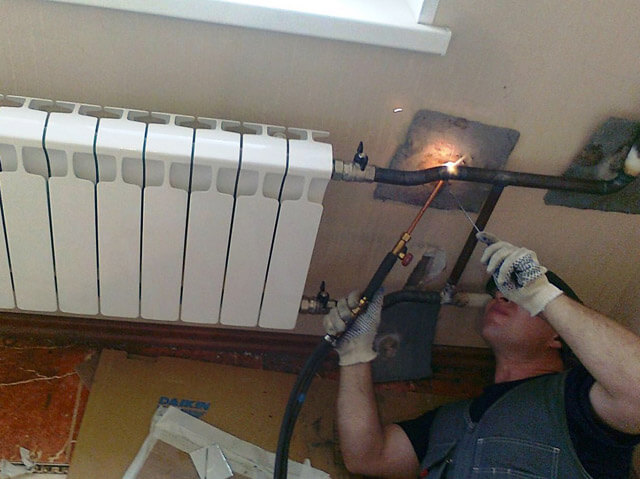
- The electrodes are pre-calcined, and the place of work is heated by a gas burner. The flame evaporates the liquid seeping out of the pipe, the level of adhesion of the deposited metal to the base increases.
- When choosing a voltage, you should focus on your own preferences.
Beginners should be aware that:
- alternating current forms a more stable arc, makes it possible to work even under an impressive water layer, but the final quality of the seam is not too high;
- direct current, in turn, helps to achieve the maximum penetration depth of the deposited metal and the strength of the seam, but directly working in an environment of high humidity is more difficult.
A useful video for beginners on how to cook a pipe with water when repairing a heating main: