- Material advantages
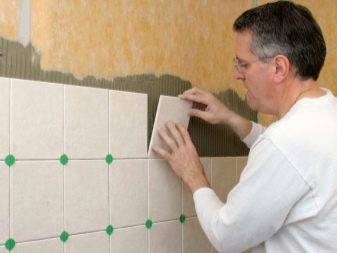
- Panel mounting
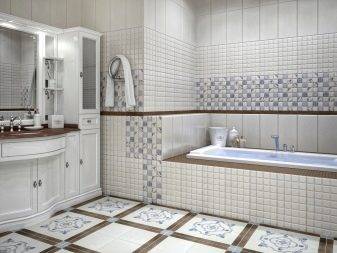
- Which is better: panels or tiles?
- Why PVC panels?
- How to choose the right quality plastic?
- Choice of accessories
- 2 PVC panels
- What are the advantages of plastic panels?
- Ways to install wall and ceiling plastic panels
- Cladding with crate
- On glue without framing
- Mounting methods
- Required Tools
- Frame method
- Adhesive cladding method
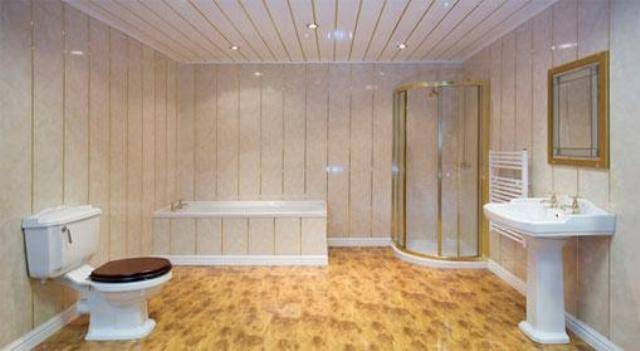
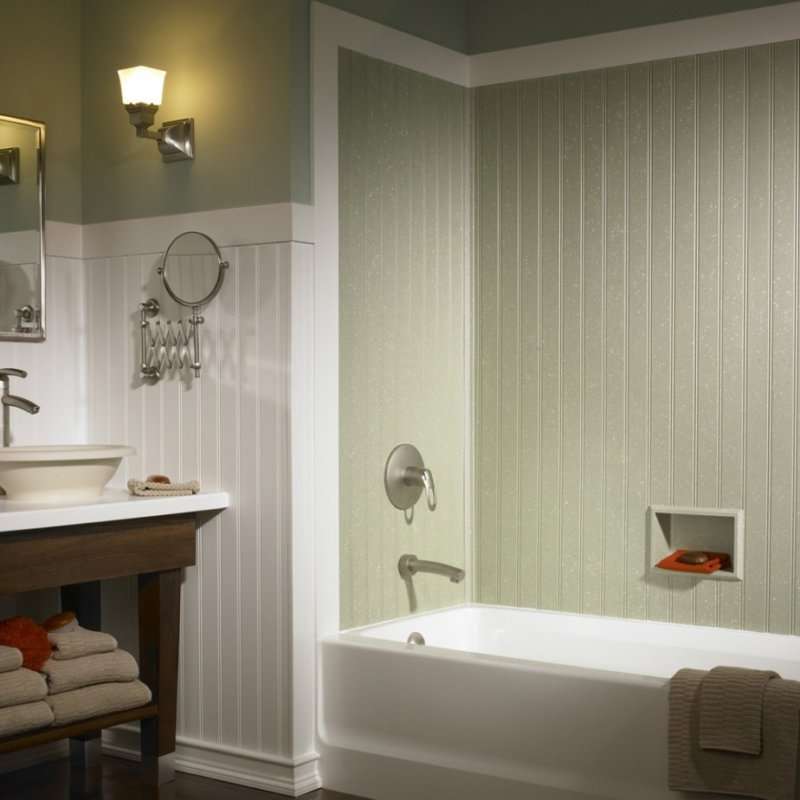
- Options for finishing the bathroom with plastic panels: photo with explanations
- 1. Combine horizontally
- 2. Vertical combinations
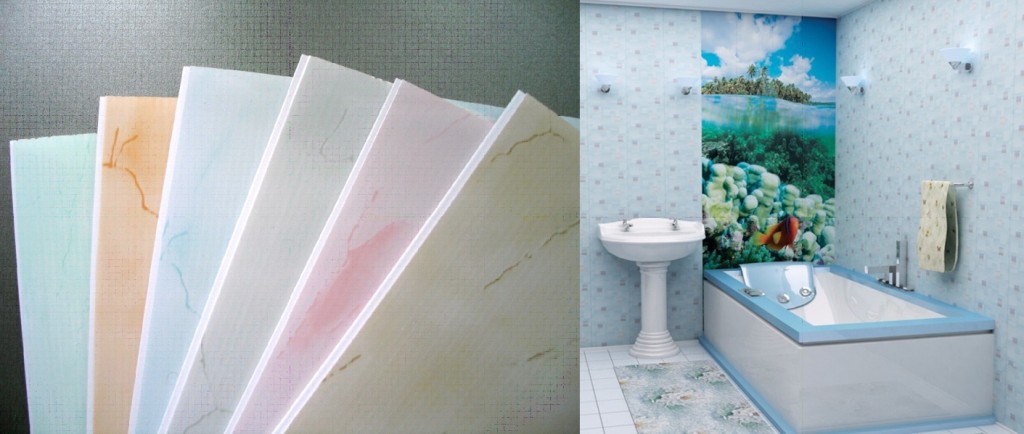
- Production material
- Plastic
- Seamless plastic
- MDF
- Glass
- Acrylic
- Mosaic
- Laminate
- Aquapanels
- Installation of plastic panels
- Step 1. Marking the walls
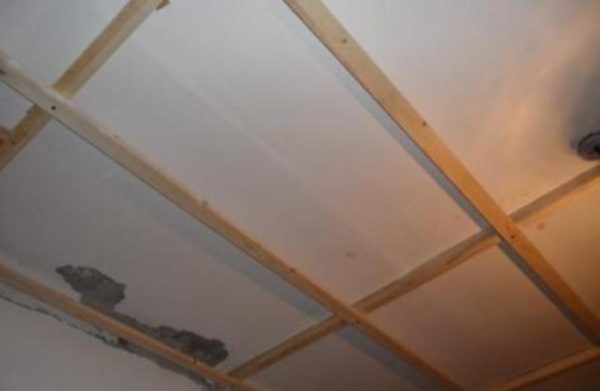
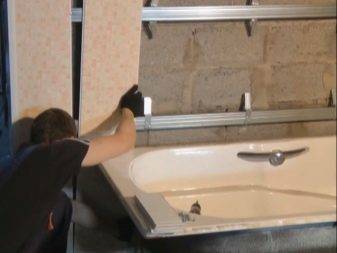
- Step 2. Mounting the crate
- Step 3. Fixing the slats
- Step 4. Installing moldings
- How to care?
- Mounting methods
Material advantages
Plastic panels are in no way inferior to tiles. The indisputable advantages of the material are the price and excellent sound insulation.
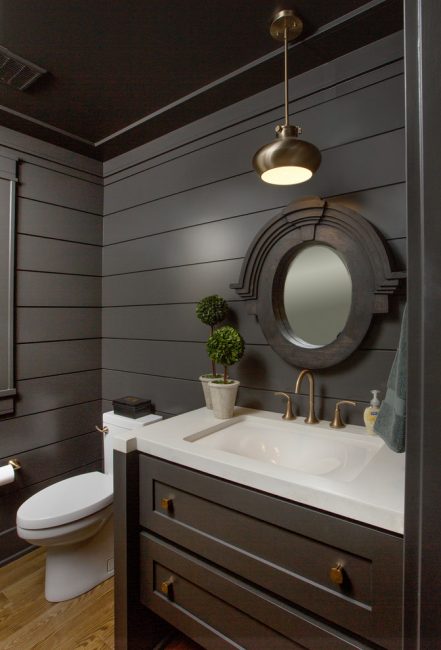
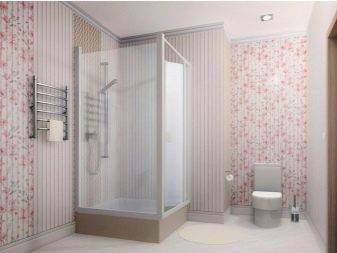
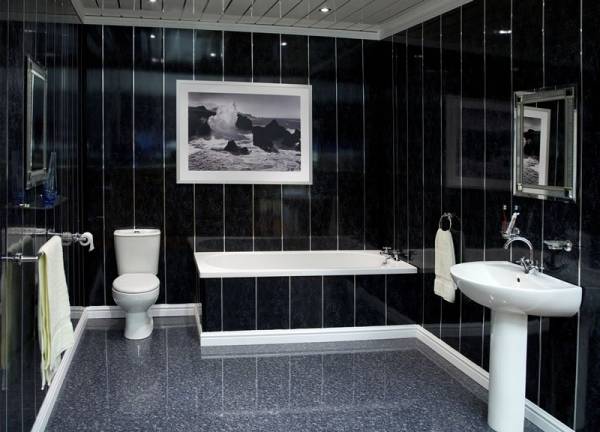
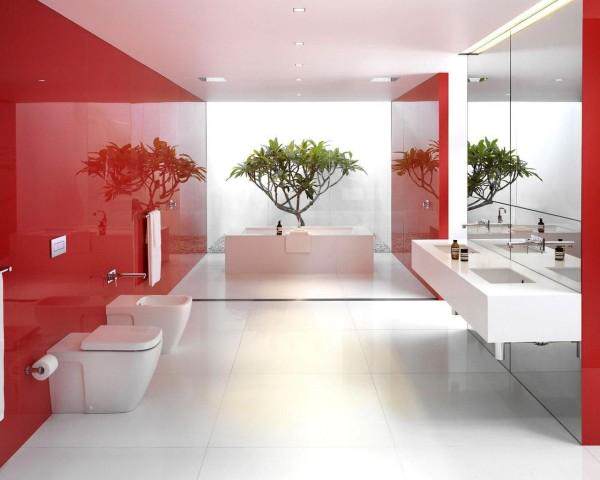
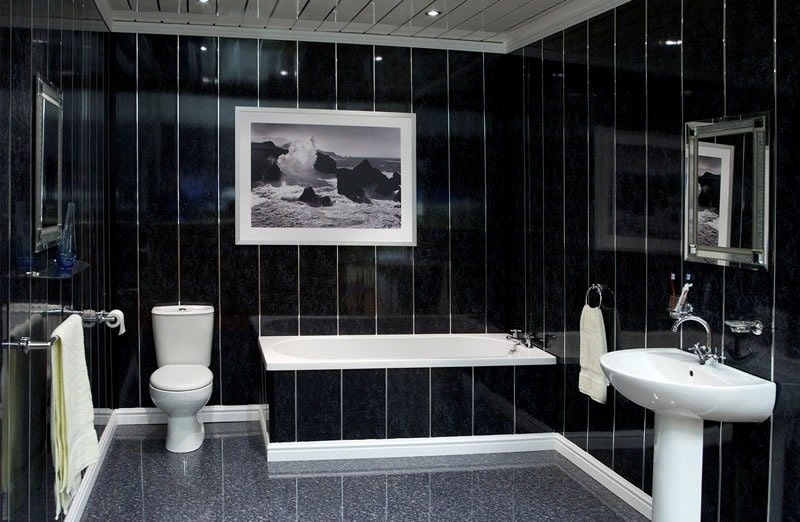
Stylish hygienic room interior in dark colors
The range allows you to realize the idea of decor using:
- decorative pattern;
- imitations of marble, wood;
- fashionable 3D image;
- photo printing;
- colored background of any shade.

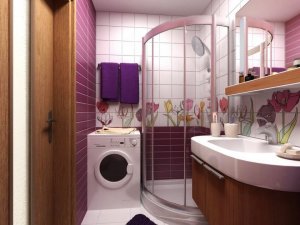
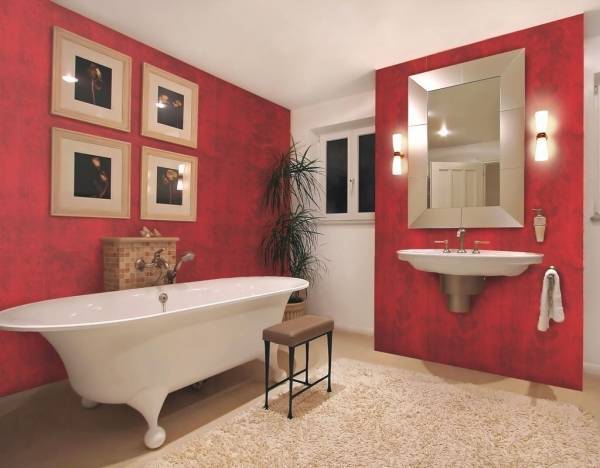
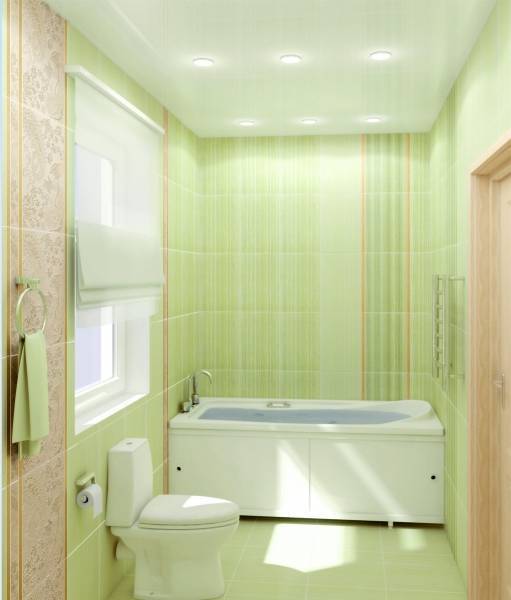
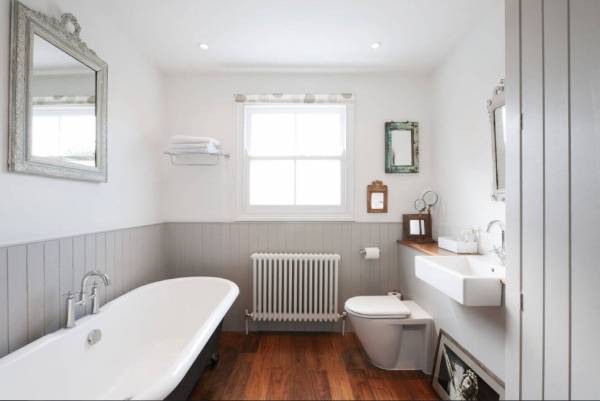
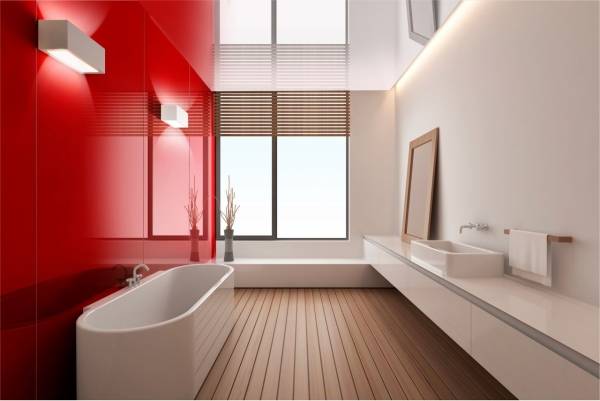
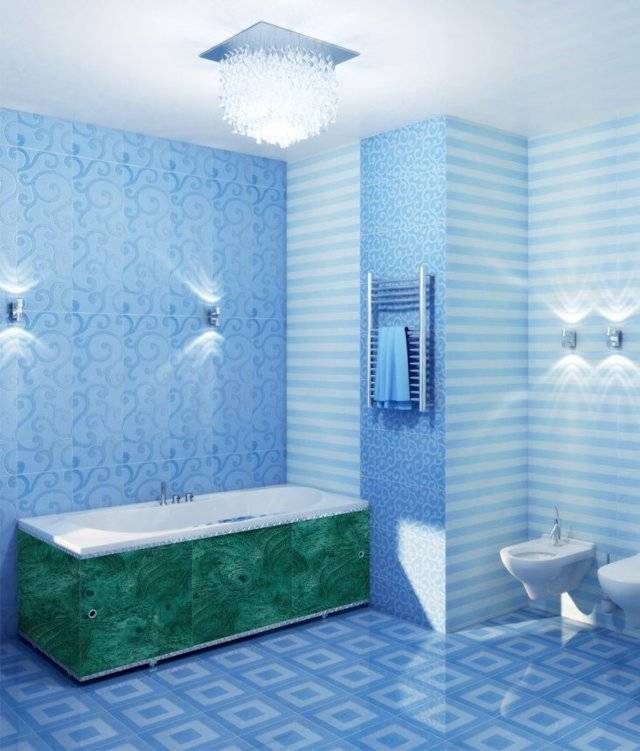
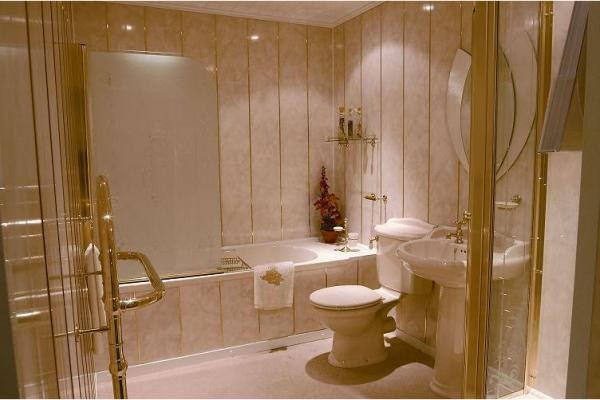
Plastic in a classic bathroom
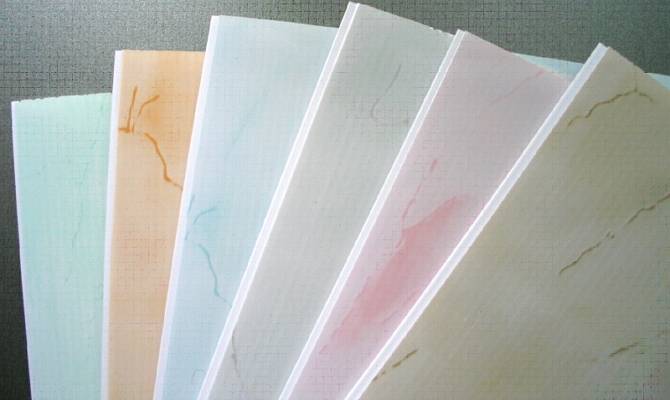
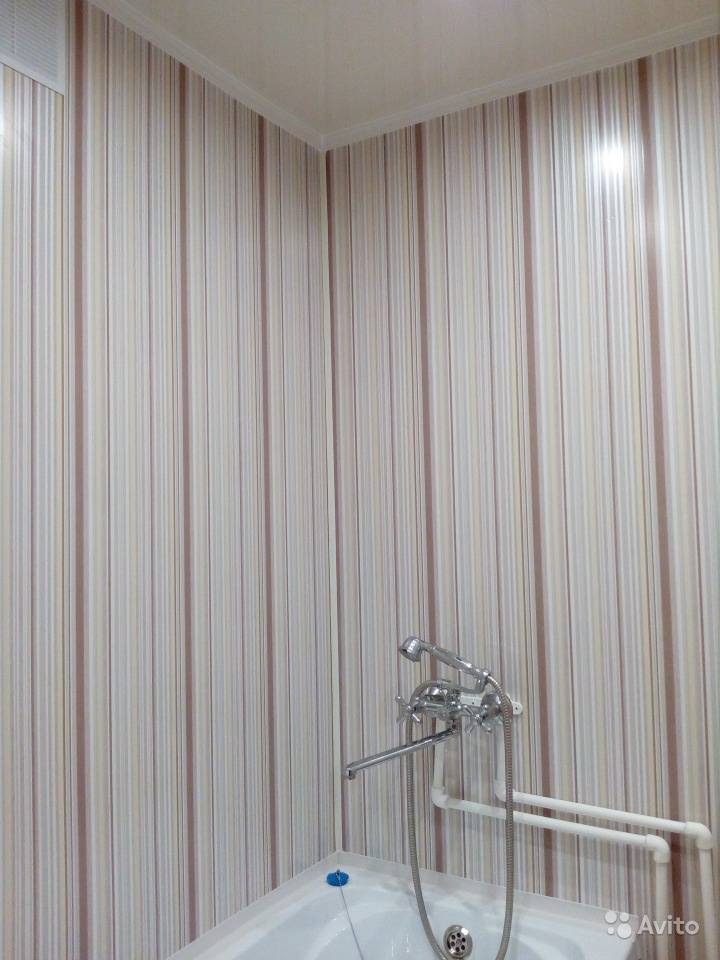
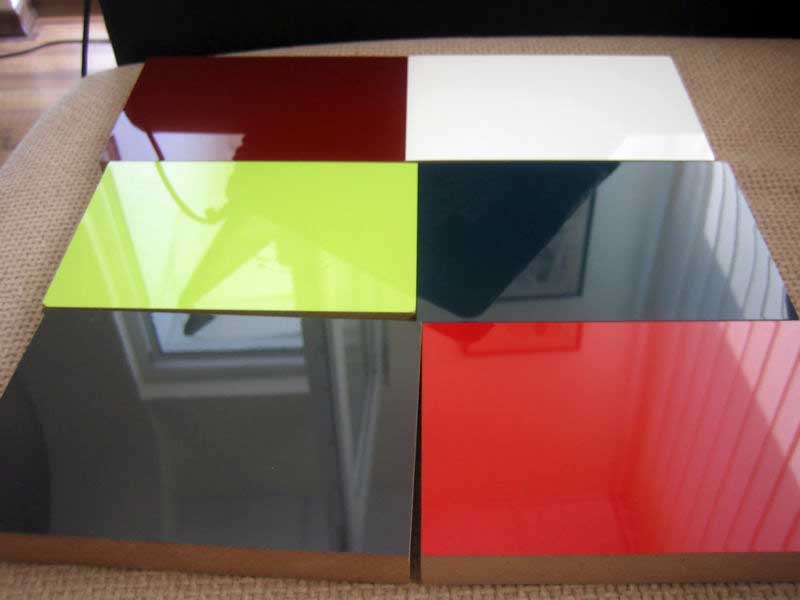
The palette of PVC panels is diverse - from pastel to bright shades, and even deep black with a glossy and matte surface.
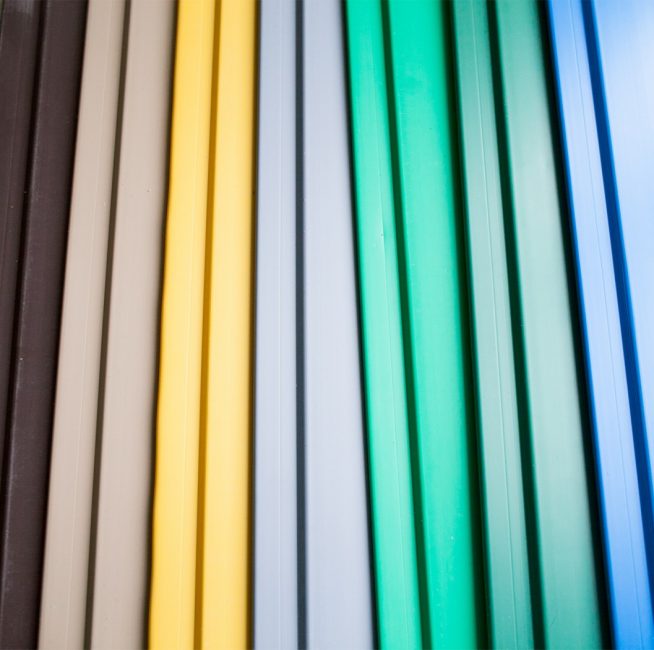
Color palette of plastic panels
Design of a small bathroom combined with a toilet. TOP-12 techniques for unique space correction + 50 PHOTOS
Panel mounting
Plastic panels are mounted in two main ways:
1. Using a crate or guides.
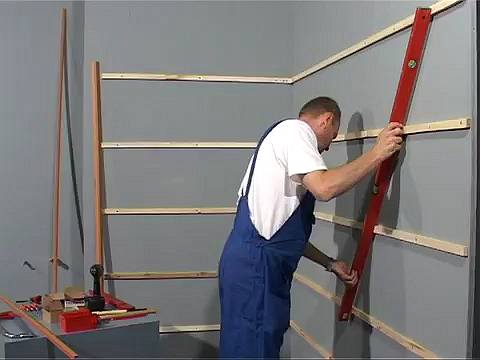
Installation of plastic panels on the crate
2. Fastening with screws and adhesives to the wall itself.
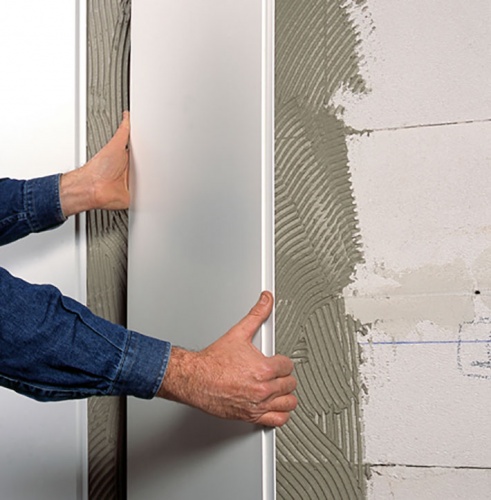
Installation of PVC panels on the adhesive composition
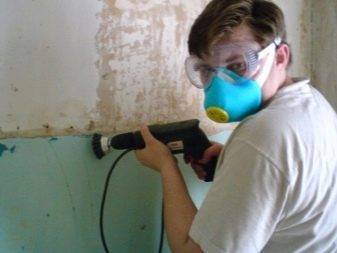
Each option has its own work order, imposes its own requirements for the preparation of sheathed surfaces, and also regulates the amount of area that can be saved. The last factor is especially relevant for small-sized bathrooms, which are “rich” in all Khrushchevs, without exception, as well as apartments in small families. In their bathrooms, every centimeter is valuable. In such spaces, it is irrational and even contraindicated to equip a crate for fixing plastic panels for finishing the bathroom. Here you need to save space as much as possible, so all the structural elements of the skin will be fixed directly to the wall. In this aspect, you will have to work on the preparation of the most ennobled surface. At least it needs to be leveled so that the decor does not turn out to be humpbacked and wavy. The process will require both physical and material costs.
Before mounting the panels on the adhesive, the walls must be carefully aligned
If the dimensions of the sanitary zone allow you to slightly reduce its volume, then it makes sense to give preference to the first option for installing plastic panels for the bathroom. The crate is best made from metal profiles.If it is planned to use wood for its creation, then make sure that these are elements treated with protective compounds. With this method of decorating the walls, the surfaces of the latter are not subject to mandatory preparation in terms of leveling and similar work.
It is recommended to mount PVC panels on a metal crate
All problems will be hidden under the decorative layer. An exception is the fungicidal treatment and priming of the walls, which is carried out to prevent the formation of fungus in the gaps. Panels attached to rails will take at least three centimeters from each side. In principle, not so much, however, there may not be enough space to install a washing machine, so it’s worth calculating everything before starting work.
Which is better: panels or tiles?
A noticeable difference between these facing materials is 4 points:
- difference in product area;
- most panels are cheaper than ceramics;
- installation of panels is faster and easier than tiles;
- the tile outweighs its opponent in weight.
Let's start with what they have in common:
- both materials are moisture resistant;
- respond well to household chemicals and are easy to clean;
- have a large selection of colors and patterns.
There are a lot of differences between ceramic tiles and PVC panels.
- The strength of the tile is much greater than plastic, which affects its durability.
- PVC can be installed on side walls, ceilings, ledges and niches. With this material it is easy to hide pipes and electrical wiring. Only the walls and floor are tiled.
- Locks at the joints of plastic panels allow you to mount them without gaps, which completely eliminates the ingress of moisture. The tile is laid out with seams.If they are processed in violation of technology, water can get under the lining and lead to the growth of bacteria.
- For the installation of tiles, the walls are ideally aligned. Panels do not require such preparation, they are installed on a previously removed frame.
- Tile work is more time consuming, messy and requires skill. Installation of PVC panels can be carried out independently. There is almost no dirt left behind.
- Finishing a bathroom with plastic panels will cost much less than using tiles, but the operation of such a room will be less durable.
- Sand and clay are involved in the production of ceramics; it is classified as an environmentally friendly material. Plastic cannot boast of naturalness.
Why PVC panels?
PVC panels or, simply put, plastic are much more popular than the same ceramic tiles when it comes to decorating a toilet. And, choosing between the same tiles and plastic panels, many tend to favor the latter. What is so attractive material? Everything is simple! The main advantages of PVC panels are their low cost and ease of installation compared to the same ceramics. If we compare prices, then making panels will cost at least 4 times cheaper than laying tiles. Moreover, the water resistance of both the one and the other material remains at its best.
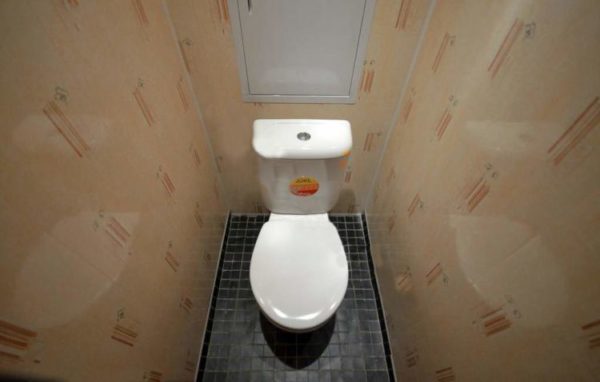 Finishing the toilet with PVC panels: interesting ideas (photo)
Of course, ceramics are much stronger and more durable, but we must pay tribute - and PVC panels can last a long time if they are treated with care. In addition, they are quite resistant to hot steam or chemicals. Other advantages of the material are as follows.
-
Ease of installation - to install the panels on the wall, you do not have to do a lot of work. And you don't need a lot of tools. In addition, you do not have to mess with adhesive solutions designed for laying tiles. And you do not need to have any special skills to carry out the work either.
- No need to level the walls before finishing. So, if the panels will be mounted on the frame, the base does not need special preparation (at least it is not necessary to align it).
- It will be possible to use the toilet immediately after the installation of the panels. After all, you don’t have to wait until the tile adhesive dries.
- You can mount PVC panels in absolutely any room, but most often they finish the walls in the bathroom, toilet, kitchen, bathroom.
-
A large selection of color variations makes it possible to choose panels for any interior style. Some panels can imitate wood, stone and other natural materials.
- The panels are very easy to clean. It is enough to dilute the soap solution and wipe them with a cloth dipped in it.
 Toilet repair with panels
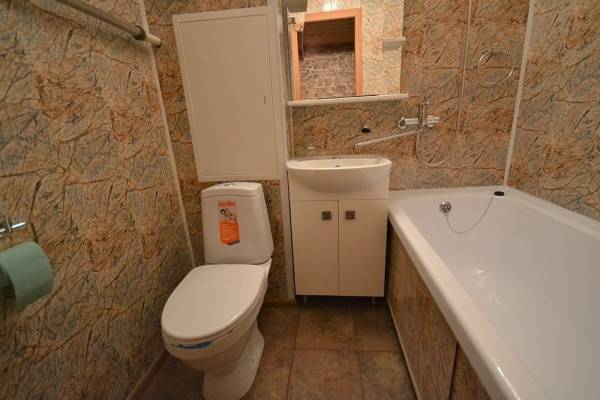
Most panel manufacturers report material lifespans of 25 years on average. However, in general, this aspect will directly depend on how carefully the owner of the toilet treats the finish. By the way, when mounting even on a frame, the panels steal very little free space (no more than 5 cm), so they can be mounted even in narrow and cramped rooms.


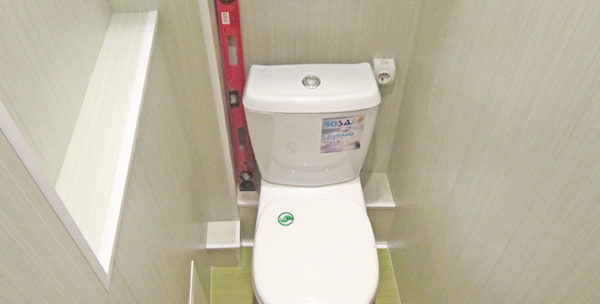
 Plastic bathroom panels
How to choose the right quality plastic?
To purchase plastic panels, you need to pay attention to the condition of the outside.It should not show internal stiffeners, the surface should be smooth and free of defects.
You should try to lightly press down the edge of the plastic strip with two fingers. High-quality plastic will not squash. If you have consumer goods in front of you, then the internal ribs will collapse or break.
Sometimes plastic sellers show how well and carefully the seams are joined. But they still hold the panels a little at an angle.
Pay attention to this and ask to connect the panels on a horizontal surface, only in this way the true quality of the seam will be visible.
Try bending the corner of the plastic several times in different directions. High-quality material will not break from such repeated bending. Bad plastic containing a high content of chalk will simply crack or break.
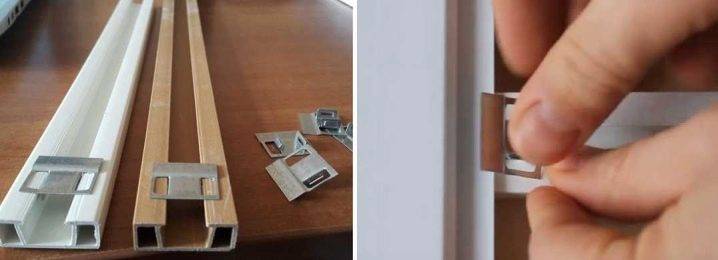
Choice of accessories
- The starting profile is initially attached to the wall, then plastic is inserted into it. It is used for framing along the line of the floor, ceiling, attached to door frames to make slopes.
- External and internal corners are used to accurately connect two perpendicular planes. Sometimes such a profile is used to join the surface of the ceiling and walls.
- The H-profile is used to connect two short strips of plastic along the length. It does not look aesthetically pleasing, but in some cases such a docking is necessary.
- The ceiling plinth is applied to connection of plastic of a ceiling and walls. In fact, this is the same starting profile, in which one wall is made in the form of a decorative corner to improve the appearance.
- The F-profile is a starting strip for connecting the outer corner planes. It is convenient to do this due to the presence of one wide side in the profile, which hides all the irregularities of the previous plane.
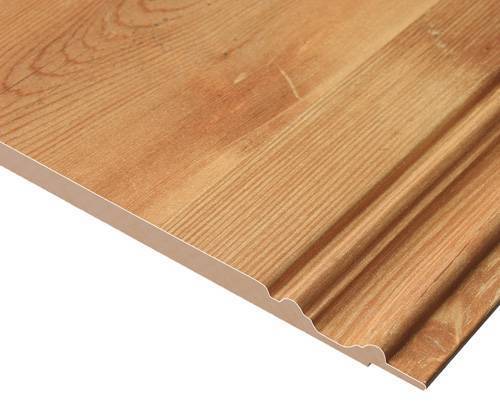
2 PVC panels
Plastic panels are dense rectangular boards that are made from various grades of PVC. The most common types are vinyl. They have a number of advantages:
- The material does not deteriorate under the influence of strong moisture and water.
- They are easy to clean from dirt and dust.
- Plastic panels have a fairly long service life.
- Fungi and insects do not start on them.
The disadvantages of this material include:
- Low mechanical strength. Accidental impact or awkward movement in the room can pierce the panel.
- Plastic materials are food for rodents, so this finish is not recommended in the bathrooms of private houses.
- Before installing the elements, you should first carefully prepare the walls and provide for powerful ventilation. This is due to the fact that the plastic does not allow air to pass through and creates the feeling of a “steam room” in the room.
- The installation of plastic panels in the bathroom will significantly “eat up” the volume of the room, because about 15 cm will have to retreat from each wall.
- To trim the bathroom with such elements, you will need a special glue, which should not lose strength when exposed to moisture.
Next, it is worth mentioning what you should pay attention to when purchasing plastic panels. It is recommended to give preference to options with the maximum number of stiffeners - the ribs increase the mechanical strength
Products of various shapes such as wavy did not perform very well: such panels are very difficult to wash, and dirt accumulates in the bends.Installation of plastic panels is more convenient if the panel itself is wide - this saves time and money. Particular attention should be paid to the quality of plastic materials and their color: some plastic panels from the same series may have different shades, which will be noticeable in small rooms.
 Choice of plastic panels
The color of the elements and their shape should be determined by the desired design of the room, since it is the finish that will be fundamental to the overall interior of the bathroom.
It should be noted that in order to optimize the work, all communications (pipes, open wiring, heating system) can be hidden behind the panels. This will save space and enhance the aesthetic properties of the interior. In order to expand the room at least a little, it is recommended to remove the old coating from the walls (plaster, etc.), especially if the layers are thick enough. In Soviet-built apartments, bathrooms were made ready and there was a large gap between the walls of the house and the walls of the bathroom. Cutting down the walls of the bathroom to the walls of the house will allow you not to lose in the volume of the room.
Also, before you finish the bath, you need to replace absolutely all pipes (including heating) with plastic. This is due to the fact that behind the panels it will not be possible to control the condition of the pipes, in addition, condensate may accumulate behind them, which will lead to pipe corrosion.
It is also important that metal pipes are usually located at a decent distance from wall surfaces, which will significantly “eat up” space when installing panels in the bathroom.
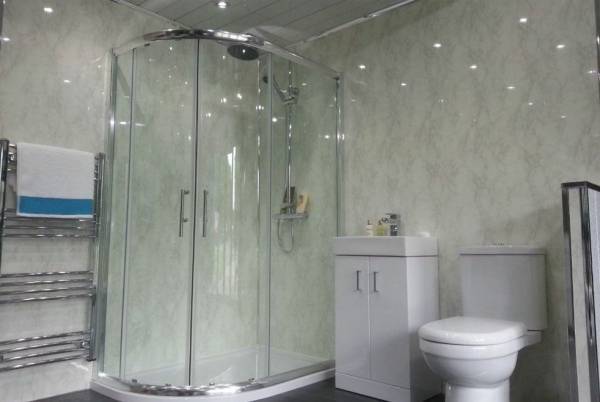
What are the advantages of plastic panels?
Such panels are much more popular than the same ceramic tiles when decorating a toilet. When deciding which material to use for a bathroom, many prefer plastic.But why? Why is this material so attractive to home craftsmen? The reason is simple - these are the advantages, including ease of installation (especially when compared with tiles) and relative cheapness. On average, finishing with PVC panels will cost 4 times cheaper than tiles. At the same time, the water resistance indicators of both materials are equally high.
Plastic paneled toilet design
Of course, tile is more durable and will last longer, but plastic can also be durable if treated with care. Moreover, the panels are resistant to aggressive substances and hot steam. As for other advantages of the material, they are listed below.
pvc wall panels
- Ease of care. To clean the panels, just wipe them with a cloth dipped in soapy water.
- Ease of installation. It won’t take a lot of effort / time, and the list of necessary tools is small. You will not need to prepare and use glue yet, as is the case with tiles. Finally, no special skills are needed to carry out the work.
- Large assortment of flowers. PVC panels can be selected for any interior. Some rulers are made under a natural stone, wood and other materials.
- There is no need to pre-align the walls. For laying the panels, a frame is mounted, and therefore the base does not need to be specially prepared (at least, you definitely won’t have to level it).
- Installation of panels is possible in any room. Although they usually decorate the walls of the bathroom, kitchen, toilet.
Plastic bathroom panels
According to the manufacturers, PVC panels last an average of 25 years. But in each case, the service life depends on how carefully the owner treats the finish.By the way, even when laying the panels on the frame, they do not “steal” a lot of free space (maximum - 5 cm), and therefore they can be used in cramped and narrow bathrooms.
3D panels
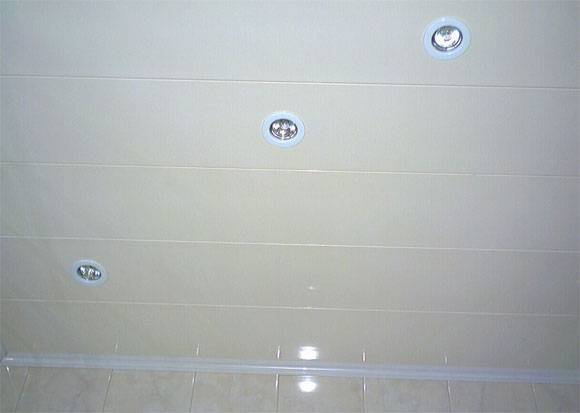
Ways to install wall and ceiling plastic panels
Plastic on the walls for the bathroom can be installed in two ways. The selection criteria are the level of humidity and the presence or absence of defects on the ceiling and walls.
- With the frameless method, PVC sheets are attached directly to the ceiling;
- If it is not possible to level the surface, a base frame is preliminarily erected for installation. The material can be wooden bars, metal or plastic slats.
Cladding with crate
Installation of the wallboard base is required at high relative humidity levels, or if there are a large number of irregularities. Also, the frame is used if it is necessary to install additional lighting, or a warming or noise-insulating composition. The basis is made up of durable profiles.
 PVC sheathing
On glue without framing
It is permissible to install on liquid nails or adhesive composition only if there are no uneven walls. In this case, it is undesirable to allow a high level of humidity. The mixture is applied with a notched trowel or a specialized gun. In the latter case, it is desirable to apply glue with lines, or with a serpentine.
 Installation without a crate
When using the frameless method, the construction costs are lower. However, you will need to purchase liquid nails. Also, it will not work to mount lamps on the ceiling.


Mounting methods
Before you go to the store for finishing material, you need to take measurements. Calculate the total surface area that will be decorated with plastic.Its width is multiplied by its height. From the resulting number, subtract the area of doorways and windows, if any, in the room. The latter are of course rare for rooms in Khrushchev, but in a private house a bathroom can even have several of them. It is also worth removing the bath area from the general value if it is adjacent to the wall, and the repair does not involve its dismantling. After the calculations are sent for the material. There are two ways to install PVC panels:
| Adhesive (frameless) | The panels are attached directly to the wall. |
| frame | A special crate is installed under the material. |
In addition to a set of tools for work, you will additionally need:
- Floor and ceiling plinths;
- corners.
These materials perform a decorative function, but without them, interior design will seem unfinished.
Required Tools
The list of tools for finishing the bathroom with PVC panels includes:
- Drill, hacksaw, screwdriver;
- Building level, tape measure, pencil, square;
- Screws and dowels;
- Construction adhesive, self-tapping screws or kleimers;
- Bars of wood or metal crate;
- Joint sealant.
The list may be supplemented. The set of tools depends on how the panels are attached to the wall surface.

Frame method
This type of installation is not suitable for small rooms. The frame will inevitably "eat" valuable centimeters. Usually this method is chosen for finishing the ceiling. As mentioned above, the material has a special structure (without pores), so it will not become a breeding ground for harmful organisms. But, if there are voids under the panels, then whole colonies of bacteria and mold can settle in them over time.In addition, in the presence of a frame, the risk of damage to the material increases significantly, it becomes more brittle, without having a solid surface under it. Of the obvious advantages, the ability of the crate to hide obvious wall defects is noted: it can mask their irregularities or curvature.
Finishing work is conditionally divided into several stages:
- Marking and installation of the first rails. The future crate is constructed from wooden or metal bars. For a bathroom, it is better to opt for the latter, as wood is less durable and prone to decay. The main line is drawn horizontally around the entire perimeter of the room. Focusing on it, with the help of dowels, attach the first rail. A second one is installed along the bottom near the floor in a similar way. From them will be repelled in future work.
- Fixing additional rails. The optimal distance between them is considered to be a distance of 50 cm. Before installing additional rails, check their "horizontal" using a level.
- Molding fixture. They are necessary to mask the joints in the area of \u200b\u200bthe corners.
Bathroom design 2 by 2 meters: interior design tips +75 photos
After the work on the frame is completed, proceed to the installation of plastic panels. They start the process from the wall that is always in sight (far). The material is attached to the crate with self-tapping screws using a screwdriver. The panels are inserted into the corners (moldings) and screwed to the frame. On the sides of each there are special grooves that allow you to connect them together. To ensure a better hitch, they are lightly tapped with a hammer.

Adhesive cladding method
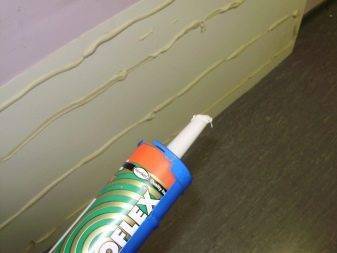
The adhesive method is devoid of all the disadvantages of the frame method, however, it is associated with additional finishing work: putty and surface primer.The first is carried out only if necessary, it does not apply to the mandatory preparatory stages. If the walls have obvious bumps, crevices or damage, then applying putty is indispensable. Defects are smoothed out, and the surface is leveled. After the putty dries, the wall is primed to ensure good adhesion to the adhesive. Panels before installation, if necessary, cut.

A layer of glue (the so-called "liquid nails") is dotted onto the surface of the wall. At the same time, they try not to cover up the places where the panel seams will be located, since the substance can seep through them. As in the adhesive method, it is necessary to monitor how evenly the material lies on the surface. The process is completed by installing a framing profile.
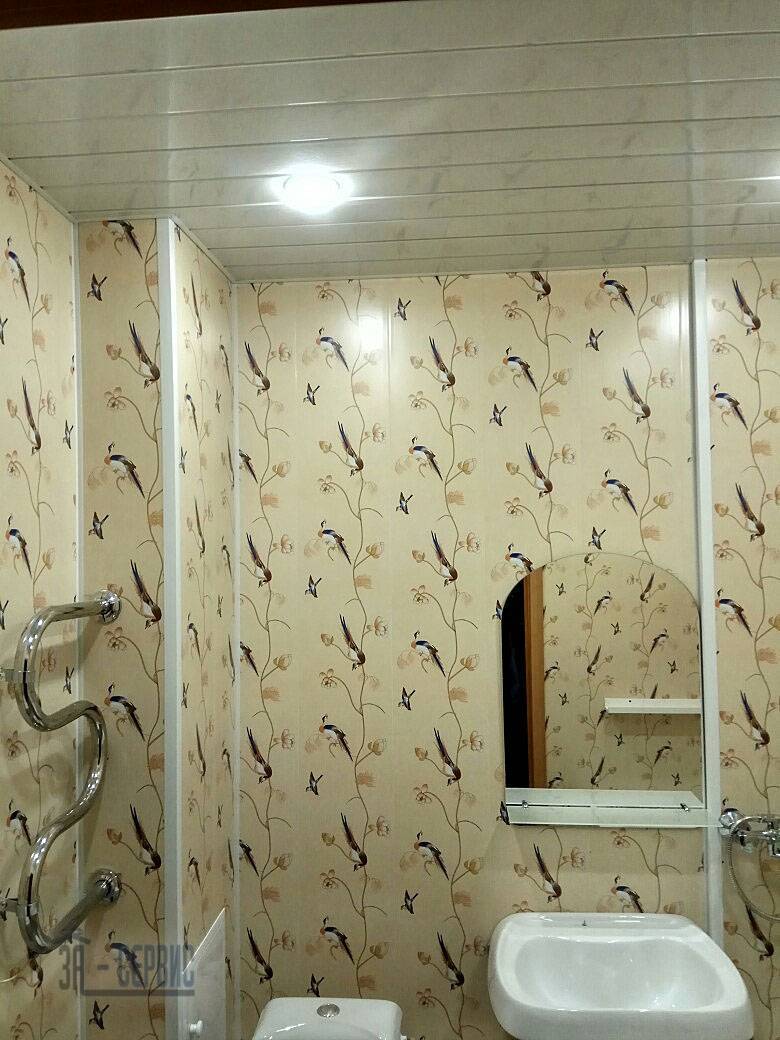
Options for finishing the bathroom with plastic panels: photo with explanations
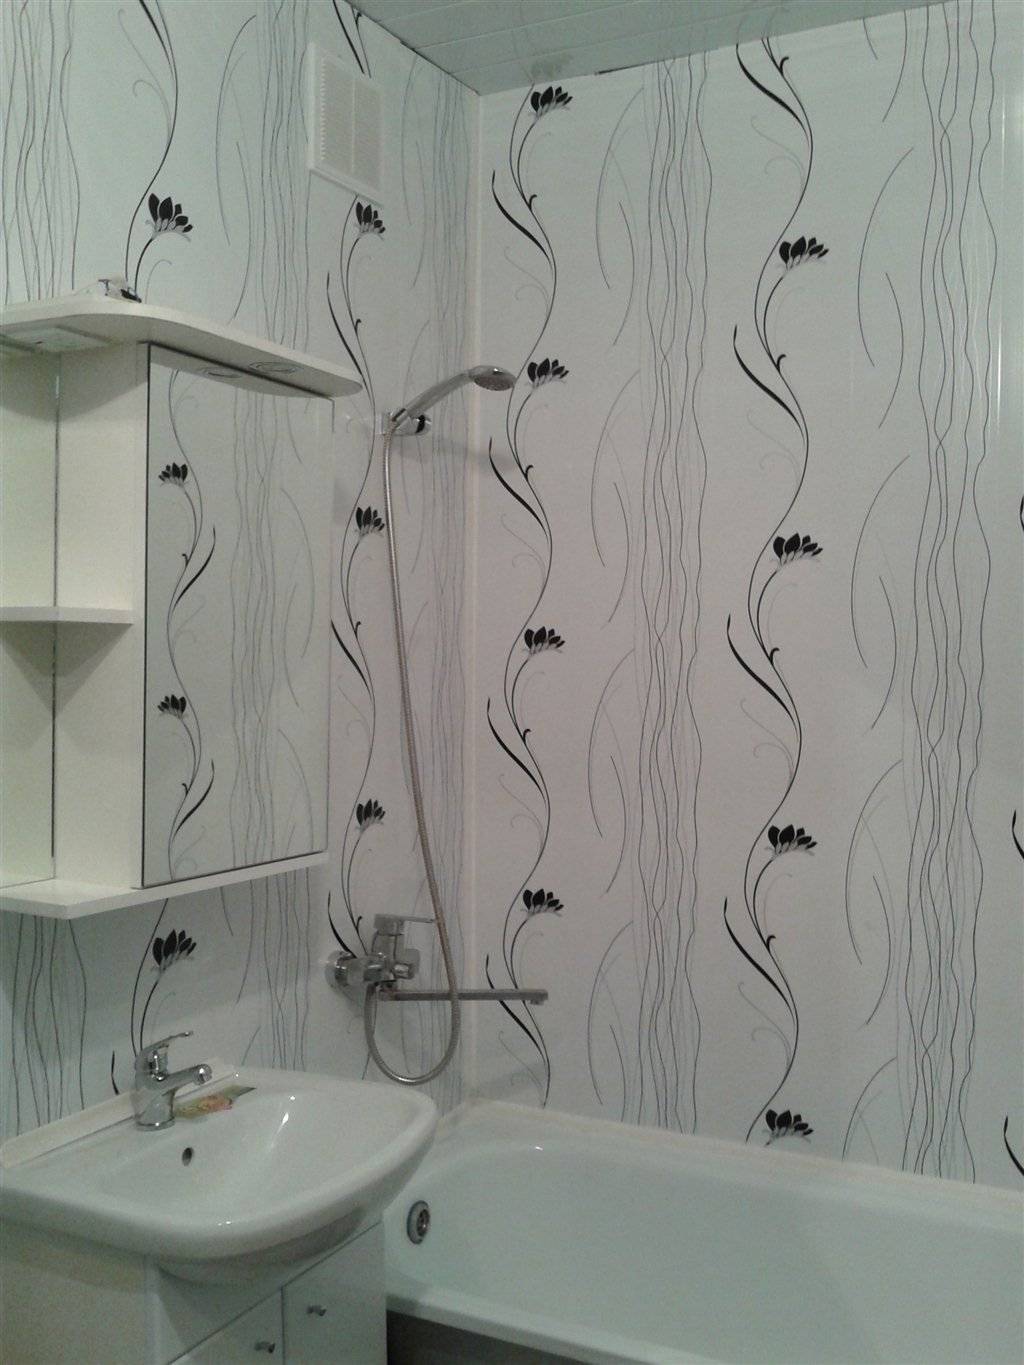
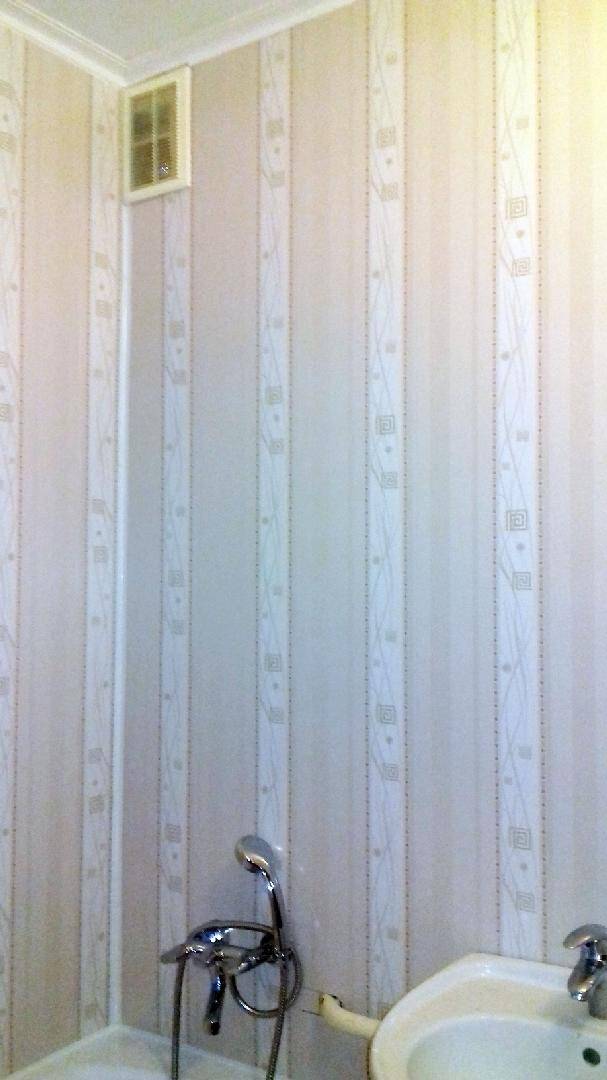
Often, PVC slats are good on their own, you can decorate a room with them without thinking about any special decor. But if you want to get an original interior, you should think about interesting combinations.
1. Combine horizontally
The best choice for rooms with high ceilings. Allows you to visually reduce excessive height, make the room more comfortable. The essence of the reception is to divide the wall into sections. There may be two or more stripes.
In the first case, the space is divided into two parts. The most popular option is a 1:2 ratio. One of the fragments is closed with lamellas with a large expressive pattern, the other is plain, with small stripes, etc.
Given that joining the panels is quite difficult and this will require special fittings, the manufacturer produces plates with an already applied pattern. A combination of several horizontal stripes is also possible.In this case, it is easiest to lay lamellas of suitable colors across the wall. Options for such bathroom decoration with plastic panels with photos are presented in the gallery.
Instagram anastasiagavrilyuk
Instagram design_studio_olga_sharlay
Instagram lrinadesign

Instagram grand_house_kz
Instagram vann_life
Instagram levsha_city
Instagram keramikaanna
Instagram panelikazani116
Instagram galimova0912
Instagram levsha_city
Instagram vann_life
Instagram levsha_city
Instagram levsha_city
Instagram vann_life
Instagram levsha_city
2. Vertical combinations
A winning technique for decorating low and long rooms. It makes it possible to zone the room and visually increase its height. Assumes that vertical stripes of various widths will be laid out on the walls. It can be a symmetrical repeating pattern or a set of elements of different widths. The color of the design is selected based on the tasks that need to be solved by the decor.


For example, in order to divert attention from the obvious imbalances of the room, multi-colored stripes of the same width alternate. To make the interior more dynamic, two types of cladding are selected: plain and with a small pattern.
At the same time, their main color is the same. Strips alternate in the ratio 2:1 or 1:1. We offer vertical combinations for a bathroom sheathed with plastic panels, photos in the gallery.
Instagram levsha_city
Instagram
Instagram iriskasannikova
Instagram levsha_city
Instagram levsha_city
Instagram levsha_city
Instagram levsha_city
Instagram levsha_city
instagram clairreme
Instagram pchelka3663
Instagram center_designs
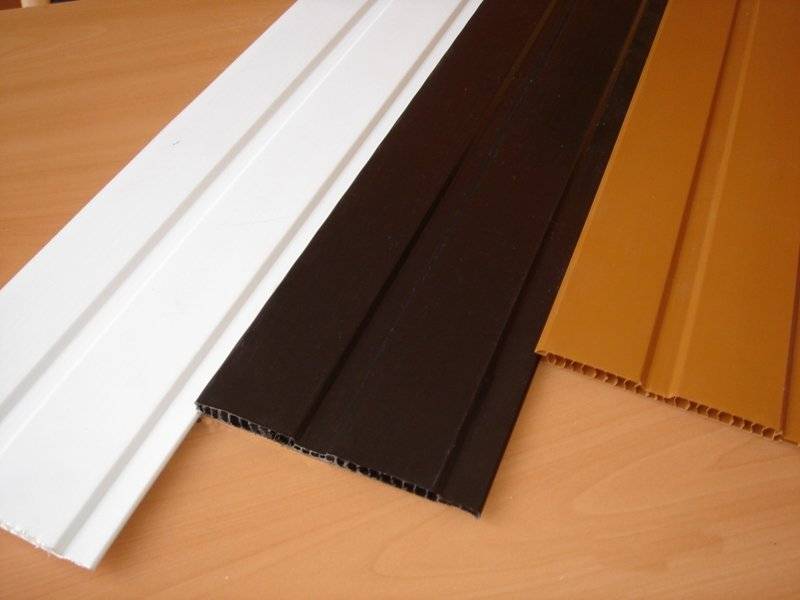
Production material
Panels can be made from a variety of materials, each with its own advantages and disadvantages.
Plastic
PVC panels have the following advantages:
- aesthetics;
- practicality;
- antistatic;
- resistance to temperature changes, moisture;
- resistance to deformation;
- quick and easy installation;
- the ability to hide pipes and other defects.
Before installing PVC, you do not need to level the walls - it is mounted on installed rails. Sheet PVC panels are interconnected with a special fastener.
The main disadvantages of this material:
- the impossibility of creating a pattern using PVC;
- brittleness of the material - PVC sheet can be damaged by inaccurate pressure.
You need to choose high-quality PVC cladding panels for the bathroom - a cheap analogue quickly loses its appeal.
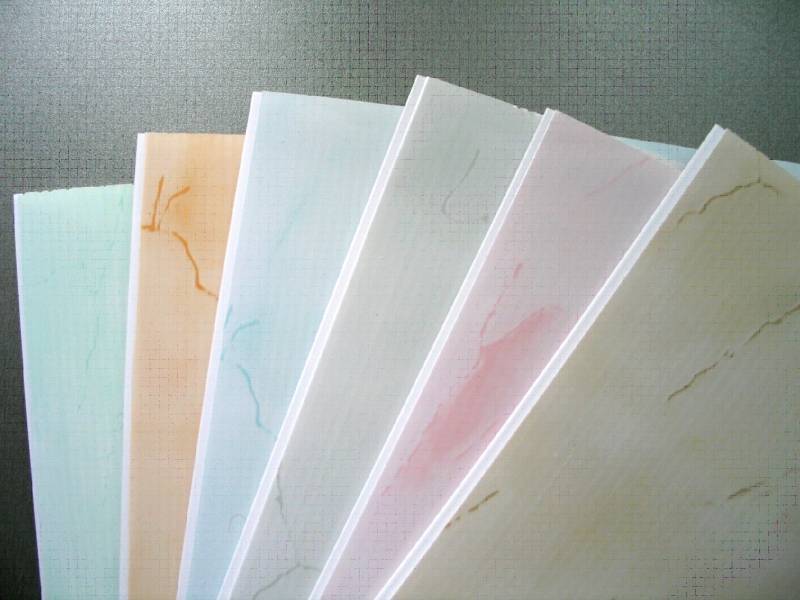
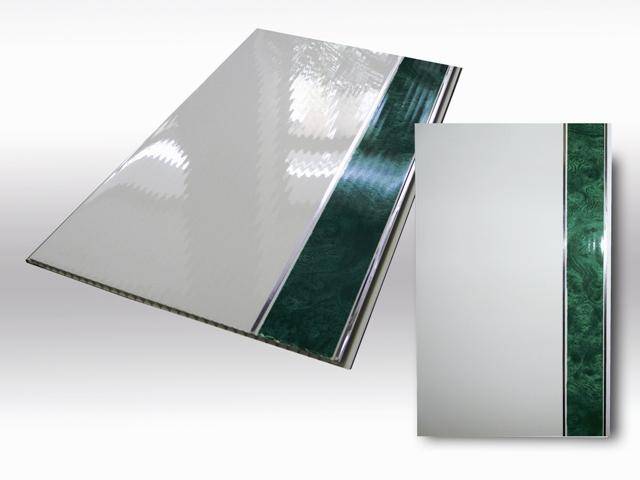
PVC sheet products may vary:
- in appearance - glossy and matte;
- according to the drawing method - printed and film;
- along the seam - seamless and suture.
 Seamless
 Suture
Seamless plastic
The cladding, which is in great demand, allows you to quickly make repairs, saving at the same time. These bathroom panels are available on the market in different colors and at different prices. Seamless products have a sheet width of 25 cm. They do not have connecting grooves. During installation, they are tightly joined, trying to make the gap as small as possible.
Main advantages:
- profitability;
- ease of installation;
- easy care;
- big choice.

MDF
MDF is compressed wood dust and has some advantages over PVC:
- high resistance to high humidity;
- MDF panels are very durable;
- MDF - good heat, waterproofing material;
- MDF is an environmentally friendly canvas.

Glass
Glass panels look fashionable in the bathroom. The main advantages of the material:
- aesthetics;
- uniqueness;
- resistance to external influences;
- hygiene;
- glass panels are easy to clean;
- fast installation;
- glass sheets serve for a long time with proper operation and installation;
- visual increase in volume.
Glass panels have disadvantages:
- big weight;
- fragility;
- injury risk;
- installation complexity;
- high price.
Glass sheets can be decorated with a pattern. You can also hide pipes behind glass - for this it is better to choose matte or colored panels. Glass walls are dangerous if there are children at home, because there is a risk of injury to them.


![Plastic bathroom panels: 100+ photos [best ideas 2019]](https://fix.housecope.com/wp-content/uploads/6/a/d/6add872b48f07c5cb183369d548066ad.jpeg)

Acrylic
Acrylic bathroom panels - innovative cladding. Different concentrations of additives affect color and transparency. The gloss level of acrylic exceeds even MDF panels, not to mention PVC.
The advantages of this material are as follows:
- great strength;
- increased resistance to mechanical damage;
- ease;
- resistance to abrasion and ultraviolet;
- environmentally friendly product;
- easy care;
- a large selection of shades;
- complete water tightness.
The only drawback is the high price, which does not allow such facing material as acrylic panels to completely replace ceramics, PVC or MDF counterparts. Only aquapanel can compete with acrylic.
Mosaic
Mosaic will help create an attractive design. Mosaic tiles have the following advantages:
- aesthetics;
- wide range of color shades;
- high wear resistance;
- environmental friendliness;
- simple installation;
- easy care.
Laminate
Laminated sheets are made on the basis of fiberboard impregnated with a special compound to increase moisture resistance. Laminated fabrics do not provoke the development of mold.
The advantages of this type of material:
- easy care;
- resistance to external influences;
- water resistance;
- aesthetics;
- UV resistance.
Laminated sheets can be mounted bypassing the installation of the crate - they are glued to the aligned walls.
Aquapanels
Aquapanel for the bathroom is the perfect solution. Aquapanel is a fiberglass mesh filled with weightless expanded clay.
The main advantages of this material:
- high moisture resistance;
- resistance to temperature extremes;
- easy care;
- aesthetics;
- the aquapanel can be bent.
Attach the aquapanel with a special adhesive and screws to a pre-installed frame.
Installation of plastic panels
Interior trim with PVC panels
Step 1. Marking the walls
The crate should be fixed strictly according to the level, this will help to avoid distortions. In order not to measure each rail, you should make markings on the walls. The bottom row of the crate should be located 1-2 cm above the floor, so a point is marked on the wall with a pencil at this height, and then a horizontal line is drawn along the entire perimeter using a level. Exactly the same line is drawn under the ceiling or along the edge of the finish, if the walls are not sheathed to the full height. Further, 40-50 cm are measured upwards from the bottom line, a beacon is placed, and so on to the very top. Strictly parallel lines are drawn through the beacons along the perimeter of the walls. The markup is ready.
The panels must be attached to the crate perpendicularly, so the horizontal frame is sheathed vertically, and vice versa. To make markings for a vertical crate, the first line is drawn in the corner from ceiling to floor using a plumb line. Next, mark the second corner, and then draw the rest of the lines in increments of 50 cm.
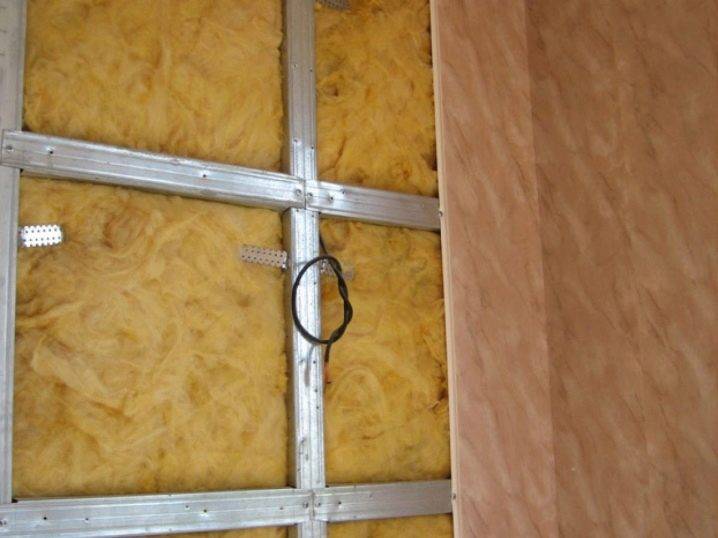
Step 2. Mounting the crate
Installation of wood framing Installation of wood framing
If a tree is used for the crate, all slats must be primed with an antiseptic in advance. Holes for dowels are drilled along the marking lines with a puncher at a distance of 50 cm, then slats are applied, leveled horizontally and fixed on the wall. Where the walls have irregularities, wooden wedges are laid under the crate. If there is wiring along the wall, it must be hidden under the trim. To do this, measurements are taken, holes are drilled in the wall and the wires are fixed with clamps so that they do not protrude beyond the plane of the crate.
Installation of the frameInstallation of the cornerInstallation of the cornerInstallation of wall panels using metal profiles
Step 3. Fixing the slats
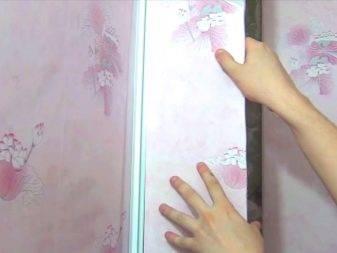
The first lamella is installed in the far corner from the entrance, which is considered the most noticeable.
Installing the first panel
Make measurements, if necessary, cut the panel along the length with a hacksaw. With one edge, the panel is inserted into the side molding, applied to the corner and attached to the crate from the back side.
Fixing panels from the corner
The second lamella is inserted into the mounting groove of the first, the joints are pressed tightly and fixed to the frame rails.
Installing the cladding stripInstalling the cladding stripPanel mounting scheme
To achieve maximum sealing of the joints, the side edges are lightly smeared with silicone before insertion.All subsequent elements are mounted in the same way.
Fixing slats Fixing slats
Holes are cut out under the switches and sockets in the panels with a sharp knife, and after installation, these areas are covered with plastic boxes. The last lamella most often requires cutting in width, so first they try it on the wall, mark the cut line with a pencil and cut off the excess with a hacksaw.
How to fix pvc panels
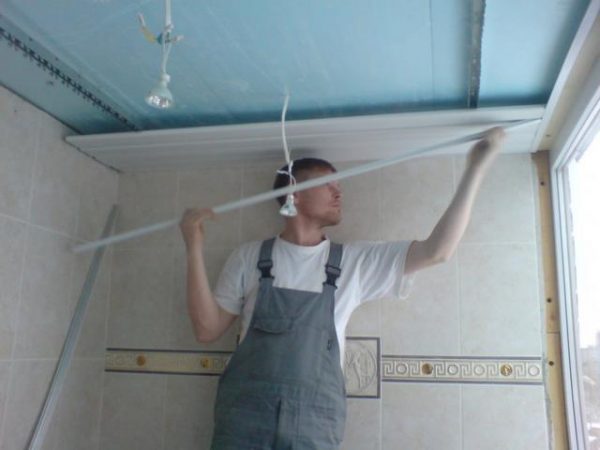
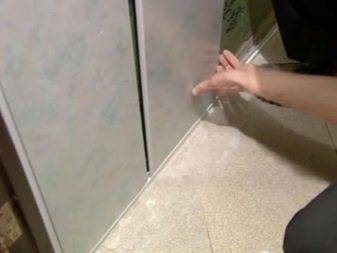
Step 4. Installing moldings
After installing all the elements, the surface should look monolithic and even, without gaps at the seams and around the perimeter. To do this, all corners, joints and joints are closed with special plastic moldings. Their design allows you to carefully insert the edges of the panels on both sides, making the corners look much more attractive.
Installation of moldings
Finally, a decorative molding is installed along the perimeter of the ceiling, and a plastic plinth is attached along the perimeter of the floor. On this wall decoration with PVC panels is considered complete. With careful operation, the panels do not lose their attractiveness for a long time and do not require repair.


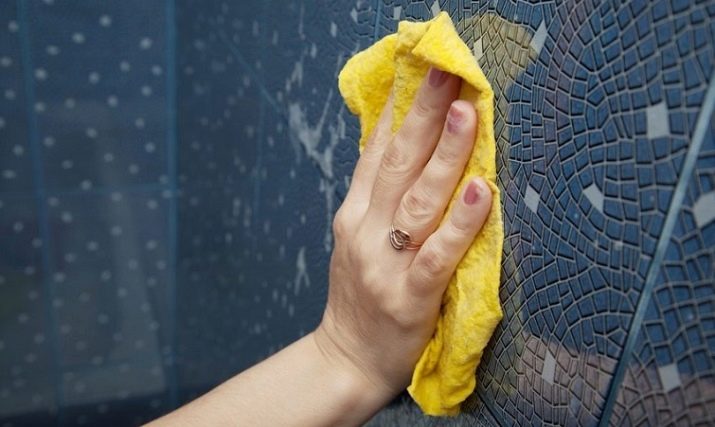
How to care?
Caring for plastic panels is easy. It is enough to regularly wipe them with a damp cloth, without waiting for them to splash with water, which is typical for most apartment buildings. Dirt from the seams can be removed hard brush or toothbrush. In order not to push through the surface of the lamellas, it is worth using a flannel cloth or a foam rubber sponge to clean them.
It is undesirable to use cleaning powders with abrasive. It may cause scratches
It is better to use liquid gels, but in order to choose the right product, you need to pay attention to which plastic it is intended for.

Someone washes the panels with ordinary laundry soap, and then wipes them dry. In the most advanced cases, they use baking soda, applying it to pollution and removing it after an hour.
Some people prefer using a melamine sponge. However, in any case, the panels should be washed delicately so as not to push through the material and scratch the pattern. No need to rub many times in one place, there is no need to use aggressive chemicals.
Mounting methods
To date, there are several methods for installing PVC panels, while mounting on the crate is considered the most widely used. The frame structure is assembled from both metal profiles and plastic or wooden beams. If a tree is chosen for the crate, then it should be pre-treated with antiseptic agents. Standard metal profiles are usually used on the frame, and the size of wooden and plastic bars should not be less than 4 × 2.5 cm. They are attached to the wall and ceiling with screws, observing a step of 40 cm.
The lathing slats must be fixed perpendicular to the direction of the panels. At the same time, regardless of whether it will be a suspended ceiling, a panel or a screen, sheathing can be done both vertically and horizontally. The choice, as a rule, depends on the characteristics of the room and style. But it is worth noting that vertical mounting has its advantages. It provides an unhindered flow of water down
When assembling the crate, the structure should be further strengthened at the corners with supports, which are used as small sections of panels.
The installation process is as follows:
- Finishing starts from one of the corners of the room or from the door.First of all, the starting corner is fixed, it is attached to the surface with staples or nails. Then, using the fastening system, the first panel is installed, which is hammered to the frame with nails.
- The next step is the installation of the second panel, it is placed right next to the first and thus the cladding continues to the next corner.
- At the end of the sheathing, the finishing corner is fixed and the final panel is inserted into it. The joints between the elements are carefully coated with sealant and proceed with the installation of ceiling or floor plinths.
No less popular is the installation of PVC on special mounting clips; for this, a strong frame is made at the beginning. In the case when there are significant irregularities on the surfaces, plastic or plywood gaskets are placed under the planks and profiles and fixed with self-tapping screws. Similarly to the first method, an inner corner is fastened with clips near the door or in one of the corners, after which the first plate is inserted into the profile. Then a second one is placed in its groove and snaps with clips. Further, everything continues according to the previously described scheme.
If the bathroom is small, then frame installation is not considered the best option for it, since the design reduces the usable area of \u200b\u200bthe room. Therefore, for small bathrooms, panels are most often installed in a frameless way, on glue. The only disadvantage of this technology is that it requires a perfectly flat surface, so the ceiling and walls have to be well prepared for sheathing. To fix the material, you should purchase special adhesive mixtures that do not contain organic solvents in their composition, as they adversely affect the plastic.A suitable tool for this is "liquid nails", they require no more than one can per 5 m2.
Installation of panels on glue is carried out in several stages:
First of all, dry the working base well with a heat gun or a building hair dryer. Then the surface is primed with an antiseptic.
After that, the walls and ceiling should be leveled so that the differences do not exceed 3 mm. The presence of minor tubercles and caverns is allowed, they are easy to cut with a grinder
Sheathing elements that are adjacent to the floor and ceiling are cut off, fastened with dowels and decorated with skirting boards.