- Preparation of the base of a water-heated floor
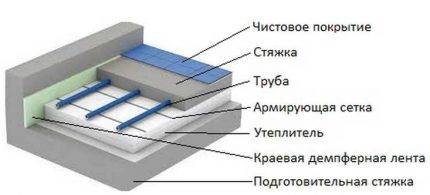
- The device of the base under a heat-insulated floor.
- Warming and waterproofing.
- Recommendations for choosing mats
- Design Features
- Contour laying methods
- Insulation - type and thickness
- The choice of the collector-mixing unit
- Important factors when choosing floor insulation
- Choice of ceramics
- Features of laying insulation
- No. 1 - slab laying technology
- No. 2 - installation of roll materials
- No. 3 - mat mounting scheme
- Features of the material for the production of mats
- LOGICPIR Floor from TECHNONICOL
- Step-by-step instructions for installing LOGICPIR boards Floor
- Tips for laying thermal insulation
- Mounting Features
- Insulation for various bases
- floor slabs
- Ground insulation
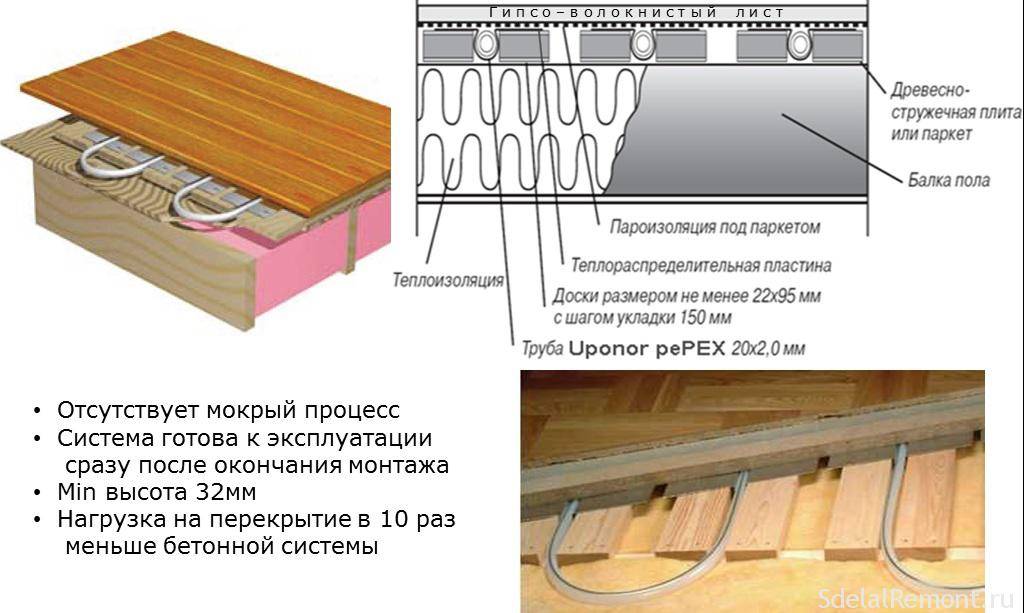
- Floor in a wooden house
- Conclusion
Preparation of the base of a water-heated floor
After designing, it is necessary to remove debris from the room, check the evenness of the surface with a level. This design does not require a flat surface. Correction is required only when there is a slope. In this case, the base will have to be leveled before the screed, since if the pipes lie at different heights, the floor will warm up unevenly.
The next step is to add clean sand or cement. The last mixture must be moistened for a denser styling. For 10 buckets of sand, 1 bucket of cement is taken.The layer is poured gradually, as a rule, drops are removed.
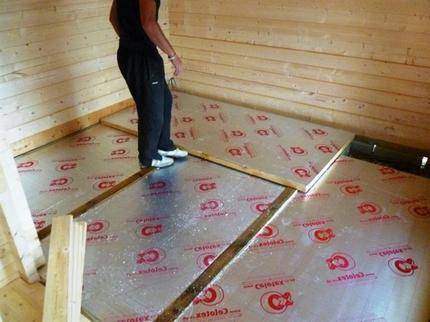
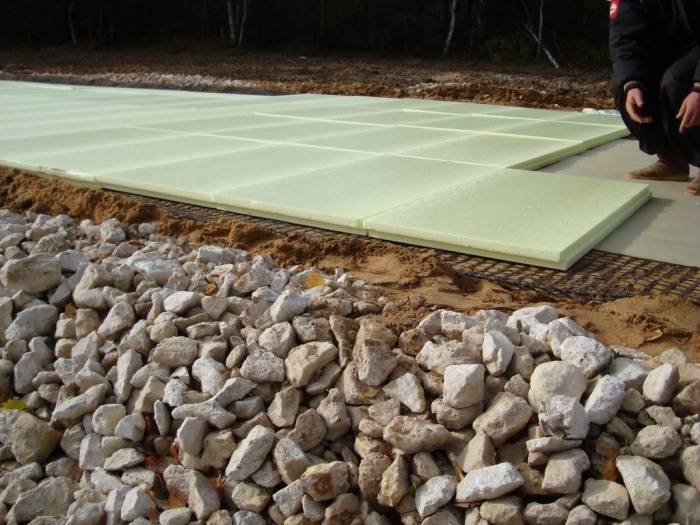
You can make a rough concrete screed, but this will only increase the cost of the work and take a lot of time. The bedding is well rammed manually or by special mechanisms. A heat-insulating layer is laid on an already flat surface. Some people place a layer of film first, but this is not necessary. Usually stack sheets of "extrusion" foam.
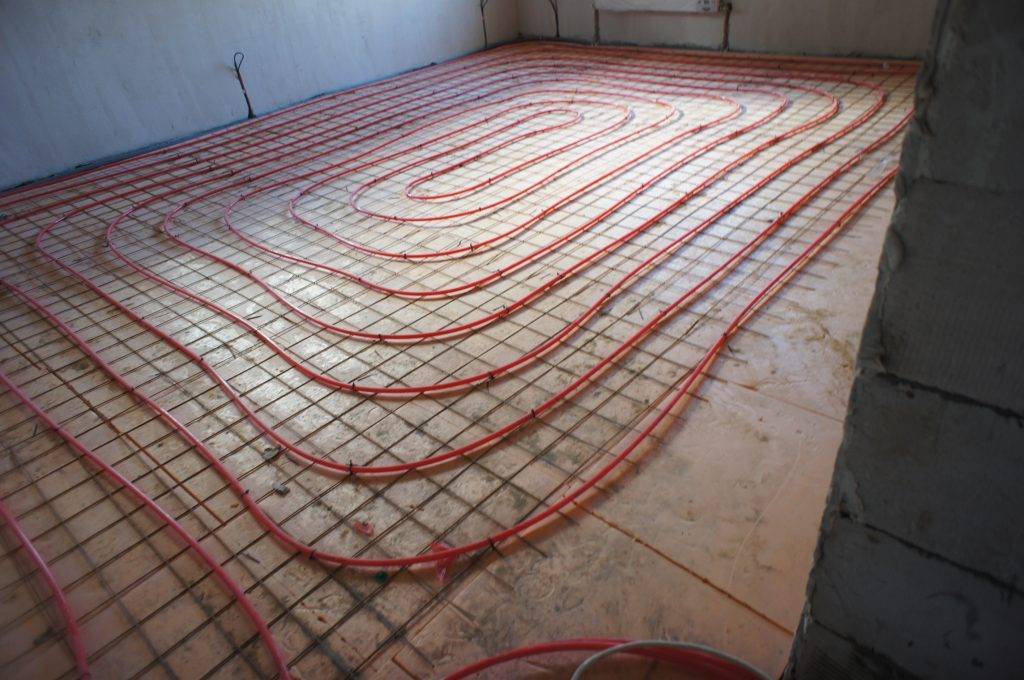
It is necessary to lay sheets from the left corner of the window. Building foam in cylinders is suitable for hitching mats so that the structure does not move apart. The second sheet and the subsequent ones should first be tried on, if necessary, cut out the places of the protrusions with a clerical knife. After laying, you should additionally go through the seams with foam. When the thermal insulation layer is laid, welded meshes are laid out on the surface, which attract the dowel-nails to the foam. Fasteners need to be twisted so as not to crush the sheet.
Grids are different, so you need to look at the size of the cells, which affect the evenness of the entire structure. Contrary to popular belief, the mesh does not have a reinforcing function, it is used only for the convenience of pipe installation. For a perfect screed, it is better to use polypropylene fiber. When the preparation of the base is completed, it is the turn of the installation of pipes.
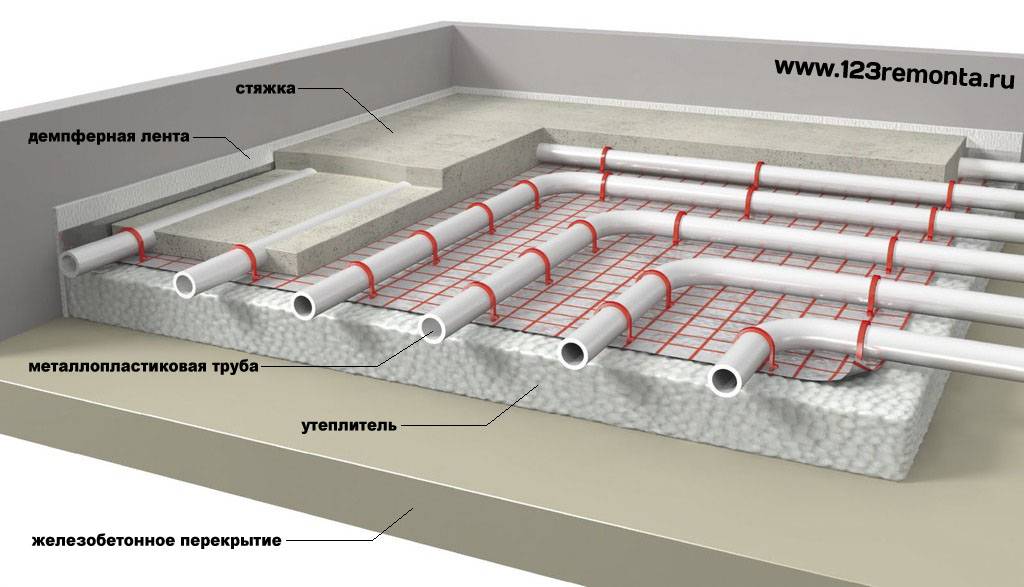
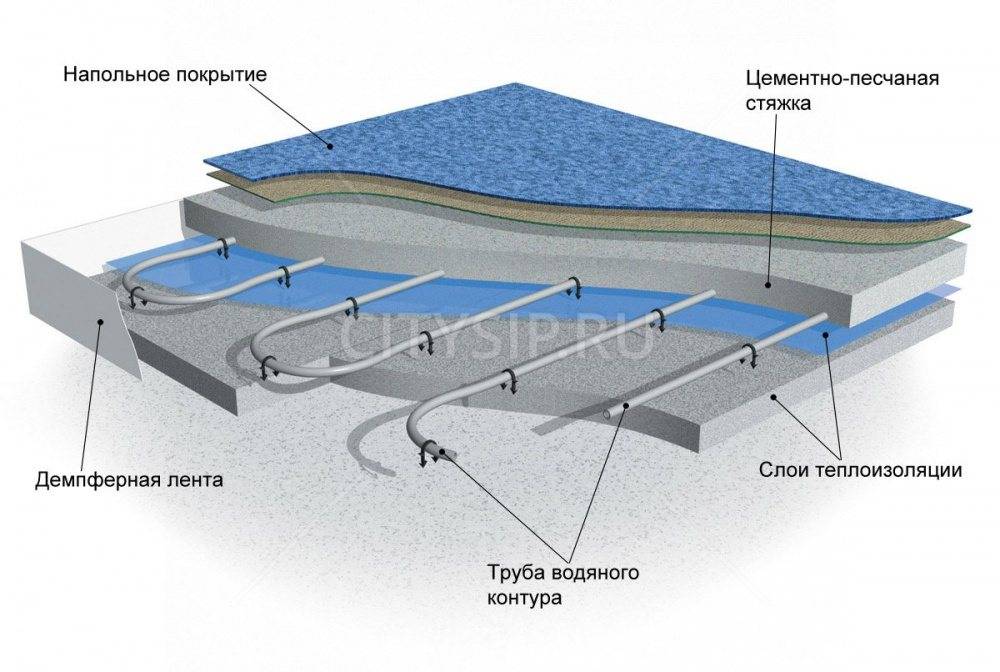
The device of the base under a heat-insulated floor.
Underfloor heating must be installed on a solid foundation. For example, on a concrete slab. Then the thickness of the “general” floor layer will not exceed 8 cm. When laying the floor directly on the ground, it is required to level it as much as possible and insulate it as best as possible. The thickness of the insulation will depend on the weather conditions of the area and the specific location.In the event that the warm floor is laid above the basement, or on floors above the first, the thickness of the insulation will be the smallest. About 3 cm.
Warming and waterproofing.
Instead of a dense plastic film, roofing material can be used. Pieces are cut from a roll of film or roofing material along the length of the room and laid with an overlap on each other (an overlap of about 20 cm.) Also, the waterproofing must be wrapped on the walls.
A heater is placed on top of the laid out waterproofing, which serves to retain heat in the room. Of the many options that modern manufacturers can offer, professionals advise choosing from two options:
- Extruded polystyrene foam. Has all the necessary benefits. It has low thermal conductivity, high moisture resistance. It is also very wear resistant.
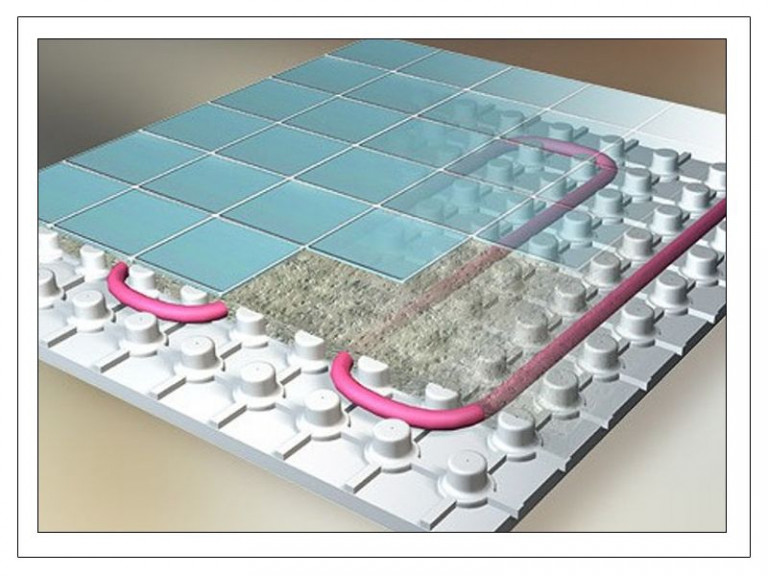
- Expanded polystyrene in the form of profile mats. The main feature of this type of insulation is the surface with protrusions. This makes pipe laying easier. The pitch of the protrusions in this insulation is 5 cm. The main disadvantage is the increased cost compared to EPS.
When choosing the thickness of the insulation layer, several important conditions should be taken into account.
- When laying insulation directly on the ground, its thickness must be at least 10 cm. You can also consider the option of two-level installation. Two layers of insulation 5 cm thick.
- When laying out the insulation in the room under which the basement is located, a layer of 5 cm.
- When laying on all subsequent floors, its thickness is possible up to 3 cm.
To fix the insulation, you will need dowels-umbrellas, or dish-shaped dowels. For fixing pipes, harpoon brackets are needed.
The procedure for laying out the insulation:
- Level the surface where the insulation will lie. This is best done with sand or a rough screed.
- Laying pieces of waterproofing. The seams must be taped.
- Directly laying out insulation boards butt-to-butt. (marked side should be on top)
- The seams between the plates must also be glued with adhesive tape.
- Fasten the insulation with dowels.
If you are laying insulation in two layers, you should follow the principle of brickwork. The seams of the top and bottom layers should not match.
Recommendations for choosing mats
When choosing a heater, you should pay attention to such various technical and operational indicators. Main selection criteria:
Main selection criteria:
- waterproofing;
- the ability of the material to withstand static and dynamic loads;
- pipe diameter;
- features of the room in which the laying of the water floor.
So, roll material, due to its low waterproofing characteristics, is not suitable for laying on basement floors.
It should also be used with caution in apartments where people live below, because in the event of a pipe leak, it will not be able to retain moisture, and water will flow directly into the neighboring apartment.
Sheet mats and foiled polystyrene foam blocks, on the contrary, have good waterproofing qualities, which eliminates the possibility of leakage. In addition, they are materials whose thermal conductivity is very low, due to which, when they are used, the maximum level of heat transfer to the floor is ensured.
When organizing a water-heated floor, such a material characteristic as load retention is of no less importance.Profile mats made of expanded polystyrene with a density of 40 kg / m3 perfectly cope with this. Flat slabs and foil mats also have a high density.
These heaters can be safely used to organize an underfloor heating system in an apartment or in a private house, which will be used as the main heating.
But the rolled material remains outsiders in this position as well. Its density is not enough to withstand loads, so it can only be used to organize additional heating.
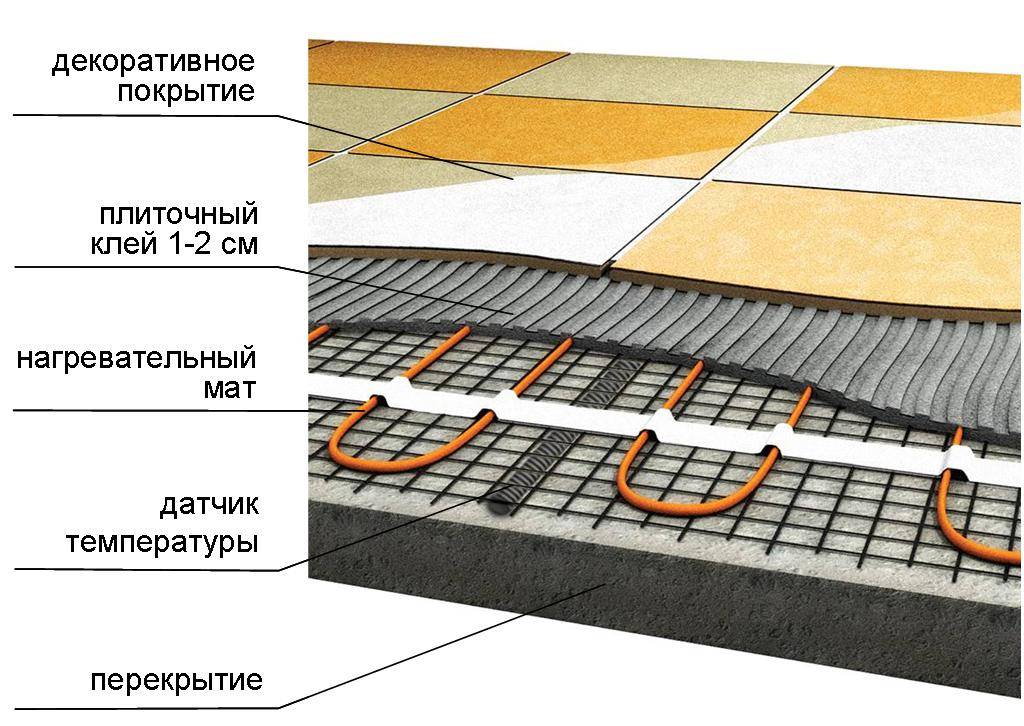
The above diagram shows what values the total thickness of the layers of the water floor is made up of, and what height of the room it can take (+)
Another parameter to take into account is the thickness of the mat. If there is already some kind of thermal insulation on the floor, thinner slabs can be used.
Also, the height of the room itself, the diameter of the pipes, the thickness of the future screed and the floor facing are taken into account.
Design Features
No more than 90-100 meters of pipe should be diverted to one circuit. Otherwise, the water in the return section will lose too much heat. For one circuit, the optimal length is considered to be 70-80 m. In addition, the longer the length, the stronger the resistance. All heated rooms should be divided into circuits of approximately the same length. Calculations are carried out using a specialized calculator. The pipe pitch at the walls is chosen in accordance with the temperature behind these walls. The standard interval values are in the corridor of 10-30 cm. It is permissible to go beyond these limits, but if it is exceeded, alternating sections with noticeably different temperatures will appear.Gaps shorter than 10 cm can lead to tube bending problems. The Underfloor Heating Calculator will require you to enter data such as type of flooring, water supply temperature, and treatment temperature.


Other information to calculate in the calculator:
- pipe pitch;
- its variety;
- screed thickness above the contour.
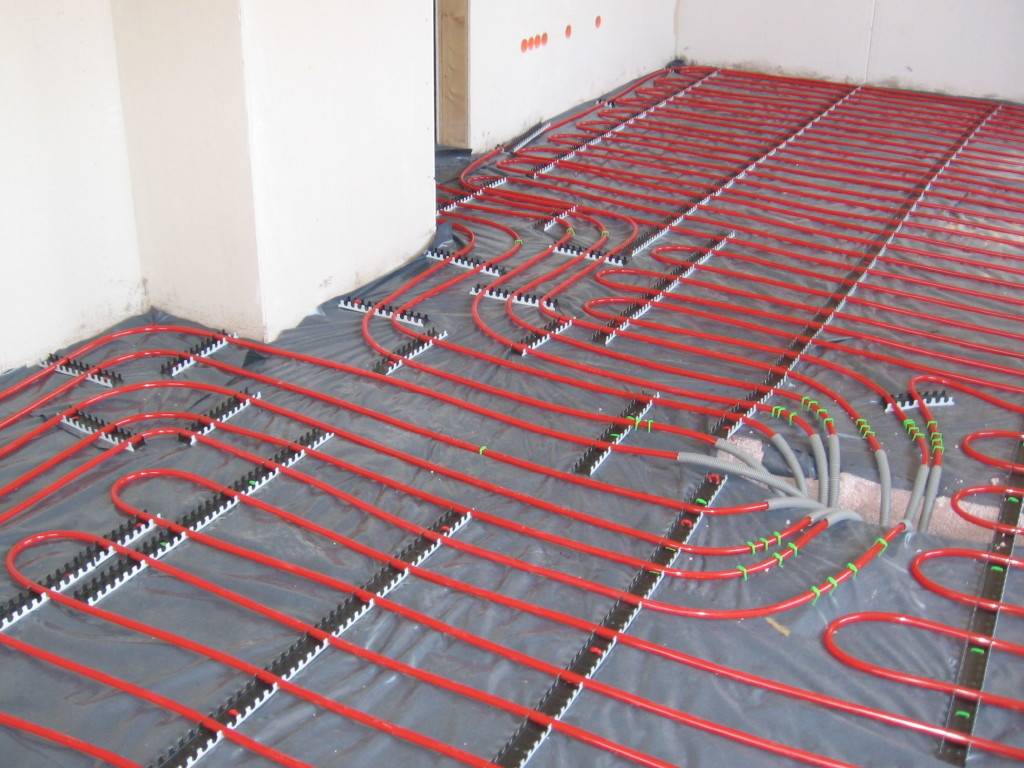
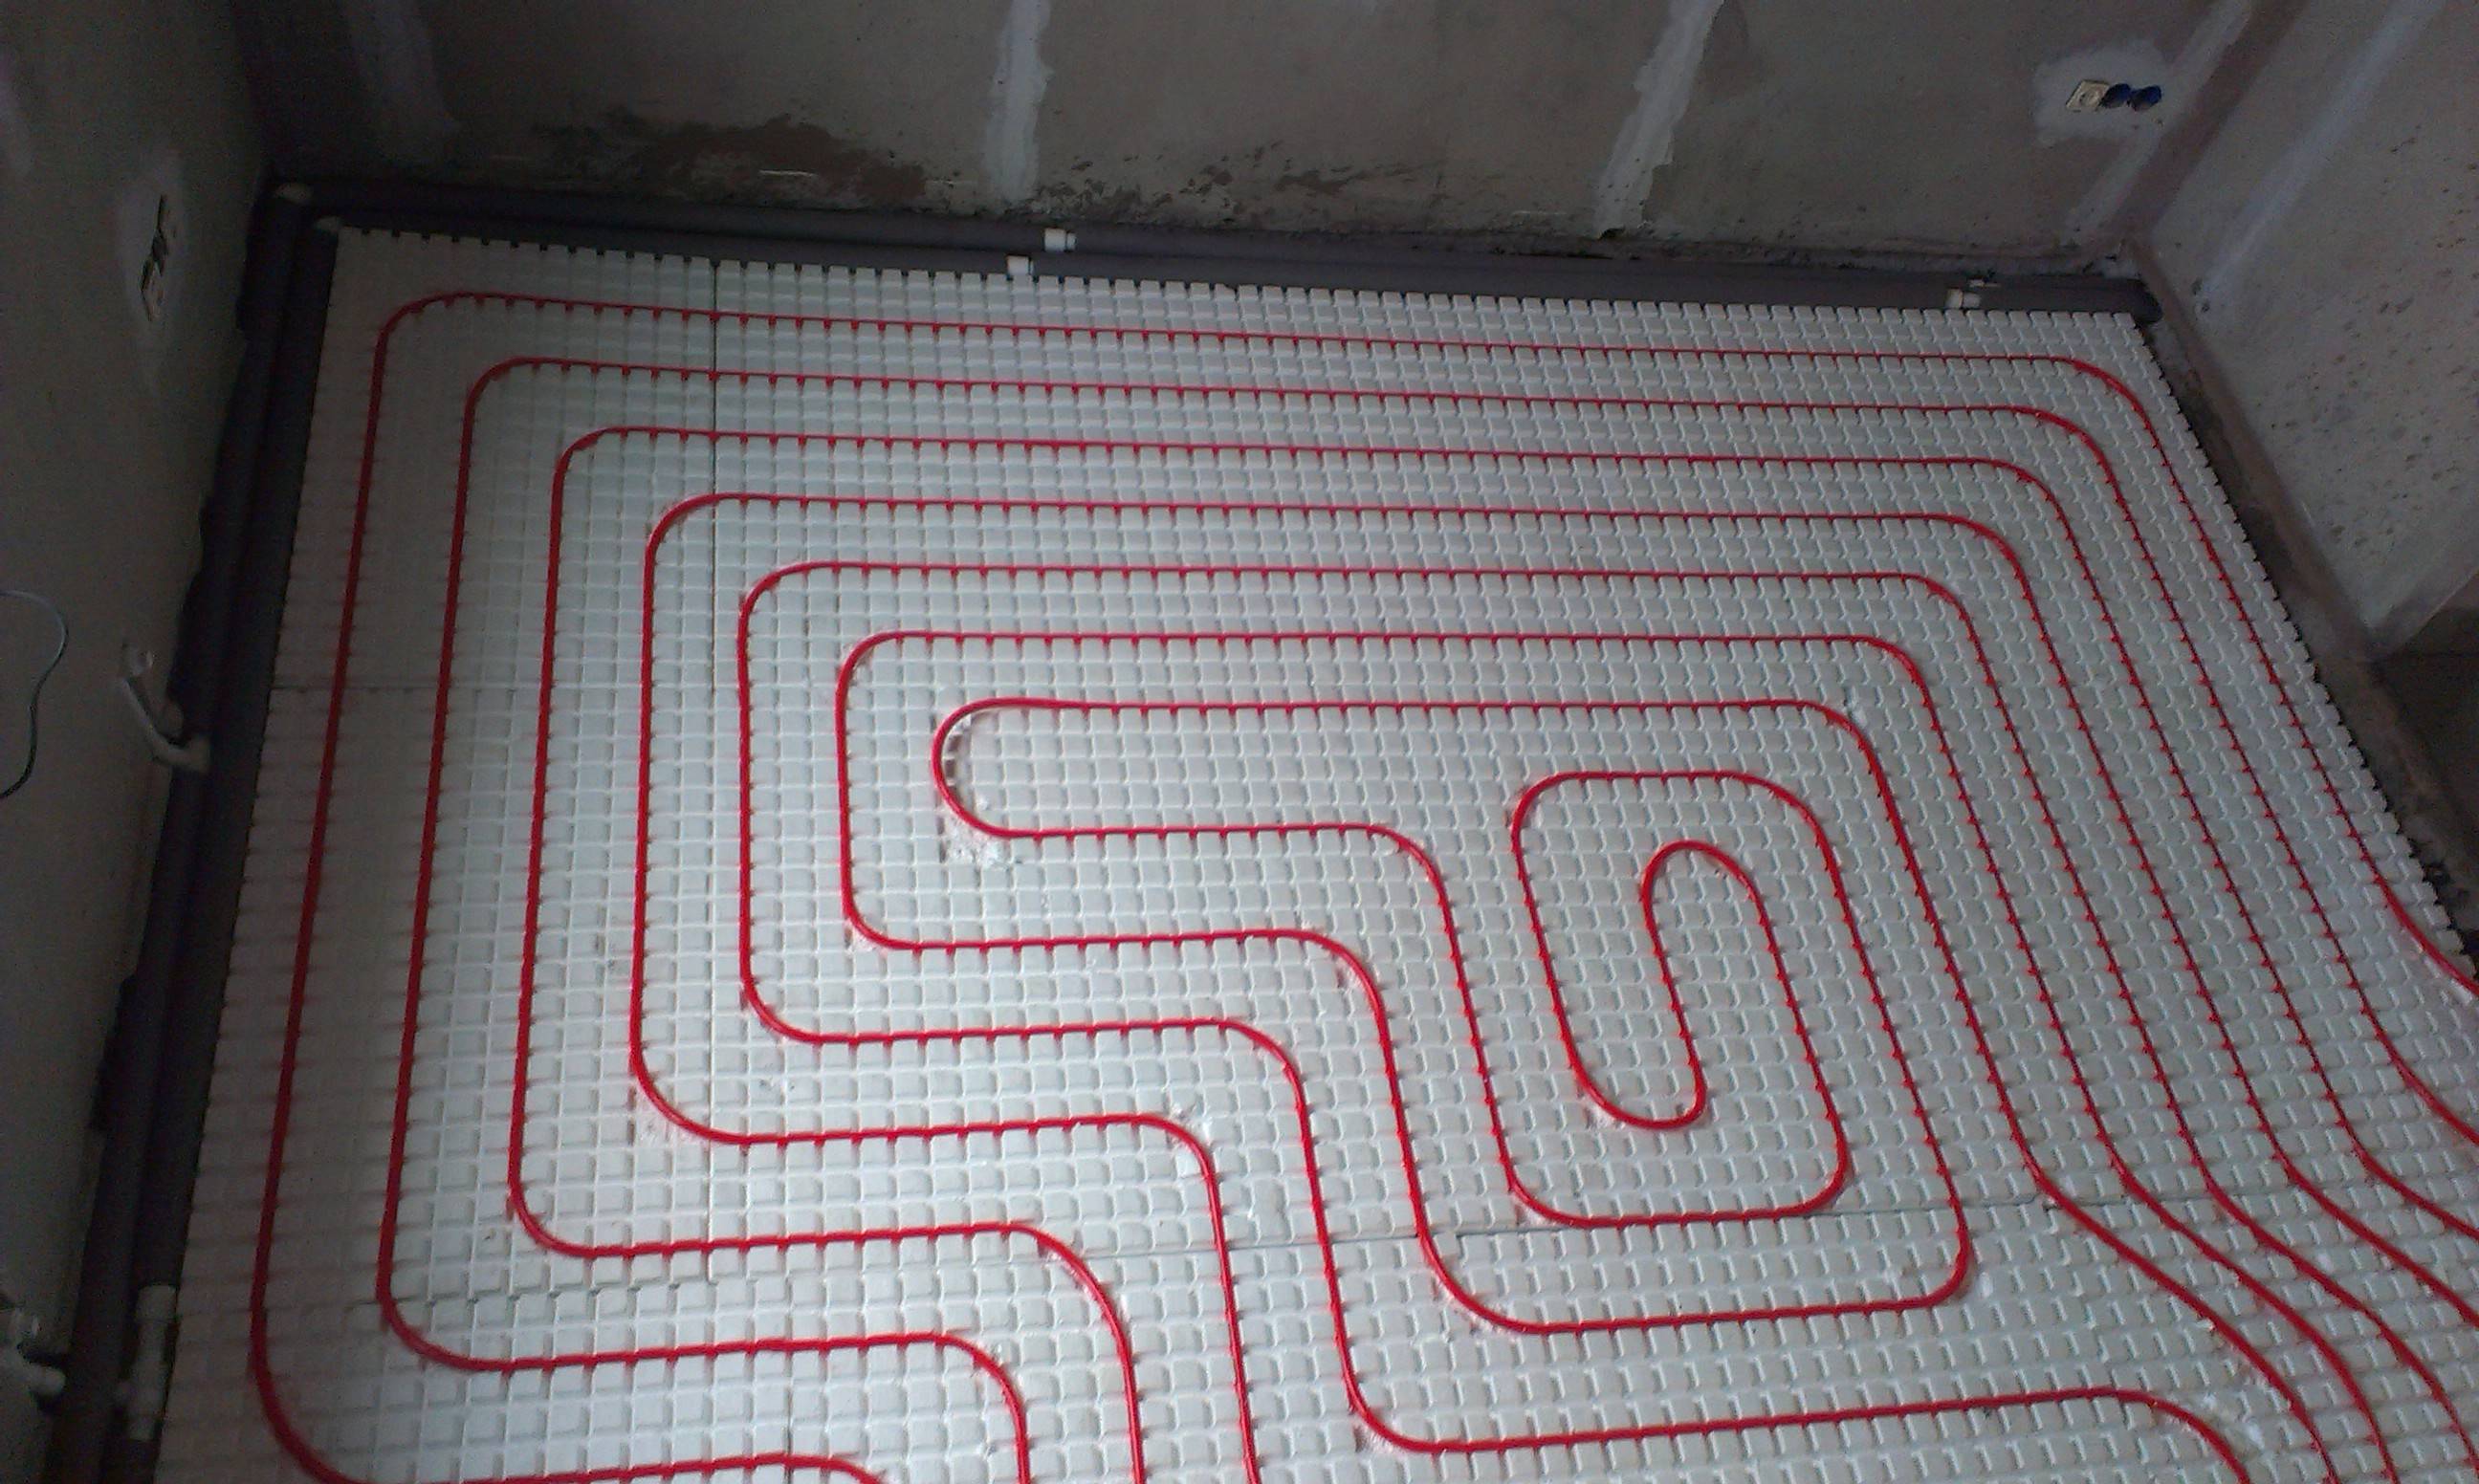
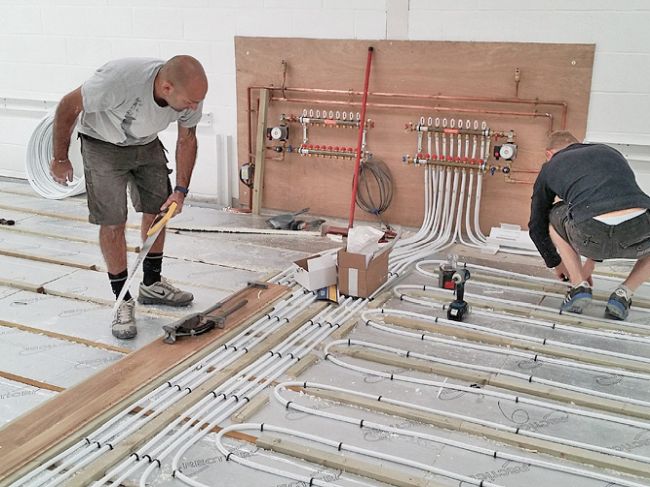
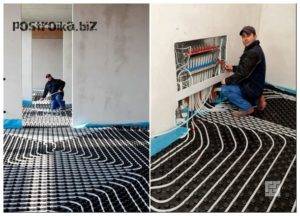
Contour laying methods
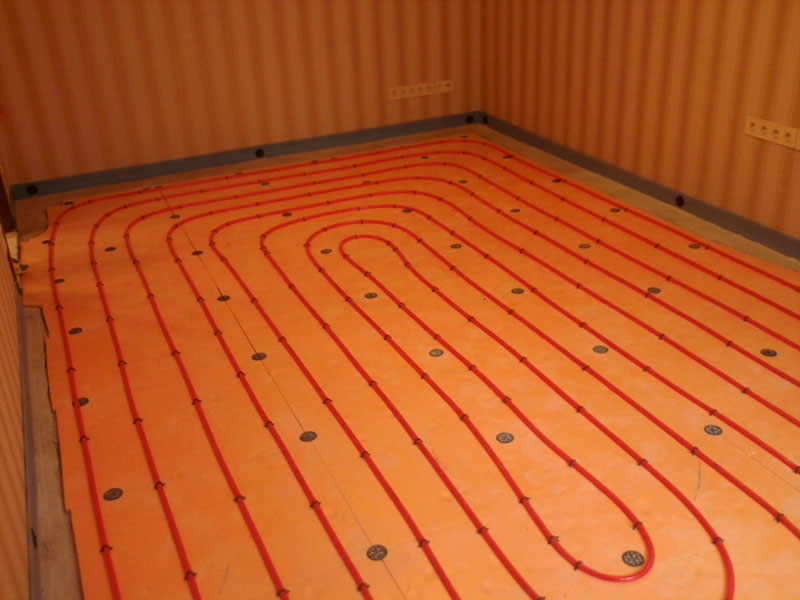
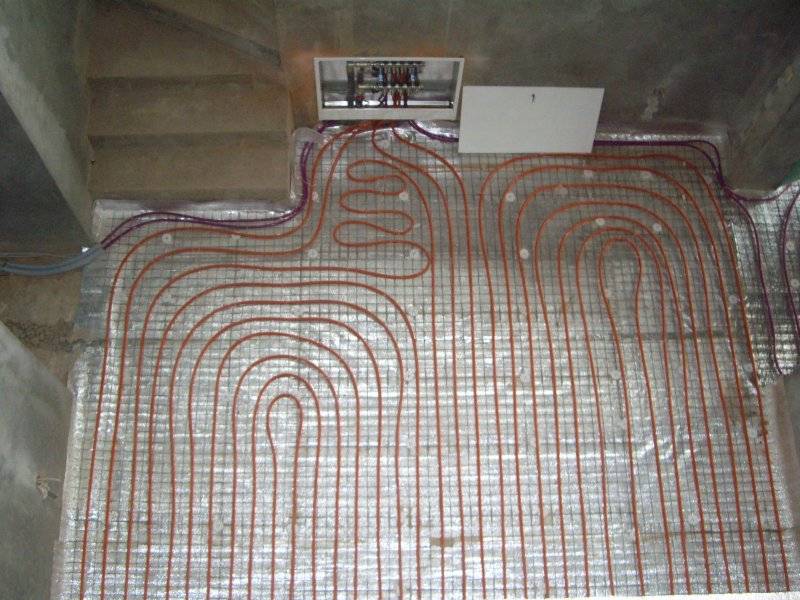
The pipes of the heating structure differ in pattern: they can look like a snake, a snail, etc. The quality of heat distribution in the room, including on the floor itself, depends on the laying of the circuit.
As a result of movement through the pipes, the liquid cools down, so it is important to establish perfect circulation. For the same reason, the system is mounted starting from the walls, moving towards the exit or center.
The most common configurations are in the form of a snail shell, snake and combined. The coiled tube can have single or double/triple bends. The figures are formed in straight lines near three walls, and only next to one do the transition to the desired figure. If we are talking about a snake, then one of the sides will be wavy. Lines of repeating bends are formed, as a rule, along the diagonals of the room. The water supply is organized so that in each of the larger and closer to the walls turns, the water temperature is approximately 1 ° C higher.

Insulation - type and thickness
The ideal thickness of the thermal insulation layer depends on the structure of the material. In the case of mineral wool, 50 mm is enough, but loose heaters will need up to 150 mm. Another popular option is styrofoam.Mineral wool is good for its ability to organize moisture exchange equally well and keep the temperature at a constant level. High humidity itself is a problem for mineral wool. A material oversaturated with moisture will not be able to normally perform a heat-insulating function. Loose heaters are a budget material. But in some situations it will not be possible to lay out a sufficient layer of such thermal protection. Styrofoam is not suitable in some cases, because it is not able to conduct steam. The moisture accumulated on the insulation will become an environment for the appearance of mold and fungus. For wooden floors, foam is an unacceptable option.

The choice of the collector-mixing unit
An important element of the heating system. All loops and branches converge here. The mixing of hot and cold streams to a predetermined temperature immediately takes place. AT collector-mixing unit (distribution cabinet) there are valves for regulating the volume of water in the circuits and, accordingly, its temperature, as well as the same indicator in the entire system. To make the right choice, you need to consider 3 main nuances. The number of valves must match the number of water inlet/outlet lines. Five circuits of the water system will need 10 valves. The second aspect is management. Preference is given to adjustable valves. They provide the ability to separately configure branches
This is important not only because the rooms need different temperatures, but also because of the uneven distribution of heat between them, especially at different distances from the node. It is advisable to get a system with a valve to eliminate air bubbles

Important factors when choosing floor insulation
The choice of one or another insulation for your future warm water floors should be approached, after weighing the pros and cons. This must also be done in order to continue to enjoy warmth and comfort, and not to think about how to carve out free time and set aside a certain amount to redo low-quality insulation.
This is especially true for those who live in private houses or in the conditions of the north, if the insulation is not done with sufficient quality, that is, there is a risk of freezing of the heating pipes that will pass under the floor, or simply from the warm floors made, there will be no proper effect, the room will warm up badly.
In order to choose the right insulation and insulation method, from a variety of options, you need to consider the following factors:
- The climatic zone of your residence and the average temperature in winter.
- Consider also what temperature in the room will be optimal for you, and you will be able to fully feel the comfort and warmth.
Warm insulated floor - comfortable living
- The conditions of your residence - (the floor on which the apartment is located, a comfortable apartment or a private house), for apartments located on the ground floors, and for private houses, it is recommended that the insulation for the water floor be at least 50 mm thick.
- Ask the seller about such characteristics of the insulation as sound insulation and its thermal conductivity.
It is important to consider that no matter where you live, in a private house or in a comfortable apartment. Even a well-insulated floor with water heating will not give you the desired effect if you do not timely insulate plastic windows, because not only through the floor, but through poorly insulated doors and windows, a lot of precious heat is lost
Choice of ceramics
In order to choose a quality tile material that will be used as the main floor covering, it is necessary that it meets some basic requirements.
Requirements:
- a high level of security, the presence of which requires water-heated floors;
- strength indicator;
- resistance to possible temperature changes that occur when heating rooms of any size;
- the required indicator of thermal conductivity and density of the material used.
In addition to using tiles on water-heated floors, it is possible to install other facing materials:
- brooms, but not glazed;
- granite;
- glazed clinker;
- marble;
- porcelain tile.
The warm water floor and the materials used for its arrangement must have a high level of porosity. That is why the use of terracotta is not recommended. Such a device involves the use of various grouts and adhesives that have been specially designed to work with warm water floors. They are as elastic as possible even after passing through the rejection stage. Able to compensate for the temperature difference that occurs between the tile and the base.


Features of laying insulation
The substrate mounting scheme depends on the type of materials used. But in any case, it must be placed on the most even surface.
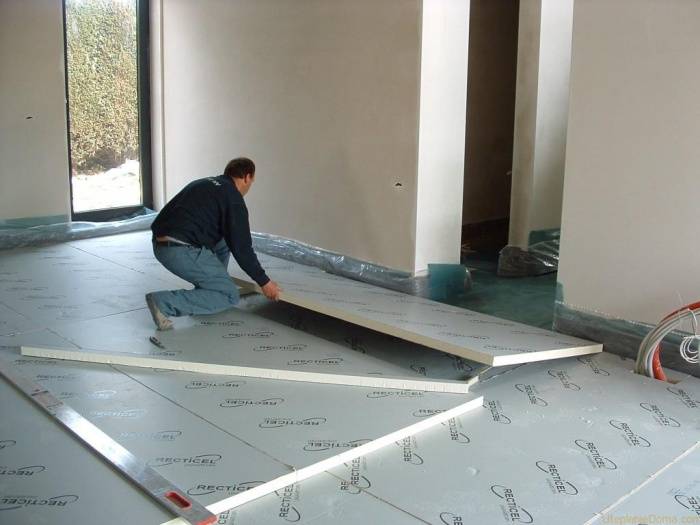
No. 1 - slab laying technology
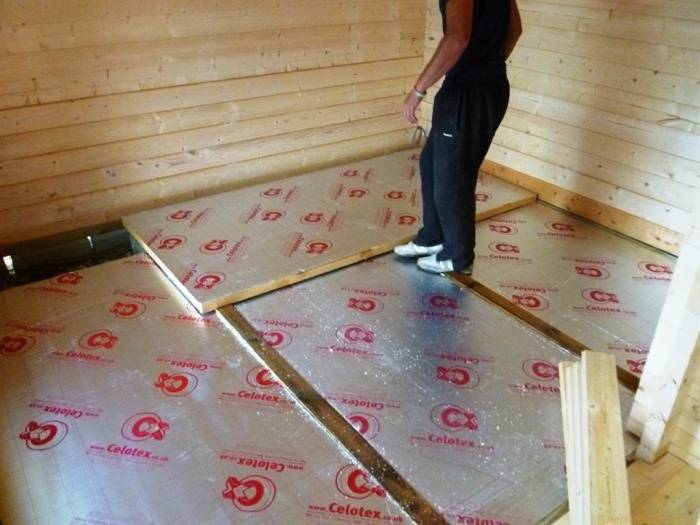
The substrate, constructed from boards with mounting chamfer, is assembled easily - according to the principle of the designer. Plates are easy to fit and measure. You can cut the plates to the appropriate dimensions with an ordinary knife.
The ease of laying the substrate is convenient because during installation at any time you can change the configuration of the contours and the length of the pipelines. So that the plates of the material do not move relative to each other during installation and operation, their joints are glued with construction tape.
In order to prevent the formation of heat-conducting bridges, the contour seams between adjacent plates are glued with foil tape
The sequence of actions when laying insulating boards:
- Styrofoam plates are laid on a cleaned and leveled base, fixing them with special plastic brackets, anchor dowels or planting them on an adhesive composition.
- A foil layer is laid on top of the stacked and docked plates.
- The top layer is lined with a reinforcing mesh, on which pipes are subsequently mounted.
If the concrete screed of the base floor is poured with significant deviations from the level or has gross cracks and irregularities, or the concrete slabs are laid with violations, it is better to build a frame before laying the substrate. For this, wooden logs are assembled from a dry and even beam with a section of 50x50, 50x100 or 100x100 mm.
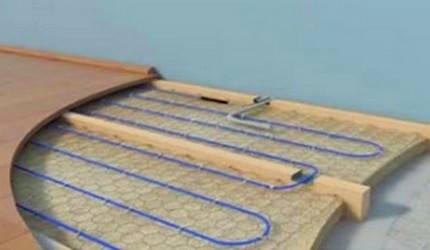
Logs are placed at an equidistant distance of 60 cm, cuts of mineral wool or foam boards are laid between them
A distance of 60 cm between the lags is considered the best option, since with such a “step” no additional crate is required. The main thing is that the logs are located in the same plane and lie strictly in level.
Thermal insulation boards must be tightly packed between wooden joists. If there are gaps - they must be blown out with mounting foam.
In laying plates made of extruded polystyrene foam, it is necessary to observe some nuances:
No. 2 - installation of roll materials
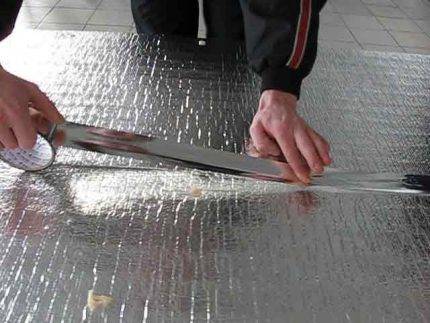
The laying of the roll material is carried out on a carefully leveled base and fixed to the base base using tile adhesive or double-sided tape. Cutting strips of the required size is performed with ordinary clerical scissors.
To compensate for the thermal expansion of the screed, it is recommended to place the foil layer with a slight overhang on the wall.
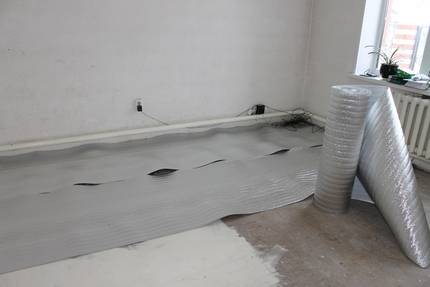
The foil material is placed with the metal side up so that the metallized surface best reflects heat.
When laying rolled materials, they are guided by the marking of printed mounting markings. It determines the distance between the contours and facilitates pipe laying. Typically, rolled materials at the edges have allowances for a foil polymer film to allow the connection of adjacent sheets.
When laying cuts, special attention is paid to expansion joints. To do this, the joints of the laid strips are glued with one-sided construction or metallized adhesive tape.
If a cork coating is used as a substrate, then before laying it, it is necessary to take care of reliable vapor and waterproofing.
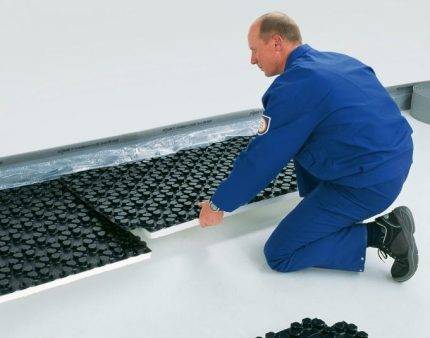
No. 3 - mat mounting scheme
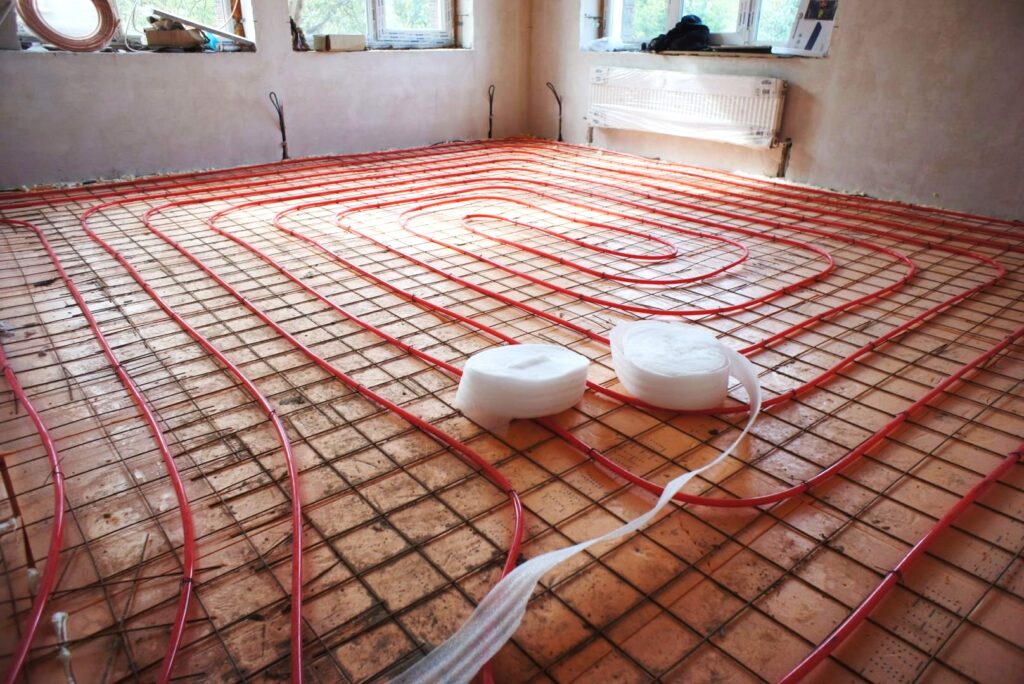
The stage preceding the laying of mats is the arrangement of film waterproofing. After laying it around the perimeter of the room, strips of damper tape are glued along the bottom of each of the walls.
Mats are laid on the prepared base, fastening the plates together by means of a locking system. To securely fasten plates of small thickness and light weight, an adhesive method is used and plastic harpoon brackets are used.
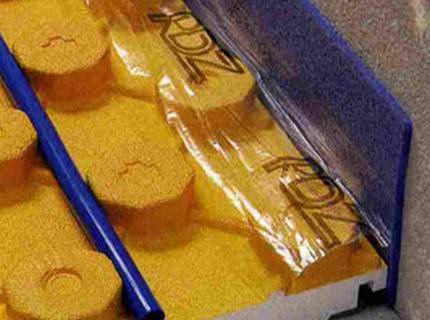
Some manufacturers, for ease of installation, complete with mats, apply edge strips, with which it is convenient to mark the exit areas from the heating zone
An important point: when laying mats, it is not allowed to use metal fasteners, since it can damage the integrity of not only the heat insulator, but also the waterproofing.
The choice of the optimal base for the thermal insulation substrate depends on your capabilities. Yes, a good underlay is not cheap. But it will significantly increase the functionality of the equipped water floor system.
Features of the material for the production of mats
Modern mats are made from extruded polystyrene foam - a material that not only has excellent thermal insulation properties, but also has a whole list of other advantages.
Main advantages:
- Low vapor permeability (0.05 mg (m * h * Pa). For comparison, this indicator for mineral wool is 0.30. This means that polystyrene foam does not pass water vapor well and does not accumulate moisture, it is constantly in a dry state, and as a result does not contribute to the formation of condensate .
- Low thermal conductivity, and hence the maximum preservation of heat in the room.
- Soundproof characteristics.
- Does not attract rodents and is not a breeding ground for the formation and development of microorganisms.
- Durability. According to the results of the tests (alternating high and low temperatures from plus 40 to minus 40 degrees and exposure to water), the service life of products made from this material is up to 60 years.
The mats use expanded polystyrene with a density of up to 40 kg / m3, so they perfectly withstand heavy loads.
This property is especially valuable when constructing a water floor, since a rather heavy structure is laid on top of the mats, consisting of water pipes, a layer of concrete and a finishing floor covering.
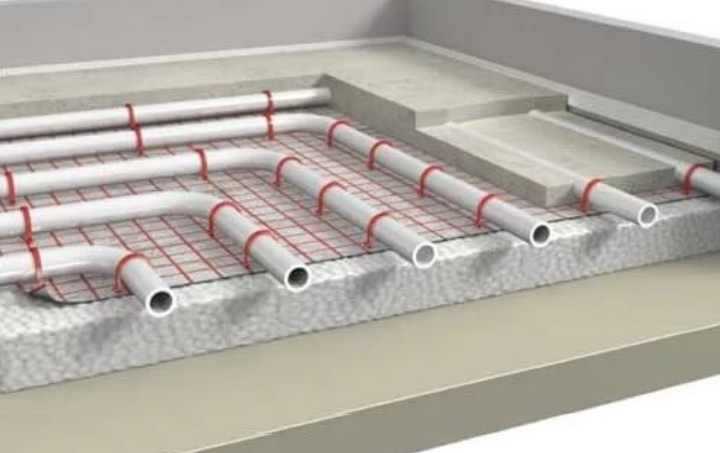
 The weight of the water floor heating system per 1 sq.m. is about 200 kg, the thickness of the layers is about 150 mm. The main load falls on the bottom layer. The high density of expanded polystyrene ensures the strength of the mats and allows them to support a heavy structure (+)


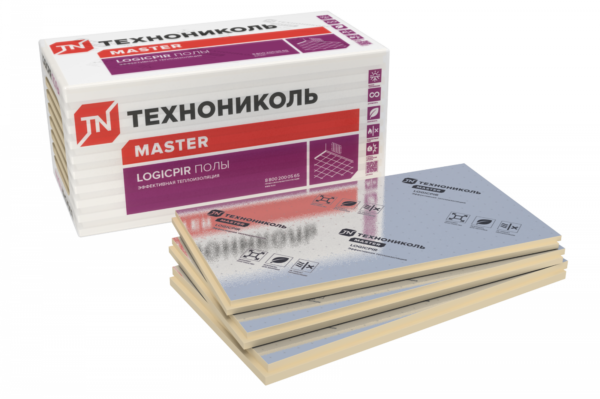
LOGICPIR Floor from TECHNONICOL
Innovative product LOGICPIR from TECHNONICOL
The insulation is made of rigid polyisocyanurate (PIR) foam with a closed-cell structure, laminated with aluminum foil on top and bottom, due to which the heat and sound insulating (impact noise) properties of 20 mm thick plates are higher than other materials of greater thickness.
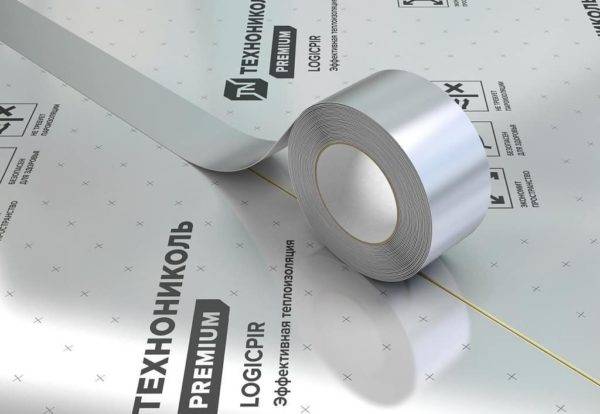
For the tightness of the thermal circuit, the plates with molded straight or four-sided L-shaped edges are tightly joined and glued at the seams with aluminum tape. Additional flooring of vapor barrier membranes is not required, this function is performed by foiling.
Due to their high insulating properties and minimum thickness, polyisocyanurate foam boards (TN-POL Thermo PIR system) are successfully used in the integration of all types of underfloor heating systems in dry and wet rooms of private houses and apartments, industrial complexes, public places (offices, bath complexes, etc.). .d.).
LOGICPIR Floor is an absolutely safe for health insulation with improved technical characteristics and a service life of more than 50 years, during which the performance of the materials remains stably unchanged.
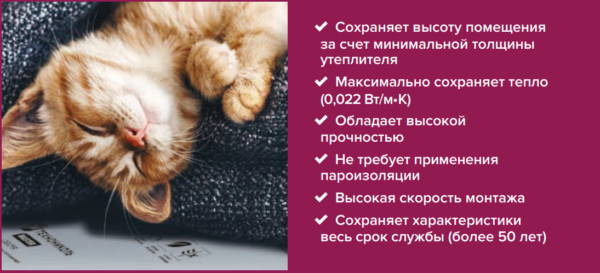
Benefits of LOGICPIR Floors
For the installation of insulation, a construction knife, a meter ruler, a self-adhesive polyethylene foam damper tape and aluminized tape are required. TECHNONICOL glue-foam may be required to isolate difficult places where communications pass (water pipes, sewerage pipes, heating risers) through the floors.
Perform styling under the power of any person. The insulation is easy to cut and has a very low weight.
Step-by-step instructions for installing LOGICPIR boards Floor
The preparatory stage consists in measuring the area of the room to be insulated and calculating the required number of plates.
Dimensions of plates with L-edge (length x width, mm):
- 1185x585;
- 1190x590.

Thermal insulation board Logicpir Floors L
Plates with a flat end are produced in one standard size 1200x600 mm, but if necessary, it is possible to manufacture PIR plates of other sizes by agreement.
To find out the number of plates, you must use the formula:
S total (total area of insulation) / S plates. (the area of one plate).
The resulting value remains divided by the number of units of insulation in one pack and rounded up, that is how many packs will be required to insulate the room.
Packaging of LOGICPIR insulation Floors
The next step in the preparatory process is cleaning the surface of construction debris, dust, grease and oil stains, traces of paint and plaster. Cracks in the subfloor must be repaired in advance with a repair mortar, after which it has completely dried, installation can begin.
The first stage is fixing the damper tape around the perimeter of the room. The recommended thickness of the tape is 8-10 mm, the width is 50 mm for straight sections and 100 mm for corners.
Stage two - laying PIR-plates with offset end joints in rows and gluing the joints with aluminum tape to create a continuous hermetic layer. Around communications, where it is difficult to tightly fit the insulation, it is recommended to apply glue-foam, also followed by sealing with adhesive tape.
Sealing board joints
This completes the installation of the heater. The next stage of work is the installation of a screed using wet or dry technology.


- Cement-sand screeds are poured with a layer of 40 mm with mandatory reinforcement.
- Prefabricated screeds are a flooring of two layers of sheet materials (GVL, GKL, plywood, chipboard, DSP), laid with offset joints and fixed with self-tapping screws.
Heating elements are laid either under the screed (electric water and liquid systems), or on top of the screed in a layer of tile adhesive (cable underfloor heating) or under the floor covering (infrared mats).
The final stage is the laying of the flooring in accordance with personal preferences (parquet board, laminate, porcelain stoneware, etc.).
With LOGICPIR Floors, the heat from the heating elements is dissipated purposefully upwards, uniform heating of the room and a consistently favorable microclimate are ensured. The absence of unwanted heat leaks allows you to lower the heating temperature of the coolant or heating elements to save costs, but without sacrificing comfort.
Tips for laying thermal insulation
Regardless of what type of mats will be used for a warm water floor, it is necessary to lay a layer of waterproofing under it. This is necessary to protect the lower layer from the penetration of moisture drops, as well as to create a strong barrier that can prevent flooding of the lower floors of the building in case of pipe leakage.
A dense polyethylene film, bituminous coating or penetrating waterproofing can serve as a waterproofing agent.
If a film is used, then it must be glued to the walls with a damper tape. The same tape is mounted around the entire perimeter of the room after laying the mats.
Installation of profile mats is quite easy, special locks contribute to the quick and high-quality assembly of heat-insulating material
The easiest installation option is when using profiled mats. They need to be laid on a layer of waterproofing and fastened together with a locking connection. Then, in the intervals between the bosses, the pipeline is laid using the chosen laying method, and by lightly pressing the legs of the pipes are fixed in the desired position.
Installation of flat polystyrene plates is also not particularly difficult. The panels are either fastened with locks, or simply glued to the waterproofing, and their joints are fixed with waterproof tape.
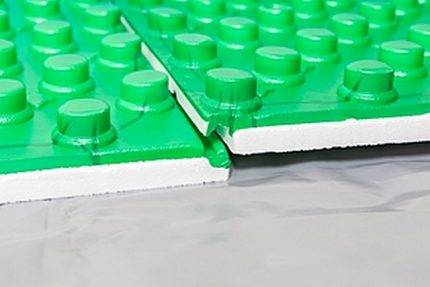
The lock connection allows you to simply and very quickly fasten polypropylene plates together
Most of all laying questions are caused by rolled insulation. It is placed in such a way that there is a foil layer on top. The heat insulator also needs to be glued to the base, and the joints between the tiles are connected with mounting tape.
Then markings are applied to it, and pipes are laid. Fixation of the pipeline is carried out using clamps or clips.
To fasten the rolled material, a special foil tape is used, which fixes the sheets and seals the joints between them.
The complexity of laying lies in the fact that thin and light insulation is very mobile. Therefore, it is necessary to make its screed very carefully so as not to move the structure fixed on it.
It should be noted that when laying mats of any kind, only plastic fasteners can be used, metal parts can damage the integral design of the mats and violate their tightness. Installation of the pipeline system can only be carried out after all the work on laying the thermal insulation has been completed.
Mounting Features
Before starting the installation of all elements of the underfloor heating, it is necessary to decide how the pipes will be connected. The most commonly used fittings are pressed, compression.
- Pipe connection
Rehau has introduced a push-on coupling and fitting method to securely connect XLPE pipes. During installation, a sliding sleeve is first installed on the pipe. After that, the expander (expander) increases the inner diameter of the pipe to the required parameters. This operation is performed in several steps.
Technology polyethylene pipe connections
Then the fitting of the fitting of the required size is attached to the stop. A sleeve is pushed onto the fitting over the pipe. Such a connection shows high resistance to a variety of negative influences, including high pressure or temperature.
Table of parameters for welding polyethylene pipes
With a special tool, the installation of a water circuit in accordance with the instructions is carried out quickly and does not require special skills. Since there are no rubber seals that wear out quickly in the system, the service life is extended, amounting to 50 years or more.
- Wiring diagram
In order to correctly carry out the installation, it is necessary at the design stage to draw up an exact diagram with the location of pipes, for example, from the Rehau collection, (single or double snake, spiral), observing the parameters recommended by specialists.
-
The optimal length of the water circuit is in the range from 40 to 60 meters, the maximum is 120 meters.
- The minimum pipe laying step is 10 cm, the maximum step is 35 cm. With a complex configuration of the room or in order to achieve the best heating, it is allowed to make different distances between adjacent pipes. For example, the step decreases in the sector of the outer wall or in the area next to the front door.
- Approximately 20 - 30 cm recede from the walls around the perimeter for laying the damper tape.
When purchasing pipes made of reliable cross-linked polyethylene, taking into account the reliability of the Rehau brand, their total length is first calculated according to the scheme.
- Tools
Installation begins with the purchase of a special tool that can be rented so as not to spend extra financial resources. For its products, Rehau offers a basic set of the Rautool brand, which includes the following varieties:

Mounting tool M1 Rehau
- scissors designed for cutting pipes;
- expansion expander;
- interchangeable nozzles with different diameters for the expander;
- manual press, necessary for crimping the compression sleeve, equipped with mounting pins and nozzles for sleeves of standardized diameters.
The kit may not include the special springs needed to bend the Rautitan Stabil tubes and will need to be purchased separately.
- The main stage of installation
The base must be free of dirt and leveled.If the height differences and defects are significant, a rough screed will be required. After that, a heater is laid, on which a polyethylene film is spread, and then a reinforcing mesh, to which the pipes are fixed with clamps. You can instead lay special mats with grooves.


Laying underfloor heating on the ground
Pipes laid according to the scheme are connected to the collector. It remains to check the warm floor for performance and perform a screed.
Insulation for various bases
The heat-insulated floor is mounted not only in apartments, but also in private houses. Some heaters for a warm water floor are universal, others are more suitable for specific situations. For example, in some dwellings, thermal insulation has to be laid on the ground, in others on wooden logs. For the first case, one that absorbs moisture well is not suitable. It is worth considering the general cases in more detail.
floor slabs
Concrete floor slabs are most often used in apartment or private houses with basements. In new buildings, they may be without a screed, so they will require additional maintenance. Due to the presence of a metal base in the floor slabs, they conduct heat very well. And this means that if they install a warm floor on them, then its efficiency will be low. That is why a rough screed is applied before starting work. Some masters use expanded clay as a filler for concrete. It creates an additional air gap, which provides blocking of heat escape. If there is a basement or other room below where there may be dampness, then it is desirable to lay waterproofing under the screed.
As an insulator for a warm floor, which will be laid on top, any of the listed heaters is suitable. For those sensitive to moisture, the rough screed and the insulator itself are waterproofed from above before pouring the finishing screed. Concrete slabs withstand the load well, so problems with the thickness of the screed should not arise.
Ground insulation
There are times when insulation has to be carried out directly on the ground. The reason for this may be the special design of the house. Before starting work, it is necessary to prepare the base well. To do this, you need to go deep to such a level that from the bottom point to the top point of the future floor was 50 cm. The bottom layer of soil is well rammed. If there is excess moisture in it, then it is necessary to dry it. This can be done by constant ventilation or the use of heat guns.
A gravel pillow is laid on top of the compacted soil. Its thickness should be not less than 20 cm. It is leveled and displayed approximately under the level. Next, medium-grained sand is poured at 20. It is compacted as much as possible and brought under the level. The next step is waterproofing, which will prevent the development of the fungus and excessive heat transfer. A heater is laid on the membrane. In this case, it is better to use penoplex. It has excellent compressive strength and does not absorb moisture. It is better if its thickness is 10 cm. Another layer of waterproofing is laid on it, then a reinforcing mesh and a floor heating pipe is laid, followed by a concrete screed.
Floor in a wooden house
Warming the floor under the water in a wooden house has several options.If the house has a rough concrete floor, then you can act as in the case of floor slabs. If there is a dry bulk insulation under the beams, then you can use the underfloor heating system with a dry screed. As a heater, you can use extruded polystyrene foam with bosses. But first you need to level the surface of the wooden floor and lay waterproofing on it. If the ceilings allow, then it is good to use a heater with a thickness of 10 cm.
In the case when the house stands on a pile foundation, then it will be necessary to insulate the underground well. To do this, the final floor is dismantled and the state of the log is assessed. If a fungus has already appeared on them, then you will need to scrape everything off and treat it with an antiseptic. Next, boards are stuffed onto the lower end of the log to form a small cavity. Waterproofing is laid in it, and a heater is placed on top. You can use stone wool or polystyrene foam. In the second case, with the same thickness with mineral wool, the effect will be better. The next step is to install another layer of waterproofing, and then a warm floor system with a dry screed.
Conclusion
Heated floors throughout the house will make life more comfortable. And now it is not an attribute of luxury, but an ordinary functional device. Warm water floors "compete" with electric ones, and as practice shows, many choose the first option. The heat from the water system is distributed more evenly, although the setup process requires a lot of manipulation. Despite the limitations in multi-apartment buildings, outside the city, installing a water system is easier and more profitable than an electric one. Structures are made of three basic materials: concrete, polystyrene or wood.In terms of aesthetics, the third option is better. It is easier to assemble a concrete structure with your own hands, if you do not take into account ready-made options from other materials. The latter can not always be combined with the parameters of the room. The shape of the pipelines of the water floor system, in turn, is selected only on an individual basis. In addition to the formation of the contours themselves, you need to select and install insulation, screed and topcoat.


