- Instrument selection
- Operating principle
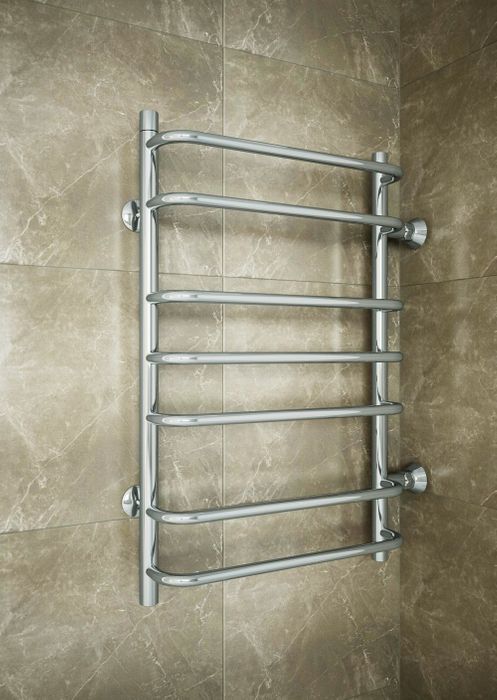
- Electric towel warmer TERMINUS
- How to connect a heated towel rail to the riser in the bathroom?
- Towel dryer connection technology
- Materials and tools
- Stages of installation of a water heated towel rail
- Connecting an electric towel warmer
- Installation and connection
- At what height do they hang
- How to accurately make holes in a tile
- How to make a hole for the socket and install it
- wall mount
- Step-by-step instruction
- Necessary tools
- Dismantling of old equipment
- How to properly install bypass and ball valves
- Fastening
- brackets
- supports
- Fitting
- Installation, tightening "American"
- mark
- Hole preparation
- Fixation
- Tightening fasteners
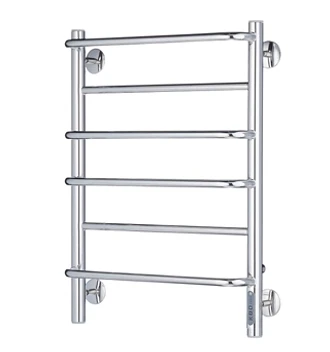
- Water heated towel rails
- Installing an electric towel warmer
- Do-it-yourself towel dryer installation
- How to install a water heated towel rail with your own hands
- Connection options
- Dismantling the old
- Conclusion and welding of pipes
- How to make a bypass in front of the device, installation of American women and taps
- Installation on polypropylene pipes with all fittings
Instrument selection
Operating principle
Dryers can be divided into three main groups.
- Water - connected to the heating system or HVO.
- Electrical, mains powered.
- Combined, combining these two principles.
Water are used most often.Their main advantage is that you do not need to pay for the coolant. The main disadvantage is the complexity of installation, especially if you plan to transfer the radiator. In the latter case, coordination with the management company will be required. In the event of an accident, the entire riser will be blocked. Another disadvantage is the possibility of leakage due to poor-quality installation or the wrong choice of product.
Electric towel warmer TERMINUS
Electrical appliances are safe, but they consume a lot of energy. They can be hung at any distance from the HVO and heating system. The battery is placed not only in the bathroom, but also in other rooms - dressing rooms, kitchens, hallways. They need a separate outlet to power them. In the bathroom or kitchen, it must have a residual current device.
Combined models ensure uninterrupted operation even when water or electricity is turned off.
How to connect a heated towel rail to the riser in the bathroom?
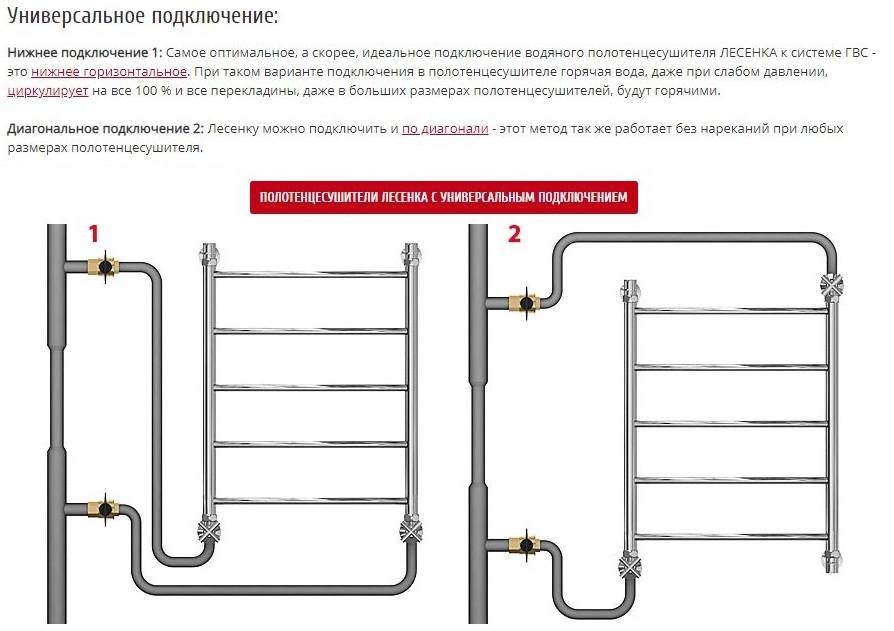
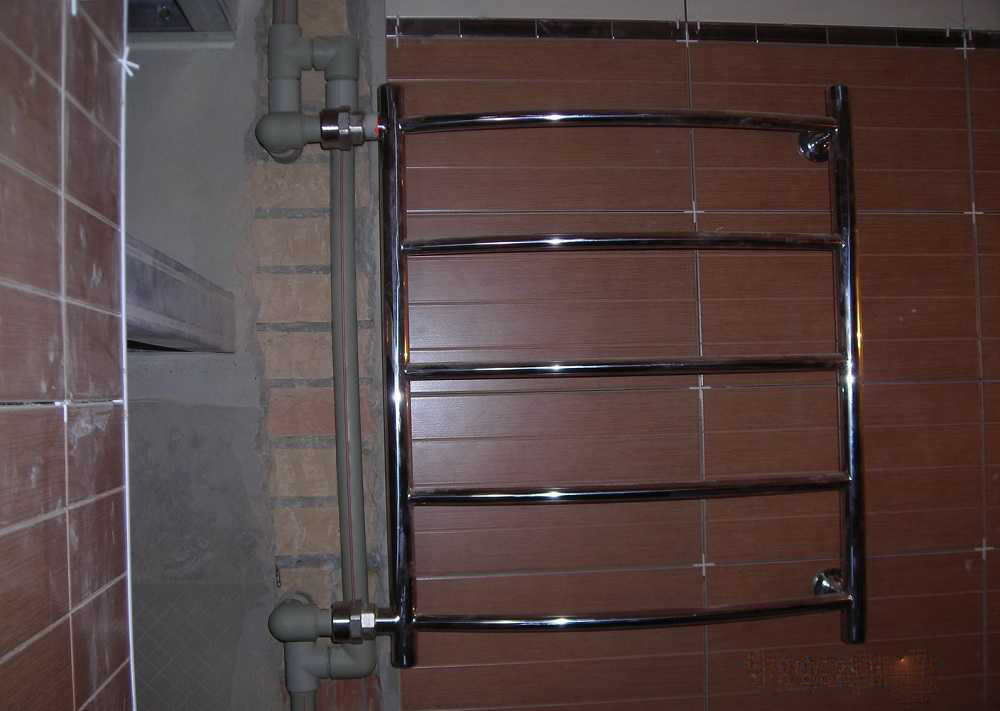
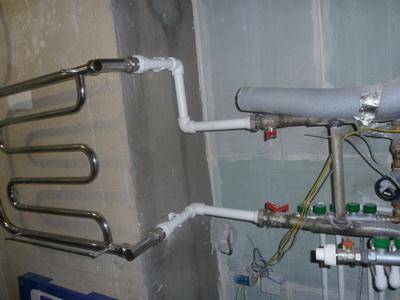
There are two ways to connect a water heated towel rail to a riser. If you have a riser with hot water, the heated towel rail crashes into it. Less commonly, a heated towel rail is connected to the heating system, but this is not advisable, since in this case the device will be hot only during the heating season, and the rest of the time it will not be of any use, except as a hanger. Towel dryers are electric and water. The article will talk about water ones, since electric ones do not require a tie-in to the riser and are installed as a floor heater, powered by the mains.
Before connecting a water heated towel rail to the riser, it may be necessary to dismantle the old heated towel rail that was already installed in your apartment before.Please note that before you connect the heated towel rail in the bathroom, you will have to go to the HOA and agree on turning off the hot water riser. Only after it is turned off will it be possible to begin work on dismantling the old heated towel rail and properly connecting the heated towel rail to the riser. In order to properly connect the heated towel rail to the riser, you can use several schemes
- Serial connection. The heated towel rail is connected to hot water supply. To do this, a branch is made from the pipe with hot water that goes to the mixer and the heated towel rail is connected there. The disadvantage of this method is that slightly warm water will come out of the tap.
-
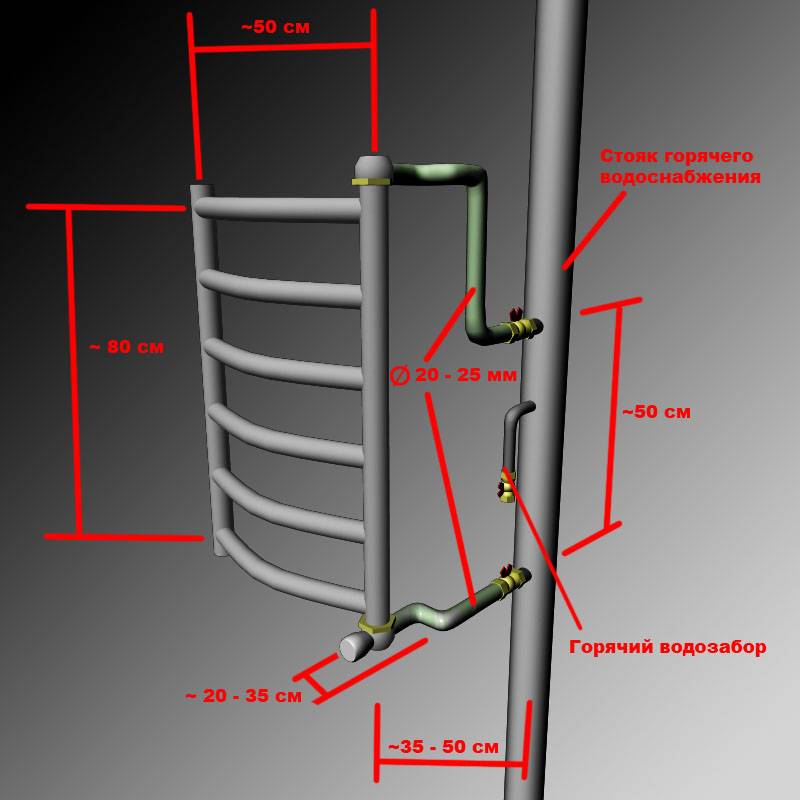
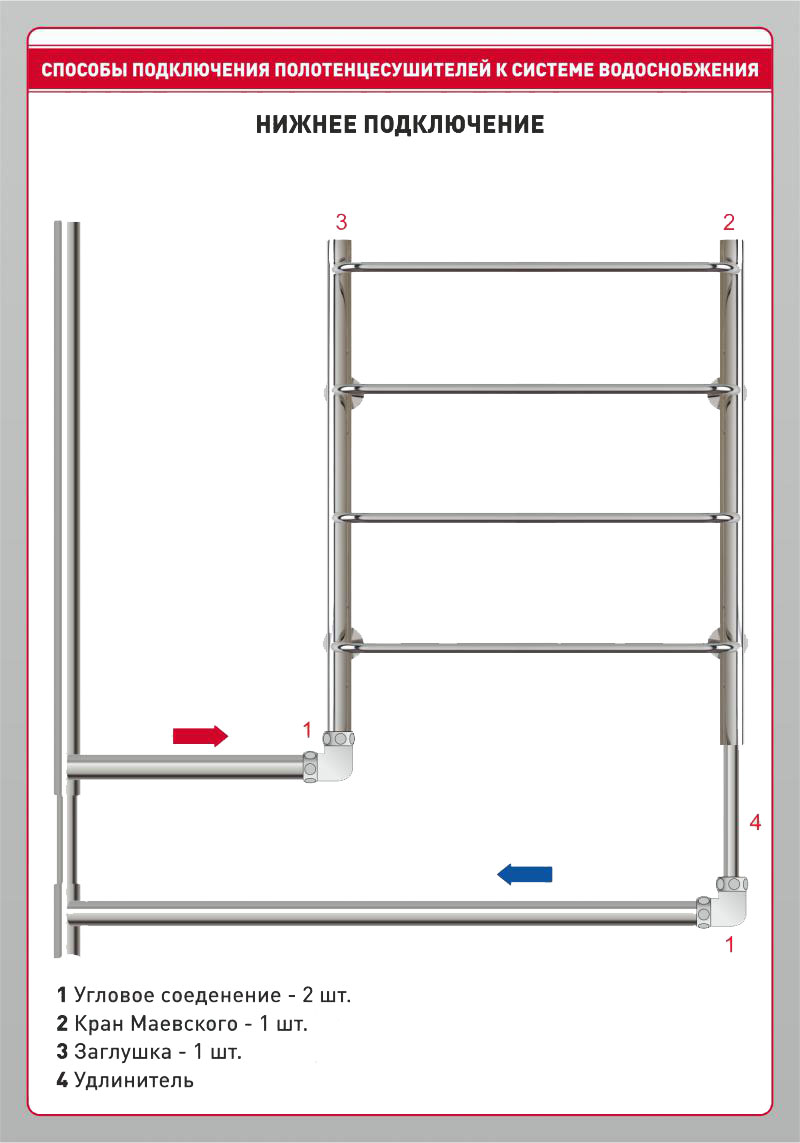
Parallel connection This method is a more correct connection of a heated towel rail. To the riser, the heated towel rail cuts into a straight line, then there is no heat loss. Correctly connect the heated towel rail in the bathroom by first installing special taps on the pipe to which it is connected. This will allow you to regulate the temperature in the device and also facilitate its removal if necessary.
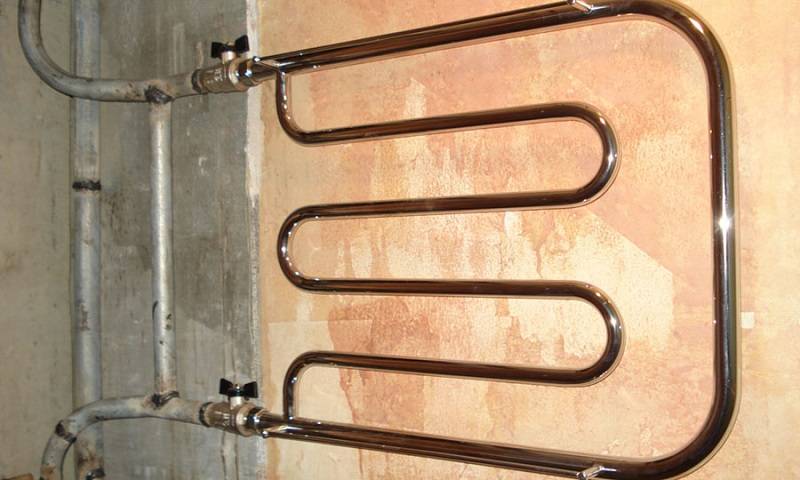
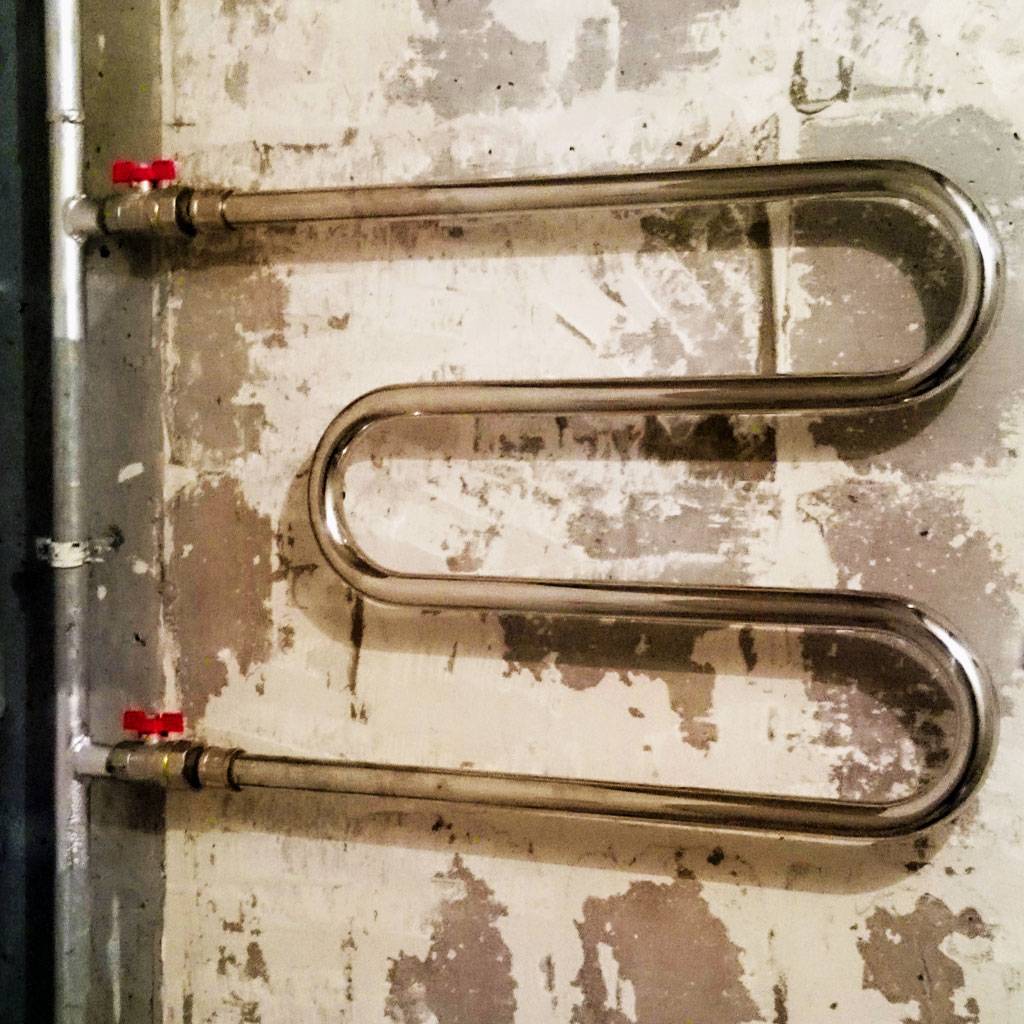
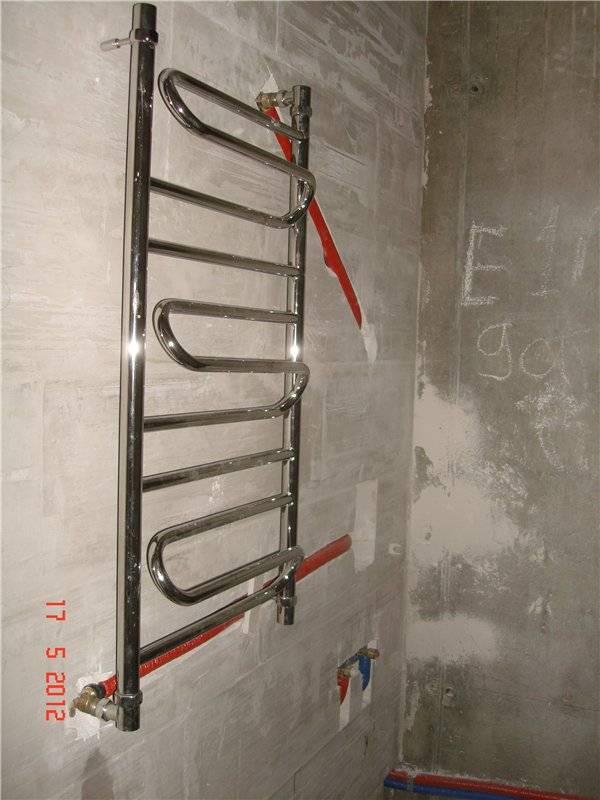
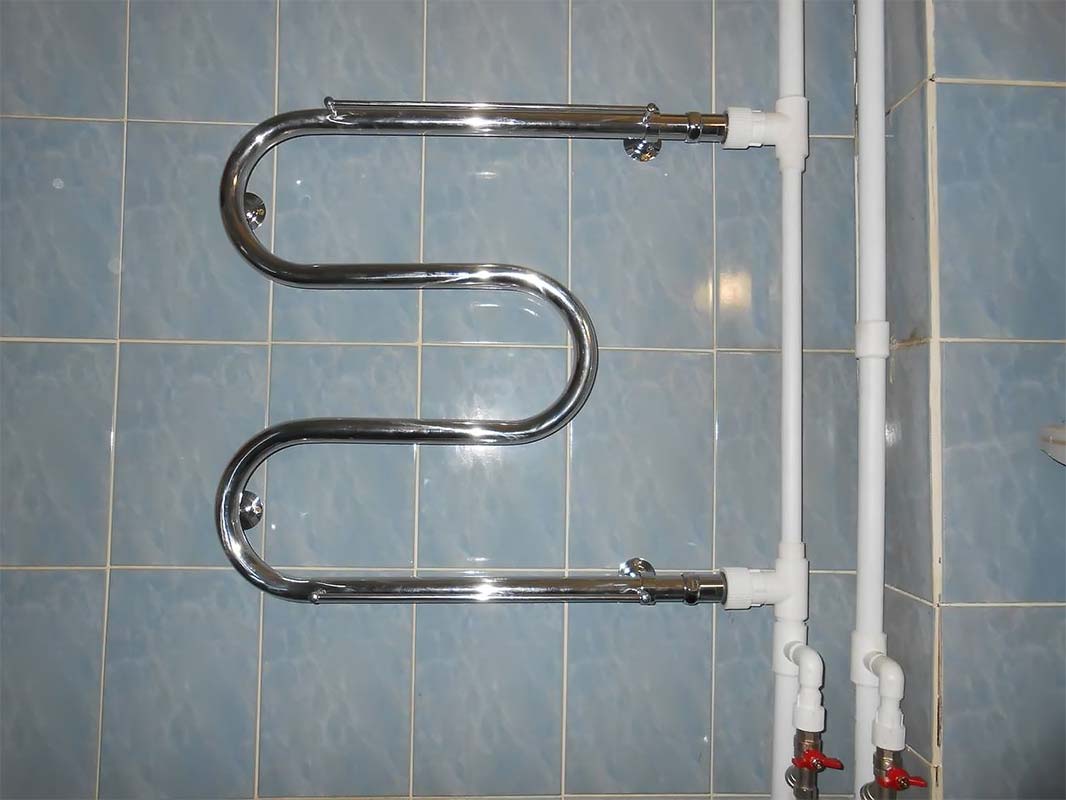
It is worth noting that the water inlet to the heated towel rail should be at the top, and the outlet at the bottom, since water flows through the device from top to bottom. Often, when connecting a heated towel rail to a riser in the bathroom, it is necessary to partially or completely change the riser. To do this, the pipes must be connected to each other.
For mounting a heated towel rail, it is most convenient to use pipes made of metal-plastic. It is convenient to connect it due to the presence of threaded fittings, and it can also be soldered. The pipes must be the same width as your utility pipes.
It is better to replace the entire riser, then you will not have to make many joints that may then leak. New heated towel rails often have a fitting, in order to install such a detachable coupling with an internal thread. In the future, such a heated towel rail will be easy to remove and install
In order for the heated towel rail to work correctly, it must be positioned horizontally. Install Mayevsky's faucet. This is done in order to prevent the formation of an air lock in the heated towel rail. Otherwise, it will not be able to function.
Towel dryer connection technology
The process of installing a towel dryer depends on the type of device. Water heated towel rails require a special approach to connection. Connecting electrical devices is quite simple.
Materials and tools
Before connecting the heated towel rail, you must familiarize yourself with the connection diagram proposed by the manufacturer in the instructions. Also check the complete set of the purchased device.
To install the dryer, you will need the following tools and materials:
- construction level;
- pencil;
- roulette;
- a hammer;
- Adjustable wrench;
- screwdriver;
- soldering iron and knife for PVC pipes;
- Mayevsky's crane;
- two tees;
- clutch;
- fasteners, brackets;
- PVC pipes with a diameter of 32 mm;
- tow or sealing tape;
- fitting.
If a jumper is to be installed, two more ball valves should be purchased.
Stages of installation of a water heated towel rail
The towel dryer is most often connected to a hot water supply system. You can install the device yourself, following the selected connection diagram and step-by-step guide:
- shut off the water supply;
- mark with the help of the building level the areas of drying attachment on the wall surface, observing the required distance from the riser and the slope of the piping 5 - 10 millimeters;
- install and fix the heated towel rail;
- mount the jumper by installing tees and ball valves at the ends of the pipe;
- using angle and straight fittings, connect and adjust the direction of the coolant supply and return outlets;
- install Mayevsky's tap on the heated towel rail.
All connections are sealed with tow or special tape. Before supplying water to the system, as well as after starting the coolant, the tightness of the joints is checked.
Connecting an electric towel warmer
This type of towel dryer can be installed in any room, regardless of the location of the hot or heating pipeline. The installation process of the device consists of fixing the structure in the selected location and connecting it to the network.


Properly connected electric towel warmer
The installation of an electric heated towel rail in a bathroom or in another room with high humidity is carried out taking into account the observance of safety standards:
- connection must be made through a three-core cable;
- grounding must be present;
- only hidden insulated wiring is allowed;
- RCD is required.
Requirements for the installation of heated towel rails with electric heating:
- distance from the floor - at least 20 centimeters;
- pieces of furniture should be placed in compliance with a distance of 75 centimeters;
- there should be a space of 30 centimeters between the wall and the dryer;
- distance from the bathroom and washbasin - at least 60 centimeters.
The outlet must be at a safe distance from the hot towel dryer surface.
Connecting a heated towel rail in a country house
To ensure the operation of the dryer for bath towels in a country house, various connection methods are used. If heating is carried out in the country house, then an excellent option would be an insert into the circuit of the heating system. But with such an installation, it should be borne in mind that the device will only function in the cold season.
If regular use of the heated towel rail is expected, then the electric design would be the best option. Such drying can be turned on and off as needed.
Connection of water devices in a country house is carried out according to standard schemes. Most often, when connected to a heating circuit, a side or diagonal tie-in is used.
Installation and connection
The space in the bathroom is divided into four zones:
- Zero - direct contact with water (bath or shower).
- The first is a shower. The distance above the bathtub or the volume of the shower cabin along the perimeter is 10-15 cm, where there is a risk of a large amount of splashes. You will need a device with at least IPx7 protection.
- The second is coverage around the 1st zone in a circle, from 60 cm long and along the height of the bathroom. Small chance of vertical splashes. Suitable electrical equipment with protection IPx4 or more.
- The third is a segment outside the second zone, a relatively reliable place for installing an electrical device and connecting to a network with splash protection and the mandatory installation of an RCD.
Attention! If you use an electric dryer connected to the mains or with a thermostat installed on the plug, then the length of the wire is important.The socket must be installed in the 3rd zone, and the heated towel rail must be placed in the 2nd or 1st zone, depending on the degree of protection of the housing
It is better to place the heated towel rail in the third zone so that splashes do not fall on the device
The socket must be installed in the 3rd zone, and the heated towel rail must be placed in the 2nd or 1st zone, depending on the degree of protection of the housing. It is better to place the heated towel rail in the third zone so that splashes do not fall on the appliance.
At what height do they hang
- The main point in the location of the equipment is moisture protection.
- The installation of the device is carried out at a distance of at least 120 cm from the floor, it is necessary to retreat from the plumbing equipment by at least 60 cm.
- An electric heated towel rail can be placed above the washing machine, but in such a way that there is no interference with loading laundry when the lid is located frontally.
- When positioning a ladder-type dryer, you need to take into account the height of an adult for free access to the top rung.
How to accurately make holes in a tile
If possible, place the appliance near the ventilation grill or between the door and the hood. To fix the heated towel rail, two to four points are provided.
Are these plates or brackets with holes fasteners, which are covered with a decorative cap. The most commonly used dowels for screws 6x60.
In order to install an electric heated towel rail on the tile, it is necessary to take into account the order of drilling holes in the tile:
with a marker you need to mark the points on the tile;
carefully beat the enamel at the marked point with a drill at low speeds or use the tip of a file for this;
if it is not possible to beat the enamel, then a piece of adhesive tape should be glued to the drilling site so that the drill does not slip during operation;
drill a tile in an unstressed mode;
drill the wall in puncher mode with the greatest pressure;
after all the holes have been formed, plastic dowels are inserted into them or clogged with a soft mallet.
Important! If the installation was carried out before laying the tiles in the bathroom, then you should pay attention to the rules for laying cables and installing sockets in wet rooms.
How to make a hole for the socket and install it
To do this, you must perform the following steps:
- using a drill, make holes for fasteners, dowels are mainly used;
- strip the ends of the wires from insulation;
- install dowels in the prepared span;
- pass the wires through the holes with rubber plugs;
- connect the bare ends of the wires to the outlet;
- fix the socket housing on the wall, fix it tightly;
- tighten the fixing bolts;
- Apply power to the outlet and check operation.
wall mount
The markup is done first:
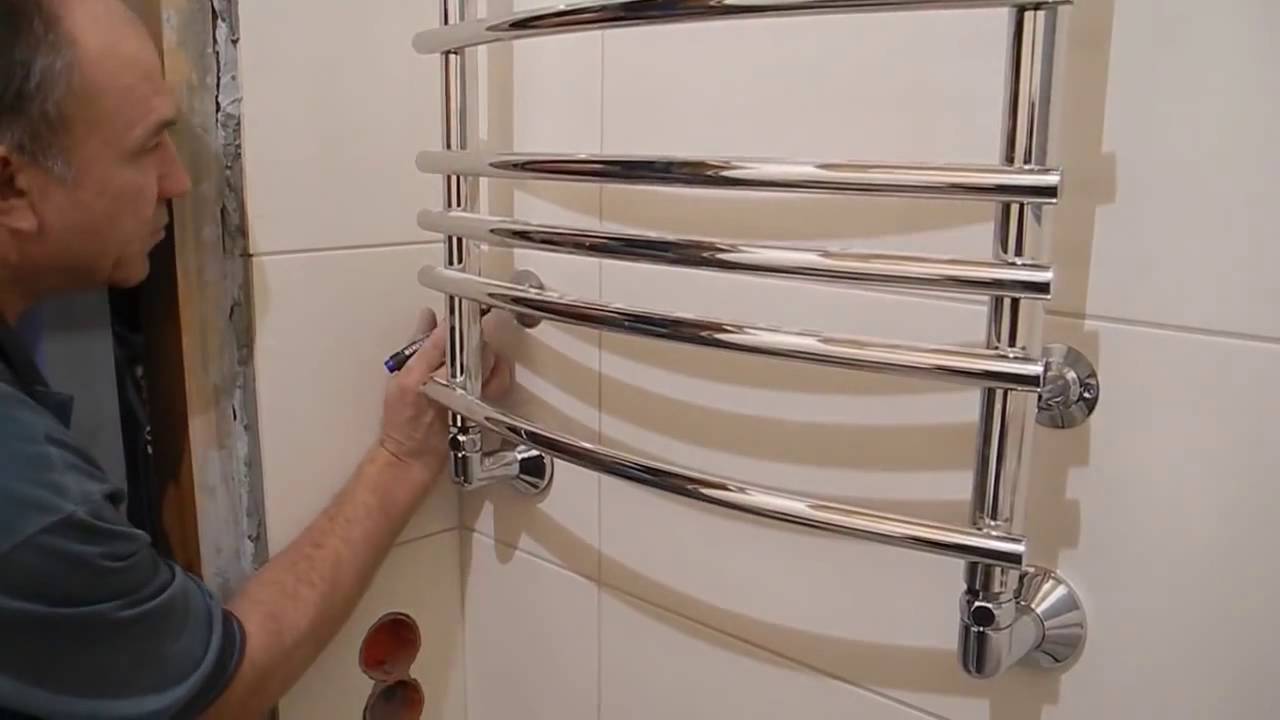
- Attach the heated towel rail or mounting plate to the wall so that the main parts of the appliance are at the permitted height.
- Mark the position of one top fastener. A plumb or level is useful here, then from the marked point you need to draw a vertical and horizontal line directly in the level.
- Attach the heated towel rail so that the place of the first marked fastening coincides, and also combine 2 adjacent fasteners with lines, mark their positions on the wall.
- Using a plumb line and / or level, determine the location of the fourth attachment point, then complete the markup to the correct rectangle. For safety, check whether the last mark is accurately determined by again attaching the heated towel rail.
- Drill holes according to marks. Now everything is ready to fix the device.
Step-by-step instruction
The order of installation and connection to the system that provides the supply of coolant does not depend on the selected scheme.
Necessary tools
The type of tools is selected based on the type of heated towel rail. Coils are generally supplied with all parts required for installation. Additionally, a soldering iron and a knife may be required if polypropylene pipes are used.


Dismantling of old equipment
Before proceeding with dismantling, it is necessary to coordinate these works with the management company (if the coil is installed on the wall in an apartment building). Then you can remove the old heated towel rail.
In this case, two options are possible:
- Union nuts are unscrewed, through which the dryer is attached to the supply lines.
- The coil with the help of a "grinder" is cut off from the supplies. The rest of the latter should be enough to cut the thread.
In both cases, the length of the supply pipes must be sufficient to insert the jumper.
How to properly install bypass and ball valves
You can hang a heated towel rail without a jumper. However, most plumbers recommend installing the latter. The bypass is mounted on couplings pre-cut into the pipes. If necessary, threads are cut on the inlets. If work is carried out on steel pipes, then a bypass of the same section is welded to the latter. Ball valves are mounted at the ends of the coil.In this case, it may also be necessary to thread the old pipes.
Fastening
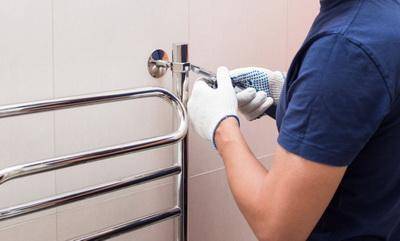
As mentioned above, various fasteners can be used to install heated towel rails, regardless of the type of coil.
brackets
Arms are subdivided on telescopic and demountable. The order of installation of these fasteners in both cases is the same. Installation is carried out as follows: marks are applied to the wall, along which holes are drilled. Then a bracket is screwed into the latter by means of anchors and screws. Telescopic models are convenient in that they not only fix the heated towel rail, but also allow you to adjust the gap between the pipes.
supports
Like detachable fasteners, supports can be attached to the wall using self-tapping screws or screws that are screwed into the wall. Such elements are rarely used to fix the coolant pipe, as they create certain difficulties during installation.
Fitting
Fittings are used to fix the supply pipes to the heated towel rail. There are several types of these fasteners, each of which is used in the appropriate conditions: "American" (with a union nut), plugs (close unused inputs), manifolds (create a separate branch), and so on.
Installation, tightening "American"
"Americans" are mounted at the outlet of the heated towel rail. The thread before starting work is treated with a sealing paste, and then the nuts are tightened. When performing the last work, it is not recommended to apply excessive efforts.
mark
In order to determine the points at which holes for installing fasteners will be drilled, it is necessary to attach the heated towel rail to the outlet pipes, align it with the building level and make appropriate marks on the wall.
Hole preparation
When installing coils, it is recommended to make deep holes. To do this, you need to drill a concrete wall. Then you need to insert dowels into the holes obtained, into which the screws of the fasteners will be screwed.
Fixation
Before installation, fasteners are put on the pipes of the heated towel rail, which are then screwed to the wall with screws. In this case, it is recommended to use brackets, since the latter allow, after installation, to adjust the position of the coil according to the level and relative to the supply pipes and the wall.
Tightening fasteners
At the last stage, all fasteners and fittings are tightened with an adjustable wrench. With excessive force, you can strip the threads, because of which you will have to repeat the described procedure.
To check the performance of the system, you need to slowly, in order to avoid water hammer, open the inlet and outlet stopcocks. Water should not seep through at the pipe connections.
Water heated towel rails
Before starting installation, you must:
- Officially coordinate the work with representatives of public utilities;
- Draw up a detailed plan, as well as an estimate, in which it is imperative to indicate all the tools and materials necessary for the implementation of installation work;
- Ensure free access to the closing device and shut off the water supply.
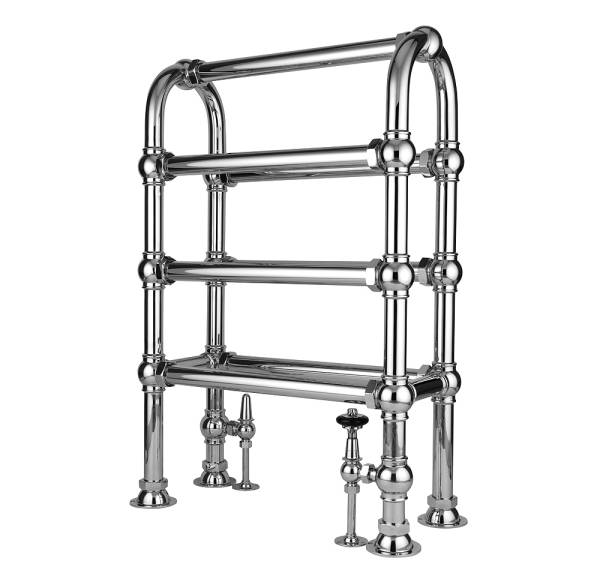 Convenient heated towel rail
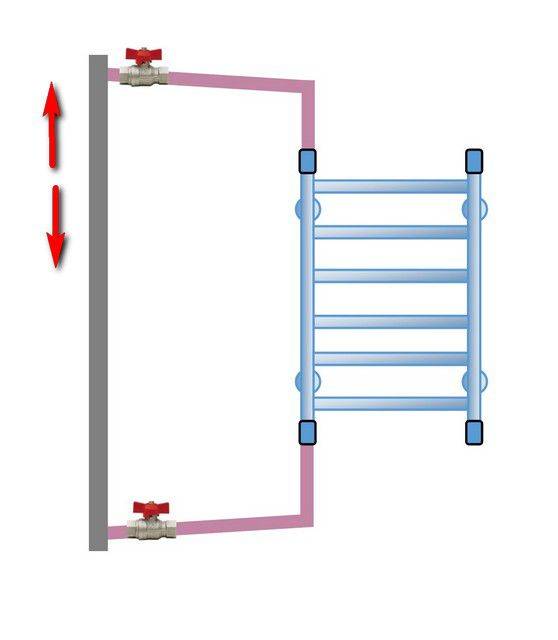
When the installation of a heated towel rail is carried out at the same time as the entire riser is changed, it would be quite advisable to install a tap that will allow you to shut off the water supply to the upper floors. This will come in handy in case of an emergency.


Taps can be positioned so that the flow of water is directed through the heated towel rail or bypassing it. The latter option will help to avoid clogging it with rust or sand in the event that the supply of hot water is interrupted for scheduled maintenance. It will also make the job easier. for repair or replacement outdated design. The riser in this case replaces the jumper. When the distance to the eyeliner is less than half a meter, it can be positioned horizontally. Otherwise, a slight slope should be made, about 1 cm.
The coil and conductive pipes must be fixed to the wall in such a way that they are freely located in the special fixing rings, and they can also be placed on hooks. Thanks to this, excessive loads on the wall surface as a result of possible deformation of the heated towel rail during heating can be avoided.
Depending on the size of the pipes, the distance between the wall surface and the axis of the pipeline should be approximately 3.5 to 5.5 cm.
In this case, special attention should be paid to the tightness of all connections.
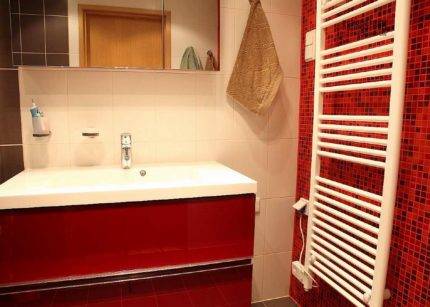
Installing an electric towel warmer
The main advantage of an electric heated towel rail is the ease of installation. Like any wall-mounted electrical appliance, it must be hung on the wall and connected to the power supply. It remains to turn on the device itself and use it for its intended purpose.
An important requirement is compliance with electrical safety rules
Such a device should be connected only through the so-called “automatic device” or RCD - a residual current device. If the socket for connecting the device will be installed directly in the bathroom, be sure to use a special device with protection against moisture.
Such a socket is mounted in the thickness of the wall, it has a special cover. In addition, the appliance must be grounded.
 When installing an electric heated towel rail, special sockets with increased moisture protection should be used. Connect such a device through an RCD
It is believed that the option with an electric heated towel rail is not economically viable compared to water models, as it increases heat bills. However, the power of such devices is not so great, as is the consumption of electricity.
This is enough to dry a damp terry cloth, but it does not do very well as a bathroom heater.
The choice is yours!
Do-it-yourself towel dryer installation
Today, it is quite difficult to imagine a bathroom without a heated towel rail. This important attribute occupies the most important place in our houses and apartments. In addition to the fact that this device dries our towels instantly, it even regulates the air and climate in the room. Everyone knows that bathrooms are dominated by humidity, dampness, etc. And in order to avoid unpleasant odors, it is necessary to install a heated towel rail. We will find out in the article how exactly this is done.
This device, some people install themselves.But in general, it is recommended to invite professional plumbers who are quite well versed in every detail. Whatever decision you make, in this article you will read a clear description of the connection and installation of a heated towel rail. This is done quite easily and simply. Step-by-step instructions will help anyone understand the simplest little things.
How to install a water heated towel rail with your own hands
The installation of water-type equipment is different from the installation of electric heated towel rails.
There are several schemes for tie-in equipment.
Below is a detailed process for installing a water heated towel rail with your own hands.
Connection options
You can install the device in two ways:
- Connect to the heating system. In such a situation, after removing the old device, the installation of special taps, bypasses, American women is required. The equipment is connected in parallel with the heating system.
- Connect to hot water system. The dryer is cut into the water supply system, connected in series. This is done directly inside the apartment itself, no additional work is required. There is one nuance of such a connection - this is a decrease in the temperature of hot water.
Dismantling the old
The first thing to do is to dismantle the old equipment, but it is important to coordinate your actions with the Housing Office so that you can turn off the riser. Dismantle the equipment as follows:
- If the device does not form a single structure with the hot water main and is connected using fixing elements, then they are unscrewed.
- If the coil is welded to the riser, then a grinder is used to trim it.This must be done in such a way that the remaining part of the pipe is sufficient for threading.
- In one and the other case, the last step is to remove the dryer from the brackets.
Reference! The height of the riser cutout must be greater than the distance between the nozzles of the new device by the length of the used couplings, fittings, which will be required later to install the bypass.
Conclusion and welding of pipes
To connect the device to the water supply system, it is recommended to use polypropylene pipes
In the process, it is important to carry out high-quality welding or soldering pipes to the water supply
Certain skills are required to carry out such work. The connection of pipes with a coupling is carried out immediately after working with a soldering iron. It is recommended to bring the temperature of the soldering device up to 260 °C.


How to make a bypass in front of the device, installation of American women and taps
To install a bypass, you will need to make threads on the end sections of the pipes. If, after removing the previous device, the thread remains, then it is enough to clean them and drive them away with a die. This will improve the connection. If there is no thread, it is cut with the help of such a die. After preparing the pipes, the installation of shut-off valves is carried out using welding. Any stopcocks, Americans or bypasses are installed in the same way.
Installation on polypropylene pipes with all fittings
Installing the appliance and attaching it to the wall is the last thing to do. Work is carried out according to the following scheme:

apply markings under the brackets;
holes are prepared and dowels, brackets are inserted into them, screwed to the dryer;
fix the dryer with screws;
fittings are used to connect equipment to polypropylene pipes, while it is important to wind a sealing linen winding around the threaded connection for a reliable connection and prevention of leaks.
Important!
When fixing the coil to the wall, it is important to do it evenly and observe the horizontal position of the device.


