- Installation of forced exhaust in the toilet and bathroom
- Common Mistakes and Additional Tips
- When is forced ventilation needed?
- Installation procedure
- Criterias of choice
- Performance
- Safety
- Noise level
- Power
- Additional functions
- How to calculate the power of the hood
- Types of ventilation
- Kinds
- Varieties of exhaust fans
- Axial fans
- Duct fans
- natural ventilation
- Fan connection diagrams
- From a light bulb
- From the switch
- Through automation
- Types of bathroom ventilation
- Natural
- Forced
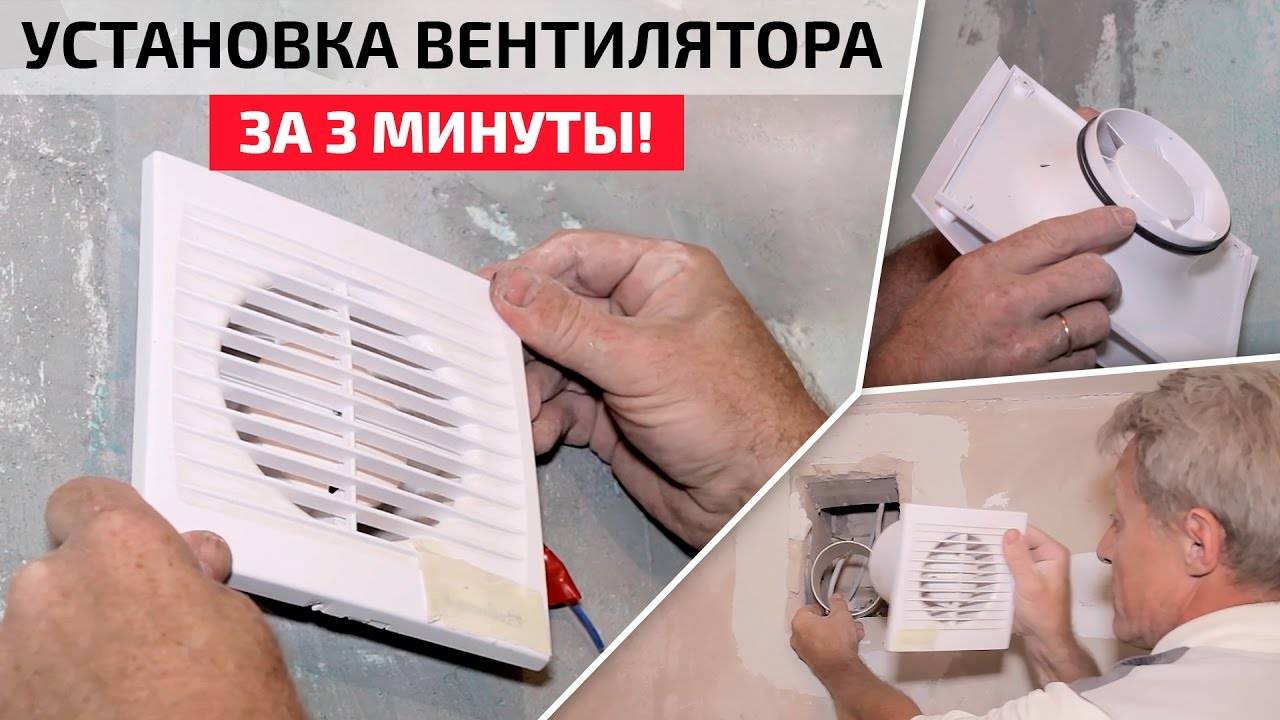
Installation of forced exhaust in the toilet and bathroom
It is possible to carry out the correct installation of a ventilation hood with your own hands only on the condition that you are at least a little familiar with the work of an electrician and do not hold a screwdriver in your hands for the first time. Otherwise, it would be better to let an electrician do the installation work.
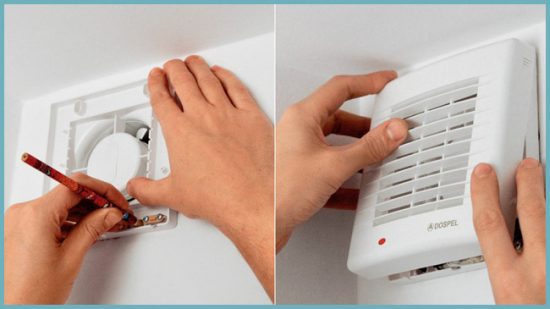
Installation steps:
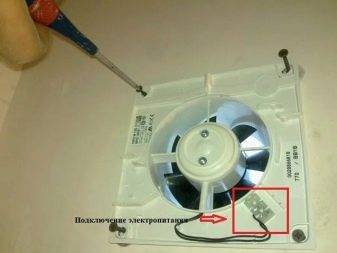
- All forced hoods are mounted in the opening of the natural ventilation channel. If the opening is too small, it can be expanded with a grinder or a hammer and chisel.
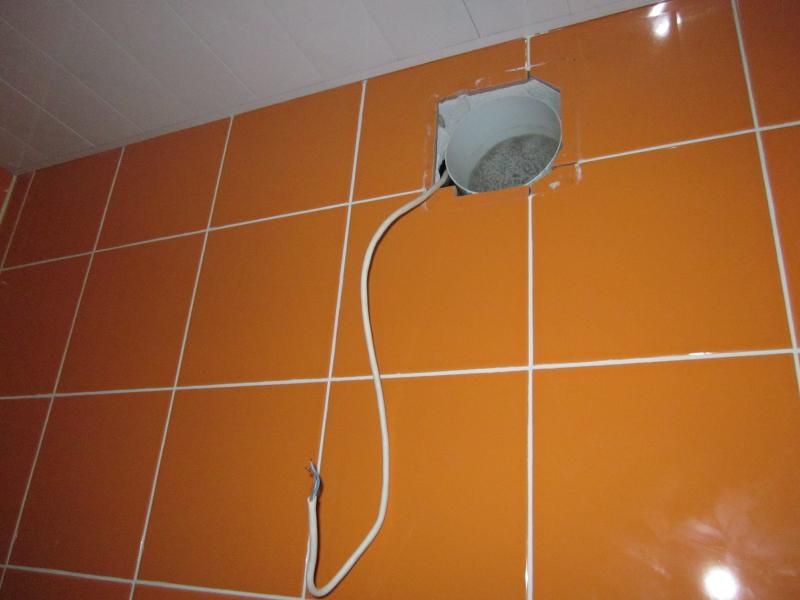
- Having mounted the device in the opening, fix it with self-tapping screws or “plant” it on liquid nails. Outside, you should only have a grill.
- The next step is to connect the hood to electricity.You can make a separate switch for the device or connect the cord to the light switch so that the hood turns on when a person enters the bathroom for their own needs. In some cases (for example, in families with children), this technique is not entirely rational - energy consumption will be an order of magnitude higher.
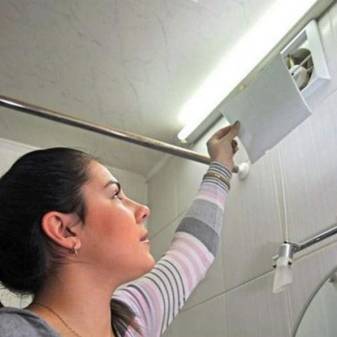
- After completing the installation of the device, fix the grille to it from the outside with the help of clamps.
 Completion of the hood installation
Common Mistakes and Additional Tips
Fan connection errors can cause not only incorrect operation of the hood, but also a short circuit or fire. Do not forget that the bathroom is a room with high humidity, which means it is especially dangerous for electrical appliances and wiring.
In order to arrange ventilation without errors on the first attempt, consider the following tips:
- The fewer bends and simpler design of the ventilation duct, the better the traction.
- With a single ventilation system in a separate bathroom, air should move from the bath to the toilet, and not vice versa.
- For all wire connections, use terminal blocks, not electrical tape.
- Strip exactly the part of the wire that will go into the terminal block.
- Check for a mosquito net in the fan. If suddenly it is not there, add it, because mosquitoes and other insects feel great in warm, humid ventilation shafts.
- In a private house, be sure to insulate part of the ventilation duct or shaft passing through unheated rooms. Otherwise, in cold weather, there will be no traction.
- Do not neglect grounding for metal fans.
In addition, to prevent the fan from interfering with natural ventilation when it is turned off, double rectangular grilles can be used, with a fan opening at the top and a regular grill below it.
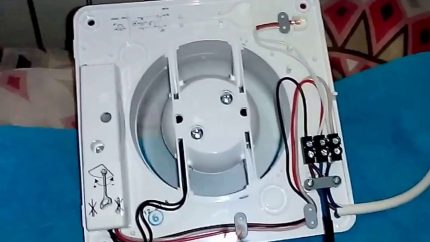 When connecting the fan power, do not mix up the contacts: N - zero, T or LT - timer, phase from the switch, L or Line - phase directly from the box
If it is not possible to install a double grille, you can maintain natural ventilation by substituting foam legs 1–2 cm under the corners of the case, at the points of fastening with self-tapping screws. As a rule, the ventilation window is square, and the fan housing is round, and these gaps are quite enough for air circulation.
Please note that even a perfectly installed and sufficiently powerful fan will not work effectively if there is not enough ventilation. Usually it is provided by a gap of 1.5-2 cm under the door to the bathroom, but for beauty it can be replaced with a special grill that cuts into the bottom of the door.
Also make sure that fresh air enters the housing at all, because after installing plastic windows and new doors, insulating the walls and concrete screed on the floor, the apartment is hermetically sealed like a thermos.
When is forced ventilation needed?
The relevant guidance documents say that air exchange in residential and any other premises can be carried out in various ways. Namely, with the help of natural, forced or mixed ventilation.
And which type of air exchange to choose depends on the conditions of a particular room. So, whether a fan is needed or not needed in a particular bathroom depends on the performance and stability of natural ventilation.More precisely, whether it can provide sufficient air exchange to maintain optimal or at least acceptable conditions.
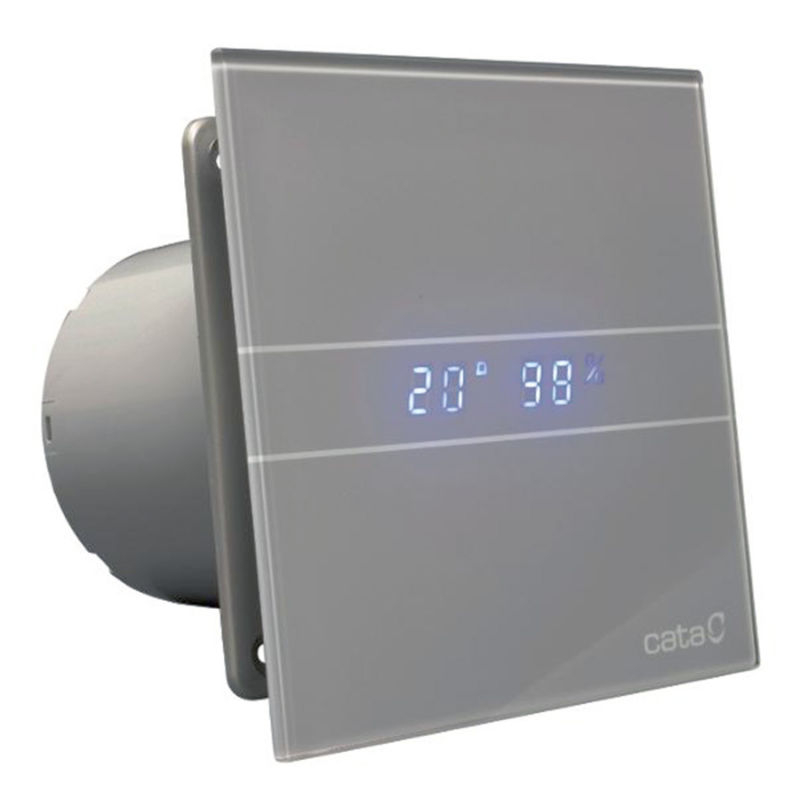
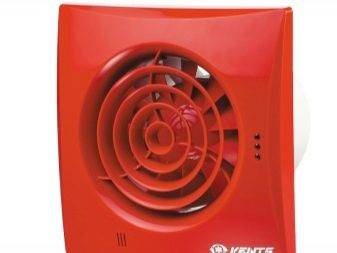
 Modern fans are compact, economical products that are designed to make any ventilation system efficient and stable.
Proper ventilation should remove at least 25 m³ of air from the bathroom every hour, and at least 90 m³ of air from living quarters and the bathroom. This indicator is relevant if there is an exhaust hood in the bathroom that provides ventilation for the rooms in which residents regularly stay and relax.
Moreover, these values are considered to be the minimum possible, and in reality, air exchange should often be more efficient and productive. The reason for this is the insufficient quality of the supplied outdoor air. For example, due to the significant amount of carbon dioxide, the amount of which in large cities may well reach 400 cm³, and in small cities - 375 cm³ for every cubic meter of air.
As a result, in order to reduce CO2 to optimal values, a much larger amount of outdoor air may often be needed. For example, to maintain optimal conditions in the bathroom, you may need not a minimum of 25 m³ of air every hour, but up to 150 m³.
But the biggest difficulty is that the natural ventilation system is not stable. And if outside the window the air warms up to 15 ° C, then with the windows closed, its effect will become almost zero.
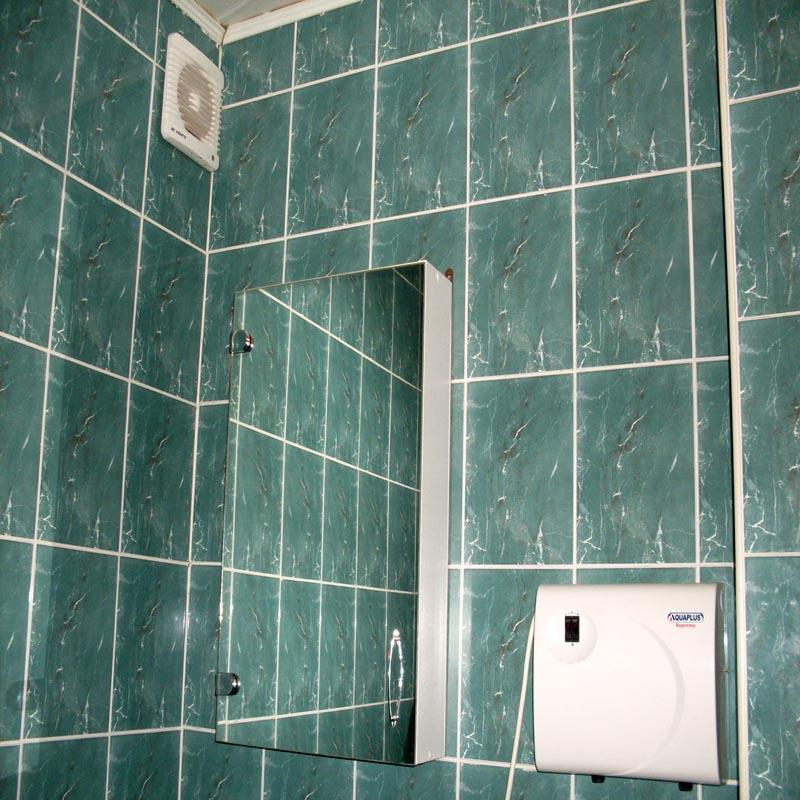
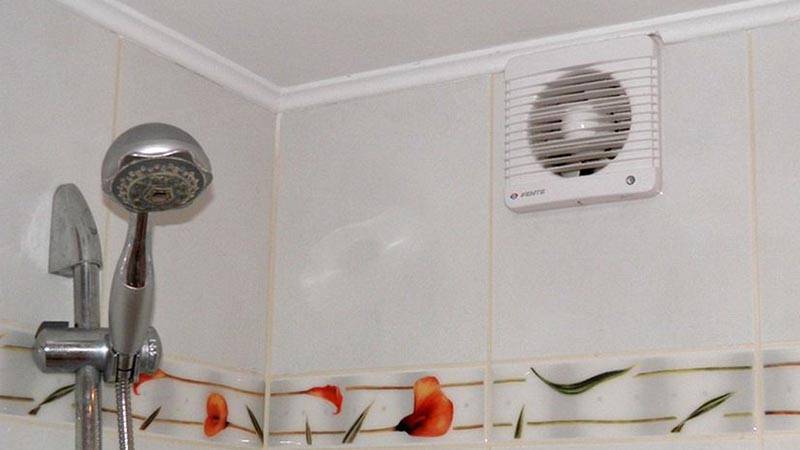
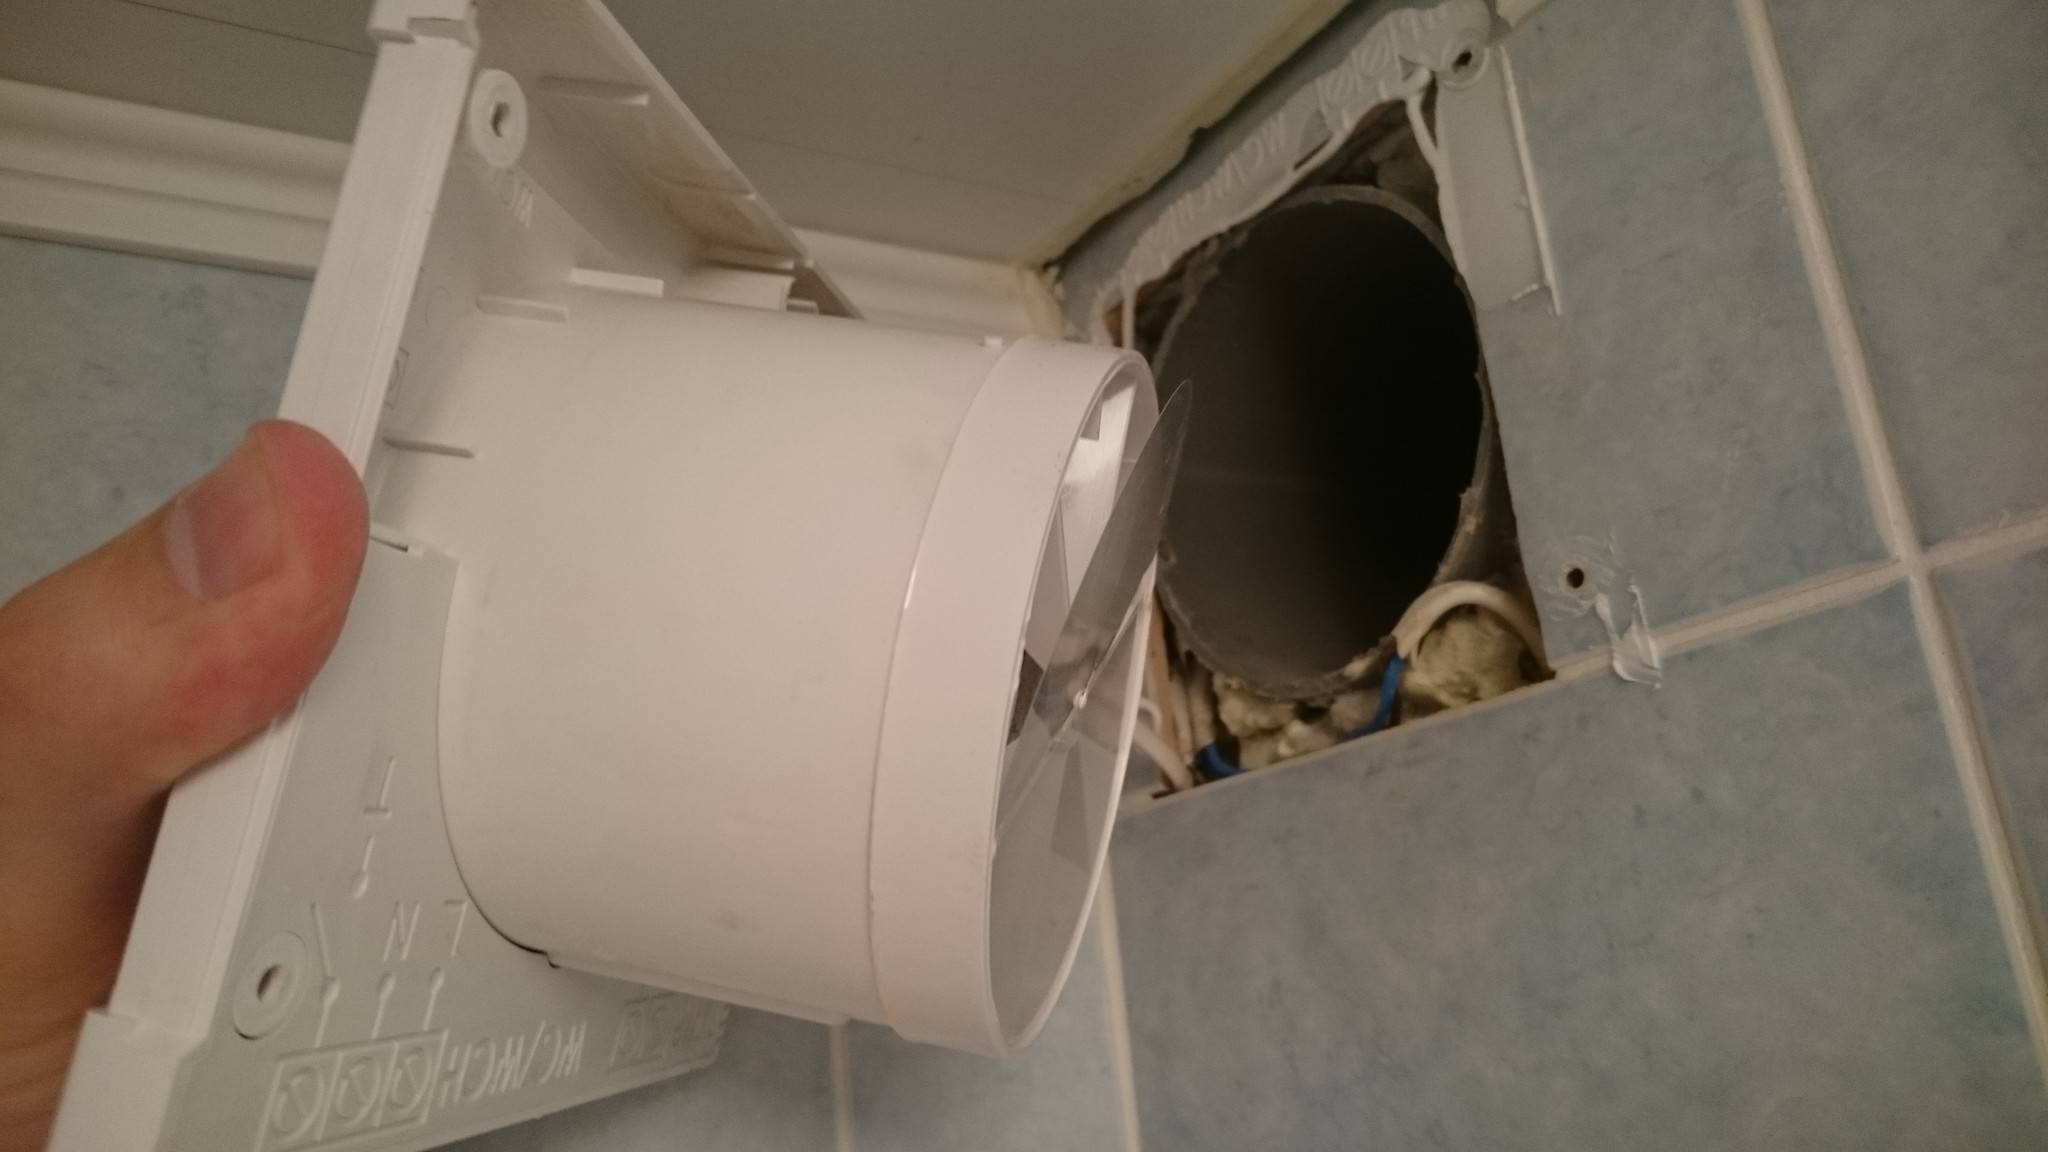
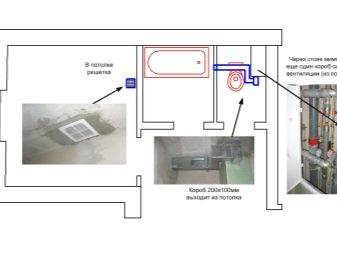
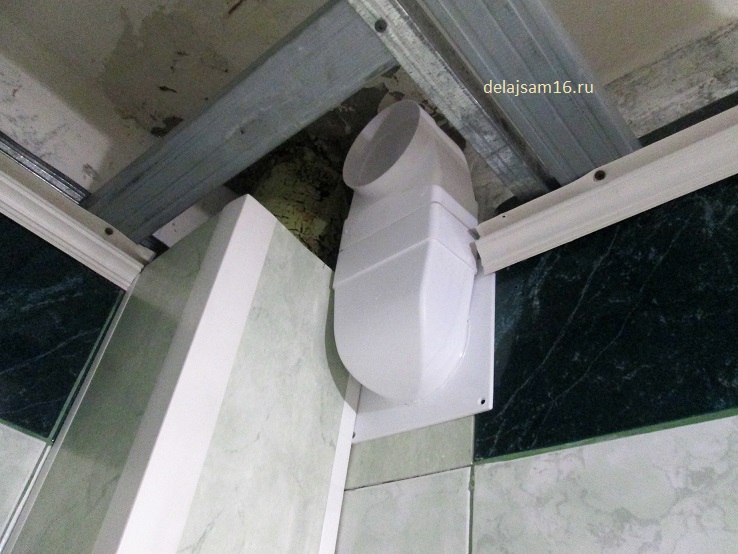
 The efficiency of the fan depends on the correct placement of the fan. For example, this product should not overlap natural ventilation channel Or the situation with air exchange will only worsen.Therefore, a separate seat should be prepared for fans, as shown in the photo.
Besides, efficiency of natural ventilation it is quite difficult to identify - for this you will have to take measurements indoors, and at the moment when the temperature of the street air is 5 ° C. In addition, this requires special equipment. Therefore, in most cases, indicators that it's time to get a fan are fungus or mold in the bathroom (for example, in the seams between tiles, other secluded places) or an unpleasant smell. After all, most negative processes occur without visible signs and become apparent only at advanced stages.
Another important disadvantage of natural air exchange is the inability to effectively regulate its performance.
In addition, the use of energy-efficient windows and doors significantly affects the performance of the traditional system. The tightness of which is violated by the natural processes of air exchange.
As a result, it can be pointed out that natural ventilation is structurally reliable, not expensive and is able to cope with the functions assigned to it. But with the exception of critical moments caused by the instability of natural air exchange and significant loads when using the bathroom.
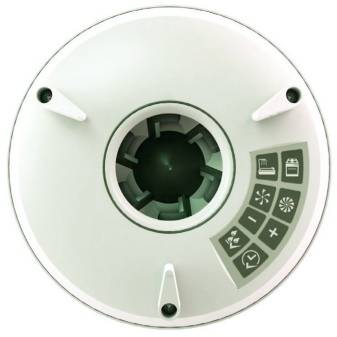
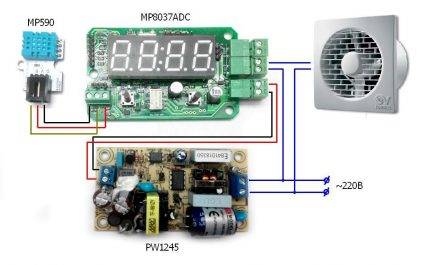 The diagram shows a fan, as well as a humidity sensor (MP590), a time relay (MP8037ADC). Which are designed to control a switching power supply (PW1245), which will automate the ventilation system and make it efficient and economical
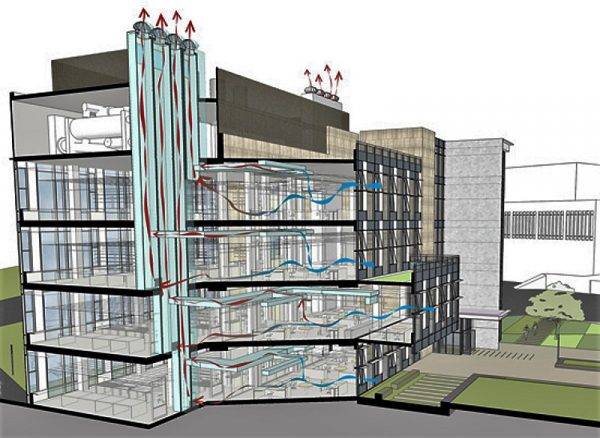
Taking into account all these points, the alternative solution is the use of a mixed ventilation system.It will permanently remove polluted air, moisture in a natural way, and under significant loads - forcibly, that is, with the help of a fan
Which is more likely to make living conditions comfortable and non-hazardous to health, and at a moderate cost.
At the same time, you should not use the fan on an ongoing basis. Since this significantly increases operating costs, reduces fire safety.
Installation procedure
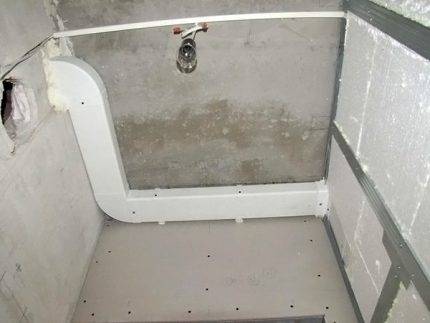
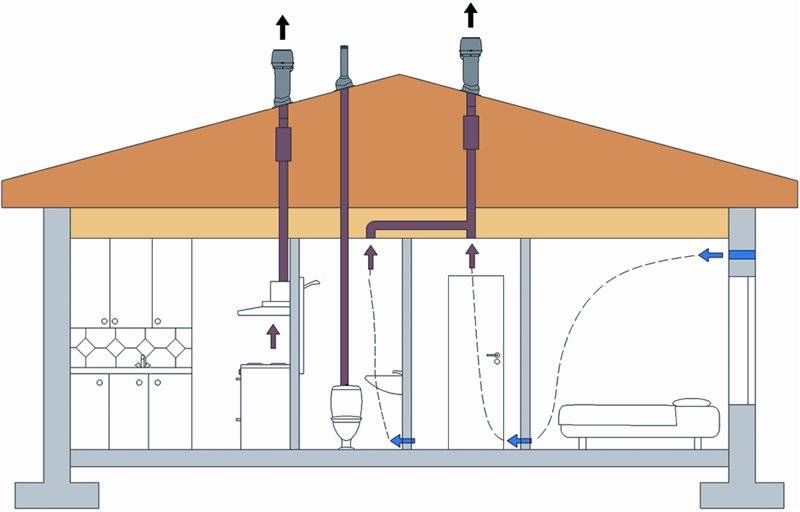
 Ventilation duct installation diagram
- With self-installation of ventilation, the ventilation duct is preliminarily cleaned. For this, a brush or a load suspended on a rope is used. It descends several times into the channel in a rotational motion. The channel is cleaned if the indicator - a sheet of paper brought to the ventilation shaft - deviates towards the room or is not held by gravity on the grate.
- All work is carried out with the electricity meter turned off at a height. To do this, you need to provide a stepladder.
- Installation of the unit is carried out under the ceiling itself in the zone of maximum humidity, opposite the source of air intake.
- Given the size of the fan and the location of the power supply, the position of the wiring and the installation itself is marked.
- Installation work is carried out in the presence of a grate, glue for fixing it, a screwdriver, dowels. You may also need a piece of hose for the duct, as well as a drywall box to mask the pipe and unit.
- The fan is installed in the air duct. If the model is of an overhead type, the box is first strengthened.
- The terminals located on it are connected to a two-wire cable line with a cross section of 0.2 cm.
- The fan housing is mounted directly. For this purpose, latches are provided in most models. Otherwise, dowels are used for these purposes.
- If it is impossible to directly connect the installation, the air duct is built up. It is disguised in a box or decorated. In this capacity, a flexible, semi-rigid or rigid hose is used.
- For economical use of electricity and rational use of equipment, it is convenient to start the fan into operation along with turning on the light: you need to run a cable from the fan to the switch.
- After installation and connection, voltage is applied to the network, the operation of the forced ventilation system is checked.
Before assembling the fan into the duct, the power supply is also turned off, but the procedure is somewhat different.
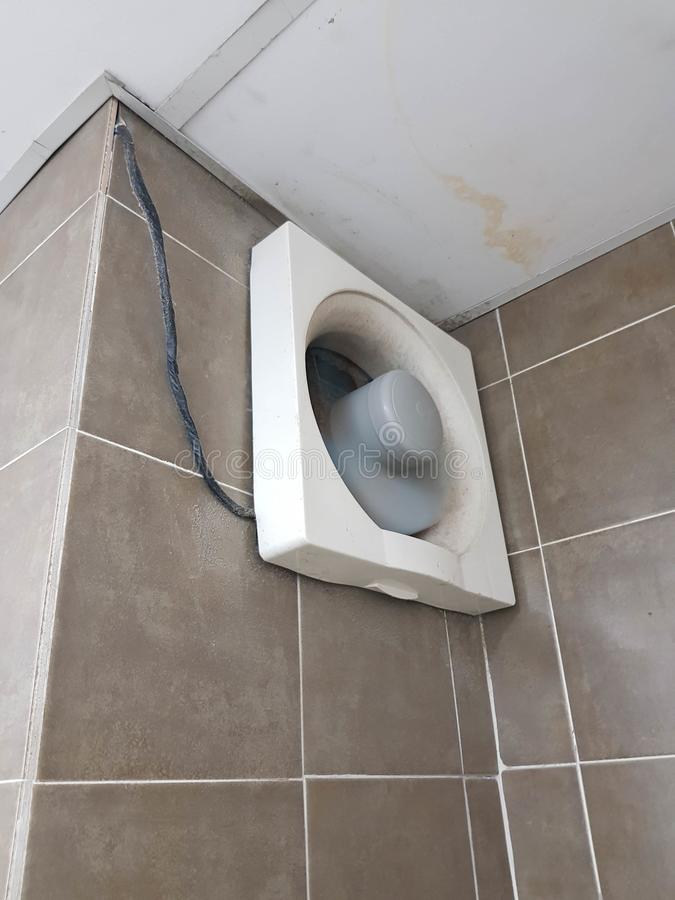
 Nothing should interfere with the movement of air masses
- The unit in the channel is placed strictly vertically, as deep as possible. This position is securely fixed so that during operation it does not fall from the generated vibrations.
- The supply cable must be new, without kinks and damage to the insulating winding, designed for "zero" and phase. It connects to the fan.
- In a convenient place, a switch is installed to start the equipment in operation.
- Voltage is applied to the network and the correct connection is checked, as well as the operation of the equipment.
Criterias of choice
As already mentioned, there are norms for air exchange in the room. Choosing an electrical appliance for ventilation in the bathroom should be based on their requirements.


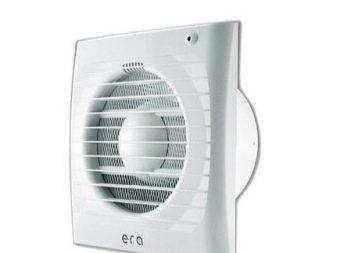
Most often, overhead axial or radial fans are installed in bathrooms.
Performance
Extraction performance is measured in number of cubic meters air, which the device is able to remove from the room in an hour.
According to SNiPs:
- If the bathroom is combined, then both the inflow and outflow of the air flow should be 50 cubic meters. m/h per person.
- If not, in the bathroom it should be 25 cubic meters. m/h
The productive power of the hood is indicated in the accompanying documents. It must be compared with the norms for a particular room and choose the best option.

Safety
Since the hood is powered by the mains, and the bath is a place of high humidity, you should pay attention to the safety of the structure. There is a safety standard for electrical appliances that deal with humid air
There is a safety standard for electrical appliances that deal with humid air.
In the device passport, it is designated as IP, followed by two numbers:
- the first - from 0 to 6 - the degree of protection against various foreign particles that can penetrate into the case along with the air flow;
- the second is the level of protection against moisture.
Bathroom electrical appliances must have at least IP 34 protection.
Noise level
This parameter is also important when choosing a device. Sounds above 35 dB are perceived by the human ear as annoying noise
Even if the fan does not work constantly, but turns on from time to time, the sound it makes attracts attention
Therefore, the quieter the appliance works, the better.
Be sure to pay attention to the relevant characteristics in the instruction manual.

Power
Its performance depends on the power of the device. Power consumption is indicated in the passport.
Since exhaust fans do not run constantly, they do not put a lot of stress on the electrical wiring.However, it is worth getting acquainted with the amount of electricity they consume.
Typically, costs are between 7 and 20 kWh. If the device is equipped with additional functions, the consumption may increase by a maximum of 10% of this power.
Do not choose too powerful a device. This also increases performance, which increases the flow of exhaust air and creates a draft. This is the other extreme of the ventilation system. Therefore, it is advisable to choose an electrical appliance that meets the needs of a particular room.
Additional functions
For convenience of work in some models additional functions are provided.
Usually this:
- Timer. Allows you to set the time to turn on or off the device, thereby allowing it to successfully perform its functions.
- Hygrostat. Controls the state of the air for high humidity. As soon as the humidity begins to exceed the norm, the automation turns on the hood. The fan runs until the moisture content in the air drops to an acceptable level.
There are models that have both functions. This allows you to choose the optimal mode of operation.
How to calculate the power of the hood
The hood in the bathroom must cope with its task in accordance with established standards.
To calculate its productive capacity, you need:
- Check with sanitary standards and select the required value.
- Multiply the standard by the number of people living in the house.
For example: 3 × 50 = 150 cu. m/h


From this it follows that for a combined bathroom, which is used by three people, you need to choose an exhaust fan with a capacity of 150 cubic meters. m/h
Types of ventilation
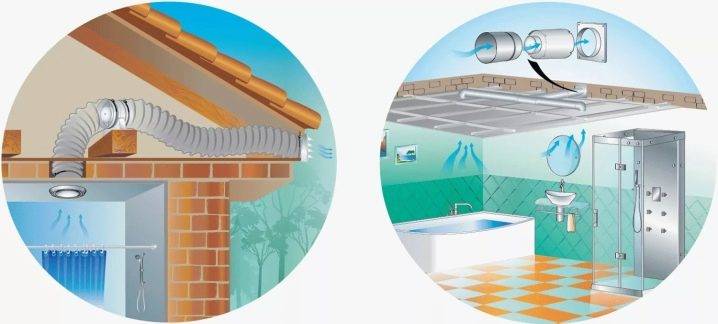
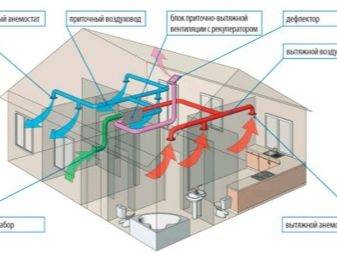
All ventilation systems of residential and non-residential premises are divided into two types according to the method of air movement: natural and forced. Below is a little more about each of them.
Natural ventilation. This ventilation system is created at the stage of creating a house project. Natural ventilation is a specially created channels made of pipes, plastic or bricks, passing through some rooms and going out, as a rule, to the attic or roof. At the same time, fresh air enters from the cracks in windows and doors, and then is removed naturally through the exhaust opening into the ventilation duct.
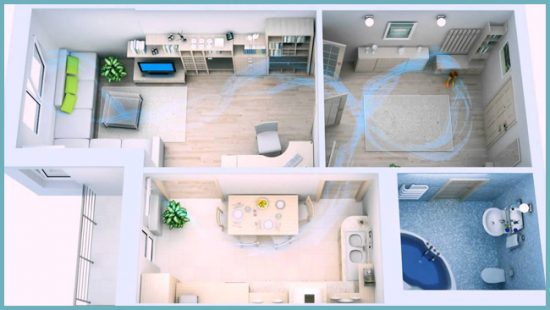 Natural air circulation
A significant disadvantage of this type of ventilation is its high dependence on external factors - weather conditions, wind speed, temperature, in the absence (or presence) of which it simply stops working. What can not be said about the following type of ventilation.
Forced ventilation. It is usually used when natural ventilation stops working or is not enough. Its principle is simple: a special device is mounted in the vent of the bathroom, which artificially creates draft, providing the room with fresh air, regardless of external factors, weather conditions or contamination of the channels. In addition, various filters, coolers, and heaters may be present in artificial ventilation systems, which will further expand its capabilities.
Kinds
Based on the various configurations of the premises in an apartment or house, their dimensions, there are several options for ventilation that can be installed in them.The simplest will be natural ventilation, which is laid during the construction of housing, but if desired, it can be done or upgraded later. Such a system helps to promote air masses, effectively updating them indoors, without requiring the installation of any electrical equipment.
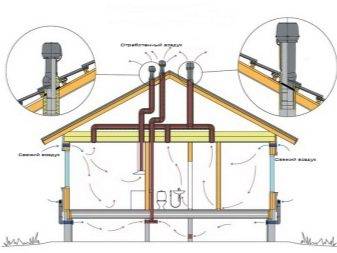
The principle of its operation is that air ducts are installed on top of the room leading to the roof, the hot air in the room rises and enters these secret paths due to the temperature difference. This principle is called convection and works quite effectively if the temperature is different in the room and on the street.
When creating such an extract, it is necessary to provide for some nuances.
- The air duct must be placed vertically. Each room in the room should have its own shaft.
- If the premises are located nearby and have similar specifics in the form of high humidity, a large temperature difference and a strong smell, then they can be combined with one ventilation shaft.
- The natural type of ventilation at a neutral temperature has a small draft, therefore it is desirable to make air ducts with smooth walls.
- When installing ventilation yourself, it is better to make sure that there are no sharp corners that impede the passage of air and its removal to the outside.
- One-story houses should have a wiring near the ceiling, which goes to the attic and is displayed on the roof.
The air that is removed from the room has a certain tension and circulation, which is called traction force.
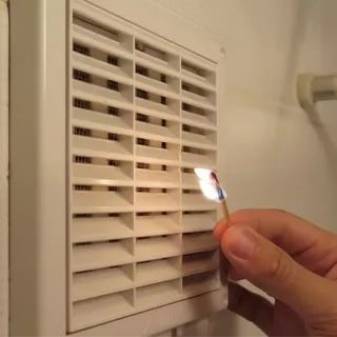
There are several ways to check the ventilation performance.
- Bring a match to the ventilation. If there is movement of the flame, then the ventilation is working fully.
- Take a sheet of paper and bring it to the ventilation. If he stays on it, then the traction is good, if he falls, then the air is removed badly. The indicators will be inaccurate if the air temperature in the room and on the street is approximately equal.
If natural ventilation is inefficient, it is advisable to use an enhanced version. Forced ventilation involves the presence of an electrical device in the form of a fan. Ceiling ventilation of this type must be equipped with a suitable device that can cope with a given amount of air masses. For such a device, it is enough to have one channel in the room, through which all polluted air will be removed from the room. To calculate the optimal power of the device, you need to multiply the volume of the room, where the length is multiplied by the width and height of the room, by the frequency of use, which varies from 5 to 10, which is dictated by the number of people living in the room and using the bath, toilet or kitchen.
Using forced-air fans in a bathroom can be dangerous, as contact with moisture from electrical appliances can cause a short circuit. In order not to risk the performance of the device and the safety of residents, it is necessary to install moisture-resistant fans.
When choosing a fan, it is important to pay attention to various indicators
- The presence of a humidity sensor, which itself calculates the moment to turn on when the humidity threshold has been overcome. This type of inclusion helps to significantly save on electricity.
- Fans with a timer allow you to set the time for turning on ventilation so as not to waste time on this, but to actively use the room under optimal and comfortable conditions.
- With the presence of a motion sensor that activates the fan if there is someone in the room.
- A device with a non-return valve to prevent the entry of polluted air from the environment into the room.
Modern devices can be equipped with smart technologies that have many functions and are easy to operate. Smart ventilation allows you to achieve the desired result even for people with disabilities. Exhaust ventilation can have an autonomous version and be located in the ventilation shaft of the bathroom, in the kitchen window or any other place where it can bring air from the room to the street. The operation of such a device is carried out on batteries, which means that there is no risk of a short circuit and a threat to humans.
Varieties of exhaust fans
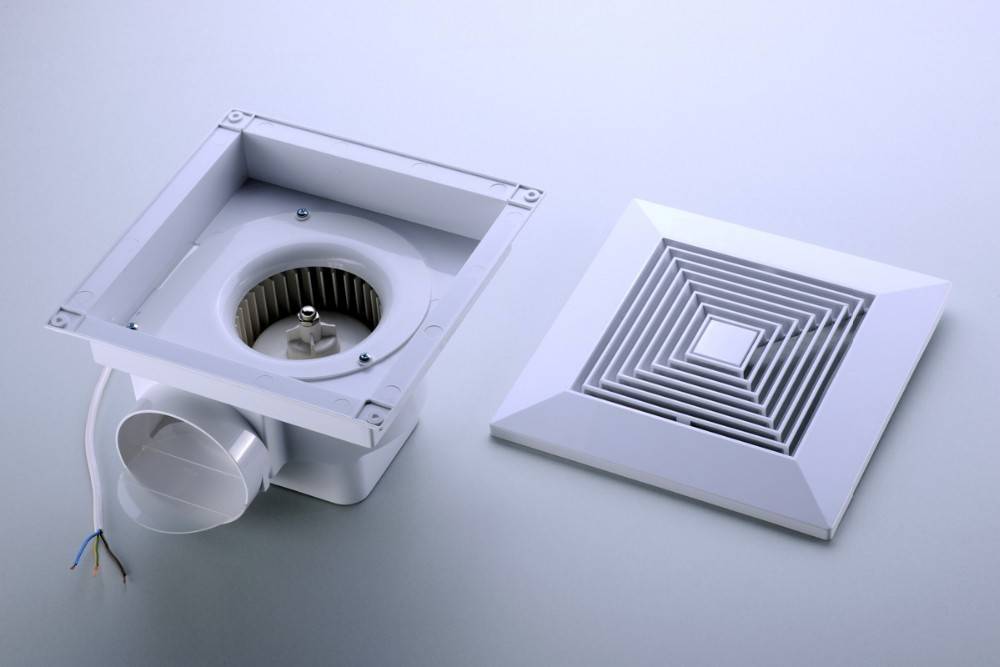
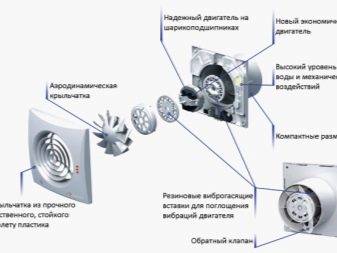
The design of the exhaust fan is quite simple: housing, motor, impeller with blades. There are models equipped with a check valve that does not allow foreign odors from other apartments to enter the room, which is very important for high-rise buildings.
Bathroom fan device
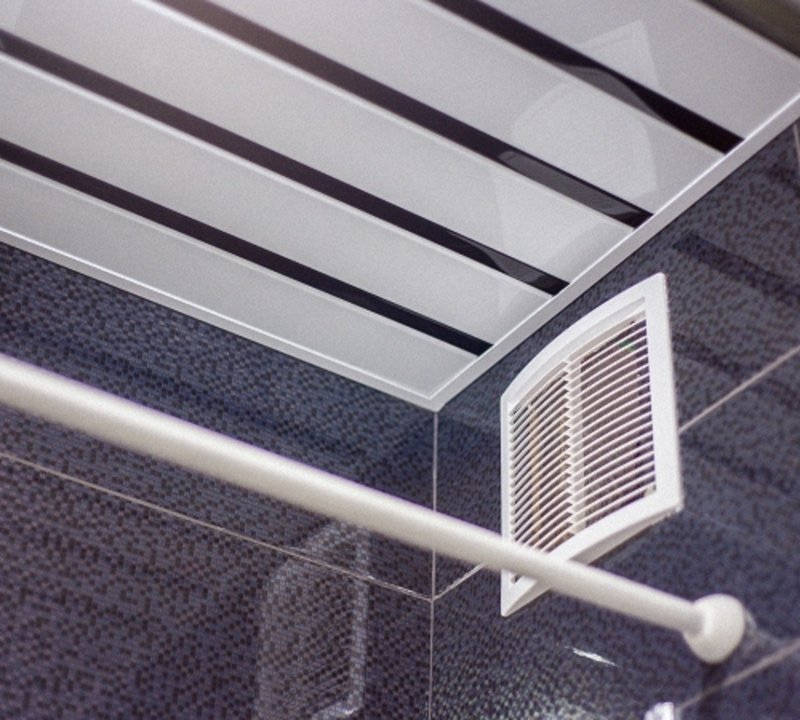
The air duct of the exhaust device is connected to the general ventilation system or is output separately through the wall to the outside. According to the mounting method, all exhaust fans are divided into ceiling and wall, as well as built-in and overhead.


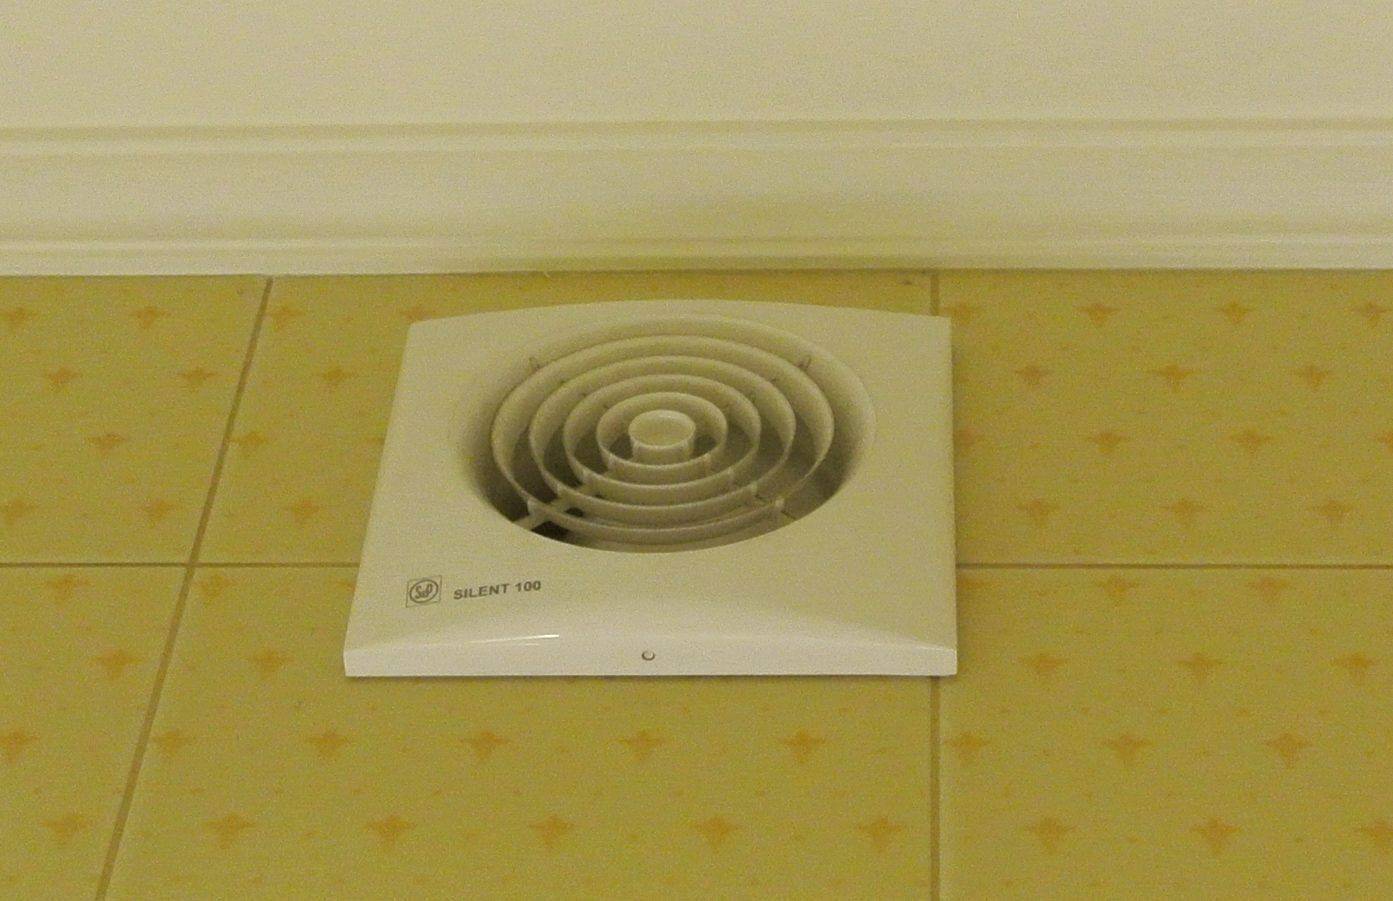
Bathroom ceiling fan
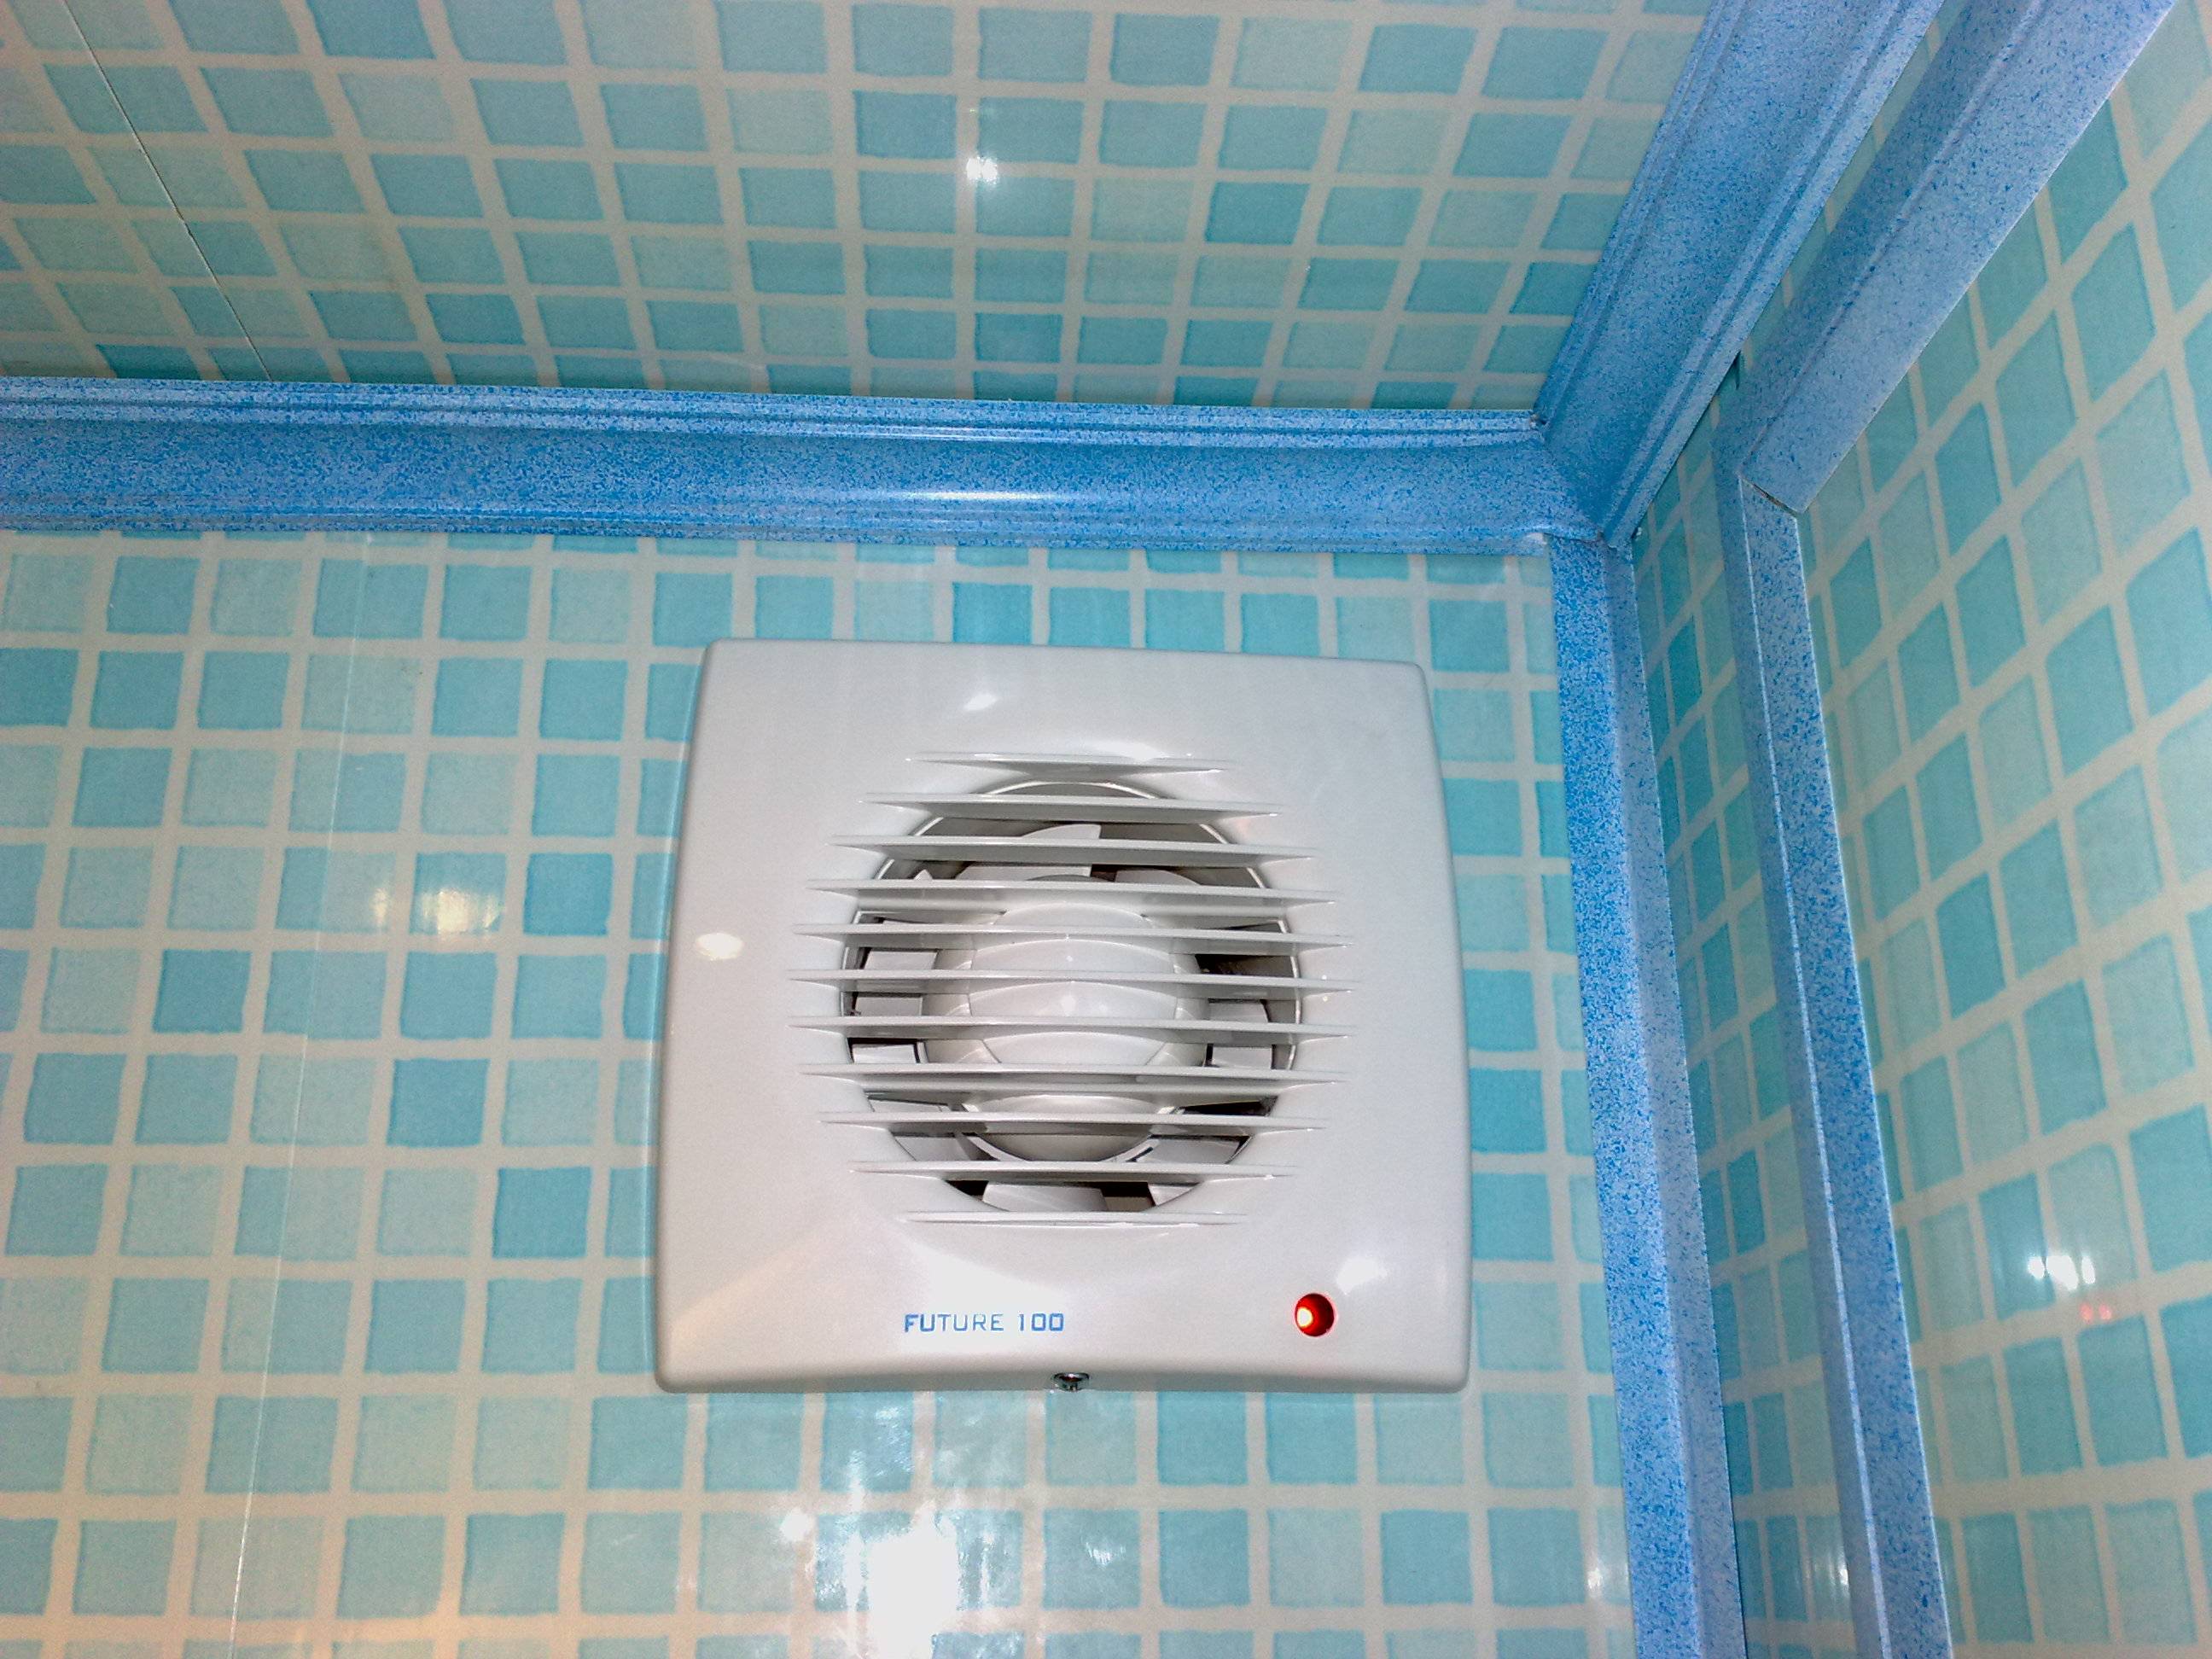
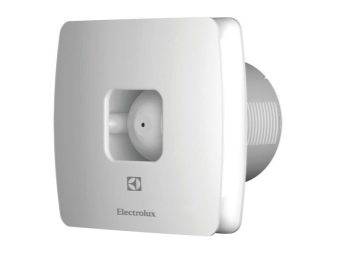
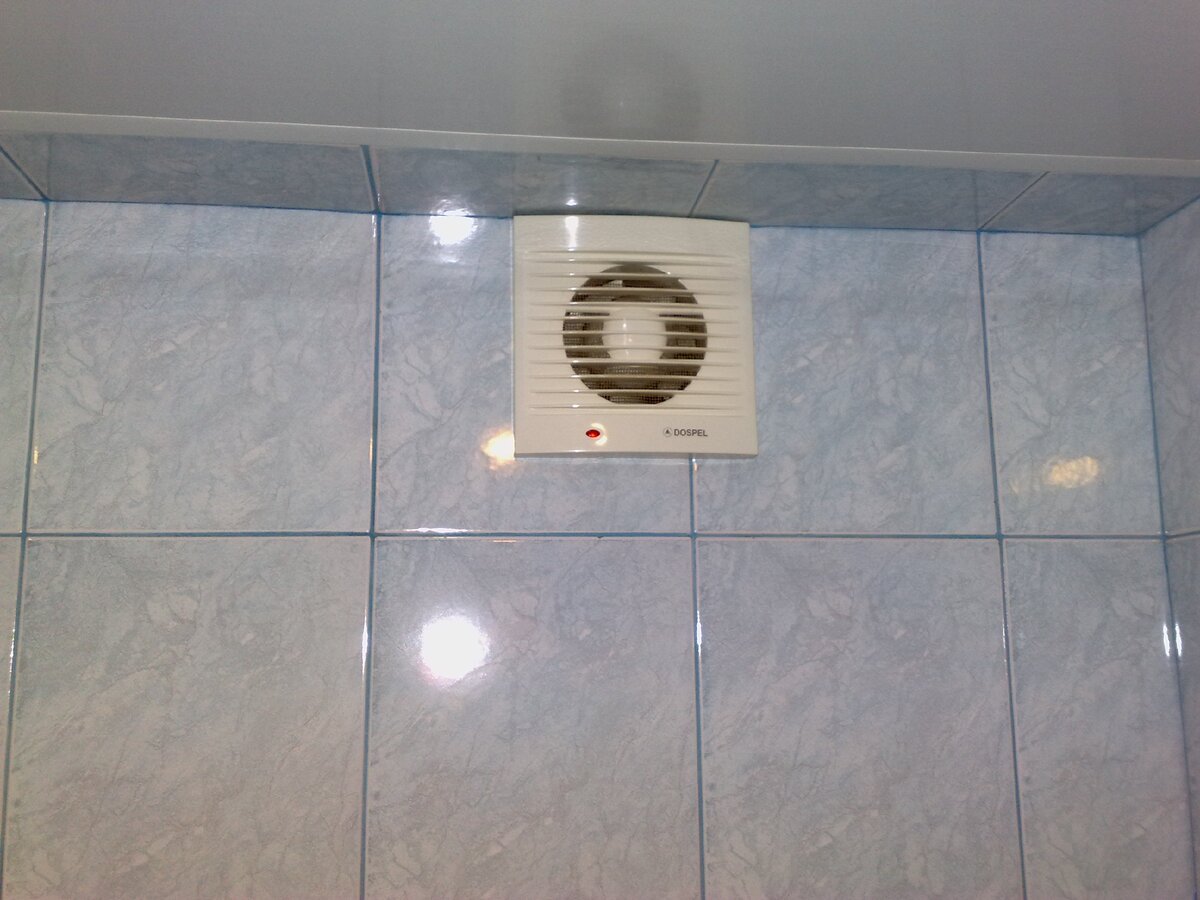
Wall hood
Ceiling ones are less in demand, although they are distinguished by high performance and simple installation.Such a fan is capable of actively circulating a large volume of air, so it is great for spacious bathrooms. But most consumers still choose wall-mounted models, both built-in and overhead. They are easy to install, easy to use, easy to clean and replace. Due to their compact size and modern case design, they look quite aesthetically pleasing, fitting perfectly into any interiors.
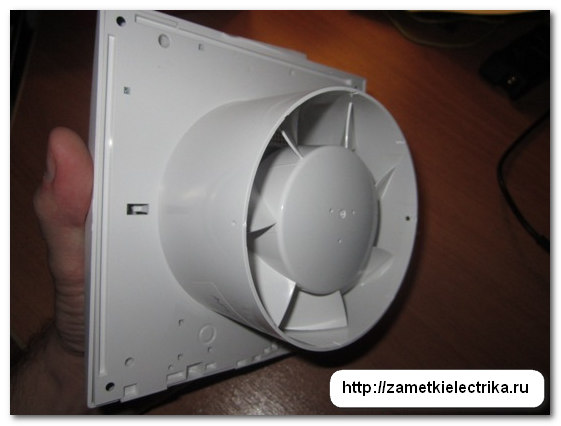
On the picture axial fan for bathroom
Depending on the internal device, fans are divided into:
- electric - simple models with a built-in or external switch. That is, the residents of the apartment must independently turn the device on and off as needed. A very common option is when such a fan is connected to a general switch in the bathroom, and then the hood turns on simultaneously with the lamps. True, in this case, moisture does not always have time to completely go into the ventilation, but electricity consumption is reduced;
- automatic - exhaust devices equipped with special sensors. Models with humidity sensors automatically turn on as soon as the moisture level exceeds the norm, and turn off when the condensate has completely evaporated. Models with motion sensors turn on when a person appears and turn off when the room is empty. There are also automatic fans with timers that operate only for a predetermined interval of time.
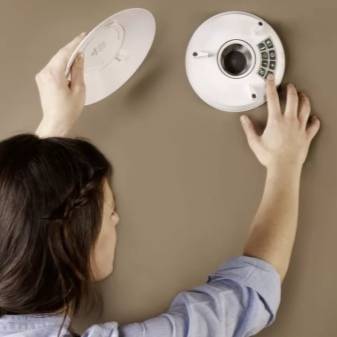
Hidden bathroom fan
Pictured is a backlit exhaust fan.
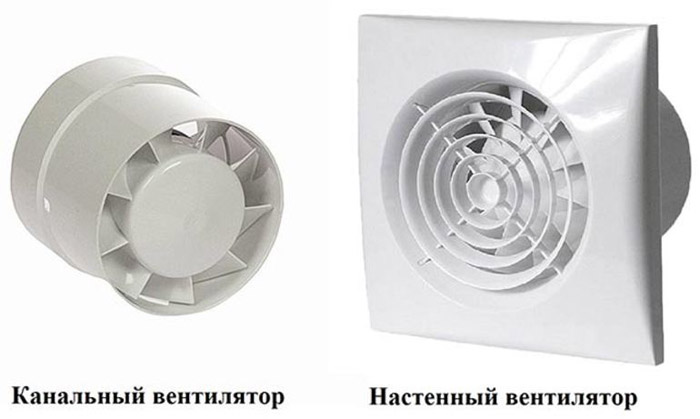
Exhaust fans are also classified according to the type of construction.In the domestic sphere, the most popular are axial and channel devices that are suitable for multi-storey and private houses.
Axial fans
In axial fans, the movement of air occurs along the axis of rotation of the blades, which is the reason for such a name. The design is very simple: a body (usually cylindrical), an impeller with blades, an electric motor. Many models have a front-mounted manifold that improves aerodynamic properties. The structure of the blades reduces the resistance to air flow, so the fan has a high efficiency. According to the type of installation, such devices can be both wall-mounted and ceiling-mounted.
Axial fans
Most modern axial fans are characterized by low power consumption and reduced noise level, unlike the models of the previous generation. They can work for a long time without stopping, are easy to clean, and have an attractive design. For these devices to be effective, the length of the duct should not exceed 4 m. The same applies to the area of \u200b\u200bthe bathroom - the smaller the room, the more efficient the hood.
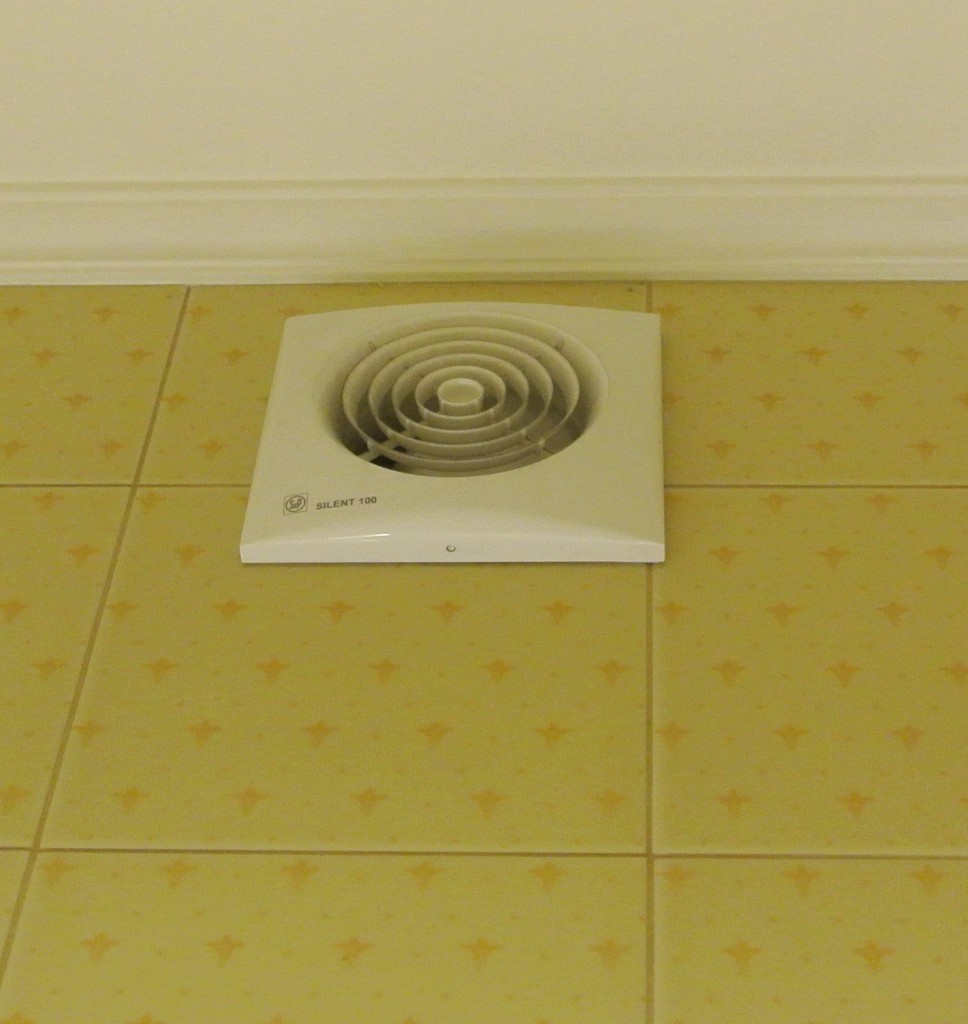
axial exhaust fan
Duct fans
duct fan
For bathrooms of a large area, ducted or centrifugal fans are best suited. Their design differs markedly from axial devices: inside the cylindrical body there is a drum with many narrow curved blades. With the help of the centrifugal force generated by the blades during rotation, the air is drawn inward and directed to the ventilation duct.
CAT fans for in-duct installation
Such fans work effectively with air ducts from 4 meters long, they are installed both on the ceiling and on the wall (depending on the modification). The extraction can be carried out continuously, but usually the device is connected to a switch in the bathroom or to a humidistat. This saves energy and extends the life of the fan. Many models are designed for concealed installation and are relatively quiet, so that they are almost invisible in the bathroom.
Exhaust diffuser in the bathroom
duct exhaust fan
natural ventilation
Natural extract for the bathroom - a system for providing air circulation in the sanitary room without installing electrical equipment. It works due to the properties of gases when heated to rise up, called the law of convection. Such an extract to the bathroom is planned at the stage of creating a project for a room or house, as it requires the installation of air ducts that open to the attic or roof.
 natural ventilation
When creating a project for hoods in the bathroom and toilet, the following rules are followed:
- Air ducts must have a strictly vertical orientation, and each ventilated room has its own shaft.
- Air shafts can be connected into one common exhaust duct for the bathroom and toilet, kitchen and sauna rooms, but only if they are located on the same floor.
- The hood to the bath, kitchen, sauna and toilet are combined on the floor with one common channel, if these rooms are located in one part of the house. If there is a significant distance between the ventilated rooms, it is easier to make separate air ducts.
- A natural bathroom hood has a small draft force, so the air ducts must be made of a material with a smooth surface.
- When laying the duct with your own hands, it is better to avoid sharp turns, protrusions and bends, so as not to impede the circulation of air masses.
- If, when laying an air duct in a sanitary room, it is impossible to do without bends, you need to make the channel turn smoothly with a radius of at least 100 mm.
- Inside one-story buildings, the hood to the bath is laid through the ceiling to the attic, and then to the roof.


The natural exhaust for the toilet and bathroom works according to the law of convection. Warmer air, saturated with water vapor, rises to the ceiling of the sanitary room, enters the air duct, and then is drawn out into the street due to the difference in external and internal temperatures. The tension that is created during the circulation of air masses is called traction force. To check whether the exhaust ventilation is working with your own hands, you need to bring a match to the grate: if the flame deviates towards the channel, then everything is in order.
Fan connection diagrams
There are several different schemes for how to connect an exhaust fan in toilet or bathroom room. The difference lies in the power supply to the device.
The wiring itself should be installed during repairs in the room, since the most correct from an aesthetic point of view would be to remove it into the wall. If this is not possible, consider decorative overlays or boxes.
There are three ways to connect to the mains:
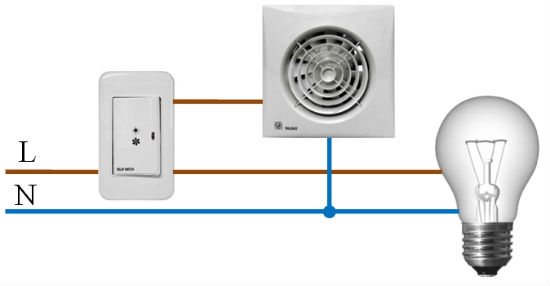
- With a light bulb. When implementing this scheme, the device is connected in parallel with the light.Accordingly, while the lighting in the room is on, the fan will work.
- Separate switch. Not the most convenient scheme, since you have to constantly remember to turn on the hood. Of the benefits: if necessary, it is possible to turn on the device autonomously.
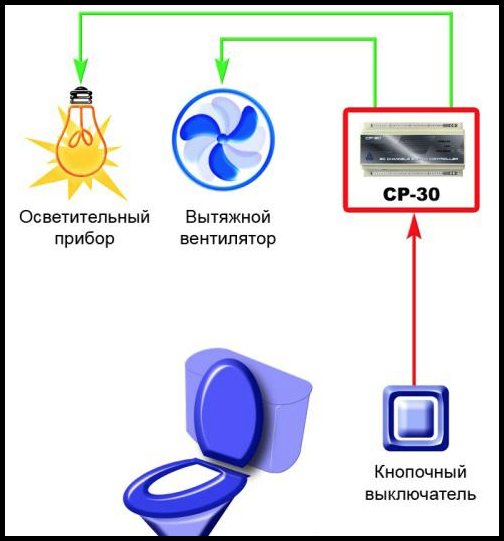
- Through automation. For this, a timer or a special sensor is used. Convenient, but more expensive way.
From a light bulb
The question is often asked on the forums how to properly connect the hood in the bathroom using the method of connecting the fan wiring in parallel with the light switch.
The light bulb mounting method is the cheapest and easiest way to connect the exhaust fan wiring. In this case, when you turn on the light in the room, the hood also starts to work.
The device turns off only when the light is off.
To implement this scheme, it is important to understand how to connect the fan to the light switch, and what are the pros and cons of this connection. The pluses include:
The pluses include:
- ease of installation;
- low cost.
The downside can be considered that the hood works even when it is not needed (for example, during the adoption of water procedures).
It is also important to remember that often the fan operation time in this case is simply not enough, and you have to leave the light on for a while. This leads to wasted energy
In addition, with frequent turning on and off of the device, the resource of the motor is generated, which leads to its speedy breakdown.
From the switch
Many people, having learned how connect the fan in the bathroom to the switch light, as well as the pros and cons of this method, understand that it does not suit them.For ease of use, you need to connect the device separately from the light.
This is necessary for those cases when long-term ventilation of the room is required after people have left it. For example, after taking water procedures with a lot of steam.
Such a scheme for connecting an exhaust fan in the bathroom and toilet is more expensive and difficult to install. To implement it, you will need an additional cable, as well as a device responsible for turning on the device.
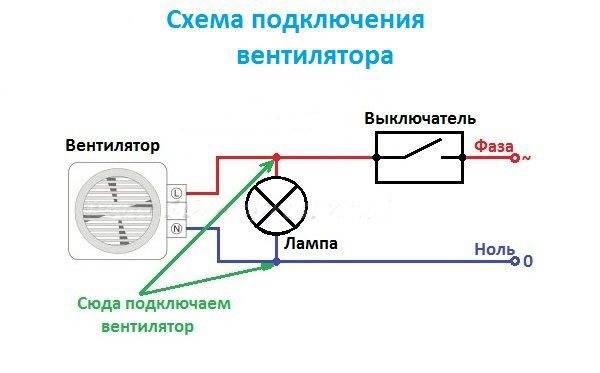
In fact, the circuit itself repeats the circuit for connecting a light bulb, only instead of a lighting fixture there is a fan. All this can be displayed on a two-key switch, one button of which will be responsible for the light, and the other for the hood.
Of the pluses, it should be noted the possibility of autonomous activation of the hood. The disadvantages include the lack of automatic shutdown (a forgotten device can work for a very long time).
Through automation
The most modern is the scheme for connecting a fan in a bathroom with automation elements - with a timer and a humidity sensor. The most interesting should be considered the possibility of connecting a timer.
This allows you to program the fan run time. For example, you can set the settings so that the device works for a while after a person leaves the room, and then turns itself off.
Thus, the room is sufficiently ventilated, and at the same time there will be no unnecessary energy consumption.
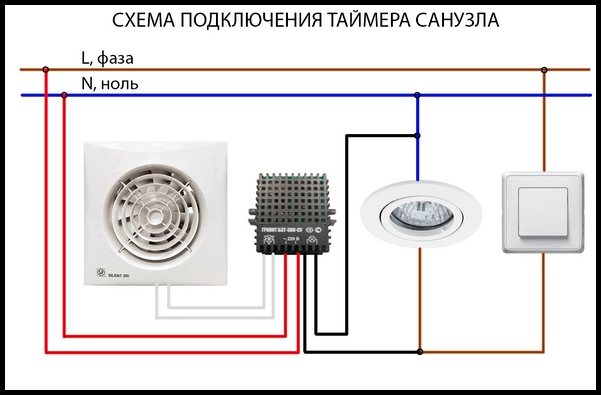
The installation scheme itself is quite simple - it is similar to connecting a fan through a switch. The main difference is that, in addition to the zero and phase terminals, there is also a signal wire that is connected to a lighting bulb.


The standard workflow is as follows:
- The fan turns on at the same time as the light.
- As long as the light is on, the extractor is working.
- After turning off the lighting, the fan runs for a while and automatically turns off.
- The main difference between a fan with a humidity sensor is that the device has a built-in sensor that measures the amount of water vapor in the air. When the humidity rises to a certain level, it sends a signal to the relay, which closes the circuit.
The fan starts to work. When the humidity in the room decreases, the circuit opens, stopping the operation of the hood.
Types of bathroom ventilation
Room ventilation parameters are regulated by the current SNiP 41-01-2003. The standard prescribes several types of ventilation and the frequency of air exchange.
Ventilation can be of two types.
Natural
With the help of special openings in the bathrooms, fresh air is supplied and exhaust is removed. The exchange occurs due to the pressure difference - warm air from the room rises and is released into the atmosphere through the ventilation ducts. Fresh air enters from below through openings in the door. The dimensions of the openings are calculated taking into account the climatic zone of the buildings, the volume of the room and the frequency of exchange. In bathrooms, the air should be changed 6-8 times per hour.
Natural ventilation in the bathroom
The advantages of such a system are simplicity and autonomy of operation.
Disadvantages - a large dependence on weather conditions, the likelihood of reverse thrust. The air is not drawn out of the room, but forced in. As a result of this phenomenon, the humidity in all rooms increases.
High humidity causes mold and mildew
Another disadvantage is high heat loss. In the context of constantly rising energy prices, the cost of maintaining premises is increasing. Homeowners are trying to reduce losses in various ways. This must be done skillfully, as a result of unprofessional intervention, instead of the desired savings, you can get serious losses. The walls and ceilings of the bathrooms will have to be repaired.
Forced
Ventilation scheme
Fans are used to supply/extract air. The exhaust fan for the bathroom removes air only in a given period of time or at certain values of air humidity (depending on the type and capabilities of the device), the supply of fresh air is provided by special products. According to the method of air supply or exhaust, forced ventilation can be exhaust, supply or supply and exhaust. If the fan only removes air, the system is forced exhaust, if it only blows air, it is forced supply. If there are two fans, one of which supplies and the second removes, then the system is called supply and exhaust.
The use of a forced ventilation system in the bathroom allows you to achieve regulated humidity levels with minimal heat loss. Which type of ventilation to choose depends on the capabilities and wishes of the owner of the apartment and the architectural features of the building.
Ventilation in the bathroom


