- Self-installation options for bathtubs
- DIY installation instructions
- Assembly of legs and siphon
- How to set the right height from the floor?
- Examination
- grounding
- Joint sealing
- Screen
- Installing a bathtub in a tiled bathroom
- Installing an acrylic bathtub on support legs
- Cast iron bath installation
- Siphon installation
- Second phase
- Leveling
- Guidelines for choosing the right bath
- How to install an acrylic bath on a brick base
- Leak test and preparation for operation
- Installing a cast iron bath
- Basic requirements for choosing a bath
- Transport rules
- Helpful Tips
- Siphon assembly features
- Installation of an acrylic bath on bricks
- Assembly of the siphon group
Self-installation options for bathtubs
Installing a bathtub without a master is a serious task. The ease of use of the product and its service life greatly depends on what it will stand on.
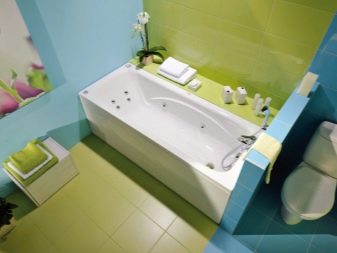
It is important to choose the right height, and for this the bath is installed on legs, a podium or a frame. Each option has its own characteristics and is suitable for different types of baths.
Installing a bathtub on legs
Many bathtub kits include standard legs that allow you to easily and quickly put the product. Depending on the material of manufacture of the product, the legs may have a different design.For example, in the case of plastic and acrylic models, the legs are not attached to the bath itself, but to the profiles on which the bath itself is placed.
To install the bath on legs, it is enough to bring it into the room, tip it over on its side and fix the supports, and then turn the bath over and place it in the planned place. Most often, cast-iron legs are placed on the legs, which have a large mass, rigid walls and are generally quite stable.
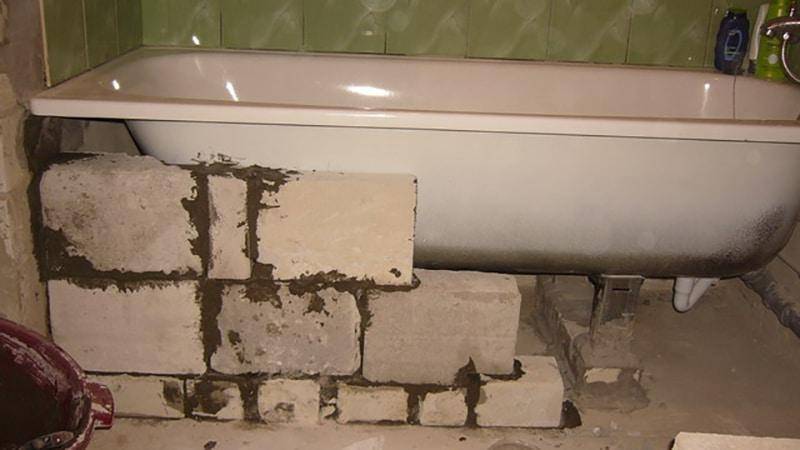
Podium installation
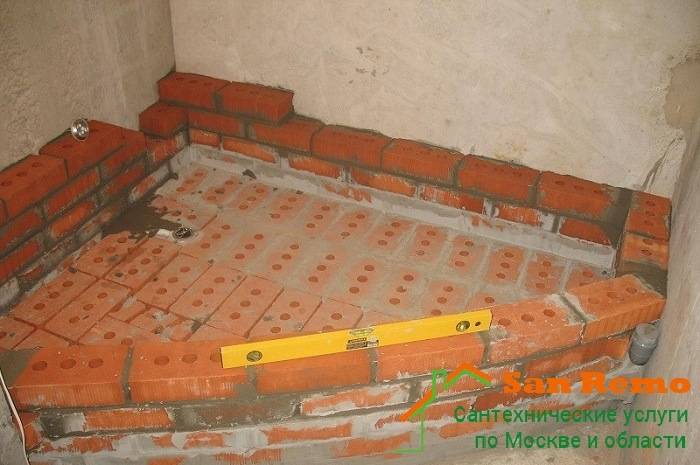
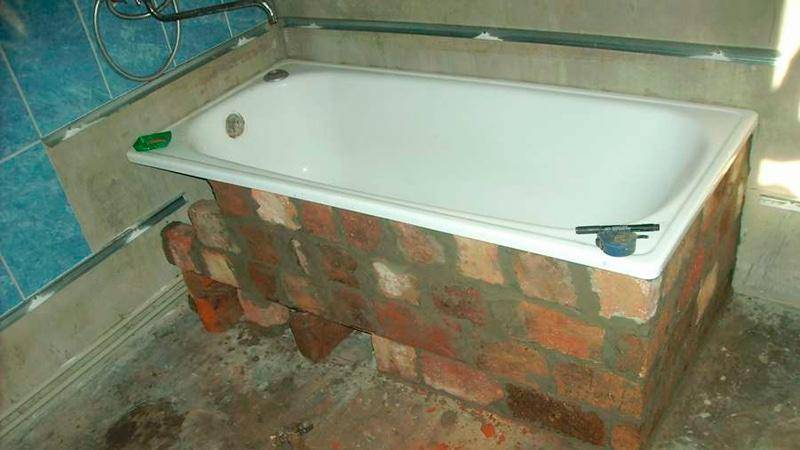
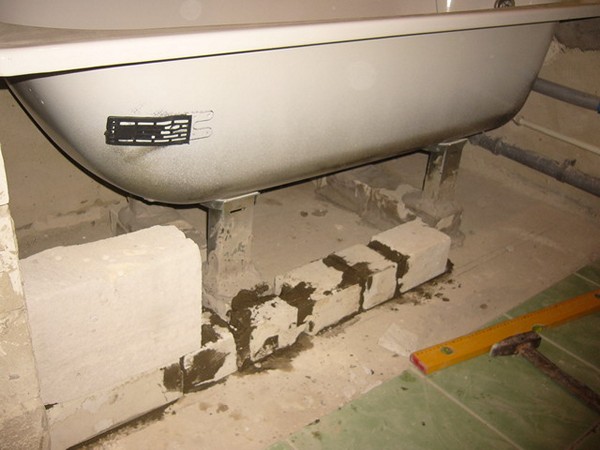
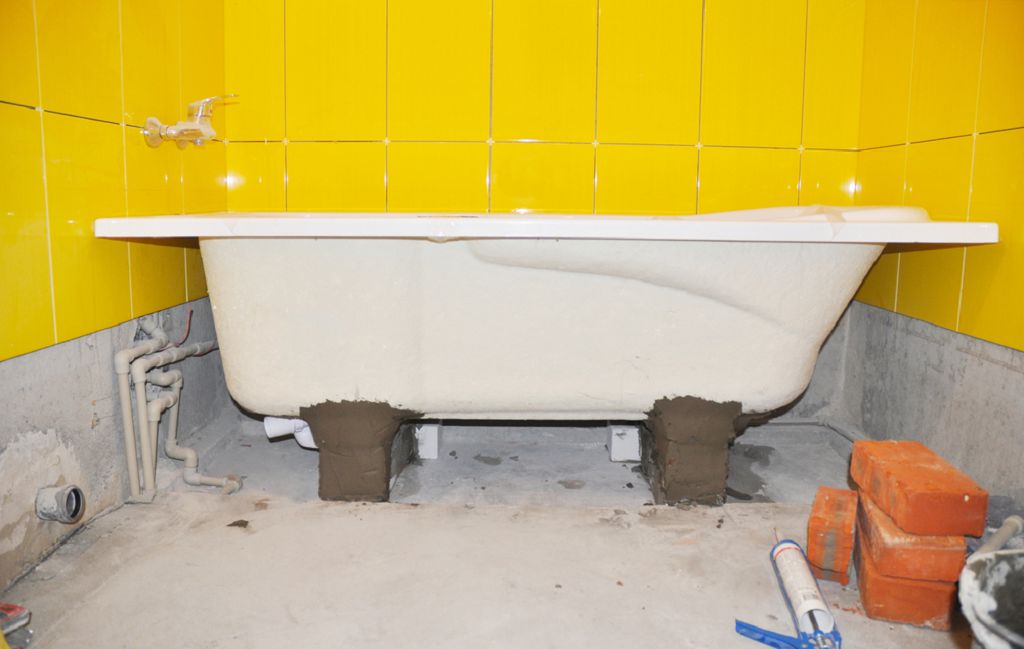
When the standard legs from the kit are not enough to stabilize the bathtub and support the bottom of the bowl when it is filled with water to the brim, you can create a brick podium without the help of a master. It is necessary to assemble a support that will repeat the shape of the bottom of the bath. It is better to use a solid brick that resists moisture and is not afraid of weight loads.
Steel bathtubs are usually installed on the podium, especially thin-walled ones. Under the influence of water or under the weight of a person, they can be deformed during operation, and this leads to peeling and cracks in the enamel coating.
Installation of a bathtub on a frame
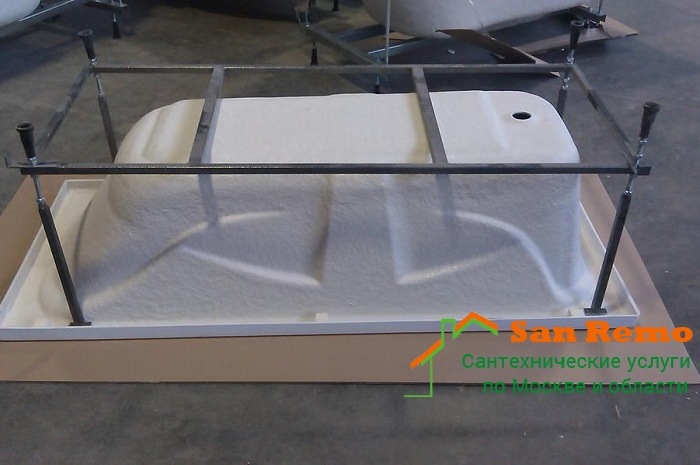
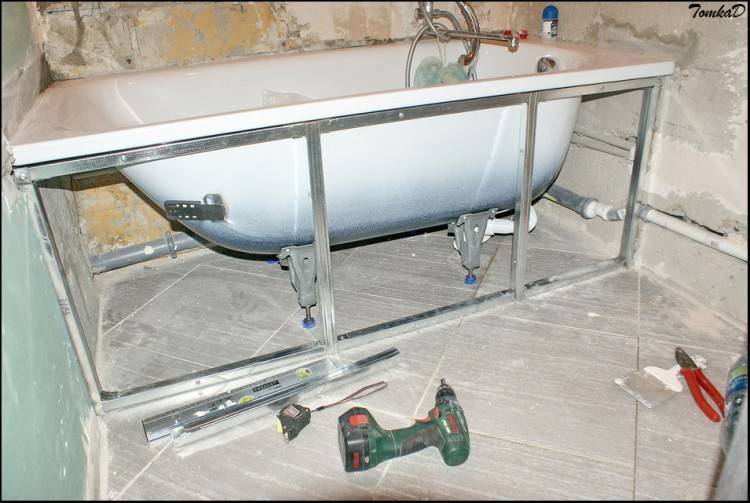
In order to avoid deformation of the bowl and strengthen the structure, it can be installed on wooden or metal a frame along which the mass of water and a person will be evenly distributed. Acrylic and plastic models are traditionally placed on the frame, which are quite fragile (compared to cast iron), but large or corner steel bathtubs are also often installed on them.
We also note that most acrylic and plastic bathtubs are sold with a set of legs and a screen, which performs an exclusively decorative role.
DIY installation instructions
Assembly of legs and siphon
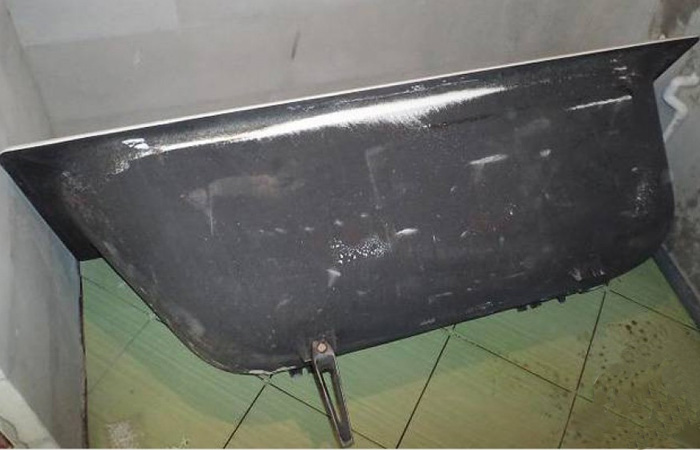
STEP 1.First of all, you need to put the bathtub on the side edge, having previously covered the floor with cardboard or cloth, so as not to damage the coating.
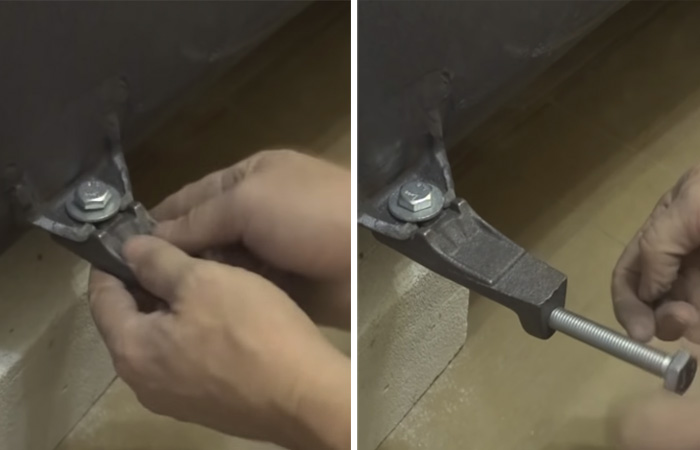
STEP 2. The next step is to assemble and install the legs, how do you attach them? Although each model has its own legs, the principle is the same everywhere. They consist of a wedge and an adjusting bolt. First you need to fix the wedge to the special lugs on the body, this is done with the help of a bolt, washer and nut from the kit. Then the bolt itself is screwed into the wedge. Do the same with the rest of the legs.
For more information on installing legs, see our dedicated article.
STEP 3. Next, you need to assemble and install a drain-overflow, it is also called a siphon with overflow. This is done quite simply:


first, the drain is assembled: parts (7), (4) and (10) are interconnected using a special nut, while it is important not to forget to install rubber gaskets (9), they will help to avoid leaks;
the overflow (14), (17) is assembled according to the same principle, and then connected to the drain with a nut (4);
the structure is applied to the corresponding holes on the bath, gratings are laid on the outside and fastened with bolts (5) and (20)
once again, the broach of all nuts is checked.
In the picture, the conditional wall and bottom of the bathroom are marked in red.
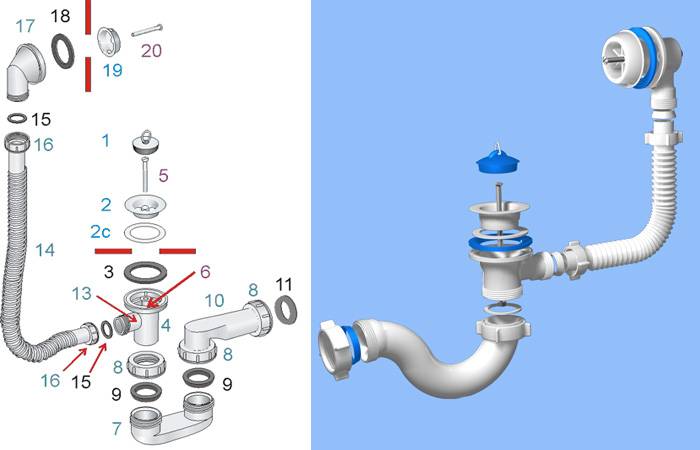
Rubber gaskets have different diameters, so carefully look at which one you need to install. otherwise the siphon will leak.
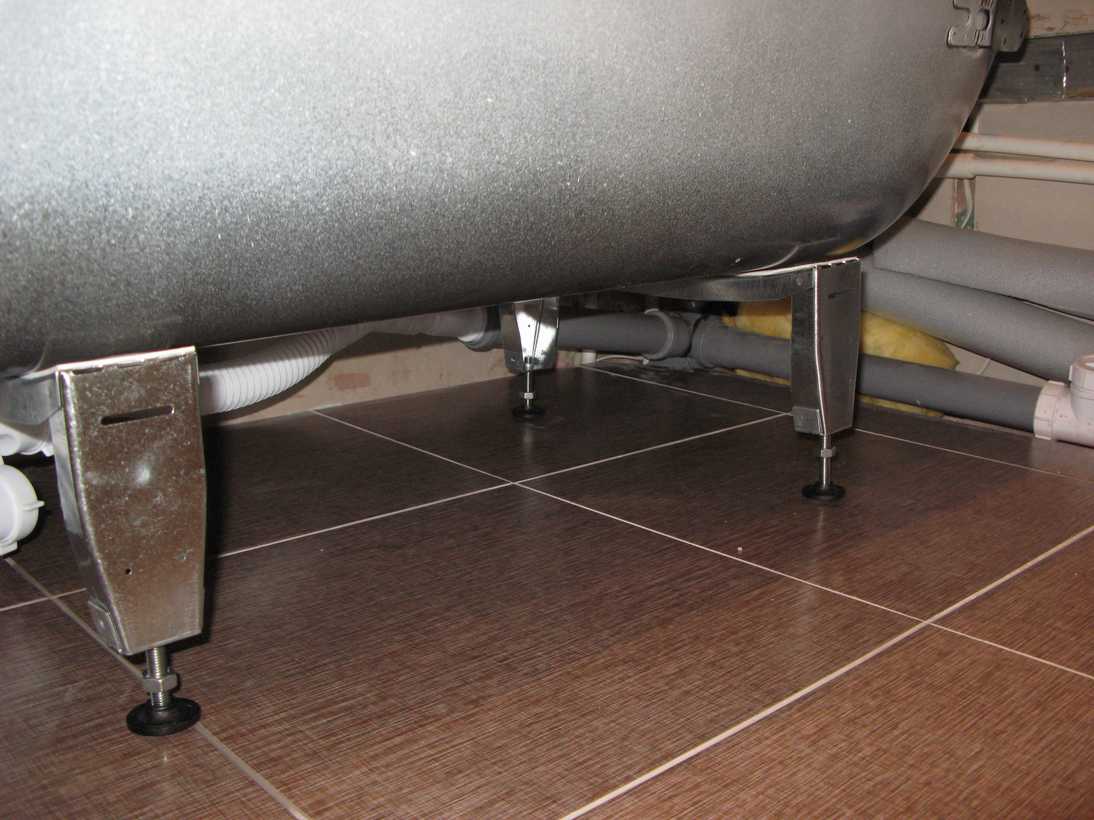
How to set the right height from the floor?
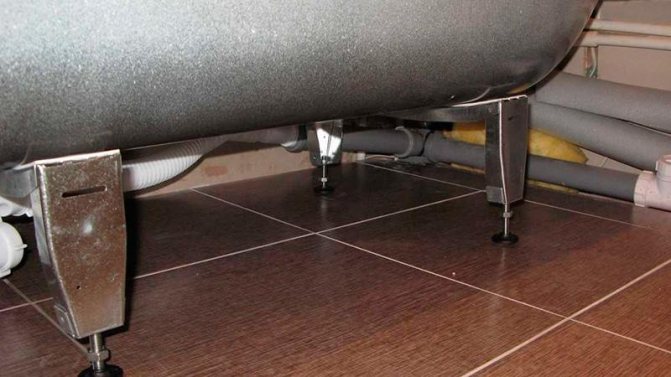
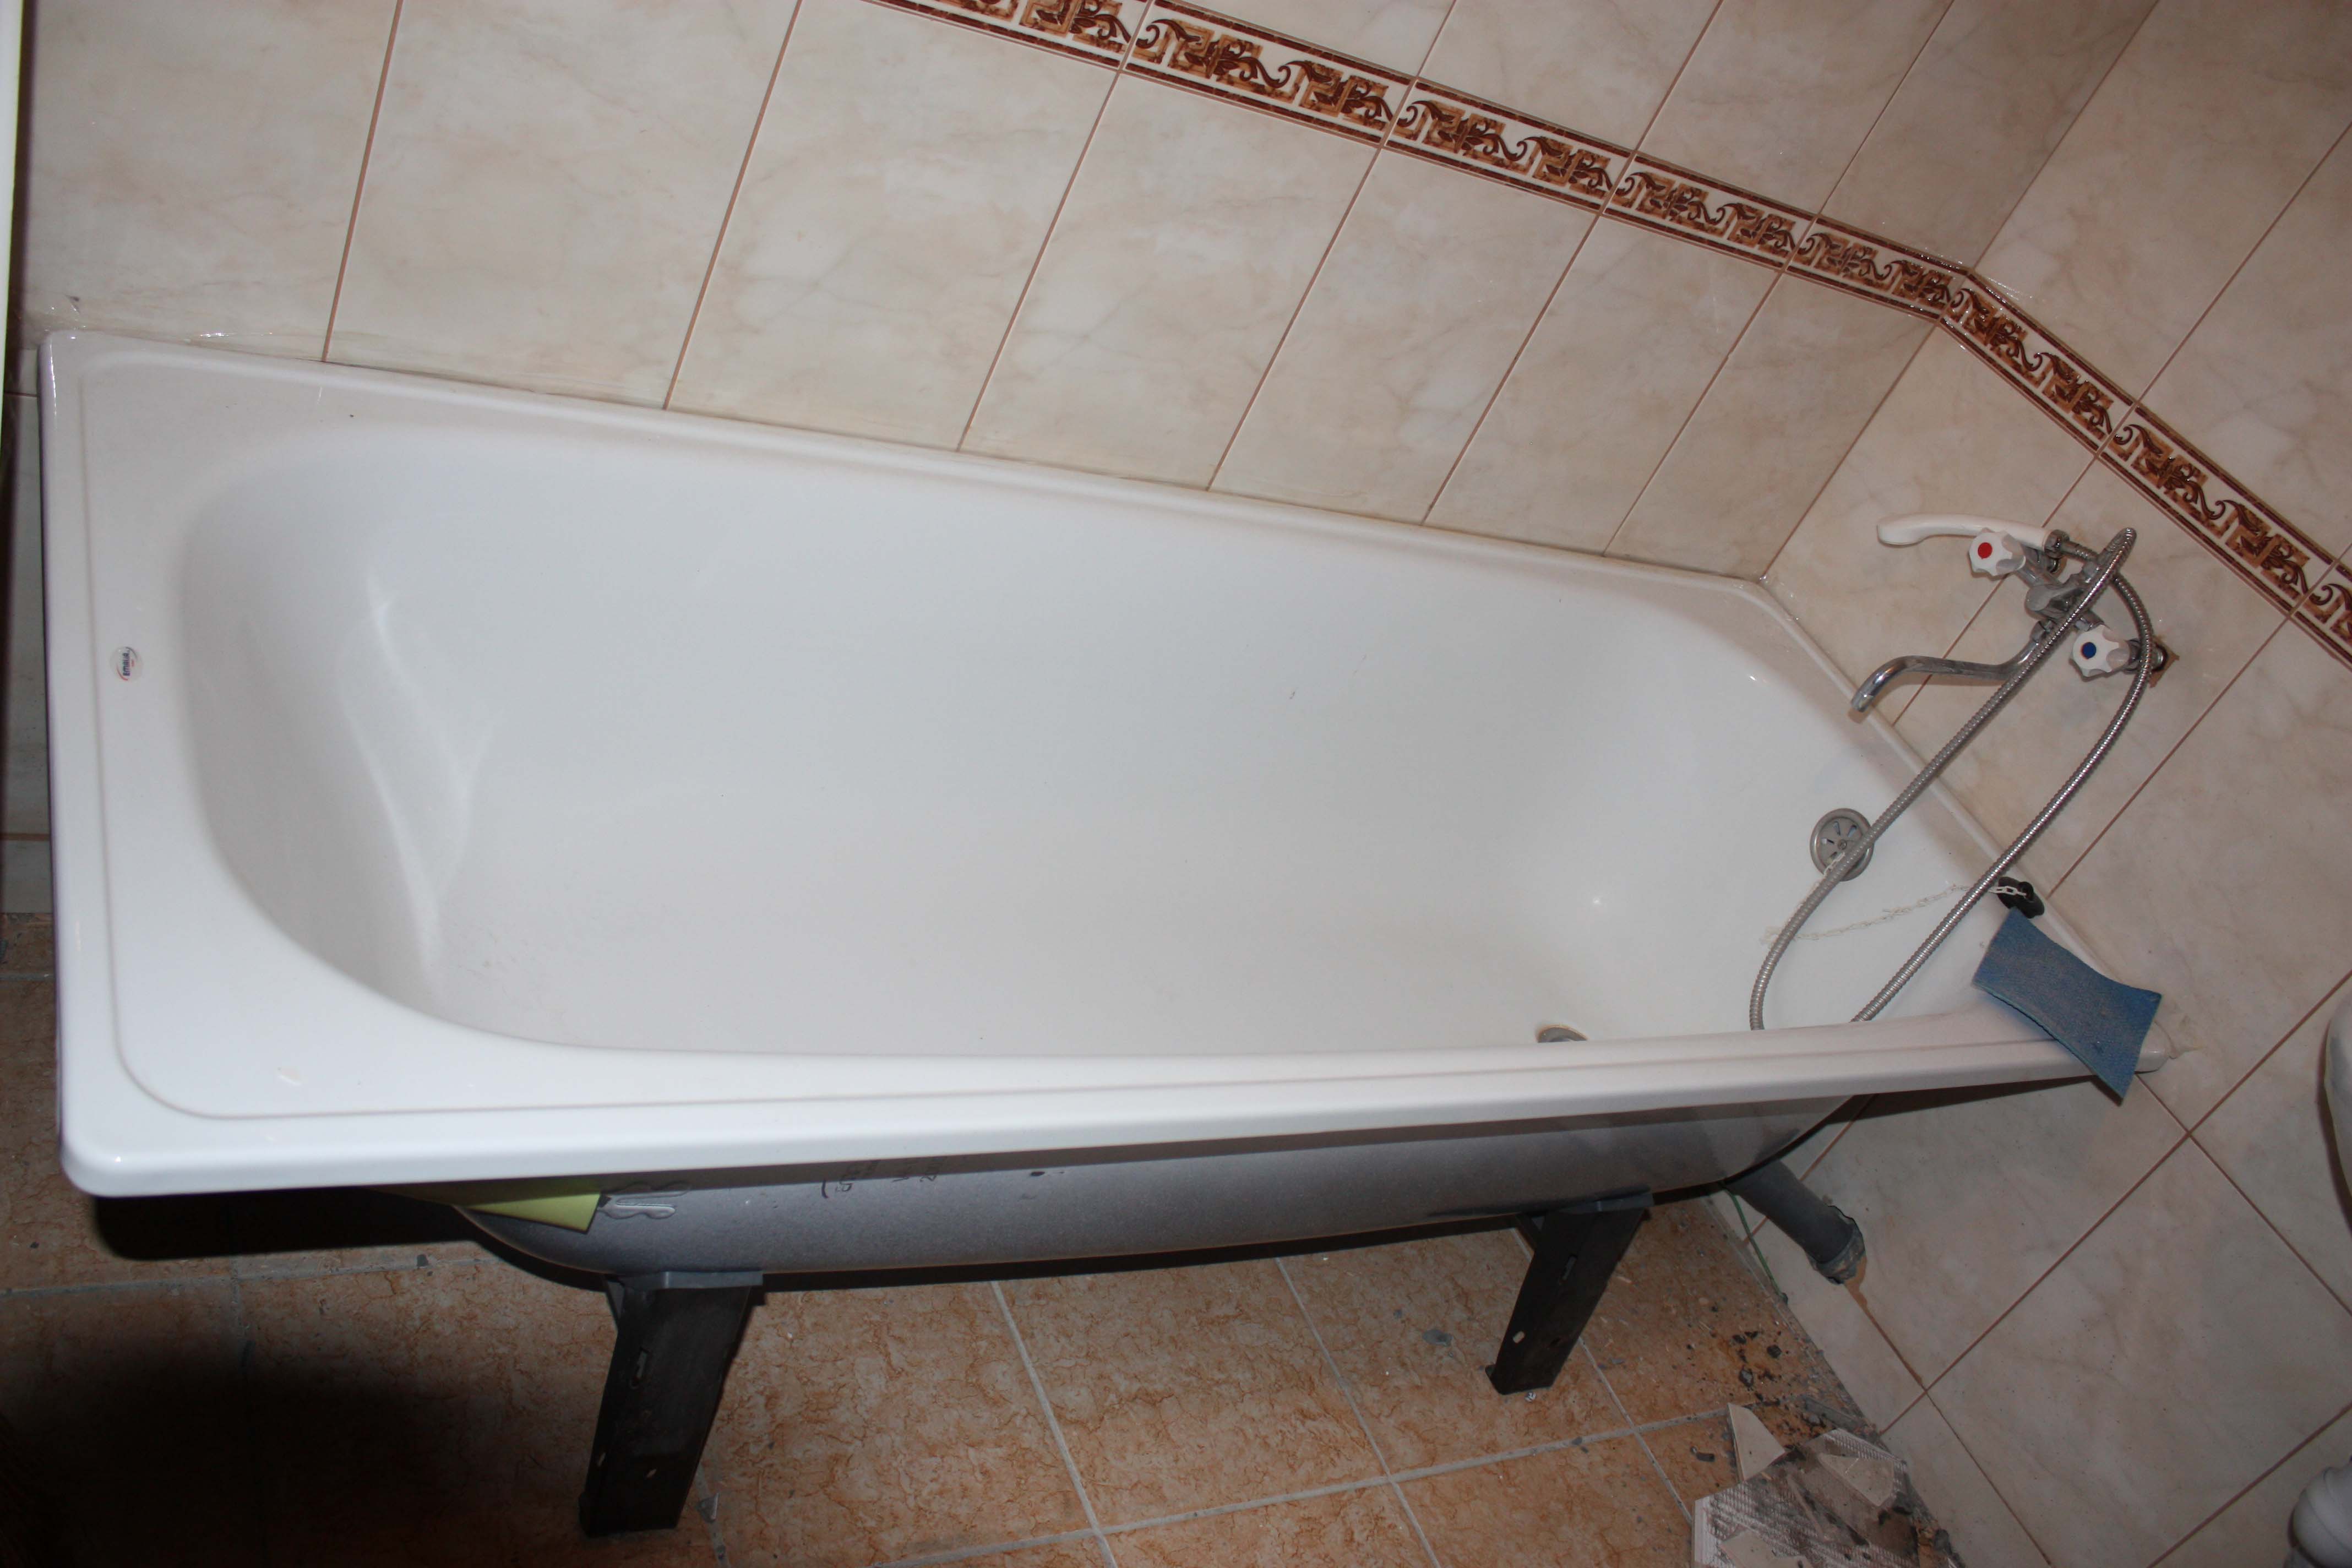
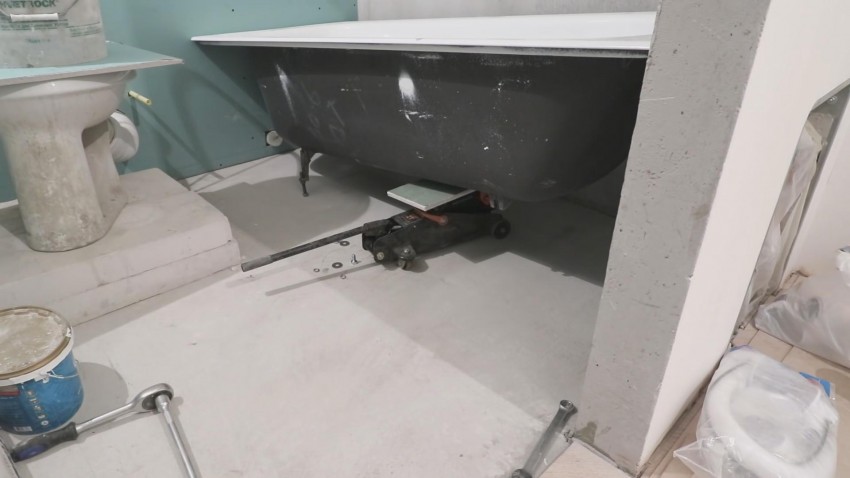
Now the font needs to be turned upside down, put on legs and move to the wall. This will require the assistance of a second person. This must be done very carefully so as not to damage the tile. Next, we connect the collected drain to the sewer.This can be done using the corrugation from the kit.
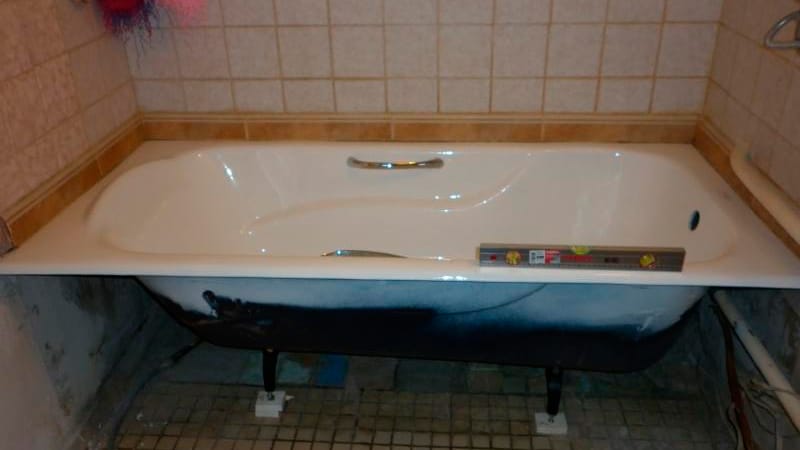
How to raise higher? The height of the bathtub is adjusted by twisting the legs, for this you need a wrench. Set the right near leg so that the right near corner is at the required height, the optimal value is 60 - 65 cm.
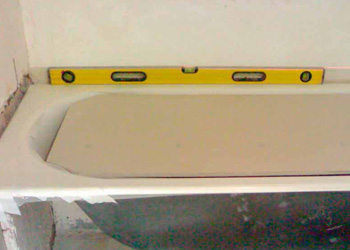 Next, put the level on the front side and set the left near leg so that the level shows the ideal horizontal. Perform the same manipulations with the far legs.
Ceiling the bath and check that it "does not play." If the legs are not adjustable, you will have to file them, or lay steel plates.
A slope for draining water is provided in the design, so you do not need to do an additional one!
Examination
Next, the font must be checked. Fill it with water and then remove the cork. Look under the drain, if there is water - you need to tighten all the nuts well again, wipe the puddle and repeat the procedure again. If history repeats itself, it remains only to change the siphon.
grounding
Many people forget about grounding, but in vain! After all, a font made of an alloy of carbon and steel conducts electric current, so it is necessary to equalize the potential. For this, a grounding conductor is used. On some fonts, for example, models of the Roca brand (Roca), there is a special plate to which the conductor is attached using a conventional bolt, but if it is not there, like with older products, you can clamp it with a leg nut after stripping one end of the wire.
It is better to use a copper wire with a cross section of 2.5 mm2. On the other hand, it must be connected to the ground loop of the apartment.
Grounding the bath is the safety of your family, it must be approached with all responsibility. Therefore, be sure to read our article on grounding bathtubs, which describes in detail all the nuances.
Joint sealing
 The next stage of work is sealing the junction of the wall and the cast-iron bath.
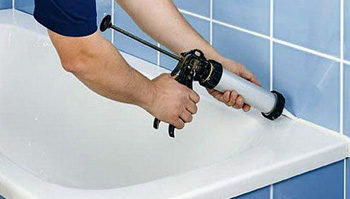
If the gap is small, just put on gloves, take silicone sealant and carefully walk it along the entire joint.
Then moisten your finger or a rubber spatula and wipe away any residue. If the gap is quite wide, you will have to use a sealing tape or a corner.
Screen
It is better to close the space under the font with a special screen so that it looks more aesthetically pleasing. There are many different models:
- sliding;
- mirror;
- accordions;
- with shelves;
- from tiles.
Which one to install is up to you. Here it is worth being guided not only by aesthetics but also by ease of use.
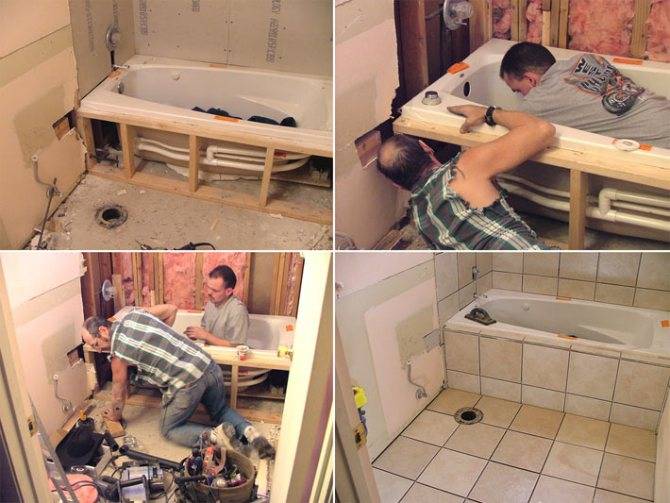


Installing a bathtub in a tiled bathroom
All the methods described above imply that the tiling will be done after the installation of the bathrooms. But, what if an iron bath or a shower cabin needs to be installed in a tiled room?
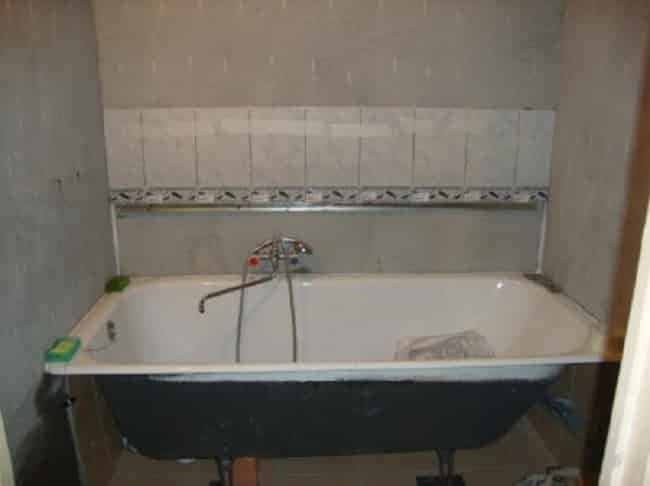 Installing a bathtub in a tiled room
We will be of the opinion that the tile is at a certain level and does not need to be repositioned. Then the installation process is greatly simplified;
It is necessary to level the floor and check it with the rule. You can install the bath on legs, a frame or bricks
Regardless of the method chosen, it is best to ensure a minimum gap between the wall and the bathroom;
After connecting the plumbing outlets of the toilet bowl, bathtub and other consumers, it is important to close the gap between the wall and the side of the bathtub.To do this, use a flexible plinth (made of aluminum or plastic), sealant or tile pieces;
First of all, the gap is covered with a layer of sealant
A plinth is installed on top of it. If the option with tiling is selected, then first the sealant is applied to the gap, and after it dries, the tile is installed. For its installation, you can use waterproof plaster;
It remains only to install the fan in the hood, mount the column or boiler, remove the remains of construction debris and check the correct connection.
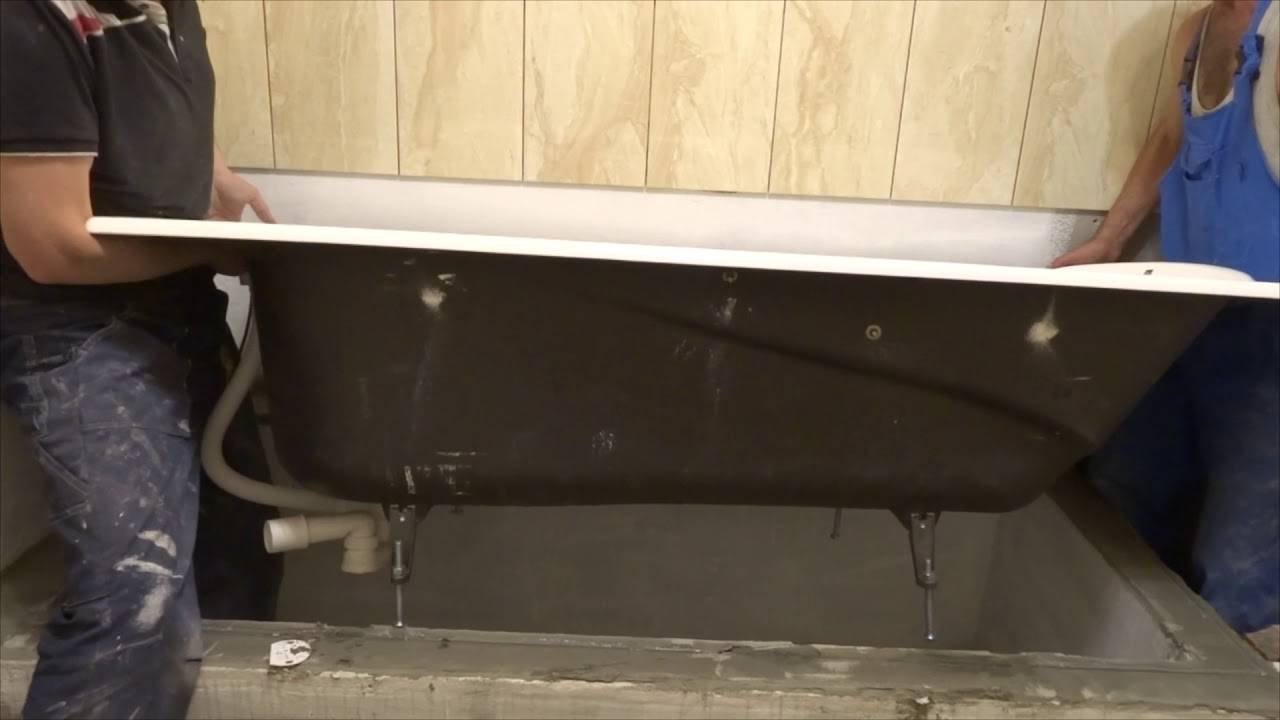
Installing an acrylic bathtub on support legs
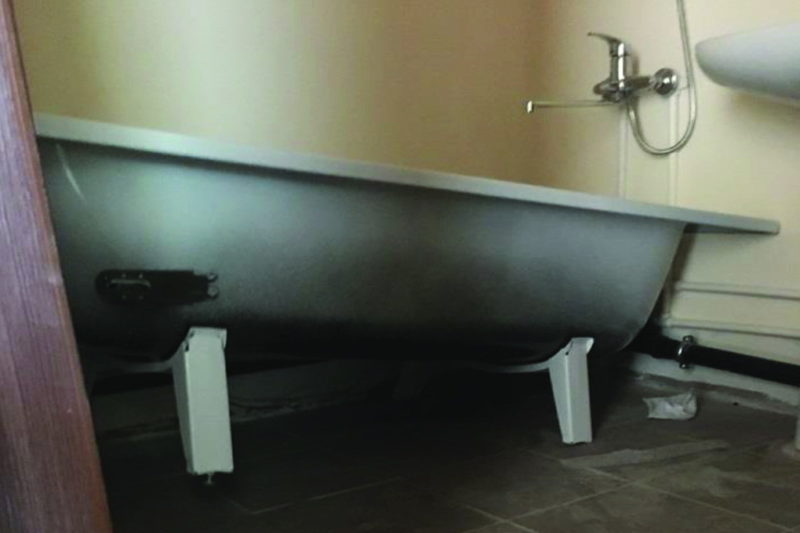
This is the fastest and easiest installation method that does not require a set of tools and special skills. The assembly of the bath with legs is easy if you use the instructions that are attached to the product. If, according to the instructions or during installation work, it becomes necessary to drill the font, then this should be done with a wood drill at slow speeds. Mounting on the support legs consists of screwing the legs to the bowl and adjusting them in place.
- Screwing legs. On the lower part of the bath body there are special seats marked with stickers or corresponding symbols. To facilitate self-assembly of an acrylic bathtub, some manufacturers supply products with pre-drilled holes. And if they are not, then you need to make these holes yourself. Then the legs are screwed into these holes, otherwise the load will not be distributed evenly and the bath will quickly fail.
- Support adjustment. Almost all bathtub legs are designed with the ability to adjust the height of the support in order to attach the bowl at the desired slope using a level.First, the bath is installed against the wall, and then the legs are twisted, setting the desired height. After that, proceed to horizontal alignment, when the level is set on the side of the bath in a horizontal position. If necessary, the legs are twisted up or down with a wrench.
When the optimal performance is set, the legs are fixed with nuts in the desired position. Sometimes, for greater reliability, the bathtub is screwed to the wall with special plastic or metal hooks, which are pre-mounted strictly horizontally around the entire perimeter of the bathtub into the wall at the same distance from each other. The hooks are screwed up to the wall cladding.

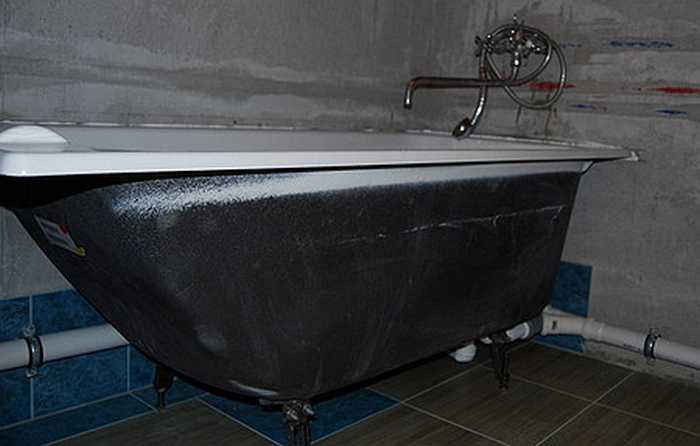
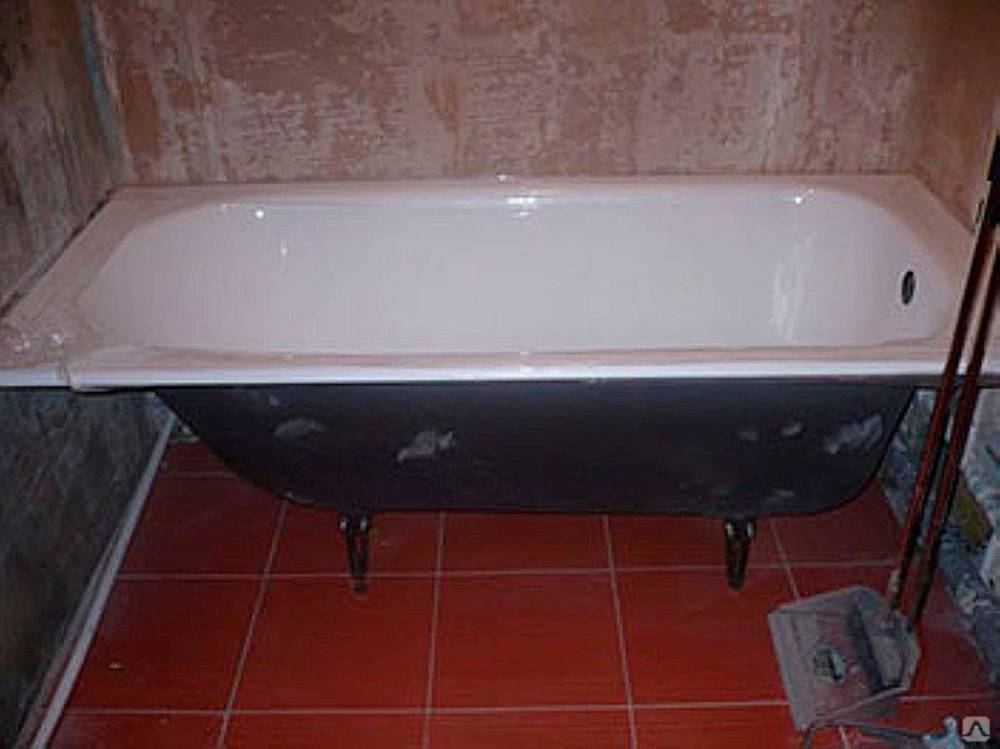
Cast iron bath installation
The technology of installation of a product made of cast iron is the same as the installation of a steel bath, so the descriptions of technologies for both types of baths can be combined.
Before starting installation, it is necessary to prepare a flat base on which it will be installed. If the floor surface is uneven, it must be planned using the arrangement of a cement screed. If your bath is open or has decorated legs, then before installing it, the walls are finished with tiles or polypropylene panels.
Siphon installation
Rubber gaskets are “put on” the drain hole and the entire harness is fully assembled according to the instructions that are attached to each specific product
Special attention should be paid to the correct installation of cone-shaped gaskets and, for reliability, coat all detachable connections with silicone sealant. At this stage, we do not attach the drain corrugation yet
Second phase
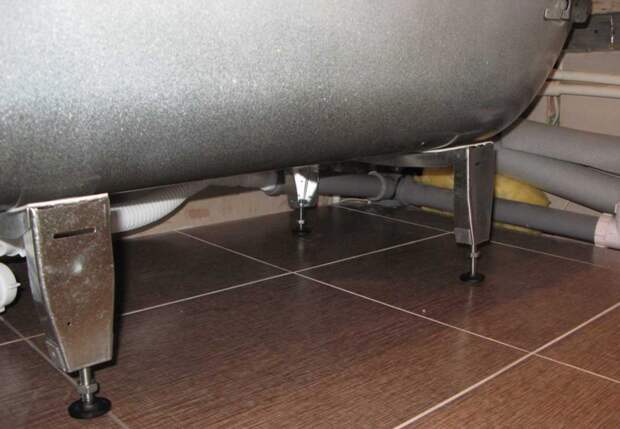
- Installing supports.In structures where the supports are fastened by means of wedges, they are lightly tapped with a hammer in various directions, starting from the center and gradually moving towards the edges. The operation is performed for a more reliable fastening of the wedges.
- We install a special screw with a fixing nut, which can be adjusted in height.
- We attach the outlet of the siphon outlet to the sewer drain and install the bath on the supports. At the same time, we put one of its sides on legs, and the other on temporary supports that serve as a safety net against a possible fall. We install two second supports and remove the safety net.
- We level the bathtub with the help of the adjusting screws, which were mentioned above.
Leveling
To perform this operation, it is recommended to use a long building level, which is able to perfectly "expose" the entire structure. It is first laid in the center along the bathtub and the bathtub is leveled in the longitudinal direction by tightening the screws, after which the same operation is performed in the transverse direction. A drain system is assembled, its tightness is checked by pouring water, if there are leaks, they are eliminated by tightening the connections and applying sealant. Cast iron or steel tub is ready to go!
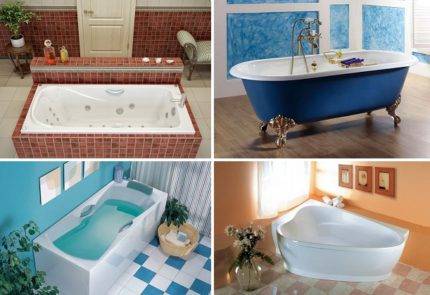
Guidelines for choosing the right bath
Modern industry offers us bathtubs of various shapes and colors, made from various materials. Due to the variety of models, the homeowner always faces the problem of choice.
If the shape of the container and its coloring excite us more from an aesthetic point of view, then important operational characteristics of the product depend on the material of manufacture: its practicality, appearance and durability.
In addition to the material, dimensions and configuration of the bowl, the choice of bath is influenced by the size of the hygienic room, the height of the sides that is convenient for all members of the family, the presence of additional devices and functions.
In the production of bath bowls are used:
Steel. Steel plumbing attracts with an affordable price, an abundant assortment. Due to the lightness, the installation can be handled without the involvement of assistants. The disadvantages include high heat transfer, the ability to deform, bend under the weight of large people, "noise" when water is drawn into the bowl.
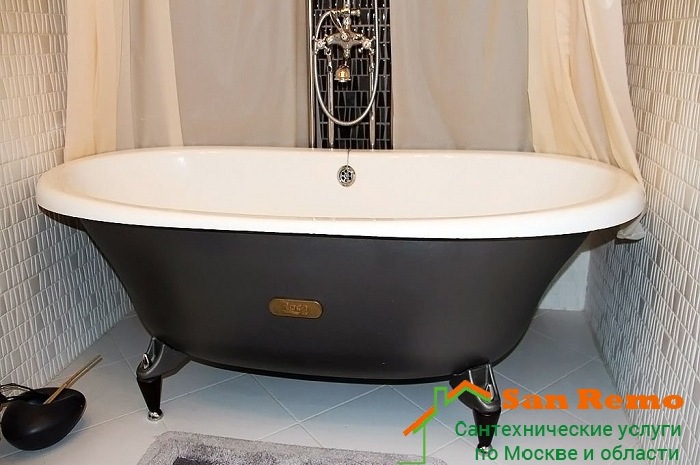
Cast iron. Expensive, reliable, durable. Does not make noise when filling with water, perfectly maintains the temperature in the container. Due to the impressive weight, the installation of a cast-iron bath cannot be carried out alone.


Plumbing is quite fragile, with careless handling, you can split the bowl or damage the enamel.
Acrylic. Easy and inexpensive option, which is easier and more logical to replace than to repair
It does not sound when water is filled, it retains heat, but it does not last long enough and does not please with stability. With the installation without difficulty, you can handle it yourself.
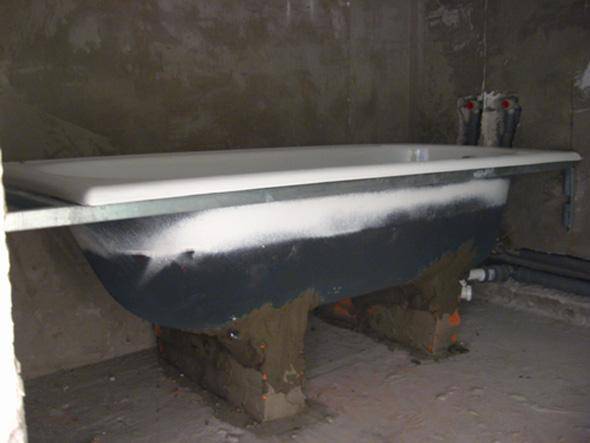
If there are people with impressive weight in the family, it is advisable to install sanitary containers made of steel and acrylic on brick pedestals or additional supports built from it.
These measures will provide stability and stabilize the position of the bottom.For owners with a less solid build, instead of capital brick fixtures, it is enough to install an additional frame made of a bar or a steel profile.
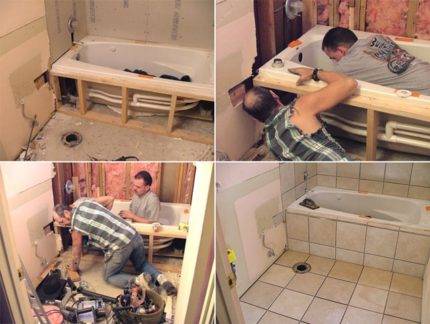 A frame made of a wooden block or a metal profile will provide an opportunity to tile a kind of bathtub wall or arrange niches for storing hygiene items under the plumbing (+)
The shapes of the baths are also pleasing with variety. In addition to the rectangular structures familiar to our eyes, there are oval and square ones. For small bathrooms, corner models are increasingly being used. And in addition to products in which it is more convenient to take a bath while lying down, those that are specially designed for procedures in the “sitting” position are also in demand.
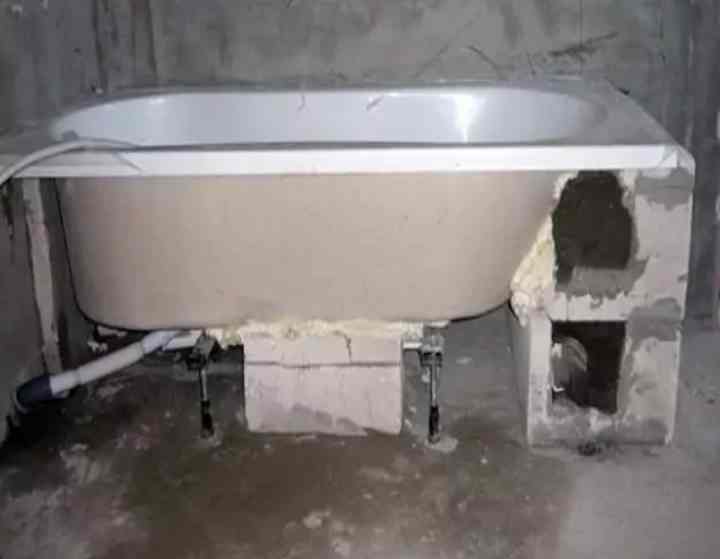
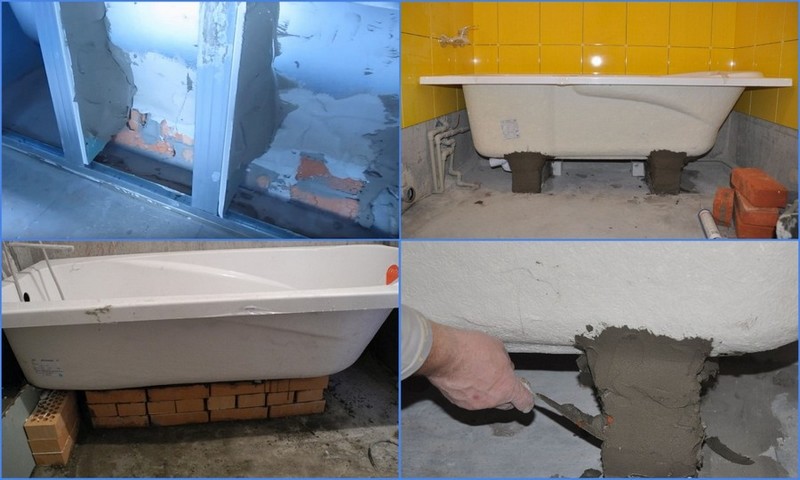
How to install an acrylic bath on a brick base
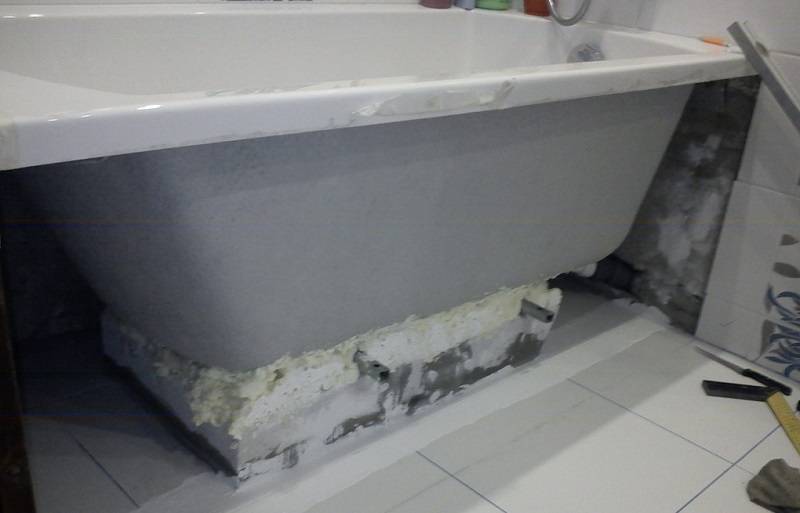
If for some reason you did not have a metal frame and legs in the kit, or you are physically unable to use them, we will consider how to install an acrylic bathtub on a brick base.
Before proceeding with the installation of an acrylic bath on a brick base, you should prepare the place for its installation. Dismantle the old bath and clear the place of debris.
Next, lay out the base in half a brick. We put a bathtub on top with the expectation that there is a gap of approximately 1 cm between the bottom of the font and the brickwork, which is then filled with mounting foam. This is necessary for a tighter fit of the bottom of the bathroom to the brick base.
You can install the bath on a brick base with or without mounting brackets.
Leak test and preparation for operation
Even professionals check the reliability of all connections before completing work:
- close the bottom drain; fill the water to the brim.Check whether the tightness of the waterproofing between the edges of the vessel and the walls is observed;
- when pouring water through the top overflow hole, check whether it is securely connected to the siphon and whether there is a leak;
- open the drain and check if water is leaking at the junctions of the exhaust system with the sewer outlet;
- put a sheet of white paper under the siphon - even with a slight leak, it will leave stains from a few drops.
The work can be considered completed if, after testing for waterproofing, you do not find any signs of leakage at the joints. So, having useful knowledge, you can easily cope with such a task as installing a cast-iron bath with your own hands. It remains only to clean it from the contaminants that arose during the installation. Do it right away before the stains get old. For these purposes, there are many special detergents. Enamelled cast iron vessels can be washed and cleaned with most of them, except those containing abrasives or acid concentrates. It is also not recommended to clean them with hard cutting and scratching objects - for example, a knife or a metal brush.
Installing a cast iron bath
First you need to prepare the base: the floor must be even, solid and able to withstand the weight of the tub itself + water + person. It can be just a high-quality cement-sand screed or an already tiled floor.
For most models, the design of the legs allows each of them to be adjusted in height. Using the level, you need to achieve a horizontal position of the upper edge of the sides. There is no need to worry about the flow of water: it is provided by the bottom slope.
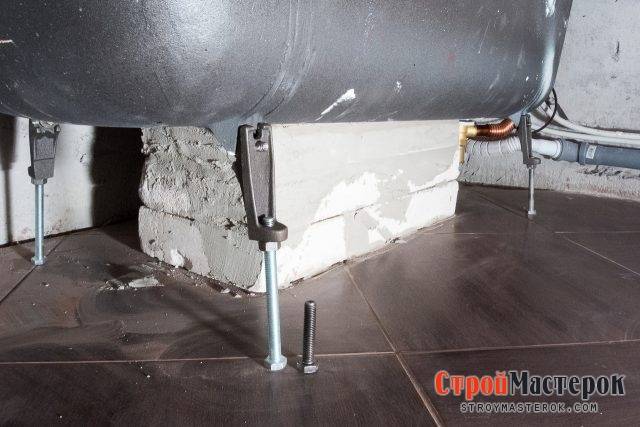
The included leg bolts are half as long as needed.
In most cases, the bathtub is installed at such a height that its upper edge is located at a level of 60 cm from the floor. Make sure that the height of the drain hole in the bottom is sufficient to drain the water well.
Basic requirements for choosing a bath
Most preference is given to cast iron bathing vessels, because they have a longer service life compared to other products. In addition, heavy cast iron tubs are much more stable than their lighter counterparts made of steel and plastic, and retain heat well.
If you decide to replace your old bathtub with a new cast iron one, you should carefully consider your choice:
pay attention to the quality of cast iron, choose a product without "shells" and cracks;
inspect the bathtub from all sides: the outer, cast-iron surface should be even, and the enamel coating layer inside the bathtub should be thick enough and glossy-smooth;
the thickness of the enamel coating is characterized by the even color of the enamel and the thickness of the layer at the end of the enamel layer along the outer edges of the product;
the sides and corners themselves should have a flat, slightly rounded surface.
Important: the comfort and duration of its use will depend on how high-quality the product you choose.
Transport rules
The first serious problem caused by the independent installation of a cast-iron washing tank is the significant weight of the product. Some large models weigh more than 150 kg, and in fact the bath must not only be delivered to the house, but also lifted to the floor, sometimes without using the elevator.Before installing a cast-iron bath, it is transported following the following recommendations:


It will take 2 people to lift a cast-iron washing tank to the floor, since one worker will not cope with such a weight, and three will not turn around in tight flights of stairs.
When transferring and lifting the bath to the floor, it is correct to carry it, orienting it with the drain hole against the direction of movement.
The washing container is brought into the bathroom, placed vertically to give room for maneuvers for movers and plumbers.
In order not to damage the threshold or doorway or scratch the bathtub, obstacles in the way of transportation are covered with soft material (foam rubber, cardboard, cloth).
Helpful Tips
If it is planned to install an acrylic bath in the shower room, which will replace the cast iron one, then it is important to know the features of working with the new material and decide on the installation method that is most suitable for specific conditions. After dismantling works, first of all, you need to put the wall in order, level it and putty.
Installing acrylic sanitary ware on your own is quite simple, because it is light in weight, but it is better to have an assistant who will assist with any carrying of the product, which will protect the fragile surface of the new bathtub from damage.
When installing the font, the first thing to take care of is leveling with the floor level so that the structure stands securely and checking the height of the legs so that the bath does not stagger
When installing the product on a brick base, it is important to monitor the level of the supports after each new layer, so that subsequently there is no skew of the plumbing.
If this problem cannot be resolved, it is worth considering changing the installation method of the product.If there is a desire to make sure that the bathing container does not swing at all, then the best option would be to build a podium. This option is perfect for residents of the ground floor or a private house, and in old high-rise buildings it is better to refrain from such a significant weighting of the floor of the house.
If it is not possible to build something bulky, strengthening the acrylic bath can be done using a metal frame or a combined version using legs and brickwork. The choice of option depends on the skills, working conditions and dimensions of the font. After completion of the installation work, it is necessary to close the joints of the bathtub with the wall. This can be done with a sealant. But it is better to use a plastic corner, which is cut at 45 degrees at the base so that you can evenly glue it to the surface.
You will learn more about installing an acrylic bathtub in the following video.
Siphon assembly features
It is mounted only after the legs are ready and the bowl is finally fixed. The siphon has several details.
- The downpipe is connected to the hole of the plumbing bowl located at the bottom, a sealant is applied to the joints, and a rubber lining is placed inside. Sealant is also applied to its surface.
- A branch pipe is inserted into the outer part of the bowl structure.
- A hose is installed in the outlet intended for overflow.
- There should be a lining at the other end of the hose, it is connected to the hole of the sanitary bowl located at the bottom, and a protective overflow grill is used to secure it.

The optimal option for installing a bathtub is chosen taking into account the complexion of family members.It is not recommended to install a sanitary bowl on legs alone, as its service life will be reduced. Relatively cheap models of acrylic bowls have legs or are supplied without fastening parts. The frame is purchased independently. A more reliable option is to install a plumbing product on brickwork or on a metal frame.
Installation of an acrylic bath on bricks
You should not assume that if an acrylic bathtub is lightweight, then the requirements for its brick supports are different. It must be remembered that the weight of the liquid collected in it and the mass of the human body do not decrease at all depending on the material from which the bath is made. The small weight of the bowl only greatly facilitates the process of its installation, but it does not simplify the design of the support - a flat brick pillow is needed under the bottom and supports along the edges of the acrylic bath.
There is another do-it-yourself acrylic installation method. bathtubs on bricks - built-in. This method of installation involves the creation of a support for an acrylic bath in the form of a wall closed around the perimeter, on which it is laid. Under the bottom of the bath, as in all other cases, lay out a flat brick pillow. Sometimes, the space inside the circular support is sprinkled with sand, but then you will have to face some problems with access to the drain siphon, since it will be impossible to get to it without a special device.
A bath on bricks can be installed in any convenient way, as long as it is thorough. You need to visually imagine the weak points of the acquired bath and fix it in such a way as to strengthen these places.
Assembly of the siphon group
Bathroom fittings sold separately. They are divided into two groups:
- prefabricated;
- Whole.
In the first case, the siphon group is assembled on threaded connections from small plastic parts. All curves are rectangular.
In the second case, the siphon is represented by a curved pipe. All bends are smooth, there are no threaded connections.
A one-piece siphon looks trivial, but it has huge advantages.
- The more threaded connections and parts, the higher the likelihood of leaks;
- Smooth bends do not impede the flow of water, draining is faster and the likelihood of deposits and blockages is extremely low;
And besides this, the siphon is not a subject for demonstration, and no one will see it except you. Therefore, an objective choice is a siphon with a solid body.


Its assembly consists in screwing through the cuff, the overflow system.


