- Methods for fixing the toilet to the floor
- Features of toilet bowls for giving
- Choosing a place for a toilet
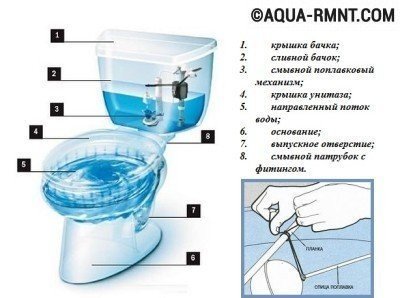
- Structural elements
- Required Tools
- The mechanism for replacing the seat in a new toilet
- Dismantling the old
- How to install a toilet yourself and save money
- Selection and purchase of plumbing fixtures
- Ways to install a floor-standing toilet
- Dowel fastening
- Glue installation
- Installation on taffeta
- Dismantling the toilet
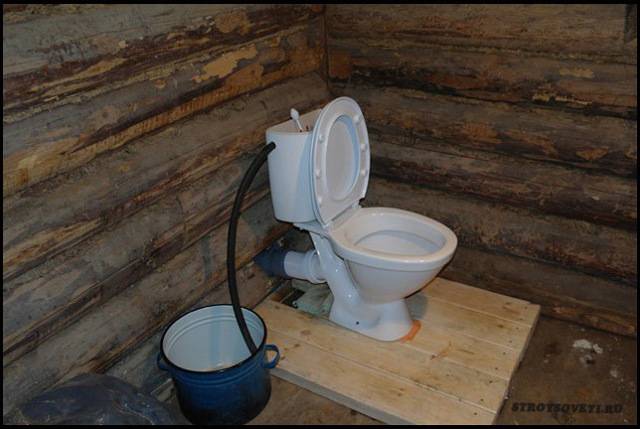
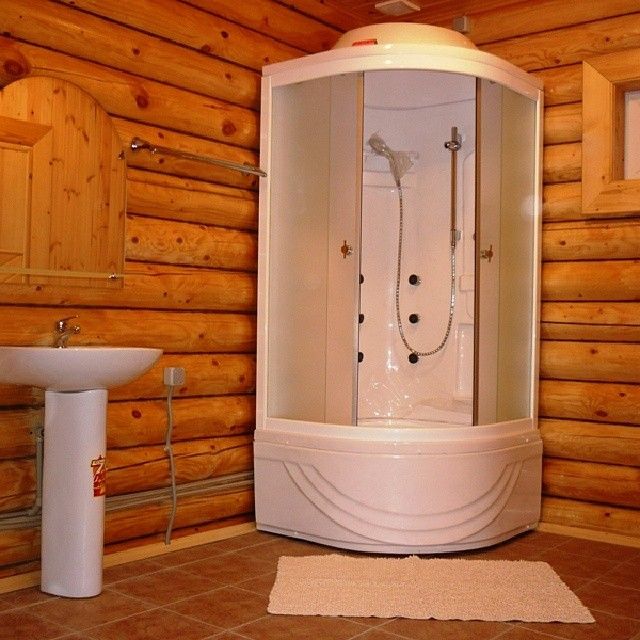
- Ventilation of the bathroom of a wooden house
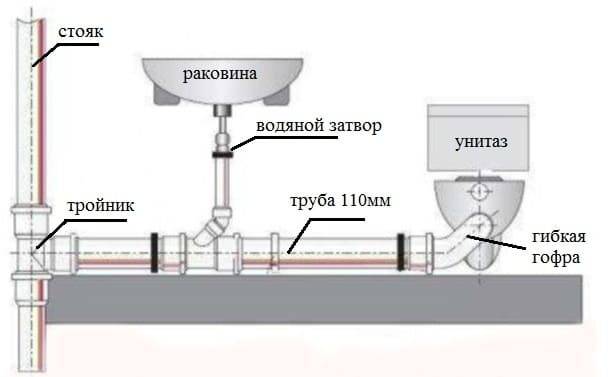
- Sewer connection
- with oblique release
- Norms for installing a toilet on the site
- Toilet installation rules
- Preparing for mounting on boards
- Choosing a toilet bowl - which type is better
- Taffeta - what is it and is it needed during installation
- Purchase of consumables and tools
- Helpful Tips
- Step-by-step installation of a toilet bowl on an eccentric
- If the toilet bowl, installed on a wooden floor, is loosened
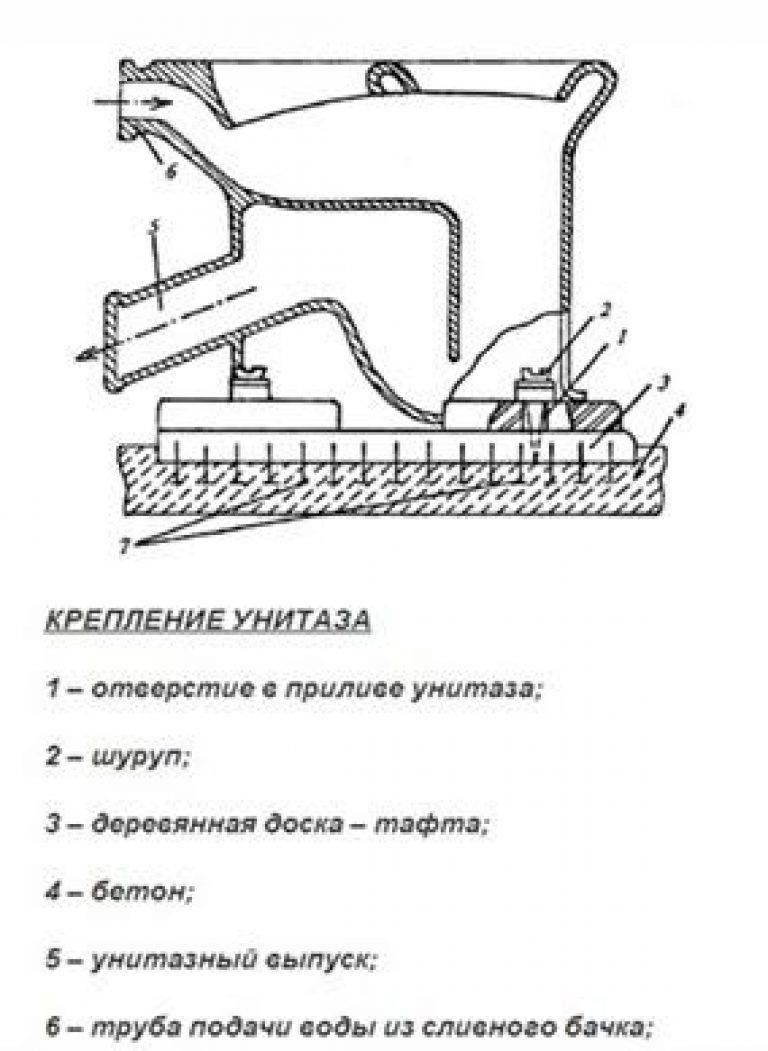
Methods for fixing the toilet to the floor
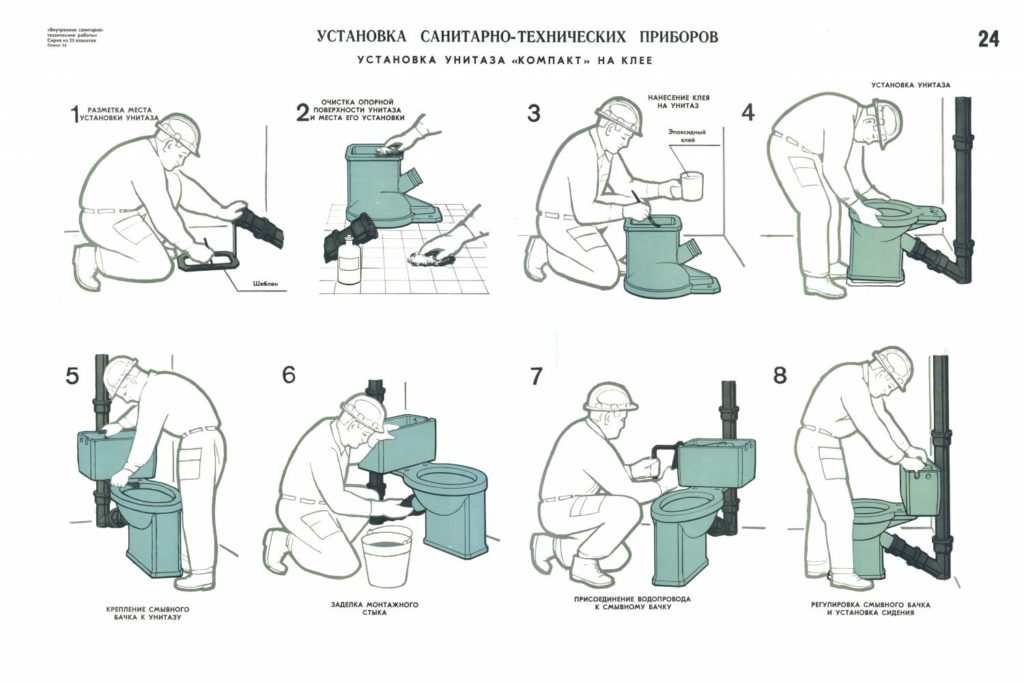
There are several methods for installing the toilet to the floor, which are used not only by home consumers, but also by professionals - representatives of elite construction companies. They differ in the list of tools used. The most popular following methods of attaching the toilet to the floor:
- with the help of dowels;
- using sealant or glue;
- on taffeta.
Each method has its own characteristics, advantages and disadvantages.Mounting on dowels is the most popular method, due to its accessibility and primitiveness. Causes the need to drill holes in tiles. This should be done as carefully as possible, since any wrong movement will lead to its damage. Ideally, there should be no tiles on the floor at all. It is better to fix light products on dowels.
The popularity of fastening with building glue is inferior to dowels. Alternatively, silicone sealant or epoxy based mixtures can be used. Prepare them yourself, following the attached instructions. You need to purchase them in specialized construction stores. It is better to give preference to popular brands.
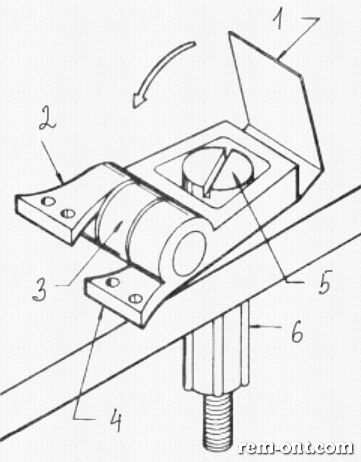
The method of fixing the toilet bowl to the floor with taffeta is outdated, but still used. Taffeta is a wooden substrate, the height of which is about 5 cm. It is installed on a specially prepared recess with a concrete solution. A large number of nails are dug into the underside (anchors will do). Thus, the wooden taffeta is securely fixed in the recess.
A toilet bowl is already installed on the taffeta and fastened with special screws
It is important to remember that wood is susceptible to the humidity found in a toilet or bathroom. For this reason, this part must be treated with a special solution.
Features of toilet bowls for giving
There are two options for choosing a toilet for a summer resident:
- standard ceramic with siphon;
- plastic for seasonal dachas.
Toilets for giving should be:
- frost-resistant;
- lungs;
- inexpensive;
- with direct sump without siphon;
- easy to install and operate.
The main requirement is to work without the use of water.Ceramic toilet bowls can be installed in cottages with central water supply and sewerage. The toilet must be heated. To keep the water in the system from freezing.
In order to properly install the toilet, it is necessary to prepare a horizontal base. The floor can be wood or concrete. In both cases, it is necessary to provide for the bolting of the housing to the base.
Choosing a place for a toilet
The place for the toilet is selected in accordance with sanitary and architectural standards, this distance is:
- at least 25 meters from the well:
- at least 5 meters from the house.
In addition, it is necessary to take into account the slopes on the site. The toilet should be at the lowest point of the site.
Structural elements
Structurally, the toilet consists of a cesspool and a house. The house can be made of wood, brick, foam blocks, cinder blocks
Pay attention to the overlap of the cesspool. Wooden beams must be at least 100 * 100 mm; plank floor 50 mm thick
Wall and ceiling cladding can be made from 22 mm thick boards.
Required Tools
To make a wooden toilet structure, you must have the following tools:
- manual circular saw;
- jigsaw;
- screwdriver;
- square;
- level;
- roulette;
- electric drill;
- marker or pencil.
If it is not possible to buy ready-made lumber, you need to have an electric planer.
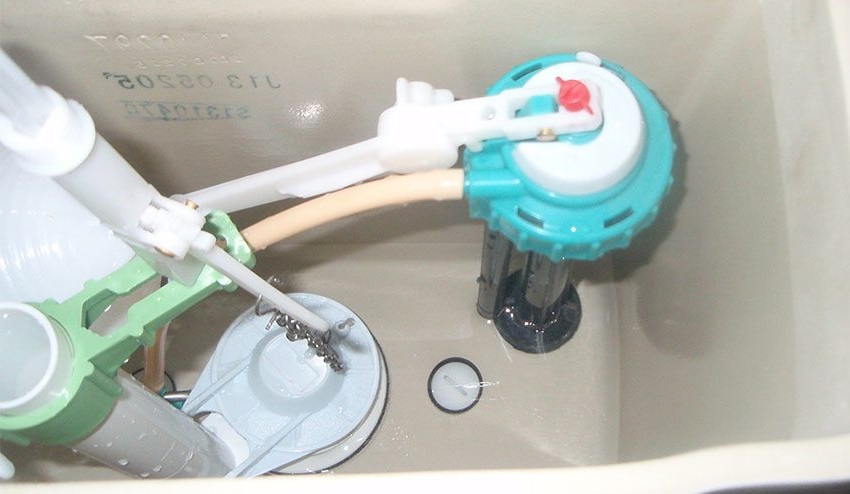
The mechanism for replacing the seat in a new toilet
In the new toilets, everything is much simpler, since the fixing bolts are made of plastic. In this case, the plastic screw is usually at the top, so you can use a screwdriver or pliers to remove the seat.Plastic bolts do not "stick" and are usually not a problem, except that they can be accidentally damaged by applying too much force when unscrewing.
In new toilet seat mounted on plastic bolts, so removing it is much easier than older models that use iron bolts and washers.
- The screw is covered with a plastic cap.
- Place for fixing the toilet lid.
- Plastic hinge.
- Place for fastening.
- Screw (plastic).
- Washer (also plastic).

When replacing a toilet seat, the only thing you need to do is unscrew the plastic washers. Sometimes a screwdriver is needed for this, although, in most cases, the screw can be unscrewed by hand.
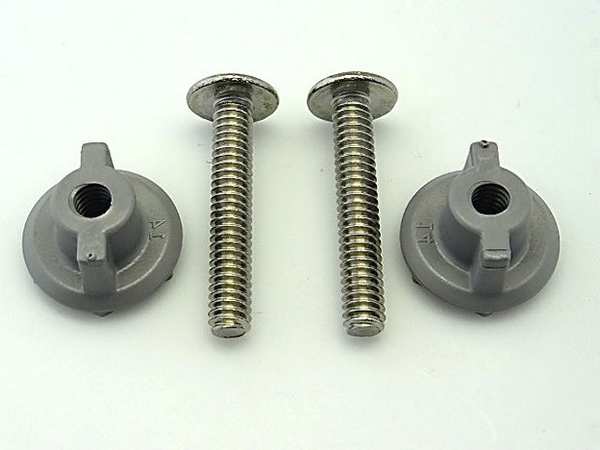
Standard toilet seat fasteners are two plastic washers and two bolts.
An example of a unique plastic toilet seat mount for the Maxwell series of the famous GERBER brand.
When buying a new seat, it is sold immediately with a set of plastic bolts, so there will be no more problems with rust.
Well, then everything is simple - insert the bolts into the appropriate holes and fasten with the help of nuts.
Dismantling the old
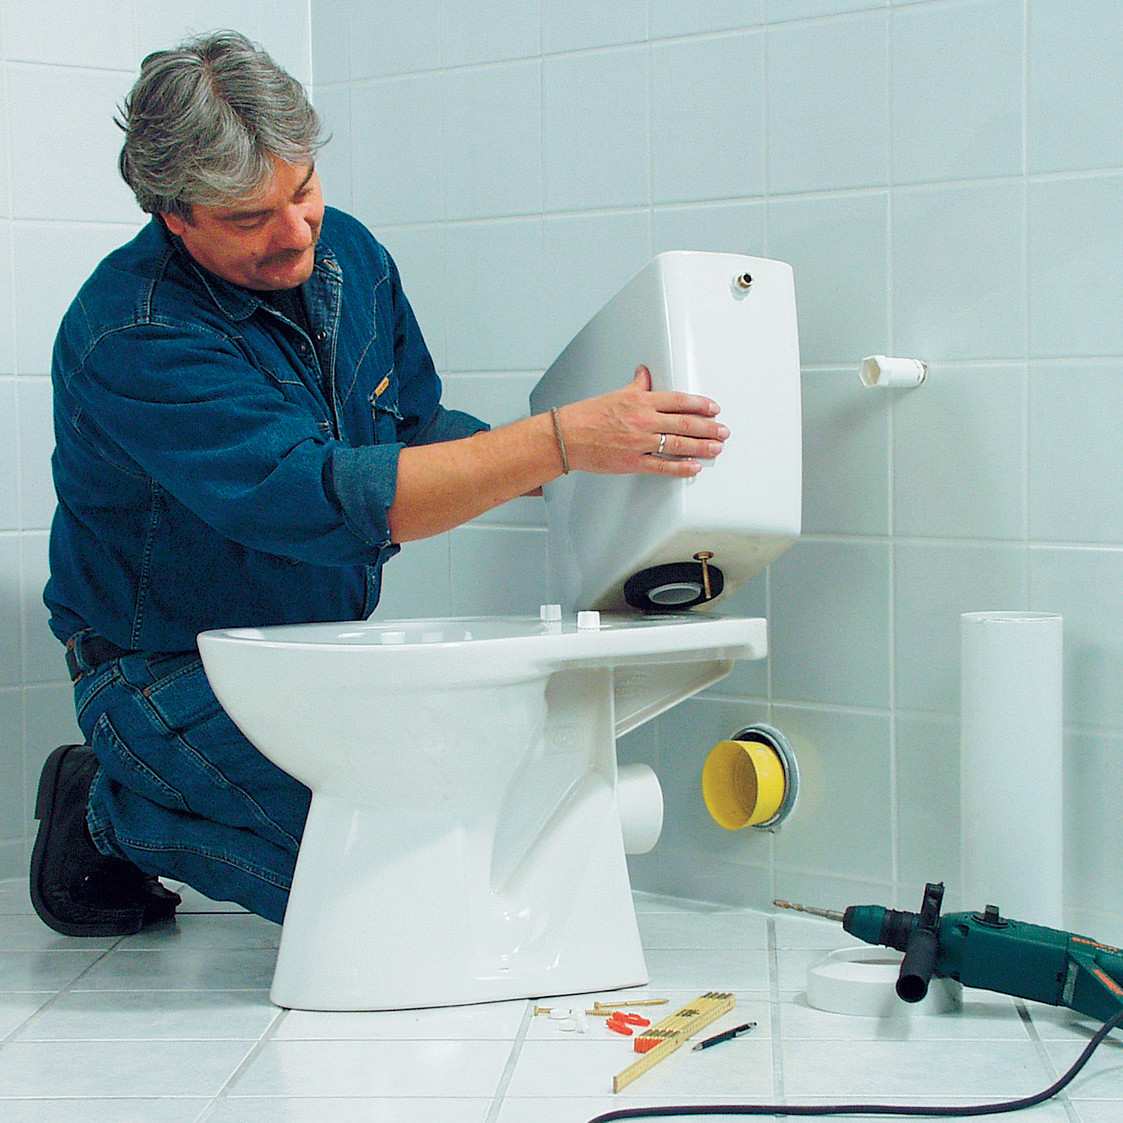
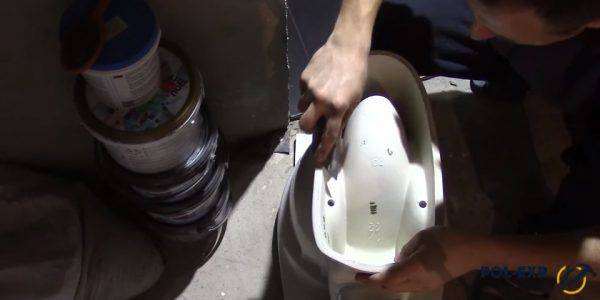
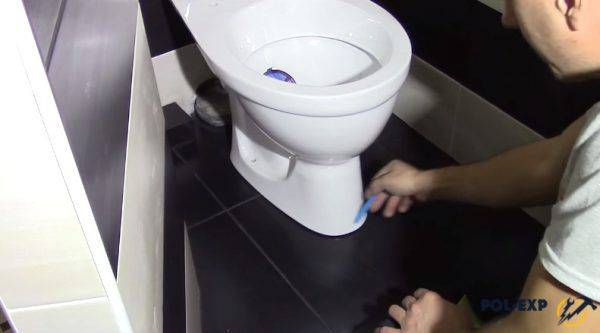
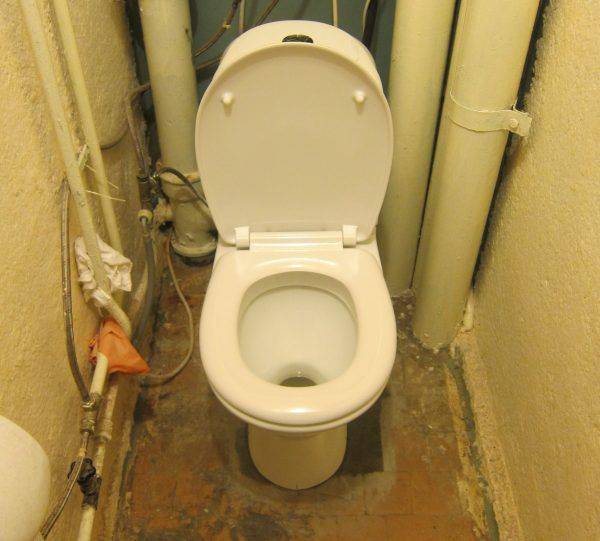
When the new toilet has already been selected, the location is known, as well as its main characteristics, it is worth moving on to the next step in the form of dismantling the old toilet. Most often, you have to clean floor-mounted toilets that are attached to the floor. You can easily and quickly deal with such a task yourself. There is no need to go to the master.
It’s worth starting by turning off the water and draining it from the tank into the toilet bowl. Then you need to unscrew the hose that goes from the drain to the tank. Next, unscrew the fasteners of the tank. If they do not lend themselves, it is worth using special tools.They are applied to fasteners (for about 6 minutes), completely dissolving lime or rust during this time.


![[instruction] do-it-yourself toilet installation | video](https://fix.housecope.com/wp-content/uploads/e/d/2/ed2a339ea575f08648a1c27623838443.jpe)

Of course, you can do without such funds. For example, using a wrench or a screwdriver to break the mounting bolts is easier. If the old toilet is planned to be thrown away, then the problem of poor detachment of the tank can be solved with a hammer. After the tank mounts are unscrewed, you should go to the toilet bowl mounts. Often they look like a nut screwed on an anchor. To facilitate the unscrewing process, you can use the methods described above.
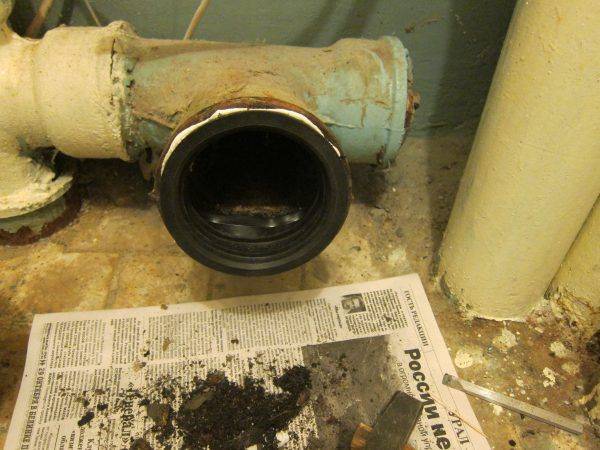
When all fasteners are unscrewed, it is necessary to disconnect the toilet drain from the sewer. In old toilets, as a rule, the place where the drain is attached to the sewer pipe was coated with cement. If so, you will have to remove the cement with a screwdriver and hammer. And you need to start with a coating that runs across the seam.
Next, you should swing the drain, but leave it in place. The toilet must be moved in different directions in order to finally drain the water remaining in the knee. It is necessary to disconnect the neck from the sewer pipe. This is not always easy: sometimes the toilet may be glued with cement mortar to the floor. In this case, with the help of a chisel and a hammer, the pedestal is broken off in parts.
Now the toilet should easily unhook, it can be taken to the trash. If desired, you can chop with a sledgehammer to make it easier to take out. Another important point is to plug the sewer hole with a plastic or wooden plug. This will allow you to work without unpleasant odors.
After the old toilet is dismantled, you should evaluate the condition of the pipes.For example, before installing a new design, experts recommend replacing a cast-iron pipe with a new plastic one. Modern pipes can greatly facilitate the installation of the toilet. Perhaps it is better to replace an uneven pipe with a direct analogue in order to make it easier to mount the toilet to the sewer drain.
How to install a toilet yourself and save money
In a new dwelling or during the overhaul of an old one, in the vast majority of cases, the installation of plumbing fixtures is required. Thinking about how to install the toilet close to the wall or moving it to the middle of the room, you can call on the help of specialists from the Housing Office.
However, the device can be installed independently, thereby saving a lot of money. How to do this, and will be discussed in our article.
Selection and purchase of plumbing fixtures
First you need to choose the type of device.
According to the location of the drain outlet, there are models of devices:
- With horizontal outlet.
- With oblique outlet.
- The vertical outlet of the toilet is only suitable when the sewer connection is located in the floor.
According to the configuration of the cup, these types of toilet bowls are distinguished:
- dish-shaped;
- visor;
- funnel-shaped.
In this case, the tank of the device can be mated with its base or installed separately on the wall.
You can also fix the device to the base in different ways. There are models of toilet bowls with four or two straight sections of fasteners. In addition, manufacturers also produce devices for which special corners must first be fixed on the basis.
Note!
Before installing the toilet yourself. you need to consider the size of the bathroom.
After all, it may also happen that, after its installation, it will interfere with closing the door or will not allow the rest of the plumbing equipment to be installed.
Ways to install a floor-standing toilet
Installation of plumbing must strictly comply with building rules and regulations, regardless of whether the installation is carried out in an apartment or in a private house. But this does not mean that it is necessary to hire specialists for such work: with careful observance of the technology, any home master can cope with this. There are several ways to fix a floor-mounted toilet, and the type of floor subfloor is the determining factor for choosing.
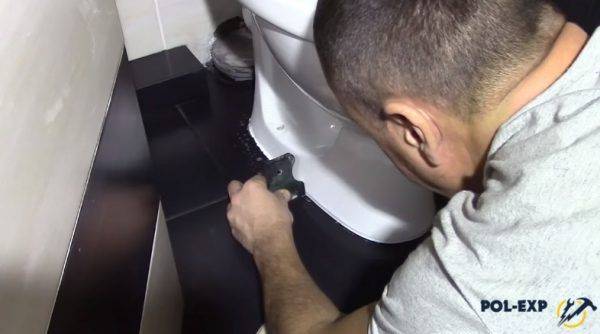
Dowel fastening
This method is considered the most practical and requires a minimum of labor and time to complete. It is used for strong dense bases with the most smooth and even surface - concrete floors, tiles, porcelain stoneware. Fixation is carried out with long dowels or special plumbing fasteners included in the kit for the toilet.

This is what the toilet mount looks like.
It is recommended that a rubber or other soft material be placed between the floor and the toilet foot to ensure a tighter and more secure fit. If the toilet needs to be raised, the base is made from a piece of thick solid board, and the mounting holes are drilled straight through the wood.
The toilet stands on a piece of thick board
When fixing the toilet bowl to the floor, do not overtighten the fasteners so as not to damage the ceramics. The fastening should not be weak either, as this leads to loosening of the plumbing.
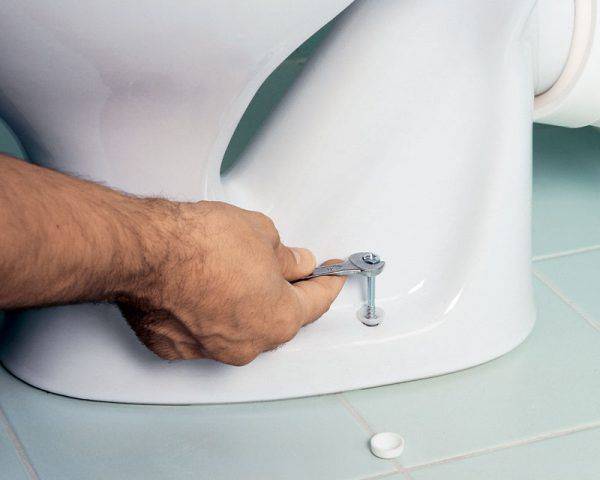
The screw must be screwed in carefully to avoid cracking the toilet bowl.
In some cases, this installation method can also be used for wooden floors.The main condition: the floor boards must be strong, at least 30 mm thick, tightly knocked together. Long screws are used instead of dowels.
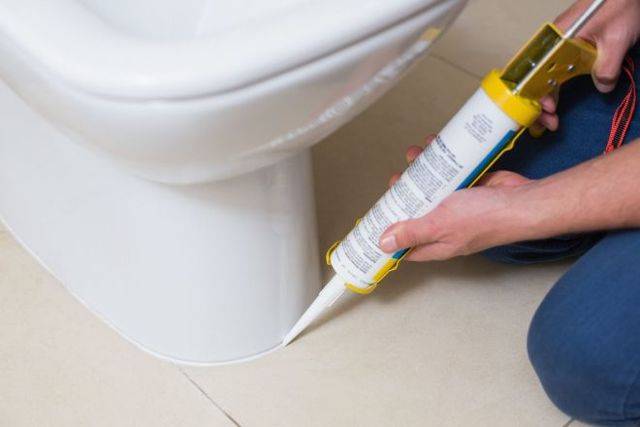
Glue installation
The method is simple, but takes a lot of time. The toilet is attached with epoxy adhesive, which takes an average of 12-15 hours to cure. All this time it is impossible to use a plumbing fixture, so as not to violate the integrity of the connection. The floor base must be strong and smooth, ideally a tiled floor.


Epoxy adhesive
Before installation, both surfaces are cleaned of dust and degreased; it is additionally recommended to treat the tile with an abrasive to improve adhesion. Glue can be bought ready-made or made on your own: for 10 parts of epoxy you need 20 parts of cement, 2 parts of solvent and 3.5 parts of hardener.
The adhesive composition is applied to the base of the toilet bowl with a layer of 4 mm, after which the device is installed on the prepared place and pressed against the floor. Until the glue is completely dry, you can not touch the toilet, so the connection to communications is made only after 12 hours, not earlier.
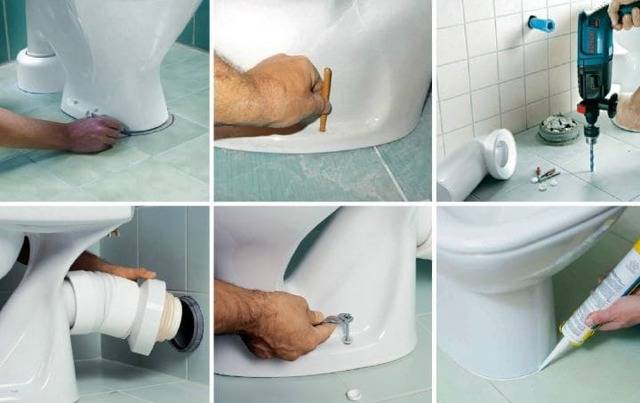
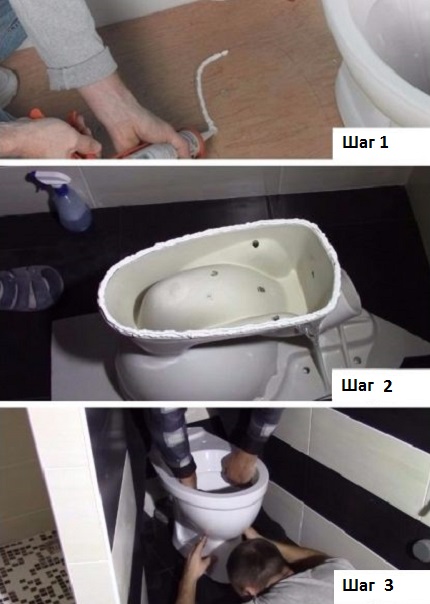
Need to clean up all the influxes
Install the toilet and outline the outline with a simple pencil
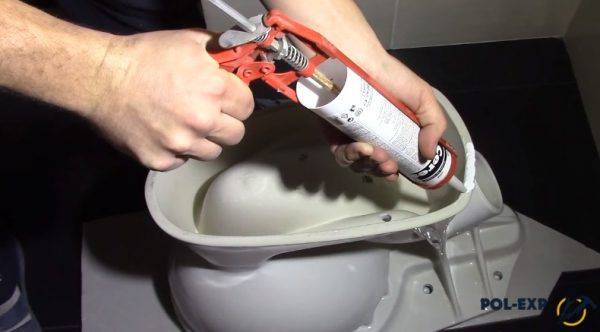
Turn the toilet upside down, apply a layer of glue or plumbing sealant
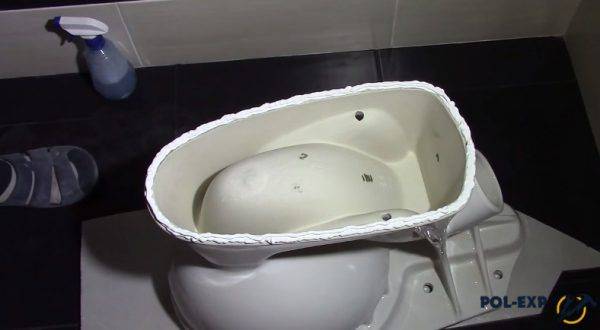
The photo shows how the glue layer should be
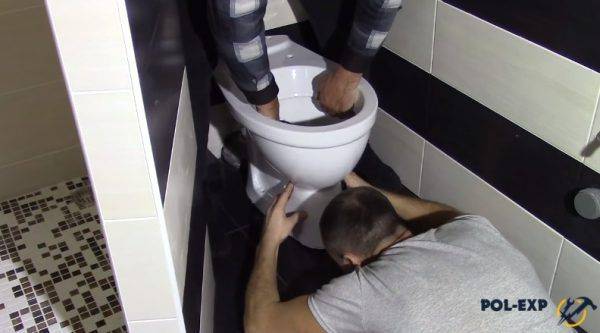
Install the toilet
Remove excess glue

Install the tank, connect the corrugation and the water inlet hose
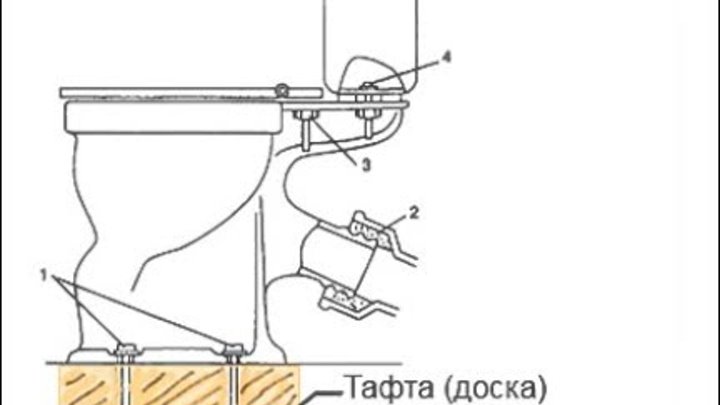
Installation on taffeta
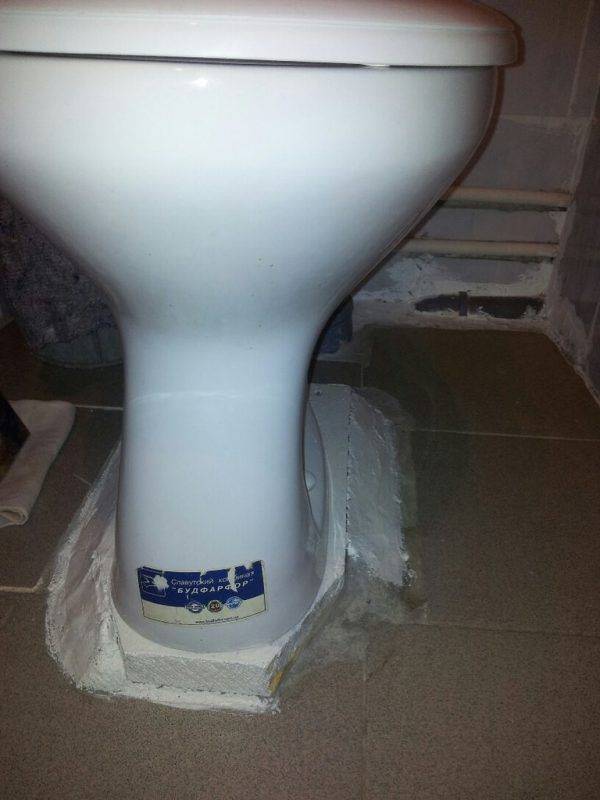
This installation method is considered traditional for wooden floors. Taffeta is a backing made from a piece of solid hardwood cut into the shape of a toilet bowl and treated with an antiseptic, drying oil or used oil.Such substrates are commercially available, so if there is no suitable wood at home, you can buy factory-made taffeta. Its thickness is 40-50 mm, which eliminates any deflections and deformations of the base under the weight of the toilet bowl and the person. The toilet itself is attached to the taffeta with screws or screws included in the kit.
Scheme of installing a toilet bowl on taffeta
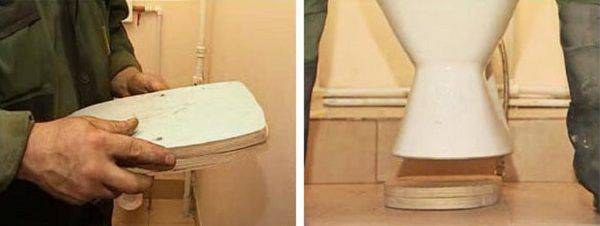
Installing a toilet bowl on taffeta (photo)
The wooden underlay can be screwed to the floor boards or recessed flush with the floor covering. The second option looks neater, but the installation process is more laborious and lengthy. In addition, if it is possible to cut a hole in the floor, it is better to simply fill the recess with mortar and make a concrete base under the toilet.
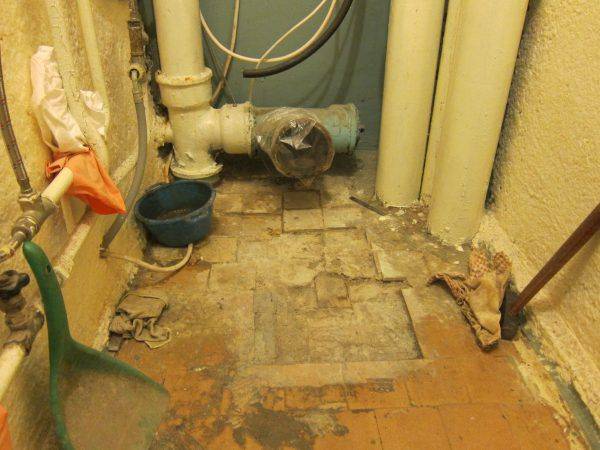
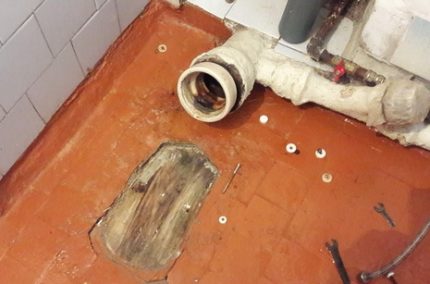
Condition of the floor after dismantling the old toilet
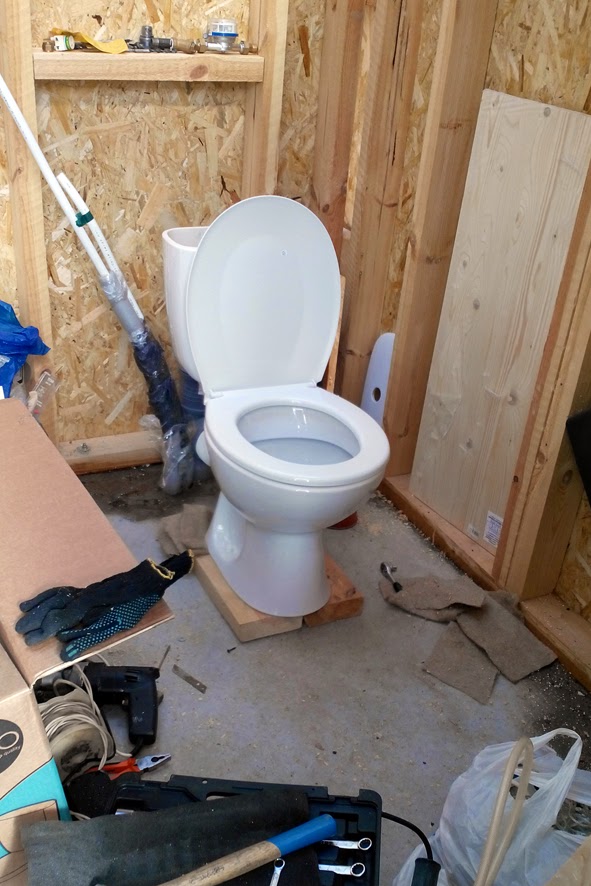
The floor is concreted, after the solution has dried, a toilet bowl is installed for fitting
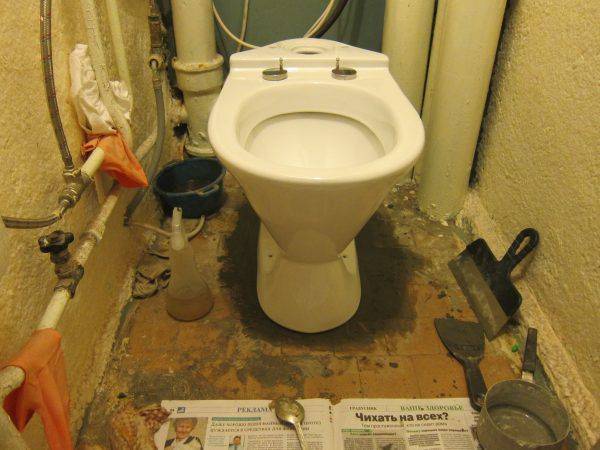
Cuff installed
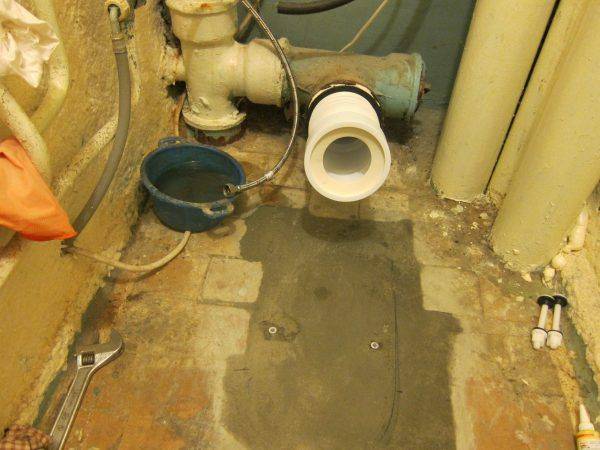
Corrugation inserted
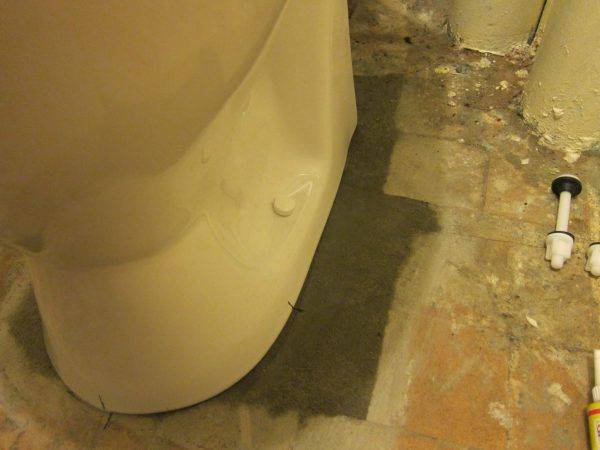
The toilet is installed, the screws are tightened
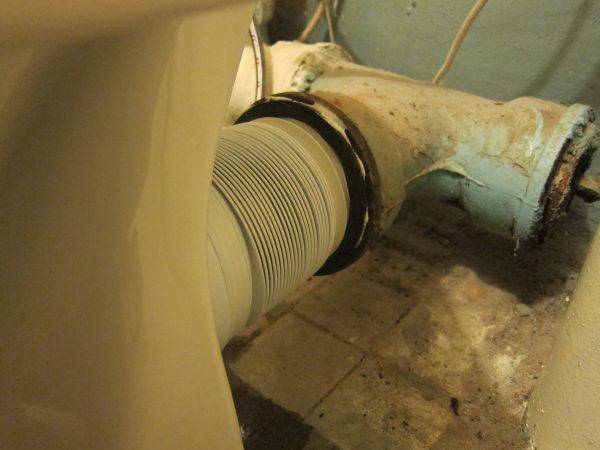
Connected toilet to drain
Tank and lid installed
Dismantling the toilet

Cement coating from the sole of the bowl is knocked down with a hammer and chisel
Before proceeding with the installation of plumbing, shut off the water supply and dismantle the old unit. To do this, follow the following scheme:
- The remaining liquid is drained from the tank
- With a wrench, unscrew the hose connecting the water supply and the tank, and then dismantle the tank itself
- Disconnect the floor mounts of the device
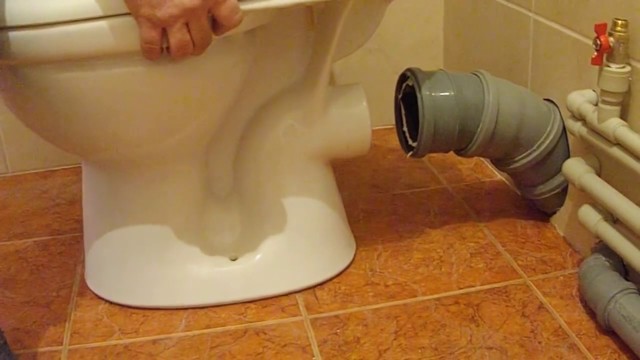
- If the drain is fixed with cement coating, the concrete around the knot is pierced with a chisel and hammer. The bell of the bowl is carefully pulled out of the fan pipe, draining the remaining water into the sewer. Then cut off the seal or wax ring
- The old appliance is removed from the room, the sewer hole is cleaned, temporarily covered with a piece of fiberboard or plastic. At the time of work, the hole can be closed even with rags
- A faucet is installed on the water pipe to stop the flow of water.
Under a dismantled appliance in old houses, rotten supports can often be found. They must be removed with a chisel or perforator.


The easiest way is to dismantle the bowl attached to the base with adhesive mastic - just hit the base of the bowl sole in the direction away from you. This method of fastening is considered to be of poor quality and indicates an unprofessional installation of an old plumbing fixture.

Do-it-yourself furniture and other wood products: drawings of benches, tables, swings, birdhouses and other household items (85+ Photos & Videos)
Ventilation of the bathroom of a wooden house
Due to the constant humidity in the bathroom or toilet, high-quality ventilation is a must here. You can make a natural hood. That is, ventilation holes with grates are made in the upper and lower parts of the room and through them warm air, rising, takes away excess moisture with it.
But, such an extract is not always enough, so a fan is needed that will draw out excess moisture and unpleasant odors. The power of such a device depends on the area of the room. Before purchasing a fan, it is better to consult with a specialist who will calculate the optimal fan power for your bathroom.
After carefully reading the recommendations given in this article, viewing the photo and video material, the device bathroom in a wooden house with your own hands will be done soundly and for many years.

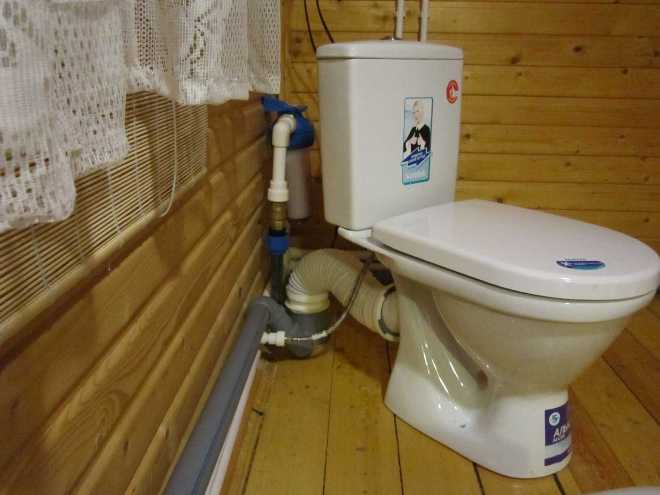
Sewer connection
A wooden floor can be laid in several ways:
- Linoleum. The most common and economical option, suitable for both cottages and country houses. Disadvantages: in case of moisture getting under the linoleum (behind the plinth), the wood may rot and black mold and dampness may occur. Linoleum does not allow moisture to pass through, so the accumulated liquid will provoke the appearance of an unpleasant odor and high humidity.
- Ceramic tiles. Ideal for bathrooms and toilets. Does not let moisture through, easy to care for. But, as you know, a wooden house can settle over time, so tiles should be laid a few years after construction. Otherwise, the tiled floor will crack.
- Laminate. The outer coating of the laminate tolerates moisture well, however, water that has entered the joints of the boards destroys the base of the laminate, made of pressed wood shavings: the boards are deformed and the floor rises.
- Wooden floor from boards, varnished or painted. Choose your paint or varnish carefully, as your main task is to keep the wood floor from moisture and decay. The coating should be water-repellent, antifungal, have a high level of wear resistance and a low level of toxicity. All product characteristics and application methods are indicated on the packaging.
The sewage system in the country can only be of periodic action. After filling the cesspool, it must be cleaned. If possible. Then install a large plastic container or several septic tanks with a descent into the ground. The installations of deep biological treatment have proven themselves best of all.
The simplest type of waste disposal in the country is a gravity-flowing household sewer. This method of waste disposal is inexpensive and can perform its functions for many years. But this requires strict observance of slopes. The disadvantage of this method is that the cesspool or septic tank must be located close to the house.
READ NEXT: How to tile your own bathroom walls
Pressure sewerage is used in cases of supplying wastewater over long distances. It requires the use of electricity, automatic control and will not work if it is turned off.
To equip a pressure sewer, you need to buy a fecal pressure pump with a grinder.
Toilet with vertical outlet without a tank is the simplest and most inexpensive. It is installed directly in the toilet above the cesspool. When connected to the water supply, it is necessary to ensure the supply of water and the removal of faeces through sewer pipes with a sustained slope. If in the country it is possible to connect to the sewer, it can be installed directly above the sewer pipe.
First of all, the toilet must be heated or arranged directly in the house. It can be connected in two ways:
- with the help of corrugations;
- using plastic factory outlets.
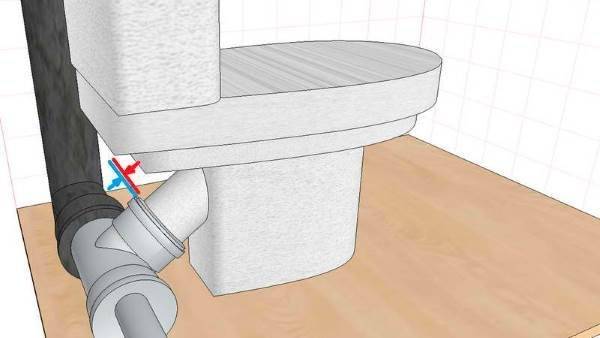
with oblique release
An oblique outlet toilet is installed in a house where the socket of the sewer pipe exits the floor at an angle. It is necessary to install a cuff with an eccentric into the socket and then connect the toilet bowl.
Norms for installing a toilet on the site
Most of the restrictions apply to pit latrines: possible contamination must be limited. The rules are:
- To the source of water - lakes, rivers, wells, wells, etc.- must be at least 25 meters. This also applies to sources located in neighboring areas.
- To the basement or cellar - at least 12 meters.
- The nearest inhabited building - a shower, baths - is at least 8 meters away.
- To buildings where animals are kept - at least 4 meters.
-
The nearest trees should be 4 meters away, bushes - 1 meter.
The rest of the rules are valid for all types of toilets:
- There must be at least 1 meter to the boundary of the site.
- Doors should not open towards the adjacent area.
- When choosing a location, the prevailing wind direction must be taken into account.
When choosing a place where you will build a toilet for a summer cottage with your own hands, pay attention not only to your own buildings and objects, but also to your neighbors. This will help to avoid friction with them and with the sanitation station. If you are going to build a toilet with a cesspool, you must also add to all the listed requirements - the organization of an entrance for a sewage truck
If you are going to build a toilet with a cesspool, you must also add to all the listed requirements - the organization of an entrance for a sewage truck.
Toilet installation rules
The fastest and easiest way to connect the toilet to the sewer pipe is to use a corrugated cuff. But at the same time, it is not possible to place the device as close as possible to the pipe socket. This circumstance is important when the toilet room is small.
When the outlet of the toilet bowl and the sewer socket are located on the same axis, experts recommend using a straight cuff, but if on different axes, an eccentric cuff, such as in the photo.The toilet installation rules suggest that when purchasing a flexible water supply, its length is taken into account, which should be equal to the distance from the connection point of the filler mechanism to the cold water pipeline. To this value add 15-20 centimeters.

It is necessary to pay attention to the thread diameter (1/2 or 3/8 inch) and the type of connection (external/internal). Also, do not forget about buying a fum tape. In the process of dismantling the toilet, the remaining water may pour out of it, so the presence of a floor cloth will not be superfluous.
In the process of dismantling the toilet, the remaining water may pour out of it, so the presence of a floor cloth will not be superfluous.
Preparing for mounting on boards
To install plumbing on a wooden floor, you need to prepare. First of all, choose the right toilet. Decide what, in addition to the plumbing fixture itself, you will need and purchase all the missing materials and tools. Among other things, if the installation will be carried out using taffeta, it also needs to be taken care of.


Choosing a toilet bowl - which type is better
Choosing a toilet is not as easy a task as it seems. Especially when it comes to installing plumbing on a wooden floor in a country house. First of all, you need to have on hand a sewerage layout project indicating the height of the pipe and its diameter. This will help you choose the right model.
Then choose from the proposed varieties, depending on the location of the sewer pipe:
- with horizontal outlet;
- with release at an angle;
- vertically oriented.
Horizontal release. They are presented in our plumbing market in the largest selection. This option for connecting the device to the pipe is optimal.The minimum number of fittings is used, and the probability of installation error is reduced to zero.
Release at an angle. Such toilets are less popular. It is highly likely that when installed on a wooden floor, the height of the tie-in point into the sewer pipe will be higher than the outlet of the toilet bowl. In this case, you will have to think about the elevation for plumbing.
You will hardly find vertical toilets in our homes. Although they are in great demand abroad, for example, in the USA. The bottom line is that the release is directed strictly down. The insert is carried out under the floor, as well as the laying of all communications.
More information about different types of plumbing and the features of choosing a toilet bowl in the articles:
Taffeta - what is it and is it needed during installation
Taffeta is a wooden stand that is used when installing a toilet bowl on a wooden floor. It is made from a piece of thick board. The thickness of the taffeta can be 20-30mm. So that the wood does not rot from high humidity in the toilet, it is treated with drying oil.
Not having high-quality power tools for drilling holes in the concrete floor, Soviet builders were forced to get out and resort to such methods, especially in conditions of high rates of construction of typical high-rise buildings.
Now taffeta is not used to install a toilet bowl on concrete. There are modern perforators that eliminate this need. But in wooden houses in private construction, the use of such an element of installation work is still justified.
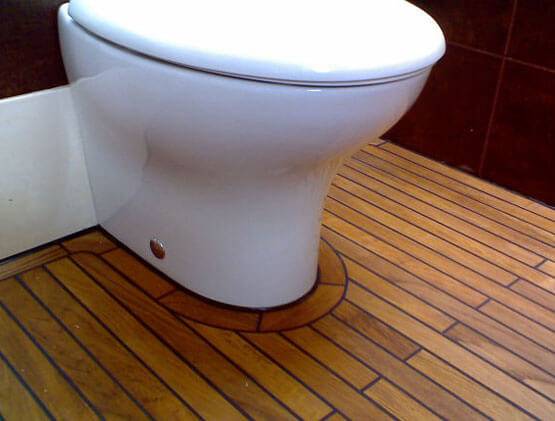
The taffeta is cut along the contour of the base of the plumbing fixture and mounted flush with the surface in the wooden floor.
Purchase of consumables and tools
To carry out a complete installation of the toilet bowl on a wooden floor, you need to prepare the following materials:
- fastening set;
- screwdriver;
- screwdriver;
- drill;
- a hammer;
- building level;
- corrugation;
- plumbing key.
The standard fixing kit that comes with the toilet is not suitable for mounting on a wooden floor. The screws and dowels that it includes are used to install plumbing fixtures on a concrete floor.
Soft wood, prone to cracking, cannot guarantee a strong fixation. For wooden floors use long wood screws.
A drill is needed for drilling holes for self-tapping screws, a screwdriver or screwdriver is for tightening screws. The building level is necessary so that the toilet bowl is level, perpendicular to the floor and does not deviate.
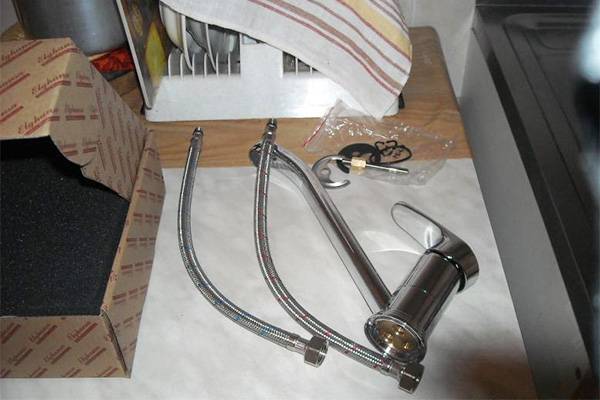
To connect plumbing to the water supply, you will need a plumbing key. The toilet is connected to the sewerage system using a corrugated pipe. Being flexible and pliable, the corrugation is well suited for installing plumbing fixtures with both horizontal and oblique outlets on a wooden floor.
Helpful Tips
Before installing and before purchasing a toilet, you should familiarize yourself with the recommendations of experienced plumbers.
By following some rules, many problems can be avoided.
The first thing experts advise to pay attention to is the type of drain
This is especially important if the sewer supply will not change.
With the help of adapters, it is especially difficult to make a high-quality connection of a toilet bowl with an inappropriate type of sewer outlet.
Do not postpone the purchase of plumbing at the last moment, as well as purchase it after repair.It is better if the place in the toilet room is prepared for a specific toilet model in advance.
This will simplify the installation of plumbing.
- You should refuse to save on bolts and anchors. It is better to choose nickel-plated fasteners. They don't rust. This will save the product in the future from ugly streaks, as well as sticking of bolts.
- An eccentric cuff, which is called a corrugation, will help compensate for the difference in floor height before and after repair. To supply water to the tank, it is better to use a flexible hose.
- In the case when the sewer pipe leaves through the floor, it is worth using a rectangular elbow or a flexible corrugated cuff.
Plumbers recommend using small wedges made of wood or plastic. However, with them it is also necessary to use a sealant to evenly distribute the weight of the toilet bowl. When installing a toilet bowl on old cast iron, it is better to use a sealant.
If the water supply is old, it should definitely be replaced. When choosing an eyeliner, you need to know the distance from the junctions on the pipe with water to the attachment to the toilet bowl. Then you need to replace the old flexible water supply. And 15 - 20 cm should also be added to it. Adapters for threads at the joints or FUM tape should be purchased in advance.
To do this, make marks in the right places. A self-tapping screw is attached to them and hit with a hammer several times. After that, you can drill a tile with a puncher or drill, but only without shock mode.
If the sewer riser is made of cast iron, it must be cleaned to metal, then thoroughly washed and dried. After that, a sealant is applied to a dry and clean metal surface. And you need to put it down a little more.After that, it must be connected to the corrugation.
You can also apply sealant to the outer part of the joint.
- In order to easily and without damage remove the corrugation connecting the toilet bowl and the sewer, its exit and the outlet of the toilet bowl are lubricated with wet soap. And only after this procedure is put on a sewer socket.
- Before you make marks with a marker through the holes in the sole of the bowl, you need to sit on it and check how comfortable it is. If necessary, you need to immediately correct the position.
- Do not use plastic dowels that come with toilet bowls. They break quickly, so it is better to give preference to other fasteners.
An additional insert in an old cast-iron sewer pipe can be removed with a perforator or burned out. Under no circumstances should a hammer be used. It is possible to burn out if the cavity was filled with sulfur or clogged with a cable. Before burning it is necessary to take care of sufficient ventilation of the room, remove all flammable means and materials.


When installing a toilet bowl on glue, you can make it yourself. To do this, take 100 parts of epoxy resin ED-6. Then it should be heated to 50 degrees and add 20 parts of a plasticizer or solvent, mix well. Pour 35 parts of the hardener into the resulting solution and mix again. It remains to add 200 parts of cement there and mix until a plastic homogeneous mixture is obtained.
How to install a toilet, see the following video.
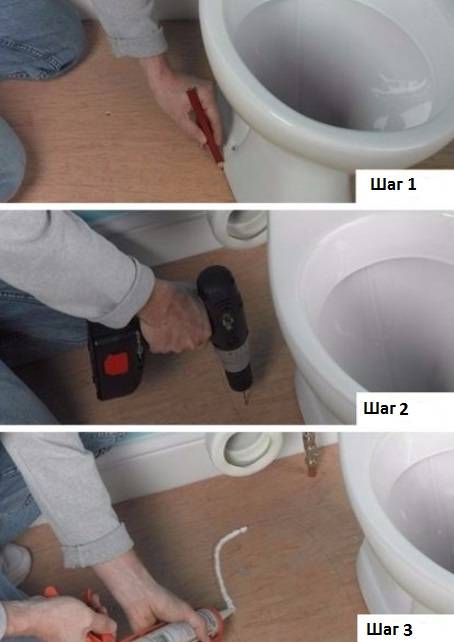
Step-by-step installation of a toilet bowl on an eccentric
For example, consider installing a toilet bowl in a newly renovated toilet, where the tiles on the floor and walls were completely changed and there is only an exit from the sewer pipe.In the source data, the presence of an axis offset between the connected elements.
The process is divided into several steps:
- Install the toilet in place of its permanent position and outline the leg with a black marker directly on the floor tile. Mark mounting holes.
- Measure the distance between the nozzles, plus add 5 cm to each side to put on the toilet eccentric.
- They buy an eccentric of the desired length and an automotive sealant (it does a better job of sealing the seam than silicone).
- Move the toilet to the side, insert the eccentric into the socket of the sewer pipe. They return the toilet bowl to its place and, turning the eccentric in a circle, achieve the exact entry into it of the toilet bowl outlet.
- A marker on the eccentric and socket of the sewer pipe makes a common notch in order to have a reference point for the position of the element.
- The toilet is removed, the coupling is removed from the pipe, the mounting holes are drilled and plastic dowels are installed in them.
- A layer of sealant is applied along the inner circumference of the sewer pipe (at the place where the eccentric fits) and the sleeve is inserted, aligning the marks.
- A layer of sealant is applied to the toilet drain outlet and the latter is installed in a permanent place, inserting a toilet bowl eccentric by 100 mm.
- Let the sealant sit for 30 minutes and check the drain by pouring a few buckets of water into the toilet. To control leakage, a sheet of white paper is placed on the floor under the cuff.
- If everything is successful and there is no leak, the toilet is screwed to the floor with screws, the marker line is wiped with alcohol.
It is important to consider that a reliable seam can be achieved by applying sealant only to a dry surface.
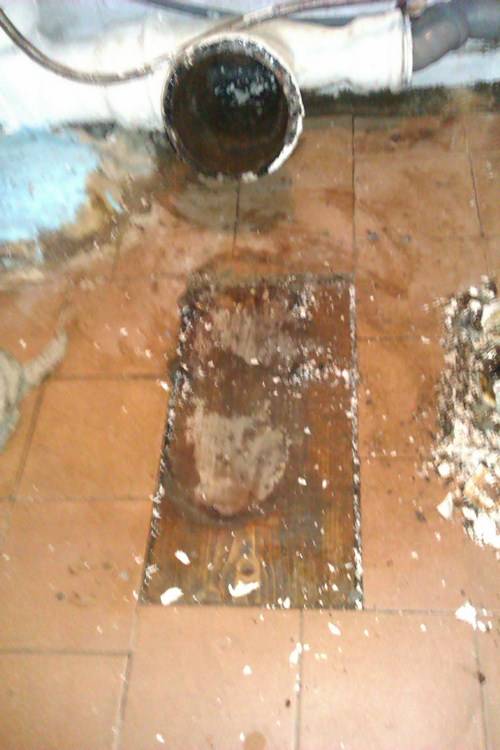
If the toilet bowl, installed on a wooden floor, is loosened
Toilet bowls are attached to the floor with screws passed through holes in the base of the device. The screws are driven into the floor or wooden plank embedded in concrete.
A frequent occurrence of installing toilets on a wooden floor or board is a violation of the “integrity” of the structure after some time. The reason for this is leakage, due to which water enters the wooden surface and destroys it over time. Therefore, the toilet, installed on taffeta, after a while, as a rule, loosens.
Small repairs with little effort
If you can't tighten the screws, remove them. Lay small chips through the holes in the pedestal of the toilet bowl into the holes in the taffeta. Place pre-cut pieces of rubber under the screw heads, grease and wrap again. To reduce the swing of the toilet, you can put a piece of sheet plastic in the gap between the end of the pedestal and the taffeta.
Big repairs require a lot of effort:
1. Pass a hacksaw blade without a frame between the floor and the end of the pedestal.
2. Use a cloth to cut the screws.
3. After closing the valve, carefully disconnect the hose from the flush tank.
4. Remove the toilet outlet from the sewer socket, having previously disconnected the flush tank from the appliance.
5. Using taffeta pliers, remove the remaining screws. With the complete destruction of taffeta, it should be thrown away, replacing it with an oak board.
6. Prepare the outlet of the toilet bowl “for a new installation”: clean it from the previous seal, wipe it dry and coat the grooves with minium putty. Wrap strands of seal on top of the putty, and on top of it - a few turns of twine, which should also be “covered” with putty.
7.At the final stage of the repair, lower the toilet outlet into the socket of the sewer pipe and tighten the screws.
Taffeta Replacement
Measure the dimensions of the old taffeta and cut out the new taffeta from the oak plank. Drill a hole in the taffeta for direct release. Experts advise treating taffeta with drying oil.
On the back side of the taffeta, fill the nails, and on the front side, using a drill, drill holes for the screws. The recess for taffeta should be filled with cement mortar and the prepared wooden board should be lowered into it with the side with nails.