- Connection Features
- Materials and tools
- Choosing the Right Drain Fitting
- Reinforcement material
- Quality of drain elements
- How to install an acrylic bathtub with legs
- Installing an acrylic bath on bricks
- Compliance with the dimensions of the room and bath
- Which siphon to choose
- Assembly of the siphon group
- Making an additional reinforcement
- Calculation of the dimensions of the structure
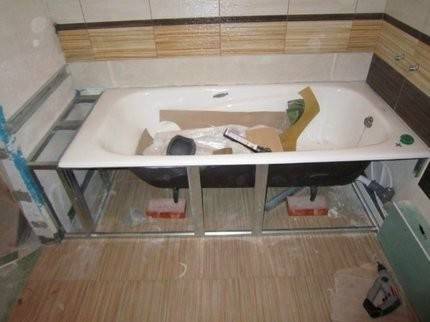
- Assembly and installation of the frame
- Installation and fixing of the bath
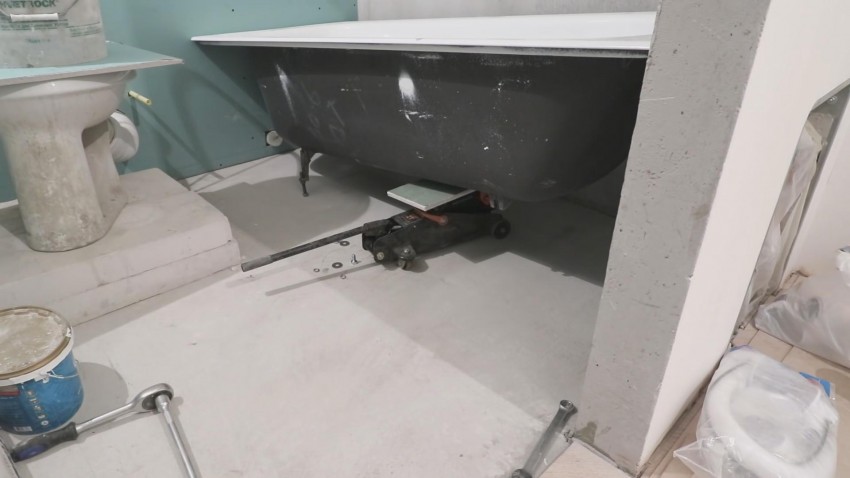
- Installing a cast iron bath
- Acrylic bath
- Bath installation
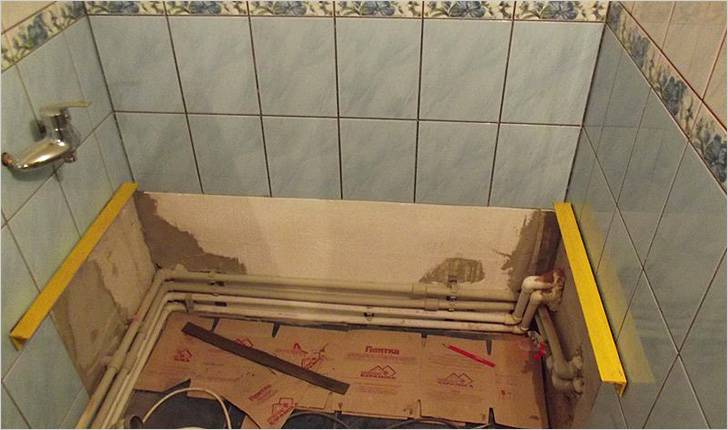
- Bathroom preparation
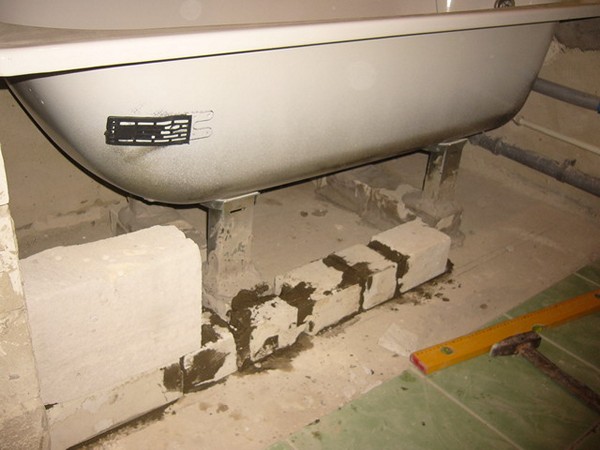
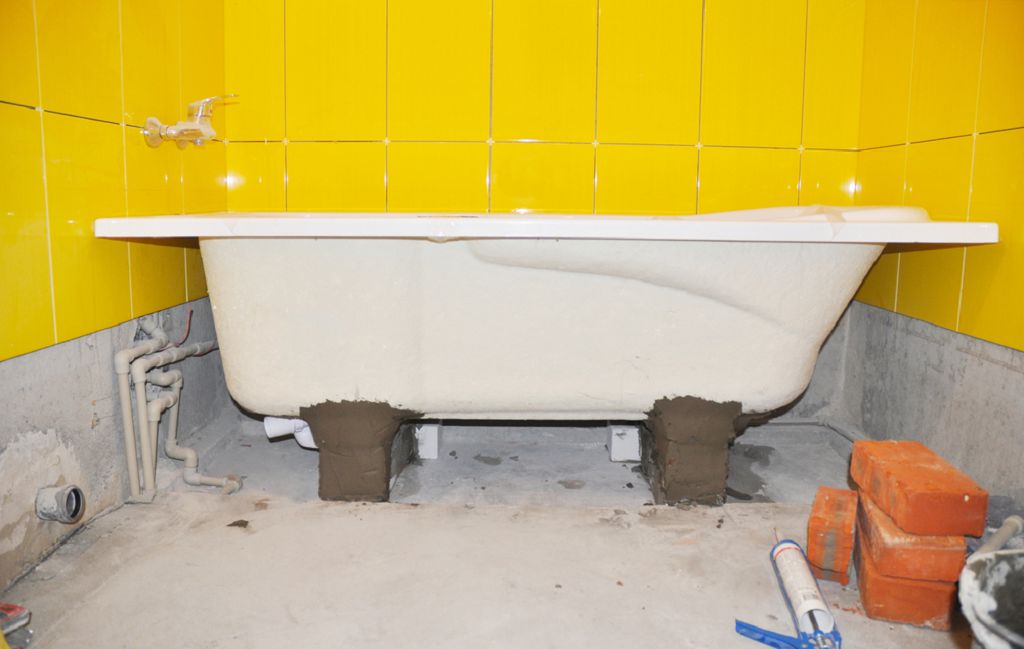
- Installation of a cast-iron bath on a brick base
Connection Features
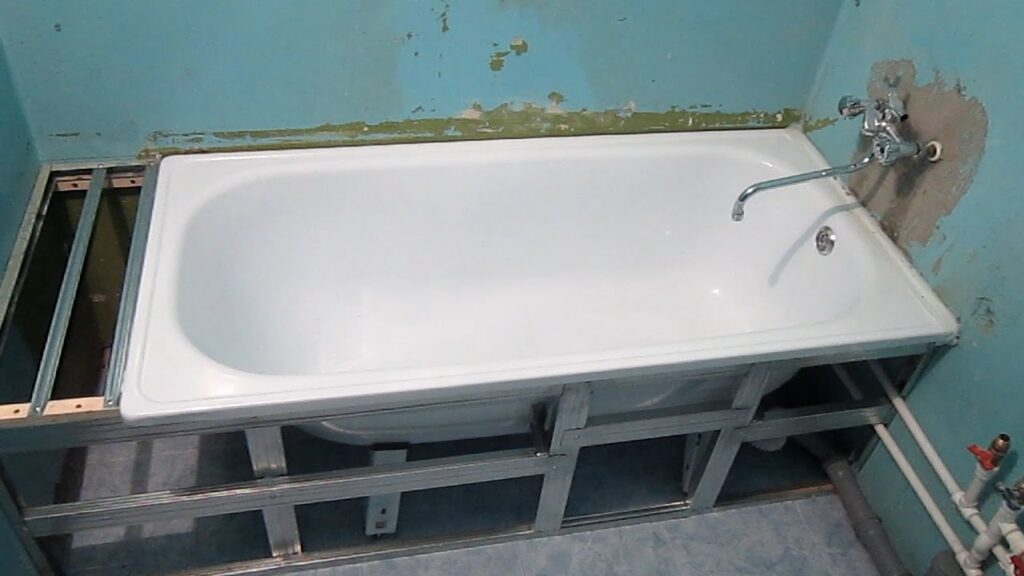
It is good to install a steel bath in small rooms, because it can be fixed closely to 3 walls. The weight of metal bathtubs is small and can be easily transported. It is better to choose models with a wall thickness of 3 mm or more.
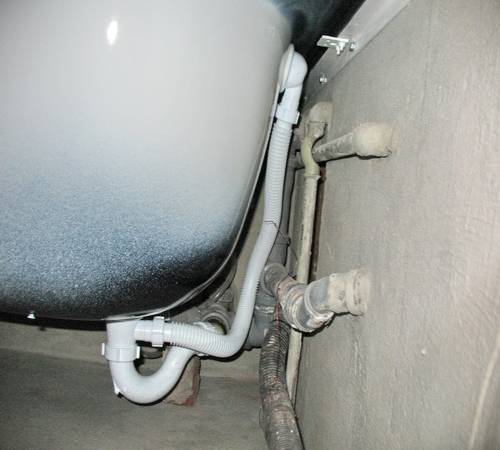
Installation of the bath begins with the arrangement of the floor. An important point in choosing a bath model is the location of the sewer pipe. The distance from it to the drain hole should be such that it is possible. Sometimes additional pipes are used if this distance is large.
Most often the pipe is located in the floor, but sometimes it comes out of the wall, and you need to consider the height of its location. In this case, a connecting adapter with a slope is used so that water does not remain in the bath.The diameter of the receiving pipe can be from 50 to 100 mm. When buying a bathtub and a siphon, you must definitely buy adapters and extension tubes.
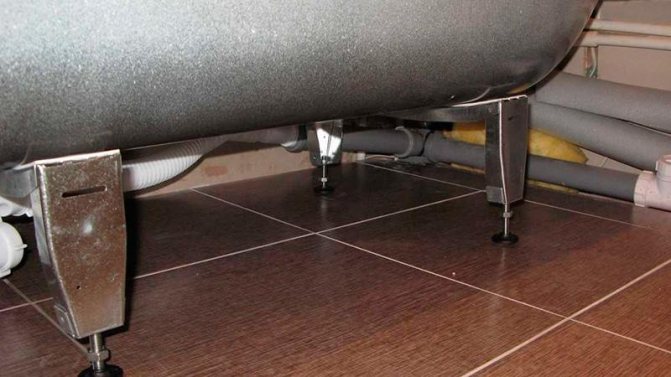
The scheme of fastening the legs to the bath.
A variety of models of plumbing fixtures have different options for attaching legs: threaded ties, hooks, double-sided tape, corners.
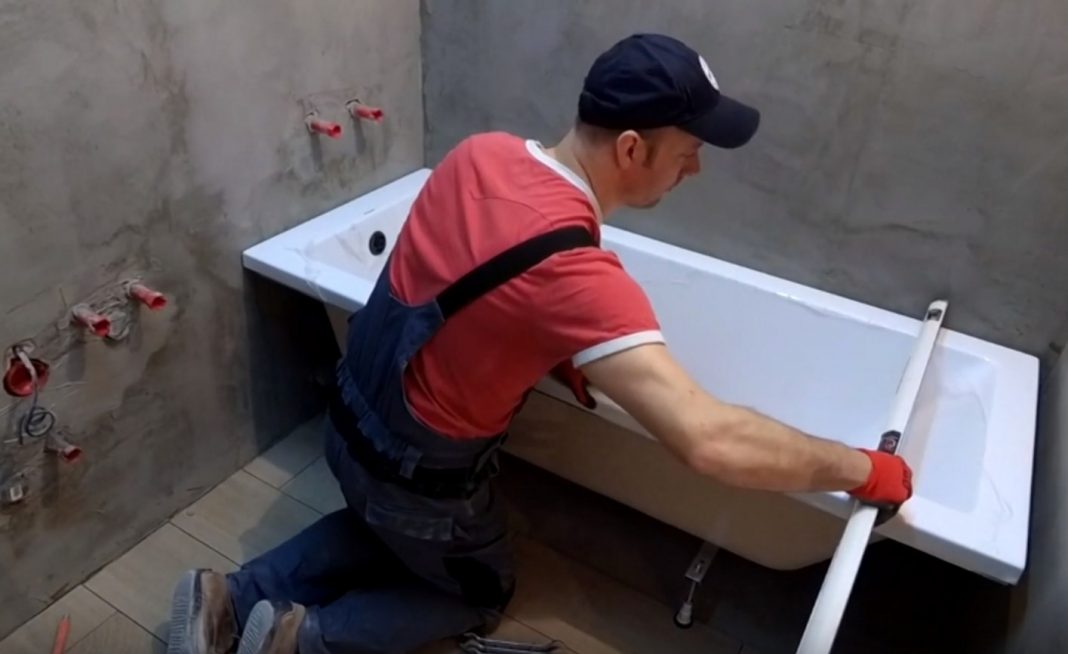
The preparation of the bath consists in strengthening the legs, installing a drain siphon and warming. The legs supplied with the plumbing fixture are more often used to level the bowl, and rigidity is achieved using brick supports.
Using a level and adjusting the feet, you can achieve an accurate installation. To give stability, hooks are used, which are screwed in at the corners. The bath is put in place and the hooks are tightened.
Consider the height of the legs. They are adjusted so that there is a slope towards the drain hole if the model being installed does not have an angle of inclination. Sometimes the legs do not have sufficient height, and then you need to make linings for them from several tiles glued with silicone.
Some models have corners welded to the bottom, using which you can fix the legs with bolts. The legs are heel bolts that are height adjustable. They are fixed with special clamps.
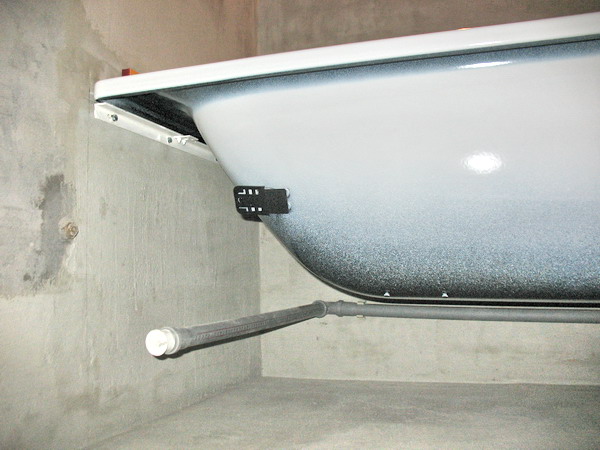
The bath is installed on legs, and the gap between the wall and the side is eliminated with mounting foam and sealant. A securely fixed side will not allow the bathtub to roll over in case of a significant load on one side. The joint can be decorated with plastic, tiles, water-repellent paint.
Foam is used to insulate a steel bath and reduce water noise. The bottom of the bathtub is moistened with water, blown out with mounting foam, and left to dry for 5-10 hours.Usually the consumption of foam is about 3-5 cans.
Scheme of installing a metal bath on bricks.
The collected bath is connected to the sewerage system. The outlet from the siphon is inserted into the sewer socket using a flexible hose and sealed with a gasket that is screwed on with a nut. You can use a rubber cuff to connect.
Then the tightness of the connections is checked. Collect water and check the tightness of the joints. If there are water leaks, check the reliability of the gasket and the tightened nut.
Wipe all connections, pour hot water and re-check the tightness.
performed using a wire that is attached to the bath and metal structures. It is forbidden to ground to water supply or heating devices.
To improve the aesthetic qualities, a screen is installed under the bathroom. It can be made from profiles, drywall and tiles.
Materials and tools
Bath installation tools: drill, building level, wrench, electrical tape, chisel, hammer, screwdrivers, rag, sealant, cuffs, brick, cement, sand, drain corrugation.
Before starting work, you need to level the floor, make waterproofing, lay tiles, check the condition of sewer pipes, drain fittings.
Independent is quite possible if you first study the materials and get expert advice.
2 main installation phase - assembly and connection to the sewer system.
For work we use the following tools and materials:
- drill;
- building level;
- wrench;
- electrical tape;
- mounting foam;
- sealant;
- paint;
- corrugated pipe;
- drain equipment;
- cement;
- sand.
Choosing the Right Drain Fitting
When choosing drain fittings, it is not surprising to get confused about how wide the range of products offered on the market is.
But is it true, what characteristics should you pay close attention to when buying, and what can be ignored?
Reinforcement material
The building materials market offers us two types of materials: PVC (polyvinyl chloride) and polyisopropylene. We meet with PVC more often, that's why we choose it.


But the relatively expensive polyisopropylene is not only stronger than polyvinyl chloride, but also has a whole list of indisputable advantages, these are:
- Hardness. This material is much harder than its rival, which reduces the likelihood of mechanical damage during installation of the bath.
- Durability. Its strength characteristics do not decrease over time.
- Surface quality. The surface of this material is smoother than PVC, which means that dirt is less likely to stick to it.
The efficiency factor is also extremely important. The efficiency of polyisopropylene is higher than that of PVC, since the friction of water against the walls of smooth pipes made of this material is much less.
Quality of drain elements
Most of the plums you see for sale are made in China. In the process of their installation, a bolt is used. Regardless of what material it is made of, after a while this bolt will oxidize, rust or corrode in some other way.
You can buy a stainless steel bolt separately, but from its contact with the grid, a soldering will certainly form, which will significantly reduce the maintainability of the product.
The industry offers bathtub drain fittings in two versions: PVC (polyvinyl chloride) or PP (polypropylene).If you are interested in the long-term and reliability of the device, it is better to prefer polypropylene as a material more resistant to household chemicals
When buying drain fittings, do not hesitate to check its complete set and make sure that all the elements stated in the passport are present:
- Plum mesh. The most economical of all nets available for sale is the model, which consists of two crossed beams. It perfectly captures the hair, preventing clogging. The most practical option is considered to be with round holes located around the perimeter of the product. The most reliable is called a grid with profiled oblique holes. However, it is also the most expensive model.
- Cork chain. It would seem that the chain is a detail that does not have significant significance. But it's not. Usually we use the chain that comes across to us as part of the kit. Doing this is undesirable. Buy separately the one used by the fishermen. Its surface is covered with a protective paint that does not allow water to spoil its appearance over time.
- Overflow pipe. In older bathtubs, the overflow pipe is made of metal, but modern production offers a better option. Use a corrugated pipe with a large diameter, and, therefore, throughput. The high capacity of the pipe significantly reduces the risk of water overflow.
There are some nuances of installation that are worth considering. For example, if the outlet valve of the drain fitting is wide enough, you can make the connection without using a cuff. The resulting gap is simply filled with silicone-based sealant or silicone itself.
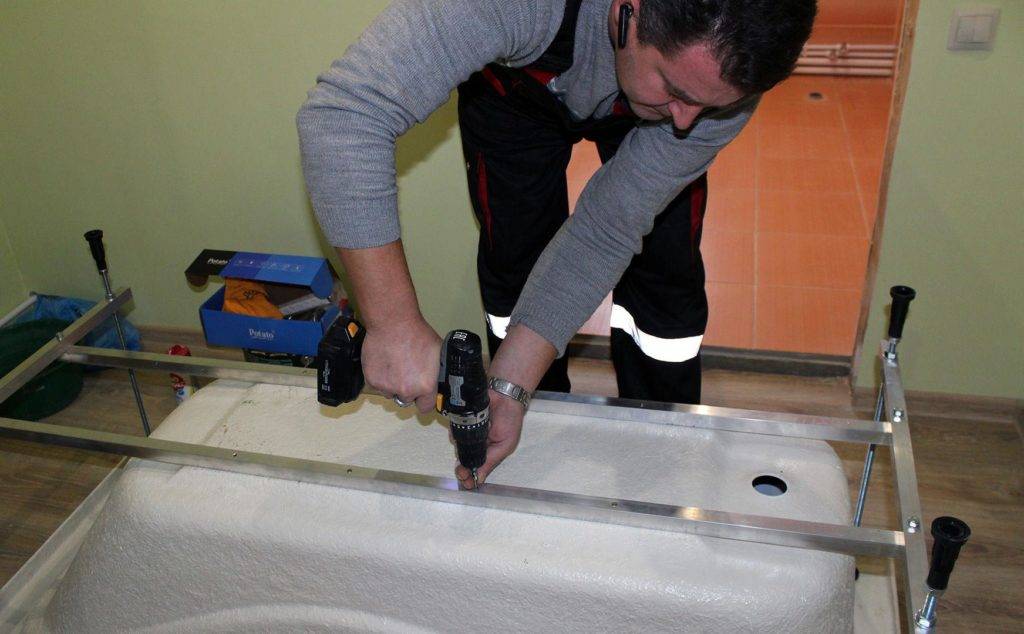
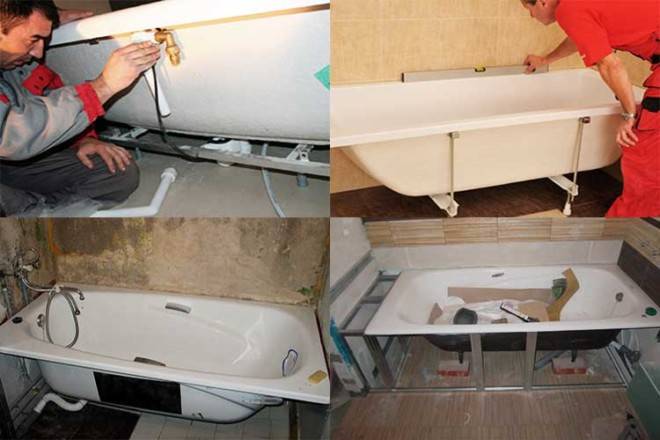
How to install an acrylic bathtub with legs
Most well-known bathtub manufacturers supplement their products with special fasteners and installation parts. Supports are included with models manufactured by Jika (Jika), Roca (Roca), Riho and others.
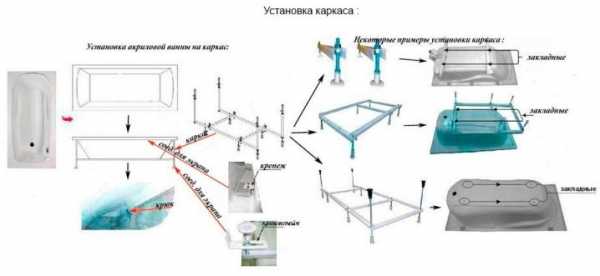
How to properly install an acrylic bathtub on legs yourself:
- On the bottom of the acrylic bathtubs, which are mounted on legs, there are characteristic protrusions for connections. To attach the legs, the bathtub must be turned over and the supports that come with the kit are attached to these protrusions;
General scheme for installing legs on an acrylic bath
- To give rigidity to the structure, the legs are also interconnected. To do this, they are tightened with nuts and fixed with studs;
- After that, the drain is processed (a siphon is connected to it). The water outlet does not need to be touched until the bathtub is installed on the floor. When all the preparatory work is completed, you can proceed with the installation of the bath;
The scheme of connecting the bathroom to the pipeline
- The legs are installed on the floor, using the level, the evenness of the installation is checked. If any corner is too high, then, as mentioned above, all other corners are raised. This is done very simply: the bath is turned over and some of the legs are adjusted to the desired level;
Adjusted feet for bathroom installation
- For strength, we recommend slightly knocking out the plastic supports with a hammer with a rubber working surface.
With acrylic and glass baths, you need to work very carefully. Plastic is susceptible to deformation under impact loads
When the installation process is over, proceed to install the faucet, washing machine and other consumers.
Video: complete video installation instructions for the bath
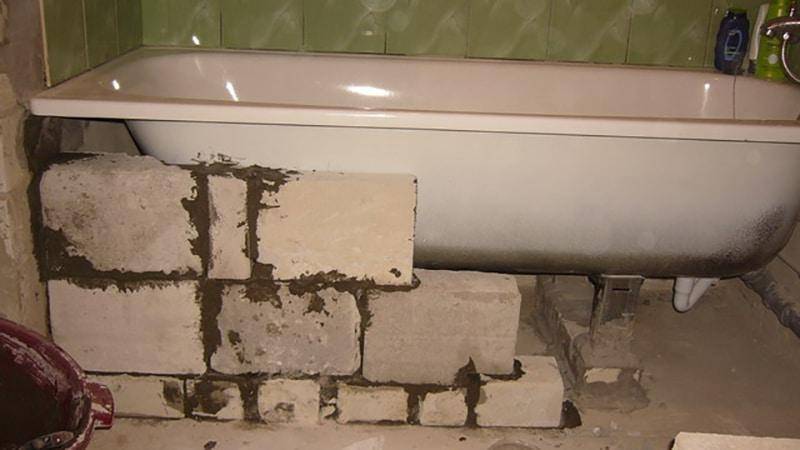
Installing an acrylic bath on bricks
We note right away that this method is rarely used to install plastic bathtubs. For acrylic plumbing, not only perfect evenness is important, but also the complete absence of shock or other loads that contribute to deformation. Brick supports are quite difficult to install with your own hands so that they evenly distribute pressure over the entire plane of the bath.
Step-by-step instructions on how to install an acrylic bath on bricks:
- The height to which the bath will be installed is determined based on the dimensions of the bathroom and the dimensions of the liner. The optimal height is considered to be 3 bricks;
Parallel bathroom brick laying pattern
- For laying, a classic chess pattern is used. For its implementation, the floor is leveled, the first row of bricks (2 pieces) with cement mortar is laid on it. On top of them, 2 more pieces are installed, but in the opposite direction. So up to the height you need;
Scheme of chess laying bricks
- If for the installation of a sliding frame system it is possible not to make accurate measurements of the bath, then they are required for bricks. In addition, you need to calculate the location of the supports in such a way that there are no sagging points. For example, 4 brick supports at each corner and two in the central part;
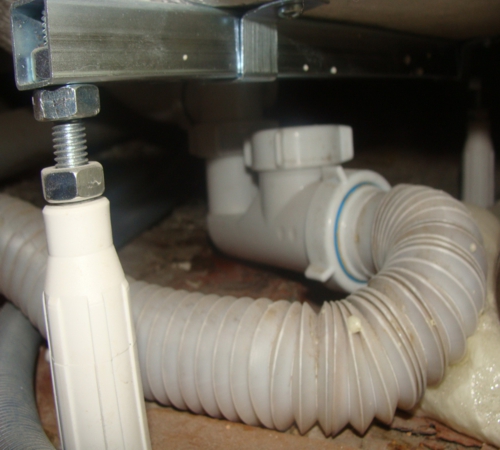
- While the solution hardens, you can start connecting the sewerage system. If this is not a hydromassage model, then all work is performed according to the standard scheme. From the sewer there is an adapter and a siphon with overflow, and pipes for installing a mixer depart from the water outlet.
Connecting the siphon to the water pipes
After laying the bricks, you need to wait for the mortar to harden and only after that install an acrylic bath on them.Of course, the appearance of brick supports leaves much to be desired, so a variety of options can be used for their decor. These are tiles, decorative panels, a screen (as for a frame), etc.
Compliance with the dimensions of the room and bath
Owners of spacious bathrooms can be calm: they have a wonderful opportunity to choose any bath they like, as long as they can fit in it themselves.
Everyone else will have to carefully measure their small spaces to make sure that the chosen model will look organic and will not deprive you of the opportunity to place the equipment you need in the bathroom.
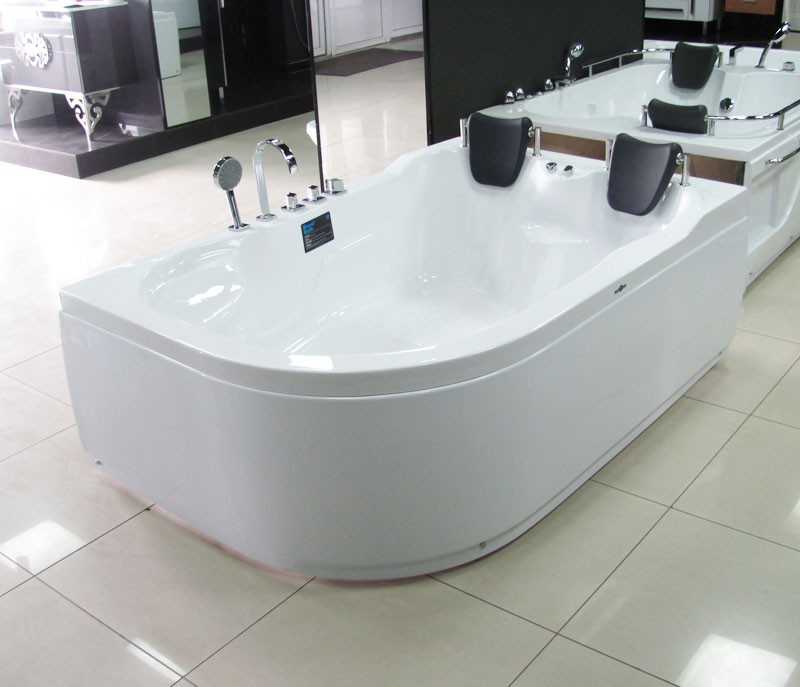
If the area of your bathroom allows, you can install a custom-sized and unusual-shaped bathtub, equipped with all sorts of additional features.
Remember that the appearance of the product may give a false impression. Some very similar models have completely different sizes. The most common sizes of bathtubs made of different materials also differ from each other.
The length of steel products is 150-180 cm, and the height is 65 cm, the width is 70-85 cm.
For cast iron models, three types of sizes are considered standard:
- small-sized with a length of 120-130 cm and a width of 70 cm,
- European standard with the same width of 70 cm, but a length of 140-150 cm,
- large-sized with a width of 70-85 cm and a length of 170 to 180 cm.
The choice of acrylic models is truly huge. Their length varies from 120 to 190 cm, and their width is 70-170 cm.


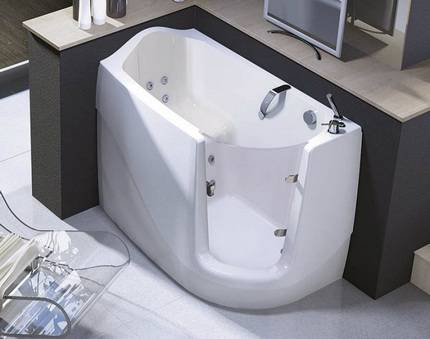
A compact sitz bath can be literally crammed with all sorts of electronics. The price of such a baby can be several times higher than the cost of a standard model.
Small bathrooms are purchased for various reasons.Sometimes due to the fact that there is not enough space in the bathroom for a large structure. But sometimes owners of large rooms also opt for compact models.
For example, elderly and disabled people are often advised to take hygiene procedures in a sitting position. They need small-sized "sitting" baths.
By the way, the fact that the model takes up little space in space does not make it cheaper. Conversely, compact products are often very expensive. They are created in order to satisfy the needs of a number of people. And if they are in demand, then you have to pay for them.
However, usually in spacious rooms completely different models reign. They are made of acrylic or cast iron. Cast iron ones look monumental and reliable, but without pretensions to originality, but the variety of acrylic ones can be envied. There are both angular and rectangular models, there are even polygons or ovals. The abundance of decorative finishes also impresses.
Sometimes buyers, falling under the influence of unscrupulous sellers, instead of acrylic products, buy cheap plastic fakes. As a rule, this is Chinese low-quality consumer goods, which you are tormented to install later. We will return to the nuances of installing plastic bathtubs.
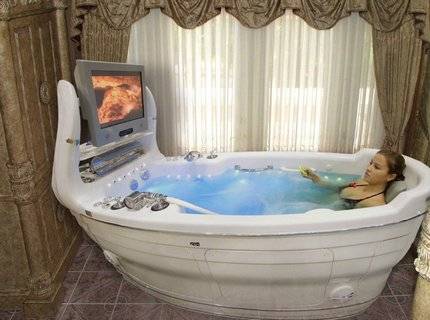
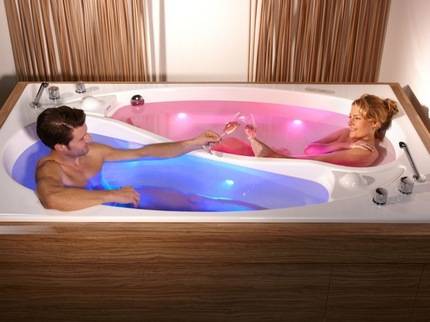
Modern bath models are becoming more complex and multifunctional: progress allows us to meet the growing needs of customers, if only there was money
Which siphon to choose
There are many different types of bath siphons available. There are semi-automatic ones that make it possible to drain the water without diving into it with your hand and without rummaging along the bottom, but by turning a special washer fixed above the water. In this case, the cork will rise by itself, and the water will begin to leave.
Such siphons are much more expensive than conventional ones and it is worth overpaying for them only when the installed bath is very large. In average homes with small bathrooms, a simple plastic appliance will do just fine and will last for years and require less effort to install yourself.
Some siphons have metal outlets that are bolted to the overflow and siphon. They are easier to install than plastic ones, and their appearance is much more beautiful. But there are also disadvantages in the presence of metal: sometimes manufacturers, especially Chinese ones, replace stainless steel with nickel-plated iron, due to which metal parts begin to rust over time. Fasteners are also very often made of a material subject to corrosion. After a couple of years, they stick to each other so that it is almost impossible to unscrew them.
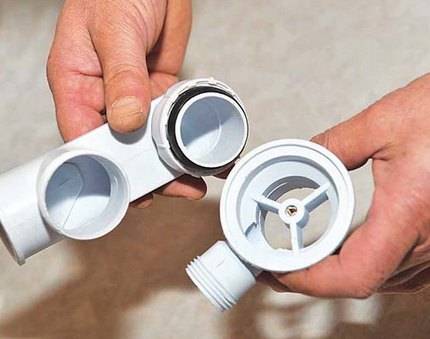
Assembly of the siphon group
Bathroom fittings sold separately. They are divided into two groups:
- prefabricated;
- Whole.
In the first case, the siphon group is assembled on threaded connections from small plastic parts. All curves are rectangular.
In the second case, the siphon is represented by a curved pipe. All bends are smooth, there are no threaded connections.
A one-piece siphon looks trivial, but it has huge advantages.
- The more threaded connections and parts, the higher the likelihood of leaks;
- Smooth bends do not impede the flow of water, draining is faster and the likelihood of deposits and blockages is extremely low;
And besides this, the siphon is not a subject for demonstration, and no one will see it except you. Therefore, an objective choice is a siphon with a solid body.
Its assembly consists in screwing through the cuff, the overflow system.
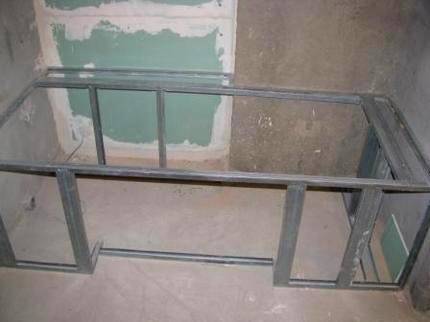
Making an additional reinforcement
The walls of the bath under the mass of water and the body immersed in it can be deformed. Therefore, when installing a steel bath, the manufacture of an additional reinforcement structure will definitely not be superfluous. The material for the manufacture of the frame can be:
- wooden bars with a section of 20x100 mm;
- galvanized profile UD or SD with a section of 20x40 mm;
- metal corners 25 mm.
Calculation of the dimensions of the structure
The size and design of the frame depends on where the bath will be located. It can stand alone or be placed close to the wall. Installing a steel bath against a wall is preferable, as this placement allows for a more even distribution of the load.
The frame is a structure on racks located at a distance of 500 mm from each other, the upper belt of which is made along the perimeter of the bath
When planning to place the bath directly against the wall, from the side adjacent to the vertical surface, you can refuse to install support racks. In this case, the upper belt must be fixed to the wall itself.
When measuring rectangular bathtubs, keep in mind that the outer layer will be mounted flush with the front edge of the rim of the structure.
 The installation height is considered to be 600 mm, but it may vary depending on the placement of plumbing fixtures, as well as the features of communication systems
After measuring the dimensions of the structure, add a margin of 10% to the resulting value.This will not significantly affect the costs, but at the same time it will allow in the future to prevent possible problems associated with a shortage of material in case of damage.
Wooden bars or metal corners are cut with a hacksaw into frame elements. The cutting angle must be 45°. When working with wooden blanks, before proceeding with the installation of a steel bath, it is advisable to cover the frame elements with protective enamel. Treating the elements with a special primer will help prevent corrosion of the metal.
Assembly and installation of the frame
The prepared elements are placed on the floor and a preliminary fitting is carried out. The wooden base of the structure is attached to the floor with anchors or dowels. When making a frame from a profile, metal elements are connected by welding.


Vertical posts are fixed to the base frame. On the short side of the bath, only one rack is provided, placing them exactly in the middle of the segment.
 Installation of corner support posts does not take much time, but it must be done with the highest quality, since it is the corner posts that will take on the load of the bowl itself, as well as water and human weight
With the help of connecting elements, the upper belt of the frame is assembled. The design will completely repeat the assembly of the lower support. The cut profiles are laid on the corner posts and fixed by welding or self-tapping screws.
Installation and fixing of the bath
Training. Before installing the steel bath, all floor finishing work must be completed. It would be nice to finish the walls as well. As a result, the risk of damage to the bath will decrease significantly. The place where the bath will be mounted must be cleared of construction debris.

Water and sewer pipes. Installation of communications is carried out based on the future location of the bath. The water drain will be below the bath, and the water pipes will be brought to the desired height.
Bath assembly. According to the available instructions, the steel bath is assembled. It is necessary to fix the legs, support handles and other elements that are included in the kit.
Adjustment. If there are legs in the kit, then installing the bath on them is the easiest installation option. You just need to install the bath in a clearly horizontal position. Some decide to install a bath in addition to the brickwork. In this case, several support columns are built; between the bottom and the last brick there should be a gap of 5 mm; this gap is filled with mounting foam. Thanks to this, the bath will have sufficient rigidity.
Bath connection. To connect the water supply and sewage, it is necessary to use only high-quality connecting elements
If there are threaded connections, it is important to use fum tape
Closing the joint seam. Before you close the seam between the wall and the bathtub, you can additionally attach the bathtub to the wall. This will contribute to a better fixation. As for sealing the seam, the ideal option would be to use self-adhesive tape or install a plastic corner. All small gaps can be sealed with a colorless sealant.
Bath check. When all installation and joint processing work is completed, the entire structure should be checked for leaks. To do this, the bath is filled with water. The appearance of drops at the junction of pipes is unacceptable. When they appear, you need to repair the connection.Also check the design for leaks when draining water. Any accumulation of water cannot be ignored, it is necessary to immediately remove the cause of their occurrence.
So, that's the whole process of installing a steel bath. A helpful video will help you make sure that there is nothing complicated here.
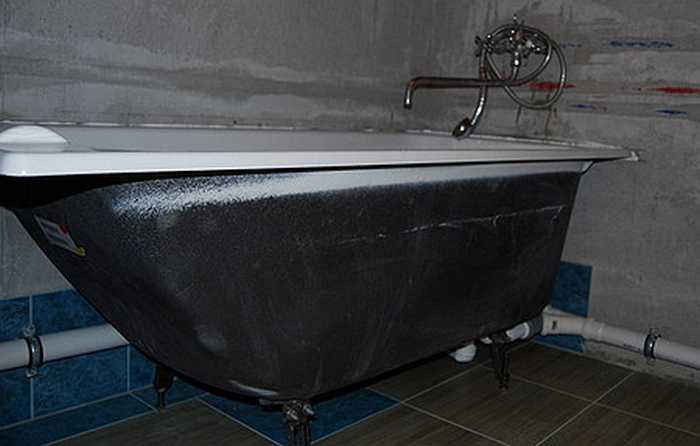
Installing a cast iron bath
The cast-iron bathtub is a high-quality, heavy model, the characteristic feature of which is long-term heat retention. Before you install the bath with your own hands on the bricks, you need to bring it into the room in height, turning it on its side and laying it on its destination with the bottom against the wall so that the outlet is in a certain direction.
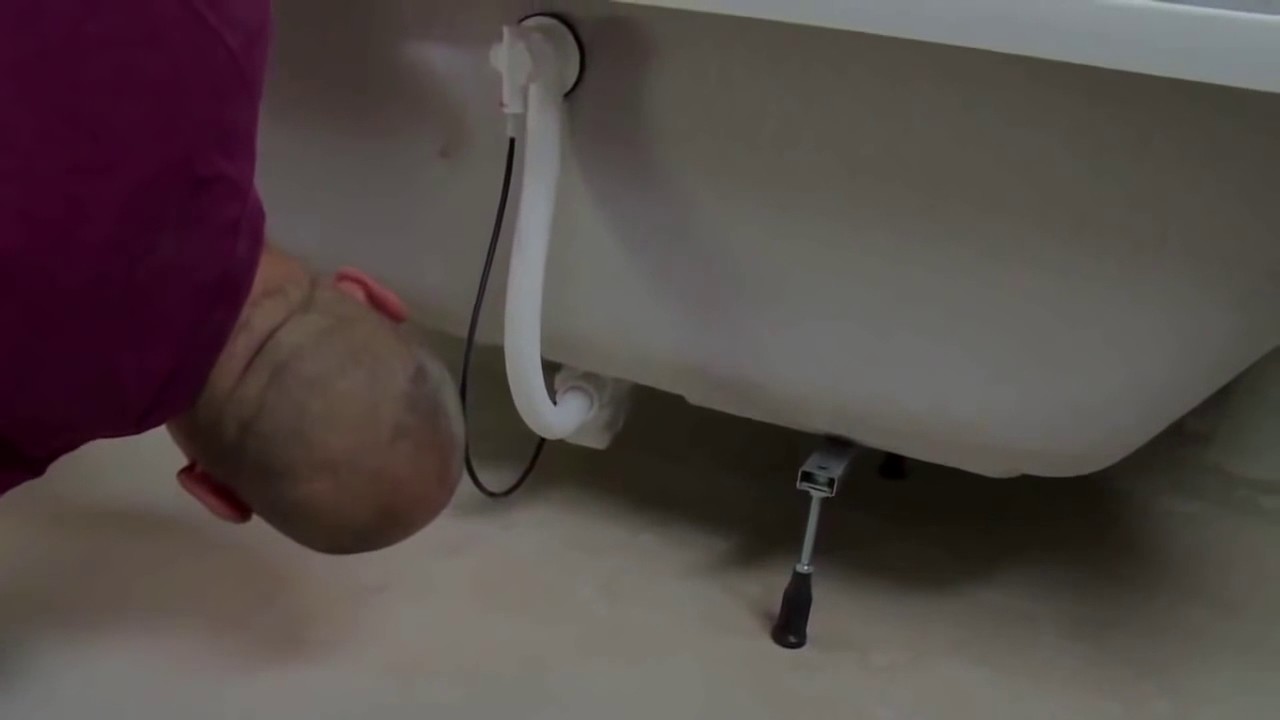
Installation of a metal bath involves fixing the supports with a tie bolt. The wedges are fastened by tapping from the center to the edges until they are firmly fixed. Each support must be equipped with an adjustment screw with a nut.
 Fitting a cast iron bathtub
After, the bath is turned upside down to install the side supports. Use the level and adjustment screw to avoid all sorts of tilts when setting the horizon. Smooth legs should be fixed using polymer glue in the work so that they do not slip on the surface, or, alternatively, put plastic plugs on them.
After installing the bathtub on the legs, the water supply is connected, having waterproofed all the gaps, slots and butt joints. At the end, a faucet with a shower is installed.
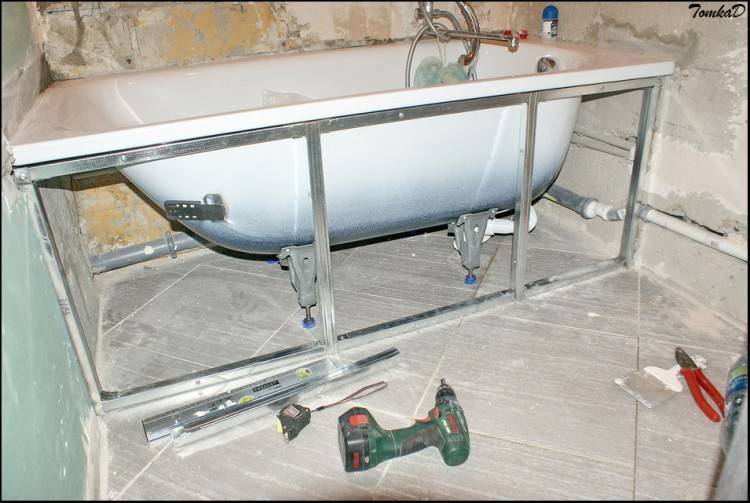
Acrylic bath
Manufacturers recommend installing acrylic bathtubs on the frame with their own hands, as this is much more reliable.


We recommend that you seek help from specialists, they will take measurements and weld you a reliable steel frame.Of course, it will cost more than installing it on legs, but it will last a long time.

You can also save a little by assembling a bathtub frame from bars.

This option will cost much cheaper, but often the beam starts to get wet and this causes deformation of the frame. This negatively affects the design, as the load on one side of the bath becomes greater.


But to prevent this from happening, you can cover the timber with a moisture-resistant primer. After that, the siphon and overflow are connected, as well as other plumbing equipment, if necessary.

Then finishing work is carried out and the bath is completely ready for use!

Now you know how to install a bath with your own hands. We wish you success in the installation work!
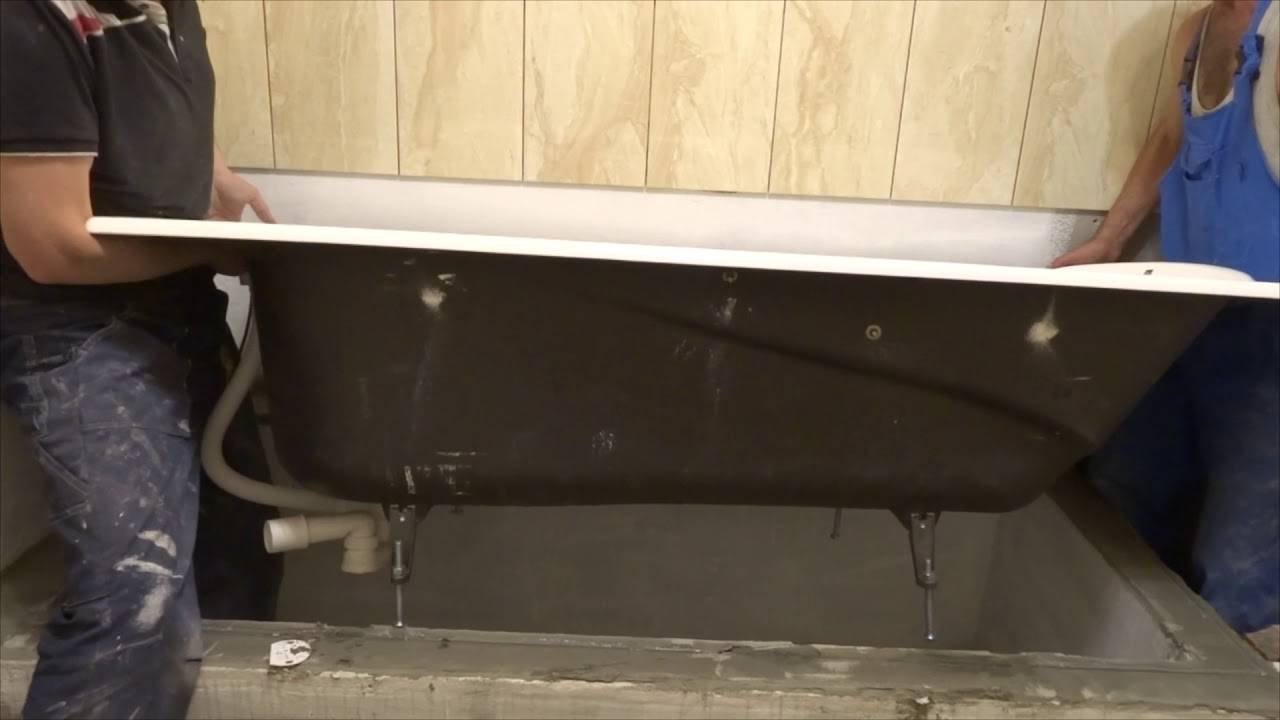
Bath installation
The bath must be installed by two people. Regardless of the material, this is a large-sized piece of furniture and one simply cannot cope with it.
For work you will need:
- Rule with a level;
- mallet;
- Adjustable wrench for leg adjustment.
The cast-iron bath is installed in the allotted place. With a properly prepared base, no adjustment is needed.
The acrylic bath is installed inside the assembled frame, and is slightly pressed down, until a characteristic click. This click means that the bathtub is in place and seated on the frame. Since the frame is prefabricated, it is required to adjust the plumbing according to the level of the horizon. To do this, it is better to use the diagonal method.
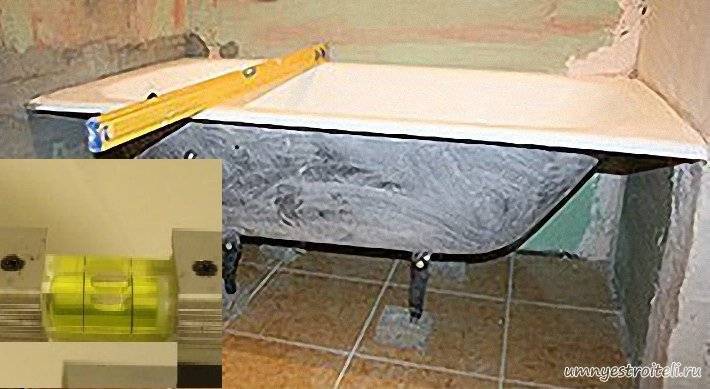
As a rule, the bathtub is laid diagonally, and if required, then unscrewing the leg, raise the lowered side.Then the rule is placed on another diagonal, and again aligned, raising the lower edge
IMPORTANT: alignment is carried out only by lifting the low side. Lowering the high is impossible.
Steel bath, set similar to cast iron
And the alignment according to the level of the horizon is carried out as in the acrylic counterpart.
Bathroom preparation
Work should be divided into two categories. It is one thing if the bath is installed in a newly renovated room, and quite another thing if the old equipment is being replaced with a new one.
In the first case, you do not need to prepare anything. Full repair, involves the preparation of the foundation. Note that floor tiles, if they cover the entire area of the room, should be laid on the adhesive applied in a continuous layer, and not on several points. Otherwise, a bathtub filled with water, and even with a person inside, can break through the tile.
But this flaw can be leveled if two boards are placed under the legs, placing them along the length of the bath. The wood material is larch. From contact with water, the resins contained in the larch polymerize, and after a while the boards will be impossible even to cut with a hacksaw.
In the second case, it is necessary to revise the flooring
Pay special attention to the places where the legs of the new bath will be. It is possible that new supports will lie in a different place
In addition, it is necessary to measure the level at which the bath will adjoin the wall. With a high probability, it can be assumed that the walls are tiled not to the floor. And after the old bath, at the place where it adjoins the wall, a clearly noticeable line remains. It's unlikely to be wiped off.Microscopic particles have penetrated into the pores of the glazed coating, with the formation of an inseparable conglomerate. If this defect cannot be eliminated, then it should be hidden. To this end, boards should be placed under the legs of the bath (as described above).
Heated drying oil is applied to the boards in a thick layer. Then they can be painted in such a color that they do not differ from the dominant background.
Separately, we recall the optimal height of the bath. In the USSR, experts calculated that it is most convenient for an average person to raise his leg in order to step into the bath, to a height of no more than 60 cm. This parameter was included in the SNiP as a recommendation. But now there are many more models of bathtubs on the market, with different overall dimensions. So be guided by this case, should be your own preferences.
If tiles were not laid under the bathroom, then it is recommended to slightly raise the level of the floor in this particular place. Even 1 cm of added height will be enough to keep water out of the tub.


This will require:
- Quick-drying self-levelling screed (20 kg):
- Deep penetration primer;
- Guide metal profile;
The floor surface is treated with a primer, and during its drying, with the help of a metal profile, a side is arranged. To do this, the profile is cut in such a way that it fits exactly in length between opposite walls. Adhesive tape is glued to the back, this will not allow it to be grabbed with a screed. Having laid, the profile is screwed through the side wall with self-tapping screws to the floor in 3-4 places. Then the screed is diluted according to the instructions on the package, and poured into a fenced area. The layer thickness is selected individually.Considering that ≈ 15 kg of the finished solution is consumed per 1 m2 of screed with a thickness of 1 cm. And from 20 kg of dry mix you get ≈ 30 kg of solution, then the screed layer in the bathroom will be 1.2-1.5 cm.
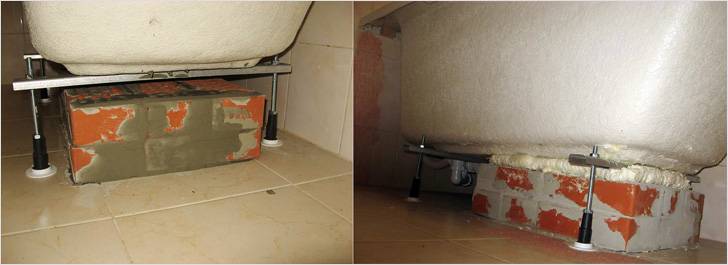
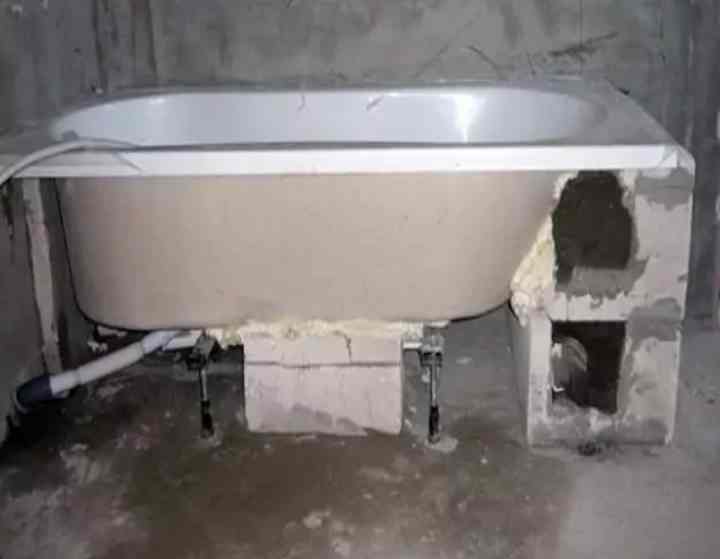
Installation of a cast-iron bath on a brick base
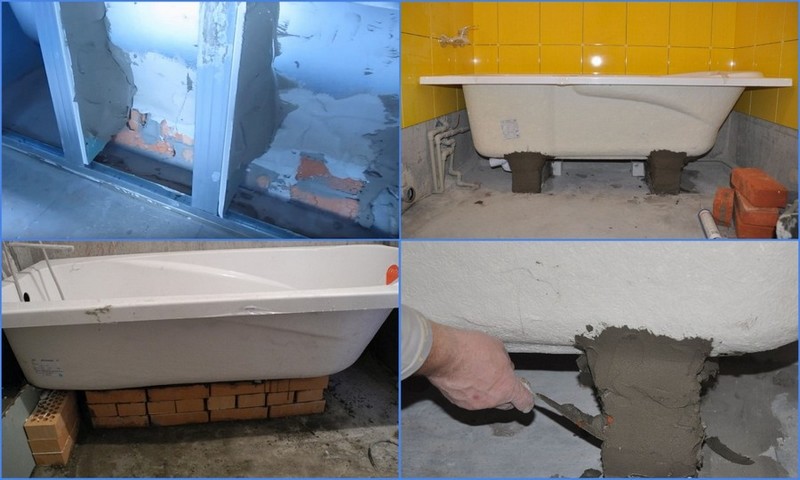
The brick base as a bath frame is used very widely. This is a reliable and affordable installation method that can be successfully used for both steel and cast iron models, as well as for acrylic models.
If the metal legs can deform over time, which fatally affects the position of the bath, then the brick perfectly withstands decades of operation.
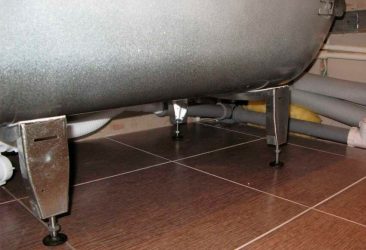
There are two options for installing a bathtub on a brick base: two supports are made from it, as shown in the figure above, or one large brick base is prepared.
For cast iron bathtubs, it is recommended to use a combined installation method: first, the legs are screwed, then the structure is mounted on a brick base, in which openings are left for the legs. Given the severity of the bath itself, the base is most often made large, although sometimes two brick supports can be used.
The length and width of the brick base must match the dimensions of the bottom of the bath. To make brickwork, you will need about 20 bricks, as well as a sand-cement mortar in a ratio of 1:4.
The combined method is considered effective when installing cast iron and acrylic baths, in which the bottom of the bath is supported by brickwork and the legs are also used as a support.
Before starting work, markings are made on the floor indicating the dimensions and configuration of the bath. After laying in two bricks, another half-brick is added on the sides to form a recess for the bottom.
The recommended height of the brick base for the front of the bath is 17 cm, and for the back - 19 cm. It will take at least a day to dry the brickwork.
Sometimes a layer of mounting foam is applied to the brick support, on which a cast-iron bath is installed. The foam on top takes the exact shape of the bottom and securely links the device to the brick base.
Foam can also be used as a material that enhances the heat and sound insulation of the bath. To do this, the entire outer side of the bath is covered with mounting foam, or only the bottom and sides to the middle of their height.
The bottom and sides of a cast-iron or steel bath can be treated with mounting foam. This allows you to improve the sound insulation of the device, as well as increase its ability to retain heat.
After the bath is installed on the foam, it is necessary to connect it to the sewer, close the drain and fill it with water approximately to the middle so that the foam sags properly under the weight of the bath. At this stage, the position of the bath is adjusted horizontally so that it stands level, but with a slight slope towards the drain.
At the same time, the external faucet of the bath should be about 1 cm higher than the edge located near the wall. This will help prevent water from overflowing onto the floor. After that, you need to open the drain and see how the water leaves. If this happens quickly, the bath is standing correctly.
If the water leaves too slowly, you should increase the layer of foam in the right places to level the structure. As with the installation of a cast-iron bathtub with legs, the edge adjacent to the wall must be treated with tile adhesive and sealant. All other components and connections should also be sealed.
Before finishing work, while there is free access to the tub piping, fill the tub with water and check the quality of the sealing of the sewer drain, as well as the correctness of the established slope


