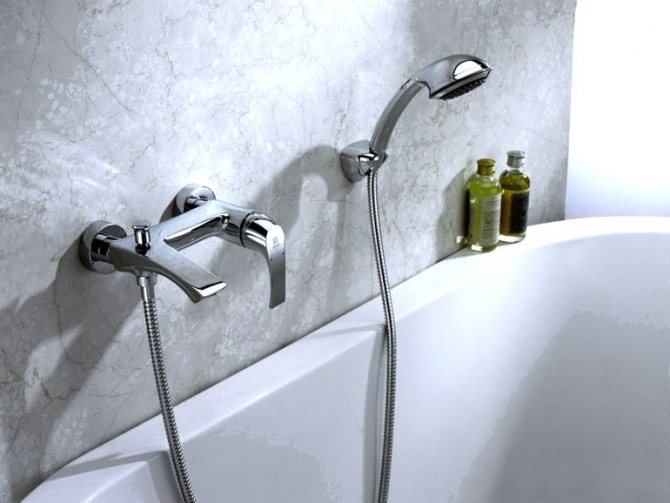
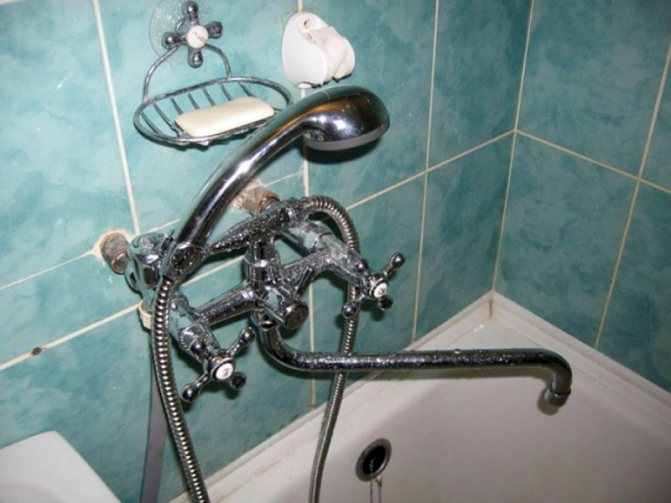
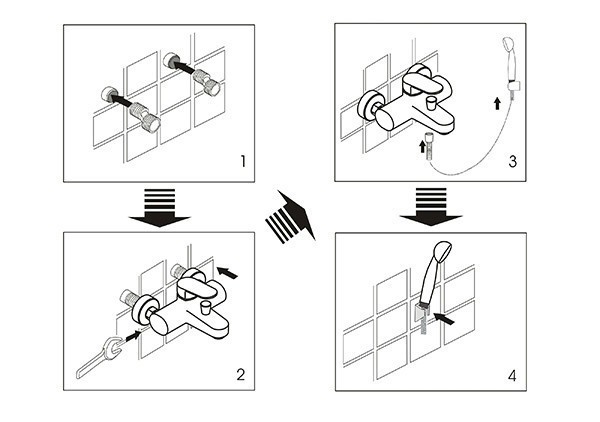
- Faucet installation on the wall
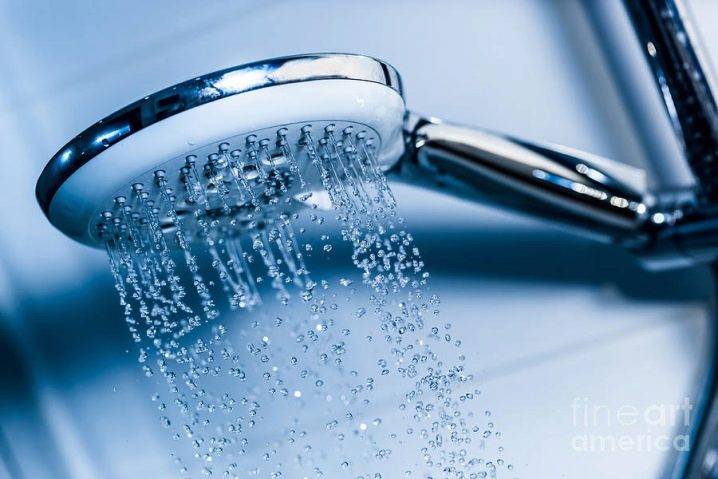
- Shower installation
- Installation subtleties
- Peculiarities
- Disadvantages in the operation of the built-in mixer
- Insulation and tools
- Installation methods and preparation for installation
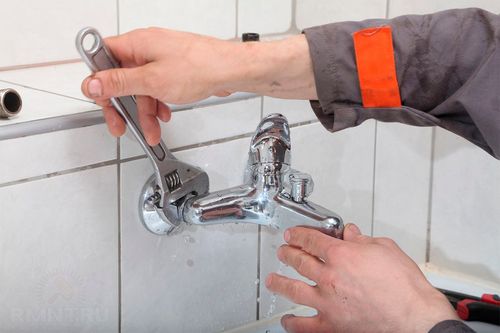
- Dismantling the old and assembling the new mixer
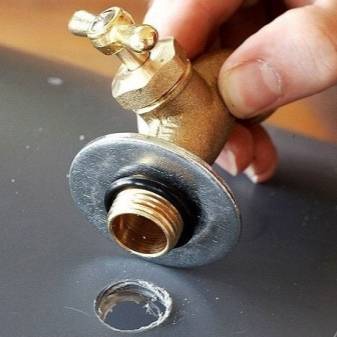
- Removing the old faucet
- How much does a faucet installation cost?
- The distance between the pipes when connecting the mixer
- Installing a faucet in the kitchen
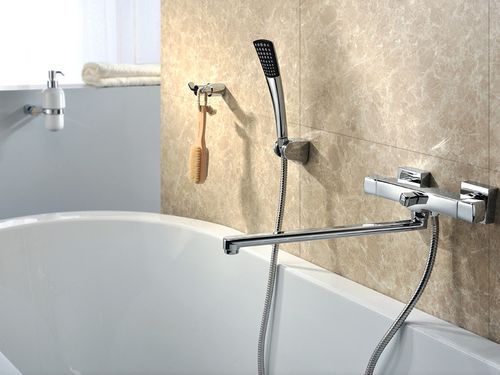
- Shower faucet installation
- Installing a faucet in the bathroom
- Be aware of the disadvantages
- Installation on polypropylene pipes in the wall
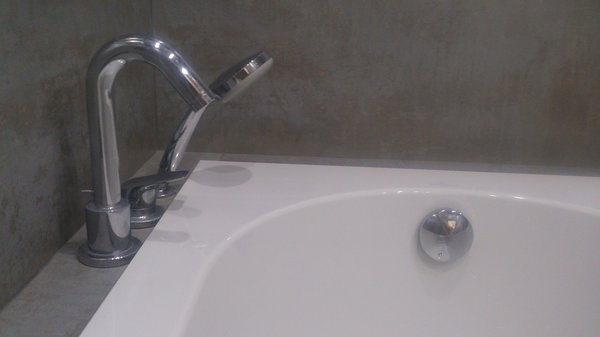
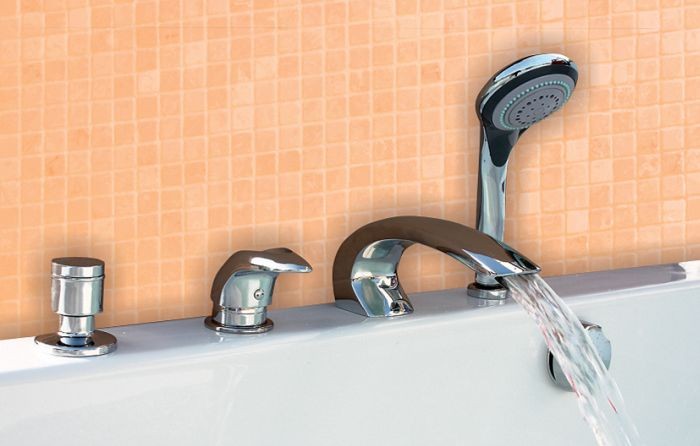
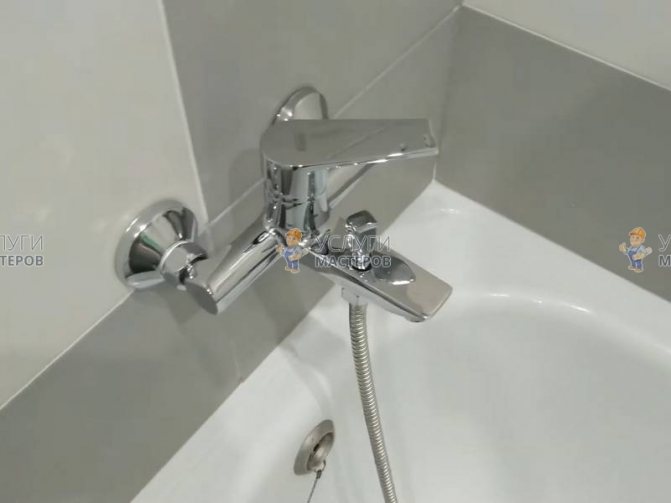
- On-Board Faucet Installation
- Instructions for drilling holes in an enamelled bath
- Tips for Drilling Holes in an Acrylic Bathtub
- How to remove an old faucet
- Faucet installation tools and workflow
- To replace the mixer you will need:
- Next, the procedure is as follows:
- How to fix the mixer on the wall and drywall?
- Standard spacing for water outlets
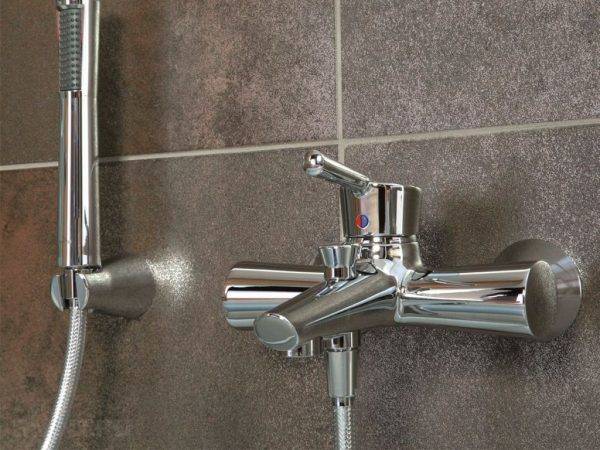
Faucet installation on the wall
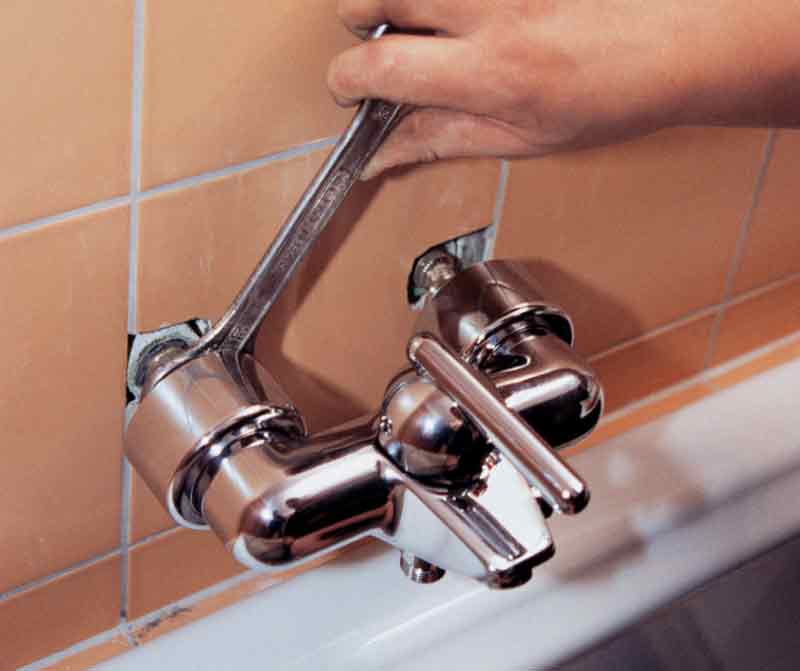
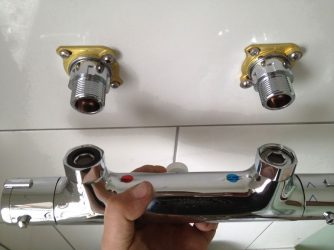
After the pipes are checked for the possibility of their further operation, the mixer in the bathroom is installed on the wall.
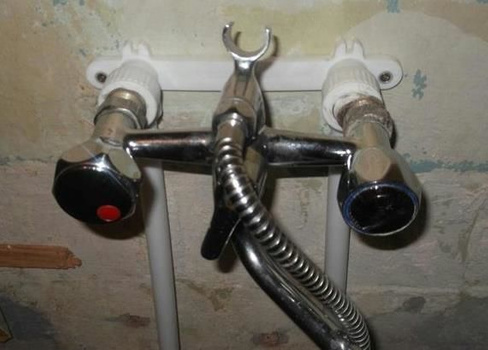
- The distance between the center points of the mixer fixing nuts is measured.
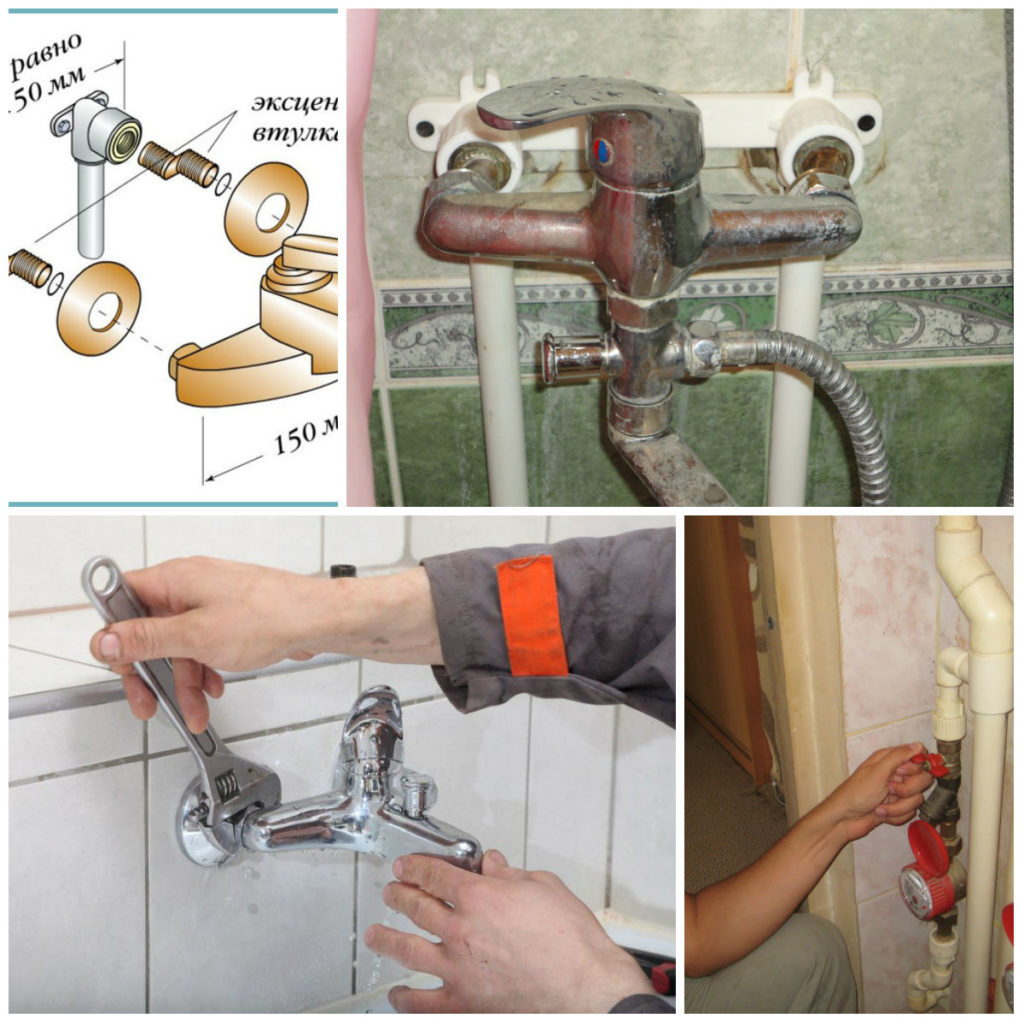
- The pipeline has connectors. They are inserted into the eccentrics from the kit, wrapped with FUM tape.The eccentrics are set so that the center-to-center distance matches the size of the crane. At the same time, their upper part must be strictly horizontal, the same distance is maintained from the ends of the eccentrics to the wall surface.
- Decorative caps hide the outlet of pipes in the wall. They are installed before the valve is screwed to the eccentrics. Decor elements should fit snugly against the wall surface, they are screwed onto the threads of the eccentrics.
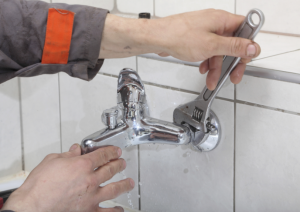
- The device is connected to the pipes with union nuts with gaps sealed with rubber gaskets. Twisting is carried out carefully so that there are no distortions. Otherwise, there will be depressurization of the connections.
- Using a tool with soft jaws, the union nuts are tightened so that the connection becomes tight.
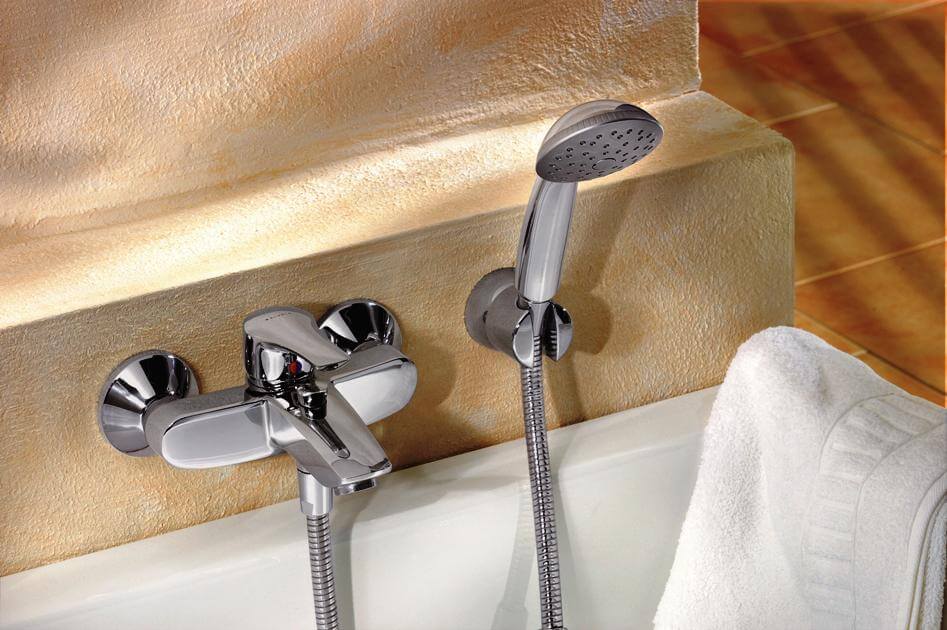
Shower installation
The next step is to connect to the shower faucet. For the correct connection of the shower, you should:
- Insert a gasket into the nut at the end of the hose that connects to the shower head and tighten by hand;
- Another gasket is inserted into the second end, and it is attached directly to the faucet (screwed into the shower hole);
- Mark the mounting location on the wall. For this, the height of users and the length of the hose are taken into account (it should not touch the edge of the bath);
- Screw the bracket for the shower head holder to the wall. To do this, use an electric drill to make holes, insert dowels into them. Then screw the fasteners to the dowels with screws and insert the shower holder.
Attaching the shower holder
Installation subtleties
It is necessary to fasten the gander to the main unit, then the line of the hose with a watering can. You do not need to use wrenches and tighten the nuts too.After assembling the model, you can start the installation, which consists of the following steps: wrap the eccentrics with sealing tape, then insert the fittings located in the wall, which are left over from the previous faucet.


This must be done very carefully. If there is no tape at hand, tow can become a substitute. Next, we screw in the eccentrics, strictly measuring the distance between the inlets on the mixer and using the level. This is done for a reason - the distance should be strictly 15 centimeters. After that, we wind the main block onto the eccentrics. You need to do this slowly, as you need to fix it carefully.
Try not to rush, and if something doesn’t work out, it’s better to take a short break and calm down. If the block is wound on both sides calmly, then everything can be put correctly. Then the block must be removed and decorative shades screwed onto the eccentrics, which must fit snugly against the wall and cover the places where the mixer taps into the wire. If that's the case for you, then you've done a great job. Next, we fasten the block back using winding. In order for the shrinkage to be dense, it is necessary to use gaskets from clamping nuts. Nuts need to be tightened with a wrench, but not very much.
Open the hot water tap and check how the mixer works. Start the test with a small pressure, gradually increasing the power of the water supply. Be sure to check how the shower works. If everything is in order, then you did it the first time. But if there is a leak, you need to find its source, turn off the water again and repeat all over again. There is a high probability that you have overtightened the nut or any fastener very much.
You have already understood how to install a new faucet instead of a worn-out one, now let's deal with a more difficult task - installing a faucet on a new wall. First, pipes are replaced, the walls are tiled. Further, plumbing pipes are laid out, beacons for plaster are installed. You must calculate the recesses in the wall so that they exactly match the distance from the lighthouse to the tiled plane. This is about 17 centimeters. If you are not sure that you can carry out all these works, then it is better to invite a specialist, so that later there will be no problems when installing the mixer.
After all the work done, you can begin to install the fittings. In order to install them, you need to set aside the distance between the centers of the fittings - 15 centimeters. The centers should be on the same parallel, the extreme point should protrude beyond the wall, the fittings should be flush with a suitable height. After installing the fittings, you can attach the faucet. This is done in the same way as in the previous version.
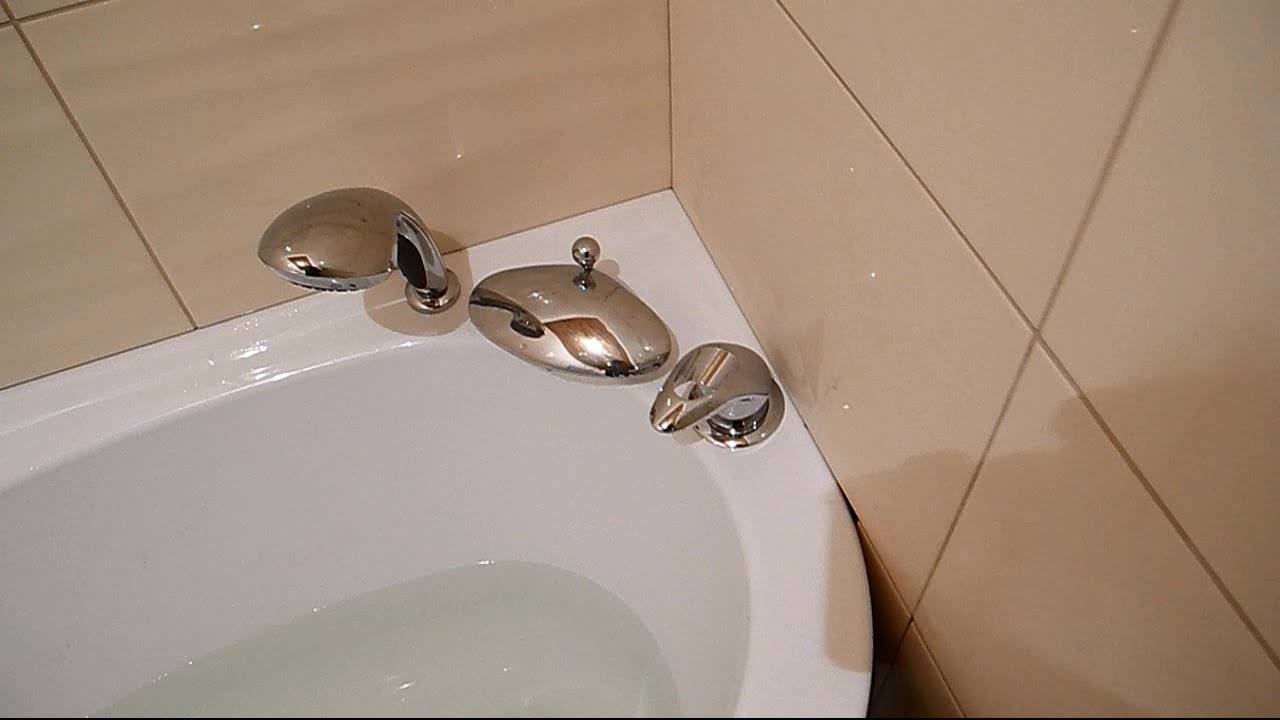
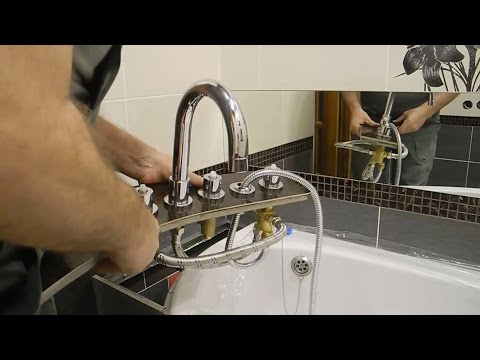
Now consider another option for installing the mixer - on a horizontal surface. Such a need arises when installing the mixer on board the bath. Before embarking on such an installation, it is imperative to clarify whether the bearing side of the side of the board can withstand the increased load. To mount this type of mixer, you will need a drill with a set of cutters, wrenches and screwdrivers.
At the beginning of the installation, it is necessary to mark up, so that later the plates can be strengthened along it. After marking, holes are drilled in the side of the bath. Carefully read the instructions on how to connect the mixer to the pipeline using the connecting hoses and other components included in the kit.Next, we seal the horizontal surface with masking tape to protect the surface from chips and damage, apply markings and start drilling the holes that are necessary to install the mixer. After the holes are ready, remove it and process the edges with a special tool.
The next step is to collect all the details and fix them without using keys. If the connecting hoses have freely taken their places, then everything is done as it should and you can proceed to the final fixing of all parts of the mixer. The next step is to check the mixer for a leak.
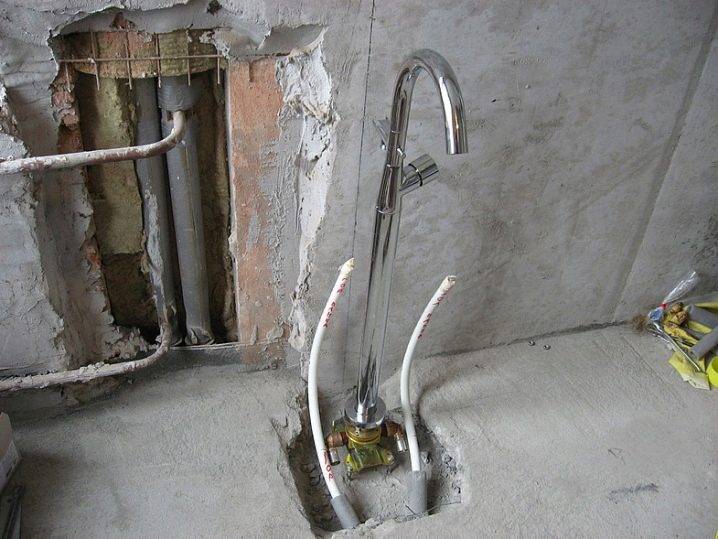
The last way to install the faucet, recognized as the most difficult and expensive - installing the faucet in the floor. Even before your bathroom is renovated, you need to start laying two pipes for cold and hot water. Indentations are made in the floor the size of the diameter of the pipes, pipes are laid along these indentations to the place where the bath will be located. After this, the recesses are sealed, a floor screed is made and tiles are laid. Then we act according to the technology described above - we mount the mixer, check for leaks, etc.
Peculiarities
Nowadays, the mixer performs not only the function of supplying water, but also is an element of decor. It should harmoniously fit into the interior of the bathroom, be compact and beautiful.
Modern plumbing manufacturers provide us with a huge selection in different price categories, but still it is worth taking into account some useful tips from experts.
Installing one faucet for bath, sink and shower is impractical, it will quickly become unusable.Check the package very carefully: it must have a manual flexible adjustment and a holder for fixing. Spouts are very often not provided in many models of mixers, and this is a small, but minus.


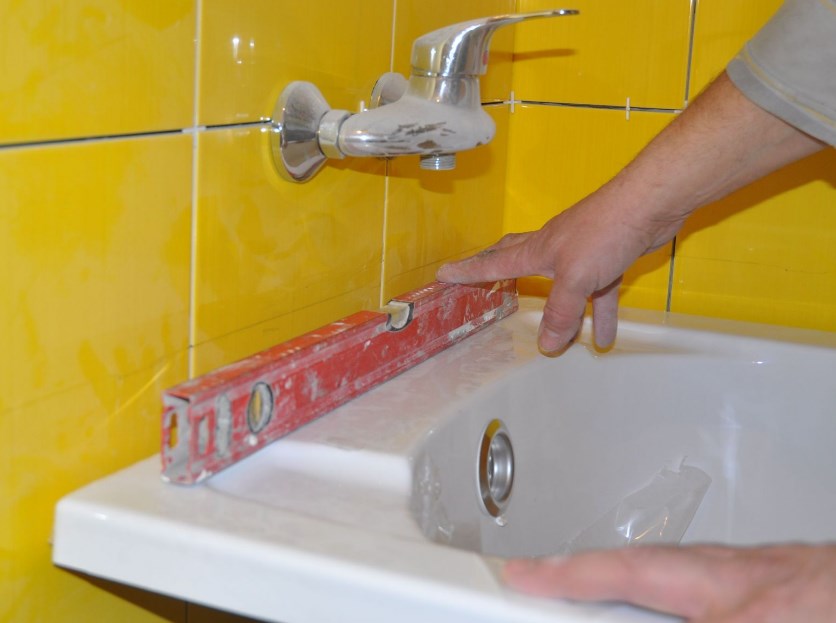
The most common type of mixer installation is wall mounting. Such installation is carried out with an acceptable distribution of pipes for water supply. It is imperative to adhere to the standards - the mixer is mounted at a height of 1.2 meters from the floor, the distance between water outlets is 15 centimeters. You must take this work very seriously, since the smooth operation of your mixer depends on the correct execution of it.
The next option is to mount on the side of the bath. The advantage here is that all spare parts will be hidden behind the body of the bath, and flexible hoses are used during installation, which gives you the opportunity to mount them in any suitable and convenient place for you. But there is also a small downside. On old-style baths, there is no place for installing a mixer, so this method is used in most cases for new generation acrylic baths.
The last type of installation is installation on the floor. This is the most expensive way, it is not suitable for small bathrooms, and it will be difficult to make it yourself if you are not a plumber.
Disadvantages in the operation of the built-in mixer
Many locksmiths are not familiar with the installation of an onboard mixer and are hesitant to take on an order due to their lack of experience in installing it.
But there are more significant disadvantages:
- Short service life.The installation of the mortise faucet on board provides for automatic concealment of the shower head hose. On the one hand, this is beautiful, but on the other hand, this mechanism reduces the service life by half and requires additional financial investments or a complete replacement of the crane.
- Price. A mortise faucet, unlike a standard wall-mounted faucet, is more expensive. Installation costs are also expensive.
- Late failure detection. Standard faucet installed in plain sight. Therefore, if a leak occurs, it can be quickly repaired. In the case of a mortise faucet, the hydraulic wiring is hidden behind the body, so the leak is eliminated only after a puddle appears on the bathroom floor.
- Inaccessibility to plumbing. In the event of a wall faucet failure, its elimination is not an easy task, but doable. A failed mortise mixer is repaired only after the bathtub is dismantled.
- High price. Mounted taps have no limits in combination with bathtubs and materials. In the case of a faucet on board, the client is offered only an acrylic version of the bathtub.
Insulation and tools
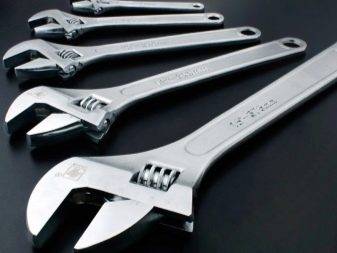
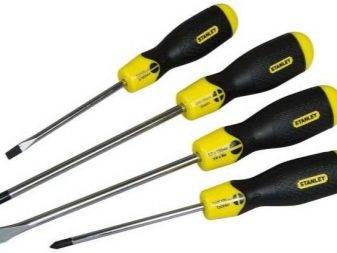
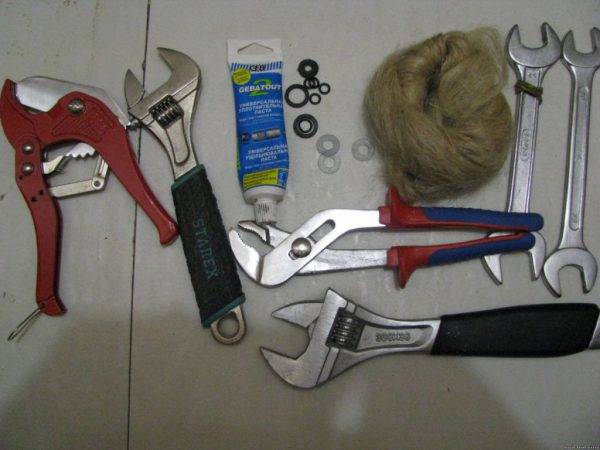
Before installing the faucet in the bathroom, you need to prepare some tools and supplies. In order for the work to be done quickly and efficiently, you will need the following:
- pliers;
- wrench;
- masking tape;
- teflon sealing tape.
 Faucet mounting tools
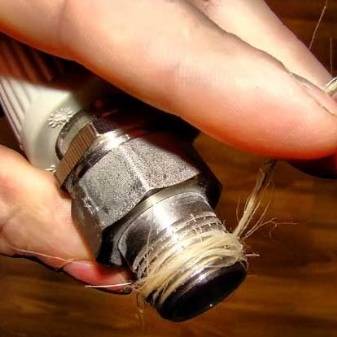
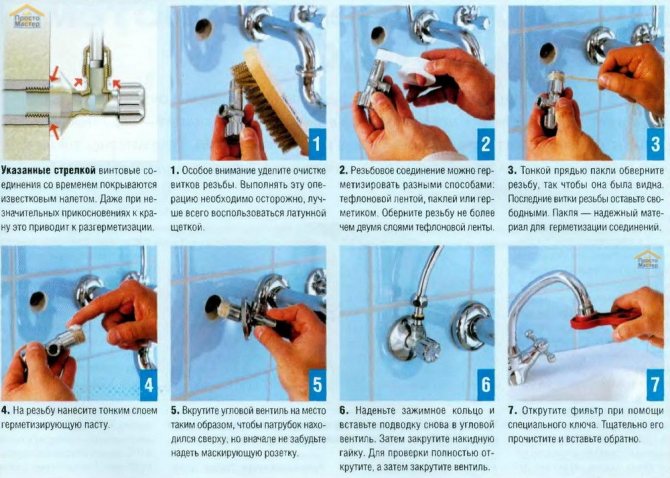
Masking tape is used to wrap around the mounting nuts to avoid damage to the nickel finish during installation or removal. The key will be needed for the dismantling of the old mixer. In most cases, a Teflon tape called fumka (FUM) is used for waterproofing.Despite the availability of modern materials, some plumbers use a cable in the old fashioned way, but still a fumka is preferable.
Insulation is wrapped around the thread clockwise in several layers. When screwing on the nut, the tape will be pressed in, sealing the connection
It is important to remember in which direction to wind the insulation. Otherwise, it will slip and you will have to wind it again - the old tape is removed and a new one is wound in the right direction.
In most cases, the listed tools and materials are enough to replace or install a faucet in the bathroom.
Installation methods and preparation for installation
The location of the new product will depend on its installation. For example, it is possible to embed the mixer or mount it on the wall. If we consider the first option, then it is built directly into the wall or mounted on board the bath. You can mount the mixer on the rack. Such an installation is possible if there is free space in the bathroom or when pipes are laid through the floor. The most expensive products today include rack-mounted mixers, the choice of which is very diverse.
 Mounting the mixer on the wall
Mounting the tap on the wall is carried out when the washbasin and bath are located side by side. This option allows, if necessary, dismantling without much difficulty, for example, to replace the mixer. The advantage of wall mounting is a more attractive appearance, but there will be no access to the connecting hoses. It is worth noting that if the sink or sink is easily removed, then the faucet is attached first, and only then the plumbing fixture.
Before installing the faucet in the bathroom, it is necessary to prepare the device itself, as will be discussed below, as well as water outlets in case of wall mounting. Basically, the fittings for mounting the mixer are already present. In the event that they are not there or old pipes are being replaced, then when summing up new pipes, the following important points must be taken into account:
- hot water is supplied on the left, cold on the right;
- the distance between the axes of the fittings should be 150 mm;
- if the bathroom faucet is installed on the side, then the optimal height will be 150-200 mm;
- in order to mask the tap connection area, the fittings should be recessed into the wall.
Next, you can proceed to the assembly of the mixer for subsequent installation.
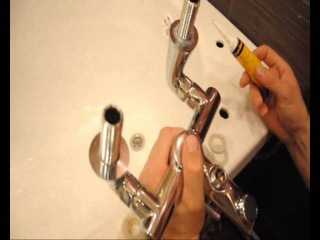
Dismantling the old and assembling the new mixer
Dismantling the old faucet in the bathroom should not cause problems. The main thing is to shut off the supply of cold and hot water to the mixer. Next, you need to drain the water remaining in the tap, and you can begin to remove it. When dismantling, it is not necessary to exert great effort so as not to damage the threaded connection on the fitting located on the wall.
 Dismantling the mixer
In most cases, products are sold unassembled, so after purchase, assembly of the bathroom faucet will be required. At the time of purchase, you need to check the completeness. All items must be wrapped in cellophane. The complete kit should consist of the following parts:
- main block;
- gander;
- gaskets;
- decorative cups;
- eccentrics;
- shower heads;
- hose.
The nuts may need to be tightened during assembly. In order not to damage the surface, the sponges of the key or the nut itself are wrapped with electrical tape or masking tape in several layers. If the part is damaged, then its replacement will be problematic.


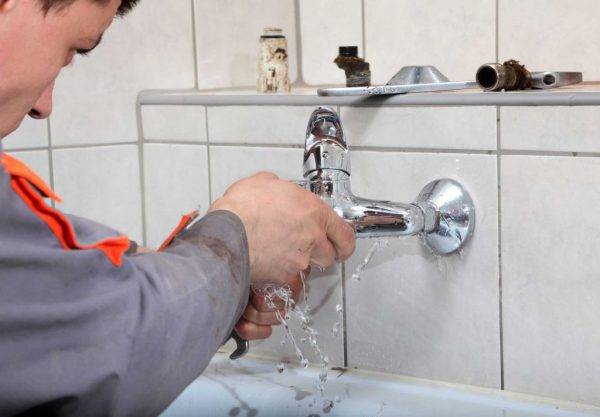
Removing the old faucet
Before installing a new faucet in the bathroom, the old model is dismantled. So that the work is not difficult, it is carried out in strict sequence:
- At the common riser, the water supply is blocked.
- The dismantling of the old model begins after unscrewing the union nuts of the fasteners.
- If there are regulating eccentrics available, they must be unscrewed.
- After that, the condition of the pipes is inspected. This is done in order to determine if the pipeline needs to be replaced. Over time, steel pipes become overgrown with rust. This leads to a decrease in their throughput. In addition, debris particles get in and clog mixers with ceramic closures. Subsequently, they quickly fail. Therefore, if the pipes are heavily clogged, it is better to replace them.
- The thread is cleaned of rust residues. A metal brush is used for this.
- It is possible to choose a new model correctly only if the center-to-center distance between pipe bends is known.
When these steps are completed, you can proceed to install the device.
The range allows you to choose the crane that is needed in a particular situation. Foreign and domestic manufacturers produce models for mounting on a vertical or horizontal plane, of various configurations.
Installing the faucet in the bathroom on a vertical plane is carried out without altering existing attachment points. This installation method is used if an urgent replacement of broken equipment is carried out or for minor cosmetic repairs in the room.
For horizontal installation, the surface is prepared in advance, existing pipes are transferred. This is done during a major renovation when the equipment in the room is changed.
How much does a faucet installation cost?
The cost of installing a faucet in a bathroom depends on the type of bathtub, the type of faucet, the presence of connected communications, and the need for additional equipment. Call our specialists and briefly describe the task, then we will be able to give an approximate cost of the service.
To determine the cost of installing a faucet in the bathroom, plumbers need to know:
- mixer type;
- mounting type (hidden on the wall, on board, hidden on the rack);
- your plans (current repairs, complete repairs, repairs in a new building);
- mixer brand.
The master will be able to give the most accurate and objective estimate of the cost after determining the scope of work.
The distance between the pipes when connecting the mixer
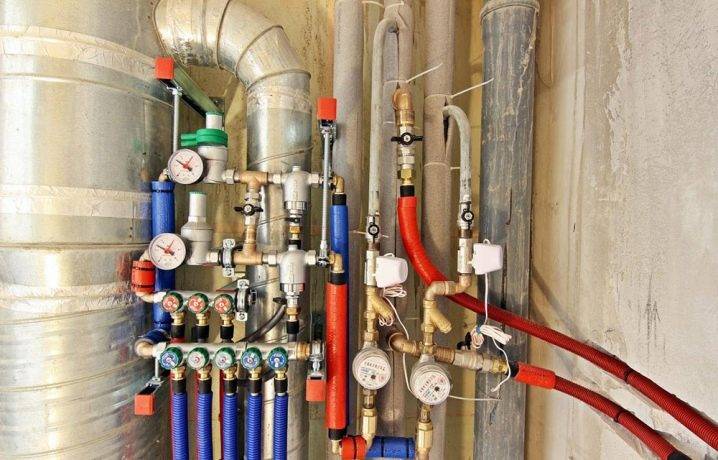
Before installing the mixer, install pipes with cold and hot water, and supply outlets to the mixer attachment point. At this stage, you should know the distance between the pipes when connecting the mixer, this parameter should be selected based on the SNIP standards and usually it is 15 cm, with a deviation of 1.5 cm in both directions.
The size of the pipe connected to the mixer is half an inch, and based on this parameter, if necessary, take care of additional adapters
Installing a faucet in a bathroom, shower or kitchen has its own characteristics and nuances, which should be paid attention to even at the initial stages of pipe installation
Installing a faucet in the kitchen
When installing a faucet in the kitchen, as a rule, the pipes are brought into the open and are not walled up in the wall, so it is not so important what distance the faucet has between the pipes, it can be easily adjusted if necessary.If the pipes are mounted in the wall, in order to avoid the use of additional elements and adapters, it is worth taking care of the distance between the pipes in advance so that the installation of the mixer goes without any problems. The mixer should be bought in advance and, based on the given dimensions, install the pipeline
The mixer should be bought in advance and, based on the given dimensions, install the pipeline.
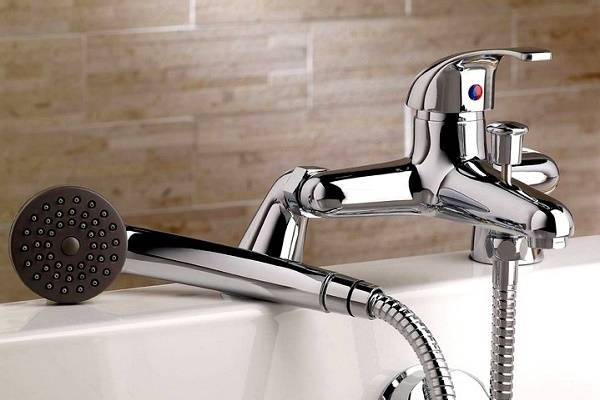
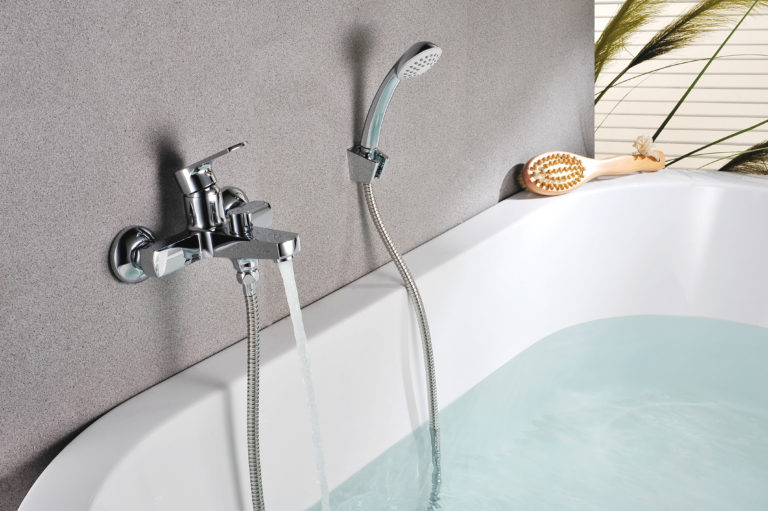
Shower faucet installation
The most suitable for these purposes are faucets designed specifically for the shower. Until recently, in this role, one faucet was used for both the sink (pictured) and the shower, which did not require large expenditures.
A distinctive feature of this type of faucet is the absence of a bath-shower switch, which gives a more modest product size. Recently, there has been a tendency to use special mixers that allow you to reveal the functions of the shower at 100%. The installation of such a mixer can be done openly or hidden during the installation process for a more aesthetic appearance, it is worth noting that with hidden installation, when repairing the mixer, there are problems with access to parts that have failed. Shower faucets designed to connect special shower heads or hydromassage elements are gaining more and more popularity.
The distance between the pipes of the faucet in the shower with concealed installation is selected especially carefully, since the complexity of installing the faucet itself will depend on this
When installing the mixer, it is worth taking into account the height to which it is worth raising the mixer.Also, do not disregard the height at which the shower head is located, which affects the quality of the mixer. Check all the necessary indicators before buying a mixer from a sales consultant
Specify all the necessary indicators before buying a mixer from a sales consultant.
Installing a faucet in the bathroom
Often when installing plumbing for connection The faucet in the bathroom pipes are immured into the wall, this saves space in the bathroom. With this type of installation, the distance between the pipes for the mixer in the bathroom plays a big role.


A small error when installing the faucet can be eliminated with the help of eccentrics that come with most faucet models. After setting the required distance between the pipes for the mixer with the help of eccentrics, all the necessary elements are connected.
When choosing a mixer, pay attention to the weight of the product, as a rule, mixers made of silumin are cheaper and lighter in weight than brass ones, but they are usually inferior in quality. When installing the mixer on the thread of the products, it is necessary to wind the tow or full tape, this will prevent leakage during the operation of the product
If you carefully approach the choice of a mixer and clearly follow the installation tips, then such a repair is within the power of every owner.
Be aware of the disadvantages
Despite all the advantages that are detailed in the brochures, before purchasing a side mixer, you should think about a number of problems, especially if the owner of the house plans to install it himself.
First of all, you should not buy an inexpensive model, because due to the nature of the operation, these plumbing products are subject to high loads. A poor-quality mixer will have to be replaced very soon.
The most vulnerable element of such a mixer is a shower hose. Most of the time it is in a collapsed state, so it gradually deforms. Soon, cracks appear on the hose, it begins to leak and needs to be replaced. Unfortunately, even expensive and high-quality faucets are not immune to hose problems.
The shower head hose of the built-in faucet is folded behind the bathtub body or behind the false panel. Constant deformation of this element leads to its frequent breakdowns.
You have to come to terms with the fact that the hose needs to be changed periodically. Prudent buyers immediately take a spare hose to make this simple repair as soon as it is needed. Particularly vulnerable in this regard are faucets, in which the spout simultaneously acts as a shower head.
Amateur craftsmen who do not have much experience in plumbing work should remember that at home it is easiest to install an onboard mixer on an acrylic bathtub. When working with a product made of cast iron or steel, the enamel will almost certainly be damaged, which can cause corrosion. As a result, the bath will have to be repaired or completely replaced.
It is better for an inexperienced master to entrust this work to a reliable specialist. Another way to solve the problem is to purchase a bathtub with a ready-made hole for mounting a mixer. True, acrylic bathtubs are usually supplied with this option. Of course, when choosing a mixer, you will have to take into account the size of such an opening.
Installation on polypropylene pipes in the wall
The installation of the mixer on polypropylene pipes is carried out using a plastic strip with an internal metal insert. The fastening of the strip on the pipes is carried out so that the outer edge does not protrude above the surface of the tile.
Note! Usually, the bar is recessed into the wall by at least 3-4 cm, and the standard distance between their axes is 150 mm. Plank for mounting the mixer on polypropylene pipes
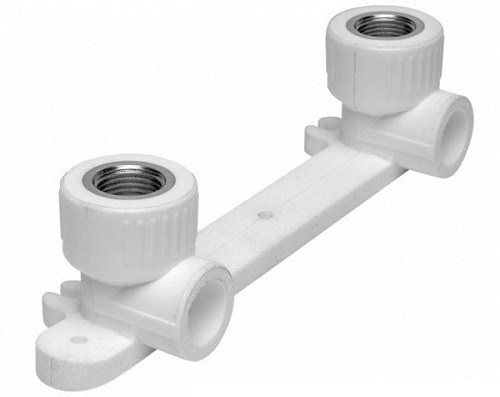
Plank for mounting the mixer on polypropylene pipes
To install the mixer on the wall, you must:
Check the presence of all parts in the kit and clean the bar to which we will screw the mixer;
Install eccentrics. To do this, you need to check their position inside the fittings along the length and then wind the FUM tape (flax) onto the narrower threaded part (which will go into the wall). Winding is carried out along the thread with tension, in several layers (usually about 10 turns), in order to completely hide thread irregularities. It is conducted from the edge of the product in the form of a cone. After sealing the thread, screw the eccentrics one by one into the outlets in the wall (along the thread) and carefully tighten with an adjustable wrench until it stops;
Attach decorative covers to make sure that the length of the eccentrics are set correctly and the length of the remaining thread is sufficient to screw the mixer. Covers should fit snugly against the wall surface, without a gap. After checking, they should be removed;
Insert gaskets into the mixer body, and screw it to the eccentrics - check the accuracy of the position of the eccentrics along the axes. The gasket is laid with the ribbed side inside the mixer, and with the smooth side towards the eccentric outlets.Then open the water and check how tightly the connection was mounted;
If water does not seep through, remove the mixer and mount decorative covers. Screw the mixer to the eccentrics by hand, then with a full compression of the nuts using an adjustable wrench
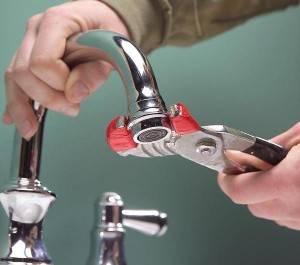
Crimping should be done carefully so as not to spoil the shiny coating of the mixer and not to transfer the gasket inside. For insurance, put a rag between the key and the nut;
Turn on the water and check how the finished system works.
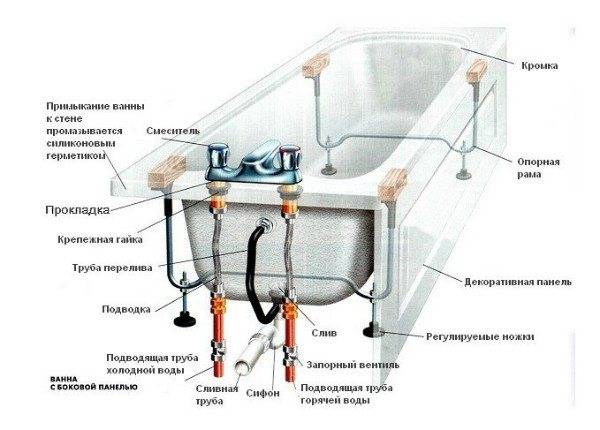
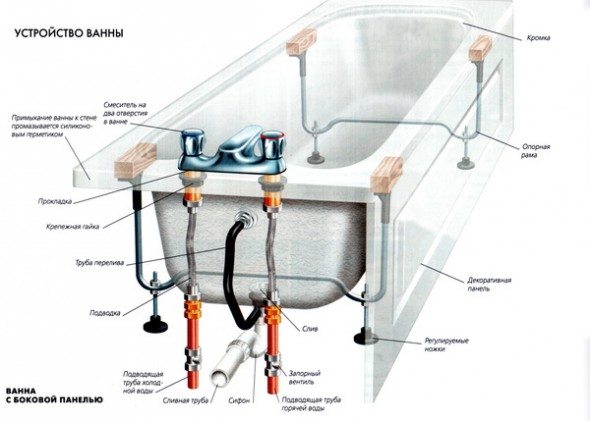
The scheme of installation of the faucet in the bathroom
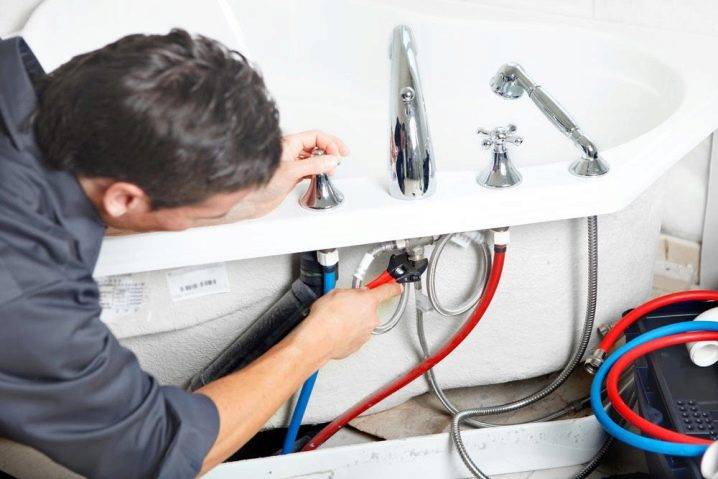
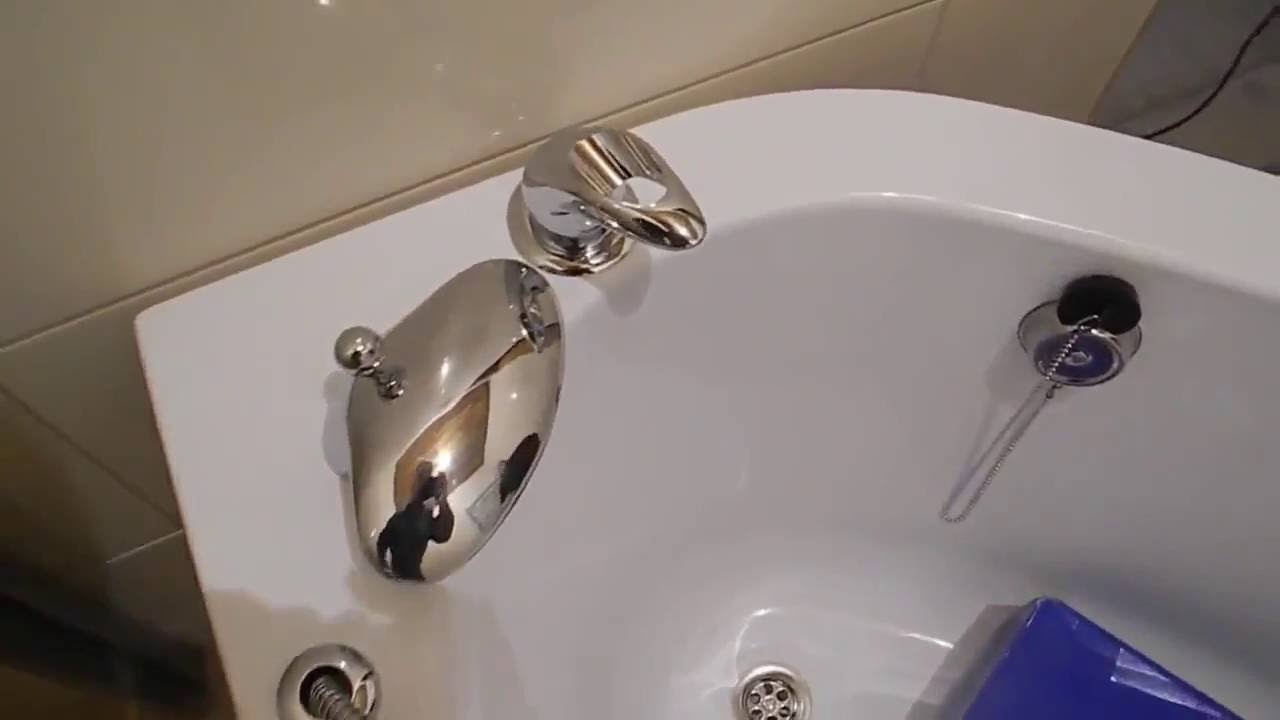
On-Board Faucet Installation
"On-board" means that the appliance will be attached directly to the side of the tub or sink itself. Usually new sinks or bathtubs have a pre-drilled hole, otherwise you will have to drill it yourself.


How to calculate the optimal bathroom faucet height from sex, there is no single standard. The value is influenced by several factors: the growth of households, ease of use, mixer model, room size. Plumbers also look along the length of the pipe to prevent excessive tension.
Instructions for drilling holes in an enamelled bath
This is a complex job that requires skills and special equipment.
Main tools:
- marker;
- pen drill;
- screwdriver (a drill will do);
- scotch;
- plasticine.
Operating procedure:
How to install a faucet in the bathroom if there is no main hole? To begin with, establish a place and close it more tightly with a piece of transparent tape.
Fashion a small plasticine collar, the dimensions of which will be x2 greater than the diameter of the future hole, and the height will be 0.5 cm. Attach a home-made collar to the surface of the bath and draw water there.
Carefully drill a hole with a drill (its dimensions are Ø 5–6 mm), focusing on the center of the mark. Set a small speed and do not press the drill too hard. Drill carefully, the thickness of the bath, even cast iron, is small.
When a hole appears, the water will go there. Having cleaned the drilling sites, mold a small cap from the same plasticine and close the hole with it, only from below
It is important to fix tightly, holding water.
Inserting the tip of a 10-12 mm drill into the hole, slowly increase its diameter. After removing the adhesive tape and artificial hill (shoulder), clean the surface. Also remove the plasticine cap from below.
hole finish
Now, to install the faucet on the bathroom yourself, you need to slowly work the edges of the hole with a rubber nozzle and a piece of sandpaper, inserting them onto the cartridge. For protection, it is better to seal the surface of the enamel around with transparent tape.
Also remove the plasticine cap from below.
The hole is ready. Now, to install the faucet on the bathroom yourself, you need to slowly work the edges of the hole with a rubber nozzle and a piece of sandpaper, inserting them onto the cartridge. For protection, it is better to seal the surface of the enamel around with transparent tape.
Tips for Drilling Holes in an Acrylic Bathtub
First, special on-board adapters are mounted for installing a mixer - devices with small spouts. Under the shower you will need a separate hole. It is advisable to carry out installation immediately, while the new bathtub is still being installed. Then it is easy to hide all the pipes and other elements under the tiles.
The installation height of the bathroom faucet must be determined immediately by inserting it into a special hole.
From below, fix the rubber gasket with a large figured washer. Tighten them with a clamping nut. First, screw it in by hand, then tighten it slightly with a wrench (half a turn is enough).
Connect the faucet installation valves to their pipelines. Turn on the water, checking the tightness with a piece of paper.
How to remove an old faucet
All devices have expiration dates and when they expire, dismantling is needed. How to install a new faucet in the bathroom on the wall, if the old one is still hanging there? To begin with, competently get rid of it:
- Inspect the mixer, especially its nuts. Under their size, prepare the necessary tools.
- Carefully remove scale, dirt, solid oxides from the corners of the threaded part.
- Try to unscrew all the nuts with a wrench without applying too much pressure. The nut is jammed - then make 0.5 turns back and unscrew again.
- The mixer is old, installed a long time ago - it is better to pre-wet all its connections with a solution, and several times. The toilet "Duckling" is ideal.
- Check eccentrics. They are working, in addition, the thread is identical to the new mixers - then you should leave them. This simplifies the installation of a new faucet in the bathroom. In addition, earlier eccentrics were mounted from other, high-quality alloys, which is why they are much more durable than modern ones.
Part of the eccentric suddenly fell off, got stuck inside the fitting. The problem is unpleasant. You will have to pull out and change the fitting. Sometimes it is fixed inside the wall, under the tiles. It will be necessary to dismantle part of the wall, then restore it after installing the mixer.
Changing the mixer is an important and large-scale business. If desired, it can be done at home on your own, without waiting for the arrival of a plumber. Flush mounting skills and possession of the necessary tools will come in handy
Flush mounting skills and possession of the necessary tools will come in handy.
Faucet installation tools and workflow
If you simply change the old device to a new one, then you do not have to choose the installation location. Installation will be carried out where there is already a communications outlet. We will consider replacing a conventional wall-mounted faucet.
To replace the mixer you will need:
- new mixer;
- gas key No. 1;
- wrench;
- open-end wrenches No. 17 and No. 14;
- linen tow or teflon tape for sealing threaded connections.
Next, the procedure is as follows:
- Make sure that the faucets that shut off the supply of hot and cold water are in good condition. To do this, rotate them clockwise until they stop. If these are ball devices, then simply rotate them 90 degrees. When the valves are not used for a long time, lime deposits may appear inside the mechanism, which make rotation difficult and prevent the water flow from being completely blocked. If this is the case, then it is necessary to slowly open and close each valve several times. After making sure they are closed, fully open the water on the faucet and make sure it does not leak.
- Next, you need to dismantle the old device. To do this, unscrew the nuts holding it on the eccentrics. Evaluate the health of the old eccentrics - check their integrity and thread condition. If they are made of good metal, then it is not necessary to change them. This saves you the hassle of installing and positioning new eccentrics. If there is any doubt about the serviceability of the old eccentrics, then carefully unscrew them counterclockwise from the pipe entry so as not to damage it (otherwise you will have to change the pipe entries, which will ruin all the repairs in the room).If the old eccentrics do not unscrew, then the places of their connection with the pipes can be gently tapped using an open-end wrench, or heated with a lighter fire. This usually helps. After removing the old eccentrics, it is necessary to clean the pipes of the water pipes from various contaminants.

- Twisting new eccentrics is done clockwise until it stops. Their outlet pipes must be located on the same horizontal line, and the distance between their axes must be 150 mm. Even before the start of twisting, tow or tape must be wound on the threads of both eccentrics. You need to start from the beginning of threading in the direction of the cut of the element. Tape or tow should be wound in a dense even layer. Checking the correct installation of the eccentrics is carried out by pre-installing the mixer in place. To do this, the device is baited with one input on any eccentric, and the second is combined with another eccentric. If everything fits together exactly, then you can make the final installation of the mixer. If not, then you need to tighten one of the eccentrics to the correct position.
- Put decorative caps on the eccentrics, install the sealing gaskets that are included in the kit on the mixer nozzles. Then unscrew the nuts on it until they stop, otherwise they will interfere with you. Wrap tow or tape tightly on the threads of the eccentrics. Tighten the mixer nuts by hand. Then tighten the connections with a wrench, but do not overdo it, otherwise the threads may be stripped.
- The last step is to install the attachments of the mixer: gander, shower hose and watering can. Be sure to seal all connections with tow or tape.
Check the faucet by changing the water pressure.In this case, there should be no leakage in any connection. If it is still found, you will have to remove the device and repeat the entire installation, while replacing all the tow and tape on the threads.


As you can see, the work of replacing the mixer is not difficult and may well be done with your own hands. Your assistants in this matter will be the accuracy and thoroughness of the implementation of all stages.
How to fix the mixer on the wall and drywall?
The reliability of the installation depends on whether the mount for the mixer was correctly selected to the wall with the water pipes brought out. This must be taken care of if the installation of the structure is performed for the first time or after a major overhaul. If, however, a simple replacement of the mixer with a new model is carried out, and nothing bothered you in the operation of the plumbing equipment, then the installation was performed correctly. Just follow the instructions above to replace the faucet.
There are several ways to attach the faucet to the wall in the bathroom, the choice depends on how the water pipes were laid. Often, a mixer in the bathroom is installed on drywall - a wall with exposed pipes is sewn up. In this case, the installation will be similar, only all the nuts are fixed on the metal frame. So all the same, how to fix the mixer on drywall or wall?
- In the gate to the main wall - the water pipes are recessed / hidden in the wall.
- In a niche to the main wall.
- In a niche to the traverse - it can be different: flat, U-shaped.
Each method requires its own fasteners for the mixer - when choosing, it is worth considering the material for the production of water pipes. Special fittings are produced for polypropylene, PVC and metal-plastic structures.The distance between them is always fixed - 150 mm. It must be strictly adhered to, otherwise the faucet mount cannot be combined with the plumbing fittings. Regardless of the class of valves, this figure will always be the same.
It is also worth remembering that the eccentrics are different in size. Their choice depends on the type of attachment. The installation is considered to be of high quality and correct if the eccentrics are flush with the surface of the finishing material - beautiful and reliable
If pipe adapters were not supplied with the mixer, special attention should be paid to their choice.
Standard spacing for water outlets
Water sockets are modern fittings installed on pipe and water outlets. When using them, the installation and replacement of mixers is greatly simplified. The most common are threaded water sockets, but compression or self-locking type fittings can be used.
By design, single (for installing taps) and double water outlets are distinguished. For mixers, a double version is used. After their installation, a stationary unit for installation is formed at the point where the water pipe exits to the bathroom.
As in the previous case, the distance between the water outlets is important. It should also be 150 mm, which allows the use of standard plumbing


