- Installation of bimetallic batteries
- How to install correctly
- wall mount
- Installation of heating radiators
- What to do if the batteries do not heat up
- Number of sections
- Regulator check
- Airlock
- Radiator cleaning
- Decorative cover
- Little tricks to increase the return temperature of heating batteries
- We set up the heating system of a country house on our own
- Location calculation
- How to connect a bimetallic radiator?
- What pipes to choose for mounting radiators?
- SNiP norms
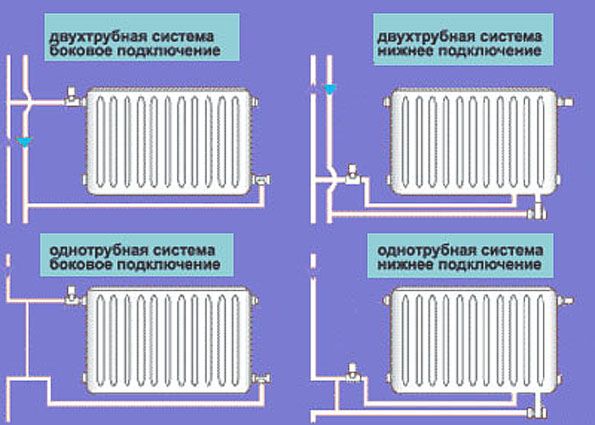
- Radiator connection diagrams, work efficiency
- Side connection
- Bottom connection
- Diagonal connection
- How to install
- wall mount
- Floor fixing
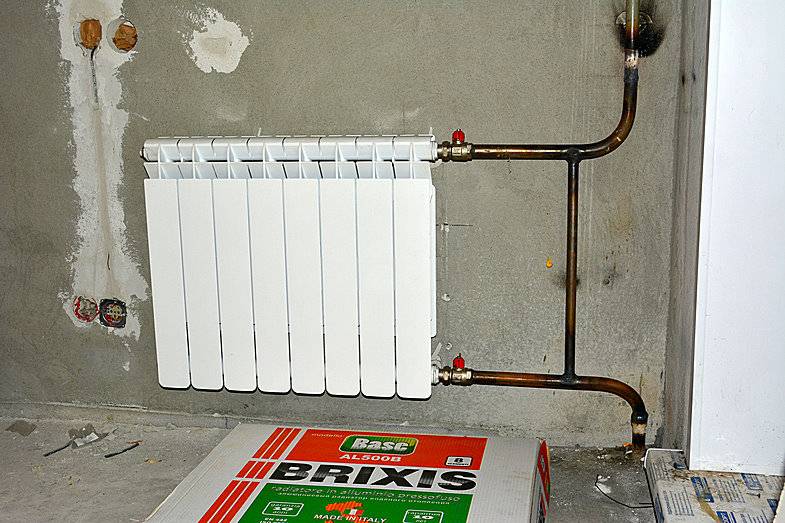
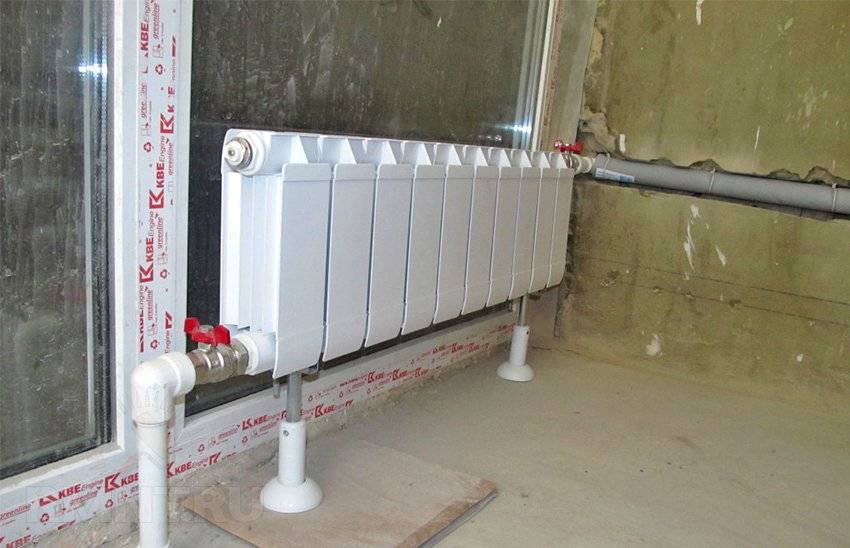
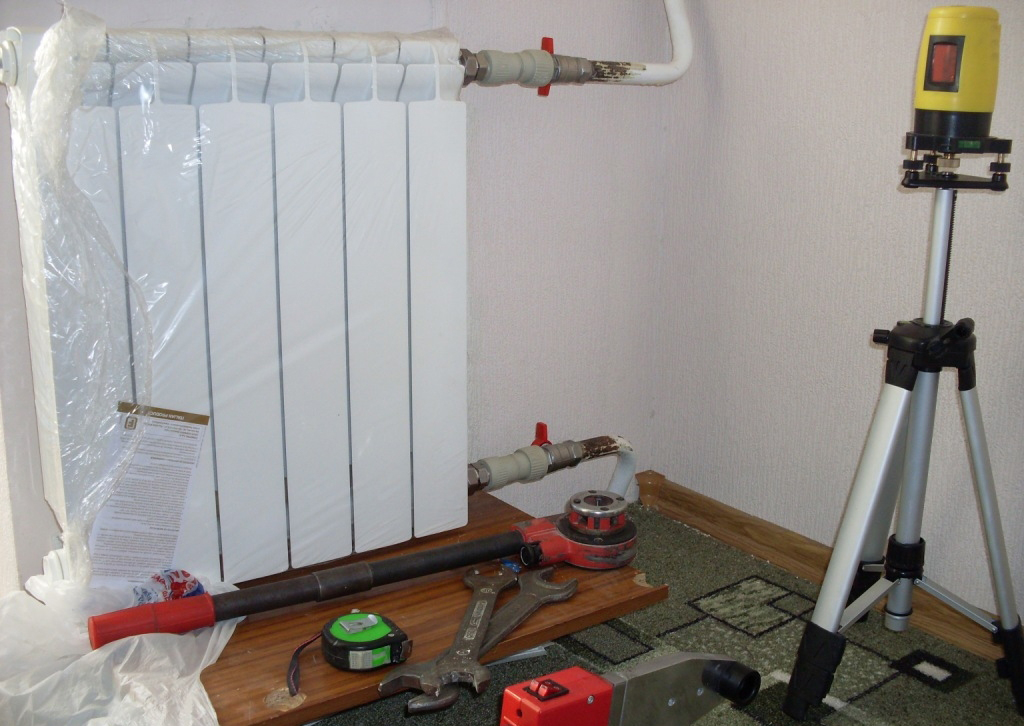
Installation of bimetallic batteries
It clearly describes the procedure for connecting bimetallic heating radiators for a specific model. It should be noted that the installation of all elements of the system is carried out in a polyethylene package of the radiator. And you can not remove this packaging until the entire installation process is completed.
Consider how to connect a bimetallic heating radiator yourself. When carrying out installation work, the following nuances must be taken into account:
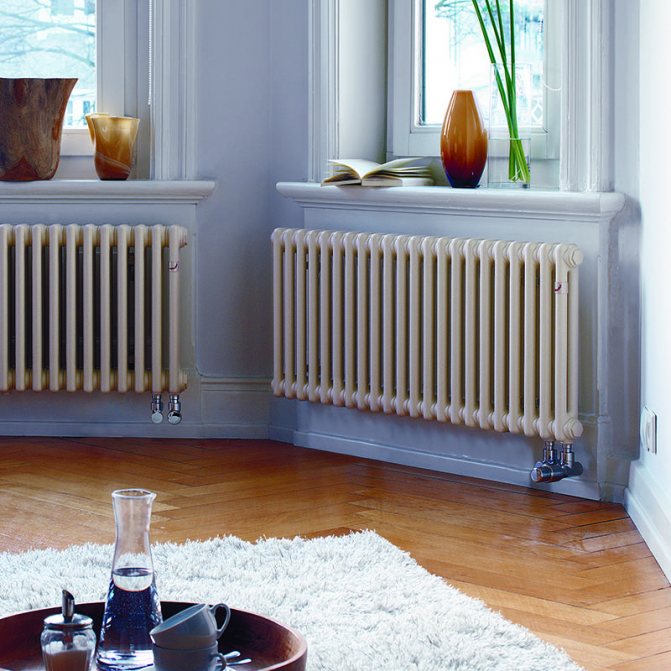
- it is better to place the battery in the center of the window;
- equipment is installed only in a horizontal position;
- heating parts must be installed at the same level within the room;
- from the wall to the battery, the distance should be from 3 to 5 cm. Too close the heating system to the wall will lead to the fact that the thermal energy will be distributed irrationally;
- it is necessary to maintain a distance of 8-12 cm from the window sill. If the gap is too small, the heat flux from the battery will decrease;
- between the radiator and the floor, the distance should be 10 cm. If you install the device lower, the heat exchange efficiency will decrease. It will also be inconvenient to clean the floor under the battery. But too high an arrangement of the heating unit will cause the temperature readings at the bottom and at the top of the room to be very different.
The installation algorithm for a bimetallic radiator is as follows:
- the marking of the place for installation on the wall of the brackets is carried out;
- fixing brackets. If the wall is brick or reinforced concrete, then the brackets are fixed with dowels and cement mortar. If you are dealing with a plasterboard partition, then the fixation is carried out by bilateral fastening;
- a battery is placed on the brackets;
- the radiator is connected to the pipes;
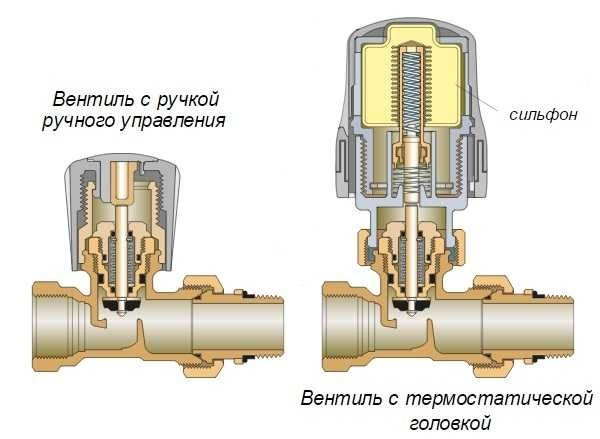
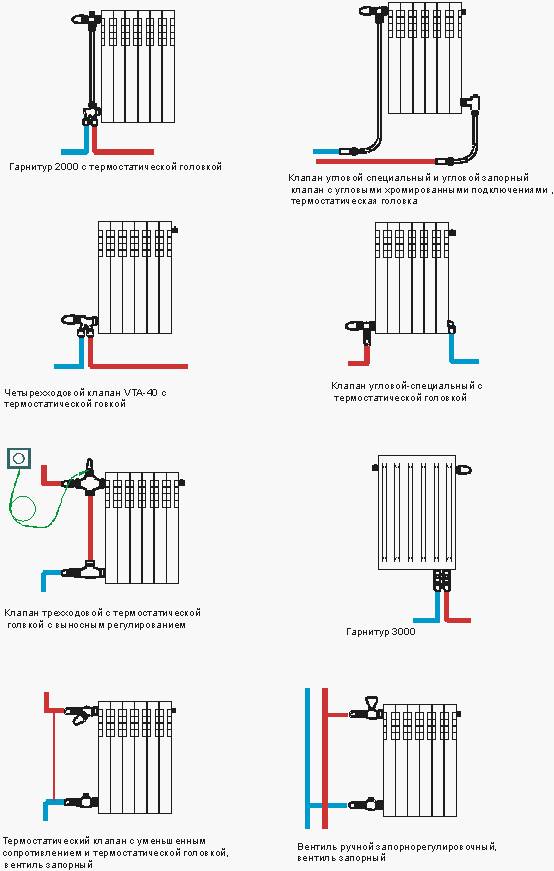
- a thermostatic valve or faucet is installed;
- an air valve is placed at the top of the battery.
Below are some recommendations regarding the self-installation of a bimetallic heater:
- before starting installation, it is necessary to block the flow of coolant into the system at the outlet and inlet. There must be no liquid in the pipeline;
- before installation, check the battery for completeness. The radiator must be assembled. Otherwise, it is necessary to assemble the unit according to the manufacturer's instructions;
- Do not use abrasive materials during assembly. Since the design of the battery must be sealed. And abrasive substances can destroy the material of the device;
- in bimetallic radiators, both right-handed and left-handed threads are used. This must be remembered when tightening fasteners;
- when connecting sanitary fittings, the right choice of material plays an important role. As a rule, flax with a thermally resistant sealant is used. Tangit threads or FUM tape are used;
- before starting installation, you must have a well-planned radiator connection diagram. It should be noted here that the connection diagram for bimetallic heating radiators can be lower, diagonal or side;
- when the installation is completed, the device is turned on: all the valves of the unit, which previously blocked the path to the coolant, open smoothly. If you open the taps abruptly, you can provoke clogging of the internal pipe section or cause water hammer. After the valves are open, excess air should be released using the air vent;
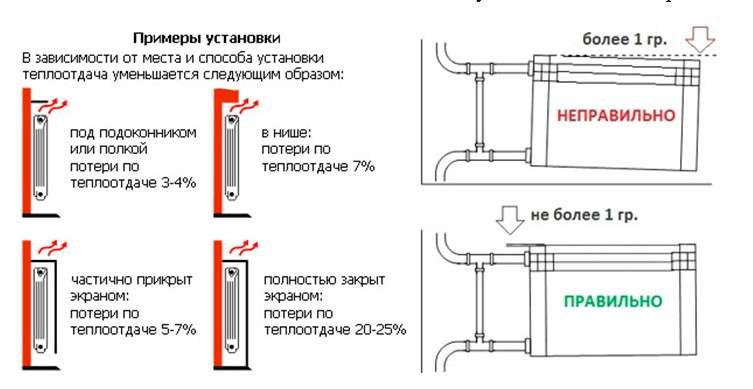
- do not cover bimetallic batteries with screens, install them in wall niches. This will lead to the fact that the heat transfer of the device will sharply decrease.
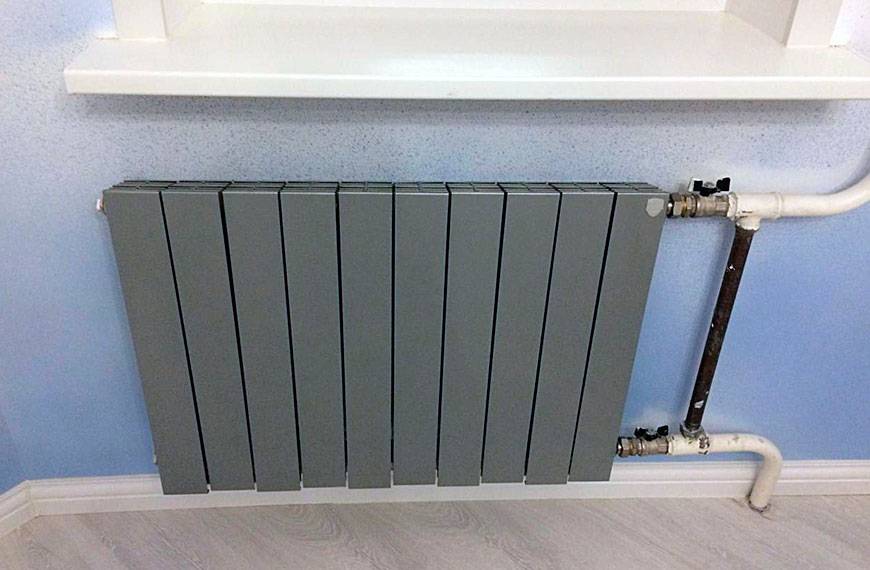
How to install correctly
Metal radiators, except for cast iron ones, are quite light. When they are fastened, there are no problems with the bearing capacity of walls made of aerated concrete or brick. But in some cases, such as frame houses or rooms with a large glass area, the equipment can be fixed to the floor.
For the selection of fasteners, the load from the battery is taken into account.Cast iron can be hung on strong hooks or mounted with floor brackets, light steel and aluminum can be hung on plate brackets or overhead corners. Installation diagram:
- for 8 sections - 2 on top and 1 on the bottom;
- for every additional 5-6 sections - 1 more on top and 1 on the bottom.
Steel panel radiator diagram
With this arrangement of fasteners, the heating device will be stably and securely fixed to the wall. It is recommended to place the brackets closer to the outer sections.
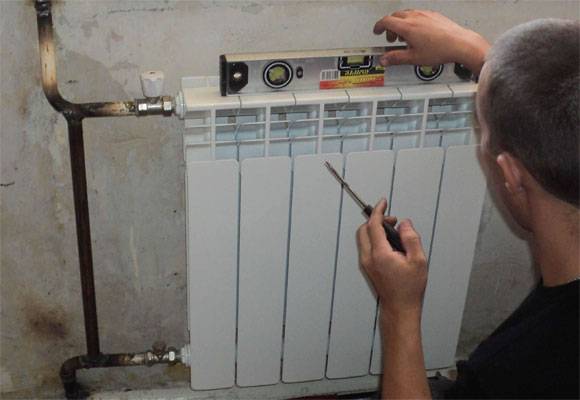
wall mount
Installation begins with marking the surface. Mark on the wall first the points for attaching the bottom brackets and screw them loose.
Then lay up the center distance, mark the points and mount the upper brackets.
The radiator is hung on the wall and checked for horizontal position. If necessary, make adjustments. After that, the brackets are finally fixed.
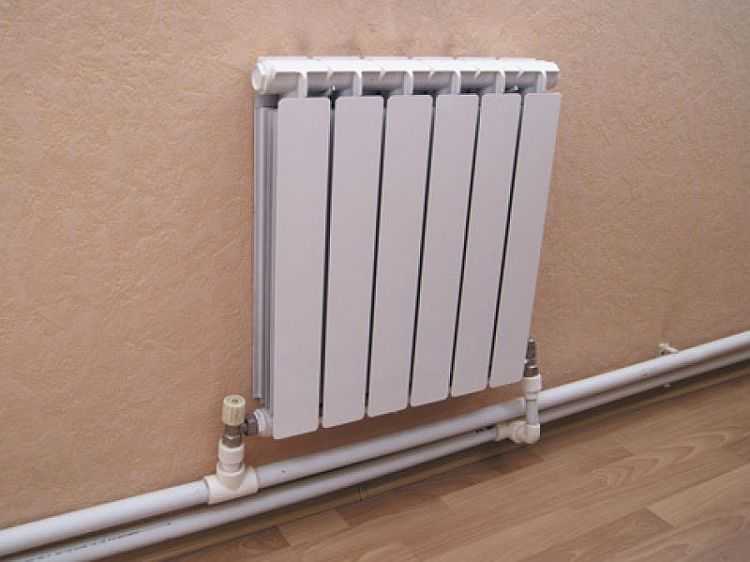
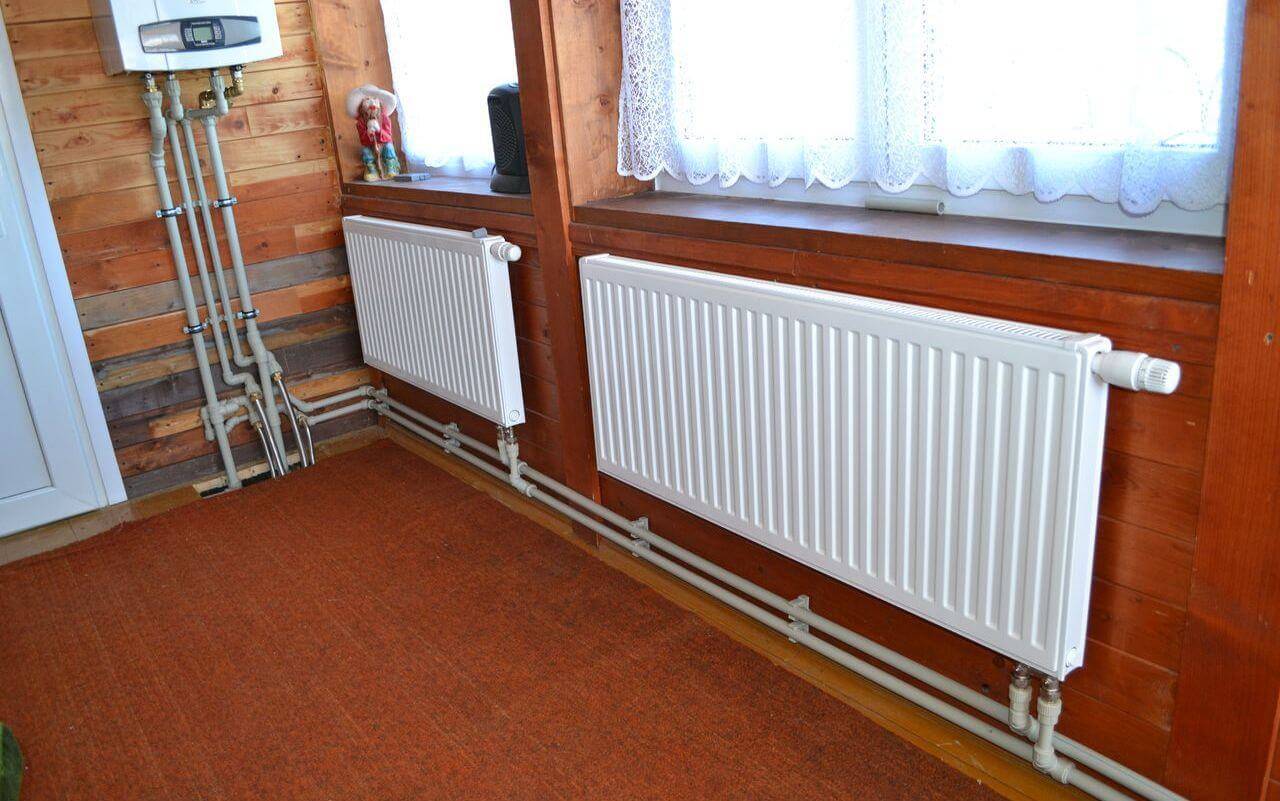
Installation of heating radiators
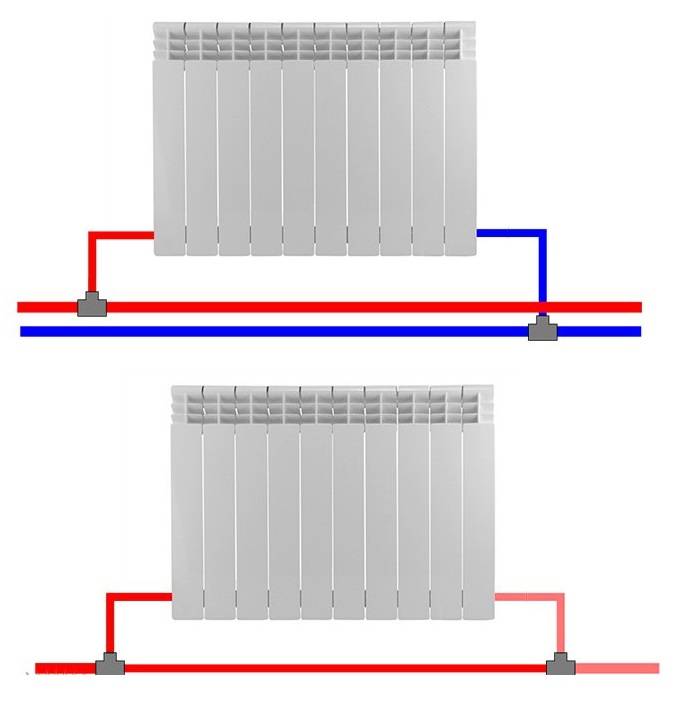
Heating radiators should be connected to the system only after the water has been drained from its pipelines. After that, if the system is single-pipe, you need to equip a bypass. Then install shut-off valves or ball valves. With their help, it will be possible to turn off the battery for seasonal maintenance. A two-pipe system does not require a bypass. Places of threaded connections must be repacked with high quality using tow and FUM tape.

Upon completion of the connection of all radiators, it is necessary to check the quality of their connection. To do this, the system is filled with water to the required level, all the air is released from the batteries using Mayevsky taps and each threaded connection is carefully inspected.If there are no coolant leaks, turn on the heating and, when the temperature of the circulating water reaches about 60 degrees, re-examine the same places. If there are no leaks and no air is collected in the radiators, this installation can be considered complete.


As you can see, it is not at all difficult to install heating radiators, and anyone can do it, subject to all the above rules and recommendations.
What to do if the batteries do not heat up
Number of sections
The first thing to do is to calculate whether there are enough sections of radiators for your room. If there are not enough of them, then there is only one way out - to select the necessary heating radiators and add several sections to the battery.
The standard way to calculate the number of heating radiators:
16sq.m. x 100W / 200W = 8
where 16 is the area of the room,
100W - normative thermal power per 1m²,
200W - approximate power of one section of the radiator (you can see it on the passport),
8 - the required number of heating radiator sections
Regulator check
If your battery is equipped with a power regulator, then it is worth checking at what temperature it is turned on. In the spring, there is no need to heat the room strongly and, perhaps, the regulator is at an insufficient temperature now.
Airlock
Check the surface temperature of the battery itself, if it is very hot in one place, and barely warm in another, then, most likely, an air lock interferes with good heating.
Another symptom of an air lock is an incomprehensible noise, gurgling. Modern batteries have a special air release valve (Mayevsky's tap) located at the top of the battery and opened with a flat screwdriver.It is enough just to unscrew the faucet a little, until the sound of air escaping, wait until all the air has escaped and water has flowed, and then tighten the faucet.
Do not forget to substitute something to collect water. If you don’t risk it yourself or haven’t found a similar valve in your battery, then call a plumber.
Radiator cleaning
The quality of the battery is very much interfered with by dust and dirt. You can clean it from the outside yourself. It is better to remove the old layer of paint, if there are several of these layers, then the procedure is required, and paint with a special heat-resistant paint, preferably dark (black) in color. Only a plumber using special equipment can clean the battery from the inside.
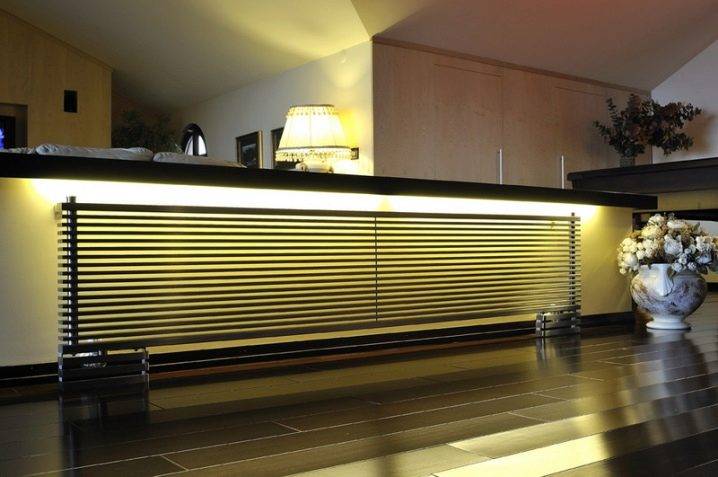
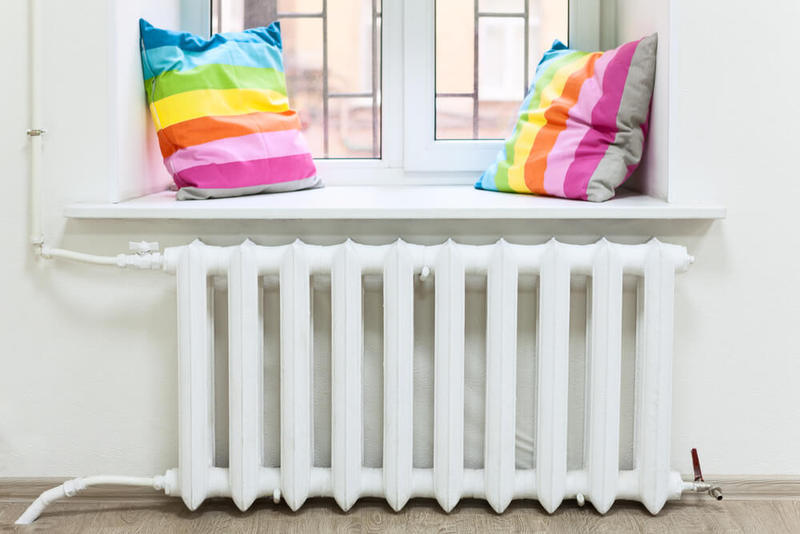
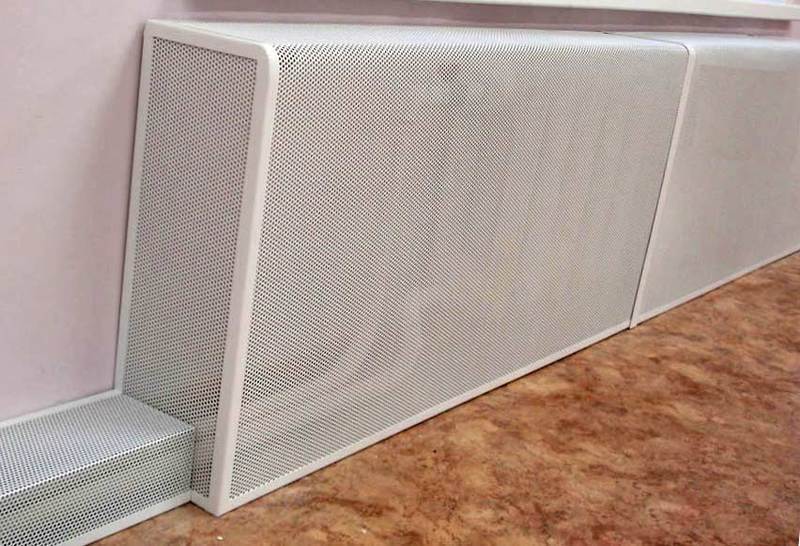
Decorative cover
A decorative screen (casing) will regulate and increase heat transfer. Moreover, at the moment the choice of screens is wide; they are not easy to fit, but they will decorate any interior. But you need to carefully consider the material from which it is made. A screen made of wood or plastic will not give the desired effect and, on the contrary, will not let some of the heat into the room. In order to make the room warmer, the screen must be chosen from aluminum, it will perfectly conduct heat.
Little tricks to increase the return temperature of heating batteries
The battery needs free air access, remove everything that blocks it, including curtains, you can simply lift them onto the windowsill. An ordinary fan can help the movement of air. Position it so that the flow goes past the battery. Thus, warm air will quickly get deeper into the room, and cold air closer to the battery.
Part of the heat is absorbed by the wall behind the battery, to avoid this, you need to isolate this area.Corrugated cardboard and aluminum foil can serve as insulation. Attach this design with cardboard to the wall, and with foil to the battery. Heat reflection will be just fine.
It is not necessary to use improvised means, there are better, more convenient solutions for thermal insulation. Modern materials, such as polyrex, penofol or isolon, are remarkably insulating, and on the one hand they have a self-adhesive surface, which, of course, will facilitate their installation.
Note. After gluing the insulation, the distance between the battery and the wall should not be less than two centimeters, otherwise the air will not circulate and it will not become warmer
If the distance is not enough, you can simply stick the foil, it is better to keep the distance and not risk sticking a thick layer of insulation.
Batteries can heat poorly if they are installed so that the gap between them and the wall is initially less than two centimeters, in which case it is worth considering their reconstruction, since half of the heat will go into the wall and will not be able to get inside the room.
The use of technical solutions can, in principle, eliminate the need to install new batteries. Thanks to these little tricks, you can simply raise the temperature by a few degrees, if this is not enough for you, then of course you should think about replacing the batteries and external thermal insulation. published


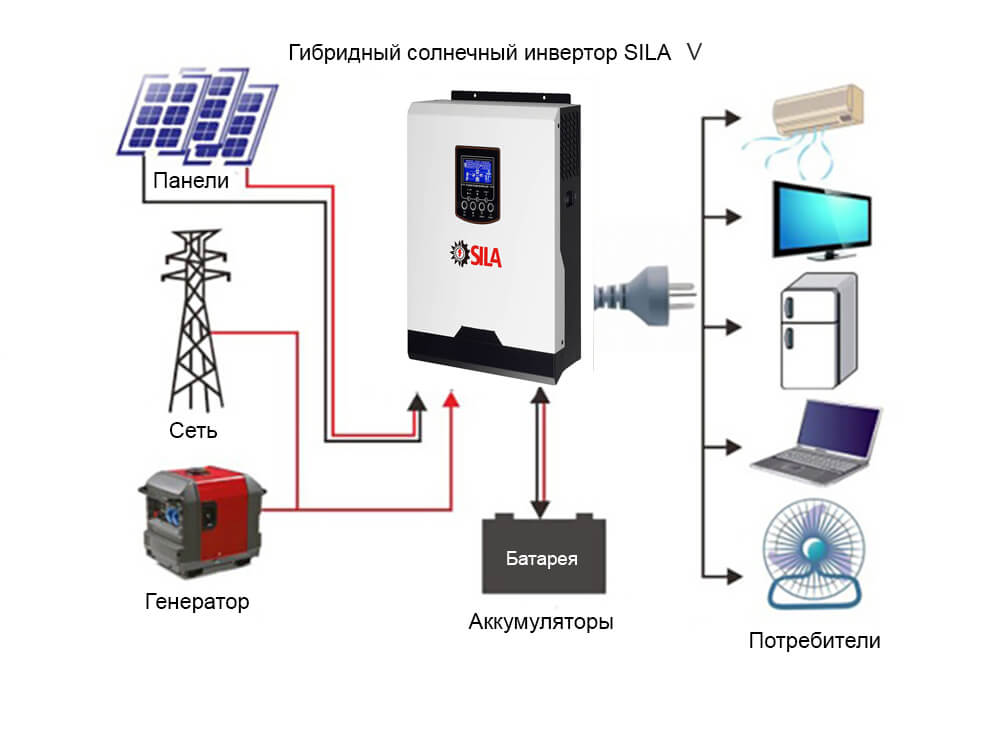
We set up the heating system of a country house on our own

In my previous article, I wrote that one of the effective ways to upgrade heating systems in private buildings is to switch from an open heating system to a closed one.The heating system of a residential building improved in this way has many advantages, which together ensure its simple operation, you just need to turn on the boiler at the beginning of the heating season and turn it off at the end. Everything!
However, in order for the heating system of a country house to work in this mode (turned on, “forgotten” for six months, turned off), you need to correctly configure and adjust its operating parameters. This is what will be discussed in my article. I will make the main calculations, conclusions and calculations using the example of my heating system, but the reader can always use this information by drawing an analogy with his specific case.
Location calculation
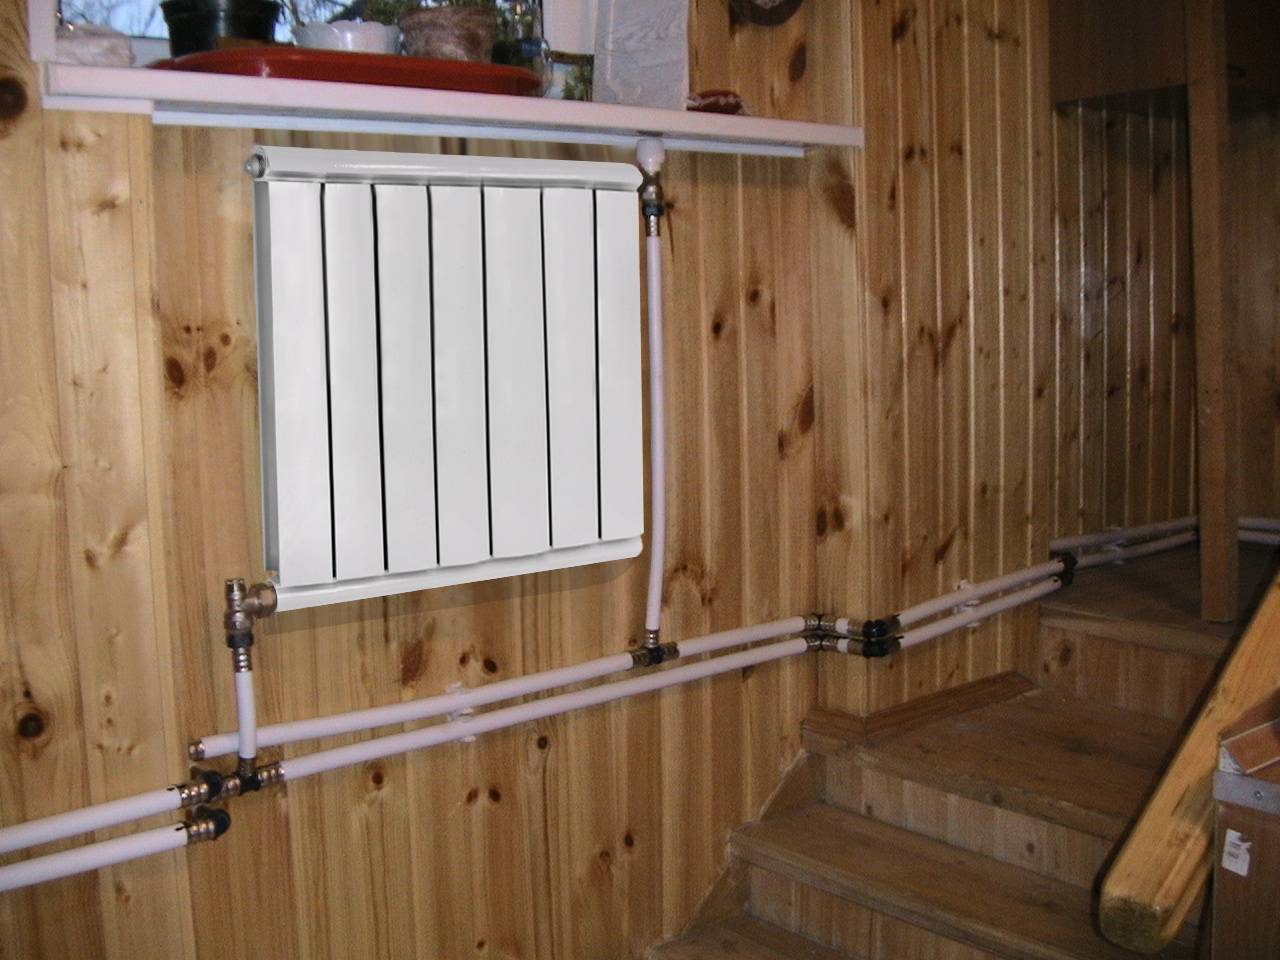
In order for the coolant to circulate without excessive resistance, it is necessary to observe the slopes of the pipelines connected to each radiator:
- supply pipelines must have an inclination towards the heating battery;
- for return, the slope should be from the battery to the pipeline.
Such an arrangement of pipes will make it possible to minimize the resistance to the passage of the coolant through the heating batteries, which, in turn, will contribute to the uniform distribution of heat between the premises of the building.
If the above requirements are not followed during installation work (for example, install the supply and return pipelines strictly horizontally or with a negative slope), this can significantly reduce the efficiency of the entire heating system.
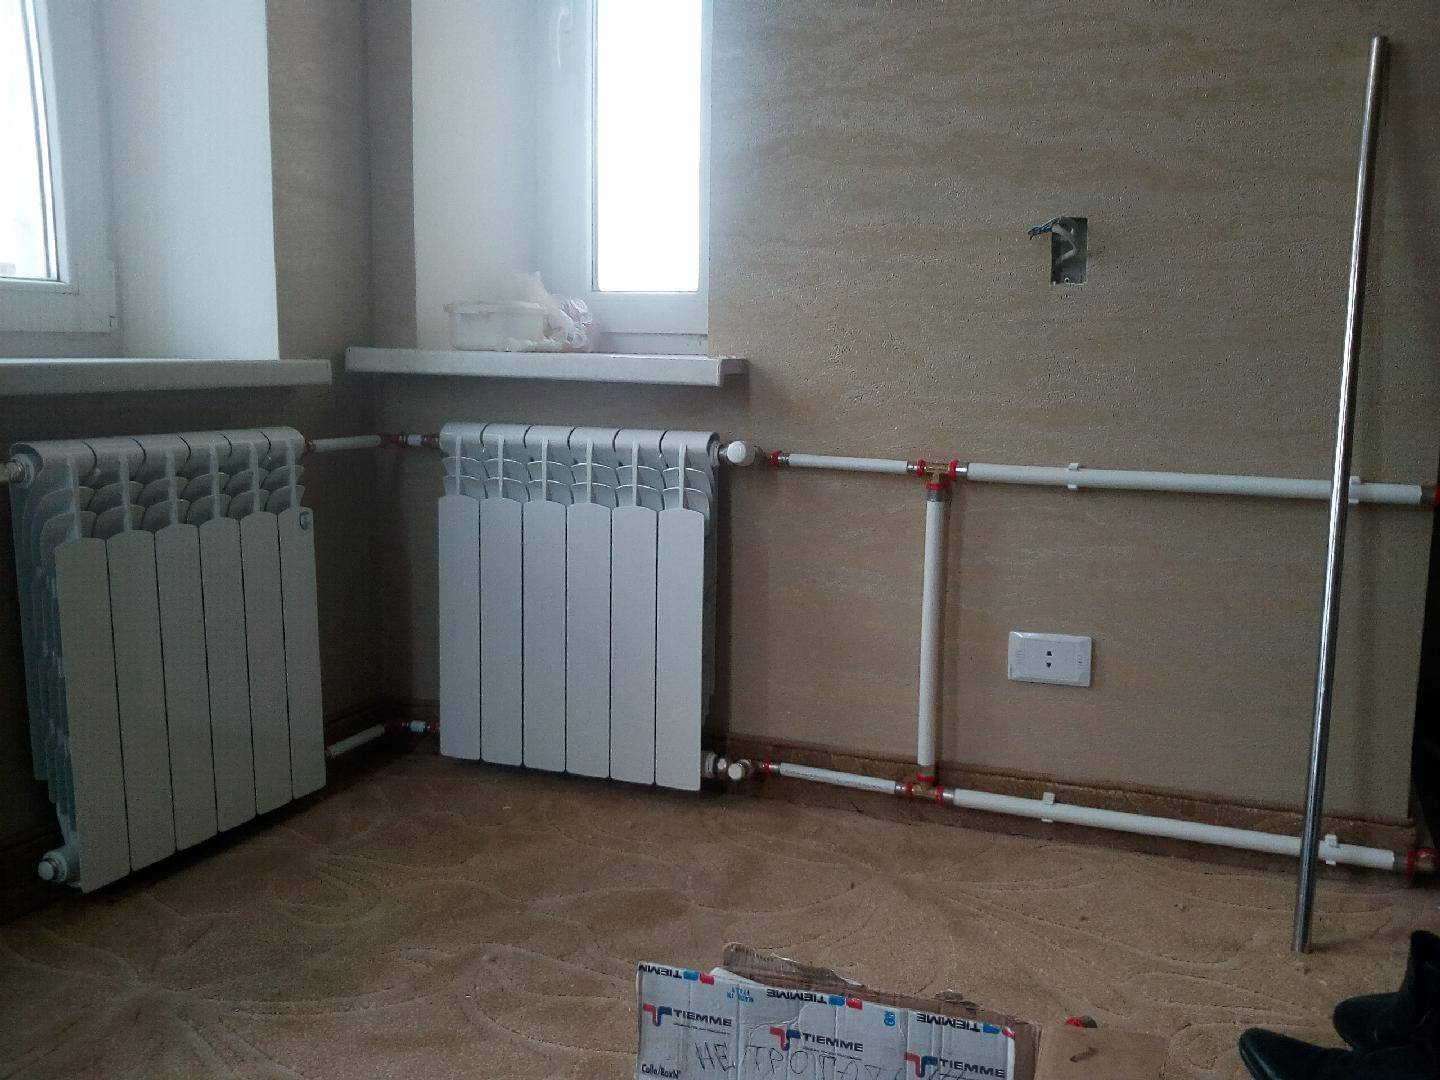
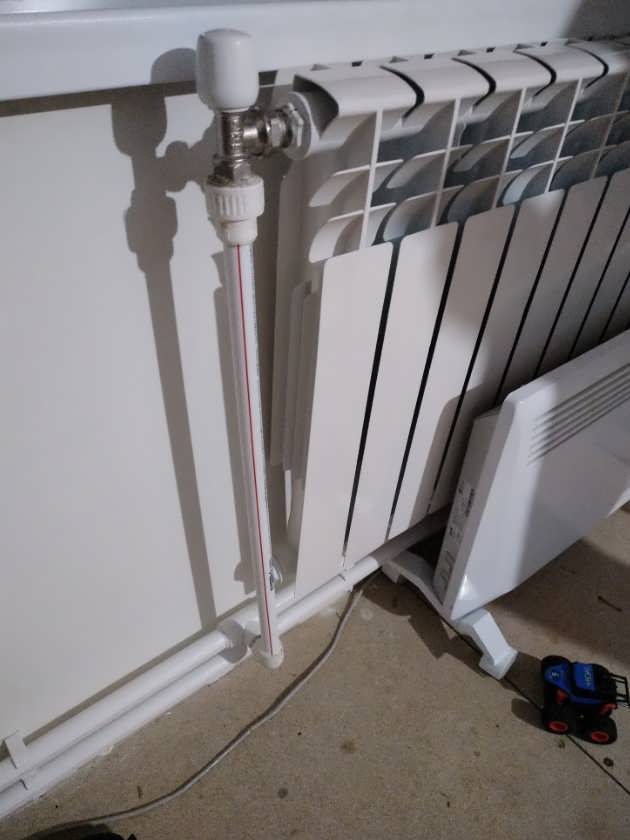
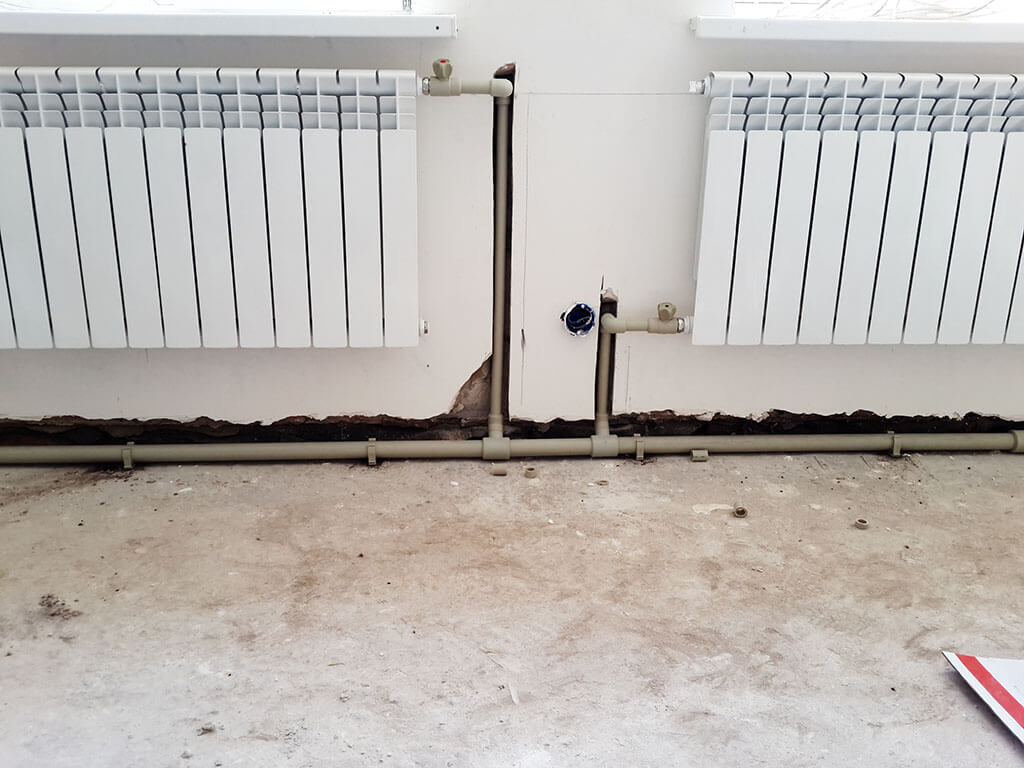
How to connect a bimetallic radiator?
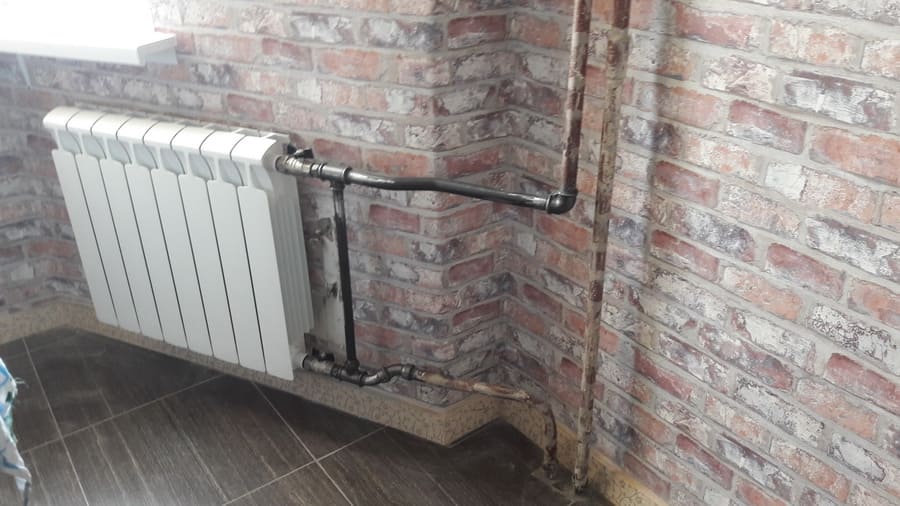
Very often, and in the fall almost daily, on the most popular forum in Runet on the topic of installation, topics or messages appear with the question of problems connecting bimetallic radiators in apartments, and I am very sorry that in our time, when there is access to any information on the network, there are many people are faced with this problem by turning to “specialists” to replace radiators, who have no idea how this installation is performed. And the question is not only that the radiators do not warm up completely or completely, which casts doubt on the feasibility of such a replacement, but also that installation is also often carried out with serious violations of the design conditions of the heating system, which seriously affect its reliability, thereby the life and health of residents are in serious danger. In this topic, through the posted photos of my work, I will try to give simple tips on how to connect radiators so that all building codes are observed and new heaters are fully warmed up.
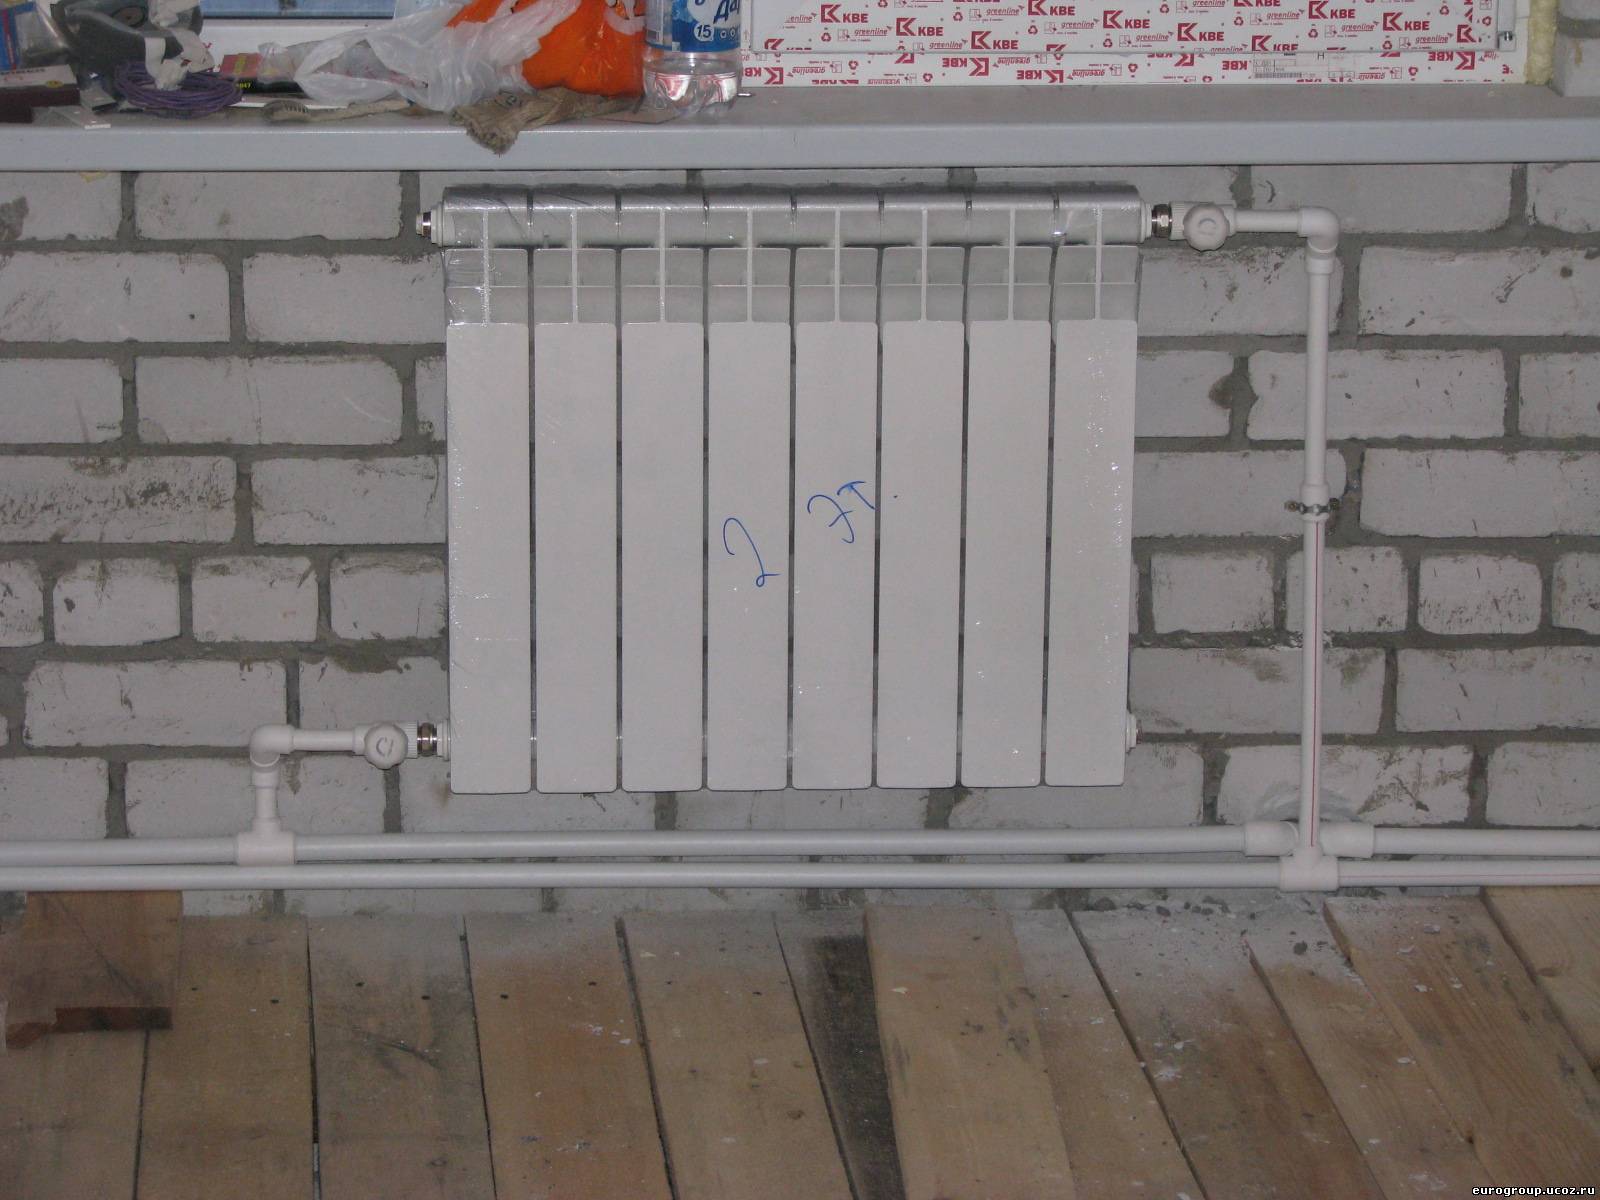
What pipes to choose for mounting radiators?
Firstly, I would like to immediately decide on the type of pipeline material that the new radiator is connected to: if in the house, according to the project, the heating system risers are made of a steel black pipe, then the leads to the radiator must be made of steel.Options made of plastic pipes (polypropylene, metal-plastic) are significantly inferior in reliability to a steel pipe and are categorically unacceptable in systems designed from steel, especially with open laying, which is unacceptable according to the requirements of SNiP, connecting a radiator with copper pipes and stainless steel pipes, I personally consider it inappropriate for economic and aesthetic reasons, as well as due to a decrease in the reliability of the pipe due to the significantly smaller wall thickness.
Secondly, it is necessary to determine the type of connection for the pipeline, it is difficult to argue that gas welding is optimal, both for reasons of reliability (with threaded connections there is always a weak spot-squeeze) and from the aesthetic side due to the absence of threaded fittings
It is also important that the risers mounted by the builders of the house rarely differ in the correct geometry relative to the walls and floor, while gas welding, the installers can easily correct all the irregularities left by the builders
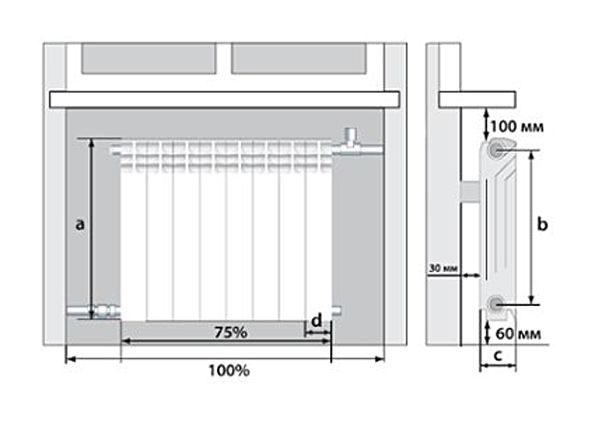
SNiP norms
Clearly established standards define the permissible errors in the installation of radiators.
Main parametric landmarks:
- the distance from the window sill to the battery is 10 cm;
- from the battery to the floor level - 12 cm (not less than 10 cm and not more than 15 cm);
- at least 2 cm from the wall to the heating source.
In accordance with SNiP, regardless of the selected connection scheme, it is recommended to connect in the following sequence:
- determination of the place of fixation of fasteners (at least 3 pieces);
- mounting brackets to the wall using cement or dowels;
- installation of the constituent elements of the radiator;
- battery installation;
- connection to the pipes of the heating system;
- installation of an air mass vent;
- removal of the protective film.
It is not difficult to install a radiator in an apartment with your own hands, but if in doubt, it is better to contact specialists.
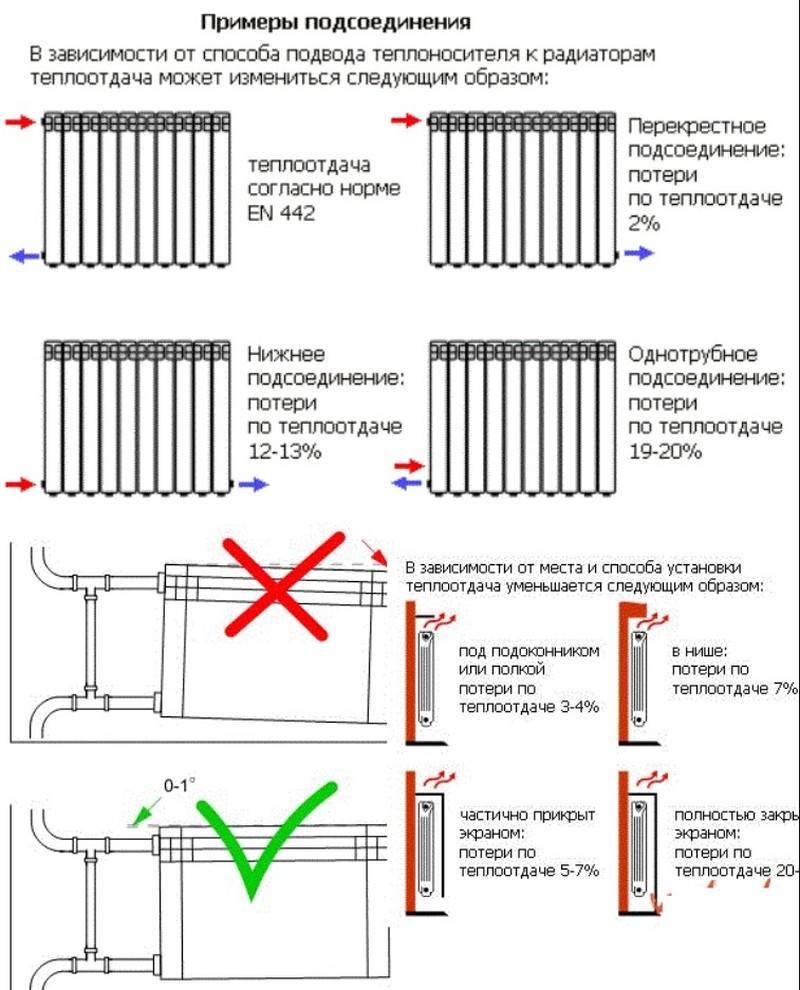
Radiator connection diagrams, work efficiency
Depending on the device of the heating system, there are various schemes for connecting heating devices to it. If you look at the section, then each radiator has an upper and lower full passage channels through which the coolant is supplied and leaves.


Each section has its own channel, connected to two common ones, the task of which is to pass hot water through itself, to receive part of the thermal energy. The overall efficiency of the device depends on the amount of hot liquid that has had time to pass through the channels of the sections and the heat capacity of the material from which the heating elements are made.
The amount of coolant passing through the channels of individual sections directly depends on the connection scheme of the heater.
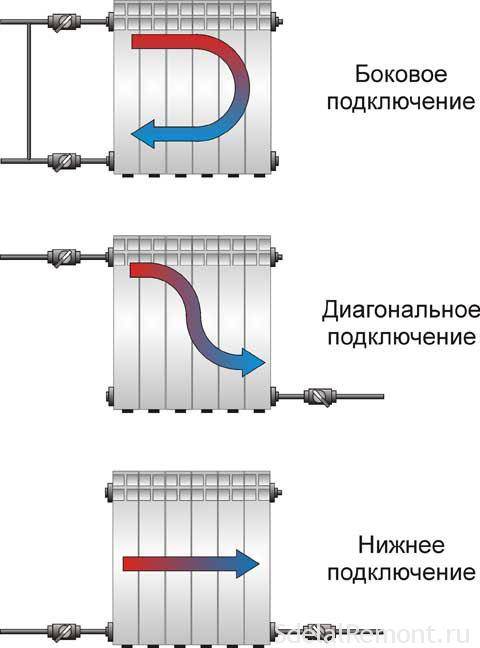
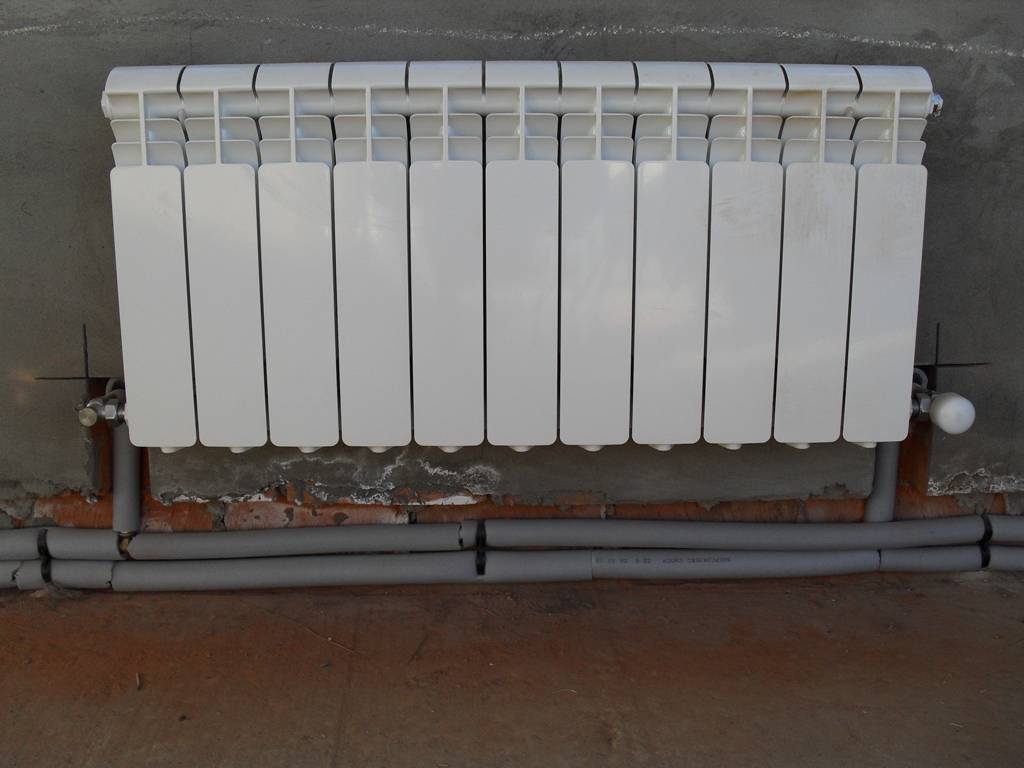
Side connection
With such a scheme for installing heating batteries in an apartment, the coolant can be supplied from above or below. When the supply is from above, water passes through the upper common channel, descends through the vertical channels of individual sections to the lower one, and leaves in the same direction from which it came.
Theoretically, the coolant should pass through the vertical channels of the sections, heat up the radiator completely. In practice, the fluid moves along the least hydraulic resistance.
The farther the section is from the entrance, the less coolant will pass through it.With a large number of sections, the latter will heat up much worse, or even remain cold at all with low pressure.
With the side method of installing the installation of heating radiators in the apartment and supply from below, history repeats itself. The efficiency of the heater here will be even worse - hot water must rise up the channels, a gravitational load is added to the hydraulic resistance.
The side connection scheme is most often used for riser wiring in apartment buildings.
Bottom connection
With this scheme, the coolant is supplied from below, passes through the sections, and exits through the same lower channel. It uses the principle of convection - hot water always rises, cold water falls.
It's supposed to be so theoretically. In practice, most of the hot water passes from the supply inlet to the outlet, the lower part of the battery heats up well, and the coolant flows weakly to the top. The efficiency of the heater with the bottom connection of both streams is 15-20% lower than with the side piping scheme.
The bottom connection is good because when the battery is aired, the rest of the battery heats up properly.
Diagonal connection
The classic method of tying batteries is diagonal. With the correct installation of heating radiators in an apartment in a diagonal way, the sections heat up evenly, and the efficiency of using thermal energy increases.
With the diagonal piping method, hot liquid enters through the upper common passage hole, descends through the channels of each section and exits the lower passage channel on the other side. Here the liquid descends from top to bottom, hydraulic losses are minimal.
This method also has disadvantages.The battery is aired, this must be monitored, the air must be bled through the Mayevsky tap. The second is that dead zones with cold water can form at the bottom at low pressure.


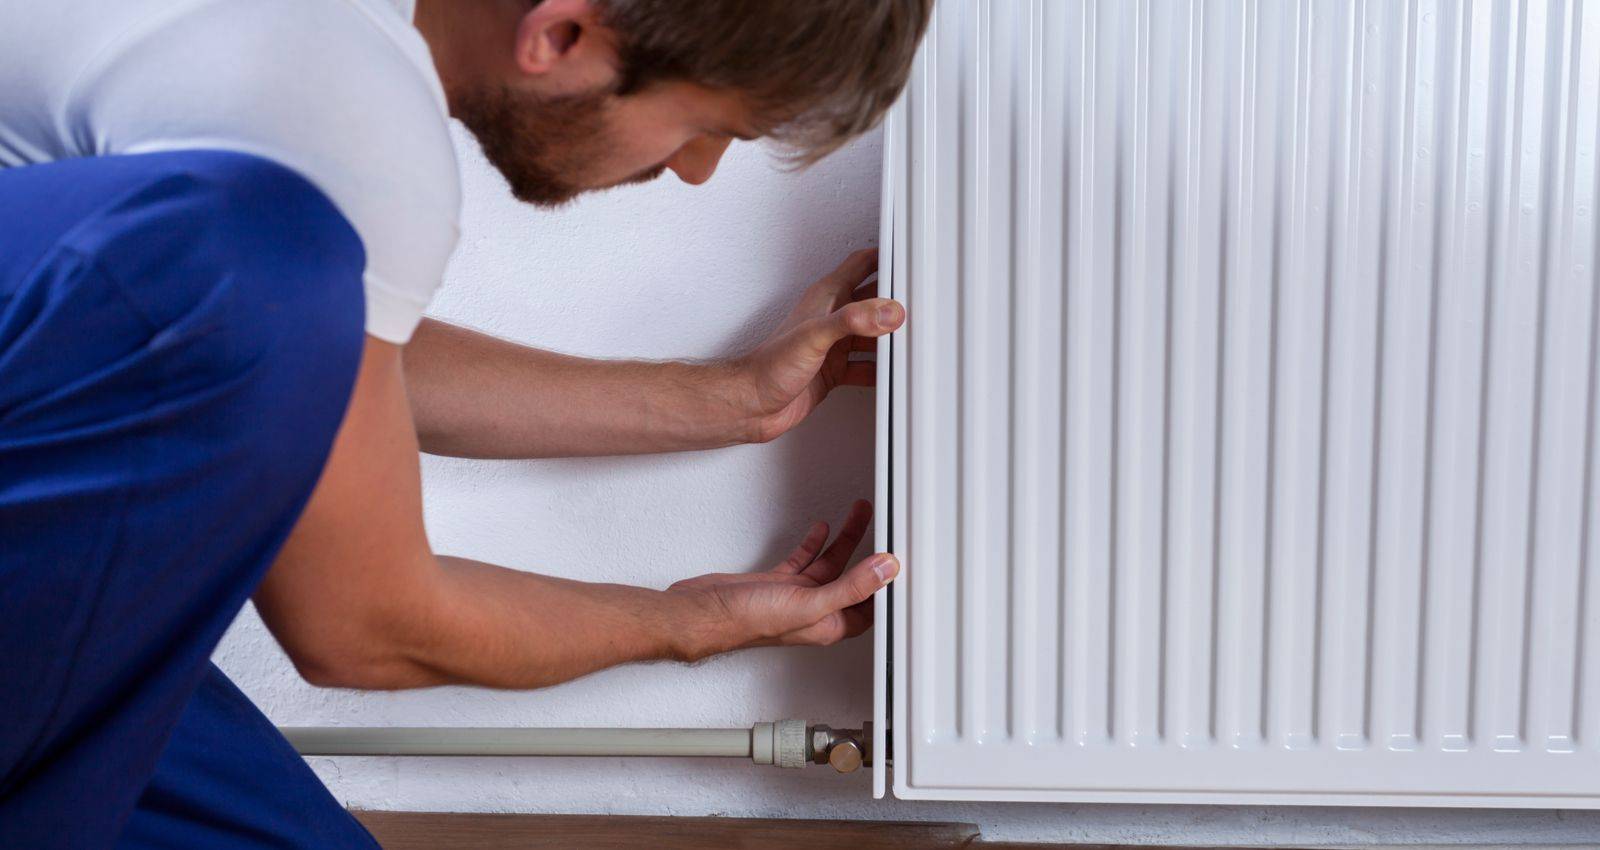
How to install
Now about how to hang the radiator. It is highly desirable that the wall behind the radiator be flat - it is easier to work this way. The middle of the opening is marked on the wall, a horizontal line is drawn 10-12 cm below the window sill line. This is the line along which the upper edge of the heater is leveled. The brackets must be installed so that the upper edge coincides with the drawn line, that is, it is horizontal. This arrangement is suitable for heating systems with forced circulation (with a pump) or for apartments. For systems with natural circulation, a slight slope is made - 1-1.5% - along the course of the coolant. You can’t do more - there will be stagnation.
Proper installation of heating radiators
wall mount
This must be taken into account when mounting hooks or brackets for heating radiators. Hooks are installed like dowels - a hole of a suitable diameter is drilled in the wall, a plastic dowel is installed in it, and the hook is screwed into it. The distance from the wall to the heater is easily adjusted by screwing and unscrewing the hook body.
Hooks for cast iron batteries are thicker. This is fasteners for aluminum and bimetallic
When installing hooks for heating radiators, please note that the main load falls on the top fasteners. The lower one serves only for fixing in a given position relative to the wall and it is installed 1-1.5 cm lower than the lower collector. Otherwise, you simply will not be able to hang the radiator.
One of the brackets
When installing the brackets, they are applied to the wall in the place where they will be mounted. To do this, first attach the battery to the installation site, look where the bracket will “fit”, mark the place on the wall. After putting the battery, you can attach the bracket to the wall and mark the location of the fasteners on it. In these places, holes are drilled, dowels are inserted, the bracket is screwed onto the screws. Having installed all the fasteners, the heater is hung on them.
Floor fixing
Not all walls can hold even light aluminum batteries. If the walls are made of lightweight concrete or sheathed with drywall, floor installation is required. Some types of cast iron and steel radiators come with legs right away, but they do not suit everyone in terms of appearance or characteristics.
Legs for installing aluminum and bimetal radiators on the floor
Floor installation of radiators from aluminum and bimetallic is possible. There are special brackets for them. They are attached to the floor, then a heater is installed, the lower collector is fixed with an arc on the installed legs. Similar legs are available with adjustable height, there are fixed ones. The method of fastening to the floor is standard - on nails or dowels, depending on the material.
This is interesting: What is the slope of the sewer pipe is considered optimal in various situations - we tell the main thing