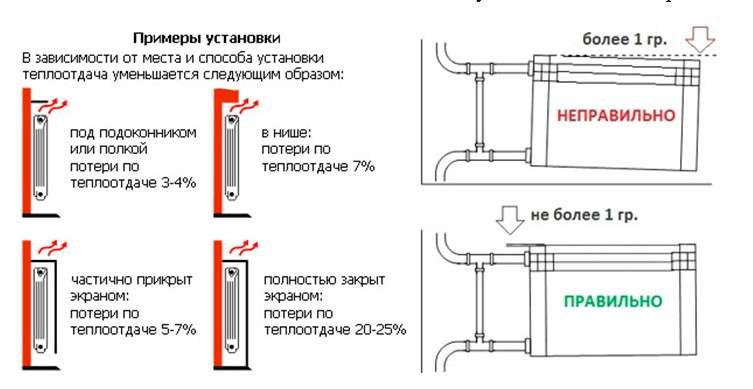
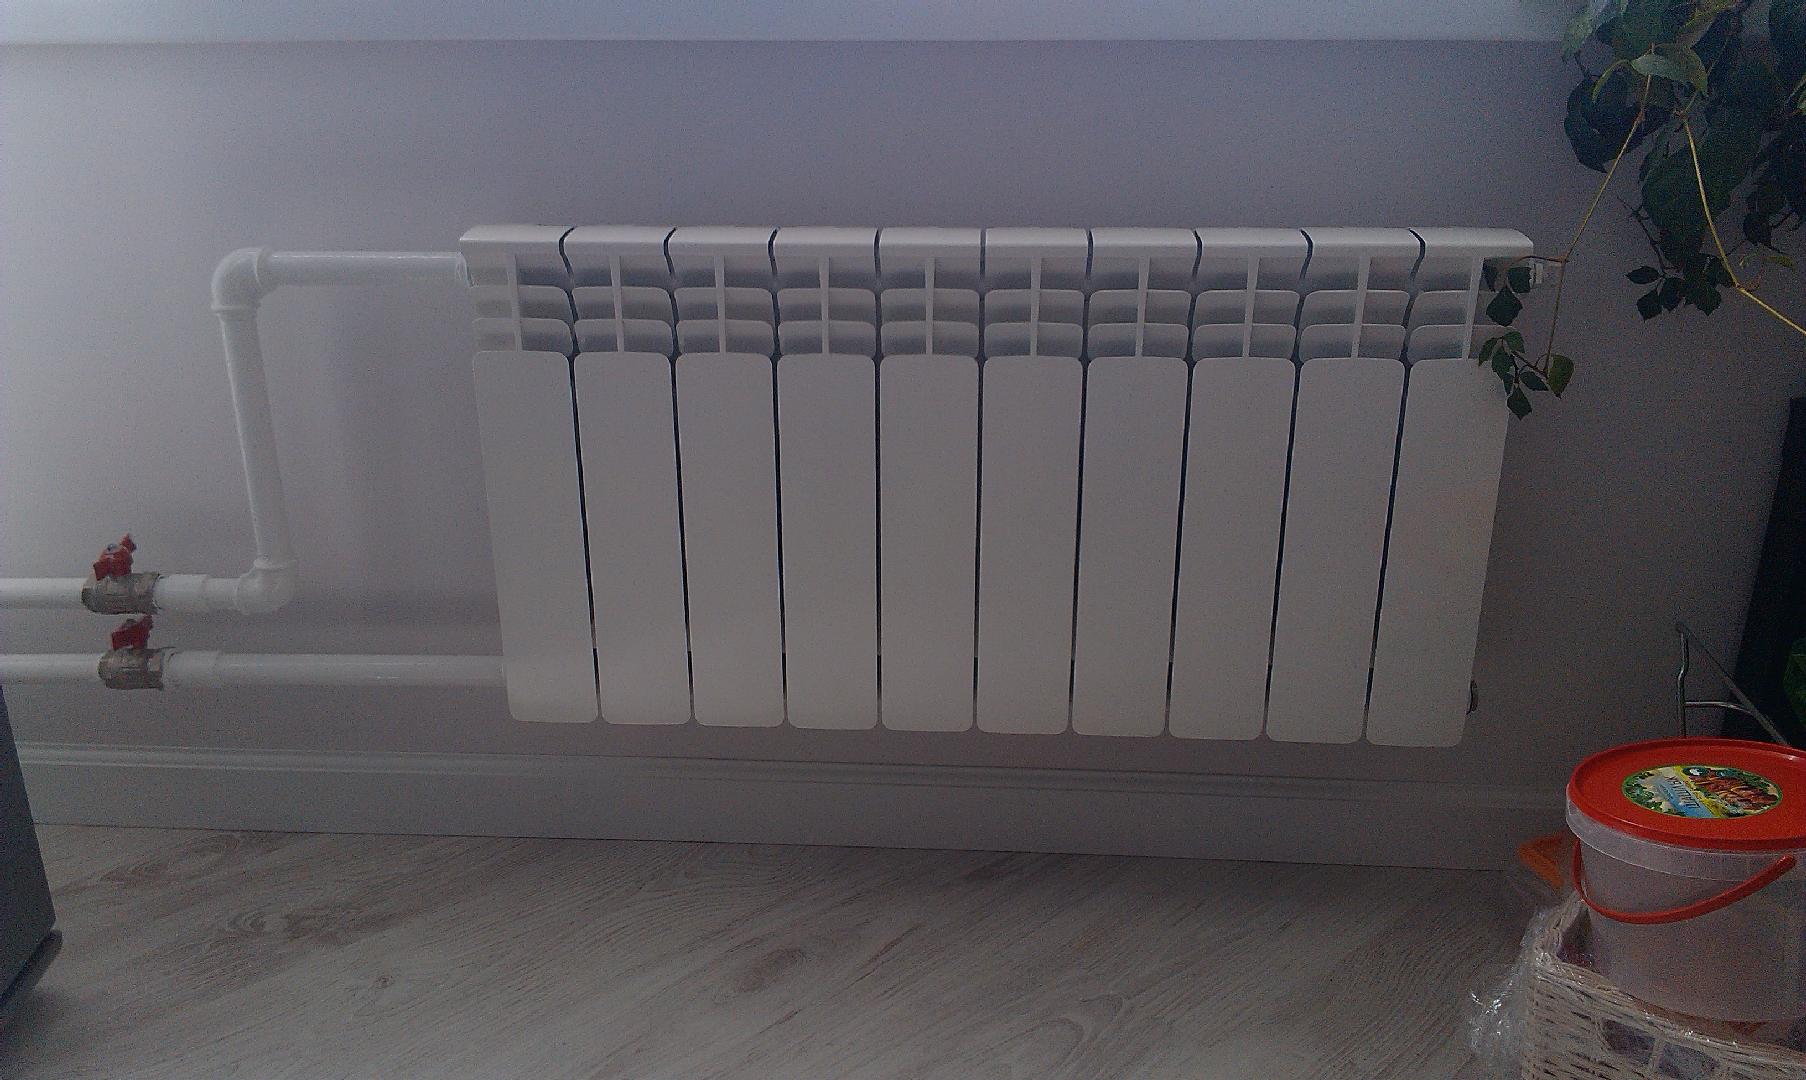
- Radiator connection diagrams, work efficiency
- Side connection
- Bottom connection
- Diagonal connection
- Do-it-yourself installation of cast iron batteries
- Mounting brackets
- How to install a heating radiator?
- Crimping
- Installing the Radiator Mount
- What can be the binding of polypropylene pipes
- Radiators with bottom connection
- Bottom connection principle
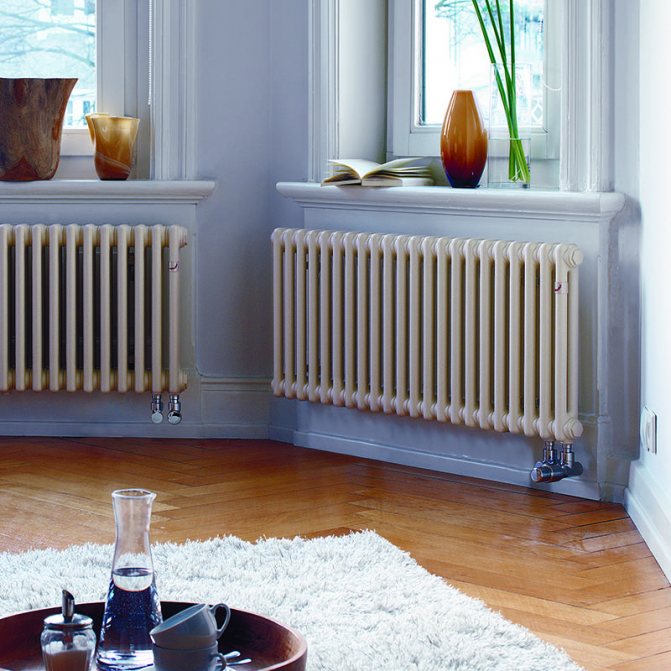
- Selection and installation of radiators
- Making a homemade radiator
- Preparing for installation
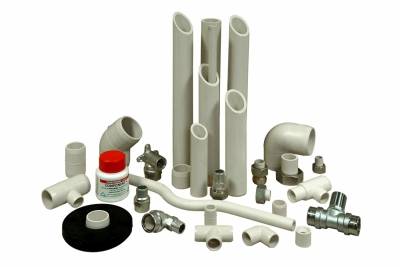
- materials
- Tools
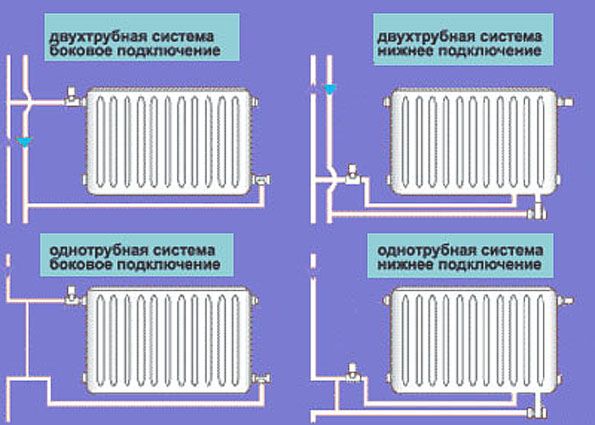
- Radiator connection diagrams
- Radiators with bottom connection
- Radiators with side connection
- Option number 1. Diagonal connection
- Option number 2. Unilateral
- Option number 3. Bottom or saddle connection
- Non-standard situations
- Mounting accessories
- Pipes
- Accessories
- Advantages and disadvantages of one-pipe and two-pipe heating systems
- Single pipe heating system
- Two-pipe heating system
- Strapping options
- Placement of heating devices
- Bimetal heating devices
- aluminum batteries
Radiator connection diagrams, work efficiency
Depending on the device of the heating system, there are various schemes for connecting heating devices to it.If you look at the section, then each radiator has an upper and lower full passage channels through which the coolant is supplied and leaves.
Each section has its own channel, connected to two common ones, the task of which is to pass hot water through itself, to receive part of the thermal energy. The overall efficiency of the device depends on the amount of hot liquid that has had time to pass through the channels of the sections and the heat capacity of the material from which the heating elements are made.
The amount of coolant passing through the channels of individual sections directly depends on the connection scheme of the heater.
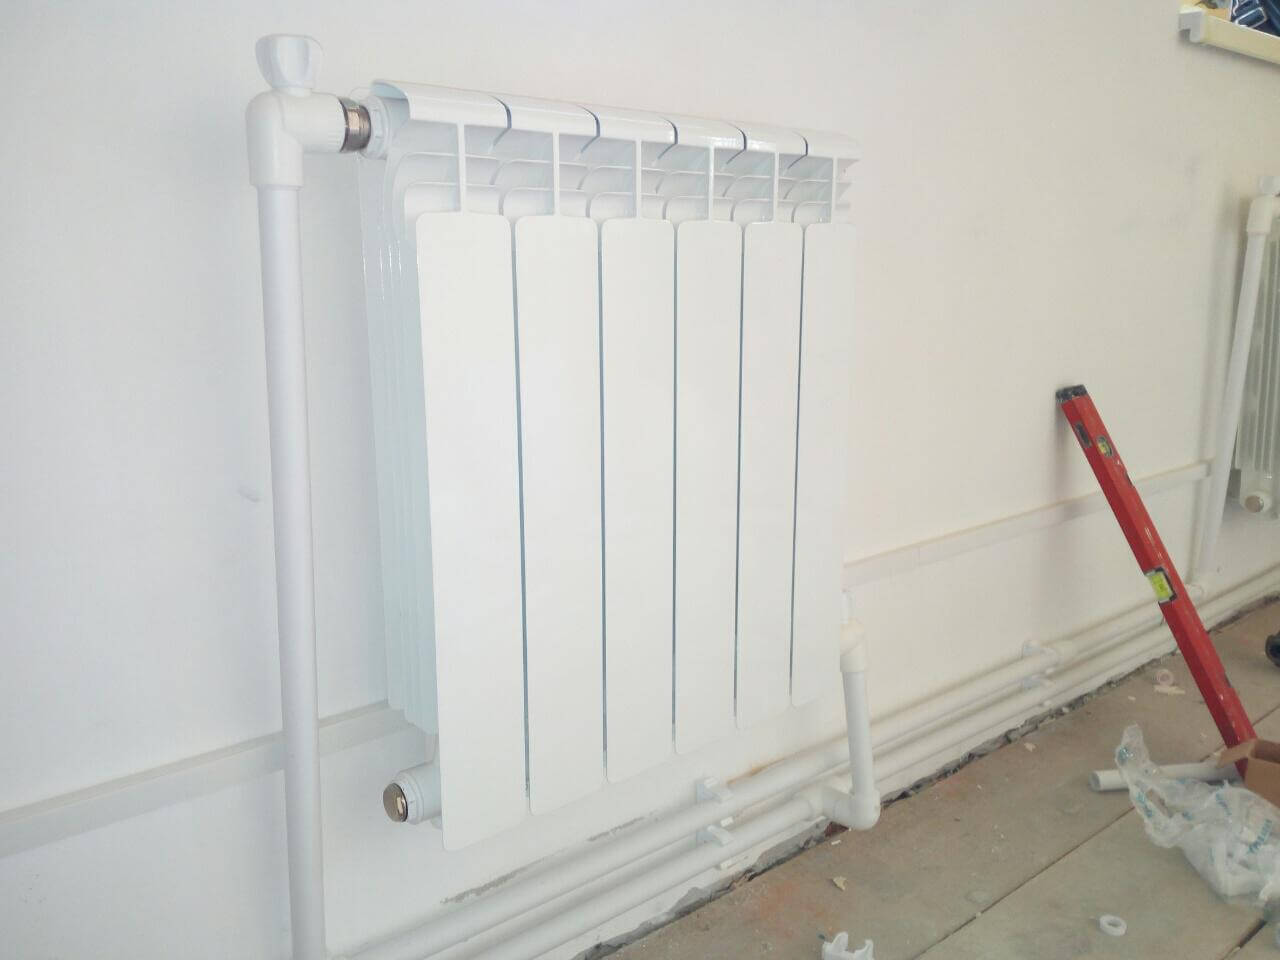
Side connection
With such a scheme for installing heating batteries in an apartment, the coolant can be supplied from above or below. When the supply is from above, water passes through the upper common channel, descends through the vertical channels of individual sections to the lower one, and leaves in the same direction from which it came.
Theoretically, the coolant should pass through the vertical channels of the sections, heat up the radiator completely. In practice, the fluid moves along the least hydraulic resistance.
The farther the section is from the entrance, the less coolant will pass through it. With a large number of sections, the latter will heat up much worse, or even remain cold at all with low pressure.
With the side method of installing the installation of heating radiators in the apartment and supply from below, history repeats itself. The efficiency of the heater here will be even worse - hot water must rise up the channels, a gravitational load is added to the hydraulic resistance.
The side connection scheme is most often used for riser wiring in apartment buildings.
Bottom connection
With this scheme, the coolant is supplied from below, passes through the sections, and exits through the same lower channel. It uses the principle of convection - hot water always rises, cold water falls.
It's supposed to be so theoretically. In practice, most of the hot water passes from the supply inlet to the outlet, the lower part of the battery heats up well, and the coolant flows weakly to the top. The efficiency of the heater with the bottom connection of both streams is 15-20% lower than with the side piping scheme.
The bottom connection is good because when the battery is aired, the rest of the battery heats up properly.
Diagonal connection
The classic method of tying batteries is diagonal. With the correct installation of heating radiators in an apartment in a diagonal way, the sections heat up evenly, and the efficiency of using thermal energy increases.
With the diagonal piping method, hot liquid enters through the upper common passage hole, descends through the channels of each section and exits the lower passage channel on the other side. Here the liquid descends from top to bottom, hydraulic losses are minimal.
This method also has disadvantages. The battery is aired, this must be monitored, the air must be bled through the Mayevsky tap. The second is that dead zones with cold water can form at the bottom at low pressure.
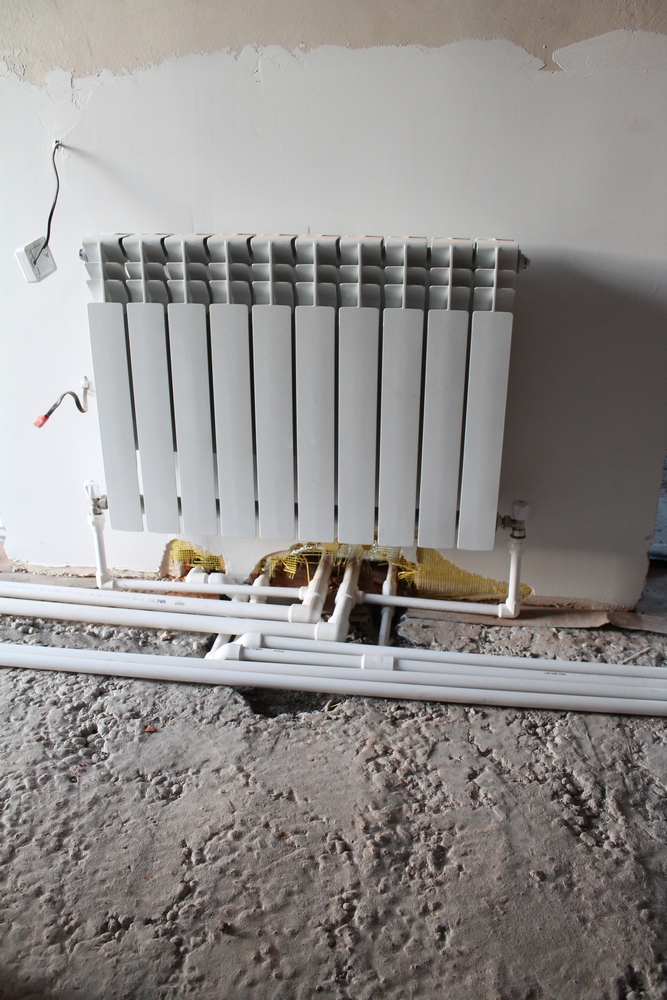
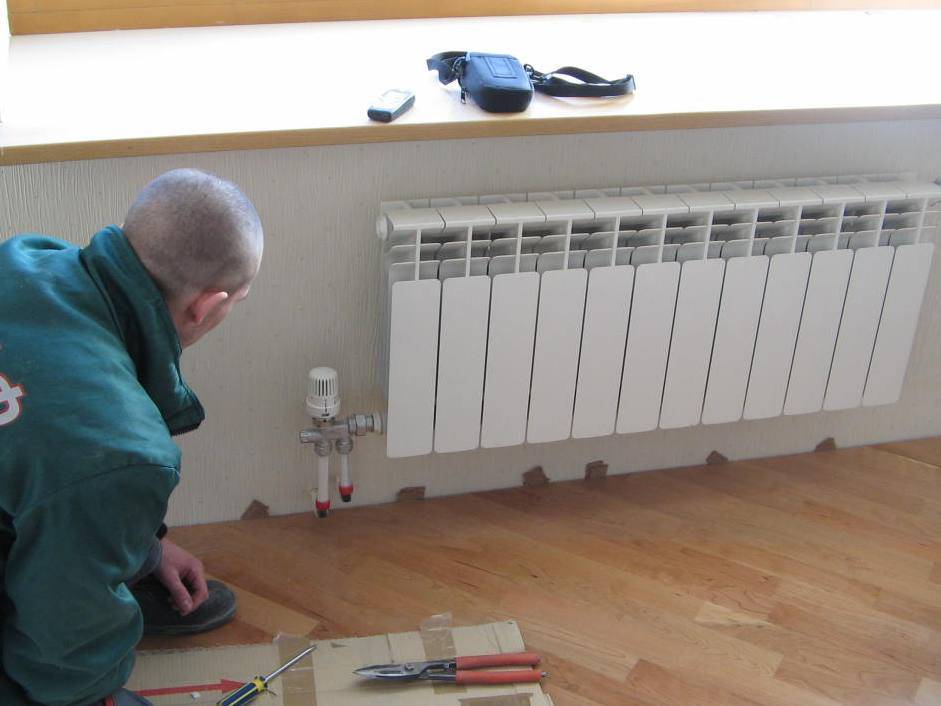
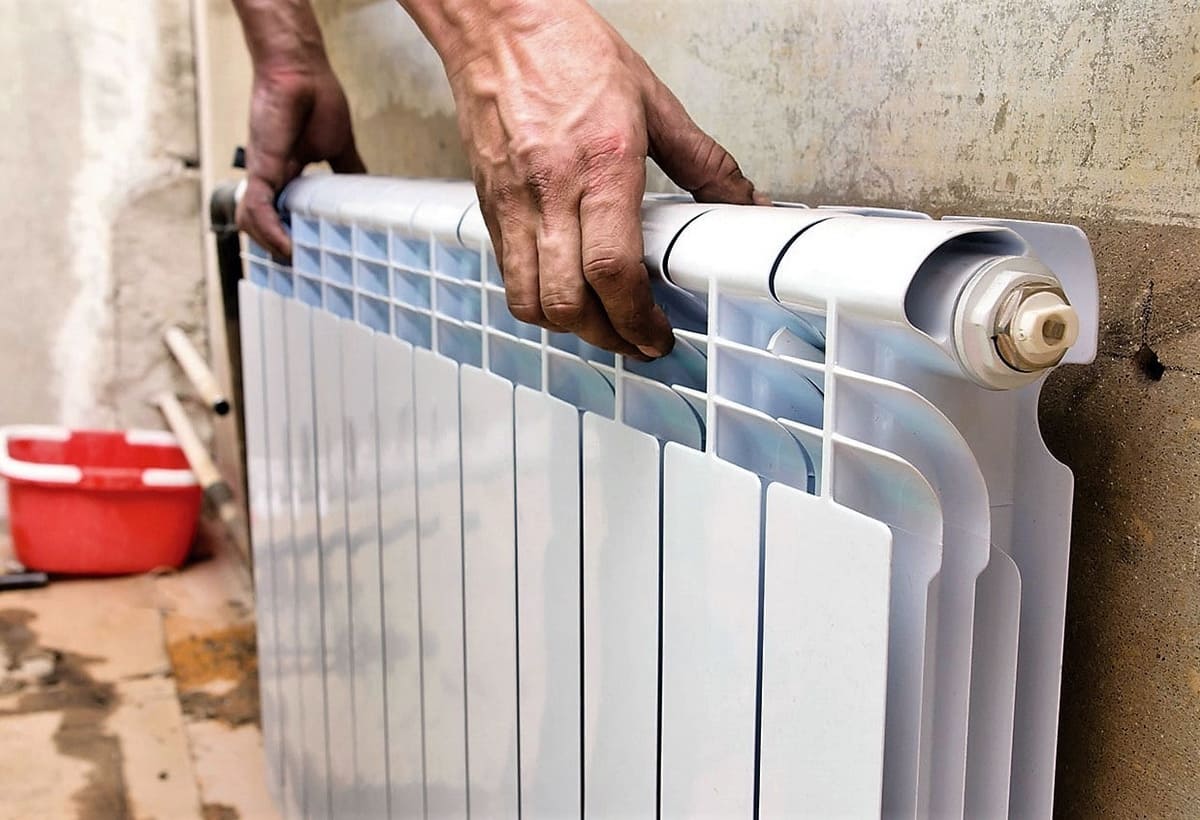
Do-it-yourself installation of cast iron batteries
The process of installation of products is quite easy and requires a small number of tools and simple building skills. Due to the weight of the radiator, it is easier to install with two or three people. The durability of the service of devices and their efficiency depends on the quality of installation of the heating system.
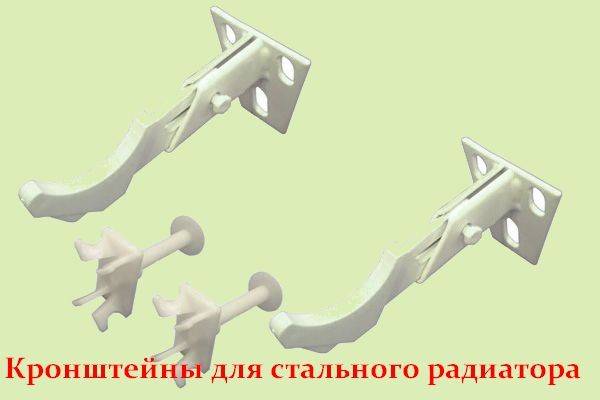
Mounting brackets
In order to install the brackets, you should mark the wall and determine the places where they will be located. Holes about 12 centimeters deep are drilled in reinforced concrete walls, into which dowels or special wooden plugs are inserted.
Photo 2. Options for installing a cast-iron radiator on brackets: a - near a wooden wall, b - brick, c - lightweight construction.
After the holes are prepared, brackets are attached, which are fixed with cement mortar or special plugs.
Important! Before hanging a cast-iron battery on the brackets, check the reliability of the fasteners. In the case when the walls are not designed to install heavy products on them, floor brackets will be the best option.
Fixings will eliminate any load on the walls
In the case when the walls are not designed to install heavy products on them, floor brackets will be the best option. Fasteners will eliminate any load on the walls.
How to install a heating radiator?
In addition to batteries, components are installed in the heating system, which ensure ease of maintenance of radiators and prevent the creation of emergency situations. The standard installation process includes the following steps:
- Installation at the point of the upper manifold, where the supply pipe is connected, a manual or automatic air vent.
- Installation of plugs on all free collectors. In the case when the plugs do not match the diameters of the supplied pipes, the solution is to use special adapters that usually come with radiators.
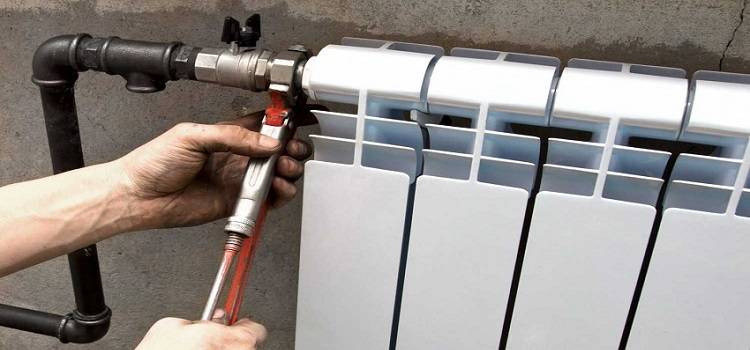
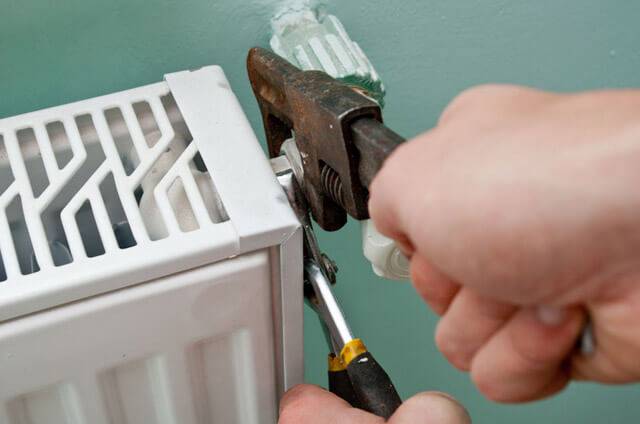
- Installation of control and shutoff valves.Thanks to ball valves installed at the inlet and outlet of the battery, it is possible to dismantle the radiators without stopping the entire system.
- Connecting equipment to the heating system. Cast iron batteries can be connected according to four different schemes. The radiator connection is determined based on the selected fittings and pipes.
Crimping
The final step in the installation of radiators is their crimping. Usually this manipulation is performed using a special device, but in its absence, crimping can be performed independently without additional tools. Filling the battery with water is done very slowly, thereby preventing water hammer.


Careful filling will prevent damage to the valve and the system as a whole
Installing the Radiator Mount
When the radiator is purchased, you can begin to install it, but for this you need to choose the right place where the fasteners will spin.
If the walls are made of drywall, special butterfly dowels are used, if the walls are made of gypsum or slag blocks, then plastic dowels should be used. For brick and concrete walls, metal anchors should be used. It is forbidden to shoot the radiator brackets with a construction pistol.
Note. For drywall walls at the stage of their installation, it is better (necessary) to lay power guides in the drywall construction at the places where radiators are attached.
After selecting the fasteners, markings are made, then holes for the radiator fasteners are drilled, the selected fasteners are hammered in and the radiator suspensions are screwed on.
There is an opinion that radiators should be installed with a slight slope to avoid the formation of air pockets. It is erroneous.The slope will not get rid of traffic jams, but will lead to a violation of the circulation of the coolant and reduce the thermal performance of the system. (SNiP 3.05.01-85 "Internal sanitary systems")
Holes for fasteners should be drilled with the same drill size as the fastener itself, and the fastener must fit snugly into the wall. After the dowel is inserted, it must be planted (hammered to the stop).
All strips (brackets) from the kit must be placed in their places and fixed with bolts, which are also included in the kit. To tighten these bolts, you can use an adjustable wrench and seat them tightly into the wall.
What can be the binding of polypropylene pipes
The piping for a home heating system can be very different. The thing is that the consumer is always trying to reduce the amount of consumables, while trying to equip radiators in all heated rooms.
It should be said right away that these are relics of the past. Unlike expensive metal pipes, polypropylene consumables are much cheaper and easier to install. therefore, saving on the length of the pipeline is not worth it. Choose the type of strapping that will bring the most benefit in your case. The only factors that may affect the choice of type of strapping are the following factors:
- what heating scheme is used (one-pipe system or two-pipe);
- what type of radiator connection you have chosen (diagonal, side or bottom).
As a rule, when using any heating scheme: one-pipe or two-pipe, any type of connection for heating radiators can be used.
according to experts, laying the pipeline must minimize the number of bends. A smooth highway remains resistant to hydrodynamic loads. The pipeline will reduce the number of zones in which air can accumulate.
For tying a single-circuit and double-circuit heating system using polypropylene pipes, there are some peculiarities.
- usually in such a system a serial connection of radiators is used;
- a bypass is always mounted in front of the battery, connecting the supply pipe and the return pipe. During normal operation of the heating system, the bypass is not activated. During preventive maintenance or in case of an emergency, the water supply to the radiator is stopped. The coolant circulates freely through the bypass.
- both parallel and series connection of batteries is used;
- both radiator pipes are connected to different pipes. The upper one is connected to the supply pipe, the lower branch pipe is connected to the return. Usually in two pipe systems, radiators are connected in parallel, so the installation of bypasses is not required.
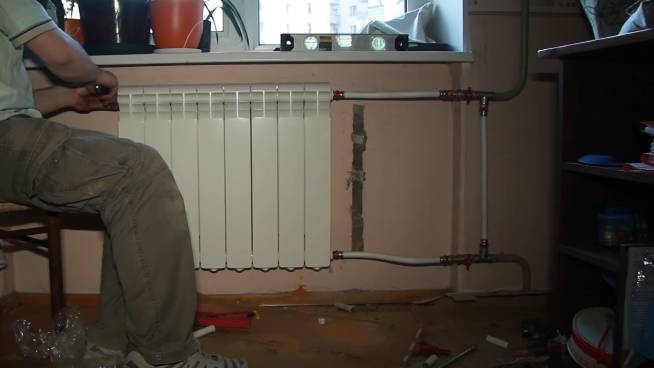
Tying polypropylene pipes with radiators is carried out in two ways: by soldering and using fittings. Installation of radiators and their connection is carried out using a soldering iron and plumbing keys for an American.
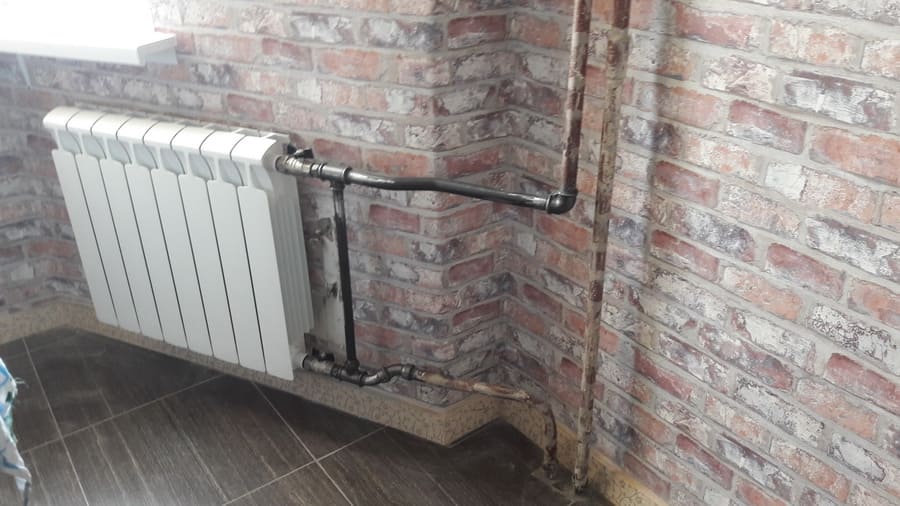
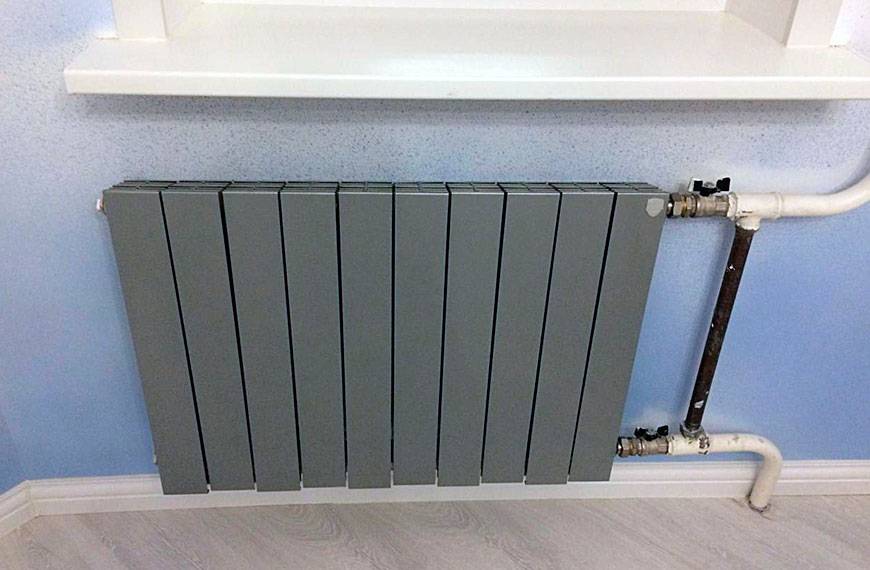
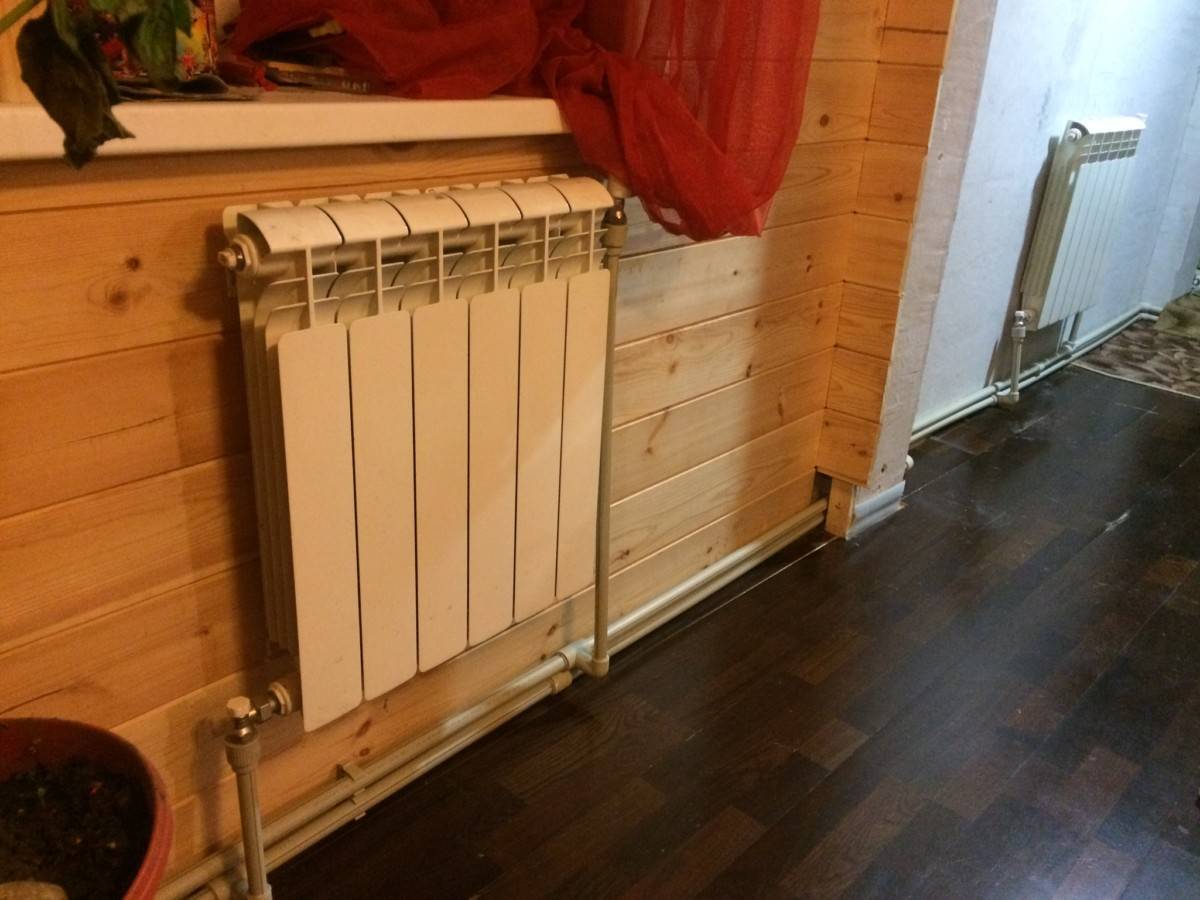
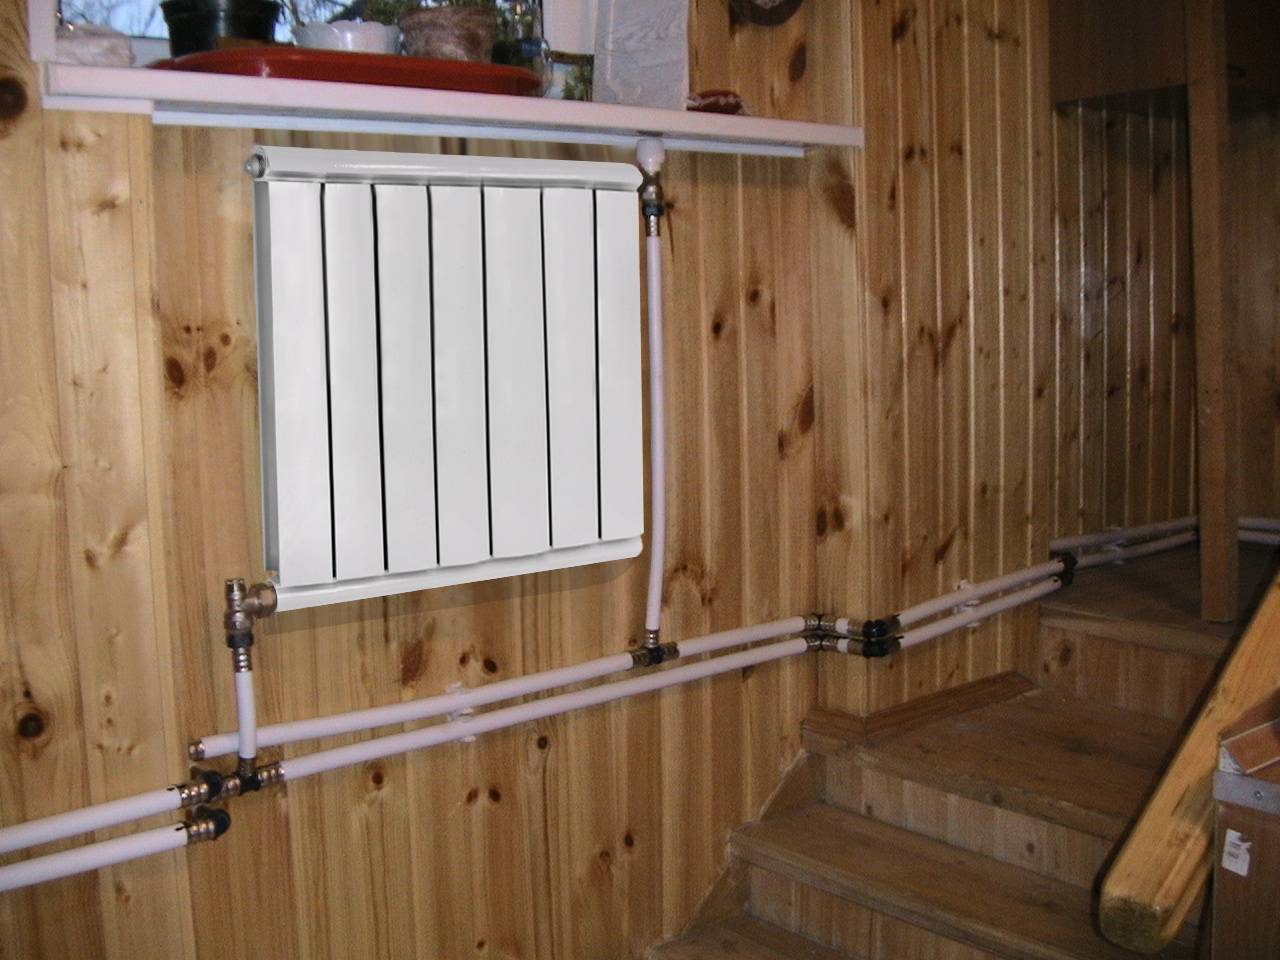
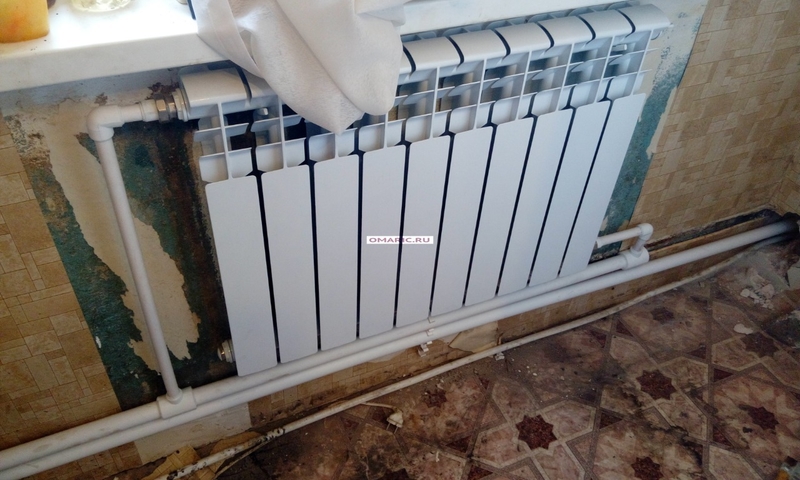
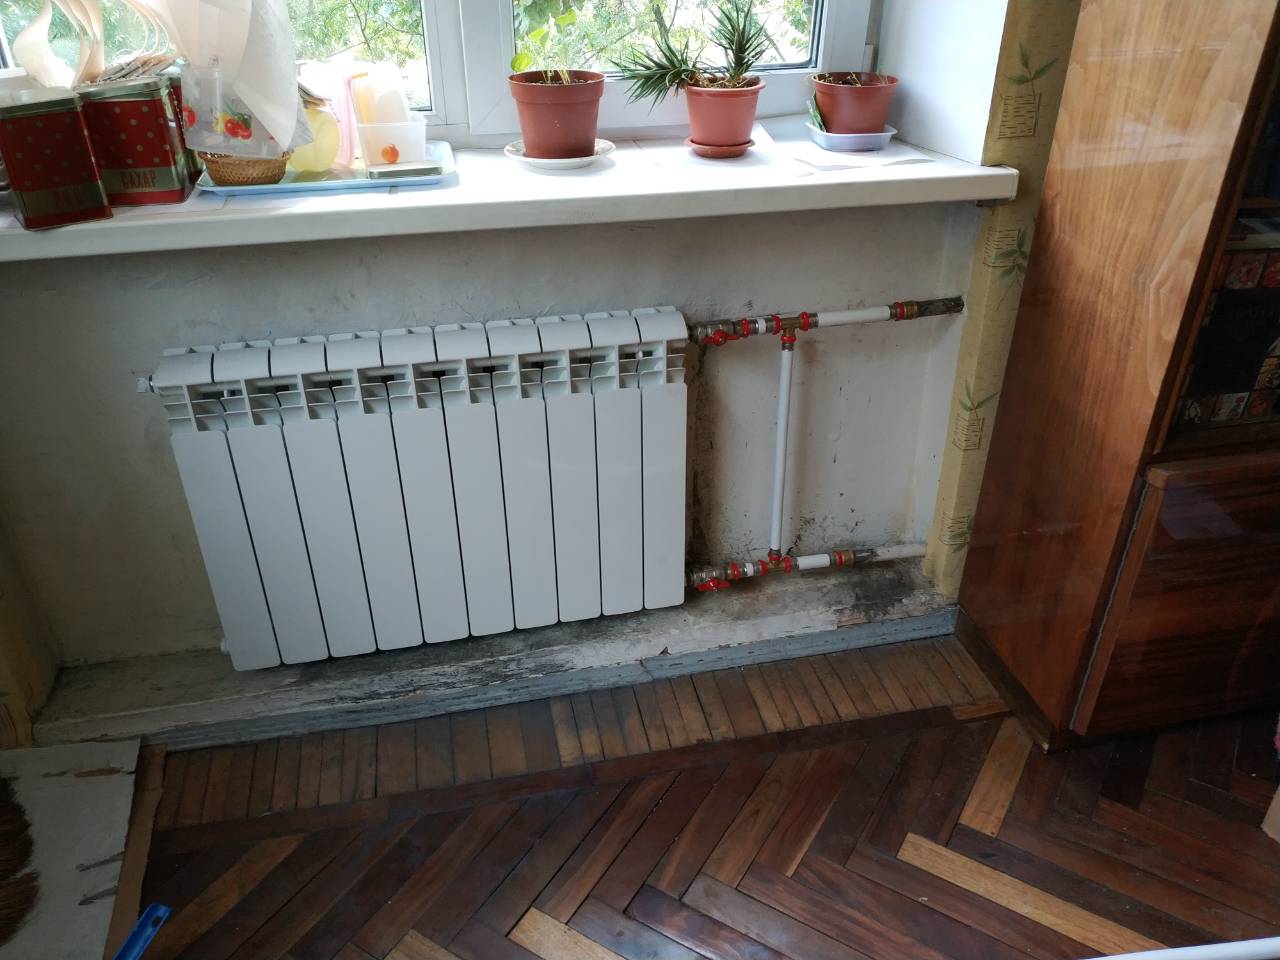
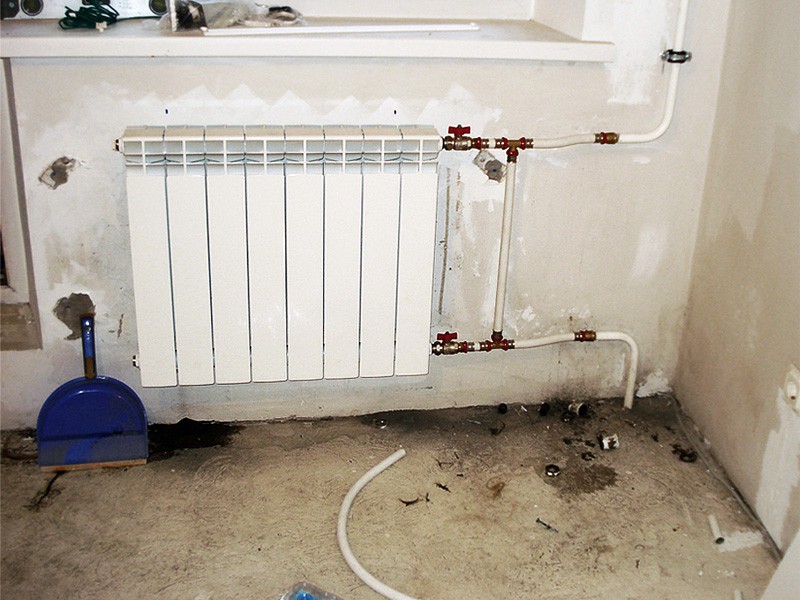
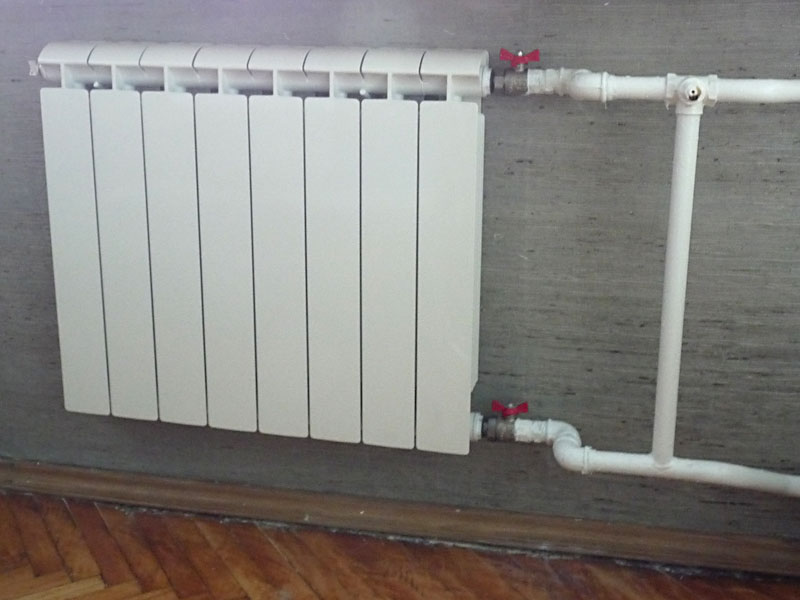
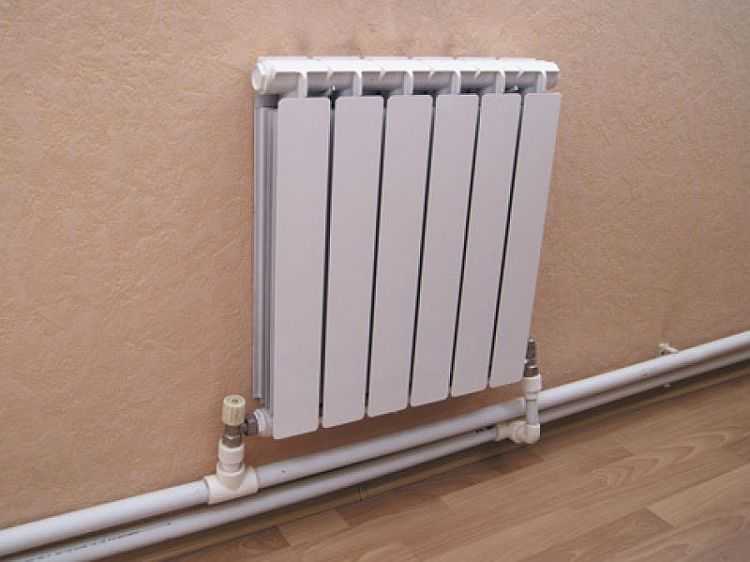
Radiators with bottom connection
You can hide bulky pipes if you make heating with a bottom connection. Of course, standard systems are more familiar to understanding when the coolant enters from above or from the side and exits down. But such a system is rather unaesthetic, and it is difficult to cover it with a screen or somehow ennoble it.
Bottom connection principle
With a lower connection, the main part of the pipes is hidden under the floor covering, sometimes there are difficulties in seasonal inspection or preventive maintenance. But there are also pluses - this is a minimum of complex bends or joints, which reduces the risk of leaks or accidents.
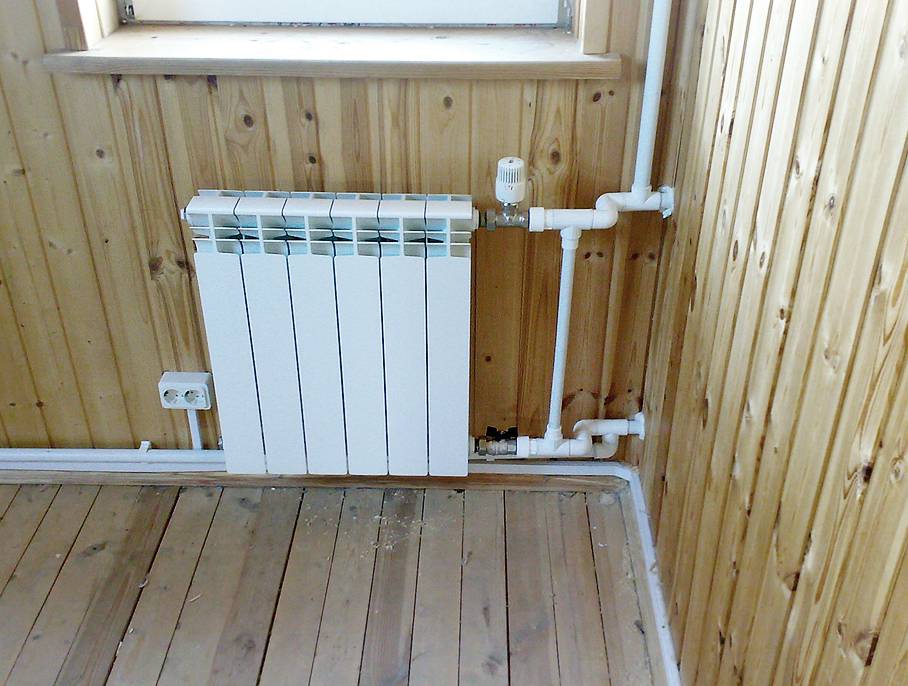
The connection diagram for heating radiators with a lower type is simple - the return and coolant supply pipes are located nearby, in the lower corner of the radiator. It is also allowed to connect pipes from different sides of the radiator. The upper holes (if any) are screwed with a plug.
The radiator installation kit is identical to the standard one:
For bottom connection, it is best to use bimetallic radiators. they are strong, durable, have excellent heat dissipation due to heating, radiation and convection. Even when using the bottom connection, heat loss will not exceed 15 percent. Due to the supply of hot coolant from below, the bottom of the battery heats up and heats up the top by convection.
Selection and installation of radiators
For the bottom connection, bimetallic heating radiators are recommended, they are easy to assemble, install and repair. Radiator sections can be removed, added or replaced if damaged.


When buying, it is better to give preference to domestic manufacturers, it is important to check the integrity of the battery and packaging. Documentation should be understandable and written in Russian. Before installation, you need to make a markup
it is done with a pencil on the wall. In this case, the points where the brackets will be installed are marked. The bottom of the radiator must be at least 7 cm from the floor and 10 cm from the window (if located under the window). Distances are maintained so that the air in the room circulates freely.The distance to the wall should be about 5cm
Before installation, you need to make a markup. it is done with a pencil on the wall. In this case, the points where the brackets will be installed are marked. The bottom of the radiator must be at least 7 cm from the floor and 10 cm from the window (if located under the window). Distances are maintained so that the air in the room circulates freely. The distance to the wall should be about 5 cm.
For more efficient circulation of the coolant, heating radiators are installed with a slight slope. this eliminates the accumulation of air in the heating system.
When connecting, it is important to follow the markings and not confuse the return and supply. If connected incorrectly, the heating radiator can be damaged, and its efficiency will decrease by more than 60 percent. There are the following types of bottom connection:
There are the following types of bottom connection:
- one-way connection - the pipes come out from the corner below and are located side by side, heat loss can be about 20 percent;
- versatile piping - pipes are connected from different sides. such a system has more advantages, since the length of the supply and return lines is less, and circulation can occur from different sides, heat losses are up to 12 percent;
A top-down connection is also used. but in this case it will not be possible to hide all the heating pipes, since the coolant will be supplied in the upper corner, and the output will be from the opposite lower corner. If the heating radiator is closing, then the return line will be brought out from the same side, but from the lower corner. In this case, heat losses are reduced to 2 percent.
If you plan to connect heating radiators with your own hands, it is important to follow the installation and safety techniques. The coolant during installation or repair must be drained, the batteries are cold. If in doubt, it is better to call the master or use the training video tutorial, since with a lower connection it will be difficult to repair the sections
It is better to plan a heating system with bottom heating together with the layout of the house
If in doubt, it is better to call the wizard or use the training video tutorial, since with a lower connection it will be difficult to repair the sections. It is better to plan a heating system with bottom heating together with the layout of the house.
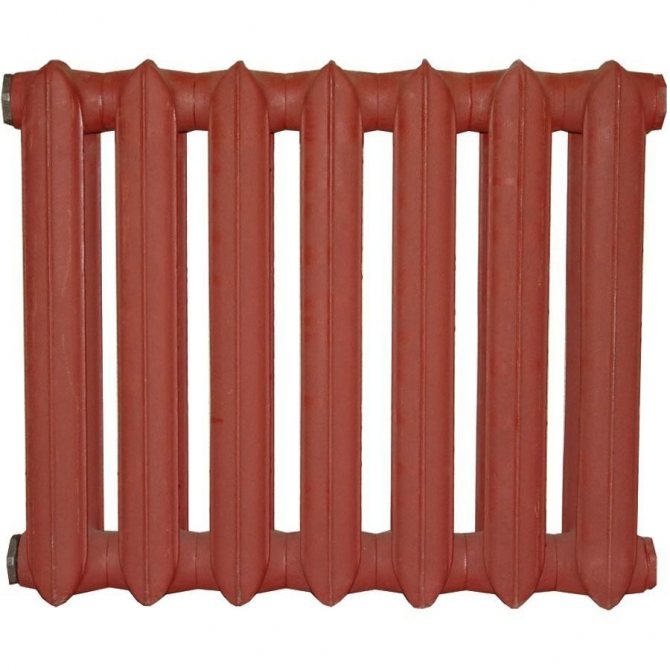
Making a homemade radiator
Let's see how to make a heating battery with your own hands using the example of a sectional radiator. We will heat a large room, so we need a large radiator, three meters wide, consisting of four pipes. For assembly we need:
- Four pieces of pipe three meters long (diameter 100-120 mm);
- Sheet metal for the construction of plugs;
- Ordinary metal water pipe for jumpers;
- Fittings - since the radiator turns out to be large, you need to give it additional rigidity;
- Threaded fittings.
Of the tools you will need a grinder (angle grinder) and a welding machine (gas or electric).
We cut off the plugs, jumpers and pipes of the desired length. Then we cut holes for the jumpers and weld them. The last step is to weld the plugs.
If the pipe was intact, we cut four pieces of three meters from it. We process the edges of the pipes with a grinder so that the trim is smooth.Next, we cut out eight plugs from a piece of sheet metal - we will later insert fittings into two of them. We cut the water pipe into pieces, the length of which should be slightly larger than the diameter of the pipes used (by 5-10 mm). After that, we start welding.
Our task is to connect four large pipes with jumpers. To give additional rigidity, we add jumpers from reinforcement. We place jumpers from the pipe near the ends - here you can retreat by 90-100 mm. Next, we weld our plugs to the end parts. We cut off the excess metal on the plugs with a grinder or welding - as it is more convenient for anyone.
When carrying out welding work, special attention should be paid to the quality of welds - the reliability and strength of the entire radiator depends on this.
Radiator connection diagrams:
1. Side connection;
2. Diagonal connection;
3. Bottom connection.
Next, proceed to the installation of threaded fittings on the side plugs. Here you need to decide how the coolant will flow - based on this, you can choose a diagonal, side or bottom connection scheme. At the last stage, we carefully clean all our connections with a grinder so that the radiator acquires a normal appearance. If necessary, cover the radiator with paint - it is desirable that it be white.
When everything is ready, you can start testing the radiator - for this you need to fill it with water and inspect it for leaks. If possible, pressurized water should be supplied, for example, connect a radiator to the water supply.When the check is completed, you can proceed to install the radiator in the heating system.
Today, heating systems are laid using plastic pipes of small diameter, using circulation pumps to move the coolant. Therefore, it is necessary to ensure high-quality fasteners for the radiator so that it does not break the pipes. It is best to hang it on a few metal pins driven into the wall, or mount it on metal floor supports.


Preparing for installation
The preparation process is no less important than the installation of radiators. So, if you live in a multi-storey building, then you should try to negotiate with your neighbors about the joint replacement of heating pipes. The effect of such a replacement will be more tangible than if you changed pipes only at your place. Also, it is not necessary to explain that this should be done in the summer, and not in the winter. If there is an old system, then it must be dismantled, and only then begin installing a new one. You also need to purchase a minimum of materials and tools.
materials
When installing heating radiators, we recommend that you use polypropylene pipes for heating.
In addition to the radiators themselves, you will need:
- pipes, tees, adapters and everything connected with it;
- conventional valves or Mayevsky taps for airing batteries;
- brackets on which, in fact, the batteries are attached;
- drives;
- stopcocks, you can take the ball version, it will be more reliable.
Tools
The required tools may vary slightly depending on the type of pipes used, but be sure to have:
- keys: gas and adjustable;
- level, ruler, tape measure;
- a set of open-end wrenches;
- screwdriver;
- torque wrench;
- pencil and carnation for marking;
- hammer drill (a drill may not be able to cope with a concrete wall).
Plastic pipes are well suited for the heating system. They are durable, unpretentious and easy to install. True, you will need to find a soldering station to connect them.
Radiator connection diagrams
How well the radiators will heat up depends on how the coolant is supplied to them. There are more and less effective options.
Radiators with bottom connection
All heating radiators have two types of connection - side and bottom. There can be no discrepancies with the lower connection. There are only two pipes - inlet and outlet. Accordingly, on the one hand, a coolant is supplied to the radiator, on the other hand it is removed.
Bottom connection of heating radiators with one-pipe and two-pipe heating systems
Specifically, where to connect the supply, and where the return is written in the installation instructions, which must be available.
Radiators with side connection
With a lateral connection, there are much more options: here the supply and return pipelines can be connected to two pipes, respectively, there are four options.
Option number 1. Diagonal connection
Such a connection of heating radiators is considered the most effective, it is taken as a standard, and this is how manufacturers test their heaters and the data in the passport for thermal power - for such an eyeliner. All other connection types are less efficient at dissipating heat.
Diagonal connection diagram for heating radiators with a two-pipe and one-pipe system
This is because when the batteries are connected diagonally, the hot coolant is supplied to the upper inlet on one side, passes through the entire radiator and exits from the opposite, lower side.
Option number 2. Unilateral
As the name implies, pipelines are connected on one side - supply from above, return - from below. This option is convenient when the riser passes to the side of the heater, which is often the case in apartments, because this type of connection usually prevails. When the coolant is supplied from below, such a scheme is used infrequently - it is not very convenient to arrange pipes.
Lateral connection for two-pipe and one-pipe systems
With this connection of radiators, the heating efficiency is only slightly lower - by 2%. But this is only if there are few sections in the radiators - no more than 10. With a longer battery, its farthest edge will not heat up well or even remain cold. In panel radiators, to solve the problem, flow extensions are installed - tubes that bring the coolant a little further than the middle. The same devices can be installed in aluminum or bimetallic radiators, while improving heat transfer.
Option number 3. Bottom or saddle connection
Of all the options, the saddle connection of heating radiators is the most inefficient. Losses are approximately 12-14%. But this option is the most inconspicuous - the pipes are usually laid on the floor or under it, and this method is the most optimal in terms of aesthetics. And so that the losses do not affect the temperature in the room, you can take a radiator a little more powerful than required.
Saddle connection of heating radiators
In systems with natural circulation, this type of connection should not be done, but if there is a pump, it works well. In some cases, even worse than the side. Just at some speed of movement of the coolant, vortex flows arise, the entire surface heats up, and heat transfer increases. These phenomena have not yet been fully studied, therefore it is not yet possible to predict the behavior of the coolant.
Non-standard situations
An unpleasant situation can happen when, when dismantling cast-iron batteries, the bottom of the cork breaks off and the thread remains inside.
Proceed as follows:
- the collector is warmed up;
- put a chisel to the part in the direction of its twisting and try to turn it with a hammer;
- as soon as the edge of the thread sticks out, it is turned out with pliers.
Often you have to remove old rusty batteries in which the threaded connection is corroded or even perforated.
In this situation, you need to do the following:
- "arm" with a coupling made of brass or cast iron of the desired diameter;
- cut off the thread from the eyeliner, but leave the first five turns;
- drive the thread with a die;
- wind the thread with sanitary flax soaked in paint (on an organic solvent), which dries quickly;
- screw the prepared coupling;
- now the wound thread is screwed into the coupling, and the problem is solved.
Mounting accessories
Installing an aluminum radiator provides for the presence of all the necessary elements of the process.
Pipes
A competent choice of such a constituent element, taking into account all the nuances, will ensure long-term and reliable operation of aluminum space heating sources.
Points to pay attention to:
- The use of copper pipes for aluminum radiators is prohibited. Such a connection can lead to the accumulation of gas and subsequent rupture of the battery.
- For the supply of coolant in the conditions of an individual heating system, pipes made of polypropylene and metal-plastic are used, and for central heating - from metal.
Photo 1. Copper pipe with fittings, this type is undesirable to be connected to aluminum batteries in order to avoid a gas explosion due to its accumulation.


It is unacceptable for aluminum alloy to come into contact with steel or cast iron that has not been treated against corrosion.
Regardless of the type of pipes used, when installing aluminum radiators, it is imperative to use automatic valves to remove excess air masses.
Accessories
Additionally, aluminum heating appliances are supplied with:
- plugs for sections located along the edges;
- brackets for fixing the radiator. Mounts are floor and wall;
- seal gaskets to eliminate the possibility of leakage;
- air vent valves.
Photo 2. Wall brackets for aluminum radiators Kermi 500 mm, needed for secure fixing.
And also shutoff valves are attached to aluminum radiators. Its installation at the inlet and outlet of the battery will allow you to control the temperature in the room and isolate the operation of the heating device when it becomes necessary to replace it.
Advantages and disadvantages of one-pipe and two-pipe heating systems
The main difference between the two heating schemes is that the two-pipe connection system is more efficient in operation due to the parallel arrangement of two pipes, one of which supplies the heated coolant to the radiator, and the other drains the cooled liquid.
The scheme of a single-pipe system is a series-type wiring, in connection with which the first connected radiator receives the maximum amount of thermal energy, and each subsequent one heats up less and less.
However, efficiency is an important, but not the only criterion that you need to rely on when deciding to choose one or another scheme. Consider all the pros and cons of both options.
Single pipe heating system
- ease of design and installation;
- savings in materials due to the installation of only one line;
- natural circulation of the coolant, possible due to high pressure.
- complex calculation of thermal and hydraulic parameters of the network;
- the difficulty of eliminating errors made in the design;
- all elements of the network are interdependent; if one section of the network fails, the entire circuit stops working;
- the number of radiators on one riser is limited;
- regulation of the flow of coolant into a separate battery is not possible;
- high coefficient of heat loss.
Two-pipe heating system
- the ability to install a thermostat on each radiator;
- independence of the network elements;
- the possibility of inserting additional batteries into an already assembled line;
- ease of elimination of errors made at the design stage;
- to increase the volume of coolant in heating devices, it is not necessary to add additional sections;
- no restrictions on the length of the contour along the length;
- the coolant with the desired temperature is supplied throughout the entire ring of the pipeline, regardless of the heating parameters.
- complex connection scheme compared to single-pipe;
- higher consumption of materials;
- installation requires a lot of time and labor.
Thus, a two-pipe heating system is more preferable in all respects. Why do the owners of apartments and houses refuse it in favor of a one-pipe scheme? Most likely, this is due to the high cost of the installation and the high consumption of materials necessary for laying two highways at once. However, one should take into account the fact that a two-pipe system involves the use of pipes of a smaller diameter, which are cheaper, so the total cost of arranging a two-pipe option will not be much more than a single-pipe one.
The owners of apartments in new buildings are lucky: in new houses, in contrast to residential buildings of Soviet development, a more efficient two-pipe heating system is increasingly being used.
Strapping options
Tying is the procedure for connecting the battery to the heating pipes. Today, many varieties are produced, and the location of the collectors can be both from below and from the side. The most common side connection.

With a bottom connection, there are usually no alternatives. The manufacturer strictly indicates which collector plays the role of an input, which one plays the role of an output. If you mix up the connection order, the battery simply will not heat up.

There are several options for side connection. One-way - one of the most common, in most apartments the batteries are connected that way. Two collectors are used on one side, the upper one is for the inlet of the coolant, the lower one is for the outlet.It can be implemented both with a single-pipe and with a two-pipe scheme.
For a single-pipe circuit, two tees, two spurs and two shut-off ball valves will be needed. For a two-pipe scheme, only ball valves are needed, since there is no need to build a bypass jumper. All threads are sealed with fum tape or a layer of winding with investment paste. If you have welding skills, a bypass can be built without spurs and tees.
Diagonal strapping means connecting the input on one side from the top, and the output on the other side from the bottom. It is the most efficient in terms of the efficiency of the use of thermal energy. But it can be difficult to make it if the coolant is supplied to the apartment vertically according to a single-pipe scheme. Bypass is also needed here, as in the previous scheme.

With saddle connection both input and output are placed at the bottom. It is not necessary to build a bypass with a single-pipe scheme.
In the event of an accident, the line is blocked by taps and a piece of pipe of the required length is screwed between them, through which the flow of the coolant is restored. But it is still better to build a bypass.
Placement of heating devices
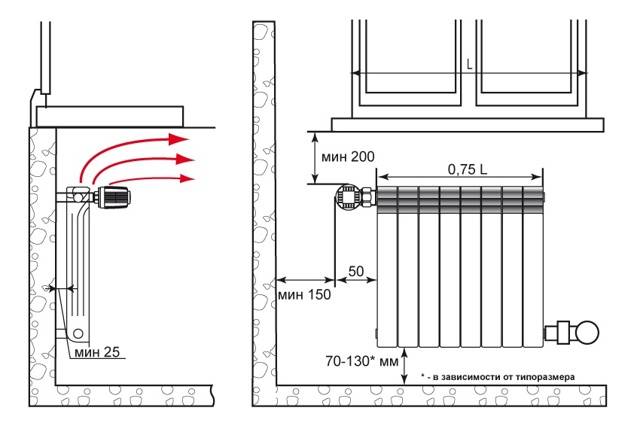
It is of great importance not only how to connect the heating radiators to each other, but also their correct location in relation to building structures. Traditionally, heating devices are installed along the walls of the premises and locally under the windows in order to reduce the penetration of cold air flows in the most vulnerable place.
There is a clear instruction for this in the SNiP for the installation of thermal equipment:
- The gap between the floor and the bottom of the battery should not be less than 120 mm. With a decrease in the distance from the device to the floor, the distribution of the heat flux will be uneven;
- The distance from the rear surface to the wall on which the radiator is attached must be from 30 to 50 mm, otherwise its heat transfer will be disturbed;
- The gap from the upper edge of the heater to the window sill is maintained within 100-120 mm (not less). Otherwise, the movement of thermal masses may be difficult, which will weaken the heating of the room.
Bimetal heating devices
To understand how to connect bimetallic radiators to each other, you need to know that almost all of them are suitable for any type of connection:
- They have four points of possible connection - two upper and two lower;
- Equipped with plugs and a Mayevsky tap, through which you can bleed the air collected in the heating system;
The diagonal connection is considered the most effective for bimetallic batteries, especially when it comes to a large number of sections in the device. Although very wide batteries, equipped with ten or more sections, are undesirable.


Advice! It is better to consider the question of how to properly connect two 7-8 section heating radiators instead of one device of 14 or 16 sections. It will be much easier to install and more convenient to maintain.
Another question - how to connect sections of a bimetallic radiator can arise when regrouping sections of a heater in various situations:
The place where you plan to install the heater is also important.
- In the process of creating new heating networks;
- If it is necessary to replace a failed radiator with a new one - bimetallic;
- In case of underheating, you can increase the battery by attaching additional sections.
aluminum batteries
Interesting! By and large, it should be noted that a diagonal connection is an excellent option for any type of battery. Do not know how to connect aluminum radiators to each other. connect diagonally, you can't go wrong!
For closed-type heating networks in private houses, it is advisable to install aluminum batteries, since it is easier to ensure proper water treatment before filling the system. And their cost is much lower than that of bimetallic devices.
Of course, over time, moving along the radiators, the coolant cools down.
Of course, you will have to try before you connect the sections of the aluminum radiator for rearrangement.
Advice! Do not rush to remove the factory packaging (film) from the installed heaters until the finishing work in the room is completed. This will protect the radiator coating from damage and contamination.
The work process itself does not take much time, you do not need any special skill or expensive equipment, you can purchase all the necessary tools at any hardware store. And do not forget, the connection will serve you for a long time and without hassle only if you used high-quality materials in your work and followed all the rules for installing the heating system.
We are talking about exactly what is shown in this picture.
In the presented video in this article you will find additional information on this topic.