- Installing a faucet on a mixer
- Checking the correct connection
- How to connect the washing machine to the water supply?
- Installation wizard recommendations
- Tip # 1 - prepare the conditions for installation
- Tip # 2 - choose the optimal room
- Water connection to the machine
- The issue of power supply
- Tip #4 - consider external factors
- Quality flooring and flooring
- Ambient temperature
- Get ready for the process
- Choose a prominent location for the crane
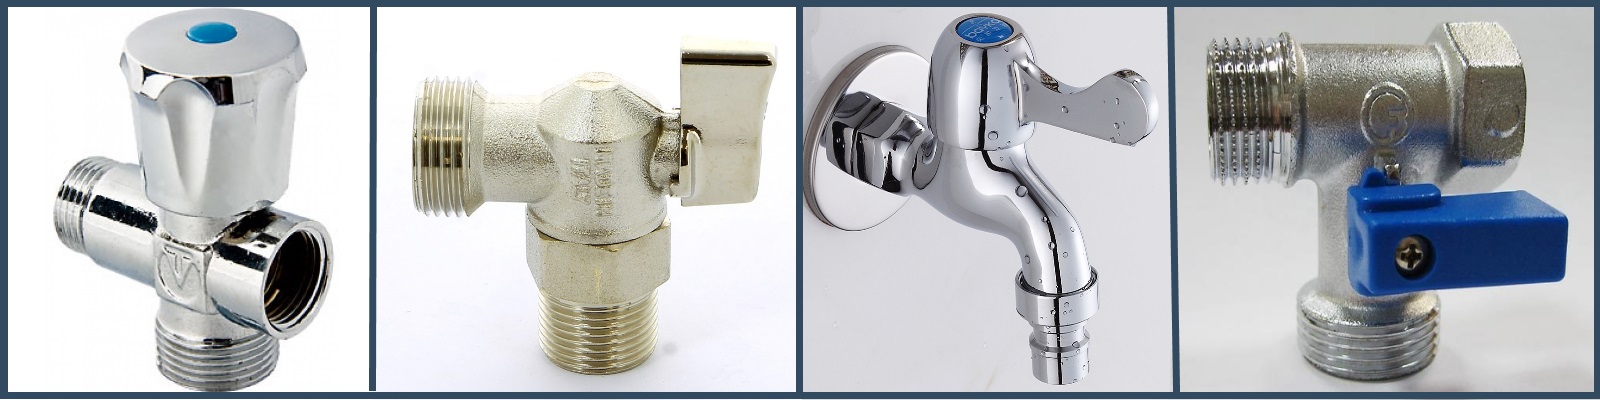
- Types of stopcocks
- Filter for plumbing system
- Which hose is best?
- Water connection
- From steel pipes
- From polypropylene and metal-plastic pipes
- Materials and tools for installation
- Stage # 3 - leveling the washing machine
- Connecting the water supply hose
- Leveling with feet and level
- Washing machine installation
- Trial run
- Replacing the inlet hose
- Insertion into the water supply
- Steel pipe
- Metal-plastic pipe
- Polypropylene pipe
- Do-it-yourself connection of the washing machine to the water supply
- Hose attachment.
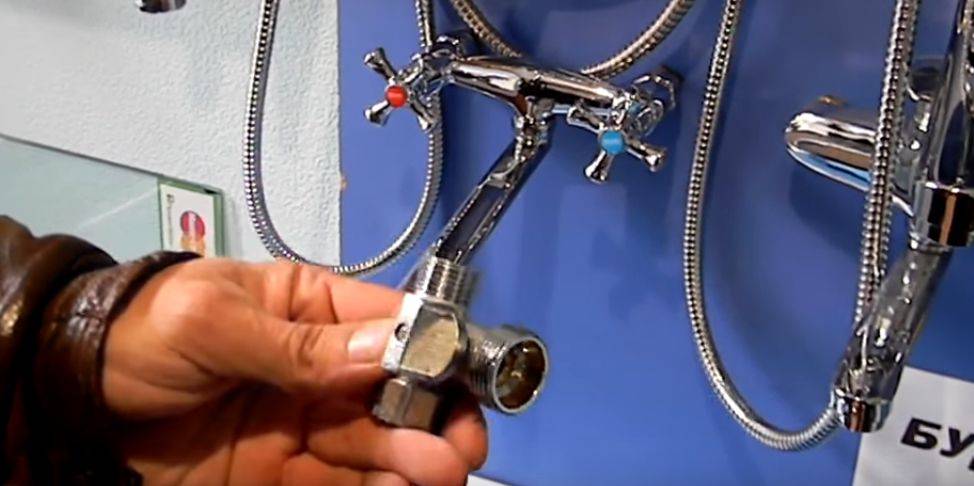
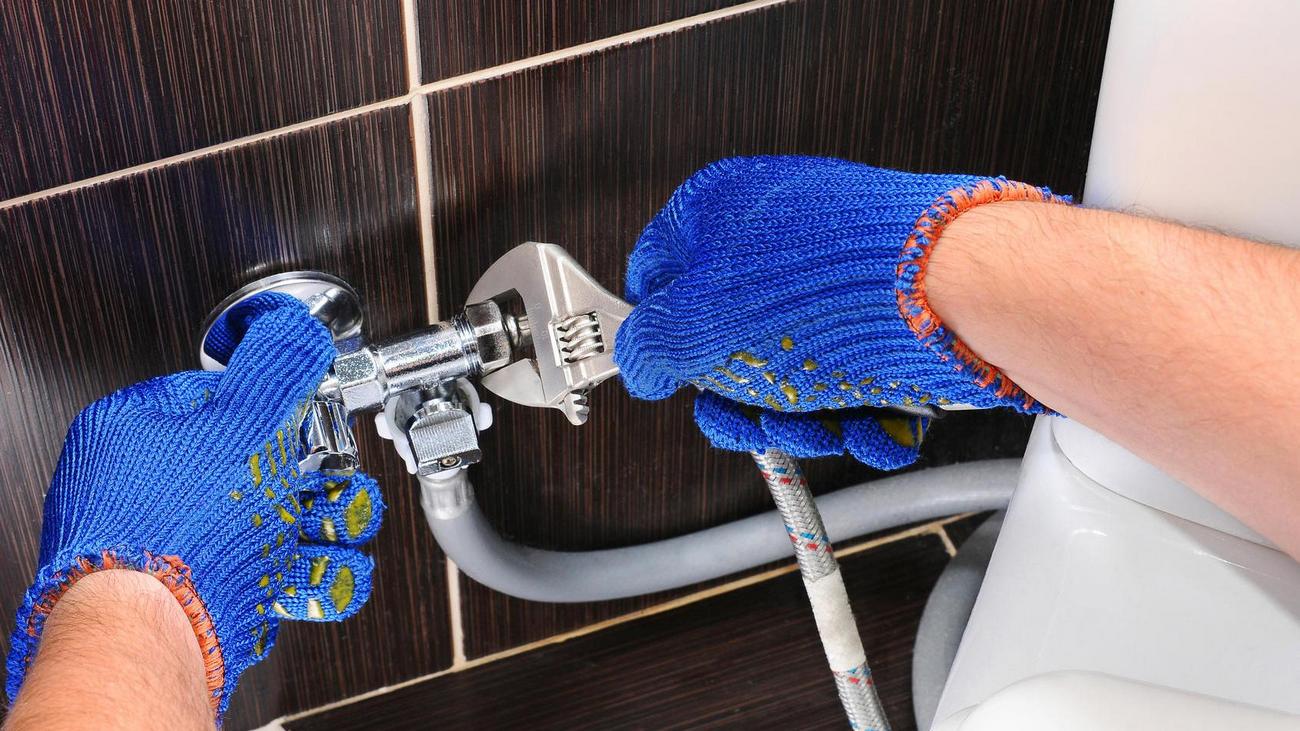
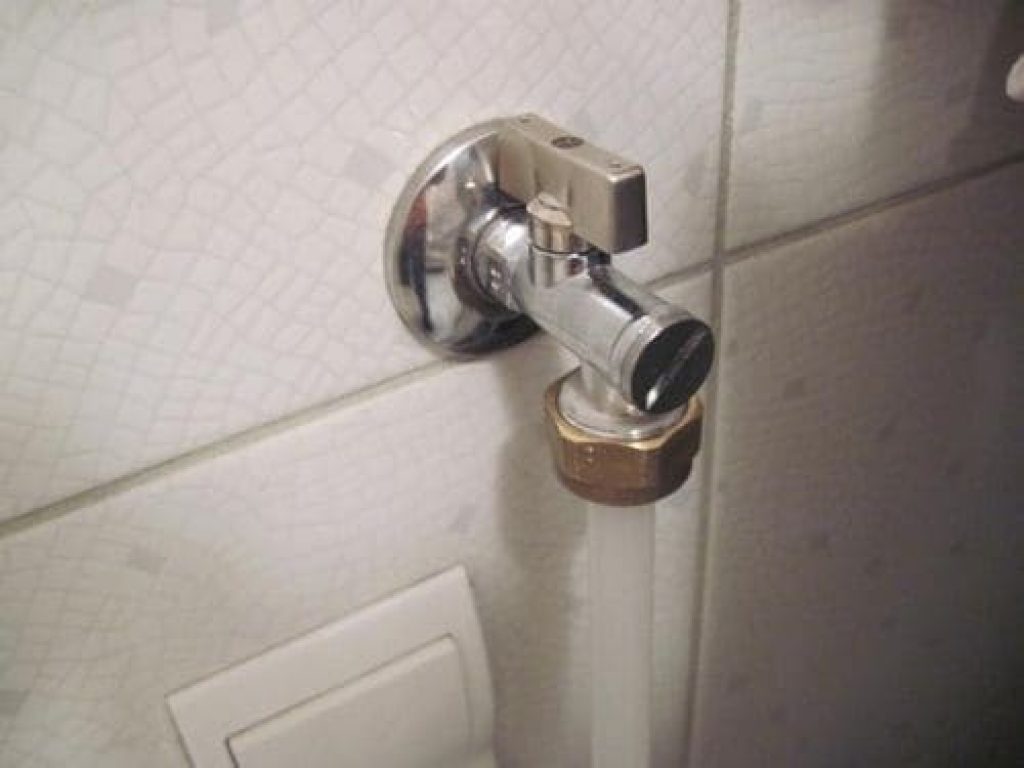
Installing a faucet on a mixer
The attitude of professional plumbers to the idea of installing a tap to connect the washing machine to the water supply to the mixer can be called ambiguous.This design does not look very aesthetically pleasing, since the filling tap of the machine is difficult to place beautifully in such a situation. In addition, usually the position of the mixer changes, it moves forward, it may no longer be as convenient to use as before. Finally, there are additional loads for which the mixer was not designed, its service life will be reduced.
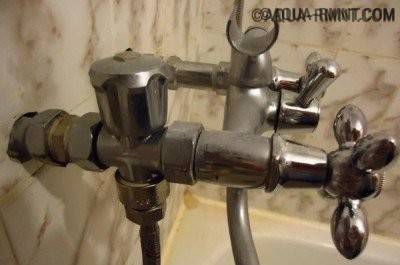
Installing a washing machine faucet on a faucet is a relatively inexpensive and simple solution, but it creates additional stress on plumbing equipment and is not recommended for permanent use.
However, such a solution is quite possible when a temporary connection of the washing machine is necessary. Of course, there is nothing more permanent than temporary solutions, but the owners of the equipment must consider the risks that arise for their plumbing.
If the tap is installed in front of the old Soviet-era mixer, which is mounted directly on the pipes, it makes sense to install a new mixer. This will facilitate installation and increase the reliability of the entire structure. Otherwise, you will simply have to put a mortise clamp on the pipe, which is more expensive and more difficult to install than a conventional faucet.
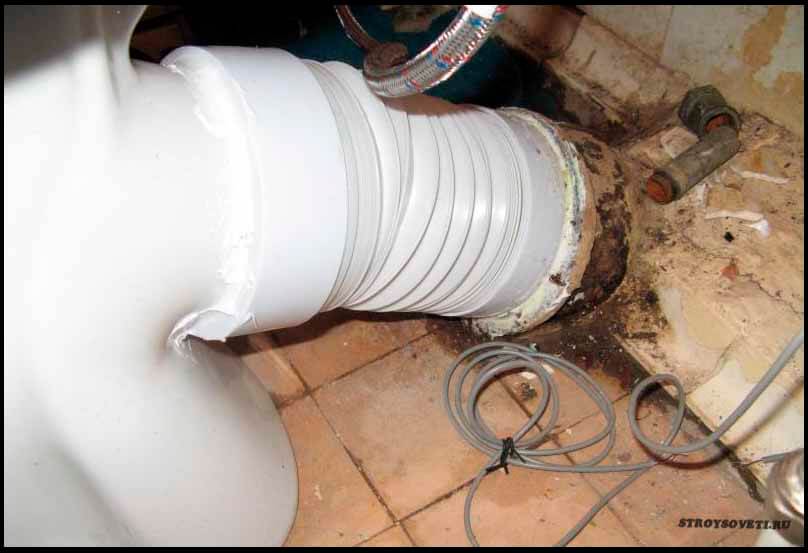
Sometimes it happens that the ends of the pipes from time to time were damaged by corrosion and became uneven. There are two ways to fix the problem. The easiest way is to file the ends to make them straight again. The hose gasket can then be pressed securely against the pipe. Another way is to put an extension cord. It will hide uneven ends, and the hose with gasket will be fixed on a new, undamaged surface.
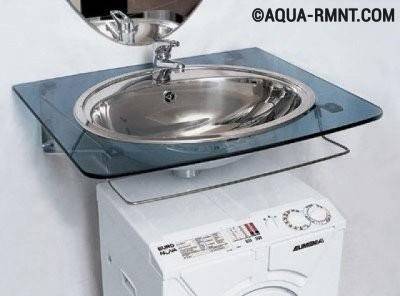
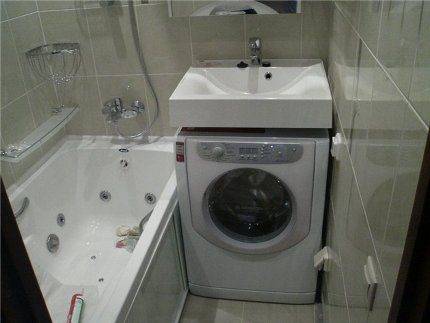
Installing a washing machine under the sink saves space in a small bathroom, but connecting the device to a faucet can spoil its appearance
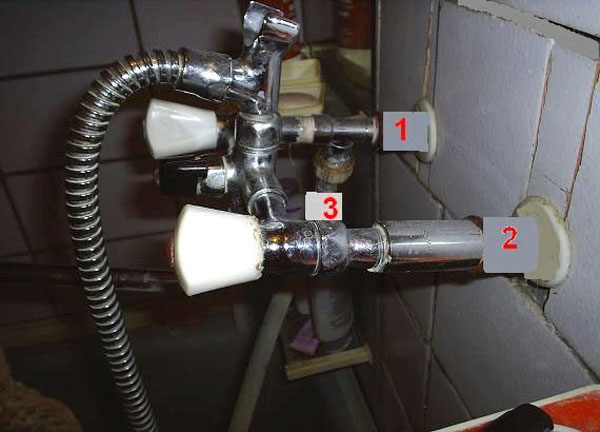
Some craftsmen, as an experiment, install a through tap not on the cold water pipe in front of the mixer tap, but after the taps and in front of the spout from which warm water flows. This is done so that already heated water enters the washing machine, which allows less energy to be spent on heating. The solution is non-trivial, but technically not entirely correct.
When the crane is turned on with such an arrangement, a mixture will necessarily occur, i.e. the flow of cold water into the hot water pipe. As a result, the quality of hot water supply to the neighboring apartment may deteriorate. The problem could be solved by installing non-return valves in front of the mixer, but then during washing (i.e. for several hours) it will not be possible to open the mixer taps.
If an Aqua-Stop type system is installed on the washing machine (it may be called differently by different manufacturers), then you can completely refuse to install a tap. On such models, the end of the inlet hose is equipped with special solenoid valves that are controlled by the machine and connected to it with special wires. In this case, the control system itself will block the flow of water if necessary, and also ensure unhindered water intake. However, there is no such technique that would not break. if possible, you should still consider installing a crane even for such machines.
Checking the correct connection
Before turning on the washing machine for a full wash, you need to perform a test run to make sure that the connection is made correctly.
The test begins with a set of water - the machine must fill the tank for a certain time indicated in the technical passport. In this case, it is necessary to monitor not only the rate of water intake, but also the tightness of all connections and hoses. Leaks that occur should be repaired immediately.
The collected water should be heated to the set temperature in 5-7 minutes. During the operation of the unit, extraneous noise is unacceptable. If the machine knocks or makes a lot of noise, you need to stop it and check the connection again. At the last stage, the spin and drain are checked.
 After checking the connection of the washing machine, you can load laundry into the drum and start washing
So, you can connect a washing machine without calling a wizard if you use the instruction manual and the recommendations outlined in our article. Be careful and careful, and you will succeed!
How to connect the washing machine to the water supply?
As for connecting the washing machine to cold water, below will be presented step-by-step instructions with which you can connect yourself:
Scheme of connecting the inlet hose of the washing machine through a tee to the water supply
- First you need to choose a place to connect. Of course, the best place will be the area where the connection of the metal-plastic pipe with the flexible hose of the mixer is marked. In principle, it is also possible to connect to a shower tap;
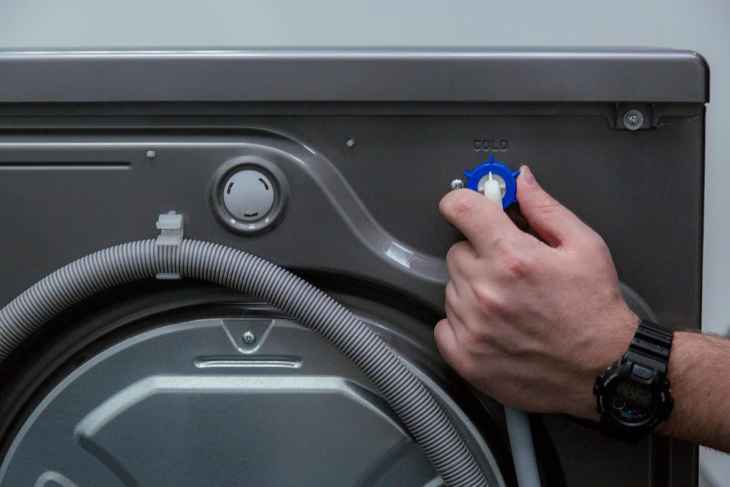
- then unscrew the flexible hose;
- then we wind the fumlent on the thread of the tee and, directly, install the tee itself;
- also, a fumlent is wound on the remaining two threads and flexible hoses from a washing machine and a washbasin faucet are connected;
- Finally, you need to tighten all threaded connections with a wrench.
Connecting the washing machine to the plumbing system
It is worth noting that it is imperative to check the presence of o-rings at both ends of the inlet hose, since it is they who prevent the flow of water at the joints.
Another option for connecting the washing machine hose to the water supply
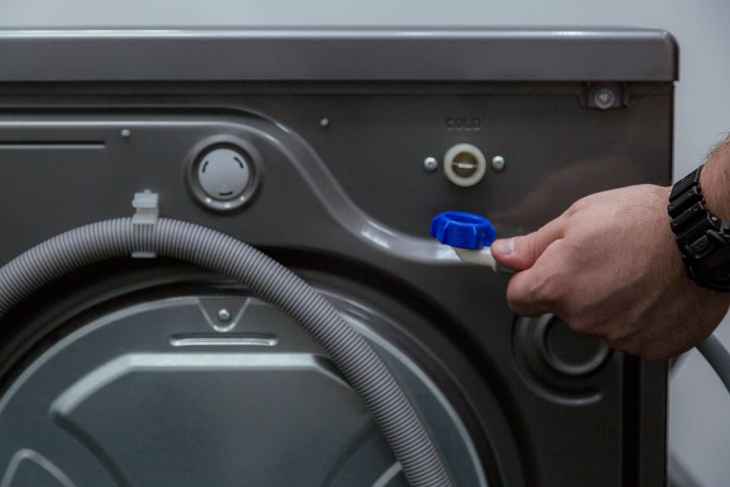
There is another option for connecting the machine to the water supply, by connecting the inlet (inlet) hose to the drain tap in the bathroom or sink.
If you decide to use this method, then you will need a longer inlet hose. One end of the hose in this case is screwed to the tap after the gander is disconnected. People who choose to connect this system claim that the process itself takes a little over a minute.
At the same time, they are completely sure that they avoid water leaks during the downtime of the machine, because the connection of the supply hose was not carried out permanently.
Special attention deserves the moment that today many modern automatic units are equipped with a special system that blocks the water supply to the disconnected machine.
Such equipment is equipped with an inlet hose, which has a block of electromagnetic valves at the end. These valves are connected by wires to the machine, which, in fact, carry out control.
If desired, you can buy a special inlet hose with automatic leakage protection
The whole system is inside a flexible casing.That is, when the machine is turned off, the valve automatically shuts off the flow of water into the device.


This is very convenient and reliable, because, for example, when the light is turned off, you will be sure that when the machine is turned off, it will not continue to pump cold water into itself from the water supply.
As you can see, connecting the washing machine to the sewer and water supply is quite feasible on your own. The main thing is to follow the established rules and follow the instructions that come with the equipment.
A properly connected washing machine will serve you for a long time and faithfully.
If suddenly you doubt something or are not sure about the correctness of your actions, then you can always seek help from specialists. Of course, a specialist will cope with the installation of the device much better and faster, but he will have to pay for this.
The equipment will work smoothly and for a long time only if all the necessary installation measures are carried out as expected and in accordance with the standards.
It is worth saying that if you purchased a dishwasher, then its installation is carried out according to the same principle. All installation activities are identical to those when installing a washing machine.
Naturally, in this case, it is also necessary to first read the instructions for the equipment, which must necessarily go to it when selling.
Installation wizard recommendations
It often happens that the equipment installed independently or by the master begins to vibrate during the spin cycle. This indicates that the installation was done incorrectly.Therefore, even before buying, you need to decide on a place for the car, read the recommendations of installation specialists.
Professional installation tips washing machine, as well as step-by-step instructions to help you install and connection by all means.
Tip # 1 - prepare the conditions for installation
When choosing the overall dimensions, type of construction and technical characteristics of the model, they are guided not by their own wishes, but by the possibilities of the room in which it will stand.
In a spacious bathroom, as a rule, there are no problems with installing a washing machine. In order to save money, it is placed as close as possible to the outlet, plumbing and sewerage.
The necessary conditions for the operation of the washing machine include the close location of the outlet and water. This will help avoid lengthening of electrical cables and hoses.
Pay attention to ease of use, as well as the aesthetic component. Accommodation problems most often occur in small apartments.
Tip # 2 - choose the optimal room
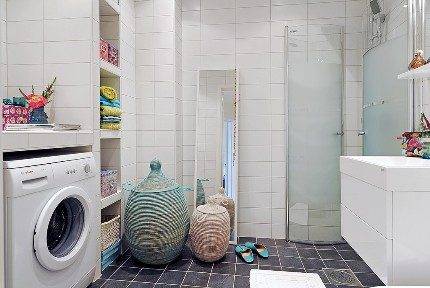
Most of the users, when choosing a place, choose a bathroom as the most suitable in terms of logic. After all, it is here that the water pipes and the sewer drain are located. In addition, the washing process will be hidden from view.
The washing machine can also be placed in a small bathroom, having previously decided on the size and location. In this case, to save space, the machine was installed under the sink.
When choosing a place for a typewriter, pay attention to the following points:
- the ability of the floor to withstand vibrations;
- the possibility of laying communications over remote distances;
- during measurements, it is necessary to take into account irregularities on the walls;
- the space for installing the machine must be at least 1 cm larger than its nominal dimensions.
If there is little space, and the dimensions of the machine are large, you should think about placing the unit in the kitchen or in the hallway.
Tip #3 - The Importance of a Proper Connection
The question of the correct connection of the washing machine to communications should be taken very carefully. Next, we will consider this process in more detail.
Water connection to the machine
Machine wash, like any other, is impossible without water. The plumbing must meet two basic requirements: sufficient pressure in the pipes and clean water.
If they are not met, install the pump to increase pressureand the water is filtered. A tap is built into the pipe that supplies water to the machine to shut it off. Thus, the likelihood of leakage becomes minimal.
The issue of power supply
The washing machine is a powerful machine. Residents of old apartments in which the wiring has not changed are recommended to run a separate cable, since the wires and sockets installed many years ago are not suitable for connecting modern appliances. The cross section of the cable must correspond to the expected load.
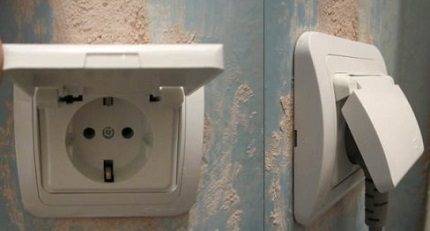
The socket for connecting the washer is installed with grounding. If we are talking about a room with high humidity, for example, a bathroom, then it is advisable to choose models with a protective cover
We have analyzed in detail the installation and connection of an outlet with grounding in this material.
Tip #4 - consider external factors
Ambient temperature and type of flooring should also be taken into account when installing the washing machine
Quality flooring and flooring
The requirements for floor quality are high.It must be strictly horizontal, firm and even.


The floor covering will have to withstand the vibrations created by the rotating drum. If there are doubts about the quality, it is necessary to strengthen it at the installation site of the machine.
Ambient temperature
In a heated apartment or house, appliances are warm. With a long shutdown of heating, which is often observed in country houses and in technical rooms, the equipment cannot be left.
The water remaining inside the machine after washing will definitely freeze. This will rupture the hose or even the pump and require repair/replacement.
Get ready for the process
The owner of the machine needs to know the peculiarity of the procedure for installing the unit to the water supply.
After all, a breakdown of a special crane may occur, which will later need to be replaced, or if the machine needs to be moved to another place in the house. Even a beginner in this matter can cope with the task quite well if he remembers a list of important points.
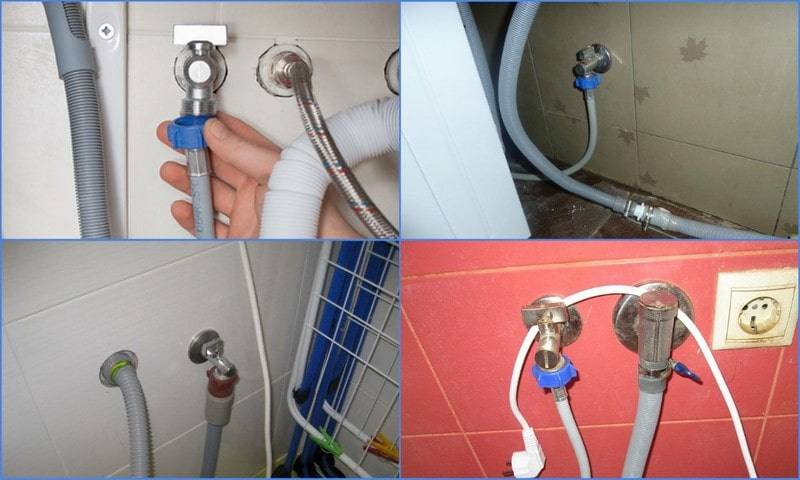
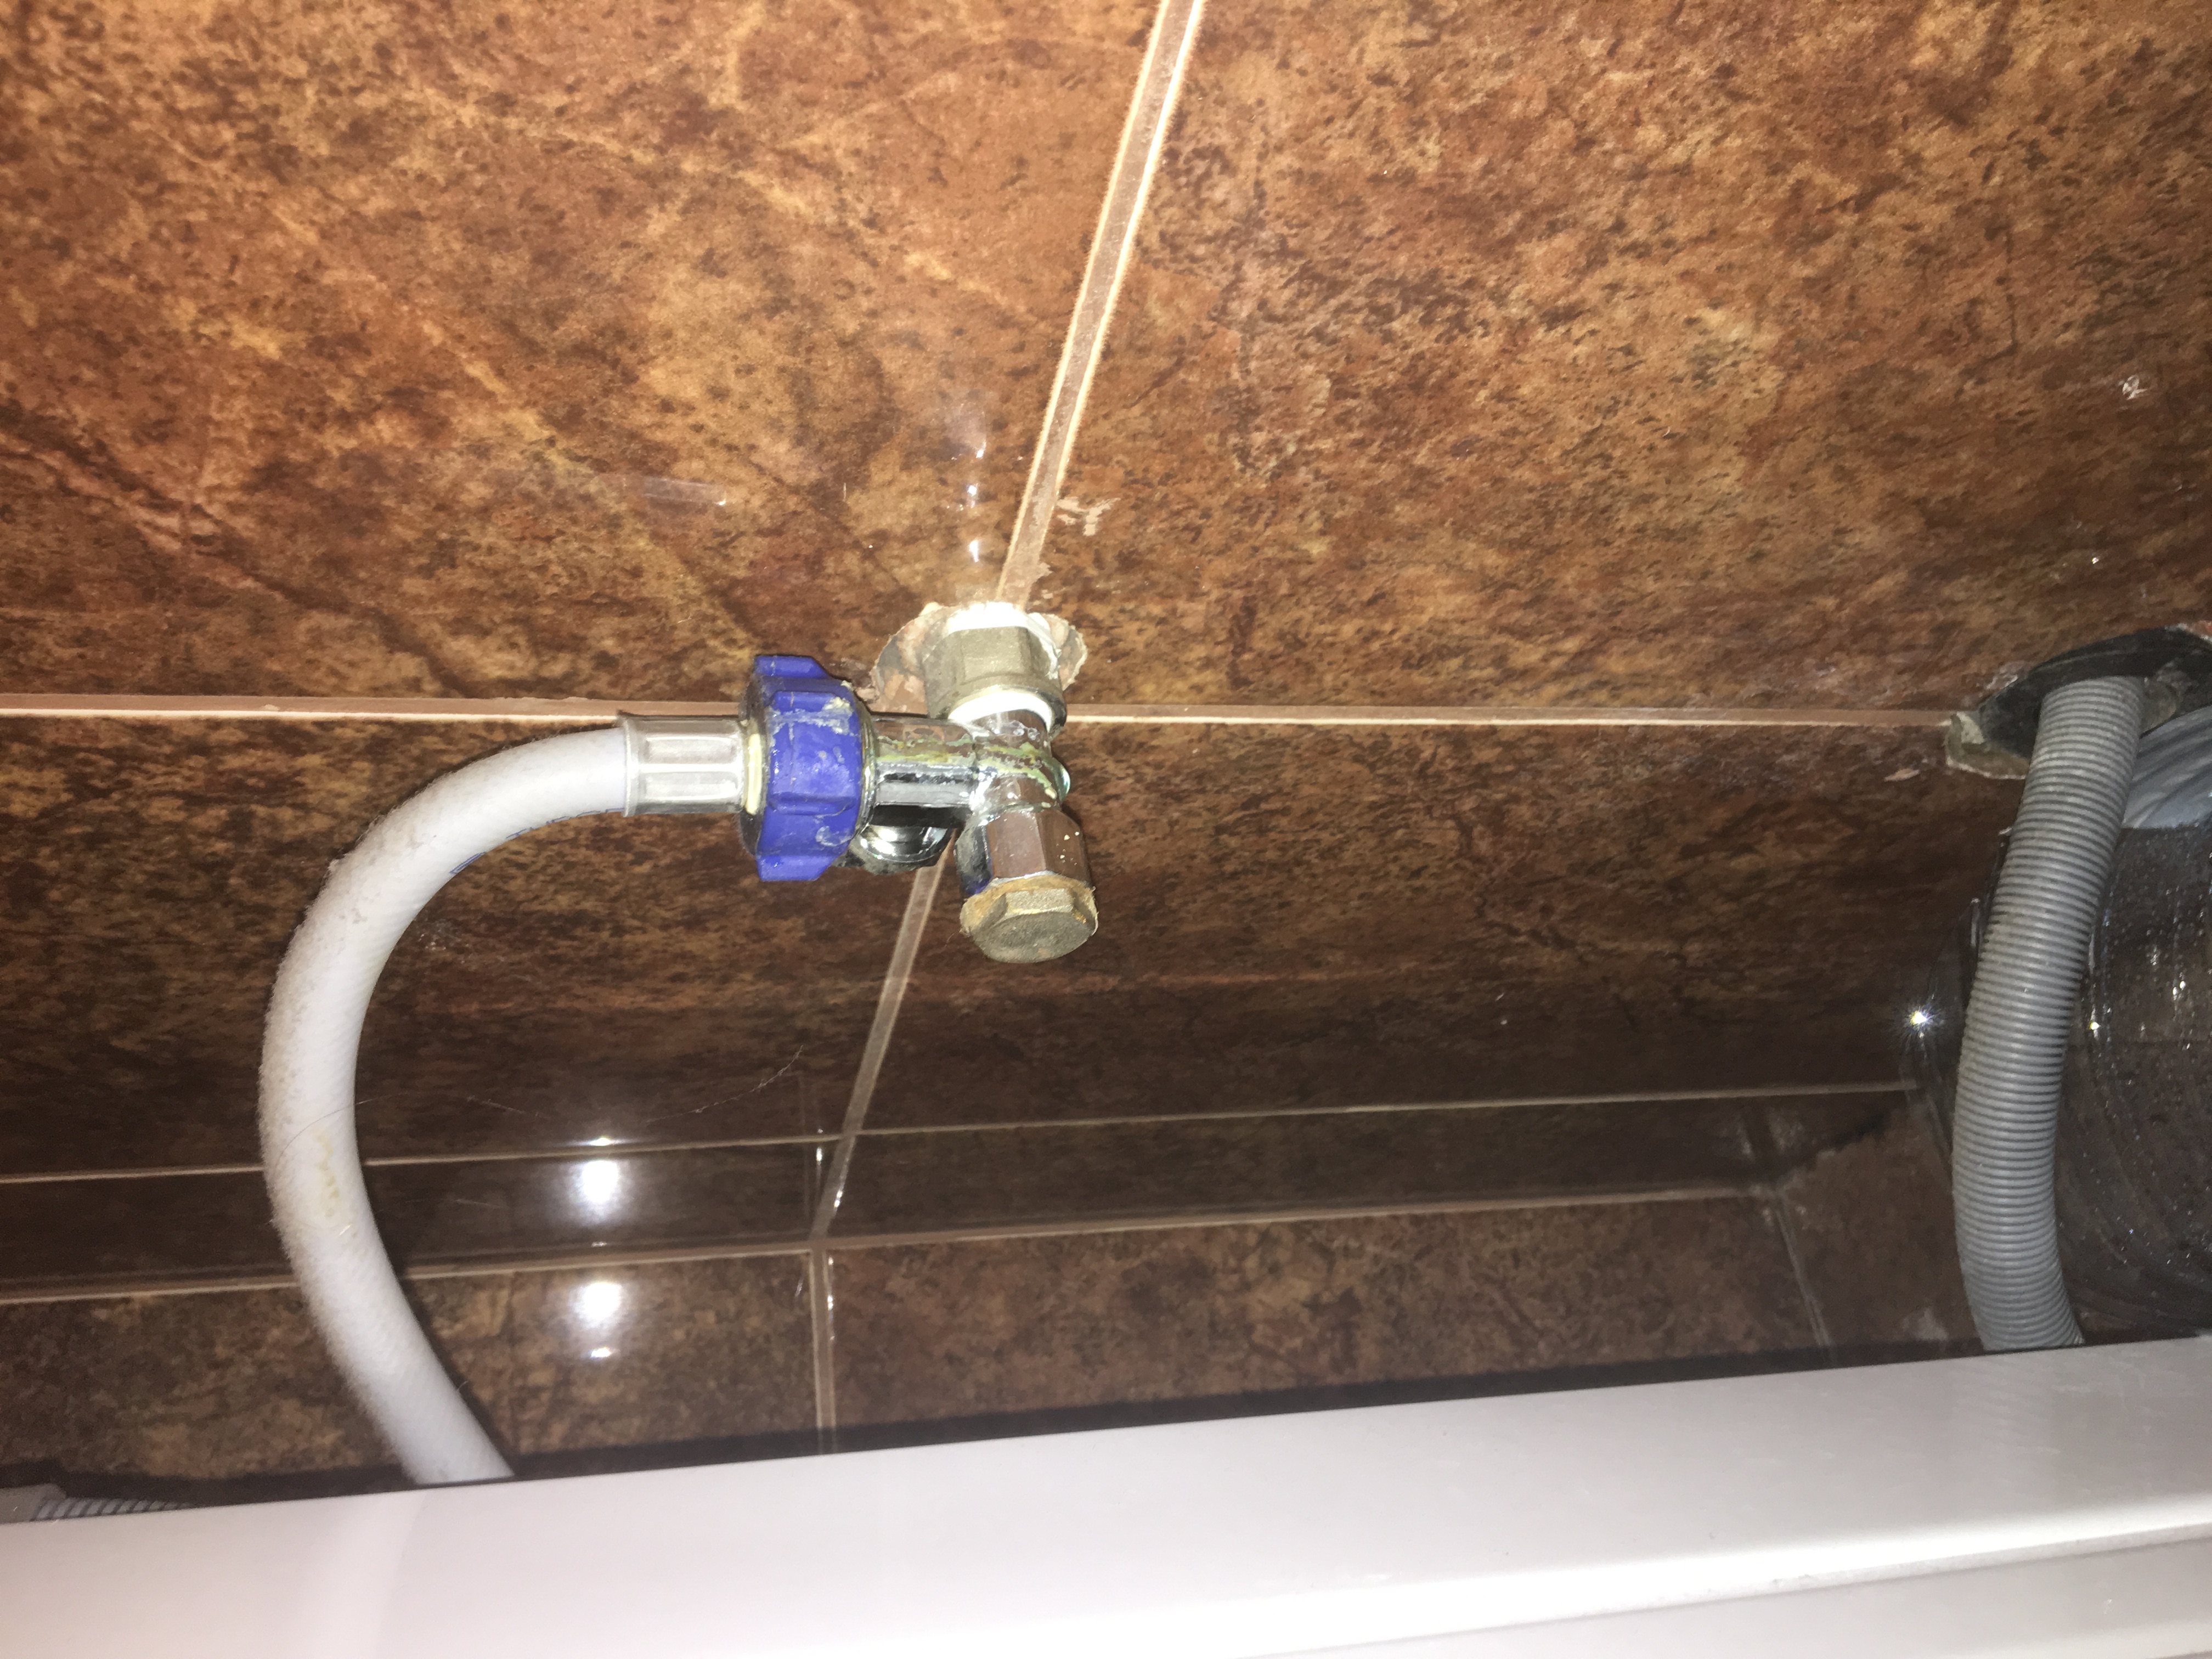
Choose a prominent location for the crane
 When installing a washing machine, it is possible to use stopcocks of a fairly simple design.
The installation of such taps is carried out in a conspicuous place so that the owners can, at any moment getting out of control, shut off the water entering the washing machine.
The machine automatically performs various actions, heats up the water, having previously taken it from the system, at this time various kinds of breakdowns can occur, which can be prevented only if the tap is in a visible place, and then it becomes possible to turn the valve and stop the water supply.
In most cases of a car breakdown, it is necessary to turn off the water, and if this is not done, then there is a possibility of flooding the apartment (house) and neighbors.
Types of stopcocks
When connecting your washing machine, you can use stopcocks, a variety of which is divided into two categories:
- Passage tapsThey are cut into an existing water supply that goes to other objects (faucet, boiler, etc.);
- End valvesThey are placed on a branch of the water supply, specially made for automatic machines.
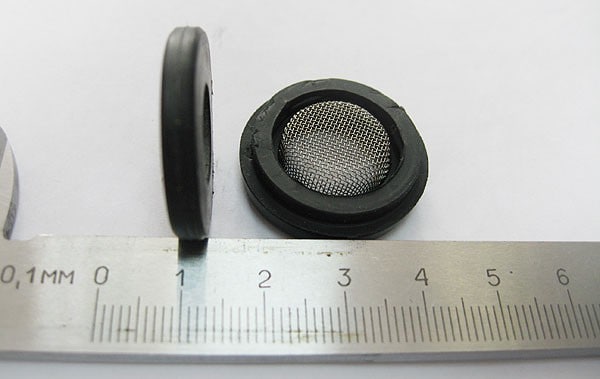
Filter for plumbing system
It would be better for the washing machine if it received water from the plumbing that runs throughout the house, exactly the same section.
It is recommended to install filter - it will purify water, which will enter the machine.
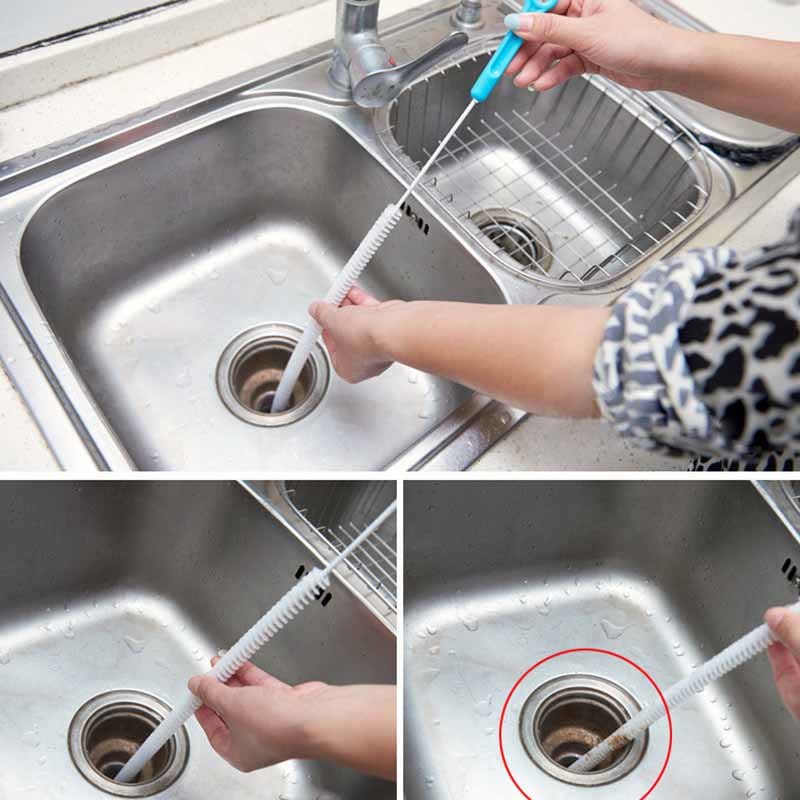
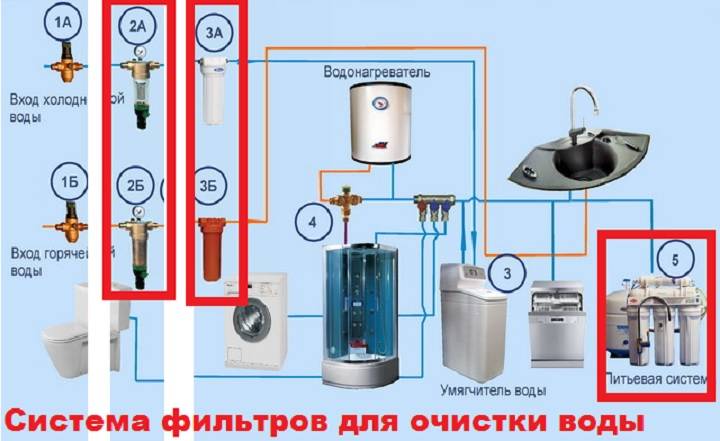 The filter is a mesh that is very easy to install. Don't forget to clean it periodically.
We recommend turning off the water supply to the machine after washing, and turn it on only before it starts.
Or you can install a whole system of filters. But this is subject to the availability of material opportunities.
Which hose is best?
It may be that the manufacturer provides a special hose for connecting to the water supply, and if there is one, then it is better to install it. The length of the provided hose may not be enough, so you should not immediately connect it from two parts, because in this case it will soon be broken.
The best option is to buy a new, longer hose in a special store from the manufacturer of your machine. It is better to buy a hose in a company store, because cheap analogues in ordinary stores, as a rule, break down very quickly.
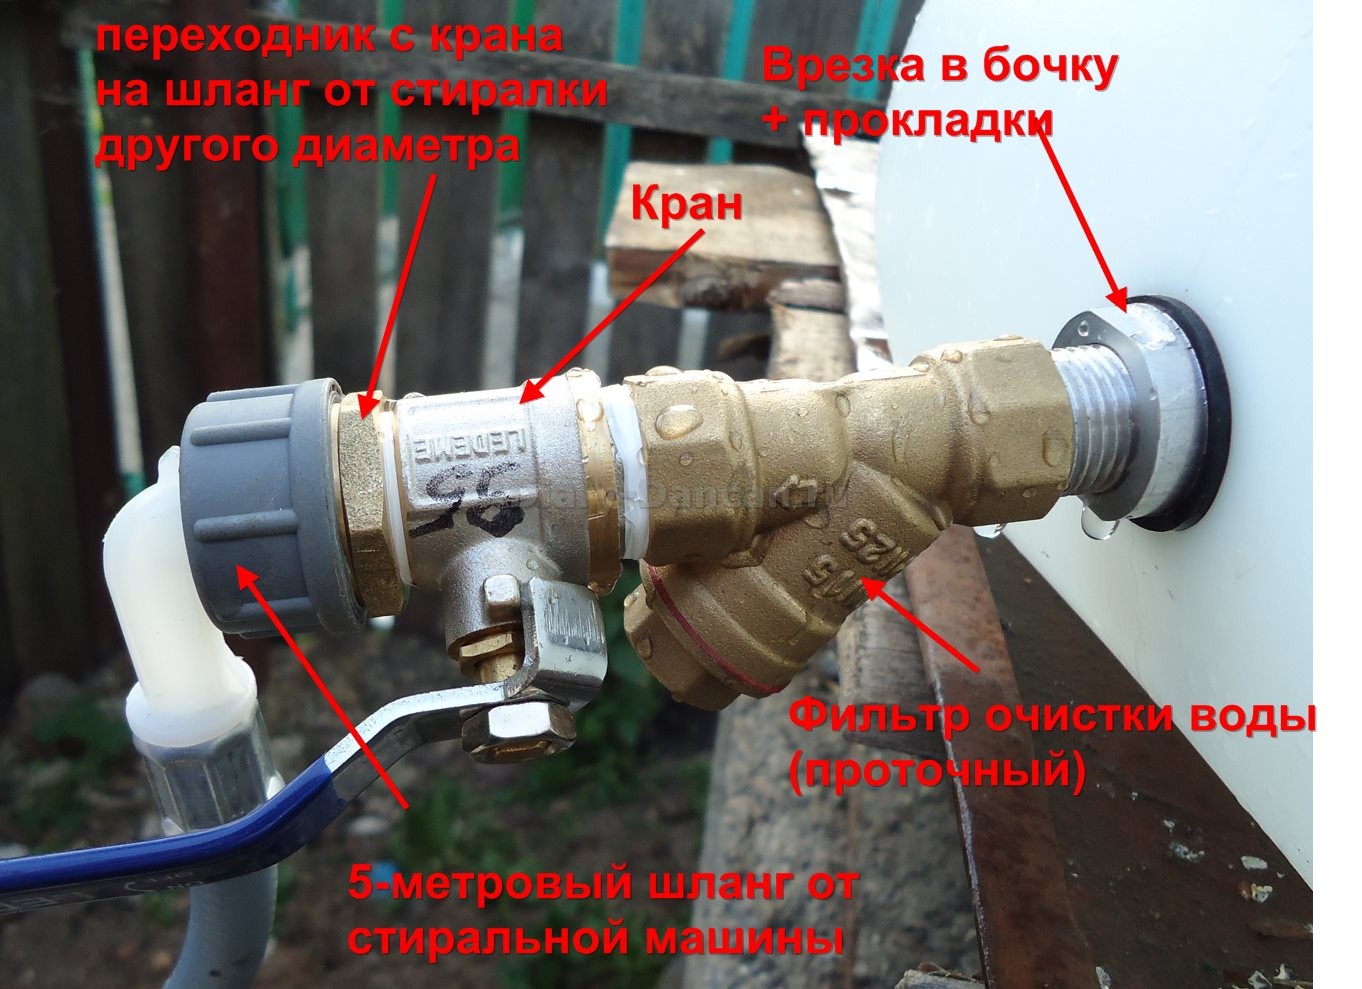
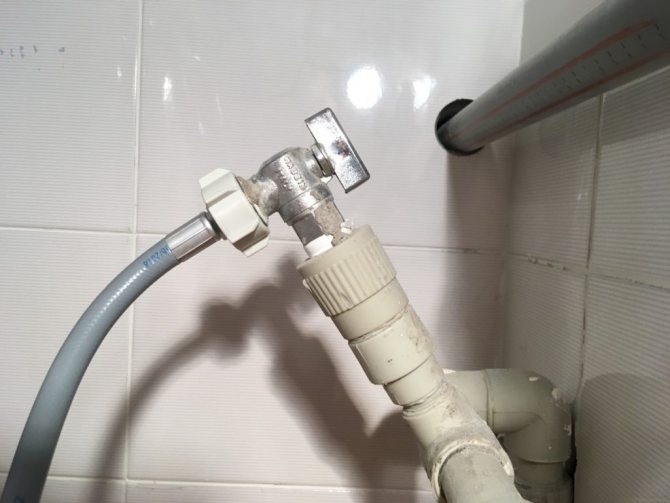
Water connection
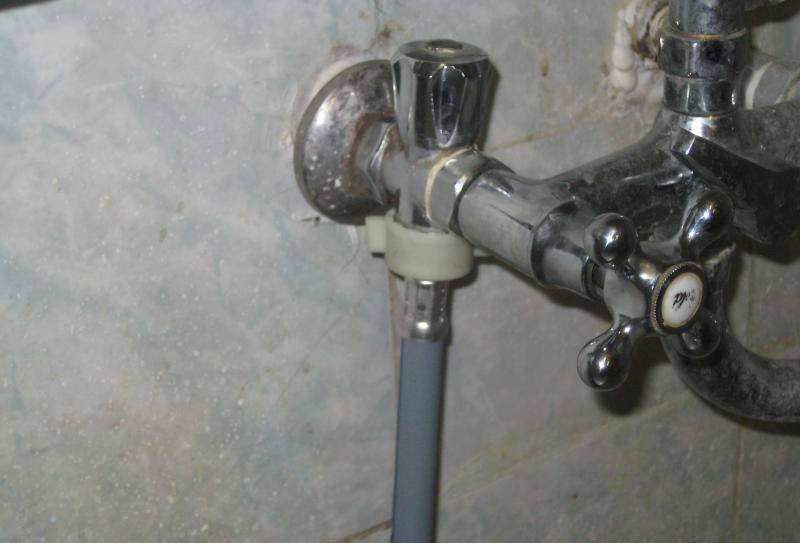
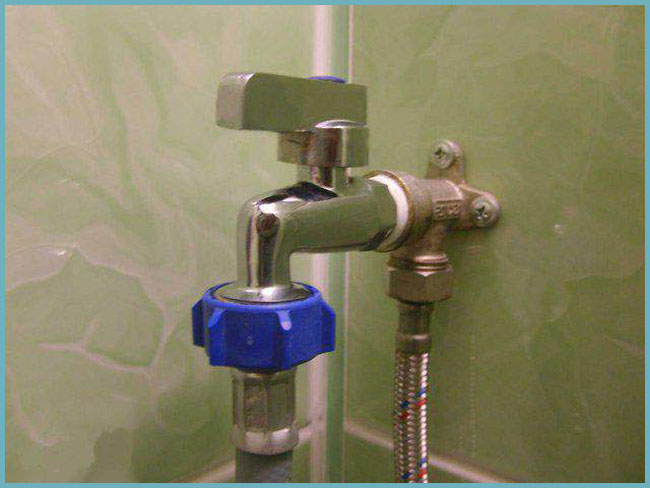
Before directly installing the water supply hose, a special tap must be installed separately in the water pipe for such a connection. It is called a valve for connecting a washing machine.
Its main feature is the size of the threaded connection for the water supply hose. The size is ¾ inch or 20 mm, while the diameter of the plumbing thread is ½ inch (approximately 15 mm).
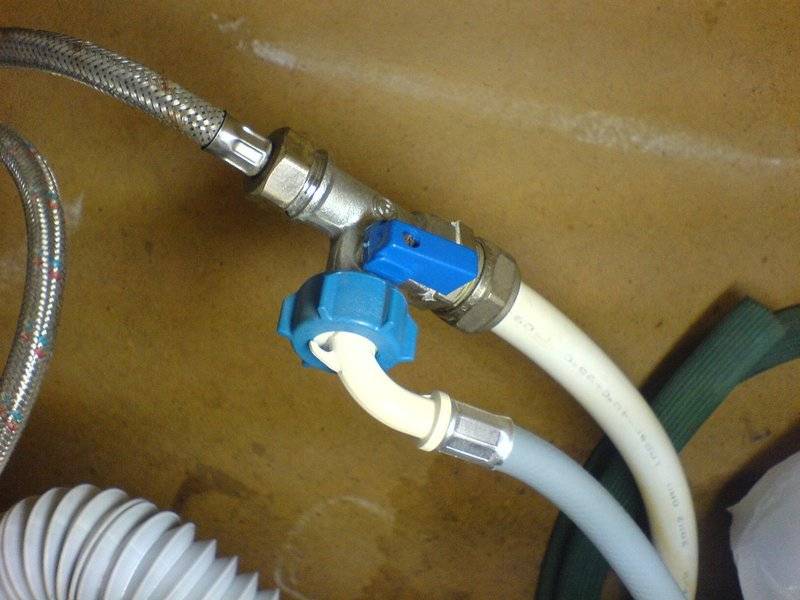
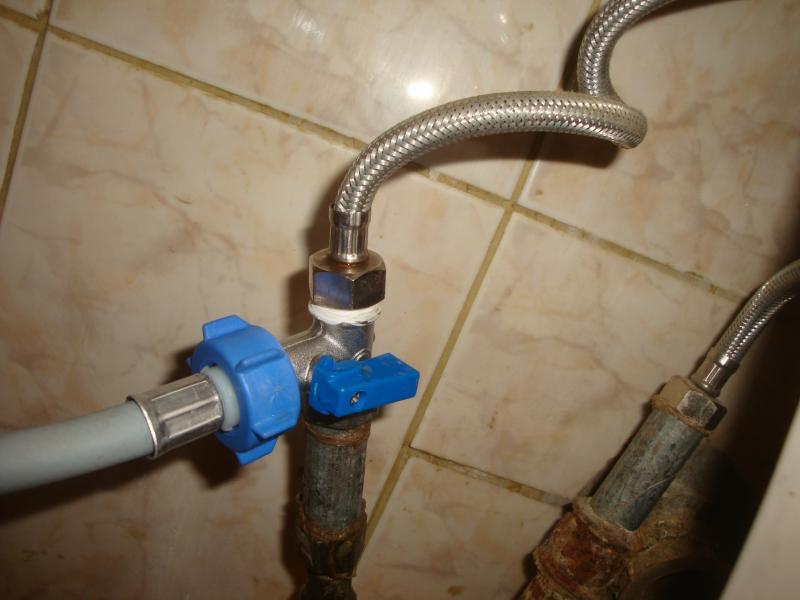
The simplest and cheapest solution for connecting the machine to the water supply is to install a three-way valve to connect the washing machine.
The valve is inexpensive, sold at any hardware store with a plumbing department and does not require rebuilding the plumbing system. It is installed at the junction of the cold water supply hose to the washbasin and the cold water outlet of the water supply system.
How to install a three-way valve:
- turn off the supply of cold water to the sink;
- disconnect the cold water supply hose from the water supply;
- a sealant (fum, flax) is wound on the threaded connection of the water pipe in a clockwise direction (i.e. to the right);
- we wind the three-way valve onto the threaded connection of the water pipe until it stops;
- on the opposite end of the valve we wind the washbasin cold water supply hose;
- smoothly open the supply of cold water to the water supply and check the connections for leaks.
When the valve is installed correctly, water leakage is excluded. In exactly the same way, a three-way valve can be connected to a kitchen sink or toilet.
We wind one end of the water supply hose onto the threaded connection of the rear panel of the washing machine, and the other end onto the threaded connection of the three-way valve.
The main advantage of this installation method is that it is suitable for any type of water supply: steel, metal-plastic or polypropylene. Also, this method is ideal if the water pipes are hidden in the wall.
From steel pipes
To supply water to the washing machine, it is necessary to install a conventional valve to connect the washing machine. To make such an installation, it is most advisable to make an insert into the water supply.
Insert production procedure:
- shut off the cold water supply;
- drill a hole 10.5 mm in diameter in the wall of the water pipe;
- we install a special collar with a flange and a threaded outlet on the pipe. The flange must necessarily fall into the hole you made in the pipe;
- on the threaded connection of the clamp clockwise (to the right), tightly wrap the sealant. Sealant - linen or fum;
- we wind the valve onto the threaded connection of the clamp until it stops;
- smoothly open the supply of cold water to the water supply and check the connections for leakage;
- we wind one end of the water supply hose onto the threaded connection of the rear panel of the washing machine, and the other end onto the threaded connection of the valve.
From polypropylene and metal-plastic pipes
It is possible to install a valve for connecting a washing machine in the manner described above, that is, by inserting it into the water supply. The advantage of this method is the relative simplicity and minimal availability of tools and equipment.
The next method is more aesthetic in terms of beauty, but requires special equipment (a welding machine for polypropylene pipes, mechanical or hydraulic pipe shears) and handling skills.
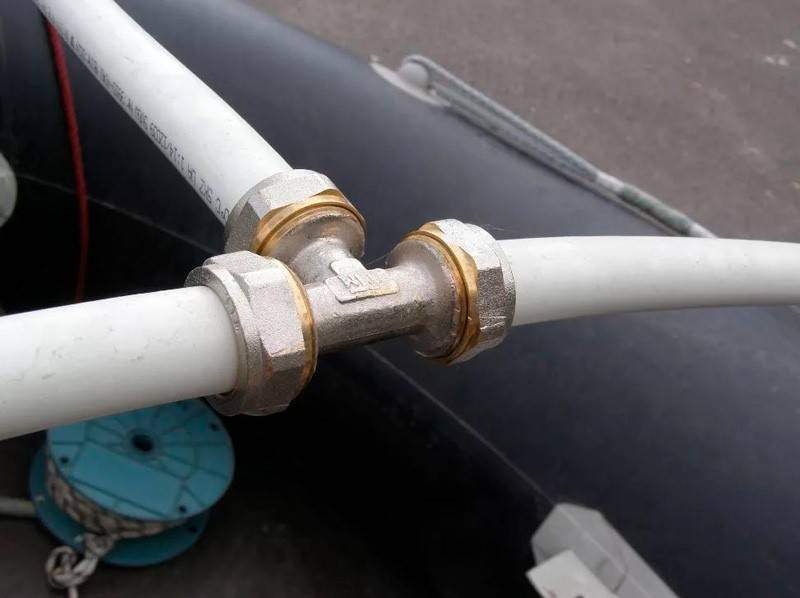
The essence of this method of installing a valve for a washing machine is that it requires cutting out a part of the pipe and a tee is installed in this place.
A fitting is mounted to the outlet of the tee (combined polypropylene coupling with external thread), and only then the valve itself is installed on the coupling. The washing machine is connected to the valve.


A tee with one threaded outlet and two connectors for metal-plastic pipes is also inserted into the water supply system from metal-plastic pipes. The valve itself is mounted directly on the threaded outlet.
Materials and tools for installation
To connect the unit to the water supply network, it is not enough to choose a suitable valve.
You also need to stock up on tools, which include:
- A wrench with an adjustable mechanism, which is needed to perform installation work: connecting pipes and nozzles, tightening nuts.
- Plastic pipe calibrator for fitting a faucet when it is installed on a water pipe cut.
- A thread cutter or similar tool used for this purpose.
- Drill, file, screwdriver, which may be needed for drilling and other work.
- Scissors for plastic pipes or a grinder for tapping a tap into a water supply system made of plastic or metal elements.
In addition, you will need a double hose, which can be included with the automatic machine or purchased separately.It is desirable that the length of such an element be somewhat longer than required - this will allow you to have a small margin required when rearranging.
If the hose is purchased specifically, it is better to give preference to a part that has wire reinforcement, which makes it easy to withstand high pressure in the pipes.
The filter for water purification is mounted on the thread of the tap, which is connected to the outlet of the water pipe. A small element improves the quality of the water used, thereby reducing the risk of plaque and deposits.
If the liquid contains a large amount of minerals, it is allowed to use several filters at once.
Seal rings, winding, FUM tape, spare bolts, which are difficult to do without when installing plumbing products - the listed set will ensure reliable fastening of the tap and the tightness of this assembly. You should also consider the best connection option, taking into account the configuration of the room and the placement of plumbing fixtures.
Stage # 3 - leveling the washing machine
In order for the automatic machine to serve with maximum efficiency, the installation and connection of the washing machine should be approached with the utmost care.
The floor base requires special attention, which must meet a number of criteria:
- strictly horizontal surface;
- strong structure;
- stability;
- protection against vibration and other influences that are inevitable during the operation of the unit.
If the ground does not meet these criteria, it is better to take measures to meet them.
In addition to evenness and reliability, the base for installing the washer must also have anti-vibration properties.If you have to put it on a tiled or wooden floor, then the whole process is best done using devices that dampen vibration:
On fragile surfaces, it is desirable to produce a cement-sand screed or to strengthen existing floors at the site of the intended installation of the washing device.
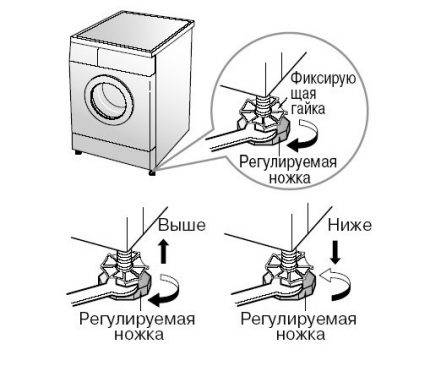 Adjusting the position of the washing unit is achieved by changing the height of the support legs: to increase the distance from the floor, they can be unscrewed, and to decrease, they can be screwed in.
After making sure that the base meets all the previously mentioned requirements, you can proceed with the installation. A fully unpacked machine with fasteners removed is placed in the selected place.
The horizontal position of the installation is determined by the top panel, while the angle of deviation, which is checked by the top cover, should not exceed two degrees. Exceeding this indicator leads to a sharp increase in vibration, which has a very negative effect on the condition of the nodes and significantly reduces the life of the machine.
It is strictly forbidden to lay improvised materials under them that can slip out from under the supports during operation. This can lead to an emergency situation. At the same time, it is allowed (and even recommended) to put a thin rubber mat on a sliding tiled surface.
As soon as the body of the machine takes a perfectly horizontal position, tighten the lock nuts counterclockwise, fixing the optimal height of the support legs.
When leveling the machine, it is recommended to consider the following factors:
- The greatest degree of stability of the unit is achieved with the maximum screwed adjusting feet, however, this option is only valid with a perfectly flat surface.
- When installing the machine on an inclined floor, it is advisable to use fixing parts to fasten the supporting structures.
- To check if the unit is installed correctly, you need to try to swing it diagonally. If the process is done correctly, there is no free play or its amplitude is the same for different diagonals.
After making sure that the unit is in the correct position, you can proceed to the next steps.
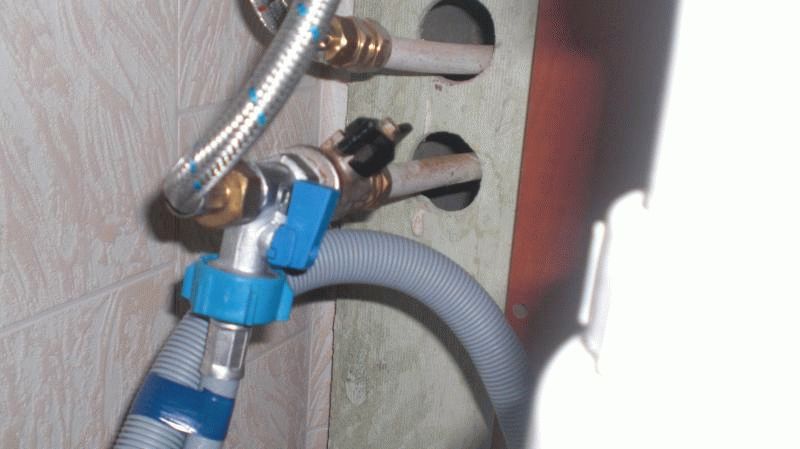
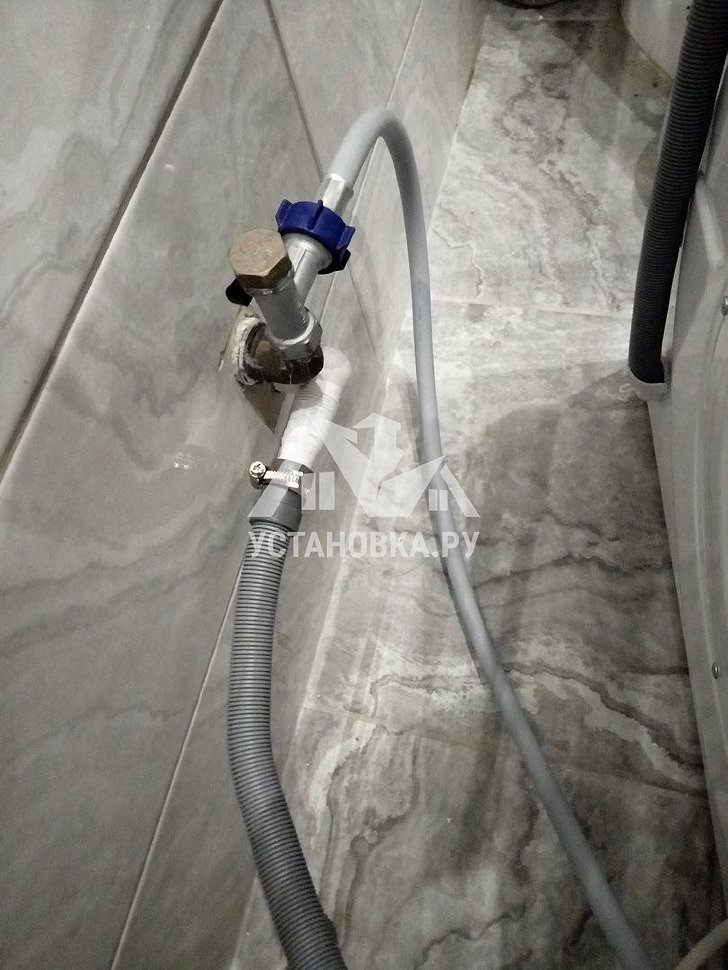
Connecting the water supply hose
Usually, when installing a water supply system, during the repair of an apartment or house, the installation sites of household units, whose work is associated with the use of water, are foreseen in advance. These are primarily washing machines and dishwashers. In these places, an experienced installer must install special connection taps. Subsequently, they are connected to special water supply hoses.
The usual dimensions of taps are ½ and ¾ with an external thread. Hose nuts also have this dimension. Connection is carried out with the tap closed.
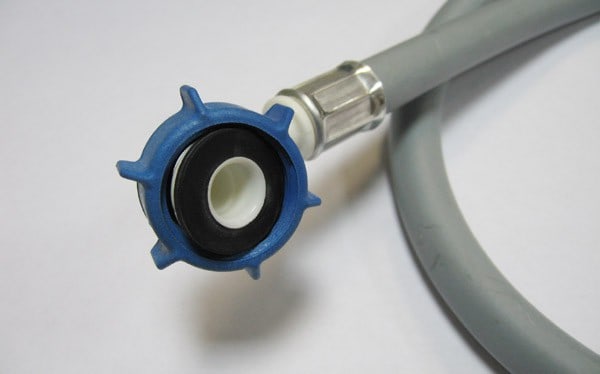
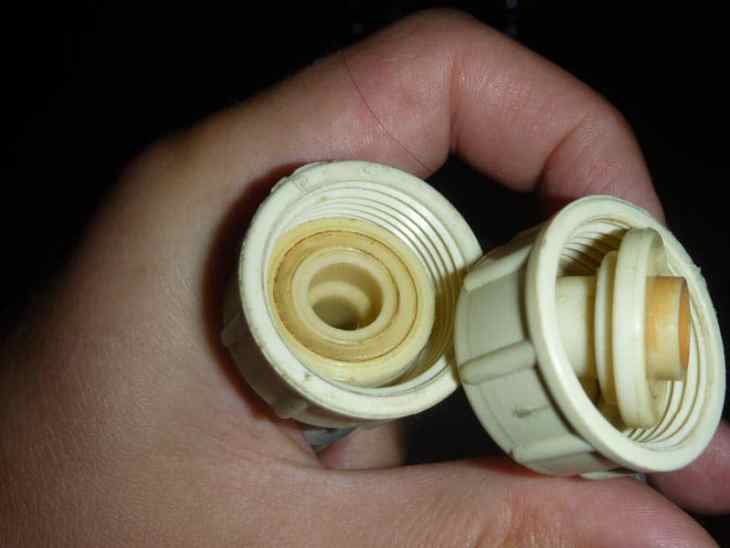
Before screwing the tube, make sure that the sealing gaskets are present. It happens that they come in a kit and require installation. In some cases, they simply get lost in transit. After making sure that the gaskets are present, you can connect the water hose.
Usually, from the side of connection to the fitting of the machine, the tube is L-shaped at 90 degrees for easy connection. While holding the tube from twisting, it is necessary to screw the nuts onto the connection valve and onto the fitting. The sequence in this case does not play a role. The main thing is that when installing the unit, the pipe is not twisted or bent. With the opening of the water tap, the connection can be considered complete.
Leveling with feet and level
A common mistake when installing a washing machine on an uneven floor is the lack of regulation of the legs, as a result of which excessive vibration and loud noise occur during its operation.
 Level alignment
In order to properly adjust the machine, you need a special key and level. The level is located on the typewriter and the legs are untwisted / twisted to the required height. After you need to press on the corners of the machine from above to assess its stability. In addition, special anti-slip coasters can be purchased at the store.


After you have connected the washing machine to the water supply and sewerage, and also leveled it, you must proceed to the next step. We will talk about this further.
Washing machine installation
Before starting the installation, the washing machine is released from the packaging, inspected to check the integrity, and the locking bolts are removed. They are installed by the manufacturer at the factory and are intended to fix the drum during transportation. But you can’t leave them in the car after installation, as this leads to a breakdown of the chassis. The bolts are twisted with an open-end wrench and removed from the housing along with plastic bushings, and the plugs included in the kit are inserted into the holes.
On a new machine, you need to unscrew the transport screws and remove the plugs
Transport bolts hold the entire drum suspension in a fixed state, so as not to damage it during transportation
Stub
Now you can start installation.
Step 1.The washing machine is placed in the chosen place, the level is placed on the top cover, the height is adjusted with the help of the legs. The machine should stand level, without distortions, not too close to the wall. On the sides, there should also be at least small gaps between the walls of the machine and furniture or plumbing.
The machine needs to be level
Machine legs
Step 2. After making sure that the placement is correct, the machine is pushed forward a little to facilitate access to communications.
Step 3. Connect to the water supply. They take a water supply hose, insert a filter on one side (usually it comes with a kit), screw it to the fitting on the rear wall of the machine, and the other end to the through tap on the water pipeafter inserting the gasket.
The filter can be installed in the form of a mesh in the hose, or in the body of the washing machine
Filling hose
One end of the hose is screwed to the machine
Inlet hose connection
Step 4 Connect the drain hose next: insert its end into the drain hole and tighten the nut tightly. The length of this hose must not exceed 4 m in order to ensure the normal drainage of used water.
Drain hose connection
If it is necessary to extend the hose with water supply, we use a second hose and an adapter coupling
Step 5. Both hoses are filled into the corresponding recesses on the back of the machine to prevent kinks. After that, the washing machine is installed in a permanent place and the location is again checked by level. Now it remains only to connect the washing machine to the outlet and check its operation in test mode.
Plug in the machine
Trial run
Trial run
First you need to take the passport of the device and put it in front of you in order to check the data during the verification process. A test run is carried out without loading laundry, with only water and a small amount of powder. So, they turn on the water supply to the tank of the machine, while recording the filling time to the specified mark. Immediately after this, all connections are inspected, and if a leak is detected, the water is drained and the problematic connection is sealed again. If no leaks are visible, you can turn on the machine.


The water should heat up to the desired temperature within 5-7 minutes, so note the time and check with the device's passport. While the water is heating, listen carefully: the device should work almost silently, and any rustles, creaks, knocks indicate a malfunction. If there are no extraneous sounds, check the operation of other functions, including the drain. After turning off the machine, once again inspect the hoses, connections, floor around the body. Everything must be dry and clean. Ladder in the bathroom read on the site.
Replacing the inlet hose
In the event that the water supply hose has visible damage and leaks water, you should not deal with its restoration. These attempts will lead nowhere. You need to buy a new one and replace it. Before buying, be sure to check the length of the filler tube and the dimensions of the connection elements. It is even better to take the old hose with you and the sales assistant will select an analogue. Before replacing, it is necessary to close the connection valve in order to reduce the pressure in the hose. To do this, you need to wait for a few minutes. If this is not done, then the efforts applied to unscrewing can lead to damage to both the valve and the fitting.After dismantling the damaged element, a new one should be installed as described above.
Insertion into the water supply
Steel pipe
What will be required:
- Saddle clutch.
- A drill with a radius equal to half the hole in the sleeve.
- Tap.
- Tow.
- Spanners.
What to do:
- Turn off the water supply and drain the residue using a mixer located nearby.
- Select a part of the pipe for inserting the coupling, which is freely accessible close to the machine.
- Clean and polish the pipe using a knife or sandpaper
- Try on the coupling by turning it, positioning the valve correctly.
- Install the bolts, tighten with a wrench, and the gasket.
- Place a cloth or container under the pipe so that water flows into them.
- Drill a hole in the pipe through the sleeve located inside the coupling.
- Wrap the tap with a piece of tow, wrapping it along the length in the direction of twisting. Coat with sealant.
- Screw the coupling onto the faucet.
- Connect the hose from the washing machine to the faucet and tighten by hand.
 Pipe insert
Metal-plastic pipe
What will be required:
- A tee with a single internal thread.
- Pipe cutter.
- Pipe calibrator.
- Tap.
- Spanners.
- Fum tape.
What to do:
- Shut off the water and drain off the residue.
- Choose a part of the pipe for inserting the coupling that is easy to reach.
- Cut the pipe and part its ends, bending them with care.
- Calibrate the two ends of the pipe and chamfer by inserting the instrument and turning it a small number of times.
- Remove the nuts and rings from the tee.
- Put the nut, and then the compression ring, on both ends of the pipe.
- Screw the pipe into the hole of the tee to the end and tighten the nuts by hand.
- While holding one nut with a wrench, tighten the second, and then also tighten the first nut.
- Wrap the faucet with fum tape, placing several turns along the entire length in the direction of winding
- Screw it all into the fitting.
Connect the hose of the washing machine to the faucet, twisting by hand.
Polypropylene pipe
What will be required:
- MRV tee with a thread of the required radius.
- Faucet for washing machine.
- Pipe cutting device.
- Soldering iron.
- Fum tape.
Actions:
- Turn off the water, drain the water.
- Select a part of the pipe that is freely accessible for the soldering iron, close to the washer.
- Cut a piece 3 cm smaller than the tee.
- Wipe the pipes from the water and dry them so that there are no flaws when soldering.
- Install a suitable size nozzle on the soldering iron and heat it to the desired degree.
- Attach a soldering iron to the pipe and one of the ends of the tee, wait about 6 seconds.
- Quickly remove the device, connecting the hot elements, and wait for about 10 seconds.
- Repeat the same steps for the other end of the pipe.
- Wrap the tap with fum tape, placing turns on the thread where it will be twisted.
- Combine it with a tee.
Next, connect the hose of the washing machine to the tap by twisting it.
Useful articles, news and reviews on our Yandex Zen channel
Do-it-yourself connection of the washing machine to the water supply
This stage is the most important and difficult. So there are a few important things to look at.
- Estimate the place where the machine will stand. The connection method and the choice of the necessary parts will depend on this.
- It must be remembered that water hoses should be located behind furniture or interior details. This will determine their length.
- It is necessary to estimate in advance the approximate length of the water hose laying. Very often they come with very short ones.
- To connect to the plumbing system you will need: pipes, a valve or a regular faucet.
Faucet for connecting a washing machine
The most common connection method is a connection on a flat section of the water supply. This will require a tripod. Or it can be done on a special branch of the pipe. A connection is made to the tee or process through the toilet bowl.
Stages of direct connection to the water supply.
During the connection process, you may need some special tools. When working with metal piping, you will need a variety of wrenches. You will also need some seals. Fumlenta or linen. It is better to choose linen, as it swells during use and prevents leakage.
When working with a water pipe made of polymers, especially if you have to make a new tie-in into it, you will need a special one. tools for soldering polypropylene pipes. You will also need a calibrator and special fittings.
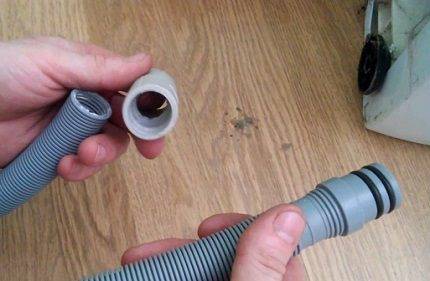
Hose attachment.
First you need to connect the pipeline hose to the machine. At the same time, insert special filters that come with the kit into the ends of the hose. After that, tighten the nut located on the hose. It is better to tighten the nut by hand, without using wrenches.