- The length of the freon line
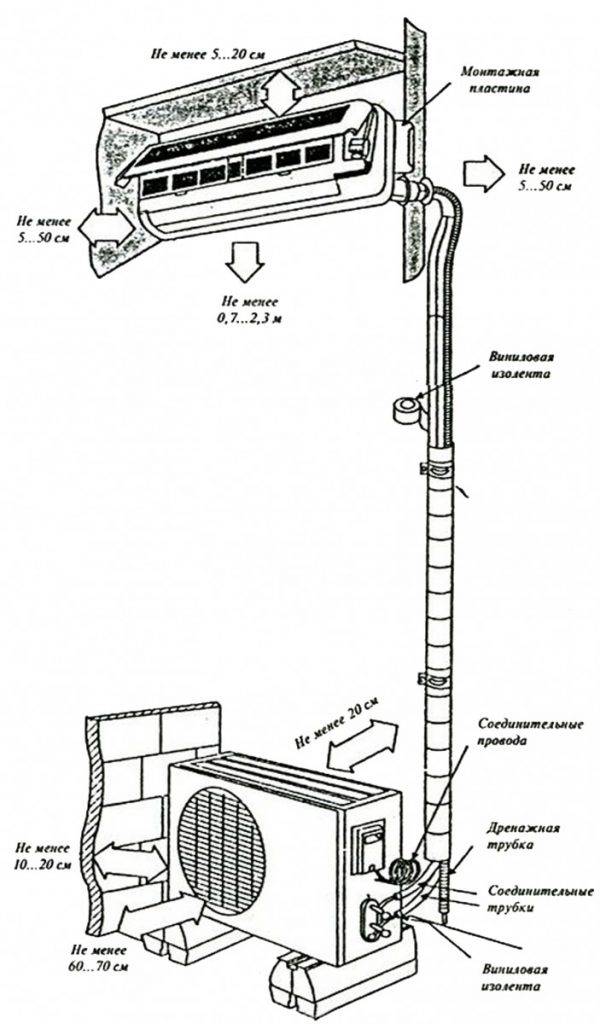
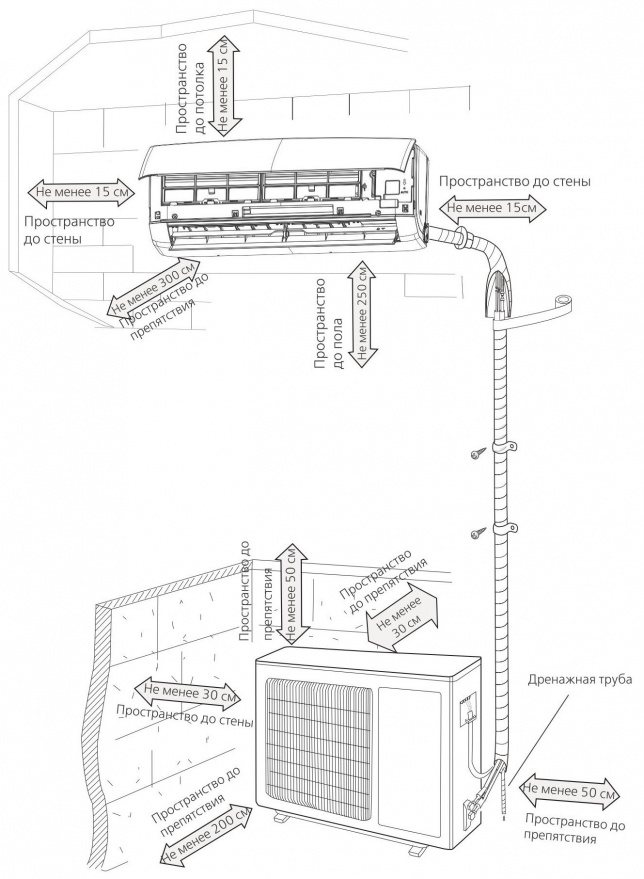
- Norms of distance between blocks
- Pipeline too short
- Distance is greater than standard
- Main types
- Design
- Location
- Possibility of location of the unit in the technical room
- Connecting blocks
- Drainage
- Freon circulation system
- rolling
- Port connection
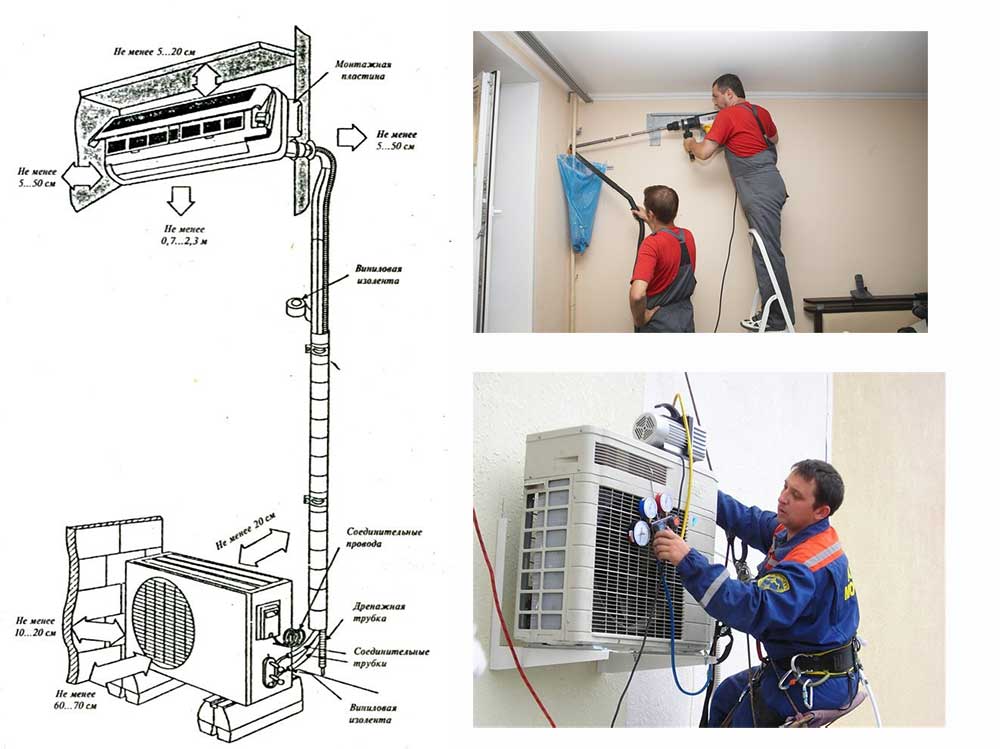
- Basic rules for installing and connecting an air conditioner
- Features of mounting the outdoor unit of the air conditioner
- Which is more profitable: professional installation or do-it-yourself installation of a split system
- Pressure and seal test
- Block fixing
- Installation of the outer part
- Installation of the interior
- Some general information
- Choosing the right place to install the air conditioner
- Conclusions and useful video on the topic
The length of the freon line
Users of climate technology often argue about the distance from the external unit of the air conditioner to the internal one, and then experiment with the installation. They can be understood - sometimes the features of the interior or the location of the rooms require an increase in the length of the pipeline.
But professional installers know for sure that it is impossible to arbitrarily increase or decrease the length of the pipeline. Indeed, deviation from the required parameters immediately affects the performance of the air conditioner.
We will find out what the installation standards should be and why they cannot be changed.
Norms of distance between blocks
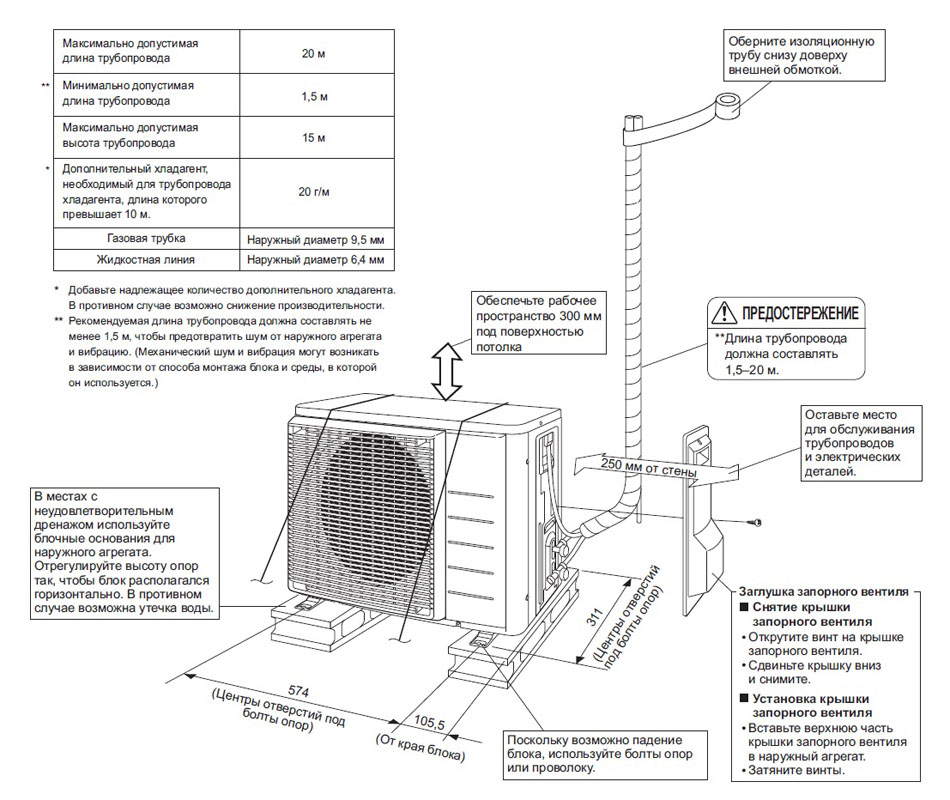
Installation standards are set by the manufacturer. If you take the instructions, then in the installation section you will find diagrams and operating parameters that you need to focus on during installation.
As a rule, they indicate the maximum length of the trunk, nothing is said about the minimum. But in the kit with the blocks you will find copper tubes for connecting them - in no case should they be shortened.
The piping length depends on the model.
For household split systems with an indoor wall unit, the following standards apply:
- the maximum distance between the blocks is 15 m or 20 m (less often - 10 m);
- the minimum distance between the blocks is 3, 4, 5 m (along the length of the pipe in the kit).
The exact data is indicated in the technical documents for a specific model.
According to the parameters indicated in the table, it is clear that when the route is extended, additional filling of the circuit with freon is required.
If the split system is equipped with a 5-meter pipe, it cannot be shortened. What if the distance between the blocks is only 3 m, and the tube is 5 m? You just need to carefully wind it up in large rings, without breaking or twisting, and hide the remaining 2 m in one of the blocks.
Pipeline too short
If the manufacturers do not indicate the minimum length of the freon line in any of the available sources (paper or electronic instructions, video), be guided by the generally accepted value - 3 m. You cannot make the route shorter.
If we remember how the process of transition of the refrigerant from one state to another takes place, then we will understand that a short pipe is simply not enough for a complete transformation of the substance.Freon, which did not have time to turn into a gas in the evaporator, will enter the compressor in the form of a liquid, which must not be allowed.
The consequences of installing a pipeline that is too short are different:
- breakdown of air conditioner parts;
- the transition of vibrations from the outdoor module to the wall;
- noises uncharacteristic for an air conditioner - freon gurgling in the pipeline.
These troubles can be eliminated only by increasing the length of the pipeline. As you can see, a small mounting nuance turned out to be very important.
Distance is greater than standard
As you already know, the maximum length of the freon line is limited to 20 meters. This value is relevant for home models with an average performance of 2.5-3 kW. But for semi-industrial units from 8-9 kW, other boundaries are used - the length of the pipeline increases to 50 m.
It can be concluded that the parameters of the distance between the blocks of split systems are directly related to such a technical characteristic as performance.
The most dangerous thing that can happen if the pipeline is too long is a decrease in pressure. Moreover, both sections - gas and liquid - expect negative consequences.
If the gas pressure drops before it enters the compressor, then it also becomes lower at the outlet. As a result, the temperature parameters decrease, freezing occurs.
There is no special line heating function, so the compressor overheats and breaks down due to the load. You examined the features of compressor diagnostics and the method of repairing it in the article: How to lay an air conditioner route: the specifics of a communications device
A decrease in pressure in a pipeline section with liquid freon leads to an increase in the proportion of gas.A high gas content increases the speed of the refrigerant, which leads to an even greater pressure drop. In such conditions, the normal functioning of the air conditioner is simply impossible.
But there is one way out: to reduce pressure losses in the line, increase the diameter of the copper pipe. To do this, use the formula:
Professional installers advise increasing the length of the freon line only in horizontal sections.
In order not to resort to complex calculations, it is recommended to increase the diameter of the gas pipe (it is slightly thicker) by 1 size: that is, replace 3/8 with 1/2, 1/2 with 5/8, etc.
We do not recommend doing the usual installation of an air conditioner or replacing pipes on your own. Experienced professionals know better how to deal with difficult cases and avoid problems.
Main types
When carrying out the installation, you must carefully read the instructions, as the installation will depend on the type of washbasin that you have purchased.
These sinks are classified according to several criteria.
Design
Depending on the design features, there are three types:
- Monolithic - when the pedestal and the sink itself are one. The peculiarity of such products is the absence of a sink stop - this is an integral and indivisible device.
- Consisting of a separate bowl, they are convenient in that when cleaning the siphon, you do not need to move the entire structure, just move the leg away.
- Modifications in which the leg does not touch the floor. The advantage is their installation at any height you need.
Location
There are two types:
- Corner - great for small bathrooms. Installation is carried out only in the corner of the room. Basically, these shells are small in size.
- Ordinary - their installation is carried out along a flat wall. This is the most popular option, as they can be installed in any bathroom.
Possibility of location of the unit in the technical room
Non-residential premises of an apartment building that are not part of any apartment belong to all apartment owners of this high-rise building at the same time. This is approved by the Housing Code in the first part of Article 36.


This means that any attic, as well as technical premises of an apartment building is in common ownership tenants.
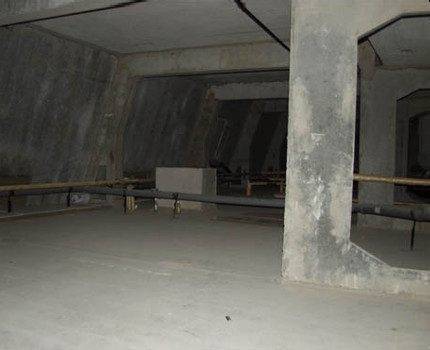
From the standpoint of the law, the attic is designed to accommodate utility and technical communications for domestic purposes, and hence climate equipment (i.e. air conditioners)
Article 161 of the Housing Code reflects the need to maintain favorable living conditions for all residents of a high-rise building. This room, which is the common property of the apartment owners, must be kept in good condition both in terms of sanitary and epidemiological well-being and fire safety.
According to the "Rules for the technical operation of the housing stock" developed by Gosstroy No. 170 dated September 27, 2003, the managing organization (hereinafter referred to as the MA) is obliged to ensure the temperature and humidity conditions of the attic (technical floor), which excludes the formation of condensate on the building envelope (clause 3.3.1).
Moreover, the temperature of a cold (unheated) technical room can exceed the temperature of the outside air by only 4 ° C (clause 3.3.2).
Access to the attic is allowed only for employees of the MA and personnel of operating companies whose equipment is located on the roof or in the attic (clause 3.3.5).
According to the above norms, they have not defined a direct ban on installing a split air conditioner element in the attic. If the MA does not present reasonable objections and if 50% of the homeowners in this apartment building do not speak out against the placement of the compressor-evaporative unit (or units) in the technical floor, then such installation will be legal.
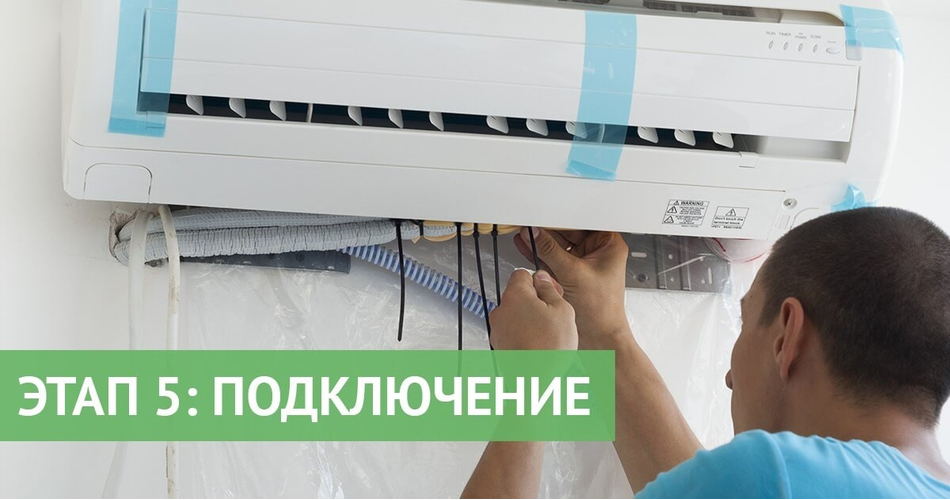
Connecting blocks
Here, in general, there are no special secrets. The communications stretched through the hole in the wall are connected to the appropriate connectors. There are no problems with connecting the cable - connect wires of the same color to the terminals that are already connected to them. In this case, you can't really go wrong.
If the height difference in the installation of blocks exceeds 5 meters, it is necessary to make a loop to catch the oil (we lay copper pipes in this way) dissolved in freon. If the drop is lower, we do not make any loops.
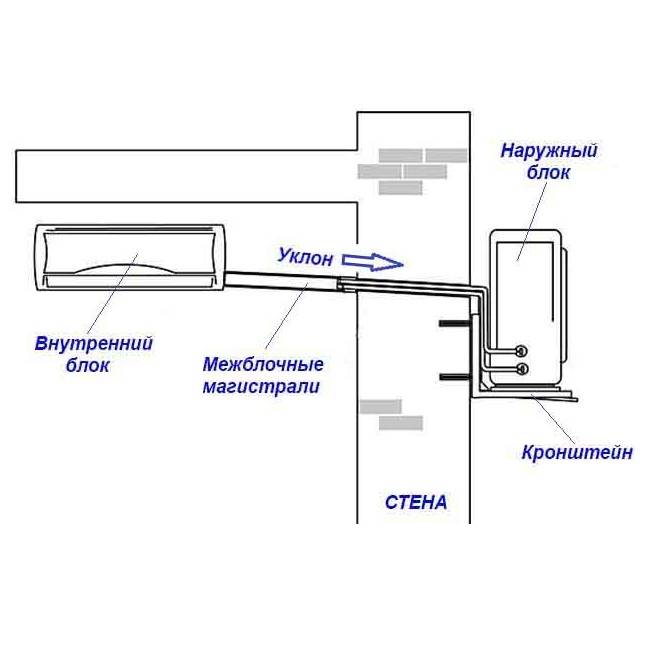
Laying the route between the indoor and outdoor unit of the split system
Drainage
There are two ways to divert drainage from the split system - into the sewer or just outside, outside the window. The second method is more common with us, although it is not very correct.
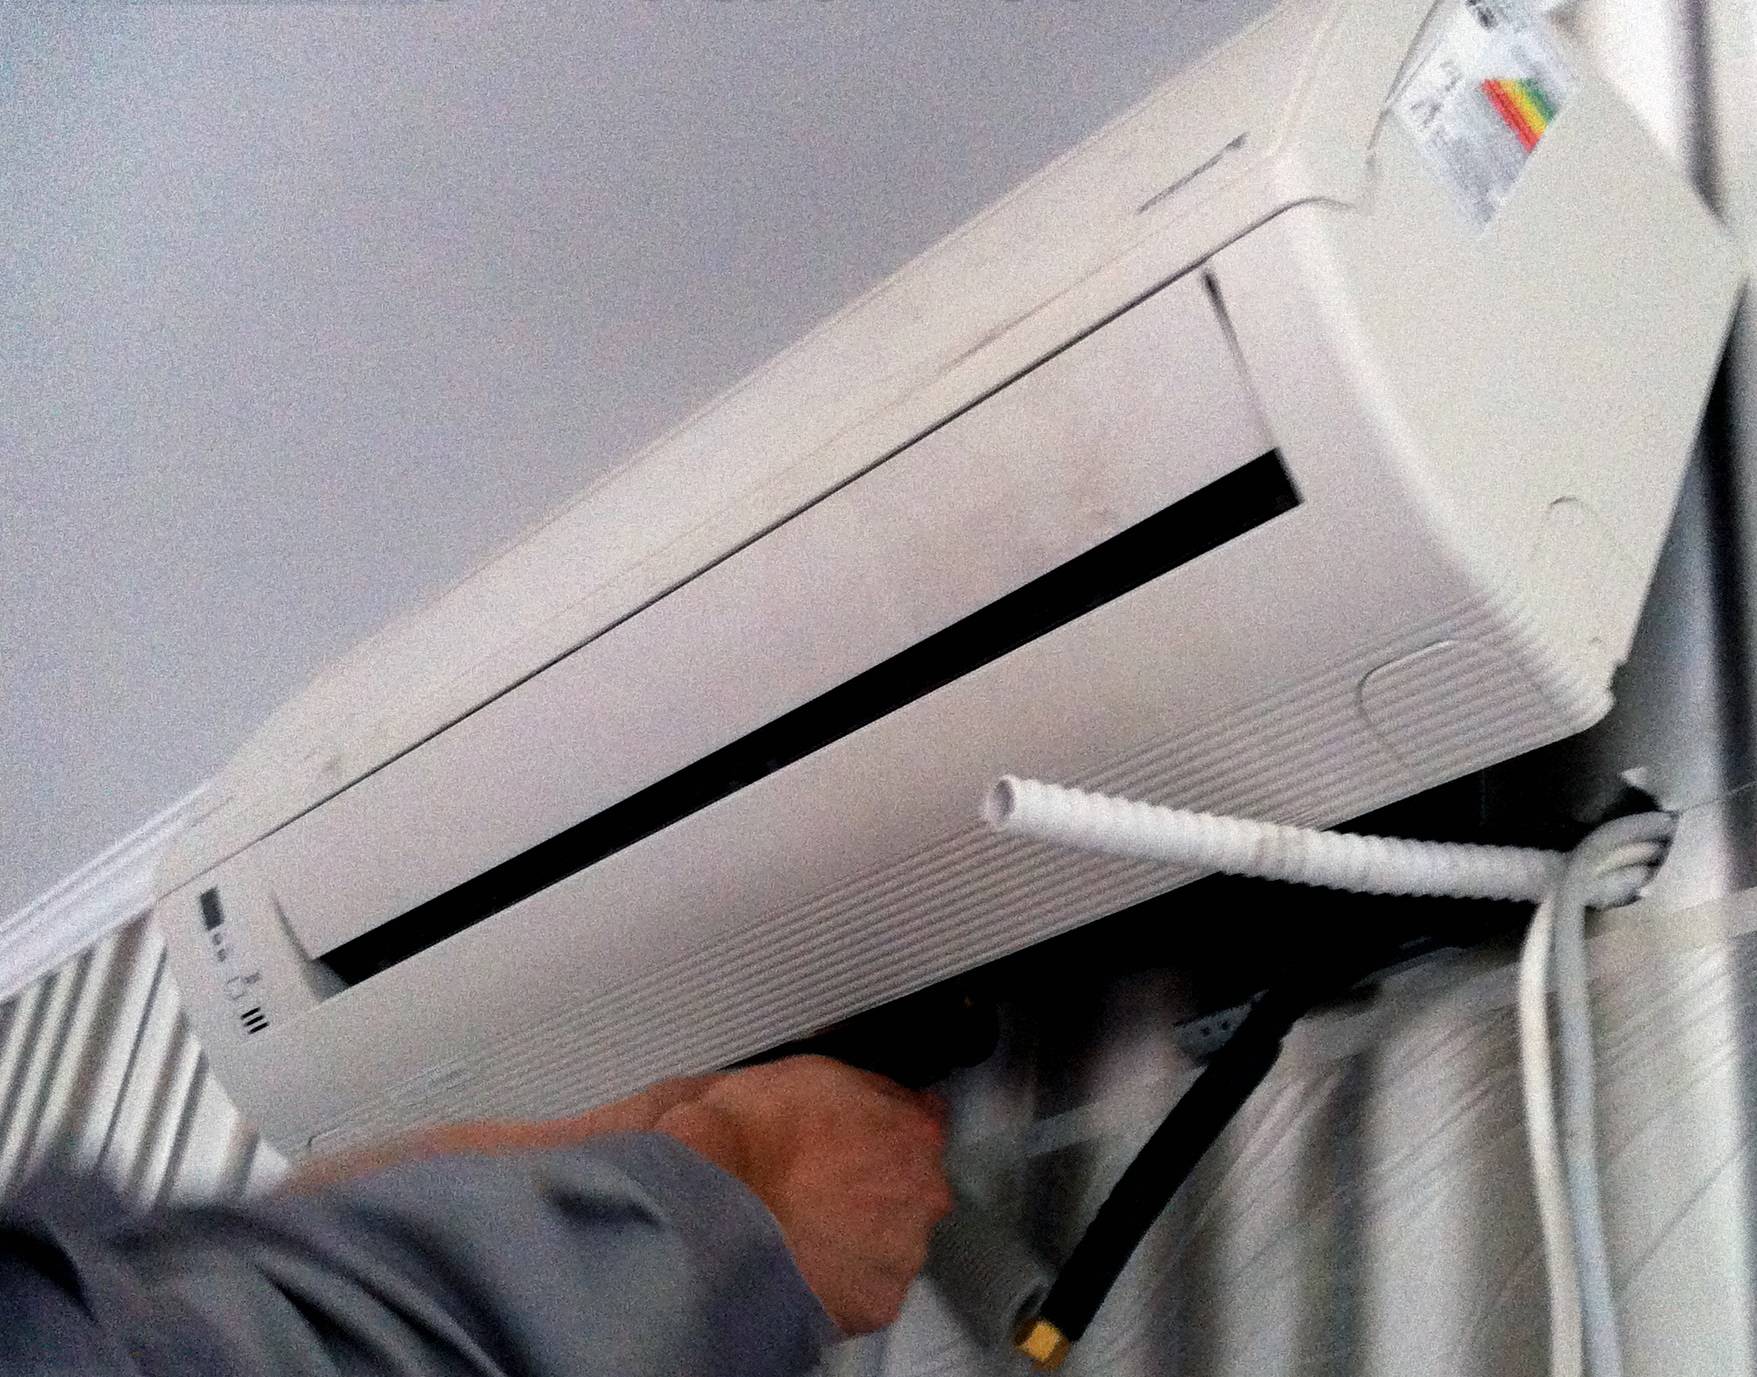
This is the drain outlet of the indoor unit (handy)
Connecting the drain tube is also easy. A corrugated hose is easily pulled onto the outlet of the drainage system of the indoor unit (a tube with a plastic tip at the bottom of the unit). To keep it secure, you can tighten the connection with a clamp.
The same is the case with the drainage from the outdoor unit. Exit it at the bottom. Often they leave everything as it is, and the water just drips down, but it's probably better to also put on a drainage hose and take moisture away from the walls.
Outdoor Unit Drainage
If not a hose is used, but a polymer pipe, it will be necessary to select an adapter that will allow you to connect the outlet of the air conditioner and the tube. You will have to watch on the spot, because situations are different.
When laying a drain pipe, it is better to avoid sharp turns and certainly not to allow sagging - condensation will accumulate in these places, which is not good at all. As has been said more than once, the tube is laid out with a slope. Optimal - 3 mm per 1 meter, minimum - 1 mm per meter. Throughout it is fixed to the wall, at least every meter.
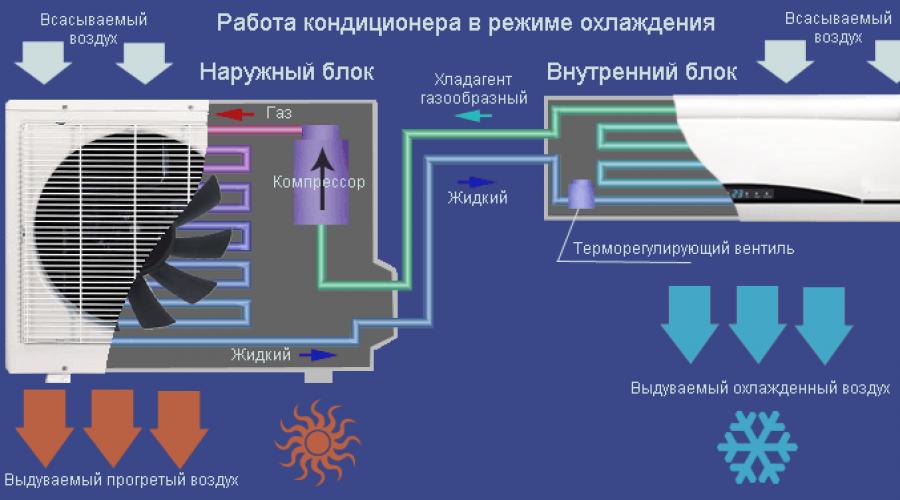
Freon circulation system
It is somewhat more difficult with connecting copper pipes. They are carefully laid out along the walls, avoiding kinks and creases. For bending, it is better to use a pipe bender, but you can get by with a spring one. In this case, sharp turns should also be avoided, but in order not to bend the tubes.
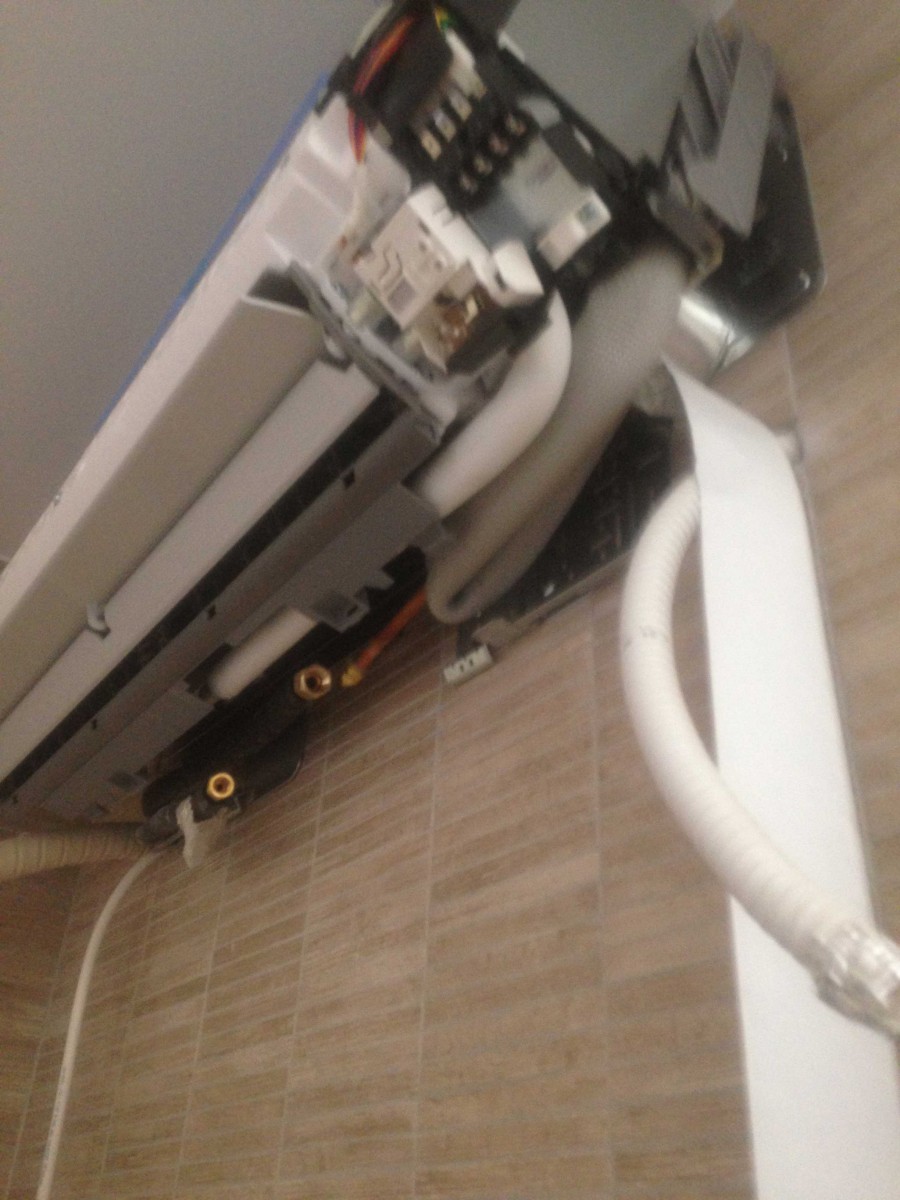
The ports on the outdoor unit look like this. Same on the inside.
From the beginning, we connect the tubes in the indoor unit. On it, we twist the nuts from the ports. As the nuts loosen, a hiss is heard. It's nitrogen coming out. This is normal - nitrogen is pumped in at the factory so that the insides do not oxidize. When the hissing stops, take out the plugs, remove the nut, put it on the tube, and then start rolling.
rolling
First, remove the plugs from the pipes and check the edge. It should be smooth, round, without burrs. If the section is not round during cutting, use a calibrator. This is a small device that can be found in the forehead shop. It is inserted into the pipe, scrolled, aligning the section.


The edges of the tubes are carefully aligned for 5 cm, after which the edges are flared so that they can be connected to the inlet / outlet of the blocks, creating a closed system. The correct execution of this part of the installation is very important, since the freon circulation system must be airtight. Then refueling the air conditioner will not be needed soon.
Expanding copper pipes for air conditioning installation
When flaring, hold the pipe with the hole down. Again, so that copper particles do not get inside, but spill out onto the floor. In the holder, it is clamped so that it sticks out 2 mm outward. That's right, no more, no less. We clamp the tube, put the flaring cone, twist it, applying solid efforts (the tube is thick-walled). The flaring is finished when the cone goes no further. We repeat the operation on the other side, then with the other tube.
This is what the result should be
If you have not rolled pipes before, it is better to practice on unnecessary pieces. The edge should be smooth, with a clear continuous border.
Port connection
We connect the flared edge of the pipe to the corresponding outlet, tighten the nut. No additional gaskets, sealants and the like should be used (forbidden). For this, they take special tubes made of high-quality copper so that they provide sealing without additional funds.
Connection principle of copper tube with air conditioner port
You need to make a serious effort - about 60-70 kg. Only in this case, the copper will flatten out, compress the fitting, the connection will become almost monolithic and accurately sealed.
The same operation is repeated with all four outputs.
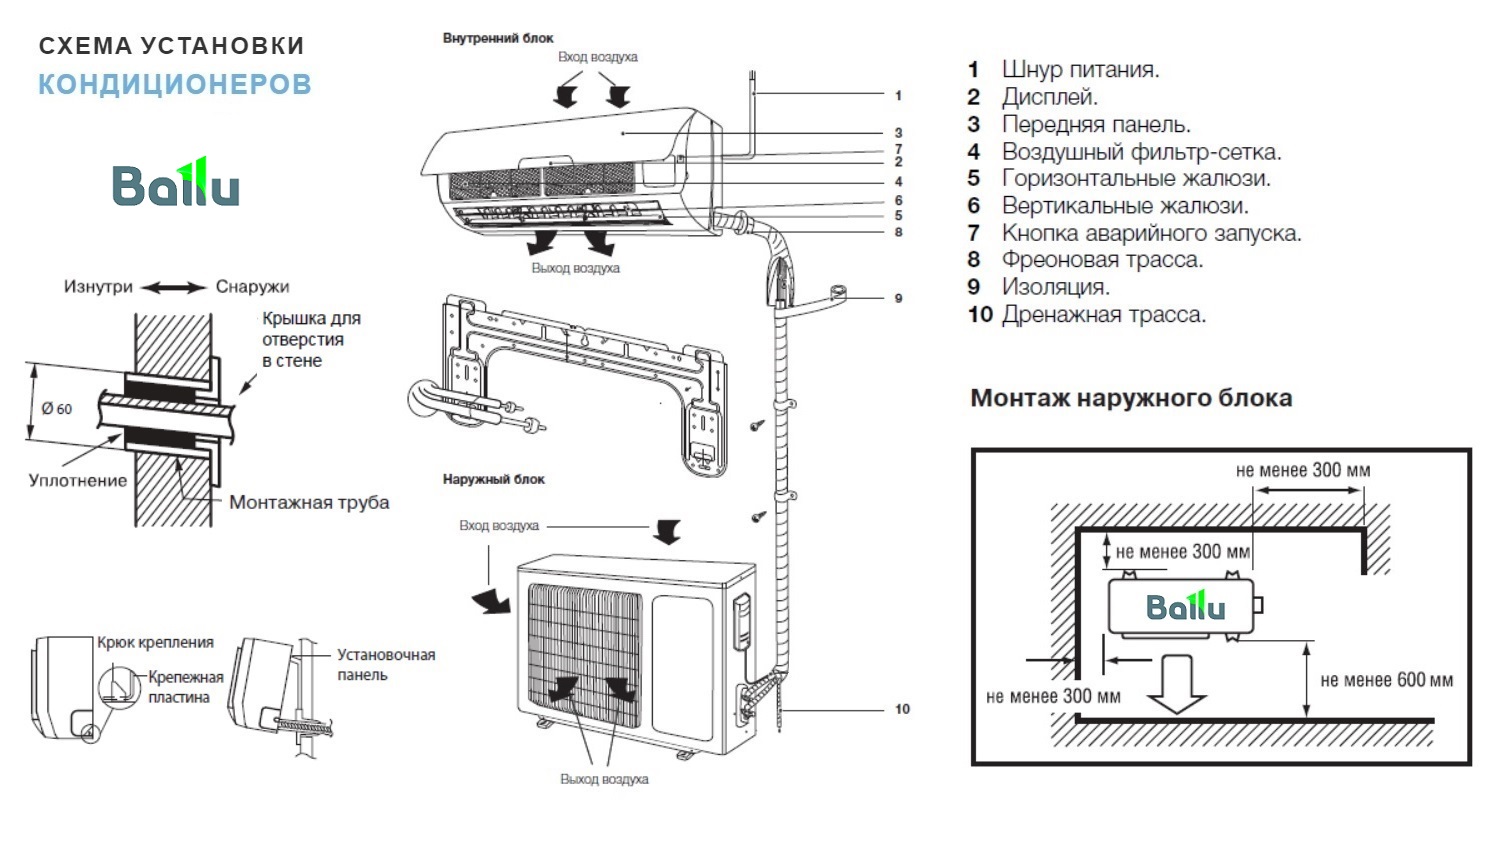
Basic rules for installing and connecting an air conditioner
The structure of the traditional split system includes an external unit, which is located outside the window, and an internal unit. In some cases, more than 1 block is installed. Such combinations are known as multi-split systems.
Installation diagram of the indoor and outdoor unit of the split system
Each element of the system performs its functions. So, the outdoor unit is responsible for condensation, while the indoor unit performs the functions of an evaporator. The blocks are connected using a line of tubes and wires. Freon circulates through the tubes. The system also includes a drain tube. It is connected to the outdoor unit. It is responsible for the removal of moisture condensed during the operation of the installation. According to the rules, this tube must be connected to the sewer system.
Air conditioning systems are available for sale for every taste and request. However, in terms of their composition and connection technology, they practically do not differ from each other.
Before proceeding with the installation of blocks, you need to decide on a number of important points.
- First, decide on the side of the world to which the capacitor unit will go.
- Secondly, you need to establish the material from which the walls of the house are made. In accordance with this moment, suitable fasteners will be selected. Additionally, certain changes in the installation process of the system are made by the weight of the blocks.
When choosing the power of a future split system, take into account the operational and other important characteristics of housing. First of all, consider the orientation of the apartment or house to the cardinal points
Also important is the number of people inhabiting the dwelling, the total power of electrical appliances, the number of heating radiators, the presence of other ventilation systems and devices.
Features of mounting the outdoor unit of the air conditioner
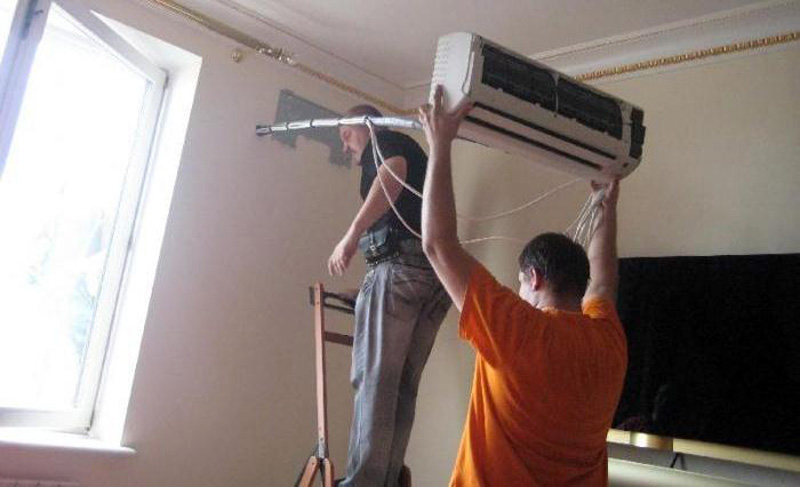
 Most often, this part of modern split systems is placed on the wall of the house. But keep in mind that if you live in a multi-storey building, then the installation of the outdoor unit of the air conditioner itself, and regular preventive / maintenance maintenance in the future will be expensive. The fact is that such work can only be performed by a specially trained person, at least who owns a certificate of an industrial climber.
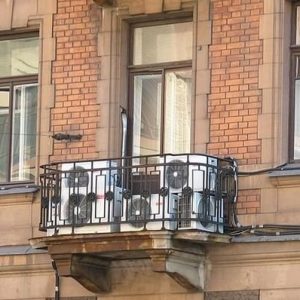
Experts recommend choosing a balcony or loggia for installing the outdoor unit of the air conditioner. Just keep in mind that it is strictly forbidden to install the outdoor unit of split systems on glazed balconies / loggias if it is not possible to ensure the supply of fresh air by opening the window sashes.


In general, when installing the outdoor unit of a split system, you should be guided by the following recommendations of specialists:
- you can not install the unit near trees and in close proximity to gas communications;
- it is undesirable to install the outdoor unit on the sunny side of the house - there will be problems with high-quality cooling of the room, and the unit will quickly fail under the influence of hot air;
- the best option is to install the outdoor unit on the leeward side of the house;
- you can not install the considered part of the split system too close to the ground.
If the outdoor unit is installed next to a tree, then the branches of the latter will constantly beat against the unit at the slightest breath of wind, and debris will fall directly into the device. Therefore, if it is not possible to “bypass” the crown of a tree, then you just have to cut it.
Installing the outdoor unit too close to the ground increases the risk of both street debris/dust and snow contaminating it. If there is no other mounting option, then you need to use a special stand.
Another point is very important - you need to take care of the removal of condensate. Of course, it is brought out automatically, but it is necessary to provide its collection point. Keep in mind that simply discharging condensate onto the sidewalk will lead to dissatisfaction with the surrounding people - they are unlikely to like to pass under drops of not too clean water.
Please note: air conditioner installers may offer to equip a dedicated condensate sewer discharge system, but this will require additional financial costs, and considerable ones. It may be possible to divert condensate to a flower bed or to a drain - there are options anyway
Lastly, the outdoor unit of the air conditioner is noisy. If you install it in close proximity to the neighbor's windows (in an apartment building), then troubles may arise "out of the blue" - it is doubtful that the neighbors are fans of the earplugs.
Installing an air conditioner is the prerogative of specialists, although you can carry out this process yourself. But in any case, you will need to choose the location of a modern split system, taking into account the technical characteristics of the equipment.
Which is more profitable: professional installation or do-it-yourself installation of a split system
The price of installing an air conditioner depends on the complexity of the work, on the power and size of the equipment. To make the comparison correct, the cost of professional services for the installation of a small power household appliance, for example, 3.5 kW, can be considered as a basis.
This service includes:
- installation and connection of both units;
- harness laying (up to 5 m);
- formation of through holes in the wall.
Also, the cost of installing an air conditioner includes the cost of consumables. On average, professional installation of low-power split systems costs the client 5500-8000 rubles.
Average prices for renting a tool and purchasing materials for installing an air conditioner in an apartment with your own hands:
- Perforator ("Makita") - 500 rubles per day.
- Two-stage pump - 700 rubles / day.
- Installation kit + communications (5 m) - 2500 rubles.
Independent installation of a split system saves from 1500 to 4000 rubles.
In some cases, equipment is leased only on security. It is approximately 4000-8000 rubles. The amount of the deposit depends on the value of the equipment rented. If pipe rolling is required, then tool kits designed for this purpose will have to be added to the list. The cost of their rent is 350-500 rubles per day.
The total amount reaches 3700 rubles. To this value you need to add 10%, which will cover unforeseen costs and the purchase of consumables. The result will be about 4000 rubles. This means that self-installation of a split system saves from 1,500 to 4,000 rubles.
It is worth noting that the minimum amount for a professional installation does not always include a complete list of work.You may have to pay extra for some of them. With this in mind, we can conclude that the savings are about 2500-3500 rubles.
On a note! Economic benefits can only be achieved as a result of the correct installation of a split system with your own hands. Repairs and alterations will only incur additional costs.
The cost of installing an air conditioner includes the cost of consumables.
Pressure and seal test
Before the process of pumping freon, be sure to check the drainage. To do this, after removing the filter, pour clean water onto the evaporator of the indoor unit, as if simulating the formation of condensate.
If the drainage is done correctly, then the water will freely exit through the tube and not overflow over the edge of the inner pan.
Also, before opening the ports of the freon line, it is advisable to check the pressure in the system. The manufacturer, as a rule, fills the refrigerant for 5 meters of the route, and reports this on the nameplate of the outdoor unit.
However, there are also half-empty copies (they save freon).
Next, the tightness of all connections is checked. Super-professionals do it for the right price with nitrogen, at a pressure of 38 bar. But are you willing to pay money for such quality?


In the standard version, after disconnecting the vacuum pump, a certain amount of refrigerant (5-7 bar) is simply released into the route and the pressure value is memorized.
Wait 20 minutes and check if the readings have changed. With a positive result, using the hexagons, the service valves of the air conditioner are fully opened and all the freon is launched into the line.
Next, apply voltage to the air conditioner and test it in all modes.During cooling, measure the surface temperature of the evaporator with a pyrometer, and best of all with a contact thermometer.
After entering the operating mode, it should be at least + 6C. If the temperature is higher, additional freon charging may be required.
In this case, a complete reload of the system is used more, and not just its refueling, due to the complexity of the process.
If all the installation steps are completed without comment, you can enjoy the coolness and assume that your air conditioner is installed correctly.
Block fixing
Installation of plastic (PVC) windows in a house or apartment: step-by-step instructions for do-it-yourself installation | Photo & Video
Connecting an air conditioner
back to menu
Installation of the outer part
Choosing and installing interior doors: step-by-step instructions for do-it-yourself installation | 80+ Photos & Videos
First of all, the outer part is installed. The first rule is not to forget about safety if the installation takes place above the second floor. When installing, consider the following factors:
- The block should not block the view of the neighbors
- Condensate must not run down the wall
- Attach the device so that you can perform maintenance on it.
Air conditioner mounting scheme
When fixing the outdoor unit on the balcony, you must also follow the rules:
- make sure that the balcony is strong enough to support the appliance. On average, the weight of such a product is 10-15 kg.
- if possible, it must be fixed in a place where the wind blows from all sides so that condensate does not flow down the wall
Installing the module outside
Recommendations for installing air conditioners:
- The block inside must be installed so that the air does not blow over you, otherwise tonsillitis and bronchitis will be provided
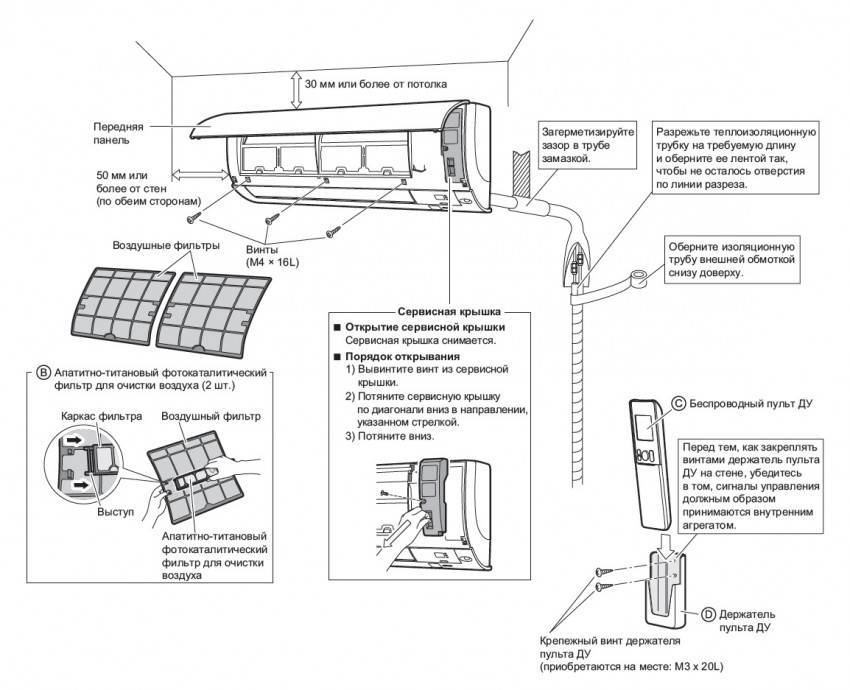
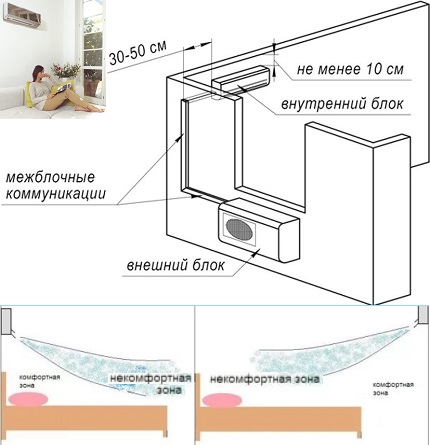
- The distance from the ceiling must be 100 mm. And from the side wall 125 mm
- The outdoor unit must be attached so that you can reach it for preventive maintenance
- The distance of the outer product from the back wall should be 20 cm, and from the side wall 300 mm
Indents from the edges of the walls
If possible, the module outside should not be placed to the side of the window, but best of all under the window, since if you decide to call the master in case of a breakdown or to check the device, then it may well refuse to work due to improper installation.
Fixing outdoor and indoor unit, tilt and piping
back to menu
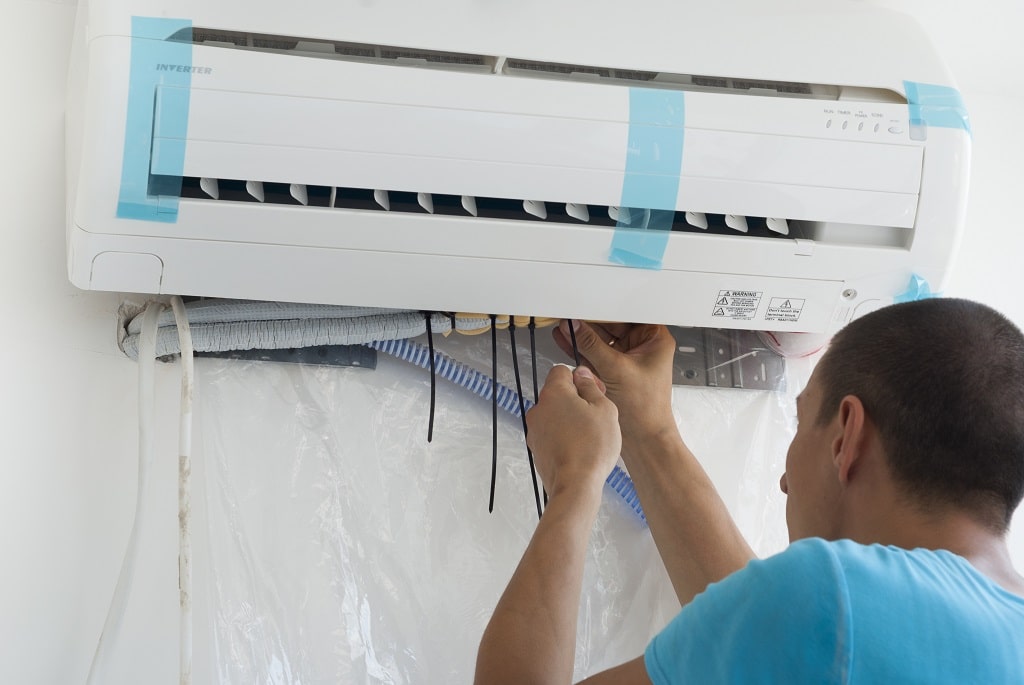
Installation of the interior
Making a dressing room with your own hands: how to equip a storage system in a pantry or bedroom? | 100+ Photos & Videos
Installation of the interior
The first step is to properly arrange the wiring. Make sure the wiring can withstand this load.
Recommendations for fixing the device:
The inner part should be located so that there are no unnecessary objects near it. Otherwise, they will interfere with the cooling of the device. Do not place the air conditioner above a fireplace or other heat source. The wind from the electric air conditioner should not directly blow on a person, unless, of course, you want to maintain your health.


back to menu
Some general information
Our main goal is to install the air conditioner without damaging it. But, in addition, it is necessary to properly install both the indoor and outdoor units. Otherwise, the performance will be much lower, if the device will function at all.
To get started, you will need a special tool: a puncher and a vacuum pump, a manometric pump, a building level. As for consumables, the installation of a split system is carried out with a standard kit, which should be included in the kit. This is a heater, a drainage hose, dowels, brackets, etc. If this is not there, then you need to buy it, and only after that start installing the air conditioner.
Choosing the right place to install the air conditioner
When choosing an area in your room that is appropriate for mounting a split system - both internal and external structures - be sure to consider each of the following factors:
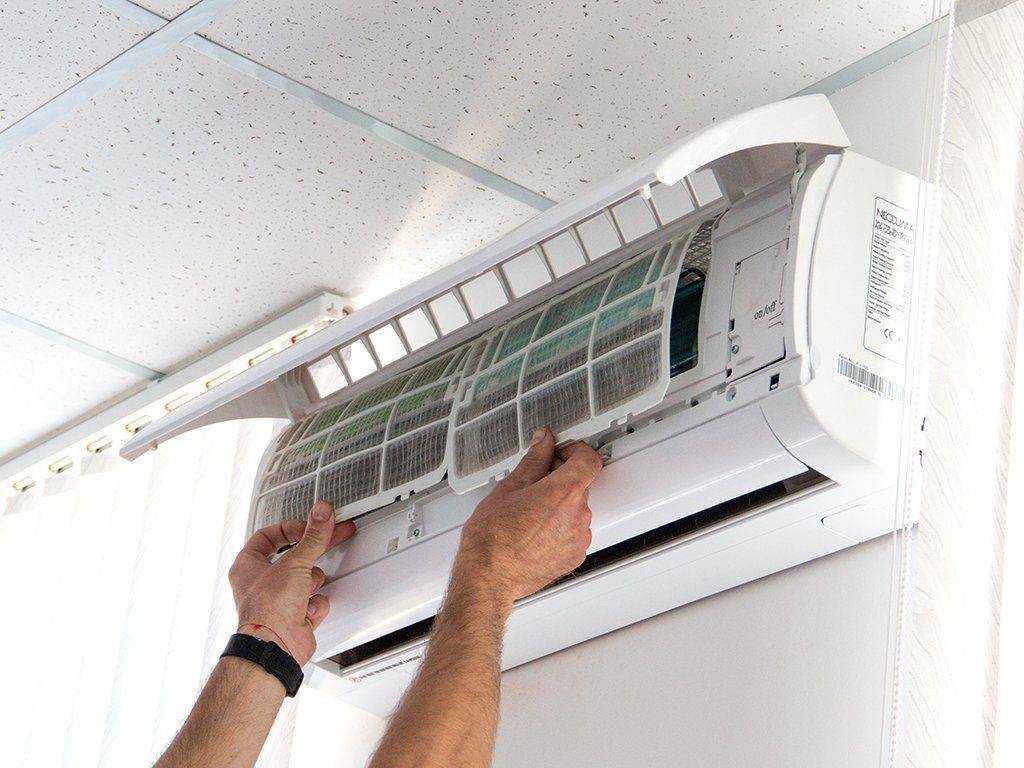
First of all, it is necessary to correctly calculate the presence in this room of regular and unhindered access to the air conditioning device itself, in order to be able to clean the air conditioner filters or identify any problems, if any;
In addition, one should take into account the rationality of the minimum distance and the minimum number of physical barriers between the indoor and outdoor units, since with an increase in communications between the units, the performance of the air-conditioning system as a whole is significantly reduced). The ideal and most rational route length is 6 meters, in systems with such communications there are no more problems for air conditioner owners (the need to refuel or clean excess moisture in the air conditioner);
To ensure the most efficient operation of the air conditioner in terms of blowing, the minimum distance from the unit to the resistant wall should not be less than ten centimeters;
In no case should you place the indoor units of the air conditioner above the walls, cabinets, or any other large furniture, because a high barrier constantly formed in the atmosphere, thanks to the air conditioner, cold air clots will be a natural factor in reducing the productive activity of your air conditioning device
150 centimeters is the minimum distance of the indoor unit from any obstruction to the flow of cooled air;
According to the same factor, adhere to the minimum distance of the indoor unit from the ceiling and side walls (minimum is 15 and 30 centimeters, respectively);
In addition, it is highly recommended to coordinate the installation of the air conditioner with your neighbors in order to avoid problems and scandals when you install your split system. In principle, the installation of an outdoor unit, as part of the workflow, should not cause any extremely serious problems for the population of an apartment building, if the work takes place in it, however, it is very possible that someone in this case may not like it at all, for example, the sound of a working propeller, or gas condensate. In this case, try to notify the neighbors in advance about the upcoming amount of work;
And, finally, the most intuitive factor - the operation of the air conditioner itself should not interfere with other people, and air flows should not interfere with the lives or work of people who are in the same room with you. Accordingly, take into account the flow of light air currents when proceeding with the installation.
Having decided on the location for the structure, taking into account all of the above factors and not finding any flaws in your own plan, you can proceed directly to the workflow itself.
Conclusions and useful video on the topic
A video demonstrating the dismantling procedure will be an additional help for people seeking to remove the system with their own hands.
The video clearly demonstrates all the subtleties of the work:
Solving the problem of removing (dismantling) a household split system with your own hands is a completely feasible process. The main thing is to have an idea about the device of such equipment and how it is installed. Obviously, the dismantling will have to be done in the reverse order.
Do you install, replace, repair and maintain split systems and repeatedly remove equipment and put it back? Share your dismantling secrets with beginners in this business - leave recommendations below under this article.
If this is the first time you have taken up the removal of split system blocks and you have any questions that we have not considered in this material, ask them to our experts and other site visitors.


