- Sink Installation Recommendations
- Types of shells
- Types of bathroom sinks by installation method
- Shape and size
- Production material
- Varieties of hanging sinks
- Drain connection
- Varieties of suspended structures
- Advantages of suspension systems
- Variety of classification of hanging compositions
- Fixing a wall-hung sink to the wall with brackets
- Narrow and small
- Photo-guide for installation installation
- What is to be done at the preparatory stage?
- What elements does the cabinet consist of?
- Niche preparation
- Installing a hanging pedestal with a do-it-yourself sink
- Installation installation
- Preparatory stage
- Mounting the device
- Installation connection
- Installation of an integrated sink
Sink Installation Recommendations
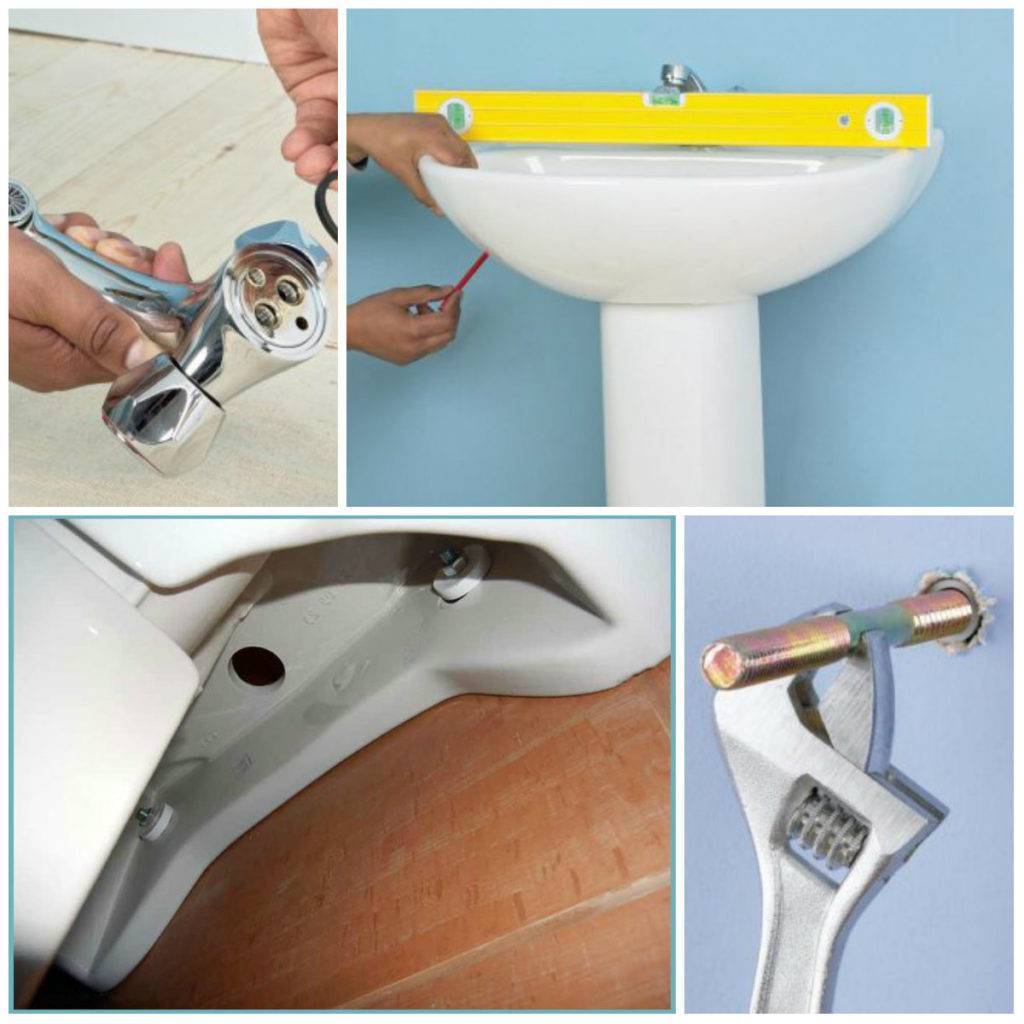
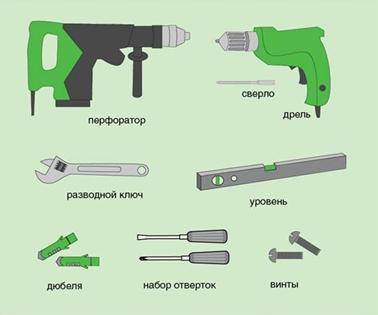
To mount the washbasin to the wall, you need to prepare the tools:
- screwdriver;
- wrenches and wrenches;
- drill with a drill for concrete or wood, according to the type of base;
- a hammer;
- level;
- pencil.
You need to check how solid the wall in the bathroom is. To do this, use a small drill. In a place that will then be closed by plumbing, a test hole is drilled. If the drill enters the wall easily, you will need to use anchor fasteners to secure the brackets.The depth and diameter of the hole depends on the hardness of the wall.
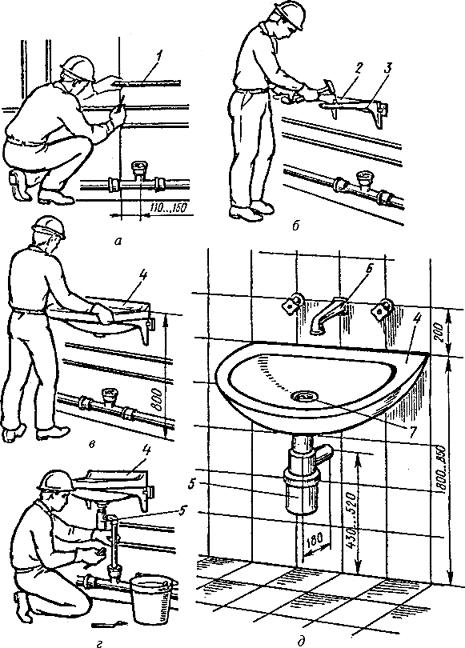
When installing a sink, it is worth considering the requirements of Building Regulations and Rules (SNiP). According to SNiP, standard height from floor to the upper edge of the washbasin, which is convenient for a person of average height, is 80–85 cm. Based on this, the height of the brackets should also be selected. If the growth is different from the average, you need to adjust the position of the sink for yourself.
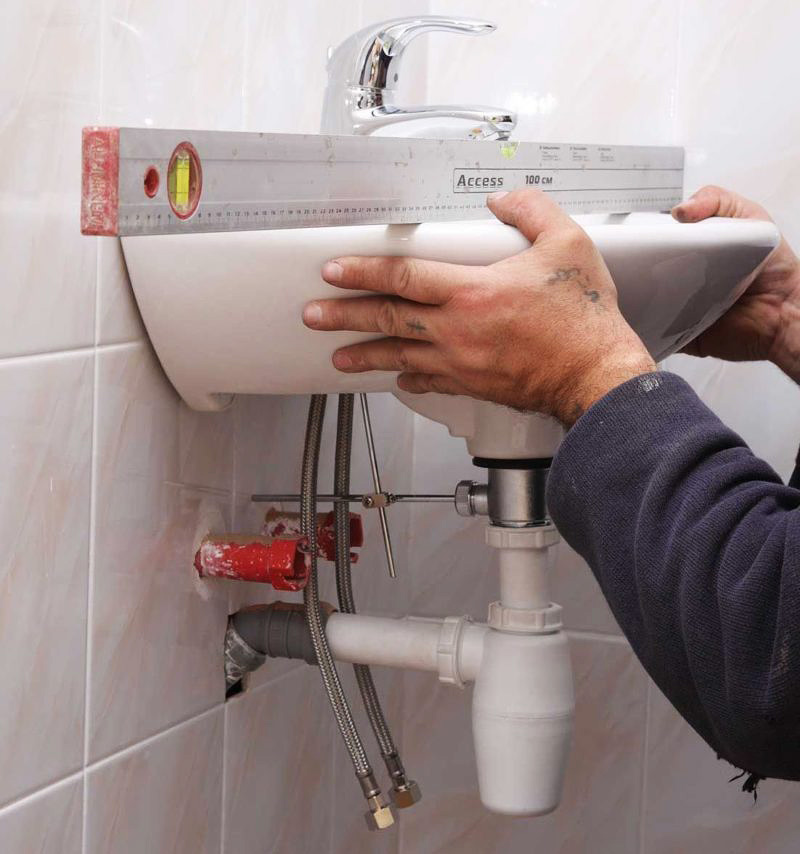
Installing a small washbasin on anchor screws is simple:
- Mark with a marker or pencil on the wall the place for fixing the anchors. Make holes with a drill so that their diameter is slightly smaller than that of the dowels. Fix the dowels in the holes using a small amount of glue and a hammer. Screw in the anchor screws until they stop.
- Sinks of large sizes are fixed on brackets. To install the bracket, mark a horizontal line on the wall and check its evenness with a level. It will act as a border along which the upper edge of the equipment is exposed. After that, the width of the shell is marked and the thickness of the side walls is outlined down. The resulting marks are connected by a horizontal line. Fasteners are mounted along this line.
- Next, you need to attach the bowl to the upper horizontal along the previously drawn line and thus mark the places on the wall with a marker that coincide with the holes for fastening in the sink structure. After that, holes are made in the wall in these places with a victorious drill. It is necessary to drill as deep as possible to the very base of the wall, otherwise the plaster layer will not hold the structure. The hole diameter should be slightly smaller than the cross section of the bushings used.Dowels are driven into the resulting holes.
- Now you need to mount the brackets. On the wall, mark the places where you will need to install the fasteners, holding the washbasin with your hand. Holes are prepared in the marked places of fasteners, dowels are driven in and fasteners are installed. Check the reliability of the fasteners with pliers. They should not budge under load.
- After all the above procedures, if everything is done correctly and the brackets are fixed securely enough, you can install the washbasin itself. The seam is treated with sanitary sealant. Install sink and faucet.
When installing frame fasteners, nuances are taken into account. They are used if the walls in the bathroom are hollow or loose, which makes it impossible to fix conventional brackets. This design consists of two profiles and is attached simultaneously to the floor and walls. Adjustable legs make it easy to set the desired height. First you need to pick up the level and fix the frame. Then the studs for the sink are twisted. After that, the frame is sheathed with plasterboard and lined with a finishing material. Rubber washers are placed on the studs and the bowl is mounted.
Performing the steps in accordance with the instructions for fixing plumbing equipment leads to the creation of a solid structure that will last for many years.
Previous post Views, purpose and installation rules bed fittings
The next entry Features of fastening vertical racks when assembling a frame house
Types of shells
Unlike kitchen sinks, bathroom sinks come in a much wider range.
In order to choose the right accessory, you need to pay attention to the following characteristics:
- type of instalation;
- shape and size;
- manufacturing material.
Types of bathroom sinks by installation method
According to the installation method, sinks are divided into the following types:
-
With a pedestal In the people, this design is also called a tulip. Its main feature is the presence of a leg or pedestal. This solution allows you to hide the siphon and water pipes, and also provides a reliable support for the bowl. These structures have a predetermined height, usually 70-80 cm, and in the case when it is not enough, you will have to additionally make a stand or pedestal. It is not possible to reduce the height of the pedestal.
-
Overhead. Such models are installed on the countertop and protrude above it at a distance not exceeding 10 cm. After installing the overhead sink, it seems that it is a separate object. Such designs do not have holes for installing a mixer, so the faucet is mounted on a countertop. For ease of use, the height of the countertop should be no more than 85 cm.
-
Mortise. Such a sink crashes into the countertop, this can be done both from below and from above. When inserting from below, plumbing is flush with the countertop, which greatly simplifies the removal of water that has fallen on it. When installing the sink on top of the countertop, it protrudes a few centimeters above it. The faucet can be installed both in the hole on the sink and on the countertop.
-
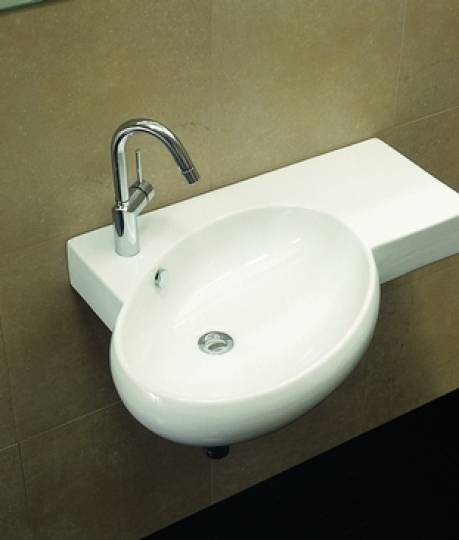
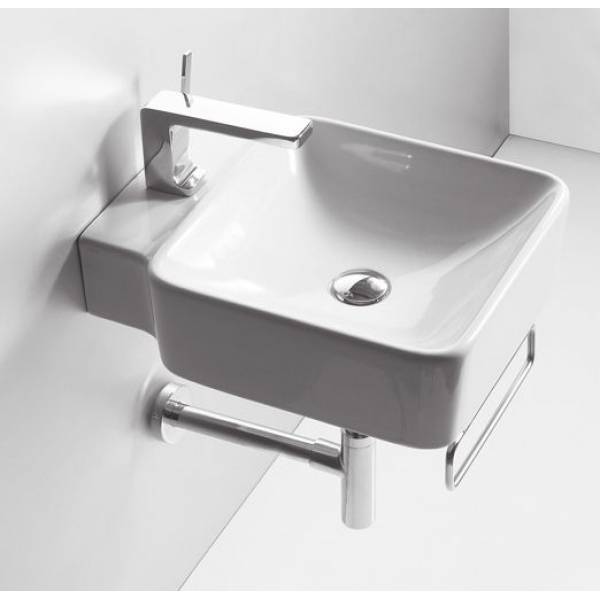
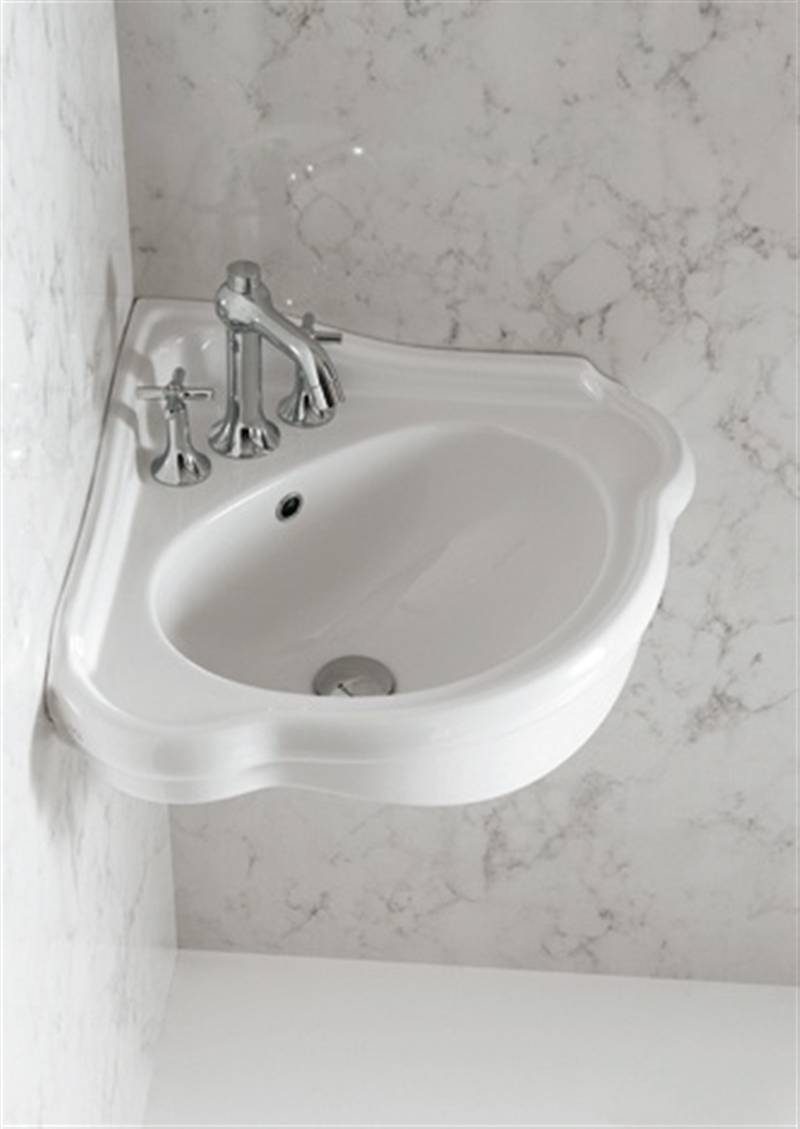
With wall mount. This design is also called console. There is no need to install a cabinet or countertop, as the sink is fixed directly on wall with special fasteners. There are models of sinks with wide wings that allow you to imitate a countertop.The faucet can be installed both on the sink itself and on the wall. The main disadvantage of such models is that the connection to the plumbing and sewer system remains in sight. The advantage is the release of free space, and this is an important point for small spaces. Under flat models, you can install a washing machine.
-
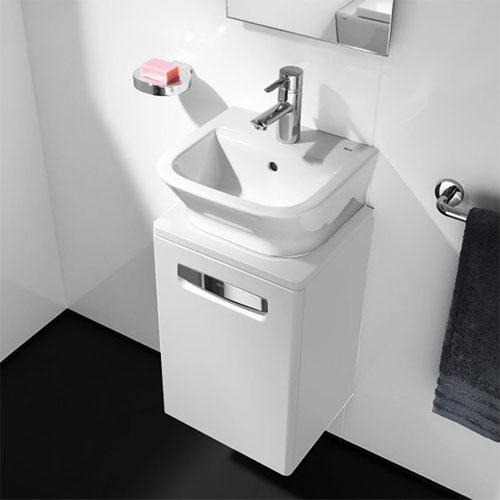
Furniture. Typically, these models come with bathroom furniture. They can be mounted on a separate countertop, but most often furniture sinks are installed on a stand or bedside table that matches their size.
Shape and size
One of the main parameters that you need to pay attention to when choosing a bathroom sink is its size. Only a properly sized washbasin will ensure its comfortable use and will not take up a lot of free space.
For small rooms, sinks 50–65 cm long and 40 cm wide are usually chosen. If you have a large room, you can install models up to 75 cm long or a double sink, in which case two people can wash at the same time.
Having decided on the size of the sink, you can proceed to the choice of its shape. Sinks are:
- round;
- oval;
- rectangular or square;
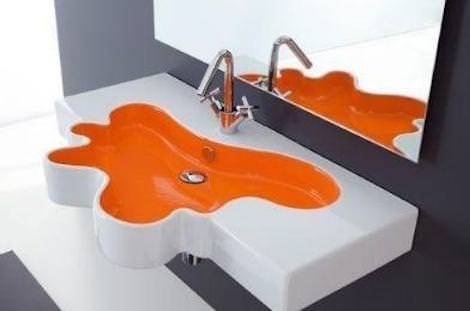
- complex shape.
Production material
In the manufacture of bathroom sinks, a variety of materials are used:
-
ceramics are the most common products. Porcelain is more expensive and of high quality, sanitary faience is simpler and cheaper;
-
natural or artificial marble. Although natural marble is a more expensive material, the presence of pores in it requires more careful maintenance.Sinks made of artificial marble outwardly practically do not differ from those made of natural stone, but they are cheaper. In addition, they have a smoother surface, which greatly facilitates maintenance;
-
Corian is a composite material, which includes acrylic resins and mineral filler, and with the help of a pigment, any color can be applied. Since this material is easy to process, shells of any shape can be made from it. Such models have a smooth surface, so they are easy to care for;
-
glass. Glass sinks, although they are expensive, look very beautiful. For their manufacture, special glass is used, so their strength is high. The disadvantage of such models is that traces of water are visible on them, so you need to take care of them more carefully;
-
Stainless steel. Such sinks have a long service life, high strength and hygiene. The disadvantage is that when hit by a jet of water, a lot of noise is created. Care must be taken of metal models carefully so as not to scratch their surface.
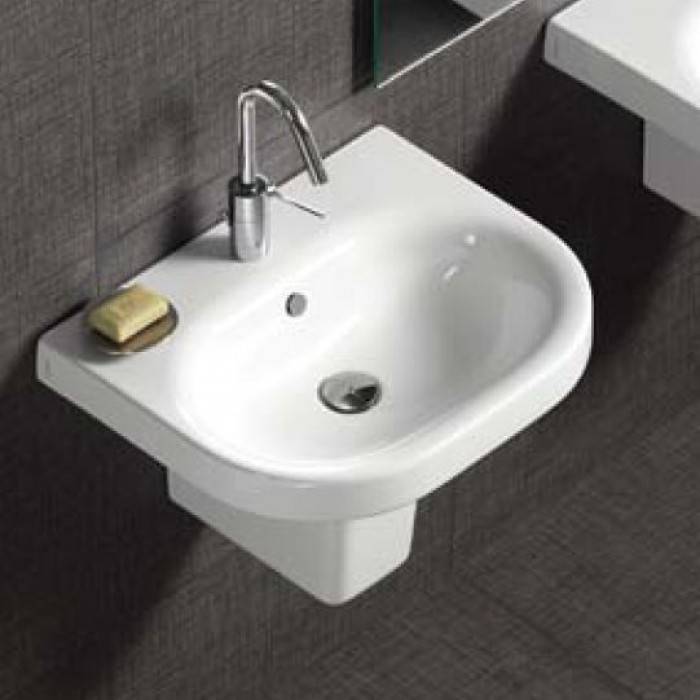
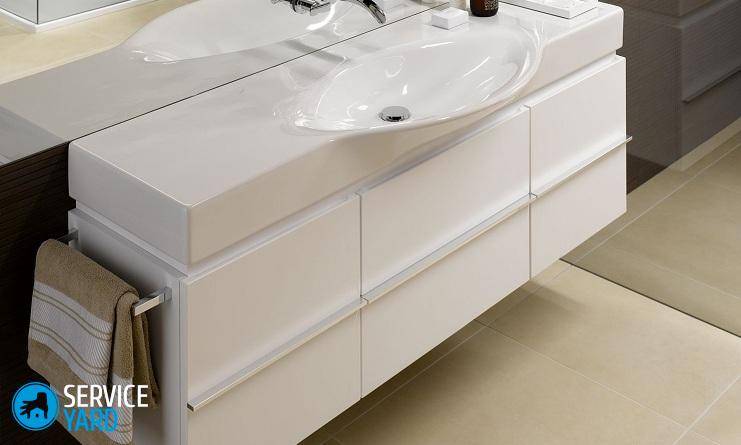
Varieties of hanging sinks
Hanging sinks are divided into several types, which are mounted on the surface of the wall. Subspecies of these shells will have slight distinguishing features:
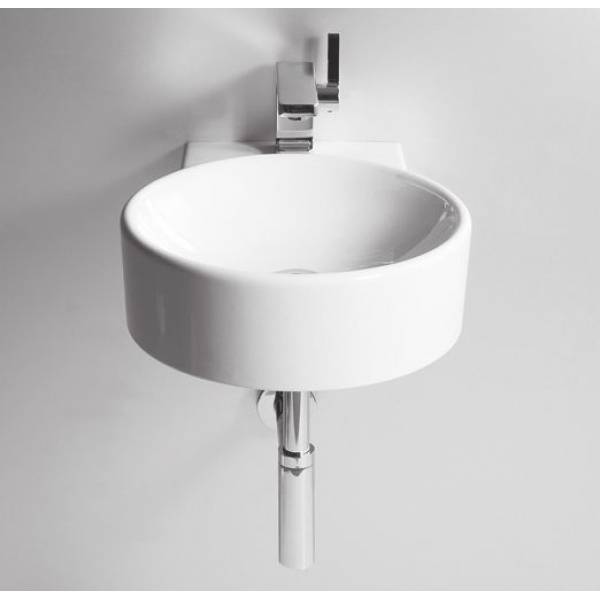
- classic hanging-type products look like an ordinary bowl mounted on the bathroom wall;
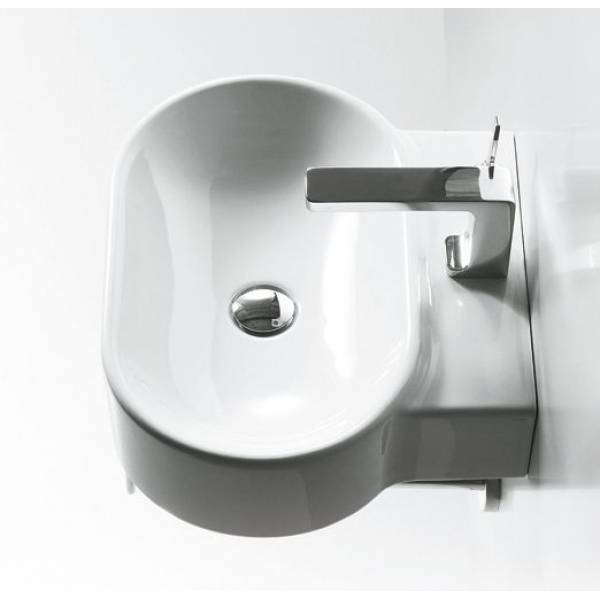
- a washbasin with a working area is not one sink, but together with an additional panel, you can perfectly place soap, shampoo and other bath items on it. The structure is entirely fixed on the walls without the participation of massive fasteners;
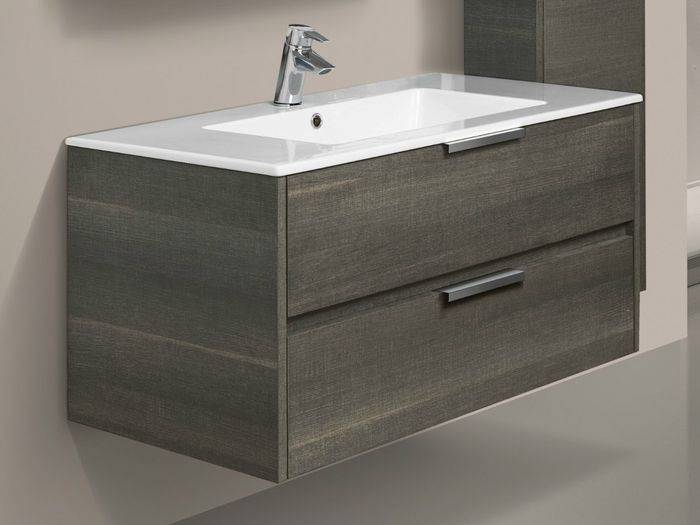
- a washbasin with a cabinet or on a semi-pedestal is a product that is installed on the bathroom wall as a complete set: a washbasin with a cabinet or a semi-pedestal. The top surface of the vanity unit is usually used in various ways: as a place to place toiletries or as a place where a washbasin will be installed or built in, while the vanity units act as a disguise for the installed bowls. Communication pipes are usually hidden behind the facades of the cabinet, and the cabinet itself is suitable for storing toiletries or hygiene items;
- the overhead washbasin can be installed both on countertops and on curbstones;
- a built-in washbasin for its installation requires a base from a cabinet or pedestal. At the same time, the hanging sink itself is built into a horizontal surface, on the same level with the working surface of the cabinet.
 Built-in wall-mounted washbasin
There are a lot of varieties of such products, in connection with this, the sink happens:
- rectangular;
- oval;
- round;
- square;
- asymmetric;
- double;
- angular.
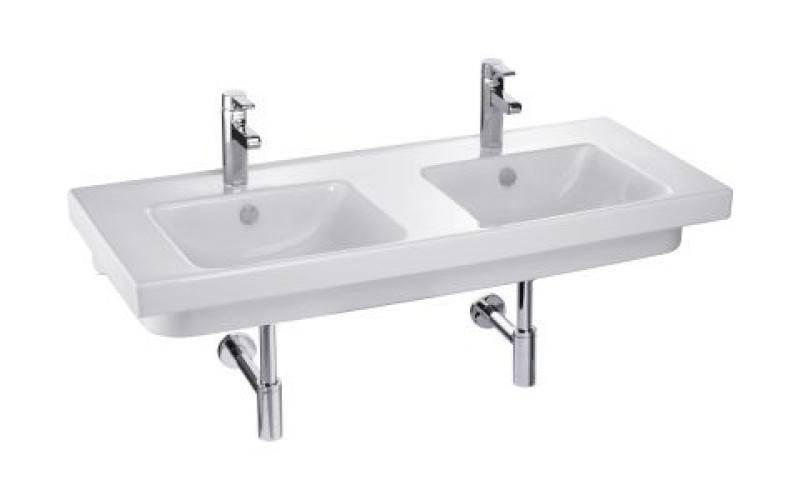

In addition, washbasins can be made complete with cabinets or countertops. Among the popular models, a rectangular design and an oval stand out. A rectangular sink is more suitable for a large and medium bathroom.


Such products are produced in sizes established by the standards, which is good for consumers who can choose designs specifically for a particular bathroom. For example, the following products can be given:
- rectangular sink, 55 cm in size, the most popular, due to ease of use;
- washbasin size 50 cm, non-standard, therefore not suitable for all rooms. They are most often used for hotels.
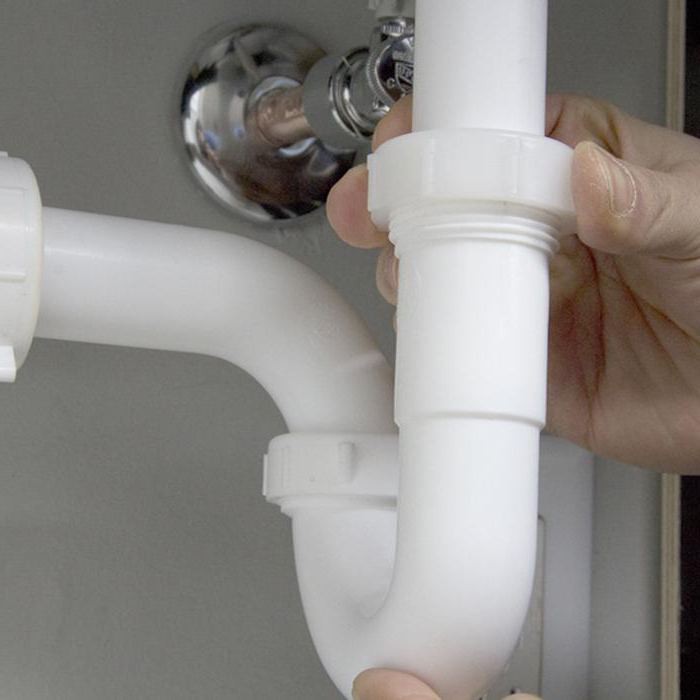
Drain connection
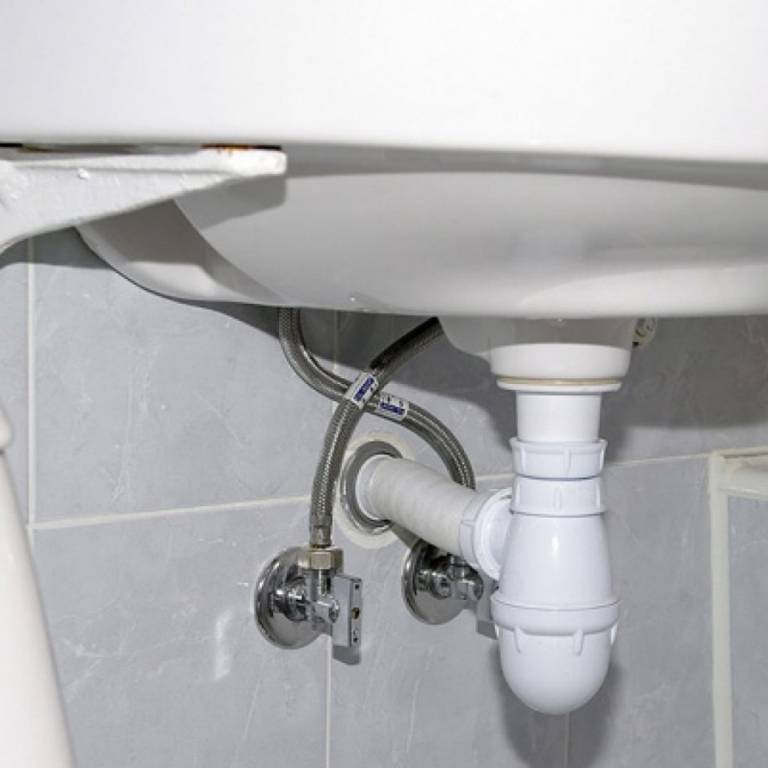
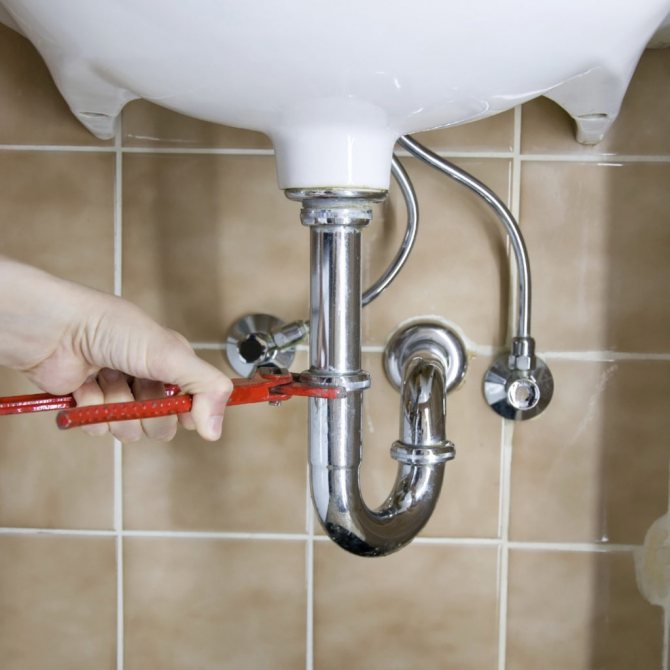
Before the sink is attached to the wall, you need to connect a drain - a water seal made of metal or plastic with corrugation or branch pipes. One of the best options for this device is the bottle model, which is easy to install and, when a blockage forms, it is cleaned without much effort.
To connect the siphon with the outlet pipe, caps are used. nuts and cone gasketsusing the instructions. Similarly, they act when assembling an element connecting the structure with the overflow.
First, a drain is assembled from individual elements and installed with an overflow. Then a water seal with a corrugation is mounted and a drain device is connected to the sewerage system. An important point is to check the drain for leaks. Also check the operation of the mixer.
The drain valve is closed with a cork, the wash basin is filled and the water leaves through the overflow. Then the plug is removed and checked to see if the siphon is leaking. If there are no leaks, after installing the faucet and draining, they are engaged in fasteners for the washbasin.
Varieties of suspended structures
The decision to decorate the bathroom with a hanging cabinet with a sink is not even half the battle, because you still have to choose the right model, buy it and install it. Therefore, let's start from the beginning - find out what the manufacturers offer, and try to decide which option is best for the bathroom.
Advantages of suspension systems
Those who have already come across information about bathroom furniture know that there are several types of cabinets depending on the installation method. Of these, two types of floor - standing on the floor with the bottom and legs, and suspended. Read more about bathroom cabinets below.
So why exactly are wall-hung sink cabinets in high demand?
There are several such reasons:
- Long service life. It is the suspension systems that, due to the most optimal air circulation, are less susceptible to the damaging effects of moisture and steam.
- Ease of installation. There is no need to involve specialists for installation, with all the necessary elements and clear instructions, any home master can handle the installation.
- Serviceability. Easy access to the floor under the furniture allows not only to simplify the cleaning process, but also to notice in time, and, therefore, eliminate leaks.
- Saving free space. This quality should not be confused with the purely visual effect of increasing the size of the room, although it is present to the fullest. In practice, you can make sure that even a small-looking cabinet can fit a lot of necessary things, until then randomly dispersed throughout the room.
- Individual approach. Even if your height or physique is not much outside the standard values, still the ability to install the sink at a height that is comfortable for you makes life much easier.
- aesthetic functionality. The hanging cabinet is not only conveniently organized for storing a wide variety of small items needed in the bathroom. She also hides behind her own facade all the unsightly looking plumbing stuffing.
- Extensive range of design solutions. It is quite possible to choose furniture for any style and interior or to level the heaviness of the washbasin with the airy design of the hanging pedestal.
Many, having seen a solid list of advantages, will immediately think - do hanging pedestals really have no drawbacks? Alas, the ideal does not exist. A significant disadvantage of the design is the requirement for a truly reliable support.
Brick or reinforced concrete walls are best suited for this, but for plasterboard panels, you will have to lay a reinforced frame at the places where the cabinets with a sink are attached to them.
And yet - wall models really look good only if all communications are hidden. When the sewer pipe remains in plain sight, for example, it is located along the entire wall above the floor, then hanging an elegant wall cabinet is like covering an old sideboard with a lace napkin.
Variety of classification of hanging compositions
As mentioned above, there are many options for hanging models on the market. And our task at the moment is not just to choose an original design, but to try to take into account all the nuances - both design and work. So what varieties now exist and what benefits do they provide?
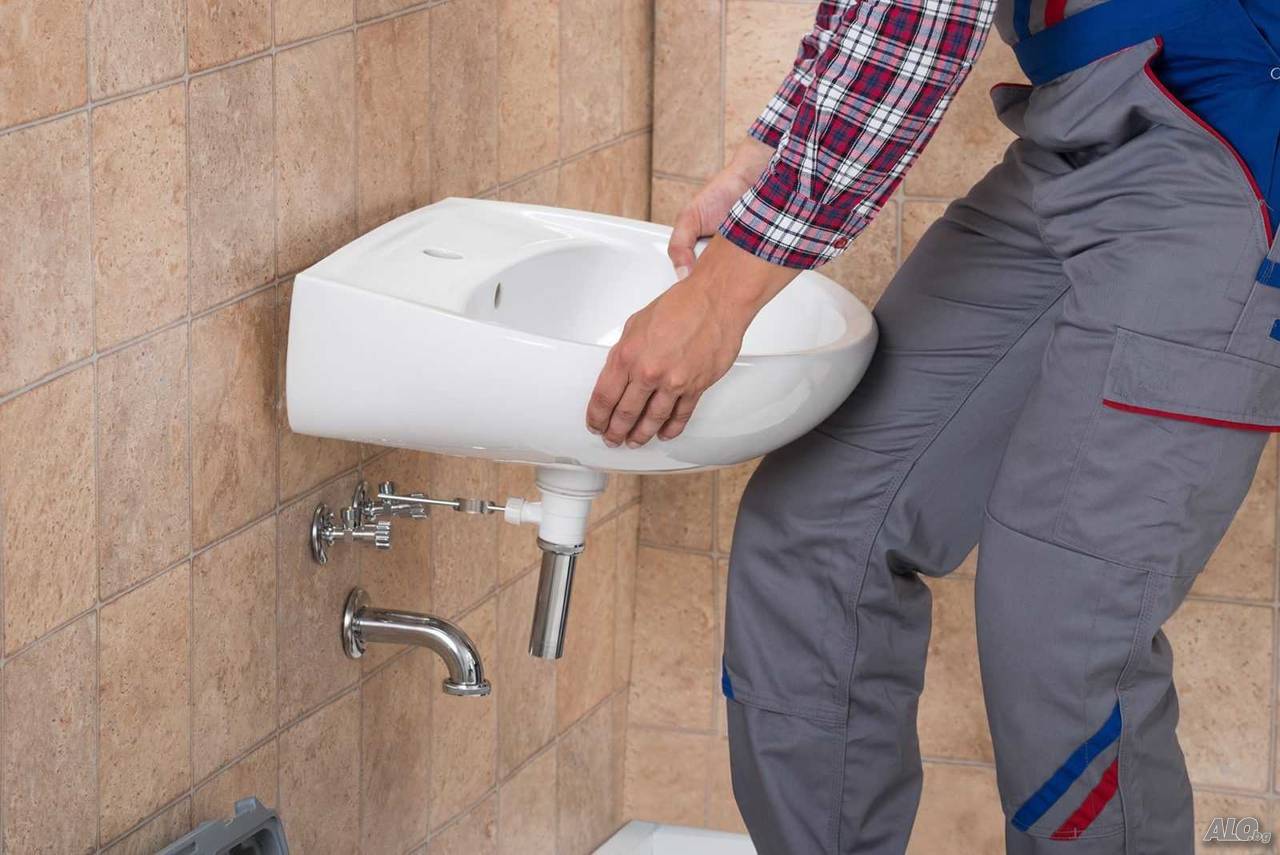
Fixing a wall-hung sink to the wall with brackets
Mounting brackets are used if you have purchased a heavy sink. It can be stone, cast iron or marble plumbing. Installation of a hinged sink on special brackets has some differences from the first mounting option. Mark up before starting work. To do this, you need to determine the distance between the brackets. In the marked places on the wall, it is necessary to make holes with a drill. Then the brackets are installed and the washbasin is hung on them. Before fixing the sink, install the faucet on it and connect the siphon.
 Photo 4.Hanging sink on brackets can fit into different interior styles.
Narrow and small
Module Roca-the Gap 39 cm wide
Furniture of this type are made for installation in bathrooms of a small area, as well as for placement in bathrooms.
As a rule, the width of such models is 30.0 - 40.0 cm, while the smallest are corner structures.
Smaller pedestals are not manufactured by the industry, but can only be assembled according to individual orders.
Photo-guide for installation installation
The use of installation in the installation of sinks significantly expands the possibilities of designers and architects, allows you to organize a wash area in a convenient place, without being "attached" to the main walls.
Image gallery
Photo from
Suspended plumbing in the bathroom
Installation options for plumbing installation
Placement of the sink in the middle of the room
Installation of plastic panels over the installation
In the case of using the installation, the installation and connection process is much longer and more complicated, but for the sake of the result it is worth making an effort and spending money:
Image gallery
Photo from
We try on the installation intended for the installation of a wall-mounted sink at the installation site in order to determine the optimal height and distance between the wall and the supporting structure
We expose the mounting studs, providing a distance between the wall and the installation
We select the optimal height for the operation of the sink, focusing on all members of the family
We increase the height of the installation by extending the steel legs located at the base of the structure
Using a building level, we check the geometric characteristics of the installation.If necessary, we correct the shortcomings by adjusting the height with retractable legs
We fix the height we have chosen by tightening the bolts at the base of the installation. We screw the bolts into both legs with force
Through the mounting holes we mark the points required to attach the installation to the wall. We carry out the same actions, marking the attachment points to the floor
We drill the wall and floor at the marked points. The diameter of the drill corresponds to the diameter of the dowels and plugs into which the self-tapping screws will be installed, the drilling depth is approximately 1 cm more
Step 1: Fitting the installation to the installation site
Step 2: Adjusting the Length of the Spacer Studs
Step 3: Choosing the optimal sink height
Step 4: Increase the Height of the Support Structure
Step 5: Checking the levelness with a spirit level
Step 6: Fixing the position of the retractable legs
Step 7: Marking the attachment points of the supporting structure
Step 8: Drilling the wall and floor according to the markings
The stage of preparation for fixing the supporting structure and for direct fixing the sink has been successfully completed.
Now let's get down to solving the main problem and finishing:
Image gallery
Photo from
Step 9: Attaching the Top of the Support Structure
Step 10: Fixing the installation to the floor
Step 11: Framing the false wall
Step 12: Attaching the Installation to the Frame Posts
Step 13: Screwing Into the Stud Installation
Step 14: Laying and connecting communications
Step 15: Installing a false plasterboard wall
Step 16: Finishing and Attaching the Appliances
What is to be done at the preparatory stage?
Before proceeding with the installation work, make sure that you have prepared everything you need:
- drill for concrete;
- electric drill or hammer drill;
- silicone sealant;
- screwdriver or screwdrivers;
- keys;
- fasteners.

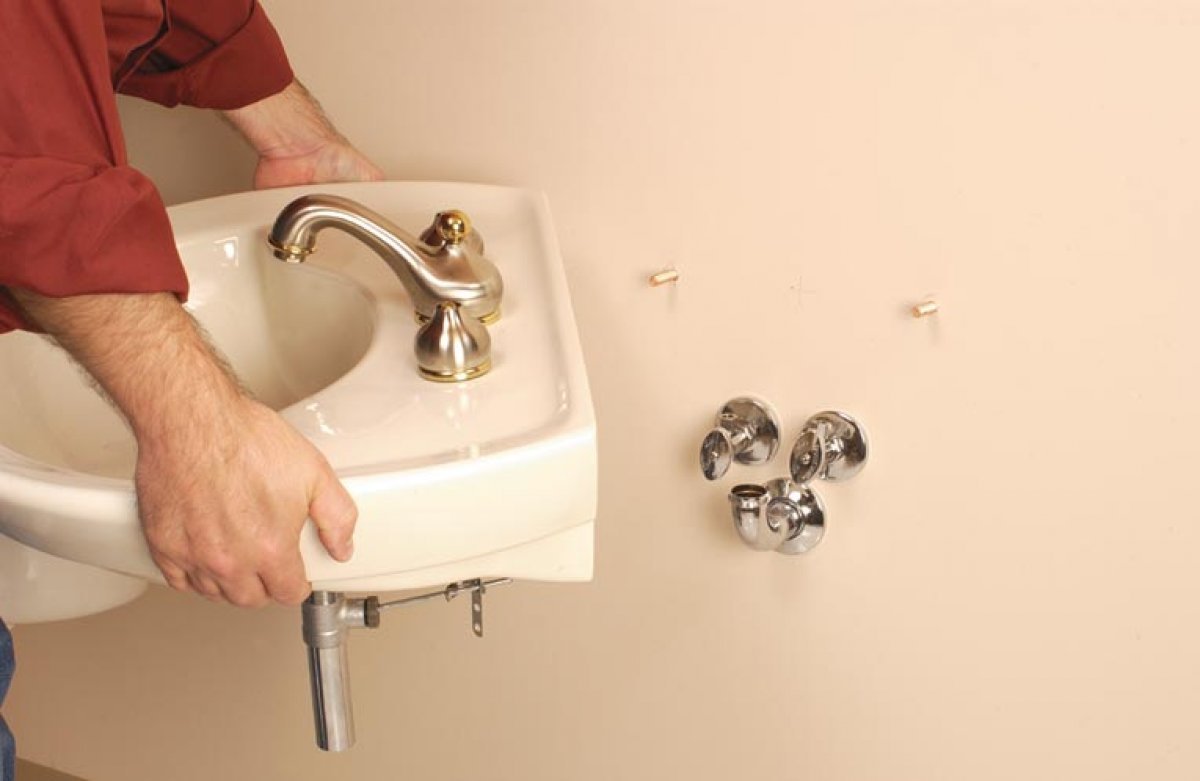
First of all, the home master will have to dismantle the old sink:
- Shut off the inlet water supply.
- Remove the fasteners securing the mixer.
- Disconnect the water pipe.
- Remove mixer.
- Loosen the nuts to fix it at the bottom of the washbasin.
- Drain the remaining water from the siphon and remove it.
- Dismantle the old sink.

As soon as the siphon is disconnected, close the drain pipe to prevent unpleasant odors from entering the room.

What elements does the cabinet consist of?
Not the most time-consuming of the many options is the process of assembling the cabinet under the sink. Especially if you have a finished sketch with all the markups
When assembling a product, it is important to represent its structure as a whole and the features of the arrangement of individual parts. At the curbstone, these components are:
- the frame is constructed from wooden bars;
- the countertop (the upper surface of the product) is constructed both from GC panels and from wood, stone, glass, and other materials;
- end walls can be both drywall and lighter plywood, which is not particularly important in terms of load perception (they do not apply to load-bearing elements);
- additional parts of the structure - shelves, drawers, hinged components are made of a material that is most capable of perceiving a functional load (glass, plywood, drywall).
The following assembly tool is required:
- electric jigsaw;
- a hammer;
- drill;
- hacksaw;
- screwdriver;
- pliers;
- sandpaper;
- screwdriver;
- pencil and tape measure;
- chisel.
Niche preparation
Installing a wall hung toilet involves using a niche to accommodate the frame.As already mentioned, a certain strength of the walls is necessary for fastening. The design of the installation can withstand a weight of up to 400 kg, part of the load from which is transferred to the wall. This issue must be approached with particular care.


In order to place the installation, it is necessary to prepare a niche. It should be the following:
- Height - 1 m;
- Width - 0.6 m;
- Depth - up to 0.2 m.
In some cases, it is problematic to create such a depth. In such cases, it is necessary to go deep to the possible value, and hide the remaining elements with plasterboard panels.

By hiding the main part of the device, certain opportunities open up for decorating and improving the interior. It’s not worth just placing the installation near the wall and sheathing it with GKL, because. placing a conventional toilet will be cheaper and easier. In addition, it will take up less space.
Installing a hanging pedestal with a do-it-yourself sink
Before attaching the hanging cabinet with a sink to the wall, prepare the following tools according to the list:
- Electric drill with a set of drills.
- Building level.
- Roulette.
- Screwdriver.
- Pencil.
Important! Check carefully the completeness, then study the instructions, specifically find out where and why each part is used. Be sure to read the assembly diagram, remember the attachment points and the main purpose of each component
Also check the package contents. There should be dowels in the kit, only they are designed exclusively for concrete walls. Therefore, it is better to purchase more powerful mounts if you are dealing with a cinder block or brick wall. In this case, you will be sure that the cabinet is securely fixed.
Install the wall hung cabinet with a sink according to these instructions:
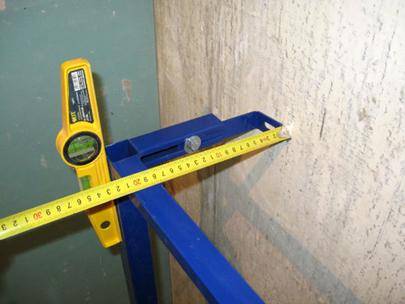
Mark the tiles with a long building level. In this case, the horizontal line should indicate the installation location of the upper wall bracket.
Important! If you want to accurately determine the position of the sink, then add to this line the distance from the surface of the cabinet to the bracket. For all models, this figure is different.
Attach the brackets right in the middle of the line, mark where the holes for the dowels will be.
Important! Work extremely carefully, even though the brackets have special slots for final adjustment, because if you make serious mistakes, then they cannot be corrected in any way.
Make holes for dowels. Drill with a special drill and very carefully
It is important that the holes do not coincide with the seams, because on any wall these are the most vulnerable places. It is better to shift the location of the cabinet a couple of centimeters in one direction
From this, the comfort of its use will not deteriorate at all, but the fixation will be reliable. In addition, in this way you minimize the likelihood of cracking tiles.
Fasten the brackets. Attach metal dowel nails, make sure that their plastic elements clearly fit into the holes. Alternately tighten each bracket to the stop for a couple of turns. Drive in the dowels, then fix the brackets with self-tapping screws.
Assemble the hanging cabinet according to the scheme. Install finishing mechanisms, adjust fittings and guides for drawers. Check how well all the mechanisms work, if necessary, correct the mistakes made. Assemble the cabinet, attach a handle to the drawer.
Pre-hang the cabinet on the brackets, check the correctness of its position.
Install the sink in place, mark the locations of the holes for fixing it. Finally fix the sink.
Important! If in your model the sink lies completely on the bedside table, then the brackets must be reinforced
- Drill holes to fix the sink, secure it with special nuts and studs.
- Assemble the siphon, then connect it to the sewer. Assemble the mixer, connect to the right place. Check that all connections are tight. Just lay the paper on the floor, leave it for a while and check its condition after 30 minutes. If there are wet spots on it, you will have to immediately begin to eliminate the leak.
- Fill the sink with water, check how stable all fasteners are.
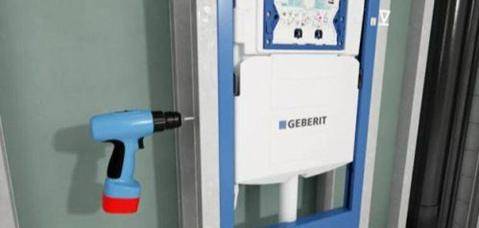
Installation installation
Let's see how to install toilet bowl installation. The entire installation process consists in the systematic implementation of the following main stages:
- preparation for installation;
- fixing the installation;
- device connection.
Preparatory stage
The first stage of equipment installation - preparation - includes:
- preparation of tools necessary for work;
- selection of a place for installation of the structure.
It is more expedient to install a toilet bowl in a place:
- equipped with water and sewer pipes. If the installation of the toilet bowl is carried out far from communications, then it is necessary to carry out additional work to lengthen the pipelines, which will lead to an increase in time and money costs;
- where the toilet will not interfere.In apartments, special niches are most often provided, which saves a small space of the toilet room. If the toilet is located in a country house, then a place is selected that is remote from the kitchen and living quarters.
To do the job, you will need the following tools:
- tape measure, building level, marker for measuring work;
- drill, puncher and a set of drills for preparing mounting holes;
- wrenches for assembling the structure and its fastening.
Tools required for mounting the installation
At the preparation stage, it is important to check the presence of all fasteners included in the installation kit, water and sewer connections, as well as o-rings necessary for connecting communications.
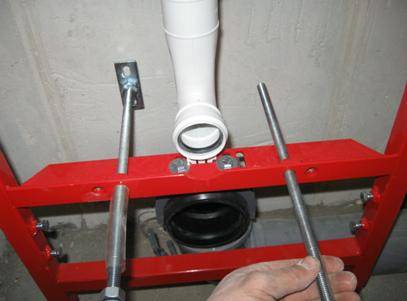
Mounting the device
Do-it-yourself installation is carried out according to the following scheme:
- frame assembly. If a block installation is mounted, this step is skipped. When assembling the device, it is recommended to strictly adhere to the attached diagram and securely fix all fasteners;
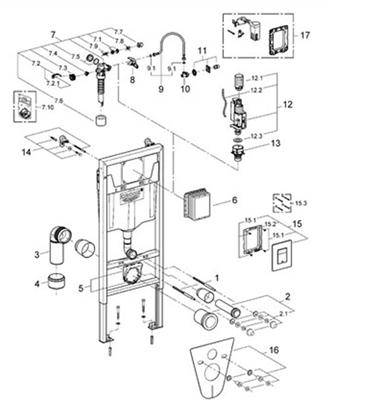
Instructions for assembling the device
marking places on the wall and floor for fixing bolts
When carrying out work, it is important to take into account the dimensions of the decorative finish of the room;
Determining where the frame is attached to the wall and floor
- drilling holes and inserting dowels for further fixing the installation;

Preparation of holes for fastening the structure
fixing the frame of the installation
When installing equipment, it is important to observe the following parameters:
the fastening elements of the toilet bowl, located on the installation frame, must be at a distance corresponding to a similar parameter on the toilet bowl itself;
the outlet of the sewer pipe should be located at a height of 23 cm - 25 cm from the floor;
the optimal height of the hanging toilet is 40 cm - 48 cm from the floor tiles or other finish;

Recommended installation distances
The most important step in installing the frame is its alignment in the horizontal and vertical directions. The frame is adjusted with special screws provided for by the design of the equipment.


- drain tank installation. When fixing the toilet bowl, it is necessary to take into account the height of the drain button. The most universal is a distance of approximately 1 m from the floor of the toilet room. This parameter is considered optimal for using the toilet by both children and adults;
Installation of a cistern for a wall-mounted toilet bowl
- installation of fixtures for the toilet.
Installation of fasteners for the toilet
Installation connection
Water supply to the drain tank can be performed:
- side;
- above.
The choice of water connection method depends on the design of the used tank. For water supply, it is recommended to use rigid plastic pipes, and not flexible pipes, since the service life of the pipes far exceeds the life of the pipe.
For strength, the junction of the pipe and the tank is sealed with a gasket and treated with a sealant.
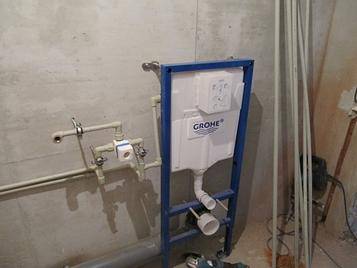
Connecting the drain tank to the water supply
The toilet bowl and the sewer pipe can be connected:
- by cutting into the pipe. Such a connection is considered the most optimal, but it is not always possible to perform it in practice, since it is quite difficult to combine the drain from the toilet bowl and the pipe;
- using a plastic adapter;
- using a corrugated pipe.
If a direct connection is not possible, it is recommended to use plastic adapters, since the service life of the corrugated pipe is shorter.
The complete process of installation and connection of the installation can be viewed on the video.
After installation and complete connection of all devices, you can proceed to the final finishing of the niche and attaching the toilet bowl.
Installation of an integrated sink
A sink purchased for installation by cutting into a countertop should be selected with a template included in the kit. Otherwise, marking and cutting the hole for the sink can be difficult and not accurate enough, which will lead to the penetration of moisture under the sink and ruin the wooden countertop.
Making a hole for sink in artificial countertop stones will have to be entrusted to a specialist. It is quite difficult to do this with your own hands without the necessary tools for processing such material.
Tools for work:
- jigsaw and drill;
- wrench or gas wrench - for the installation of communications.
- Step 1. Carefully cut out the template for the outline. Determine a place on the countertop where the elements located under the countertop will not interfere. Place the template on the countertop and carefully align it parallel to the edge, secure and trace around the contour with a pencil.
- Step 2. Paste the surface of the countertop along the contour with masking tape. This is done in order to protect its surfaces from damage by the jigsaw body when cutting a hole.
- Step 3. Drill a hole for the jigsaw blade with a drill. Cut the hole exactly along the contour. This must be done without pressure on the jigsaw, otherwise its blade will bend, and the cut will be uneven or oblique, deviate from the contour line.In any case, this will require additional refinement of the cut with a sherhebel, file, etc. Cut a hole for the sewer outlet and water pipes, if necessary.
- Step 4. Carefully treat the cut surfaces with silicone sealant. Allow the time required for curing. Try on a sink.
- Step 5. Install a siphon of the selected design on the sink. Install a drinking water faucet on the countertop (if necessary). Using the template, mark the holes on the sink panel for installing the faucet. Drill holes. Fasten the faucet with the flexible hose connected to the sink. Install the sink fixtures included in the product kit. With their lack of reliability. you can make a mount with your own hands from a metal mounting tape by threading it into the holes of the mounts.
- Step 6 Glue the edge of the countertop with a rubber seal or apply a layer of sealant. Install the sink panel. From the bottom side, inside the pedestal, fasten the mounting tape with tension using self-tapping screws to the details of the pedestal. Apply a layer of transparent sealant around the perimeter of the installed panel (its excess can be cut off after hardening).
- Step 7. Connect communications inside the cabinet.
A more difficult option for do-it-yourself installation of a mortise sink in the kitchen is the installation of a panel under the countertop. To do this, after cutting the hole according to the template, an additional groove is made along the perimeter of the cutout on the reverse side of the tabletop.
- Step 1. Make a template that will repeat the dimensions and contour of the surfaces of the sink and the “wing” of the panel that should be opened. Draw a contour according to the template on the top side of the countertop.
- Step 2Saw a hole along the contour, process the rough edge of the countertop with a file, sand it. Flip the tabletop.
- Step 3. On the reverse side, select the groove so that the tabletop panel freely enters there.
- Step 4. Apply a layer of modified silane adhesive to the resulting groove and place the sink panel there (install the sink in the “upside down” position). Press the panel around the perimeter with your hands, then pull it through the substrate with clamps in several places and leave the glue to harden for 12-24 hours.
- Step 5. After the glue has hardened, the sink is additionally fixed with a two-component epoxy resin. The composition is prepared according to the instructions and poured into the gap between the panel and the countertop body. After hardening, the junction of the countertop and sink is glued with aluminum tape.
- Step 6. Turn over the countertop with the installed kitchen sink, install it on the cabinet. Carefully cut off excess glue around the sink. Make water and sewer connections.
Installing sinks in the kitchen is not as difficult as it might seem at first. The main requirements are the accurate performance of work on sealing all possible points of water penetration and the exact correspondence of the hole for mounting the mortise sink.