- Installation and connection of a gas oven
- The main secrets of connecting gas appliances
- Rules for installation and installation
- Varieties of ovens
- Pros and cons of combined appliances
- What safety rules must be observed?
- How to arrange a place under the oven
- Hardware Installation Instructions
- Requirements for embedding a stove
- Additional stand and leveling
- Rules for connecting a stove in a private house
- Installation of gas stoves: regulatory requirements
- Tips and tricks for choosing an oven
- Residual current device installation
- How to install a geyser
- What to bring with you
- We remove the old
- Direct installation
- How to prepare a new oven for work
- Connection order
- What to do
- Rules for installing and preparing a furniture niche
- Connecting the gas oven
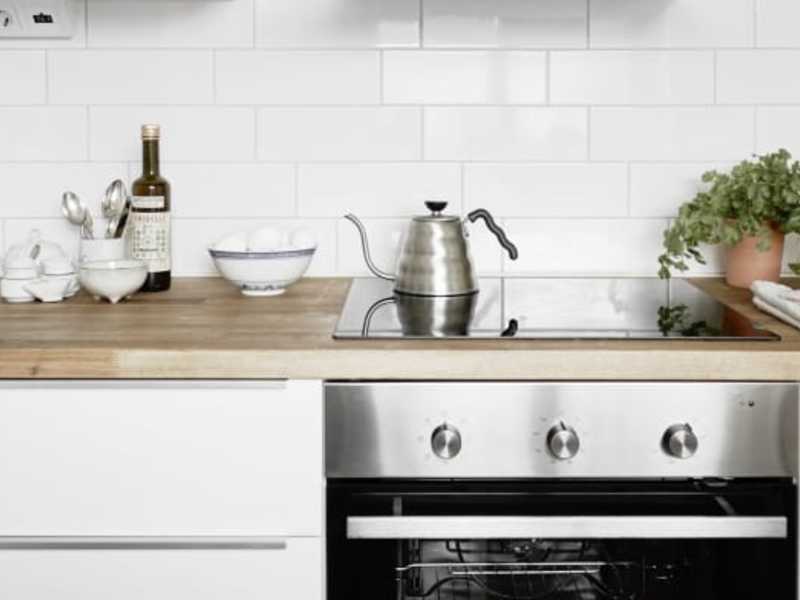
- How to position the oven under the countertop?
Installation and connection of a gas oven
Install gas oven on a principle similar to that of an electrical appliance. The niche of built-in appliances is prepared in the same way. In the same way, indent from the walls.
Differences in connection are related to the source from which the cabinet operates.
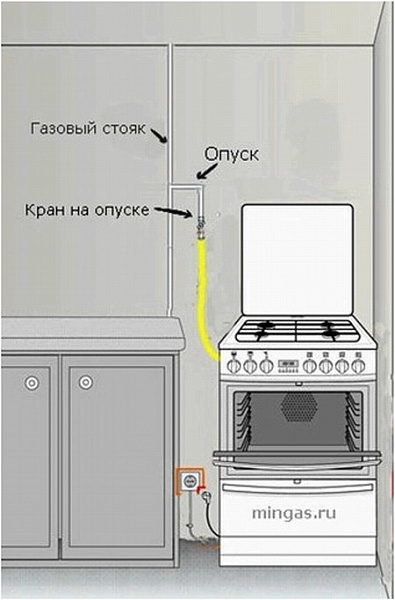
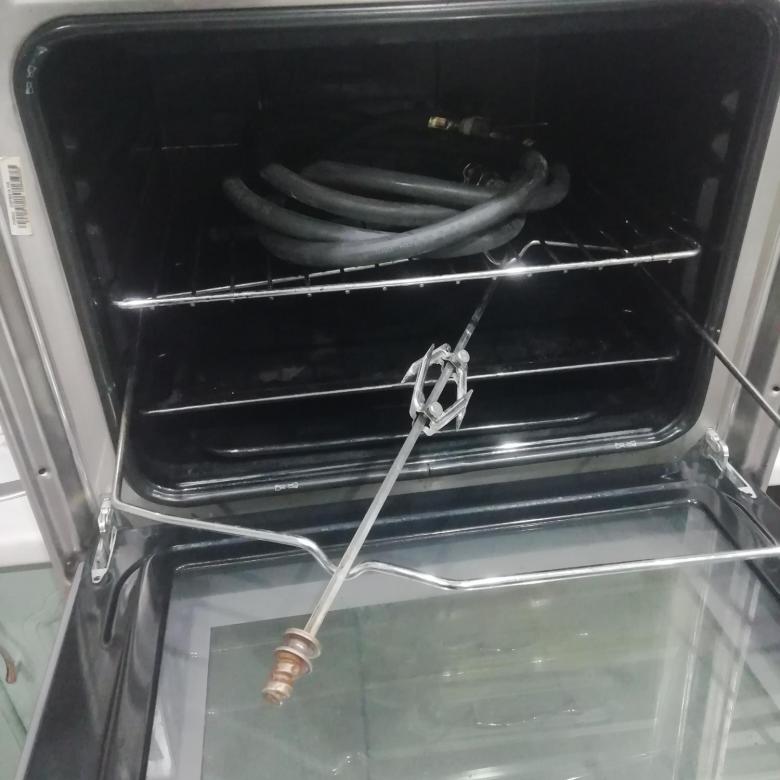
Gas appliances are connected to the gas line with a flexible hose.The main rule in this case is to correctly ensure complete sealing of the joints.
As already mentioned, it is better not to install a gas installation with your own hands if you do not have the relevant experience, so it is better to contact specialists.
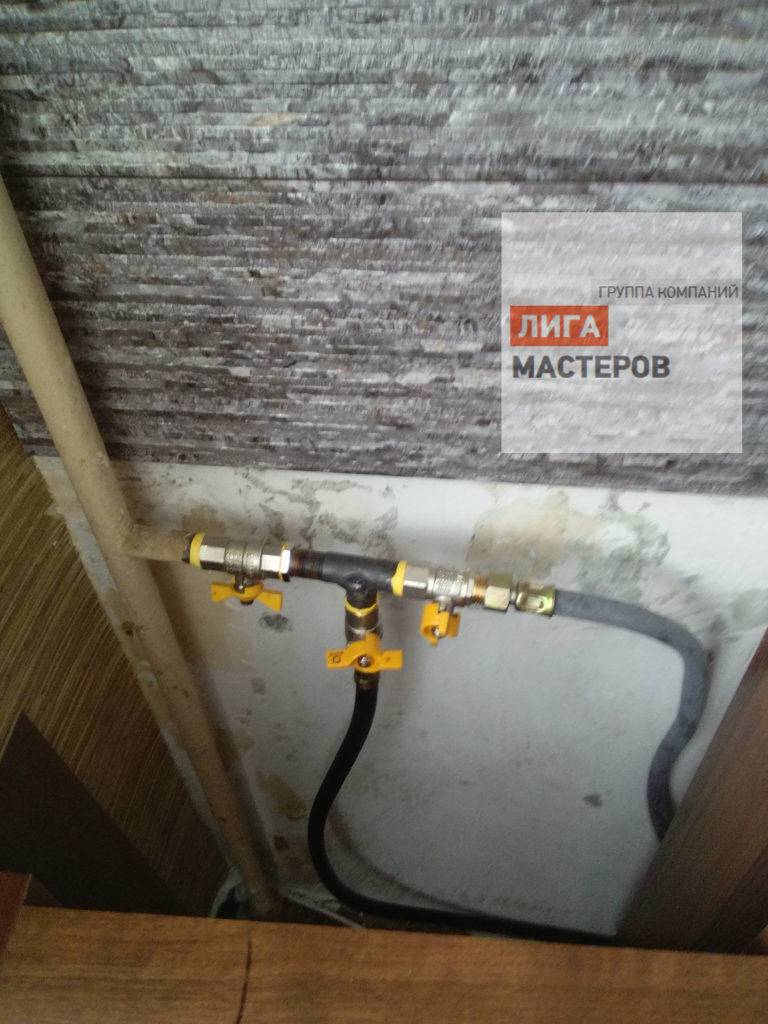
When connecting an oven and a hob to the gas pipe at the same time, two branches with different taps to stop the gas supply will be required. Then you will need to put a dielectric gasket behind the tap, which will be needed to break the network. To connect the device to the central gas supply, you need a copper or steel tube or a bellows hose.
In this case, the pipe must be placed next to the oven, it is recommended to take a ½ inch pipe with an external thread. The gas outlets of most ovens are designed specifically for these parameters.
If you are using a bellows hose, make sure that it does not come into contact with moving objects, do not allow it to be pinched.
basic
After installing the hob and oven, you need to properly set up their work so that they work as long as possible. It will be necessary to adjust the maximum allowable burner fire, the thermocouple contacts that are included in the shut-off valve of the gas control system of instruments.
The algorithm for connecting a gas appliance looks like this:
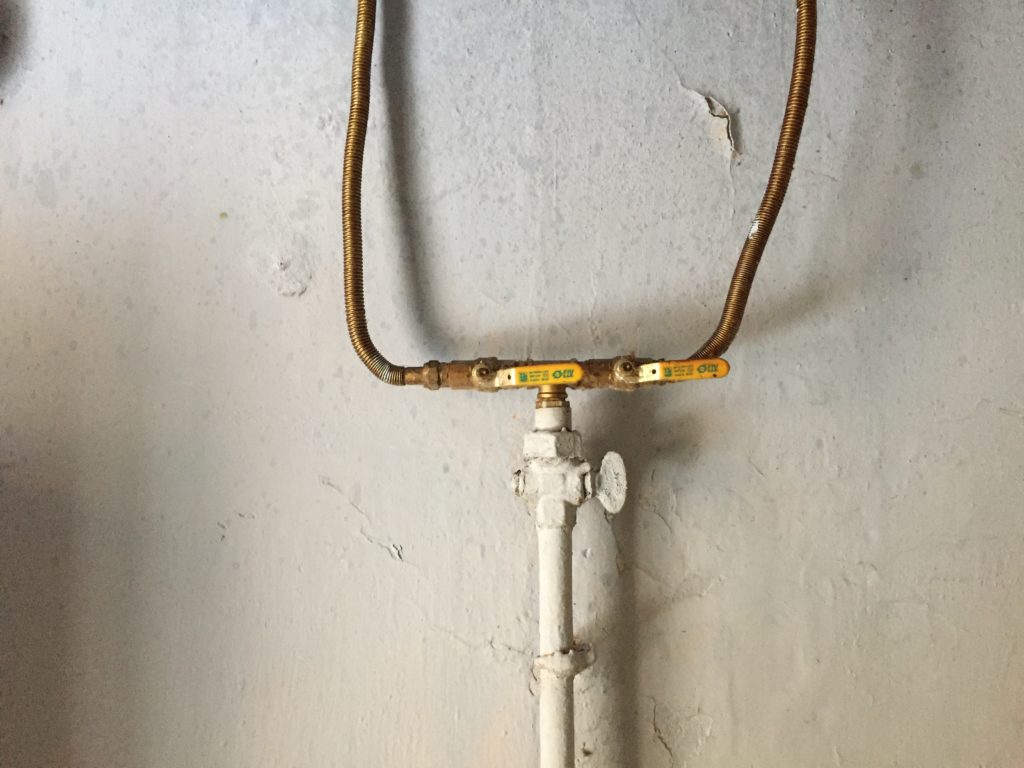
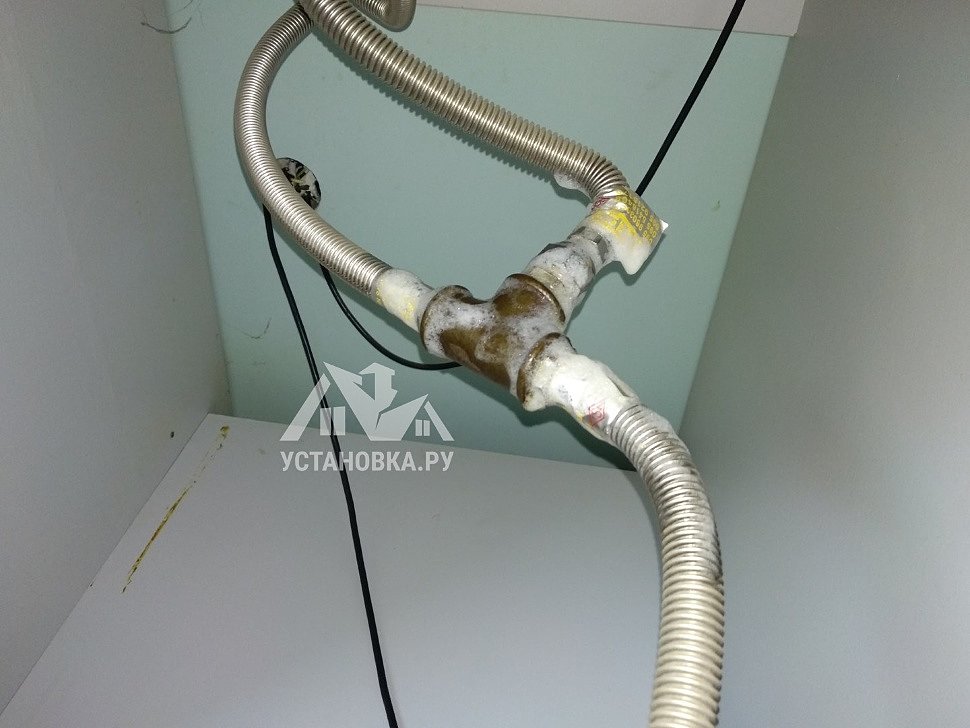
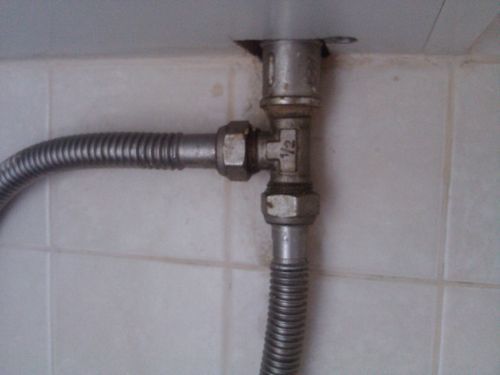
- First you need to join the general system. In the place where a shut-off valve is located on the branch of the gas wire, install a special tee. Under the thread, you additionally need to put a sufficient layer of tow or tape winding, it is pre-coated with graphite grease or paint. Bellows metal hoses must be screwed to both holes of the tee.And for each such "sleeve" it is required to install one crane with yellow handles.
- Connect the oven. The oven is connected to one of the hoses by means of a union nut with a rubber lining, which in advance will need to be generously lubricated with grease. And the second eyeliner is needed to install the hob.
- We check tightness. When you finish connecting the oven to the gas line, be sure to check how securely everything is connected to prevent gas leaks. The check is carried out simply - with the help of a soapy solution, which you need to process all the joints, and then open the gas valves. If the hoses start up so-called bubbles, then the thread does not fit well in these areas. Such nodes must be disassembled and reinstalled, observing all the rules.
- When all connections are made correctly, the built-in oven is placed in the desired niche, and then fixed with screws.
As you can see, if you wish, you can install and connect a new oven or hob with your own hands. The easiest way to do this is if it is powered by an electrical network. But it is recommended to install gas appliances with your own hands only when you have experience working with similar devices. But for beginners, it is better to contact installation specialists.
The main secrets of connecting gas appliances
Today, devices are connected to the gas supply using two types of connecting elements:
- Flexible hose.
- Inflexible tube made of copper or steel.
Here is what you need to consider regarding the wiring of the hoses themselves:
- There is a connection through a special outlet, which is located near the oven.
- After completing all work related to the installation, it is recommended to make sure that the tube is not bent anywhere, the fuel flows freely.
- When connecting a gas oven, please note that the hose should not be longer than two meters.
- The number of connections should be kept to a minimum.
Rules for installation and installation
Many people do the installation themselves to save money. But in order to carry out the installation process, you need to know a few important rules:
- The distance from the pipe to the hob should not be more than 4 meters. Therefore, a flexible hose with a length of more than 4 meters cannot be used.
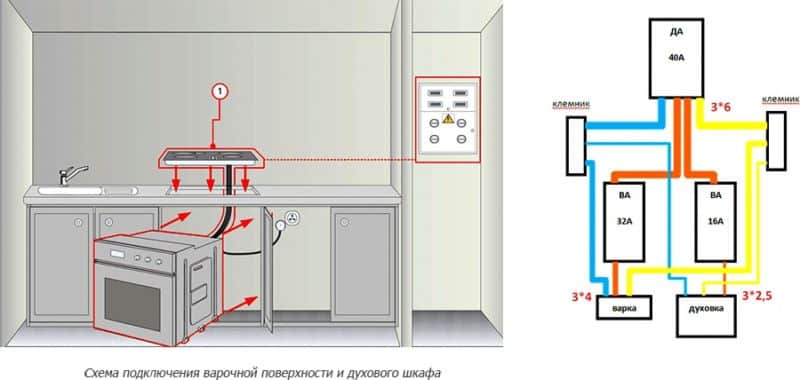
- Due to the fact that modern gas stoves use an oven light, and some models have an electric grill, a socket with a ground loop is required to connect the power. Remember that a separate copper cable with a cross section of 3 x 1.5 mm² should be stretched from the socket to the switchboard in the house. That is, it is three-core, having a cross section of each core of one and a half squares. A 16A RCD is installed in the wiring panel.
Manufacturers offer three types of gas hoses:
- Rubber fabric. In terms of mechanical strength, it is inferior to other types, but in terms of flexibility and softness it surpasses the rest. There are no metal inserts in this hose, so the product is not a current conductor, which is an important factor for electrically dependent gas stoves.
- Rubber with steel braid. This is a reliable and durable gas hose.
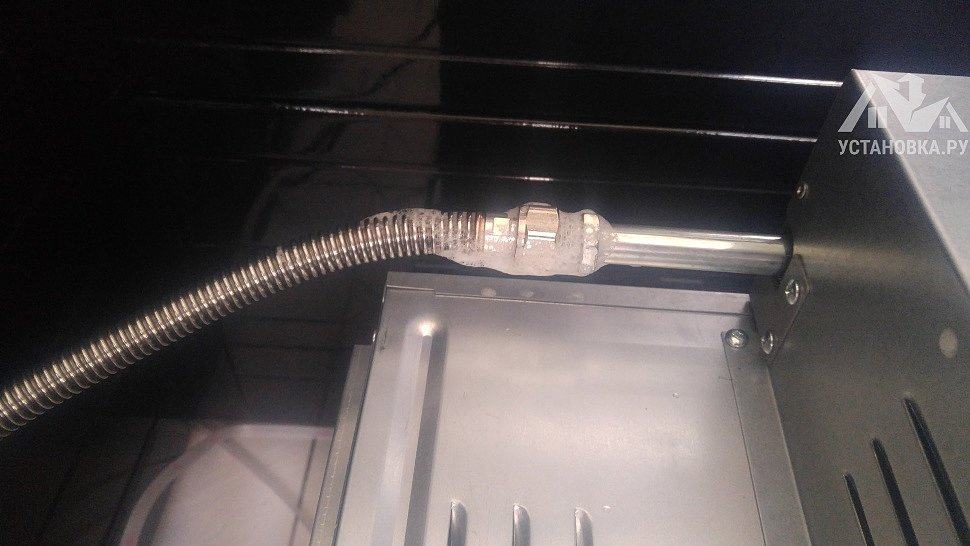
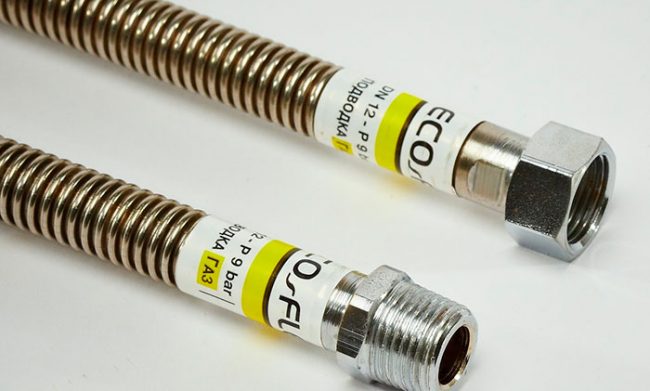
- Bellows. Such a product belongs to the category of metal hoses. It has increased rigidity and strength. Very reliable, but expensive product.Two varieties are on sale: a bare hose and covered with yellow dielectric insulation on top. It is better to give preference to the second.
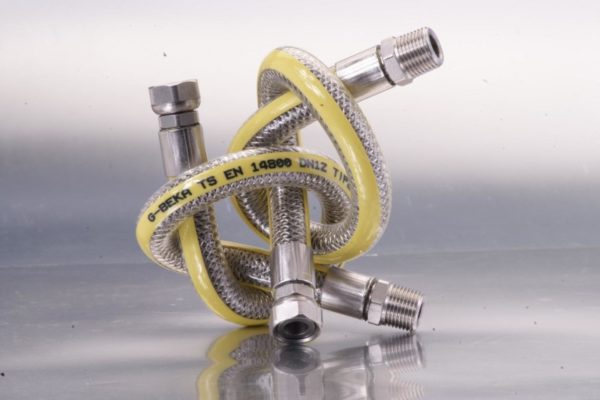
Bellows gas connection
In addition, it should be noted that steel-braided rubber and bellows hoses are electrical conductors. Therefore, a dielectric insert must be installed between the hob and the hose, which will create a current barrier. A gas hose is often confused with a water hose because they have the same design. Therefore, manufacturers put color marks on products: yellow for a gas hose, blue for cold water, and red for hot water.


When purchasing a gas hose, you need to pay attention to its inner diameter, which should not be less than 10 millimeters.
Varieties of ovens
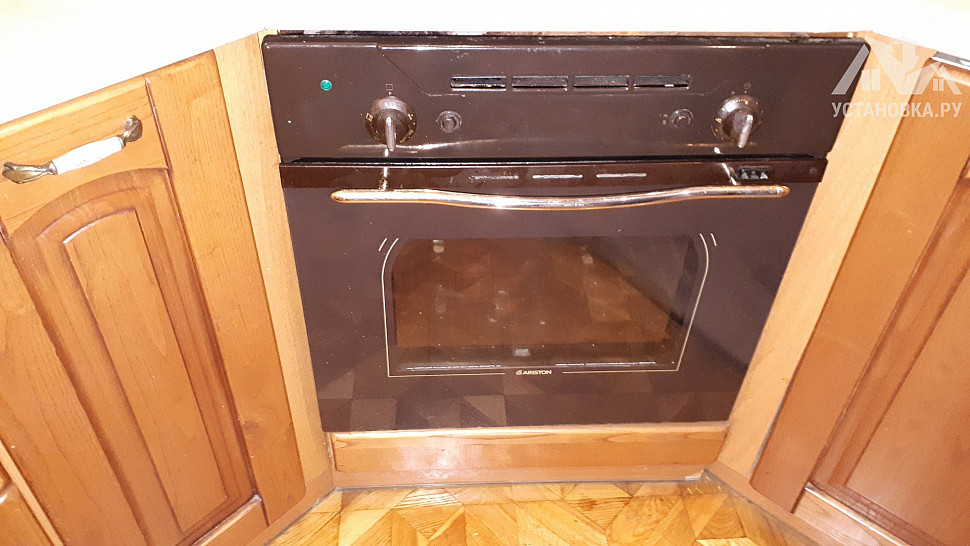
According to their location, they are divided into built-in and free-standing. To install the first, you will need a special niche.
Depending on the type of heating, the furnaces are gas and electric. Gas ones are cheaper. The disadvantages of these models include uneven heat supply, due to which food can burn, and the possibility of gas leakage. Although now many models are equipped with gas control, which prevents an emergency. The electric cabinet is equipped with multiple heating and baking modes, double protection against overheating and fire. Its disadvantage is the high cost, as well as problematic use in homes where power outages occur.
According to the installation method, the furnaces are divided into dependent and independent. The first ones come in combination with a hob, they are installed in pairs in a kitchen set, they have a common switch. The latter are autonomous, their location does not depend on the hob.Such furnaces are mounted in any place where it is convenient for the user. They are equipped with a separate control panel.
Ovens also differ in size (capacious, medium, compact, mini-ovens), the method of cleaning the chamber (hydrolytic, catalytic, pyrolytic) and the number of additional functions such as grill, skewer, timer, blowing cold air on the walls, etc.
Pros and cons of combined appliances
When purchasing a combined stove, it is necessary to take into account all the advantages and disadvantages of such a device.
Advantages:
- The gas level in the burners is adjustable.
- The hob can be cleaned until it has completely cooled down.
- The oven heats up quickly and evenly.
- Dishes don't burn.
- Safety thanks to the gas control function.
Flaws:
- The oven takes a long time to cool down.
- Difficulty of installation.
- High cost.
- Operation is accompanied by high costs.
The advantages also include several additional options that are not available in a gas oven.
What safety rules must be observed?
These include the following:
- In the process of connecting the oven to the power supply, make sure that it does not touch the gas pipe in any case. The maximum heating temperature of the conductor in accordance with established standards should not exceed 70 degrees.
- It is forbidden to use various extension cords, double or triple type sockets. Additional wires in most cases cause a sudden fire.
- Before washing the cabinet, be sure to turn off the power supply.
- Before completing the installation work, it is recommended to check each joint for gas leakage. You can use soap foam for this - just apply it to the connecting elements. If suddenly foam appeared somewhere, then there is a hole. Only after repairing the leak and crack can the equipment be used.
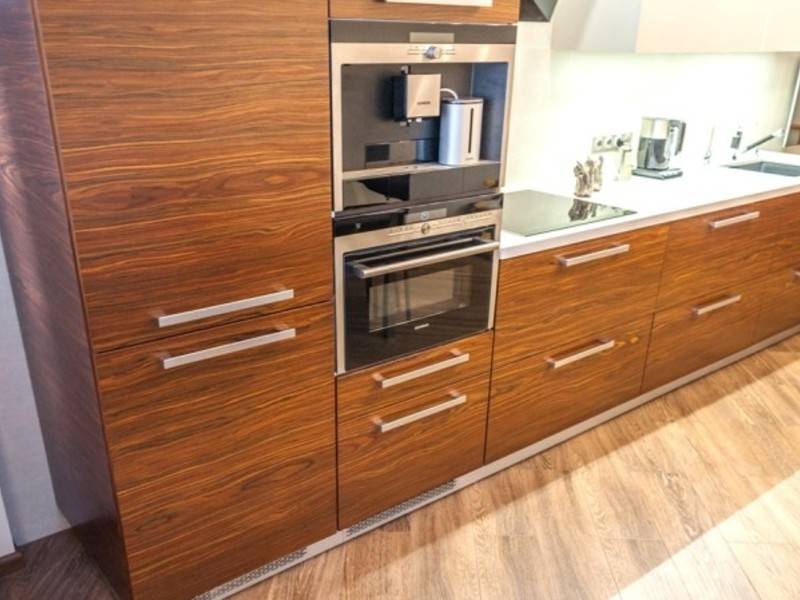
How to arrange a place under the oven
The classic option for installing an oven in the kitchen is under the hob. But at present, they are increasingly moving away from this, based on the ergonomic arrangement of furniture and the ease of use of technology. So, if the oven is installed above the countertop, it will be more convenient to control the cooking process.
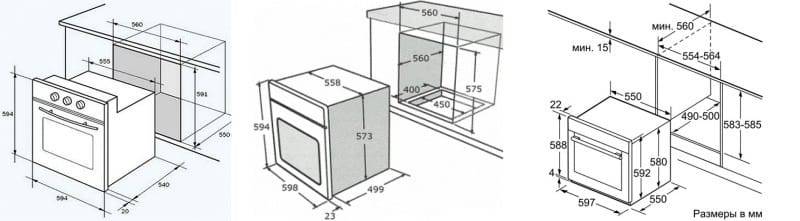
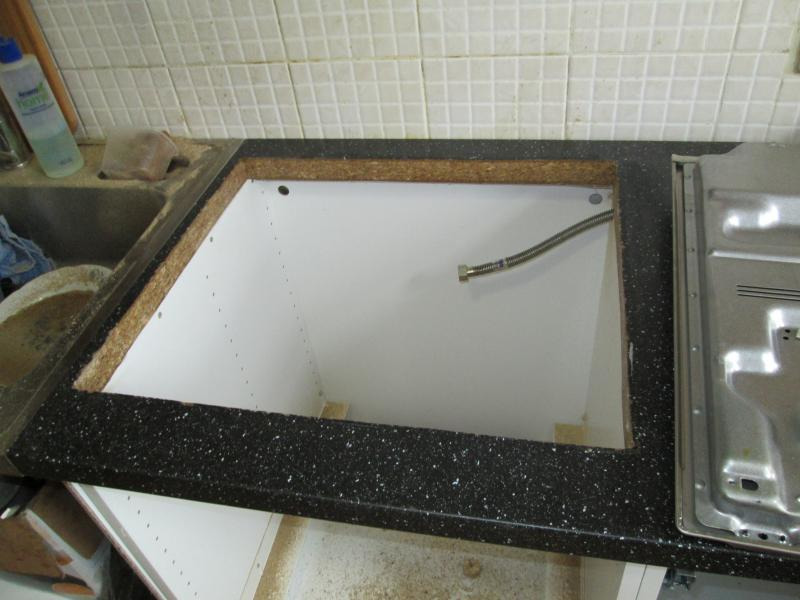
Before buying embedded appliances, they prepare a niche for it. Its dimensions must correspond to the dimensions of the furnace. Even small inaccuracies can lead to damage to the electronic parts of the device and incorrect thermal distribution. The walls of the niche should be perpendicular to the bottom and ceiling, without distortions.
In order for the equipment to serve for a long time and without failures, it is necessary to properly prepare the installation site. Before installation, study the technical documentation with the main recommendations. When choosing a place, take into account that furniture is placed next to the stove that can withstand temperatures up to 50 ° C. The device must not be placed near flammable and combustible materials (curtains, rags, oil, etc.), near the refrigerator and freezer. It is mounted away from water. The installation of an electric oven is carried out next to a grounded power outlet, which is located at least 10 cm from the floor.
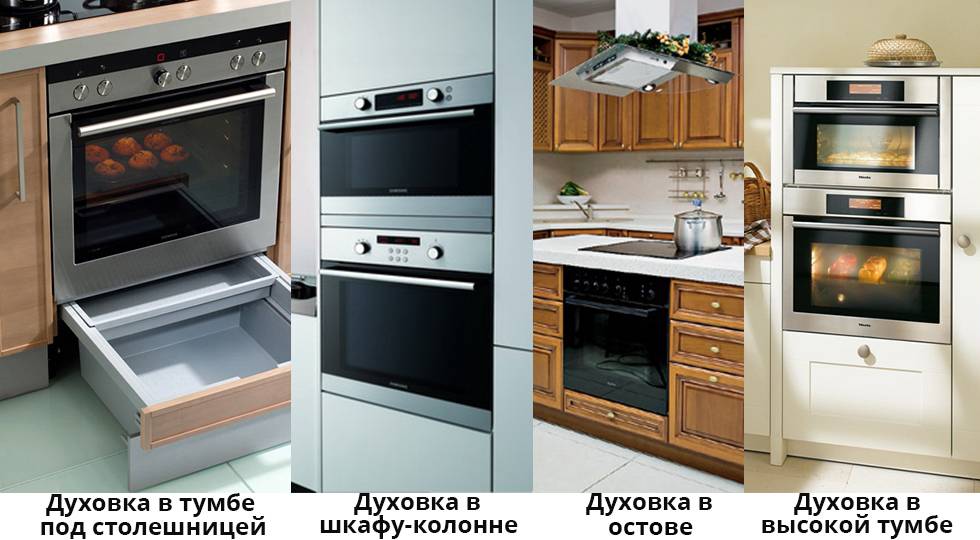
Several placement options are possible:
- Under the countertop in the curbstone, while it is not necessary to install the hob on top. Most often, this placement is used in small rooms with a small work surface.
- In a column cabinet - this option is suitable for a spacious kitchen. This arrangement simplifies the cooking process, it is more convenient to take care of the equipment, hot surfaces are removed from small children.
- In a tall cabinet, which is located on the edge of the kitchen. Other household appliances (microwave oven, electric kettle, etc.) or kitchen utensils are installed on the surface of the cabinet. The best option for medium rooms.
- On the island in the spacious kitchen, where the working area is located. This setting is suitable for families where there are no small children and rarely cook.
- In the corner where the sink is most often located. In the case of its transfer, the space is suitable for the oven, which is installed at a convenient level. At the same time, take into account that the doors open freely.
The niche in which the device will be located is pulled out of its place. Holes are drilled in the back wall with a drill for a cable or gas supply hose. Then the cabinet is put in place and proceed to the installation of equipment.
Hardware Installation Instructions
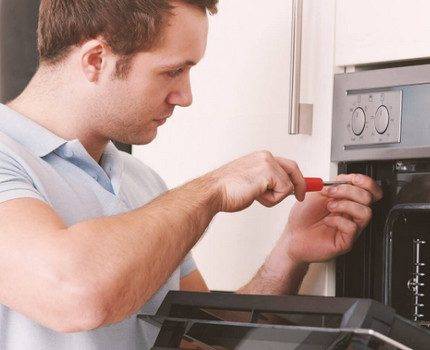
Theoretically, the user himself is able to install (place in place) a gas stove on his own. Moreover, each model of a gas stove purchased officially must be accompanied by a user manual. This document specifically describes all the nuances of installing equipment in place.
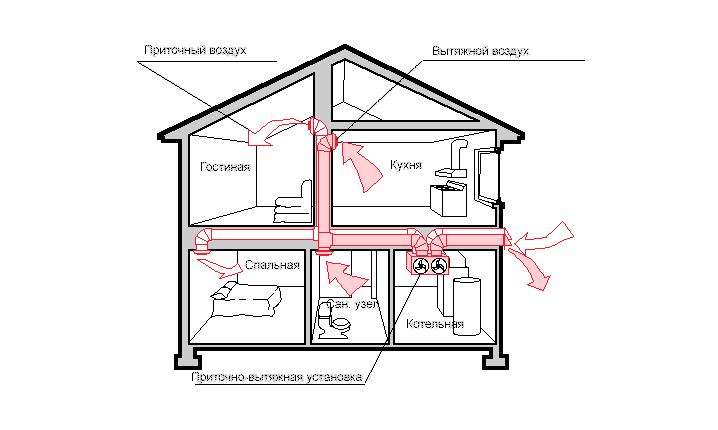
It is a completely different matter when the device is connected directly to the gas and electric networks.Of those nuances of installation of equipment on site that are noted in the documentation, one of the first is to ensure proper ventilation of the room where the hybrid stove is installed.

On-site installation of hybrid household appliances is the beginning of a common event aimed at equipping the kitchen with popular household appliances
Next, we will consider how to choose a place for installation, taking into account the requirements and features of the alignment of the hybrid plate.
Requirements for embedding a stove
This type of household appliances can be placed in the opening between the elements of kitchen furniture. At the same time, on one side of the stove, it is allowed to place a piece of furniture whose height is greater than the height of the gas stove. But, according to the rules, such furniture is placed at a distance from the body of the equipment by no less than 300 mm.


A piece of furniture placed on the other side of the equipment is allowed to be placed provided that the height is the same as the stove. If it is planned to mount some furniture elements above the gas stove, such installation is possible only if there is no effect on the working process of the equipment.
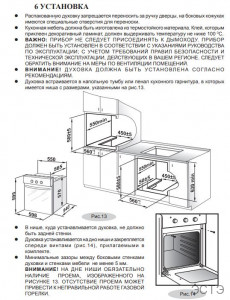
Based on the rules, for such cases, the minimum allowable vertical offset from the surface with burners is at least 650 mm, and the offset to the hood is at least 75 cm.
Configuration for built-in installation as part of kitchen furniture: 1 - surface level of machinery; 2 - surface levels of kitchen furniture elements; 3 - minimum distance to the exhaust device (750-800 mm); 4 - the minimum allowable distance to the upper piece of furniture (650 mm)
Given the same rules for installing equipment in place, certain requirements also apply to pieces of furniture, as well as to walls, partitions, floors that are placed next to heating equipment.
In particular, the furniture must have a heat-resistant structure capable of withstanding temperatures of 90 °C or more. Consideration should be given to such a moment as a significant heating of the rear region of the gas stove as the equipment is used.
Additional stand and leveling
Many models of gas combined stoves come with a stand. Using a stand slightly increases the overall height (approximately 5-10 cm).
The use of the stand is convenient because this piece of equipment is equipped with wheels (two wheels) and adjustment screws (two screws). There are also designs of gas stoves with four adjusting screws.
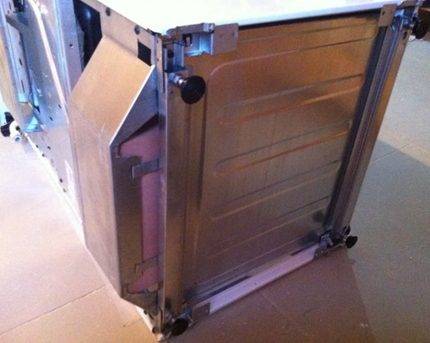
An illustrative example with adjusting support screws included in the design of household hybrid appliances. With the help of these structural components, it is easy and simple to level the equipment
If it is convenient to move the equipment with the help of wheels, then by adjusting the screws, the gas stove is easily leveled to the level of the horizon or to the level of the surfaces of the furniture set.
Meanwhile, the stand can be removed if necessary. In this case, the adjusting screws are installed directly on the bottom of the gas stove.
Rules for connecting a stove in a private house
The operation of gas equipment in an apartment and a house is significantly different. For example, the equipment (meters and stoves) of residents of multi-storey buildings are checked by gas supply service employees several times a year. This is a mandatory measure.Homeowners from the private sector will be able to make their own decisions regarding gas supply. There are several main options:
- connection to the central highway;
- use of autonomous gas supply;
- combined type of connection.
In many ways, the connection of equipment will depend on which of these options is chosen by the homeowner. In the first case, the connection of equipment and subsequent maintenance is controlled by the relevant services. If you use cylinders or another type of autonomous gas supply, then you have to do everything yourself.
Be sure to learn how to properly connect this technique, since the safety of your family depends on the final result. If you have attracted a commercial organization, be sure to check whether their specialists have certificates confirming their professionalism.
Installation of gas stoves: regulatory requirements
According to current legislation, gas systems are considered a high-risk area and only employees of regional and local gas services, distribution companies or firms that have an official license to carry out work of such a plan are allowed to interfere in their functionality.
Among the activities requiring the participation of a representative of the gas service include: the initial connection of equipment, reconnection, scheduled and unscheduled repairs, installation of a gas meter, replacement of parts, etc.
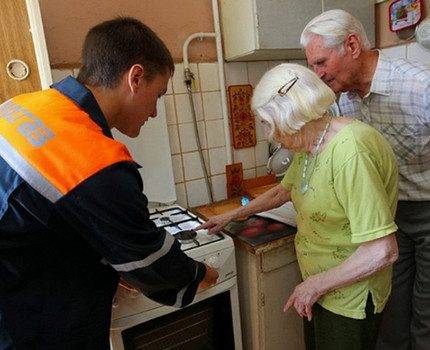
The primary connection of the gas stove to the communications of the central system is always carried out only by the official representative of the gas service - a qualified installer with permission
Even if the owners did all the work personally, starting the gas to the burner is allowed only after the specialist inspects all the connecting nodes for possible leaks and officially gives the go-ahead to activate the equipment and its further correct operation.
The owners will be able to carry out the subsequent replacement of the stove with another model on their own, but they still have to notify the gas company about this.
Gas units prepared for installation must be registered with the relevant service. Every six months, its employees come to the client and conduct a scheduled inspection of the equipment for compliance with all the rules and regulations for safe operation.


There is a fine for unauthorized connection to the network or transfer of a gas pipe.
After the initial official connection of the stove to the central communications, the owner receives an agreement on the rules for the provision of gas supply services and a subscription book indicating the price for supplying the resource.
However, if after connecting the owner did not use the stove, but first invited the master to examine the correctness and quality of the connections, no punishment will follow. The unit will be inspected, registered as a new gas flow point, and it can be used as usual.
Tips and tricks for choosing an oven
The leader in consumer preferences are electric models. The latter give more options for temperature and cooking methods. When choosing, you can use standard criteria: ease of use, economy, safety, appearance, compatibility with the situation and environmental friendliness.Gas ovens have a significant drawback: you often have to monitor the condition of the dishes from below, as they dry out from one-sided exposure. As for the separation of dependent / autonomous, then the size of the room is important in this regard. In a sense, dependent ones are more versatile, but autonomous ones will do if there is a separate hob, and an additional one will be superfluous due to the lack of another hood. In terms of built-in / freestanding, none of the options has a clear advantage. The first type is better for design, and the second type can be represented by compact options.
Regardless of the type of device, you need to pay attention to the presence of a smart interface, a built-in microwave, and the possibility of automatic cleaning. The buyer should be interested in the presence of Let's Taste and StreamFunction
Savings in operating costs depend on energy efficiency.

Residual current device installation
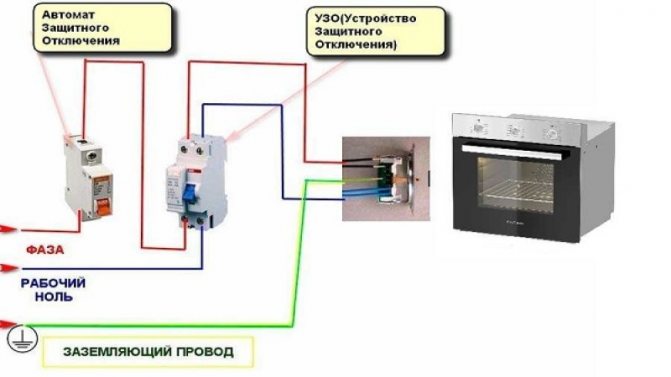
On the line for connecting the oven, in addition to the circuit breaker, it is recommended to install a residual current device (RCD). This process should be entrusted to a qualified master.
With the help of the machine, the wiring is protected from overheating and short circuit currents. The RCD provides user protection. If there is an insulation breakdown to the ground, touching the phase wire, it will turn off the power supply. The power of the machine is calculated taking into account the current consumed by the equipment. When a hob is connected with the oven, it is selected based on the total power of the devices. The RCD parameters must be one step higher than the rating of the machine. For example, if a machine is installed at 25 A, the RCD is selected at 32 A.According to the second parameter - the cut-off current - the selection is made as follows. If one instrument is connected to the line, select 10 mA. Class A and B are suitable for installation. It is not recommended to use the AC class, since it does not provide the proper degree of security.

How to install a geyser
Self-installation is prohibited by the law of the Russian Federation, but since representatives of the gas service often remain elusive, we recommend that you mount the device yourself. Specialists should only be invited to connect the hose to the gas pipe and check all connections for leaks.
What to bring with you
First of all, prepare all the necessary materials and tools. You will need:
- new geyser;
- PVC pipes for water supply and metal-plastic pipes for gas;
- fitting;
- taps - gas and water (it is better to use ball valves);
- salt and magnetic filters;
- corrugation or galvanized pipe (if it comes with a column);
- Mayevsky's crane;
- a ring to make an entrance to the chimney;
- gas hose (its length depends on the distance between the pipe and the column);
- water hoses (also select the length depending on the distance);
- dowels and screws;
- gas key;
- pipe cutter;
- set of wrenches;
- drill;
- level;
- sealant, FUM tape and tow;
- soldering station for pipes.
In the case of a private house, you may also need a metal (asbestos) pipe to remove smoke. Its diameter should not be less than 120 mm, and its height should be two meters or more.
We remove the old
This is an old geyser, the use of which is not safe. It is best to replace it with a modern analogue.
If you already had a water heater, then, first of all, you need to dismantle it. For this:
- Close all gas valves.
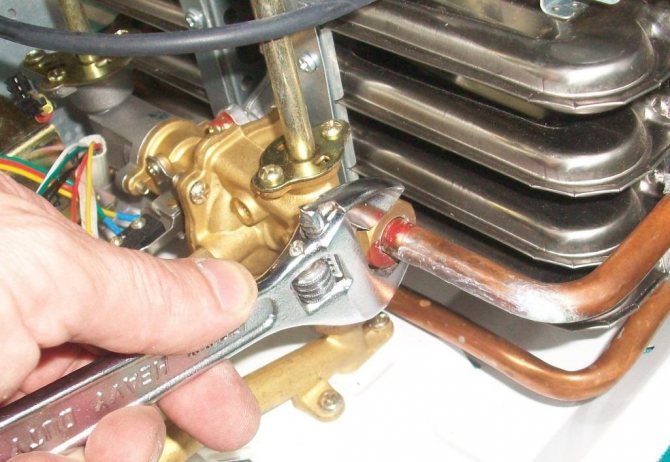
- Using a spanner, unscrew the fixing nut on the hose.
- Then remove the hose from the column. In the event that the hose is new and has no damage, then it can be used further. Otherwise, buy a new one.
- Now you can proceed to disconnect the device from the water supply. Turn off the water (if there is a faucet near the column, then it is enough to turn it off, otherwise you will have to block access to the water for the entire apartment).
- Remove the connecting pipe located at the outlet of the column and pull it out of the chimney.
- Dismantle the water heater by removing it from the mountings.
Direct installation
Installation of a gas water heater takes place in several stages. After choosing a place, you need to prepare all communications: plumbing, chimney and gas pipeline. All this should be in close proximity to the future column, so that after installing the latter, you only have to connect the hoses to the pipes.
To connect the gas to the geyser, be sure to call the specialists of the special service.
- So, the first step is to mark the place for the water heater. I hang it on a special bar that comes with the device. This is where you will need a drill, dowels and self-tapping screws. It is better to mark up with a level.
- We drill holes, drive in dowels, apply a bar and fasten it to the wall with self-tapping screws.
- The next step is to connect the water heater to the chimney. This is done using a corrugation or a metal pipe. Installing the latter is easy. The pipe must be put on the pipe (and the sleeve must also be tightened with a clamp) of the column. The other end is inserted into the chimney and covered with cement (possibly with asbestos).But do not forget that the horizontal section of the pipe cannot exceed 6 m and you cannot make more than 3 corrugation bends.
- Now you can proceed to connect the column to the water supply. As mentioned earlier, the installation of pipes and branching is best done in advance. In this case, it is not always a good option to tie into the nearest line (if the pressure in it is weak, cut directly into the main pipe going to the apartment). Be sure to install a tap on the new branch that goes to the water heater so that you can repair the column or replace it without turning off the water in the entire apartment or house. To carry out the pipeline, you will need metal-plastic pipes and a soldering iron, as well as a faucet, couplings.
- After finishing work with the hot and cold line piping, you just have to connect the hoses to the appropriate outlet and inlet to the column and to the pipes.
It looks like a chimney made of corrugations. The ring has a purely aesthetic value.


This completes your work. Connection to the gas pipe is carried out by specialists of the relevant service. A ball valve is also placed at the column inlet, all connections are sealed and then checked for leaks.
How to prepare a new oven for work
After installation, the device should be disposed of everything that remains after unpacking. Even before the first switch on, the oven must warm up to +25 ° C, so if the appliance was cold, then leave the doors open. In the future, the stove needs to be calcined. It should be heated together with all grates, baking sheets and everything that is included in the package and is intended for internal use.Then the oven is turned off, opened and left to cool completely. After a few hours, the inside of the oven, including all its elements, is washed with non-abrasive products. First, they work with a sponge, and then wipe everything dry with a rag or thick cloth. For normal calcination, 2-3 hours are enough at maximum temperature - as a result, technical materials and liquids will be eliminated. Simultaneously with calcination, it does not hurt to use the convection or top heating mode.
Warming up is also used:
- After washing.
- After glass replacement.

Connection order
Regardless of the type of device, connecting the oven takes place in several stages:
Existing wiring needs to be assessed. The oven can only be connected if:
- Physical condition is good.
- The cross section of the conductors is not less than necessary.
- The line has an automatic switch or at least a knife switch. They are needed to de-energize the equipment in an emergency.
If the existing wiring does not meet the requirements, it is necessary to lay a new route from the shield to the intended location of the oven. On this line, you will need to put a machine of a suitable denomination. We will talk more about the cross section of the wires and the ratings of the machines for them further.
What to do
First you need to prepare the oven for connecting to the mains. The oven may have a power cord. Sometimes it ends with a three-prong (grounded) plug, sometimes there is no plug. Depending on the connection method, you can install a plug on the cord, or you can do without it. You can even change the cord - this does not even affect the warranty.
It's all about which connection method you choose.You can - traditional through a three-pin socket with a plug. You can one that is not so convenient, but is considered more correct. Through the terminal block. Depending on the selected connection method, connect the electrical wires (more on this below).
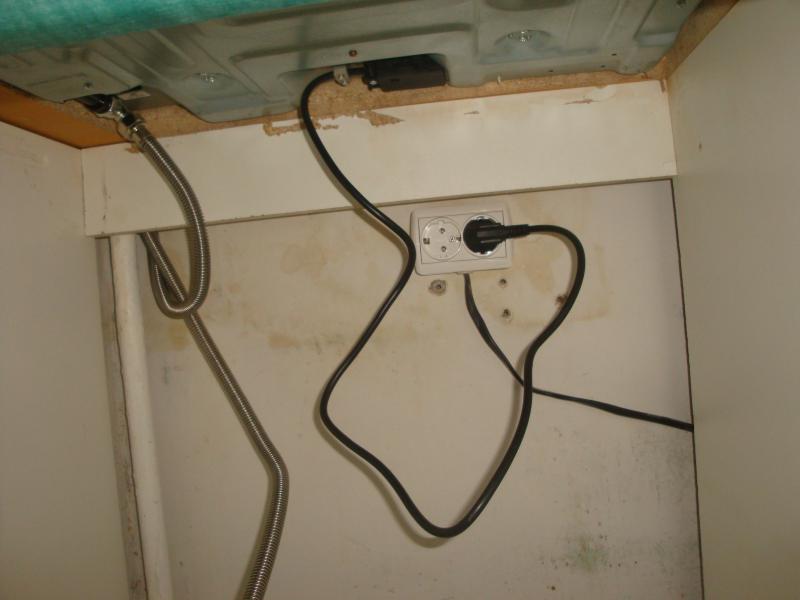
In some cases, the power cord with plug is already connected to the oven
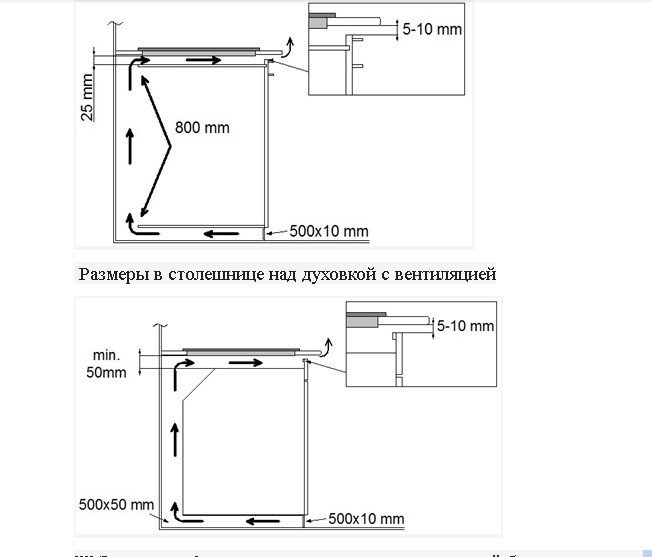
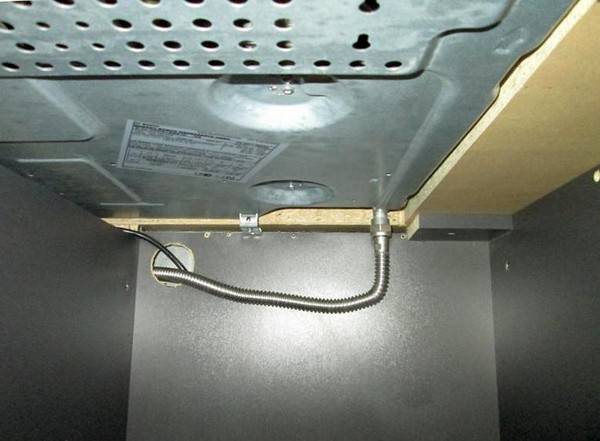
Prepare a place for the installation of a built-in oven. Typically, manufacturers recommend that cold air be supplied from behind and from below for ventilation. If the furniture has a back wall, make a hole in it or even cut it out as much as possible
To ensure air flow from below, you can lay linings a few centimeters high on the sides (it is important that there is also an air gap at the top between the oven and the worktop. In addition, the side racks of the cabinet must be adjusted to the dimensions of the oven - it must be fixed to the sidewalls with screws.
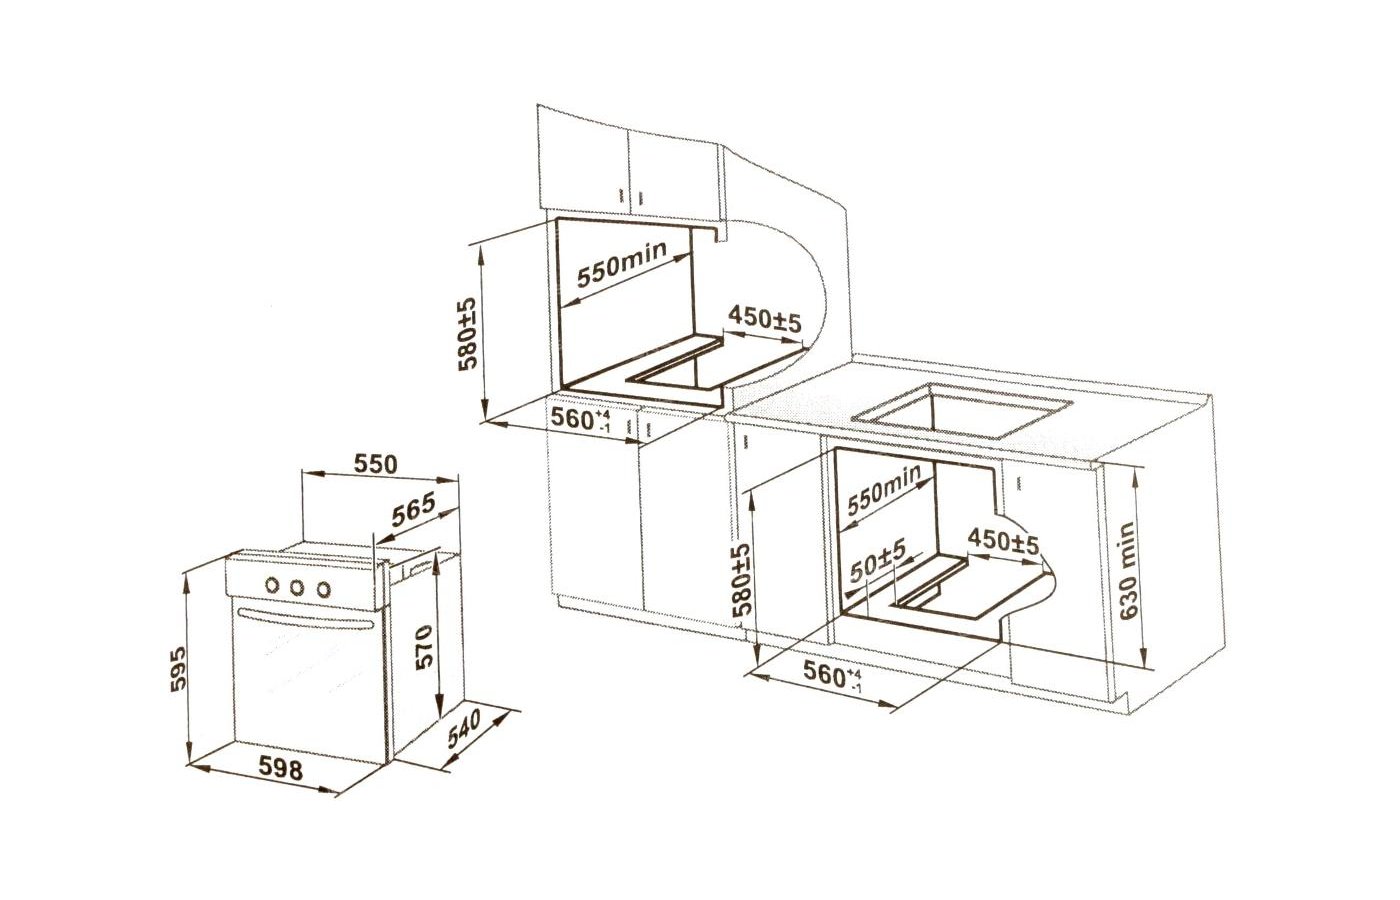
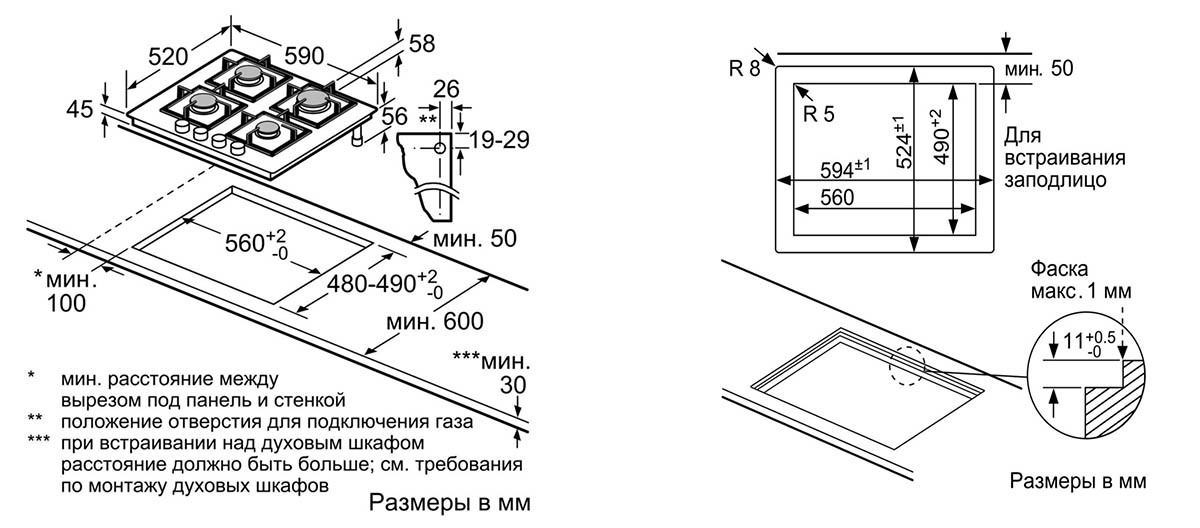
Such a plan picture will be in your instructions with the exact mounting dimensions
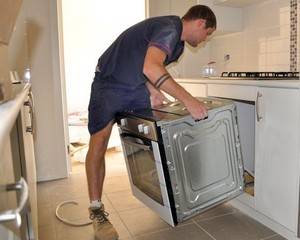
The built-in oven is installed in place, we check the verticality and horizontalness of the installation with a building level, if necessary, correct it. We open the door, there are holes on the side strips, we install self-tapping screws in them that will hold the oven in place
To prevent the walls of the furniture from breaking when screwing in the screws, first make a hole using a drill with a diameter slightly smaller than the diameter of the self-tapping screw.
We open the door, there are holes on the side strips, we install self-tapping screws in them that will hold the oven in place. To prevent the walls of the furniture from breaking when screwing in the screws, first make a hole using a drill with a diameter slightly smaller than the diameter of the self-tapping screw.
That, in fact, is all. They have already connected the oven, but not everyone fully understands some of the nuances and, most likely, there are a lot of questions about the electrical part. We will talk about them further.
Rules for installing and preparing a furniture niche
Installation is carried out between sections of the working surface of the kitchen, under its countertop or in a niche designed for this in a headset or a separate module. The wall is designed according to the parameters of the oven, and ordered or bought, taking into account all sizes and installation methods. A segment suitable for mounting the oven is disconnected from the rest, if such a fastening is present. After meeting all the criteria, taking into account aspects of the compatibility of furniture and the oven, it remains to prepare a furniture niche. In this sense, one should start with protection against surges in the power supply network. Then make grounding. They also leave gaps between the oven and the walls of the furniture. To maintain an acceptable level of ventilation between the back wall of the niche and the oven, leave at least 40-50 mm, and the margin on the sides is 50 mm or more. In addition to ventilation, you should protect the lower part of the furniture from heating: you need a rise of 90-100 mm.
Important points:
- The connection to the electrical panel must be routed through a separate machine.
- Do not directly connect copper and aluminum wires.
- It is forbidden to connect the electrical wires in a twist.

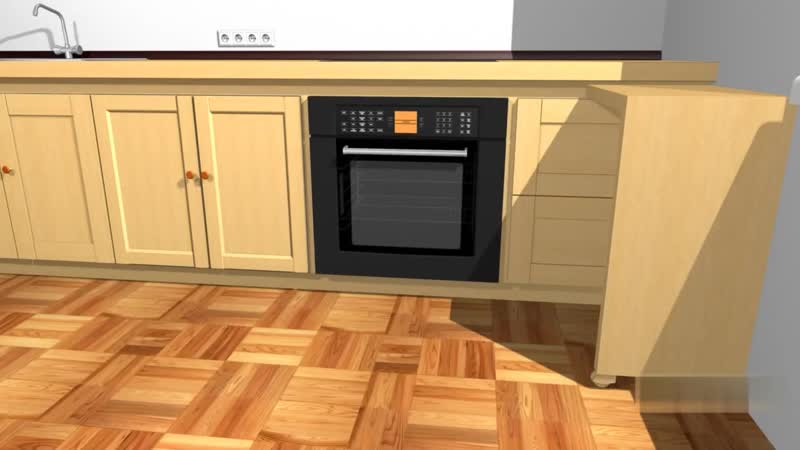
Connecting the gas oven
The installation process begins with the correct placement of the oven in the niche.
It is worth remembering that the oven generates heat, so it is important to observe the gap between the walls of the cabinet and the niche. Otherwise, the device may fail quickly due to improper heat distribution.
The following distances must be taken into account:
- from the back wall of the oven to the wall must be at least 40 mm;
- on the sides of 50 mm;
- from the wall of the niche to the bottom of the gas oven must be within 90 mm.
The difference between connecting a gas cabinet and an electric one is the correct connection of the power source. Gas type models work by connecting flexible hoses to the gas line.

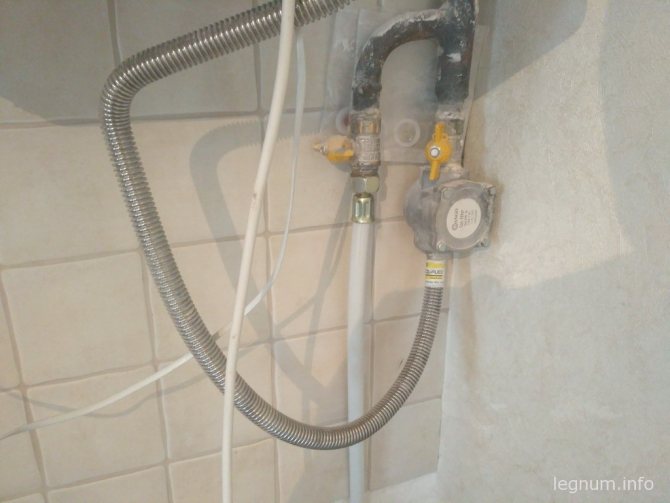


 Use a copper tube or bellows hose to connect the cabinet
If the gas cabinet is dependent on the hob, then in this case it is necessary to connect two gas branches to two different gas stop valves. A copper tube or bellows hose is used for connection to the central gas supply line. In most cases, 0.5 inch male pipe is suitable. Metal pipe or bellows hose is connected in the same way. After installation, you need to check the correct connection. Do not kink the hose, make sure that the hose does not touch other objects.
How to position the oven under the countertop?
The question regarding the technique of installing the oven under the countertop is primarily decided taking into account the configuration of the equipment. This decision should be approached when the relationship between the base and the hob is determined. If these components are placed separately, then the organization of two technological points will be required. In the first, the stove will be installed directly, and in the second - the hob. The need for separation is due to the fact that there are different ergonomic requirements for the nature of the location of these parts. To embed the oven in a place under the countertop, it is enough to calculate the space under the work surface and connect the communications in advance.The tabletop will be a kind of protective top for the equipment, although insulating transitions should be provided between them. As for the hob, it is located in the cutout of the worktop canvas. It can be integrated into the “window” of the slab or installed in a completely free niche that will connect the two edges of a solid canvas. In any case, it is necessary to initially process the countertop specifically for the parameters of the hob.