- Main Process
- Chassis suspension
- Electric installation work
- Connecting a thermostat
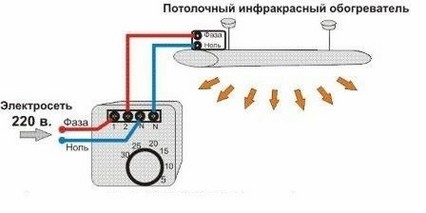
- Connecting the thermostat to an infrared heater
- Necessary materials and tools
- Mounting Features
- The best ceiling infrared heater with thermostat
- Characteristics
- pros
- How does a thermostat work?
- Typical types of thermostats
- How to connect a thermostat to an infrared heater?
- How to connect a thermostat to an infrared heater
- Necessary materials
- Wiring diagram
- Standard
- With a magnetic starter
- Noirot Royat 2 1200
- The main options for thermostats
- Manufacturers
- Connecting thermostats to infrared electric heaters
- What appliances are suitable for giving
- Features of infrared heaters
Main Process
Chassis suspension
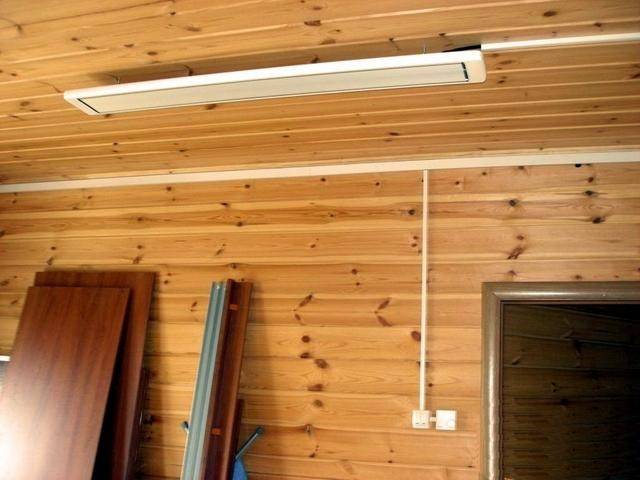
First you need to determine the installation location of the infrared heater in the house (or apartment). As we said above, the case can be placed both on the ceiling and on the walls, depending on the individual preferences of the owners.
First of all, you need to mark the places for installing the fasteners yourself. To do this, use a tape measure, which measure the same distance from the ceiling to the selected area.It is also recommended to use a building level, with which you can evenly set the brackets in a horizontal plane.
After marking, proceed to drilling. If the ceiling (or wall) is made of wood, drill holes with a drill. If you have to deal with concrete, you can not do without a puncher. It is necessary to drive dowels into the created holes and screw in the brackets, after which you can install the infrared heater in its place.
We draw your attention to the fact that the design of the unit is different. Some products have guides fixed in brackets. A simpler option is chains fixed in the ceiling (special holders cling to them)
Also on the market you can see infrared heaters on the leg, which are simply placed on the floor.
A simpler option is chains fixed in the ceiling (special holders cling to them). Also on the market you can see infrared heaters on the leg, which are simply placed on the floor.
Electric installation work
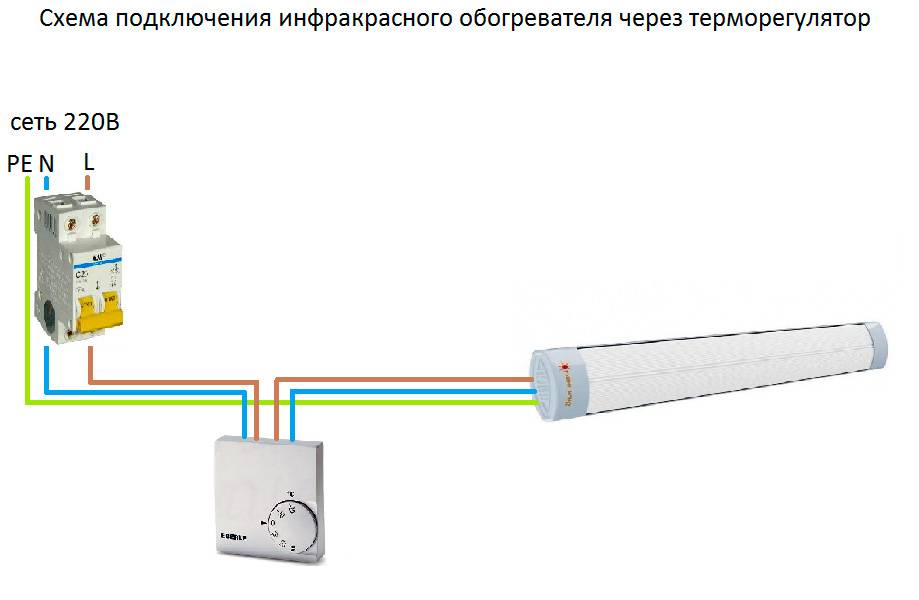
As we said at the beginning, the process of connecting an infrared heater to the network will be carried out using a temperature controller.
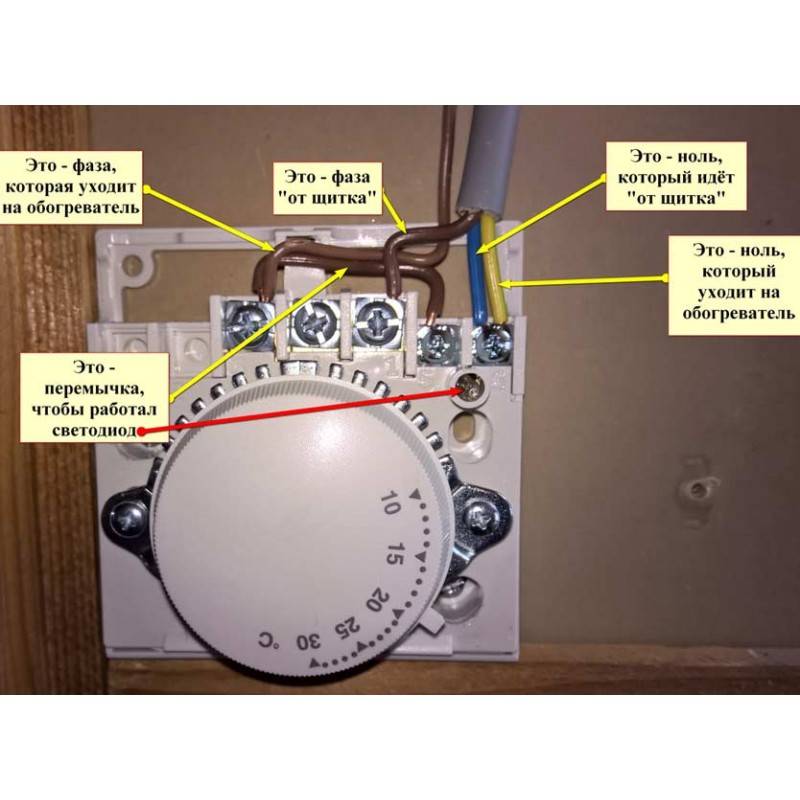
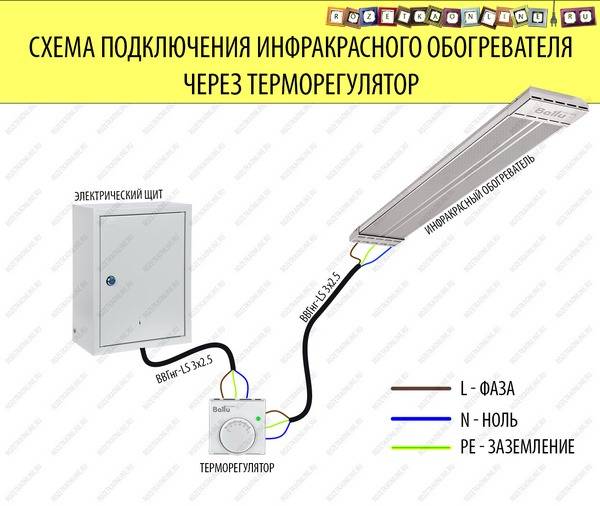
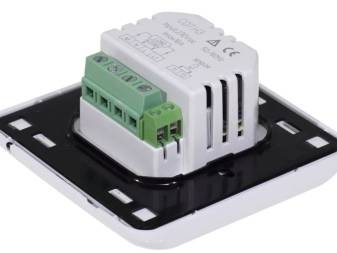
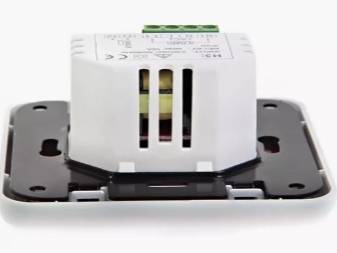
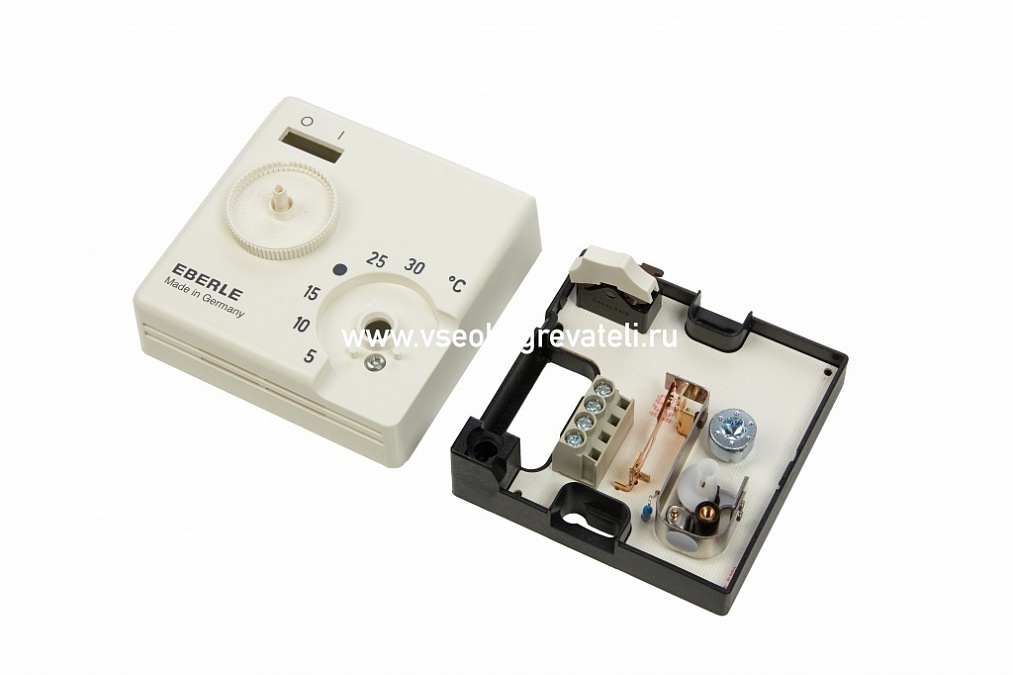
First you need to connect the contacts of the collapsible electrical plug to the terminal blocks of the thermostat, which are installed in the product case. Each "socket" has its own designation: N - zero, L - phase. It should be noted that both zero and phase terminals are at least two each (from the network to the regulator and from the regulator to the heater). Everything is quite simple - you strip the wires, insert them into the seats until they click (or tighten the screws). Be sure to follow the color coding of the wires so that the connection is correct.
To your attention schemes of the correct connection:
As you can see, connecting an infrared heater through a thermostat is quite simple, the main thing is not to confuse the wires and carefully tighten them in the terminal blocks.
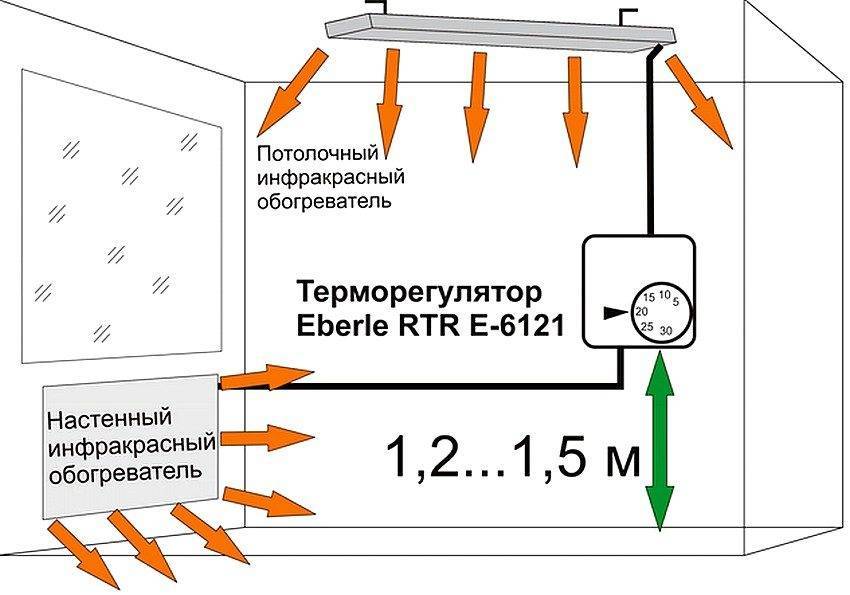
A very important nuance is the correct choice of the location of the regulator. Do not install the product next to a heater, as in this case, warm air entering will adversely affect the measurement accuracy. It is best to place the device in a more remote area, at a height of one and a half meters above the floor.
Also note that you need to install the controller in the coldest room, otherwise the heating problem will not be completely solved. As for the number of infrared devices serviced by one temperature controller, it all depends on the power of the heaters. Usually one 3 kW controller is used for several products, the total power is not more than 2.5 kW (so that there is a margin of at least 15%)
Usually one 3 kW controller is used for several products, the total power is not more than 2.5 kW (so that there is a margin of at least 15%).
You can read more about connecting a thermostat to an IR heater in our separate article, which provides several installation schemes!
So that you can clearly see the whole process of connecting with your own hands, we provide these lessons for viewing:
How to connect a temperature controller


Connecting a thermostat
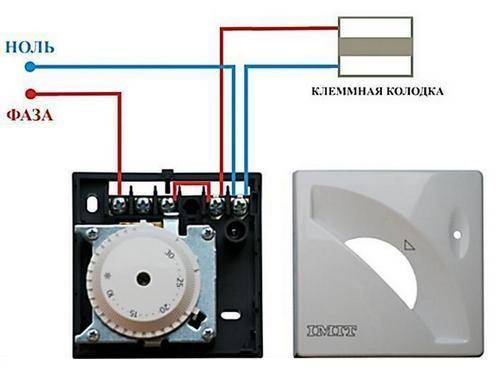
Since temperature controllers can be used both to control heating elements and to control a cooler, there are two types of contacts and terminals in the design of the device.During the independent connection of the device to the system, it is necessary to strictly observe the polarity of the contacts and avoid contradictions in the circuit.
Thermostat connection diagram
No electrical connection is required to connect a mechanical thermostat, since all control and opening of the switch is done by physically changing the characteristics of the heating plate. To connect this device, you need to follow the algorithm below:
- In the documentation for the devices, there is a designation of the terminals by numbers; in accordance with these indicators, it is necessary to assemble the system. First of all, you need to connect the zero cable to the box electrodes and lead it immediately to the consumed heating elements, for example, a warm floor;
- The phase is brought into the controller directly, without connection to household appliances. The box itself will distribute electricity at the moment the contacts are turned on. In some devices, it is necessary to lay a jumper inside the thermostat from the positive wire to the operation indicator, which shows a signal at the moment the heater is turned on and throughout the entire period of operation;
- The control unit contains terminals for connecting a cooling heating element, as well as for an external temperature sensor. All devices must be connected in series, the current must be completely disconnected. This is a typical thermostat connection scheme, which is most common in underfloor heating or infrared space heating systems;
- The temperature sensor is connected last, after which a test run of the system and a voltage check on all elements are performed.
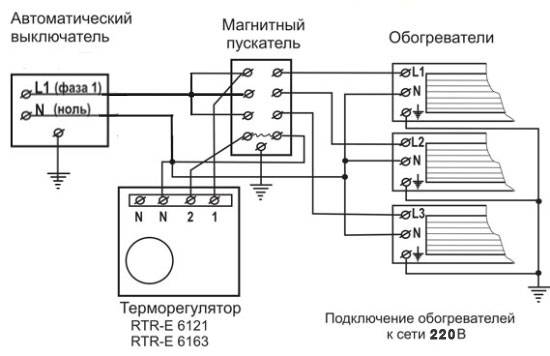
Scheme using the machine
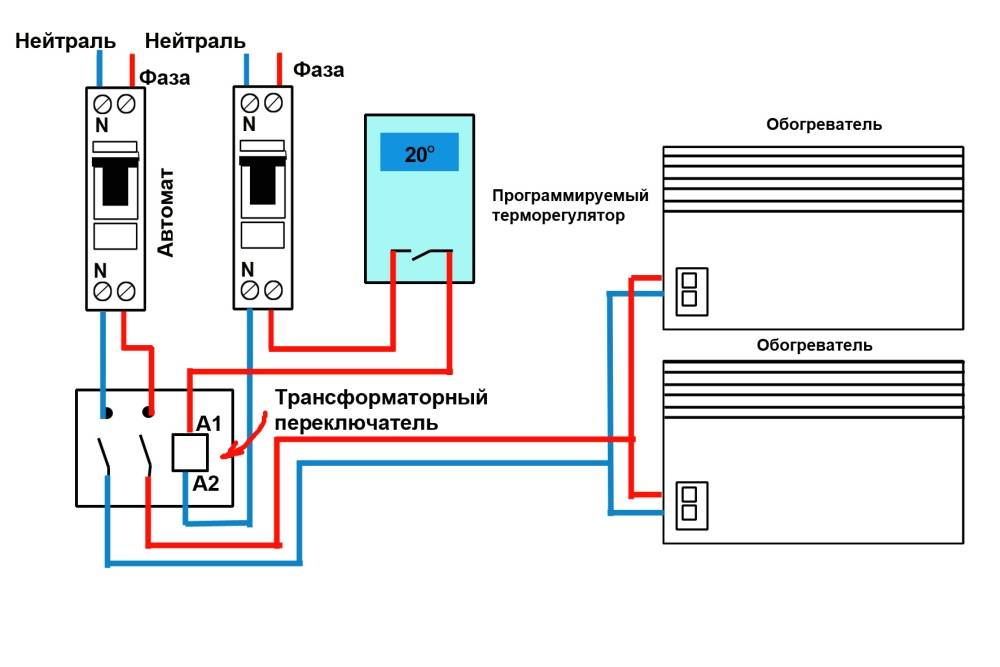
There is also a thermostat connection scheme using a magnetic circuit breaker, most often this scheme is used when there are several controlled devices that require high voltage current for operation. In this case, the machine is connected to an open network of a positive cable in parallel with a thermostat, in addition there is a connecting cable with a control device. Current is supplied to consumer devices through a circuit breaker, but it is controlled by a thermostat. The heating elements are connected to the controller only on a parallel line and through the machine, this allows the system to be operated with high voltage without interruption and in a safe mode. In the event of an emergency, the switch will trip and completely de-energize all devices.
Thus, it can be seen from the diagram that the thermostat is connected to heating or cooling devices immediately before applying voltage to them, that is, the controller will be the first element in the system. Many thermostats are equipped with an electronic microcircuit and a processor that, in addition to temperature readings, provide additional data on various indicators, such as the state of humidity in the room, pressure and the time required to reach the set parameters. Such devices have a cost much higher than mechanical household thermostats.
Connecting the thermostat to an infrared heater
Before proceeding with the installation of the heater, first you need to decide on the installation location of the equipment
It is very important to choose the right place to ensure the safest use of the device and its uninterrupted operation. A few tips will help with this:
Tip 1. Do not place the device where the humidity is high. This is extremely unsafe, especially for electric type thermostats.
Tip 2. Exposure to sunlight will negatively affect the operation of the device, so it is best to choose a place hidden from the sun. The fact is that, being in the sun, they will begin to show inaccurate data, which will adversely affect the heating process.
After the place has been selected, you can proceed to the preparation of all the necessary tools and the installation itself.
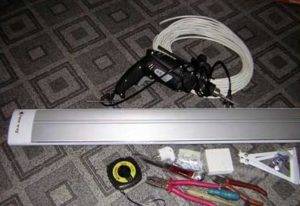
Necessary materials and tools
One of the main required tools is a tape measure - it will allow you to measure the required distance from the ceiling to the selected installation location of the device. Additionally, it is worth stocking up on a building level in order to carry out installation as smoothly as possible.
Also, during the installation process, you will need tools and materials such as:
- drill or drill;
- perforator;
- dowel;
- bracket.
Thanks to all these devices, it is possible to carry out the installation of equipment.
Mounting Features
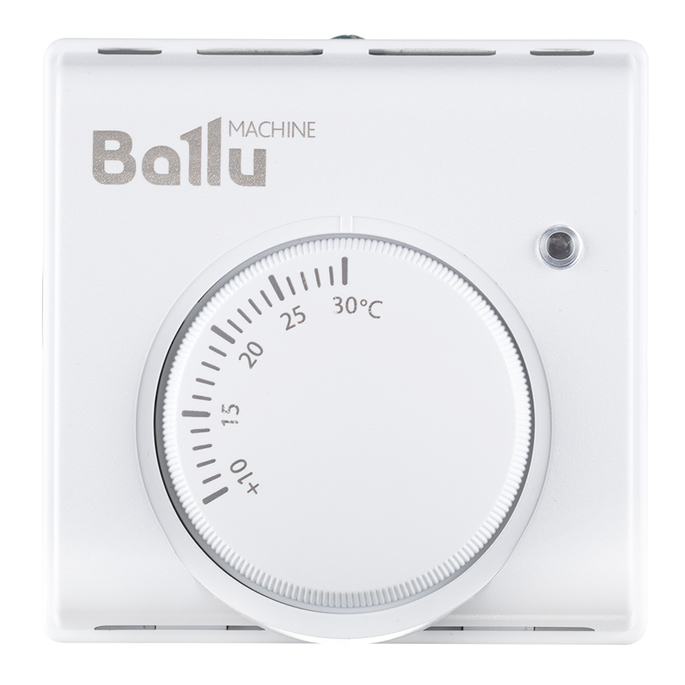
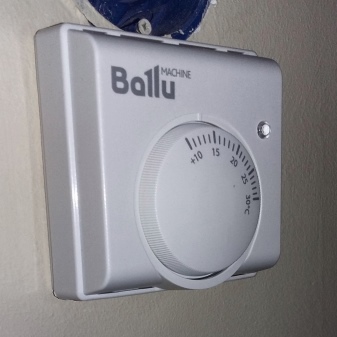
During the installation of the heater, it is worth considering some features, and one of these features is also the mounting of the thermostat. You can consider the process of installing and connecting a thermostat using the Balu brand thermostat as an example.
In order for the device to efficiently cope with all the functions assigned to it, you must first familiarize yourself with the installation rules, and then perform it as correctly as possible
Among the main rules that you need to pay attention to, you can note:
- The thermostat can only be installed 1.5 meters from the floor.
- Before mounting the device, a layer of insulating material must be placed under it.
- In no case should the thermostat be mounted next to pieces of furniture or behind curtains.
The last point is due to the fact that such an arrangement would be extremely inconvenient, as well as dangerous due to the lack of air that would cool the operation of the device.
The best ceiling infrared heater with thermostat
Models with thermostats save energy. When installing several appliances on the ceiling, use one thermostat per room. The device controls the temperature, depending on the indicators turns the heater on or off.


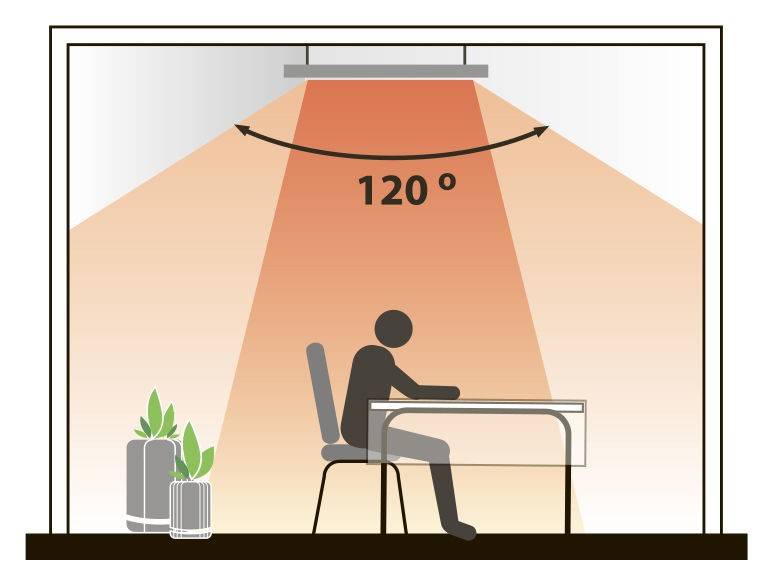
The Pion model meets the modern needs of customers, including low power consumption and high heat dissipation. The specimen has a 120˚ beam angle, powder-coated aluminum alloy housing. The color palette is white and wood color. The manufacturer also produces the Peony Lux line. Models differ in color, power, equipment. Heaters are sold with or without a thermostat and wire.
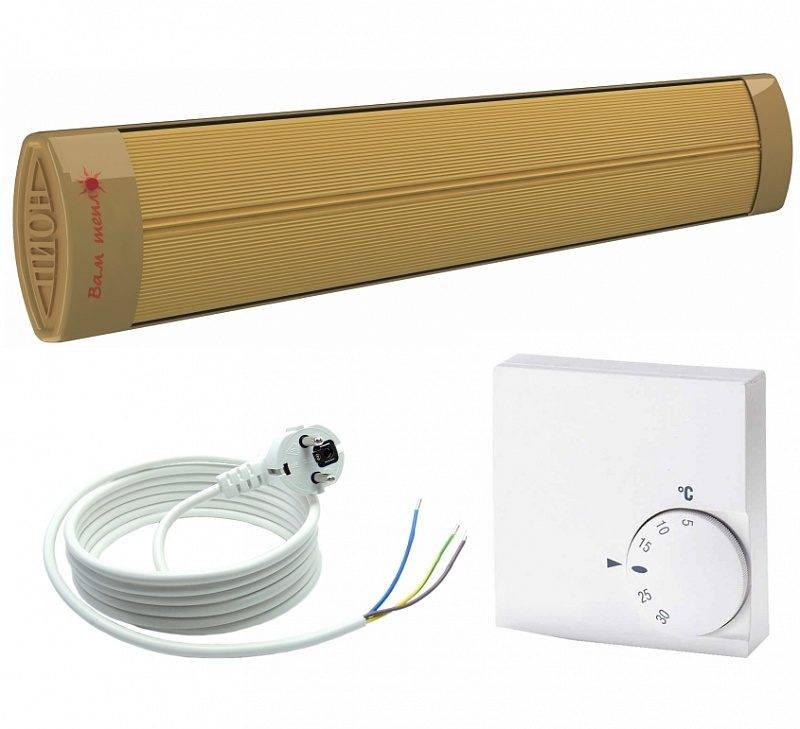
The Pion Lux 0.4 Zh model plus a thermostat is low-power. It is mounted in bathrooms, pantries, bathrooms, hallways.
Characteristics
- power - 400 W;
- voltage - 220V;
- weight - 2.3 kg;
- working height - 1.8-3 m;
- work in winter - 4 m²;
- in the autumn / spring season - 8 m²;
- installed on ceilings finished with wood;
- overheating or underheating of the room is excluded;
- the device comes with a German thermostat;
- protection IP 54.
pros
- the thermostat works after 1 s;
- temperature adjustment in the range of 5-30˚;
- high quality thermostat made in Germany;
- moisture resistance;
- setting the operating mode for a day or a week;
- light weight.
Minus - low power.
How does a thermostat work?
Such a regulator consists of two main nodes:
- Temperature sensor installed near the heat source and / or in the heated room.
- The control unit that processes the signals of the temperature sensor.
These structural elements interact with each other according to the following scheme:
- The control unit receives the heater operation program, which indicates the temperature regime in the room or the degree of heating of the heating element.
- The temperature sensor reads the "degrees" in the room and / or at the heating element, transmitting this information to the control unit.
- The control unit turns on the heating element if the temperature transmitted by the sensor is less than the programmed value. And turns off the infrared panel if the temperature in the room or at the heating plate exceeds the programmed parameter.
As a result, ceiling and wall infrared heaters with a thermostat consume only the required “volume” of electricity, heating the room only to the desired temperature. In this case, the calibration of heat transfer and temperature is carried out in steps of 0.1-1.0 °C
Typical types of thermostats
Modern manufacturers produce two types of thermostats:
Mechanical devices. For such regulators, a special plate or diaphragm made of a material sensitive to temperature deformations is used as a temperature sensor.Therefore, thermomechanical regulators, in fact, do not have a control unit. The plate closes or opens the contacts of the electrical circuit that feeds the infrared heater, under the "influence" of the actual temperature in the house. And all regulation consists in fixing the set temperature with the help of a mechanical lever, with which the elements of the plate temperature sensor are positioned.
- The main advantage of such a regulator is the ability to work without supplying electricity to the device.
- The main disadvantage is the low accuracy of calibration - from 0.5 to 1 °C.
Scheme of connecting an infrared heater to a thermostat
Electronic devices. The temperature sensor of such a device captures thermal radiation by reading electromagnetic waves of a certain frequency. At the same time, both the temperature "overboard" and the degrees in the house are controlled. The control unit of such a controller receives signals from the sensor and processes them according to the embedded algorithm (program). Electronic instruments have only digital controls. The signal processing algorithm from the sensor is set using factory programs or buttons on the case. Information about the temperature and operating modes is displayed.
- The main advantage of such a device is its high accuracy - calibration is carried out in steps of 0.1 °C. In addition, there is some autonomy of control. For example, infrared heaters with a thermostat for summer cottages can be programmed for a week of work on the air temperature outside the house and not even go out of town to control and adjust the operation of the heating system. Mechanical regulators cannot do this - the user will have to “turn the wheel” of the settings almost daily.
- The main disadvantage is that it only works when there is voltage in the network.
How to connect a thermostat to an infrared heater?
When installing a thermostat, you need to focus on the following generally accepted rules:
- A separate regulator is installed in each heated room.
- A heat-reflecting screen must be installed between the temperature sensor and the supporting surface.
- Ceiling infrared heaters with a thermostat cannot be more powerful than 3 kW.
- The recommended placement height is 1.5 meters from the floor level.
The installation of the device itself is carried out as follows:
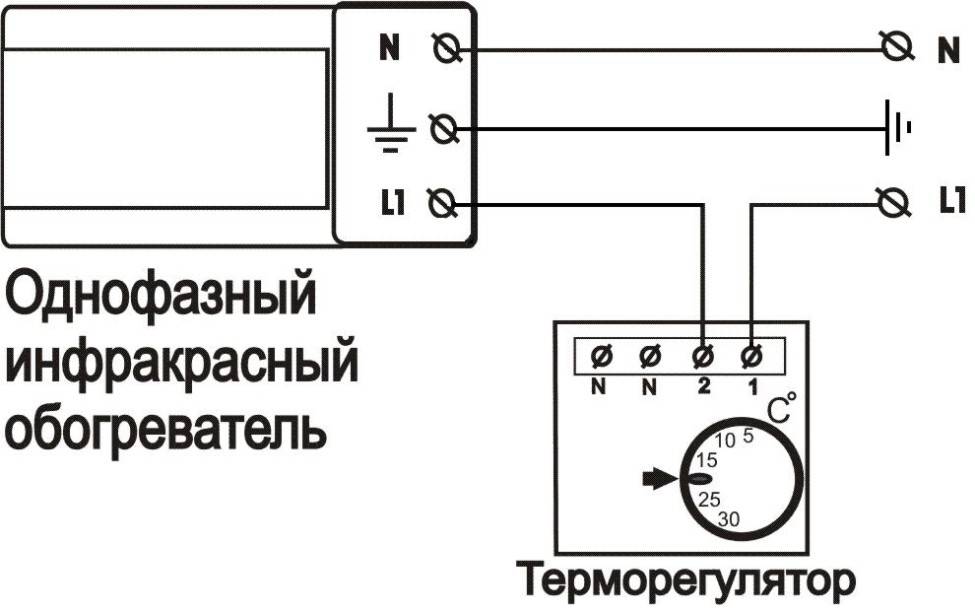
- A separate line is “pulled” from the central shield to the regulator, which ends at the incoming “zero” and “phase” terminals.
- A power supply line is pulled from the regulator to the heater, starting from the outgoing terminals of "zero" and "phase".
- External temperature sensors are connected to the corresponding connectors of the temperature controller, connected to the controller using separate lines or wireless communication protocols.
Exact installation diagrams are given in the passports for specific models of control devices.
How to connect a thermostat to an infrared heater
Using the thermostat is very convenient, you just need to determine how to properly connect the thermostat to the infrared heater in order to get the maximum effect from using this device.
Necessary materials
 Preparation for the installation of the thermostat will not take much time, as well as the installation itself. Even in the absence of experience in connecting thermostats, all work can be easily done independently.
But if you do not have experience with electrical equipment and even installing an outlet is difficult, and you are not familiar with the principle of operation of an indicator screwdriver, you should not try to figure out how to connect a mechanical or electronic thermostat. In such cases, it is safer to entrust this work to a professional.
For those who are well versed in electricity and know for sure that appliances and equipment should be de-energized before work, it is necessary to prepare such a set of tools:
- Drill or screwdriver. They are only needed to drill a hole in the wall for mounting the thermostat.
- Pliers for working with electrical cables.
- Indicator screwdriver or tester.
- Pencil, tape measure. They will help determine and designate the place where the temperature controller will be located.
Also, for work, you will need an electric cable that will connect the thermostat and the infrared heating device, a collapsible socket and hardware for attaching the regulator and fixing the cable. When the materials and tools are prepared, you can begin marking and installation.
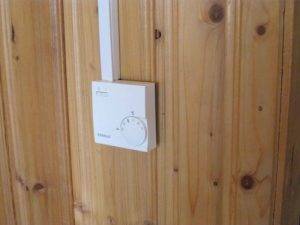
 Electronic thermostat that controls the operation of the IR heater
Wiring diagram
The scheme for connecting the thermostat to an infrared domestic heater is selected depending on the device used, the experience and knowledge of the electrical installation specialist.
Standard
In the standard scheme, the thermostat is installed in a ready-made network between the heater itself and the circuit breaker on the shield. The starting point of the network will be the automaton. Two wires depart from it - phase and zero, which are connected to the corresponding contacts of the thermostat.Two wires also come from the thermostat, which are already connected to the heater.
This scheme is also convenient if two or three heaters must be connected to one thermostat. Located in different rooms, they provide the same temperature throughout the apartment. For their effective operation, the connection is made in this way:

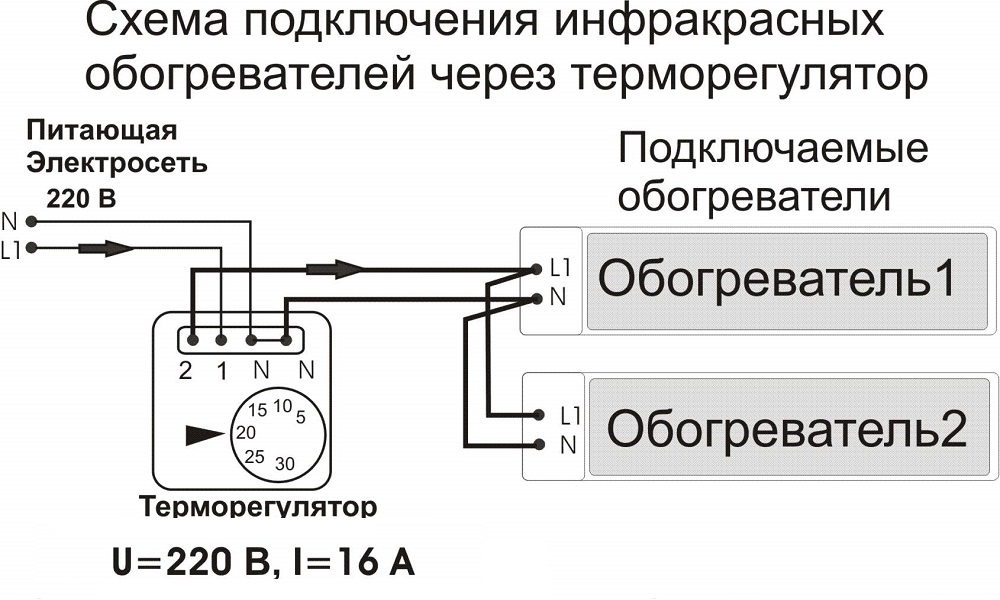


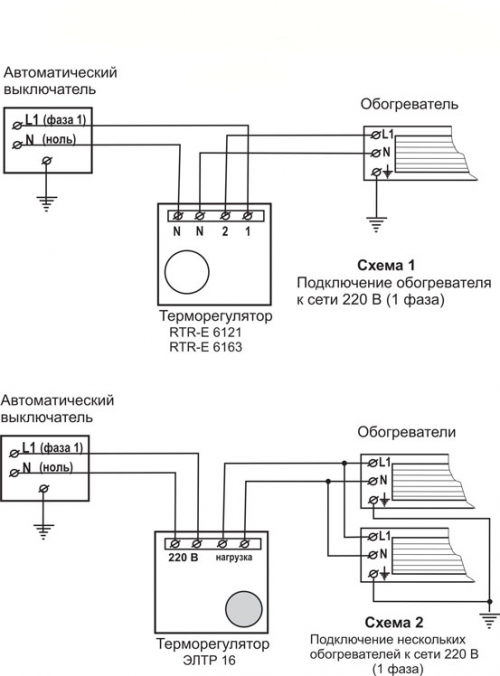


- Two wires lead from the machine to the thermostat: phase and zero.
- Two wires for each heater depart from the machine.
- Infrared heaters are not connected to each other.
Parallel connection allows you to safely control several devices at once, without buying additional controllers for each of them.
Options for connecting infrared heaters through a thermostatImportant: For several heaters, serial connection is allowed. But it is considered less convenient, therefore it is used extremely rarely.
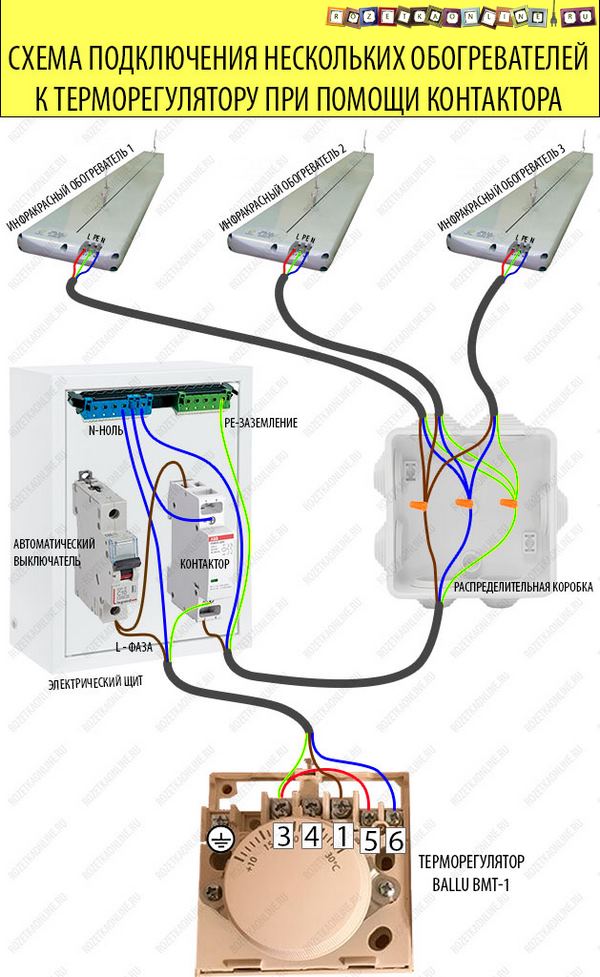
With a magnetic starter
This circuit is a little more complicated and will take a little longer. But thanks to the use of additional equipment in the form of a magnetic starter, it is possible to connect several heaters to one thermostat at once, including equipment with higher power, industrial systems.
Devices are connected in the following sequence:
- Using a cable (phase and zero), a thermostat is connected to the machine.
- Through the output terminals, the thermostat is connected to the magnetic starter.
- The magnetic starter is connected to heating devices.
At the same time, the scheme for magnetic starter connection calculated individually. This will ensure the safe and efficient operation of the devices.
 With a magnetic starter
Noirot Royat 2 1200
Infrared quartz heater Noirot Royat 2 1200 is a versatile wall-mounted option. Programmed for three modes of operation, it is ideal for installation in any room.

The possibility of greater coverage of the heating area is achieved by turning the surface of the heating device at an angle of up to 30 degrees. The control panel, for ease of use, can be mounted both on the left and on the right side of the heater.

Specifications:
- the heating element is made of quartz;
- the operation of the device is carried out at different powers of 0.3,0.6,1.2 kW;
- device dimensions 0.45x0.12x0.11 m;
- the presence of a safety device and a thermostat;
- low noise during operation of the heater.
Unlike the previous two models, this heater has a higher cost, around 9,700 rubles.

The question of how to choose a thermostat for an infrared heater can turn into a difficult task. In addition to its main function - heating the room, the potential buyer is interested in the efficiency and safety of the device.

The main options for thermostats
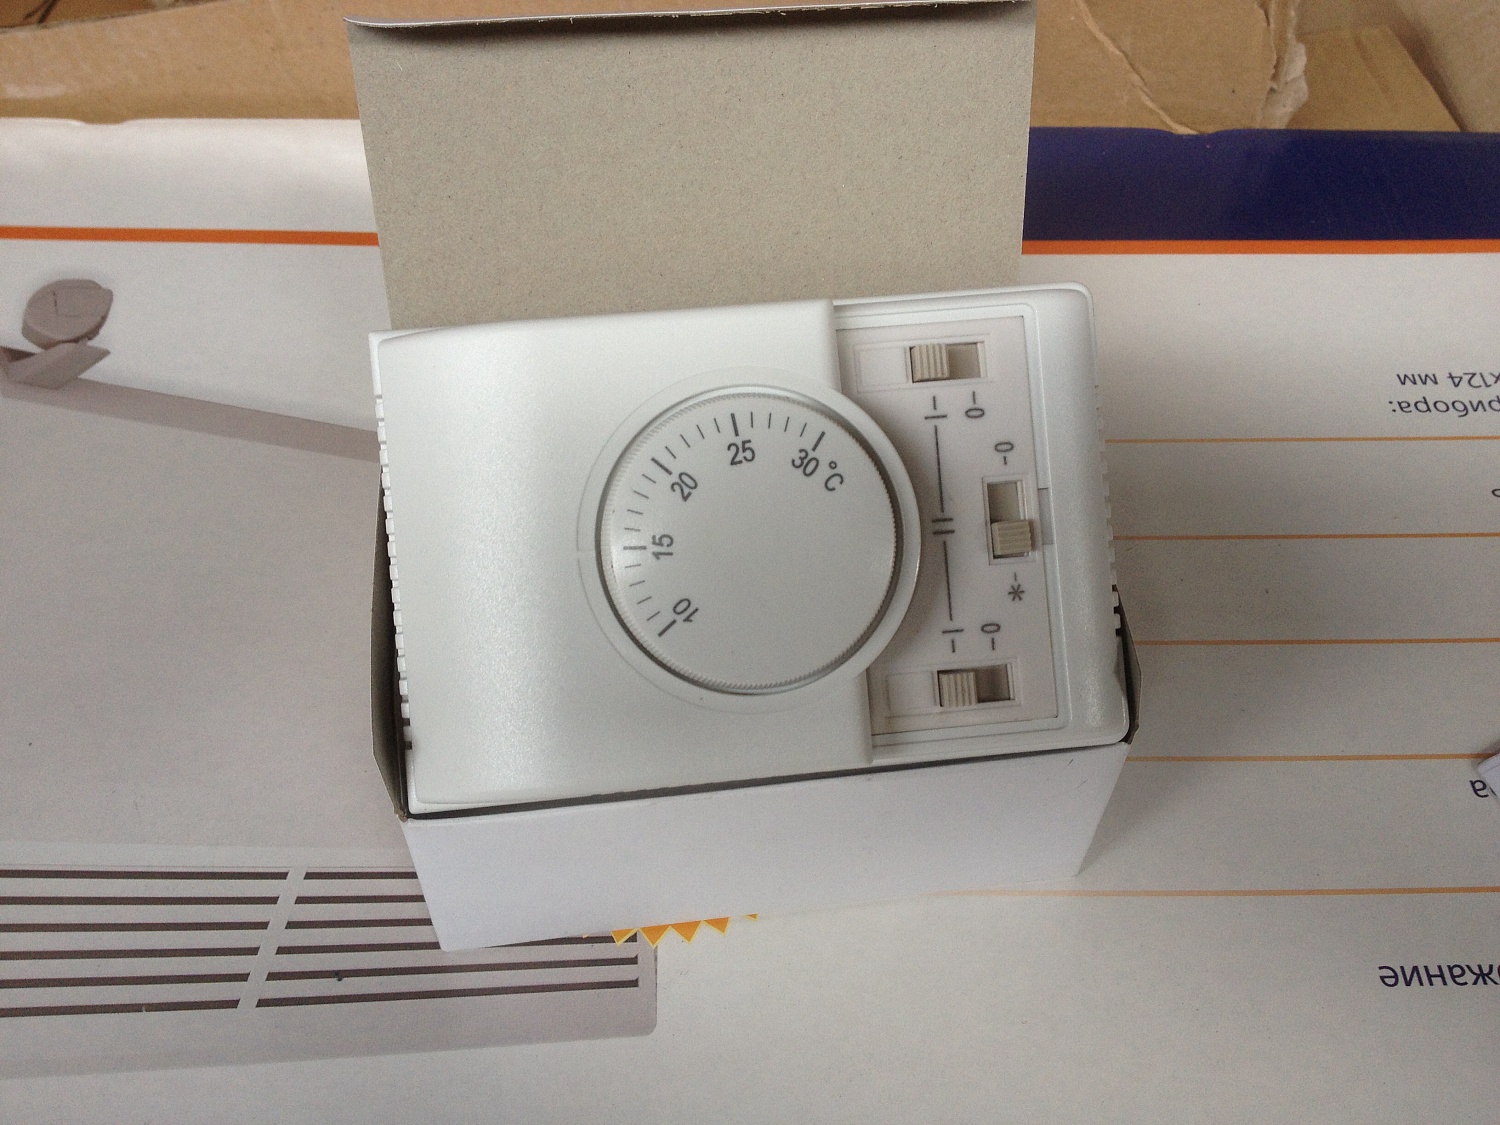
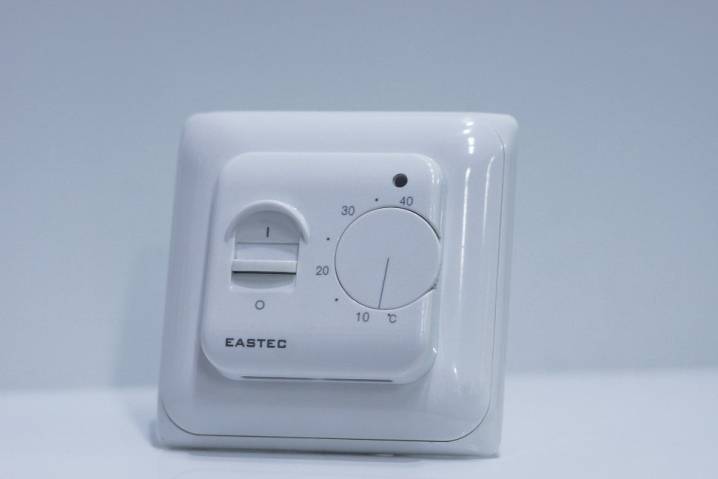
For infrared heater use mechanical or electronic type of thermostat. Both options have a square or rectangular plastic case, and the principle of operation and internal structure are different.
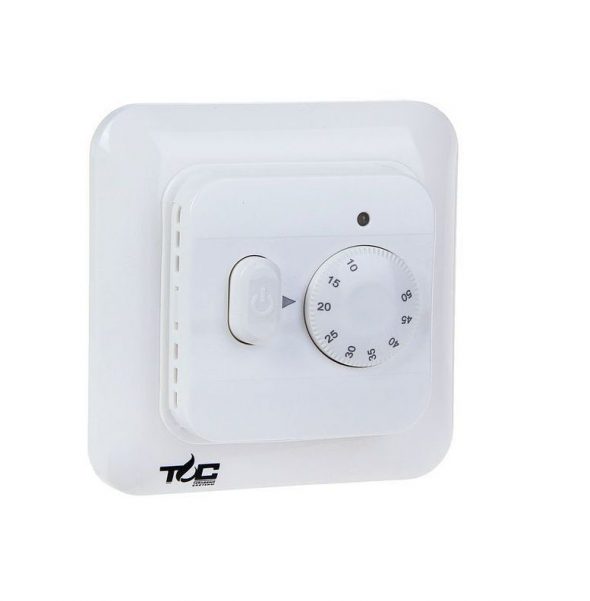
The plastic housing contains functional elements that ensure the operation of the control system
On the outside of the plastic box of the mechanical regulator there is a round-shaped switch that allows you to smoothly adjust the necessary parameters. One division may have a different meaning, depending on the model of the device.For example, in some cases, one division allows you to adjust the temperature by 1 °, and there are also options with a value of 2 °, 3 ° or more. The light indicator of the device status and the on / off button are also located on the plastic box. A mechanical device is optimal in the case when people are constantly in the room, which allows you to turn off the thermostat in a timely manner. This device does not have a remote control.
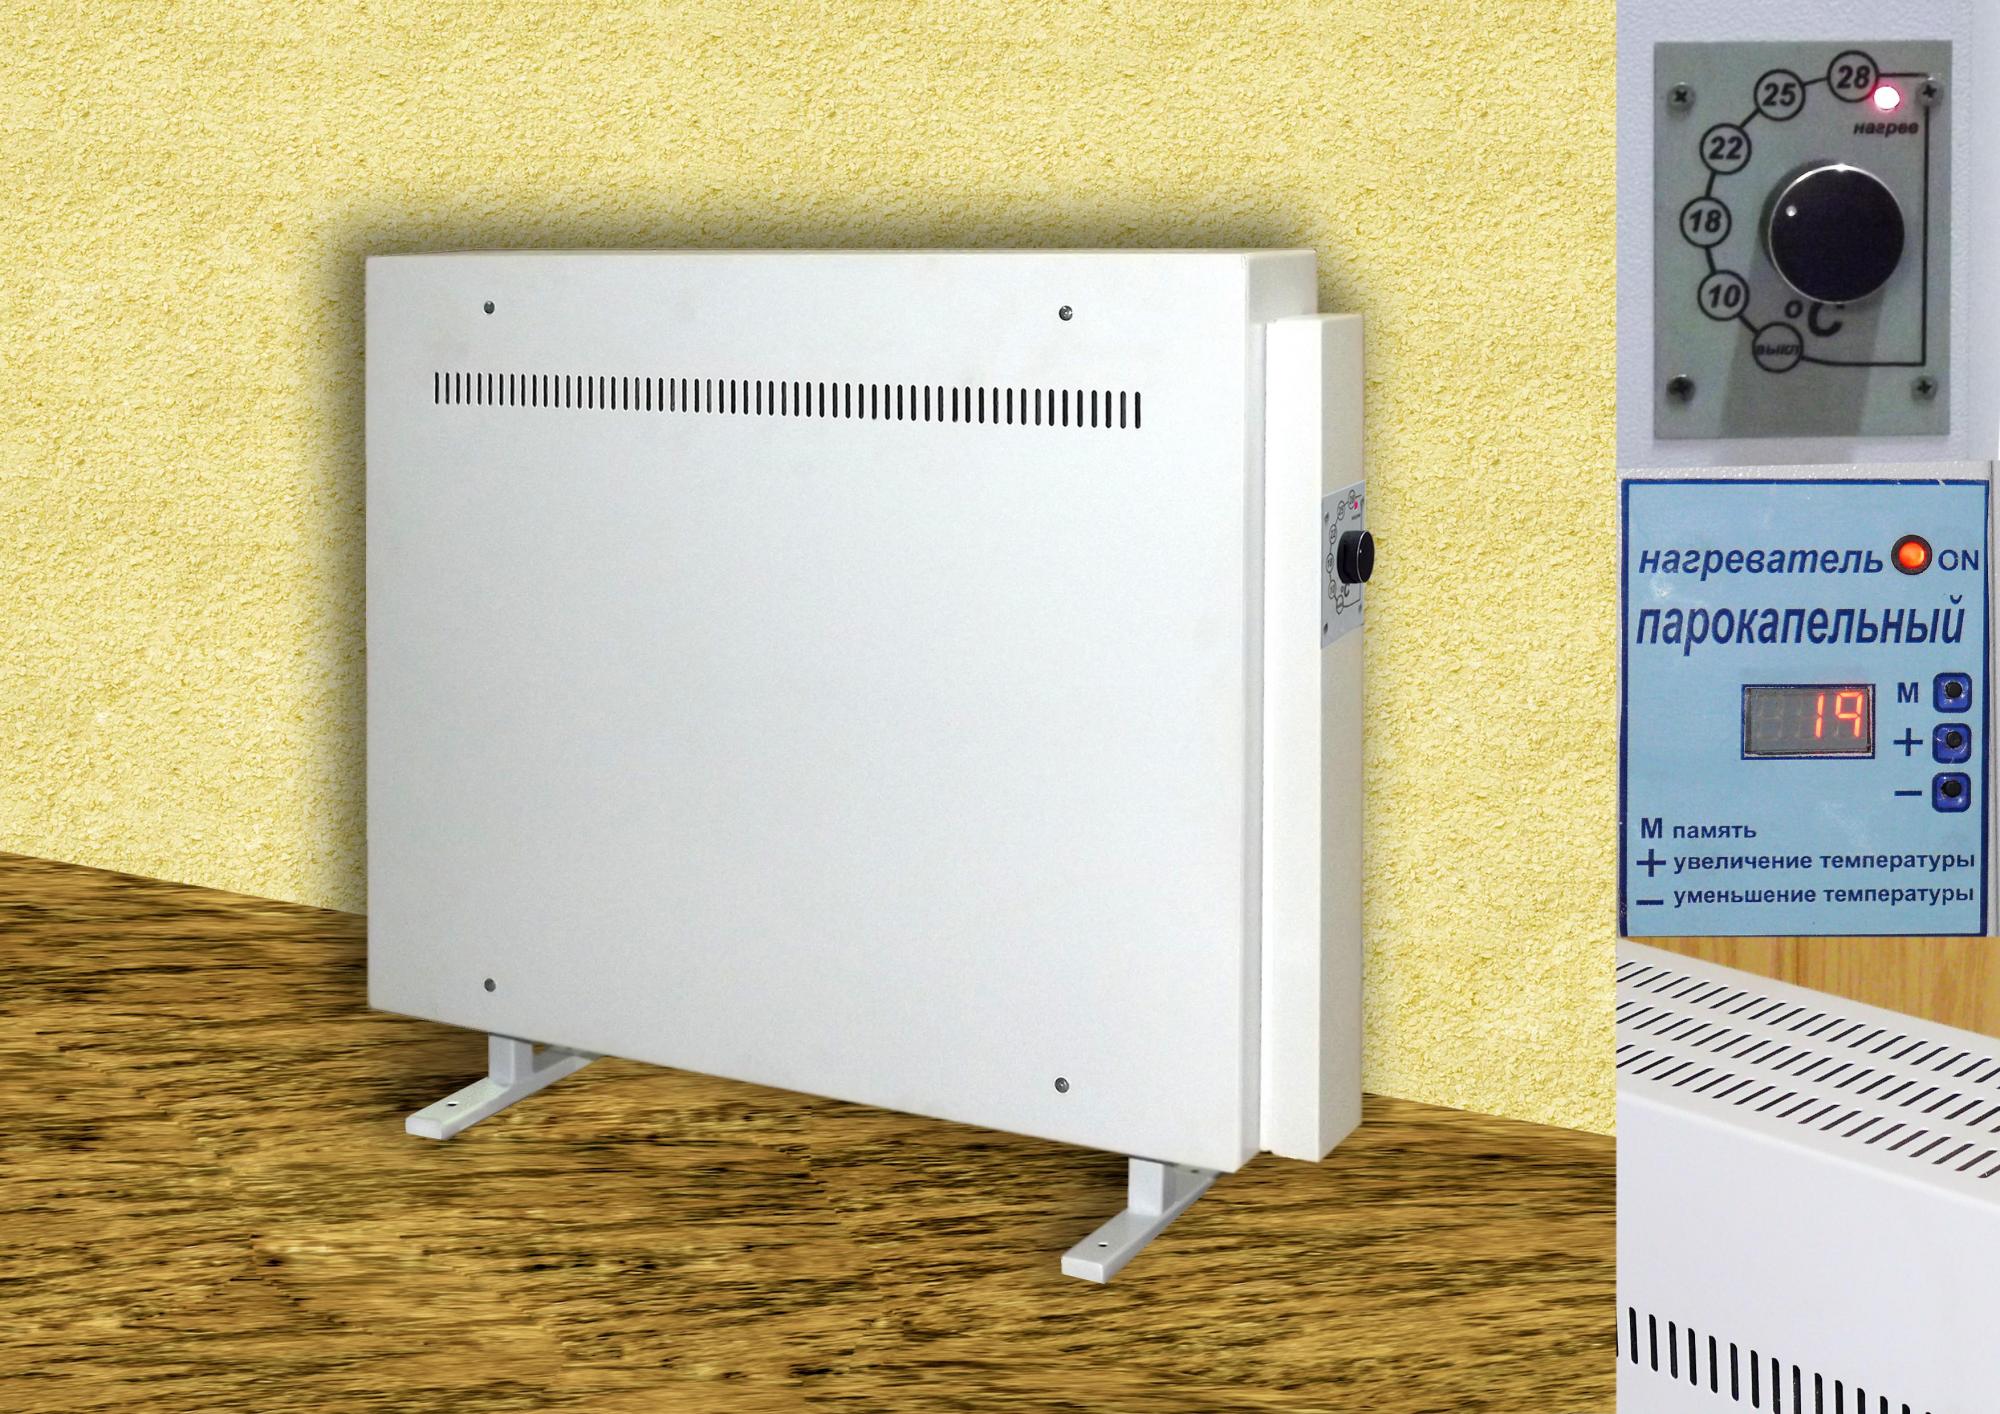
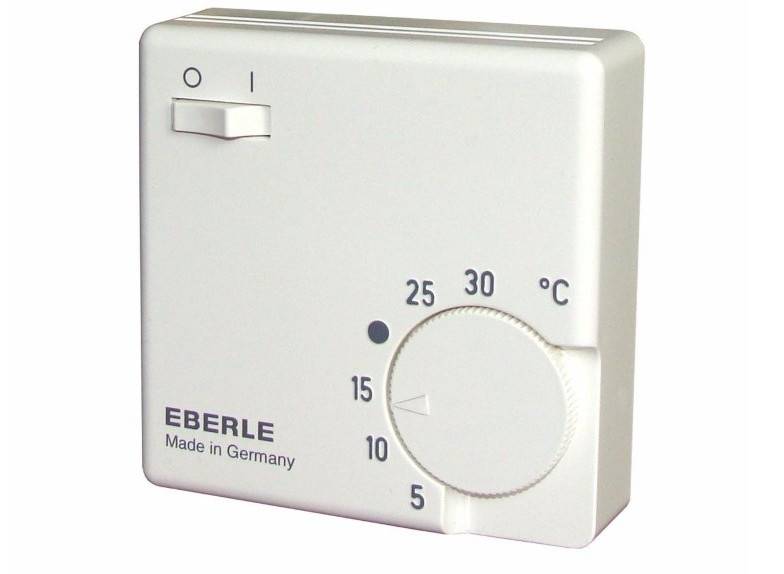
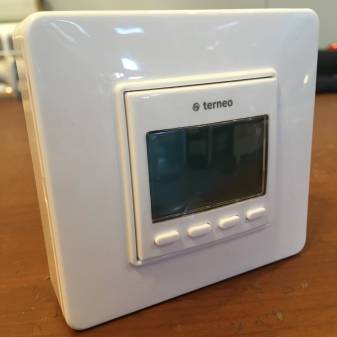
The electronic thermostat has a display that shows all the information
In an electronic type device, temperature is controlled using buttons, and the main indicators are displayed on the display. Modern models can have touch and remote control. Such a device can be trusted to control the temperature in the room even in the absence of owners.


The choice of a certain type of thermostat is carried out depending on the type of room, the desired functionality of the device. For example, in a country house, which is often visited by the owners, an electronic version is appropriate. Using the remote control, you can preheat the room with an infrared heater before arrival. Mechanical models have a lower cost and are suitable for living spaces.
Manufacturers
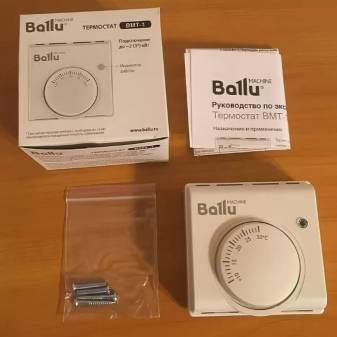
If we talk about manufacturers, then on sale it is easy to find various kinds of thermostats for an IR heater for a summer residence. Moreover, both mechanical and electronic type. Solutions from domestic firms are considered quite popular, which combine durability, quality and affordable price. European, Japanese and American models of thermostats are considered popular.If we talk in more detail about specific models, then for a start we should name the regulator called Ballu BMT-1. This device is a fairly affordable mechanical thermal relay that works with infrared heaters from this manufacturer. The advantages of the model will be the ability to work with 1-phase devices with a power of up to 2 kW and the presence of a rather large control range. Another advantage is that the body of the Ballu BMT-1 is made of very durable plastic.
The next model, which is also quite popular, is Easter RTC 70.26. This electromechanical type thermostat is used in underfloor heating equipped with infrared heaters. It has a remote type sensor that measures the desired indicators and transmits a signal to the main control unit. It is very easy to use, versatile and can work with most heating devices up to 3.5 kW.
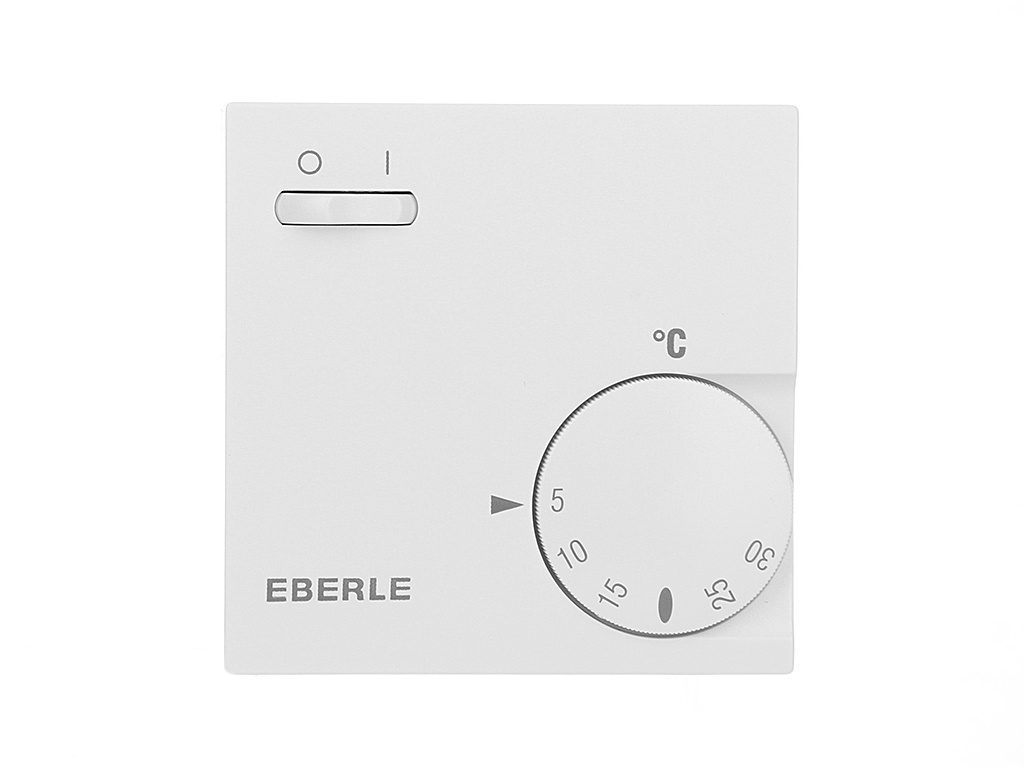
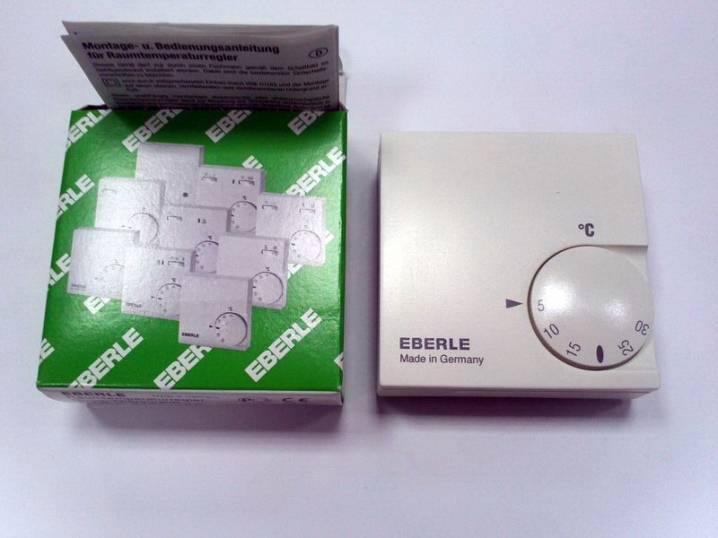
Another good device is Eberle RTT-E 6121. It belongs to the category of electromechanical overhead devices that have manual control. The temperature control range is from +5 to -30 degrees Celsius
It is important that this device allows you to control several heaters at once, the total power of which will not exceed 3.5 kW. Also, a distinctive feature of the device will be the possibility of its use in rooms where the humidity reaches 95 percent.
It is based on a bimetallic plate.
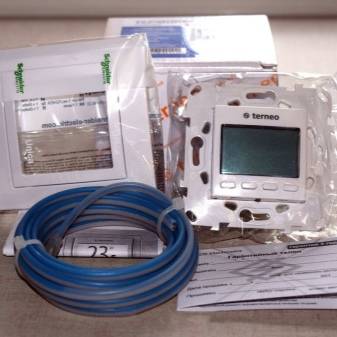
Another model that is extremely popular among consumers is Terneo PRO.This is a programmable electronic thermostat, which belongs to the expensive price segment. Due to the presence of the cloud, the device can store all the data on the settings and operation of the infrared heater, which makes it possible to view the necessary information from a smartphone or tablet. Moreover, there is a special application for working with this model of thermostat.
For fans of domestic products, the best solution would be BiLux T08. This is a programmable thermostat from the domestic manufacturer of the same name. It is equipped with a pleasant backlit screen, which belongs to the touch. Differs in the highest class of moisture protection and has a very durable case made of plastic. It has two control modes:
- programmable;
- manual.
Connecting thermostats to infrared electric heaters
Efficient operation is ensured by correct installation. First, you need to think about where the equipment will be located. The device should not be located in a zone of high humidity and near heat sources. If these rules are not followed, the temperature measurement may not be accurate, which will lead to incorrect operation of the heating device.

The next important question is how to connect the thermostat to the power source and to the heater itself. An automatic shutdown relay is used to close the circuit. Here are the most common connection schemes.

The first way to connect a thermostat to an infrared type heater is to use one thermostat per heater. This option is the easiest way to connect a thermostat with your own hands.

The second method involves the parallel connection of two heating devices at once to one thermostat. First, the first electric heater is connected in series, from which wiring is performed to connect the second device. There is an option to use more than two electric heaters with one thermostat.

Despite the complexity of the connection, this scheme is the most practical. Here, the principle of operation of the device is based on the use of an electromagnetic starter for the safe use of an electrical appliance.
Some manufacturers can offer you a ready-made circuit, selling their own magnetic starters. Therefore, if you are poorly versed in electrical engineering, it is better, first, to carefully read the instructions for connecting, or trust the work of professionals.

The cost and types of infrared heaters with a temperature controller on the example of three popular samples. Models of infrared wall and ceiling thermostats are the most popular in their product segment. Their main distinguishing feature is their compact dimensions.


In addition, potential customers are attracted by the original design of the product and the possibility of selecting a thermostat for the design of the room. Let's consider several options.

What appliances are suitable for giving
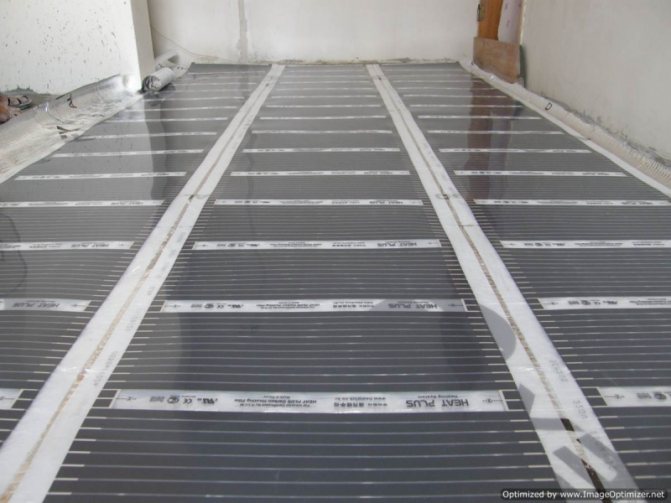
The conditions of a country house are characterized by a lack of heating (not always, but most often). Therefore, for a summer residence, you should choose a thermostat that can provide a comfortable environment in a cool or night time.. For this, different options can be used. For example, ceiling infrared heaters will be a very good solution.They radiate downward, heating the floor and pieces of furniture that are in the path of the waves.
Given that furniture in the country is not always very comfortable, it turns out a kind of underfloor heating, and this is quite comfortable and warm. The option is good because it does not require spending money and heating the entire house, as happens with other types.
The device is installed at the point where it is needed and covers a certain space, which is necessary.
There is one "but". Country houses, most often, are small. Their ceiling height is sufficient not to scratch the top of the head against the ceiling, but for the operation of the ceiling IR heater, at least 2.5 m is required.
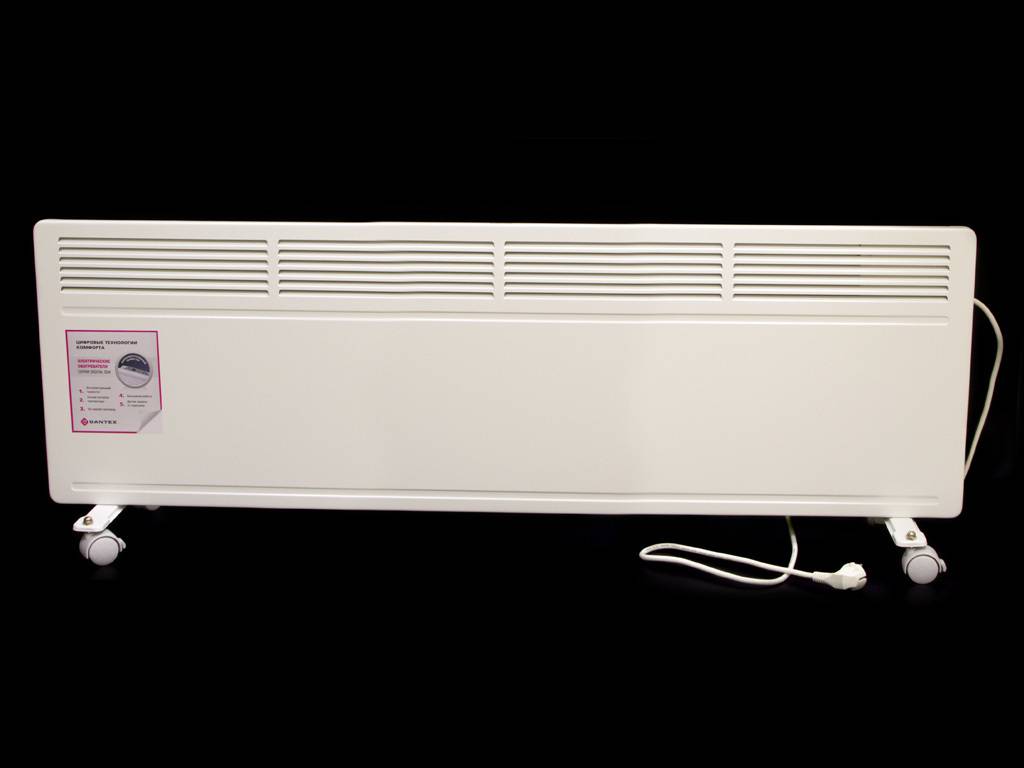
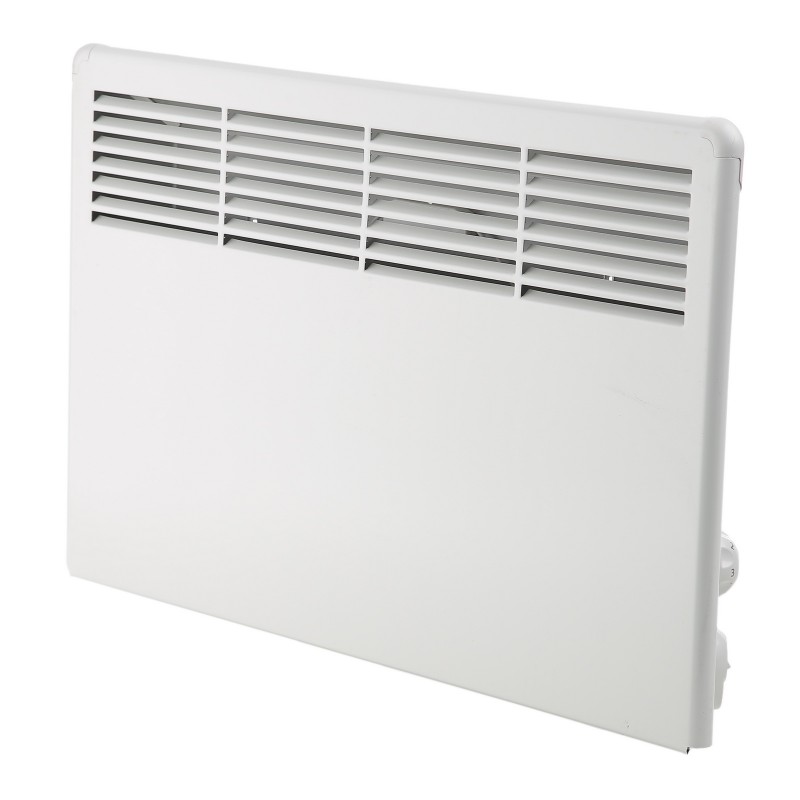
The solution is wall-mounted infrared heaters. They are installed at the right height from the floor and at the right distance from people (sofas, beds, etc.) in order to provide heating and not spoil the summer holiday with burns or other problems.
Features of infrared heaters
Infrared heater can be attached to a wooden surface
Infrared heaters are a unique opportunity to make life comfortable in summer cottages, apartments, private houses. Today, such devices are also in great demand in offices and other similar establishments where a regulating thermal system is needed.
Can an infrared heater be used as a single heating system? This is a very interesting question, which can be unequivocally answered in the affirmative. This type of heating is smartly suited, both for the main heating system, and as an addition. The difference will be expressed solely in rated power.
This type of heating has several advantages:
- It does not require huge expenditures of either money or labor to establish powerful structures.
- It is characterized by silent operation and automation.
- Guarantees safety and environmental friendliness.
- Provides zone heating. At the same time, it can maintain different temperatures in two different zones.
The device can be installed for zone heating
The infrared heater is easy to install, attach and use. It starts performing its functions as quickly as possible, providing a high level of comfort in the zone of its actions. A huge advantage of using this type of heating is a small percentage reduction in moisture in the room. That is, there is no problem of dry air.
To get the maximum benefit from the use of such a useful installation, it must be properly installed.
This is interesting: Types of underfloor heating - an overview of the features and main advantages