- Overview of popular budget models of thermal imagers for examining cottages
- Data retention and ergonomics
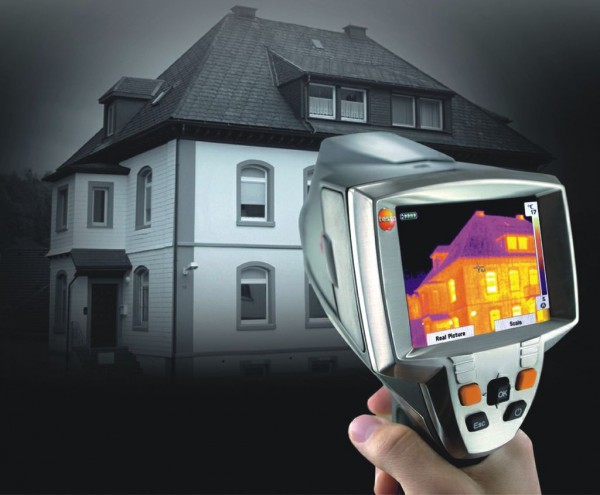
- Device and principle of operation
- The device and principle of operation of the thermal imager
- How is the thermal scanner checked?
- Thermal Imager Workswell WIRIS 2nd Generation
- Device and principle of operation
- Types of pyrometers
- How to choose a thermal imager
- What are thermal imaging cameras used for in construction?
Overview of popular budget models of thermal imagers for examining cottages
The RGK TL-80 thermal imager is very popular, which is ideal for examining the fencing structures of an object, the quality of installed door and window blocks, and the “warm floor” system. This is a good solution for both beginners and professionals. The resolution of the detector is 80x80p, the screen resolution is 320x240p, the temperature measurement error is less than 2%. The model is equipped with a 5 megapixel visible camera, thanks to which you can record video with voice commentary.
Related article:
For effective operation of the device in a dimly lit place, the thermal imager has a built-in IR illumination and a 32x zoom option. The device is supplied with software with three active windows, the operation of which is described in detail in the instructions.The thermal imager is powered by a battery, thanks to which the device can operate for 4 hours. The cost of the device is an average of 60 thousand rubles.
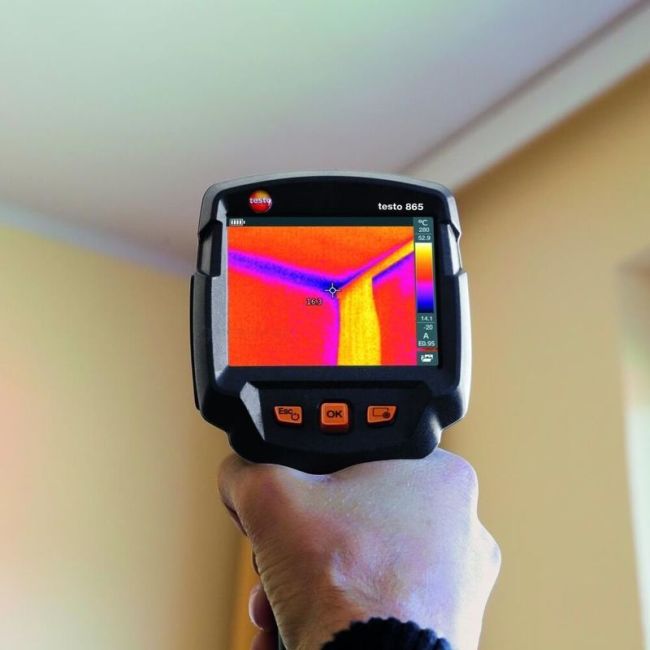
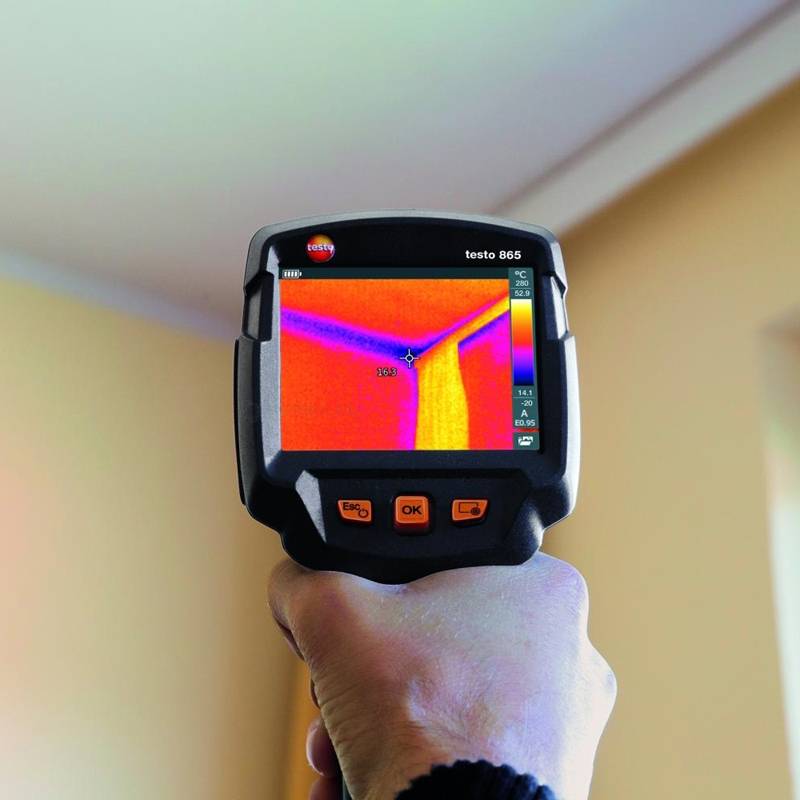
Another equally popular model is the Testo 865 thermal imager. The device has proven itself for everyday inspection of heating, air conditioning and ventilation systems. Thermal imager "Testo" is characterized by a detector resolution of 160x120r, a screen resolution of 320x240r, a range of captured temperatures from -20 to 280 °C, and a thermal sensitivity of no more than 0.12. The device can work for 4 hours.
The Testo 865 thermal imager is charged by a battery, thanks to which the device can work for several hours
The thermal imager has a picture-in-picture function, which allows you to superimpose a thermal image of an object on a real one. The cost of the device is 69 thousand UAH.
A good model is the Pulsar Quantum Lite XQ30V thermal imager. The device has a detector and a display with a resolution of 640x480p. The temperature range is from -25 to 250 °C. The thermal sensitivity of the instrument is 0.11. The telescopic lens allows you to examine from a certain distance, which does not affect the quality of the resulting image. Information is recorded on a 6 GB memory card. You can buy a Pulsar thermal imager for 105 thousand rubles.
Data retention and ergonomics
For convenient work with the received images, it is important that they are saved in a certain format. Many thermal imagers produce an image that requires special software to view and analyze.
There are models that produce a picture in JPEG format, but do not save temperature data, i.e.the user will see that some zones are warmer than others, but will not know the exact figures. There are thermal imagers with a compromise solution: they save the image in JPEG format, but also provide complete information on temperatures. Such radiometric files can even be imported via e-mail, and other users can view all the data without additional software. When choosing, it is worth starting from what tasks will need to be solved using a thermal imager.
In addition, it is important to pay attention to the ergonomics of the device, especially if you have to work with it often and for a long time. It's good that today's range offers a lot of compact and inexpensive options. You also need to take into account the ease of operation, the location of the main buttons, and the simplest and most comfortable device to use is a thermal imager with a touch screen
You also need to take into account the ease of operation, the location of the main buttons, and the simplest and most comfortable device to use is a thermal imager with a touch screen.
When choosing, do not forget to pay attention to the terms of warranty and post-warranty service. Too low price for such a device should alert, because often unscrupulous manufacturers thus get a quick profit by selling not quite high-quality goods
It also does not hurt to read reviews on the Internet about this model before buying.
We hope that our material has helped you at least a little to understand the range of thermal imagers.
Device and principle of operation
The sensitive element of any thermal imager is a sensor that transforms the infrared radiation of various objects of inanimate and living nature, as well as the background into electrical signals.The received information is converted by the device and reproduced on the display in the form of thermograms.


In all living organisms, as a result of metabolic processes, thermal energy is released, which is perfectly visible to the equipment.
In mechanical devices, the heating of individual components occurs due to constant friction at the junction points of the moving elements. Electrical-type equipment and systems heat up conductive parts.
After aiming and capturing an object, the IR camera instantly generates a two-dimensional image containing complete information about temperature indicators. The data can be stored in the memory of the device itself or on external media, or can be transferred using a USB cable to a PC for detailed analysis.
Some models of thermal imagers have built-in interfaces for instant wireless transmission of digital information. Registered thermal contrast in the field of view of the thermal imager makes it possible to visualize signals on the screen of the device in halftones of a black and white palette or in color.
The thermograms display the intensity of infrared radiation of the structures and surfaces under study. Each individual pixel corresponds to a specific temperature value.
According to the heterogeneity of the thermal field, errors in the engineering structures of the house and defects in building materials, shortcomings in thermal insulation and poor-quality repairs are revealed.
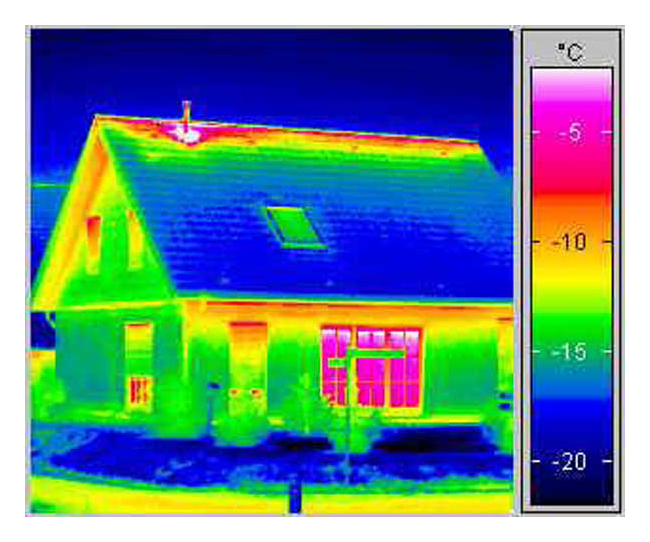
On the black-and-white screen of the thermal imager, warm areas will be displayed as the brightest. All cold objects will be practically indistinguishable.
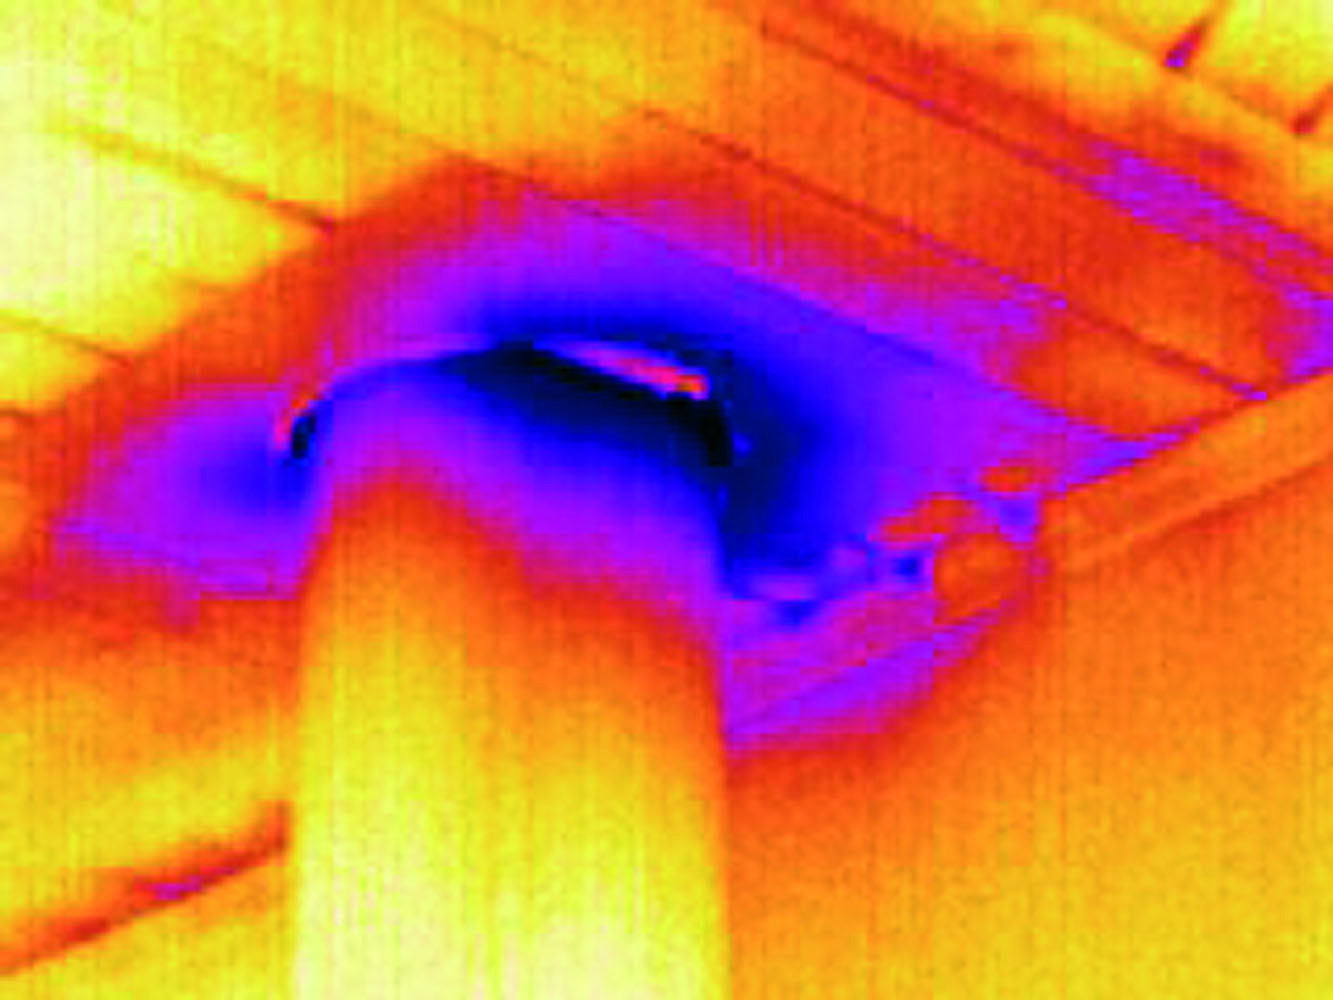
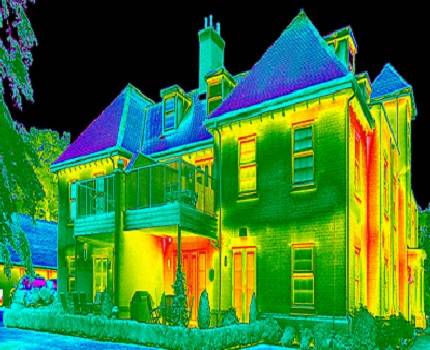
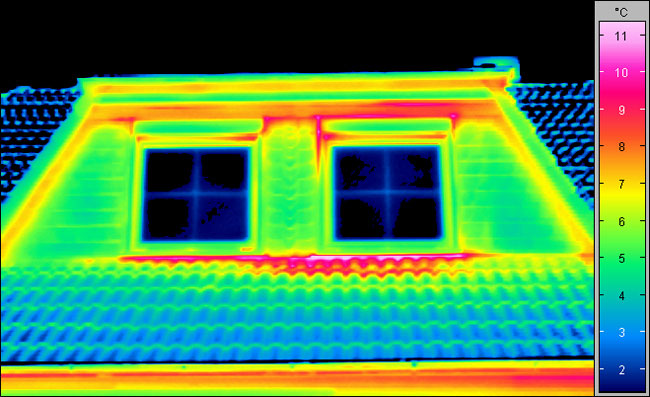
On the color digital display, areas that radiate heat the most will glow red.As the intensity of the radiation decreases, the spectrum will shift towards violet. The coldest zones will be marked in black on the thermogram.
To process the results obtained by the thermal imager, it is enough to connect the device to a personal computer. This will allow you to reconfigure the color palette on the thermogram so that the required temperature range is best seen.
Modern multifunctional devices are equipped with a special detector matrix, which consists of a huge number of very tiny sensitive elements.
The infrared radiation recorded by the lens of the thermal imager will be projected on this matrix. Such IR cameras are able to detect a temperature contrast equal to 0.05-0.1 ºC.
Most models of thermal imagers are equipped with a liquid crystal control display for displaying information. However, the quality of the screen does not always indicate the high level of infrared equipment in general.
The main parameter is the power of the microprocessor used to encode the received data. The speed of information processing plays a major role, since pictures taken without a tripod can be blurry.
The functioning of thermal imaging devices is based on fixing the temperature difference between the general background and the object, and converting the received data into a graphic image visible to the human eye.
Another important parameter is the resolution of the matrix. Devices with a large number of sensing elements provide better two-dimensional images than thermal imaging devices with a lower resolution of the detector array.
This difference is explained by the fact that one sensitive cell has a smaller surface area of the object under study. In high-resolution graphic images, optical noise is almost imperceptible.
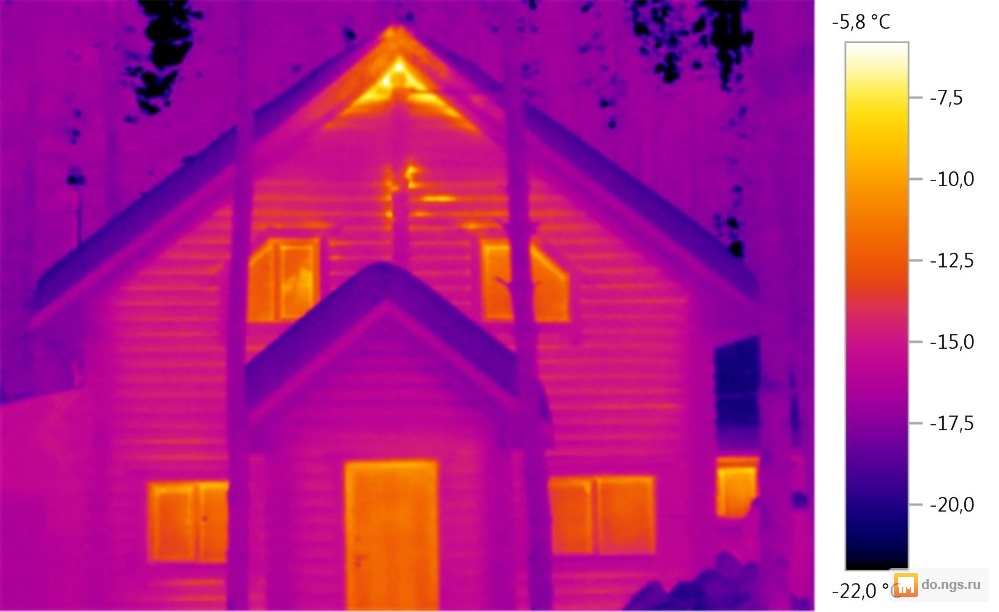
The device and principle of operation of the thermal imager
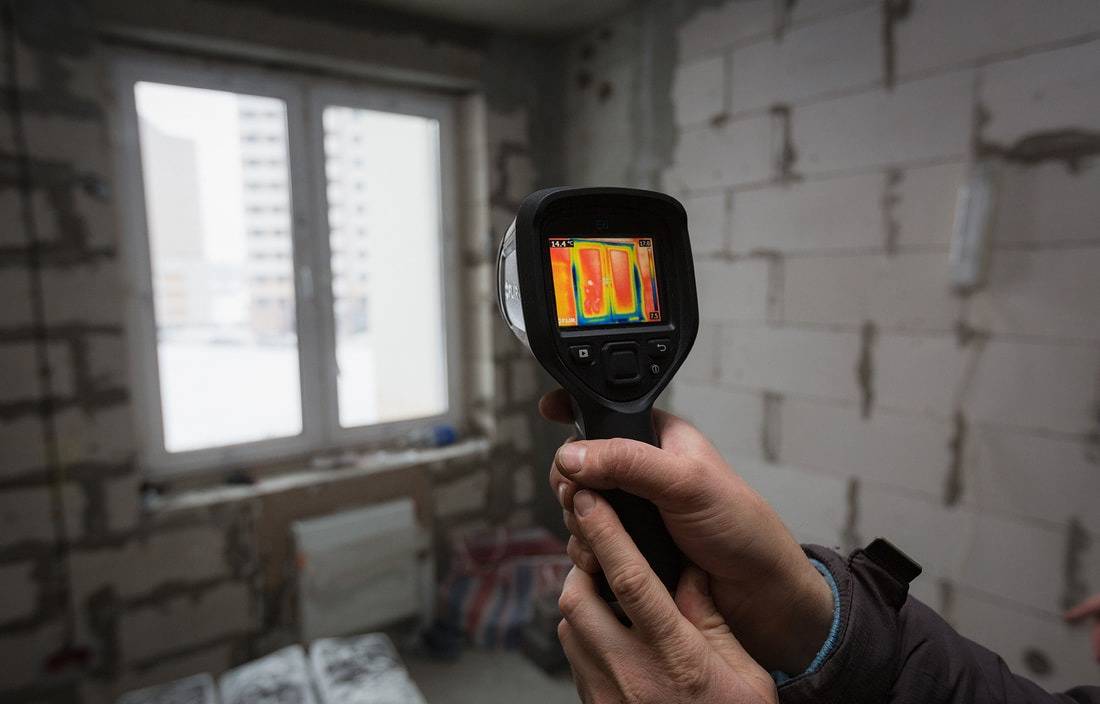
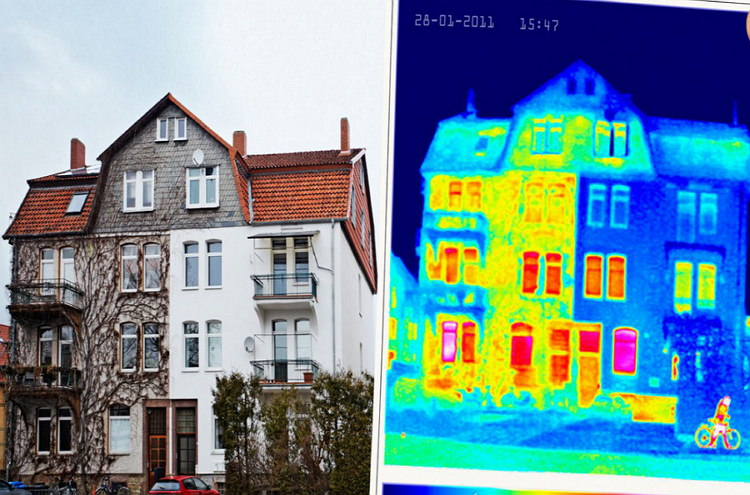
If you do not go into all the subtleties of physics, then all bodies whose temperature exceeds absolute zero emit thermal radiation. And with a change in temperature, with its increase or decrease, the wavelength of radiation also changes. And this indicator can already be registered and divided into gradations in a certain way. We see the result of this approach on the screen of the thermal imager - warmer areas look lighter, and cold areas look darker.
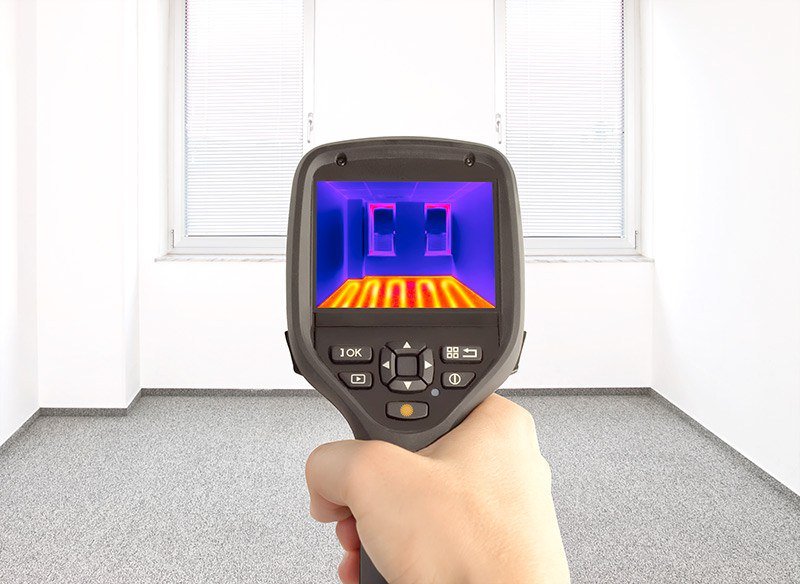
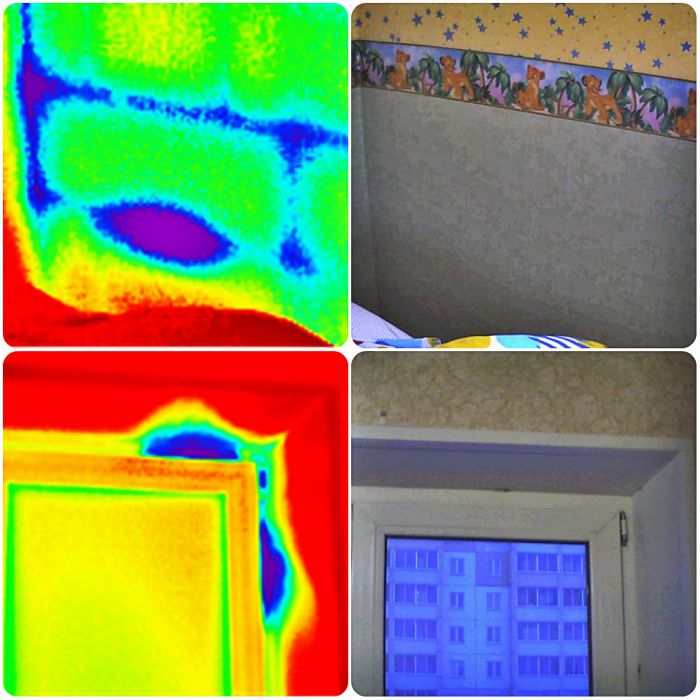
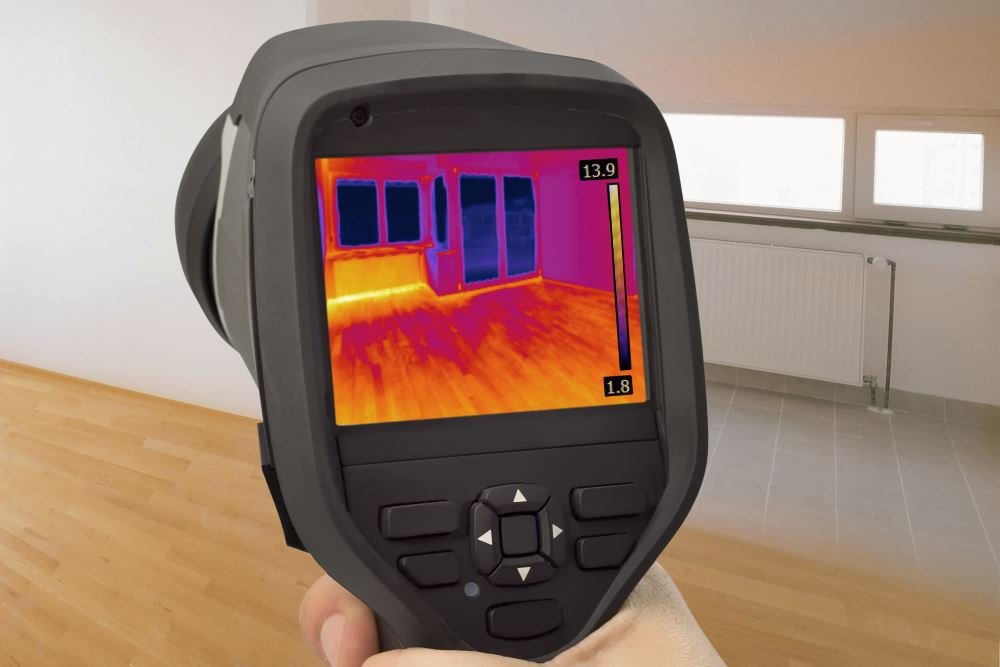
 Indoors, using a thermal imager, you can find cold zones
The radiation is captured by a special matrix of thermistors, which receives focused radiation from the lens of the thermal imager. Depending on the distribution of heat over the object under study, exactly the same analogue of the heat map is transferred to the matrix. Then the instrument logic transfers this data to the monitor screen for more convenient human perception.


Thermal imagers can display the thermal image in two ways: by showing only gradations of thermal radiation, or by measuring the exact temperature of the point at which the lens is pointed.
How is the thermal scanner checked?
One of the main specific features for the operation of a thermal imager is the absence of incandescent or daylight lamps. These factors interfere with the operation of the device and, if present, the indicators will be blurry or underestimated in case of real leaks. The most realistic way to inspect the house with a thermal imager is in the evening.
To obtain the most accurate results of problems at home, shooting with a thermal imager is best done in winter, so that the temperature difference between indoors and outdoors is at least 15 °, that is, this implies that the weather must be frosty for the device to work. Another condition is that the room must be heated for at least two days.
In addition, it is desirable to free the house from various interior items (carpets, furniture, etc.), as they can have a serious impact on the final result, which will be unreliable because of this.
Stages of heat leak inspection technology:
- Initially, all surveys are carried out indoors, where a greater percentage of defects is detected - from 85. Problems are searched for gradually - from windows to doors, examining technological openings and walls, and not just the volume of heat in the room.
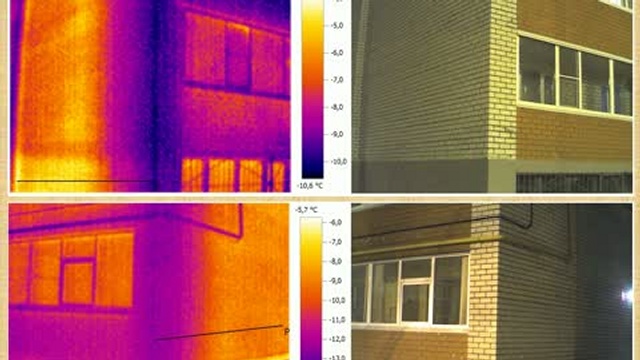
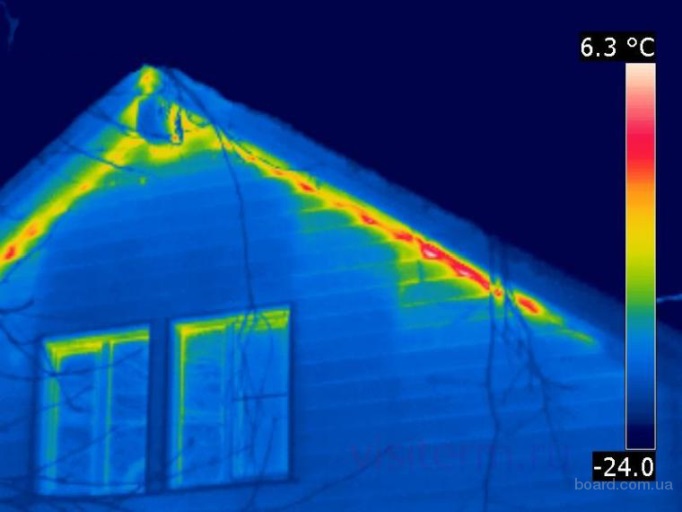
- This is followed by external shooting of the roof and facades. It is necessary to inspect the house with a thermal imager as carefully as possible, since sections on the same plane can have different indicators, and this will be visible during the examination with a thermal imager.
- The results are first processed using the device, after which they are loaded into a special computer program that produces the most accurate results.
In the event that professionals get down to business and make a comprehensive thermal imaging survey of the cottage, then after a while they will provide the customer with a full report with comments and recommendations. With an independent examination, there are no such opportunities, unless, of course, there is knowledge on how to eliminate flaws in the field of thermal insulation or wind and vapor barrier.
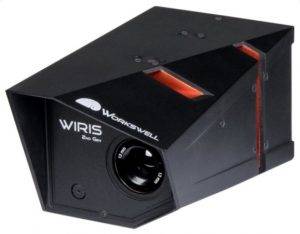
Thermal Imager Workswell WIRIS 2nd Generation
WIRIS 2nd Generation combines a thermal camera, a digital camera and a control unit in one housing. Since the end of 2016, the WIRIS 2nd Generation thermal imager has appeared with a temperature range increased to 1500 °C using a high-temperature filter. The thermal imager has the following features:
Full radiometry and temperature measurement. Fully radiometric and calibrated image data (images and videos) can be viewed and stored remotely, which means that the images retain all the information about the shooting parameters, which can then be fully processed in the included software.
Digital zoom - if the task is to measure distant objects, then you have a digital zoom option. The digital camera has a 16x zoom and the thermal camera has a 14x zoom with a resolution of 640×512.
Photogrammetry and 3D models - the images taken by the system are fully radiometric and contain information about GPS coordinates in the EXIF metadata of the files. These images can be used to create 3D models. To create 3D maps and 3D models, special photogrammetric software is used to combine raw images.
GPS - You can link the image temperature data to a value from an external GPS receiver. The GPS data is stored in the EXIF part of the JPEG file and is available for use.
Weight - 390 grams.
Device and principle of operation
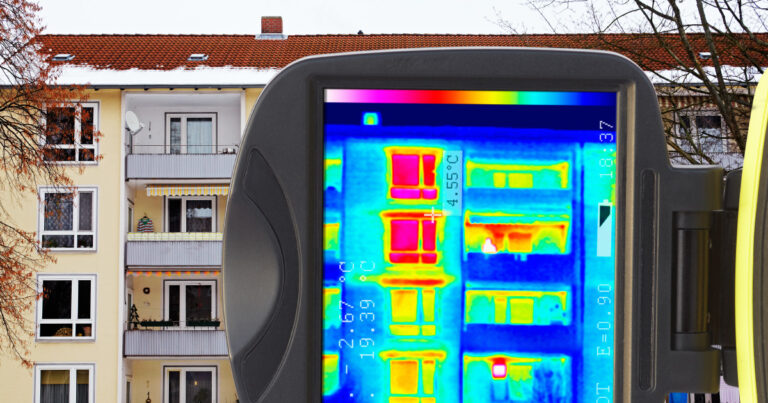
The operation of a thermal imager is based on the effect of thermography, which consists in obtaining an image in infrared range. The infrared camera captures the radiation, converts it into a digital signal and displays it on the monitor of the device in the format of a thermal image. Modern industrial-type models can transfer the received image to an external electronic device for processing, printing and further use. The principle of operation of such devices is shown in the following figure.
An IR camera equipped with a lens captures the object being examined and transmits the image to the analysis processing unit, from which the image is sent to the display, memory card or external device
The main elements of the design, as well as the means of controlling the operation of the device are presented below:
- lens (1);
- display (2);
- control buttons (3);
- body of the device with a comfortable handle (4);
- key to start the device (5).
Thermal Imager Design Components - Fluke TIS Model
Types of pyrometers
There are several classification divisions of pyrometers:
- According to the main method of work used:
- infrared (radiometers), using the radiation method for a limited infrared wave range; for precise aiming at the target are equipped with a laser pointer;
- optical pyrometers operating in at least two ranges: infrared radiation and the visible light spectrum.
- Optical instruments, in turn, are divided into:
- brightness (pyrometers with a disappearing thread), based on a reference comparison of the radiation of an object with the magnitude of the radiation of a thread through which an electric current is passed. The value of the current strength serves as an indicator of the measured temperature of the surface of the object.
- color (or multispectral), which works on the principle of comparing the energy brightness of the body in different regions of the spectrum - at least two detecting sections are used.
- According to the method of aiming: tools with an optical or laser sight.
- According to the emissivity used: variable or fixed.
- According to the method of transportation:
- stationary, used in heavy industry;
- portable, used in work areas for which mobility is important.
- Based on the temperature measurement range:
- low-temperature (from -35…-30°С);
- high-temperature (from + 400°C and above).
How to choose a thermal imager
The thermal imager is a faithful assistant to construction control engineers, technical survey specialists and energy auditors. It helps to determine the quality of thermal insulation, detect cold bridges, check the operation of heating devices, etc. But sometimes it's hard to choose a thermal imager: you need to know which features are definitely not useful so as not to overpay for it.


For example, to examine the walls of private houses, a thermal imager up to 200 thousand rubles is suitable. At larger facilities - public and industrial buildings - the functionality of budget devices will not be enough. Here the price tag varies from 200 thousand to 2 million rubles.
6 steps to choosing a building thermal imager
Step 1. Select the resolution of the detector.
Step 2: Choose your screen resolution.
Step 3. Select thermal sensitivity.
Step 4. Select the temperature measurement error.
Step 5. Select the required features.
Step 6. Choose a price category.
| Detector resolution, pixels | less than 320x240 | Ideal for: close inspection of thermal insulation of walls and utilities inside and outside of private houses and small buildings to determine the quality of work performed (private practice). |
| 320x240 | Ideal for: Inspection of thermal insulation violations in buildings, except for large objects such as industrial buildings or power lines. For the preparation of official reports and conclusions. | |
| more than 320x240 |
Ideal for: inspection of structures and equipment of large engineering structures (industrial buildings, power lines, nuclear power plants) at a safe distance. For the preparation of official reports and conclusions. | |
| Screen resolution, pixels | less than 640x480 | Ideal for: quick inspection of walls, structural joints and radiators. |
| 640x480 and above | Ideal for: a comprehensive survey of all types of buildings and structures. | |
| Thermal sensitivity (NETD), °C | >0,6 | Ideal for: temperature difference between outdoor and indoor air of at least 20°C. |
| ≤0,6 | Ideal for: temperature differences between outdoor and indoor air of 5-10°C and above. | |
| Temperature measurement error | above 2 °C or 2% | Ideal for: inspections of private houses and civil buildings without detailed processing of the results. |
| below 2 °C or 2% | Ideal for: the need to draw up official acts or reports on the results of the survey of any buildings. | |
| The functionality of the software stuffing | Picture in Picture feature | Ideal for: compiling a high-quality report and visually demonstrating problem areas to the customer. |
| Video metering function | Ideal for: Improving the speed of processing results and the quality of the report. | |
| Voice guidance function | Ideal for: Professional thermal imaging professionals who don't have the time to jot down important points in a notebook. | |
| Price, thousand rubles | up to 250 |
Ideal for: Those who offer cottage and private home inspection services. |
| 250-700 |
Ideal for: legal entities with SRO approval that conduct thermal imaging inspections of private and multi-apartment buildings, office and commercial buildings. | |
| over 700 | Ideal for: large specialized organizations that conduct inspections of industrial and civil buildings of large area and high level of responsibility. |
* A detector is a device like a camera lens that captures an image. The higher its resolution, the better the picture will be.


There are several groups of manufacturers on the market: Chinese, Russian and Western. The first ones are distinguished by a low price, but experts complain about the high errors of the instrument when determining temperatures. Russian models lag behind Western ones in terms of manufacturability, but are cheaper: they are suitable for examining private houses. The niche of thermal imagers in our market is almost completely occupied by European and American manufacturers: Fluke, Flir, Testo and others.
What are thermal imaging cameras used for in construction?
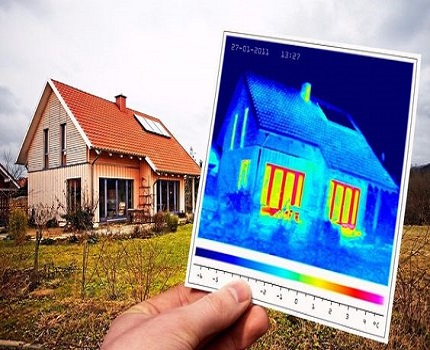
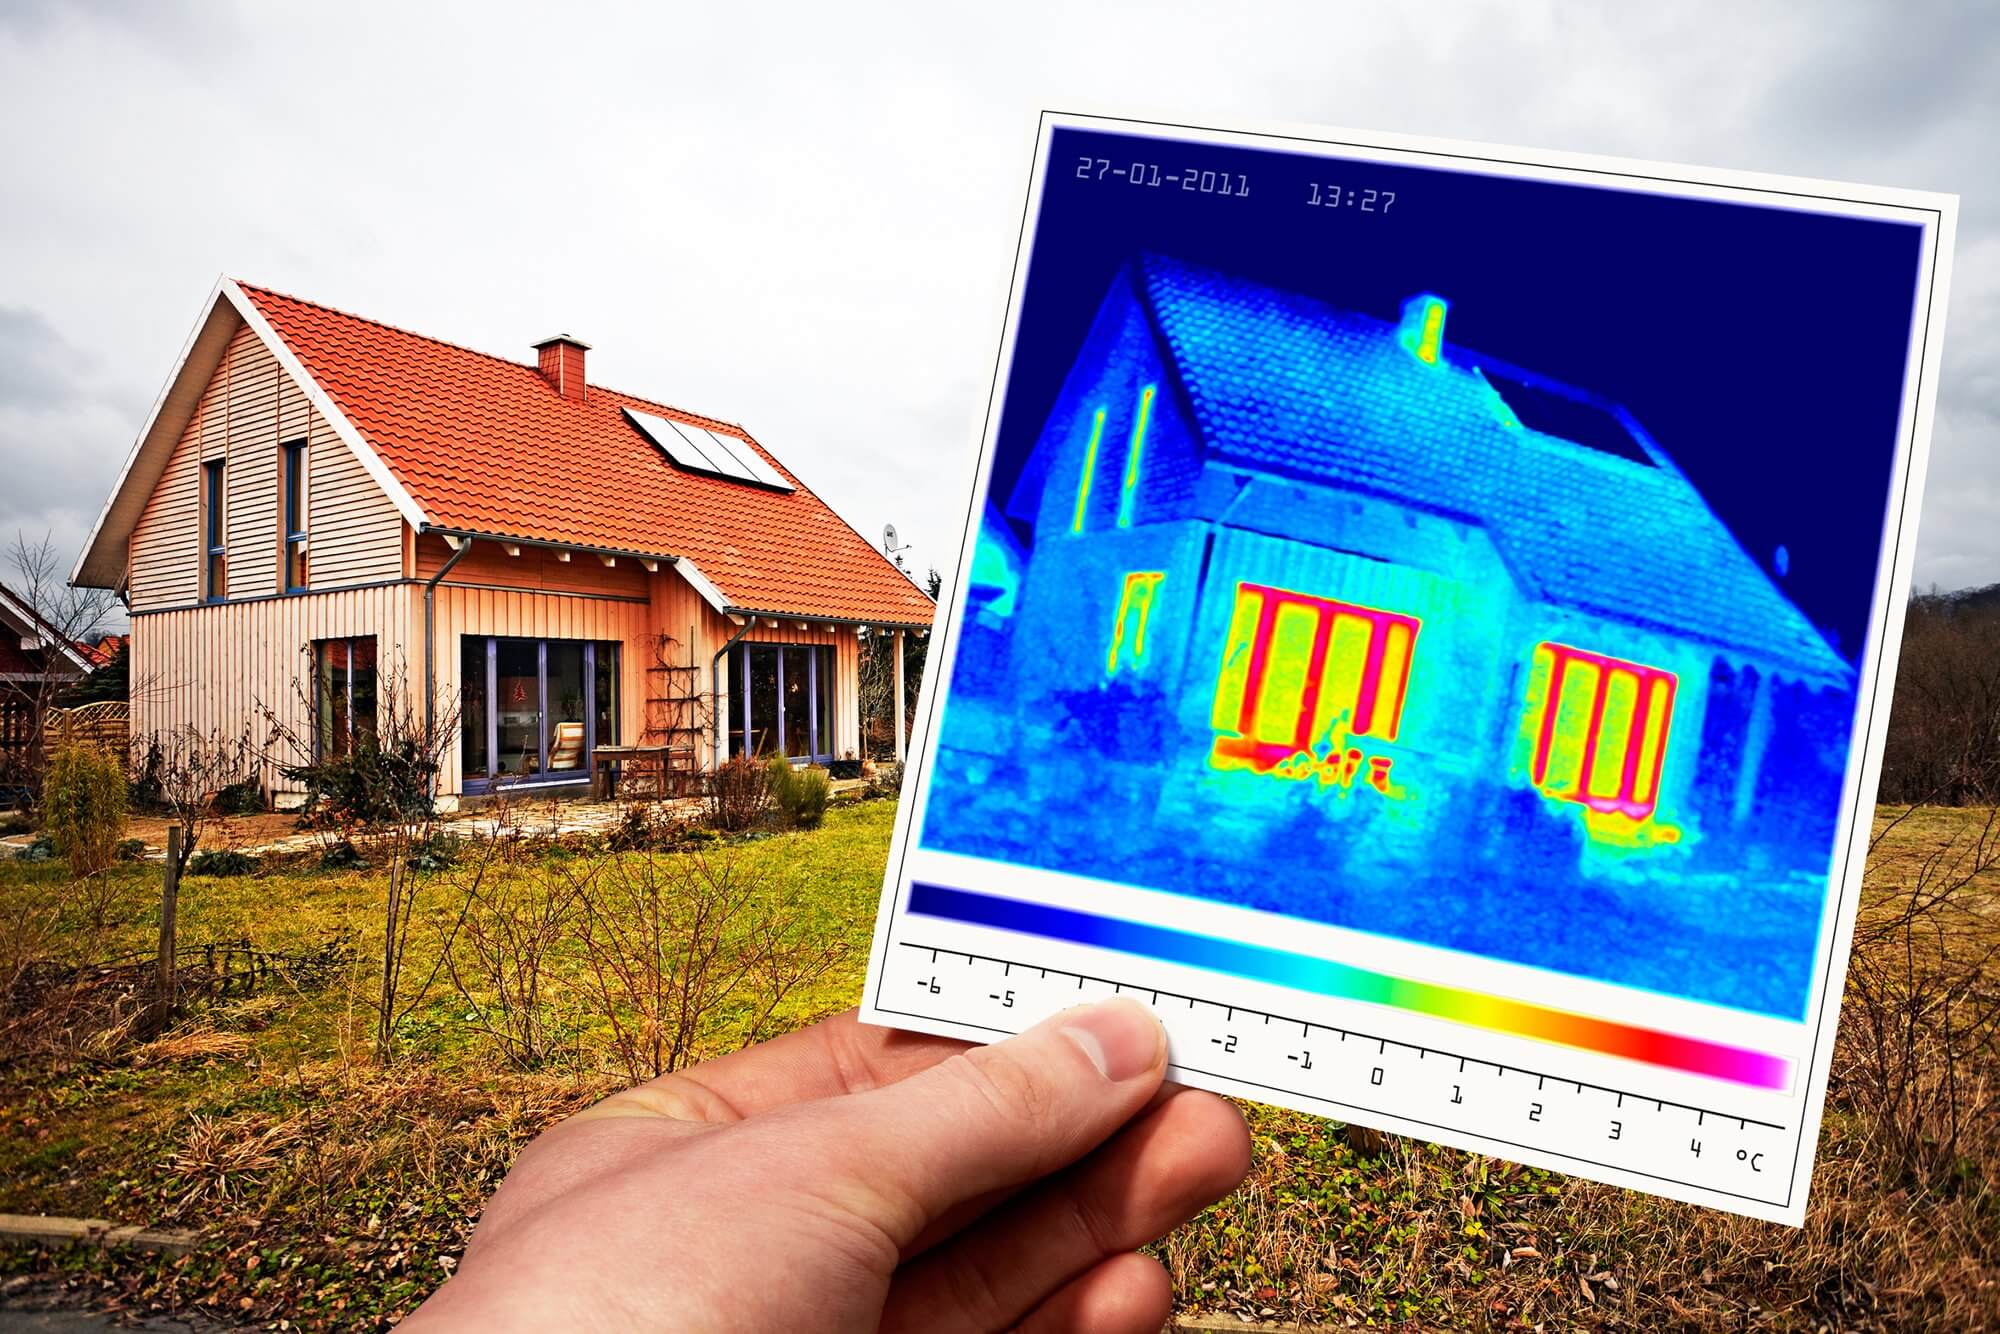
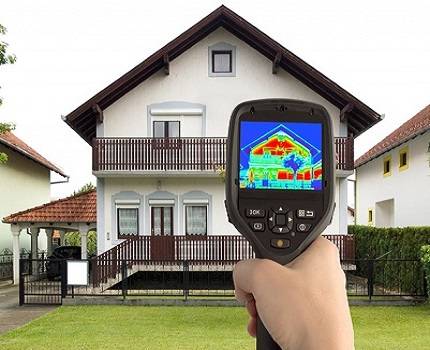
An inspection of a cottage, dacha or residential building with a building thermal imager makes it possible to see on the thermogram what is happening inside various objects and structures of the building, without touching them at all. This is called non-destructive testing.
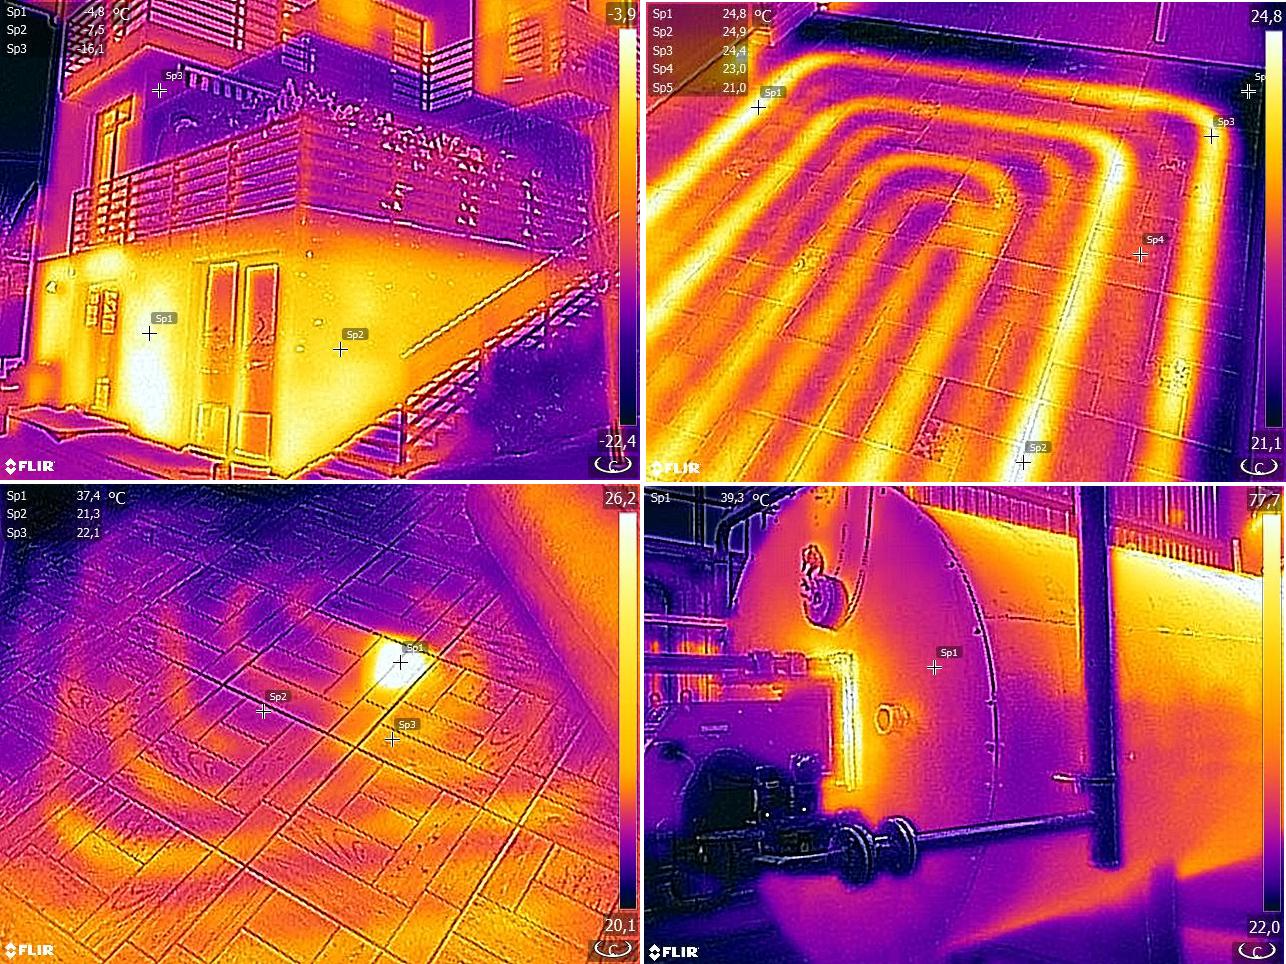
This kind of inspection will show the condition of the heating pipelines in the walls and underfloor heating without opening the plaster or tiles.
Thermal diagnostics is based on the principle of fixing the inhomogeneities of the thermal field, which makes it possible to judge the state of the objects under study.
The unique advantage of modern thermal imagers over other means of control is precisely the ability to look inside objects without violating their integrity. Even a minimal deviation of temperature indicators from the norm will indicate the presence of problems, for example, in the power grid.
Checking a private house with a thermal imager will help solve a variety of problems:
- localize the places of heat leaks and determine the degree of their intensity;
- control the effectiveness of the vapor barrier and detect the formation of condensate on various surfaces;
- choose the right type of insulation and calculate the required amount of heat-insulating material;
- detect leakage of the roof, pipelines and heating mains, leakage of coolant from the heating system;
- check the airtightness of window panes and the quality of installation of door blocks;
- diagnose ventilation and air conditioning systems;
- determine the presence of cracks in the walls of the structure and their dimensions;
- find places of blockages in the heating system;
- diagnose the condition of the electrical wiring and identify weak contacts;
- find the habitats of rodents in the house;
- find sources of dryness / high humidity inside a private building.
A construction thermal imager makes it possible to quickly check the compliance of the parameters of the erected building with technical requirements, evaluate the quality of a real estate object before purchasing it, and diagnose the operation of internal communications.
A survey of the house with a thermographic scanner before the start of laying thermal insulation materials will help to correctly calculate the cost of insulation
And after the completion of the work, thermal imaging will allow you to control the final result and detect installation flaws that create heat loss. The check will also show cold bridges, which can be quickly eliminated in preparation for the winter season.
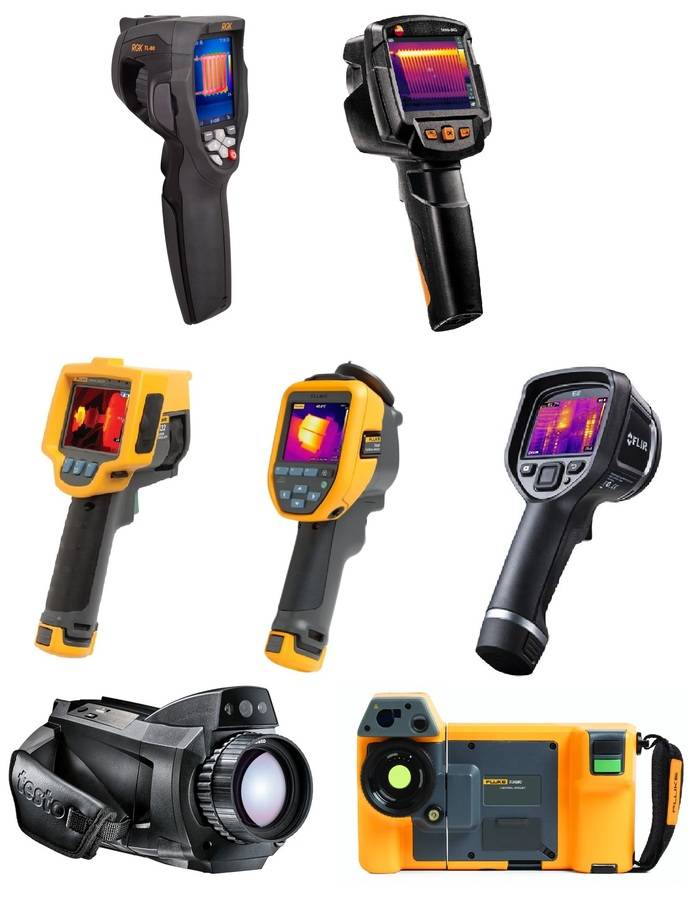
7 models thermal imagers for construction Budget options for surveying private houses, cottages and small public buildingsStandard options for surveying apartment buildings, office, retail and small industrial buildings
| 1. RGK TL-80 |
Ideal for: inspections of building envelopes in operation or continuous monitoring of a building under construction. The resolution of the detector of the device is not enough for a full-fledged examination with a report. | 59 920 rubles |
| 2. Testo 865 |
Ideal for: daily control of heating systems, ventilation and air conditioning. The image enhancement function will help to identify imperceptible defects in communications. | 69 000 rubles |
| 3. FLIR E8 |
Ideal for: Professionals with little experience. The intuitive and minimalistic interface is easy to understand. | 388 800 rubles |
| 4 Fluke Ti32 |
Ideal for: Shooting from any distance and in bad weather. | 391,000 rubles |
| 5 Fluke Tis75 |
Ideal for: shooting from a safe distance and quick reporting without a PC. | 490 000 rubles |
| 6. Testo 890-2 |
Ideal for: Shooting large objects. High-tech filling will help you perform complex examinations. | 890 000 rubles |
| 7 Fluke TiX580 |
Ideal for: filming large industrial sites from various distances. | 1,400,000 rubles |