- How to make a fan heater with your own hands: the device of a home-made unit
- Heating device from the power supply
- How to make a powerful heater with your own hands
- Making your own oil heater
- Homemade infrared heater
- Homemade low-power devices
- Option 1. Creating an oil appliance
- Cooler fan
- How to make a plastic bottle fan
- 3 Oil system
- How to make a USB fan with your own hands using a motor
- Idea N3: Oil Heater
- Search fan motor
- Design of gas generating furnaces
- Modernization of an existing fan
- How to DIY
- frame
- Preparing Work Items
- holes
- Plates for gas labyrinth
- Installation of grate
- final assembly
- Directional heat gun
How to make a fan heater with your own hands: the device of a home-made unit
Not all country houses are equipped with an autonomous heating system, and some do not have a stove or fireplace, not to mention warm floors and other delights of life.
Sometimes there is simply not enough heat to create a comfortable environment, and summer residents often purchase mobile heating devices.
However, there is a chance to save money on buying an expensive device and assemble a fan heater with your own hands using improvised materials.
It is not possible to heat the whole house and even one large room with a conventional household fan heater, but it is ideal for creating a comfortable atmosphere in a work or bed, as well as in a small room.
Heating device from the power supply
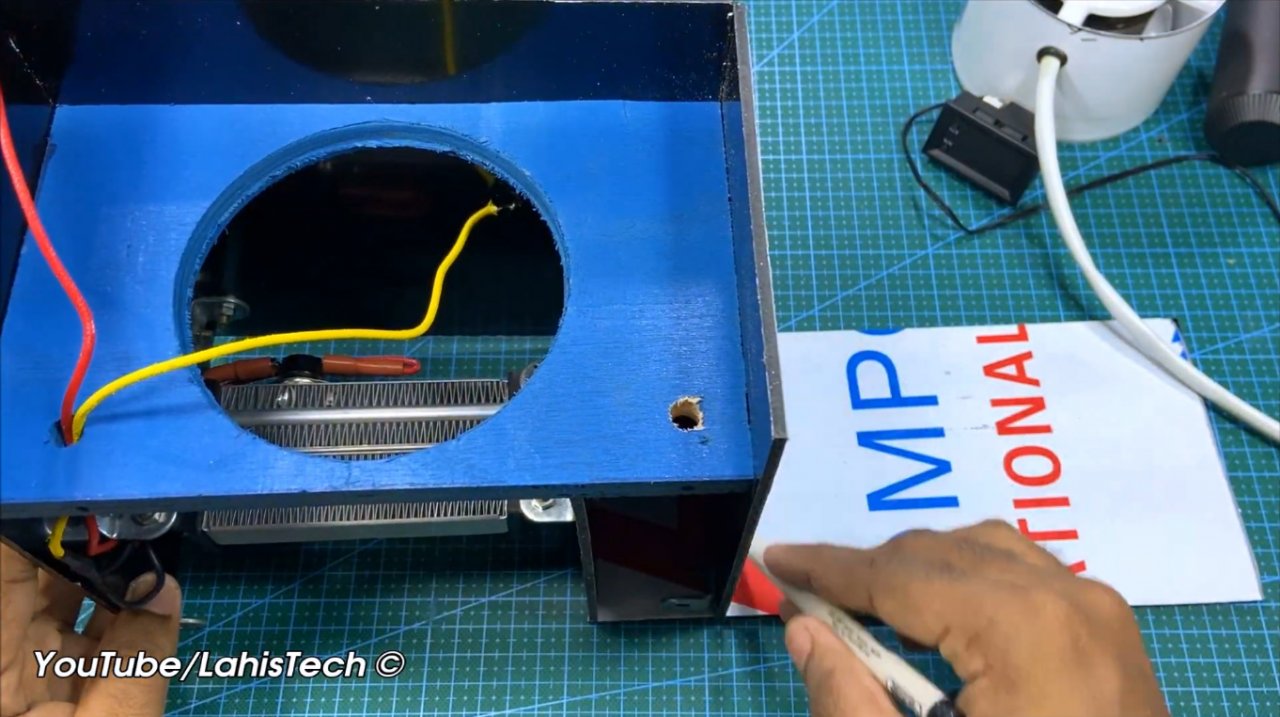
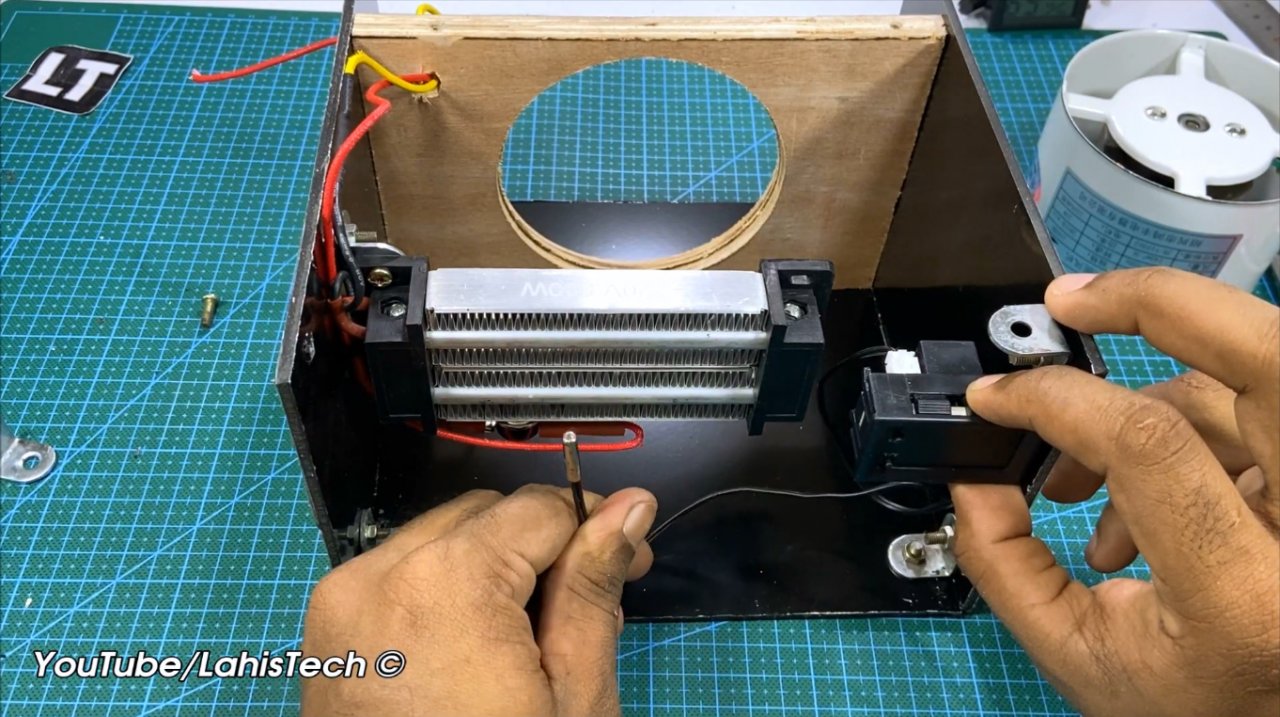
A heating device from a computer power supply does not differ in appearance from it, since main elements - fan and the heating element are located inside the case
Required parts and materials:
- old computer PSU;
- power supply 12 V (up to 300 mA);
- thermal fuse;
- heat shrink;
- fasteners and wires;
- soldering iron;
- 3 m nichrome wire;
- fiberglass sheet.
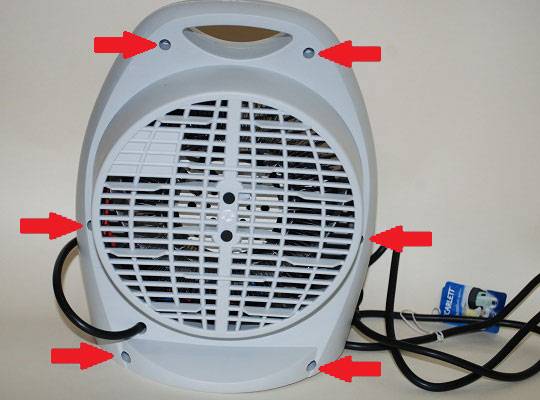
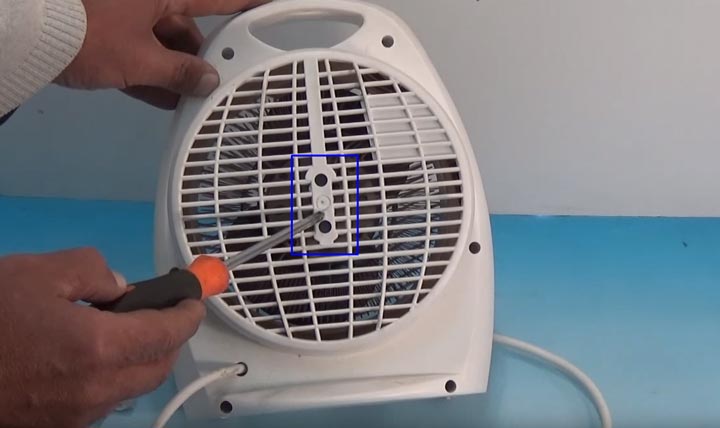
The role of the case will be played by the old PC power supply, so we take out all the insides from it, except for the cooler.
Everything except the cooler from the power supply must be removed. In order to disassemble the old PC power supply and assemble a fan heater from it, you need the usual tools for home use - wire cutters, a hacksaw, pliers and a screwdriver
We build a frame for the heater from fiberglass. We cut the material with a hacksaw, and then we connect the individual elements with a soldering iron.
We prepare the heater as follows: we wind the wire in the form of a spiral on the prepared frame and fix its ends with screws. We connect the screws with a wire.
We equip the heater power cable with a thermal fuse that will turn off the device in case of overheating. Overheating is considered the moment when the temperature overcomes the threshold of + 70 ° C.
To power the fan, we insert a 12 V power supply into the case. The power supply can be purchased or made independently. We connect the fan - when an electric current is applied, it starts to rotate. We assemble the remaining elements according to the scheme and check the finished device for operability.
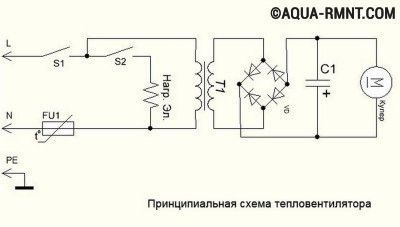
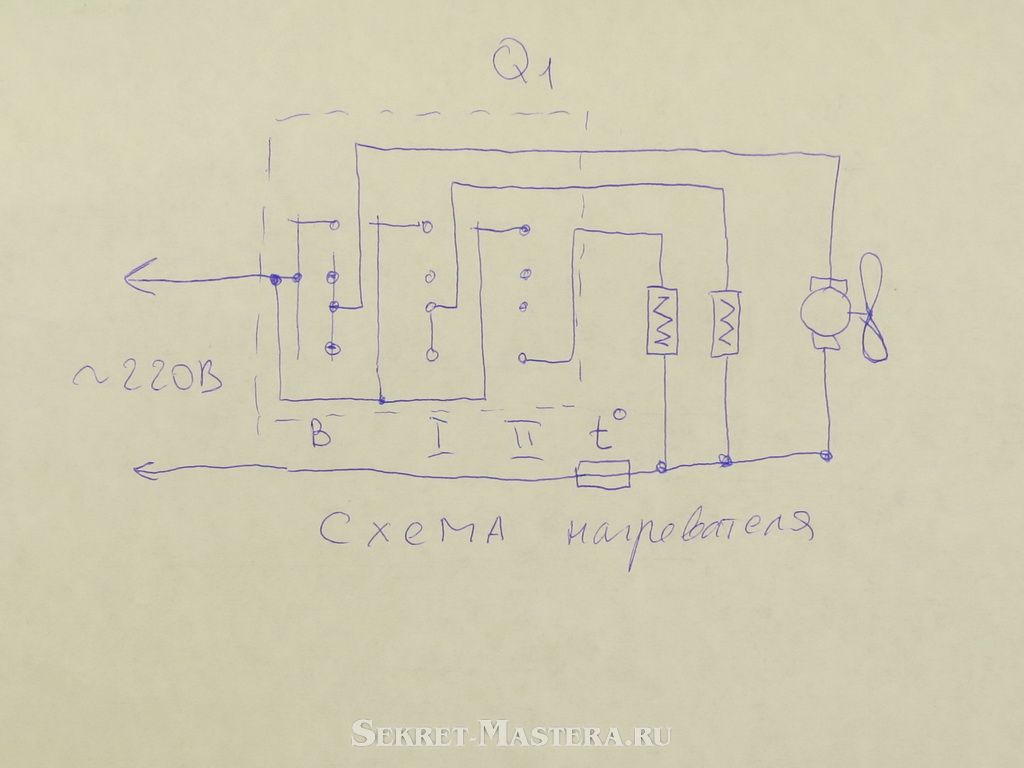
Something like this looks like a schematic diagram of a fan heater assembled by oneself. The role of the power connector will be played by the power switch of the new device
Safety measures must be observed during the operation of any heating equipment, including oil heaters.
You see, knowing what the device consists of and how it functions, you can quickly fix the breakdown or replace one of the elements with a more modified one. Small homemade appliances last a long time without repair and have many uses. For example, the second model (from those proposed above) can be used in an electric fireplace as a heating element.
How to make a powerful heater with your own hands
By the way, with your own hands, you can make more “serious” heaters, they can be used not only to heat the garage, but also enough to maintain heat in a small workshop.
Making your own oil heater
To make such a design you will need:
- TEN - 1 kW at the rate of 1 sq. m.
- Sealed housing, the design of which completely eliminates the leakage of liquid, most often it is a welded construction. The composition, which includes muffled pipes.
- Pure and technical oil. Its volume is 85% of the internal volume of the case.
- Means of control and automation, their nomenclature is determined by the power parameters of the heater.
The work order looks like this:
- They draw up a sketch of the system, it should reflect the linear dimensions of the sections, an elementary thermal calculation. Based on this sketch, you can draw up a list of materials needed to create the structure.
- The purchased pipes are cut to size and muffled, subsequently heating elements will be installed in them.It makes sense to invite a specialist to perform welding work.
- It is necessary to provide a neck for filling oil and a valve for draining oil in the design; it is installed at the lowest point of the structure (register)
- After the register is welded, it is advisable to test it for tightness; to perform this work, it is necessary to involve a pressure test pump. As leaks are identified, they must be completely eliminated.
- Install heating elements in pre-prepared places and after that you can perform a performance check.
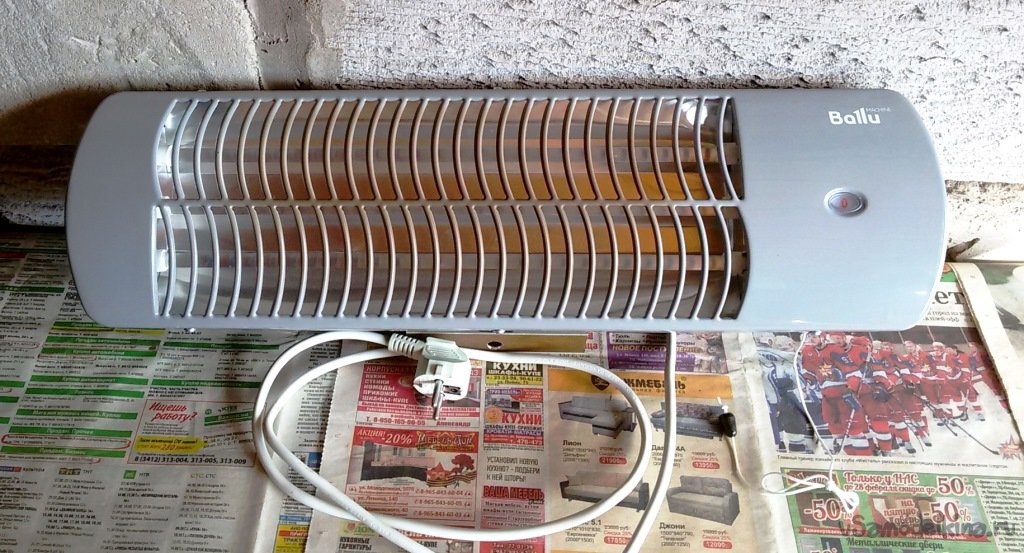
Homemade infrared heater

While the mixture is still in a liquid state, it must be poured into a mold made of wooden beams and, after drying, connect the wires and test the operation of the device.
Homemade low-power devices
The models described above are only suitable for local heating. To heat the room, it is necessary to build a more powerful heater, the manufacturing technology of which we will consider below.


Option 1. Creating an oil appliance
A self-made oil heater has a high efficiency and is also quite functional and safe. The principle of operation of the device is based on the fact that the heating element located inside the body warms up the oil located near it, as a result of which the convection movement of flows is activated.
To ensure smooth power adjustment, the device is equipped with a rheostat or discrete switches. To automate the process, a thermostat and a tipping sensor are additionally installed.
To make an oil heater, you need to prepare in advance:
- TEN with a power of 1 kW (for a room with an area of 10 squares);
- durable and sealed housing, the design of which completely eliminates the leakage of liquid;
- clean and heat-resistant technical oil is taken at the rate of 85% of the total body volume;
- control and automation devices - are selected in accordance with the total power load of the device.
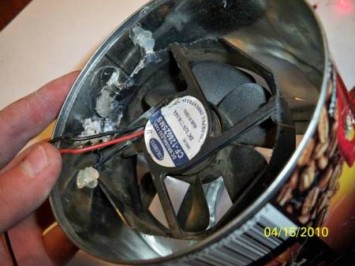
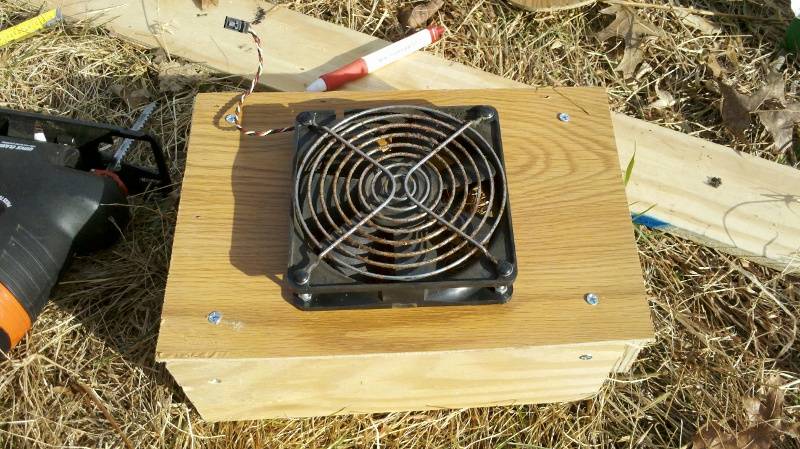
Cooler fan
This is the easiest way to make a home fan. For manufacturing, we need a cooler from an old computer. This part itself is already operational, we just have to correctly connect it to the wire.
If the future fan will be located in close proximity to the computer, then a standard USB cable will do as a wire. We cut off the unnecessary edge of the cord with a small connector and strip the wires. Similarly, we clean the wires at the cooler.

Sometimes there are more than two wires in the cooler and USB cable, remember, we need black and red color of two wires in one and in the other element. We don't need the rest.

After stripping, we connect the red wire to red, black to black, the connections must be properly insulated. After insulation, the fan is already fully operational, it remains to come up with an original stand for it to your taste and glue it to the cooler. All! The device is ready!


How to make a plastic bottle fan
Crazy Hands' favorite raw material - plastic bottles - are almost ideal for creating your own fan. For a propeller, the top of a standard round bottle works well. It is necessary to cut off the part with the cork just above the glued label.
The part of the bottle with the cork will be the blades.To do this, the plastic before the cork needs to be cut so that several different petals are obtained. After one, the petals are cut off at the base. The rest are the future propeller blades.
Plastic bottle fan blades
- To shape the blades and twist them a little, you can use a candle or a lighter. The main thing is not to overdo it, because the plastic is soft and can catch fire. The task is to warm it up a little, and not set it on fire.
- The cork will be the base of the propeller. A hole is made in it according to the dimensions of the axis of the motor. To keep the connection firmly, you can put it on glue.
- Now is the time to think about the foundation. The rest of the plastic bottle is also suitable for it. A hole is cut in it to firmly place the cork with the blades at a right angle. It is necessary not to forget to weight the base - with nuts, bolts or any other metal objects.
- A hole is made on the base for the button and the chain is assembled. There is also enough space for the power supply.
The field for imagination when working with a plastic bottle is extensive. You can use several bottles at once. One will become a propeller (more precisely, part of it), and the second will become a good base. But then additional materials will be needed. For example, regular drinking straws.
Simple and lightweight bottle fan
3 Oil system
Homemade oil units are characterized by reliability and safety. In addition, you can do it yourself battery heater. Such structures can be used both for heating residential and some technical premises. The product includes a metal case, which is subsequently filled with a coolant (water, technical oil).
To make a powerful oil heater with your own hands, you will need certain materials. Among them:
- tubular heater;
- electric pump with a capacity of 2.5 kW;
- temperature controller;
- tubes that can withstand temperatures of 160 ° C;
- a used battery (if any), if there is none, you can make a base out of pipes yourself using a welding machine;
- technical oil;
- conductive cord with plug;
- metal corners.
All manipulations are carried out using an electric drill and a welding machine. Step by step guide to making an oil heater:
- 1. First, a rectangular frame of the right size is made to install the unit. To do this, the corners are cut into segments of the required length and welded together to form a rectangular structure. Legs are welded at the bottom of each corner.
- 2. In a container prepared in advance, a hole is made for mounting heating elements. They are located at the bottom of the product. Additionally, you will need a hole at the top to fill the oil. For work, a grinder is used.
- 3. Then the electric pump is mounted on metal plates.
- 4. To fix the latter, heat-resistant pipes are used, which are fixed to the body by welding and connected to the pump with shut-off valves.
- 5. Next, install the heating elements in the holes made. Fastening is carried out with bolts.
- 6. A threaded outer fitting is welded onto the inlet for mounting a protective cover. The simplest design can be made from a piece of pipe with an internal thread, which is then screwed onto a fitting.A rectangular metal plug is welded onto the second end of the tube to prevent the coolant from pouring out.
- 7. At the final stage, install and connect the thermostat and conductive cable. Next, the container is mounted on the prepared frame and the coolant is poured.


How to make a USB fan with your own hands using a motor
So, to make a fan from a disk motor and usb, we need more time, but this type of fan will look better. Everyone can make such a device, the main thing is to show a little desire and patience.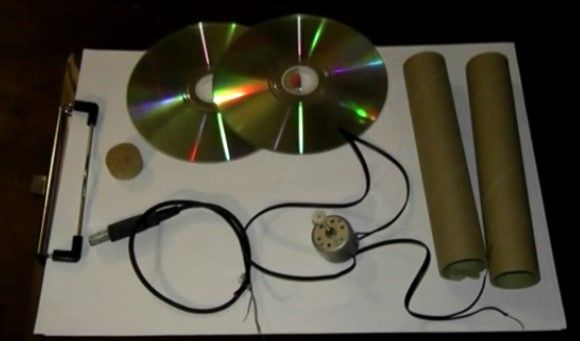
First of all we have to make the blades for our fan, we recommend using a regular CD, it looks great and is quite easy to make. Also read an interesting article where we make a laser level.
- We make 8 identical marks on the disk, and cut everything along them.
- Then we warm up the disk and bend all the blades in the right direction. To warm up the disk, it is enough to use a regular lighter, bend the blades carefully, do something wrong - you will have to buy a new disk.
- Now let's move on to the base of the fan itself, for this it is best to take cardboard and bend it into three parts, or a cardboard base, for example, food wrap is wrapped around it.
- A special fastening is glued to the disk.
- We make the base of the case more stable, you can attach a regular disk.
- We hide all the wires, we display one (for connecting to the network).
- We fix the motor in a paper pipe and immediately attach it to the base.
- We attach the blade to the engine.
- Now we connect the wires from the motor to the USB cable, as described above.
- This is the result obtained in the end, if desired, the cardboard base can be painted over or somehow decorated.
Here the guys from the video show a really cool way. In a similar way, you can make a fan out of paper, but remember, the paper must be thick, it is optimal to use cardboard in general.
It will be interesting to know: Do-it-yourself water leakage sensor.
Idea N3: Oil Heater
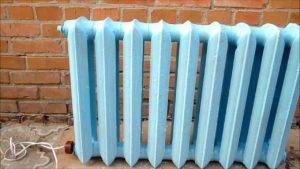
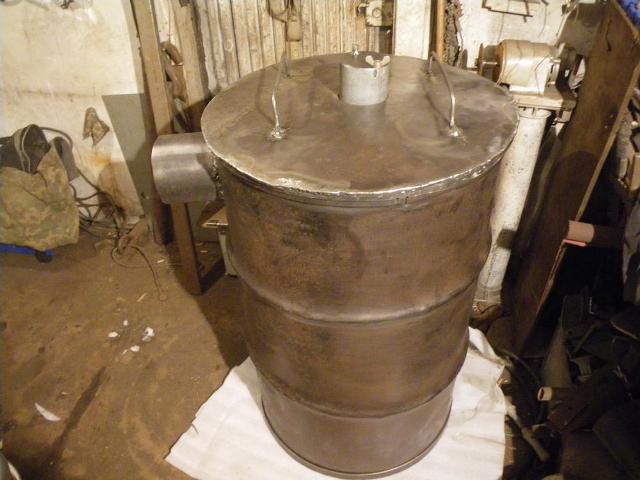
Since technical oil has good heat transfer functions, it is widely used in heaters. You can assemble such an oil heater yourself at home. To do this, you will need an old heating radiator (a cast-iron or bimetallic battery, a register or other tubular structure), a tubular heating element, the oil itself as a heat carrier, sealed plugs for placing the heating element.
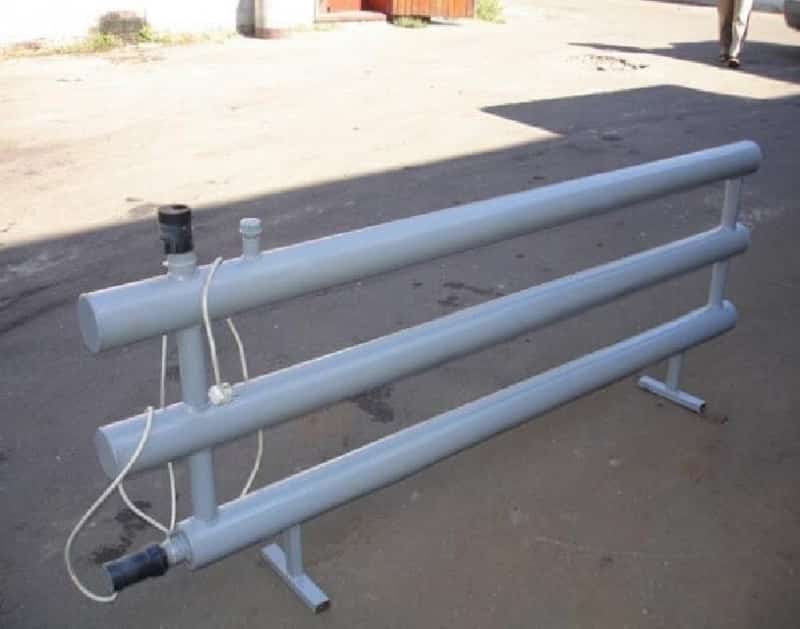
Rice. 11: Example of using the BU register
To maximize the safety of the operation of the oil device, it can be supplemented with a heating sensor, the opening contacts of which are connected to the power circuit.
The oil cooler manufacturing process is as follows:
Take the old radiator, it is important that it be replaced due to a system upgrade, and not because of a violation of the integrity of the case. It is advisable to verify this yourself by pouring liquid or at least through an external examination.
Rice. 12: Get an old radiator
Prepare two holes in the heater - under the heating element and for filling the oil. The first hole must be threaded and located at the bottom so that the heated masses rise up.It is more convenient to place the second hole in the upper part; when the heater is put into operation, it will also have to be sealed. In addition, it is possible to make holes for draining oil and for an emergency pressure relief valve. Rice. 13. Prepare two holes
Screw the heating element into the hole on the radiator. When choosing a particular model of heating element, it is important to make sure that the thread diameter matches the diameter of the hole, and that the set includes oil-resistant rubber gaskets. Rice. 14: screw the heater into the bottom hole
Another important point is that the diameter of the heating element must be such that it does not touch the radiator walls at all. For sealing, linings, special compounds and tow are used.
- If you left the oil drain and sensor ports, install the appropriate equipment in them. Seal all holes that will not be used in the future, leave only the oil filler neck.
- Fill the heater with technical oil approximately 85% of the total volume. A margin of 15% is needed for the free space that the liquid will occupy after heating and thermal expansion. Never top up with oil. Close the oil filler neck.
Rice. 15: close the oil filler neck
- Ground the heater to a ground loop.
It should be noted that in order to increase the service life of such a device, a heating element should be selected in accordance with the case material. Otherwise, due to the large difference in the output voltage of the particles of these metals, the destruction of the elements will occur.Also note that the heater will have a decent weight, so it is desirable to ensure it is securely fixed in space or make a design for ease of movement.

Rice. 16: Structure for moving on wheels
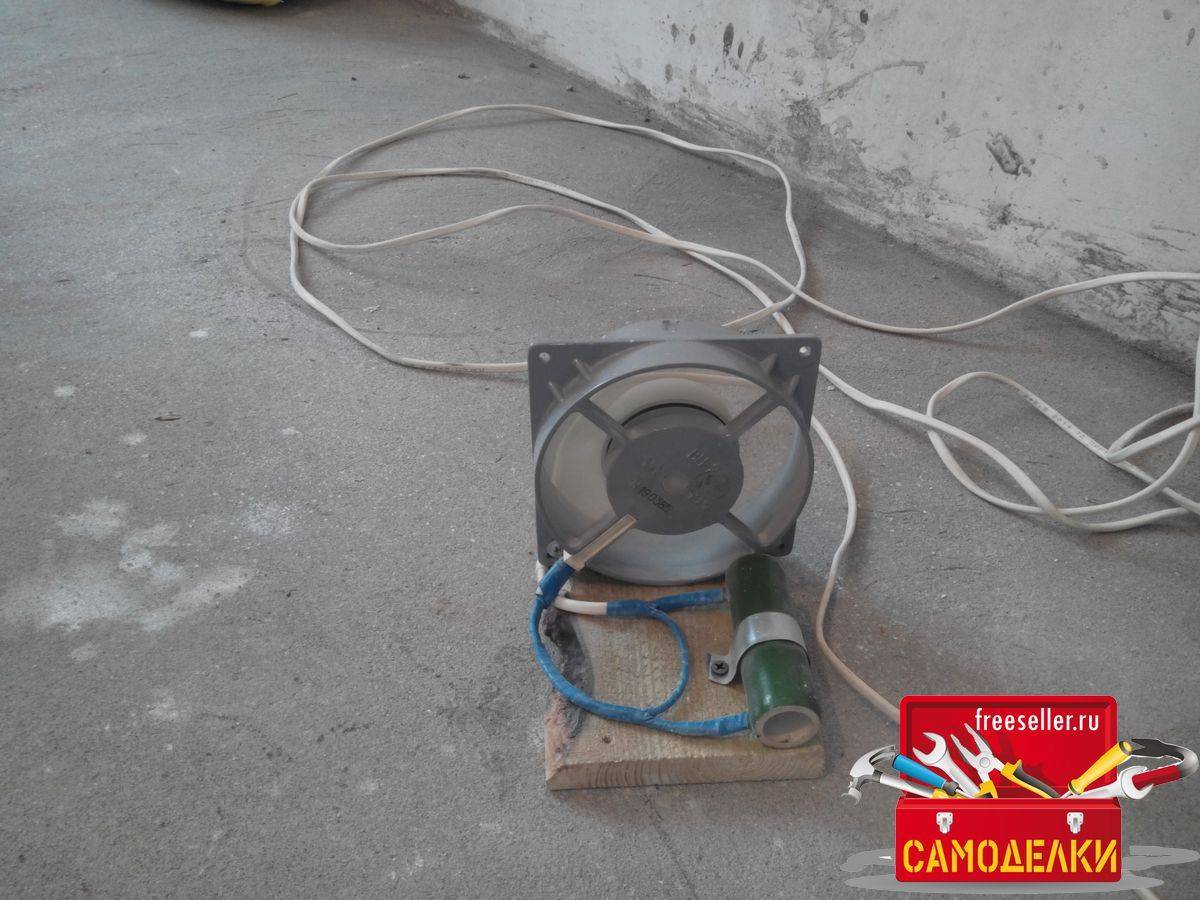
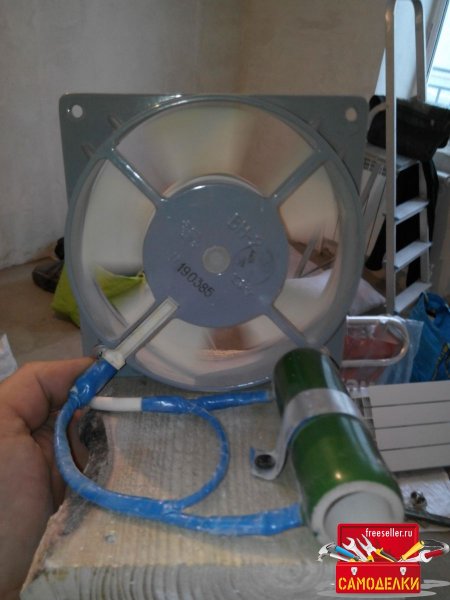
Search fan motor
One YouTube video suggested using a 3 volt DC motor from a hardware store. Tops the USB cable, works by rotating the blade of the laser disc. Useful invention? If you are tired of an extra port, the heat will help you survive. It's easier to take a processor cooler, power it from the system unit. A yellow wire goes to 12 volts (red to 5). The black pair is the earth. Collect from an old computer. Citizens of the Russian Federation are simply too lazy to invent, we throw curious equipment into a landfill.
Asynchronous fan motors operate without a starting capacitor ... The peculiarity of fan motors is: they go straight with the winding. A couple of tips to help get the engine:
- The blender is noisy, there is usually a collector motor inside. If the device has lost its relevance, it was possible to get a new one, it will serve perfectly as a fan.
- The best duct fan is a vacuum cleaner. The engine is placed in a sealed housing, equipped with an impeller. Install the good in the channel, a good outflow of air from the room is provided.
- In the refrigerator, the compressor is often in working order, the device is supposed to be thrown into a landfill. There is a chance to get a working asynchronous motor along with a start-up relay. We believe that if you remove the motor, the start-up conditions will change, we suggest that readers do the practice on their own. Shaft rotation may be slightly slow...use a gearbox.The start relay will energize the starting winding, then turn it off. The principle of operation is based on a bimetallic plate heated by current, which at the right time breaks off the auxiliary winding. In terms of protection, it works flawlessly. The circuit is better including an asynchronous motor through a capacitor.
- Many guessed that the convection oven is just a noisy wonderful fan blowing a quartz lamp. Since the glow element is a consumable item, it is easier to replace a steamed turnip. It is better to remove it in case the temperature controller does not work properly. Most air grills are guided by a timer, you will have to cock the mechanism hourly. It's easier to stop. Chewing gum is not good, use tape. Not worth a thank you. Portal VashTechnik is happy to help.
- In washing machines, the engine is able to give out speed. Collector motors are used, asynchronous ones do not develop good torque at the start. Inside the speed controller is thyristor, the circuit works on the cut-off principle. You will figure out where to look: the engine is powered through the key. Belt or direct drive - zero difference.
- Do-it-yourself asynchronous motors. Put a round magnet on the shaft, put one coil on the side - the chances are that the device will work. The truth will have to start manually, remember the first planes, cars.
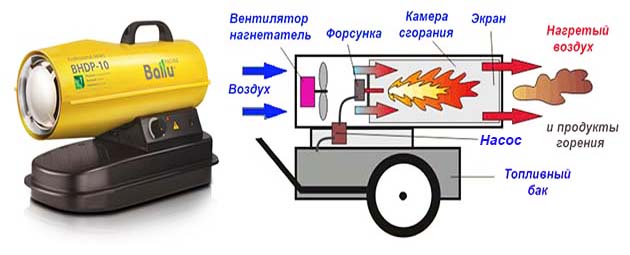
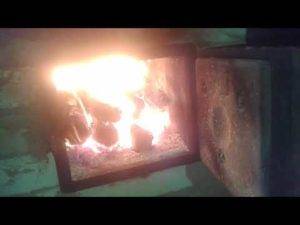
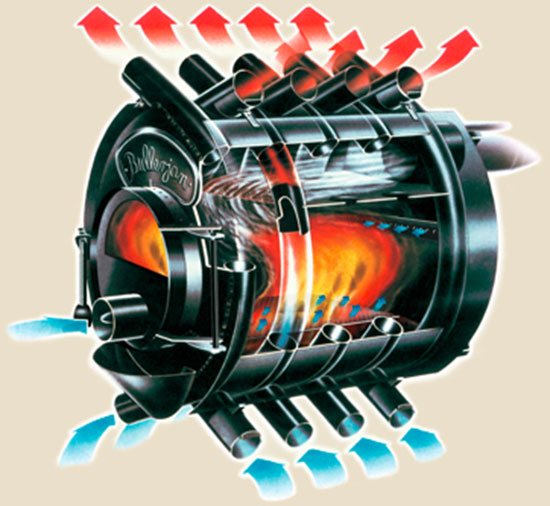
Design of gas generating furnaces
The gas-generating furnace is a separate direction in the heating equipment industry. The principle of its operation is as follows: solid fuel burns with a small amount of oxygen, under the influence of low temperature values, pyrolysis gas is produced.This substance mainly consists of methane and carbon monoxide, has a high heat transfer coefficient, which contributes to a multiple increase in the efficiency of such equipment. Fuel in such a design burns out almost completely. Heat is transferred through heat exchangers to the fluid in the system.


Gas-generating furnaces of various types are offered by many manufacturers of heating equipment. You can also make them yourself.
Modernization of an existing fan
Plastic bottles will come in handy in upgrading a store-bought fan. Practically free improvised means will help to significantly increase the performance of the device.
Let's look at how and by what method you can arrange a pleasant sea breeze in an apartment:
We have made parts designed to enhance the airflow. They will provide accelerated cooling of the space around.
Now you need to make the basis for fixing them:
After preparing the device, designed to enhance the performance of the fan, we proceed to the assembly and commissioning:
How to DIY
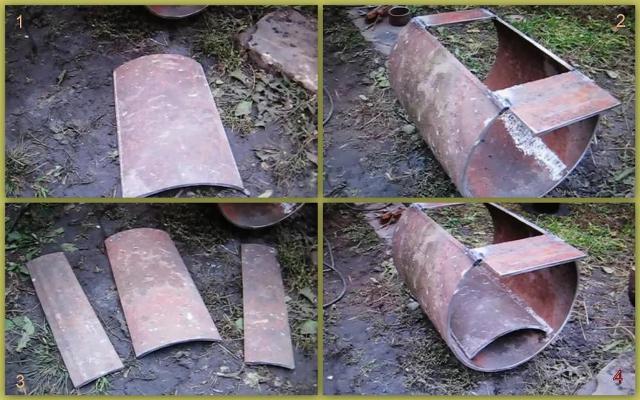
- a thick sheet of metal or an iron pipe (you can use a barrel);
- corners made of steel (5 × 5);
- hinges, door latches;
- chimney pipe;
- rebar bars.
The number of materials and various additional elements depends on the size of the room and the tasks assigned to the heating equipment.
The oven has two compartments. The afterburning chamber will be a special labyrinth located at the top of the device. It is made of metal plates, placing them parallel to each other.
frame
It is made in a rectangular shape, while several metal sheets are welded together. You can use a ready-made barrel or a piece of thick-walled pipe.
Preparing Work Items
First you need to mark and then cut out the details of the future furnace: sides, top, panel for the grate, plates for the gas labyrinth (3 pcs.). The edges of such elements must be cleaned with a grinder.
holes
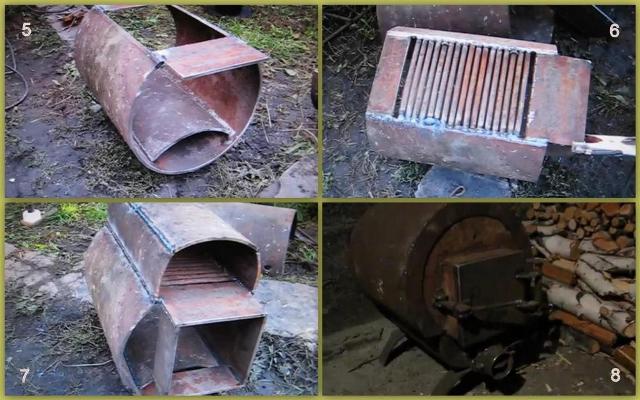
A round hole is cut out in the upper element of the furnace, a chimney will be connected there. In the front wall of the body, hatches are made in the form of rectangles (for firewood and a blower).
Metal pieces that act as doors are ground and hinges are attached to them. The edges of such structures must be scalded to ensure a snug fit.
Plates for gas labyrinth
At 10 cm from the top of the facade, perpendicular to it, a plate is installed. It should be 7 cm shorter than the length of the entire heating device. Behind it, two more plates of the same size are attached to it. The indent from the top is 15 cm. After the complete assembly of the furnace, this design will become a gas labyrinth that slows down the movement of gas.
Installation of grate
Corners (2 pieces) must be welded to the sides of the body at the same height. A grate will be installed on them. It is made from reinforcement rods or from a metal sheet with a large number of slots.
final assembly
All parts are connected with a corner by welding. The edges are cleaned with a grinder and painted with a refractory compound.
Such a home-made stove can heat small utility rooms. After assembly, it must be tested. If everything is done correctly, the device will start heating the room quickly enough (within 30 minutes).
The issue of heating country houses and garages, industrial and residential premises is always relevant. Many are interested in how the heater stove works, whether it can cope with the task. This is a fairly simple and small device that can heat a room in a few minutes.


The stove takes up little space, is easy to operate and maintain, and an affordable price contributes to the growth of its popularity among the owners of cottages and garages. By purchasing a set of drawings and having the skills of welding, this device can be made by hand.
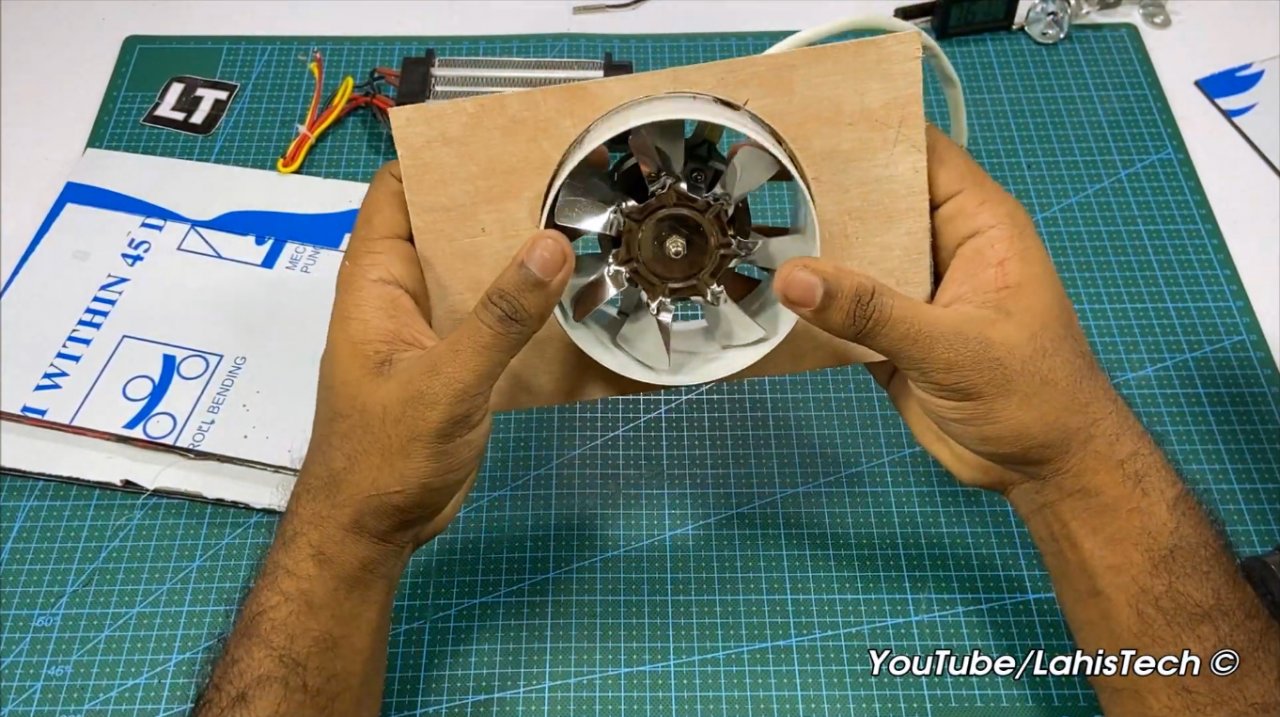
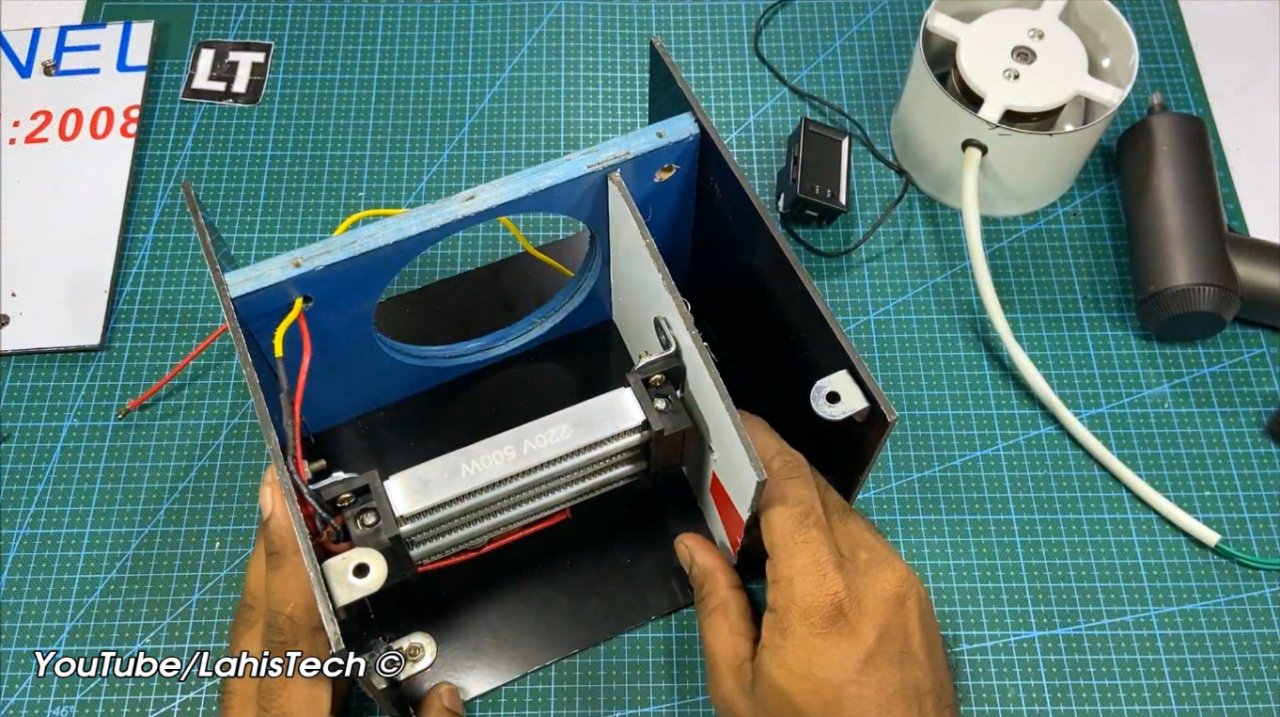
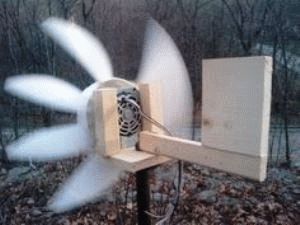
Directional heat gun
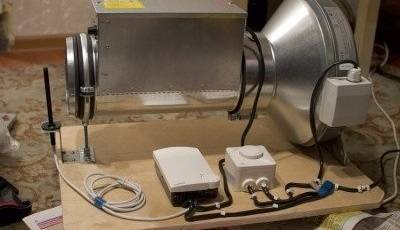
The heat gun of our own production has enough power to easily heat a garage, utility room or office in the house
For assembly you will need:
- a piece of plywood 16 mm thick;
- fan (duct);
- temperature and speed controllers;
- heating element PBEC (2.2 kW);
- fasteners (clamp, bracket, studs, nuts, washers);
- wheels.
We cut out a rectangle of about 47 cm x 67 cm from plywood, we clean the bumps and corners with emery.
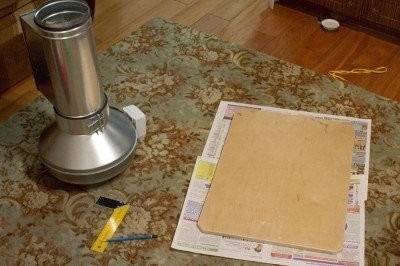
The plywood base was not chosen in vain: it is light, flat, and most importantly, it does not conduct electricity, which is important in case of force majeure
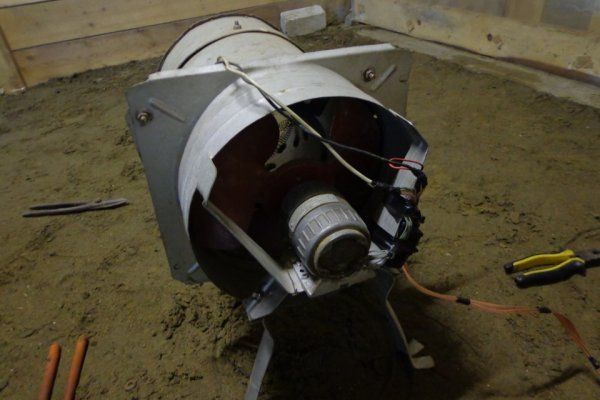
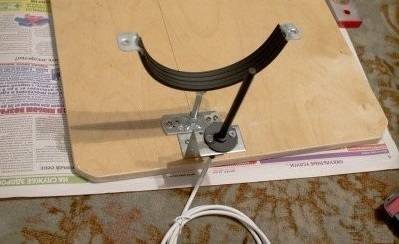
We connect two central parts with a coupling - a fan and a heating element. We fix the resulting structure on a plywood base using a bracket and a plumbing clamp.
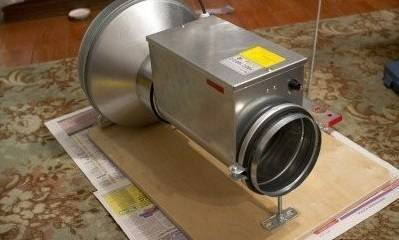
We select fasteners in such a way that they firmly fix the elements of the device and do not harm them. For example, self-tapping screws are great - they do not destroy plywood
Self-tapping screws (16 mm) are suitable as fasteners.We install a temperature sensor (for example, TG-K 330), which is necessary for controlling the temperature regime, next to it there are two more devices - for adjusting speed and temperature.
When connecting the parts of the fan heater to each other, we do not forget about the safety of the device: the junctions of wires and cables must be insulated
Pulsar 3.6 is suitable as a thermal regulator. After installing all the necessary devices and parts, we connect them according to the scheme.
Device control schemes can be found in specialized literature, instructions for devices such as an electric fan, or on highly specialized sites.
For ease of use, we fasten the wheels to the plywood base.
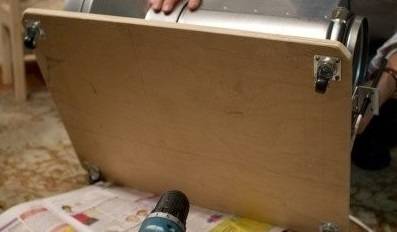
Small rollers screwed on the underside make the homemade fan heater more convenient to move around the room, especially if it is heavy
Well, that's all - a homemade heat gun is ready.

Try to place the parts of the device in such a way that, if necessary, it is easy to disassemble each of them and replace the failed elements.
Like any homemade fan heater, this device has disadvantages. For example, when the device is stopped, the voltage on the heating element remains, and this is quite dangerous, since overheating occurs and an emergency situation is possible. The situation can be corrected by installing a relay to timely turn off the power supply to the temperature controller. Another disadvantage is the inadequate heating of the room, but this is a disadvantage of almost all stationary fan heaters.