- Soundproof membranes
- Technology for fixing the membrane to the ceiling
- How to soundproof an apartment
- The best soundproofing of the ceiling in the apartment
- Soundproofing the ceiling in the apartment modern materials and installation
- Noise isolation on the ceiling: preparation of the base
- Installation of ceiling panels
- Three ways to soundproof a ceiling
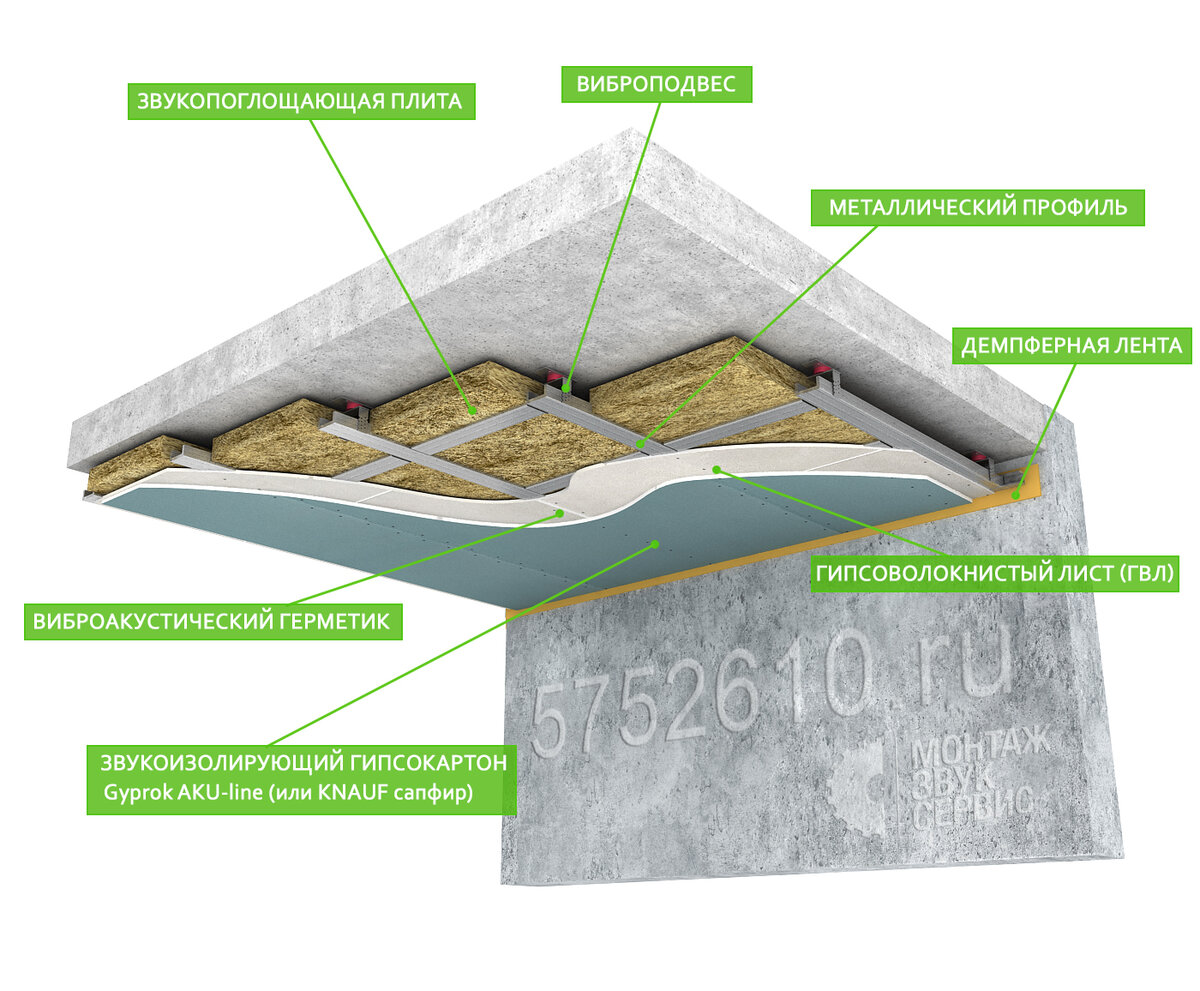
- Frame installation
- Sequencing
- Glue mounting
- Sequencing
- Mineral wool - the best choice for ceiling insulation
- Soundproof plaster
- Plastering technology
- Features of soundproofing ceilings
Soundproof membranes
Membrane films for sound insulation are small in thickness - up to 2 cm, so they are used for stretch ceilings in the event that the height of the room is small and every centimeter counts. Their soundproofing properties can be compared with a five-centimeter layer of mineral wool.
The membranes consist of several layers with different elasticity and sound absorption. For the manufacture of these materials, polyethylene foam, fiberglass, non-woven material and thin lead plates in various combinations are used. The membranes can be supplied in rolls or plates. The table gives an overview of soundproofing membranes.
Table. soundproof membranes.
| Illustration | Name, features | Options |
|---|---|---|
| Topsilent Bitex (Polipiombo) Fiberglass coated on both sides with polypropylene fabric. | Roll material, thickness 4 mm, width 0.6 m. Sound insulation up to 24 dB. They are attached to the ceilings with Fonocoll glue. | |
| Tecsound Aragonite (calcium carbonate), coated on one side with a non-woven fabric. | Roll material with high density, thickness 3.7 mm, width - 1.2 m. Sound insulation up to 28 dB. Attached to the ceiling with glue. | |
| Akustik-Metal Slik Lead foil 0.5 mm thick, coated on both sides with foamed polyethylene. | Roll size 3x1 m, thickness 6.5 mm. Sound insulation up to 27.5 dB. Attached to the ceiling with Fonocoll glue. | |
| Zvukanet Wagon Fiberglass in a polypropylene membrane. | Roll, size 0.7x10 m or 1.55x10 m. Thickness 14 mm. Sound insulation up to 22 dB. |
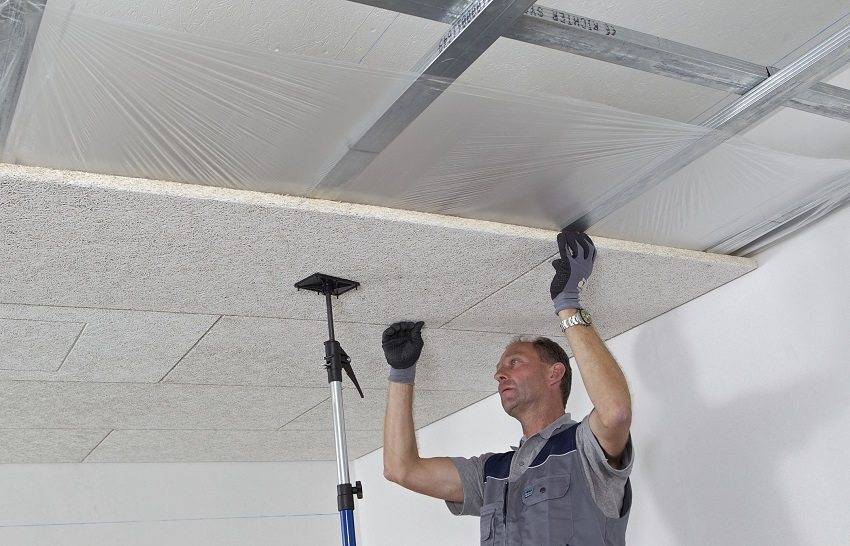
Despite the different composition, the technologies for attaching membranes to the ceiling are not much different from each other. The main stages of ceiling sheathing with soundproof membranes are described below.
Technology for fixing the membrane to the ceiling
The calculation of the membrane and glue is carried out according to the area of \u200b\u200bthe room. Membrane manufacturers recommend Fonocoll adhesive with water-based styrene acrylic resins. The adhesive is suitable for gluing any acoustic materials to concrete, drywall or wood.
- Ceiling preparation is carried out if there is peeling paint or plaster on it. They are cleaned to a solid foundation, after which gaps, cracks are sealed, and the seams are puttied. The smoother the base, the better its contact with the membrane and soundproofing properties.
- The adhesive must be applied in a thin layer on the underside of the soundproofing membrane and on the ceiling. It is convenient to do this with a spatula or a brush.The glue is kept for about 15 minutes, after which the membrane is applied to the ceiling and rolled with a hard roller. The strips are glued end to end.
- Complete drying of the glue lasts at least a day, after which you can start stretching the ceiling.
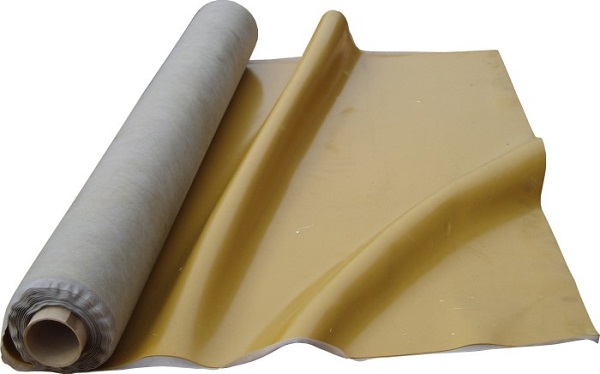
Soundproof membrane
How to soundproof an apartment
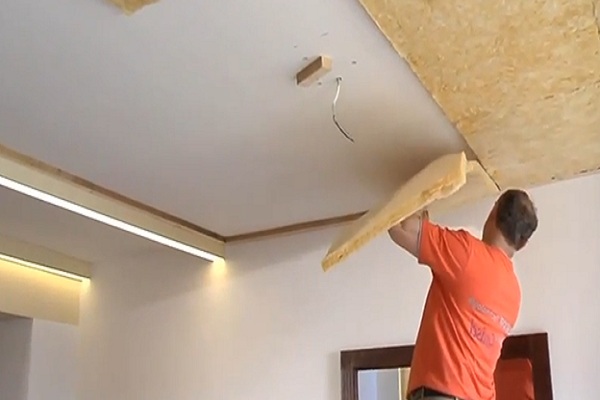
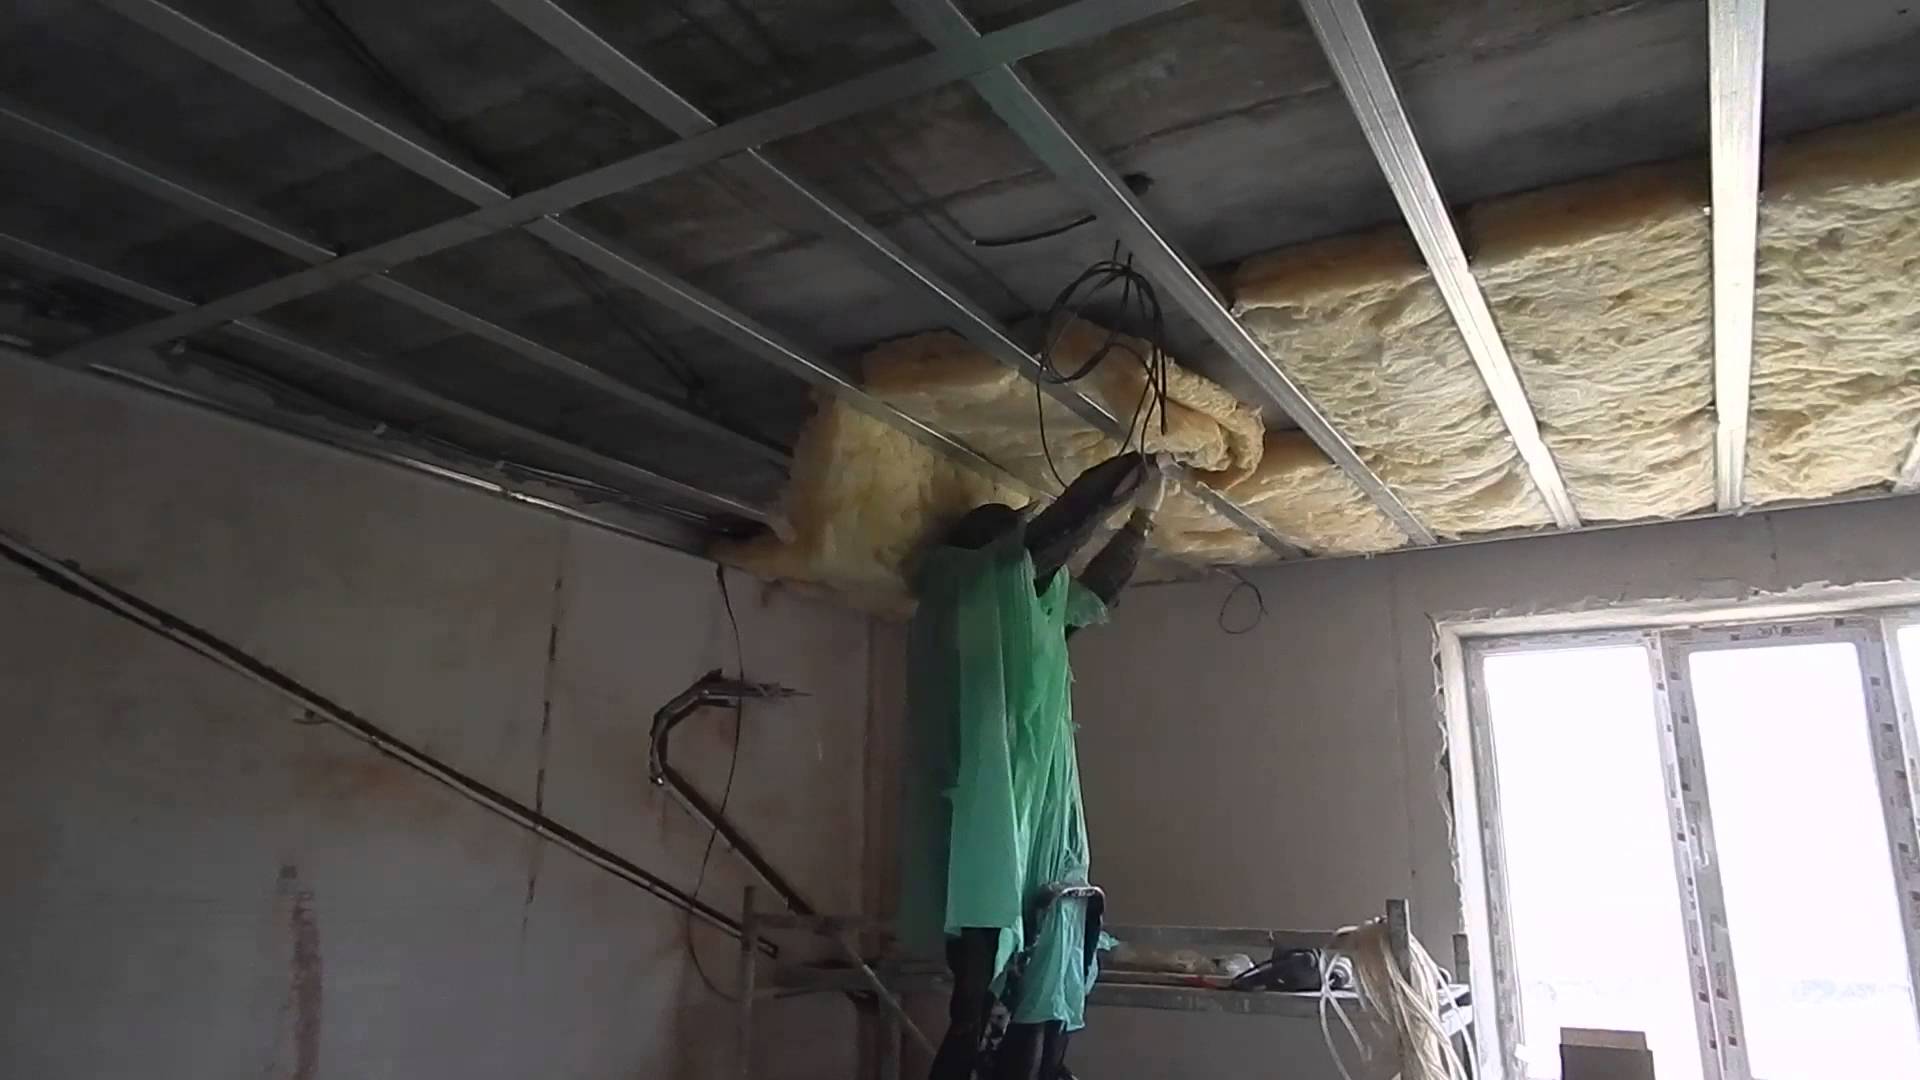
Soundproofing is carried out using any insulation materials at the stage of preparing the room for the direct installation of a stretch ceiling. It is advisable to attach the insulation layer to the ceiling in such a way that about 2 cm remains from it to the ceiling membrane, no more, then the volume of the resonator will be minimal. If the PVC stretch ceiling is already installed according to the harpoon type, which is typical for most PVC ceiling structures, then the ceiling will have to be temporarily dismantled to lay the soundproofing layer. A layer of insulation is placed approximately the same thickness as the distance from the base ceiling to the stretch ceiling.
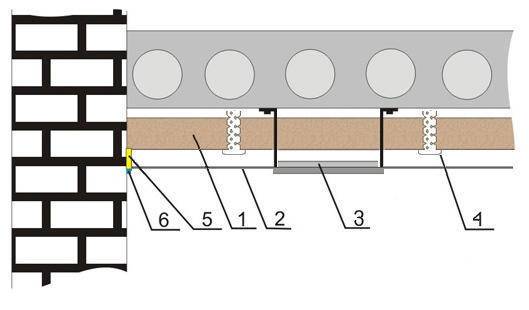
1. Soundproofing layer 2. Stretch ceiling sheet 3. Lighting device 4. Construction fungus 5. Profile 6. Decorative tape
We should stop our attention on the choice of soundproof insulation. Mineral wool is more often used - it is effective and not expensive. Vapor barrier, which is mandatory for suspended ceilings, is not needed when installing a vinyl sheet, since the film itself performs this function
The disadvantage of this material is that over time, the cotton wool becomes caked and sags, so it must be attached to the base ceiling with special care. The easiest way to fix it is to drill plastic dowels with screws to the ceiling surface, between which a strong synthetic rope is stretched.She then will keep the mineral wool from sagging and falling. The screw drilling step is 30-40 cm. It is advisable to pull the rope crosswise
Vapor barrier, which is mandatory for suspended ceilings, is not needed when installing a vinyl sheet, since the film itself performs this function. The disadvantage of this material is that over time, the cotton wool becomes caked and sags, so it must be attached to the base ceiling with special care. The easiest way to fix it is to drill plastic dowels with screws to the ceiling surface, between which a strong synthetic rope is stretched. She then will keep the mineral wool from sagging and falling. The screw drilling step is 30-40 cm. It is advisable to pull the rope crosswise.
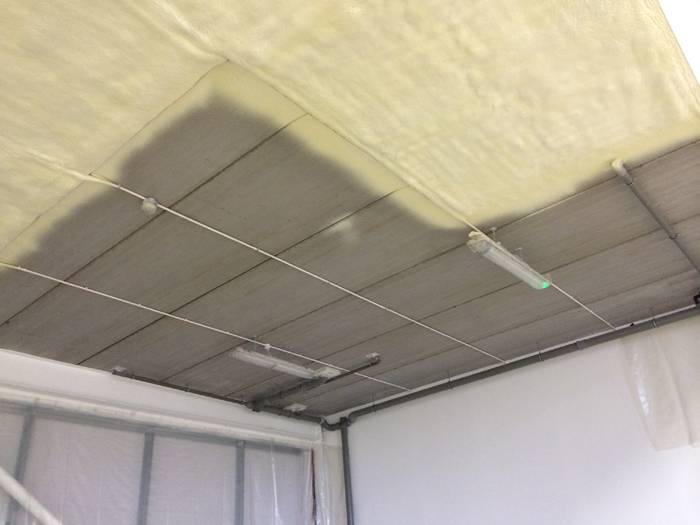
Material such as foam is also widely used in soundproofing due to the fact that it is easy to use and affordable. The foam plastic is attached to the base ceiling without any drilling, which is an additional plus - you don’t have to dust the room and disturb the neighbors with the sounds of your repair. Fastening foam boards is very simple - with glue. By the way, the foam will not stick to the whitewash or plaster, the surfaces must be primed with a primer. Styrofoam, although simple, like mineral wool, is much more expensive than cotton wool.


Basalt wool is an analogue of mineral wool, but with noticeable differences in its favor. It does not cake, does not deform and does not absorb moisture. Layers of basalt wool can be fastened by simply sealing it between the crate and fixing it to the ceiling with screws in increments of up to half a meter, and it is not necessary to tighten the rope.
After these manipulations, you can proceed with the installation of stretch ceilings in the usual mode. And if you have already decided to make soundproofing in the apartment, then you should think about ceilings installed by the harpoon method or seamless, which are easily dismantled so that in the future you can change the layers of soundproofing material.
In the video below you can see how the process of soundproofing ceilings takes place:
The best soundproofing of the ceiling in the apartment
Soundproofing membranes make it possible to silence the room not only from the side of the ceiling, but also from the side of the walls, and even from the floor - this flexible polymer produced in rolls can be called universal.
With a blade thickness of just 3mm, it can reduce room noise by 26dB, and is designed to reduce noise in the low frequency range. The uniqueness of this material lies in the fact that it can be used in combination with any finishing materials.
Installation of soundproof membranes is quite simple - it can be mastered by any person who knows how to use modern construction tools.
The only obstacle on the way to independent soundproofing of walls in this way is the weight of the membrane - it is quite heavy, and three pairs of strong male hands are required to install it.
- In general, the whole process of attaching this membrane to the ceiling is as follows.
- A wooden crate is attached to the ceilings by means of dowels or self-tapping screws - as a rule, this is a beam 20x30mm.
- After the base for installing the membrane is ready, the membrane is hung from the ceiling with hooks and thin tubes (this is done in order not to keep heavy material under the ceiling).
- When the membrane is suspended, it is fixed to the crate with the second row of wooden beams - self-tapping screws are used for these purposes. After installing all the canvases, the seams between its individual parts are glued with a special tape. She also closes up all kinds of technological cutouts.
The only drawback of soundproofing the ceiling with your own hands through a membrane is the relatively large space required for its installation - on average, it will require stealing from 60 to 80 mm from the room.
We should not forget that the suspended ceiling itself can steal about the same height. In apartments with low ceilings, the use of an acoustic membrane does not look very appropriate.
Another best remedy is acoustic ceilings that can absorb the noise produced by the upstairs neighbors. First of all, such manufacturers include CLIPSO, whose ceiling systems have a sound absorption coefficient of 0.9. Neither more nor less, and this coefficient can be "rephrased" in the ability of the system to absorb 90% of sounds.
Consist stretch ceilings with sound insulation of three parts - these are special mineral slabs made on a basalt basis, a stretch fabric with microperforation, which in its characteristics resembles a sound-absorbing membrane and fixing baguettes.
In principle, the installation of such a ceiling differs from the usual installation only at the first stage - mineral plates are first attached to the ceiling. Then everything looks standard - a baguette is mounted, on which a stretch fabric is installed using a gas gun.
There are other answers to the question, what is the best way to soundproof the ceiling - for example, in private houses soundproofing technology with a floating floor is quite common. Under the screed or wooden flooring, dense polystyrene foam is laid or a special granular material is poured. In principle, these technologies are quite effective.


Well, in conclusion, I would like to note once again that in order to achieve the best results, you need to apply a whole range of measures - soundproofing the ceiling should be carried out together with soundproofing walls and floors. This is the only way to achieve the necessary results and turn your home into a quiet and comfortable nest.
Soundproofing the ceiling in the apartment modern materials and installation
Before you make soundproofing the ceiling, you need to choose the appropriate method. You can use the following materials:
- foamed glass;
- cellulose wool;
- fiberglass boards;
- polyurethane foam;
- peat insulation boards.
The main problem is the right choice of material. You can choose from eco-friendly cork panels or coconut fiber flooring. Starting installation, it is necessary to prepare the ceiling. The front part is removed, and the selected material for sound insulation is laid between the ceiling structures. If there is no frame in the apartment, it is recommended to order the installation of stretch ceilings or make the frame yourself. All joints and seams must be sealed with silicone sealant.
Before soundproofing the ceiling, you need to decide how much noise interferes with life. So, ordinary mineral wool reduces the amount of background noise by up to 95%, but more “soft” methods can be used.
Drywall is hung on top of the panel, and then everything is covered with decorative plates.
At high noise levels, multi-stage insulation should be used: sound absorption plate, membrane and plasterboard sheets.
All joints and seams must be sealed with silicone sealant
Noise isolation on the ceiling: preparation of the base
If the house is old and the walls are thin, you can do the insulation yourself. The first step is preparing the foundation. In order not to make a mistake, you need to follow the instructions:
Illustration
Action Description
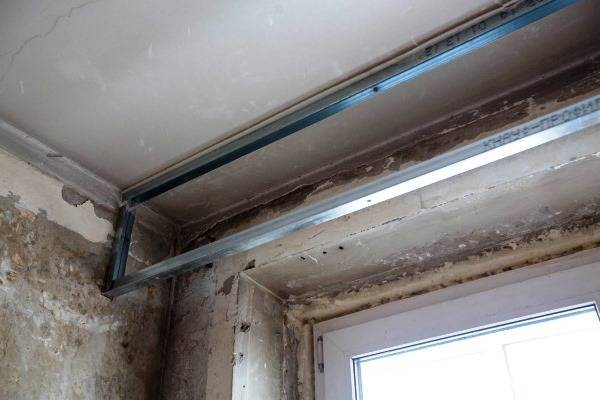
We mount the guide elements for the ceiling. To do this, take metal profiles and attach them to the wall. We hang profiles along the edge of the entire ceiling in the room
To protect the room not only from excess sound, but also from vibrations, we stick a damper tape on the profiles
We fix the profiles with tape below the main line
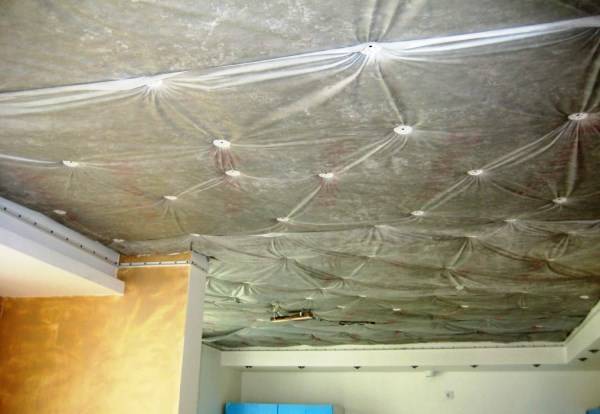
We stretch a soundproof blanket over the profiles. To keep it well, we additionally fix it with screws over the entire surface.
Particular attention should be paid to the junction of two such blankets and securely fasten the edges so that they do not fall on the stretch ceiling.
When soundproof blankets are stretched, you can proceed with the installation of the ceiling itself.
Installation of ceiling panels
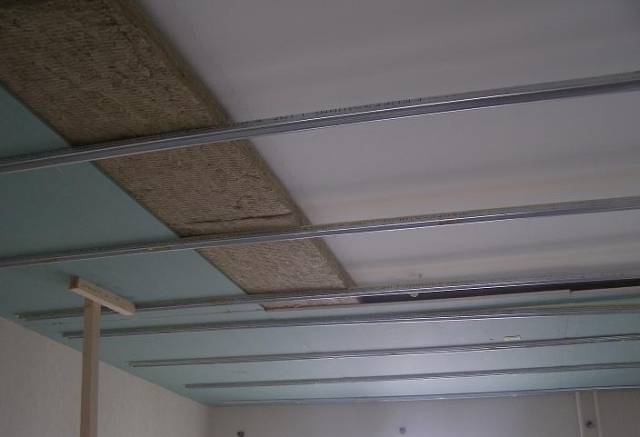
If it is decided to leave an ordinary plastered ceiling in the apartment, it is necessary to mount panels on which glass wool or other insulating material will be fixed.
Unlike a frame for a stretch ceiling, for a conventional panel one, it is necessary to lay a crate along the entire territory of the ceiling, not only along the edges, but also horizontally, to fix the plates.
In order not to be mistaken, you must first make a markup and measure the room using a construction laser, then cut wooden bars or metal profiles and fix them. If you have the right tools and minimal skills, you can replace the ceiling covering and lay the insulation in 3-6 hours.
Three ways to soundproof a ceiling
Installation of the selected soundproofing of the ceiling in the apartment under the stretch ceiling depends on its type. We will look at three possible options in detail.


Frame installation
The technique is used for laying rolled or slab wadded materials, suitable for arranging multilayer insulation. A significant plus is that the coating is placed “by surprise”, securely held in the frame. Therefore, it is not necessary to drill the surface for additional fasteners. The system can be of any height, it holds even a heavy structure well. Significant disadvantages include the cost of money and time for the construction of the frame.
For work, in addition to the insulating sheet, you will need guides from a profile or a bar, a damper tape that will dampen impact noise.
Sequencing
- We are preparing the base. We clean off the old finish from it, remove defects, cracks, putty them if necessary. We remove dirt, dust, treat with an antiseptic. Especially carefully we process the joints, corners. It is here that mold appears before other areas.
- Let's mark the base. We set marks in the areas of fixing the fasteners of the future frame. In order for the sound insulation to lie without gaps, we select for the guides a step equal to the width of the material minus 20-30 mm.
- Cut out the guides. We saw off the bars with a jigsaw, cut the profiles with scissors for metal.On the reverse side of the metal parts we paste a polyethylene foam tape.
- Drill holes in the base. We fix the guides on the dowels. If the insulating mats are thick, the profiles for them are installed on hangers with a special acoustic decoupling.
- We lay the plates apart so that they are well held in place. For multilayer structures, the rows are laid alternately. In this case, we make sure that there is a displacement of the seams. That is, the inter-tile gaps were in the middle of the plates of the next row.
Multilayer systems can be laid in this way. The first row of frame profiles is installed along the room. It has soundproofing. On top of it, across the first row, a second row of guides is placed, into which the plates are also placed.
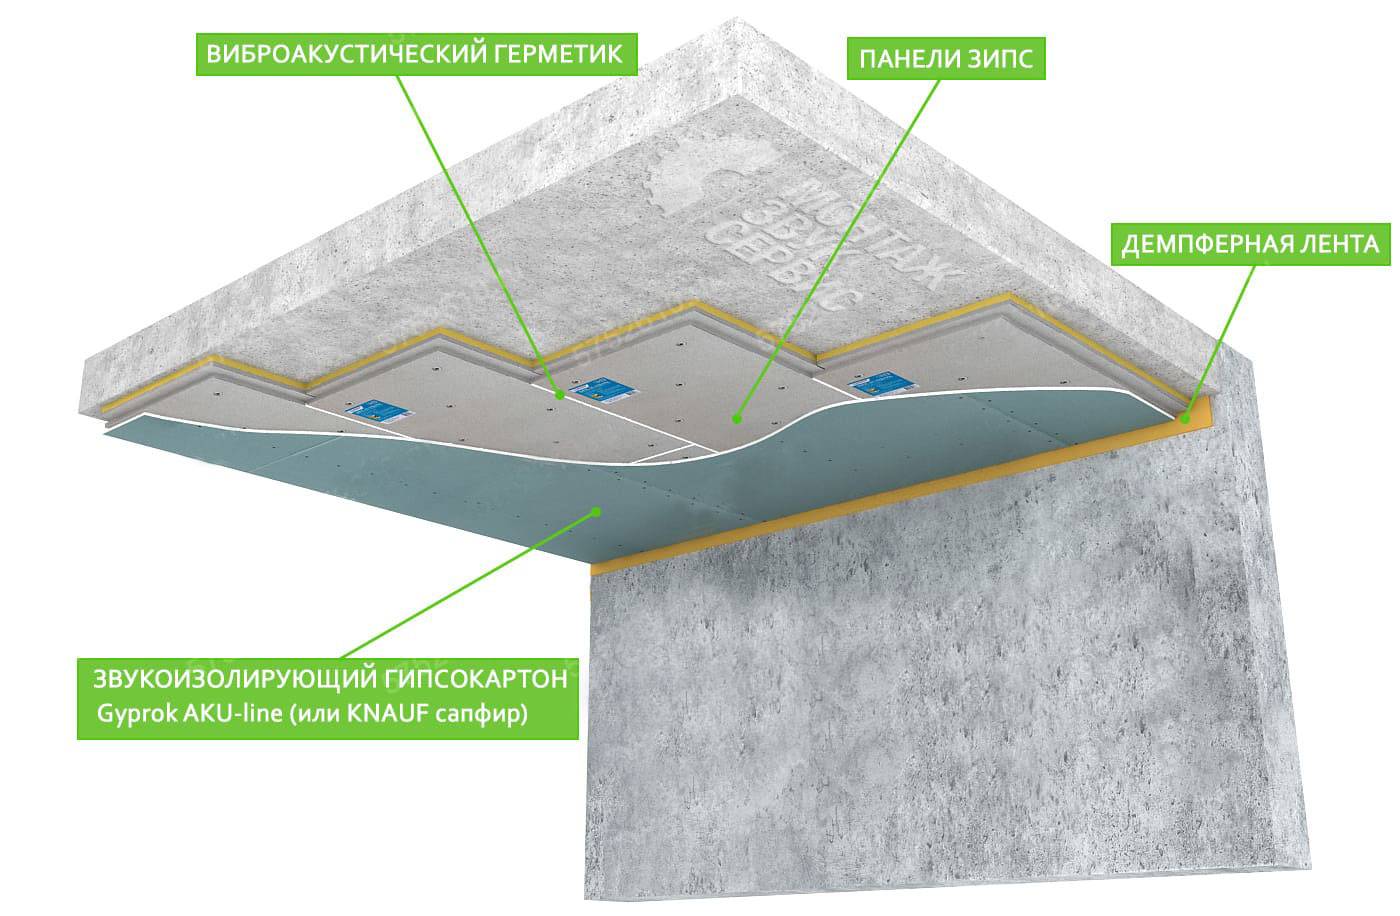
Glue mounting
Used to install semi-rigid boards with a density of at least 30 kg/cu. m. Laying is done using the frameless method. Fast, simple with a minimum of sound-conducting elements and gaps. It saves money and time for the construction of the crate. To fix the soundproofing plates, you will need gypsum or cement-based glue, dowels-fungi, five pieces per element.
Sequencing
- We are preparing the base. We remove the old finish, if it was. We close all cracks, cracks, other defects. We clean dust and dirt. Prime the base with a suitable primer. This will make it possible to reduce the consumption of glue, improve its adhesion to the surface. Apply one or more layers, wait for complete drying.
- We prepare the adhesive composition. We dilute it with water in the proportions indicated on the package. You can stir the paste by hand, but it is long and ineffective.It is better to use a construction drill with a special nozzle.
- Lay the plate on a flat surface. With a spatula, evenly apply a layer of glue on it. We distribute it over the entire surface.
- We lay the insulating plate coated with the adhesive mixture in place, press it firmly. We start laying from the wall. We adjust the elements to each other very tightly so that there are no gaps.
- We fix each plate with dowels-fungi. To do this, we drill five holes in each element. Their depth should be 5-6 cm more than the thickness of the insulator. Holes are made at the corners of the plate and in the center. We install dowels in them.
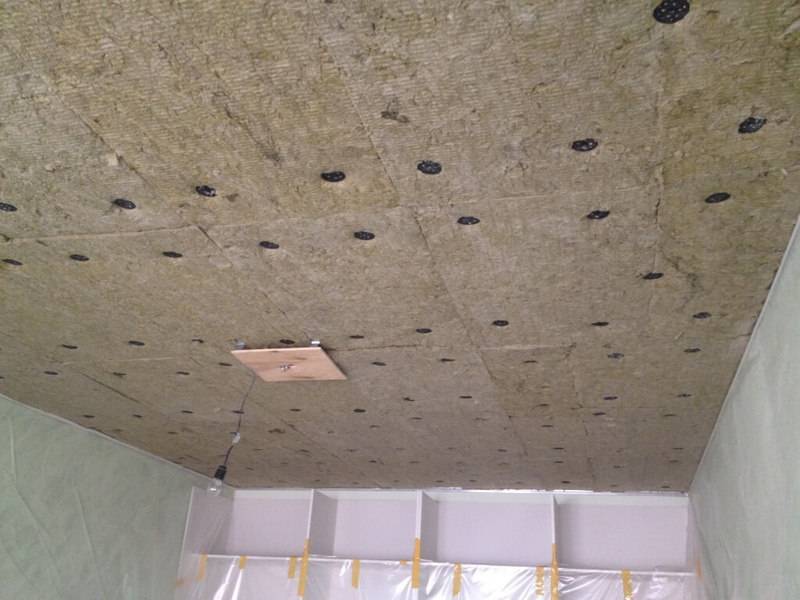
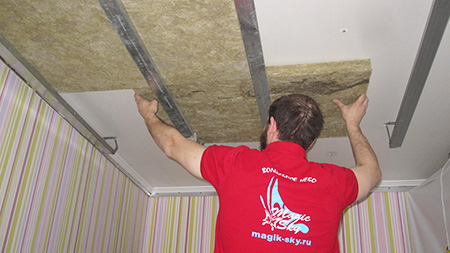
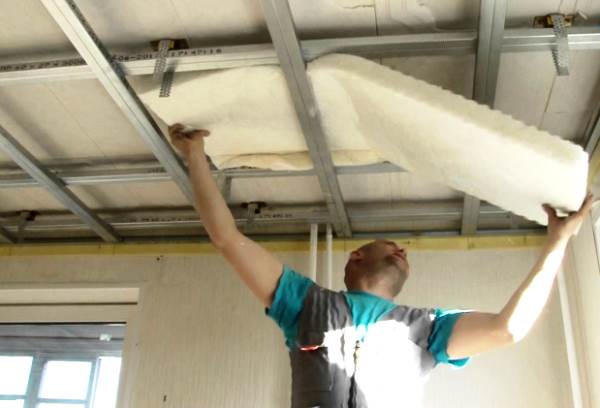
Mineral wool - the best choice for ceiling insulation
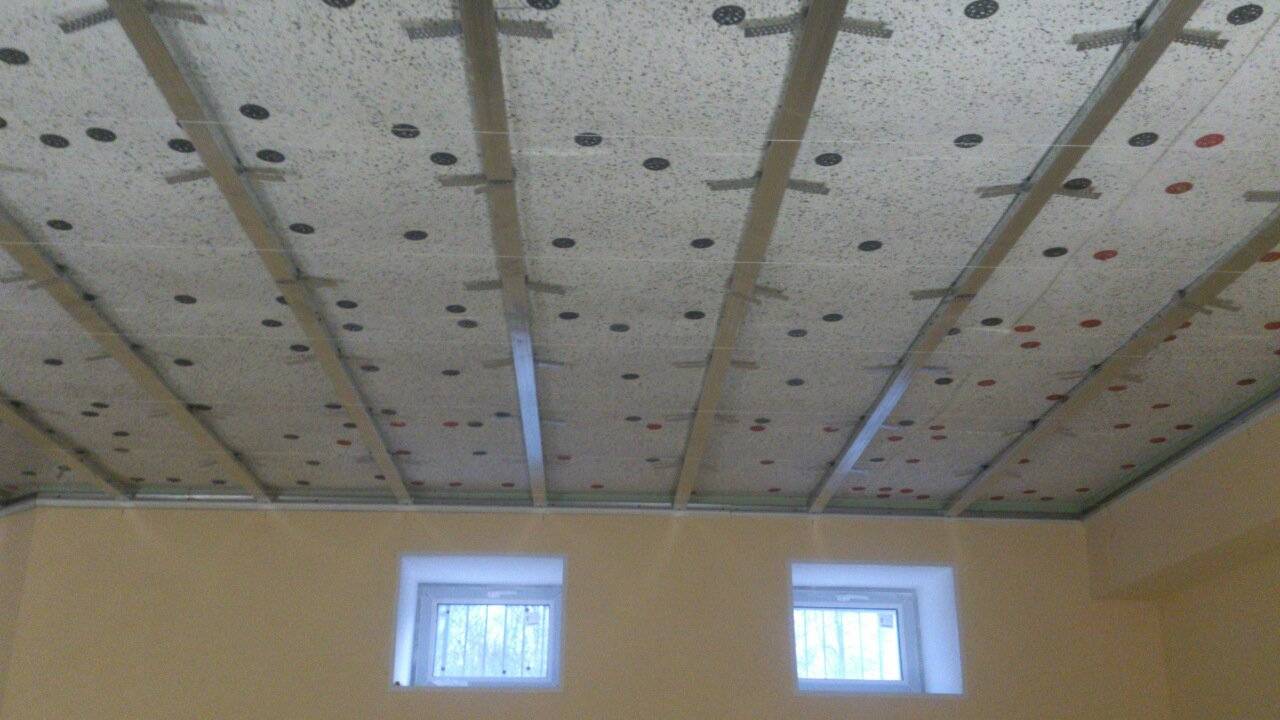
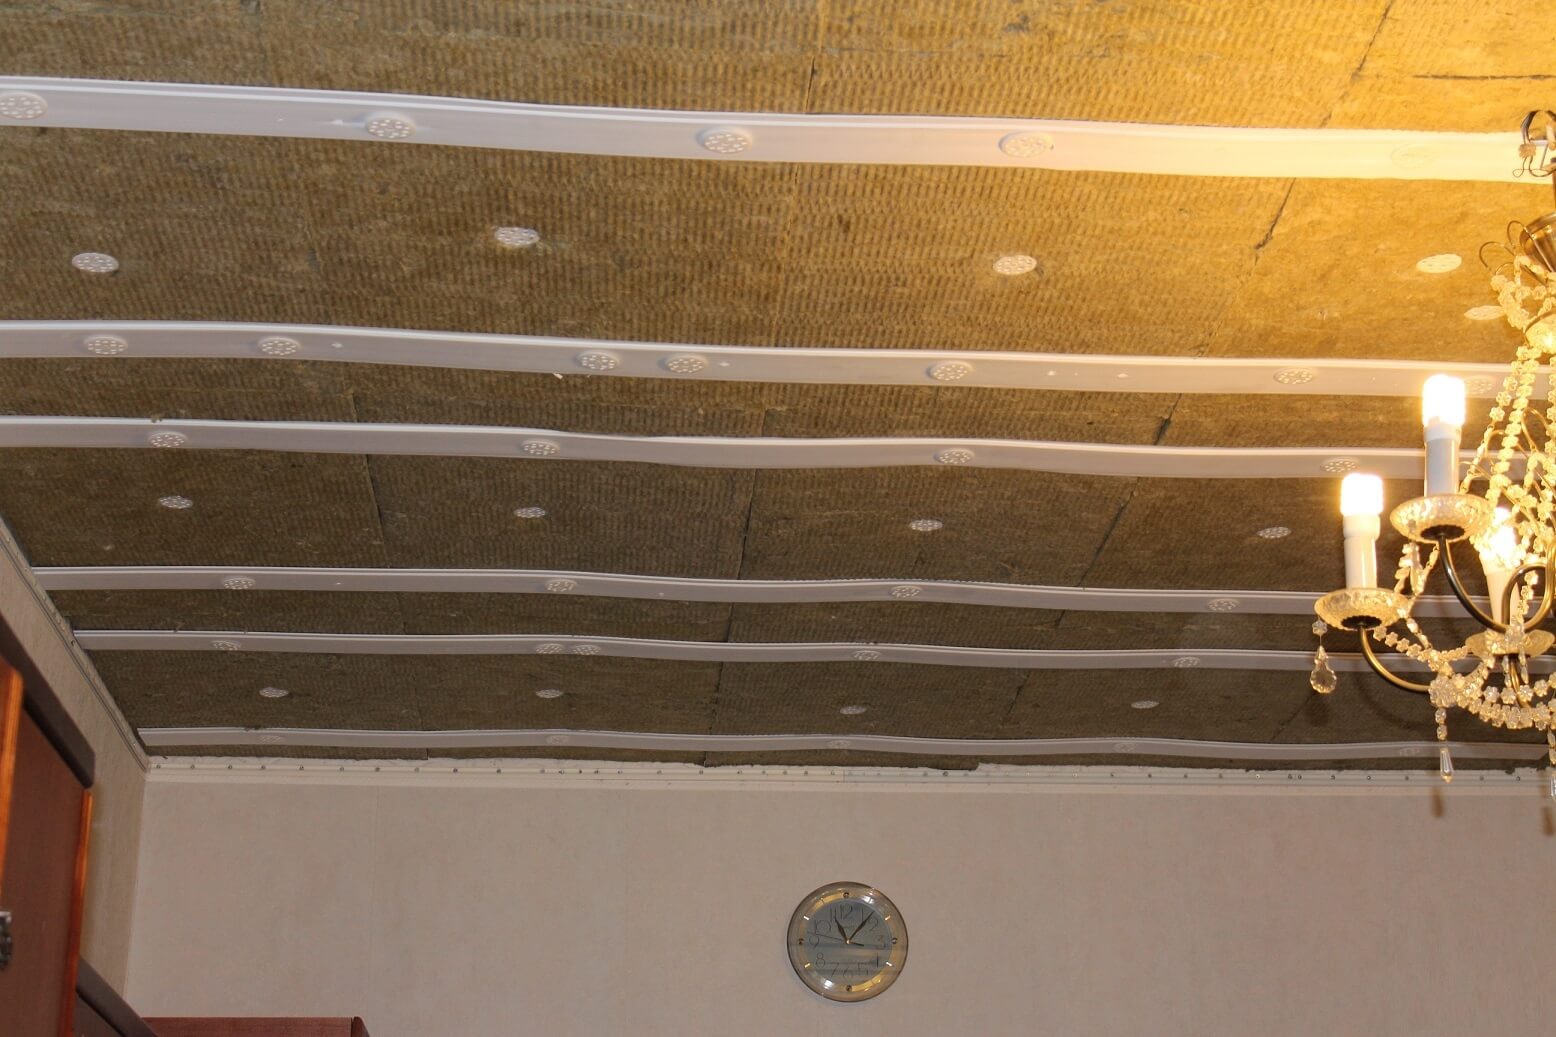
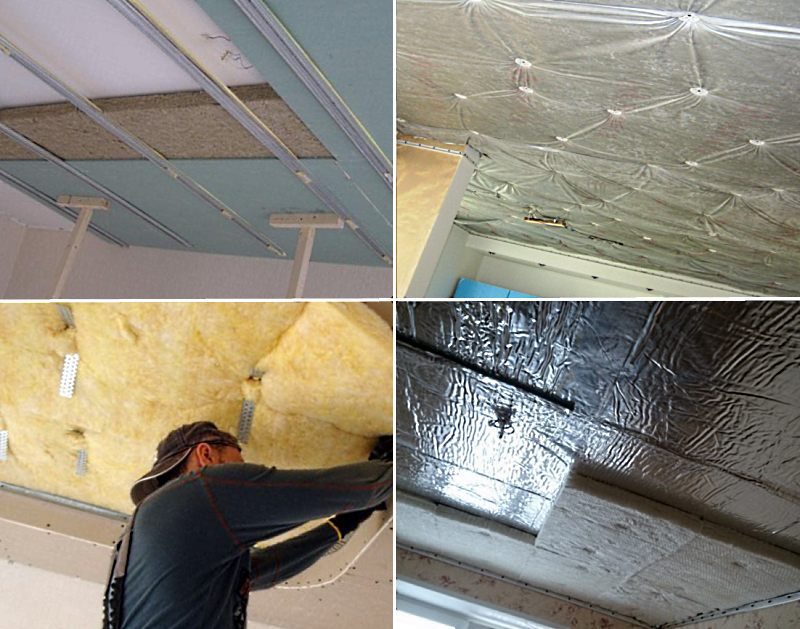
Mineral wool is a traditional soundproofing of a stretch ceiling. Among the popular types of material are soft fiberglass in rolls and basalt slabs. These products are not subject to decay, do not burn, the air-saturated structure absorbs sound well. The thickness of mineral wool is 50-100 mm, which requires a significant lowering of the ceiling level.
Popular brands include Shumanet BM and Rockwool Acoustic Bats acoustic slabs, made on the basis of basalt fiber. They are used as professional soundproofing and in private construction. Shumanet boards are covered with fiberglass on one side, which prevents the loss of small fibers and helps to keep the product from shrinking. The sound absorption index reaches 23-27 dB.
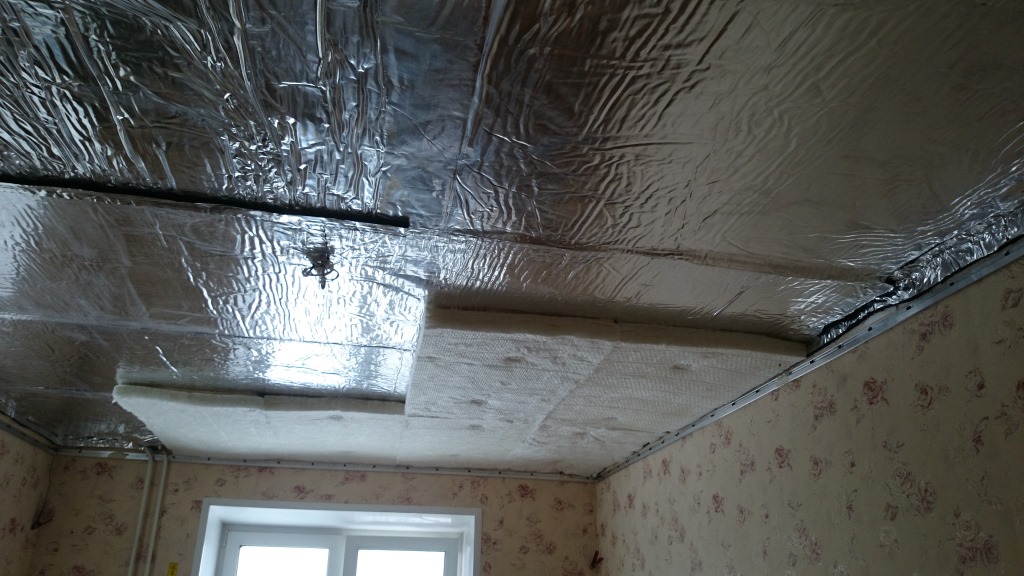
The disadvantages of the material include high hygroscopicity. Mineral wool must be protected with a vapor barrier membrane from moisture penetration from the room.
The second drawback is the impossibility of mounting recessed fixtures.Tightly laid material causes overheating of appliances and wiring. To ensure safety, the use of a chandelier is recommended.
Installation of mineral acoustic plates is carried out in two ways:
- Wireframe. In this case, the marking of the concrete floor is carried out, along which a galvanized profile or a wooden beam is stuffed in increments of 60 cm. A damper tape must be placed under the frame of wooden blocks or a metal profile. This layer will exclude the transmission of sound through rigid structural elements. Basalt wool is tightly laid between the guides. After filling the entire surface, a vapor barrier membrane is attached. It protects the material from moisture, and the tension fabric from crumbling debris.
- Kleev. This method involves applying a special composition to the plates and fixing it on the ceiling. When using mineral glue, basalt wool is additionally fixed with plastic dowels. Each plate requires 5 fasteners - 4 at the edges and 1 in the middle. The stretch ceiling is mounted after the adhesive has dried.
Soundproof plaster
Special soundproofing plaster based on Portland cement with the addition of porous components - pumice, expanded clay, perlite, and aluminum powder. When mixing plaster with water, aluminum powder emits gas bubbles, due to which its structure becomes porous and elastic. The composition of the plaster also includes polymeric materials that provide the elasticity of the coating.
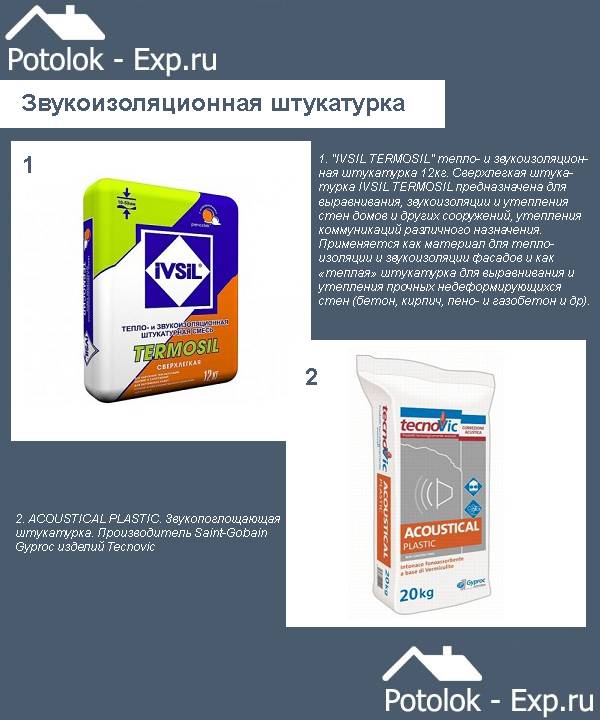
Popular soundproofing plaster
Advantages of plaster:
- for effective soundproofing of the ceiling, one or two layers of coating are sufficient, their total thickness does not exceed 40 mm;
- with the help of plaster, you can not only reduce acoustic noise, but also repair bumps, cracks and gaps in the ceilings;
- plaster is applied quickly, manually or mechanized;
- the composition does not include biological components, which ensures resistance to decay and mold;
- plaster has thermal insulation properties.
The disadvantages include perhaps the high price of the material - it is comparable to the cost of the stretch ceiling itself.
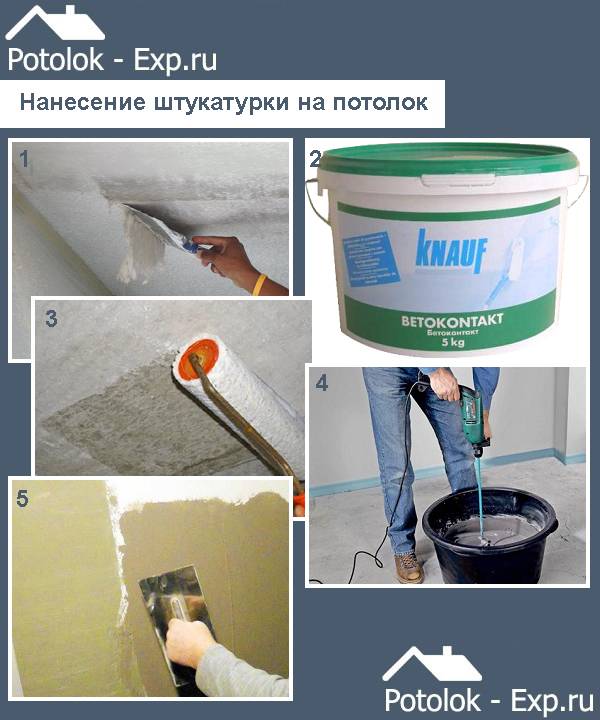
Plastering technology
Before starting work, it is necessary to calculate the required amount of dry plaster mixture. The plaster consumption is indicated on the packaging and is usually 0.3-0.5 kg per 1 m2 of a 1 mm thick coating. Thus, to obtain a minimum layer of 10 mm, 3-5 kg of the mixture is needed.


Sequence of work.
- Before plastering, it is necessary to clean the ceiling from the old coating - whitewash, paint or wallpaper. They are removed to a solid base with a spatula, then the ceiling is washed with warm water.
- The ceiling is treated with a primer "Betonkontakt". The primer is applied with a roller in one or two coats, observing the drying time between coats.
- The dry mixture of soundproofing plaster is mixed with water using a construction mixer, observing the dosage of water indicated on the package. Mixing time - at least 5 minutes. Withstand the mixture for 10-15 minutes, mix again and proceed to plastering.
- Soundproofing plaster is applied to the ceiling without installing beacons - they will create sound-conducting bridges. To make the layer even, you can use temporary beacons, which are removed after leveling the coating.The plaster is applied and leveled with a wide spatula, trying to make a layer of no more than 20 mm.
- If necessary, you can apply plaster in several layers, and each of them must be dried.
Applying soundproof plaster to the ceiling
Soundproofing plaster is able to protect against common household sounds: speech, dog barking, music or TV at moderate volume. If your neighbors like loud parties or have a nightly home theater movie, this soundproofing will not be enough, and it is better to consider other methods.
Features of soundproofing ceilings
Before choosing materials that can limit the flow of noise into a room with stretch ceilings, you need to decide which sounds bother you most often. It is no secret that there are several types of noise, and depending on its cause and strength, various methods of soundproofing are implemented.
Remember! Not always the sound insulation of a stretch ceiling in an apartment can completely save you from extraneous noise: in some cases, it is necessary to provide additional protection for the floor and walls, since sounds can enter the room from all sides.
However, it is the soundproofing of the ceiling that is the most important procedure, since the maximum sounds are received daily from the neighbors living above. By choosing a stretch ceiling for a room, you will greatly facilitate this work, since it is this design that allows you to get rid of noise with the best efficiency. The simplicity of sound insulation in this case is ensured due to the fact that in a soft or loose surface the sound is interrupted and disappears: solid structures, on the contrary, contribute to its further passage into the room
In addition, a layer of air between the base of the ceiling and the stretch film itself also contributes to noise absorption.
The simplicity of sound insulation in this case is ensured by the fact that in a soft or loose surface the sound is interrupted and disappears: solid structures, on the contrary, contribute to its further passage into the room. In addition, a layer of air between the base of the ceiling and the stretch film itself also contributes to noise absorption.
Thanks to the ability to install various soundproofing materials in the interceiling space, the choice becomes unlimited, and you can find an option that suits both quality and cost.
Important! Porous, soft or fibrous materials, as well as those that include several different layers, have the best noise-absorbing properties.
Most often, sound insulation under a stretch ceiling is created through the use of such materials:
- mineral-basalt panels (distinguished by their durability, as well as ease and safety of installation, do not cause negative reactions upon contact);
- foam and polypropylene (easily glued to the surface of the ceiling and enhance sound insulation with the additional use of plaster, used to protect against sounds of moderate volume);
- mineral wool (in addition to sound insulation, it has fire-fighting properties and provides additional protection from the cold).
These and many other soundproof materials for the ceiling differ in their characteristics, but reliably protect against noise.
When choosing a material for soundproofing a stretch ceiling, pay attention to the sound absorption coefficient: for example, windproof materials cope with this task worse than others


