- Stage five
- Option for assembling rear walls framed with profiles
- Option for assembling the rear walls on the corners
- Basic requirements for a country shower
- We build a summer shower
- Outdoor Summer Country Shower
- Wireframe creation
- Arrangement of the interior
- We collect a pallet from wooden slats
- We install the finished pallet
- How to make a summer shower in the country with your own hands (with dimensions)
- Installation of a tank for a shower, water supply and heating
- Video description
- Organization of water drainage in the summer shower
- Conclusion
- Regarding the water tank
- How to build a summer shower with your own hands
- We draw up a project
- Foundation preparation
- Finishing Tips
- Foundation laying
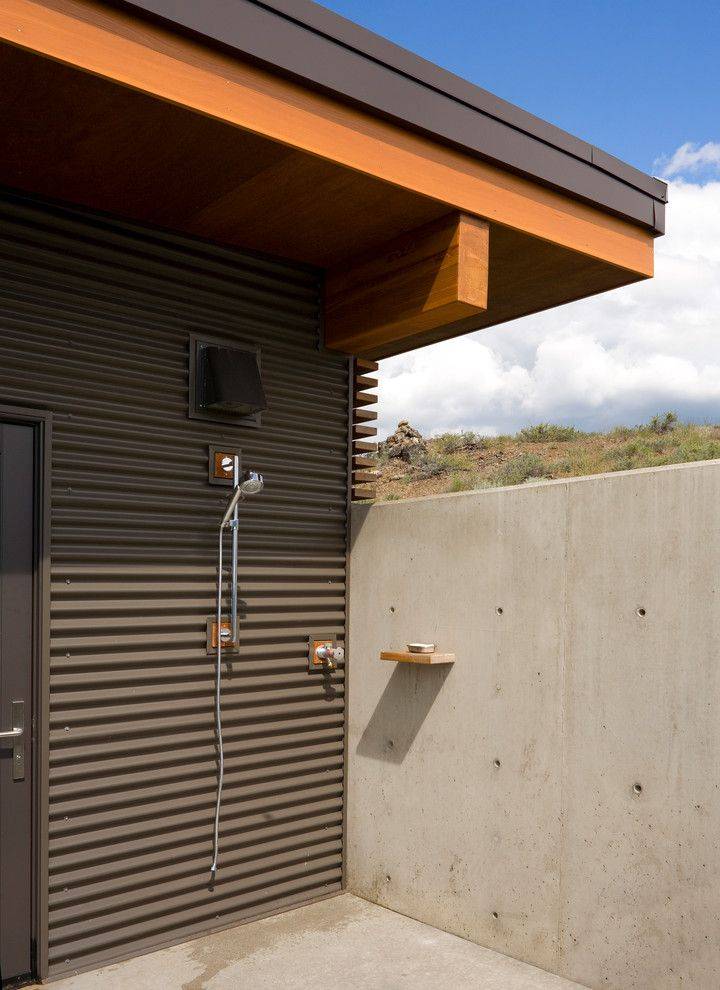
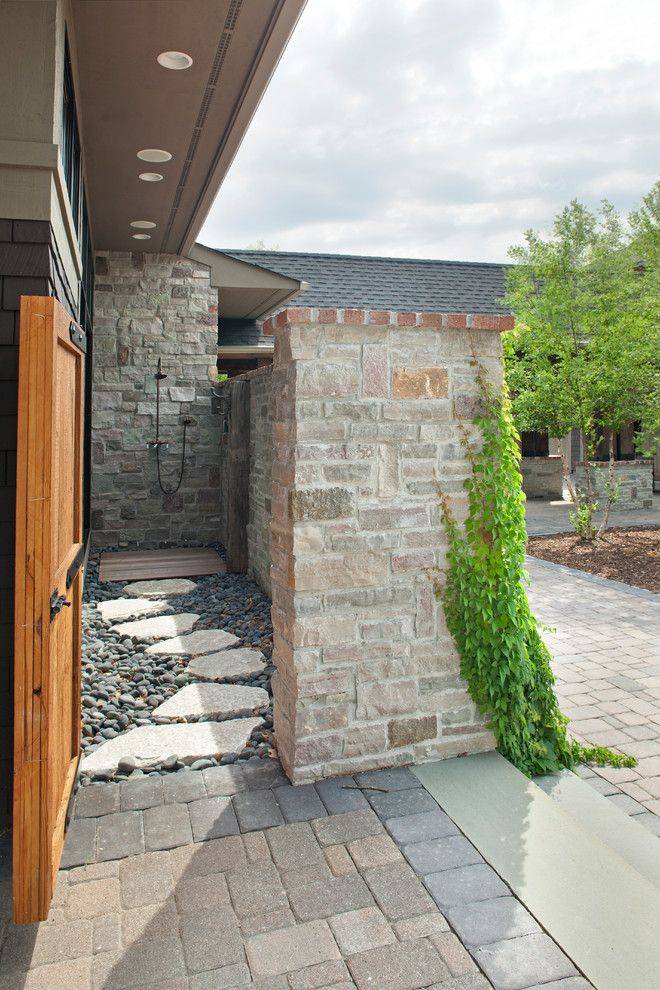
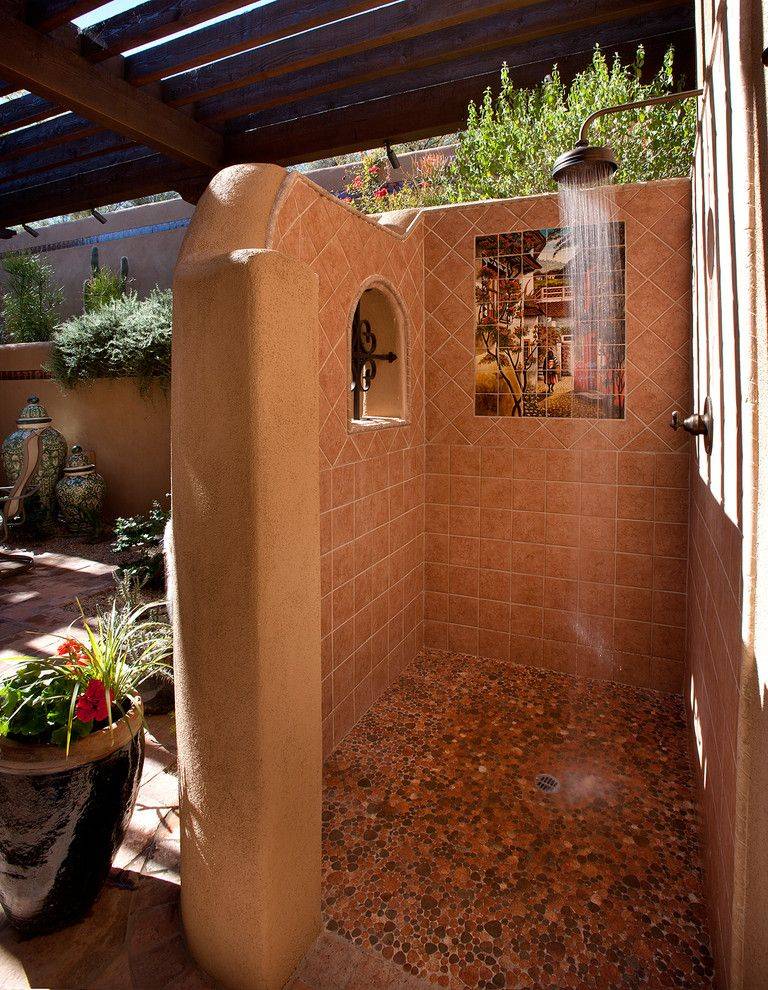
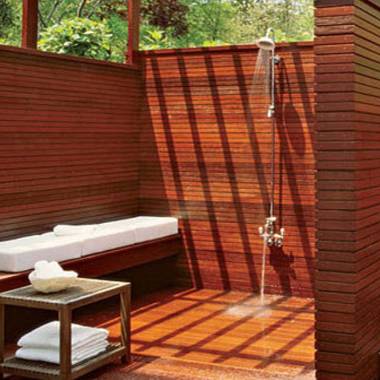
- Arrangement of a summer shower in the country
- Conclusion
Stage five
Rear wall assembly
This stage is best done together with an assistant.
We carefully look where we have the right and left walls.
Option for assembling rear walls framed with profiles
We put the glass and the central panel on the pallet, and with the help of self-tapping screws or bolts (depending on the manufacturer), we fasten the side walls to the central panel.
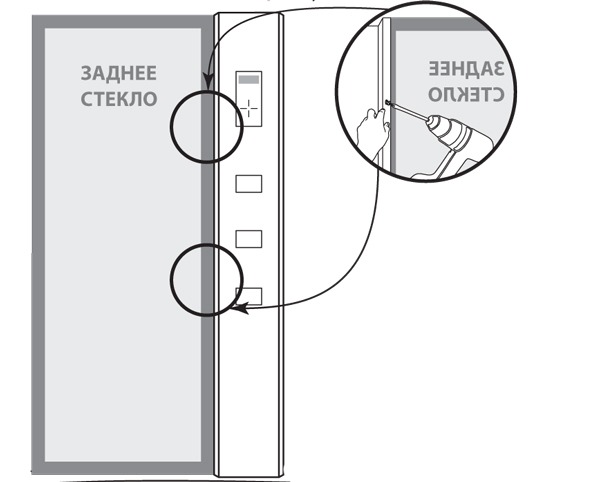
Lubricate the joint between the center panel and the side walls with silicone sealant.
Option for assembling the rear walls on the corners
1. Place the right and left glass on the pallet and fix it with self-tapping screws by installing the side corners at the top and bottom

2.Install the center post between the rear walls
3. Through the guide holes on the sides of the rear walls, connect the center post to the walls with self-tapping screws, fixing the side corners at the top and bottom.
Basic requirements for a country shower
An outdoor shower must first of all be safe for the user. The requirements are quite simple:
- The structures must be strong, the water barrel is securely fixed. In strong winds, it should not swing.
- All electrical appliances and cables in the wet area are protected from water ingress.
- Contact of a person with hot surfaces is excluded.
- The platform or pallet is made of non-slip materials.
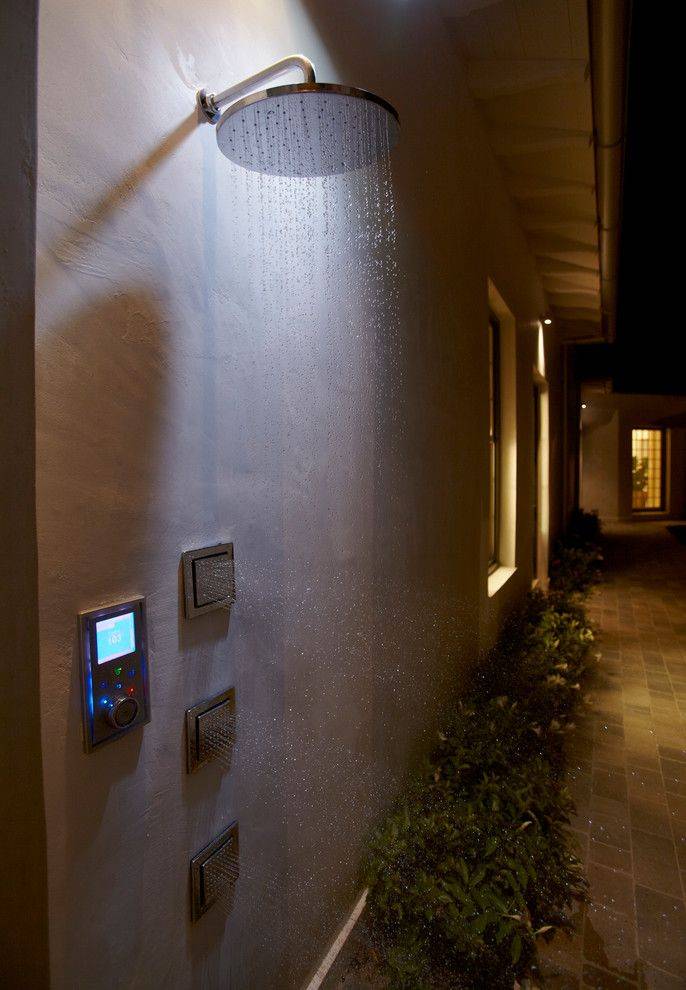
- Provides natural or artificial lighting.

You also need to think about convenience. For ergonomic reasons, the smallest dimensions of a summer shower:
- height - 2000-2100 mm;
- width - 800-900 mm;
- depth (so that you can wipe yourself with a towel) - 1100 mm.
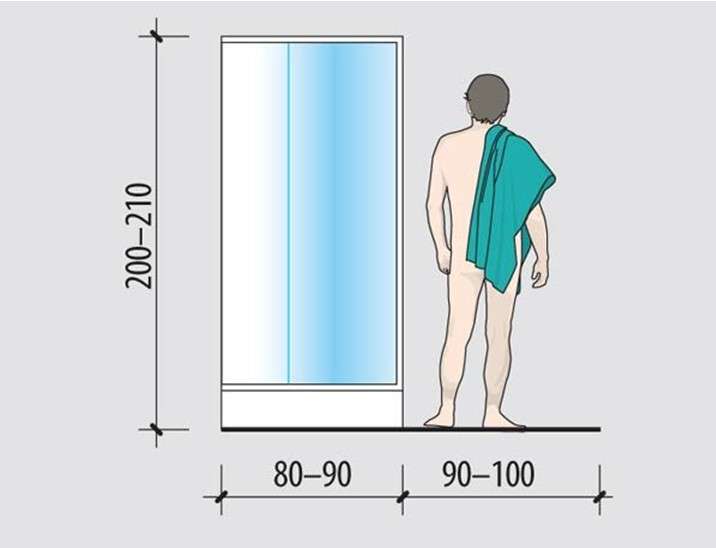
Do not make the cabin small. The saved centimeters practically do not affect the construction budget, but it will be inconvenient to use a cramped shower.
It is better to choose a place for construction on a sunny site, sheltered from the wind, not in a lowland. It is necessary to ensure the supply and discharge of water, as well as heating it with firewood or electricity to a comfortable temperature. It is desirable to protect the booth and arrange a place for changing clothes. To avoid dampness, provide natural ventilation.
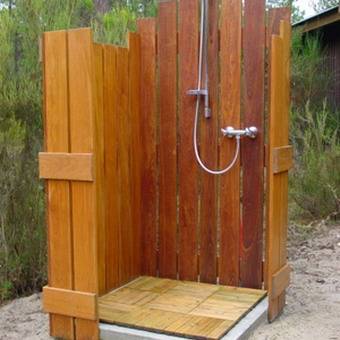
We build a summer shower
Getting down to practical advice, let's try to build a simple, but aesthetically beautiful and comfortable outdoor wooden outdoor shower for summer cottages, with a minimum consumption of materials.
It's nice to cool off with a cool shower on a summer evening.
Do-it-yourself summer shower is not only an oasis in the hot heat, but also a flight of your imagination
Let's cook:
- boards and slats
- shower set (faucet, curved tube, bracket, adapter and nozzle)
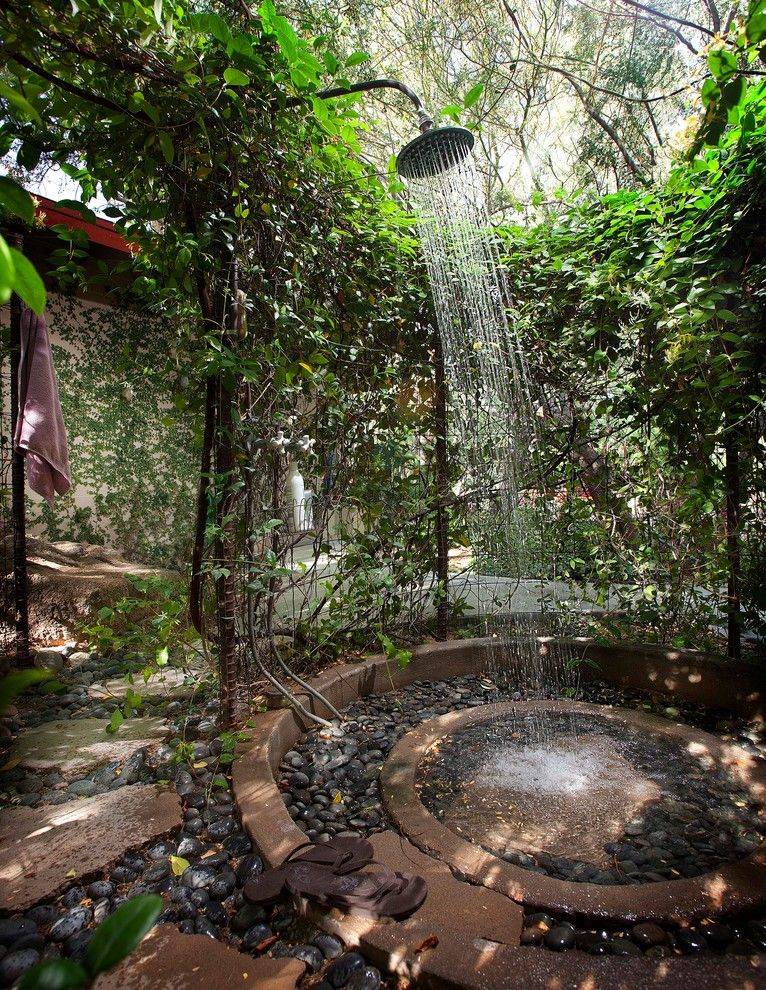
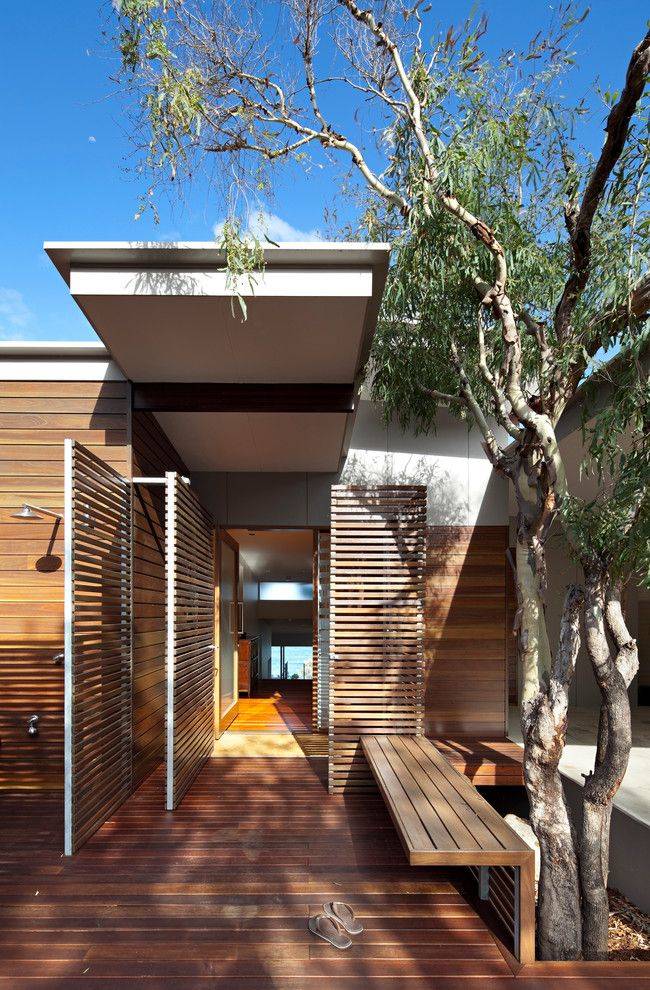
Climbing plants can be great walls for a do-it-yourself summer shower
- garden hose
- self-tapping screws
- fasteners

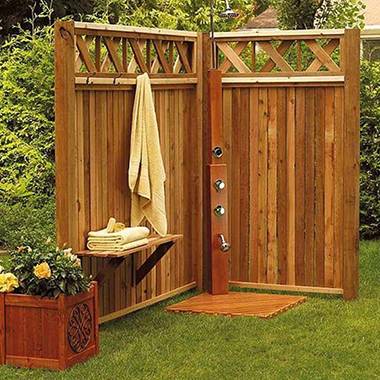
Outdoor shower with tub
Boards for the floor of a summer shower must be treated with special means
The figure shows the dimensions of each part of the shower.
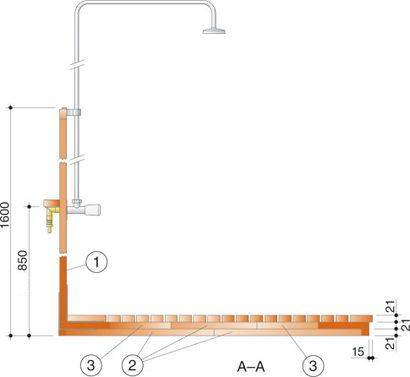
Rice. one
Rice. 2
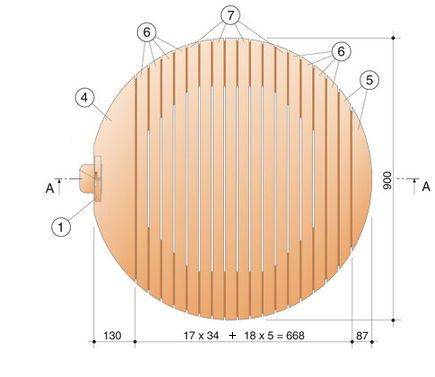
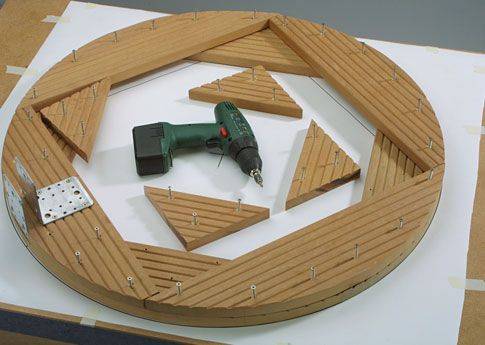
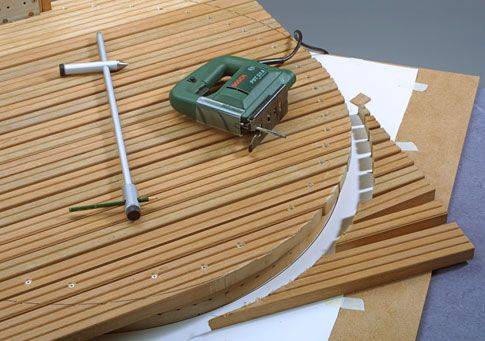
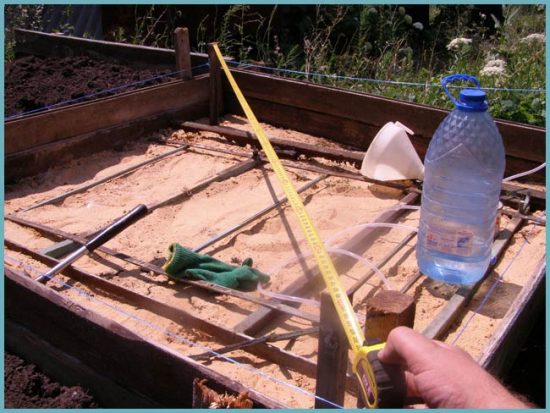
The next step is to assemble the pallet. Since the pallet is round, we need a drawing.

![[instruction] do-it-yourself shower in the country: dimensions and drawings](https://fix.housecope.com/wp-content/uploads/9/2/5/925ec556a4916ce184eb4f1cb2d3413e.jpg)


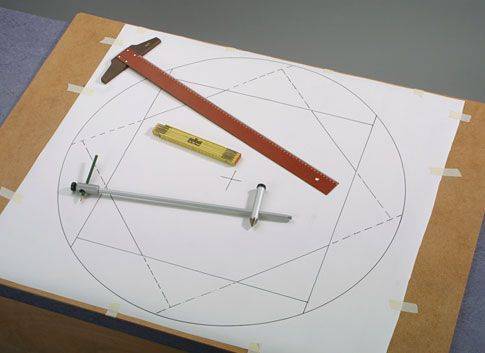
Rice. 3
We assemble the structure in three stages:
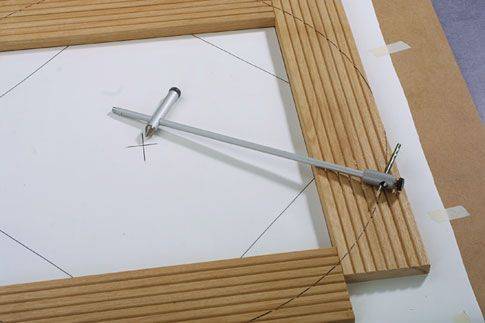
From four boards we make an inner square.
Rice. four
We draw a circle on them.
Rice. 5
We saw off the parts of the boards that go beyond the circle with a jigsaw.
Stylish outdoor shower

Wooden shower cabin - a beautiful and durable option
We impose a second layer of boards diagonally to the first, draw a circle on them and saw off the excess parts.
Rice. 6
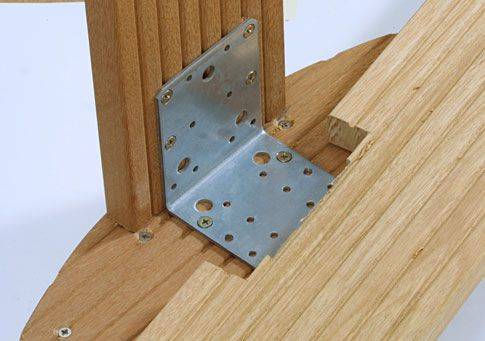
We put a mount for the shower support. We attach one part to the first layer of boards, the other to the second. We have a gap where we will insert the shower rack.

Rice. 7
We tighten both layers with self-tapping screws.
Rice. eight
Installing the support.
Rice. 9
We complete the pallet finishing by laying the top layer of slats. We repeat the operation with drawing a circle and sawing off excess parts.
Rice. ten
- We fix the pipe to the rack with a bracket.
- We mount the remaining parts of the shower set on the support. We fasten the atomizer to the top of the tube. In the lower part we fix the mixer and the adapter. Connect a garden hose to the adapter.
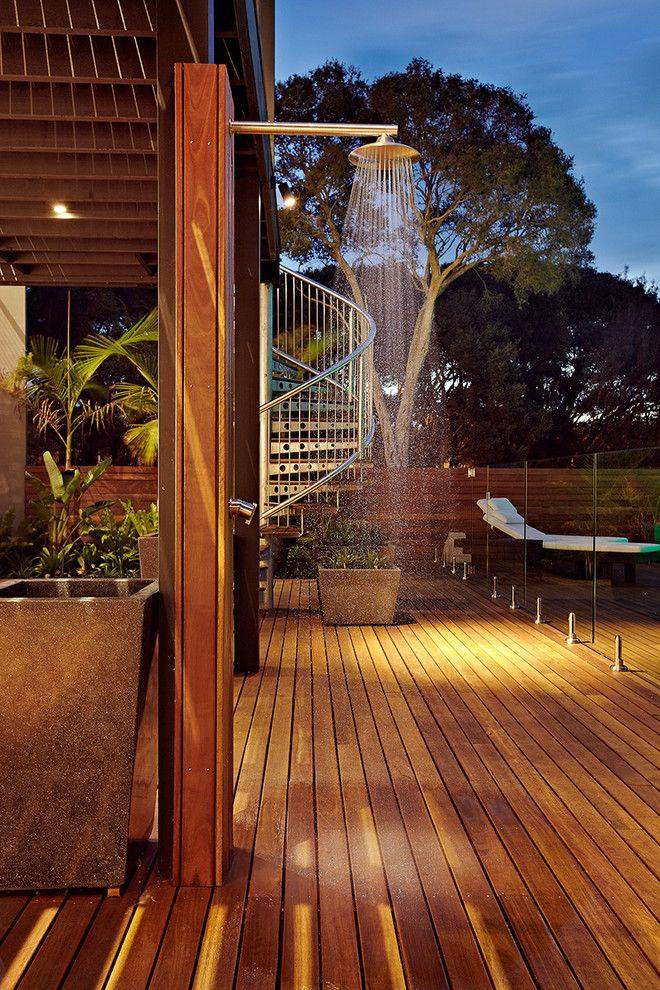
Summer shower with beautiful tiles and plant decor

Summer shower with a decorative path to the house
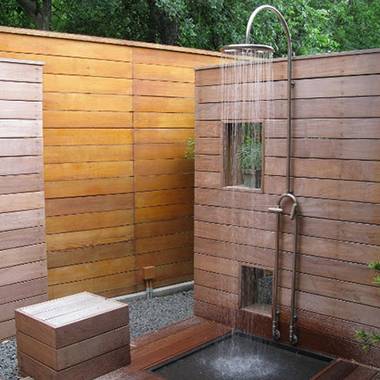
Summer shower with hydromassage
For adherents of solid buildings, we offer to build a capital summer shower. Let's prepare the tools:
- hacksaw
- a hammer

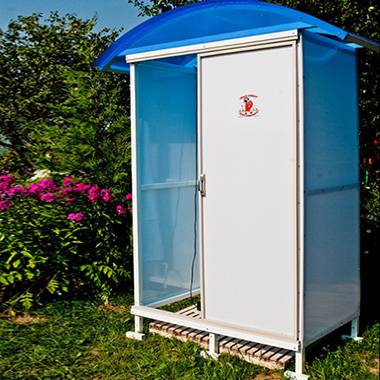
If you do not have the opportunity to build a summer shower for a summer residence with your own hands, then a portable summer shower with bottom water supply
- level
- drill
- Bulgarian
Summer shower at the entrance to the house
- concrete mixer (tank for mixing cement mortar)
- shovel
- Master OK
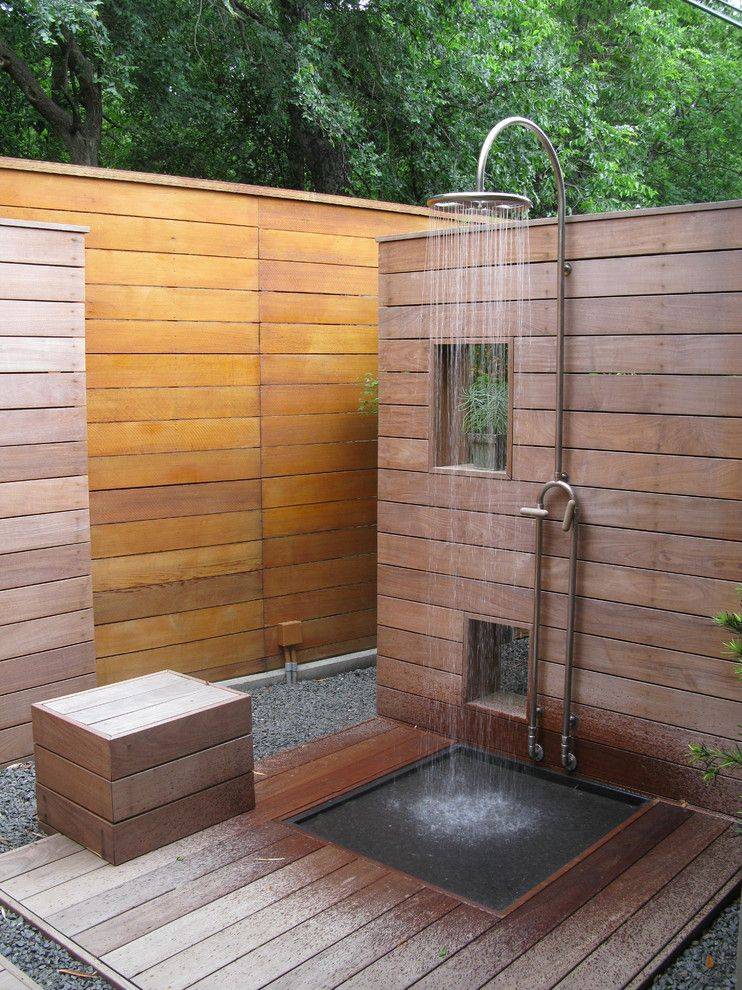
Outdoor shower with decorative stone floor

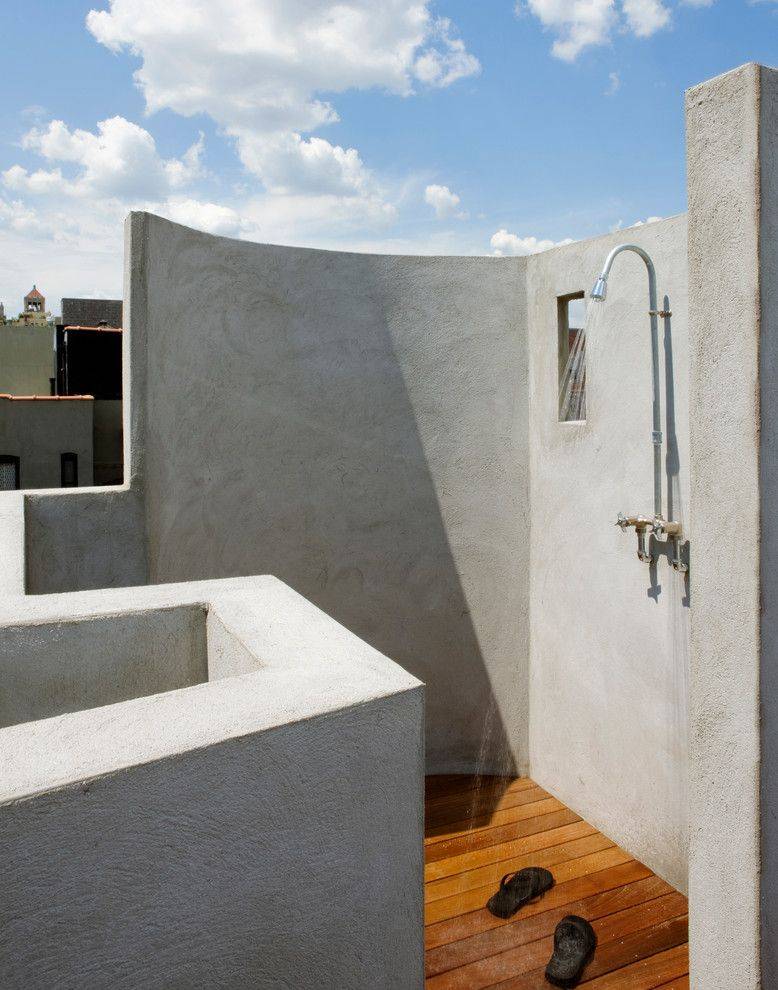
The design of such a shower room will not only allow you to freshen up on a hot summer day, but also bring aesthetic pleasure.
Construction begins with the preparation of a pit for the foundation. We dig it according to predetermined sizes. Carefully align the walls and bottom of the pit.


We expose the formwork with a margin on the walls of the shower cabin. Mix and pour the solution. We wait until it is completely dry, and proceed to the construction of the shower walls.
An outdoor shower is one of the essential additions to a suburban area.
We mark the masonry, lay out three walls in half a brick, using a level and a plumb line.
When laying the walls, do not forget to leave a ventilation hole at the bottom of the shower and a niche for a small window closer to the ceilings.

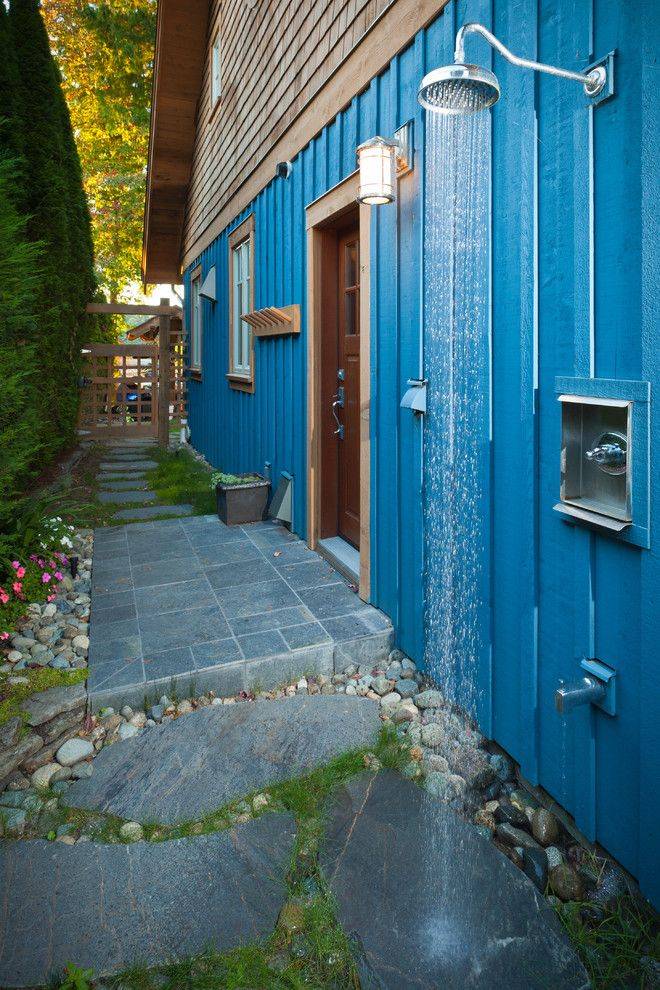
Summer shower near the wall of the house with water from the public water supply
We lay floor bars along the upper row of bricks and securely immure them.
We close the floors with a layer of waterproofing material and slate, having previously made a hole in it for the pipe.
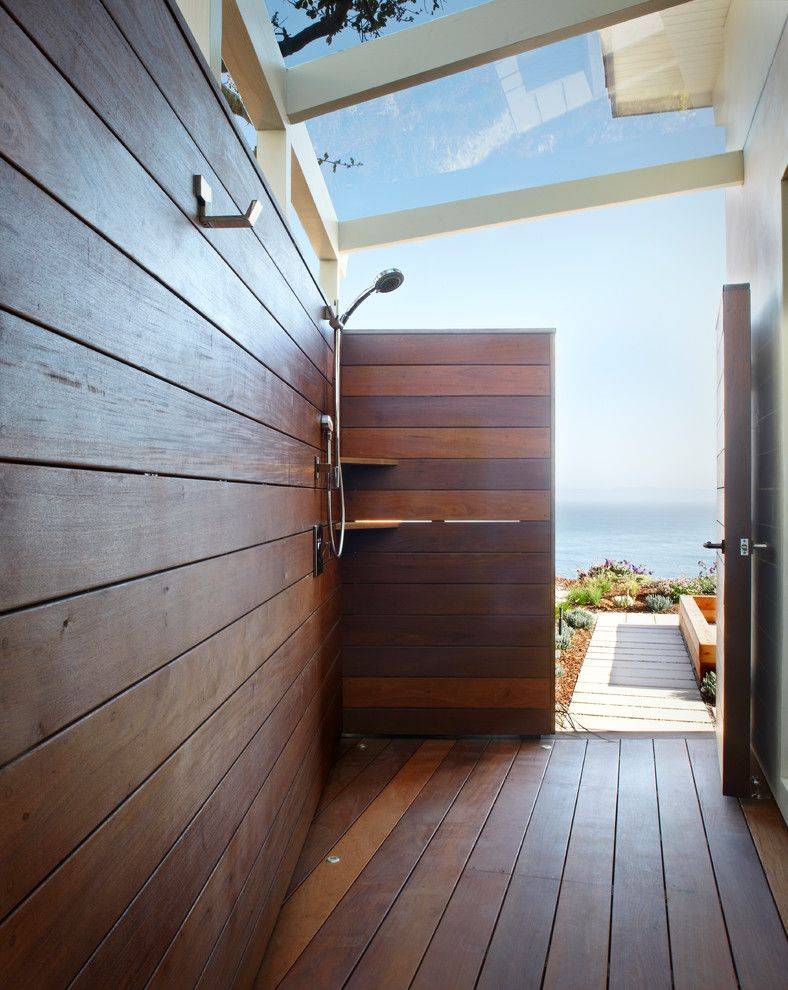
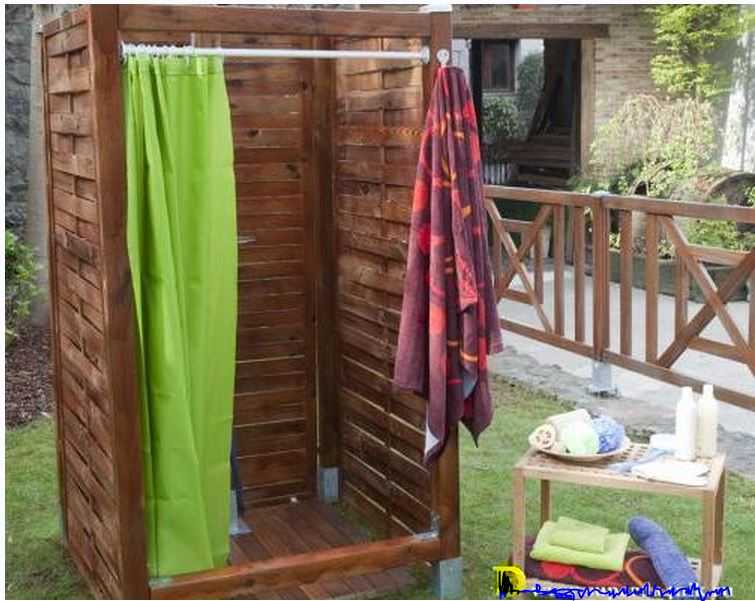
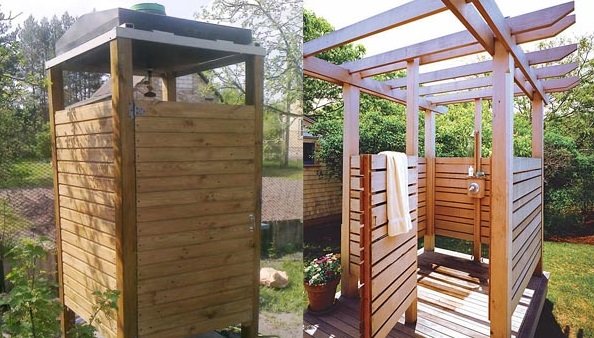
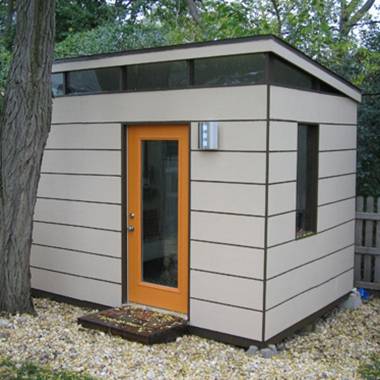
Summer shower made of wood in a modern style
An outdoor shower is one of the household facilities necessary for a comfortable pastime in a suburban area.
Let's start finishing work.The ceiling and walls can be plastered and tiled, you can use plastic fastening to a metal frame.
We run a drain pipe along the bottom. We make a frame from a metal profile or wooden bars. We lay out the bottom with wooden slats or plastic tiles.
We insert the door frame into the open wall of the shower, fasten it to the bolts, fill it with mounting foam and hang the door.
Shower panel stone wall decoration - a versatile option
Now you have an accurate idea of how to build a summer shower for a summer residence and what is needed for this. You do not have to follow our exact instructions, you can paint the shower, use other finishing materials. For an open version, you can install a frame with a curtain, and in the capital model you can do without a door, replacing it with a sliding wooden or plastic curtain.
A do-it-yourself summer shower will become an indispensable outbuilding on a personal plot
We offer you to watch interesting ideas for a summer shower in this video:
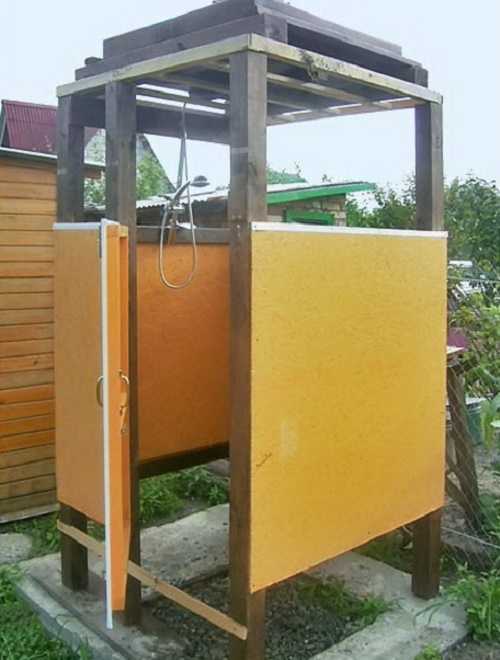
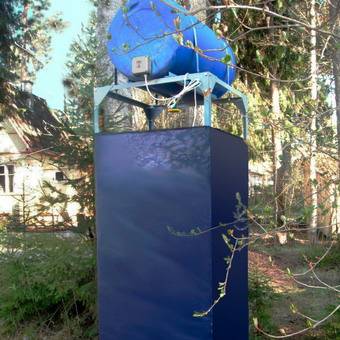
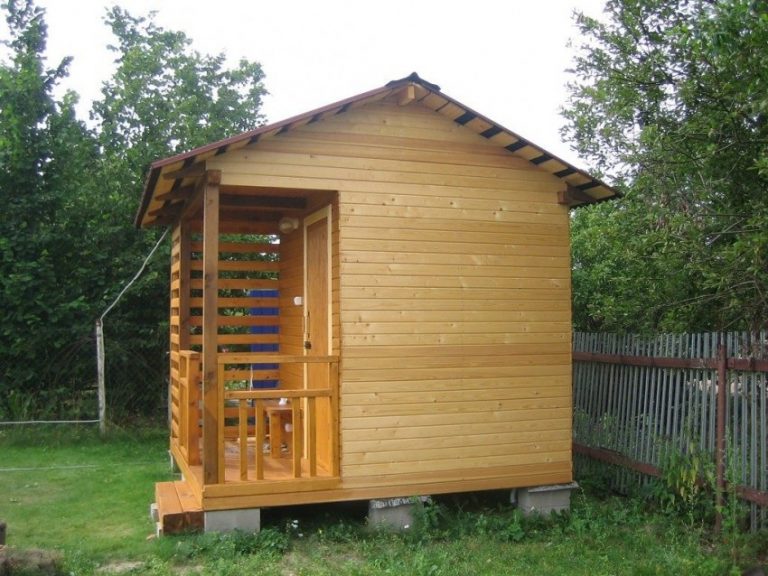
Outdoor Summer Country Shower
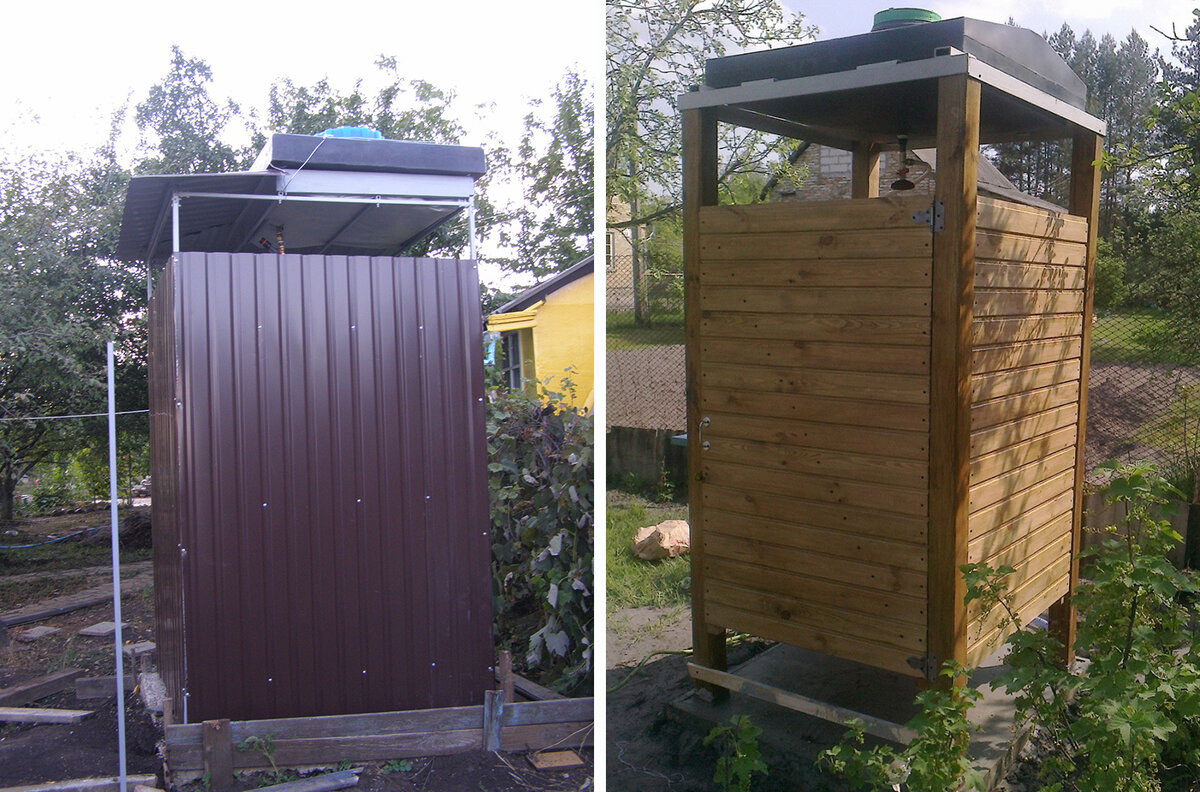
The seasonal outdoor shower is a lightweight non-insulated structure.
Its device does not require large costs and time. It is possible to purchase a ready-made shower cubicle.
This type of shower in the country is widely presented for sale in different variations. You can choose any type and model.

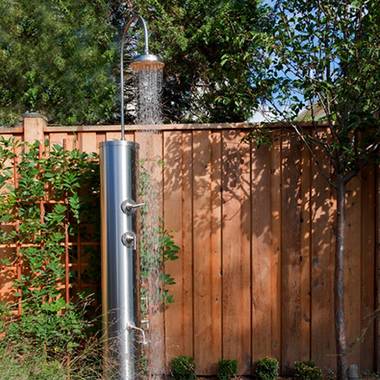
Such a summer country shower is easy to build on your own. It can be attached to the household unit or placed separately. The simplest option for a summer shower is a construction that does not require construction and consists of a tank with a handle and a tap, a hose and a shower head.
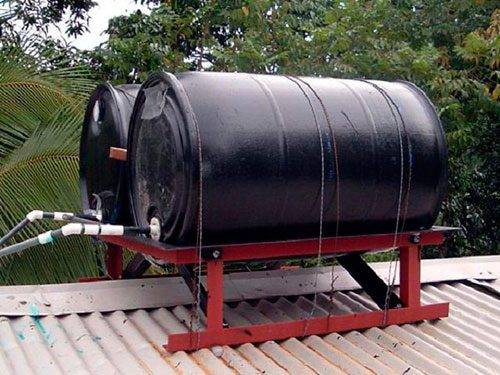
As you can see in the photo, in the summer garden shower, the tank can be placed at the required height in any place where the water will be heated in the sun:
After that, put a hose with a shower head on the end of the faucet.
If a there is no suitable horizontal a crossbar on which a water container can be hung at the required height, then its supply can be ensured in another way. It is recommended to install the tank at the bottom, and supply water to the shower head using a special shower pump.
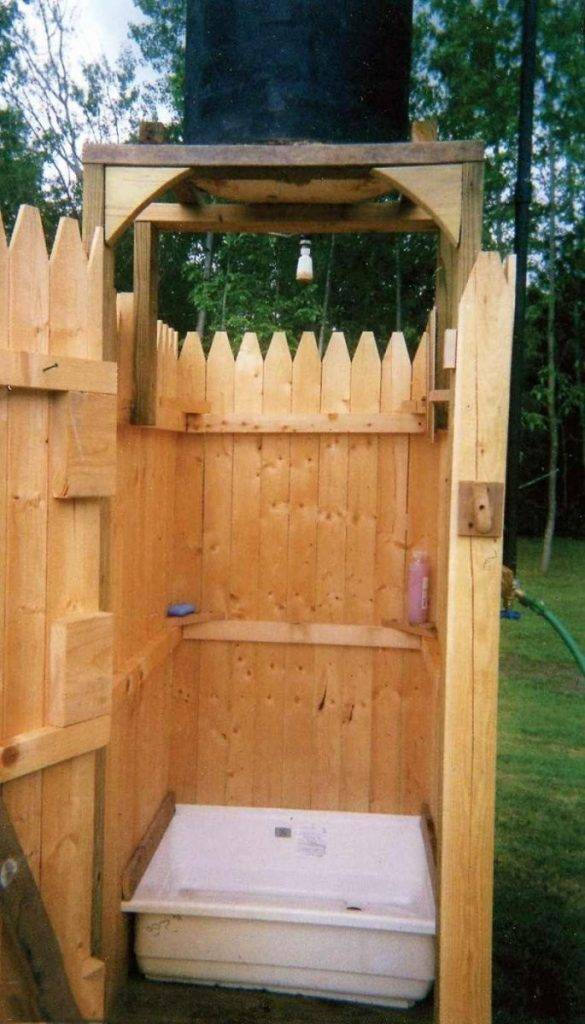
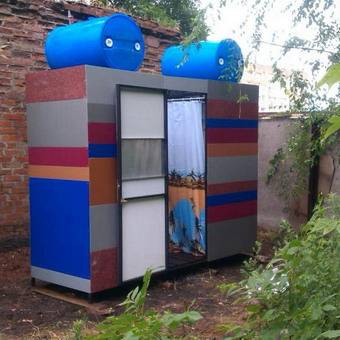
To build this type of summer shower, you must first fence off the site. A metal or wooden frame should be folded on it, which can be covered with any material at hand.
It is necessary to install four pillars, fix a water tank above them, which is equipped with a shower net and a valve, and stretch fabric, opaque film or tarpaulin between the pillars.
If, instead of a large water tank, small containers (10-40 l) are used, then pillars or a frame for a shower stall are not required.
Containers filled with water should be brought into the shower and hung on a nail.
It should be borne in mind that in such a design of a country shower, the water will not have time to warm up, so not everyone will like this type of summer shower. It would be better to install a stationary tank. It is desirable to make the slats load-bearing, fixing them crosswise. In the longitudinal direction, the bars will work in compression, they are able to withstand up to 500 kg. For a light shower design, a tank of 50 or 100 liters is enough.


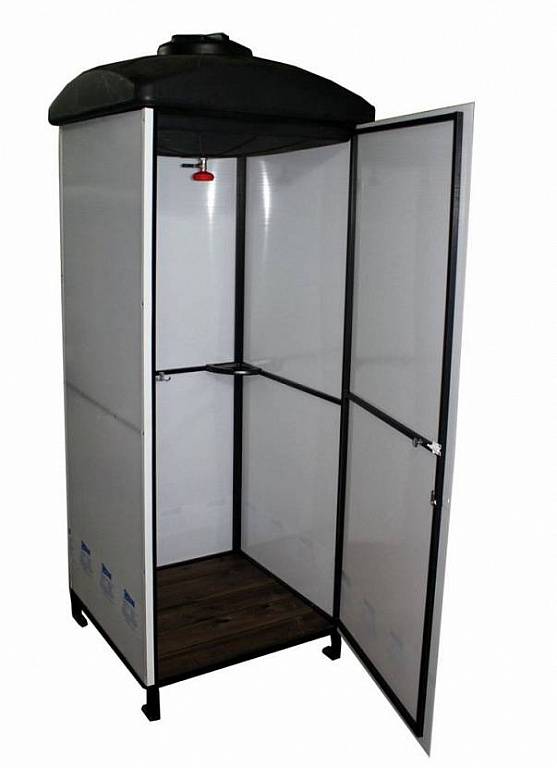
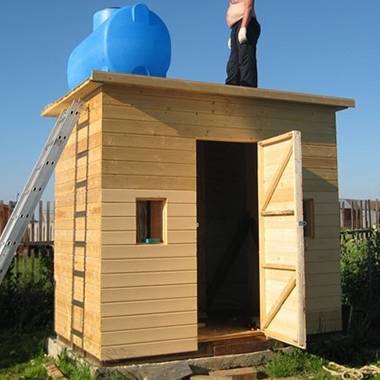
Look at the photo - for a summer shower in the country, you can use a light and flat plastic tank, preferably black, as a water tank:
In summer, in the sun, the water in such a tank will quickly heat up to a comfortable temperature.In the fall, the tank should be removed and put away in the pantry or utility block.
If, when using a summer shower for a summer residence, a small amount of water is consumed, then you can not build a pallet, but simply put a wooden grate under your feet, after sanding it with a sandpaper and soaking it with an antiseptic. In the absence of a suitable grid, you can use a rubber mat.
There is another simple design option for a summer shower in the country: if there is a shed or utility block on the site, then you should attach a cabin (2 × 2 m) made of boards to it and install a tank or other container at the top for heating water. From the tank it is necessary to divert a hose with a tap and a shower horn. Water will enter the tank through a rubber hose. for irrigation from faucet or using a pump from a bucket or well.
In addition, you can build a summer garden shower for a summer residence with a float intake. This design will allow you to use water only from the upper, well-heated by the sun layer. It must be equipped with a faucet driven by a foot pedal, which will save water.
These are the easiest ways to arrange a summer shower. If the shower is planned to be used throughout the season, then the design should be more durable and capital, in such cases it is recommended to opt for the construction of booths on the foundation and with a modernized drain system.
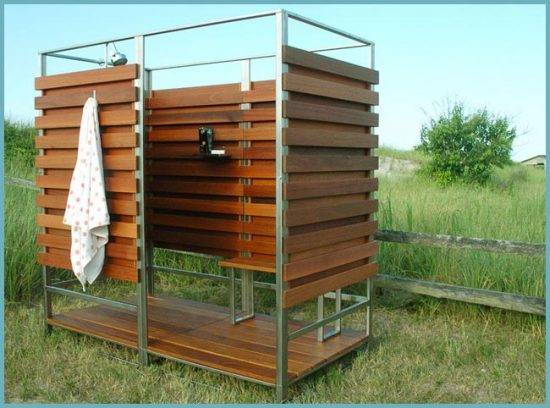
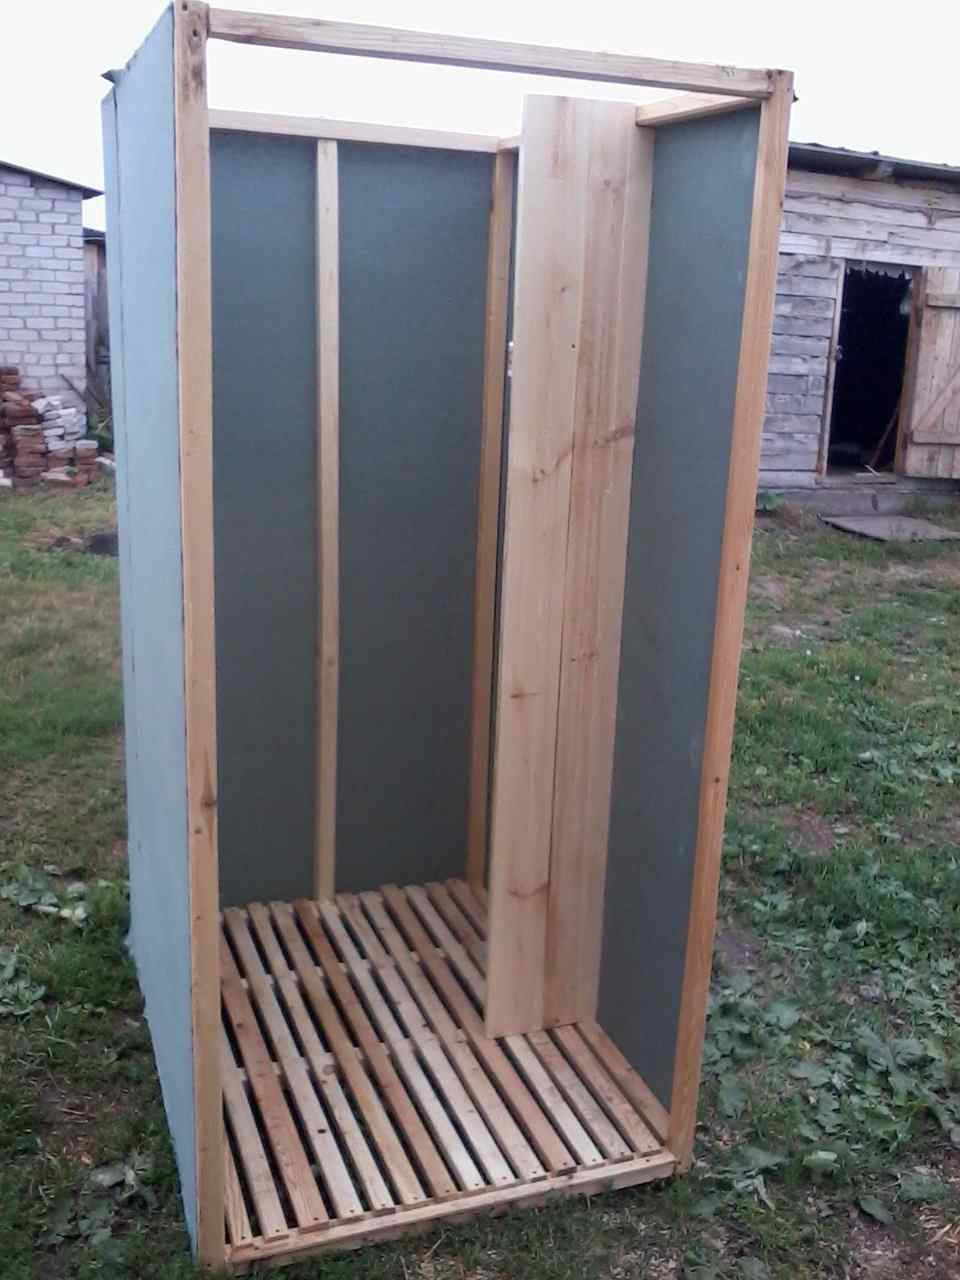
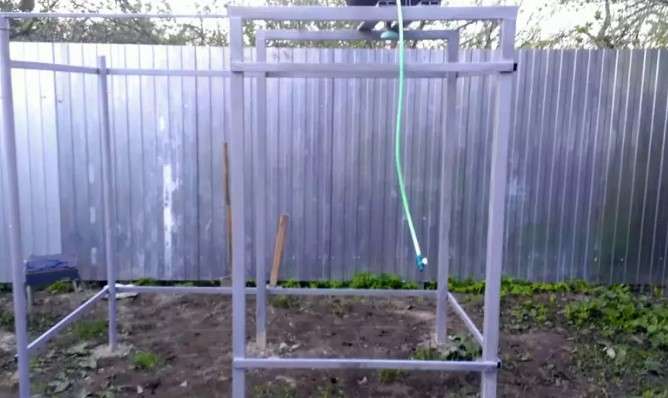
Wireframe creation
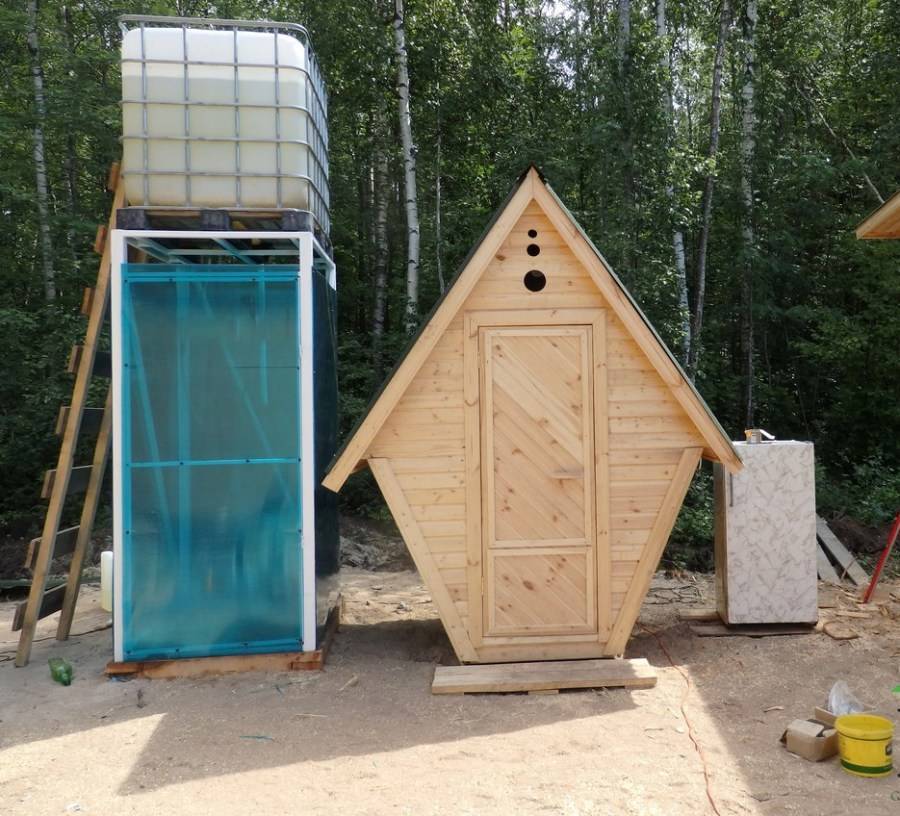
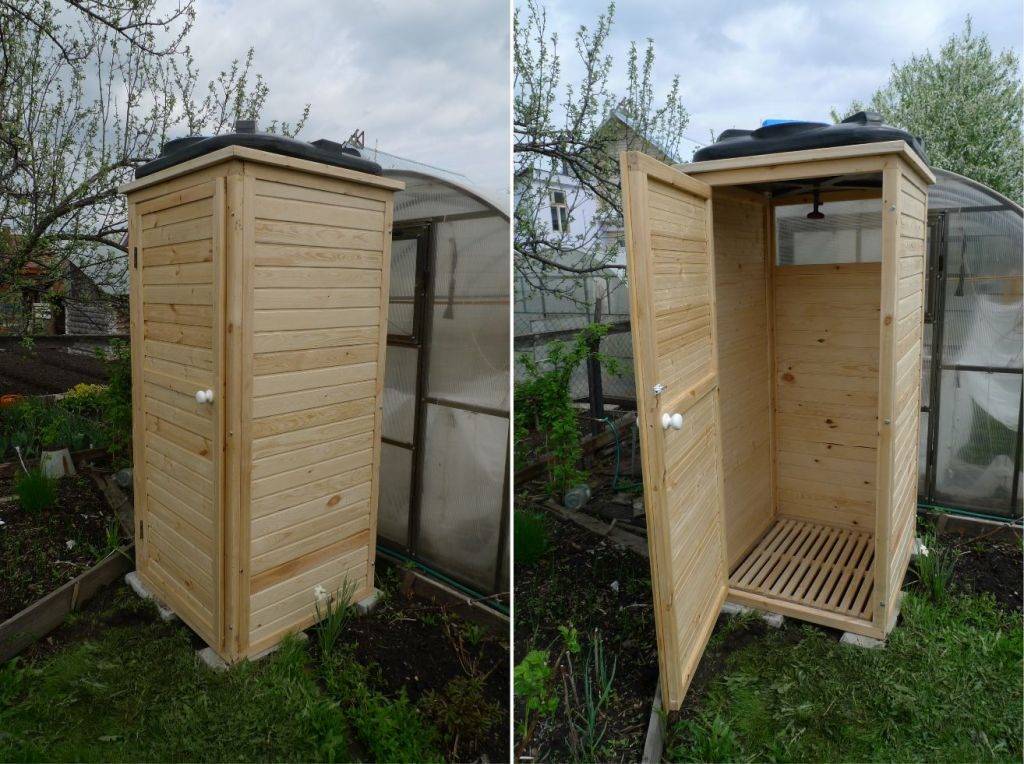
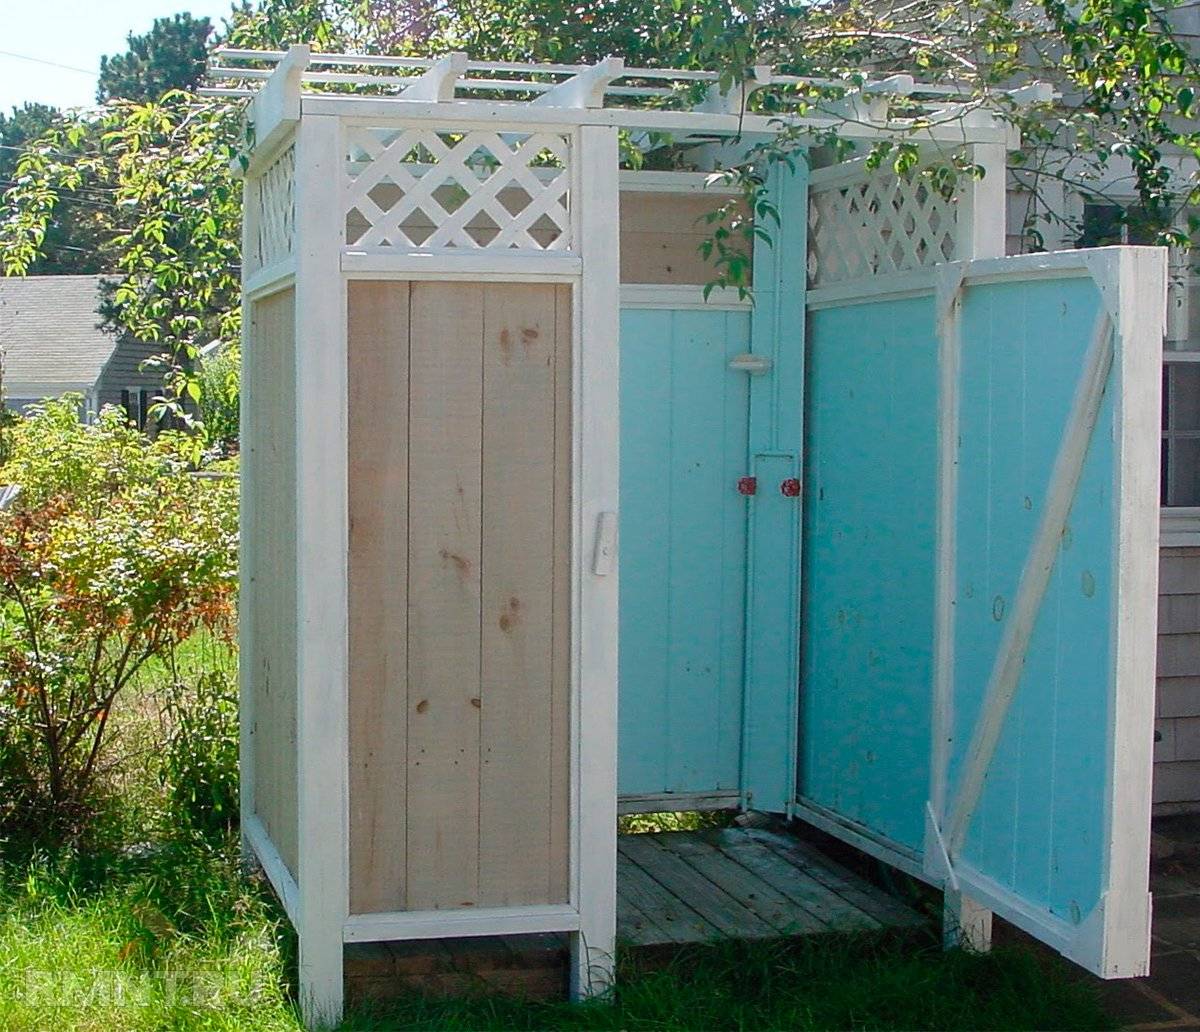
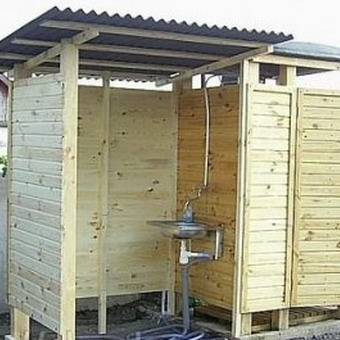
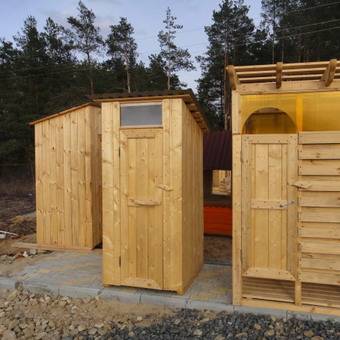
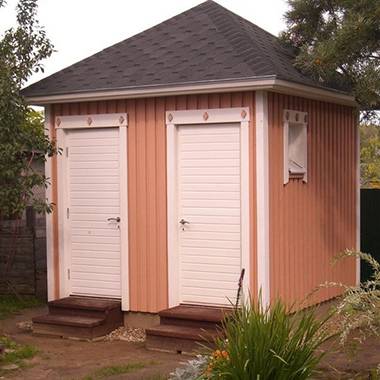
The summer shower does not have standard sizes, as many home craftsmen prefer to make a design in two parts. In one of them, according to the drawing of the country shower, there is a shower stall directly, in the other compartment they equip a locker room or install a water heater.In some cases, together with a shower, they equip a small pantry for storing inventory. As a result, the shower in the country house is a structure consisting of a shower cabin and an additional utility room.
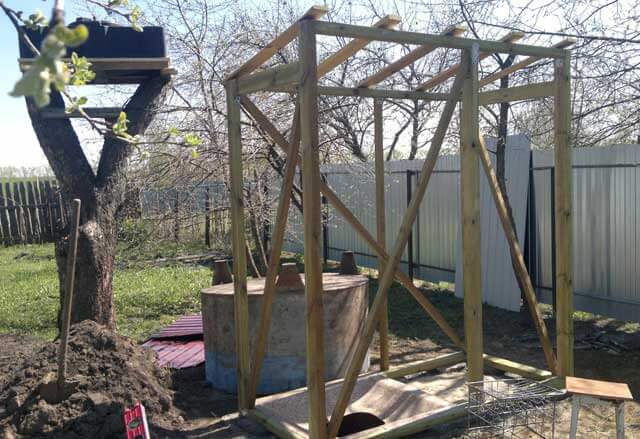
When creating a lightweight design intended for washing only, you can choose a simplified version. It involves the construction of a frame for three walls, and a curtain will replace the fourth wall. Such a shower can be small in size, about 1 meter in width and length or a little more, the height of the cabin depends on the height of the residents. A design with such dimensions is most convenient for washing all family members.
Arrangement of the interior
Wooden shower for giving
For a calm adoption of hygiene procedures, it will be necessary to organize a drain of water. To do this, use ready-made shower trays or a home-made lattice made of wooden slats.
We collect a pallet from wooden slats

The wooden grate will prevent the accumulation of water
For making pallets use dry wooden slats with a width of at least 50 mm.
The pallet is assembled in the following sequence:
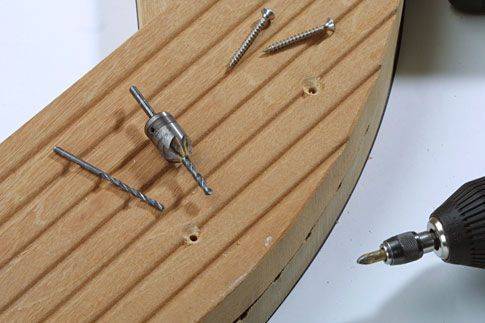
1 Using a jigsaw or a circular saw, cut the slats of the required length
2Carefully processed with a grinder
3Coated with several layers of any antiseptic to prevent the development of fungus and mold
4 The slats are laid on the lower crossbars of the metal frame. For draining water leave a small gap between them
5 All elements are securely fastened with self-tapping screws to the frame
6 The finished pallet is covered with several layers of varnish
7 If the shower cubicle is large, the grille is mounted on a pre-prepared frame of perpendicular crossbars.
A rubber mat placed on top of such a grill will provide a comfortable acceptance of procedures.
We install the finished pallet

Installing a ready-made pallet greatly facilitates the disposal of used water into the drain pit
For arranging a shower in the country, you can use a ready-made pallet. It is especially useful when the drainage pit is installed next to the shower. In this case, the installation of sewer pipes will be required to drain the water.
However, the installation of the finished pallet must be provided for at the stage of welding the metal frame. Installation of the finished pallet will be facilitated by additional profile pipes welded to the base of the shower stall. A pallet is installed on them.
Building a summer shower in the country with your own hands is not at all difficult. A little effort - and you can comfortably take procedures even on cool and cloudy days.
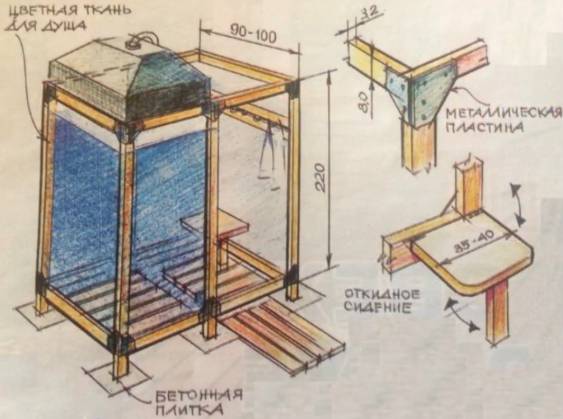
How to make a summer shower in the country with your own hands (with dimensions)
Do-it-yourself summer shower in the country: step-by-step instructions for construction and arrangement | (30 Photos & Videos)
9.3
Total Score
Step-by-step instructions for building a shower in the country
Availability of application
9
Topic disclosure
9.5
Relevance of information
9.5
Buyer ratings: Be the first!
Installation of a tank for a shower, water supply and heating
The choice of tank should be approached very carefully. In this case, it is worth considering some recommendations of professionals:
- Metal containers heat up faster in the sun. Plastic containers are distinguished by their durability, due to resistance to corrosive processes. They also have a small weight, which will reduce the load on the frame.
- The water tank should be painted in a dark color, which will speed up the heating. This is ensured by better heat absorption.
Most often, the shower tank is dark in color.
- The tank must be sealed to prevent dust and dirt from entering the water.
- Before installation, holes are made in the tank for a tap and a water supply.
Today in the store you can find ready-made designs that have a watering can, tube, faucet and fittings in their kit. A sensor for monitoring the water level and its temperature will not be superfluous. The container is installed and fixed on the prepared frame.
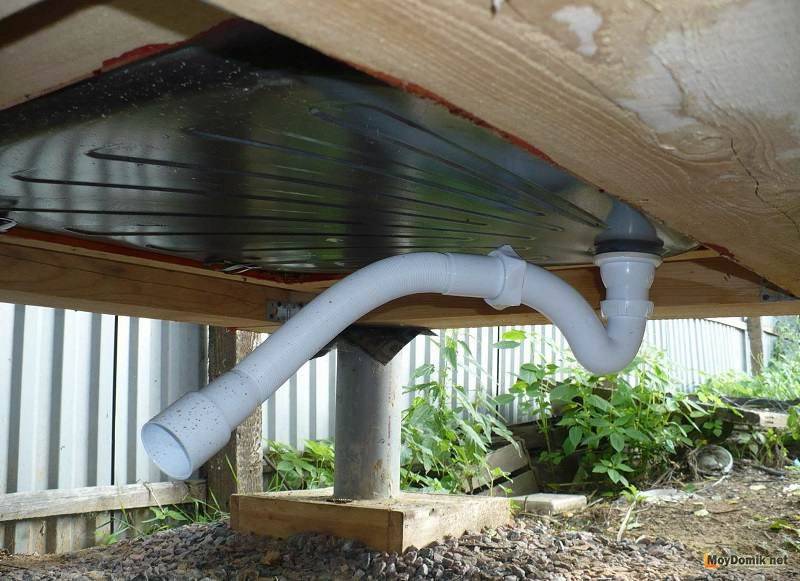
Water pipes are used to supply water to the shower:
A trench is being dug at the pipeline site. Its depth should be greater than the level of soil freezing. This will protect the system from frost.
The pipeline is going
Particular attention is paid to the junction of pipes. They must be tight and secure.
At the end of the line, a water tap is installed, with the help of which water will be supplied to the pipeline.
The pipeline is insulated with mineral wool and laid in a trench. If it is necessary to supply electricity, the electrical cable is buried in the same trench with the pipe. This will make the job easier.
At the final stage, the pipeline is connected to the water source and to the storage tank. In the latter case, polyethylene pipes or a garden hose can be used.


Water tanks can be installed separately - in this case, you can increase the volume of heated water
If necessary, the garden shower can have independent water heating. A common option is to install heating elements. Also, heating is carried out using boiler or gas boiler small power. When installing these heating elements, safety requirements should be taken into account.
Solar panels are also used for heating. This is a glass box with a coil inside. With its help, a greenhouse effect is created, which leads to water heating.
Video description
And a few more options for arranging a summer shower in the following video:
Organization of water drainage in the summer shower
There are several ways to arrange a drain in a summer shower. So, water can be diverted to a filtration well or in the filter field. In the latter version, channels are arranged between the beds. This will allow you to simultaneously irrigate the site at no extra cost.
Withdrawal is carried out in an open and closed way. In the first option, ditches are made at a slight slope from the collection point. Often this option is used on moisture-resistant soils. The closed method involves laying pipes in the ground.
It is necessary to decide where the used water will drain, given that it will be soapy
Conclusion
A summer shower in the country is an inexpensive, but in any case, useful design, which is quite simple and does not take long to install. Even if you have not quite decided on the material and design, you can always additionally consult with a manager in a store or a construction company who will tell you incomprehensible nuances and help you make the right choice.
Regarding the water tank
You can buy a water tank or build your own. Each of the materials and options has its pros and cons.
-
Plastic. Plastic shower tanks are available at any hardware store, are inexpensive, and fairly easy to install. Of the minuses - as they say in the saying "the miser pays twice."A lot of reviews say that low-quality Chinese-made plastic tanks can easily be deformed under the influence of sunlight, burst and become completely unusable. Therefore, if you take a plastic tank, then only high-quality, preferably Russian or foreign production.
-
Metal. There are also metal water tanks on sale. These can be both light options made of a thin sheet of stainless steel, and more durable ones made of steel. However, they are expensive, and with straight arms you can make a much better and more durable option yourself. The design of the tank is quite simple - it is a metal bath with a central drain, at the end of which there will be a tap in the future. The walls and "ceiling" should not be too thick (so that the sun has time to heat the water), but not too thin (so as not to get a flimsy tank). Such a tank is brewed in about 30-40 minutes.
Also, as a future tank, you can easily use some kind of metal barrel, having previously cleaned and washed it from dirt and sediment. If you decide to make the tank yourself, after all the welding and cleaning work, do not forget to paint it black. As you know, black surfaces heat up much faster than painted in a different color.
The volume of the tank must be calculated based on the needs of the family. For one or two people, 40-50 liters is enough. If in the evening 3-4 people want to rinse, then it is worth looking after a tank with a volume of more than 150 liters. Also, do not forget to compare the dimensions of the tank with the approximate dimensions of your future shower.
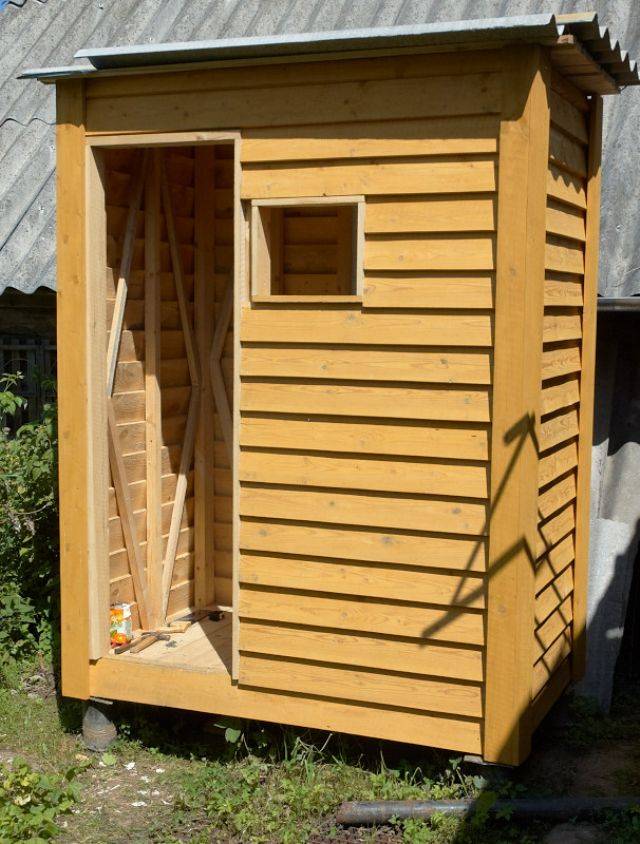
How to build a summer shower with your own hands
Summer shower occupies one of the first places among all summer cottages.Sometimes this is not just a way to wash up after a day of cultivating the land has come to an end, but also the only way to cool off in the heat.
 To build a summer shower, choose a place well lit by the sun
First you need to choose a place to install a shower structures. To do this, you should study your site for secluded places.
On the other hand, this place should not be far from the main building, so that you do not have to freeze on the way to a warm house if you decide to take a shower on a cool day.
After you have found a suitable place, choose the optimal dimensions for your cabin. Please note that a person needs a room of at least 1 m2 for ease of movement. If a dressing room is planned for changing clothes and storing dry things while bathing, the building is increased by another 60-70 cm. The height of the shower cabin is approximately 2.5 m. So, the estimated dimensions of the shower for giving are 170x100x250 cm.
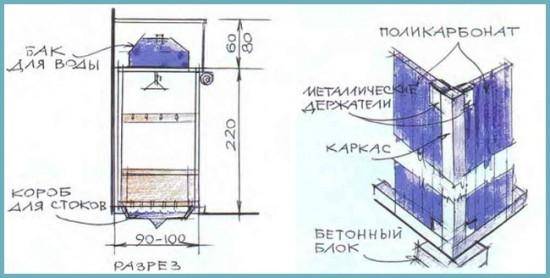 Scheme: construction of a summer shower cabin made of polycarbonate
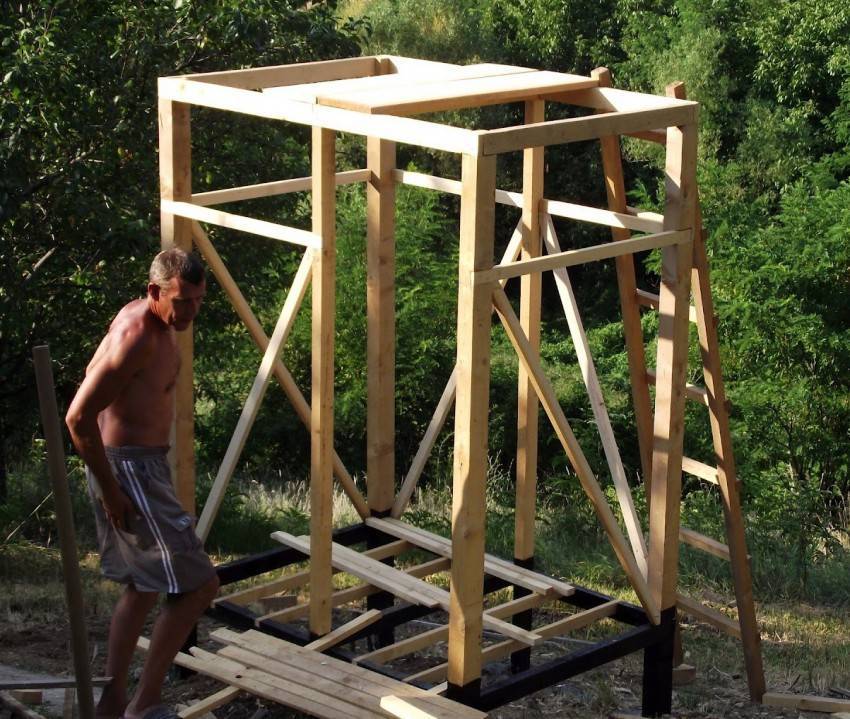
If the structure is supposed to be wooden, then the next stage of construction will be the construction of a frame from a wooden beam or a metal corner.
Next are the walls. Please note that for better ventilation, the walls should recede from the ceiling and the pallet by at least 20-30 cm. The walls are built mainly from the materials that remained during the construction of the main summer cottage.
We draw up a project
A country or construction shower is so simple that it does not need to draw up a detailed project. Usually follow the standard shower cabin dimensions 100x100x220 cm.You can’t build an outdoor shower below, since a wooden pallet takes up a certain part of its height, plus there is a watering can above your head. But here the depth and width of the building is best selected individually for the physique of the owner of the cottage. For example, an obese person in a small country shower will be cramped, so the size will need to be increased.
If you come to cultivate a shower cabin for a summer residence, build a dressing room with a dressing room, install a table and benches here, then in this case a project will already be needed. Draw what you decide to construct, and indicate all the dimensions.
When drawing up a detailed drawing, consider the following points:
- You need to take care of the ventilation hatches. For a small shower cabin, one hatch in the side wall will suffice.
- As a rule, a shower in the country is used late in the evening and during the day, so it is necessary to provide round-the-clock lighting. For natural light, you can make a window in the side wall or the top of the door. You can choose corrugated transparent glass for the window. If the garden shower is used only in the summer, then you can make it without a roof. From above there will be only a tank on jumpers. The absence of a roof will create an influx of fresh air and improve natural lighting. For night time, you can use an electric lantern. But do not forget that it is necessary to install a lighting device with a degree of protection against high humidity.
- Consider the arrangement of shelves for bath accessories. They should be within reach and at the same time not interfere with washing.
- The dressing room can be equipped in several ways. The first is to build a dressing room.To do this, it is enough to dig several racks in front of the cab doors and line them with any material. You will have a barrier without a roof in the form of a dressing room on the beach. The second option is to increase the size of the cabin itself. In this case, you can separate the place for things with plastic wrap.
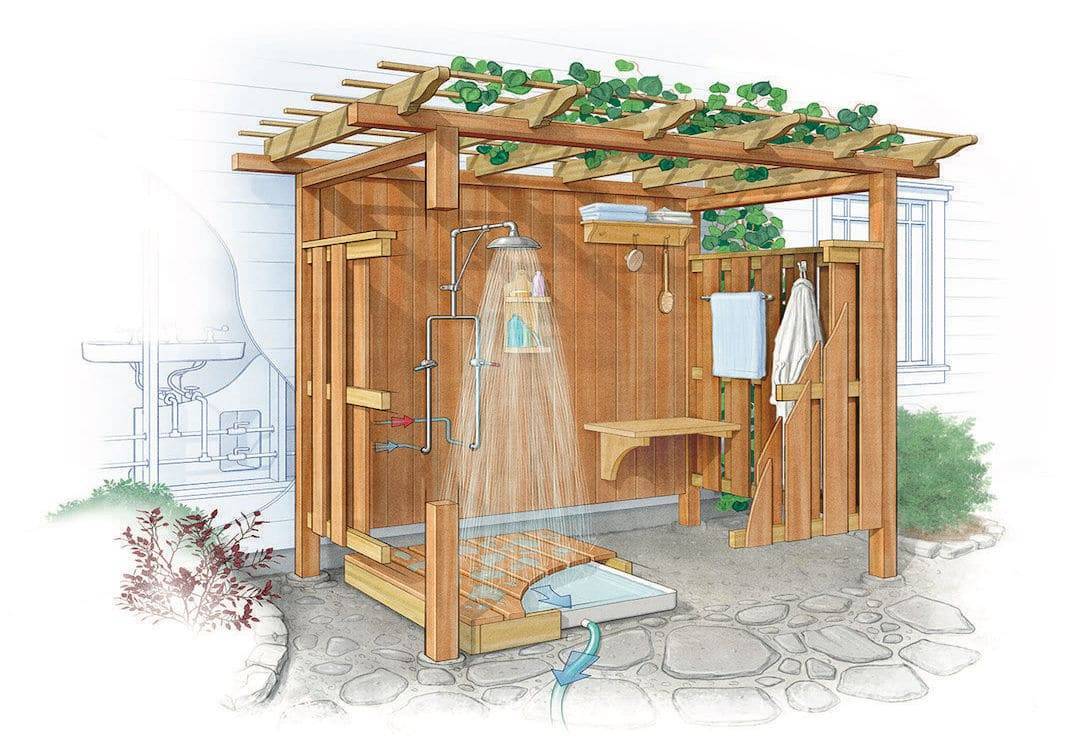
- In order to be able to use the garden shower in cool weather, organize heating. To do this, provide for the construction of a tank with an electric heater. As one option, you can attach a cabin to the house and bring hot water to it from the boiler. If you have enough space, then in extreme cases, equip a warm shower in the house itself. Then you can rinse in any weather.
- If there are always a lot of people in the country, then a fairly significant amount of water will be used in the shower. Include in the project the location of the drainage well and drain.
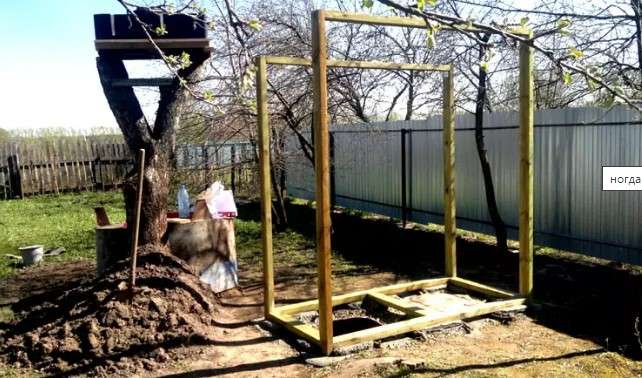
Foundation preparation
At construction of a lightweight frame structure laying the foundation is not at all necessary, but during the construction of a stationary summer shower, this stage of work cannot be bypassed. To carry out the work you will need:
- Roulette and level;
- Pegs and lace;
- Bayonet shovel;
- garden drill;
- Pieces of roofing material;
- Metal grid;
- Crushed stone and sand;
- cement mortar.
 Preparing the base for the summer shower
The dimensions of the foundation depend on the building materials from which the building will be built. For the construction of a shower from cinder block or brick for the arrangement of a slab foundation, it will be necessary to dig a pit about 15 cm deep. The work is carried out in several stages.Having decided on the place for arranging the summer shower, they prepare the site:
- With the help of a tape measure, pegs and a lace, a site of the required size is marked out.
- In the designated area, a layer of turf is removed with a depth of 15 cm.
- Level the base of the pit.
- The bottom of the pit is lined with a "cushion" of sand and poured with mortar, creating a flat surface.
Tip: If it is planned to use a wooden or metal frame as the floor of the shower room, before pouring the base, it is necessary to prepare a place for racks by installing sticks of the required diameter vertically wrapped with roofing felt.
Finishing Tips
It is logical that it is best to finish with those materials that will not deteriorate due to moisture getting on them, it can be plastic, plastic, oilcloth and even linoleum. If you decide to make a wooden shower for a summer residence, then all the material must be primed before painting, and then covered with hot drying oil (each board separately).
It is worth taking care of the floor covering. On a concrete or sand floor, you can lay a wooden grate, also treated with drying oil, and a rubber mat on top.
 As a floor, you can use a wooden grate
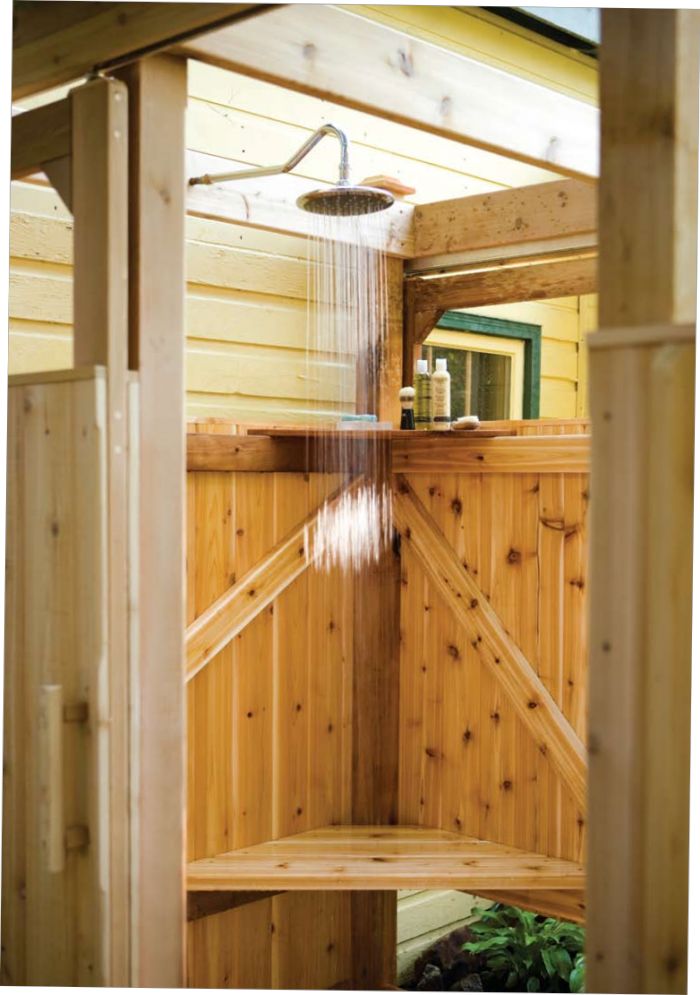
Inside, a dressing room with various accessories will also be useful. Shelf in the shower can be made together with hooks to conveniently fold or hang clothes and accessories
Keeping the locker room dry is also important, so you can raise the floors using any means at hand that will ensure the stability of the lattice
The remaining materials from the construction of the house can be used for exterior decoration. If the shower in the country is winter, then brick can be used to insulate it in order to provide thermal insulation, it will also be appropriate to use polystyrene foam.Materials and tones similar to the decoration of a residential building will look organic.


 You can decorate a summer shower with a decorative stone
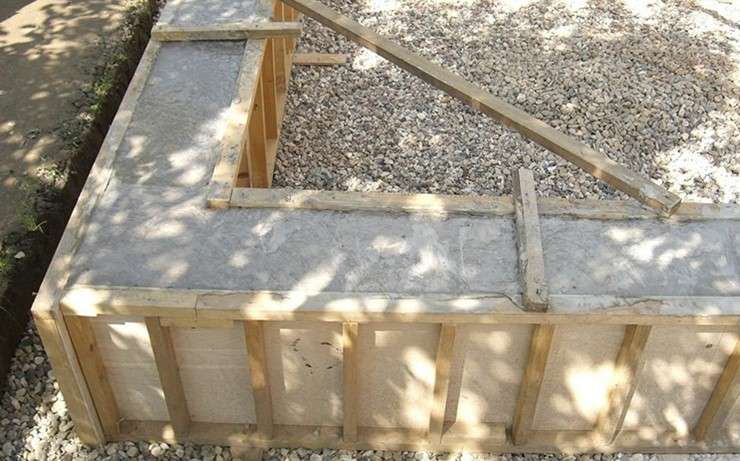
Foundation laying
Even if the load is small, it is not recommended to install an outdoor shower without a foundation at all. Hurricane winds, which are not uncommon in many regions of our country, easily overturn everything that is not securely fastened.
The foundation is made of concrete blocks or poured in the form of piles in the ground. The easiest and fastest way to lay the foundation for a small summer shower:
- drill or dig wells 60-80 cm deep;
- pour crushed stone to the bottom;
- install frame racks;
- fix the supports vertically;
- fill holes with concrete.
Supports made of metal must be pre-treated against corrosion, from wood - from decay.
It is better to lay a strip base under a brick building. Pour a layer of crushed stone or broken brick into a trench 30-40 cm deep, 20 cm wide, install formwork, lay reinforcement, pour concrete. After 3-4 days, walls can be laid.
Arrangement of a summer shower in the country
In the shower cabin, you can install a ready-made tray with a hole and drain water through a hose, or make the floor in the form of a grid of boards stuffed on logs at a short distance from one another (slits serve to drain water). It is easier to make a plank floor, but it will blow in the lattice slot. If you use a ready-made pan with water outlet through a hose, this will get rid of the construction of the drainage system. Waste water in this case can be used to water the lawn by simply laying the hose on the grass.
Outside, a summer shower can be sheathed with any material in accordance with your own taste and style, in which other buildings on the site are decorated.It can be moisture-resistant plywood, fiberboard or chipboard, lining, wooden slats, polycarbonate, siding, IT slate. d.
These photos show how to build a summer shower with your own hands and insulate it:
After that, you can proceed to the interior decoration, for which it is necessary to use materials with waterproof properties - PVC film, plastic panels, linoleum, etc. It is very easy to nail the PVC film to the frame with slats coated with a protective layer of varnish. If a wooden finish is supposed to be inside the shower cabin, the wood should be carefully treated with drying oil beforehand, and then coated with varnish or other protective agent.
A high threshold should be made between the washing compartment of the summer shower and the locker room so that water does not flow into the locker room. And you can separate these rooms using a conventional waterproof curtain.
The door to the outdoor shower should close tightly, but at the same time it should not jam due to deformation under the influence of moisture. To prevent this from happening, a moisture-resistant material must be used to make the door. In addition, you need to install special overhead seals on the door, leaving a sufficiently large gap between them and the door. Due to the presence of a double-circuit seal, it will be possible not to be afraid of both the jamming of the door and the draft in the shower.
As you can see in the photo, it’s not enough to make a summer shower - you also need to decorate it beautifully:


In the locker room, you need to build a hanger or fix hooks for clothes and towels on the wall, make a bench and shelves for bath accessories, cosmetics and other things. When choosing options for arranging a shower stall, do not forget to hang a mirror and put a rug on the floor.Moisture-loving plants can be planted around the shower, which will not only decorate the appearance of the building, but will also contribute to the rapid release of drainage from moisture.
In the final section of the article, you can watch another video on how to make a summer shower with your own hands, and install a water tank on the roof of the cabin.
Conclusion
Installing a shower in an open space will not cost a large amount. These designs are relatively quickly assembled and require a minimum number of additional devices. Regardless of whether the shower stall will be bought or created on its own, it is necessary to decide which option is best for a particular dacha. Be sure to take into account the individual parameters and advantages of different types of structures. If the cabin is made independently, then a project diagram is first drawn. After that, the materials are determined. Then comes the step-by-step workflow. The foundation and frame are being prepared, a container for storing water is being selected. Then they equip the territory. She doesn't must be constantly moist or emit an unpleasant odor. At the end, the shower needs to be finished and, if desired, decorated. It may be necessary to install forced ventilation or artificial lighting.


