- Soak
- Advantages and disadvantages
- Operation features
- How to dilute clay for kiln putty
- How to prepare a mixture of clay
- How to coat the oven
- The technology of creating an adobe oven
- Main material
- Furnace technology
- Drying design
- clay oven
- How lime mixture is made
- Impurity removal
- Checking the solution for quality
- Where is the best place to apply the mixture
- For laying and repairing stoves - proportions
- For plaster - the ratio of materials
- For sandblasting
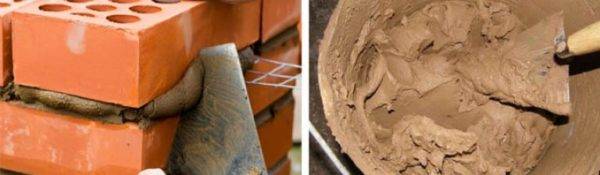
- How to knead clay mortar?
- Features of the resulting mixture
- Do-it-yourself manufacturing technology or how to make an adobe oven
- Making a solution
- Foundation laying
- We install the formwork
- Furnace assembly
- Types of clay mortars for stoves and fireplaces
- Chamotte clay for masonry
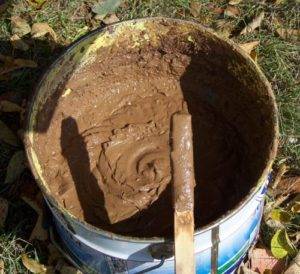
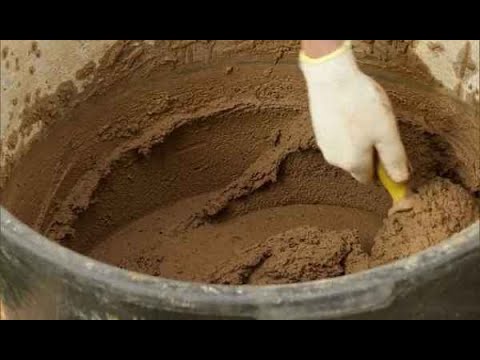
Soak
Dry packaged clay purchased at the store should be soaked. To work, you need a wide container (trough), a tank or other vessel:
- The container is filled with clay by 80%.
- Fill the container to the sides with clean water so that it completely covers the material.
- After a day, the solution is stirred. If there is not enough water, it is added again and the clay is left to get wet for another day.
- The soaked material is transferred to another container.
Clay mined in a quarry on its own is soaked in the same way. If the material is wet, it is also soaked, as it usually does not contain enough water.
Advantages and disadvantages
This material does not cause controversy among both professional builders and those who like to do household work with their own hands, since it is practically indispensable in the manufacture of stoves and various fireboxes. Chamotte clay does not have obvious disadvantages, but this does not exclude its negative properties. The advantages of the material include:
- Excellent heat resistance;
- Reliability and a long period of strength during professional laying;
- Ecological purity of the material;
- The presence of micropores for the passage of steam, which also prevents the expansion of the masonry and its destruction;
- High level of adhesion.
There are fewer cons, and besides, they are characters for many high-quality materials:
- High cost, since the production of such clay is technologically more difficult and dangerous than the production of ordinary building clay;
- Fireclay dust enters the respiratory tract, so a respirator must be used when working.
Operation features
Before starting to operate the equipment, the inner formwork must be set on fire - otherwise it cannot be reached. This operation should be carried out very carefully so that the structure does not collapse and cracks do not appear. If it was not possible to avoid cracks, then they are covered with a solution of clay, but they must be expanded before putty. Only after completing all the actions in the furnace, you can kindle a fire.
Before you start baking bakery products or similar food, it is necessary to properly heat the oven for 2 hours using dry firewood. As soon as firebrands appear, they are removed with a poker. The oven closes tightly. You will need to wait 15 minutes.During this time, the temperature inside will even out, and the bread will bake well on all sides.
To determine the degree of readiness of the oven, it is necessary to use a torch - it is placed for several minutes inside the oven, and then carefully studied. If it is charred, then it is necessary to give the oven more time to cool down, and if it has changed color - it has become more brown, then you can start cooking. This will mean that the temperature has reached about 200 degrees. The baking technology is quite simple - you need to make sure that the dough is well baked.
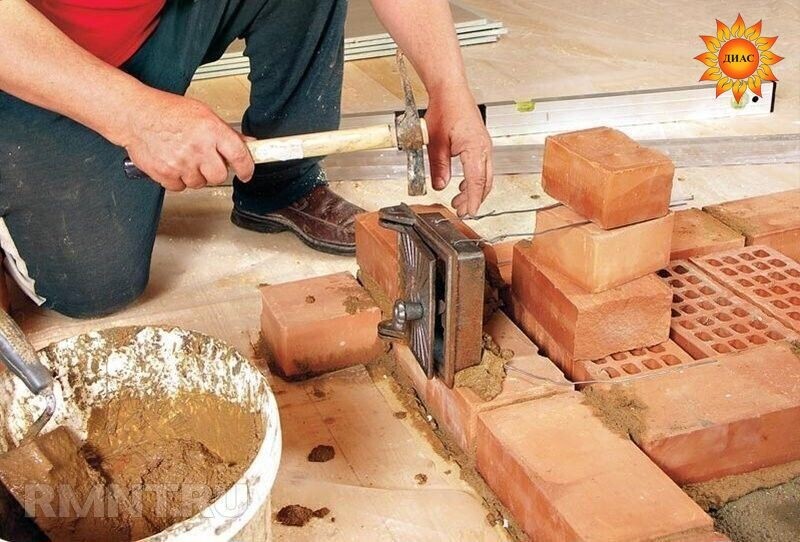
How to dilute clay for kiln putty
Despite the sea of modern technologies for laying stoves, fireplaces, fireplace complexes and all kinds of heating and decorative innovations, stoves are still laid using clay mortar. They also repair, and plaster, and correct defects in the masonry. Ready-made clay oven mixture appeared in building materials stores. Unfortunately, it is only suitable for working with fireclay bricks, where ordinary clay will not work. In other cases, to prepare a masonry or coating mixture, you will have to look for clay on your own.
How to prepare a mixture of clay
 It is necessary to distinguish between the process of plastering the oven for whitewashing and the process of repairing cracks in masonry joints. Accordingly, the solution will require different thicknesses and compositions. The ideal clay for plastering and repairing will be the one from which bricks are made. Unfortunately, they stopped sculpting bricks on their own a long time ago, preferring to buy them, therefore, they won’t be able to find a “deposit”.
You should choose low-fat red clay, if necessary, further deplete it with sand. The mixture for sealing cracks in the seams is prepared as follows:
- We take a clay-sand mixture and experimentally determine the desired proportions of the components. To do this, we prepare a plasticine-like solution and roll small balls out of it (no more than 2 mm in diameter).
- We stretch the hand with the clay ball forward and drop it on the floor. If the ball does not crack and does not smear with a blot, then this is an ideal mixture for repairing furnace joints.
- Add finely chopped straw for reinforcement and 1 kg of salt per bucket of the mixture. You can get to work.
The solution for plastering the oven is prepared in a similar way, only its consistency is creamy.
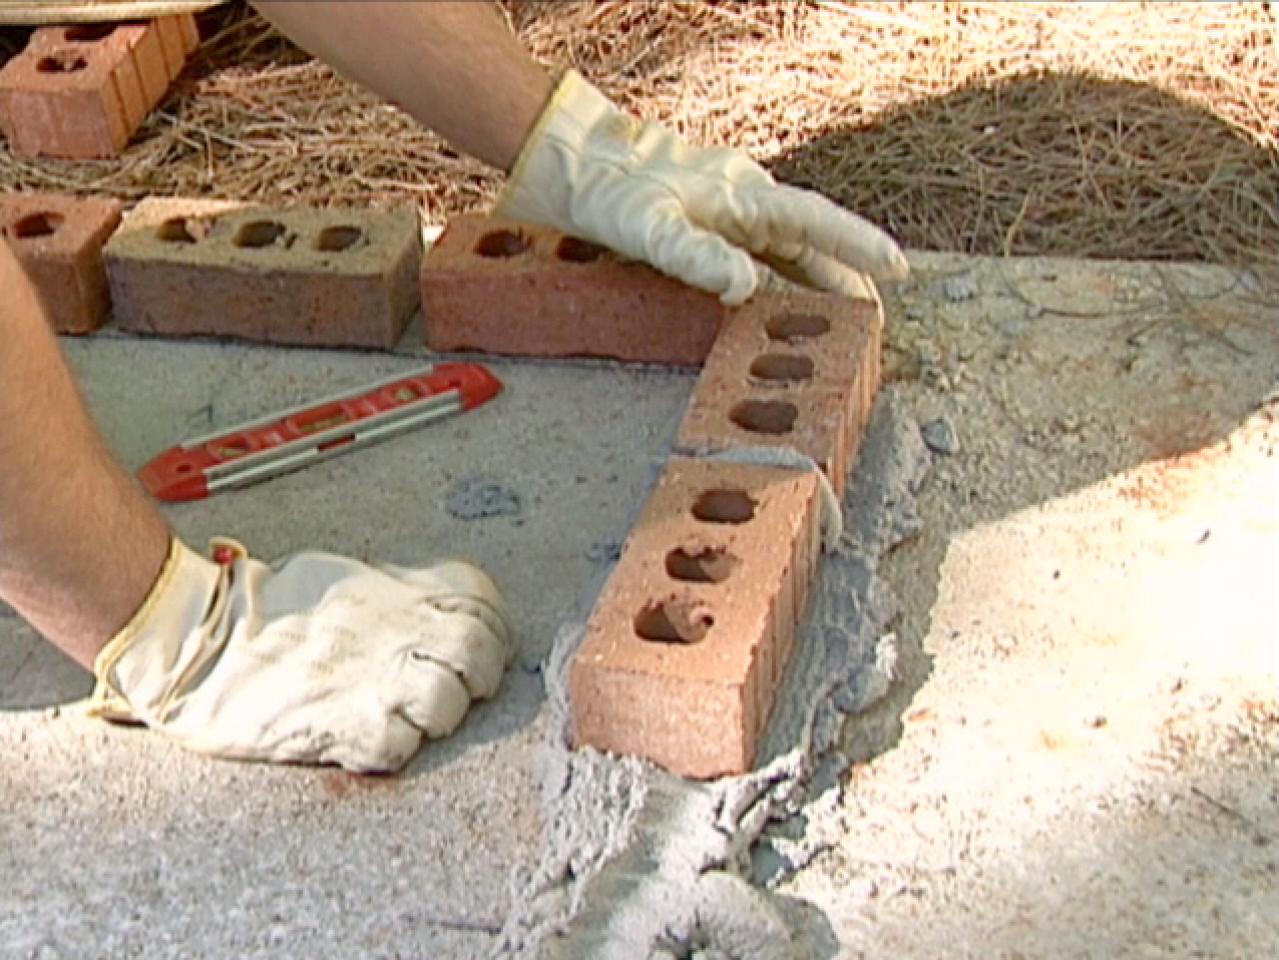
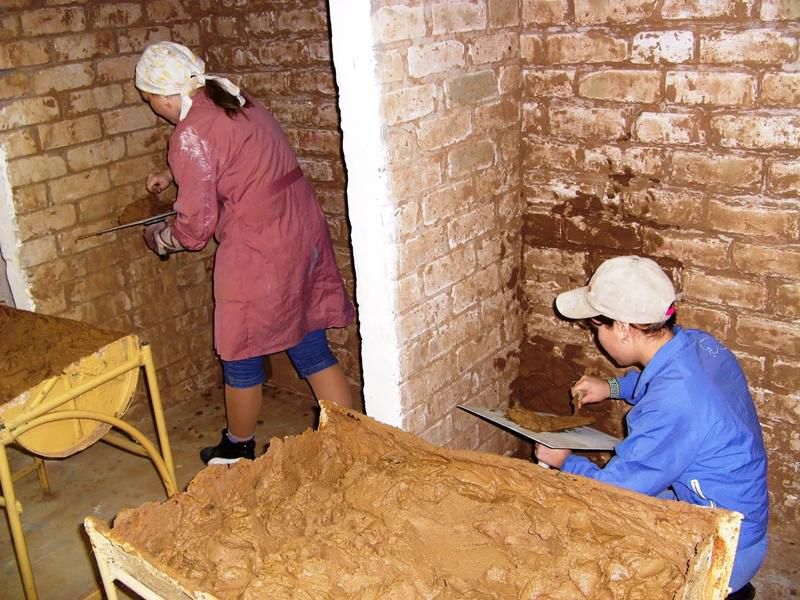
How to coat the oven
When starting repairs, you should warm up the stove a little before work. The procedure for sealing cracks in the furnace is as follows:
- remove the entire crumbling layer and all lime whitewash (clay will not fall on it);
- spray or wet the repair areas with a brush so that dry areas connect better with the repair mortar and do not pull moisture out of it;
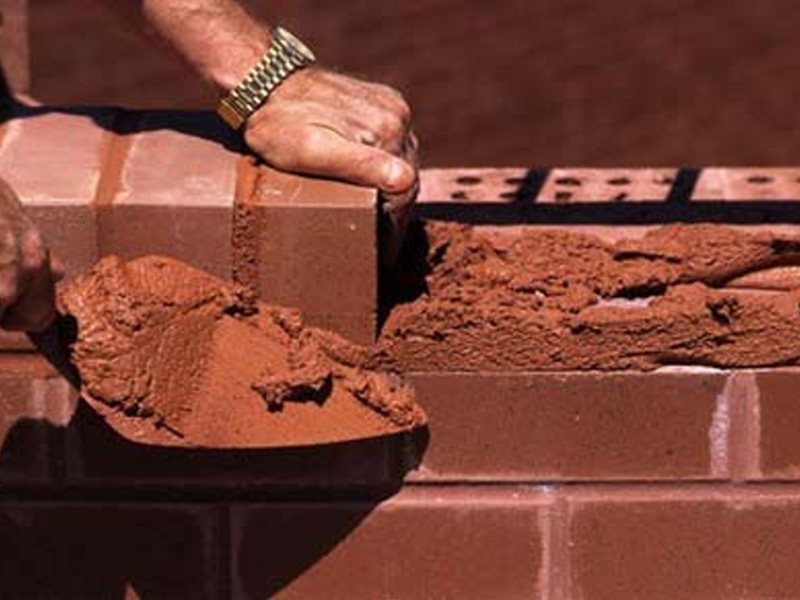
- seal the seams tightly with a plasticine-like mixture, and plaster the surface with a liquid solution.
You can coat the oven with your hands or use a spatula and trowel. After the solution dries, additionally coat small cracks.
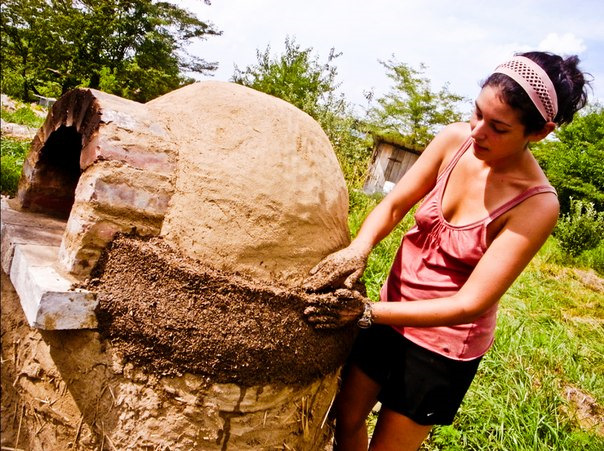
The technology of creating an adobe oven
The simplicity of the device does not mean that any master will quickly do the job and will definitely do it well. There are plenty of nuances here too.
Main material
Almost the most important stage is the preparation of clay. It depends on its quality how reliable the future furnace will be. The main requirement in clay is the ability to sinter even at relatively low temperatures. Masters who are well acquainted with this material (stoves, potters) tend to mix several types of clay.In this case, it is possible to achieve the perfect mixture: both in quality and consistency.


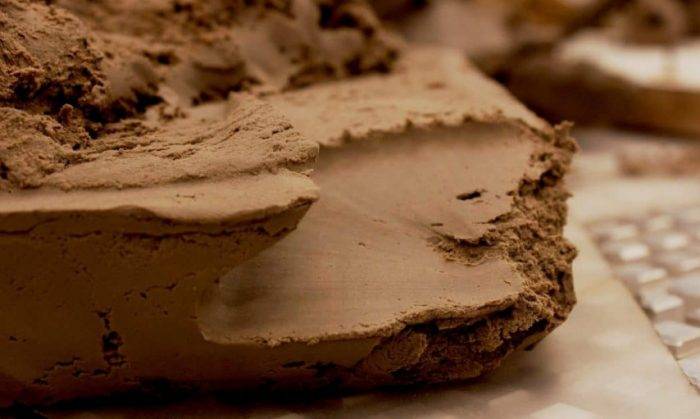
There is one more requirement: the clay, harvested independently, must be aged for some time. And we are not talking about weeks and months. You need to store it outdoors for several years so that it freezes in winter and “roasts” in the sun in summer. After that, the clay prepared in this way is ground, then passed through a sieve.
Now for the solution. It consists of sand, clay and water. However, there is no exact recipe with proportions, since clay has slightly different characteristics in each locality. Oily clay, which has a reddish tint, is considered the best. The ratio of components depends on the properties of the material used. Therefore, you have to create several samples, and then choose the best option from them.
If "lean" raw materials are used, then the amount of sand is reduced. A fatty product requires a large proportion of it. In some regions, sand is not added at all. There should be a minimum of water in the mixture: it is necessary to add just enough to get a thick, dense, homogeneous solution suitable for styling, not crumbling immediately.
Furnace technology

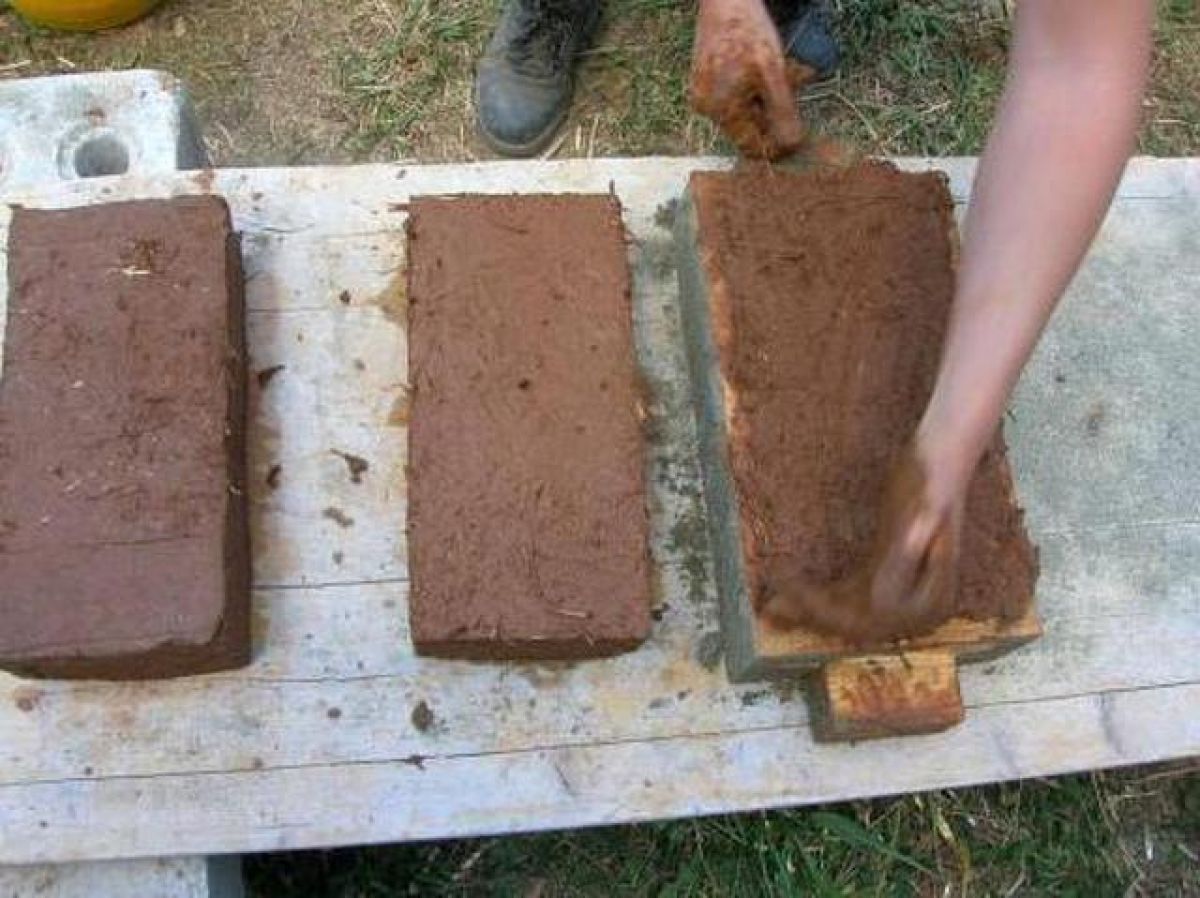
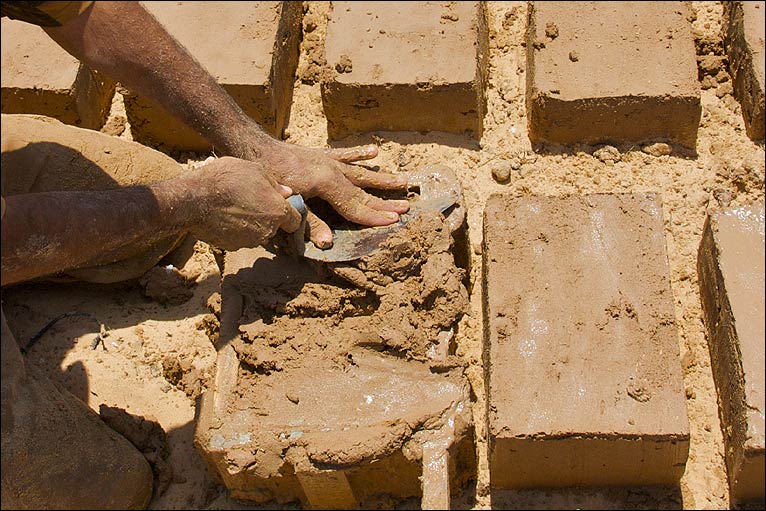
Build a structure using the usual formwork. In this case, the main requirement is dense laying followed by tamping. Decorative elements are molded by hand. The traditional material for reinforcement is rods, however, classic metal reinforcement is recommended for reliability.
This method is not the only one used.An alternative to it is the manufacture of home-made bricks, which are dried in the open air, and then connected “the old fashioned way” - using a similar (clay) masonry mortar. This method is not much different from the manufacture of a brick oven, so it is up to the future author to decide which technology to choose.
Drying design
This stage is more than the others stretched in time. The reason is the need for natural drying, at normal temperatures. The longer this process takes, the stronger the device will be. The minimum is defined: it is 2 weeks. But it is better to let the oven stand without operation for longer.
After the end of this period, the structure begins to gradually warm up. On the first day, the minimum amount of fuel is put into it so that the temperature remains low. In the following days, portions of "food" are gradually increased. It is recommended to carry out such a preparatory procedure for a week, or 5-6 days.
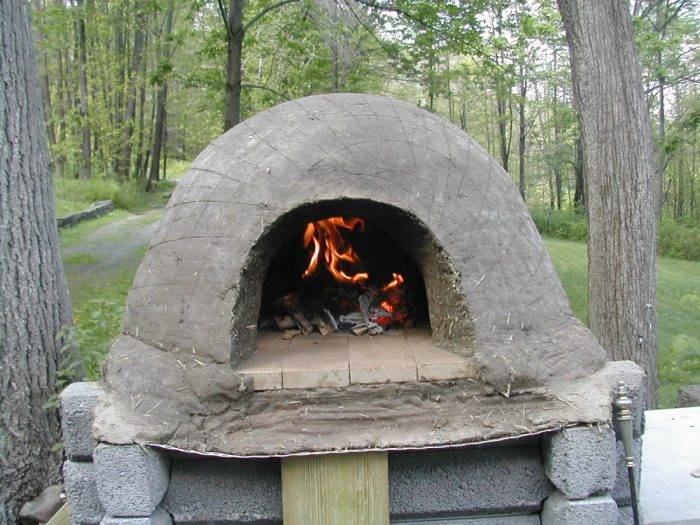
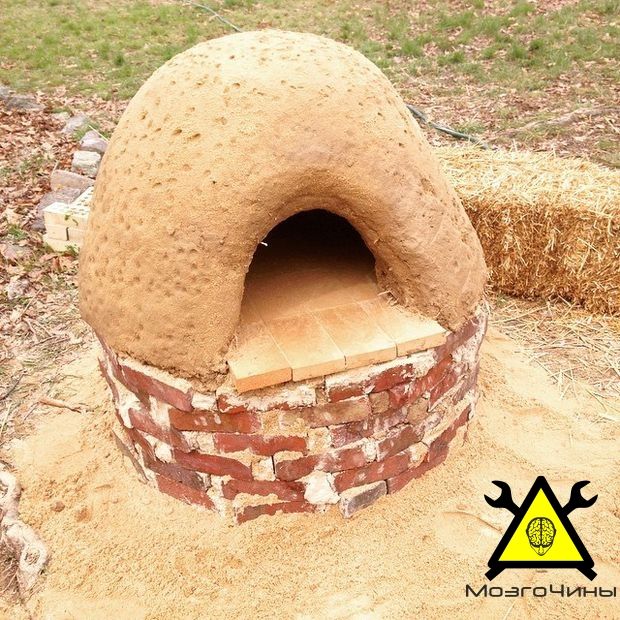
clay oven
Clay ovens have been built for centuries, since there were no bricks in the villages before or they were too expensive. At present, it is almost a forgotten art. We made our oven, relying on our own intuition and information gleaned from books, we also had no experience in this matter.
Our stove is a Russian stove "in black", that is, without a chimney. Such stoves used to be placed in the so-called "chicken" huts, where the smoke went into the room, and then out through a small window near the ceiling. Over time, the window was replaced with a chimney - a wooden pipe starting from the ceiling. In huts, such stoves could occupy up to 1/4 of the area of \u200b\u200bthe room. Our furnace has dimensions of 1.2×1.6 m. The names of the main parts and dimensions are shown in fig. one.
Rice. one.Kurnaya adobe baking oven. Dimensions are given in meters.
Before the construction of the furnace, it was necessary to make a foundation for it. To do this, we removed the sod and the upper soft layer of soil to a depth of 20-25 cm on the site. The bottom of the pit was filled with liquid clay mortar, boulders were laid and they were also filled with clay mortar. Then, formwork was installed around the pit and the masonry was raised 20 cm above ground level. The top of the masonry was leveled with a thick clay mortar and a layer of waterproofing material was laid (Fig. 2). Any material is suitable for him: roofing felt, plastic wrap, old bags. In the old days, birch bark was used for this purpose.
Rice. 2. Construction of the furnace foundation.
On the waterproofing, we laid two layers of boards 25 mm thick crosswise with an overlap. Due to this, the load from the furnace is evenly distributed over the entire foundation.
After the foundation of the furnace was laid, they proceeded to the construction of the hearth and hearth. To do this, stones were laid out over the foundation to a height of 20 cm and tied with clay mortar, and the upper 5 cm of these 20 cm were laid only from clay. If the layer of clay is thinner than 5 cm, then when heated, it will fall off the stones and there will be pits on the hearth.


A few words about clay
For a clay oven, a properly prepared clay solution is the most important thing. The mortar must provide minimal shrinkage and at the same time be durable. It is made from clay, sand, water. The more sand, the less shrinkage, but the lower the strength. Clay/sand ratio depends on the fat content of the clay used. There should be very little water in the solution, again to reduce shrinkage.
In our case, the situation was simplified, since we had no sand at all in the forest clearing. I had to do everything from clay "as it is."The clay was taken out of the pit and transferred to a 1.5 × 1.5 m shield, where, with a small amount of water, it was stirred with feet to the consistency of a stiff dough.
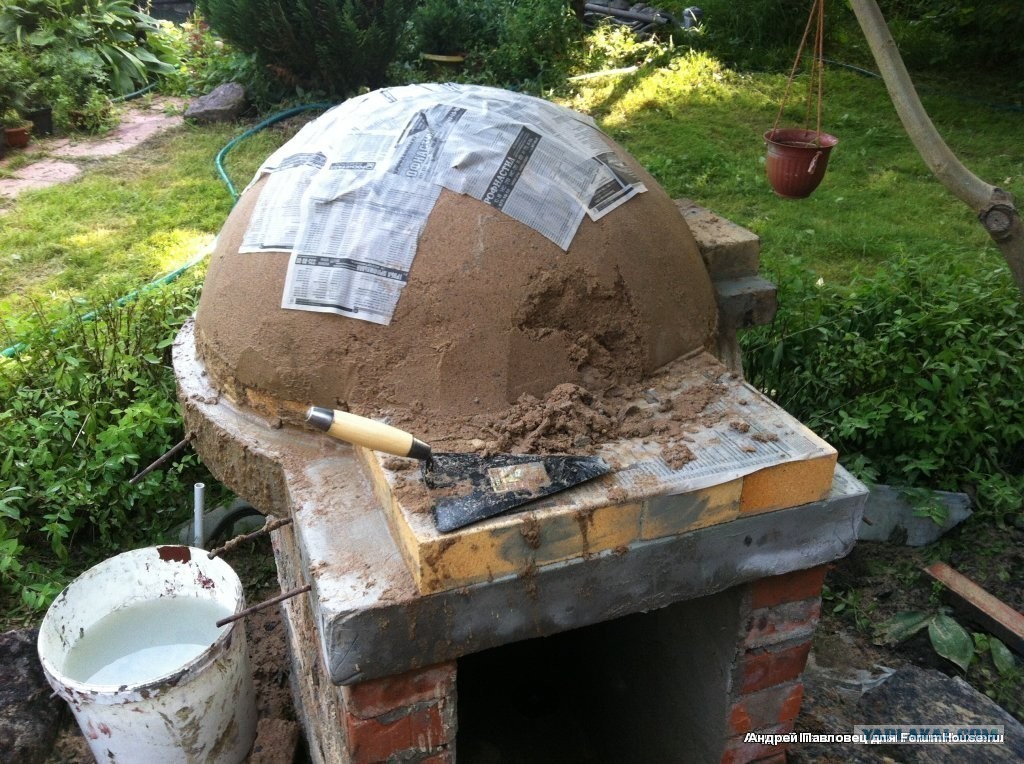
External and internal formwork was installed on the hearth. The outer formwork consists of four plank walls knocked together into a box with overall dimensions of 0.6 × 1.2 × 1.4 m. The internal formwork is shown in fig. 3.
Rice. 3. Internal formwork.
A hole 20 × 20 cm was left in the front circle. It was needed later, when the formwork was burned out. The outer formwork was wedged with stakes so that it would not deform when the clay was packed. The hole in the front circle was closed with a piece of board from the outside. Then the inter-formwork space was filled with clay.
Clay was laid in layers of 10 cm and carefully compacted. To increase the strength of the structure, we reinforced the corners, the overlap of the vault and the mouth with rods Ø10 mm. Even if the clay cracks, the rods will not let the stove fall apart. At the same time, we took into account that the mouth would be cut in the front wall of the furnace to a height of 32 cm and the rods should be 10 cm higher. The same was done with the ceiling of the furnace. The rods were placed 10 cm above the inner formwork.
How lime mixture is made
With the help of lime mortar, laying the foundation of the furnace and the chimney pipe on the roof. It should be borne in mind that when quenching lime increases by 3-5 times. Therefore, take the appropriate capacity.
Lime is well poured with water. Knead the solution and break the stones until the mixture looks like thick sour cream. Sand is gradually poured in until pieces of the mixture begin to stick to the shovel. You can store such a solution for a long time, adding water if necessary.
This is a rather difficult procedure; ready-made lime mixture can be bought. As a rule, when laying a lime kiln, a lot of lime is not required. This material behaves very well at work, there are no special problems with the preparation of mortars based on lime.
Impurity removal
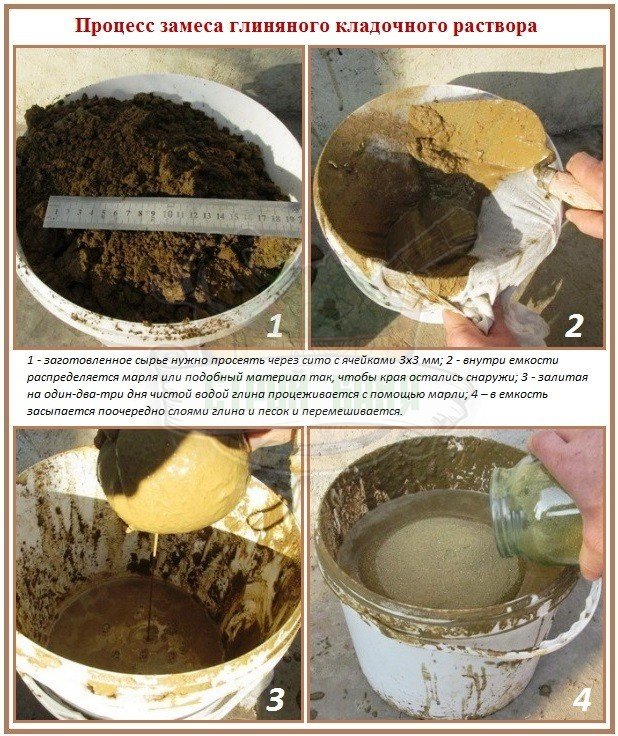
Almost all quarry clays and sands contain impurities and require purification. Remains of plants, roots, grains of sand, pebbles, pieces of crushed stone are removed from raw materials in various ways.
How to remove impurities from clay
Impurities greatly impair the quality of the masonry. Raw materials are cleaned in three stages:
- manual sampling of plant remains, roots, crushed stone, pebbles;
- sifting through a metal sieve with a hole size of 1.5 mm;
- clay soaking;
- rubbing through a metal fine-mesh sieve.
Photo 2. The process of sifting clay through a metal sieve. It is necessary to press it with the palm of your hand so that all particles pass through the grid evenly.
In practice, to clean clay for mortar, craftsmen do without the laborious process of soaking raw materials.
How to remove impurities from sand
Sand is considered prepared when the water passing through it becomes clear. To prepare the material, you need to perform the following steps:
- The remains of plants, roots, large stones are manually selected from the sand.
- After rough sampling, the material is sieved through a metal sieve with a mesh size of 1.5 mm.
- Sand is placed in a bag (or net) of burlap and washed with running water. A hose is used for flushing, water is supplied under pressure.
You will also be interested in:
Checking the solution for quality
- Visually. It is necessary to roll out the resulting mass into a cake with a thickness of 25 millimeters. After it dries, no damage should occur.
- By deliberately creating stressful situations. To check, you need to wait until the pre-made ball dries naturally. After that, you need to climb onto a tall structure and drop material from it. Upon inspection, the product should not fall apart.
- The next method will be similar to the previous one. The finished element is thrown against a wall or floor with the application of force. In the event that the formed ball breaks, the material is fragile.
So, using certain methods, you can independently determine how good the resulting material is.
Where is the best place to apply the mixture
Clay building mixtures are necessary when the structure is exposed to different temperatures. Also, their plastic properties are in demand for interior decoration. Both materials are actively used in the manufacture of pottery, but here the mixture is different.


For laying and repairing stoves - proportions
The ratio of components is chosen taking into account how much a part of the furnace structure heats up:
- Clay mortar is used in the construction of a heat storage area. It heats up to 550–600 C, does not come into contact with the flame, and is not exposed to oxides. The fluff, the source of the chimney also do not heat up much - up to 400 C, although they cool more strongly. The proportions are determined by the plasticity index: from 2 to 5 parts of sand per 1 part of clay.
- Fireclay solution can be heated up to 1200 C and above. It is needed for laying the combustion chamber. In some cases, the entire stove or fireplace is made of fireclay. Usual ratio: 30% clay and 70% fireclay. But if the clay mixture is oily, the proportions change - 50:50.
- 1, 2 row of the furnace can be placed on the lime-sand version.
- Cement is not elastic and breaks down when heated.Mixtures based on it are suitable only for the foundation and the chimney head.
For plaster - the ratio of materials
For finishing work, white, red clay of different fat content is used. Sand is taken only the purest - river, sea, alluvial quarry, fine or medium fraction. The ratio is standard: with high fat content 1:5, with medium fat content 1:3, with lean fat content 1:2. Read about the differences between career and river.
Characteristics are selected in accordance with the purpose of the plaster composition. To level the wall and repair defects, you need a plaster that fills in irregularities well and sets quickly. For him, it is preferable to take quarry or artificial sand: its grains have an angular shape, are rough and adhere better to the binder component. For decorative finishing, river is chosen: its particles have a rounded shape and are more evenly distributed over the volume of the material.
For sandblasting
For sandblasting, only sand or slag is used. The best choice is loose yellow or white quartz. Different jobs require different factions:
- Pulverized - with grain sizes up to 0.1 mm. Treat fragile surfaces in order to create a matte background or pattern.
- Average - 0.1-0.4 mm. This is how complex images are obtained on glass and mirrors with varying degrees of haze.
- A relatively large fraction with particles up to 1 mm is used to obtain volumetric images.
How to knead clay mortar?
The proportional composition of the binders determines the purpose of the mixture: masonry or finishing. They may not consist of one binder, but of two, for example, clay and cement. The filler stiffens the hardened mixture, and its slight excess does not harm the quality of the masonry.Even a small excess of binder (in this case, clay) reduces strength. That is why it is considered: the less it is in the solution, the higher its quality. However, it is better not to replace it with cement and lime, this is done only in cases where clay is not available.
The consistency of the mixture should be sufficiently plastic, viscous, but not liquid, and even more so - it should not crumble. The furnace body should not have thick masonry joints, the optimal thickness is 3-4 mm. Sand grain should not exceed 1 mm. However, the use of coarser sand is also allowed, but then its amount will change.
The exact proportions depend on the quality of the clay:
- skinny requires a decrease in the volume of sand,
- oily is diluted in a ratio of 1:2 (clay:sand).
Features of the resulting mixture
Clay mortar has certain boundaries in the field of use. The most suitable for use are the hottest areas: furnace and heat storage fragments of the structure. This is due to the fact that the resulting solution perfectly withstands high temperatures and direct exposure to the flame, but quickly becomes unusable when condensate enters or significant mechanical stress.
Clay mortar has been used for laying stoves since time immemorial.
Advantages:
- Environmental friendliness. All components are of natural origin and do not emit substances harmful to human health.
- Availability. Components can be mined, prepared by hand, or purchased at a reasonable price.
- Ease of dismantling. If it becomes necessary to shift or replace the furnace section, then the work will not require significant effort. The mixture is well removed, and the bricks remain clean and intact.
But to obtain the necessary positive properties, serious efforts and time will be required.
Do-it-yourself manufacturing technology or how to make an adobe oven
To create an adobe oven with your own hands, you need to follow certain instructions, follow them step by step without disturbing the order. The first step is to learn how to properly knead the clay mortar, so that after that you can immediately start working, and not waste time correcting mistakes. Next, a reliable foundation is created, and then the formwork is installed.
Making a solution
The adobe oven for manufacturing requires a large amount of clay mortar, which is kneaded by hand. The main thing is not to violate the proportions that will affect the fat content of the clay, and, accordingly, the quality of the resulting aggregate. That is why you will need to conduct small experiments in order to independently choose the right consistency. There are no universal proportions.
To prepare the solution, the following components are needed:
- Water.
- Sand.
- Clay.
Clay is needed to prepare the solution
The more sand is added to the solution, the less the degree of shrinkage will be, but the strength of the structure will also be reduced. The solution after mixing should be obtained with minimal shrinkage, but maximum strength
That is why it is important to correctly combine all the components
To begin with, it is desirable to mix a small amount of the solution in order to obtain a kind of sample. You will need to find the desired combination, and after that proceed with the construction of the structure in full size.


There is one important remark - you need to add a very small amount of water so that shrinkage decreases. Once the desired combination is found, the clay will need to be mixed well with water, and the right amount of sand added to create the desired consistency, reminiscent of tough dough.
You can do it the old fashioned way, using your feet - pour the solution into a large basin and stomp it until cooked - if you do not have the necessary kneading tool at hand.
Foundation laying
The algorithm for building a furnace is not much different from the original Russian method, invented in ancient times. First you need to build a quality foundation. For manufacturing, you will need to perform the following steps:
- Remove the fertile layer of soil and sod to a depth of 25 cm.
- After making the pit, it is poured with clay mortar, and then boulders are laid. After that, the clay solution is again poured from above.
We install the formwork
Formwork is being prepared. The masonry rises about 20 cm from the ground. The top layer will need to be laid out with a thick clay solution, and then covered with waterproofing material - roofing material or ordinary bags. It all depends on the budget that the master has.
In the end, it is necessary to lay the boards on top, laying them crosswise. It will take several layers. Boards must be taken with a thickness of 25 cm.
Furnace assembly
After the foundation and formwork have hardened, you can begin to build the main part of the Russian stove. It is necessary to lay stones on the foundation, and bind them with clay. The height should be about 20 cm, and the top 5 cm are made only of clay. This is a very important point.
External and internal formwork is installed on the hearth.The outer part is the walls of the boards, which are knocked into a strong box. Dimensions should be as follows: 0.6 by 1.2 by 1.4 m.
When constructing the inner part of the formwork, it is necessary to leave a small hole with a size of 20 by 20 cm, which is necessary in order to subsequently burn the formwork. Now you can return to the outer part, and wedged the boards with stakes so that deformation does not occur.
The resulting space between the sticks is filled with a liquid clay solution. But care must be taken to ensure that the hole is protected from the solution.
To compact the product, the clay is compacted as high as possible, and laid out in layers of about 10 cm. The corners are strengthened with good reinforcement, having a diameter of 10 mm. The rods are placed 10 cm higher than the inner formwork is located.
After erecting the structure, it is necessary to give the clay time to harden. To do this, it is advisable to wait about 3 days, and then carefully remove the front wall of the formwork to cut the mouth: width - 38 cm, height - 32 cm. It is advisable to create an arch shape. A protective board is removed through the hole made. You can also try to get rid of the remaining formwork walls, but this must be done very carefully, since the furnace can collapse if it is poorly formed. For this reason, it is advisable not to rush.
Types of clay mortars for stoves and fireplaces
When laying the furnace, depending on the temperature regime of the zone being built, several types of mortar are used:
- 1200-1300 0C - clay-chamotte and cement-chamotte;
- 1100 0C - clay-sand mixture;
- 450-500 0C - lime-sand;
- 220-250 0C - cement-lime;
- atmospheric temperature range (furnace foundation) - cement-sand mixture.
Of the listed masonry mortars, clay or chamotte made from it are part of three mixtures: clay-sand, clay-chamotte and cement-chamotte).
Consider these important components of masonry oven mixes.
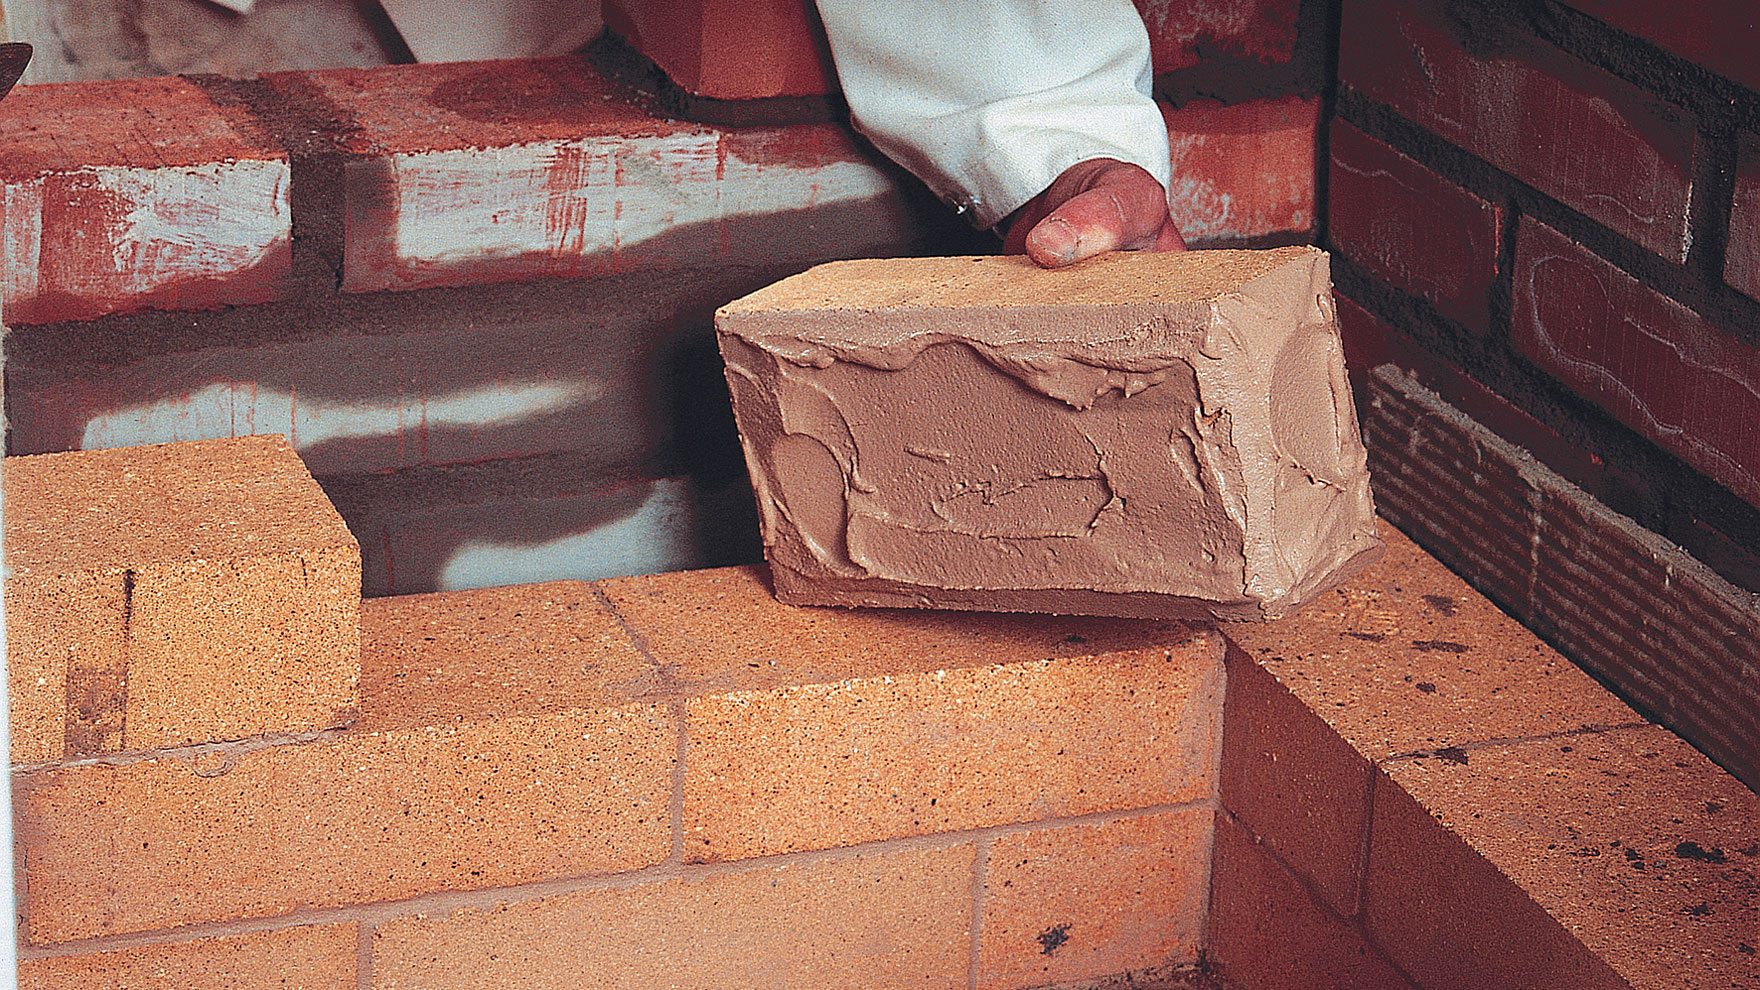
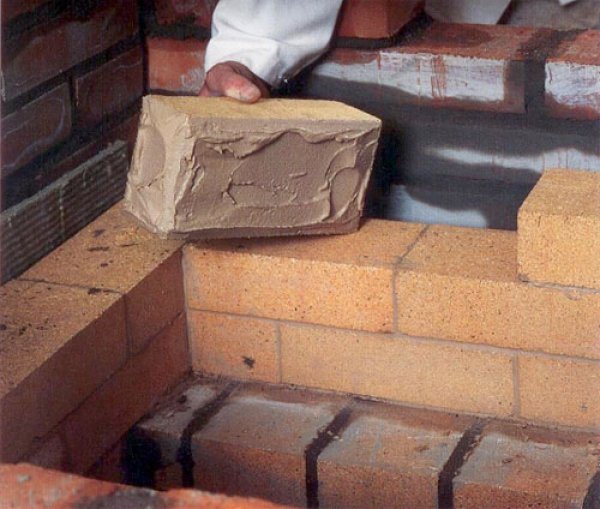
Chamotte clay for masonry
A solution of natural clay and sand is used for laying stoves with low temperature conditions - up to 1000 ºС. When a higher temperature is foreseen in the firebox, chamotte clay is taken for masonry, and the walls of the combustion chamber are made of refractory bricks. By the way, the latter is made from the same chamotte (kaolin) clay.
The working solution in this case can also be prepared in two ways:
- purchase dry kaolin clay and knead according to the instructions;
- take fireclay sand and mix with natural clay, as described below.
It will not be difficult to stir a solution of fireclay clay sold in bags, you just need to monitor its fluidity so as not to overdo it with water. For preparation according to the second method, it is necessary to purchase fireclay (mortar) in the form of sand and white or gray refractory clay. The proportions are as follows:


- refractory clay - 1 part;
- ordinary clay - 1 part;
- fireclay - 4 parts.
Otherwise, fireclay clay for masonry is prepared in the same way as simple clay. The main thing is to withstand the normal fat content of the solution so that your oven does not crack.


