- Product varieties
- acrylic stone
- Quartz agglomerates
- table top requirements
- Manufacturing
- Create a Sketch
- markup
- Assembling the frame
- sheathing
- Fake diamond
- Module materials
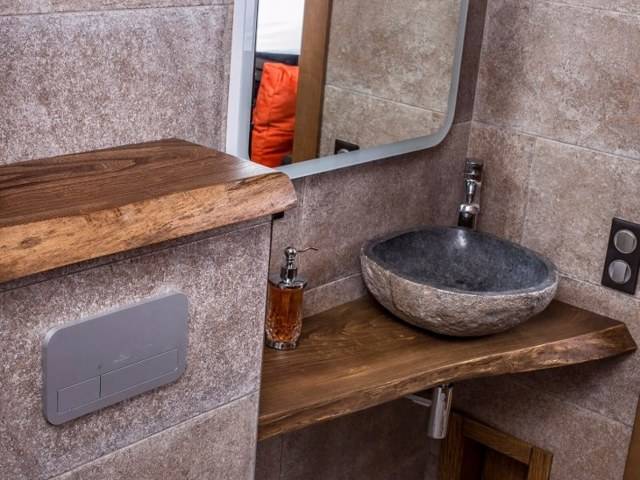
- Wooden countertop in the bathroom under the sink
- Table top with legs
- Mosaic table top
- How to make your own?
- Manufacturers overview
- Valleroy & Boch
- Roca
- Cersanit
- Triton
- Advantages and disadvantages
- materials
- solid wood
- Chipboard
- MDF
- Slabs
- furniture board
- Shapes and sizes of overhead sinks on the countertop in the bathroom
- Wash basin dimensions
- Forms of overhead sinks
- Sink "water lily" for placement above the washing machine
- Installation methods
- Hanging way to install the tabletop
- Advantages:
- Flaws:
- Floor mounted table top
- Advantages:
- Flaws:
- Semi-suspended way to install the table top
- Built-in sinks: pros and cons
Product varieties
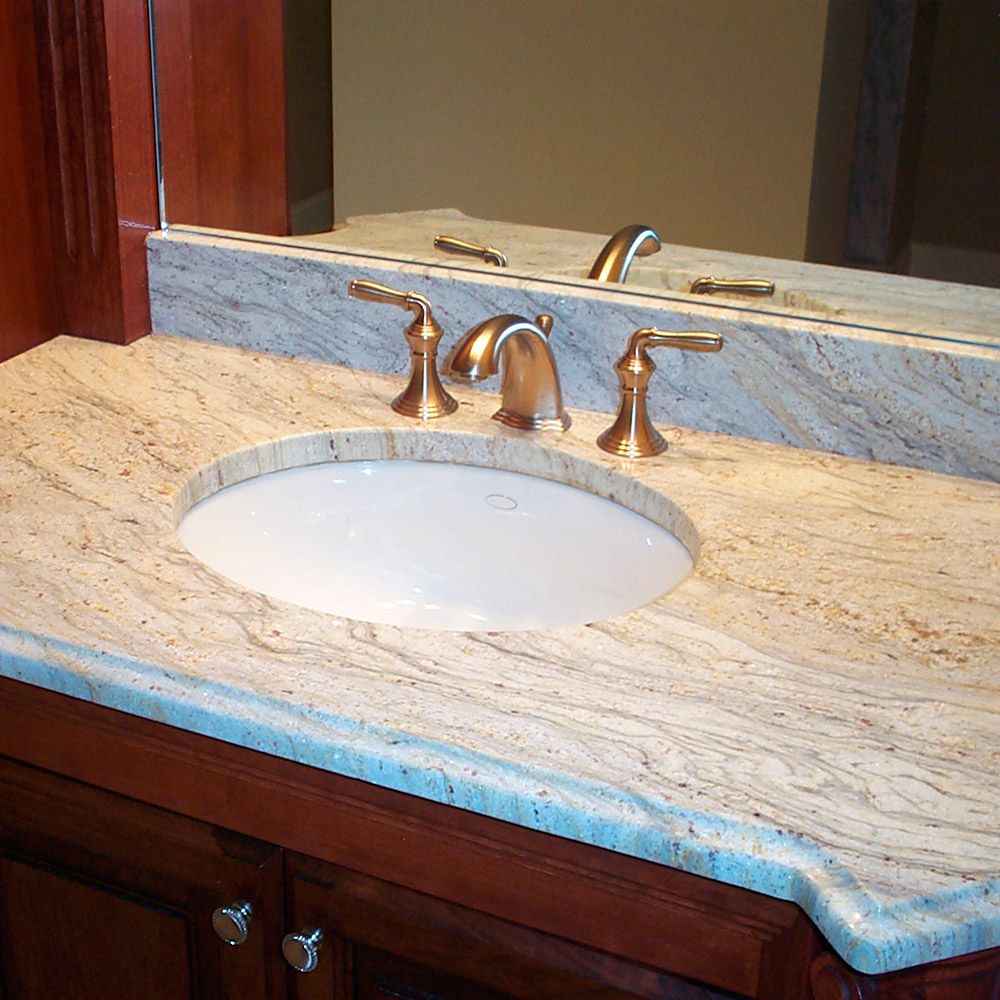
Straight artificial stone countertop
Artificial stone for countertops is an alternative to natural stone. In terms of characteristics and appearance, it almost does not differ from its natural counterpart.
Countertops in the bathroom are available in two types:
- acrylic;
- agglomerated.
The first are made from various components, additives, acrylic resin.Agglomerates are painted in any colors and shades.
acrylic stone
Easily imitates other materials, takes the desired shape, harmoniously fits into the interior.
Polymer Composition:
- 70% mineral fillers;
- acrylic resins;
- hardeners;
- aluminum hydroxide;
- plasticizers;
- dyes.

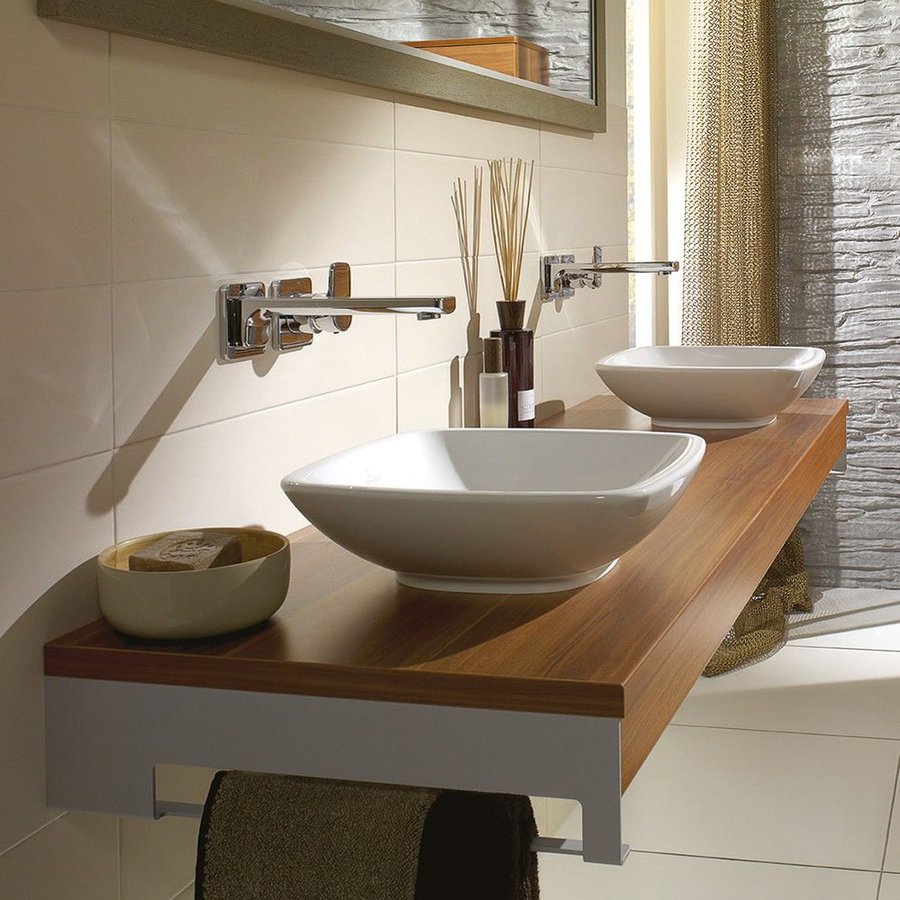
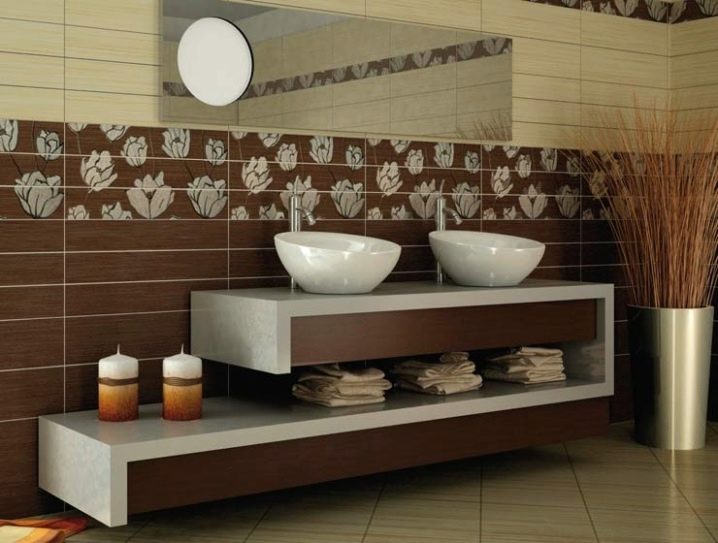
Countertop with countertop washbasins
Products have a number of advantages over other materials:
- increased strength;
- resistance to mechanical stress;
- do not deteriorate from moisture;
- do not lose their original appearance;
- suitable for any interior;
- resistant to the reproduction of microorganisms;
- defects are easily repaired.
Products do not have seams - this protects against leaks, water will not seep through the surface. Easily and quickly mounted.
A certain technology is used to produce the material. The raw mix is compacted into special molds by means of vibration. Further, the product is subjected to heat treatment, polymerization occurs. The output is a monolithic slab. The front side is polished, it gives the countertop brightness and shine.
Due to the resistance to high temperature and humidity, the products are used in bathrooms.
These models also have disadvantages:
- high price;
- a lot of weight, you can install the structure only on solid furniture.
Acrylic stone sinks do not withstand high temperatures. To wash the dishes with hot water, use special coasters - keep this in mind if you are going to install the structure in the kitchen.
Quartz agglomerates
For countertops made of agglomerates, marble, granite, quartz chips are used. Polyester resin is used as a binder. This material is highly durable.For its production, the necessary additives and components are used. The main substance is acrylic resins.
A quartz stone countertop is a durable, presentable product. Artificial material is unpretentious in care: it is enough to wipe it with a damp cloth.
table top requirements
A complex microclimate is always formed in the bathroom, which leads to increased wear of finishing materials, damage to furniture, the appearance of mold, fungus, or even an unpleasant odor. This is due to the increased humidity characteristic of this room, or direct contact with water. Therefore, the do-it-yourself bathroom countertop is made of stable and wear-resistant materials. Unlike countertops, which are used as a kitchen piece of furniture, the following requirements are imposed on them:
- High resistance to moisture. The sink top is exposed to high humidity, and it can also be splashed when washing. Therefore, you need to choose a material that is resistant to water, household chemicals, which in such conditions retains its appearance.
- Resistant to temperature changes. The material from which the countertop is made should not crack with sudden changes in temperature.
- Resistant to the spread of mold and mildew. It is desirable that the material be smooth, non-porous, so that mold or fungus does not spread on it in conditions of high humidity, which are difficult to get rid of.
Manufacturing
The whole process of manufacturing countertops consists of several stages:
- creating a sketch, in the process of work, you need to decide on the shape and size of the future product;
- marking at the installation site;
- creating a framework;
- sheathing;
- execution of finishing works.
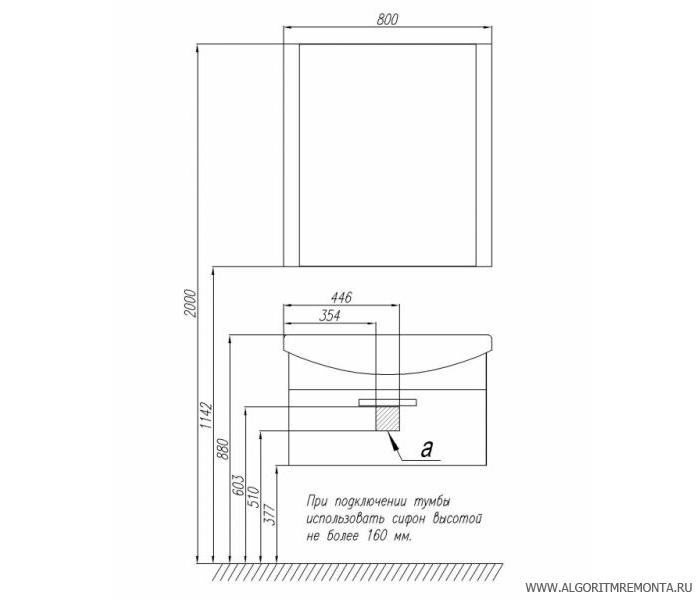
Create a Sketch
When creating a sketch of a future countertop, you need to focus not only on aesthetic appeal, but also on convenience and functionality. There are standard options:
- height - 80-110 cm;
- the distance between the plumbing elements is 70 cm or more;
- the distance from the wall to the washbasin bowl is 10 cm or more.
However, these are standard settings, so you can change them for convenience. For example, if everyone in the family is tall, then you can place the countertop at a higher height. In addition, you need to consider the need for additional details - shelves, niches, etc.
markup
After the sketch is created, and the materials are purchased, you can start marking. First of all, you need to free the installation site from unnecessary items so that nothing interferes with the work. If the countertop is not built immediately after the repair, then you need to carefully examine the finish for defects.


If they are found, then it is necessary to take measures to eliminate them (to repair potholes in the flooring, replace broken tiles, etc.). The markup is done like this:
the height of the countertop is marked and a mark is placed on the wall (if the floor is uneven, then you will first have to mark the zero level, and then measure the height of the countertop from it);
then, at the level of the height of the countertop, its length is noted;
then you need to make a projection of the future structure on the floor, measuring its length and width;
marking is done using a level, it is very important that the lines are laid strictly vertically or horizontally without distortions.
Assembling the frame
Now you need to cut the profile or timber according to the dimensions of the sketch.It is recommended to try on each part on the spot and number it so as not to confuse which one to install during the assembly process. After all the details are prepared, you can begin installation. To complete the work you will need:
- puncher or drill with an impact function to create holes in a concrete wall;
- screwdriver;
- dowels;
- self-tapping screws.
Completing of the work:
- holes are drilled in the frame elements for installing dowels in increments of 20 cm;
- the prepared part is applied to the installation site, a point is marked on the floor or wall through the hole in the part;
- holes are drilled at the marked points;
- drill holes in the walls and floor, the diameter of the hole should be 6 mm, and the depth should correspond to the length of the dowel;
- install the frame parts in place, insert the dowels and screw in the screws. During the assembly process, it is necessary to periodically check the correct installation using a level;
- to make a protruding stand, it is necessary to use two identical sections of the profile, they must be inserted one into the other and fastened with self-tapping screws. A double profile is much more reliable than a single one, so it's not worth saving;
- horizontal jumpers (stiffening ribs) are also desirable to be double. The prepared jumpers are inserted into the groove of the profile installed on the wall and fixed with self-tapping screws. To the protruding stand, the jumpers are attached through a bracket, which is easy to cut out of the profile trim;
- the upper part of the frame is reinforced with stiffeners; when placing jumpers, it is necessary to leave room for installing the sink. Spacers must be made double, otherwise, the finished tabletop will sag, even with a slight load;
- the last stage of mounting the frame is the final check of the correct location of the parts using a level.
sheathing
The finished frame needs to be sheathed with GKLV. They do the job like this:
- cut blanks corresponding to the dimensions of the profile;
- the upper blank is laid in place and the contour of the shell is drawn on it according to the template. This is a very crucial moment of work, because if the hole is not cut correctly, then after installing the sink, ugly gaps will remain;
- then the cut parts are hemmed to the frame, screwing in the screws every 15 cm;
- GKLV sheathe the upper and side parts of the structure, according to the sketch. At the last stage, narrow strips are attached to cover the ends;
- cut a hole under the sink, install it;
- then grout all the seams and proceed to the finish. Tiles or mosaics are used as decoration.
So, if you want to make a countertop in the bathroom, it is convenient to use moisture-resistant drywall. Working with this material is simple, but you need to be extremely careful when marking up. It is best to finish the countertop with ceramic tiles. The mosaic finish will look elegant.
Fake diamond

Do-it-yourself garden chair: choose your design option
But countertops made of artificial stone can be an excellent alternative to natural material.
It consists of polymers and components of quartz, marble and other elements. At the current level of production, artificial stone is no different from natural.
Therefore, its advantages are:
- high strength;
- long service life;
- resistance to mechanical damage;
- hygiene;
- ease of care;
- sound absorption;
- huge assortment.
But here it was not without drawbacks. Among them:
- visibility of seams on products longer than 3 meters;
- cheaper than artificial stone, but still very expensive;
- if the base is acrylic, the material will not like heat;
- not repairable.
The budget for such a bath will be less, but there are still drawbacks.
The choice is yours.

Module materials
The range of countertops is distinguished by an enviable variety and is designed for any wallet. Products can be purchased from:
- wood;
- ceramics;
- Chipboard;
- MDF;
- stone;
- glass;
- plastic;
- acrylic;
- metal.
In addition, the countertop can be assembled from drywall and decorate it at your own discretion.
So which option is better? You can find out only by getting acquainted with the characteristics of each in detail.
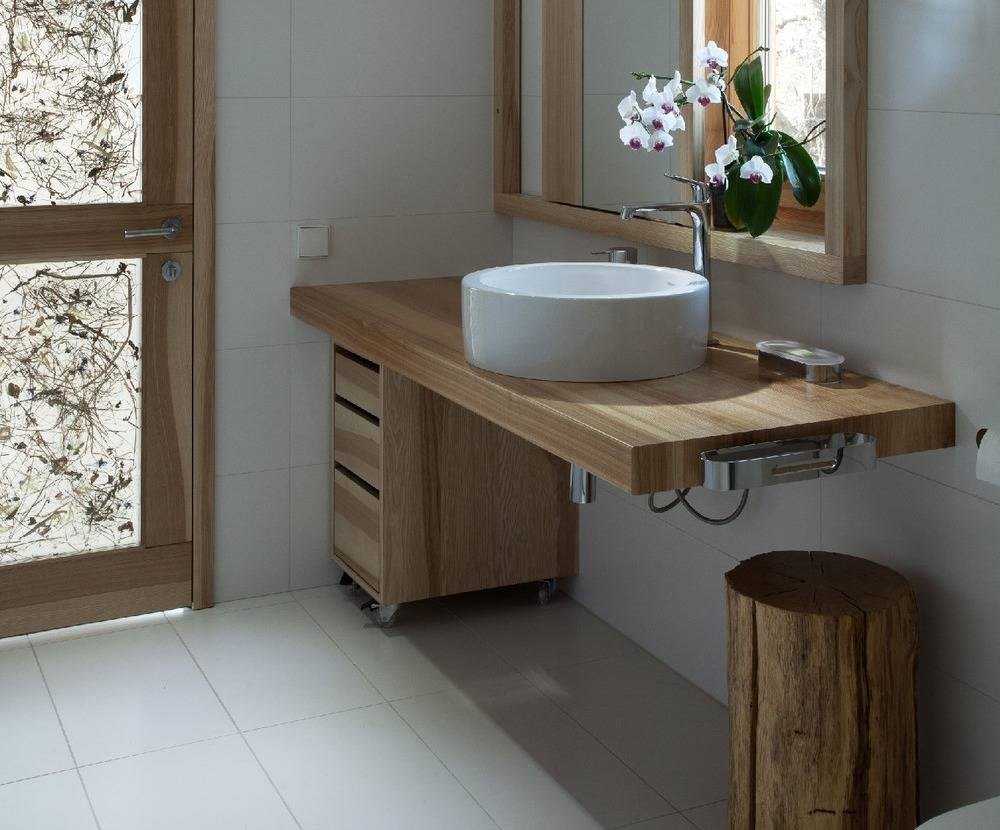
Wooden countertop in the bathroom under the sink
The wood module is aesthetic, environmentally friendly, pleasant. It is in demand in bathrooms with eco-interiors. The element brings with it a special comfort, makes the room cozy. But such a countertop will require specific care. Its surface will not withstand rough mechanical stress.


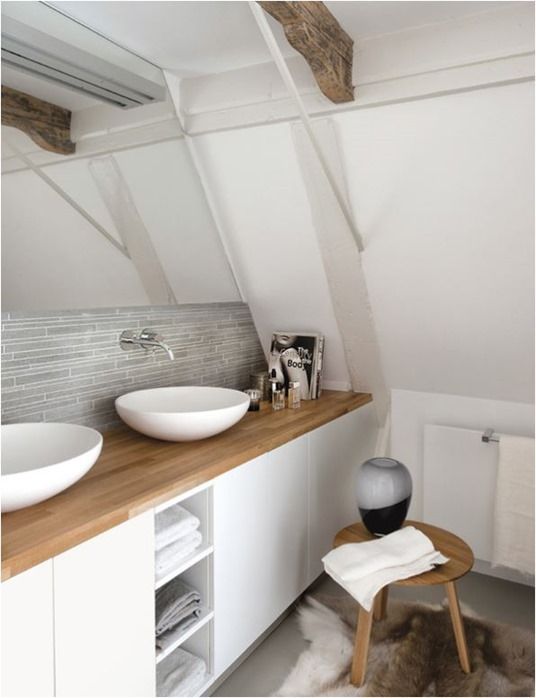
Wooden countertop makes the bathroom cozy
To increase the service life, the canvas will have to be treated with special impregnations and carefully varnished. The wood massif will feel good in rooms with forced ventilation, which will help maintain a drier microclimate there.
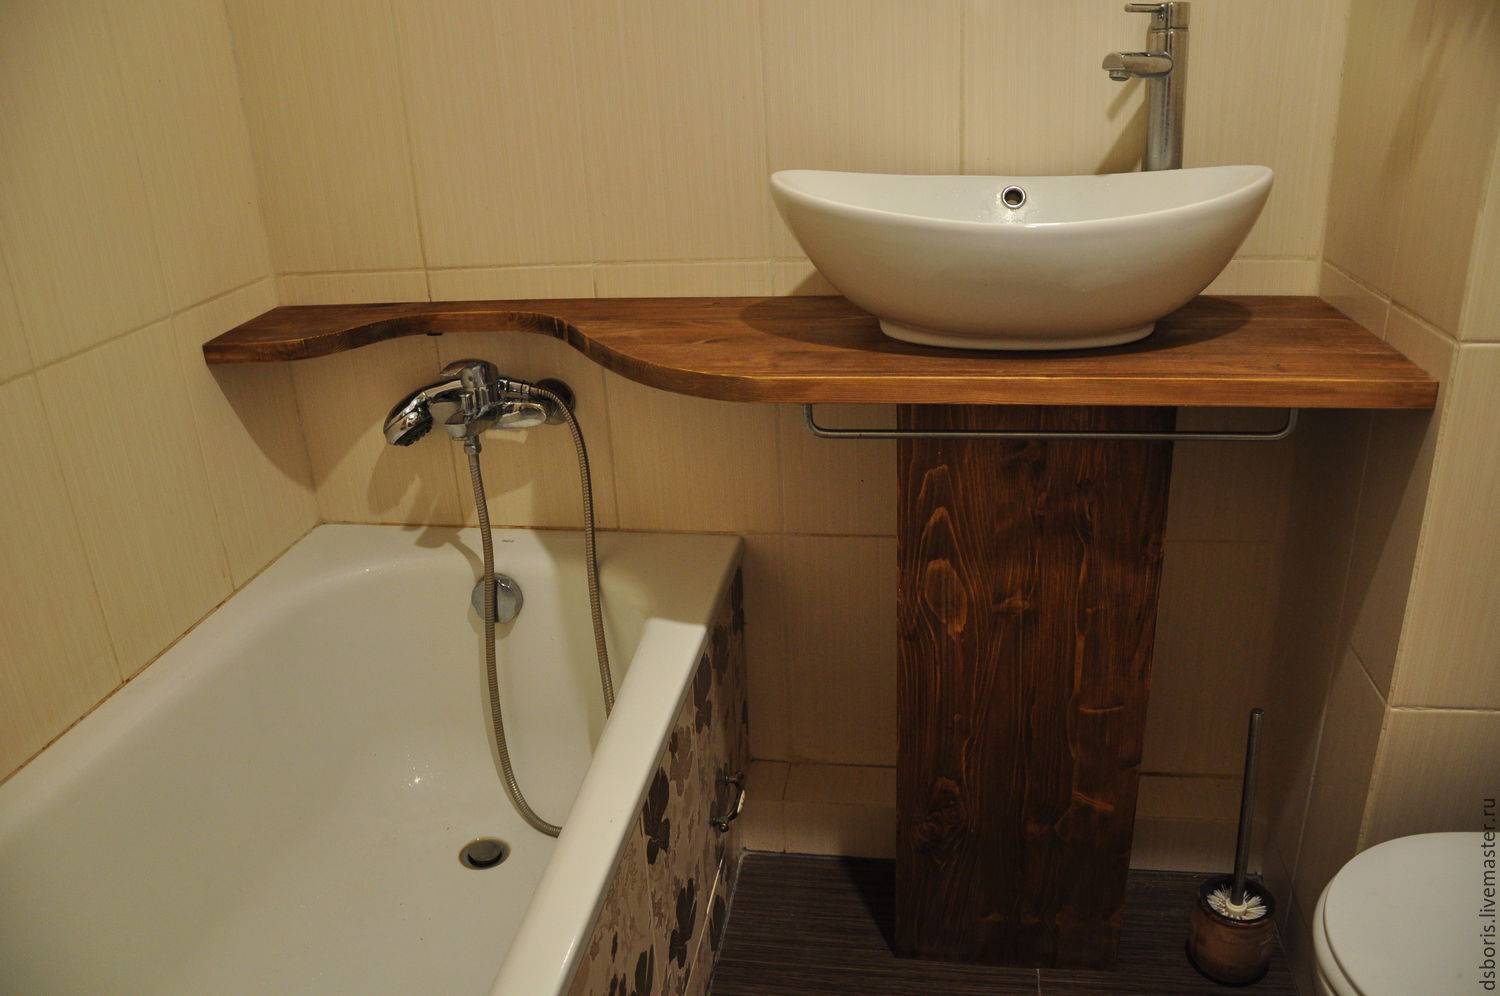
Table top with legs
If the structure has a vertical support, this will help reduce the load on the walls. There are models that cannot be hung on the walls at all due to their structural design. This, in turn, allows you to choose any place in the bathroom for their installation.
However, because of the legs, the owner will have difficulty cleaning. In addition, they will "hide" part of the usable space of the room. But even from this seemingly serious shortcoming, you can benefit. These supports can serve as racks for horizontal shelves. And in order to avoid problems with their installation, it is advisable to order the product in a specialized organization.
Although this will slightly increase the cost of the product, however, this solution to the problem will be more preferable. And if during the ordering process you specify that the shelves can be easily removed, then this will simplify the major cleaning in the bathroom as much as possible.
Mosaic table top
In this case, there is no limit to imagination and fantasy. From the smallest, bright, sparkling elements, real works of art are obtained. The assembled structure is the central object of the overall bathroom interior. At the same time, it is possible to fulfill any shapes and sizes. It just takes a little more time.
The only negative is the presence of a large number of seams. They are difficult to care for. And there is a danger that moisture and other liquid compounds will penetrate through them. It is necessary to prepare in advance a solid insulating base of drywall.
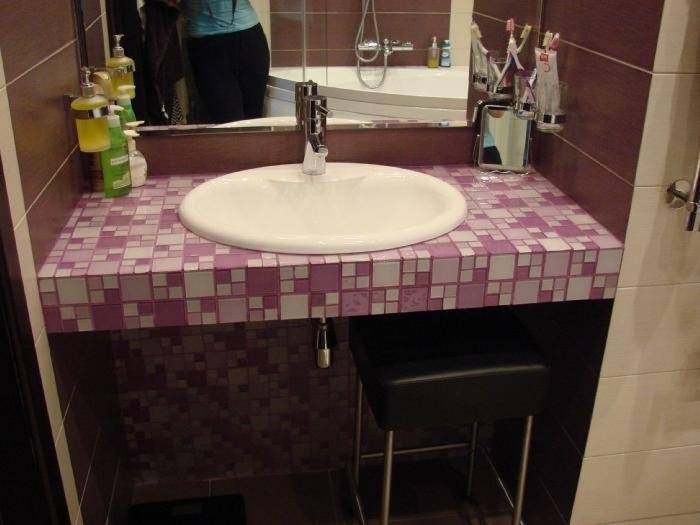
Mosaic table top
How to make your own?
Not all types of countertops can be made independently. The surface of any stone and glass requires processing on special equipment and the use of certain skills and knowledge. To date, the tabletop under bathroom sink rooms can be made independently from wood and drywall.
In the manufacture of wood countertops, we need a wooden plate to fit the size of the countertop, moisture-resistant impregnation for wood coatings, seam sealant, and tools. To begin with, we remove all dimensions in the place where the countertop will be installed, think over the method of fastening. From a wooden blank using an electric jigsaw to cut the countertop, applying the dimensions and shapes taken in advance in the bathroom.
After that, in the resulting countertop we make a hole for the siphon, if the sink is overhead, or we cut a hole for the sink, if it is built-in. A hole is also made for the faucet according to its diameter, if it will be mounted on the countertop, and not on the wall. If the countertop will have two or more sinks, then cut out holes for all the elements. Along with this, it is necessary to pre-make all the necessary holes for attaching the countertop to the wall and / or floor, depending on its design.
When the shape of the countertop is ready and all the necessary holes are made, we proceed to the processing of the edges. To do this, we need sandpaper and a special machine. The entire surface of the worktop to be treated after processing must be smooth and even. Having finished processing the edges and holes, we proceed to cover the wood and all its ends with a moisture-resistant composition in accordance with the instructions on the package. The next step is varnishing, also according to the manufacturer's instructions. It is advisable to apply a moisture-resistant composition and varnish in several layers.
Do not forget about the ends, edges and holes. There, too, everything needs to be processed qualitatively. After the applied products have completely dried, the countertop is ready for assembly. At the same time, all joints adjacent to the countertop, the walls of the sink and the faucet must be treated with a sealant.This will prevent the ingress and stagnation of moisture in hard-to-reach places.
The technology of self-manufacturing countertops from MDF or chipboard is practically no different from the option with wood. You do not need varnish, moisture-resistant composition and sandpaper processing. But if the tabletop project has rounded corners, then after cutting the ends of such corners, it will be necessary to seal them with a special film. You won't be able to do it on your own.
Making a drywall countertop is a more complex process, but it also gives you more opportunities to make curved, rounded, and other unusual design shapes. We need moisture resistant drywall. It is sold in sheets. We calculate their number from the dimensions of the planned countertop and multiply by two, since the base is made in two layers.
We also need a profile, always galvanized. It will be used in all the supporting structures of the planned countertop, and drywall will be attached to it. Accordingly, the number of profiles depends on the size and configuration of the project. If bends are planned on the surface of the product, then it is best to purchase flexible drywall for arches. You will also need self-tapping screws for metal, glue for gluing drywall sheets, glue for tiles, tiles or mosaics, moisture-resistant sealant, sealant for joints.
When everything is ready for work, then we proceed to the manufacture of the product. Having decided on the height at which the countertop will be located, we draw a horizontal line and fasten the cut profile to the wall. If the design will have several levels in height, then we fasten the profiles to the wall in accordance with the intended design. After that, we also assemble the frame of our future table from the profiles.This type of countertop cannot be suspended, so do not forget to make supports. When the frame is assembled, we sheathe it with sheets of drywall.
After the frame is sheathed with drywall and all the necessary holes are cut out, we begin tiling or mosaics. The technology for laying tiles is the same as for walls and floors. When the tile or mosaic is laid, and all seams are treated with sealant, we mount the sink, faucet and siphon, connect all communications.


How to make a countertop under the drywall sink, see the following video.
Manufacturers overview
You can choose models of European brands, you can also Russian companies. Below will be presented options for both European and Russian brands.
Valleroy & Boch
European sanitary ware company. Co-production of Germany, Italy and Austria. The best bathroom furniture is their handiwork. Their models are not budget, but the quality of workmanship is on top.
While their furniture is often presented in very unusual color schemes and bizarre designs, everything is very functional and practical. A guarantee of quality is the inscription "Made in Germany". And German products have proven themselves only from the best side.
Roca
Joint production of Spain and Russia. The company is less than a hundred years old. They started producing cast-iron bathtubs, and now they have a very wide range of bathroom furniture. This company is very common in Russia.
The choice of brand models is very wide, so you can choose what will be most suitable for everyone. The price range is designed for any buyer. Prices start from 16 thousand rubles.It happens that there are models with factory defects, but in this case it is possible to arrange an exchange or return of the product. Be sure to use sealant when installing the sink so that the furniture lasts longer.
Cersanit
Production of Russia, Romania and Poland. In its collections, the company uses calm colors - from chocolate brown to noble beige and standard white. There is a large selection of furniture for small bathrooms. But it still remains beautiful, easy to use and of high quality. The company puts the interests of customers at the forefront when looking for design solutions.
However, there are models with a problem in the drain, so you have to take into account these technical imperfections when installing sinks.

Triton
The production is exclusively Russian. The range also includes hinged models of shells, which is not typical for Russia. The company is aimed at the Russian market, therefore, it takes into account the peculiarities of the area in relation to bathrooms. In Russia, especially in the old housing stock, very compact bathrooms. This feature is taken into account by the models of this brand.
The price tag for the Russian buyer is very acceptable. If you buy models from chipboard, the joints may swell and this will ruin the appearance of the furniture. In cabinets for sinks, it is necessary to make holes for connecting communications, which, of course, is inconvenient.
Advantages and disadvantages
Installing a washing machine under the countertop in the bathroom has its drawbacks:
- It needs to be planned at the repair stage, to provide for the supply of electricity, water and sewer lines.
- You will have to carefully select an automatic machine in terms of size and technical characteristics in order to mount it into the structure without any problems.
- During the operation of the washbasin, periodic blockages are possible.
But the advantages of the combined design are still more:
- The countertop above the washing machine allows you to rationally use the space and place an automatic machine, a sink, shelves and compartments for storing linen, bath accessories, and household trifles in one zone.
- The spacious surface serves as an additional storage space for cosmetics, detergents, towels, etc.
- The close proximity of the washbasin and the washing machine does not require the laying of additional water and sewer pipes.
- Electric wires, pipes and hoses are hidden behind household appliances.
- The monolithic surface protects the washing machine from mechanical stress, exposure to aggressive household chemicals and other negative factors.
materials
Wooden countertops include not only products made of furniture panels or solid wood, they also use wood chip material. Description of the characteristics of each product will allow you to study them and make the right choice.
solid wood
The most expensive and beautiful option for creating countertops is made from solid wood. For the bathroom, it is better to choose dense types of wood. Our ancestors built their ships from durable, low-porosity trees, and for decades they had no difficulty in contact with water. A worktop made of solid larch or oak will perfectly cope with its duties.
Chipboard
The most unsuitable material for bathrooms, but available to most of the population. Sawdust and large chips are glued together with resins and pressed using pressure. The toxicity of the adhesive base is enhanced by exposure to hot vapors typical of the bathroom.The surface of the countertop is laminated to protect it from moisture, but if the layer is broken, dampness quickly deforms and destroys chipboard. The service life of such a product is not more than five years.


MDF
In terms of price-quality ratio, this is the most popular material. It is somewhat more expensive than chipboard, but much more reliable in operation. It is made from small chips, impregnated with paraffin and pressed. The product is durable, non-toxic, environmentally friendly. The material is embossable, which allows you to decorate the surface of the furniture. The tabletop is laminated to protect it from contact with water. With good care, the product will last up to 10 years.
Slabs
If you make a cut of a large tree (longitudinal or transverse) at the level of the thickness of the countertop, this will be a slab. For slab products, valuable varieties of trees with a unique pattern and color are chosen. To preserve the natural beauty, the edges are left raw. Further, the wood is protected from fungi with special impregnations and covered with layers of varnish.
furniture board
Natural polished boards are glued and pressed, thus getting a furniture board, which is subsequently used in the manufacture of products. To create the material, hard and medium grades of wood are used - ash, beech, oak, less often - pine.
Shapes and sizes of overhead sinks on the countertop in the bathroom
Having decided on the material of the washbasin, which will most harmoniously fit into the interior of the bathroom, you can proceed to the choice of the shape and size of the product.
Wash basin dimensions
The choice of the size of the overhead or countertop sink in the bathroom will directly depend on the footage of the room and the availability of free space for installation.The advantage of the overhead sink is that, thanks to the symmetrical sides of the bowl, it is not tied to the installation right up against a wall or in a corner, and can be placed on an island-type countertop. However, this type of space organization is appropriate in large bathrooms of country houses; for city apartments, such an island is an unaffordable luxury.
All sinks generally have standard dimensions, but individual manufacturers may vary by ± 3 cm.

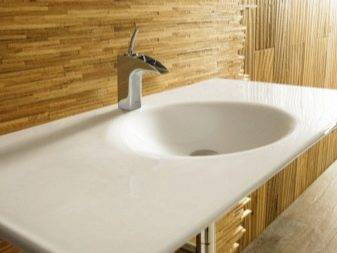
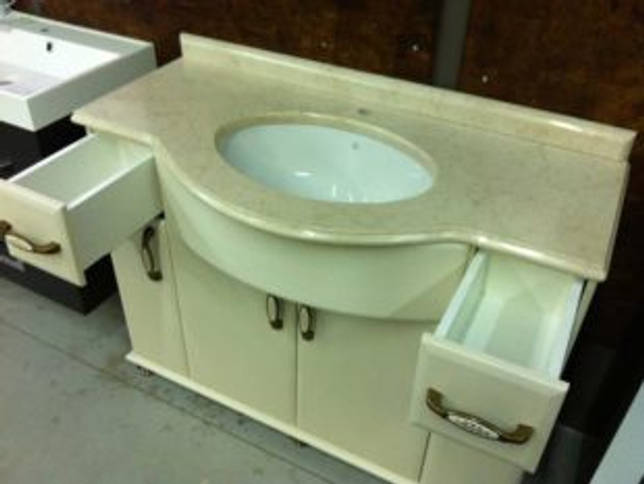
Dimensions of the oval Scorino washbasin in acrylic stone
Common sizes of overhead sinks (width x depth x height):
- small compact - 30-45 x 30-45 x 10-12 cm;
- medium standard - 46-75 x 46-60 x 10-20 cm;
- large - 76-124 (or more) x 46-60 x 20-31 cm.

Round sinks can have a diameter of 30 to 60 cm with a height of 10-31 cm
Forms of overhead sinks
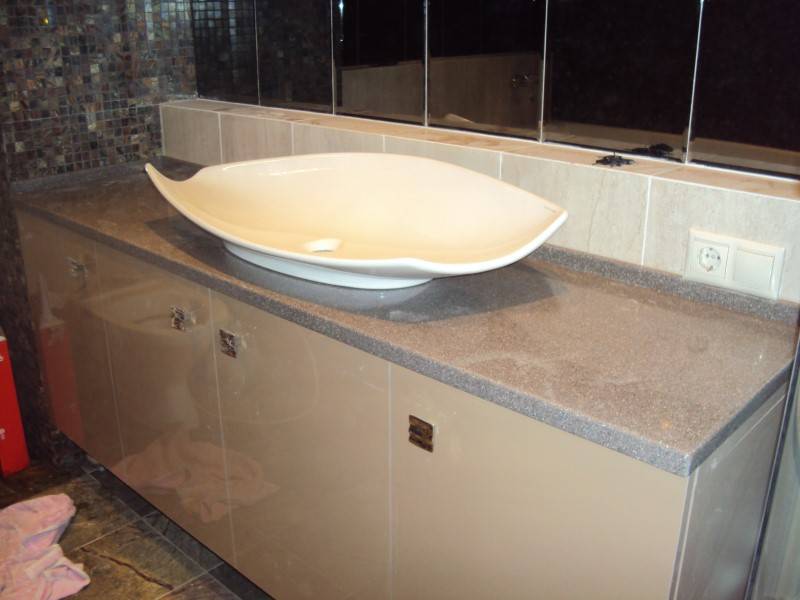
The forms of overhead sinks can be very diverse - ranging from strict geometric shapes to designer asymmetrical products, for example, with corrugated edges, in the form of a drop of water, a flower, etc.
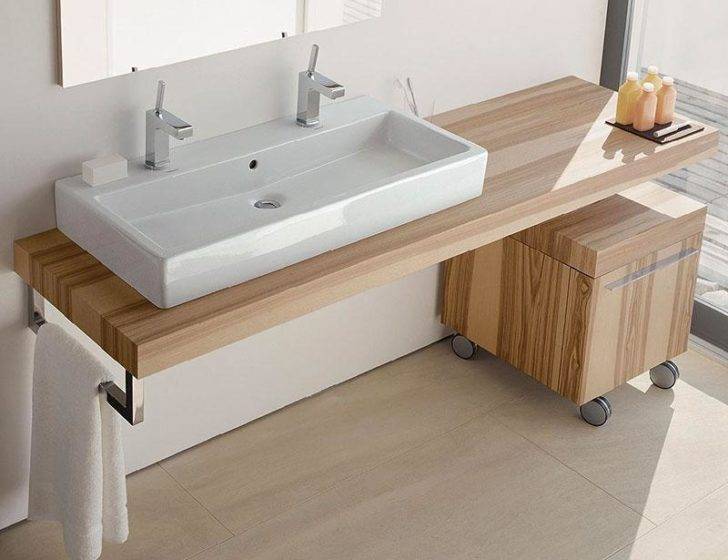
The most common are rectangular and square shell bowls, sometimes with rounded edges. They are suitable for installation on a nightstand or above a washing machine. Photos of sinks of this type in modern bathrooms confirm their popularity. A wide range of sizes of rectangular sinks will allow you to choose and install the product even in the smallest bathroom.

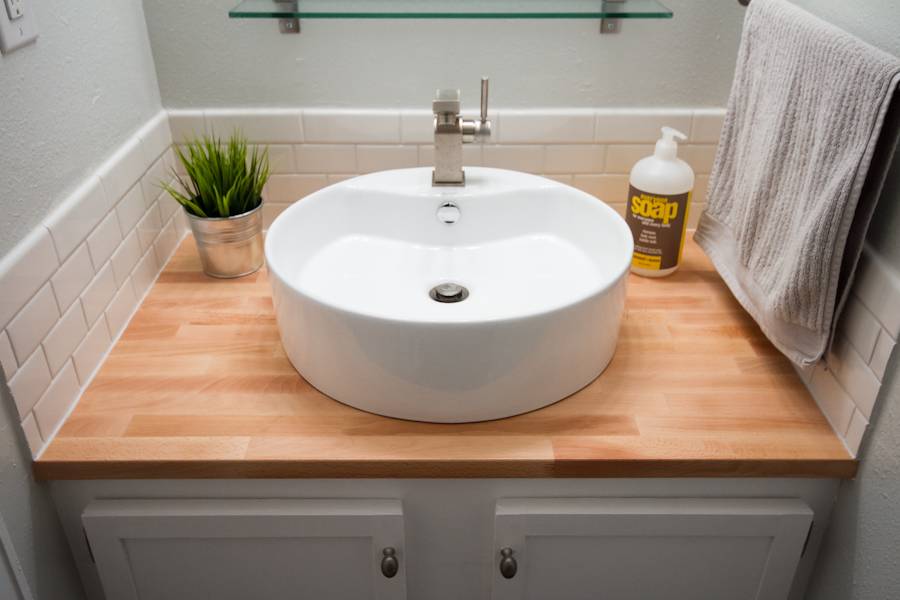
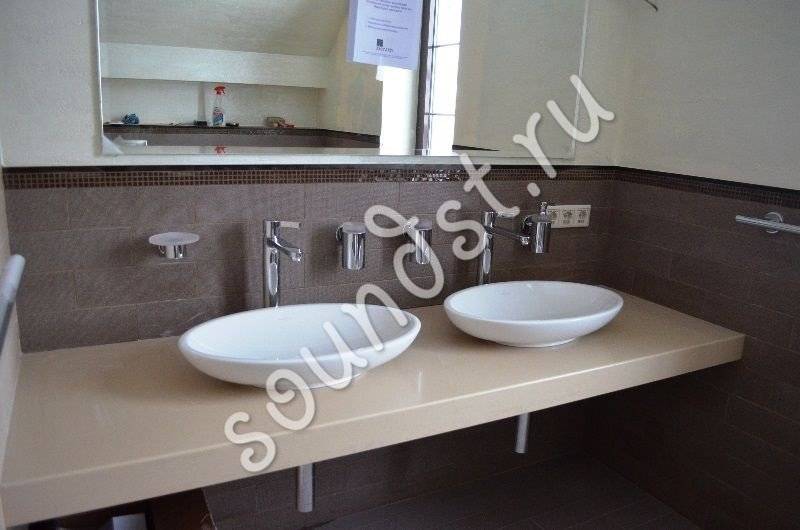
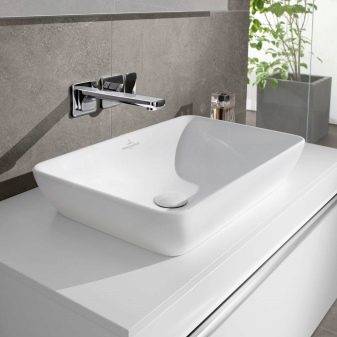
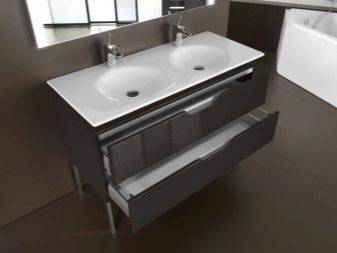
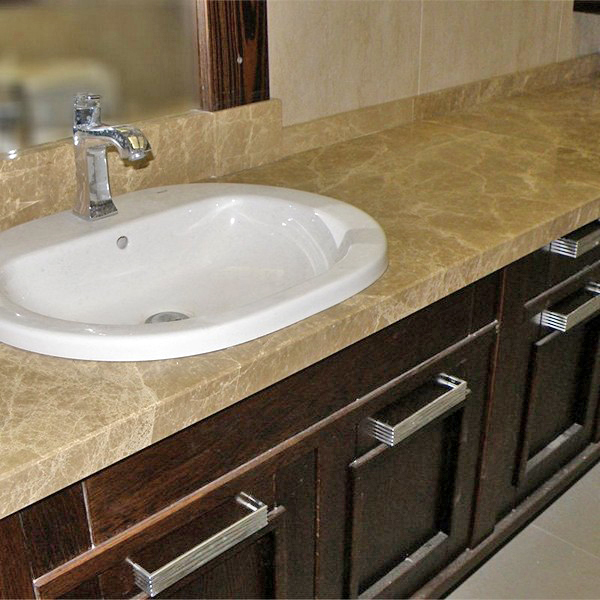
Rectangular countertop wash basin
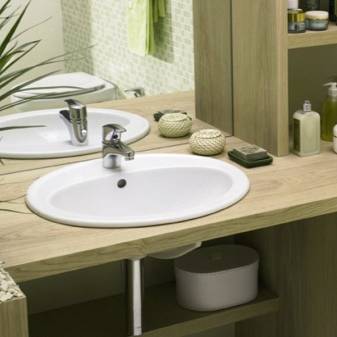
Round and oval bowls are suitable for installation in more spacious bathrooms.Their use is accompanied by additional comfort, because you can approach such a bowl, unlike a rectangular one, from any side. A distinctive feature of rounded bowls is the absence of a hole for the mixer in them - it cuts directly into the countertop. Built-in sinks in the bathroom most often have an oval, round or rectangular shape.
Among other, less common forms, one can find triangular, polygonal, diamond-shaped and other types of shells. There are ready-made sets of sinks in the bathroom with countertops and / or a built-in faucet. Designer pieces may have LED backlighting, which turns on when the tap is opened and changes color depending on the water temperature.

Creative plumbing set of countertop, sink and soap dish
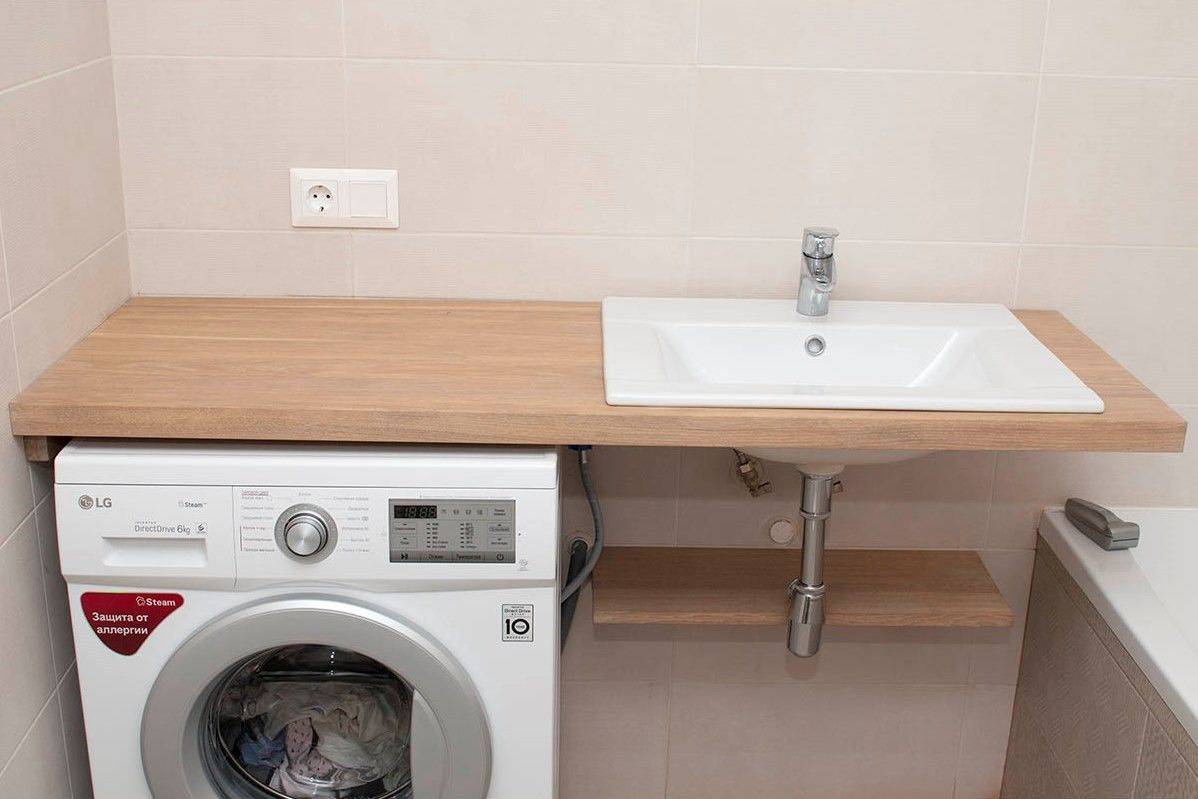
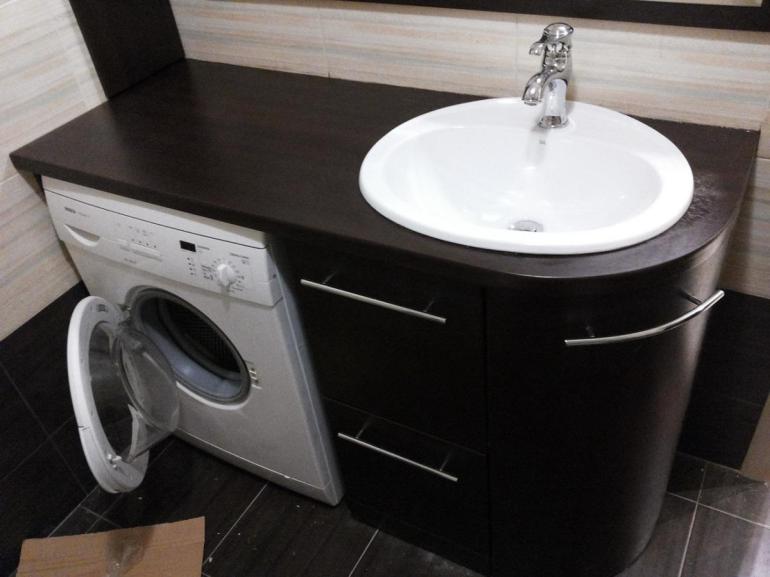
Sink "water lily" for placement above the washing machine
There is another form of built-in bowl, designed to be installed above the washing machine - a water lily sink. Its peculiarity lies in the location of the drain hole, which, unlike standard models, is offset from the center and is located on the edge of the sink. This allows you to place the siphon and sewer pipes almost right next to the wall, which makes it possible to install a washing machine under the bowl.


The water lily sink has dimensions corresponding to the standard sizes of washing machines, as a rule, it is 60 x 50-60 cm with a height of no more than 20 cm. It should be remembered that using a water lily with large models of washing machines with a depth of more than 51 cm is not succeed.Thus, a water lily sink measuring 60x60 cm can be installed on a car with a depth of up to 51 cm, a bowl of 60x50 cm can be installed on a car with a depth of 32-36 cm.

Claro Washbasin Sink by PAA Bath
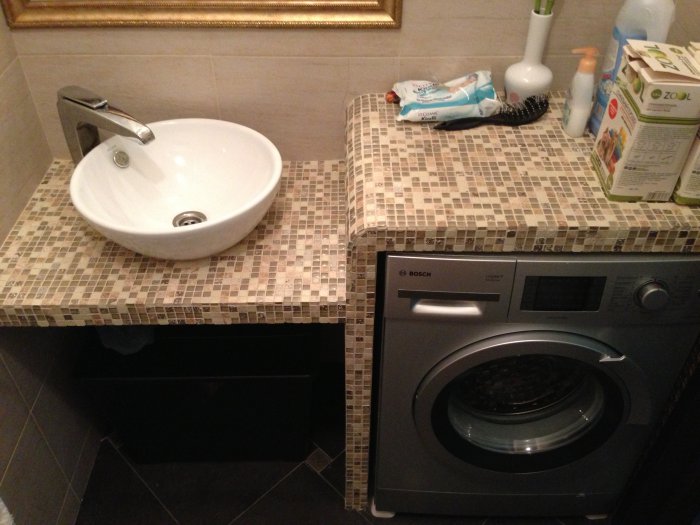
In addition to the water lily, there is another variety - a sink with a countertop for a washing machine. Its feature is asymmetry, i.e. to the left or right of the bowl there is a horizontal surface under which the washing machine is installed. Such a model is good in that the countertop creates additional space for storing bathroom accessories, and under the bowl itself you can install a bedside table, or put a laundry basket. Photos of washing machines under the sink in the bathroom clearly demonstrate the convenience of such an arrangement.

Ceramic sink with counter top for washing machine
Installation methods
The placement of countertops in the bathroom largely depends on the area of the bathroom itself, the material from which the building and walls are built, the financial capabilities of the client and, of course, his desires and preferences. However, there are only three installation methods. Let's consider each of them in more detail.
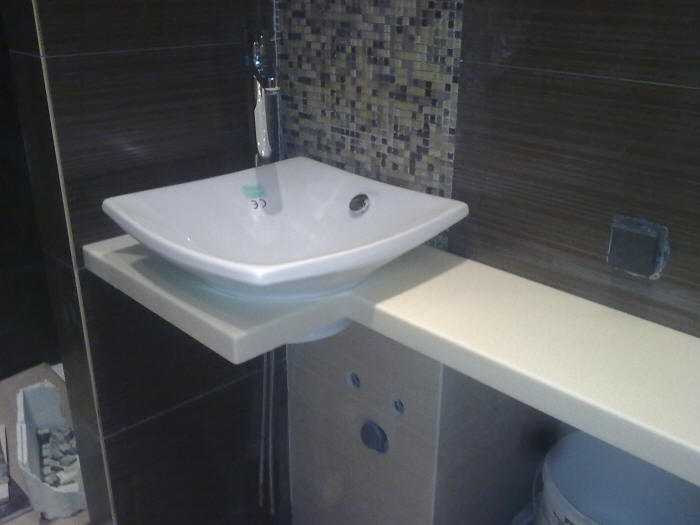
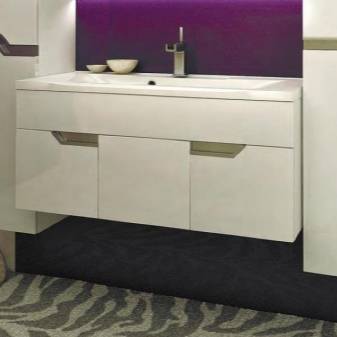
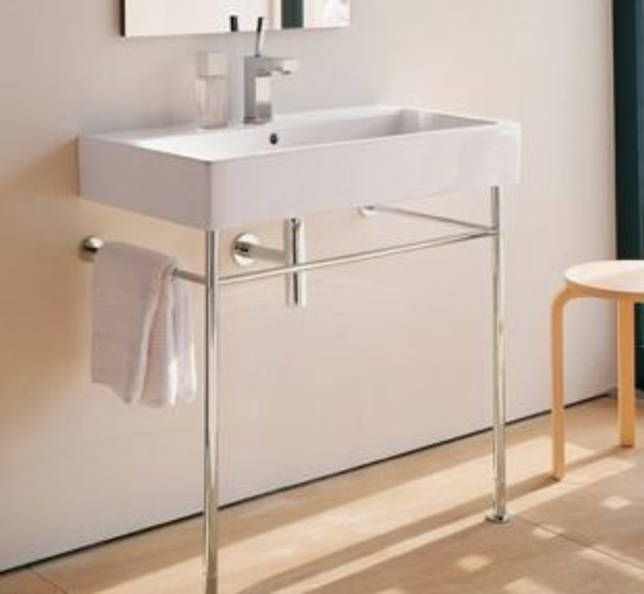
Hanging way to install the tabletop
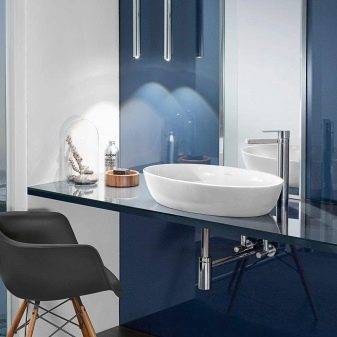
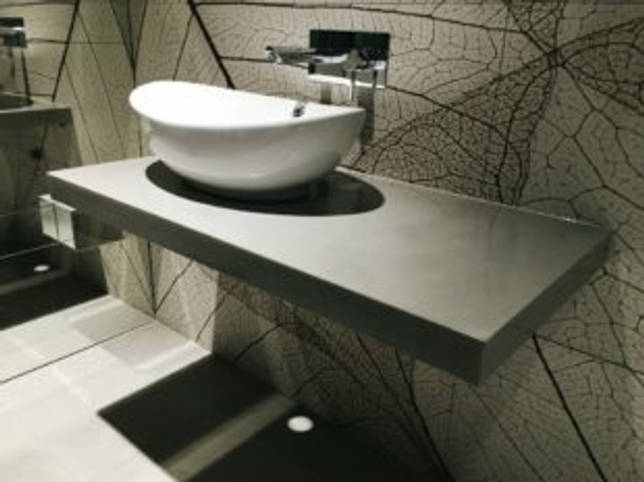 With this method, the tabletop is attached, with the help of brackets, to the wall (there is no vertical support). This type of installation is used for countertops with and without shelves. If the client intends to leave such a space free, then it is better to replace the usual plastic siphon with a chrome one, it will look more expensive and fit better into the interior.
Advantages:
- Compactness. This method is convenient and practical if the bathroom is small and it is necessary to economically arrange all the necessary items and equipment;
- Appearance.This method of fastening looks spectacular and stylish;
- Practicality. Given the installation features, the space under the countertop remains free (as a rule, a washing machine is installed under such a countertop).
Flaws:
specific
Despite all their practicality, such countertops require you to adjust the entire interior for them;
It is important to consider the material of the walls, since not every wall can be securely attached to such a "detail" of the bathroom. In order for the brackets to firmly hold the countertop, this type of installation is best used for brick or reinforced concrete walls.
After all, the countertop, in addition to its own weight, is designed to hold additional weight, because its main task is to expand the usable space and make it possible to conveniently store the necessary things.
With overhead and built-in type of sink, its weight must be taken into account. Because the wall in this case will hold not only the countertop and things on it, but also the weight of the sink.
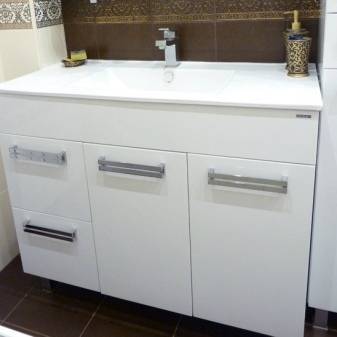
Floor mounted table top
 In this embodiment, installation is carried out on the floor, on a horizontal support with the help of legs. As a rule, such a countertop consists of cabinets closed with doors, where they store things and chemicals needed in the bathroom.
Advantages:
- The main advantage is that it does not require taking into account the material of the walls. Due to the legs, there is no load on the walls, so such a tabletop can be installed regardless of the material of the walls;
- It does not require taking into account the weight of the product. Even the heaviest natural stone will be securely fixed on the legs;
- Simple installation, which comes down only to adjusting the length of the legs using a level.
Flaws:
This method complicates cleaning in the bathroom, but if you provide for and make the shelves removable, then cleaning will not be a problem.
Semi-suspended way to install the table top
 This method combines the previous two. The back of the tabletop is fixed with brackets to the wall, and the front is mounted on special legs. This type of installation is most often used in two cases:
- for countertops made of natural stone (such a countertop has a lot of weight, due to this it requires additional fastening);
- according to the design decision (for beauty, legs or another type of support are attached to the countertop, from any material).
As a rule, during installation, a support frame is attached to the wall, to which the tabletop is attached with brackets, and the frame itself is hidden with a cladding, such installation is quite complicated and it is harder to carry it out on your own than a floor installation.
Built-in sinks: pros and cons
Properly matched to the style of the room and neatly installed in the countertop, the sink will look very attractive in the bathroom. Sinks are made from various materials. They are ceramic (porcelain and faience), metal, acrylic. They are also made of natural or artificial stone, glass, specially processed wood.
The advantages of built-in options, compared with other types, include:
- practicality - such sinks are installed on any surface, you can place the necessary accessories for washing nearby, and use the space under the sink to store any things;
- reliability - this type of bathroom sinks are rigidly fixed on the surface of the countertop, stand securely and firmly;
- ease of installation - you do not need to mount the sink to the wall, even a person who does not have much experience in such work can handle embedding the sink into the countertop;
Built-in sink
- aesthetic appeal - even inexpensive sink models, neatly built into the countertop, can look unusual and stylish. In addition, with the built-in version, all communications are hidden from view by the closed cabinet door;
- a large selection of models - a variety of configurations and sizes of sinks allows you to choose the best option for the bathroom.
Some of the disadvantages of such sinks include the fact that in small bathrooms it is difficult to find enough space to place suitable sanitary furniture for installing a sink.