- Advantages and disadvantages of a solar battery
- How to assemble a solar battery with your own hands
- Assembling the solar panel housing
- Soldering wires and connecting photocells
- Applying a sealing layer
- Final solar panel assembly
- Installation
- Calculation and design
- Formula for calculation
- Solar panels on the roof
- Features and varieties of the device
- Panel recommendation
- The principle of operation of a solar power plant
- How to solder elements for a solar battery
- Variants of modules for self-assembly
- Types of elements for modules
- crystalline
- Film
- Method for manufacturing solar cells
- Assembly of solar modules from silicon photocells
- Frame for solar battery
- Deciding on a place
Advantages and disadvantages of a solar battery
 Solar panels have both advantages and disadvantages. If there were only one pluses from the use of photovoltaic converters, the whole world would have switched to this type of electricity generation long ago.
Advantages:
- Autonomy of the power supply, no dependence on power outages in the centralized power grid.
- No subscription fee for electricity use.
Flaws:
- High cost of equipment and elements.
- Dependence on sunlight.
- The possibility of damage to the elements of the solar battery due to adverse weather conditions (hail, storm, hurricane).
In what cases it is advisable to use the installation on photovoltaic cells:
- If the object (house or cottage) is located at a great distance from the power line. It may be a country cottage in the countryside.
- When the object is located in the south sunny area.
- When combining different types of energy. For example, heating a private house using stove heating and solar energy. The cost of a low-power solar station will not be so high, and can be economically justified in this case.
How to assemble a solar battery with your own hands
Assembling the solar panel housing
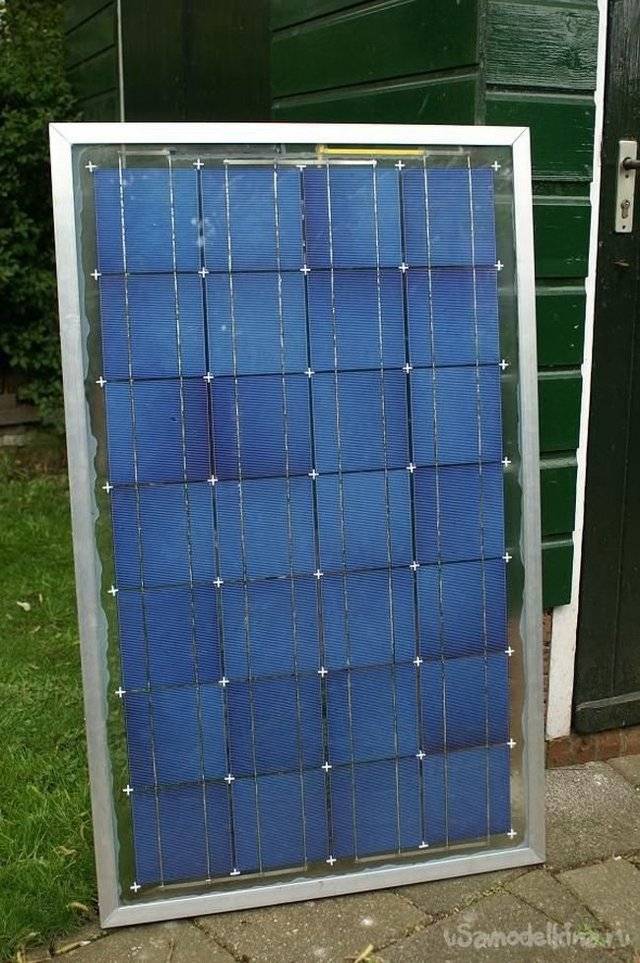
The assembly of solar panels, namely, the housing can be performed in different versions. In the first case, it can be made from plywood sheets and wooden slats, so this installation is not particularly difficult. The structures are cut to size, and then interconnected with self-tapping screws. All joints and seams are pre-coated with sealant. All wooden parts are covered with paint or special protective compounds. Further work is carried out only after the structure has completely dried.
It is a little more difficult to make a solar panel from an aluminum corner. In this case, the assembly of the frame occurs in the following order:
- Assembly from a corner of a rectangular frame.
- Mounting holes are drilled in each corner of the structure.
- The inner part of the profile along the entire perimeter is covered with silicone sealant.
- Inside the frame, textolite or plexiglass, cut to size, is placed on the treated places. They need to be pressed as tightly as possible to the corners.
- Inside the case, a sheet of transparent material is fixed with mounting brackets installed at the corners.
- Further work is carried out after the sealant has completely dried. Previously, all internal surfaces are wiped from dust and dirt.
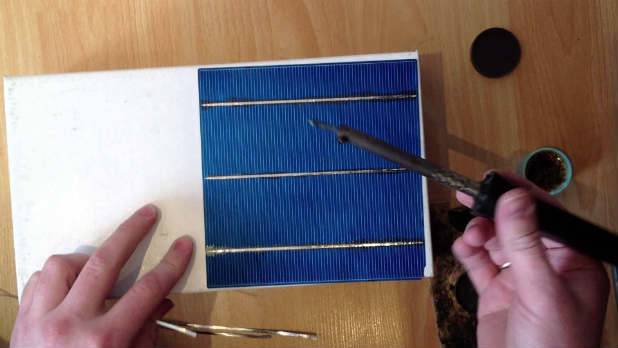
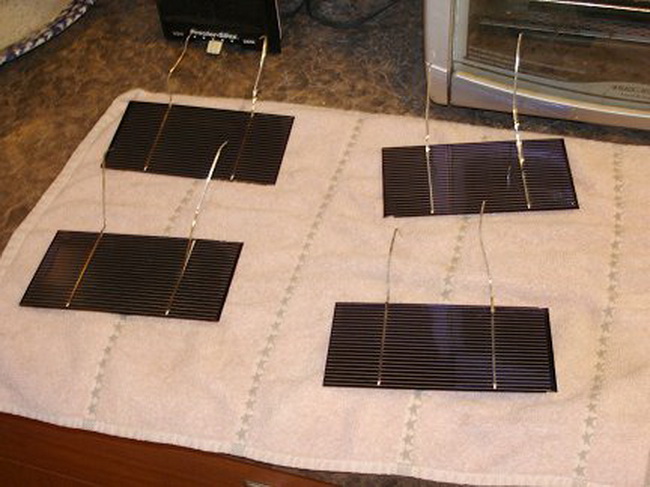
Soldering wires and connecting photocells
All elements for solar panels are characterized by increased fragility and require careful handling. Before soldering, they are wiped so that the surface is perfectly clean. Elements with soldered conductors should still be checked and corrected.
Each photographic plate has contacts with different polarity. First, the conductors are soldered to them, and only then they are connected to each other.
When using tires instead of wires, the following features must be considered:
- Tires are marked and cut into the required number of strips.
- The contacts of the plates are wiped with alcohol, after which a thin layer of flux is applied to them, on one side.
- The tire is applied along the entire length of the contact, after which it must be carried out with a heated soldering iron.
- The plate is turned over and the same operation is repeated on the other side.
The soldering iron during installation can not be strongly pressed against the plate, otherwise it may burst. On the front side after soldering, there should be no irregularities. If they remain, you need to go through the seam again with a soldering iron.
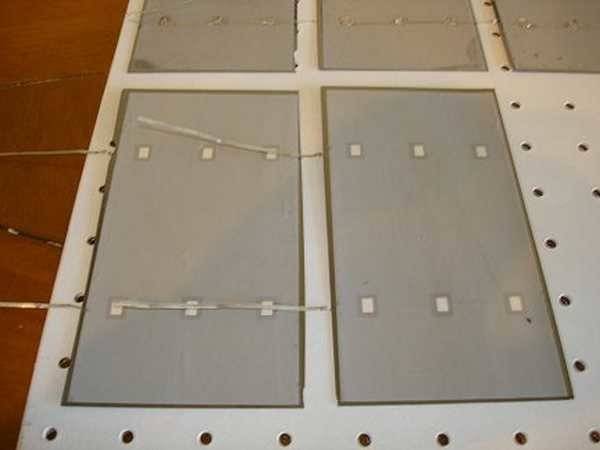
In order not to be mistaken with the placement of the plates, before assembling them, it is recommended to mark the surface of the sheet, taking into account all sizes and gaps. After that, the photocells fit into place. Then the contacts of the panels are interconnected with the obligatory observance of polarity.
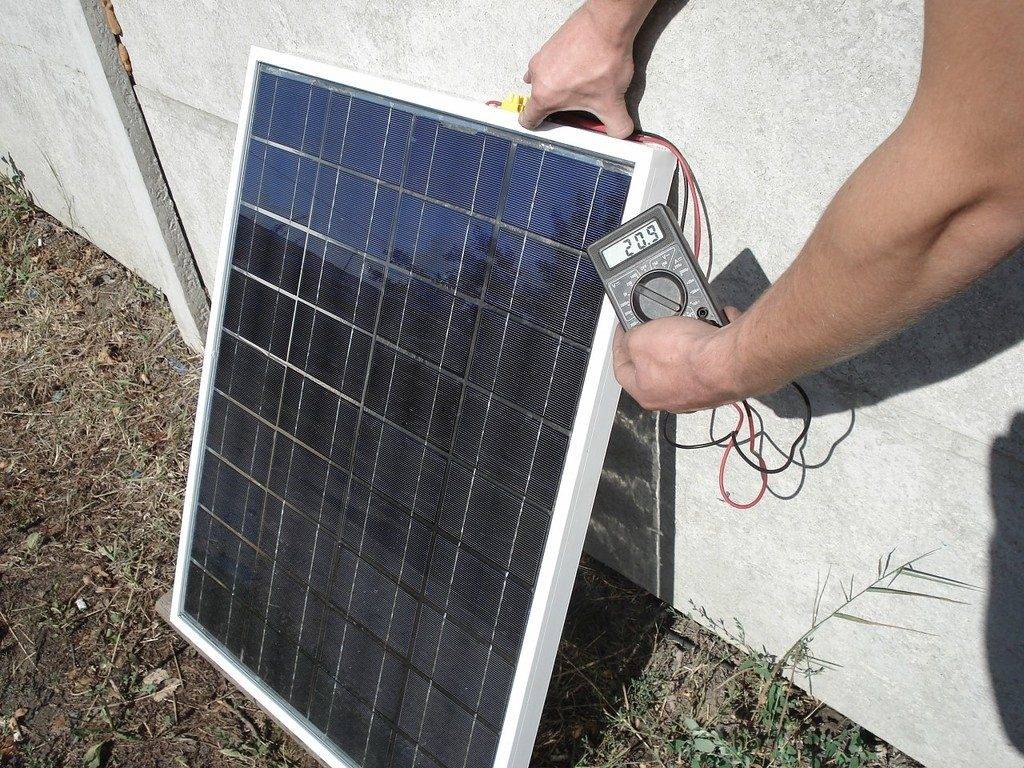
Applying a sealing layer
Before you seal the structure yourself, you need to test and check the solar panels for performance. It is taken out in the sun, after which the voltage is measured at the bus terminals. If it is within the normal range, you can start applying the sealant.
One of the most suitable options involves the following steps:
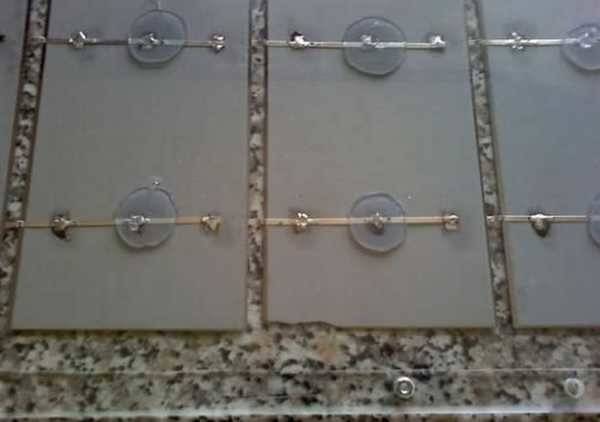
- Silicone sealant is applied to homemade solar panels with droplets along the edges of the case and between the plates. After that, the edges of the photocells are gently pressed against the transparent base and should fit as tightly as possible to it.
- A small load is placed on each edge of the plates, after which the sealant dries completely, and the photocells are securely fixed.
- At the very end, the edges of the frame and all joints between the plates are carefully smeared. At this stage, everything is covered with sealant, except for the plates themselves, it should not get on their reverse side.
Final solar panel assembly
After all the operations, it remains only to fully assemble the solar panel at home.
In this case, the procedure will be as follows:
- A connector is installed in the side of the case, to which Schottky diodes are connected.
- On the front side, the entire assembly of solar battery plates is closed with a transparent protective screen and sealed to prevent moisture from entering the structure.
- To process the front side, it is recommended to use a special varnish, for example, PLASTIK-71.
- After assembly, a final check is performed, after which the do-it-yourself solar battery can be installed in its place.
How to make a solar battery with your own hands
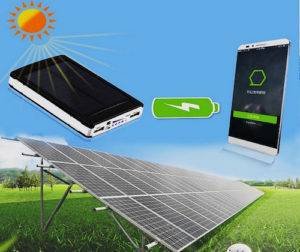
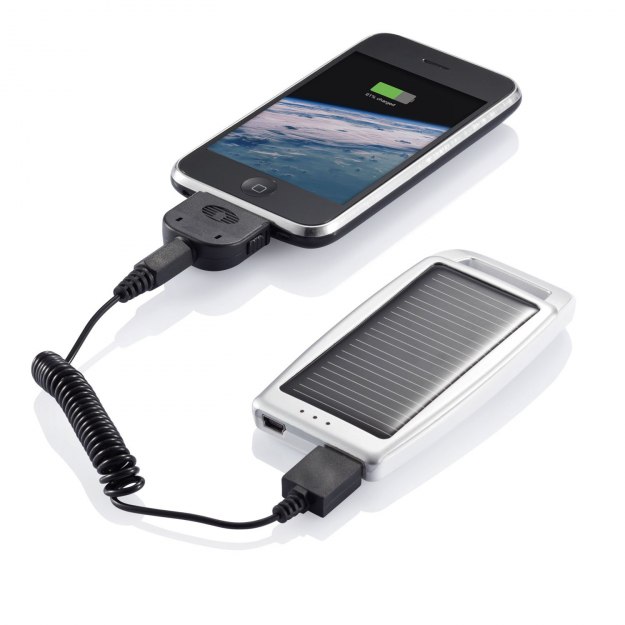
Power bank with solar battery
Overview of solar panels for tourists
Installation of solar panels
Solar panels: alternative energy

Solar battery production
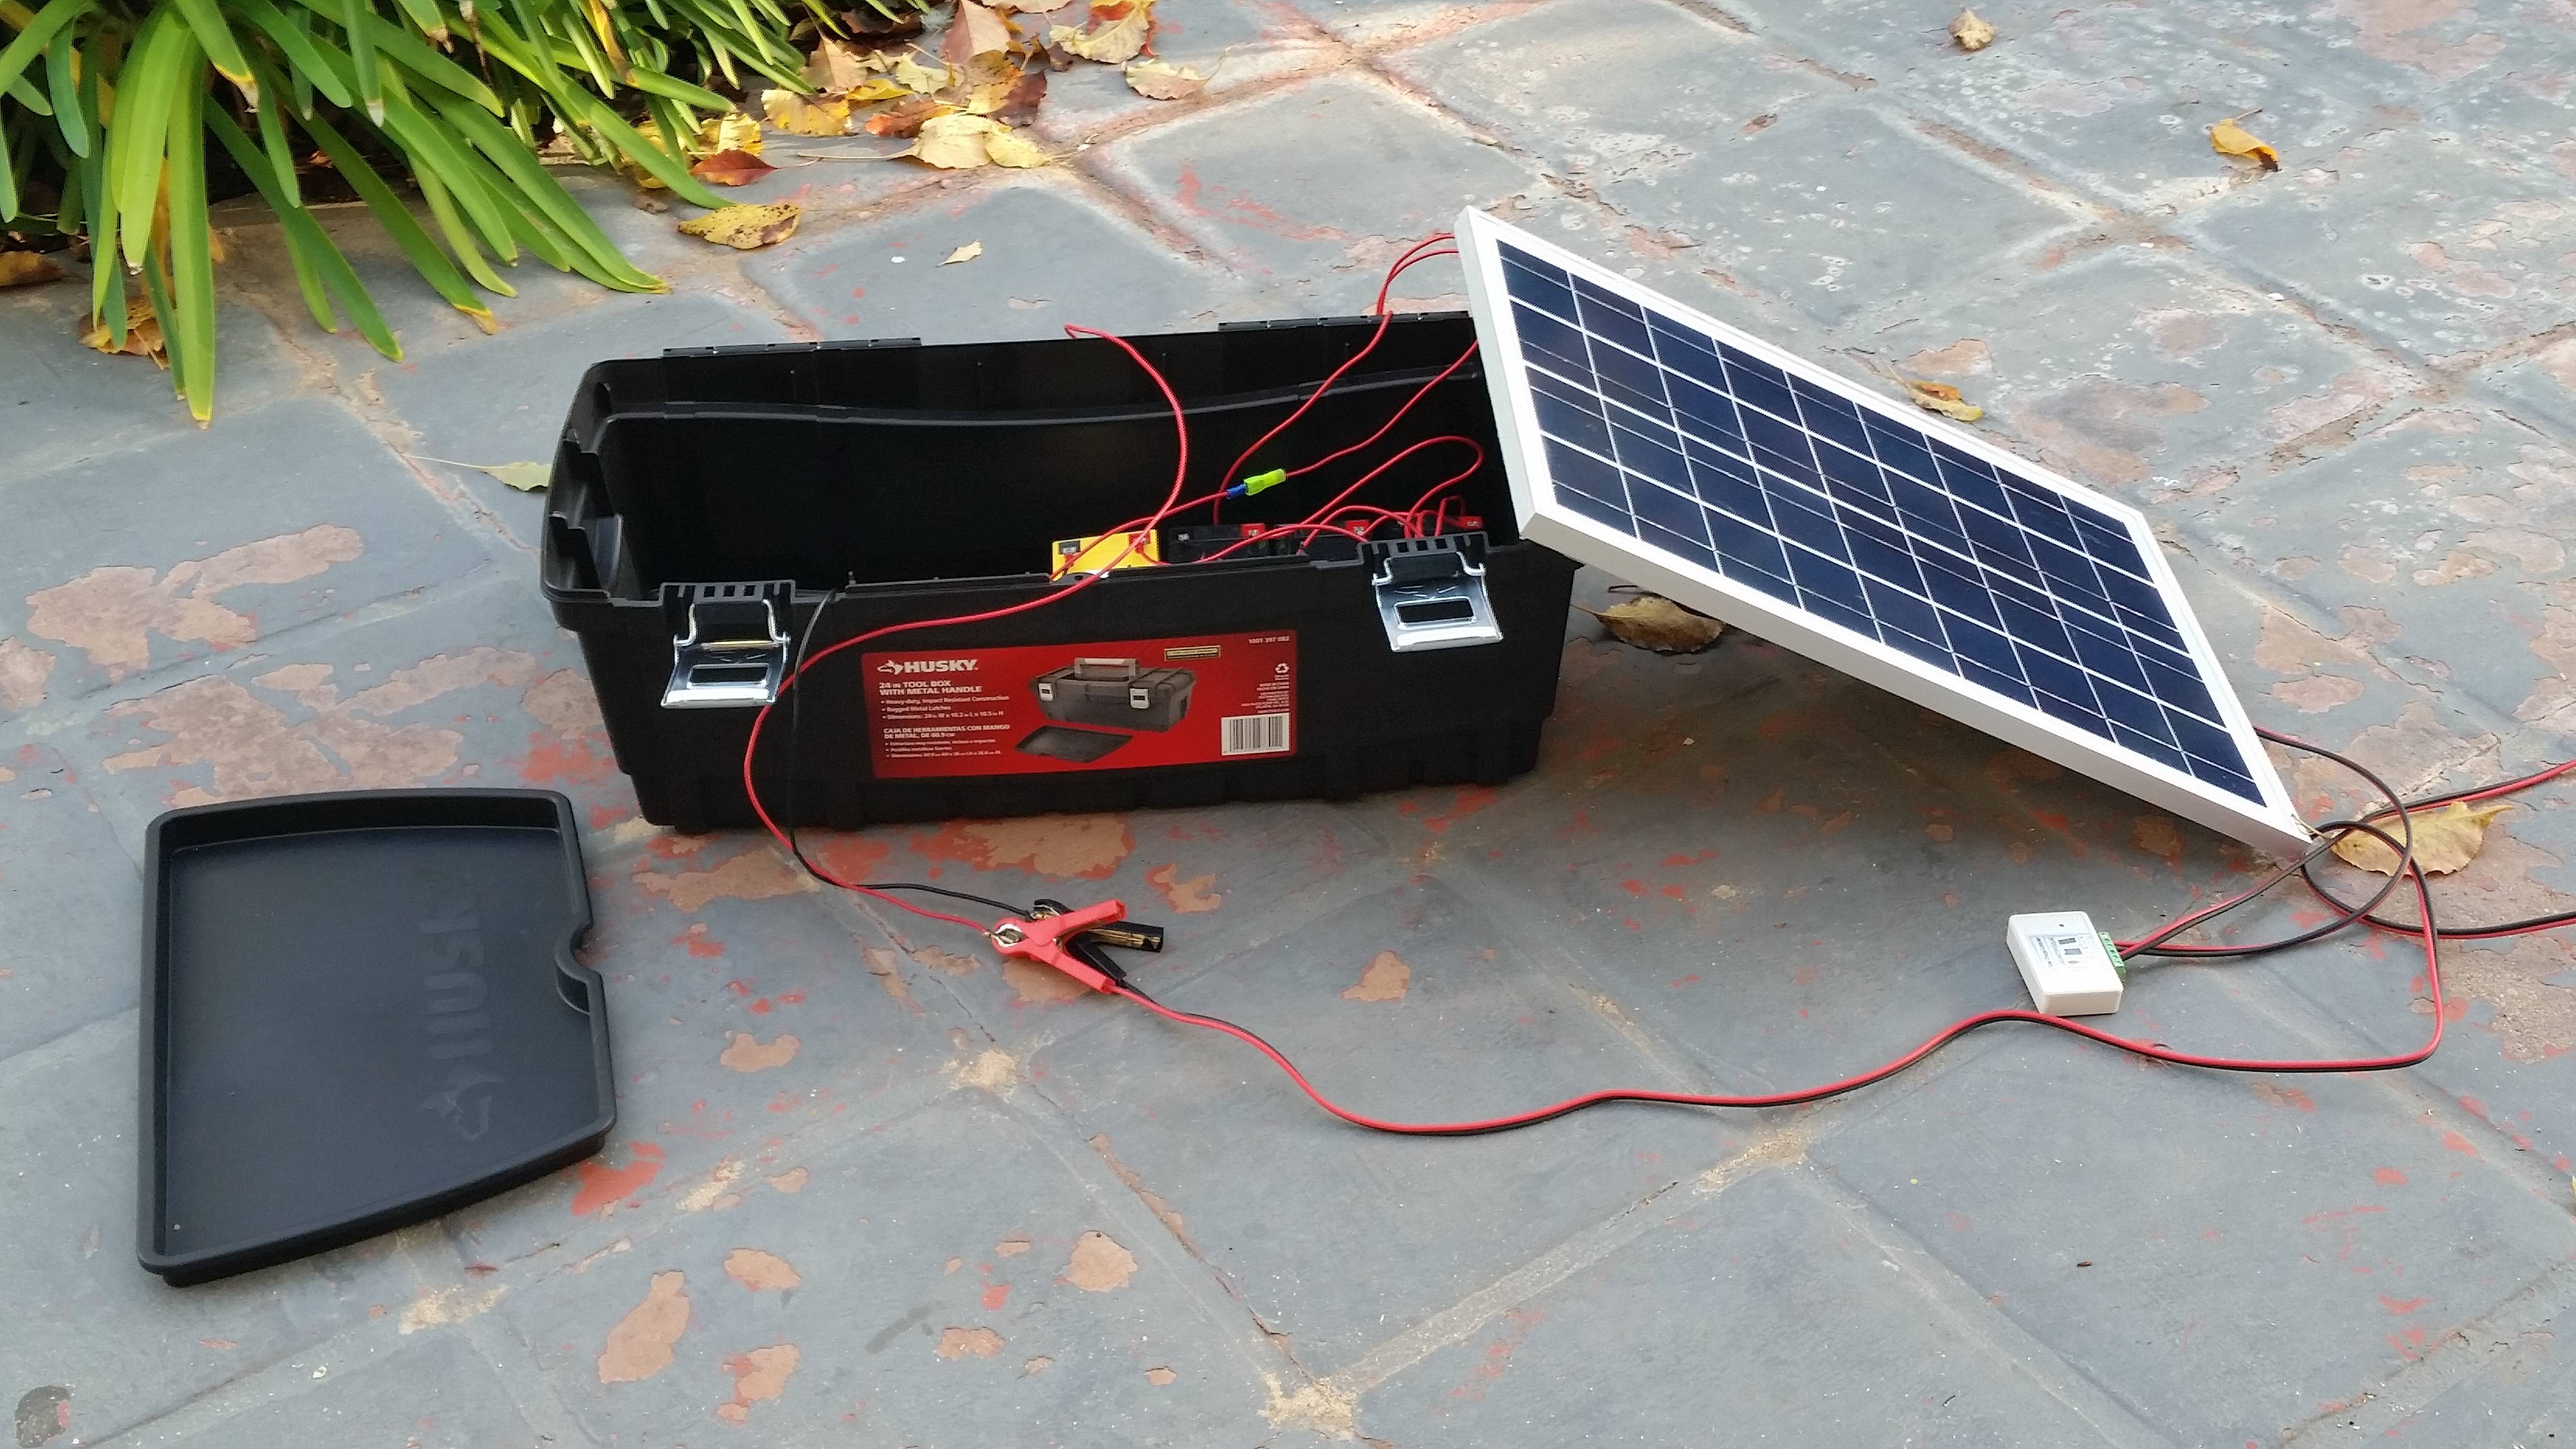
Installation
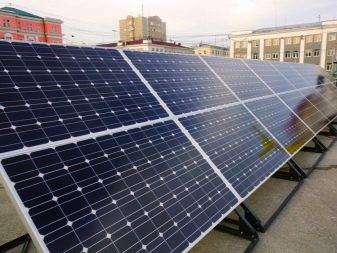
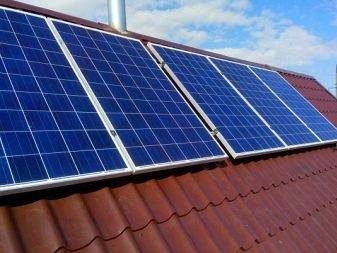
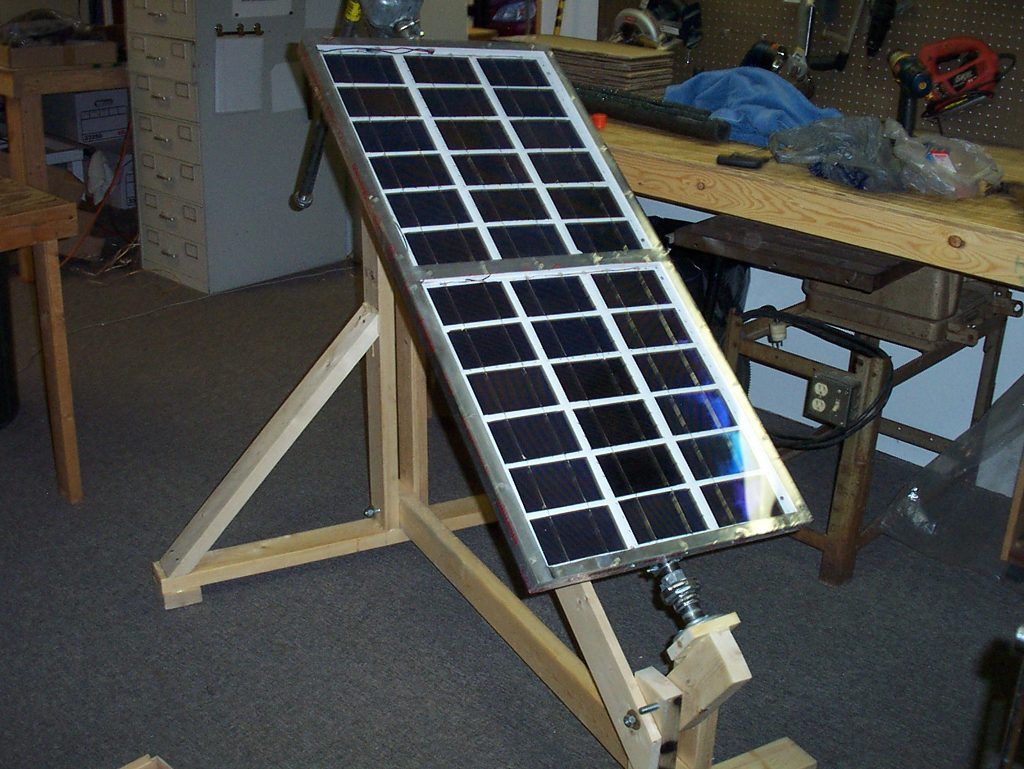
 It is necessary to mount the battery in the place of maximum illumination by sunlight. The panels can be mounted on the roof of the house, on a rigid or swivel bracket.


The front of the solar panel should face south or southwest at an angle of 40 to 60 degrees. During installation, external factors must be taken into account. Panels should not be obstructed by trees and other objects, dirt should not get on them.
A few tips to help save money and time when making solar panels:
- It is better to buy photocells with small defects. They also work, only they do not have such a beautiful appearance. New elements are very expensive, the assembly of a solar battery will not be economically justified. If there is no particular hurry, it is better to order plates on eBay, it will cost even less. With shipment and China, you need to be more careful - there is a high probability of receiving defective parts.
- Photocells need to be bought with a small margin, there is a high probability of their breakdown during installation, especially if there is no experience in assembling such structures.
- If the elements are not yet in use, they should be hidden in a safe place to avoid breakage of fragile parts. You can not stack the plates in large stacks - they can burst.
- At the first assembly, a template should be made on which the locations of the plates will be marked before assembly. This makes it easier to measure the distance between elements before soldering.
- It is necessary to solder with a low-power soldering iron, and in no case apply force when soldering.
- It is more convenient to use aluminum corners to assemble the case, the wooden structure is less reliable. As a sheet on the back of the elements, it is better to use plexiglass or other similar material and is more reliable than painted plywood and looks aesthetically pleasing.
- Photovoltaic panels should be located in places where sunlight will be maximum throughout the daylight hours.
Calculation and design
To calculate the solar battery assembled at home, you will definitely need a list of all electrical appliances and equipment available in the house. Immediately you need to find out the power consumption of each of them.
Power data is indicated in the label or in the technical data sheet of the device. Their values are quite approximate, therefore, for a panel working with an inverter, a correction must be entered, that is, the average power consumption is multiplied by a correction factor. The total power obtained in this way is additionally multiplied by 1.2, taking into account the losses during the operation of the inverter. Powerful devices at startup consume a current that is several times higher than the rated current. Because of this, the inverter must also withstand double or triple power for a short time.
If there are quite a lot of powerful consumers, but at the same time they practically do not turn on, then the inverter used in the system with a large output current will turn out to be too expensive. In the absence of significant loads, it is recommended to use less powerful inexpensive devices.
The solar battery at home is calculated according to the operating time of each electrical appliance during the day.Empirically calculated, the value is multiplied by the power, and the result is a daily energy consumption, measured in kilowatt-hours.
You will definitely need information from the local weather station about the amount of solar energy that can actually be obtained in this area. The calculation of this indicator is based on the readings of the average annual solar radiation and its average monthly values in the worst weather. The last figure allows you to determine the minimum amount of electricity sufficient to solve current problems.
Having received the initial data, you can begin to determine the power of one photocell. First, the solar radiation indicator must be divided by 1000, as a result, the so-called pico-hours are obtained. At this time, the intensity of solar luminescence is 1000 W/m2.
Formula for calculation
The amount of energy W generated by one module is determined by the following formula: W \u003d k * Pw * E / 1000, in which E is the value of solar insolation for a certain period of time, k is a coefficient that is 0.5 in summer, 0 in winter, 7, Pw is the power of one module. The correction factor takes into account the power loss of photocells when heated by the sun's rays, as well as the change in the inclination of the rays relative to the surface during the day. In winter, the elements heat up less, so the value of the coefficient will be higher.
Taking into account the total power consumption and the data obtained using the formula, the total power of the solar cells is calculated. The result obtained is divided by the power of 1 element and as a result there will be the required number of modules.
There are various models with a range of power elements - from 50 to 150 W and above.By choosing components with the required performance, you can assemble a solar panel with a given power. For example, if the power demand is 90 W, then two modules of 50 W each are needed. According to this scheme, you can create any combination of the available photocells. In any case, calculations should be made with some margin.
The number of photocells affects the choice of battery capacity, since they are the ones that create the charging current. If the panel power is 100 W, then the minimum battery capacity should be 60 Ah. As the power of the panels increases, more powerful batteries will be required.
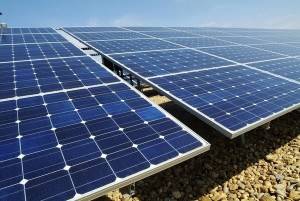
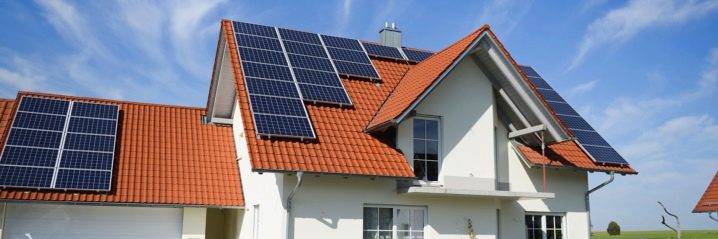
Solar panels on the roof
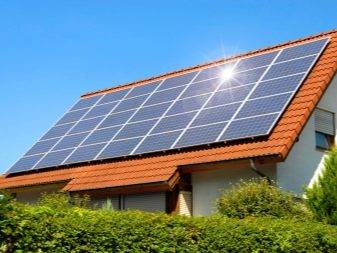
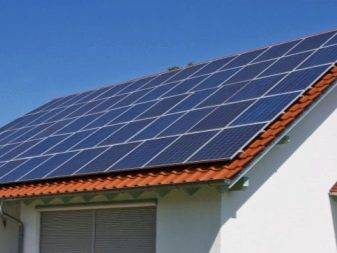
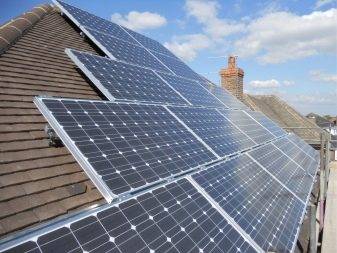
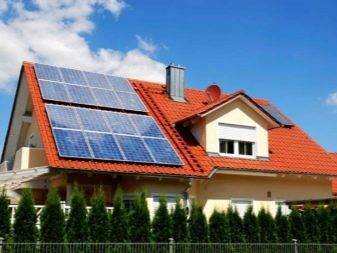
For solar panels on the roof, those buildings with one side of the roof facing south and with an optimal angle of inclination are ideal. Solar electric panels work best in warm climates where winters are short or mild. In other climatic conditions, the safety net is of paramount importance - for example, diesel generators and wind turbines are additionally connected to the system.
 Solar panels installed on the roof of the house at an optimal angle
Systems that have the ability to back up energy will come in handy in inclement weather or late at night.
More sophisticated and efficient systems also include automatic tracking of the sun (a rotary mechanism on which solar panels are installed), changing the angle of inclination from the time of year and day - which allows you to achieve maximum efficiency in power generation.
Here, however, it will not go into all the nuances of the device, types and efficiency of solar panels, read a separate article about this.
Before proceeding to the description of the assembly of a homemade solar battery, it is interesting to know for what purpose you are going to use solar energy, take part in the survey, it's simple.
Loading …
Features and varieties of the device
From an exotic device designed only for special needs, the solar battery has turned into an already relatively massive source of energy. And the reason is not only in environmental considerations, but also in the continuous rise in prices for electricity from the main networks. Moreover, there are still many places where such networks are not stretched at all and it is not known when they will appear. It is hardly possible to take care of the laying of the highway on our own, to unite the efforts of a large number of people for the sake of this. Moreover, even with success, you will have to plunge into the world of rapid inflation.
And it's not even about the format - the appearance and geometry are just pretty close. But the chemical composition is very different. The most mass-produced products are made of silicon, which is available to almost everyone and is inexpensive. In terms of battery performance, it is at least as good as more expensive options.
There are three main types of silicon, such as:
- single crystals;
- polycrystals;
- amorphous substance.
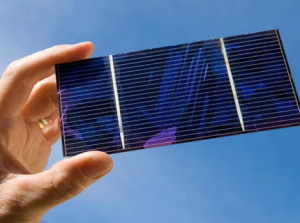
A monocrystal, based on condensed technical explanations, is the purest type of silicon. Externally, the panel looks like a kind of honeycomb. A thoroughly purified substance in solid form is divided into especially thin plates, each of which has no more than 300 microns. In order for them to fulfill their function, electrode grids are used. The multiple complication of technology compared to alternative solutions makes such energy sources the most expensive.


The undoubted advantage of single-crystal silicon is a very high efficiency by the standards of solar energy, which is approximately 20%. The polycrystal is obtained differently, it is required to first melt the material, and then slowly lower its temperature. The relative simplicity of the technique and the minimum consumption of energy resources in production have a positive effect on the cost. The downside is reduced efficiency, even in the ideal case it is no more than 18%. Indeed, inside the polycrystals themselves there are many structures that reduce the quality of work.
Amorphous panels almost do not lose to both types just named. There are no crystals here at all, instead there is “silane” - this is a silicon-hydrogen compound placed on a substrate. The efficiency is about 5%, which is largely compensated by the greatly increased absorption.
Sometimes you can find a combination of single-crystal or polycrystalline elements with an amorphous variant. This helps to combine the advantages of the schemes used and extinguish almost all of their shortcomings. In order to reduce the cost of products, film technology is now increasingly being used, which provides for the generation of current based on cadmium telluride. By itself, this compound is toxic, but the release of poison into the environment is vanishingly small. Also can be used copper and indium selenides, polymers.
Concentrating products increase the efficiency of using the panel area. But this is achieved only when using mechanical systems that ensure the rotation of the lenses following the sun. The use of photosensitizing dyes has the potential to improve the reception of solar energy, but so far this is more of a general concept and development by enthusiasts.If there is no desire to experiment, it is better to choose a more stable and proven design. This applies to both self-production and the purchase of a finished product.
Panel recommendation
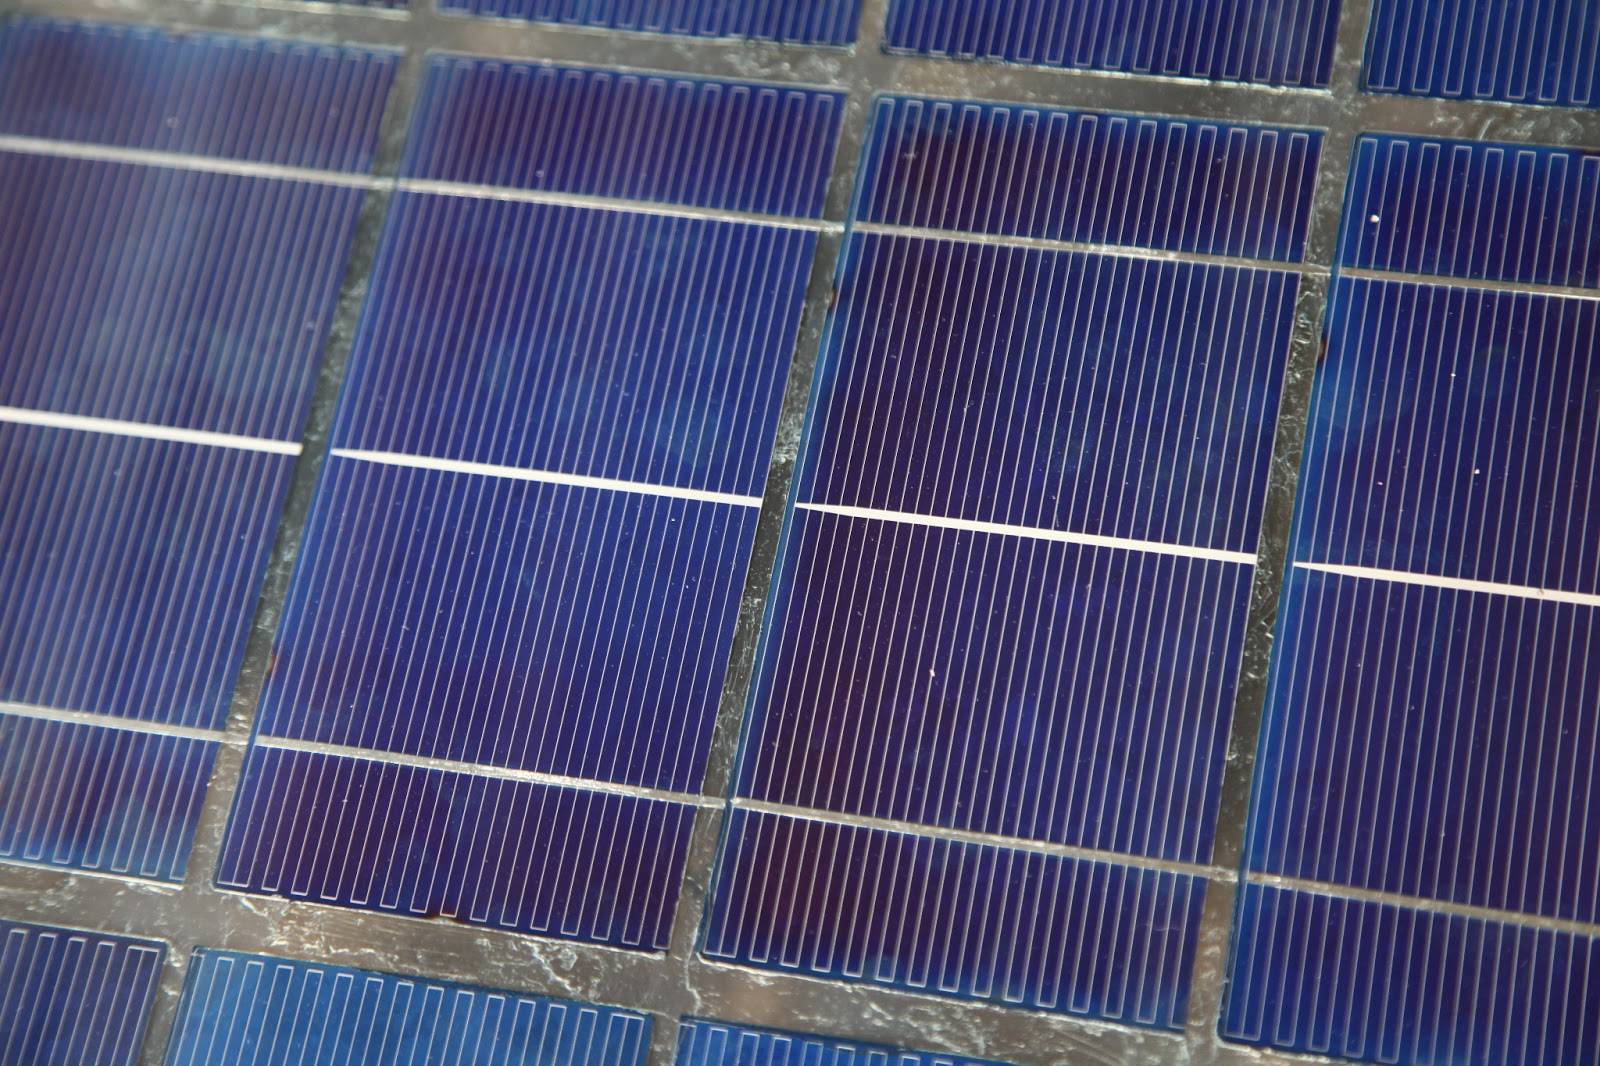
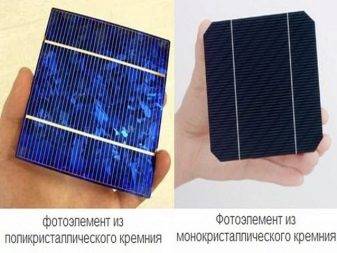
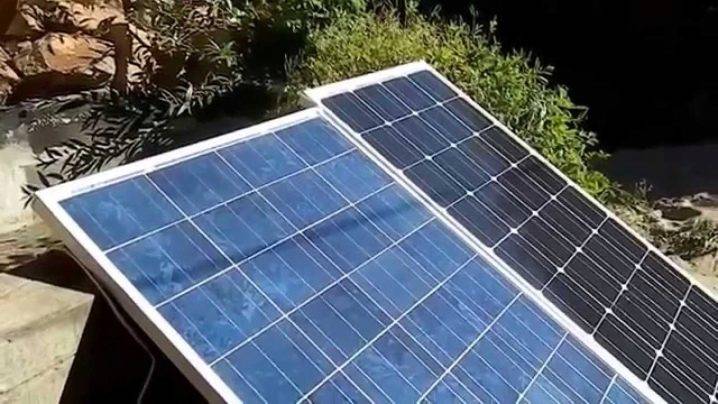
Not only Chinese, but all solar panels are divided into mono- (more expensive) and polycrystalline (amorphous). What is the difference? Without going into manufacturing technology, it is enough to point out that the former are characterized by a homogeneous structure. Therefore, their efficiency is higher than that of amorphous counterparts (about 25% versus 18%) and they are more expensive.
Visually, they can be distinguished by their shape (shown in the figure) and shade of blue. Monocrystalline panels are somewhat darker. Well, is there any point in saving on power, you will have to decide on your own. In addition, it should be taken into account that the production of inexpensive polycrystalline panels in China is mainly carried out by small firms that save literally on everything, including raw materials. This directly affects not only the cost, but also the quality of products.
All photocells are connected into a single energy chain by conductors. Depending on the type of panels, they may already be fixed in place or missing. So, you will have to solder them with your own hands. All crystalline samples are quite fragile and must be handled with extreme care.
If you do not have the proper soldering skills, then it is better to purchase class A panels (more expensive). When buying cheap analogues (B), it is advisable to take at least one in stock. The practice of assembling solar panels shows that damage cannot be avoided, so an extra panel will definitely be needed.
When determining the required number of photocells, you can focus on such data. 1 m² of panels gives approximately 0.12 kWh of electricity. Energy consumption statistics show that for a small family (4 people) about 280 - 320 kW is enough per month.
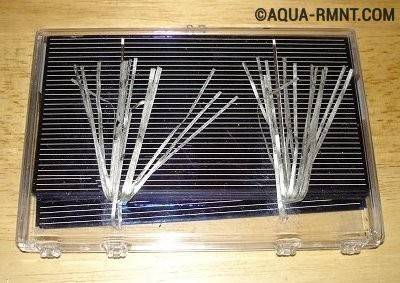
Solar panels are sold in two possible versions - with a wax coating (to protect against damage during transportation) and without it. If the panels are with a protective layer, then they will have to be prepared for assembly.
What needs to be done?
- Unpack the goods.
- Immerse the set in hot water. Approximate temperature - 90 ± 5 0С. The main thing is that it should not be boiling water, otherwise the panels are partially deformed.
- Separate the samples. Signs that the wax has melted are visible visually.
- Process each panel. The technology is simple - alternately immersing them in hot soapy water, then clean. The “washing” procedure continues until there are no traces of wax on the surface.
- Dry. The panels should be laid out on a soft cloth. For example, on a terry tablecloth.
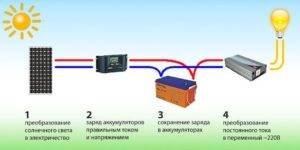
The principle of operation of a solar power plant
To have
the ability to make solar panels for the home with your own hands, you need
figure out how they work. If you understand well why
you need each of the details, you can understand the principles of operation and the device
system, the degree of its complexity, then the creation of panels for generating solar
energy will become a fairly clear and simple task for you.
Sunny
The power station is divided into three main components:
Solar battery. The task of this, consisting of several
block elements is the division of sunlight energy into two groups
electrons: with a positive charge and with a negative one. It turns out
actual electric current. The disadvantage of solar panels is that they are not
can generate large amounts of electricity. powerful voltage
they will not give, on average one element powered by the sun produces
about 0.5 volts. To convert the energy of the sun into the usual 220 volts
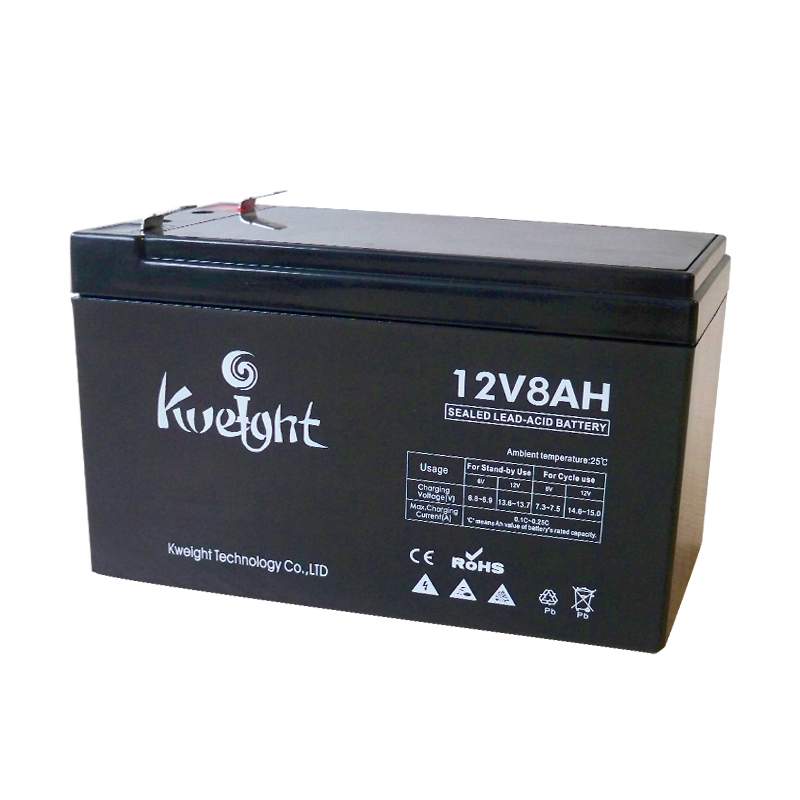
you need a huge battery. But work out the voltage up to 18
volt such a power plant is quite capable. And that will be enough for
in order to recharge the 12 volt battery as part of a solar device.
Rechargeable batteries. Solar panels suggest
the use of several such devices, some contain more than ten.
One 12-volt battery won't do the job of supplying electricity
the whole house. Of course, everything will depend on the amount of energy needed.
for all devices that consume it. During operation, you can
increase the power of your station by increasing the number of accumulating
devices. But, of course, it will be necessary to add and
additional solar cells.
A device that will modify the current at a low
voltage into high voltage energy. It's called an inverter.
You can buy an inverter in a store ready-made, it is inexpensive
At
When buying, you need to pay attention to the power it produces. She must
be at least 4 kilowatts.
Batteries
and you will get the inverter ready-made, they are not so expensive, and the panels themselves
easy to make yourself, if, of course, you have the desire and time for this.
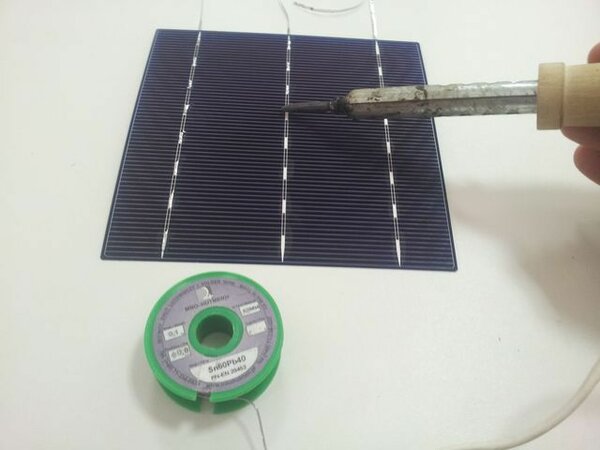
How to solder elements for a solar battery
A little about handling silicon wafers.They are very, very brittle and easily crack and break.
Therefore, they must be handled with extreme caution, stored in a rigid container away from children.
You need to work on a flat hard surface. If the table is covered with oilcloth, put a sheet of something hard. The plate should not bend, but the entire surface should be rigidly supported by the base. Moreover, the base must be smooth. As experience shows, the ideal option is a piece of laminate. It is hard, smooth, smooth. Solder on the back side, not on the front.


Everything you need to assemble a solar panel with your own hands
For soldering, you can use flux or rosin, any of the compositions in the soldering marker. Here everyone has their own preferences. But it is desirable that the composition does not leave marks on the matrix.
Lay the silicon wafer face up (face is the blue side). It has two or three tracks. You coat them with a flux or marker, an alcohol (not water-alcohol) solution of rosin. Photoconverters are usually supplied with a thin contact tape. Sometimes it is cut into pieces, sometimes it comes in a spool. If the tape is wound on a reel, you need to cut off a piece equal to twice the width of the solar cell, plus 1 cm.
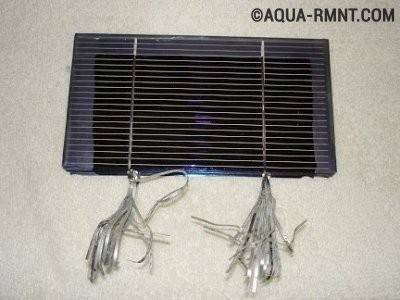
Solder the cut piece onto the flux-treated strip. The tape turns out to be much longer than the plate, the entire remainder remains on one side. Try to lead the soldering iron without tearing it off. As much as possible. For better soldering, you should have a drop of solder or tin on the tip of the tip. Then the soldering will be of high quality. There should be no unsoldered places, warm everything up well. But don't push! Especially around the edges. These are very fragile items. Alternately solder the tapes to all tracks. Photoconverters are obtained "tailed".
The front side is blue. It has several tracks (two or three) to which you need to solder the conductors. Gray is the back side. Conductors are then soldered to it from the plate going above
Now, in fact, about how to assemble a solar battery with your own hands. Let's start assembling the line. There are also tracks on the back of the record. Now we solder the “tail” from the top plate to the bottom. The technology is the same: we coat the track with flux, then solder it. So in series we connect the required number of photoelectric converters.
In some variants, there are not tracks on the back side, but platforms. Then there are fewer solderings, but there may be more claims for quality. In this case, we coat only the sites with flux. And we also solder only on them. That's all. Assembled tracks can be transferred to the base or body. But there are many more tricks.
Solder on a hard, level surface.
So, for example, a certain distance (4-5 mm) must be maintained between the photocells, which is not so easy without clamps. The slightest distortion, and it is possible to break the conductor, or break the plate. Therefore, to set a certain step, building crosses are glued to a piece of laminate (used when laying tiles), or markings are made.
Read more about using solar energy to heat your home here.
Variants of modules for self-assembly
The main purpose of a solar panel is to generate solar energy and convert it into electricity. The resulting electric current is a stream of free electrons released by light waves.For self-assembly, mono- and polycrystalline converters are the best option, since analogues of another type - amorphous - reduce their power by 20-40% during the first two years.
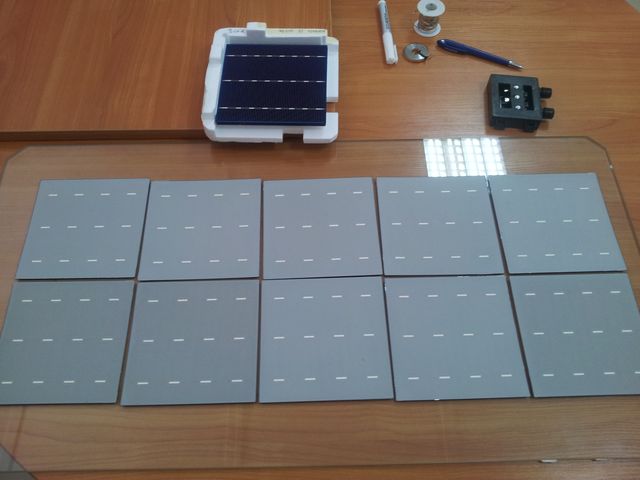
Standard single-crystal elements are 3 x 6 inches in size and are rather fragile, so they must be handled with extreme care and precision.
Different types of silicon wafers have their pros and cons. For example, polycrystalline modules have a rather low efficiency - up to 9%, while the efficiency of single-crystal wafers reaches 13%. The former retain their power even in cloudy weather, but serve an average of 10 years, the power of the latter drops sharply on cloudy days, but they function perfectly for 25 years.
The best off-the-shelf solar cell is a panel with conductors that only need to be connected in series. Modules without conductors are cheaper, but increase the assembly time of the battery several times
Types of elements for modules
There are three main types of solar panels: polycrystalline, monocrystalline and thin film. Most often, all three types are made from silicon with various additives. Cadmium telluride and copper-cadmium selenide are also used, especially for the production of film panels. These additives contribute to an increase in cell efficiency by 5–10%.
crystalline
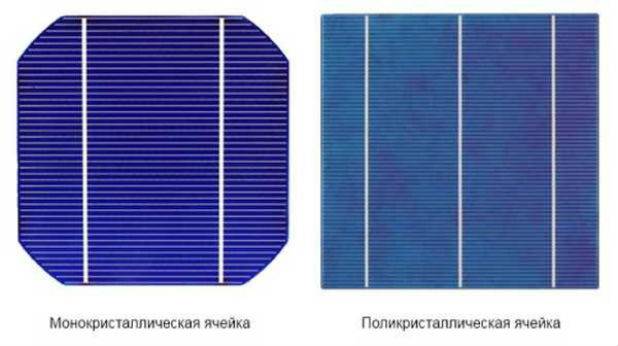
The most popular are monocrystalline. They are made of single crystals, have a uniform structure. Such plates have the shape of a polygon or a rectangle with cut corners.
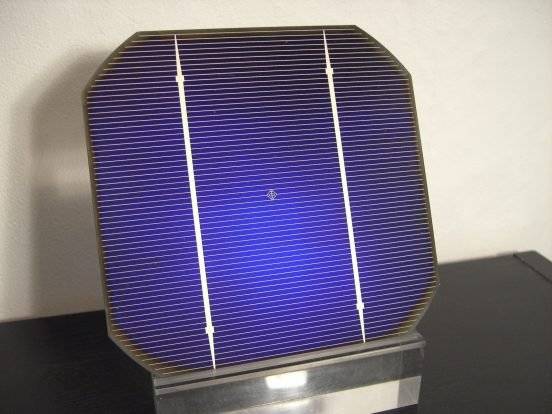
The single-crystal cell has the shape of a rectangle with beveled corners.
The battery, assembled from single-crystal elements, has a higher performance compared to other types, its efficiency is 13%. It is light and compact, not afraid of slight bending, can be installed on uneven ground, service life of 30 years.


The disadvantages include a significant decrease in power during cloudiness, up to a complete cessation of energy generation. The same happens when it gets dark, the battery will not work at night.
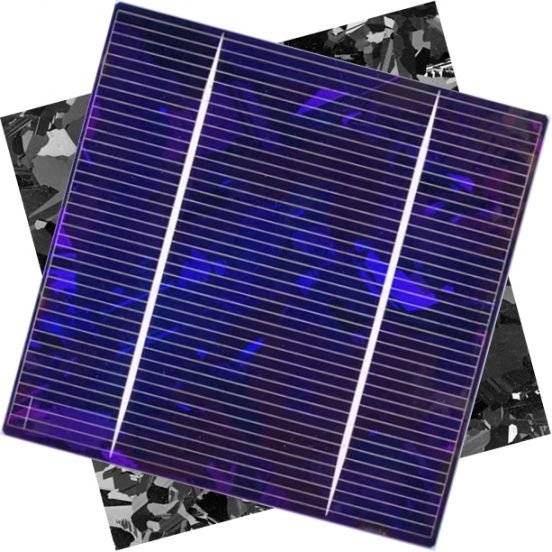
The polycrystalline cell has a rectangular shape, which allows you to assemble the panel without gaps
Polycrystalline are produced by casting, have a rectangular or square shape and a heterogeneous structure. Their efficiency is lower than single-crystal ones, the efficiency is only 7-9%, but the drop in output in cloudy, dusty or at dusk is not significant.
Therefore, they are used in the construction of street lighting, but they are more often used by homemade ones. The cost of such plates is lower than single crystals, the service life is 20 years.
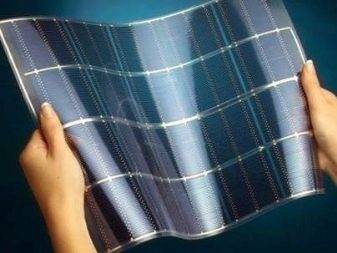
Film
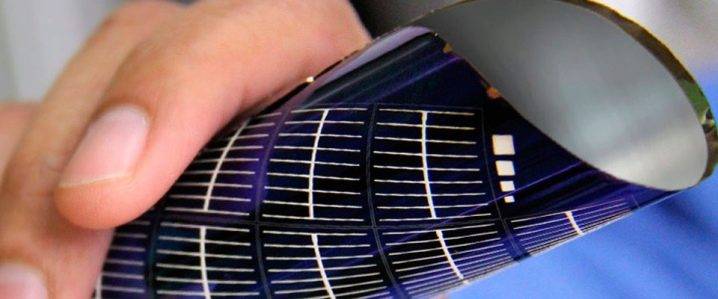
Thin-film or flexible elements are made from an amorphous form of silicon. The flexibility of the panels makes them mobile, rolling them up can be taken with you on trips and have an independent power source anywhere. The same property allows you to mount them on curved surfaces.
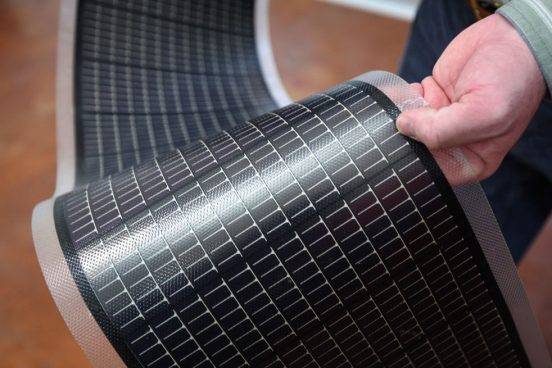
The film battery is made of amorphous silicon
In terms of efficiency, film panels are twice as inferior to crystalline ones; to produce the same amount, a double battery area is required. And the film does not differ in durability - in the first 2 years, their efficiency drops by 20-40%.
But when cloudy or dark, energy production is reduced by only 10-15%. Their relative cheapness can be considered an undoubted advantage.
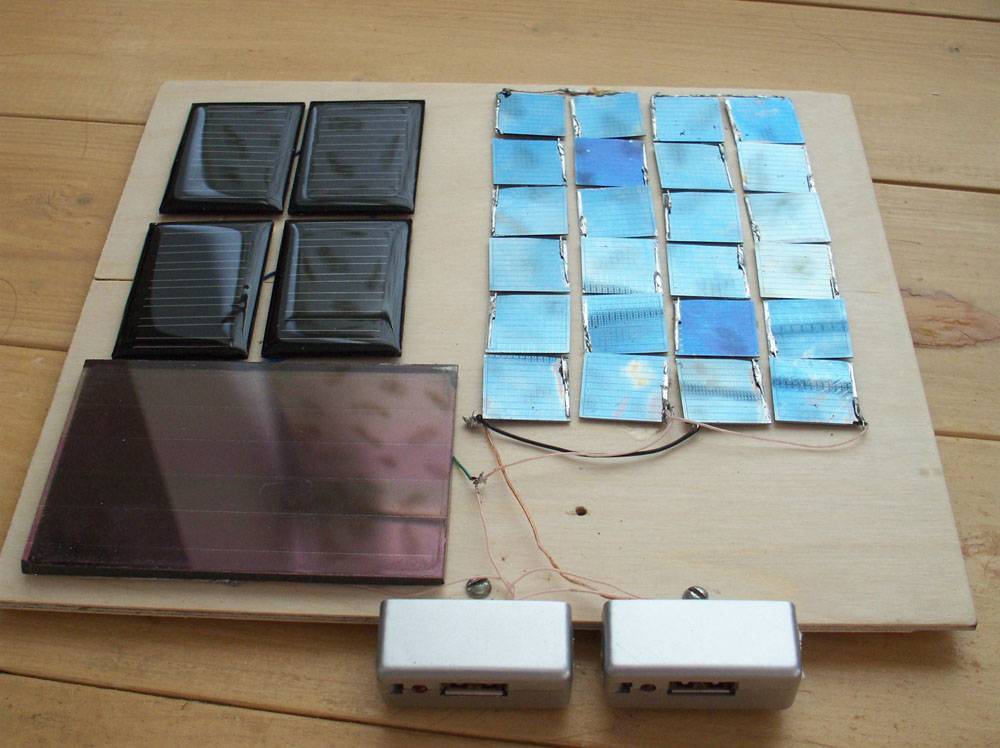
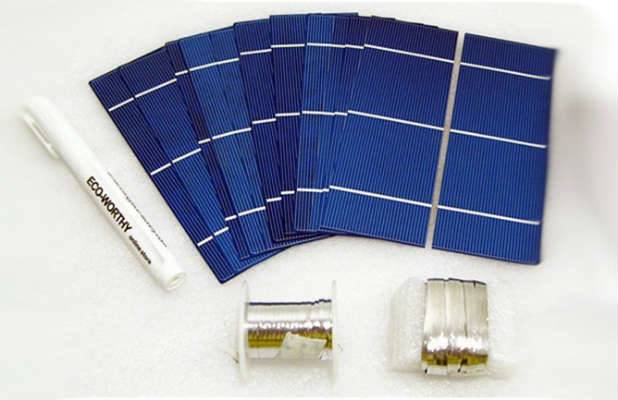
Method for manufacturing solar cells
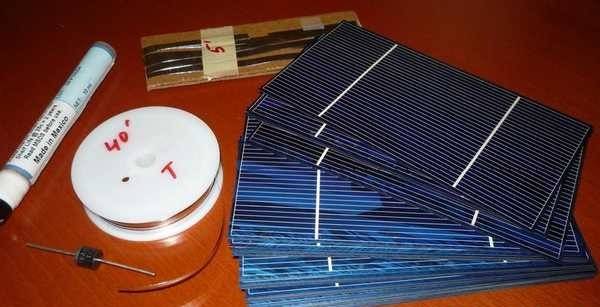
First, let's define what we need:
- Photocells.
- The basis for fixing the most valuable.
- The site where the future power plant will stand.
Now let's take a closer look at each item.
Assembly of solar modules from silicon photocells
Photocells on one side are covered with a thin layer of phosphorus. Sometimes there may be boron.
This layer concentrates a large number of electrons in one place. They do not scatter as they are held by a phosphor film.
Metal tracks are attached to the plate, along which an electric current flows in the future. These flint elements are quite fragile, so be careful when working with them.
The voltage level depends on the number of such full-fledged records.
Main components:
- Flint plates.
- Reiki.
- Chipboard, several sheets.
- Aluminum corners.
- Foam rubber 1.5-2.5 cm thick.
- Something transparent for the base of the silicon wafers. Usually this is plexiglass.
- Screws or self-tapping screws.
- Sealant.
- Wires.
- Hallmark.
- Diodes.
You will also need tools such as:
- Hacksaw.
- Screwdriver.
- Soldering iron.
- Multimeter.
For self-assembly of the solar module, mono or polycrystalline photovoltaic cells with parameters of 3 by 6 inches are used. They can be found in any Chinese store. To save money, you can purchase "special pack groups". True, marriage is often found in them.
A lot of retail outlets sell photo plates in packs of 36 or 72 pieces.
To connect the divided plate-modules, special tires are needed. And in order to turn on the assembly, hallmarks are required.
Now that everything has become clear with silicon photocells, we are going to assemble the base.
Frame for solar battery
This is the easiest thing to make at home! Usually it is made of rails or aluminum profiles. It can be easily purchased at a hardware store. It is advisable to work with aluminum for the following reasons:
- It is lightweight and does not put much pressure on the support installation.
- Doesn't rust.
- Does not absorb moisture.
- Does not rot like wood.
transparent element
When buying, pay attention to:
- The percentage of refraction of sunlight. The lower it is, the better! The efficiency of the plates will be greater.
- How much infrared does it absorb?
Suitable for his role:
- Plexiglass.
- Polycarbonate. A little worse.
- Plexiglas.
The level of absorption determines whether the temperature on the silicon wafers will rise. It is best to use anti-reflective clear glass.


Deciding on a place
The size of the solar module depends on the number of solar cells that will be installed in it. It is best to put the batteries in a place where the sun's light falls from all sides. It is also possible to equip such a power plant with an automatic turn. That is, it will always be turned towards the sun due to this thing. A rotary device for a solar battery can be made by hand.
Make sure that the shadows of houses and trees do not fall on our homemade solar panel.
The angle of inclination depends on:
- climate.
- Where the house is located.
- Seasons.
Solar batteries produce maximum efficiency at the moment when the rays fall perpendicularly.
According to some calculations, it was found that 1 square meter produces 120 watts. As a result of this, it can be assumed that a typical house will consume 300 kW per month. Therefore, you need to use an area of \u200b\u200b20 square meters.
As a result of all of the above, a do-it-yourself solar battery will help save some of the money on electricity.