- Wago
- ZVI
- Welding
- Positive sides
- Negative sides
- Mounting
- How to connect SIP wires to each other
- Twisting
- Benefits of twists:
- Cons of twists:
- Connection of various materials
- How to connect wires of different sizes?
- How to connect wires of different sizes?
- Terminal clamps
- Terminal block
- Terminals on plastic blocks
- Self-clamping terminals
- How to crimp wires
- Is it possible to connect cables by twisting
- Stranded and single-core
- Twisting methods
- Correct wiring in the junction box
- Twisting of different sections
- Twist caps
- With terminal clamps
- Types of terminal blocks
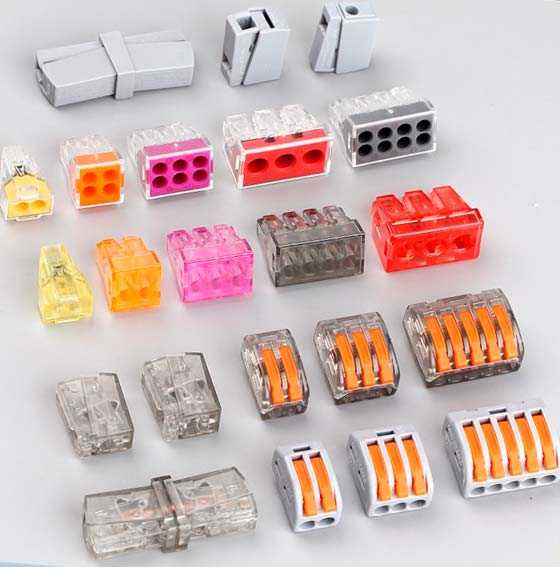
Wago
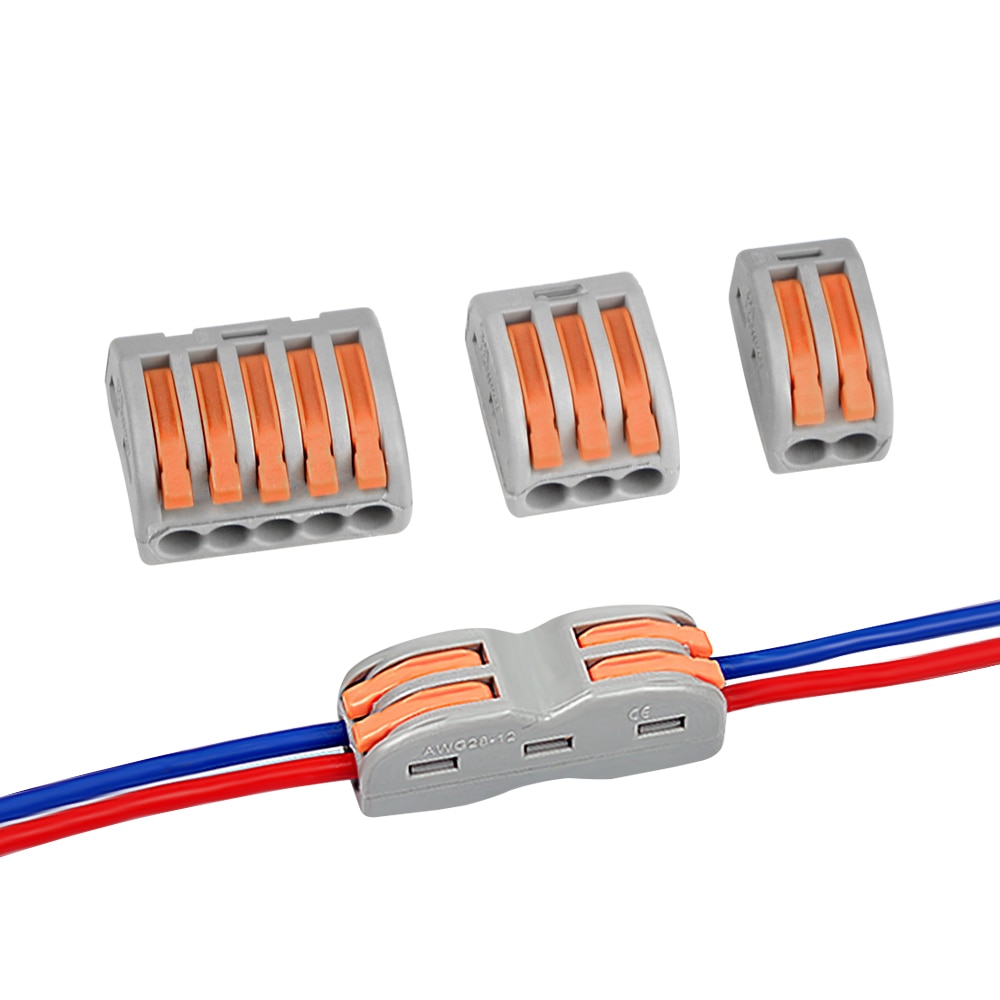
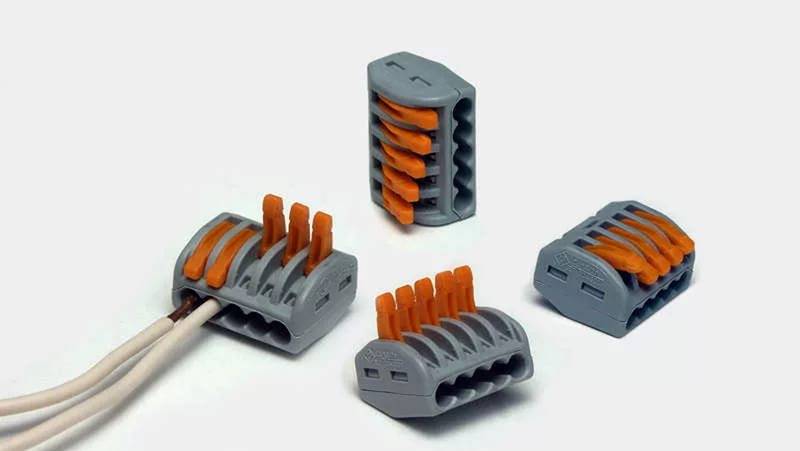
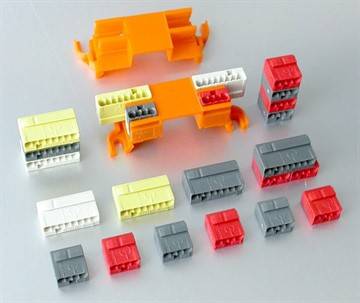
The next view is the Wago terminal blocks. They also come in different sizes, and for a different number of connected wires - two, three, five, eight.
They can join together both monocores and stranded wires.
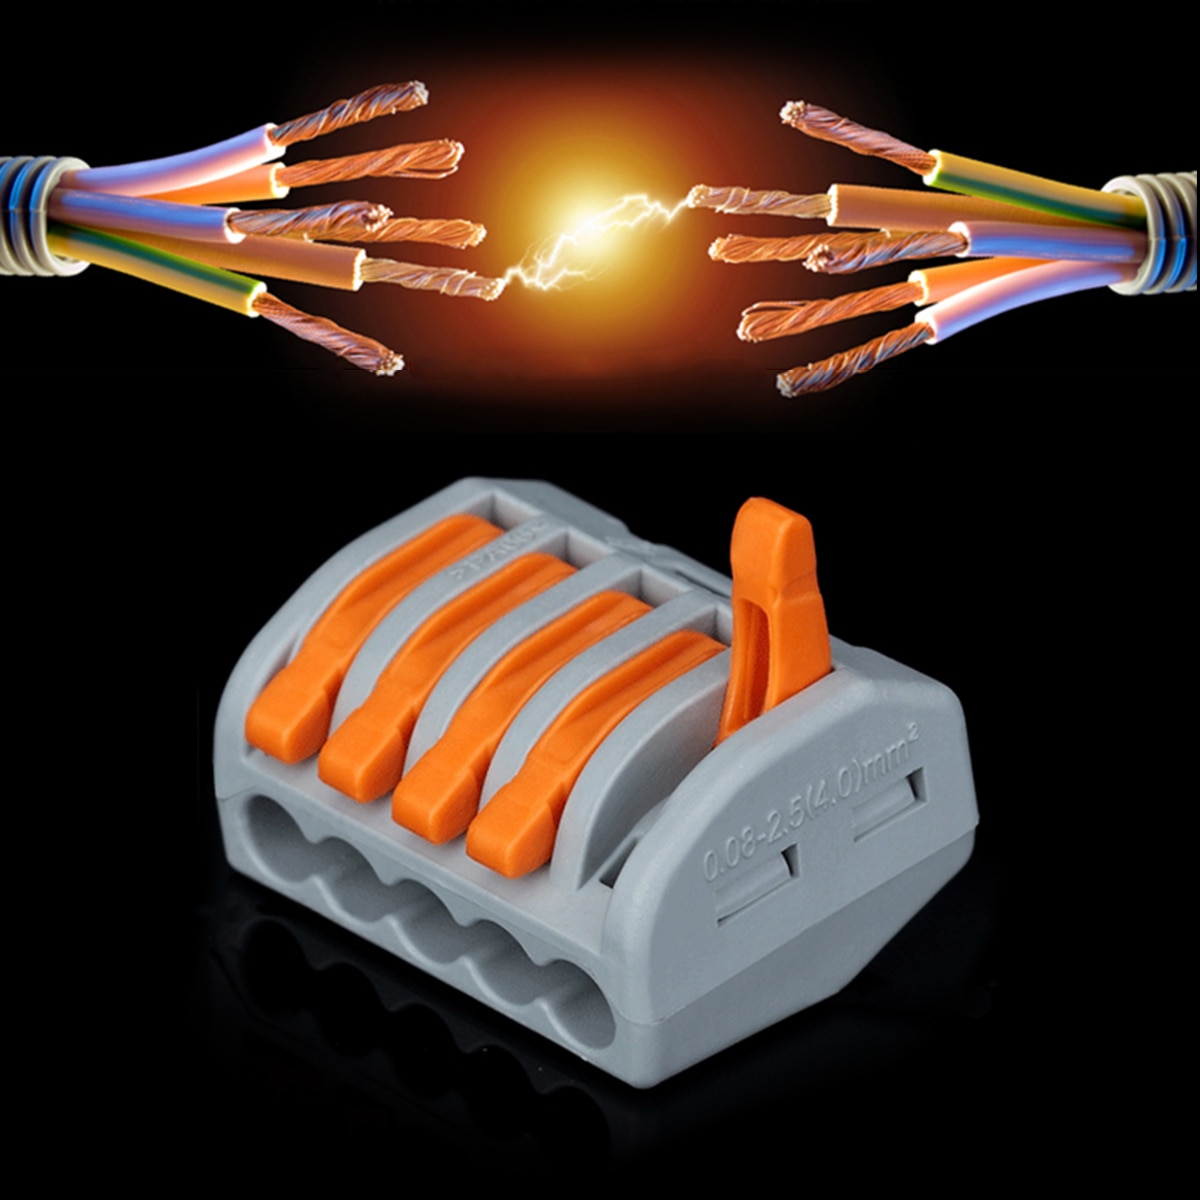
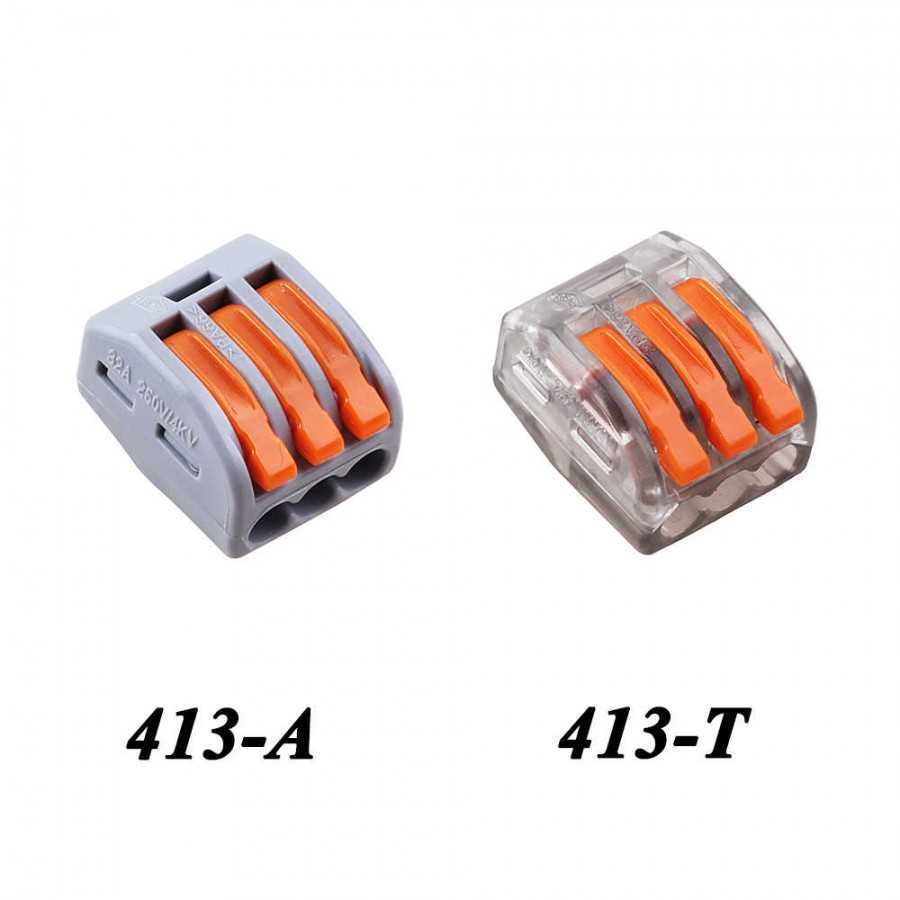
For multi-wire, the clamp should have a latch-flag, which, when open, allows you to easily insert the wire and clamp it inside after snapping.
These terminal blocks in home wiring, according to the manufacturer, can easily withstand loads up to 24A (light, sockets).
There are separate compact specimens on 32A-41A.
Here are the most popular types of Wago clamps, their markings, characteristics and for what section they are designed:
There is also an industrial series for cable sections up to 95mm2. Their terminals are really large, but the principle of operation is almost the same as that of the small ones.
When you measure the load on such clamps, with a current value of more than 200A, and at the same time you see that nothing is burning or heating, many doubts about Wago products disappear.
If your Vago clamps are original, and not a Chinese fake, and at the same time the line is protected by a circuit breaker with a correctly selected setting, then this type of connection can rightfully be called the simplest, most modern and easy to install.
Violate any of the above conditions and the result will be quite natural.
Therefore, you do not need to set wago to 24A and at the same time protect such wiring with an automatic 25A. The contact in this case will burn out during overload.
Always choose the right vago terminal blocks.
Automatic machines, as a rule, you already have, and they protect primarily the electrical wiring, and not the load and the end user.
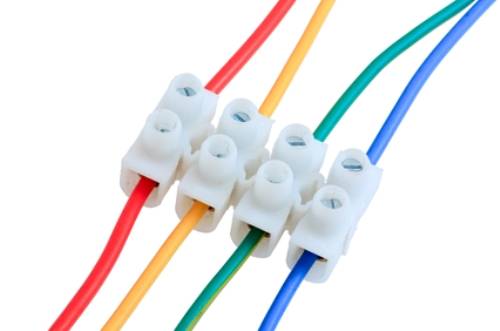
ZVI
There is also a fairly old type of connection, such as terminal blocks. ZVI - insulated screw clamp.
In appearance, this is a very simple screw connection of wires to each other. Again, it happens under different sections and various shapes.
Here are their technical characteristics (current, cross section, dimensions, screw torque):
However, ZVI has a number of significant drawbacks, due to which it cannot be called the most successful and reliable connection.
Basically, only two wires can be connected to each other in this way. Unless, of course, you don’t specifically choose large pads and shove several wires there. What to do is not recommended.
Such a screw connection is well suited for solid conductors, but not for stranded flexible wires.
For flexible wires, you will have to press them with NShVI lugs and incur additional costs.
You can find videos on the network where, as an experiment, the transient resistances on different types of connections are measured with a microohmmeter.
Surprisingly, the smallest value is obtained for screw terminals.
Welding
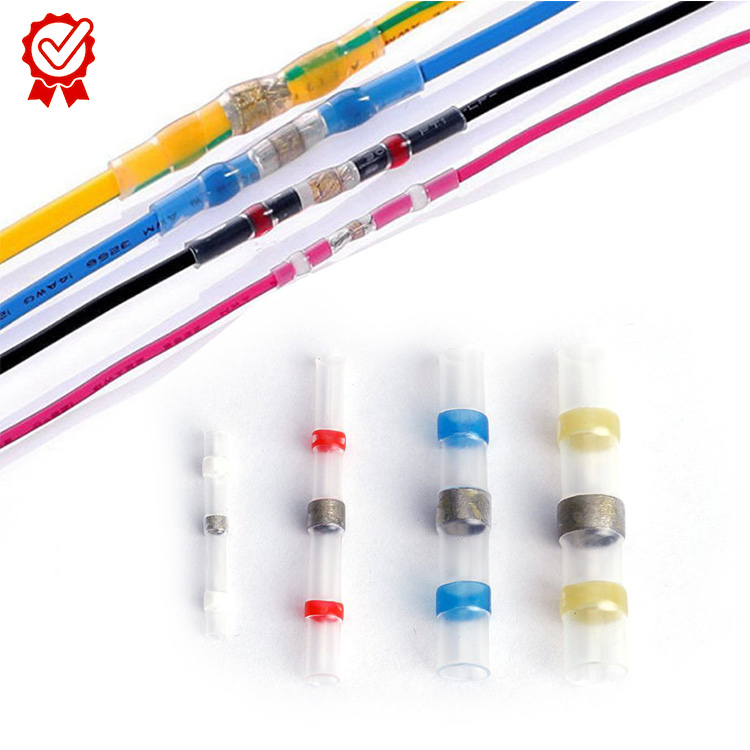
In order for the connection of electrical wires to be as reliable as possible, the considered method of twisting must be further fixed by welding. It is similar to soldering, only now a welding machine is used instead of a soldering iron.


Positive sides
This method is most preferable over all the others, as it meets all regulatory requirements in terms of reliability and quality.
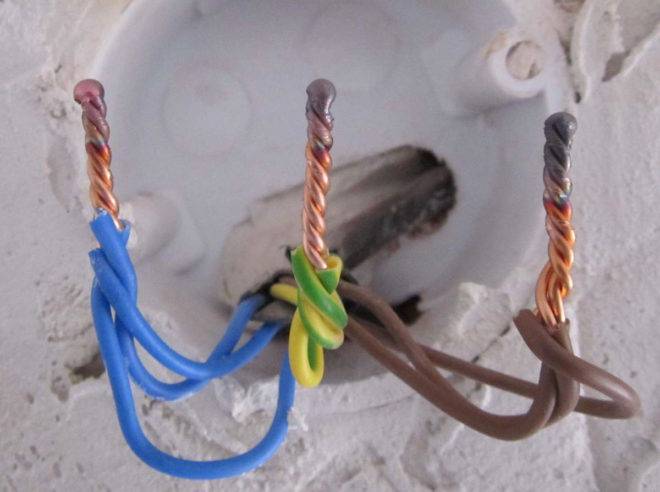
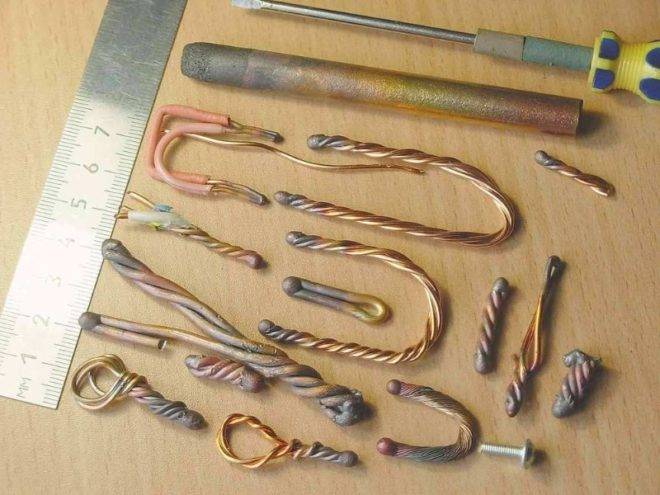
The welding method is based on the contact heating of the ends of the wires with a carbon electrode until a ball (contact point) is formed. This ball is obtained as a single whole from the fused ends of all connected wires, which ensures safe and reliable contact, it will not weaken and oxidize over time.
Negative sides
The disadvantage of welding is that certain knowledge, experience, skills and special devices are needed to carry out such work, and you often have to turn to specialists.
Mounting
In order to connect wires by welding, you will need the following fixtures, tools and materials:
- welding inverter with a power of at least 1 kW, its output voltage must be up to 24 V;
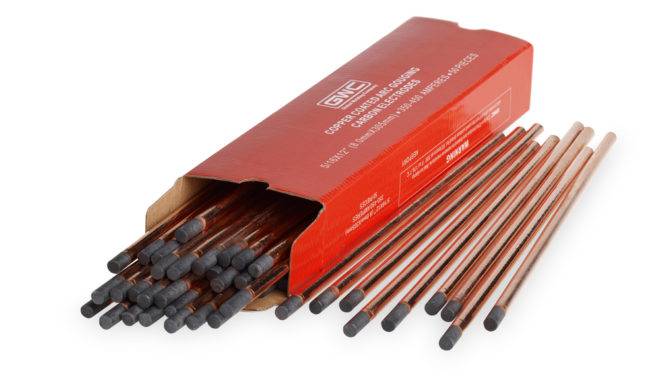
- carbon or graphite electrode;
- glasses or a mask to protect the eyes;
- welding leather gloves for hand protection;
- fitter's knife or stripper for removing the insulating layer from the conductors;
- sandpaper (for cleaning the connected conductive surfaces);
- insulating tape for further insulation of the welding joint.
The sequence of work is as follows:
- Free each connected wire from insulation by 60-70 mm.
- Clean bare veins to a shine with sandpaper.
- Twist, after biting off, the length of its tips should be at least 50 mm.
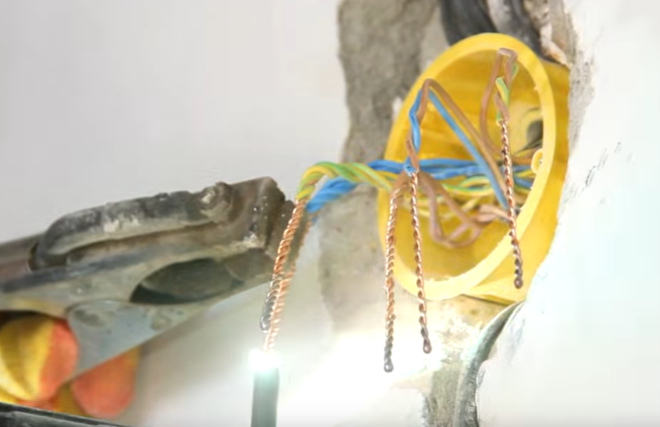
- Fasten the ground clamps on top of the twist.
- To ignite the arc, bring the electrode to the bottom of the twist and lightly touch the connected wires with it. Welding is very fast.
- It turns out a contact ball, which is given time to cool, then insulate with tape.
As a result, an almost solid wire is obtained at the end, that is, the contact will have the lowest transition resistance.
If you connect copper wires in this way, then choose a carbon-copper electrode.
I would like to recommend that if you purchase a welding machine (after all, it will come in handy not only for connecting wires, but also for many other purposes), then choose the inverter option. With small dimensions, weight and power consumption, it has a wide range of welding current adjustment and produces a stable welding arc.
And this is very important to be able to regulate the welding current. If it is chosen correctly, the electrode will not stick, and the arc will hold steady
How welding is performed, see this video:
We examined the main types of wire connections.Now let's briefly talk about methods that are used less often, but also guarantee quality and reliability.
How to connect SIP wires to each other
If you need to connect SIP to SIP, first find out its brand. 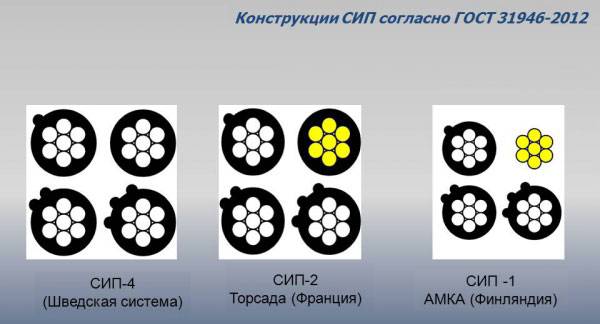
 For example, SIP 4, unlike other types of self-supporting wires, is strictly forbidden to be interconnected in spans.
This is done only on some kind of support, when no tensile force is exerted on the cores. Some, however, believe that if you make connections with sleeves with a compression press of 12 tons, then it will calmly withstand everything throughout its entire service life.
Of course, this connection will work for some time, but due to constant vibrations, wind loads, plus tension in different directions, one fine day everything will end with an ordinary cliff.
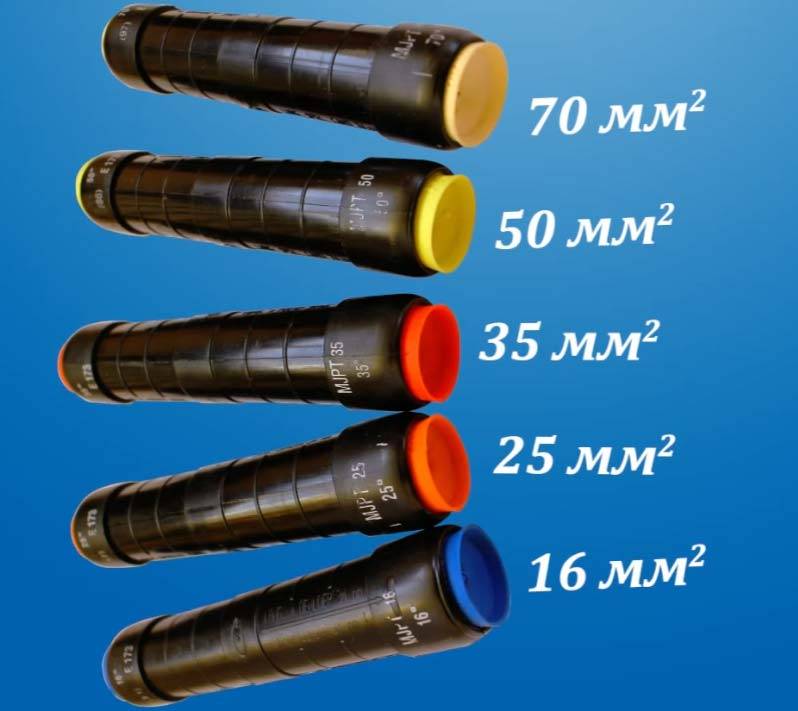
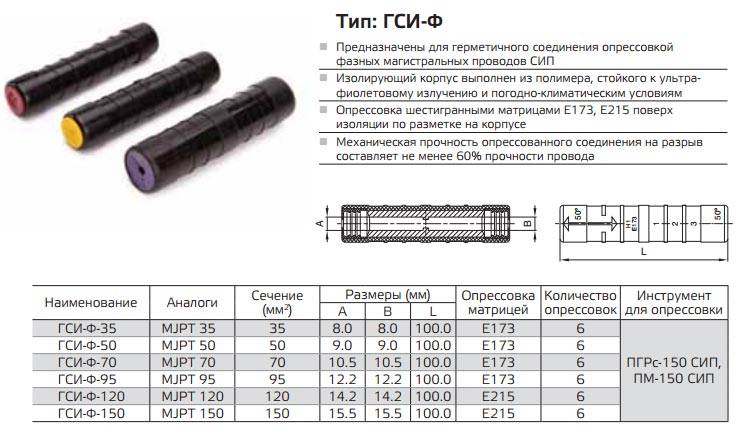
If you have SIP-1 or SIP-2, they can be connected to each other in spans with special clamps MJPT or GSI-F.
 Moreover, use these clamps for phase conductors. It is advisable to leave the carrier insulated or non-insulated wire in the SIP, or connect it with another sleeve in the gap between the anchors.


Some videos demonstrate the connection of the neutral carrier wire with a sleeve in the middle of the span. In the rules of the EIC, clause 2.4.21, this is not prohibited. The main thing is to provide the required load-bearing capacity of the wire.
To do this, a sleeve of increased length is taken, for a greater number of pressure tests (170 mm long instead of 100 mm). With the abbreviation "H" or "N" - zero. 
But just logically think about what will happen to the voltage in the sockets when the zero contact disappears with the next wind in such a connection? And it will be instead of voltage 220V all 380! And an elementary wire break in the sleeve will seem the least evil in this situation.
Twisting
This is the most common type of connection that can be made without special tools and even with fingers (not recommended). Since ordinary twisting is characterized by a rather unreliable connection, soldering or welding of an already twisted connector is additionally used.

Benefits of twists:
- Cheap connection. For twisting, two wires and insulating material (duct tape or cambric) are enough.
- Large contact area. The larger the area of the contacted conductors, the more power (current load) they are able to conduct. Twists can be made of any size, so the contact area will always be sufficient.
- Does not require maintenance.
- It is possible to connect single-wire and multi-wire conductors.
Cons of twists:
- Low moisture resistance. It is not recommended to use in damp rooms, as well as in wooden cottages.
- Additional insulation required. Unlike various terminal connections, stranding requires additional insulation.
- Do not combine aluminum and copper.
- High duration of the technological process. Soldering and welding contacts takes a lot of time.
- Requires additional hardware. To weld the contacts, you will need a welding machine with a small current. For example, the inexpensive Wert SWI model with argon-arc welding mode is suitable for high-quality welded strands.
Twisting without soldering and welding is usually used when installing temporary buildings, which then have to be removed.
Connection of various materials
As you know, in modern wiring, two types of conductors are used. The first category includes copper conductors, and the second - aluminum. According to fire safety rules, it is recommended to give preference to the first option. However, in some cases, the master has to combine copper and aluminum conductors.
A cable connector of a conventional configuration cannot guarantee high quality at the connection point. This is due to a number of reasons. With temperature differences, the linear expansion of different metals will not be identical. In this case, a gap may form between the directly joined aluminum and copper.
At the same time, the resistance increases at the point of their contact. Conductors start to heat up. Also, a film of oxides appears on the stripped veins. It also contributes to poor contact. This state of the network provokes various malfunctions, can cause a fire. Therefore, only special types of contactors are suitable for such connections.
How to connect wires of different sizes?
It often happens that wires of different sections come to the junction box and they need to be connected. Everything seems to be simple here, as with connecting wires of the same section, but there are some peculiarities here. There are several ways to connect cables of different thicknesses.
Remember that it is impossible to connect two wires of different sections to one contact in the socket, since the thin one will not be strongly pressed by the bolt. This will lead to poor contact, high contact resistance, overheating and melting of the cable insulation.
How to connect wires of different sizes?
1. Using twisting with soldering or welding
This is the most common way.You can twist wires of adjacent sections, for example 4 mm2 and 2.5 mm2. Now, if the diameters of the wires are very different, then a good twist will no longer work.
During twisting, you need to make sure that both cores wrap around each other. Do not allow thin wire to wrap around thick wire. This may result in poor electrical contact. Do not forget about further soldering or welding.
Only after that your connection will work for many years without any complaints.
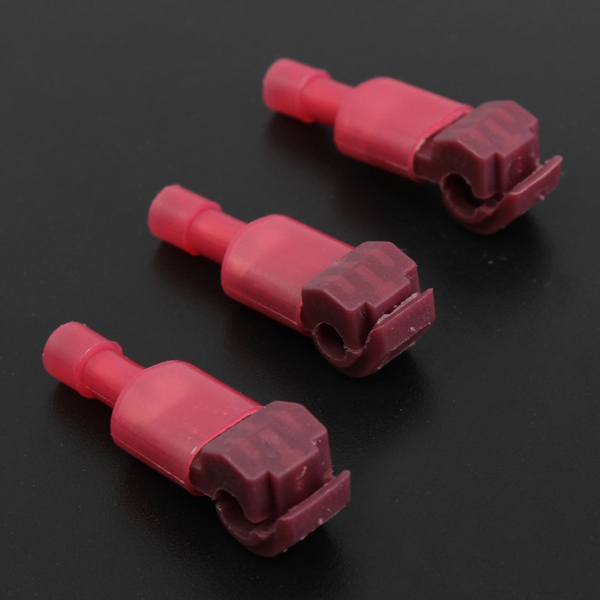
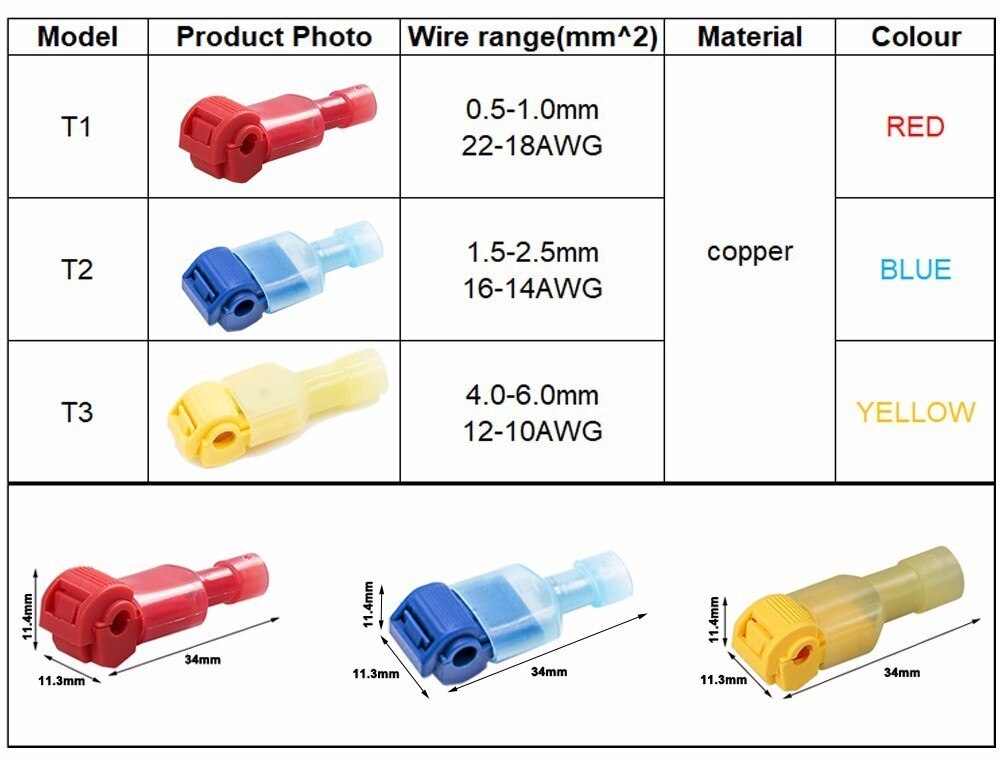
2. With ZVI screw terminals
I already wrote about them in detail in the article: Methods for connecting wires. Such terminal blocks allow you to start a wire of one section on the one hand, and on the other side of a different section. Here, each core is clamped with a separate screw. Below is a table on which you can choose the right screw terminal for your wires.
| Screw terminal type | Cross-section of connected conductors, mm2 | Permissible continuous current, A |
| ZVI-3 | 1 – 2,5 | 3 |
| ZVI-5 | 1,5 – 4 | 5 |
| ZVI-10 | 2,5 – 6 | 10 |
| ZVI-15 | 4 – 10 | 15 |
| ZVI-20 | 4 – 10 | 20 |
| ZVI-30 | 6 – 16 | 30 |
| ZVI-60 | 6 – 16 | 60 |
| ZVI-80 | 10 – 25 | 80 |
| ZVI-100 | 10 – 25 | 100 |
| ZVI-150 | 16 – 35 | 150 |
As you can see, with the help of ZVI, you can connect wires of adjacent sections. Also do not forget to look at their current load. The last digit in the screw terminal type indicates the amount of continuous current that can flow through this terminal.
We clean the cores to the middle of the terminal ...
We insert them and tighten the screws ...
3. Using Wago universal self-clamping terminals.

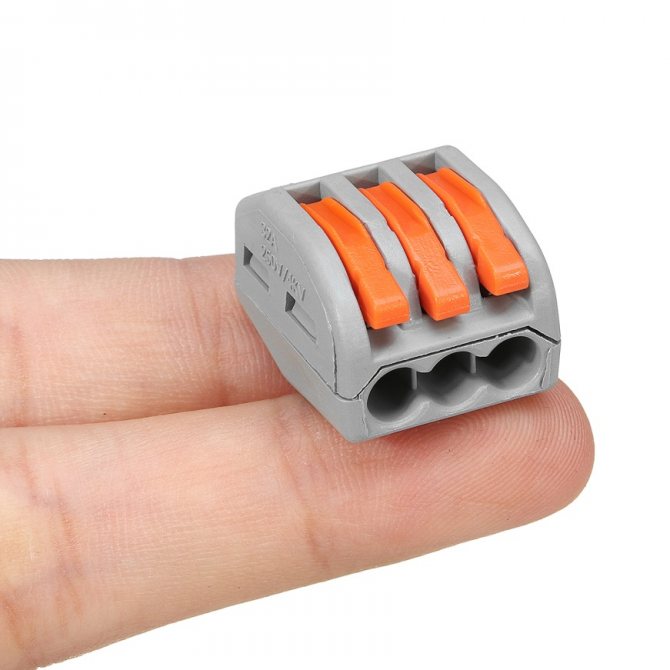

Wago terminal blocks have the ability to connect wires of different sections. They have special nests where each vein is “stuck”. For example, a 1.5 mm2 wire can be connected to one clamp hole, and 4 mm2 to another, and everything will work properly.
According to the manufacturer's marking, terminals of different series can connect wires of different sections. See the table below:
| Wago terminal series | Cross-section of connected conductors, mm2 | Permissible continuous current, A |
| 243 | 0.6 to 0.8 | 6 |
| 222 | 0,8 – 4,0 | 32 |
| 773-3 | 0.75 to 2.5 mm2 | 24 |
| 273 | 1.5 to 4.0 | 24 |
| 773-173 | 2.5 to 6.0 mm2 | 32 |
Here is an example with series 222 below...
4. With bolted connection.
A bolted wire connection is a composite connection consisting of 2 or more wires, a bolt, a nut and several washers. It is considered reliable and durable.
Here it goes like this:
- we clean the core by 2-3 centimeters, so that it is enough for one full turn around the bolt;
- we make a ring from the core according to the diameter of the bolt;
- we take a bolt and put it on a washer;
- on the bolt we put on a ring from a conductor of one section;
- then put on the intermediate washer;
- we put on a ring from a conductor of a different section;
- put the last washer and tighten the whole economy with a nut.
In this way, several wires of different sections can be connected at the same time. Their number is limited by the length of the bolt.
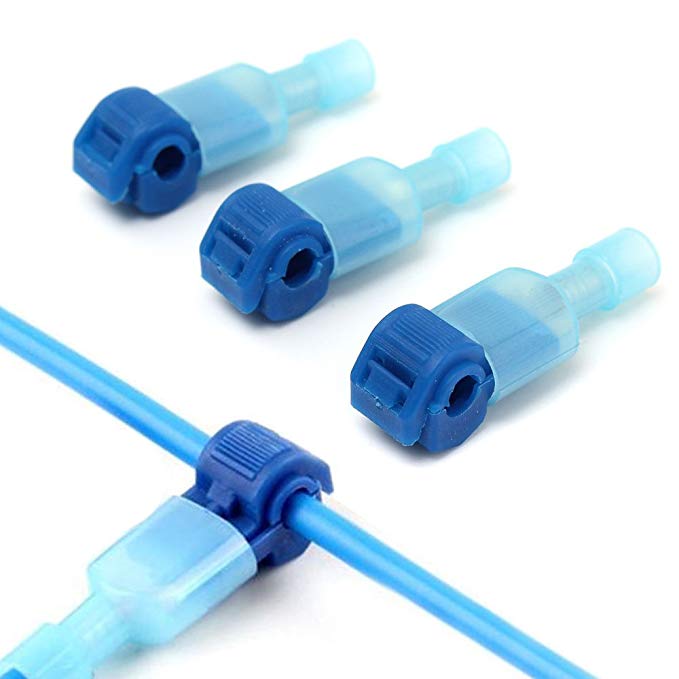
5. With the help of a squeezing branch “nut”.
About this connection, I wrote in detail with photographs and relevant comments in the article: Connecting wires using “nut” type clamps. Let me not repeat myself here.
6. Using tinned copper tips through a bolt with a nut.
This method is well suited for connecting large cables. For this connection, it is necessary to have not only TML tips, but also crimping press tongs or a hydraulic press. This connection will be a little bulky (long), may not fit in any small junction box, but still has the right to life.
Unfortunately, I didn’t have a thick wire and the necessary tips at hand, so I took a photo from what I had. I think it is still possible to understand the essence of the connection.
Let's smile:
Terminal clamps
Terminal blocks for connecting wires give one indisputable advantage, they can connect wires of different metals. Both here and in other articles, we have repeatedly reminded that it is forbidden to twist aluminum and copper wires together. The resulting galvanic couple will result in the occurrence of corrosive processes and the destruction of the connection.
And it doesn't matter how much current flows at the junction. Sooner or later, the twist will still start to heat up.
The way out of this situation is precisely the terminals.
Terminal block
The simplest and cheapest solution is polyethylene terminal blocks. They are not expensive and are sold in every electrical store.
The polyethylene frame is designed for several cells, inside each there is a brass tube (sleeve). The ends of the cores to be connected must be inserted into this sleeve and clamped with two screws. It is very convenient that as many cells are cut off from the block as it is necessary to connect pairs of wires, for example, in one junction box.
But not everything is so smooth, there are also disadvantages. Under room conditions, aluminum begins to flow under screw pressure. You will have to periodically revise the terminal blocks and tighten the contacts where the aluminum conductors are fixed. If this is not done in a timely manner, the aluminum conductor in the terminal block will loosen, lose reliable contact, as a result, spark, heat up, which can result in a fire.With copper conductors, such problems do not arise, but it will not be superfluous to make a periodic revision of their contacts.
Terminal blocks are not intended for connecting stranded wires. If stranded wires are clamped into such connecting terminals, then during tightening under pressure of the screw, the thin veins may partially break, which will lead to overheating.
In the case when it becomes necessary to clamp stranded wires into the terminal block, it is imperative to use auxiliary pin lugs
It is very important to choose its diameter correctly so that the wire does not pop out later. The stranded wire must be inserted into the lug, crimped with pliers and fixed in the terminal block
As a result of all of the above, the terminal block is ideal for solid copper wires. With aluminum and stranded, a number of additional measures and requirements will have to be observed.


How to use terminal blocks is shown in this video:
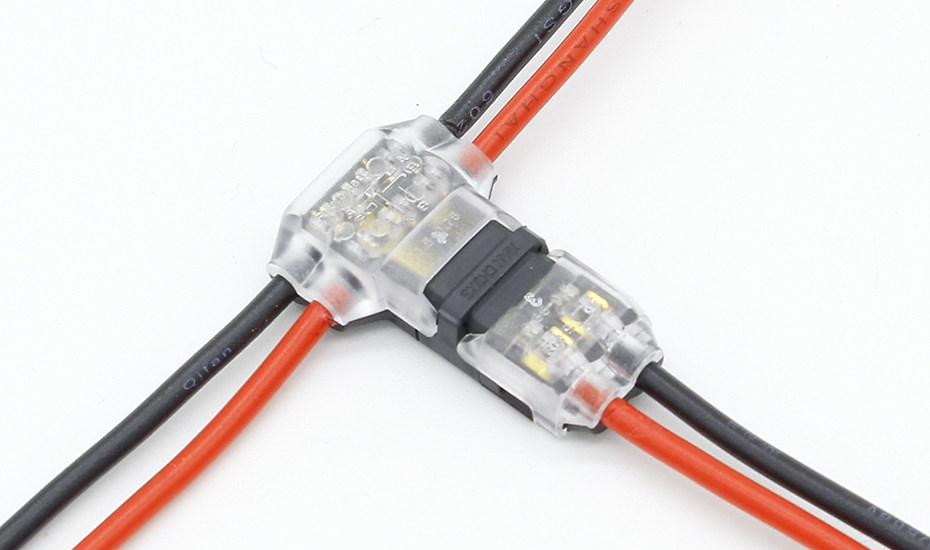
Terminals on plastic blocks
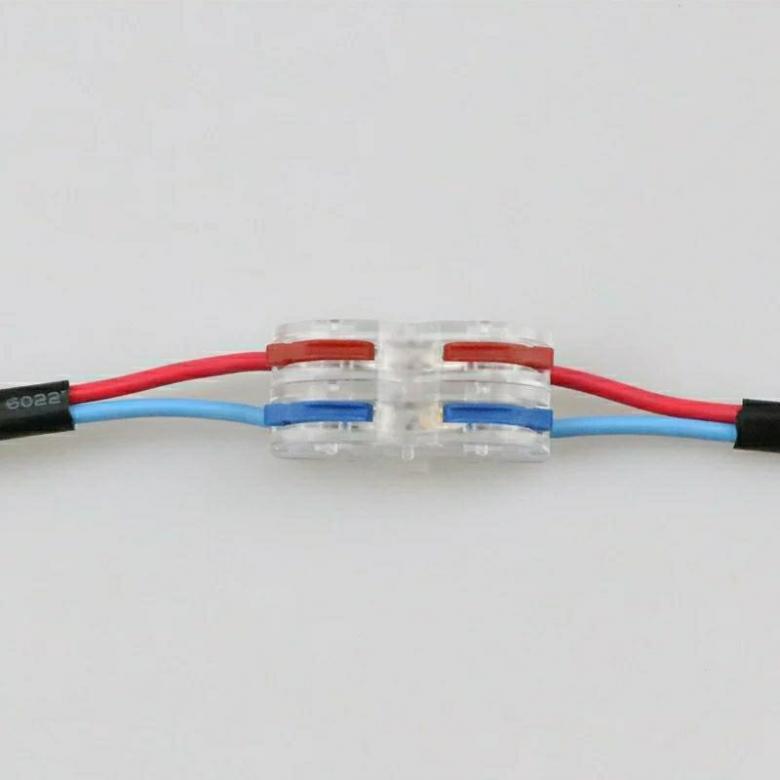
Another very convenient wire connector is a terminal on plastic pads. This option differs from terminal blocks by a smooth metal clamp. In the clamping surface there is a recess for the wire, so there is no pressure on the core from the twisting screw. Therefore, such terminals are suitable for connecting any wires in them.
In these clamps, everything is extremely simple. The ends of the wires are stripped and placed between the plates - contact and pressure.
Such terminals are additionally equipped with a transparent plastic cover, which can be removed if necessary.
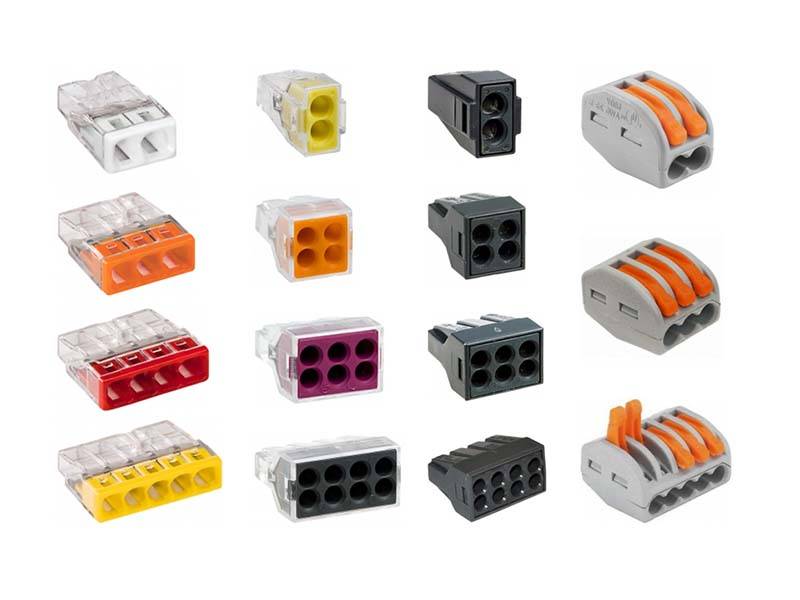
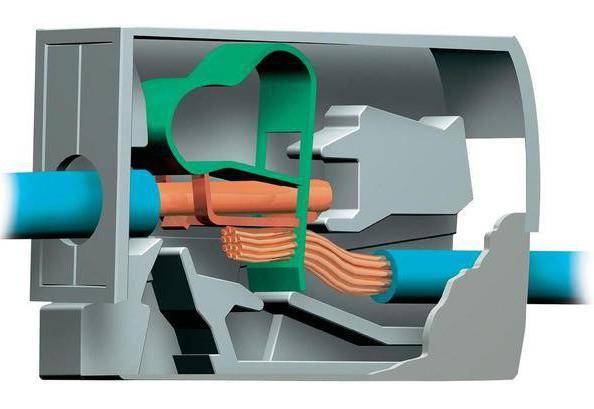
Self-clamping terminals
Wiring using these terminals is simple and quick.
The wire must be pushed into the hole to the very end. There it is automatically fixed with the help of a pressure plate, which presses the wire to the tinned bar. Thanks to the material of which the pressure plate is made, the pressing force does not weaken and is maintained all the time.
The internal tinned bar is made in the form of a copper plate. Both copper and aluminum wires can be fixed in self-clamping terminals. These clamps are disposable.
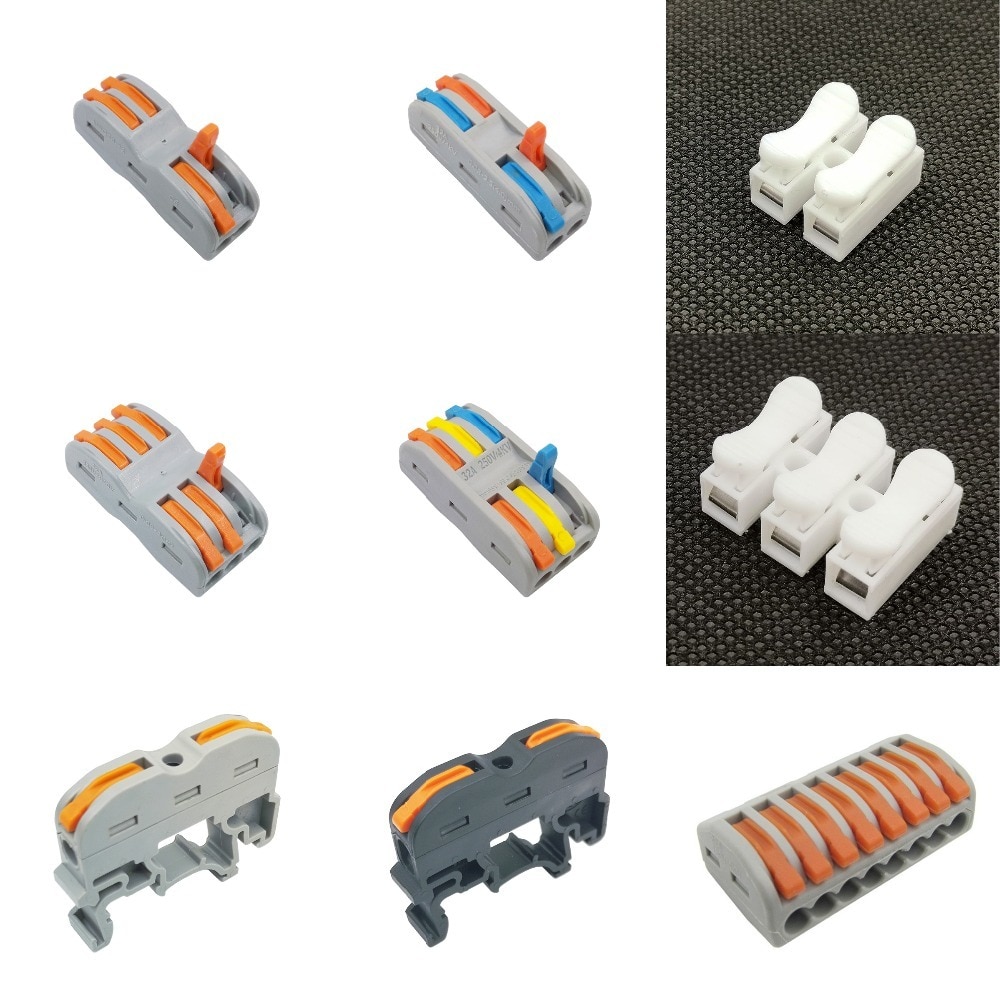
And if you want clamps for connecting reusable wires, then use terminal blocks with levers. They lifted the lever and put the wire into the hole, then fixed it there by pressing it back. If necessary, the lever is raised again and the wire protrudes.
Try to choose clamps from a manufacturer that has proven itself well. WAGO clamps have especially positive characteristics and reviews.
The advantages and disadvantages are discussed in this video:
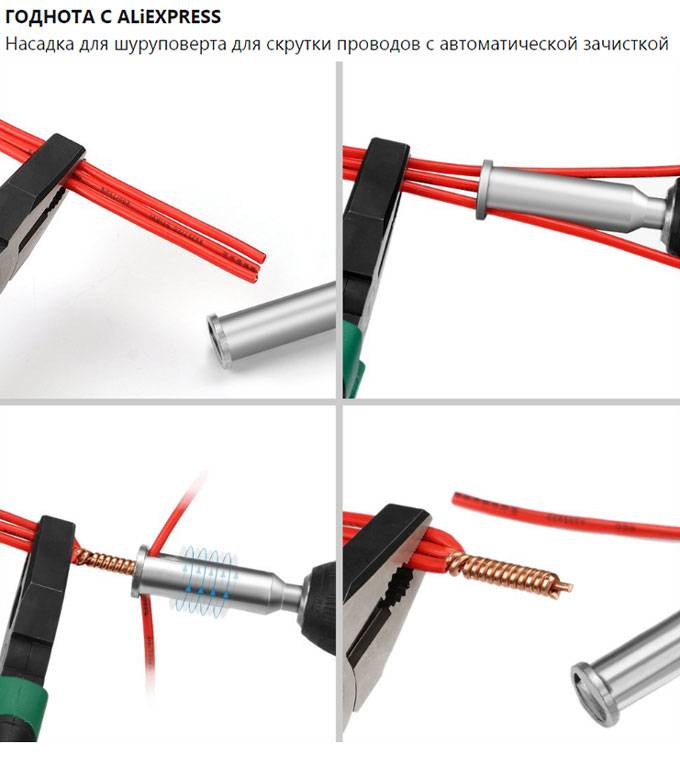
How to crimp wires
Another way to connect wires is crimping. This is a method in which a copper or aluminum sleeve is put on the wires or cables to be connected, after which it is pressed with a special crimp. For thin sleeves, a manual crimping tool is used, and for thick sleeves, a hydraulic one. In this way, you can even connect copper and aluminum wires, which is unacceptable with a bolted connection.
To connect in this way, the cable is stripped to a length greater than the length of the sleeve, so that after putting on the sleeve, the wire peeks out by 10-15 mm. If thin conductors are connected by crimping, then twisting can first be done.If the cables are large, then, on the contrary, in the stripped areas, it is necessary to align the wire, put all the cables together and give them a round shape. Depending on local conditions, the cables can be folded with the ends in one direction or opposite. This does not affect the reliability of the connection.
A sleeve is tightly put on the prepared cables or, in case of opposite laying, the wires are inserted into the sleeve from both sides. If there is free space in the sleeve, then it is filled with pieces of copper or aluminum wire. And if the cables do not fit in the sleeve, then several wires (5–7%) can be bitten off with side cutters. In the absence of a sleeve of the desired size, you can take a cable lug by sawing off the flat part from it.
The sleeve is pressed 2-3 times in length. Crimping points should not be located on the edges of the sleeve. It is necessary to step back from them by 7–10 mm so that during crimping the wire is not crushed.
The advantage of this method is that it allows you to connect wires of different sections and from different materials, which is difficult with other connection methods.


Is it possible to connect cables by twisting
According to the rules of the PUE, twisting is prohibited, since it does not provide reliable contact. It can only be used in conjunction with another connection method. It is also unacceptable to use twisting to attach two different metals.
Stranded and single-core
When connecting stranded wires, the following rules should be observed:
- strip the insulation by 4 cm;
- unwind the conductors by 2 cm;
- connect to the junction of untwisted cores;
- wires are twisted only with fingers;
- you can tighten the twist with pliers;
- bare wires are insulated with a special tape or heat shrink tube.
It is much easier to twist single-core wires. They need to be stripped of insulation, twisted by hand along the entire length, then clamped with pliers, insulated.


Twisting methods
You can do twisting in different ways. It can be done by branch, parallel or serial connection. Also, to improve the reliability of contact, caps and clamps are additionally used.
Correct wiring in the junction box
When twisting, follow the following procedure:
- de-energize a house or apartment;
- clean the wiring from insulation by 4 cm or more;
- unwind the wires by 2 cm;
- connect to the joint untwisted wires;
- twist the wires with your fingers;
- tighten the twist with pliers;
- insulate bare wires.
Both single-core and multi-core cables can be connected.
Twisting of different sections
Do not twist wires with very different diameters. Such contact is not reliable and stable. You can twist wires of adjacent sections - for example, 4 sq. mm and 2.5 sq. mm. When twisting, you need to make sure that both cores wrap around each other. A thin wire should not be wound on a thick one, otherwise the contact will be unreliable. Then you need to solder or weld the junction.
Twist caps
Caps help to securely isolate the contact point. The cap is made of fire-resistant material, inside it there is a metal part with a thread.
It is quite simple to make a twist with the help of caps - you need to remove the insulation by 2 cm, twist the wires slightly. A cap is put on them and rotated several times until the metal wires are inside.
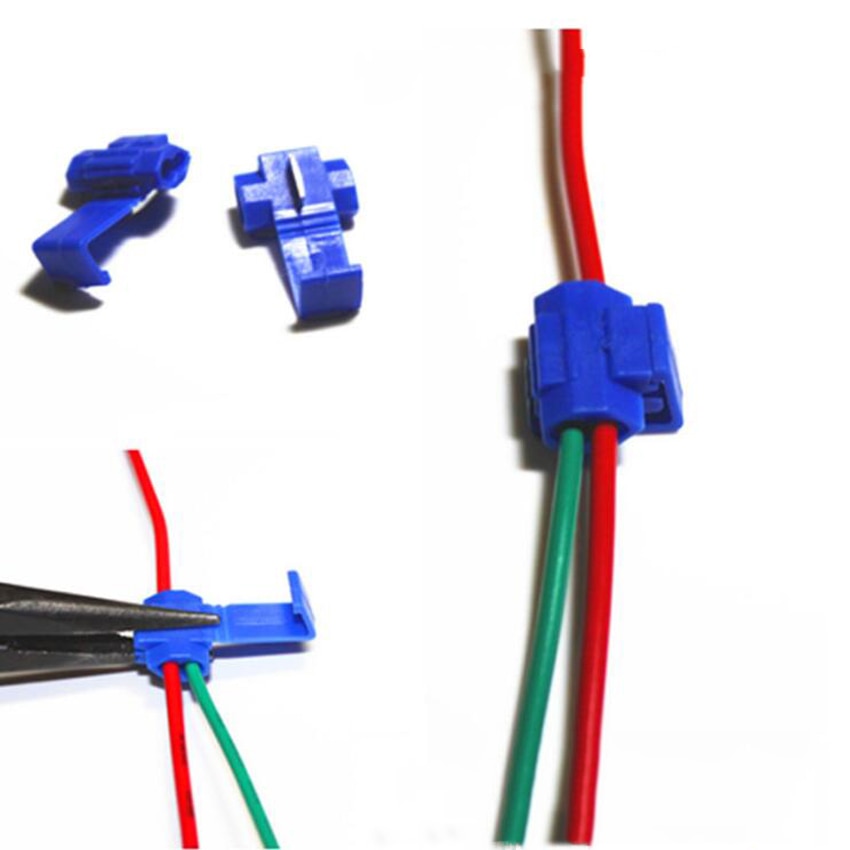
With terminal clamps
The contact clamp consists of a screw, a spring washer, a base, a current-carrying core and a stop that limits the spreading of the aluminum conductor. Making a connection with a terminal clamp is simple - just strip the ends of the wires 12 mm and insert them into the clamp hole. Terminal clamps are used for both solid and stranded conductors.
After twisting the wires you need to solder. For this, the wires are tinned before twisting and rosin is applied to them. A heated soldering iron is lowered into rosin, they need to be drawn along the stripped part of the wiring. After twisting, tin is taken to the soldering iron, the junction is heated until the tin begins to flow between the turns. This method takes a lot of time, but it is reliable and of high quality.
Types of terminal blocks
There are three varieties:
- screw. The classic version: the wire is fixed by tightening the screw resting against the pressure plate. Cheap terminals without such a plate (the wire is clamped directly with a screw) are unreliable, they are not recommended for use. The advantage of screw terminals: the user controls the clamping force;
- self-clamping. The wire is clamped by a spring-loaded plate immediately after being inserted into the connector. The advantage is quick installation. But in terminal blocks of this type, the clamping force is not controlled: it may not be sufficient. Reuse of the terminal is excluded - when the wire is pulled out, it is damaged;
- lever. The wire is clamped and released using a special lever.
The lever terminal block is reusable, but the user also does not control the pressing force.


