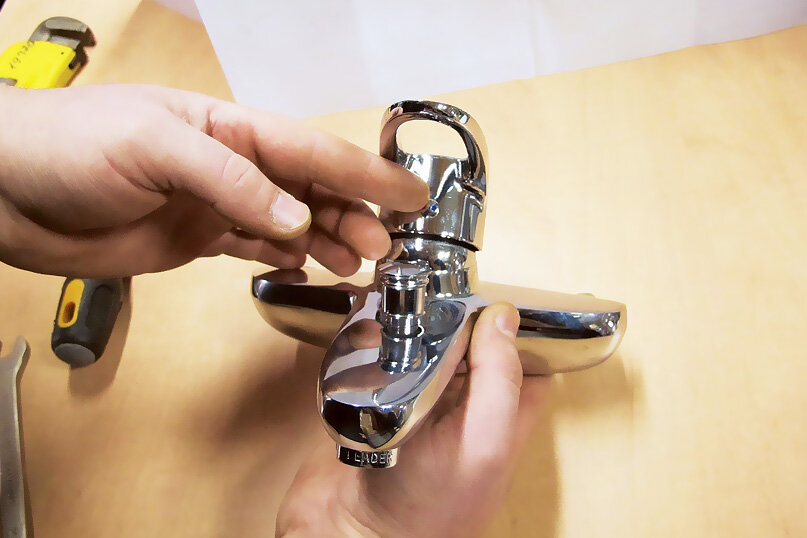
- How to connect an American GROHE faucet?
- Water heater faucet design
- The flow of the toggle switch "faucet-shower"
- How often should boilers be flushed?
- What is inside?
- Instantaneous water heater Delimano
- Characteristics
- Product in use
- What to look for when buying?
- Repair of other minor problems
- Flaws
- Connection
- How to connect a mixer with a thermostat - installation of a separate rack or shelf for a tap
- Installation and connection
- We repair a ceramic faucet box
- Preparation for repair
- Situation 1: gasket wear
- Situation 2: foreign elements getting between the plates
- Situation 3: Chips on the surface of ceramic plates
- Situation: erasing a plastic washer
- Details
- Cleaning the heating element of the water heater from scale without disassembly
- Boiler disassembly and heating element cleaning
- Installing a faucet in the bathroom: the subtleties and nuances of the work
- Installing a faucet in the bathroom: the sequence of work
- How to install a faucet in the bathroom: the subtleties and nuances of installation
- Advantages and disadvantages
- How to install the device?
- Repair of a thermostatic faucet - general progress of work
How to connect an American GROHE faucet?
Take an M10x1 die, run it along the thread, you will see what kind of M10 it is.
They are not even able to correctly indicate the thread designation: M10x18 mm.
strider1978, alas, I don’t have an M10 die.And by “M10 × 18mm” they there, I believe, understood “M10 18mm long”.
By the way, in type-smart texts about faucets they write that both Russian and imported faucets have a flexible connection standard - this is exactly the metric M10 × 1:
in plumbing
- Pipe connections.
For pipe connections in plumbing, the INCH PIPE THREAD is traditionally used.
The pipe inch is taken as a basis, equal to 33.6 mm. Sizes apply:
1/ 2 , 3/ 4 , 1 , 1 1/ 4 , 1 1/ 2 , 2 " etc.
On this thread, a pipe is connected to fittings, to taps, and other elements of the pipeline.
Thread pitch up to an inch size is taken 14 threads per simple inch ( 25.4 mm) above - 11 threads per inch.
2. Russian mixers.
When connecting parts in Russian faucets, metric threads are mainly used, with the exception of connecting the body of the Christmas tree with the fixer nut, and the nozzles of the bath-shower faucet for connecting to the pipeline.
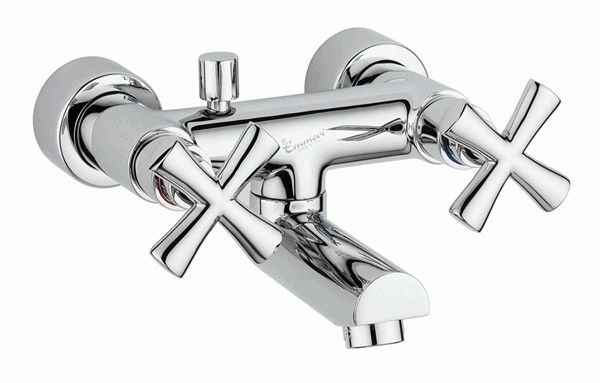
Valve heads M18X1, the same thread on the skirts for the flywheel Cross,
To fix the valve head and flywheel, thread M4, M5 is used.
Shower hose. When connecting the shower hose to the mixer body, thread M22X1.5 is used, it also goes to connect the hose to the RUSSIAN watering can.
For connecting a flexible hose to a sink faucet. Mostly - M10X1, very rarely - M8X1.
Recently, imported chrome watering cans have been used to complete Russian mixers, which have a 1/2 pipe thread, so a 1/2 - R hose is taken to complete them, or 1/2 - M22X1.5.
3. Imported faucets.
Basically, all connections go on pipe threads, with the exception of:
- flexible piping (M10X1)
- aerator (M20X1, M22X1, M24X1, etc.)
The connection of the valve head and the mixer body is 1/2, in economic models - 3/8.
Shower hoses - 1/ 2,
Branch pipes to the pipeline - 1/2, branch pipes to the body - 3/4.
- Flexible connection - connects the pipe parts, therefore, mainly pipe thread, with the exception of the connection to the mixer.
5.Spline connections of the valve head and flywheel.
The following slots are used abroad:
8X20, 8X24, 8X15.
We use an 8X20 slot.
To fix the flywheel, M5 screws are used (Russian valve head, ceramics 18X1), M4 - mechanics M18X1 (China). Towel rail connections are mostly pipe threads.
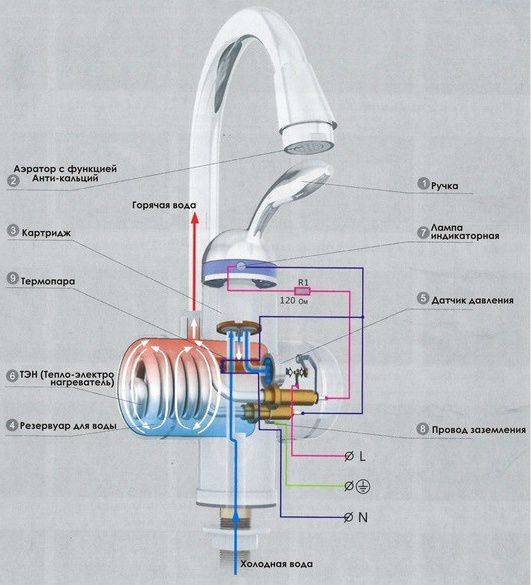
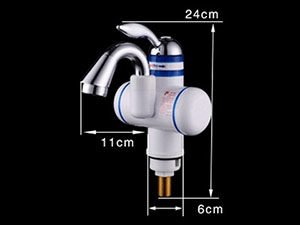
Water heater faucet design
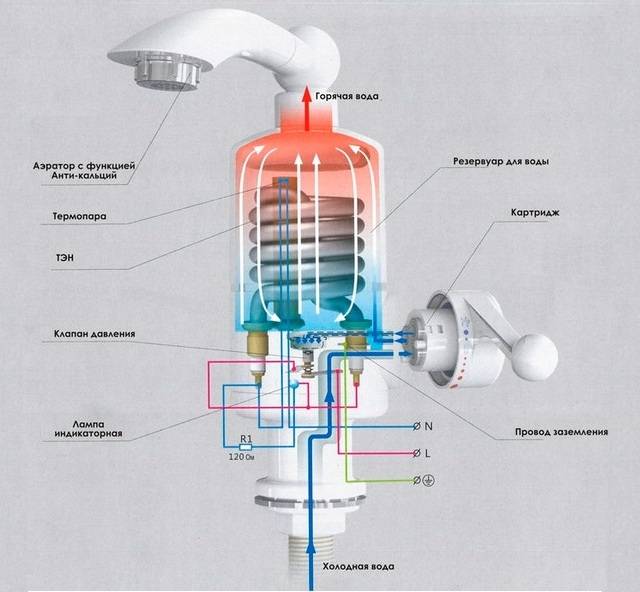
Water heater tap device
In fact, this is a water mixer, with a high-power electric heating element (heater) built into it. The faucet water heater consists of a housing, a heater, a thermostat, a water flow sensor and a protection system
Externally, such a faucet for instantaneous heating of water does not different from the usual mixer, if you do not take into account the electrical cord with which it is connected to the mains.
By type of management water heater taps are divided into hydraulic and electronic. The hydraulic crane has power switching controls. Switching is carried out manually. Electronic type of control have thermostats that automatically control the required water temperature. At the same time, the temperature of the water in the tap is displayed on the electronic display.

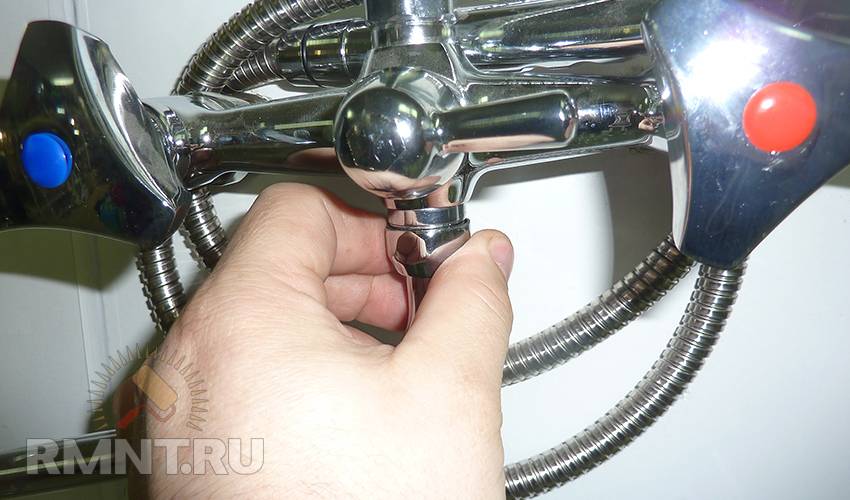
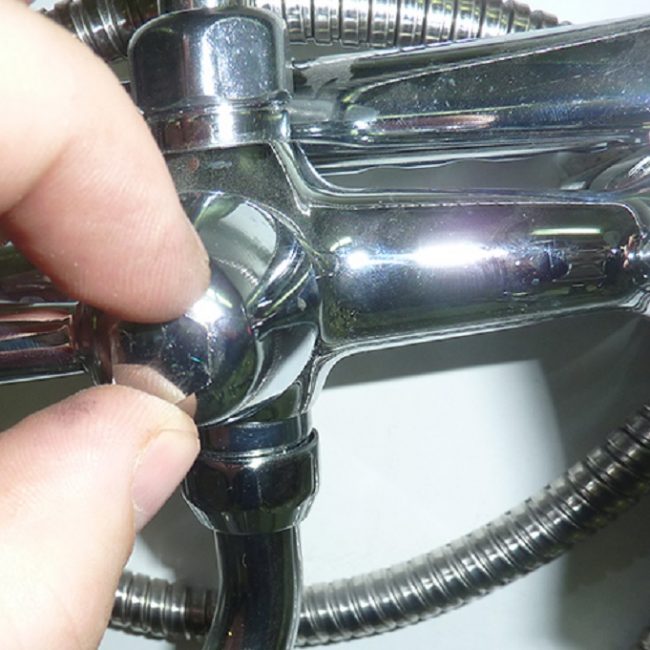
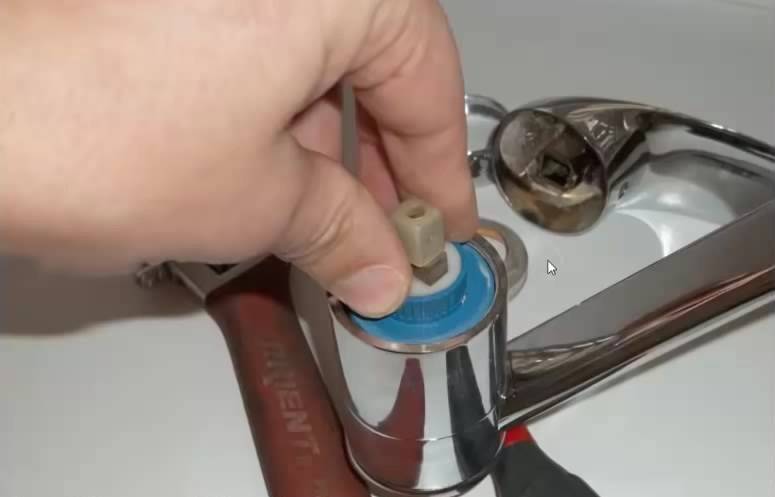
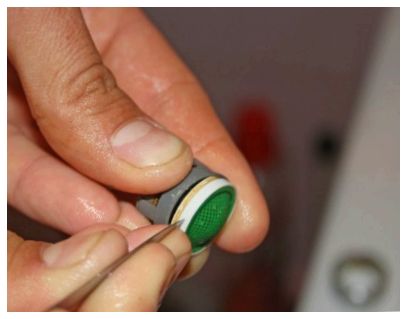
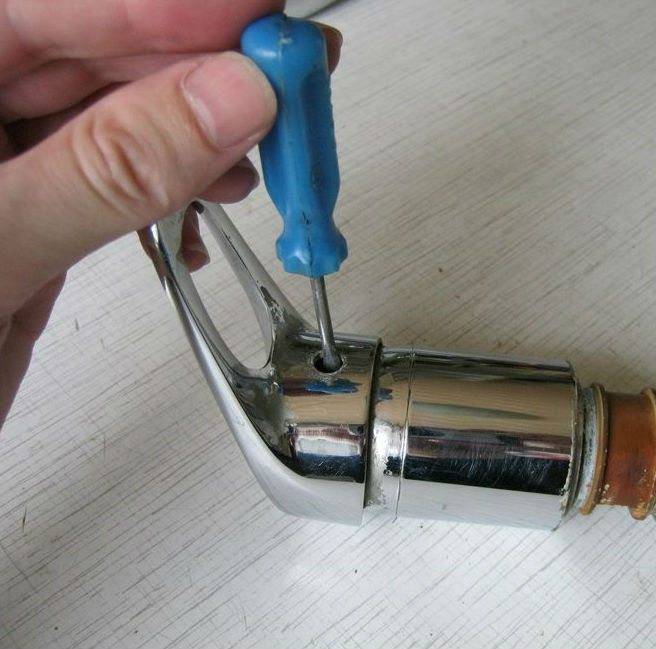
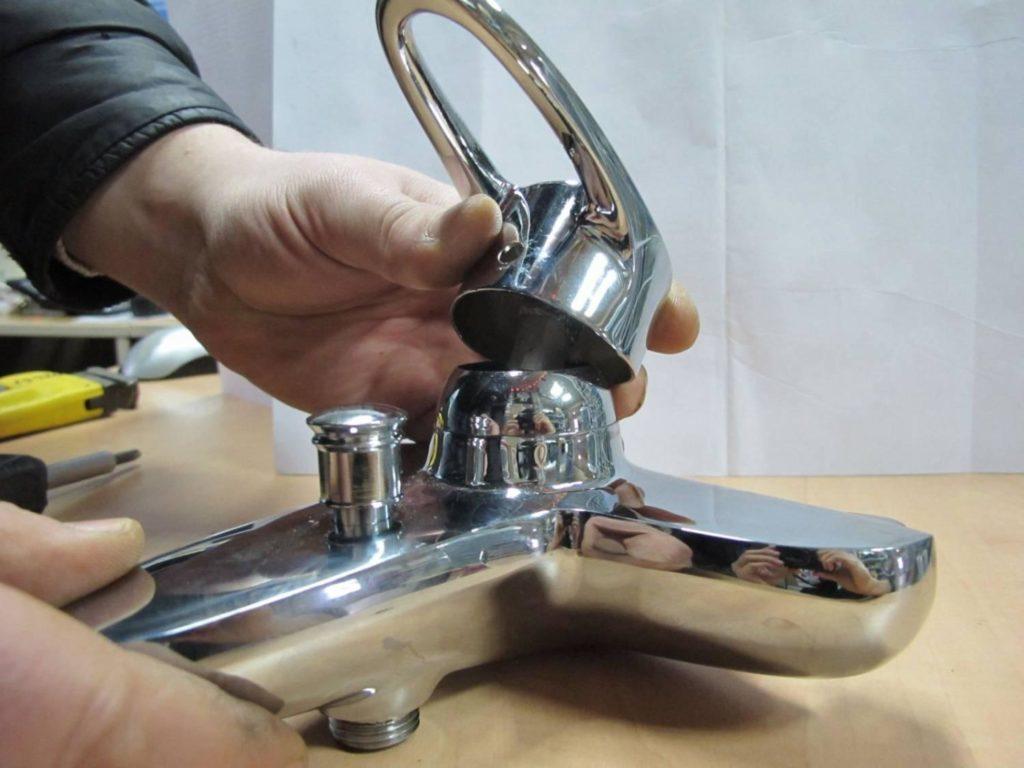
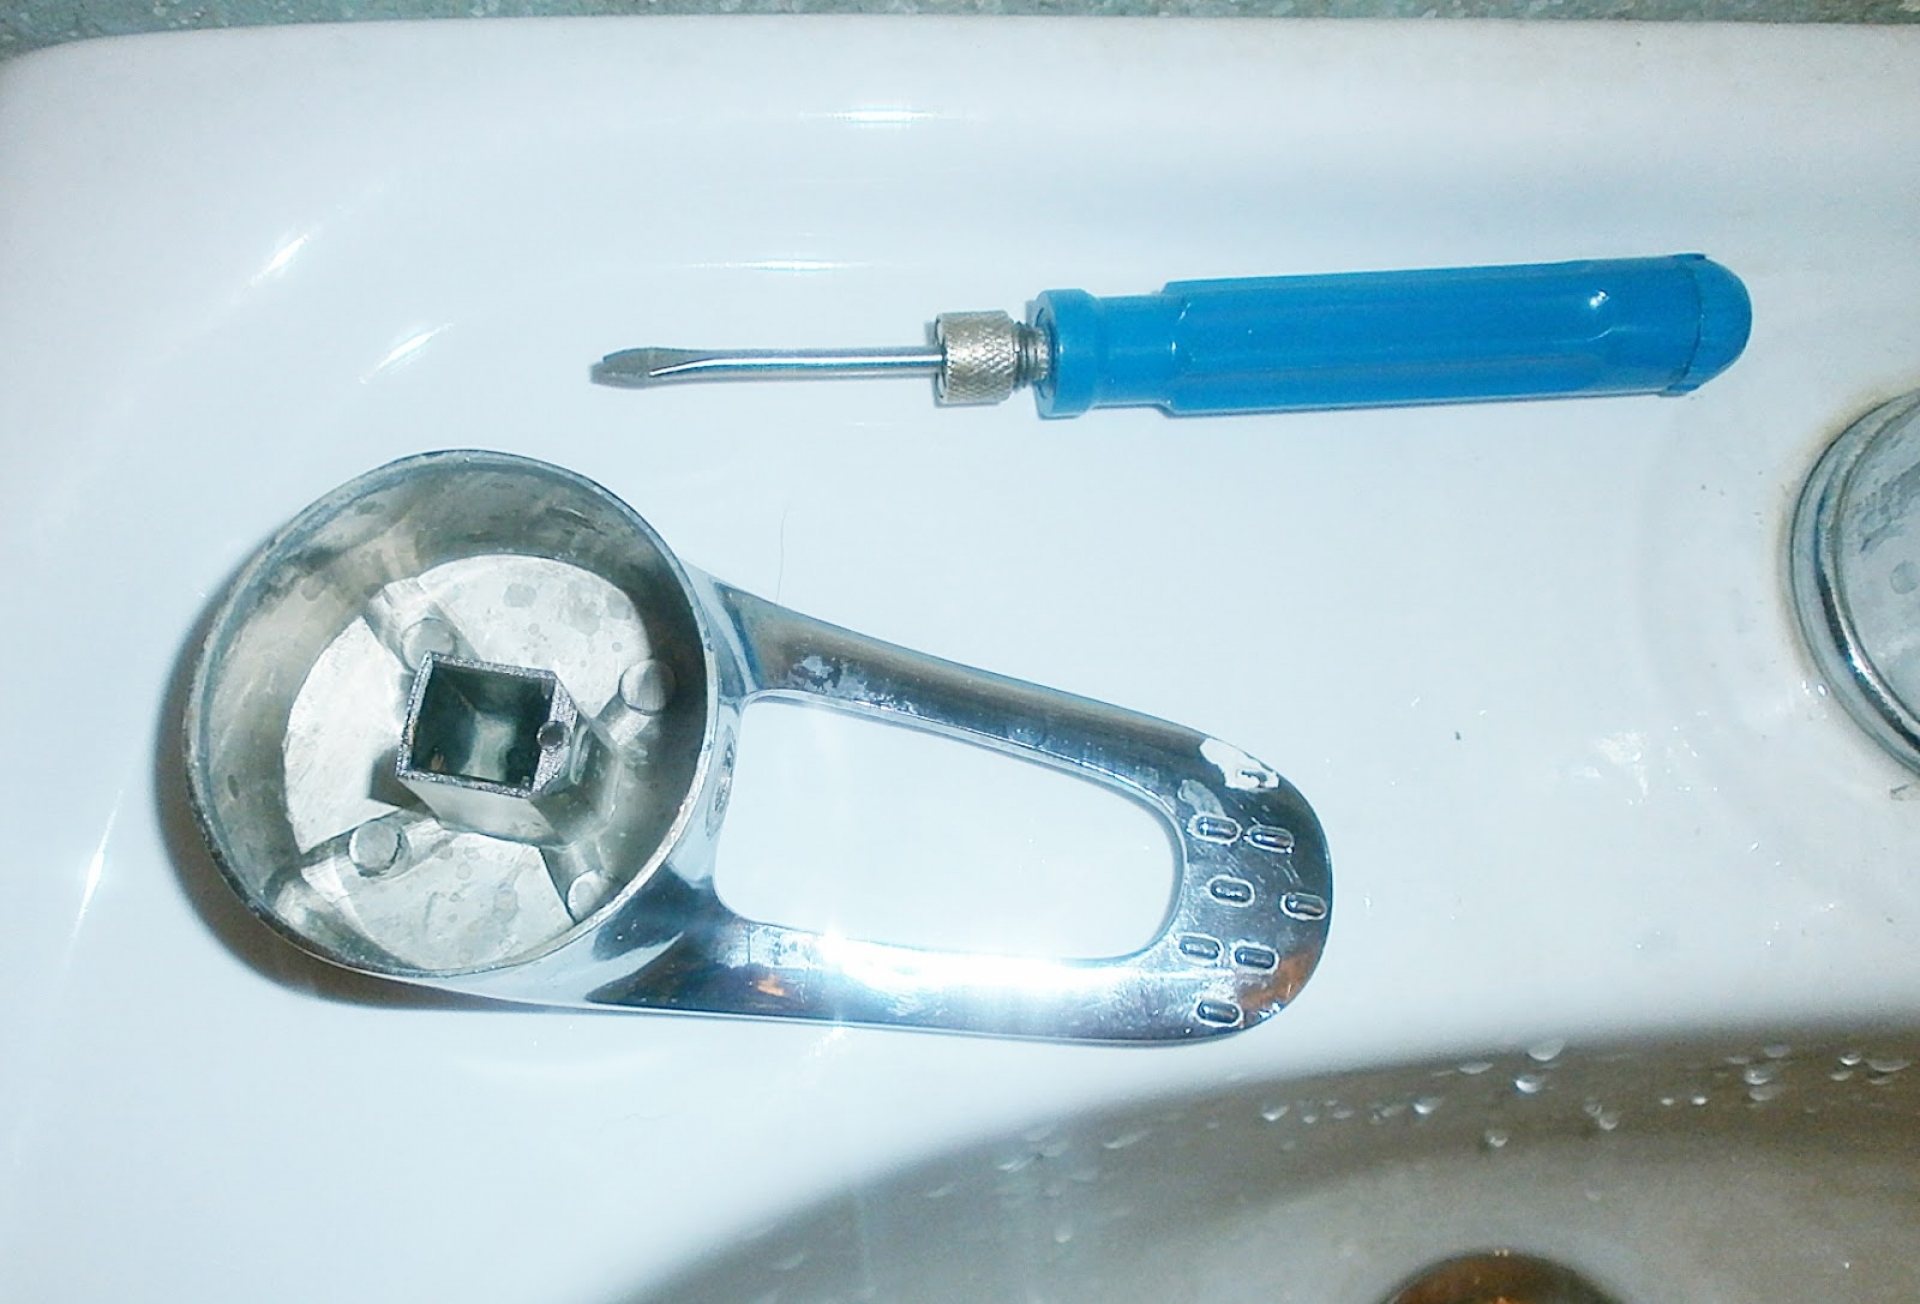
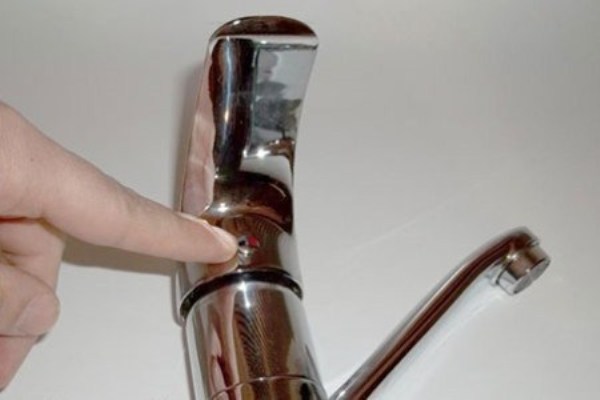
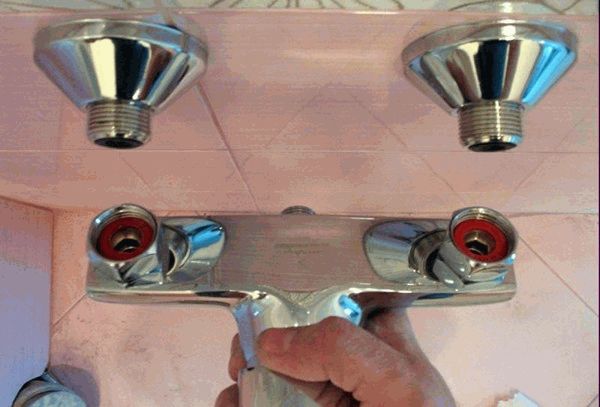
The flow of the toggle switch "faucet-shower"
Two types of faucet-shower toggle switches are used in water taps: rod (pressure) and ball (rotary).
You need to change the faucet-shower toggle switch if water flows from both the faucet and the shower at the same time.
The process of replacing a toggle switch is similar to changing a crane-box:
- Close the cold hot and water valves at the pipe entry to the living area, open the water tap and release the remaining water, relieving the residual pressure.
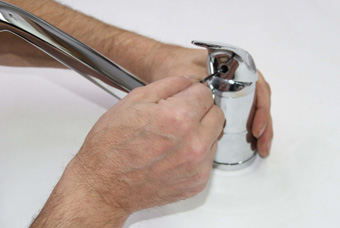
- Remove the decorative trim, unscrew the retaining bolt, remove the toggle switch handle.
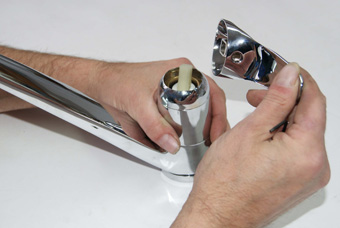
- Unscrew the toggle switch with an adjustable wrench by turning it counterclockwise.
- Change the toggle switch or gasket on it and assemble the faucet in reverse order.
How often should boilers be flushed?
In the operating instructions, manufacturers indicate the need for regular maintenance. The boiler is washed once a year, provided that there are no visible manifestations of internal malfunctions in the operation of the capacitive storage:
- reduced pressure in the hot pipeline;
- decrease in heating temperature;
- unpleasant smell of hydrogen sulfide when using hot water;
- signs of rust.
If any of the described signs that affect the operation of the water heater are detected, unscheduled maintenance is carried out. The frequency of flushing is influenced by external factors: water quality, intensity of operation. Industrial tanks are cleaned twice a year: before and after the heating season.
Maintenance of an indirect heating boiler is easy to do with your own hands, while it is better that serious damage be repaired by specialists. You can clean the BKN from foreign objects and rinse the heat exchanger and tank, you can remove scale and rust on your own. For minor repairs: replacing the sealing gasket and the magnesium anode does not require special skills. It is enough to have a screwdriver and a minimum set of plumbing tools.
This is interesting: You can often open and close the inlet valve with a tapbox on the water supply
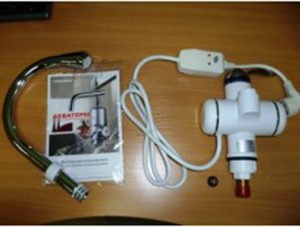
What is inside?
A heating element and a power cable are hidden in the body of the faucet for heating water. Water enters in a spiral and begins to flow out approximately 5-10 seconds after the device is turned on. During this time, it reaches the desired temperature. To adjust the pressure and temperature on the body of the product there is a special knob.
Directly under the body is a switch and an indicator light. The device is connected to the water pipe with a special screw, and is additionally fixed under the sink with a coupling.
In addition to the basic configuration, some models of crane heaters are equipped with:
- Filters for rough cleaning;
- Aerators (sprayers) for economical water consumption.
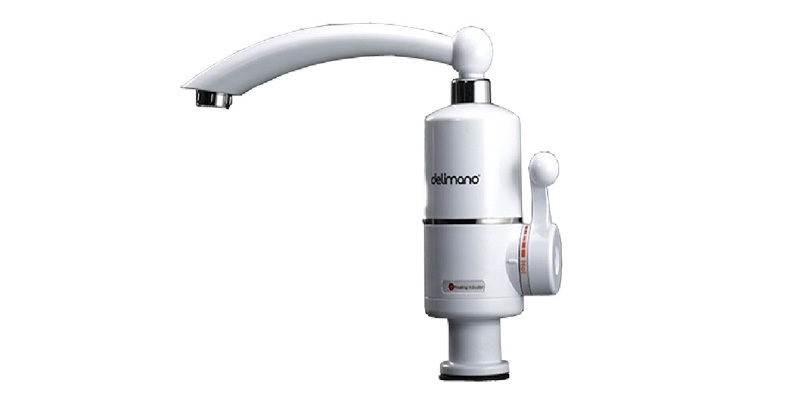
Instantaneous water heater Delimano
This device is available in white. Equipped with a regulator that allows you to control the temperature of the water. The device is functional and easy to use. It is easy to install and dismantle. It looks like a regular mixer. Materials used in its production: metal and plastic. The inner ceramic insulation layer makes it safe to use.
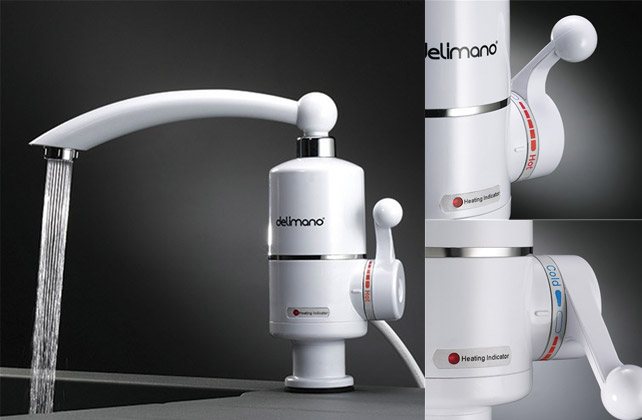
Electric flow heater Delimano
Characteristics
- It takes only 3 seconds to heat water up to 60 °C;
- Has an attractive appearance;
- Easy to mount;
- Unlike boilers and storage water heaters, it takes up little space;
- Consumes less electricity than reservoir heaters;
- Allows you to adjust the water temperature
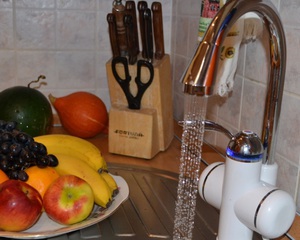
Product in use
The faucet handle also serves as a temperature regulator.Heating depends on the angle of rotation of the lever, which, according to the principle of operation, resembles a conventional mixer. When the device is turned on, a blue or red lamp lights up on the indicator.
Heating water in a tap can be compared to the process of heating a boiler. With the significant difference that the product must have a limiter that turns off the power when it reaches 60 degrees. This allows safe operation and prevents scale formation.
In this video you can learn more about the device and operation of fast water heating taps:
The safety of the instant water heating faucet complies with the IPx4 standard, which means that all electrical parts are protected from dripping under any direction of water jets and regardless of pressure. In addition, the product is equipped with an RAM - an emergency shutdown device and a membrane that protects against water hammer.
Taps for instant water heating are more economical in operation when compared with storage heaters. Boilers turn on every time as soon as the water cools down by 5-10 degrees, and the faucet consumes electricity only at the time of operation.
In general, faucets that heat water are a universal thing. It is good for arranging a bathroom in private houses and apartments outside the city, where there is only cold running water. It is also an excellent solution for organizing a comfortable country kitchen. With its help, you can save yourself during periods of preventive shutdowns of hot water. Comfortable and economical!
What to look for when buying?
Instructions for selecting a flow-through heater-mixer involves the most complete study of the characteristics of the selected model
At the same time, it is desirable to pay attention to any trifles.
To make it easier for you to navigate, we have included the main requirements in the table:
| construction detail | Peculiarities |
| Frame | Preference should be given to metal models, as well as structures made of dense polymers. Cheap plastic cases often either crack or warp when exposed to hot water. |
| heating element | The more powerful this part, the more energy the device will consume, but the faster the heating will be. For domestic use, 3 kW is usually enough. |
| Safety system | It should include a temperature sensor that controls the temperature of the water, and a built-in RCD that turns off the heating element when it closes. |
| Heating indicator | A small but very useful element: when a light is on on the device, we see that the heating element is working and hot water will come out of the tap. |
| Filter | Usually it is a steel mesh that captures large contaminants. The presence of a filter in the kit significantly increases the service life of the heating element. |
Product in a stylish metal case
As for the appearance of such appliances, the most common are white models suitable for typical kitchen interiors, as well as high-tech devices. However, if you are willing to overpay, then you can find vintage faucets with bodies made of copper, brass or bronze.
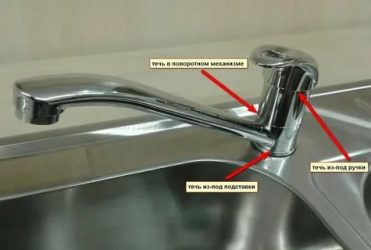
Repair of other minor problems
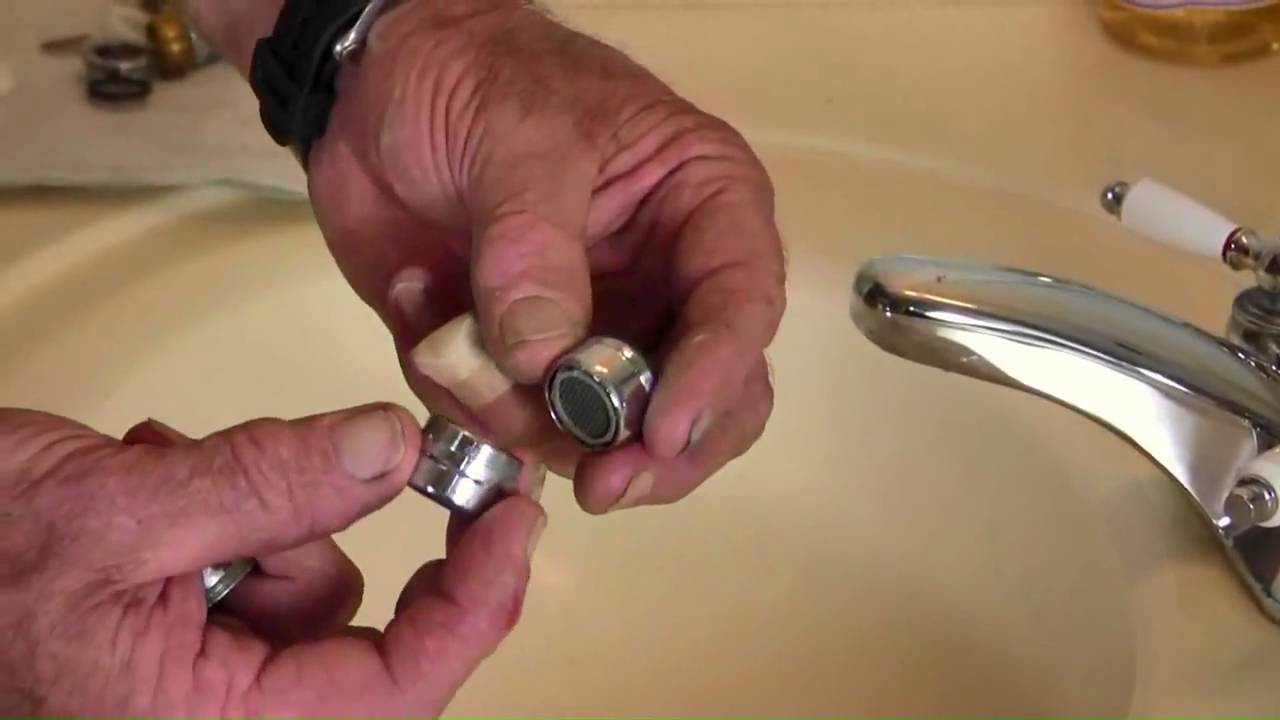
In addition to water leakage, faucets are prone to other breakdowns. For example, the water pressure of them may decrease. Very often, this kind of breakdown is associated with clogging of the aerator.
To clean the aerator you need:
- Remove the water diffuser from the faucet by turning it clockwise by hand. If your hand slips, wrap the water diffuser with a cloth and try again. If you use a tool, put rubber gaskets so as not to spoil the chrome surface.
- Pull out the aerator meshes. To do this, carefully press them from the outside.
- Wash the aerator screens under running water. Large particles of contaminant can be removed with a pin or a thin awl.
- Assemble the water diffuser and install it on the faucet without tightening it too much.
Another constant difficulty is water leakage at the connection of the gander to the body of the water tap. To eliminate it, you need to tighten the loose nut of the gander fastener with an adjustable wrench. If the leak remains, you need to remove the gander and change the rubber seal on the connection. When tightening the gander fastener nut, rubber pads must be used under the adjustable wrench so as not to scratch the surface of the nut.
When disassembling a faucet, it may become clear that many parts are “stuck” to each other and do not turn. Try lubricating them with specialized WD-40 fluid. It will dissolve corrosion, squeeze out moisture, and make it possible to disassemble the faucet without damaging it.
If you haven't found a solution to your bathroom faucet problem, read our post on faucet repair.
Flaws
There are also disadvantages to a tankless water heater. These include:
- high power consumption;
- powerful electrical cable;
- limited bandwidth.
Such a large consumption of electricity affects the electricity bills. In addition, it is required to pre-lay a powerful cable so that the faucet can warm up the water flow.This also causes inconvenience during the installation of the mixer.
The throughput of the water flow is from 4.5 liters to 6 liters per minute. Many consider these numbers small. However, it has been noticed that the device is not only convenient to use, but also provides an opportunity to get a full bath of hot water, which no other device can boast of. If we compare this device with a gas column, then the throughput of a flowing water heater is twice as large.
Connection
Any hostess will cope with this task: 1. First you need to release the device from the packaging and remove the plastic nut from the mounting tube, leaving only the rubber gasket.
2. Insert into the hole in the sink and screw down.
3. To the mounting tube from below, you need to connect the cold water supply using a flexible hose, which is sold in any store.
Please note: it is advisable to use a special tape for sealing threaded connections (fumlent). Complete with a water heater there is a detailed instruction in pictures with a connection diagram
It is very difficult to make a mistake in this case.
4. After all connections are connected, you can check them for tightness. Turn on the water without electricity and make sure that there are no obstacles to its flow anywhere.
5. If everything is in order and nothing drips anywhere, you can safely plug the device into a power outlet. The indicator on the protective device, which is located on the electrical wire, will immediately light up. In order to avoid premature failure of the heating element, a special dry-running sensor is located in the mixer. It turns off the electricity supply if there is no water in the tap.
Advice from the editors: it is worth paying attention to the outlet itself, where the water heater will be connected. It is necessary to provide for mandatory grounding and a thicker wire - with a cross section of at least 1.5, and preferably 2.5 kV
mm.
6. Next, you need to turn the faucet handle to the left, having heard a characteristic click (the heater switch-on relay will work), the water will begin to heat up. This will be signaled by the LED indicator on the mixer. After about 5 seconds, the water will be heated to the maximum level. Further, the temperature is adjusted by reducing the water pressure.
The smaller the jet, the hotter the water. In order not to experience discomfort because of this, there is a special nozzle on the tap - an aerator. It allows you to create the effect of a large volume of water with a small pressure.
There is an interesting article on how to replace a heating element in a Termex water heater. If you are interested in how to install a Termex water heater, then read more about it here.
Customer reviews indicate that the hot water faucet has proven to be the best and remains in many homes as a backup hot water system.
We invite you to watch a video on how the Aquatherm instant water heating tap is tripled and how it works:
How to connect a mixer with a thermostat - installation of a separate rack or shelf for a tap
This is a rather expensive and complicated way. Its advantage is only in the uniqueness of the design, which is suitable for the exclusive interior of bathrooms.
For standard apartments, in which the size of the bathrooms leaves much to be desired, such installation is not suitable. In addition, the price of this mixer model is many times higher than other taps.And the last - this is the complexity and complexity of the connection, leaving little chance of doing the work with your own hands.

So, having chosen a thermostatic faucet to your liking, you should not have a question about how to connect a thermostatic faucet in the bathroom if you carefully read the instructions for it and follow our advice in everything.
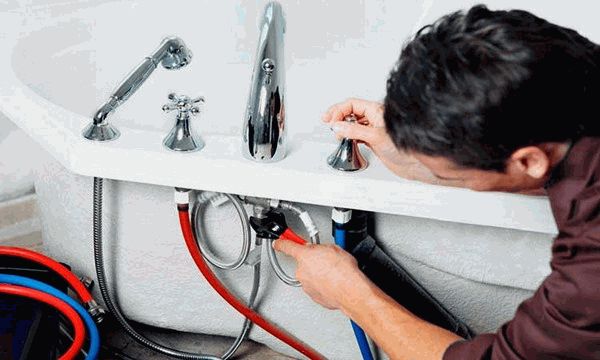
Installation and connection
 Installing a faucet with a heater is no different from installing a mixer. The main difference is the cable for connecting the power supply. Designers have provided fasteners to make it invisible and not interfere with the use of a sink or shower.
The combination of water and electricity is deservedly considered deadly, so you should minimize the risk: buy heaters from certified sellers, install strictly according to the manufacturer's instructions
It is important to check the compliance of the electrical network with the necessary requirements of the flow heater manufacturer; when connecting the power, be sure to ground it
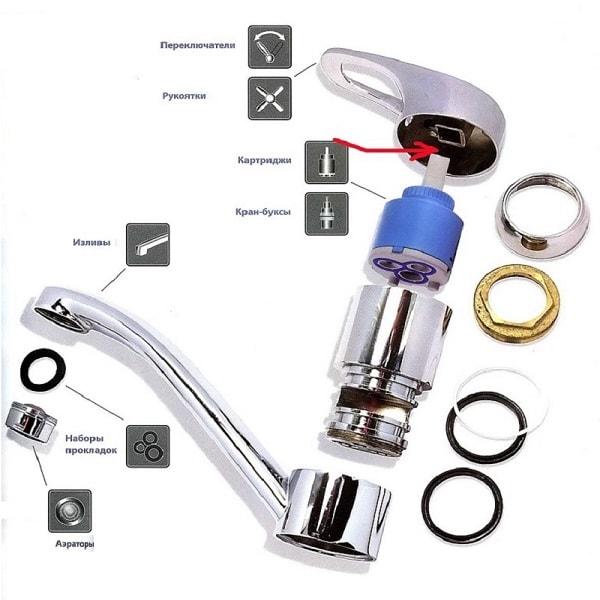
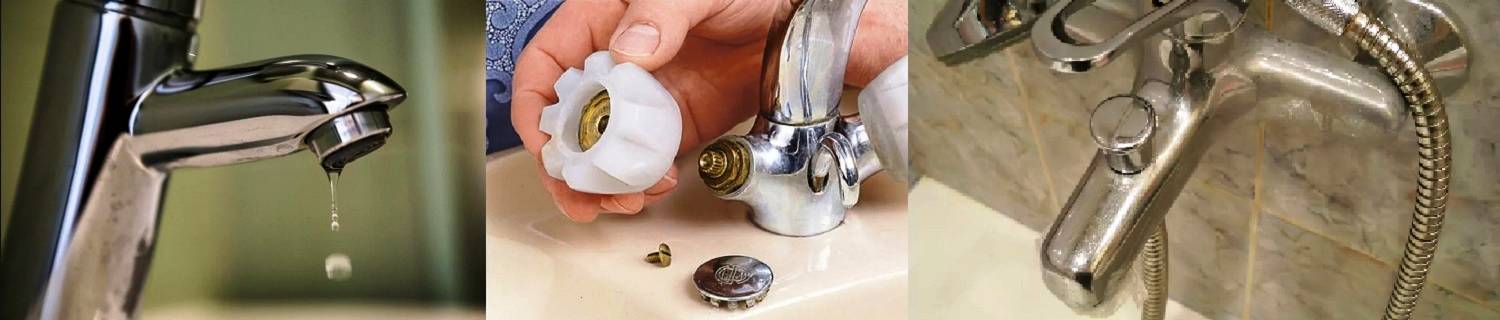
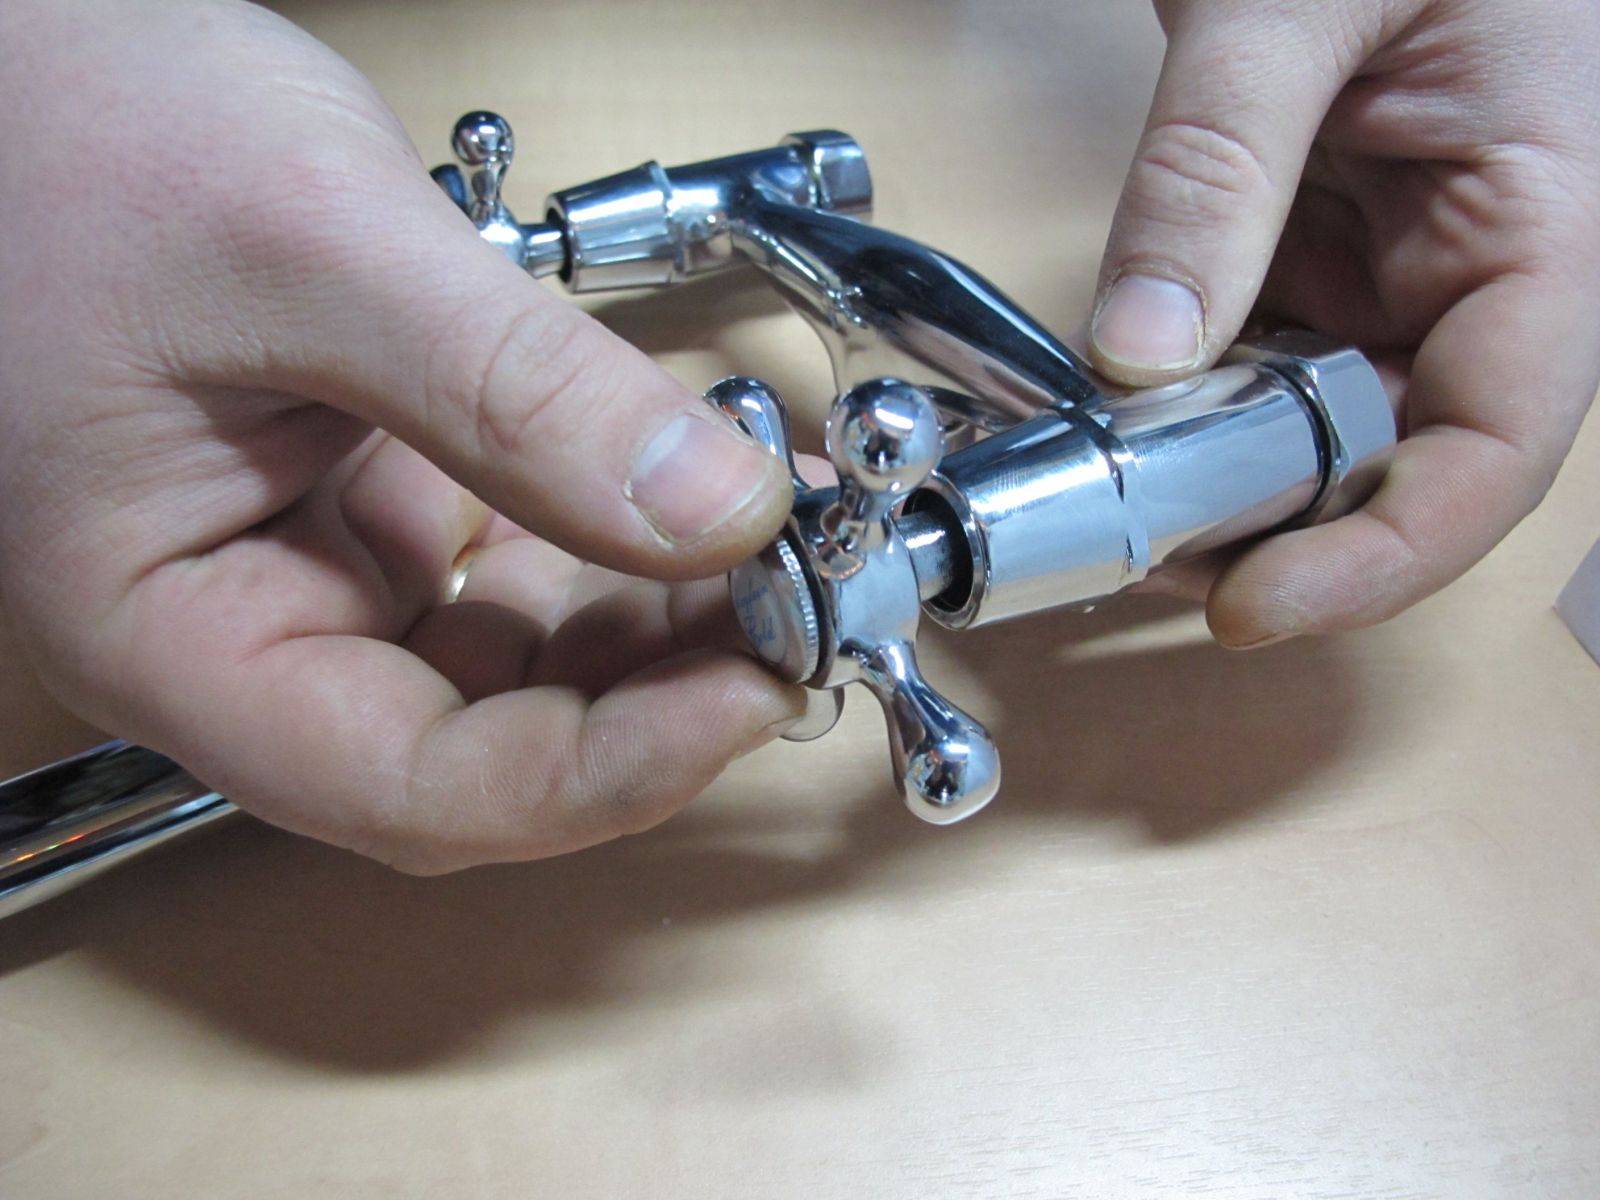
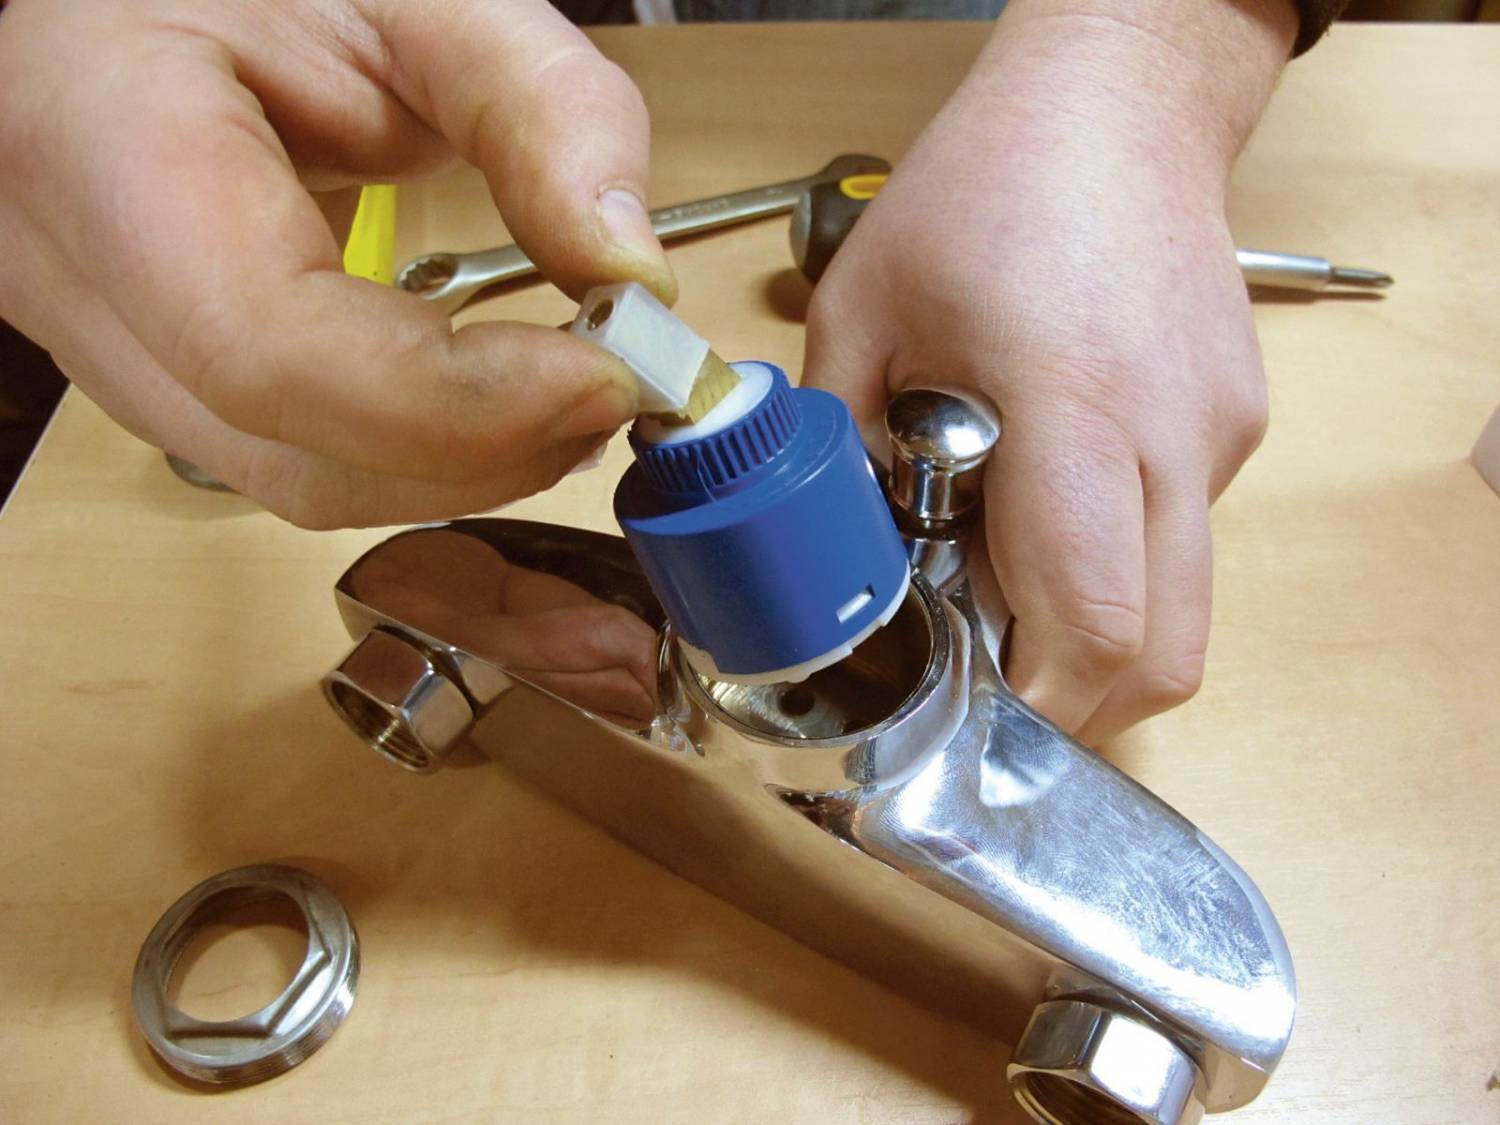
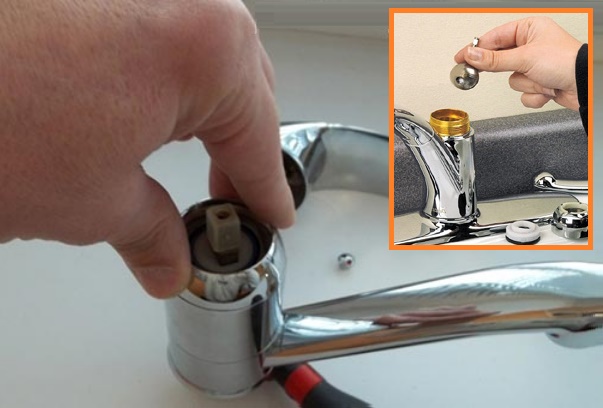
We repair a ceramic faucet box
A ceramic bushing crane that has become unusable can be repaired by purchasing the necessary parts, or by replacing it completely. Moreover, experts advise the latter option, which will take less time.
Reasons for repair may be as follows:
- The ceramic plates are worn out. They break down infrequently, and replacing individual plates is a complex and time-consuming operation, it is much easier to buy a whole part and install it.
- Foreign objects got into the space between the plates.In order to reduce such cases to a minimum, it is advisable to install devices for water purification from impurities.
- A thread has been developed between the stem and the body of the crane box. In this case, the whole detail changes completely.
Before proceeding with the repair or replacement of the faucet box, you need to turn off the water supply in the apartment or house and prepare the necessary minimum of tools: screwdrivers (flat and Phillips), pliers, gas and box wrenches.
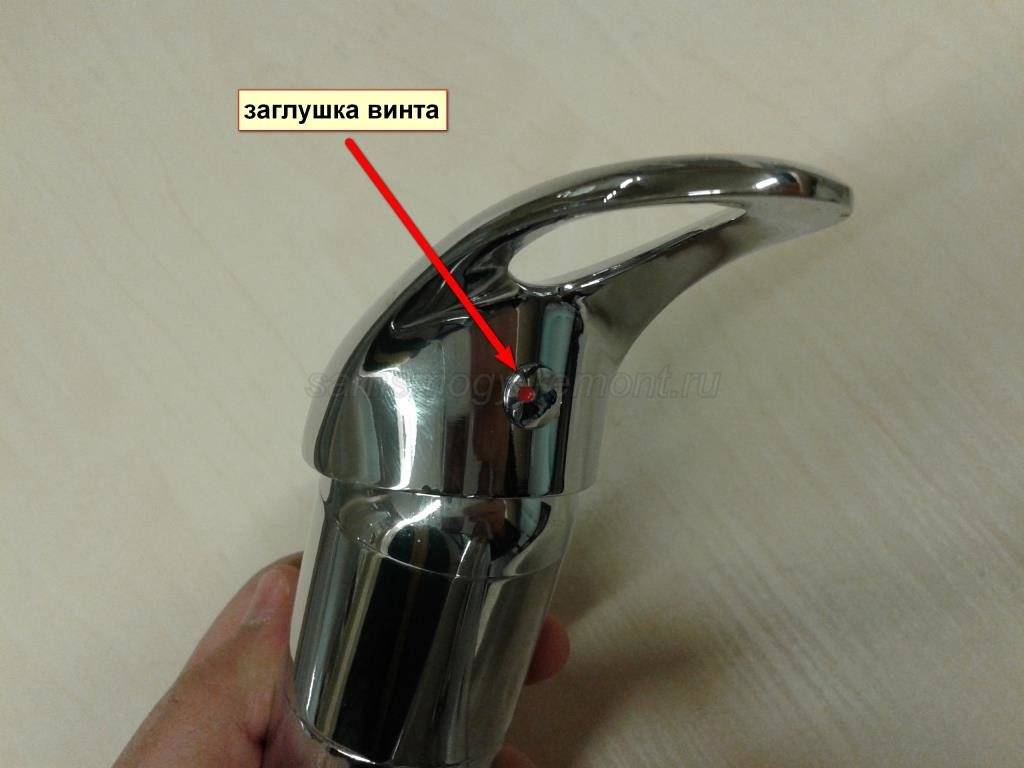
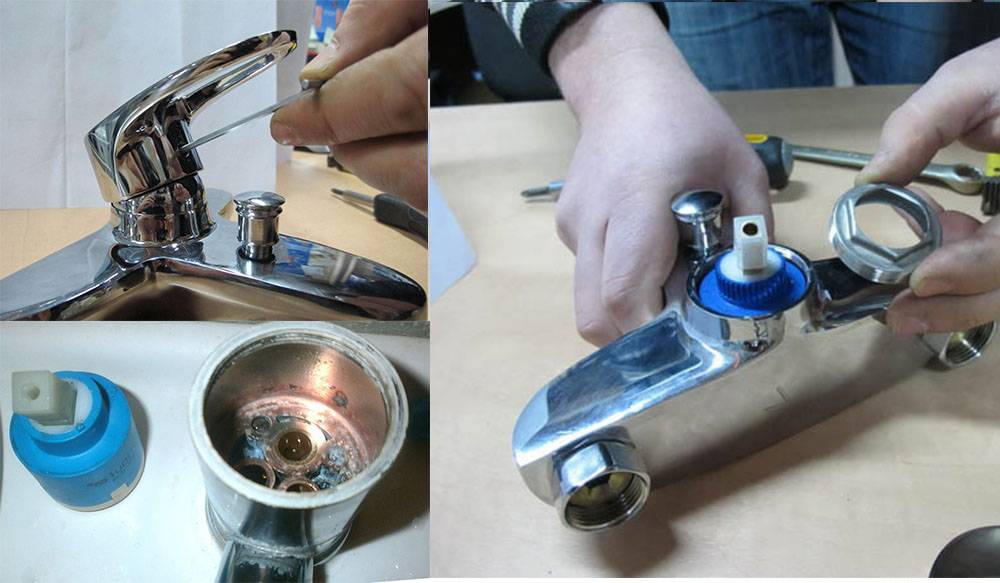
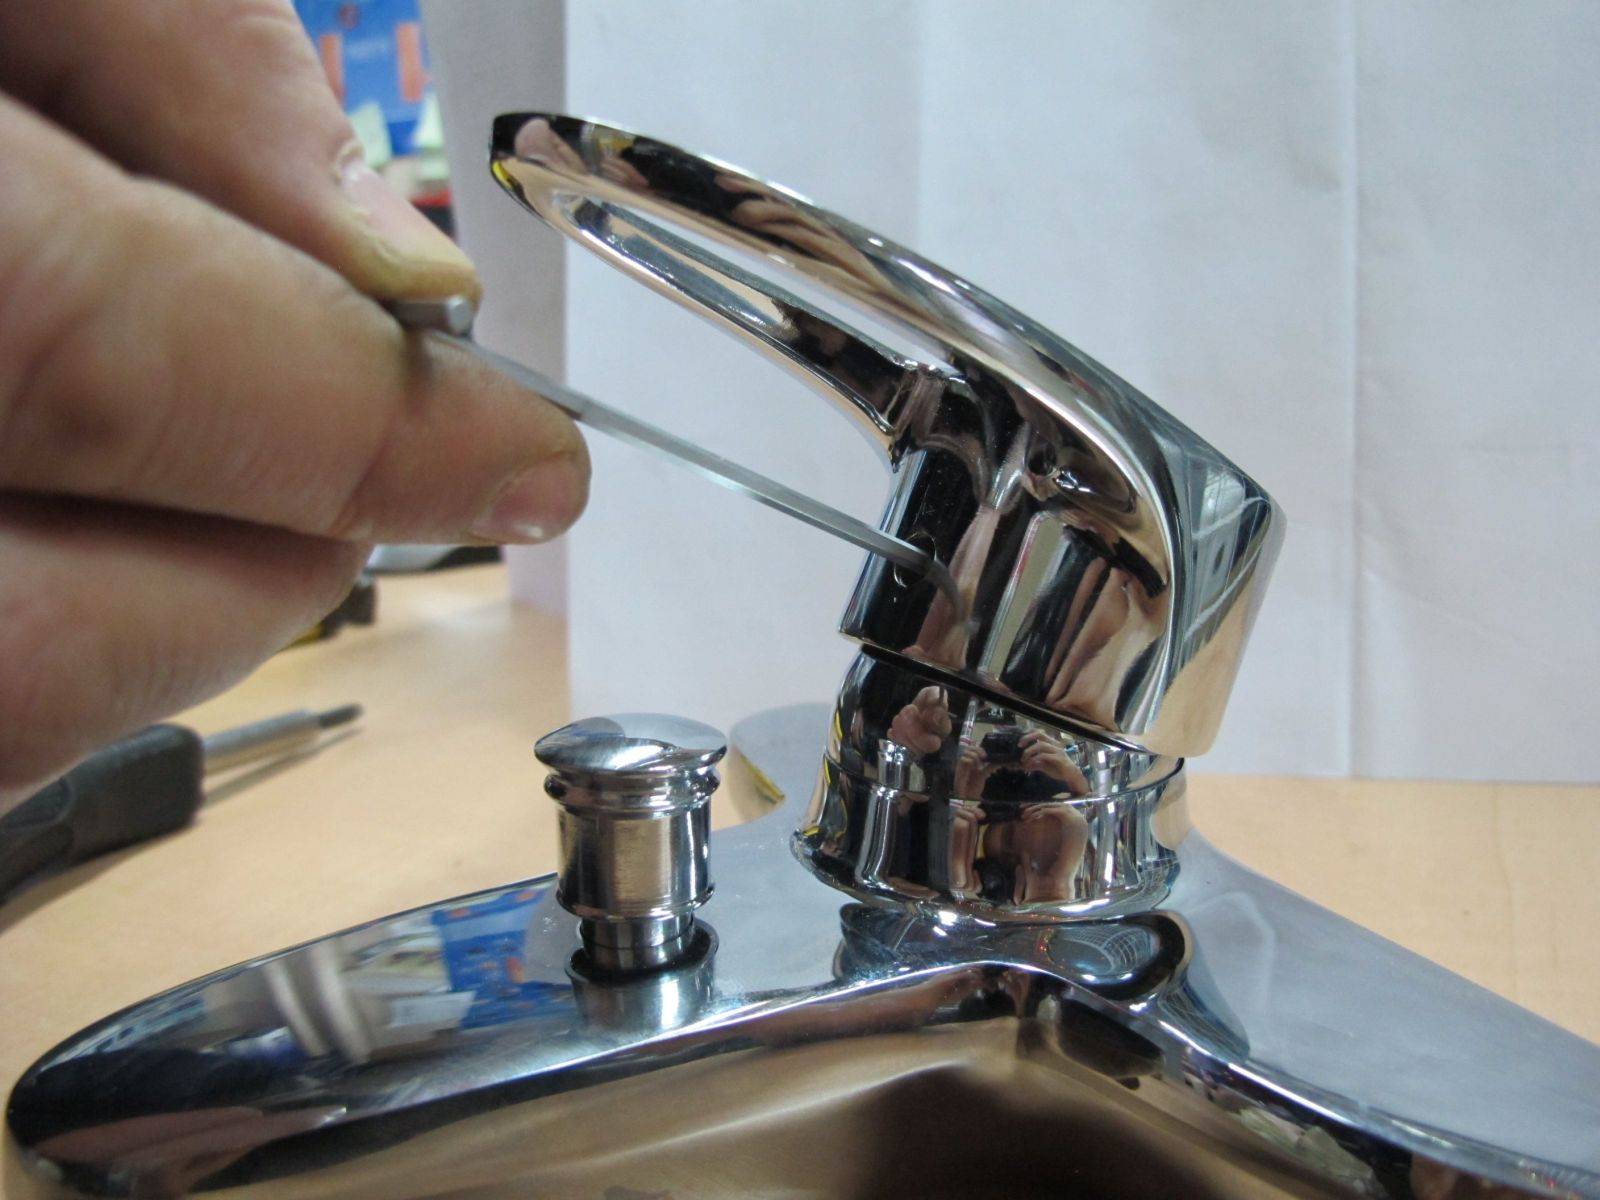
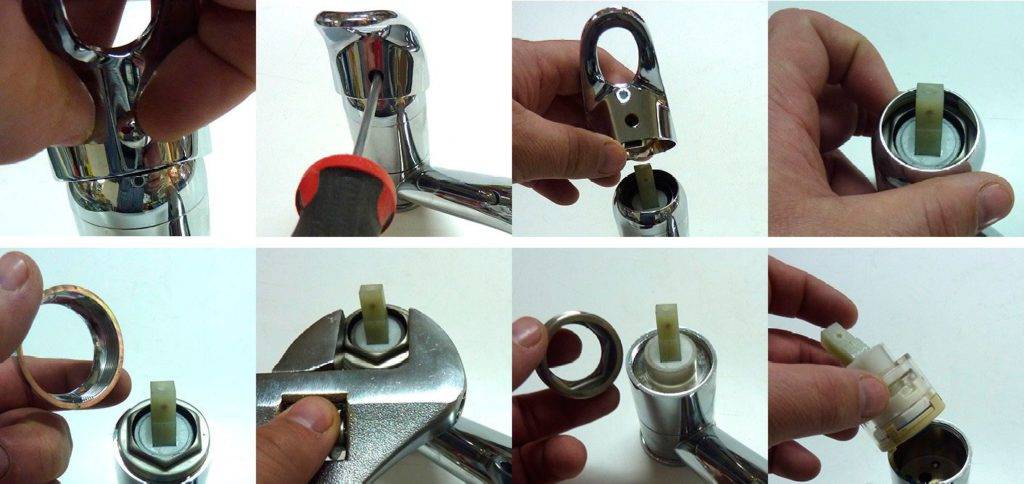
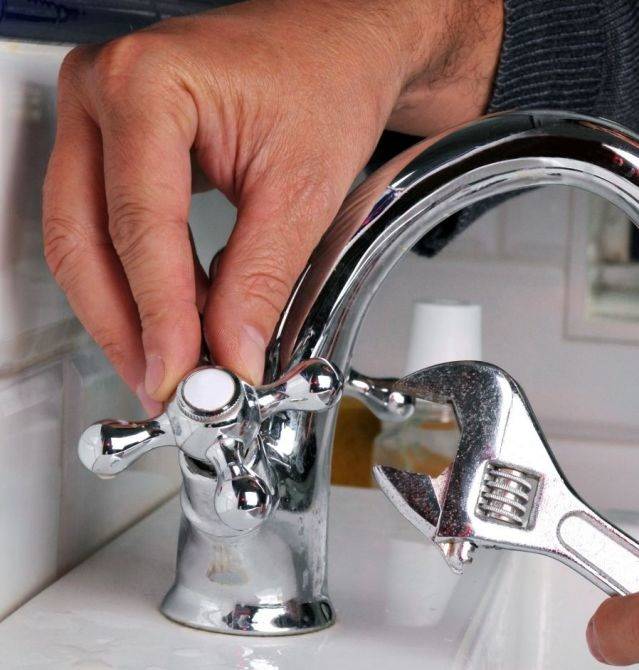
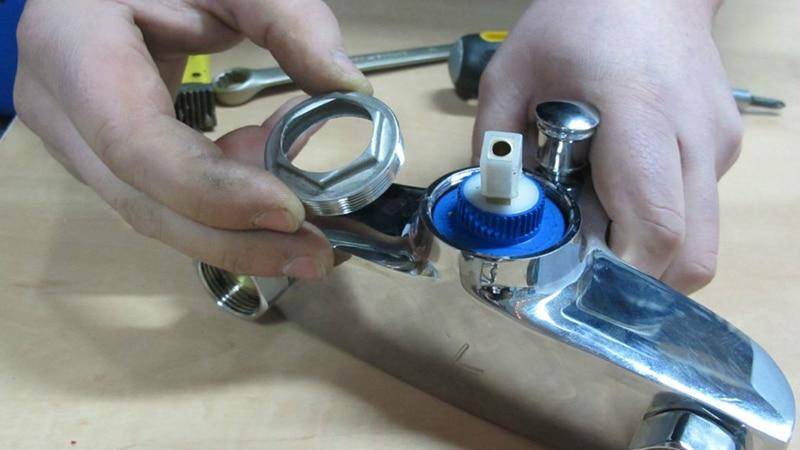
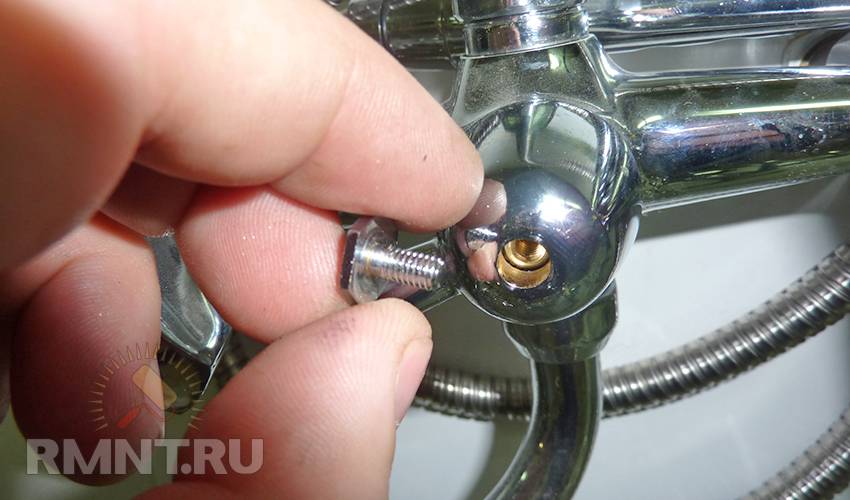
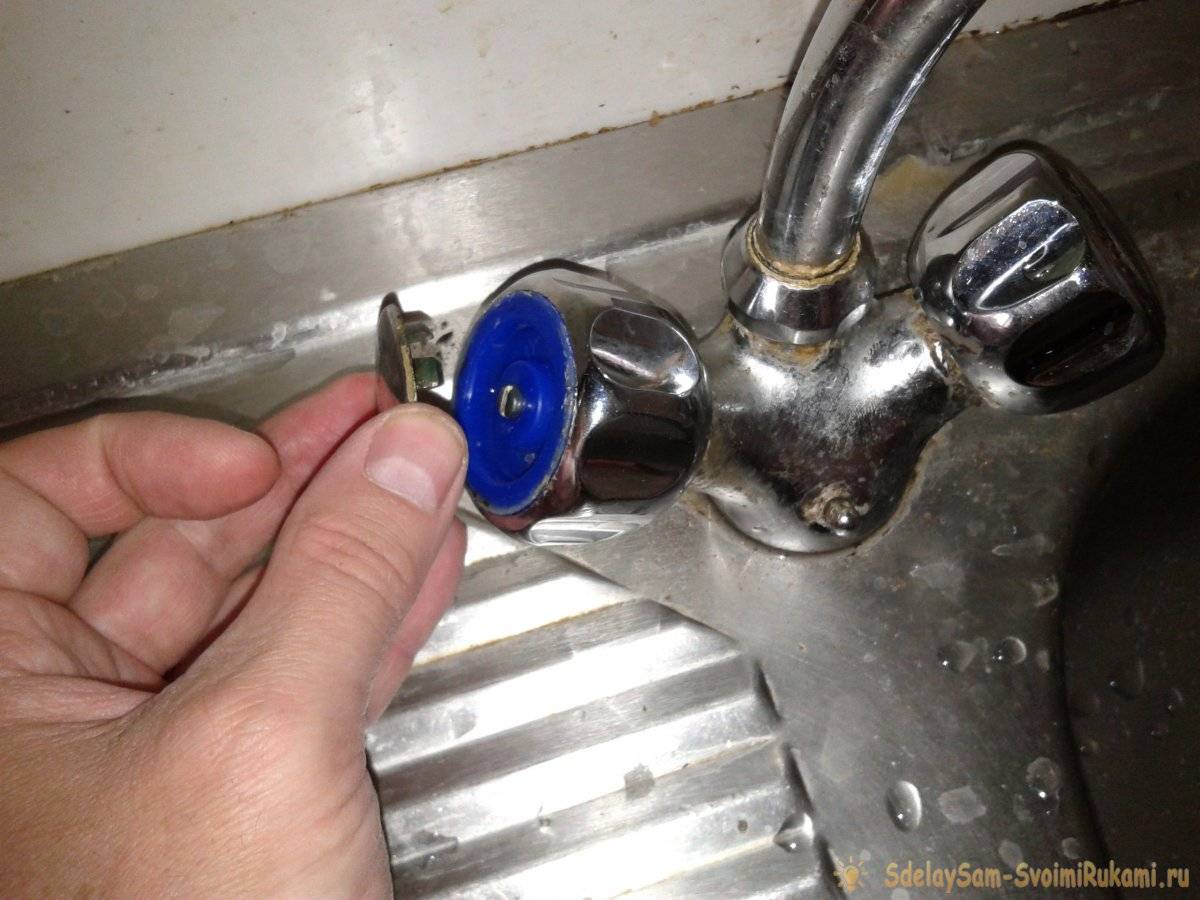
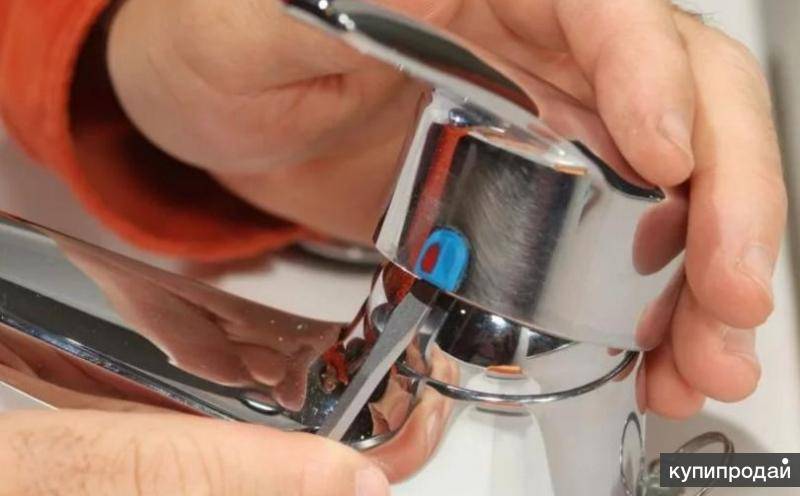
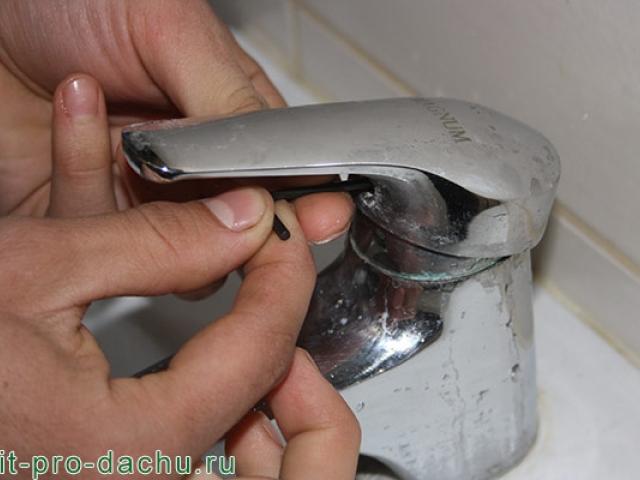
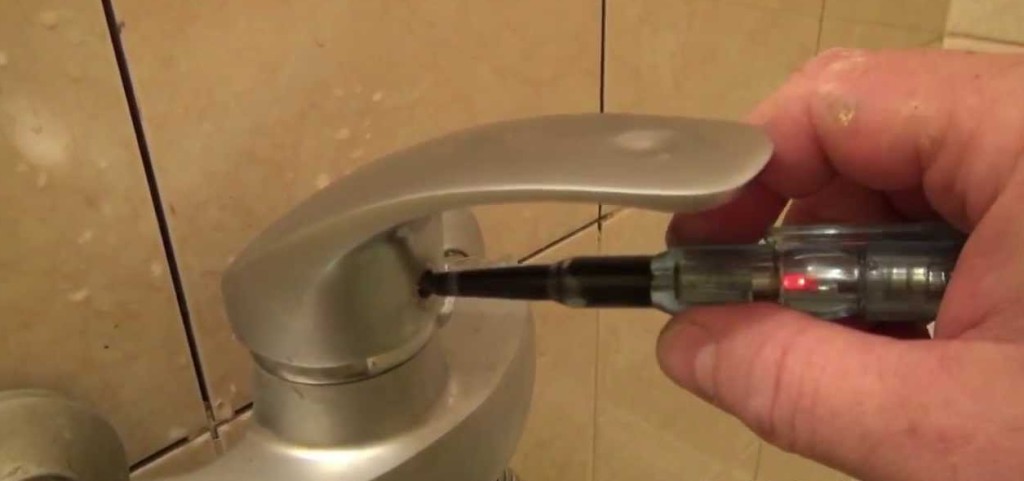
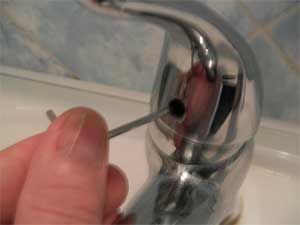
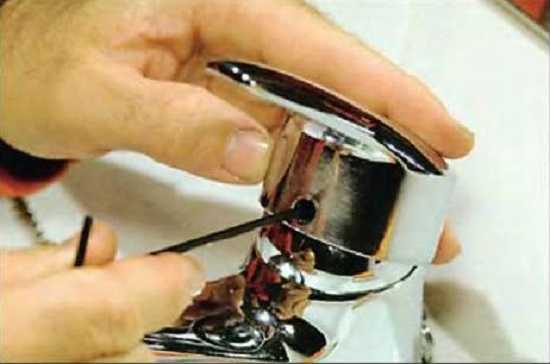
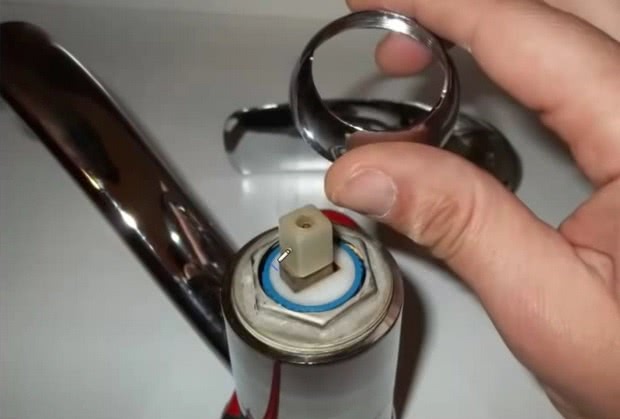
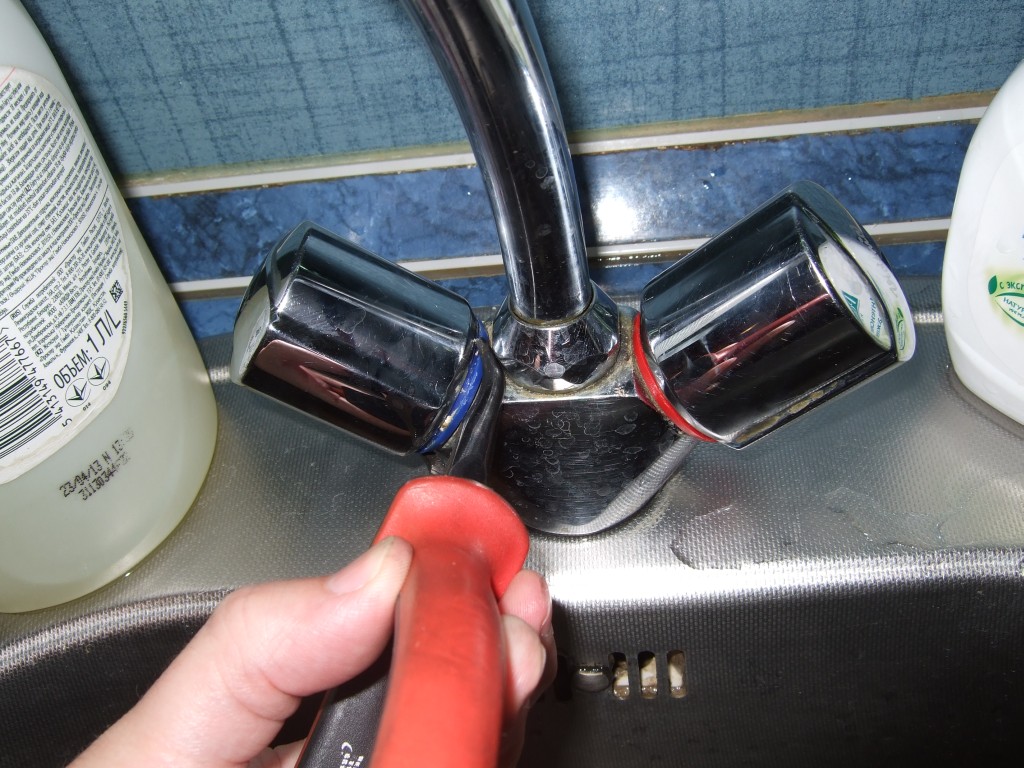
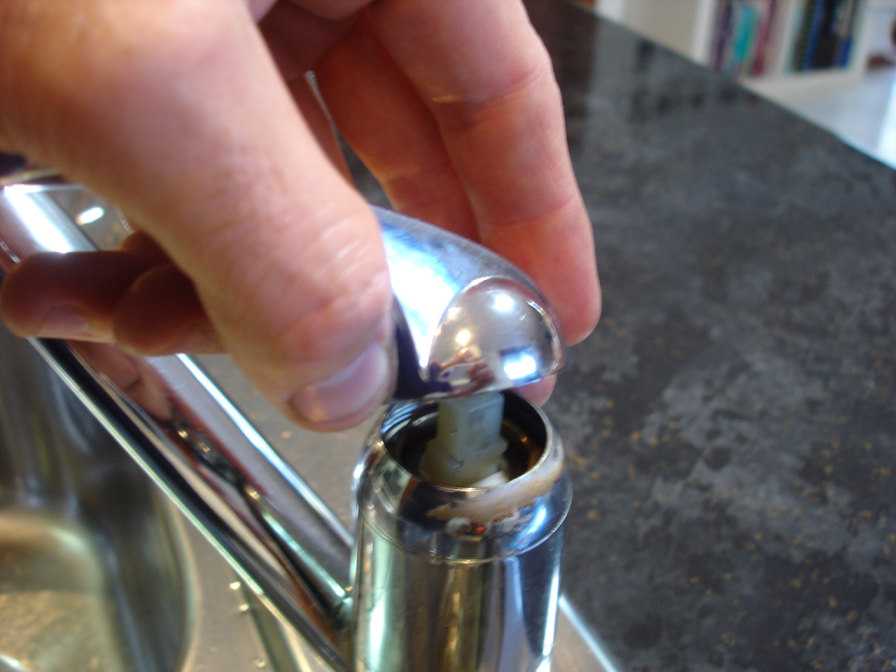
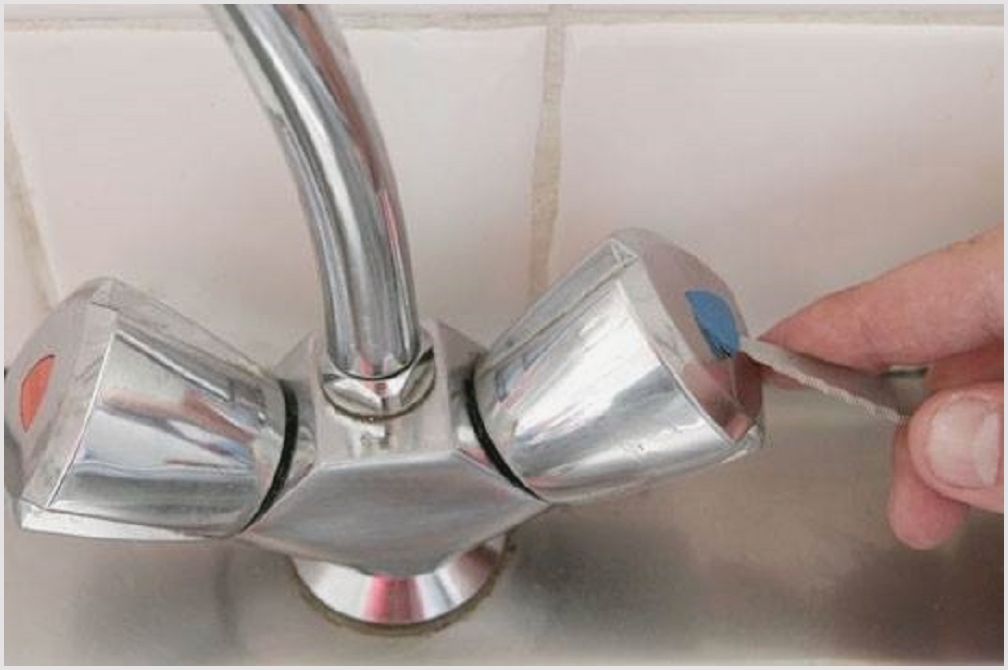
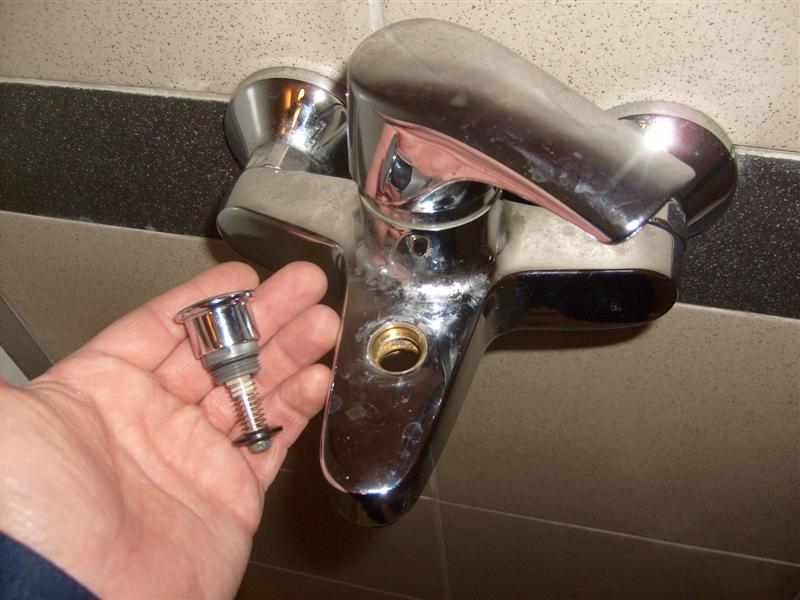
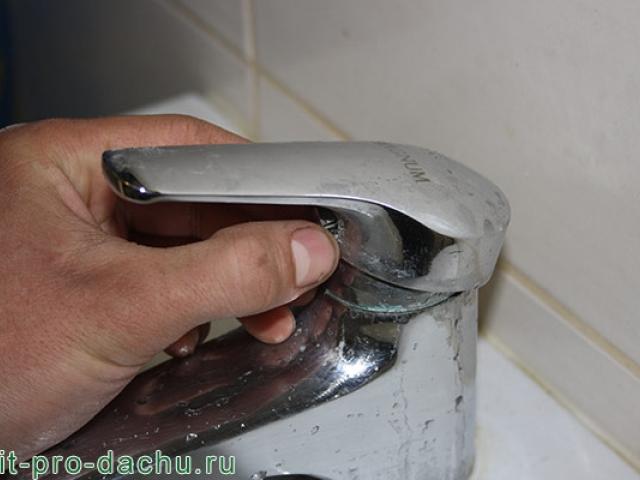
Preparation for repair
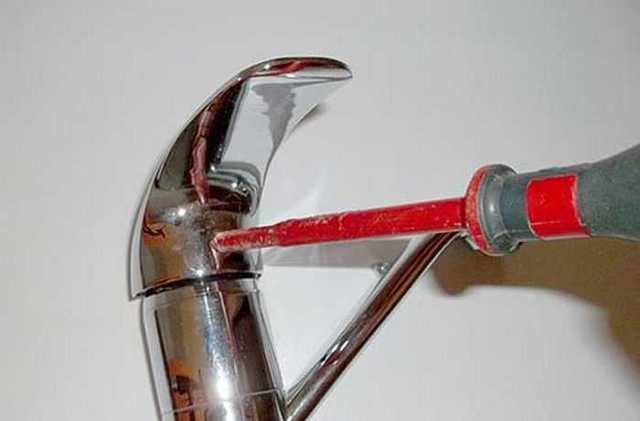
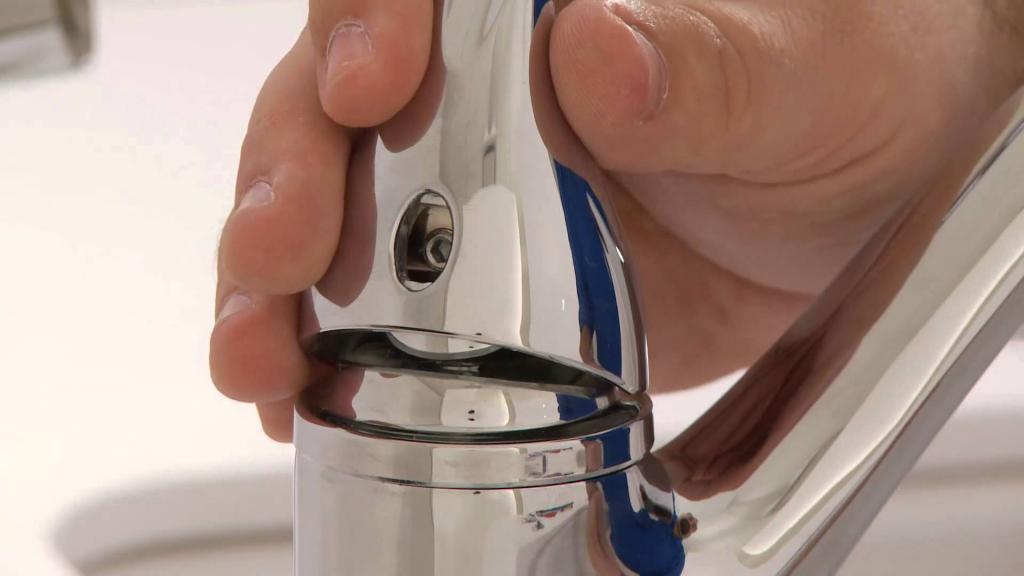
To start with crane bushings need to be removed flywheel. To get to it, we remove the colored decorative plug in the faucet valve. Next, remove the flywheel by pulling it up. Under the flywheel is a bolt, unscrewing which you can remove the valve. Often, this requires the use of force, since water is constantly in contact with the parts of the mixer, and oxide forms on the metal, which holds the parts together better than any glue. After removing the valve, the first step is to clean the threads and the flywheel. Then we unscrew the decorative insert of the tap, using a cap wrench with a head of 17.
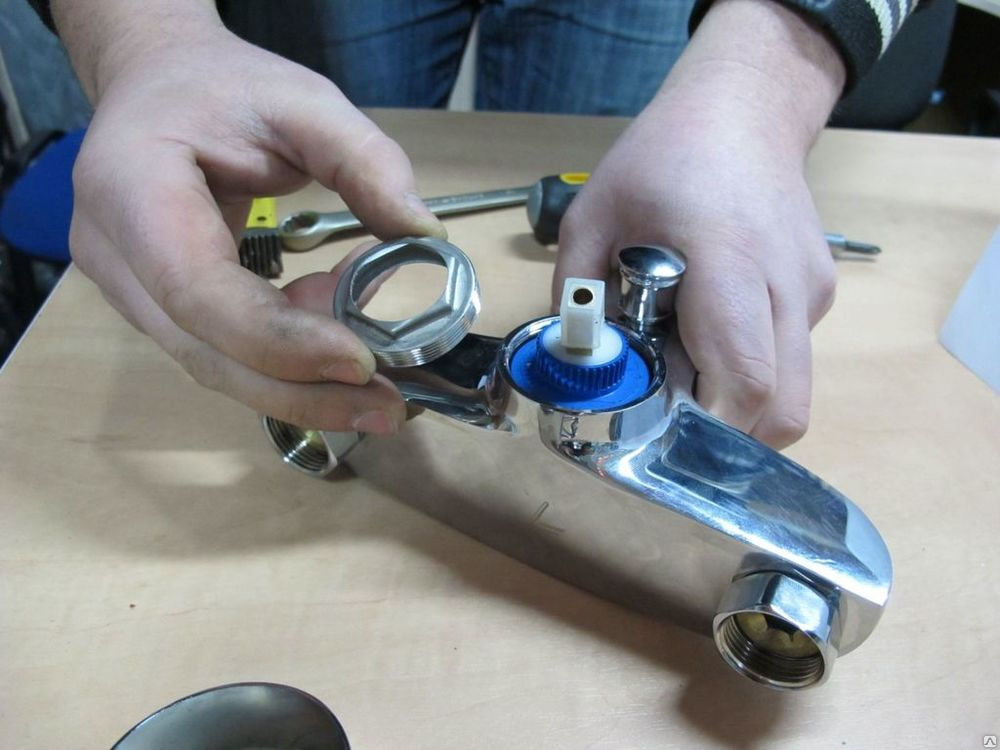
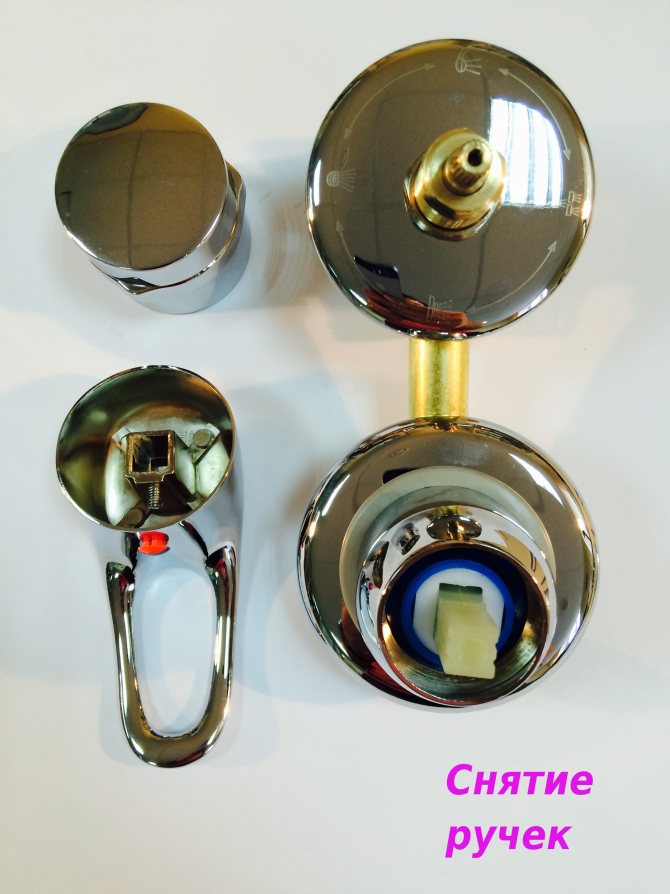
We remove the crane box in stages
Tip: in order not to scratch the surface of the faucet when using a gas wrench, you can make a kind of gasket from a piece of dense fabric between the faucet and the tool. But it's better to use a wrench.
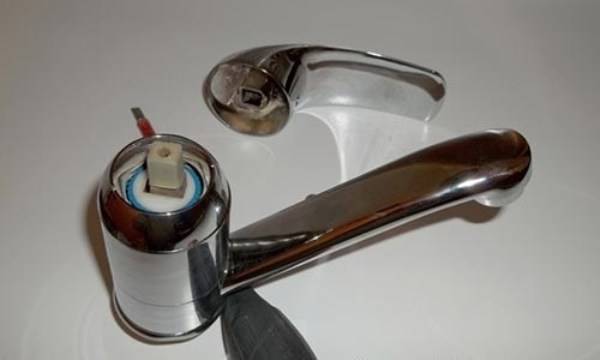
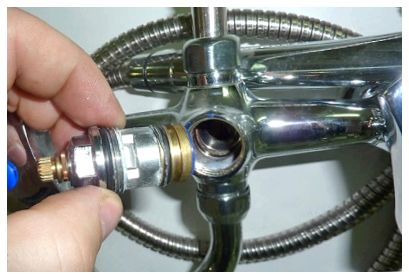
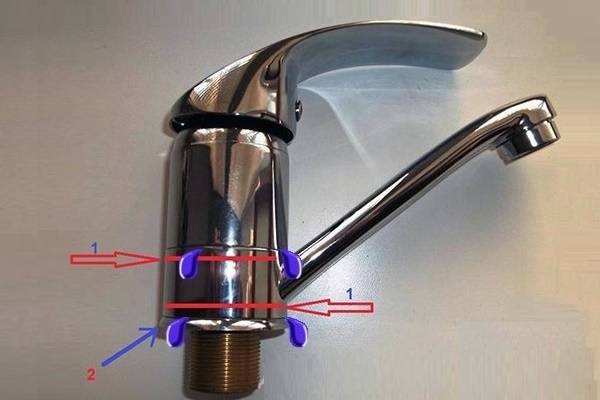
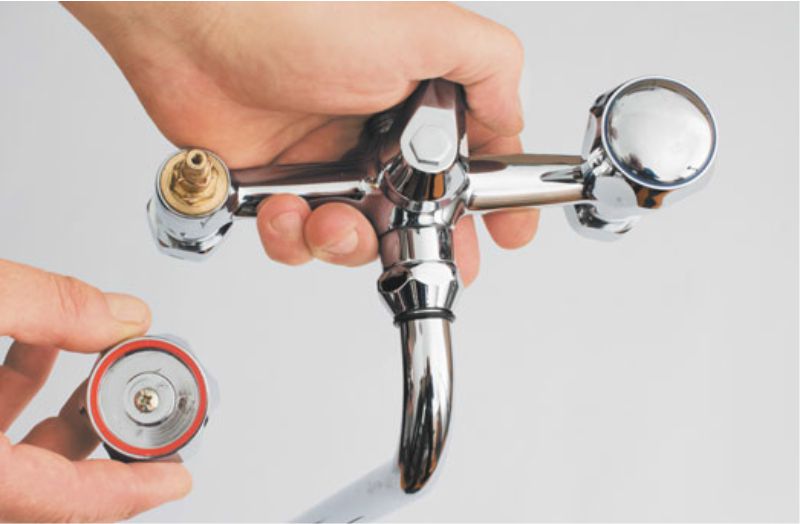
At this stage, access to the box is already open. With an adjustable wrench counterclockwise, holding the mixer, we unscrew the faucet box. After that, be sure to clean the thread of the mixer, for which you can use a cord brush.
Further, if it is planned to replace the ceramic axle box, then we produce it in the reverse order and with the utmost care. The screws should be tightened gently so that the ceramic plates do not crack.
The new bushing will fit into place without any problems if the threads have been cleaned correctly.
If there is no need to replace the entire crane box, then it can be repaired.
Situation 1: gasket wear
Wear of the ceramic gasket in the crane box
Almost all problems that lead to leaks are caused by the wear of the silicone gasket. In the event that such a circumstance occurred, and the gasket seemed to “hook” in one place, it can be replaced. Or "repair". The mechanism of operation is as follows: we unscrew the crane box from the crane and increase the height of the gasket. To do this, apply a thin layer of silicone on it. After we return the axle box to its place.
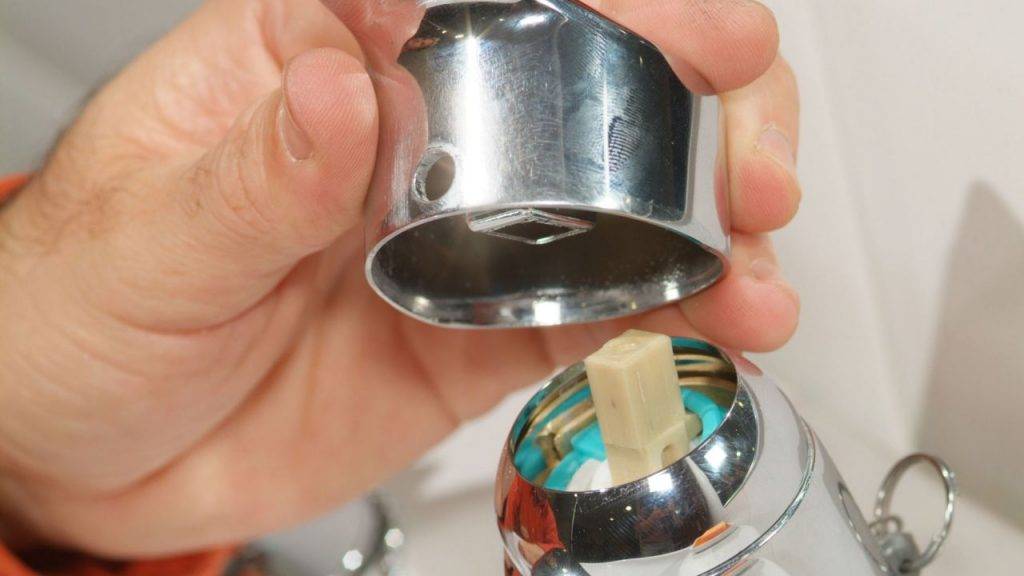
Situation 2: foreign elements getting between the plates
Any foreign particles, for example, grains of sand, falling between the plates, violate the tightness of the axle box and lead to leakage. Here we act as follows: we unscrew the crane box and disassemble it. Ceramic plates are thoroughly cleaned and treated with a water-resistant lubricant. Next, we return the axle box to its place.
Situation 3: Chips on the surface of ceramic plates
In this case, increasing the height will not help. The way out of the situation will be the replacement of both plates, but also with minor damage, their grinding is also possible. You can make it with a simple pencil rod (necessarily soft), then you should grind the plates.
Chipped ceramic gasket in the crane box
Situation: erasing a plastic washer
Erasing the washer causes the silicone gasket to press against the ceramic plates no longer with the same force, and they do not press against each other properly. The way out is to put an additional seal under the gasket (for example, a layer of electrical tape) or replace the plastic washer.
Details
Cleaning the heating element of the water heater from scale without disassembly
It is not always possible to disassemble the water heater in order to carry out its deep mechanical cleaning. This process is time consuming and complex. To disassemble a large boiler, the help of another person is needed. As a preventive treatment or first aid, you can use special products that can dissolve scale and clean the heating element from contamination.
How to remove scale in a water heater using professional tools
Water that passes through a rusty water supply should be used with products containing phosphoric acid. According to the recommendations of experts, it is better to use the following tools:
— Aipacon;
— Cillit ZN/I;
— Thermagent Active;
— Alphaphos.
REFERENCE! Equipment that has been in operation for more than 2-3 years should not be cleaned with products based on other acids.
The inside of the boiler can be cleaned with surfactant-based products. The most effective are Alumtex and Steeltex.

Before using the products, it is necessary to carefully study the instructions for cleaning the boiler from scale. The manufacturer usually indicates the exposure time on the packaging.
Usually the solution still needs to be prepared, that is, mixed with water in the required proportions. Then you need to open the cold water supply on the water heater and drain the hot water by 60-70 percent. Using the reverse connection of the boiler, you need to pour the prepared solution into the tank. Then you need to leave the product for 5-6 hours and drain through the hot water flow tap.
Cleaning the water heater from scale at home using folk remedies
If it was not possible to buy a specialized tool for some reason, then you can try using improvised means. You can clean the heater from scale with vinegar or citric acid.
To prepare an active solution, you need to dissolve 0.5 kg of citric acid in two liters of water. Release the tank by 1/3, and pour acid inside. In this state, the tank must be left overnight. During this time, lime deposits and rust should dissolve.
REFERENCE! Inside the boiler is protected by thin enamel, which can be easily damaged by aggressive chemical compounds.
Boiler disassembly and heating element cleaning
Experts advise to completely disassemble small units to clean them from scale. Thus, you can return them to their original performance indicators.
To clean the water heater from the scale layer, it must first be disconnected from the power supply and shut off the cold water supply. Then you need to wait 2-3 hours so that the water temperature decreases and the person does not get burned. Then you need to open the hot water tap and empty the tank.
Then the scale should be removed as follows:
- The hot water inlet hose must be disconnected and the corresponding tap on the mixers must be opened so that the residues drain off.
- Disconnect the power cable from the thermostat and heating element, proceeding carefully.
- Gradually unscrew the flange to which the heating elements fit, allow the remaining water to drain. After which it must be completely removed.
REFERENCE! Now is the time to take a picture of the internal connection of the boiler, so as not to get confused later in its electrical circuit.
A heating element that has been successfully removed must be descaled. This must be done with a sharp object.A knife, chisel or other object with an abrasive surface will do
Be careful not to damage the tube
The storage tank must be cleaned of mucus and other contaminants with a brush or plastic scraper. In this case, do not put pressure on the case or rub it hard, as this can lead to a breach of tightness or damage to the walls.
After the descaling work has been carried out, you need to assemble the boiler in the reverse order of its disassembly.
Before installing the boiler in place, it is recommended to clean the rubber parts of the boiler and treat them with sealant. With this technique, you can avoid the flow of water during the operation of the water heater and reduce the risk of scale.
After installing the heating element in place, you need to do the following:
- Hang the boiler in place.
- Connect it to the pipeline.
- Turn on the cold water supply and open the hot tap.
- Wait until the boiler is filled with water and check the tank for integrity.
- Put the thermostat in place and connect the wires.
- Install the relief valve in place.
- Plug the boiler into an outlet.
REFERENCE! If the boiler is regularly cleaned of rust and scale, then this process will not take much time, so that the life of the device will be extended.
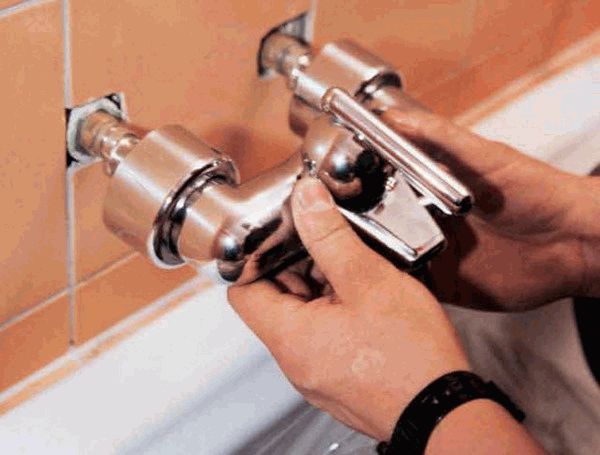
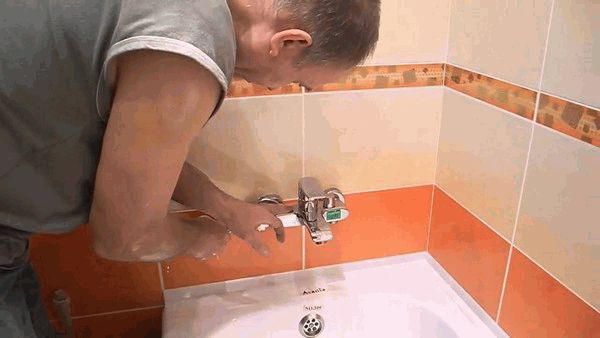
Installing a faucet in the bathroom: the subtleties and nuances of the work
There are two options for solving the issue of installing a faucet in the bathroom - you can pay a little money and call a good specialist, or try your luck and do everything yourself. In the latter case, you will have to familiarize yourself with some theoretical knowledge.From it you will learn not only how to properly install the faucet in the bathroom, but also learn how to do this work competently, taking into account all the subtleties and nuances.
How to install a faucet in the bathroom with your own hands
Installing a faucet in the bathroom: the sequence of work
We will not climb into the jungle of complex plumbing devices for mixing water - it is quite difficult to install such a product as a built-in faucet on your own. Our goal is to teach you how to install a simple and familiar wall-mounted bathroom faucet. For ease of perception of this ingenuous information, we present the entire process of installing the mixer in the form of a small instruction.
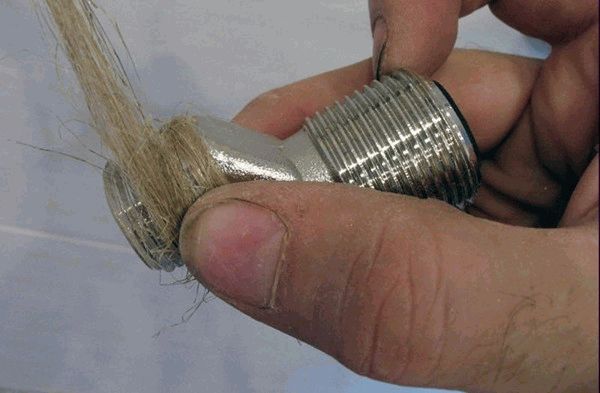
- So what do we have? There are two outlets of water pipes on the wall, which, as a rule, end with an internal thread. If for some reason they end not with an internal, but with an external thread, then the first thing to do is to install special adapters (called “couplings”). They are mounted quite simply - tow is tightly wound on the external thread, after which the coupling is screwed on and tightened tightly with an adjustable wrench.
- Now that our outlets are equipped with internal threads, we can begin to install the faucet. We unpack the box with the product and find in it a small bag with two shiny cups and take out two eccentrics from it. You can recognize them by the thread - on the one hand they have an external thread ø1/2″, and on the other ø3/4″.At this stage, we are interested in a thread of a smaller diameter (1/2 ″) - we tightly wind the tow on it (holding the eccentric in the left hand by the thread of a larger diameter, we wind the tow clockwise) and screw first one eccentric, and then the second. The eccentrics must be placed so that they look up with bends.
Installing a faucet in the bathroom photo
Installing a faucet in the bathroom: instructions
How to install a faucet in the bathroom with your own hands photo
Do-it-yourself bathroom faucet installation photo
That's basically it. This is what the instructions for installing a faucet in the bathroom look like. It remains only to deal with some subtleties, without the knowledge of which these works will turn into a nightmare.

How to install a faucet in the bathroom: the subtleties and nuances of installation
What else do you need to know in order to quickly and reliably install a bathroom faucet yourself?
- You need to know how to use the tow correctly. When winding linen, you need to follow some rules. Firstly, you need to wind it along the thread twisting, secondly, tightly, and, thirdly, with a cone, the base of which is directed from the front edge of the thread. You also need to ensure that the tow is not wound with a twisted bundle - it should be fluffy and lie down only in the grooves of the thread.
- If the installation of the faucet is carried out simultaneously with the replacement of water pipes, then you will need to know the height of the installation of the faucet in the bathroom - as a rule, it is 150-200mm above the top edge of the bathtub.
The subtleties of installing a faucet in the bathroom
Now you know how to install a faucet in the bathroom. Finally, I just want to give a couple of tips regarding the choice of this plumbing fixture.
First, pay attention to the body material - a high-quality mixer can be determined by weight (it is heavy). Secondly, it would not be superfluous to determine the material of the eccentrics - if they are silumin, then it is better not to install them, since such eccentrics quickly rot
And, thirdly, do not forget about the reputation of the manufacturer - not so many companies produce really durable and reliable mixers.
Advantages and disadvantages
How good are these devices?
- Water heats up to 60 degrees in 5 seconds.
- This temperature is not enough for the formation of scale.
- 4-6 liters of hot water are supplied per minute.
- Convenient temperature control.
- Uncontrolled drops from too cold to too hot water are excluded.
- The product has compact dimensions, weighs little (about 1 kg) and is easy to install: the process is similar to installing a conventional mixer.
- The heater has several degrees of protection for safe operation.
- Less water and electricity are consumed than when heated by storage boilers.
The device looks neat, which allows it to fit into different types of interiors - from classic and pretentious to practical minimalism.
According to consumer reviews, instant water heating taps have the following disadvantages:
- Some faucets (like Delimano) have too short a wire to connect to the mains.
- The device needs additional copper wiring as the regular one may not withstand the load, and the plugs will fly out at the first start. And if it doesn’t knock out the plugs, a short circuit can happen, especially if the wiring is old and not very reliable.
- For safety reasons, grounding must be done.Additional work turns installation from a 5-minute process (as the manufacturers declare) into a longer and more thorough procedure.
- Budget models are not equipped with filters - you have to buy them yourself. Among the cheap options distributed by unofficial dealers, there are many fakes.
How to install the device?
The installation order will be as follows:
Connect the water outlet and the main mechanism. The fastening must be airtight, use tow or tape. Any faucet with heated water for a summer residence or apartment has a lower liquid supply. Tighten the thread firmly, but be careful not to damage the seal. Also, it must not be allowed to move, otherwise the tap will leak.
The head of the faucet with instantaneous heating of water must look straight up when making the connection.
Combine connecting insert and main mechanism. The inlet insert of the washbasin faucet and instant hot water tap with shower (without shower) must be placed at the bottom.
Installation is carried out in the sink or on the sink. Do not forget to lay the rubber seal.
The main mechanism is fixed under the sink with a nut. Tighten carefully so as not to strip the thread.
Connect the installed tap for heating water, the price of which includes flexible pipes, to the water pipe
Attention: the mixer is connected only to the cold water pipe!
Make an exit to the network.
Connect an inexpensive mixer with a heater to the mains.
Carry out commissioning. Initially check when applying cold substance, make sure there are no leaks
Then an instant water heating tap with a shower, which is also profitable to buy because the mixer eliminates the need to use hot tap water, can be tested for the quality of heating.
This is how affordable instant water heating taps are installed in the apartment and in the country. Additional manipulations are not necessary. Experts have found that the weak point of the faucets is the aerator. With such a breakdown, you can easily change the nozzle to a mixer for heating water - the price of a new one will range from 22 to 650 rubles.
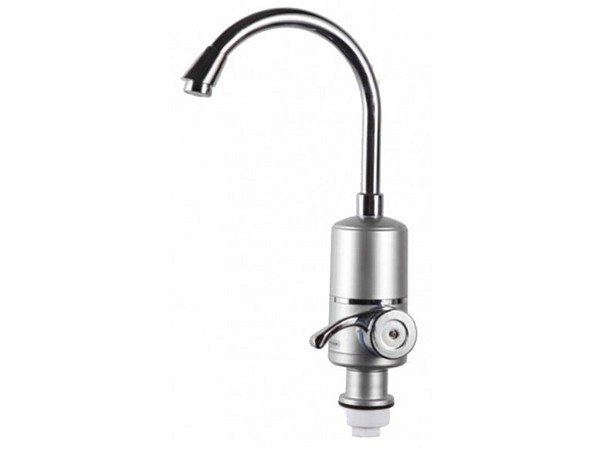
It is also worth mentioning that there are models of devices with a vertically located heating element. They look a little more compact. With a horizontal tank, a mixer with a heater can be bought from the Delimano brand.
Repair of a thermostatic faucet - general progress of work
Today, it is quite possible to repair the thermostat with your own hands. We will give you some tips and advice in this regard:
- Cold and hot water must be turned off.
- Remaining tap water must be drained.
- The sink must be covered with a rag before starting the repair, so as not to accidentally damage it.
- If the rubber seals are worn out, replace them with new ones.
- If the faucet leaks under the spout, then remove the old sealing rings and replace them with new ones.
- If the seats are clogged, gently clean them with a cloth.
- If the thermostatic faucet is noisy, install filters or cut the rubber gaskets so they fit more snugly.
In general, if the quality of the water and thermostatic faucet is good, the likelihood of repairs is significantly reduced and delayed.


