- Strengths and weaknesses of the siphon
- Advantages and disadvantages of flat siphons for kitchen sinks
- Material for the manufacture of a flat sink siphon
- Design
- Water trap for a shower cabin: siphon care after installation
- Criterias of choice
- Types of siphons according to the method of drain control
- Cork as a control mechanism
- Drain control with a lever
- Click-clack button for water release
- The consequences of the wrong choice of drain
- Why install a siphon?
- Shower tray installation sequence
- Installation of a siphon when installing a shower tray
- Assembly and installation of the siphon
- Why install a siphon?
- Connecting the cabin to the water supply
- First start shower
- Replacing an old siphon: features
- How to change the drain in a cab with a high sump
- How to shoot in a cab with a low pallet
- In the case of a pallet with a water seal
- Installation steps
- Preparation for installation, how the box is installed
- Tools and materials
- How to install a shower tray drain
- Types and features
- To assemble the shower enclosure, you will need the following tools
Strengths and weaknesses of the siphon
Now we should talk in more detail about the advantages of a flat siphon in comparison with its counterparts. These devices are made of plastic.This means that the device has sufficient strength to be successfully used in everyday life. This device combines high quality with low cost. The device perfectly copes with its main task - not to let unpleasant sewer odors into the room. In addition, it has the ability to connect additional drains.
Flat siphons are easy to clean from dirt. The device is easy to mount in the right place for this. It does not enter into any reactions with detergents or cleaning products that fall into the drain with water, does not accumulate mucus and limestone deposits. They can be installed in the kitchen or bathroom, although the most important advantage of a flat siphon is the possibility of installing it even in the smallest room. In any place where it is impossible to install similar devices of a different design, it is these units that are used.
The disadvantages of a flat siphon include the difficulty of cleaning it. In order to clean this device, you need to completely dismantle it, and this is not always convenient. In addition, dismantling can take a lot of time and effort.
When choosing a siphon, it is important not to make a mistake, and in order not to make a mistake, you need to follow the following selection recommendations:
decide on the place of installation
It is very important to understand that not every device can fully cope with its duties under certain conditions. For example: pipe siphons are not suitable for installation in a small space, while flat ones easily bypass this difficulty;
application type
There are universal, and there are narrow-profile models of devices.The former can cope with any type of plumbing or household appliances with which they will be completed. The latter, in turn, can only be used with a single unit. For example: flat ones are completed with any type of plumbing or household appliance, and pipe ones - only with plumbing, as they quickly become clogged in the kitchen;
material. The material plays an important role because the strength of the device depends on it.
The stronger it is, the more expensive the siphon will cost.
extra plums
When choosing, be sure to pay attention to whether the unit can have more than one drain and connection
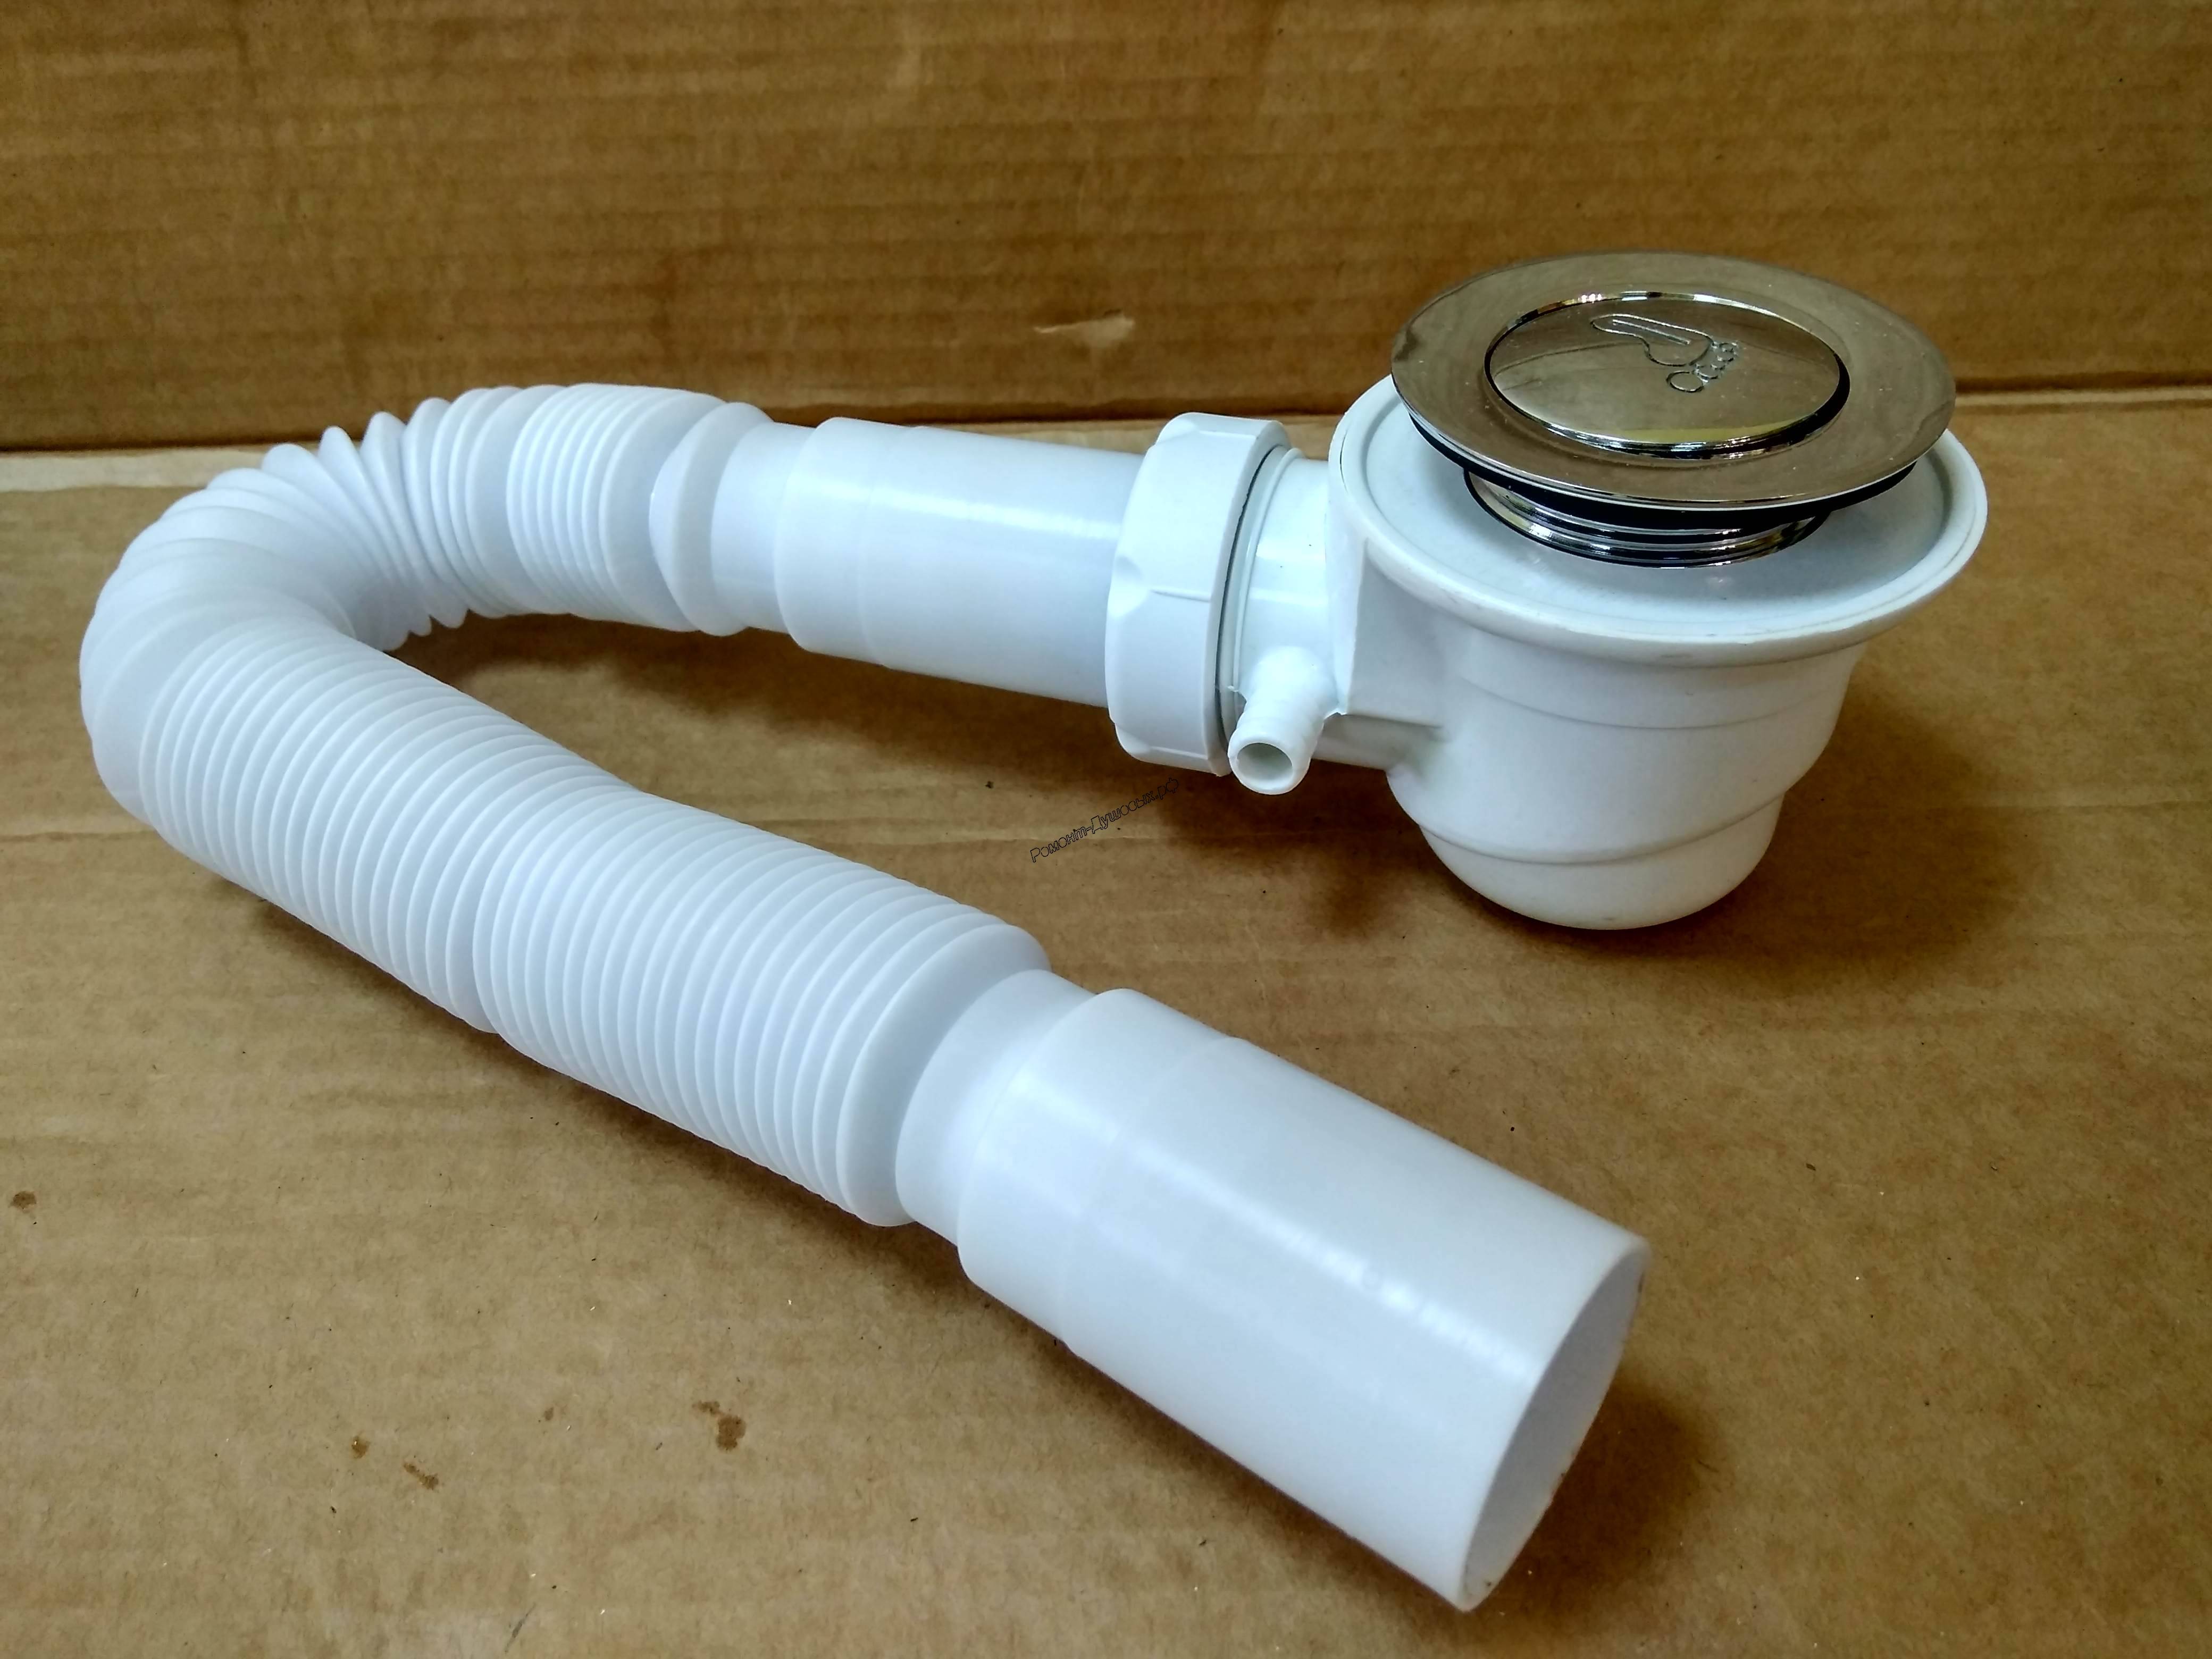
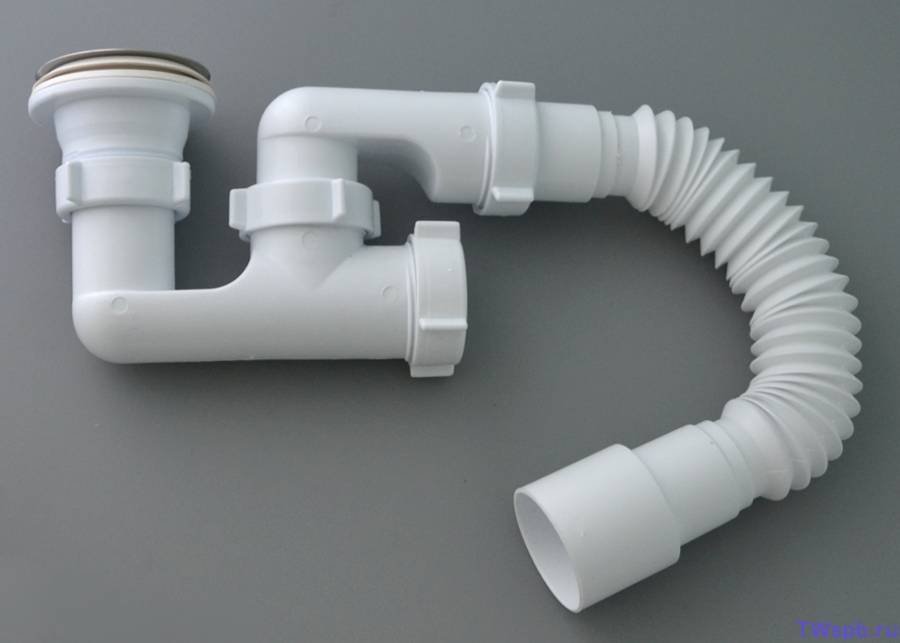
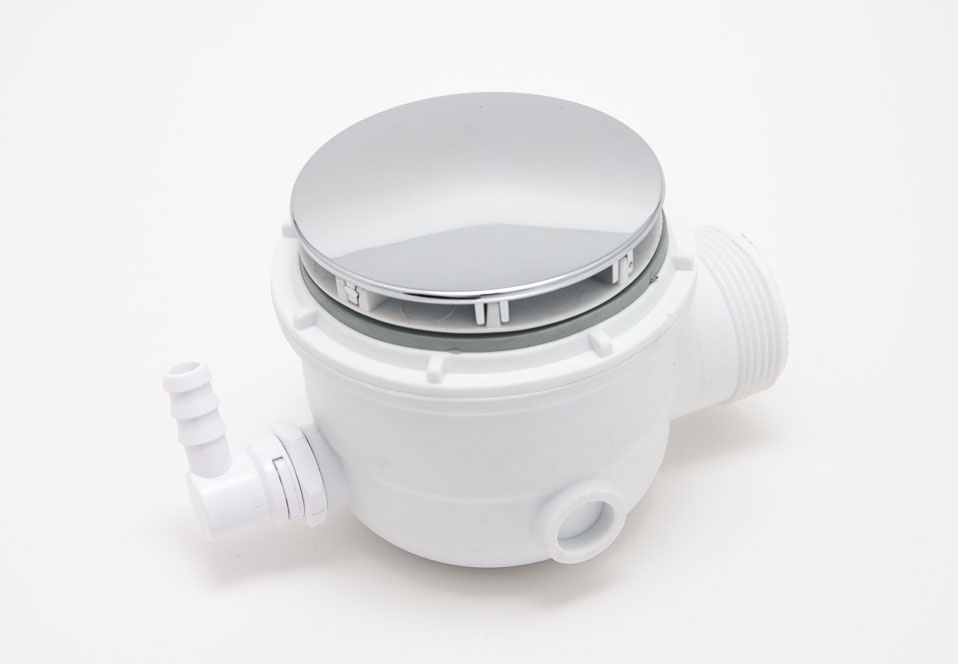
The siphon is one of the most important plumbing parts. It prevents the penetration of unpleasant sewer odors into the room. The flat siphon for the sink is very compact, it will be ideal if the floor space is limited and you want to save space.
Advantages and disadvantages of flat siphons for kitchen sinks
The advantages of a flat siphon under the sink are:
- simplicity of design;
- ease of installation;
- occupies a minimum of space.
The downside of the part is the need for complete dismantling in case of cleaning from dirt.
Material for the manufacture of a flat sink siphon
Products are made from the following materials:
- Plastic (polyethylene, propylene). It is considered the best material for a flat siphon, as it does not rot and corrode, and has good strength.
- Metal. Products made of bronze or brass are used in rare cases, since they can oxidize over time.
The choice of a flat siphon for the sink should be given special attention. When purchasing it, you must carefully examine all the details of the assembly, including gaskets and screws.In the case of installing a sink above, for which a flat siphon is used, it is necessary to exclude any flaws when fastening the parts, as they can lead to leakage
In the case of installing a sink above, for which a flat siphon is used, any flaws in fastening the parts must be excluded, as they can lead to leakage.
Siphon installation can be done independently. It is installed between the sink and the sewer pipe. Parts must be firmly fastened. It is imperative to check after installation, for which you should turn on the tap and watch the siphon.
The correct selection of a flat siphon for the sink will ensure functionality and convenience in your room.
Design
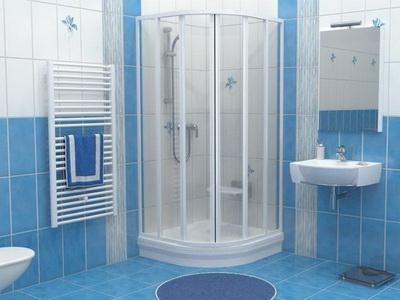
The vertical design will help save a lot of space. If the bathroom has a small area, then specially selected models of cubicles, as well as accessories and finishes, will help visually expand the bathroom.


Shower cabins are:
- Open. These are models without a dome (roof) at the top. In this design, warm steam immediately goes outside, without forming condensate on the walls of the cabin. Therefore, the product is much easier to wash.
- Closed. Such booths are closed on all sides and have a dome. They are the warmest.
- Asymmetrical. This is a great option for those who want to create a unique interior in the bathroom.
- Square. For installation, a pallet with equal length of all sides is used. Such booths can be inconvenient when used in a small bathroom, as they take up a lot of space.
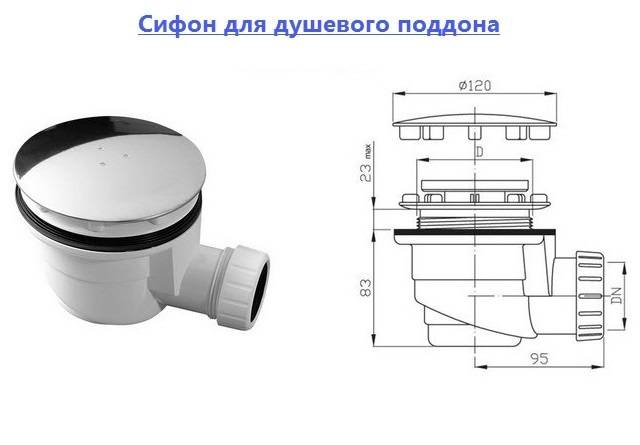
Water trap for a shower cabin: siphon care after installation
Quite often, owners are faced with the appearance of an unpleasant smell, looking for from the drain of the shower stall.The reason for this may be a banal blockage or stagnation of water in the knee. Depending on the type of siphon and how it is connected to the sewer, you can choose a method for cleaning the shower drain.
An ordinary plastic siphon can be cleared of blockage with a plunger or a metal cable.
Modern cleaning products in the form of powders or gels can easily cope with even severe blockages. In this case, it is not recommended to use strong chemicals that can harm the plastic.
A mixture of salt, vinegar and soda will cope with small blockages, which must be poured into the drain, and after a certain time, rinse it with a good pressure of water.
Criterias of choice
The principle of operation and design are not the only criteria for choosing a siphon. Its technical characteristics are important, and especially its diameter.
In order for plumbing to serve for a long time and perform all its work with high quality, the necessary characteristics should be taken into account when choosing.
- First of all, you should consider the space between the pallet and the floor. This is the main and decisive criterion, all subsequent features are taken into account in the next turn.
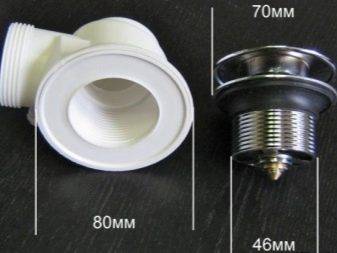
- Drain hole diameter value. As a standard, pallets have diameters of 5.2 cm, 6.2 cm and 9 cm. Therefore, before buying, you must definitely know the diameter of the drain hole by measuring it. If the siphon for connecting to the sewerage system already comes with a shower cabin and is fully suitable in all respects, then it is better to use it.

Types of siphons according to the method of drain control
Let's move on to the section: types of siphons drain control method.
Tray siphon - part of the construction of the drain. To do this, block the release of the siphon.Often there is a need to leave not very much water in the pan.
There are several options for how this can be done:
- pressing the button.
- with the help of a cork;
- with a lever;
Let's consider all methods of drain control in order to understand how they work.
Cork as a control mechanism
The most primitive elementary option is a cork design. Such an outlet is not equipped with any valves, the water simply leaves the pan through the hole and goes straight into the siphon. To draw water, the drain hole is blocked manually with a plug.
_
Water - a chemical compound of hydrogen and oxygen that exists in liquid, solid and gaseous states.
This design does not represent any complexity. In modern showers, ordinary plums are used less and less. This technique is familiar to everyone, because it is used in ordinary bathrooms and sinks.
The concept of "drain plug" will soon completely disappear from everyday life, it will be replaced by new automatic devices.
_
Device - a set of elements representing a single design (multi-contact relay, a set of transistors, a board, a block, a cabinet, a mechanism, a dividing panel, etc.). The device may not have a specific functional purpose in the product. (GOST 2.701-84)
Drain control with a lever
An outlet with an automatic bottom valve is much more convenient than a conventional “cork” system. The hole closes automatically when the lever is turned, you cannot constantly look for this same cork.
The design is quite simple, the lever is most often located in the area of \u200b\u200bthe mixer.The valve and mixer are sold and installed together, which is not very convenient.
_
rule — a clause describing the actions to be performed. (SNiP 10-01-94)
Click-clack button for water release
Separately from the mixer, you can purchase an automatic drain valve of the Click-clack system, another name is Push & Open. The valve is a large button that you can press with your foot.
When pressed once, the drain is blocked, when pressed again, it opens. Using such a device is as easy as shelling pears, and its installation is much easier and faster than a lever automatic valve.
The consequences of the wrong choice of drain
Violation of the requirements for the installation of sewer systems always has negative consequences, this also applies to showers. What unpleasant situations can arise?
- Bad smell. The reason is the failure of the shut-off siphon, as a result, a reverse draft from the sewer pipes appears, the room is filled with spoiled air. You need to know that it may contain toxic gases, exceeding the permissible concentrations has tragic consequences. Siphons by design features are wet and dry, each type fails for its own reason. We will dwell on them in more detail in this article a little lower.
- Water drains badly. During the adoption of water procedures, you have to constantly monitor the water supply, prevent it from overflowing and flooding the bathroom. Unfortunately, even the most modern means for cleaning sewer systems cannot always correct the situation; there are such contaminants that can be eliminated only after a complete revision of the siphon.
- The drain is leaking a little. At first glance, the problem is small, but this is an erroneous opinion.Constant leakage causes an increase in the relative humidity of adjacent structural elements. A fungus develops, mold grows, building materials and structures fail prematurely. Danger of leaks - they are very difficult to detect in time, in most cases secondary consequences are already noticeable.
As can be seen from the list, in order to increase the life of buildings, increase the comfort of using shower cabins, installation of drains must be done in strict accordance with regulations and industry regulations.
Why install a siphon?
 The main purpose of this device is to prevent the penetration of an unpleasant odor from the sewer into the interior of the apartment. Such siphons act as a hydraulic seal, so that air cannot escape in the opposite direction. If this element is absent, then due to unpleasant odors it will be difficult to maintain a cozy and comfortable atmosphere in the house. The models of shutter systems offered today are necessarily equipped with plugs.


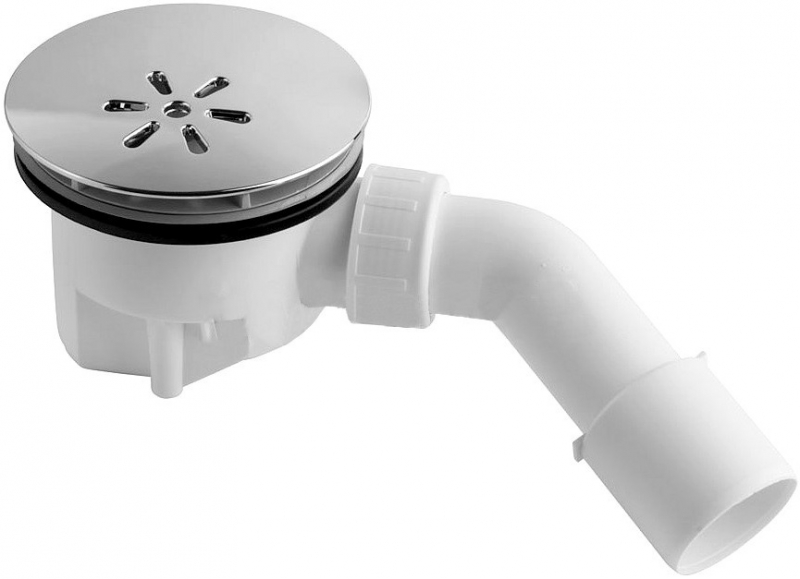
If we compare such siphons with devices with a water seal, then the latter surpass them in size. In order to choose a suitable variant of such a shutter for a shower tray, you should most carefully study the design features of each model.
Quite often, a siphon is called a ladder. Of the features of the siphon for the shower tray, it should be noted that most often it does not have a cork. The least difficulties with the installation of the pallet arise when using a siphon with a minimum height
At the same time, it is very important at what level the installation of the pallet itself is carried out.If this design is placed at a height exceeding 20 cm, then difficulties may arise associated not only with finishing, but also with the use of the shower cabin itself.
To eliminate such shortcomings, the owner will be forced to arrange thresholds or create a recess for the ladder under the pallet.
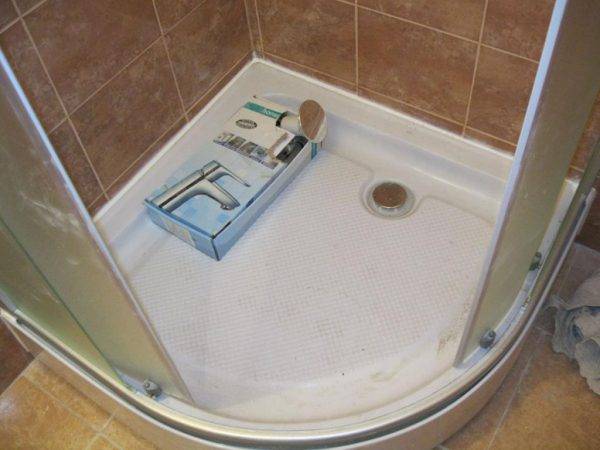
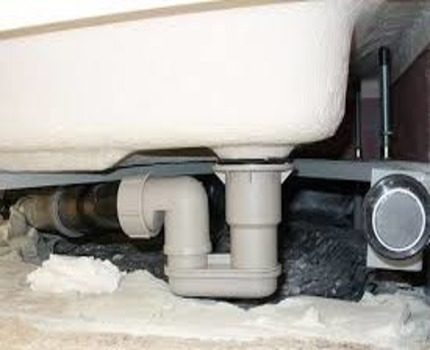
Shower tray installation sequence
When installing a shower tray, you can use a ready-made container or mount a structure in the form of a podium made of concrete lined with tiles. The first option is more popular because it is less labor intensive. To equip the podium, you should first study the question of how to make a shower tray, information about which can be found on the Internet.
The place for the installation of the pallet must be completely cleared of construction debris and dust. The bottom row of facing tiles on the walls is laid after the installation of the shower drain. The section of the wall near the pallet and 10-15 cm above it should be covered with a layer of waterproofing mixture, using a roller or brush. The number of layers is determined by the state of the surface, but there must be at least two.
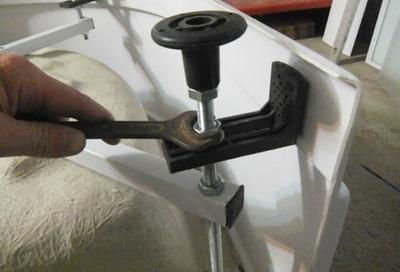
On a low pallet, the legs are fastened. To do this, it should be turned over and laid on cardboard to avoid scratches. The legs are fixed with self-tapping screws of the required length, which are provided with the pallet. They are designed according to the margin of safety and reliability for this design, so there is no need to replace them with more durable products.

Shower tray installation process
The pallet is installed on the prepared place. Further, its position is adjusted by turning the special screws on the legs.The installation accuracy is checked using the building level in two directions: along and across the pallet. At the end of the adjustment, tighten the lock nuts, which exclude the moment of spontaneous unscrewing of the threaded connection.
Next, insert a pencil into the drain hole and draw a circle on the floor. The lines are drawn along the bottom edge of the shelves. The pallet is removed to another place. Using a ruler, you need to clearly highlight the lines for the side supporting elements. Next, you need to mark the location of the dowels. To do this, attach fixing elements to the markup, the upper part of which should be strictly along the line.
According to the marking, holes for the dowels are drilled 1-2 cm deeper than the length of the plastic nozzles. Next, the structure is fixed. A waterproofing strip is fixed to two adjacent sides of the pallet using double-sided tape.
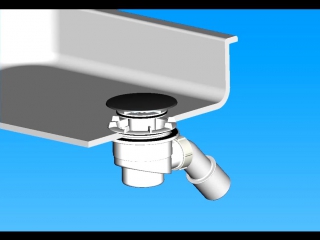
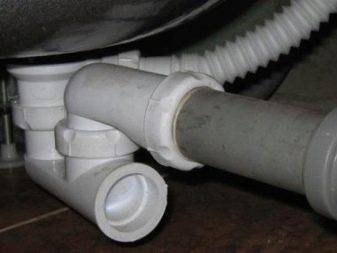
Installation of a siphon when installing a shower tray
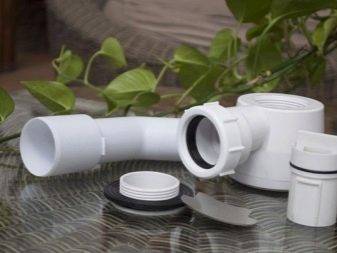
Siphon elements should be taken out of the package. If the device is installed for the first time, it is recommended to study the instructions in detail and pre-assemble the product.

Installation of a siphon for a shower cabin can be done independently
A nut and a rubber seal should be put on the pipe connecting the shutter to the sewer pipe. The assembled unit is inserted into the outlet on the housing, followed by tightening the nut. In order not to damage the rubber seal, it is recommended to lubricate it with soapy water or industrial oil.
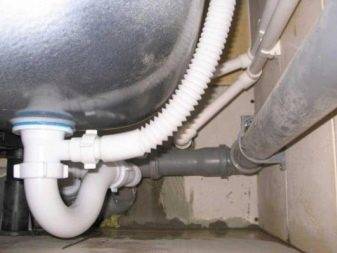
Next, the siphon is installed on the place marked on the floor. A pipe is being measured, which will be connected to the sewer network.If the plastic pipe and the pipe will be at an angle, you should use an elbow that is fixed in the direction of the sewer outlet. To ensure the tightness and reliability of all connections, sealing rubber bands are used.
The next step is to install the pallet, which should fit snugly against the wall and be stable on the floor. Its lower side is fixed to the terminals on the walls. Then a rubber gasket is placed on the siphon body. A layer of sealant should be applied to its surface. The body of the device is pressed against the bottom of the pallet with one hand. A metal ring is laid on top, which is fixed with bolts. They should be clamped alternately to avoid distortions.
Next, the siphon elbow is mounted in the direction of the entrance to the sewer. Through the corrugated pipe, the shower cabin is connected to the sewerage system. Appropriate adapters are used where necessary. After the installation of the siphon, the tightness of all connections and the absence of smell from the shower cabin are checked. To do this, water is poured into the drain. The final step is the installation of a decorative drain grate.

Installation of a water trap for a shower drain
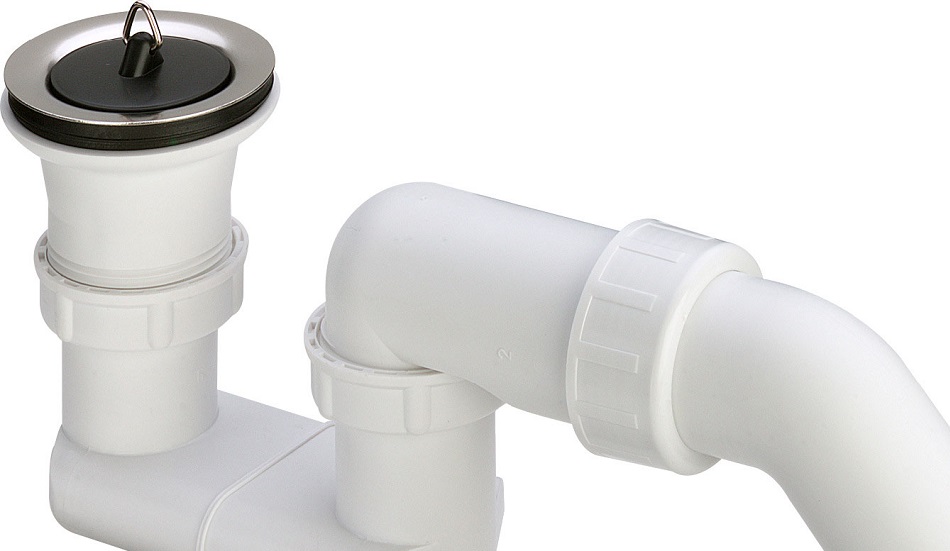
Assembly and installation of the siphon
If desired, drain fittings of any kind can be installed independently. This should be done after installing the pallet itself on the frame. If you do this, you can accidentally damage the details of the structure.
When installing pallets, cement, foam are often used, which then makes it difficult to access drain fittings, and given that their service life is relatively short, this is a disadvantage
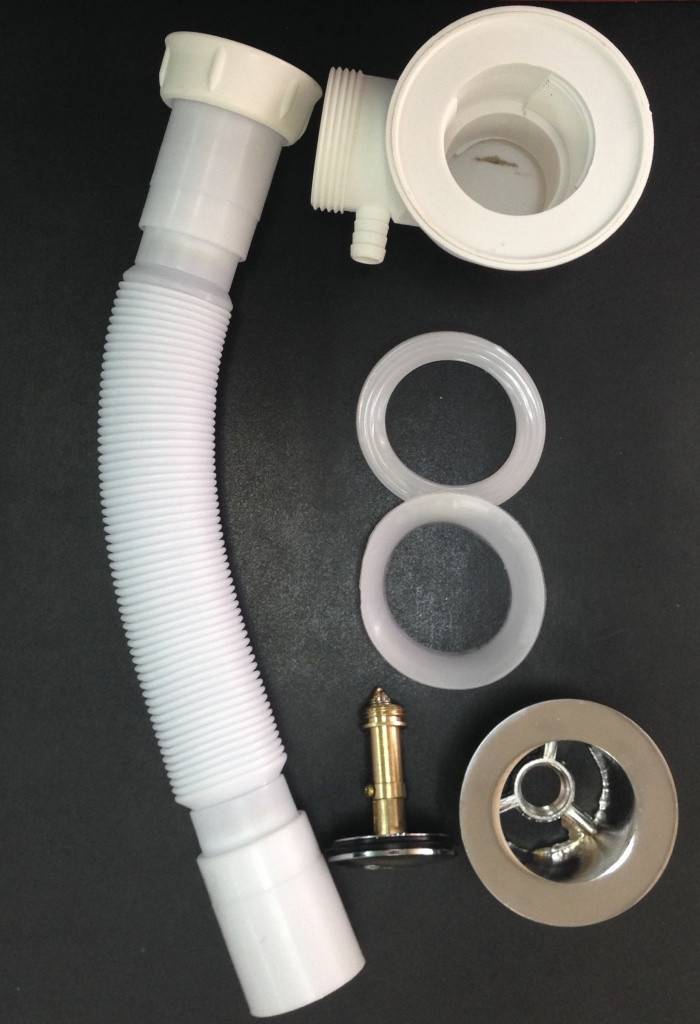
To perform the installation, follow these recommendations:
Unpack, disassemble the purchased siphon.
Apply sealant around the perimeter of the sump drain hole. This is an easy operation, as there is a recess that makes the operation convenient and avoids mistakes.
A gasket is applied to the sealant, which is included in the fitting kit.
Next, the siphon, or rather, its inlet pipe is installed in the drain hole of the pallet


Since the product is plastic, care should be taken when handling its threads during screwing.
The outlet should be directed towards the sewer pipe.
Assemble the siphon. For which the cover is first installed, then its connection is baited and tightened.
From above, the gasket is again treated with sealant, this will also not cause difficulties, since it has a recess that just needs to be filled. At the end of the installation, the drain fittings are connected to the sewer.
A similar installation procedure is similar for all modern models of such equipment. When connecting a siphon, you can use various adapters, a corrugated hose, which facilitates the procedure.
Why install a siphon?
The main purpose of this device is to prevent the penetration of an unpleasant odor from the sewer into the interior of the apartment. Such siphons act as a hydraulic seal, so that air cannot escape in the opposite direction.If this element is absent, then due to unpleasant odors it will be difficult to maintain a cozy and comfortable atmosphere in the house. The models of shutter systems offered today are necessarily equipped with plugs.
If we compare such siphons with devices with a water seal, then the latter surpass them in size. In order to choose a suitable variant of such a shutter for a shower tray, you should most carefully study the design features of each model.
Quite often, a siphon is called a ladder. Of the features of the siphon for the shower tray, it should be noted that most often it does not have a cork. The least difficulties with the installation of the pallet arise when using a siphon with a minimum height
At the same time, it is very important at what level the installation of the pallet itself is carried out.
Connecting the cabin to the water supply
When the assembly of the shower cabin is almost finished, it is necessary to connect it to the water supply.
This will require hoses and metal-plastic pipes. Mounting order:
- first of all, all materials are prepared, pipes are cut and fittings, taps are selected;
- the water supply in the bathroom is blocked, taps are connected to supply water to the cabin;
- taps are connected to the shower cabin with pre-prepared pipes;
- water is supplied to check the tightness.
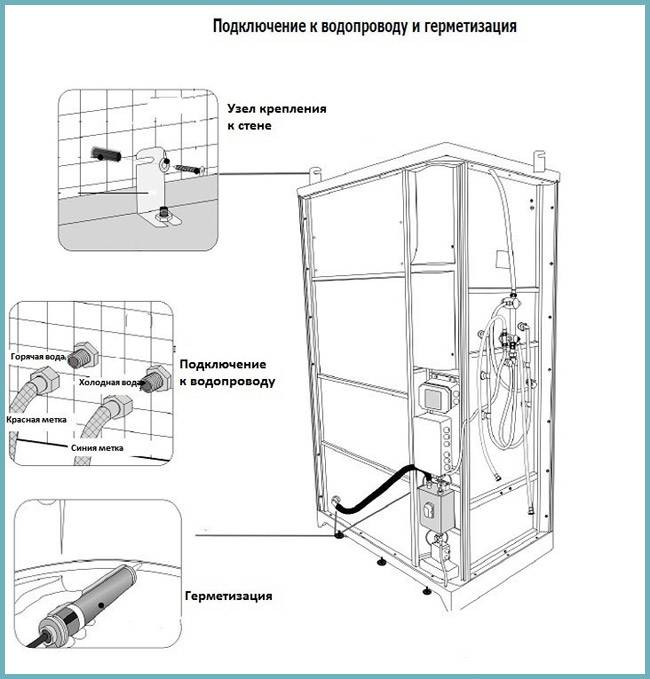
Scheme: connecting a shower cabin to a water supply
Whirlpool jets are often clogged with limescale. For a longer and uninterrupted operation of the shower stall, it is advisable to use filters that will purify the water before it enters the nozzles.
If the cabin is installed on the upper floors of multi-storey buildings, then there may not be enough water pressure to ensure its functions (for example, hydromassage). Then you need a pump and a tank for water supply. But, this is rather an exception to the rule - usually the pressure of water for the operation of a shower cabin is quite enough.
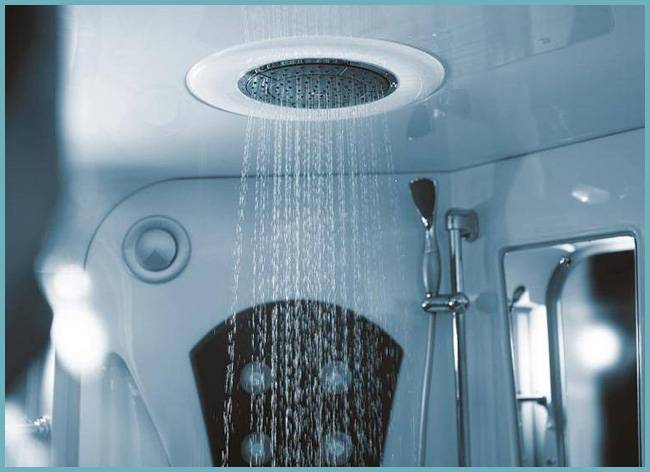
First start shower
When the installation of the shower cabin with your own hands has come to an end, it remains only to make the first start and check its performance.
Before starting, it is necessary to once again check the reliability of fastening of all nuts, the tightness of holes and joints. It is better to check the pallet under the weight of its own weight - to trample on it. It should not make any sounds and stagger.
Before turning on the cabin, carefully check the tightness of all connections again.
After a visual check, you can turn on the water supply. It is better to leave the cabin with the water on for 10-15 minutes to make sure it is tight. If even minimal smudges are found, they must be eliminated.
By following the procedure described in the article, the cabin can be connected in the shortest possible time and without financial costs.
Replacing an old siphon: features
The specifics of replacing an old sewer drainage valve is no different from installing a new one. But there are some features for replacing the siphon, depending on the height of the pallet itself.
How to change the drain in a cab with a high sump
Replacing a high-sump drain is an easy task as it is located within easy reach. If this is a pipe system, unscrew one side, lifting up to drain the remaining water.
If the fittings are solid stainless steel, unscrew on both sides - from the drain into the sewer and the outlet from the sump. Replacement occurs in the same way as described above.
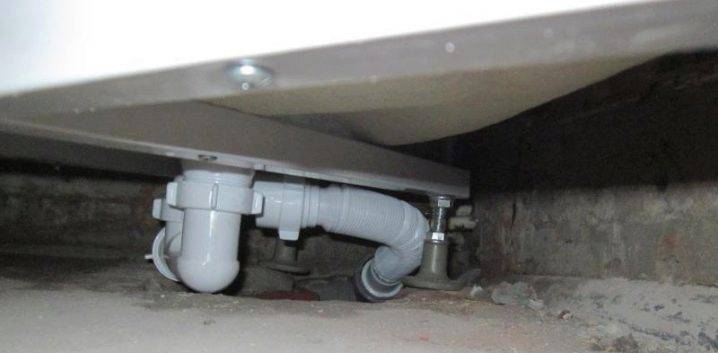
How to shoot in a cab with a low pallet
With a low location of the pallet, it is worth being smart. If the siphon is in the box, then repairs are usually made
If the reinforcement lies on the floor, resting on it, it is important not to damage the attachment points of the pipes from the sewer and the pallet. All work is carried out carefully, rags are used to absorb dirty water.
In the case of a pallet with a water seal
A water seal is a practical solution that allows you to get rid of unpleasant sewer odors. At the same time, the water plug becomes an obstacle to the passage of air. The armature device consists of 2 coaxial cylinders of different sizes, located one in the other.


The inner layer of the water seal starts from the ceiling, the outer one - from the bottom of the siphon. This creates a meander for stagnant water.
Initially, the decorative panel is removed from under the shower tray. Such an element is attached using the “latches / clips” method, so for dismantling, you only need to press on the screen and the clips will open. Further:
- The water is blocked.
- The knee is removed from the sewer outlet.
- With an adjustable wrench, the washer is removed from the thread from the pallet.
- The new siphon is unpacked.
- The drain valve is removed and its upper part is mounted on the outer side of the shower tray, the lower part - to the bottom.
- The sleeve is unscrewed and treated with silicone.
- The siphon cover is attached to the drain outlet of the pan. The thread must match.
- An overflow is installed and the knee is connected to the sewer.
Installation steps
Subsequently, its trouble-free operation depends on the correct connection of the shower cabin to the sewer. If you are installing a purchased, fully equipped model with your own hands, then you must strictly follow the recommendations of the instructions. All joints must be carefully sealed using special silicone-based sealing compounds.
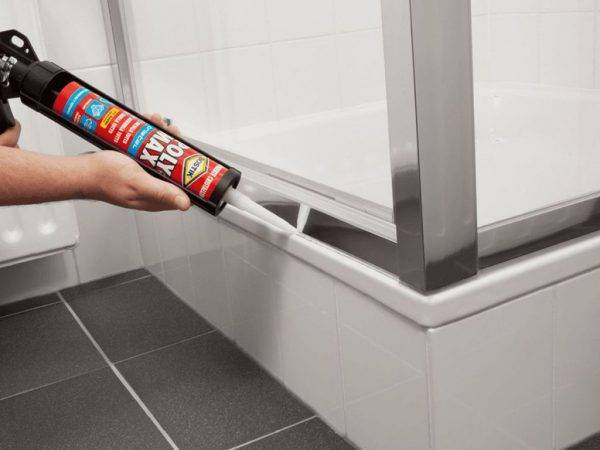 Joint sealing
At the first stage, the base for the pallet is prepared and the entry into the sewer riser is provided. It is best to use a ready-made sewer entry from the bath, which has an appropriate slope to ensure self-flow.
If the shower cabin is installed in a completely unprepared place, then work begins with the installation of a tee in the sewer drain with a drain to the shower, and its installation level must be below the floor surface.
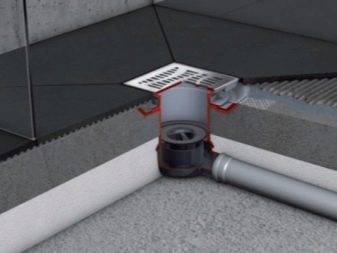
Next, a special drain channel or pipe is laid at the base of the cabin, connecting the drain hole of the pallet with the outlet of the sewer tee.
When laying, an appropriate slope for the free flow of liquid must be provided. For the siphon, a recess is formed in the concrete screed of the base of the desired size
It is important to correctly calculate the height of the siphon, taking into account the possible adjustment of the height of the legs of the pallet
Directly connecting the shower cabin to the sewer system is carried out in the following order:
- The siphon is assembled according to the instructions.
- The shower tray is turned over, the siphon is fixed on the drain hole in the assembled state. A rubber gasket is placed at the junction.
- By adjusting the height of the legs, the pallet is leveled.It must be strictly horizontal.
- The drain flexible hose extending from the siphon is connected to the outlet system (channel or pipe). The joint is securely sealed using silicone sealant.
The shower cabin is becoming increasingly popular, and therefore many people want to have it in their apartment. Installation can be completely done with your own hands, following the requirements of the instructions and recommendations of specialists. Correct and high-quality installation of the drain system is a guarantee of long and comfortable operation of the shower.
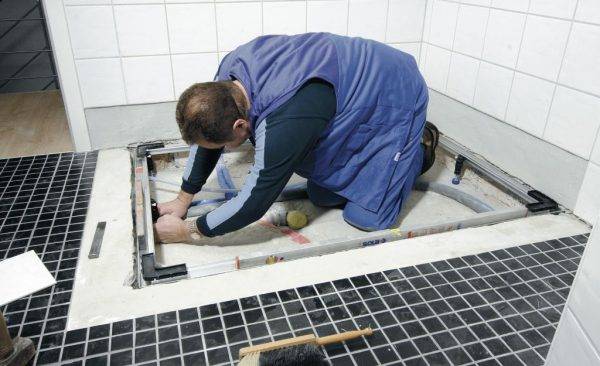
Preparation for installation, how the box is installed
In order for the future design to please a person with operational qualities, reliable and durable work, you need to know about several successive stages:
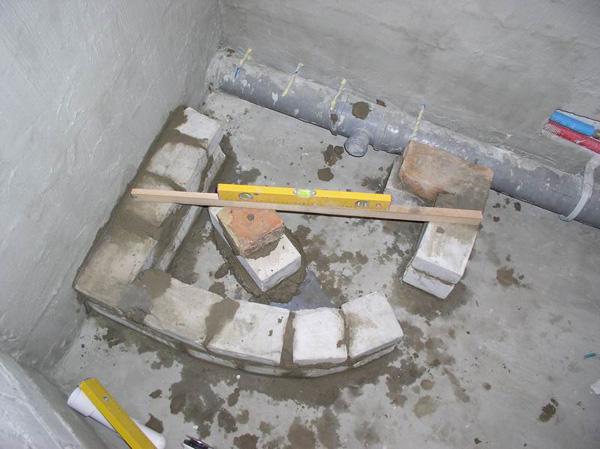
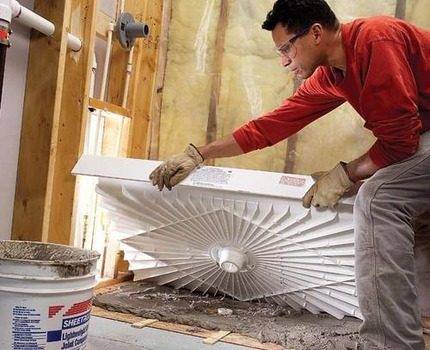
Photo 1. The process of creating a brick pedestal is one of the key stages in preparing for the installation of a cabin.
Site preparation. To begin with, the surface on which the cabin will be installed is leveled. Often the pedestal is laid out of brick. It serves as a good support for the pallet, and also reduces stress points and spreads everything over the surface. Rubber laid between the brickwork and the pallet will help prevent damage to the structure from movement.
Sewerage. After the sewerage is supplied, the cabin base drain is connected to it; sealant is used during its installation, which provides reliable waterproofing of the space under the corner.
Frame. The slats supporting the doors are connected into a single structure. They are fixed to the wall with self-tapping screws with dowels. Holes are to be treated with sealant. Walls are put on top of the frame
Care must be taken during installation.In no case should an acrylic product or glass be allowed to fall, because this will cause cracks and scratches on them.
Tools and materials
- Screwdrivers of various types.
- Drill.
- Silicone based sealant.
- Wrench.
- Mounting foam.
- A hammer.
- Level.
- Siphon.
- Water hoses.
- Shower corner.
- Pallet.
How to install a shower tray drain
You can connect the booth to the sewer with your own hands, it will not take much time and effort. In addition to the siphon, you need to purchase plumbing pipes that will be connected to the siphon and lead to the sewer.
The unpacked siphon must be checked for the presence of all its components and rubber layers for better sealing. All elements must be clean and without the slightest damage that could lead to malfunctions of the drain system.
Installation of a siphon under a shower tray:
- Unscrew the sleeve from the siphon body, remove the cover and rubberized gaskets.
- Apply sealant to the drain groove, lay the gasket on it and coat with sealant from above.
- Place the siphon cover in the drain hole so that the thread on it coincides with the bottom of the siphon.
- Fix the drain part with a screwdriver. Install the overflow in the same way.
- Mount the siphon elbow towards the sewer. Connect the siphon and the hole in the sewer with a corrugated pipe, having previously smeared the joints with sealant.
After installing the drain siphon, it is recommended to check for leaks. Then you need to level the booth, connect the water supply and enjoy the shower. Proper installation of the drain siphon affects the rate of water flow and the durability of the equipment. After the siphon fails, it will not be difficult to remove and replace it.


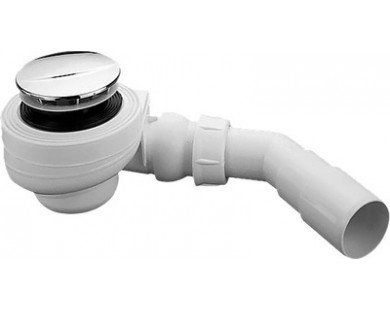

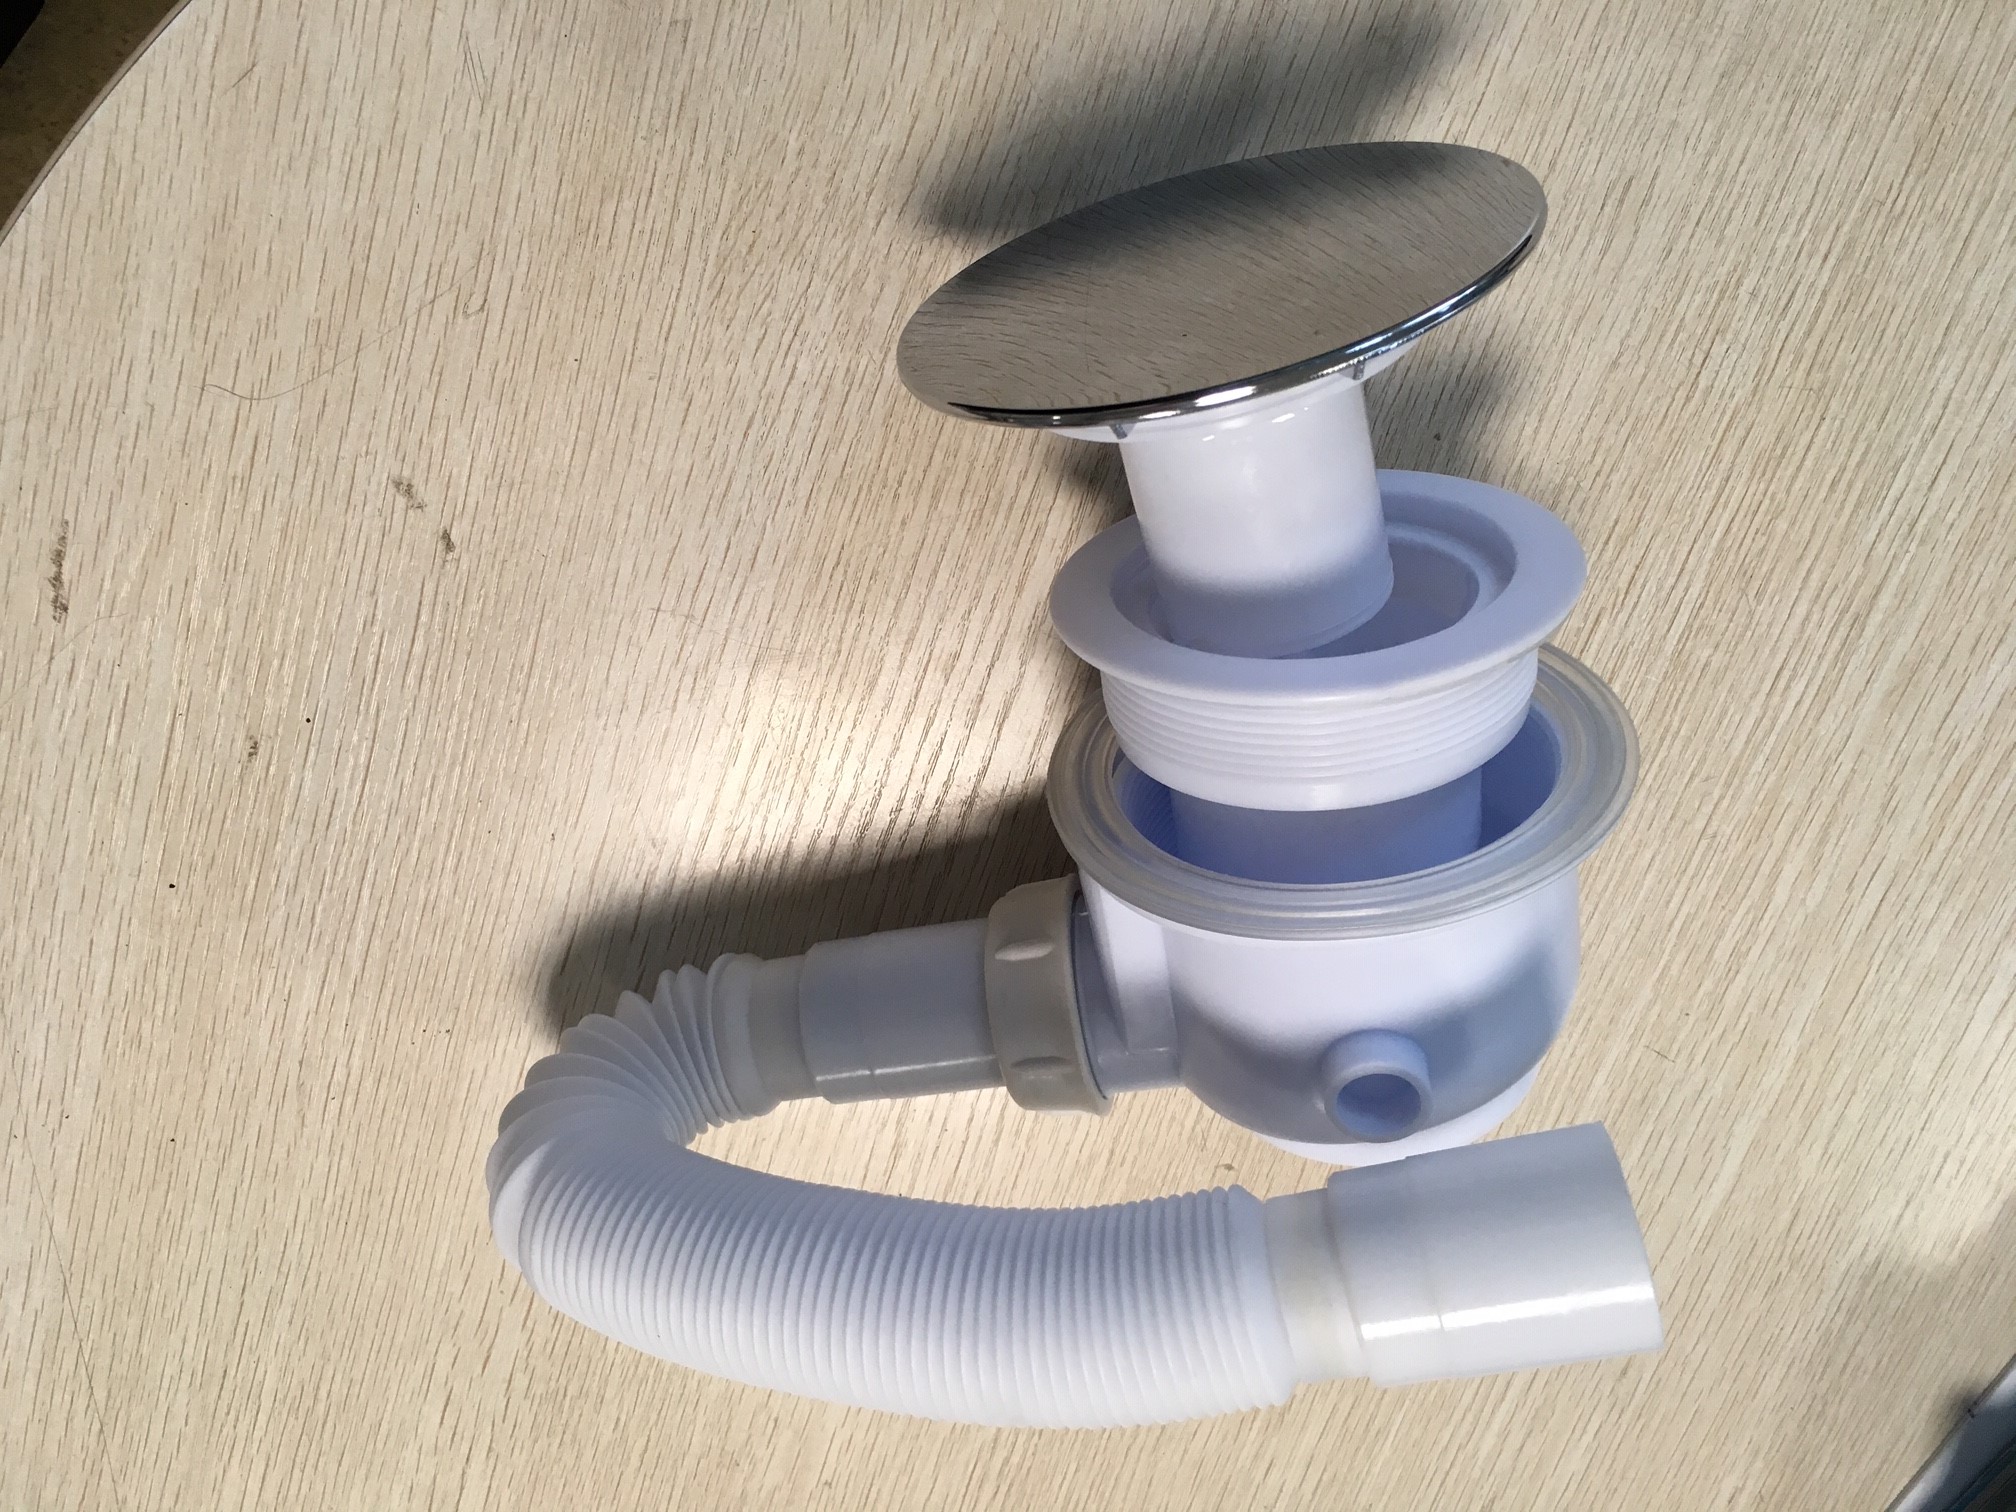
Types and features

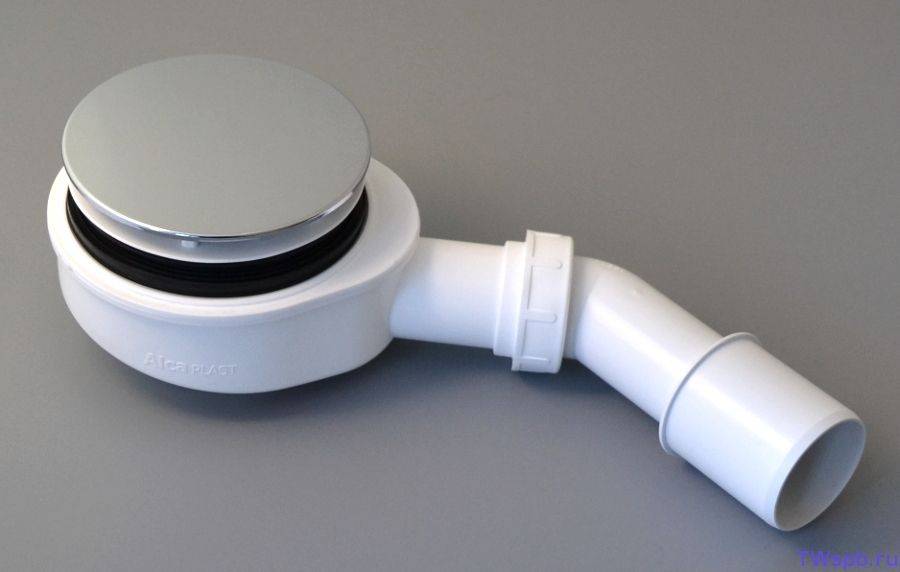
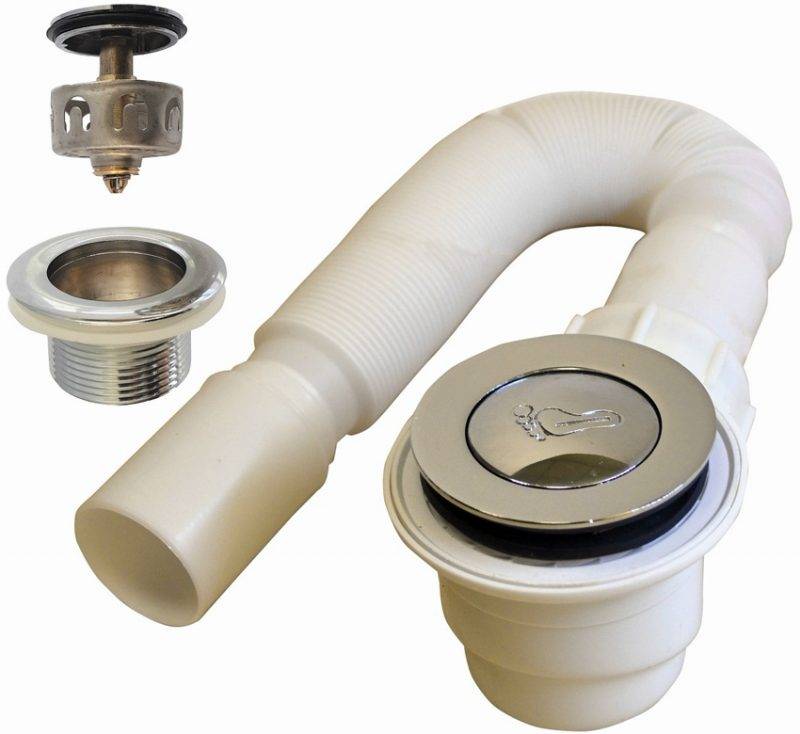
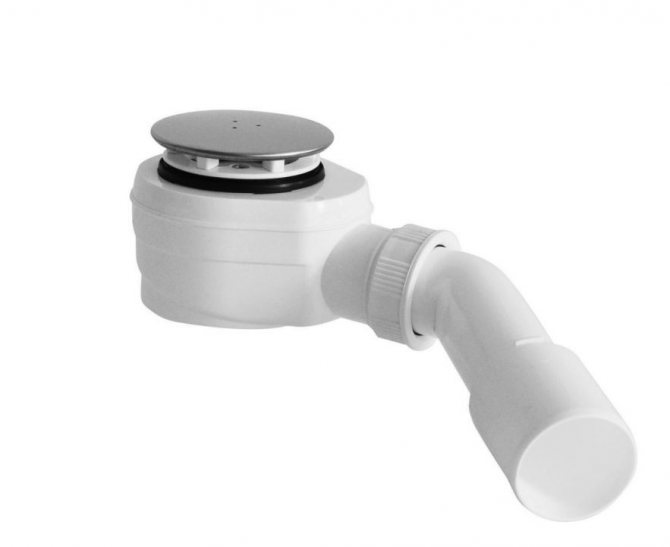
Photo of a click-clack siphon being installed for a shower
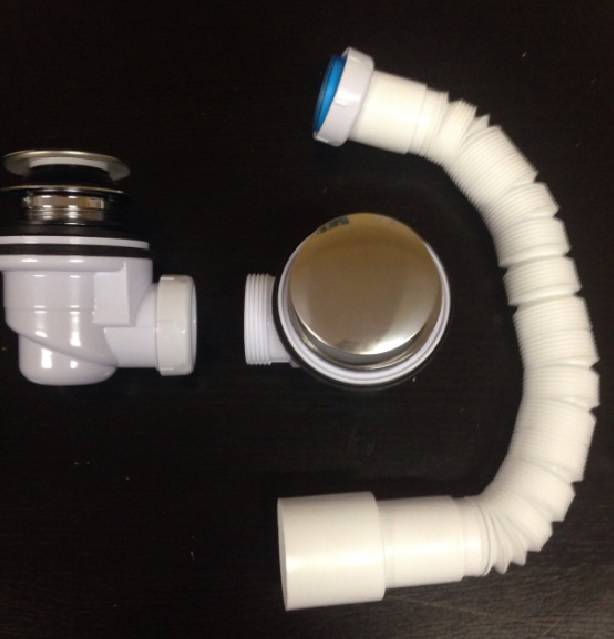
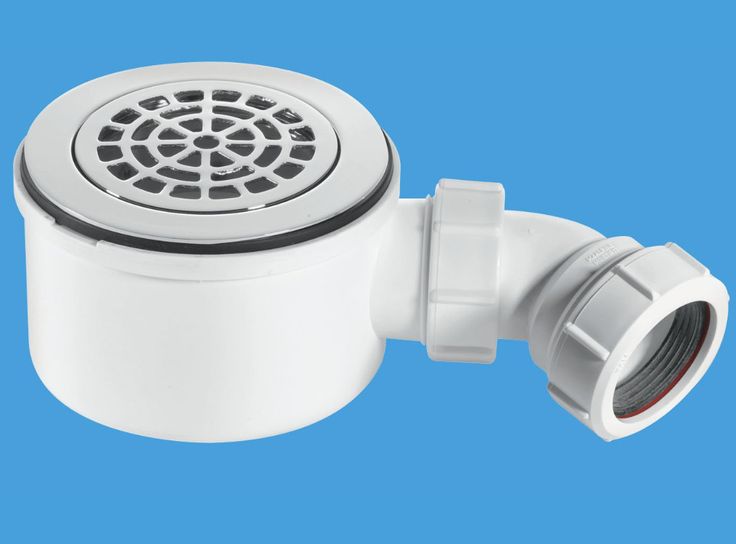
The market for shower cabins is more than diverse. Therefore, pallets are also sufficient when choosing. They can have a different shape, volume, height. Do not forget that in different pallets, drain holes can be located in different places, which is why siphons must have certain design features in certain cases.
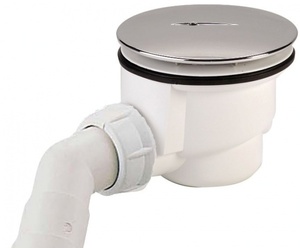
As a rule, a siphon for a shower tray includes two structural elements - an overflow and a drain. Overflows are not always provided, and the drain is usually made in the form of a curved pipe, where you can adjust the height and length.
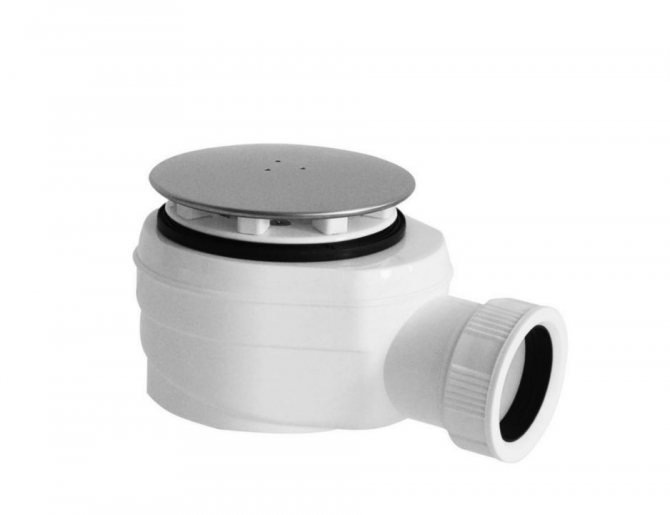
Now, among the wide range of sanitary products on the market, you can find various siphons for shower trays - conventional, automatic, as well as with the click clack function.
- Everyone met ordinary designs. The principle of their operation is that when the plug closes, water begins to accumulate in the cabin pan. It is worth opening the plug, as the water immediately begins to leave. These are outdated models that are used less and less.
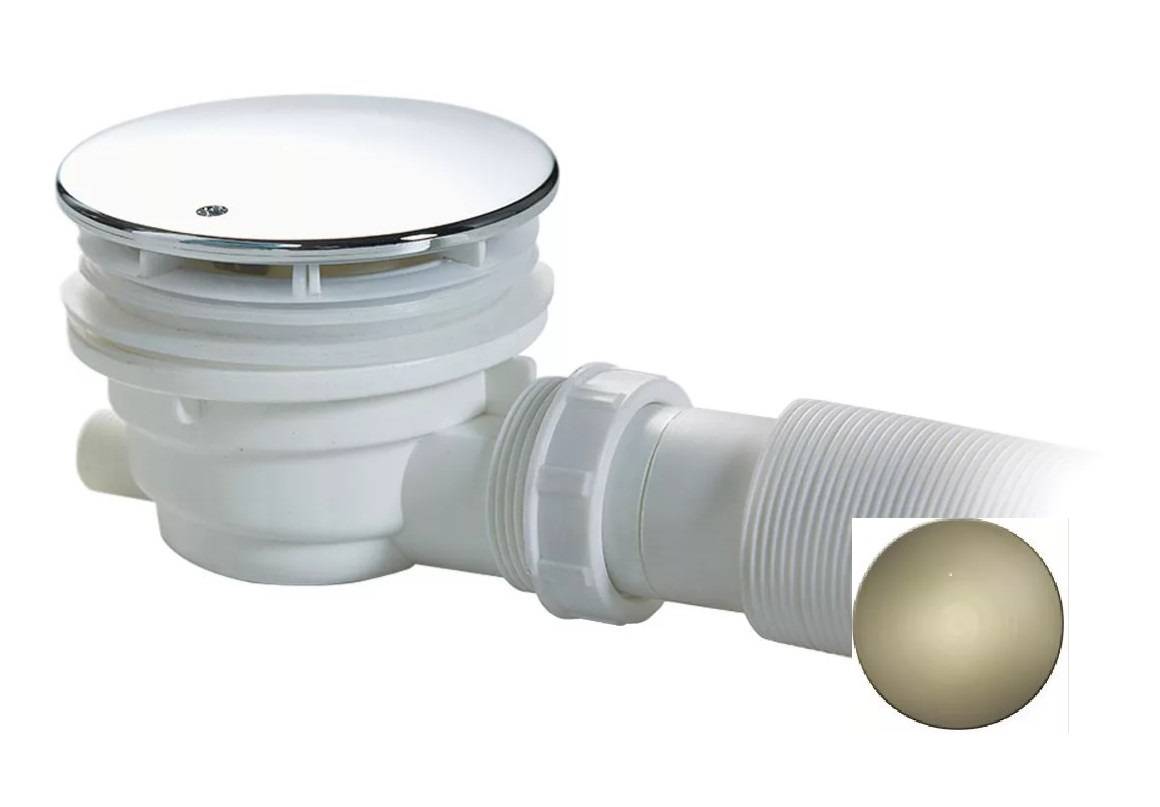
- Automatic models have become a replacement for standard solutions. They have a special handle, turning which, the drain opens and closes. That is, the cork is absent as such, exactly, like a hydraulic seal.
- Click clack systems are the most advanced. Their peculiarity lies in the fact that a person opens and closes the drain by pressing the corresponding button with his foot. Press once - the drain closes, press again - it opens. As a result, you do not have to bend down in order to collect or drain water from the pan.
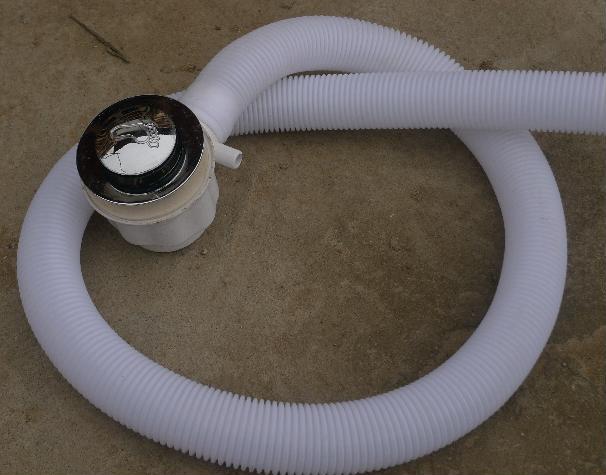
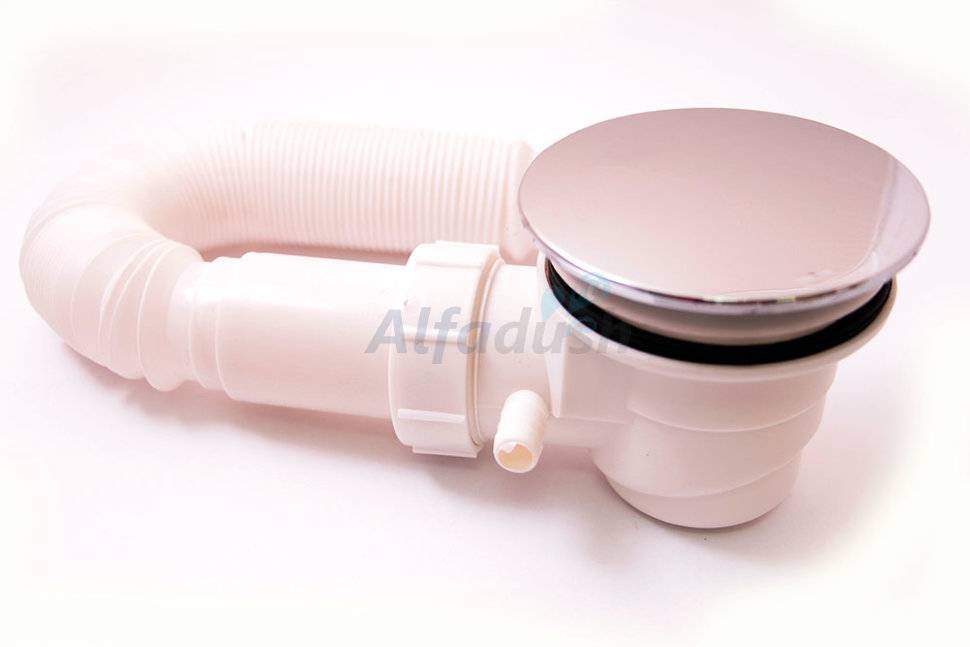
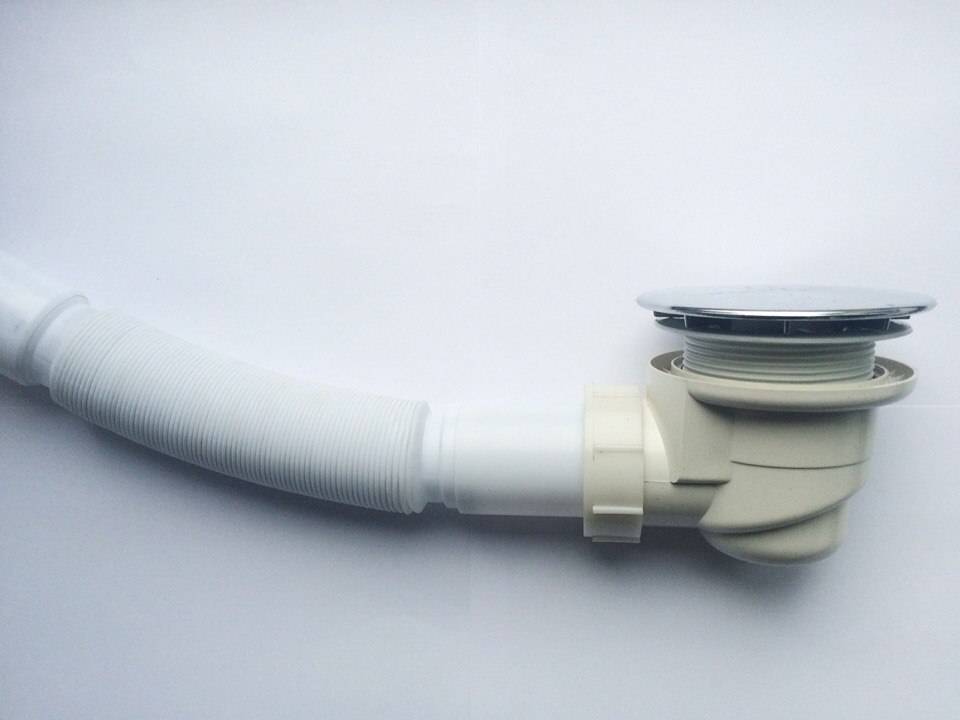
Photo of a conventional corrugated siphon
Remember that you should choose a shower siphon based on the height of the drain, since it is mounted under the pallet. From this we can draw a completely logical conclusion - it is better to give preference to low models, thanks to which your pallet can be at a minimum height from the floor surface in the bathroom. Usually siphons have a height of 8-20 centimeters.
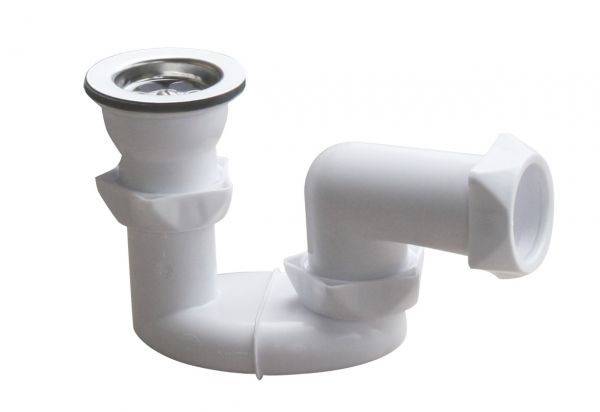
According to the type of construction, three main types of siphons can be distinguished.
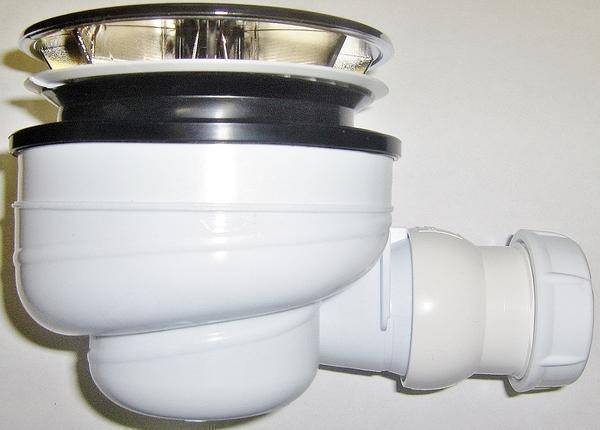
- Bottle. The name comes from the shape of the product, resembling a bottle. These are the most common designs, the shape of which makes it possible to keep water inside the siphon, thereby keeping gases from the sewer outside the bathroom.
- Pipe. Such a siphon, as a rule, has the shape of the letter S or U. It has not received other distinctive features.
- Corrugated. The peculiarity of this solution is that it can be used in those pallets where other siphons did not fit or did not fit.
To assemble the shower enclosure, you will need the following tools
Shower cabin not included!
- Sealant (with application gun)
- screwdriver
- Drill Ø1-3mm
- Phillips screwdriver
- Pencil
- Pliers or wrenches
- Level

Some shower cabins, according to the manufacturer, are assembled without sealant. But even for such showers, you still need a sealant. They need to process the drain hole of the shower cabin, fix the water cutters and magnetic seals, and other small options, if any, such as processing the hole for the radio and nozzles.
In all other shower cabins, sealant is required.
With it, all fixed elements are processed.The joints of the rear wall between the central panel and the pallet, the joints of the front frame and the pallet, the fastening of the drain and nozzles, the installation of seals and water separators.
Glass shower cabins are delivered unassembled, in cardboard boxes. The number of boxes per shower cabin is from 3 to 5 (depending on the manufacturer)


