- Tips
- Open mounting method
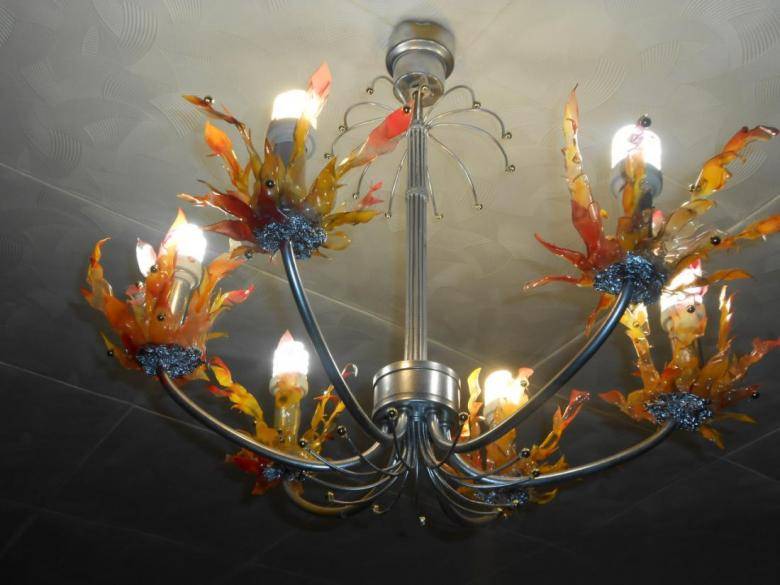
- leaf chandelier
- Photos of some interesting options
- How to connect correctly
- Simple installation
- With extra protection
- With active current limiter
- How to calculate the required number of lamps?
- Mounting horns
- Mounting horns
- Basic Rules
- Nuances of commissioning
- Choosing a chandelier for a stretch ceiling
- Design features and their types
- fabric chandeliers
- The device and principle of operation of a chandelier with a remote control
- Construction of plastic windows
- window structure
- Elements for chandeliers
- Necessary materials and tools
- Connection diagram for a chandelier with a remote control
- How to connect an LED chandelier
- How to connect a halogen chandelier with a remote control
- bottle chandelier
- Working steps
- measurements
- Dismantling
- Training
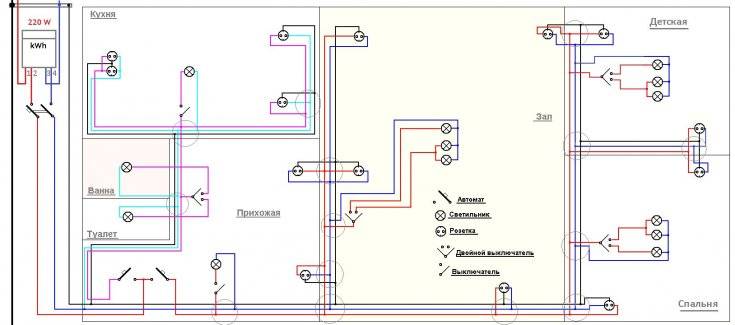
- Correct network connection schemes
- Consistent
- Parallel
- Ray
- Conclusion
Tips
In the arsenal of a home electrician, in addition to traditional electrical tape and a probe, it is recommended to have some other tricks - for example, probe bulbs. A simple device consisting of an electric cartridge with connected wires 35-40 centimeters long with stripped ends and a light bulb will allow you to quickly and easily determine the voltage in the wiring.
When starting the installation of lighting fixtures, it is useful to attach a sheet of paper to the switch with tape with a warning about the work.
In addition, among protective measures, it is recommended to have shoes with rubber soles and not to work from a stepladder on a wet floor.
Open mounting method
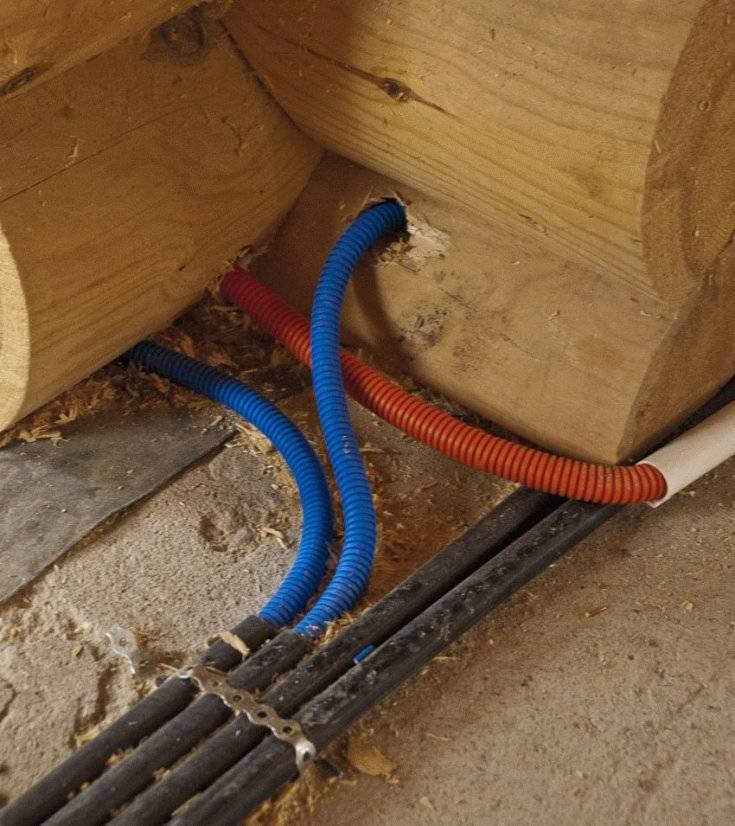
A simple, cheap and maintainable wiring method. The disadvantage is the violation of the interior. Installation is carried out by any of the 3 existing options: with brackets, in corrugation, in boxes and plastic pipes.
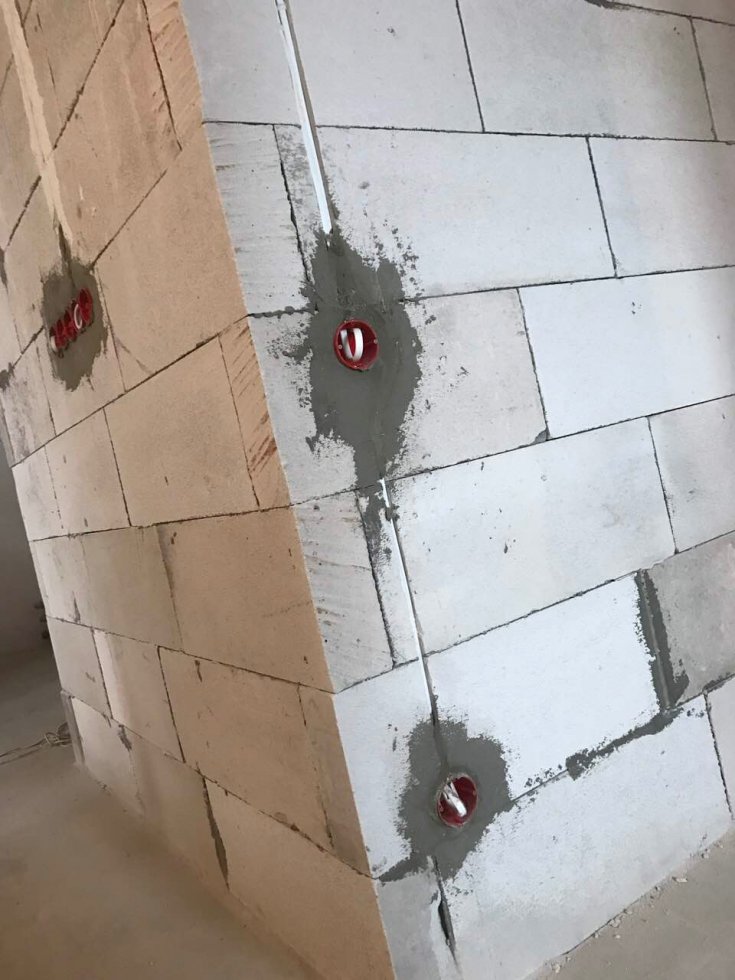
A more time-consuming and expensive option is hidden installation. At the same time, electrical wires are not visible from the outside, but are located inside the walls.
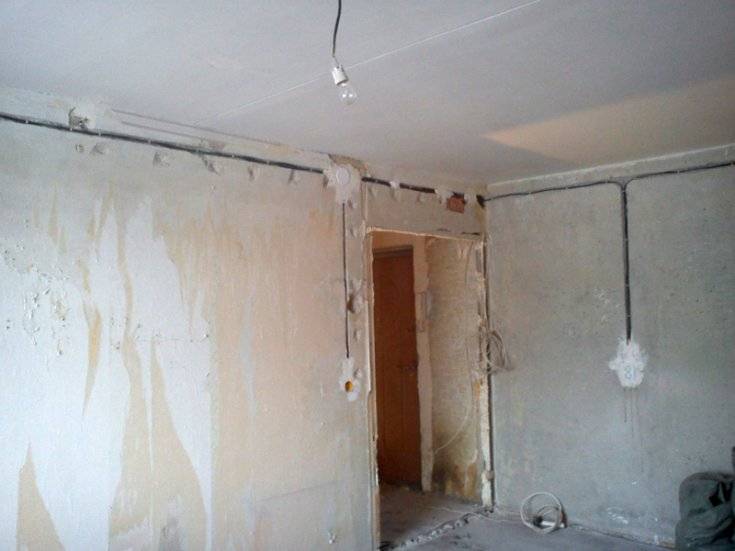
The inaccessibility of cables is both an advantage and a disadvantage of this type of installation. On the one hand, the cables are protected from damage, and on the other hand, it is quite difficult to find and replace the faulty section. The appearance of the walls of the room with this option remains unchanged.


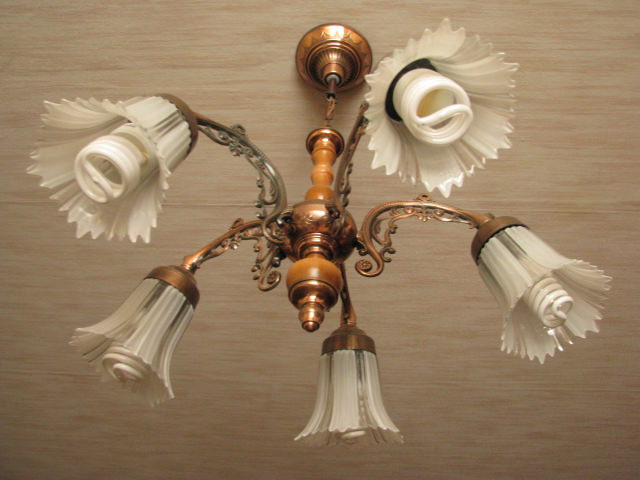
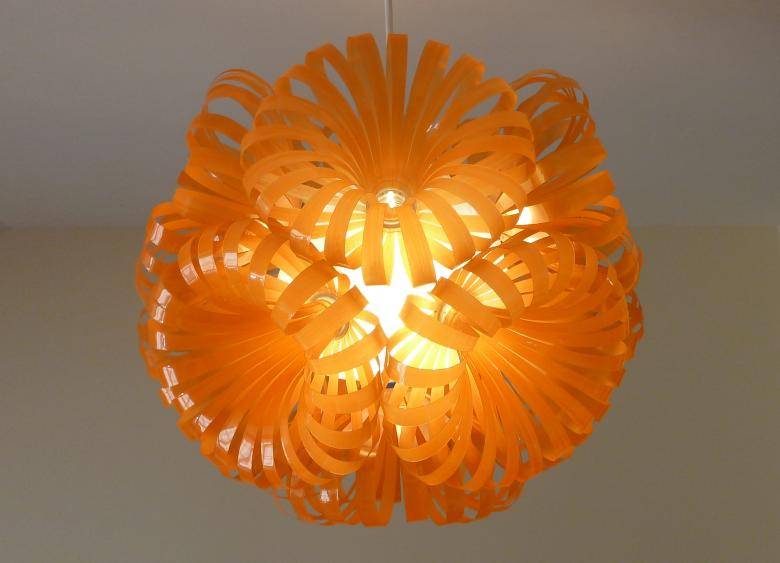
leaf chandelier
This is a very original product made from plastic bottles. The material for manufacturing has a lot of colors, which allows you to approach the process of working with imagination and show your creativity.
Step-by-step instruction
- From plastic bottles, we cut out blanks in the form of leaves of various shapes and sizes.
- Using a soldering iron, it is necessary to make the veins characteristic of them on the leaves and make the edges a little more round, which will create a natural effect.
- Using a hot needle, make holes at the base of the leaves to be able to connect them.
- We make a frame of metal wire and strong branches to them, previously formed from leaves.
This technology can also be used for lamps that will complement the chandelier, creating a whole set of lighting items in the same style.
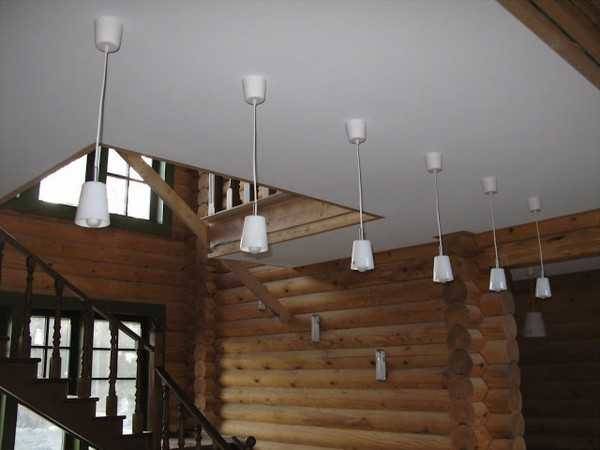
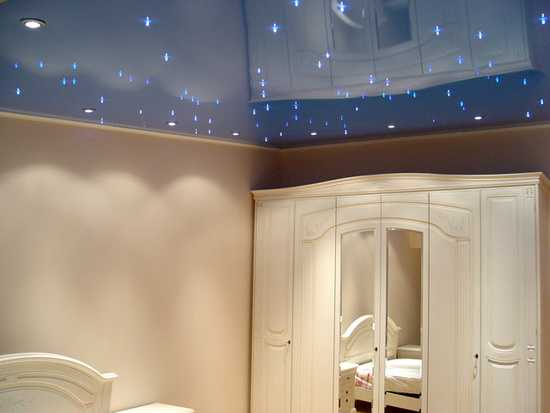
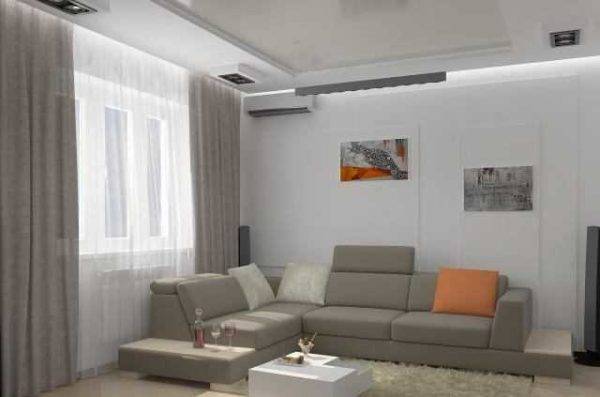
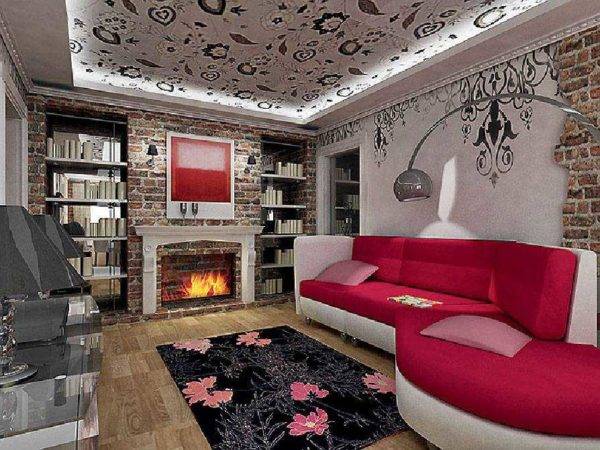
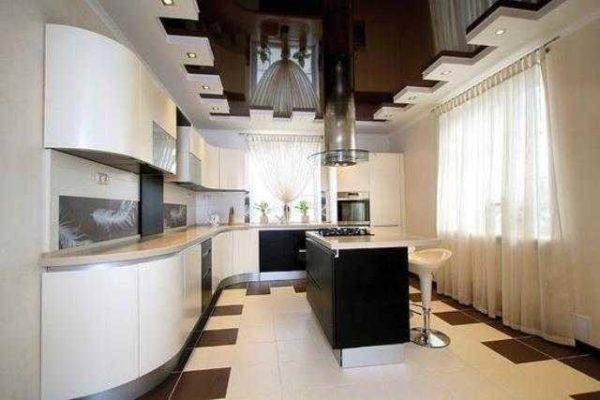
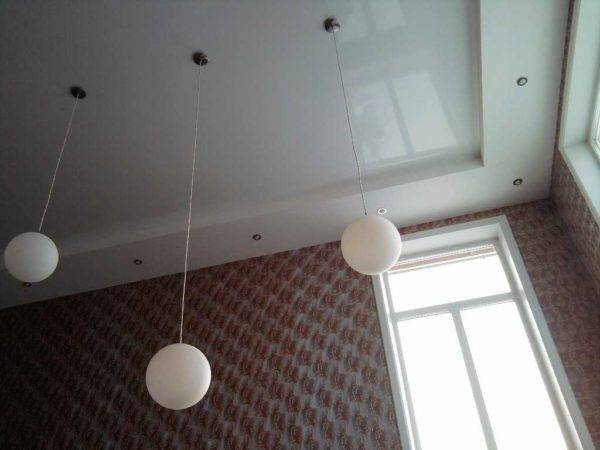
Photos of some interesting options
There are so many variations and design options for stretch ceilings that you can easily make a unique development. The material is plastic, combined with almost all materials. Even with those that do not seem to fit in texture, like wood, for example. But that's just how it seems. A few photo examples of stretch ceilings in a wooden house are given below. As you can see everything fits together well.
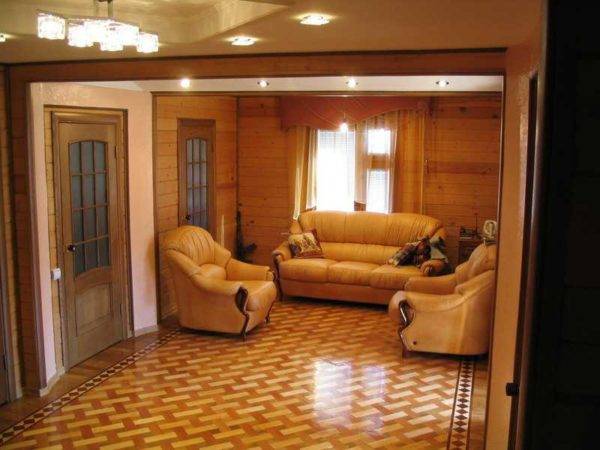
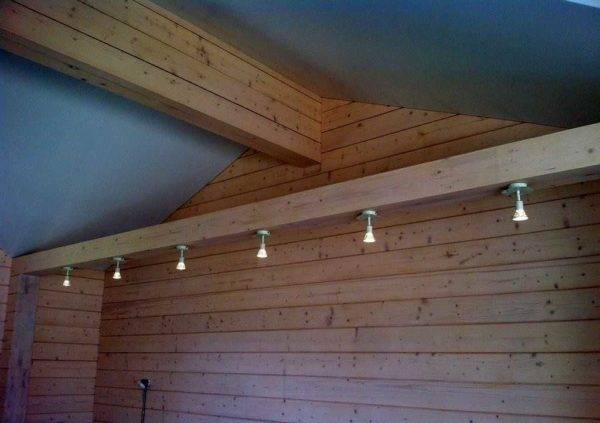
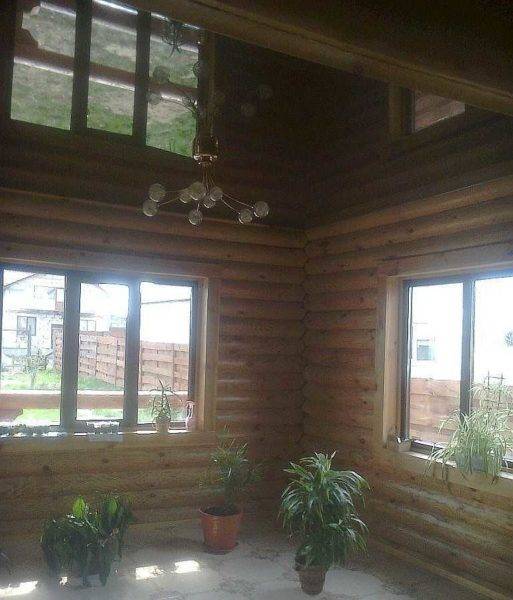
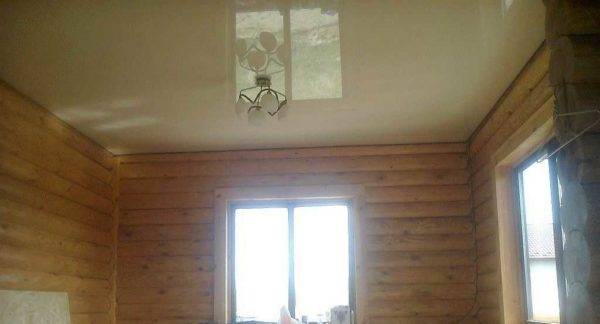

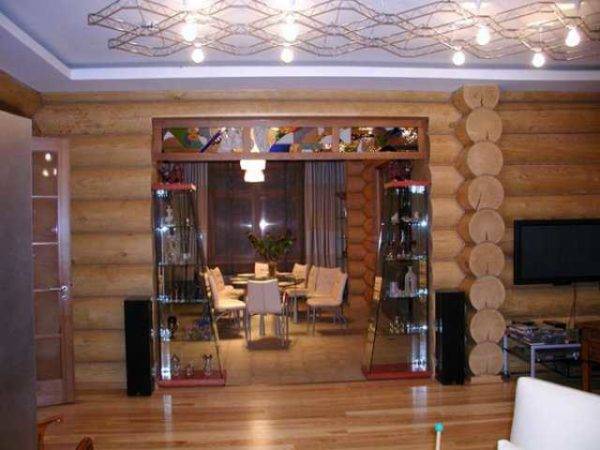
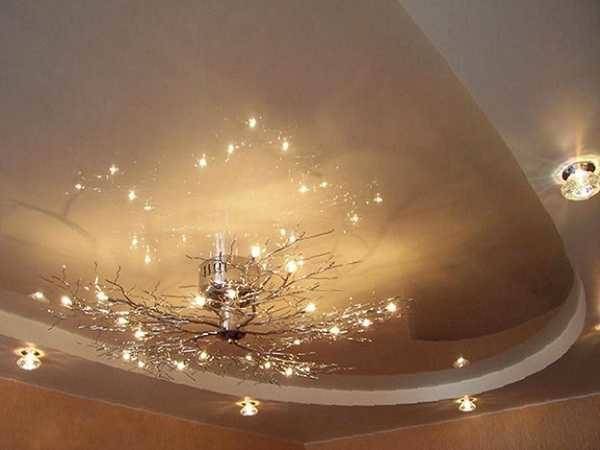
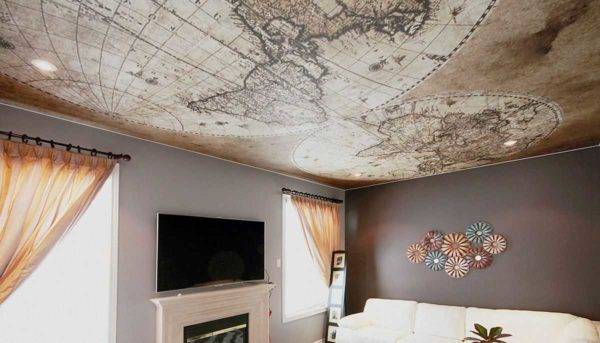
This, perhaps, is the technology that allows you to realize really any fantasy. If you want gold on the ceiling - easily, you need velvet - no problem, photo - choose which one. The number of levels and their shape is limited only by imagination.


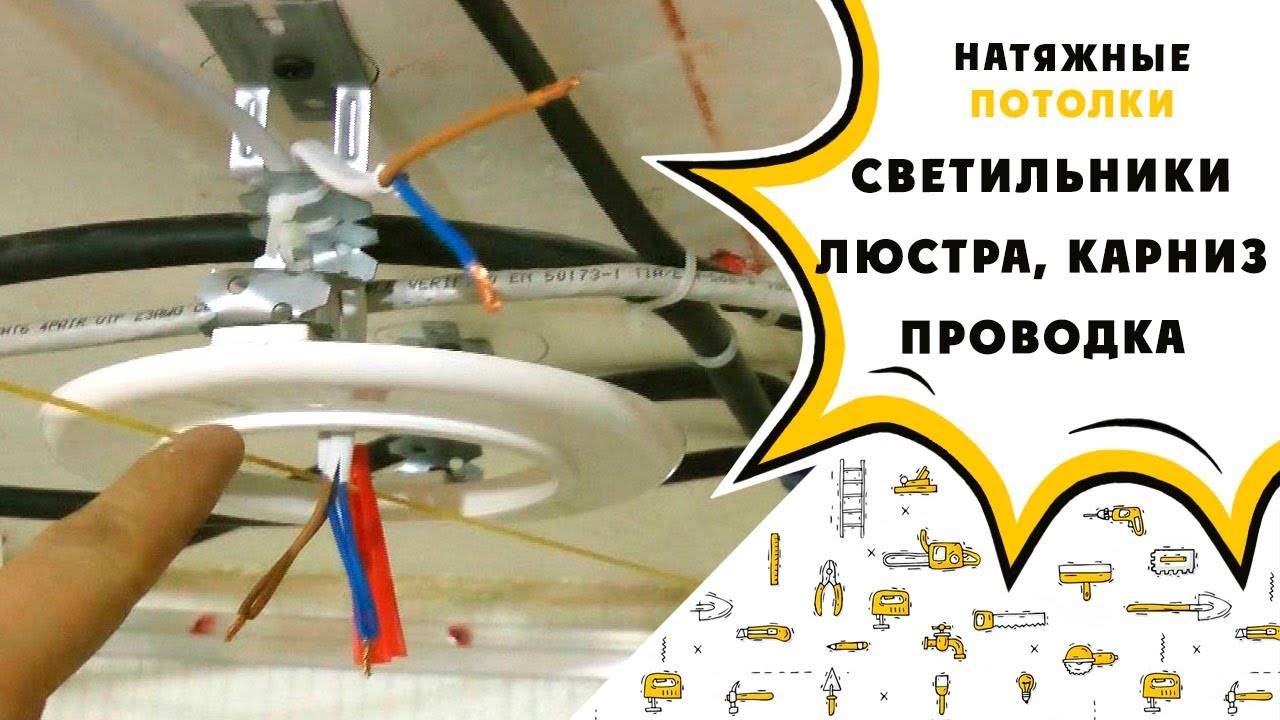
How to connect correctly
All installation work is carried out before the suspended ceiling itself is completed.
It is important to follow the chosen connection scheme. The place of installation, the height of the installation of lighting fixtures are one of the main factors that should be dealt with in advance
 The number of lamps is also considered in advance. It should be noted that in some cases there is a need for a transformer. Wires to the installation sites are connected in advance. To avoid contact with frame suspended structures, corrugated tubes are taken for wires. For each situation, a separate scheme is developed.
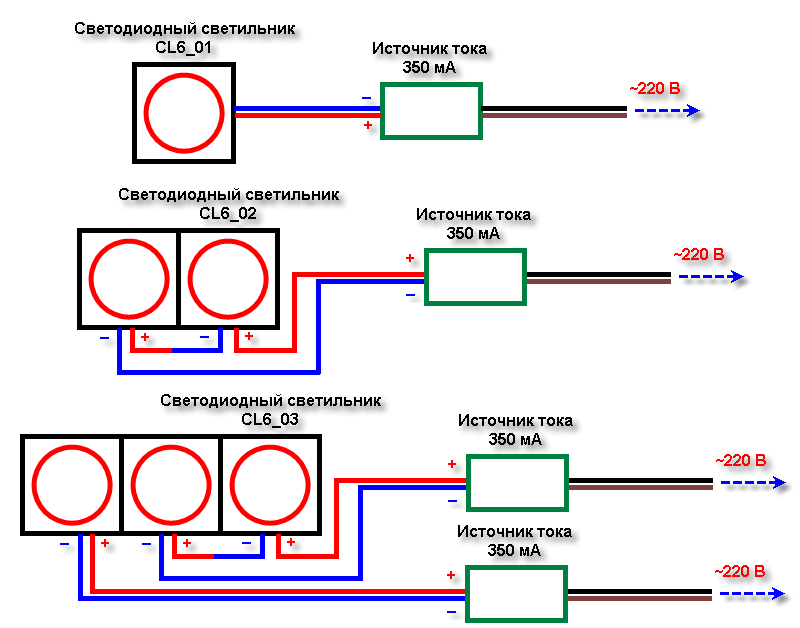
Simple installation
The usual scheme involves the serial connection of all conductors. A current-limiting resistor is required if the connection is selected in parallel.It is better to turn to electricians with a sufficiently high qualification for such work as the assembly and installation of fixtures, laying electrical wires with a sufficient cross section.
The general scheme of actions is as follows:
- De-energization of the electrical network.
- Complete the device with a power supply. Or use a regular part if all the characteristics are suitable.
- Checking the type of socles.
- Check the presence of thermal rings that prevent overheating in the system. You need to make sure that there is enough space for ventilation.
- Strict observance of polarity.
With extra protection
The purpose of the device affects which protection class to choose for a particular case:
- Filtering interference with high frequencies, protection against differential surges, from residual surges in this indicator. Protective equipment is installed near the consumer.
- For the power distribution network at the facility, from switching interference. The element plays the role of the second step when lightning strikes. Place of installation - inside switchboards.
- To ensure that lightning does not directly enter the protective system of the house. The place of installation is the entrance to the building, inside the distribution devices. The main switchboard can also be used for this.
 Typically, protection devices are supplied with a special kind of module that can be easily replaced if necessary. The installation of such devices extends the life of the entire system.


With active current limiter
The current limiting element for this circuit will be resistor R1. The power factor in this case approaches unity. The circuit has one minus - the resistor dissipates heat in large quantities.
Resistor R2 is used to discharge the residual voltage.
How to calculate the required number of lamps?
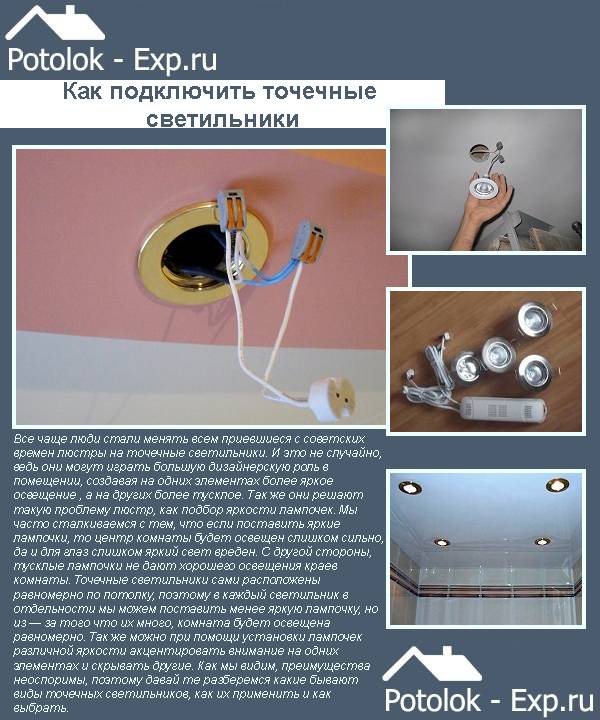
The level of illumination is selected individually for each of the rooms. It all depends on the purpose of the room. Maximum brightness is needed where you constantly read or write. For the corridor, this figure will be an order of magnitude lower.
To measure the luminous flux of one lamp, the illumination level is multiplied with the area of \u200b\u200bthe room, and then divided by the number of lamps.
The calculation per square meter looks a little different. The number of lamps is multiplied with the luminous flux, the result is divided by the area of illumination. The type of installation depends on how much equipment is needed in a particular case. When installed in a conventional chandelier, they rely on the level of light intensity.
The effective angle of light for LEDs will be approximately 120 degrees. The main thing is to calculate the number of fixtures in such a way that the light eventually turns out to be uniform.
Mounting horns
The next step after assembling the upper and middle parts of the chandelier is the assembly and installation of the horns to the frame. The horns are the very details of the chandelier on which the lighting fixtures themselves will be attached. They can have a different shape and be in different quantities. It is by this criterion that the assembly of this part differs, but otherwise the process is absolutely the same.
First you need to unscrew the decorative nut, which is responsible for attaching the protective layer to the frame body. Next, the horn itself is taken, from which it is necessary to disconnect the nut and counter-washer.

Now it remains only with their help to fix the horn to the body of the chandelier. Now we put on the decorative nut, which was removed at the very beginning.

Further, according to the same principle, all other horns should be attached.


Mounting horns
 At the stage of the disassembled body of the lighting device, to which the horns with lamps and shades are supposed to be attached, it is necessary to carefully examine the inside.
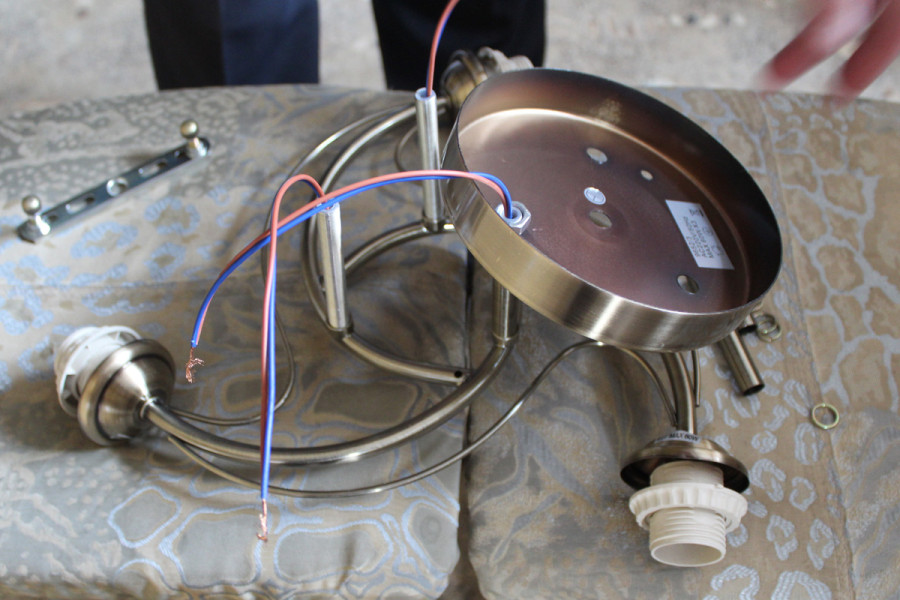
Manufacturers, as a rule, sell their products with two wires wound up: to “phase” and “zero”.
In this case, it involves the simultaneous switching on or off of all the lamps, therefore, if necessary, a third electrical wire is started. For this purpose, not only the lower decorative nut, but also the upper nut of the central rod is unscrewed, after which all plastic ring seals from the end part and the wire are removed.
Only after the introduction of the third wire, the entire bundle is fixed with plastic ring seals at the ends, and the horns are fixed on the body of the lighting device. The horns of the lamp are not only installed on the body of the chandelier, but are also securely screwed on from the inside with a nut.
Basic Rules
To wash the chandelier without removing it from the ceiling, you should follow the recommendations:
- Dilute detergent in water in the required proportion.
- Use a napkin.
- During washing, move in the direction from top to bottom.
- Lay a blanket or napkin on the floor so as not to pour water while washing the chandelier.
- It is recommended to carry out the procedure with gloves. This measure will help not to break the parts and not leave hand marks on the product.
- In order for the product to shine with cleanliness, do not use soap formulations, as they add haze to glass and crystal surfaces.
It is always a pleasure to be in a house where cleanliness and peace reign! Let the air in your home be clean and light! Keep order and use proven products to wash the chandelier: ammonia, acetic acid and water.
Nuances of commissioning
After the panel device is installed, it is necessary to turn off all the devices with which it is equipped. Next steps:
- load all sockets;
- apply voltage, check its presence at the input, correct phase and zero;
- alternately check the RCD and difavtomatov;
- evaluate the voltage at the input and output of the automata;
- check the behavior of the shield when connecting high power equipment;
- check outlets and switches.
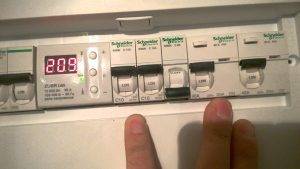
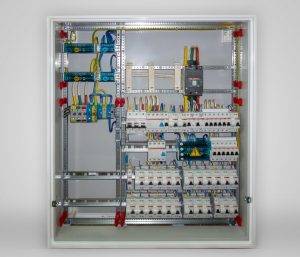
The electrical panel requires periodic inspections. Once a month, it should be opened, contacts tightened, and the quality of the RCD should be evaluated. If the shield is installed correctly, then it will last quite a long time.

Choosing a chandelier for a stretch ceiling
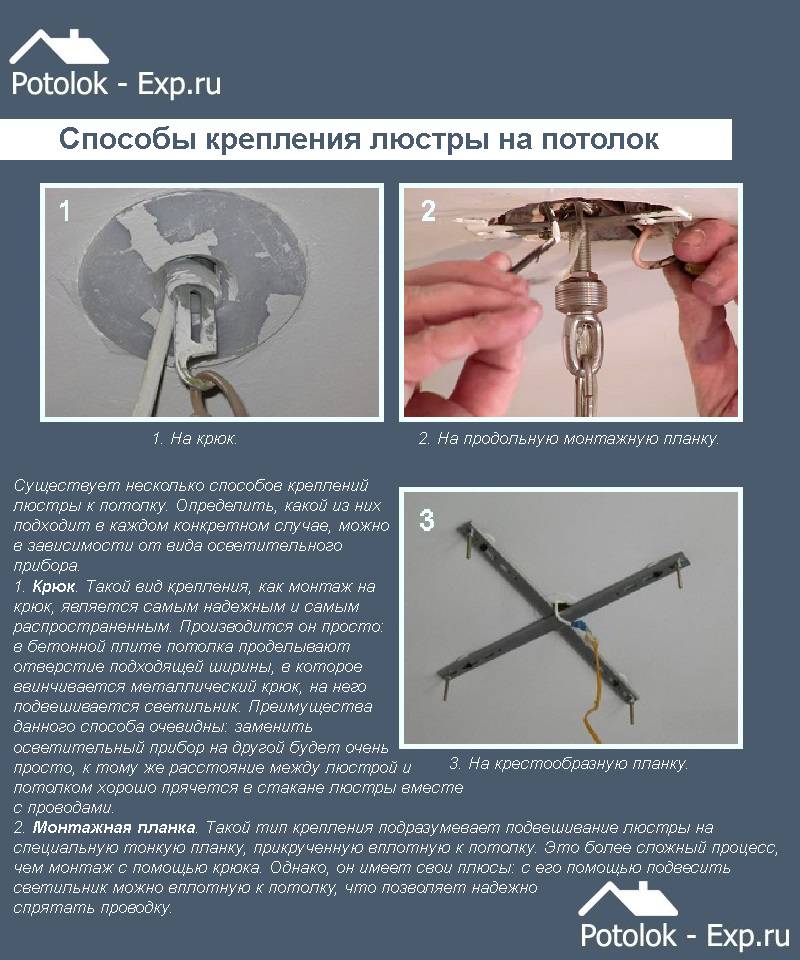
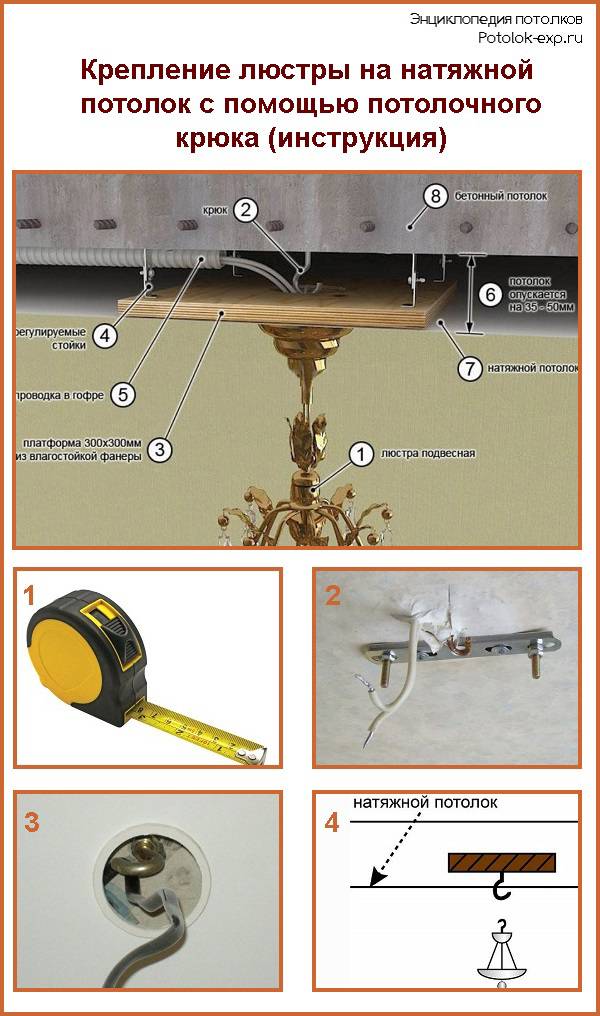
It is desirable to select lighting fixtures for any type of ceiling at the design stage, and with tensile structures this rule is especially relevant. The thing is that the fastening of the chandelier to the stretch ceiling is carried out in a peculiar way - it is usually suspended with a hook or a special platform from the base ceiling. In addition, the choice of the type of chandelier directly affects the distance between the stretch fabric and the base.

Choosing chandelier for tension ceiling, you need to be guided by the following points:
Most often, a special PVC film acts as a canvas for the ceiling, which is not very durable and can be very easily damaged by the sharp edges of the chandelier.In addition, it is also worth considering the features of the base to which the lamp will be attached - the surface of the structure should not be protruding or sharp. If there are such defects, it is necessary to address them.
Another problem associated with the use of PVC film is its poor resistance to high temperatures. If this material is constantly subjected to heating up to 45-50 degrees, then over time it will be compressed and become too brittle, up to cracking and shedding. To avoid such an impact, you should choose a chandelier that is equipped with LED lamps - they practically do not heat up during operation.


Another good option involves the use of a lamp with several shades, each of which has a low-power lamp built in - with this design, the lighting will be quite effective at a relatively low temperature.
When attaching a chandelier to stretch ceiling with glossy canvas, be sure to pay attention to the back of the device. On the glossy surface of the ceiling, the back of the chandelier will be reflected in much the same way as in a regular mirror. If wires or other internal elements of the device are visible there, then it is better to bypass such a chandelier and look for a more suitable one.
The next item is the method of attaching the chandelier
In the case of standard apartments, the situation is often very simple - there is initially a hook on the ceiling, which is installed at the central point of the ceiling. In order not to equip a new design, you can use this particular hook for mounting a chandelier.In the absence of a built-in hook, the choice of fastening does not play a special role, so you can decide how to hang the chandelier from the stretch ceiling arbitrarily.
The dimensions of the chandelier must be suitable for the room and correspond to the height of the base ceiling. For example, a large chandelier mounted on a long rod will look very ridiculous in a small room with a low ceiling. The same rule works in the opposite direction - a small ceiling adjacent to a stretch ceiling will not visually correspond to a large room with a high ceiling.
Luminaire power has little effect on lighting efficiency. In order for the room to be fully illuminated, it is better to supplement the chandelier with spotlights - all the same, the wiring will be laid in a hidden way, so there will be no problems with the visual side of the issue. To emphasize individual areas of the room, you can use decorative LED lighting.
If wires or other internal elements of the device are visible there, then it is better to bypass such a chandelier and look for a more suitable one.
The next item is the method of attaching the chandelier. In the case of standard apartments, the situation is often very simple - there is initially a hook on the ceiling, which is installed at the central point of the ceiling. In order not to equip a new design, you can use this particular hook for mounting a chandelier. In the absence of a built-in hook, the choice of fastening does not play a special role, so you can decide how to hang the chandelier from the stretch ceiling arbitrarily.
The dimensions of the chandelier must be suitable for the room and correspond to the height of the base ceiling.For example, a large chandelier mounted on a long rod will look very ridiculous in a small room with a low ceiling. The same rule works in the opposite direction - a small ceiling adjacent to a stretch ceiling will not visually correspond to a large room with a high ceiling.
Luminaire power has little effect on lighting efficiency. In order for the room to be fully illuminated, it is better to supplement the chandelier with spotlights - all the same, the wiring will be laid in a hidden way, so there will be no problems with the visual side of the issue. To emphasize individual areas of the room, you can use decorative LED lighting.
Design features and their types
Before moving on to the question of how to install a chandelier, it is worth considering the types of such lighting fixtures. Lighting structures are divided into two types, differing in mounting methods.
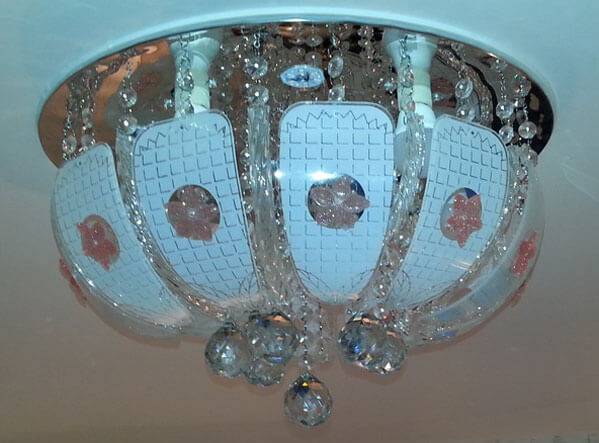
- Ceiling chandeliers. This type of lighting device is attached to the ceiling plane using strips. Often, lamps of this type are made in a form that has a visual similarity with a plate. They can be presented as a one-piece design, and with the presence of several segments. To scatter light, shades are used that have a variety of geometric shapes. They are made from glass or plastic materials. The level of light transmission will depend on the transparency of the ceiling. Very often, the product is equipped with a mirror reflector, as a result of which its lighting functions are enhanced. In the plane of the plafond, both one and several electric lighting elements can be located.This type is the best solution for spaces with low ceilings.
- Suspended lighting fixtures. A feature of this type is the method of fastening the structure, mounted on a mounting hook built into the ceiling surface using chains and strings. The junctions of the fastener and wires are masked with a decorative plate. Various materials are used in the manufacture: metal and crystal, glass, textiles and wood. They can have different geometric shapes. Suspension-type models are made with the presence of one segment of light diffusion or in the form of a structural system with the arrangement of several segments of light. A distinctive feature of chandeliers that have several shades in the design is their adjustable directionality.

fabric chandeliers
This type of chandelier involves many of its types. After all, fabrics are so diverse that they can satisfy the taste of each person.

To make it, you will need to make a frame, in the form of two circles of iron wire. Then, cut the fabric to the size of the frame, from the selected canvas. In the process, keep in mind that the diameter of the base of the chandelier must match the width of the fabric so that the chandelier looks symmetrical. Next, we sew the fabric, fixing it immediately on the frame and then connecting its edges. Optional, you can decorate the resulting lampshade lace, which will give the product a special design style.

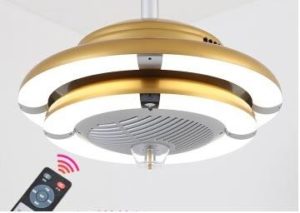
The device and principle of operation of a chandelier with a remote control

Modern pendant lights are made with a radio receiver inside and a remote control serving as a radio signal transmitter. The receiver and remote control are tuned to the same frequency and use a common signal encryption algorithm.This avoids the impact of neighbors using similar equipment.
There are 4 buttons on the remote (the simplest) that allow you to work in 4 modes: turning on / off individual blocks (up to 3) and simultaneously turning off all at once. Complex models have more buttons (for color selection mode, brightness adjustment, timer settings). The order in which the modes are turned on does not matter.
When one of the buttons is pressed, the radio signal enters the receiver, is processed and transmitted to the control unit responsible for a specific function. The remote control can work at different distances, eight meters is enough for a standard city apartment (in a country cottage, the distance must be increased).
To operate the remote control, batteries are inserted into it, the receiver is powered by a household power outlet. Phase and zero must be connected to the terminals. For an old chandelier, you need to buy a kit adapted for pair work. It is configured by the manufacturer, if one of the elements is faulty, another kit is bought.
The disadvantage of remote control is the possibility of overheating of the radio receiver. The maximum temperature level is indicated on the packaging, if it is exceeded, there is a possibility of fire. The risk is increased if the receiver is built into the fixture design. The problem is solved by a blower device or the location of the controller separately on a radiator that removes excess heat.
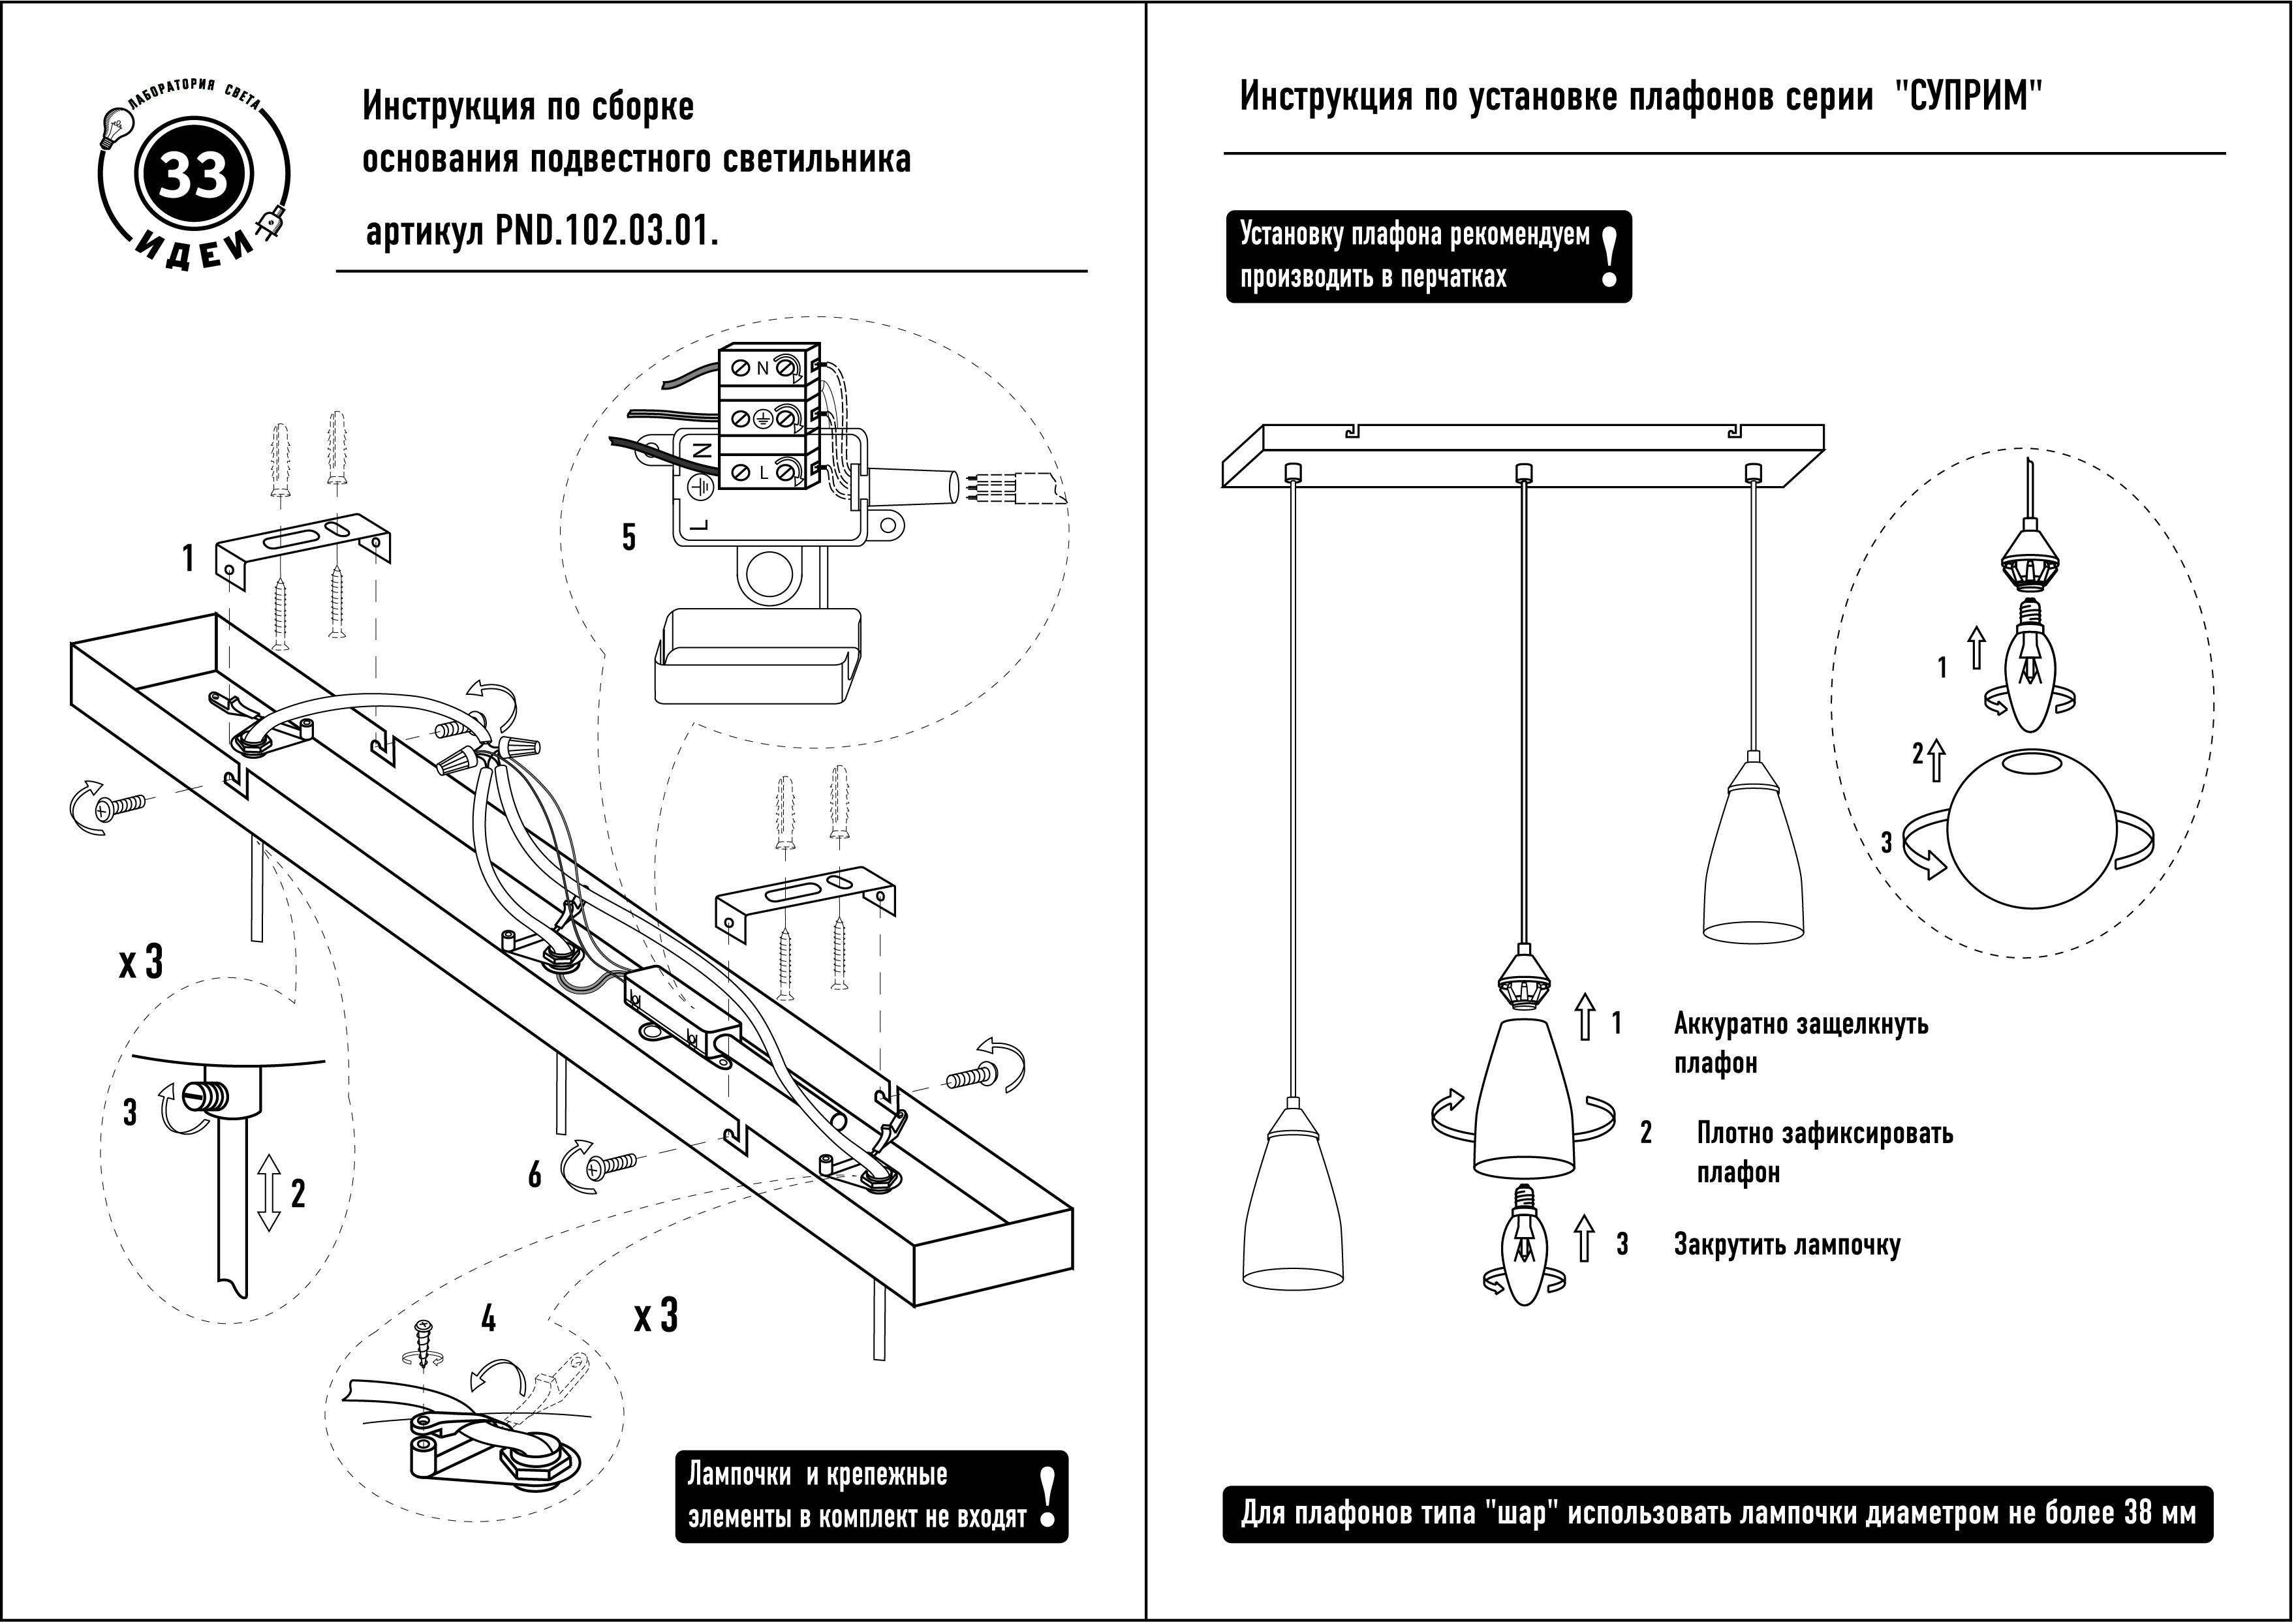
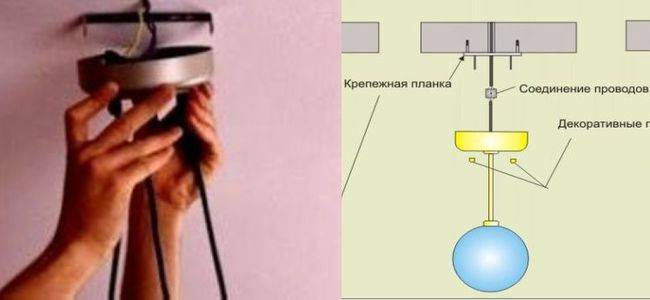
Regardless of the type of chandelier, it is mounted on a bar attached to the ceiling. At its base there are holes for the bar studs. The weight is held by nuts.The controller is housed in a hollow base along with other parts.
Lamps can be conventional halogens or LEDs. When installing, it is necessary to take into account their features.
Construction of plastic windows
To properly understand the installation process, you need to have an idea about the design of windows. Let's start with materials and names. Plastic windows are made of polyvinyl chloride, which is abbreviated as PVC. Hence the second name - PVC windows.
The main element of any window is the frame. For plastic windows, the frame is made from a special multi-chamber profile. It is divided by partitions into a number of cells - chambers. The more of these cells, the warmer the window will be. When they talk about how many cameras will be in a plastic window, they have the number of cells in the profile.
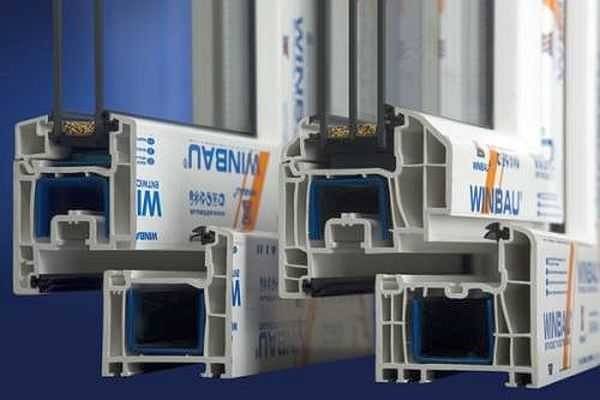
In the middle of the structure, in the largest chamber, a blue insert is visible. This is a reinforcing element of increased rigidity. It gives the profile the required strength. In plastic windows, this insert is made of plastic, in metal-plastic windows it is made of metal (usually aluminum). That's the whole difference between them.
There is also a division of profiles into classes: economy, standard and premium. The best choice if you need normal windows is the standard class. In the economy class, the partitions are too thin and they begin to freeze almost from the moment of installation. Premium comes at a high price with options that are essentially unnecessary.
If you want to have the best profile for plastic windows, take the class standard of any factory. There is no particular difference between the products of different companies. They have been standardized for a long time and all the stories of managers about the benefits are fairy tales.If they are manufactured on factory equipment, there is no difference between them: all factory profiles have long been standardized.


Profiles for windows in the standard version are white, but can also be brown - to match the color of any tree, and even pink - on request. Colored profile windows are more expensive than similar white ones.
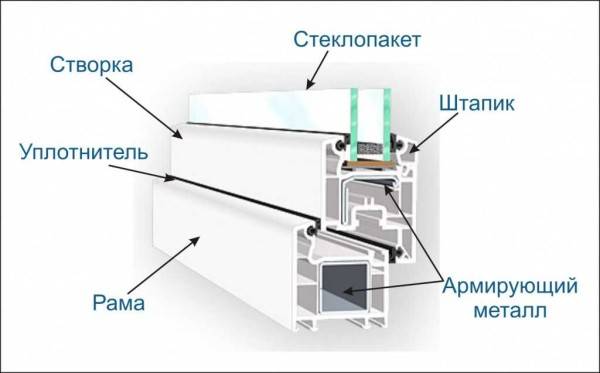
window structure
To understand what is at stake in the description of the installation process, you need to know the name of each component of the structure.
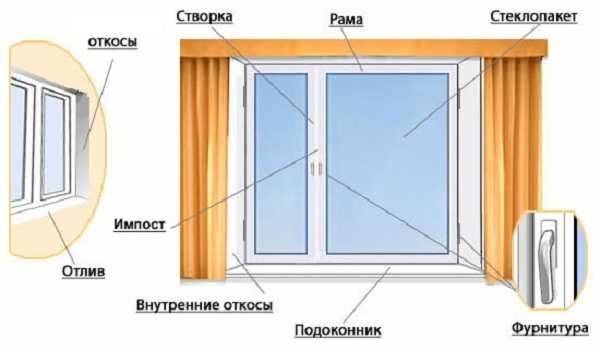
It consists of:
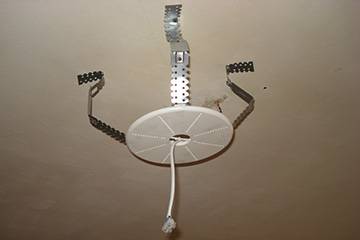
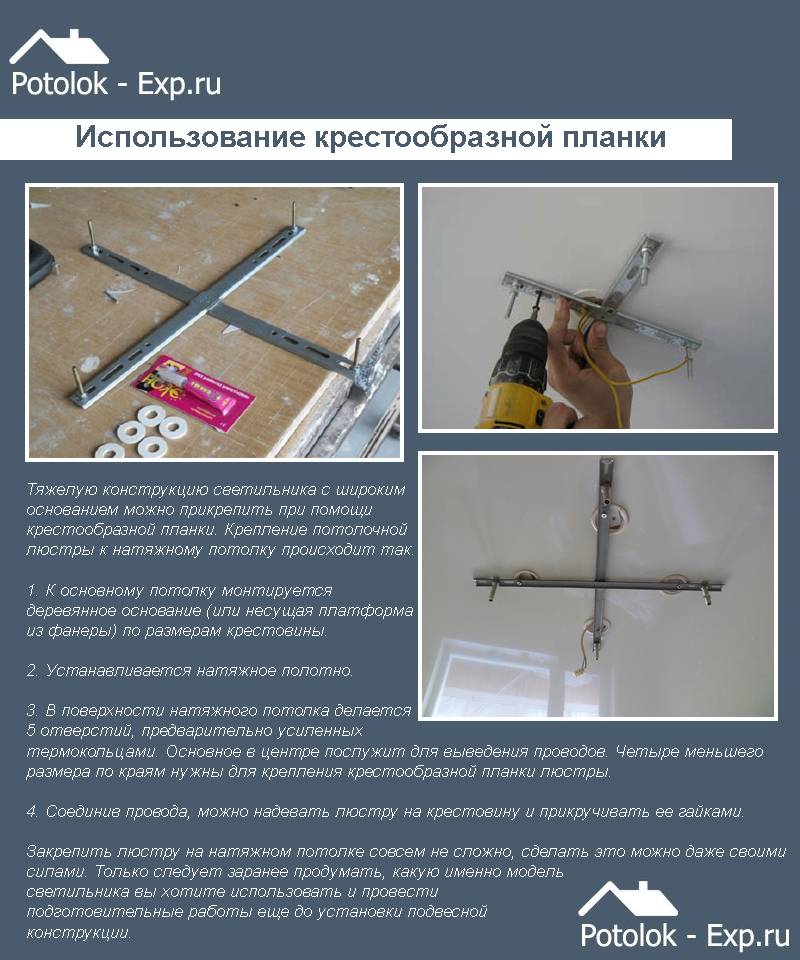
Elements for chandeliers
You can take care of mortgages for cornices and chandeliers on your own, or you can look for something similar on sale. Special platforms are produced under the chandelier, the installation scheme of which is not very different from the installation of home-made products.
When installing mortgages under a chandelier, the following must be considered:
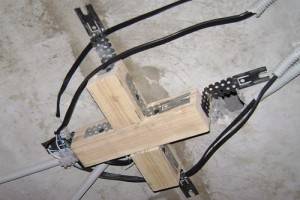
- The best materials for making bookmarks for chandeliers are thick plywood and OSB-plate is also thicker. These materials, especially plywood, are distinguished by the good viscosity of the fibers due to their structure. An ordinary tree is unsuitable for these purposes, since even good wood can dry out in a few years and crack at the point of installation of fasteners, due to which a weighty expensive chandelier will end up on the floor at the most unexpected moment.
- A rectangular fragment can be cut out of plywood, which would correspond in size to the platform of the installed lighting fixture, in particular a chandelier.
- Next, in the center of the plywood rectangle, you need to drill a hole of sufficient size through which it will be possible to pass down the electrical wires that power the chandelier.
- Do not ignore the advice about sanding all the edges of the plywood to eliminate sharp edges.If this is not done, the probability of damaging the installed ceiling with sharp burrs increases sharply, which can easily pierce the stretched canvas.
- Marking under the chandelier is also done in advance. The method of installing the embedded element under the chandelier is carried out similarly to the method of fastening described above for spotlights. As in the case of mortgages for fixtures, metal hangers can be used for fastening, only their number will have to be increased due to the greater load on the platform.
Necessary materials and tools

But whatever the idea of \u200b\u200bdecorating a room, its implementation requires:
- Tools.
- Expendable materials.
- Means of protection and means to ensure compliance with safety regulations.
From the tools needed to fix the chandelier (here we are talking about the option when only wires are removed from the concrete ceiling, without a hole and any means or devices):
- Perforator for punching holes in the slab.
- Concrete drill set.
- Extension cord.
- Electrical tester (not to be confused with a probe).
- An electrical probe (and here it is no longer to be confused with a tester, a tester is a device for measuring an electrical circuit, voltage, resistance, and a probe is a device similar to a screwdriver to determine the presence of voltage in the wiring).
- Hidden wiring indicator (in case the logic of the builders cannot be understood and it is necessary to search for electrical wires in the thickness of concrete).
- Screwdriver (preferably with a long working body wrapped with electrical tape).
- Pliers.
- Wire cutters.
- Round nose pliers.
- A knife with a dielectric handle, as well as all other tools.
Of the consumables you will need:
- Insulating PVC tape.
- Mounting block.
- Dowels and bolts.
As a means of protection:
- Rubber gloves (preferably special mounting gloves made of soft rubber, but if not available, ordinary kitchen gloves will do).
- A stable ladder or sturdy chair.
Additionally, it is useful to have on hand space for tools and assembling lamp elements.
Connection diagram for a chandelier with a remote control
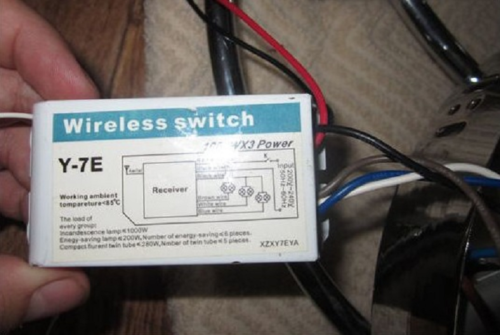
The main element of the design is the signal switching controller. Most often, this is a non-separable box, which contains information about connecting LEDs - LED, or halogen lamps - H. On Chinese controllers, the information may be hieroglyphs with poor duplication in English.
The block shows the connection diagram of the channels
Such devices may be labeled "Wireless Switch" or "Control Switch", which means a switch controlled from a remote control. The most popular models are Y-2E and Y-7E. If there is one of the models, then we can assume that you are lucky with the controller in the chandelier. Model Y-7E is best suited for remote controlled home lighting.
Its structure includes:
- Three control channels, two of which are 1000 W each, respectively, for halogens and LEDs for a chandelier, one is 200 W for fluorescent light sources;
- Switching system of input alternating voltage 240V;
- Receiver that captures the control signal from the remote control at a distance of up to 8 m.
The scheme for connecting different types of fixtures to your channel is shown below.
A pair of blue and brown wires is used at the input to the controller, this is the standard color for the input voltage circuit.If there is any doubt about the correct connection of the ceiling wires to the microcontroller unit, you can additionally look for the inscription INPUT or input.
How to connect an LED chandelier
The very fact of using a universal controller in the lighting device simplifies the task, since the device, paired with the remote control, can be removed from the chandelier and used in any other lamp. In addition, it is possible to use the chandelier for one type of light source - halogens or LEDs, without compromising the design. You just need to guess which pair of contacts corresponds to the button on the remote control.
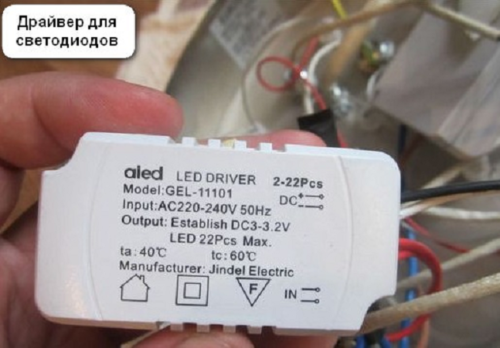
Block for LED chandelier without remote control
Another thing is if the LED chandelier is connected using a monoblock that has only one pair of leads. As a rule, the input to the block is made with wires of an arbitrary color. Since the controller is not grounded, there is not much difference where to solder zero and phase. At the output of the Chinese there is a pair of colored wires without designations.
In addition, before assembling and hanging the chandelier, it is necessary to check how the remote control works, whether the unit heats up under load. Separately, tests are carried out for the range of operation of signals from the remote control.


How to connect a halogen chandelier with a remote control
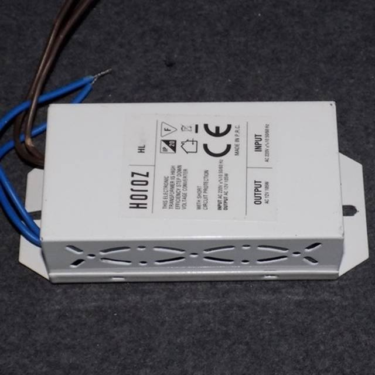
The connection procedure is no different from the LED version. The only addition is the installation of a step-down transformer for the halogen lamp.
The appearance of the step-down transformer is shown in the photo.
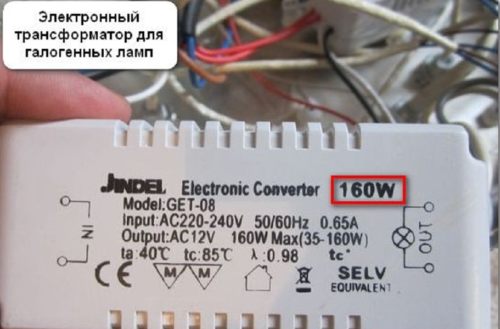
The power of the trance must be greater than the total consumption of the lamps
The number of electronic converters is equal to the number of halogens, as a rule, one or two blocks are used for each group of lamps, depending on the power and connection scheme.
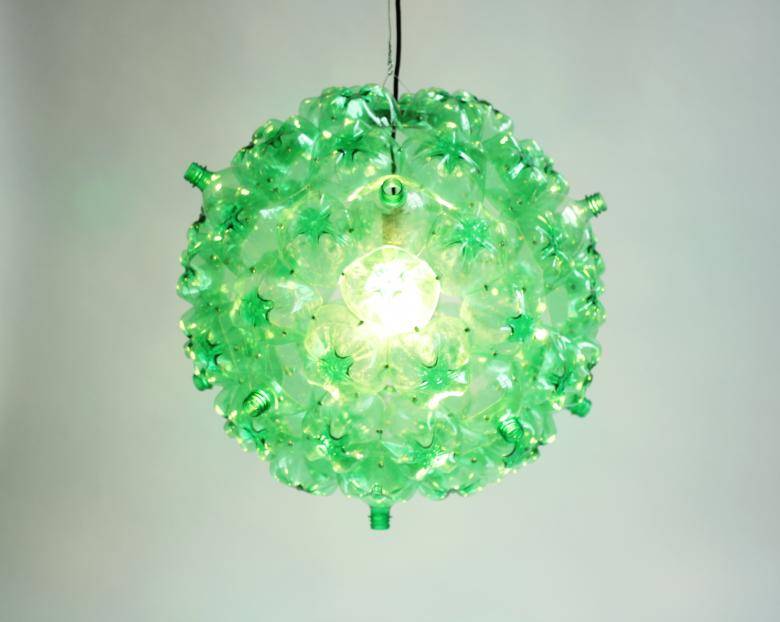
bottle chandelier
One of the original homemade chandelier ideas is the bottle chandelier. You will need:
- frame of an old chandelier;
- plastic bottles (the color palette can be very different);
- thick steel wire.

Creation instructions:
Cut bottles. Cut flowers, animals or geometric shapes out of them. Which one to choose depends on your desire.

To do this, you need to take a few wire rods, connect them in the middle, using a small piece of wire. Next, you need to cut off the top rod, thereby creating a place for the light bulb.
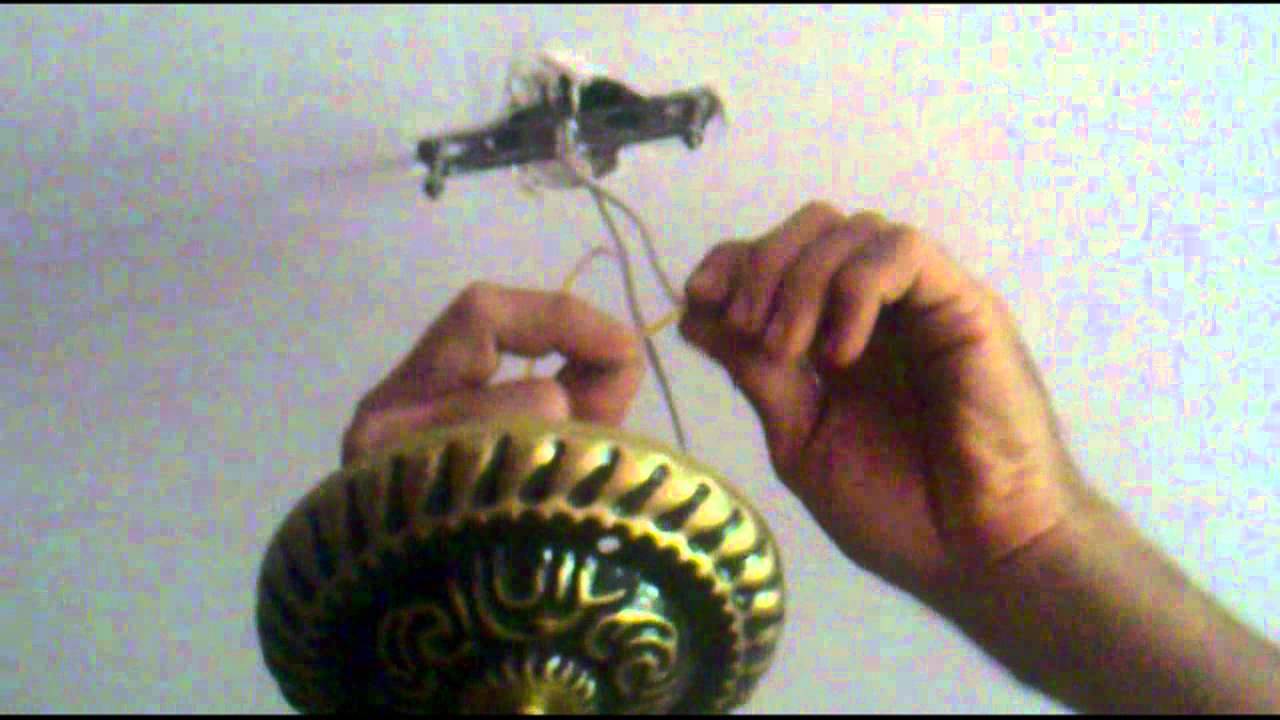
The last step is to connect the chandelier to the ceiling. It's not that hard to do it yourself. Such a lamp would be appropriate in the hallway or in the kitchen.

Working steps
Consider all the working stages of installing PVC windows.
Installation of PVC transoms - phased:
- Make measurements.
- Remove old structure.
- Carry out preparatory work.
- Make your own installation.
measurements

To measure as accurately as possible, it is worth:
- identify the type of opening (rectangle, with a quarter, ledge from the outside of the room);
- remove a layer of old plaster.
If a window with a ledge is mounted, then:
- Calculate the internal width of the transom using the formula: C \u003d B1 + A + B2. C is the distance between the quarters, A is the length between the protrusions, B1 and B2 are the lengths of the depths of the quarters.
- Calculate the height (Y = H + B3). H is the distance from the ebb at the contact area with the frame to the upper quarter. B3 - the length of the upper quarter (make 2-3 control measurements with a probe)
Measurements in several places are taken from the narrowest part of the transom. The smallest value is found, 3 cm is added. If there is an even opening, the width is measured minus 3 cm, the height minus 5 cm.
To determine the size of the window sill, it is worth measuring the width of the opening from the inside + 10 cm (it should go beyond the battery by 65-70%). Low tide is also measured, but from the outside of the house.
It is easier to measure the usual rectangular type of transom. Calculated:
- transom opening width +20 mm for mounting gap;
- height + 25 mm for clearance;
- window sill length (width + 20 mm);
- ebb length (opening width from the outside of the room + 100 mm).
The euro windows should be the same height, so it is reasonable to calculate the smallest value. Measurement from the outside is made at a bottleneck, and several times. Then the smallest value +3 cm is calculated. If the measurements from the inside and outside are the same, then the width minus 3 cm and the height minus 5 cm are measured (for gaps for building foam, installation).
Dismantling

The step by step instructions are as follows:
- At the old window block, the fasteners break out or are sawn.
- The thermal insulation, sealant is removed.
- The slopes are cleaned of plaster with a perforator, a spatula nozzle.
- The window sill is removed. The cement layer underneath is peeled off.
- All adjacent surfaces are treated with a primer.
Frost-resistant building foam with double-glazed windows is being prepared for installation.
Training
Preparation for installation includes the following steps:
- Remove the double-glazed window by folding the pivoting sash (mandatory with the window closed), starting from the blind side of the transom.
- Remove the plastic lining from the canopies by prying with a sharp object.
- Pull the rod out of the canopy at the top, picking it up with pliers. Press down with your hands.The rod should come off its original place, move outward with its lower edge.
- Open the shutter by holding the shutter with your hand. Lift her up. Remove from the canopy, which is at the bottom.
- Lean the double-glazed window on the wall, setting it in a vertical position at a slight slope, remove it.
- Remove the glazing beads by hooking with a spatula or knife. First long vertical, then horizontal. Number them so as not to confuse them when putting them in their original place.
- Remove the glass (put on rubber gloves on your hands so as not to cut yourself on the edge).
Correct network connection schemes
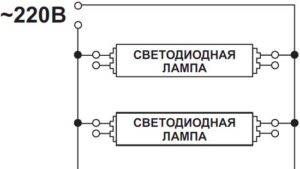 The connection is largely the same as for incandescent lamps, luminescent analogues. You just need to de-energize the base, and then screw the lamp into it. The main thing during installation is to avoid touching the metal parts of the product.


Consistent
This connection option is not always considered optimal. The number of wires is minimal, but in domestic conditions this scheme is practically not used. This comes with two major drawbacks:
- When one bulb burns out, they all stop working. Only a consistent replacement of devices throughout the circuit can cope with troubleshooting.
- Reduced voltage is applied to the lamps, therefore their glow power is not full. The number of connected light bulbs determines how incomplete this energy is.
This type of connection is relevant when building garlands on Christmas trees, with a large number of light sources with a low power rating.
The serial connection itself is as simple as possible:
- From one lamp to another phase bypasses.
- At the last bulb in the circuit, zero is fed to the second contact.
- The phase passes to the switch, from the junction box.
- Then everything goes to the spotlight.
The neutral wire or neutral is connected to the second contact of the last lamp.
For house entrances, the practical application of the scheme is also permissible.
Parallel
For most cases, this scheme is used. Consumers are not afraid even of wires in large quantities. The main advantage is that the same voltage is applied to all lighting fixtures participating in the circuit. Only one light bulb does not work after a burnout, the rest of the components remain intact. There will be no problems with finding places of breakdown.
Parallel connection is carried out in two ways: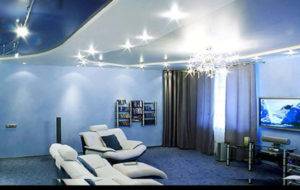
- Ray. A separate cable is connected to each of the lighting fixtures. The presence or absence of grounding affects whether the wire will be three- or two-wire.
- Scheme.
The phase with the neutral from the shield and the switch goes to the first lamp from the switch when it comes to the last option. From the lamp, a piece of cable goes to the next part. Then it goes to the second one, and so on. Each of the components is connected to four pieces of cable, the last element is an exception.
Ray
The connection option is reliable. When one bulb burns out, the others are not affected. But there are also negative sides:
- There are too many cables. But the high-quality execution of the wiring allows you to put up with such a drawback.
- One place is used to connect a large number of cables. It is not easy to connect all the elements at a sufficiently high level of quality, but the problem can be solved.
A conventional terminal block is one of the best options for connection. The phase is fed from one side, jumpers are involved in this. Then this part is bred in other parts of the structure.The wires going to the bulbs are connected on the other side.
The same method of application is for VAGO terminal blocks for the corresponding number of contacts. The main thing is to choose the right model participating in the parallel connection. Inside, everything is recommended to be filled with a paste that protects against oxidation.
Another acceptable option is the use of twisting all conductors, followed by soldering.
Conclusion
This is how you can install any chandelier with your own hands. As you can see, this is not difficult, and anyone with a minimum set of tools can perform this operation.
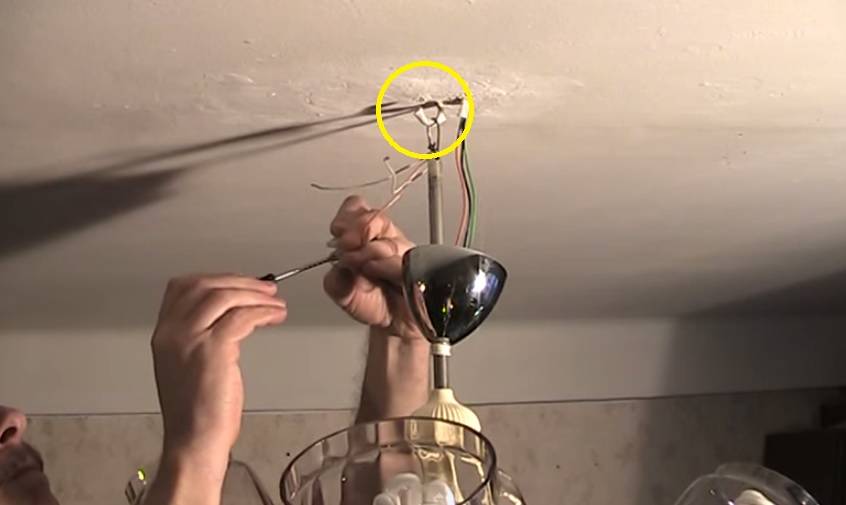
Before starting work on connecting, I recommend that you familiarize yourself with the device of the chandelier.
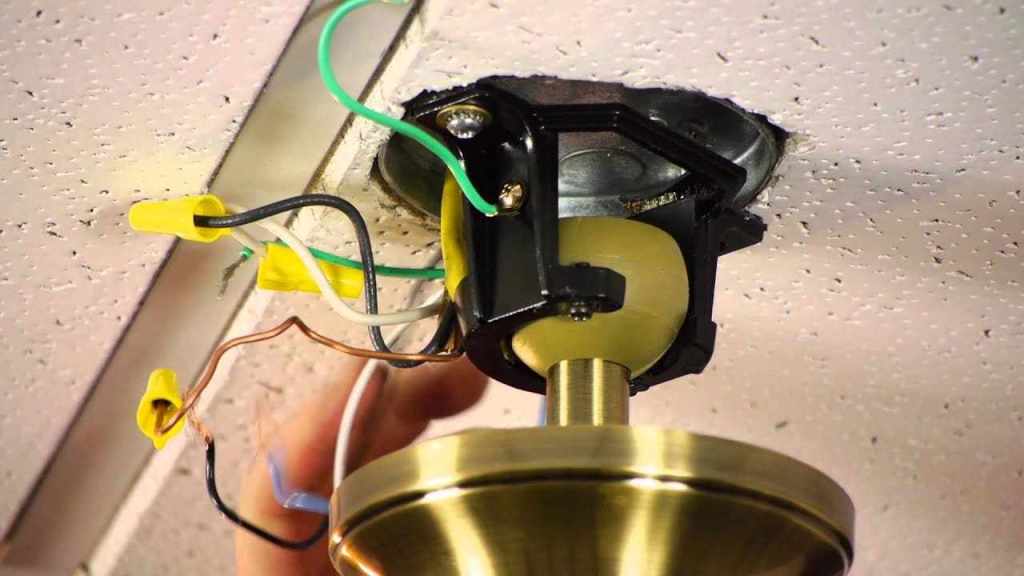
If only two wires come out of the ceiling and the chandelier, then no one has a question about how to connect the chandelier.
It is much more difficult to connect the chandelier to the electrical wiring with the ability to connect to two switches, if three wires come out of the chandelier and the ceiling to turn on each light bulb or groups of light bulbs separately. Several wires come out of the ceiling, from the chandelier too, but which one should be connected to which one? Let's try to figure it out.
Attention! Before connecting the chandelier, to avoid electric shock, it is necessary to de-energize the wiring. To do this, turn off the corresponding circuit breaker in the switchboard and check the reliability of the disconnection using the phase indicator


