- How to organize air heating
- Installation of a wood-burning stove and mining
- Placement of electric heaters
- Fireplace
- OKR
- Material parameters
- Testing
- How to make economical heating with your own hands?
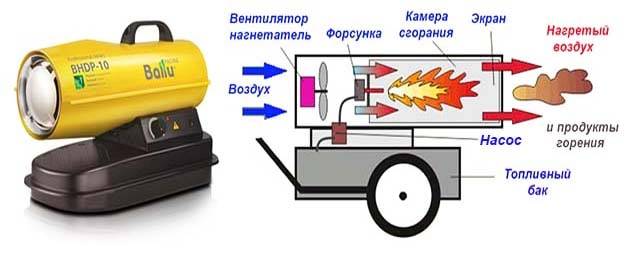
- Heating with liquid fuel
- For nothing
- How to make a homemade garage heater using a gas burner
- Garage heating with gas
- A word about fire safety
- Connecting electric heaters
- Homemade gas heater for a garage, home, cottage
- Garage water heating scheme and variations
- How to assemble an oil heater yourself?
- Wire and spiral electric heaters: scheme and principle of operation
How to organize air heating
This method of heating involves direct heating of the air in the garage room from the selected heat source. It can be any of the following units:
- solid fuel stove;
- oven - dropper at work;
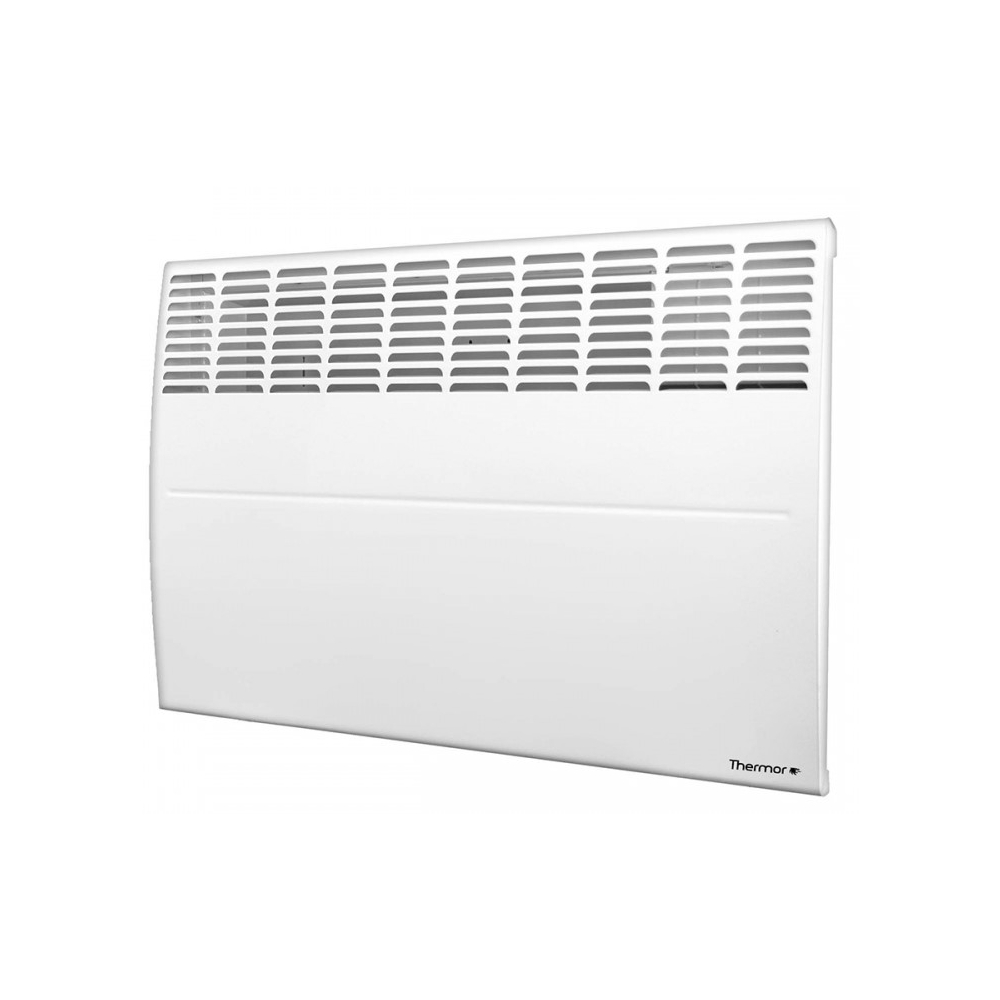
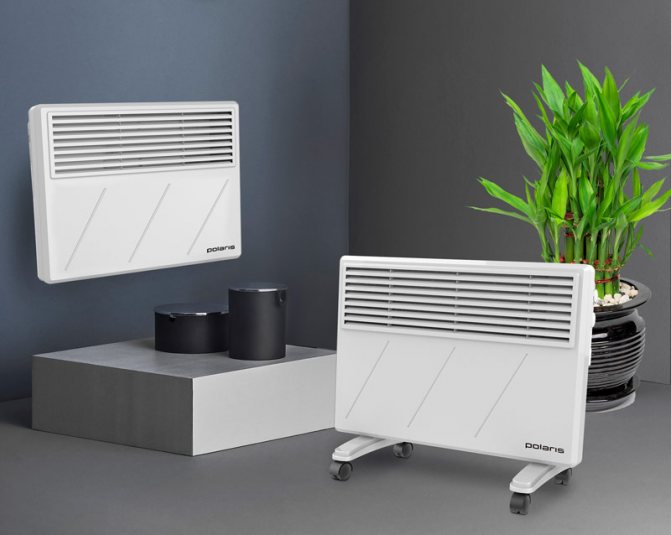
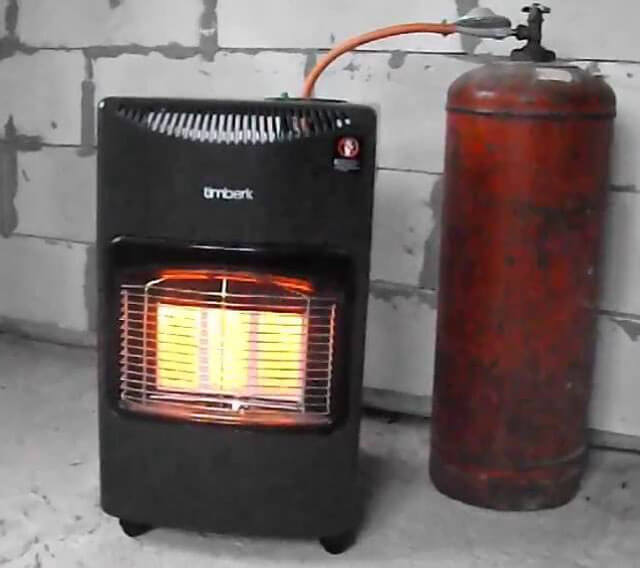
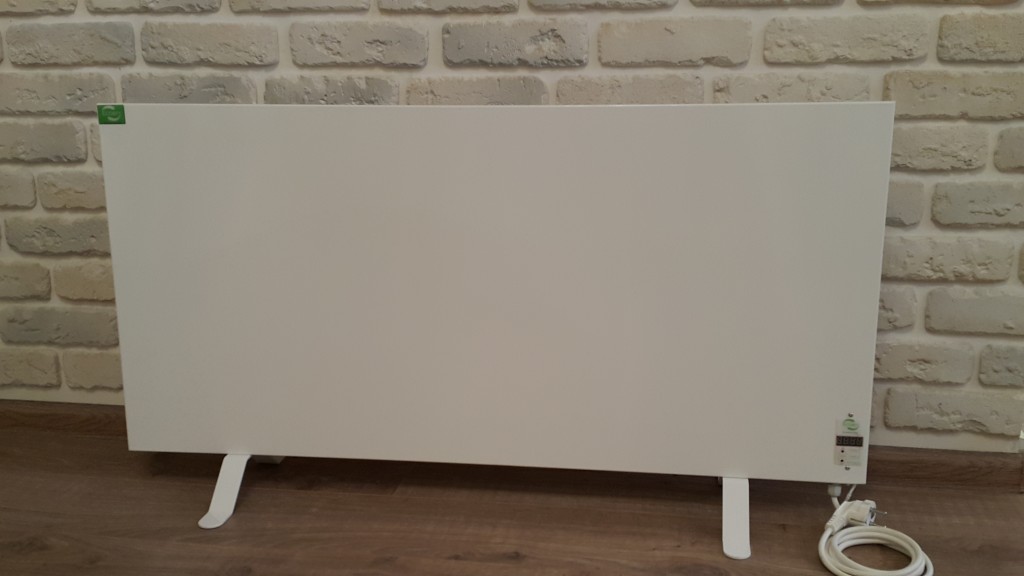
- electric heater - convector, oil cooler or heat gun;
- gas convector.
Such heaters emit products of combustion of diesel fuel directly into the room.
Installation of a wood-burning stove and mining
Direct heating of the air in the garage by burning cheap fuel - firewood and various waste - is the most economical way of heating.But it must be organized wisely, otherwise the heater will heat one corner of the room, and the opposite one will remain cold. It is clear that you cannot install the stove in the middle of the room, which means that the issue of heat distribution needs to be addressed differently.
To make effective air heating of a garage or a box with your own hands using a wood-burning stove, use our recommendations:
- Order, buy or make your own economical potbelly stove, and not just an iron box with a pipe. Examples of furnaces with drawings, diagrams and assembly instructions can be found in the relevant publication.
- The area of the heat exchange surface of the heater walls must correspond to the dimensions of the room. The calculation is as follows: in order to throw logs at intervals of 3-4 hours and evenly warm up a garage of 20 m², the heating surface area should be 1 m².
- The part of the body around the ash pan is not taken into account (it heats up slightly). On the other hand, the area of convective ribs welded to the walls from the outside is taken into account.
- Install the potbelly stove in the chosen place and be sure to organize the airflow of the case with any fan - household, for hoods or a computer cooler. Due to the forced movement of air, heat is more efficiently taken from the walls of the furnace and more evenly distributed over the box.
- Lay the chimney horizontally along the wall before letting it out into the street, so it will give off more heat into the room.
- Raise the chimney to a height of 5 m, counting from the grate, and provide it with a damper to adjust the draft. In the lower part, provide a condensate trap, adjust the cap at your discretion.
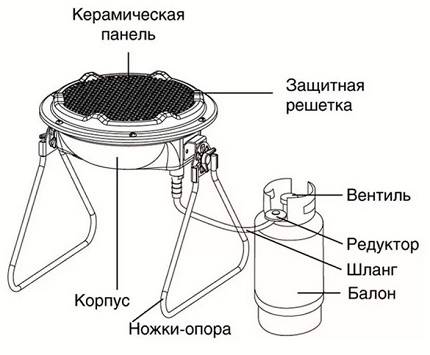
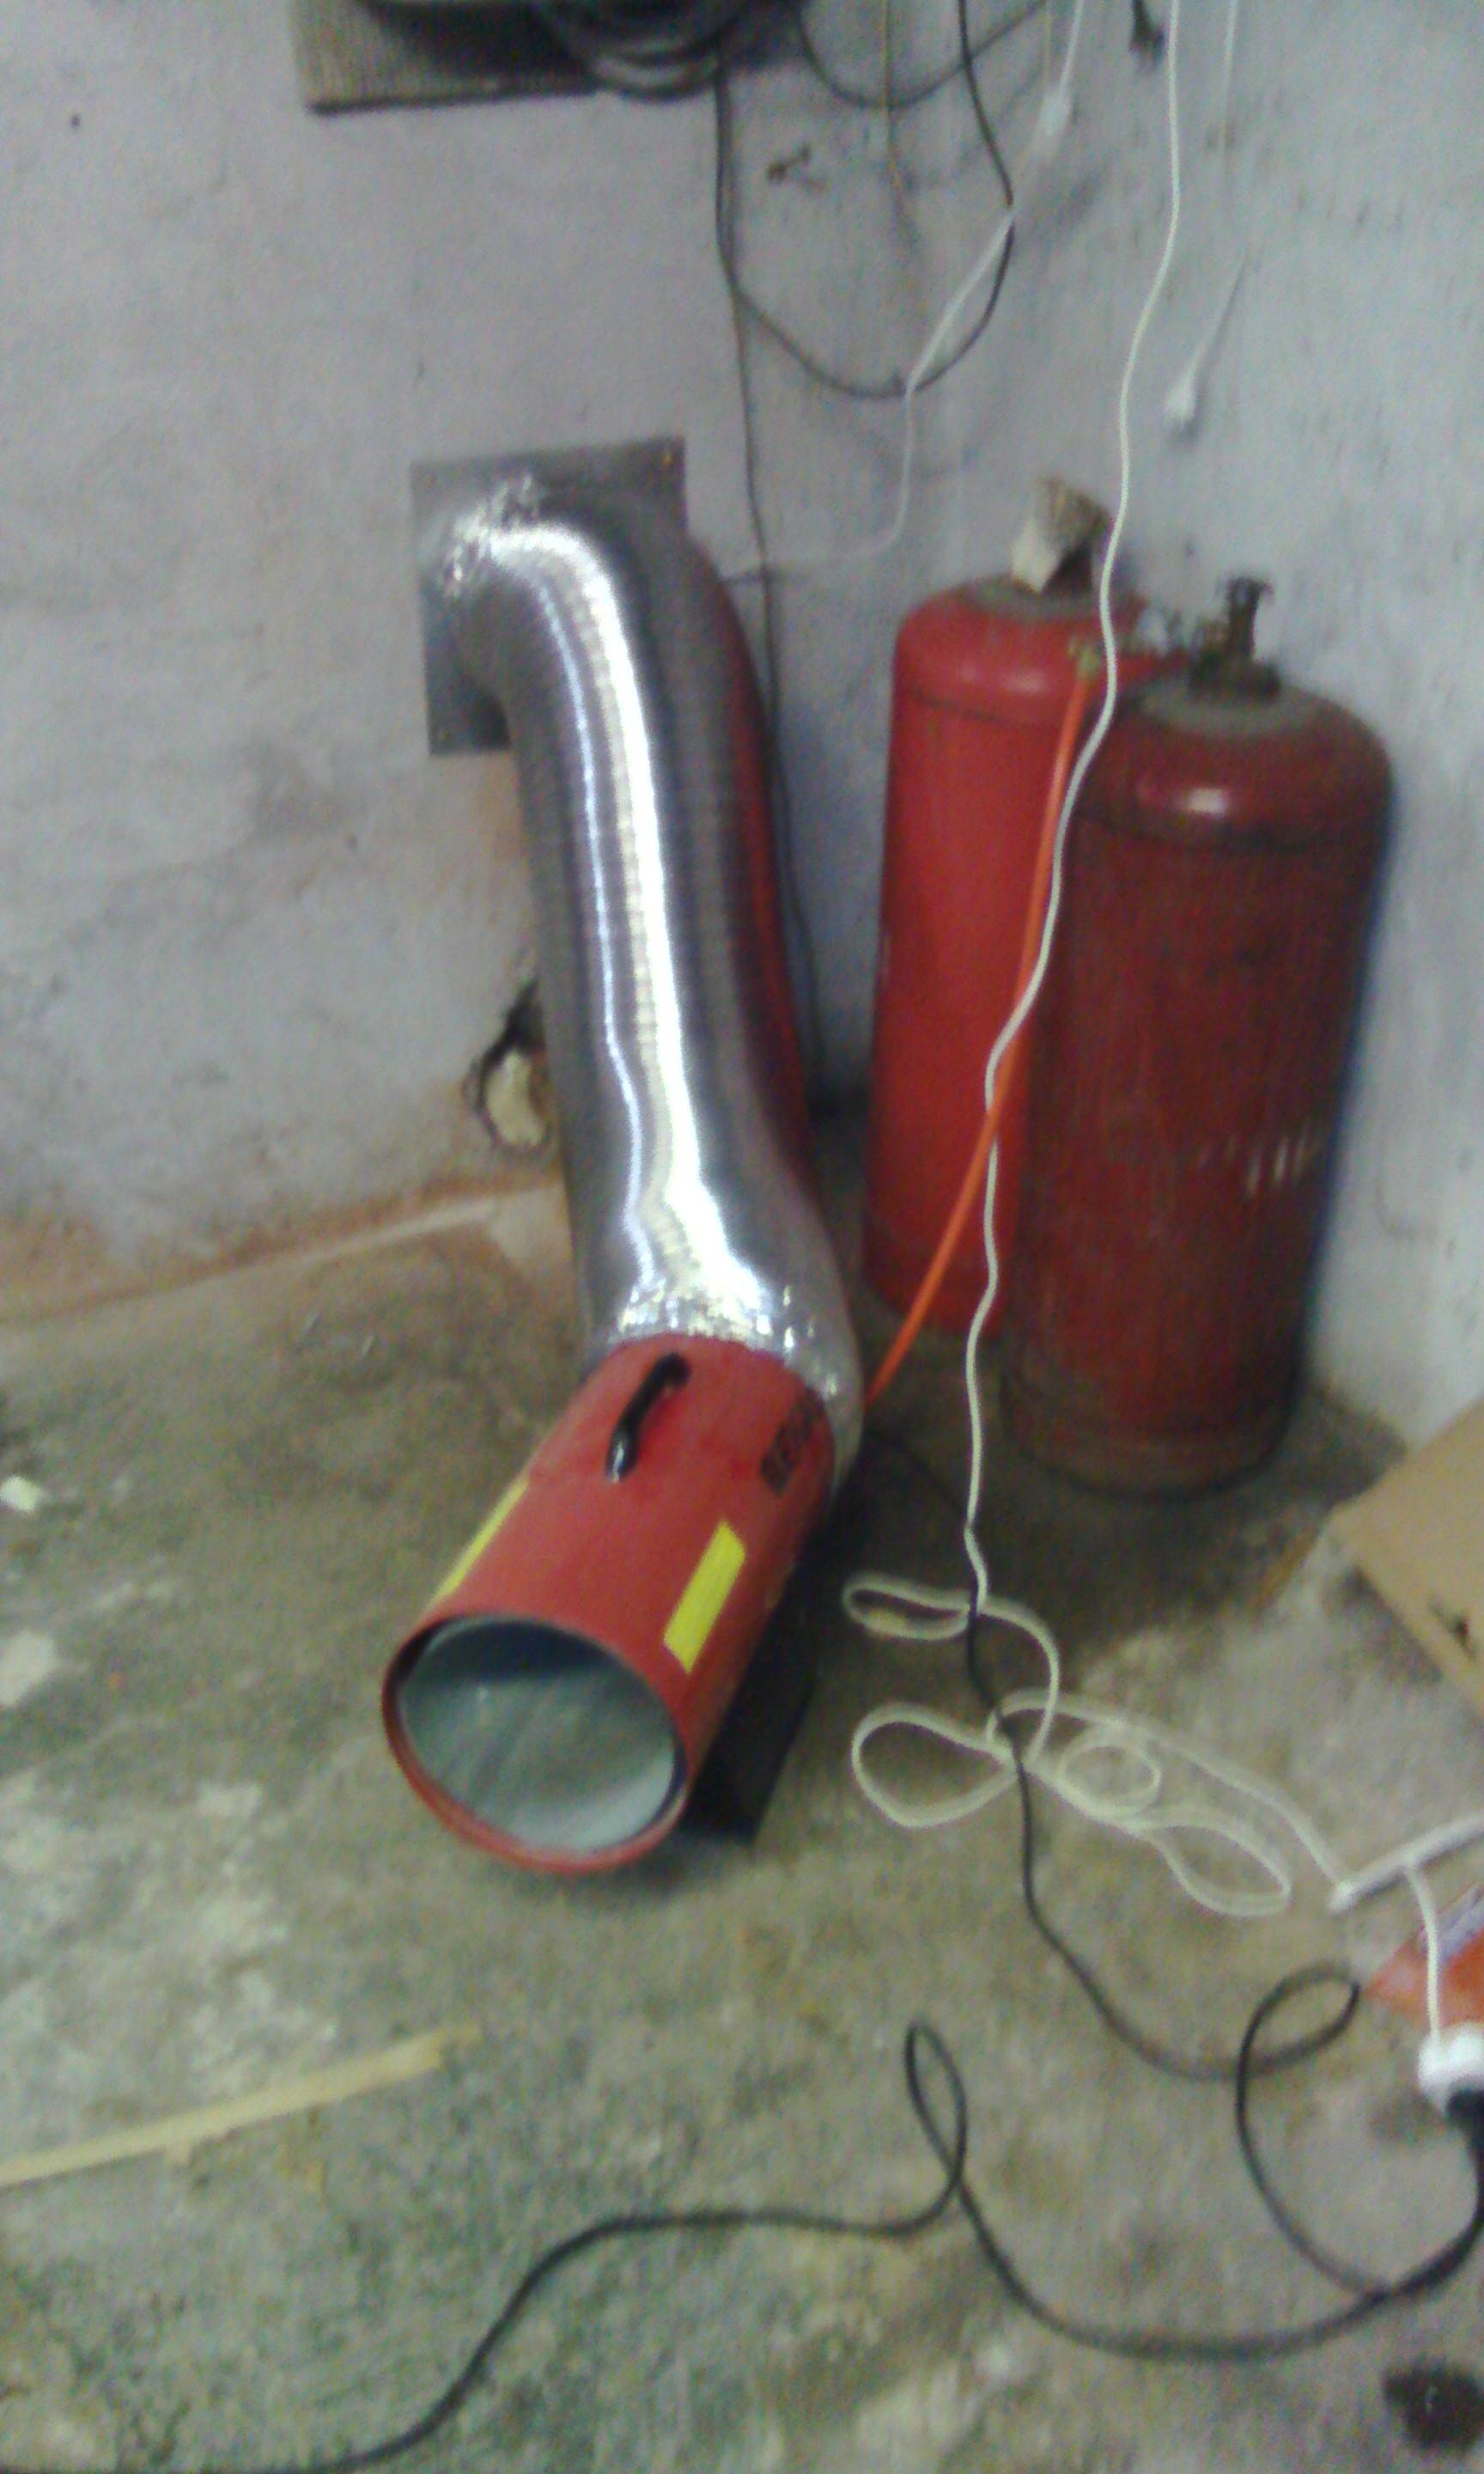
There are designs of home-made stoves designed for air heating of workshops, garages and other outbuildings. Below is a diagram of a potbelly stove made from a gas cylinder and equipped with a separate heating chamber through which air is blown by a fan. If necessary, water can also be driven through the heat exchanger.

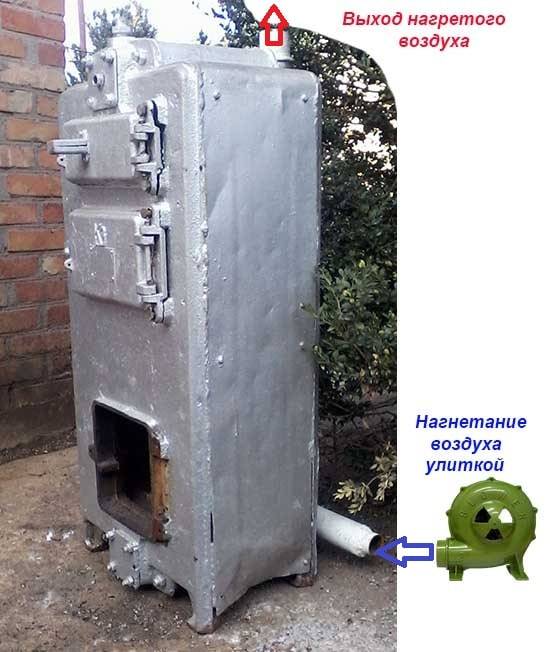
All of the above applies equally to to the bourgeoisie on the waste oil. The only difference is the placement of the fuel tank that feeds the dropper. Keep the tank away from the stove to catch fire. Do not use an ordinary two-chamber miracle heater - it is fire hazardous and consumes up to 2 liters of mining in 1 hour. Use models with a drip burner.
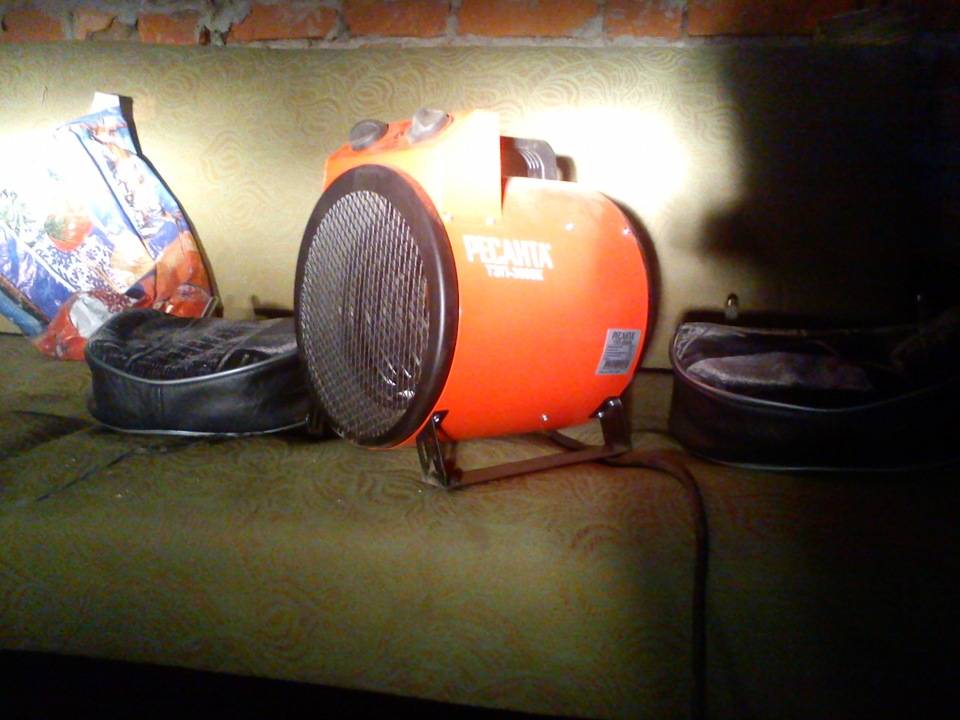
Placement of electric heaters
The first thing to do is to choose the right heating appliances for power. If you want to heat the entire garage space, then measure its area and multiply the resulting quadrature by 0.1-0.15 kW. That is, a box of 20 m² will require 20 x 0.15 = 3 kW of thermal power (and it is equal to electric power), sufficient to maintain a positive air temperature.
Now let's move on to the recommendations:
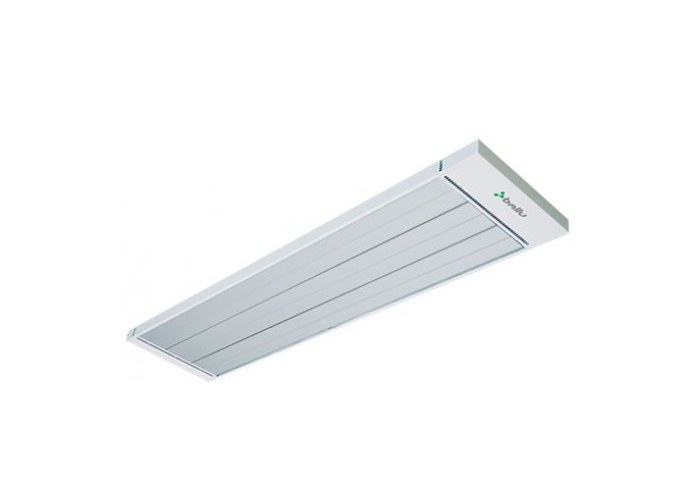
- If your work in the garage is periodic and short-term, it is better to save money and buy a portable fan heater or infrared panel. It is located in the right place and warms up only part of the room. The thermal (it is also electrical) power of the device is 50% of the calculated one.
- Try to use heaters equipped with a turbine or fan to distribute heat better and faster.
- A rational solution for convectors and other wall-mounted appliances is to put several small heaters at different points instead of one large one. Then the garage will warm up evenly, and if necessary, half of the heaters are turned off.
- Don't be fooled by sellers trying to slip a more expensive device under the guise of an innovative and high-tech product. The efficiency of all electric heaters is the same and equal to 98-99%, the difference is in the method of heat transfer.
Various heating methods can be combined. For example, it makes sense to hang an infrared panel above the workbench to provide local heating. Heat the rest of the garage with a stove or a heat gun - which is more profitable. Do not forget about the ventilation of the garage - it is necessary when burning any type of fuel.
Fireplace
Scheme of an electric fireplace with an air heating element and a double convection circuit
You can improve an ordinary electric fireplace, or make your own efficient one based on a purchased heating element, using an additional casing that creates a secondary convection circuit. From an ordinary electric fireplace, firstly, the air goes up in a rather hot, but weak jet. It quickly rises to the ceiling and heats through it more the floor of the neighbors, the attic or the roof than the master's room. Secondly, the IR going down from the heating element in the same way heats the neighbors from below, the underground or basement.
In the design shown in Fig. on the right, downward IR is reflected into the outer casing and heats the air in it. The thrust is further enhanced by the suction of hot air from the inner casing, which is less heated from the outer one in the narrowing of the latter.As a result, the air from the electric fireplace with a double convection circuit comes out in a wide, moderately heated jet, spreads to the sides, not reaching the ceiling, and effectively heats the room.
OKR
Model using IR silicate glass
Since IR-silicate glass is used, products of different brands show sharp changes in thermal conductivity and transparency. For this reason, make and test one emitter. According to the results of tests, it may be necessary to vary the diameter of the material.
Consider the following arithmetic principles for quartz settings.
Material parameters
0.5 mm: power - 350 W, current - 1.6 A.
0.6 mm - 420 W and 1.9 A.
0.7mm: 500W and 2.27A.
0.8mm: 530W and 2.4A.
0.9mm: 570W and 2.6A.
Thin wires have a solid radiating surface. When using thicker versions, exceed the IR power that glass can transmit.


Testing
The finished product is placed vertically on a non-flammable surface. Supported by a heat-resistant object. A current of 3 A is supplied to the product. A digital tester is used to monitor the current.
You need to check the behavior of the glass. If it heats up quickly in half an hour and cracks, it is not suitable.
After 1.5 hours, the radiation power is checked. Position your palms parallel to the radiating planes. The distance from them is 15-17 cm. You need to keep at least 3A min. Then 5-10 minutes will feel a mild warmth. If your palms immediately burn, you need to reduce the diameter of the wire. If even after 20 minutes there is not even a slight heat, a thicker material is needed.
How to make economical heating with your own hands?
In order for the chosen garage heating option to be economical and efficient, it is necessary to insulate the building envelope well in order to reduce the heat loss of the room. Even the most powerful boiler or electric heater will waste resources if the garage is poorly insulated. Moreover, heat-insulating materials need to be mounted on walls, floors, ceilings and gates.
To insulate the garage, you can use:
- polystyrene is the cheapest and easiest to install option for thermal insulation;
- foil insulation is used in combination with other heat insulators;
- extruded polystyrene foam;
- mineral wool;
- sprayed heaters.
To insulate the gate, it is easiest to use ordinary foam. When choosing a method for mounting polystyrene foam insulation on walls, external fixation should be preferred. When fixing the insulation from the inside of the room, the enclosing structures made of concrete and brick freeze through, which reduces the effectiveness of such thermal insulation.
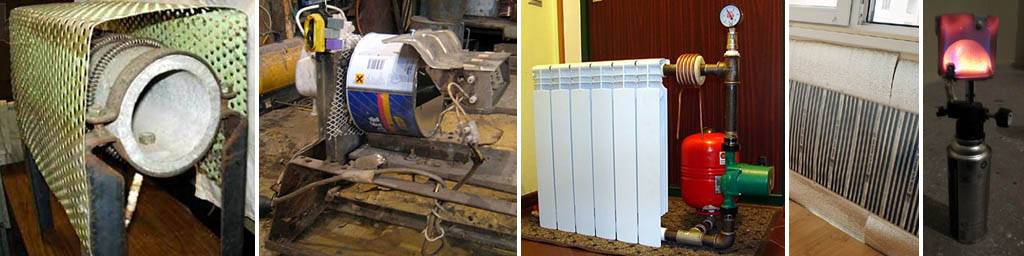
Heating with liquid fuel
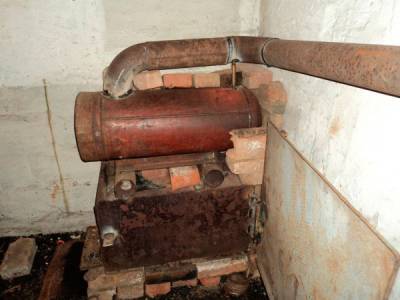
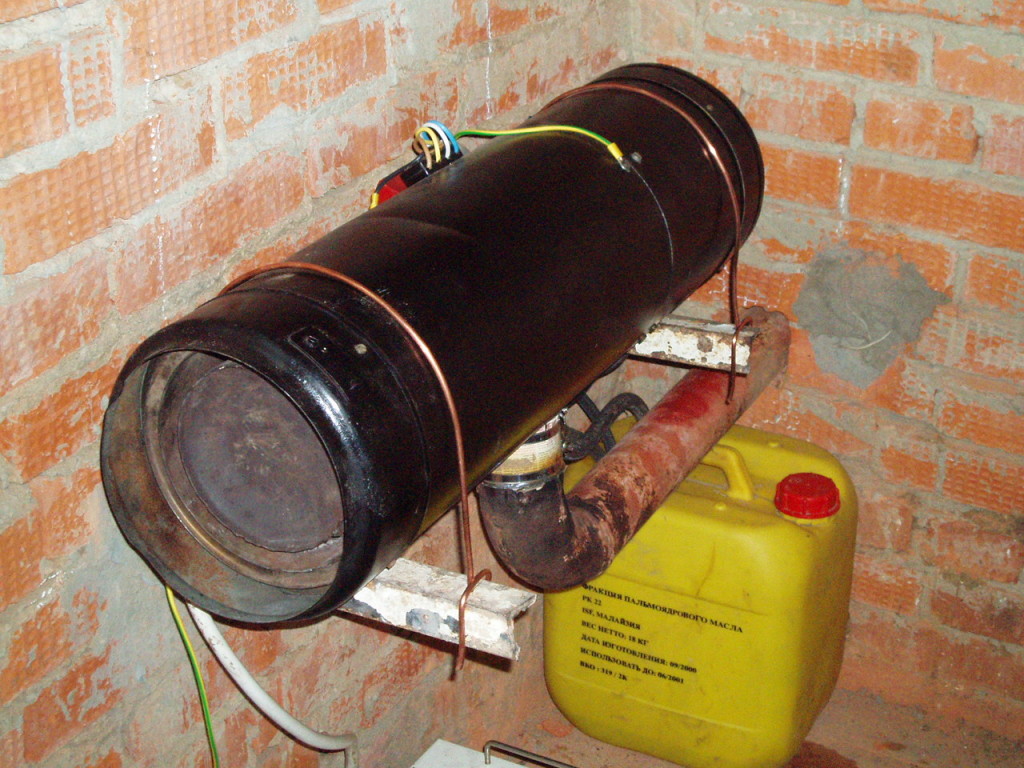
Do-it-yourself budget garage heating can be done using liquid heating units, including home-made ones. In our reviews, we have already described working furnacesproviding cheap and in some cases free heat. For example, if you are engaged in the replacement of engine oil, then during the spring and summer you can collect several barrels of finished fuel. A properly assembled oil-fired stove will generate a large amount of heat and will delight you with even burning without soot and soot.
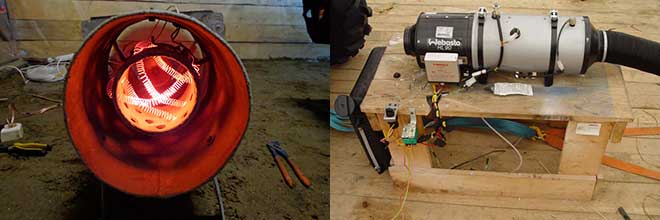
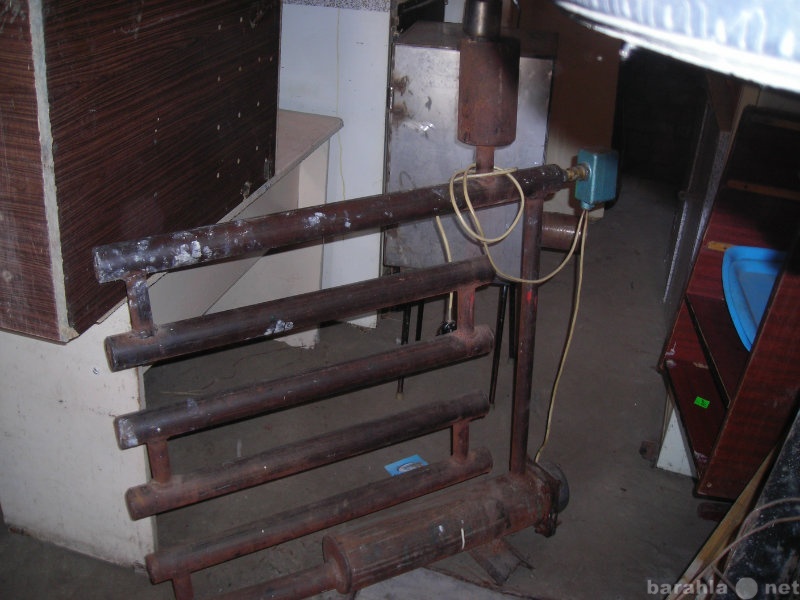
Good results are obtained by pyrolysis type ovens, consisting of several parts, as indicated in the figure.A fire is kindled in the oil container, as a result of which oil vapors and pyrolysis products begin to form. They are burned in a vertical tube with holes, generating a large amount of heat. By regulating the supply of oxygen, you can adjust the intensity of combustion.
When using any oven, it is better to allocate a separate corner for it. You also need to think about a reliable foundation and lining the adjacent walls with non-combustible materials.
Using a furnace with a plasma bowl to heat the garage, you can achieve maximum heat transfer and minimum fuel consumption. The oil here breaks down into its component parts in a hot bowl, after which it burns out with the formation of a bluish-white flame similar to plasma. Of course, there is no plasma here at all, since it is formed at much higher temperatures. These furnaces are characterized as the most productive.
For nothing
Finally - a heater option that does not require any operating costs. If you live in a concrete house, and the heat is weak, try putting sheets of foil isol behind the batteries before buying or making a heater, it reflects back more than 80% of the IR, for which reinforced concrete is translucent. Removal of the sheet beyond the contour of the heating radiator - from 10 cm. The foil surface should face the room, and the plastic one should face the wall. It is quite possible that a home-made reflector heater is enough to set a comfortable temperature in the apartment.
***
2012-2020 Question-Remont.ru
Display all materials with a tag:
Go to section:
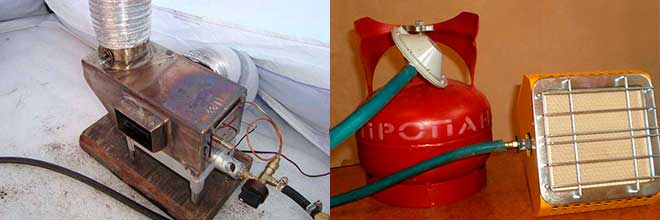
How to make a homemade garage heater using a gas burner
Such devices are usually chosen because of their compactness and economy.
There are 2 burner options, depending on the type of chamber:
- Open type - have air analyzers and fuses, due to which the possibility of gas leakage is excluded.
- Closed type - are considered more reliable, since the gas does not have access to the surrounding air.
tinkering homemade gas burner it makes sense if its final cost does not exceed a third of the price of a production analogue.
To design a gas heater you will need:
- several sheets of tin;
- Rabitz;
- sieve;
- metal scissors and rivets;
- valve burner.
As a source of gas, you can use a 0.5 liter gas canister.
A template is cut out of a galvanized sheet, which consists of two superimposed on top of a rectangle with a circle in the center. For the template, you should use a sieve - circle it with a marker, and use the resulting circle as a guide for drawing rectangles, one of which should be 2 times longer.


Fasten the parts together, screw the burner to the metal circle with bolts. Wrap the rectangles in the opposite direction, they serve to fix the sieve. Next, you need to fix the grid.
The second circle is cut out in the same way, in which at least 10 holes must be made. Attach the sheet to the rectangles of both circles so that a cylinder with mesh walls is obtained.
The device is ready to use
However, you should take precautions when working with a gas burner, do not direct the flow of heated air to objects that can ignite quickly, and do not use the unit to dry things.
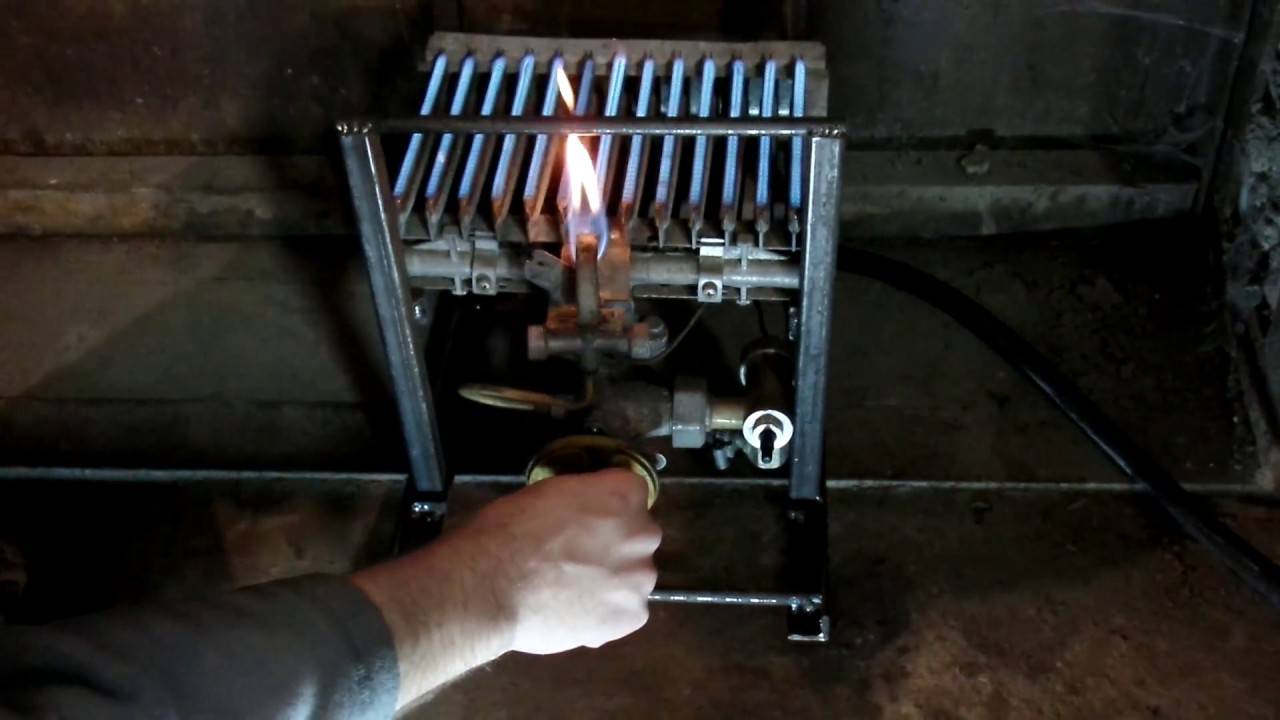
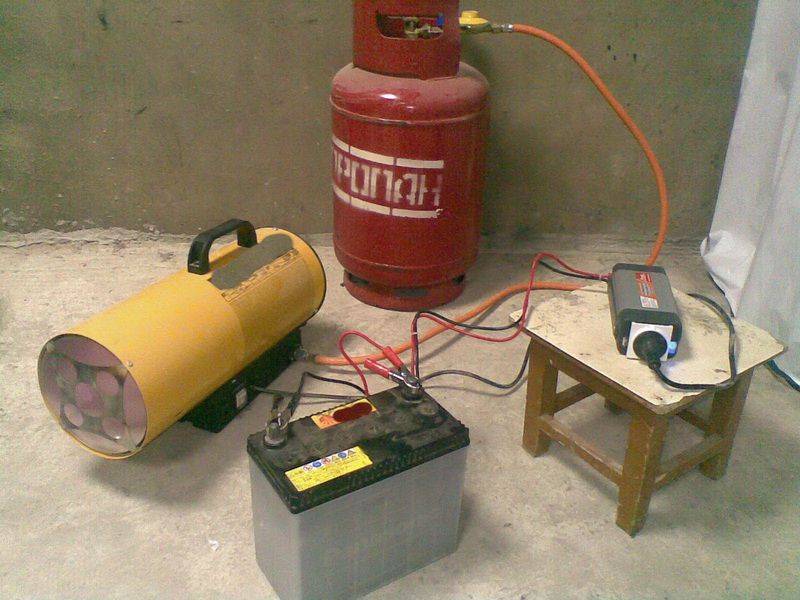
Garage heating with gas
It will be very practical and very economical to use gas for heating a garage room. Together with them, special heat generators work. In this case, methane, butane or propane, classic natural gas, can be used.
To independently assemble the gas heating of the garage with your own hands, you should take into account several significant features of the work:
- The gas cylinder must be installed in a special, securely insulated cabinet.
- Even if the room is small, you will have to try and take a protected corner to install the required equipment.
- If the garage will be heated infrequently, other options should be considered.
One of the advantages of gas heating is the availability of equipment on the market and the cost of the coolant, which is one of the cheapest types of fuel.
A word about fire safety
Equipping garage heating with your own hands, you will definitely have to take into account a very important requirement - to follow all safety rules. Any equipment is a fire hazard and can cause serious consequences.
The most important requirement is the reliable protection of all nearby surfaces. This is especially important when passing through a wall or roof of a chimney.
To eliminate its contact with building structures, it is recommended to make a special sleeve based on mineral wool. Wooden or plasterboard areas will have to be protected with a metal shield. All gaps are compensated with an asbestos cord.
Other tips to consider:
- If heating boilers are used, it is necessary to close the draft control damper only in cases where the fuel has completely burned out and smoldered.
- Do not keep flammable substances in the garage, especially if they are located near heating equipment
- Be sure to place a fire extinguisher or other means of extinguishing fires in the room
- If the heating system is constantly running or the garage is located in the immediate vicinity of the house, it is recommended to equip a fire alarm
- Do not dry any things on heaters, especially various rags that could come into contact with flammable liquids.
- Storage of gas cylinders is allowed only above the level of the floor surface
- It is not recommended to leave the heating on at night.
Connecting electric heaters
It is most carefully and competently necessary to think over heating with electric heaters. If their power is too high, the wiring and the meter are not able to cope with the load - you will have to opt for weaker equipment. You can lay new wiring, but such a conversion of the garage will be too expensive.
Consider some of the features of connecting electric heaters in a garage room:
- The minimum recommended wire size is 2.0 mm, with copper preferred
- It is undesirable to use a portable cable to connect electric heaters. If necessary, its length should not exceed 5 m
- Single-phase electrical wiring is able to withstand the connection of an electric heater with a power of up to 2.5 kW.Parallel connection of 2 or more devices will cause a voltage drop to 170 V, which can be very dangerous
Summing up
The arrangement of a heating system for a medium-sized garage room intended for one car starts from a modest 5-6 thousand rubles and can reach a couple of dozen. Each of its owners must evaluate the considered options based on the needs and wishes.


To reduce the cost of operating the equipment, part of the money should be spent on insulating the walls and ceiling in the room. Work should be carried out outside, otherwise the heat-insulating material may cause a fire.
It is necessary to take care of the absence of holes and cracks through which precious heat will flow. Roof insulation is best done with expanded clay, while taking care of reliable waterproofing. For walls, foam plastic up to 10 mm thick or mineral non-combustible wool is used.
Homemade gas heater for a garage, home, cottage
When creating a heater with your own hands, you need to follow a few recommendations:
The device should have a simple design without complex elements and parts.
It is necessary to focus special attention on safety, because the devices that block and supply gas are best purchased from the factory, or removed from old cylinders.
When creating a gas heater, its efficiency should also be taken into account.
The heater should not be bulky, and the methods of its activation should not be complicated.
The cost of materials for the heater should be no more than a third of the real price of the factory heater from the store counter, otherwise there is no point in making it, it’s easier to buy ready-made.
To make such a home-made gas heater for a garage, home, cottage with your own hands, you need a minimum of parts and material costs (tin sheet, metal scissors, riveter, rivets, metal fine mesh chisel, an ordinary household sieve, a tsarg canister with gas with a capacity of 0.5 l and a special burner with a valve).
On this topic:
BACK
FORWARD
1 of 28
The first thing to do is fasten the heater to the burner. You need to take a household sieve, lean it against a galvanized sheet and circle it with a marker. Then, perpendicular and parallel to the circle, draw rectangular ears (one of them should be twice as long). Cut out the pattern with metal scissors. It should be as even as possible.
The second stage of the installation of the heater includes fastening the parts together. To do this, take the burner and fasten it with bolts to the tin circle. Then, with the help of ears that are wrapped in the opposite direction, a strainer is attached. It helps to dissipate heat to the sides. It turned out part of the design of the heater.
The third stage of mounting a homemade heater will be the fastening of a metal mesh. To do this, you need to cut out an identical circle from the tin again. It is also cut with scissors for metal. The ears are bent, and holes are drilled in the plane of the circle (about 10). Then the mesh is taken and attached to the ears of both circles. Attach the bottom first, then the top. Fastening is carried out using a riveter and rivets. As a result of these operations, a mesh cylinder should be obtained.
The final stage is the launch of an infrared home-made gas heater.Although it is not large, it gives off enough heat to heat a garage, a room in a house or a small country house.
On this topic:
BACK
FORWARD
1 of 15
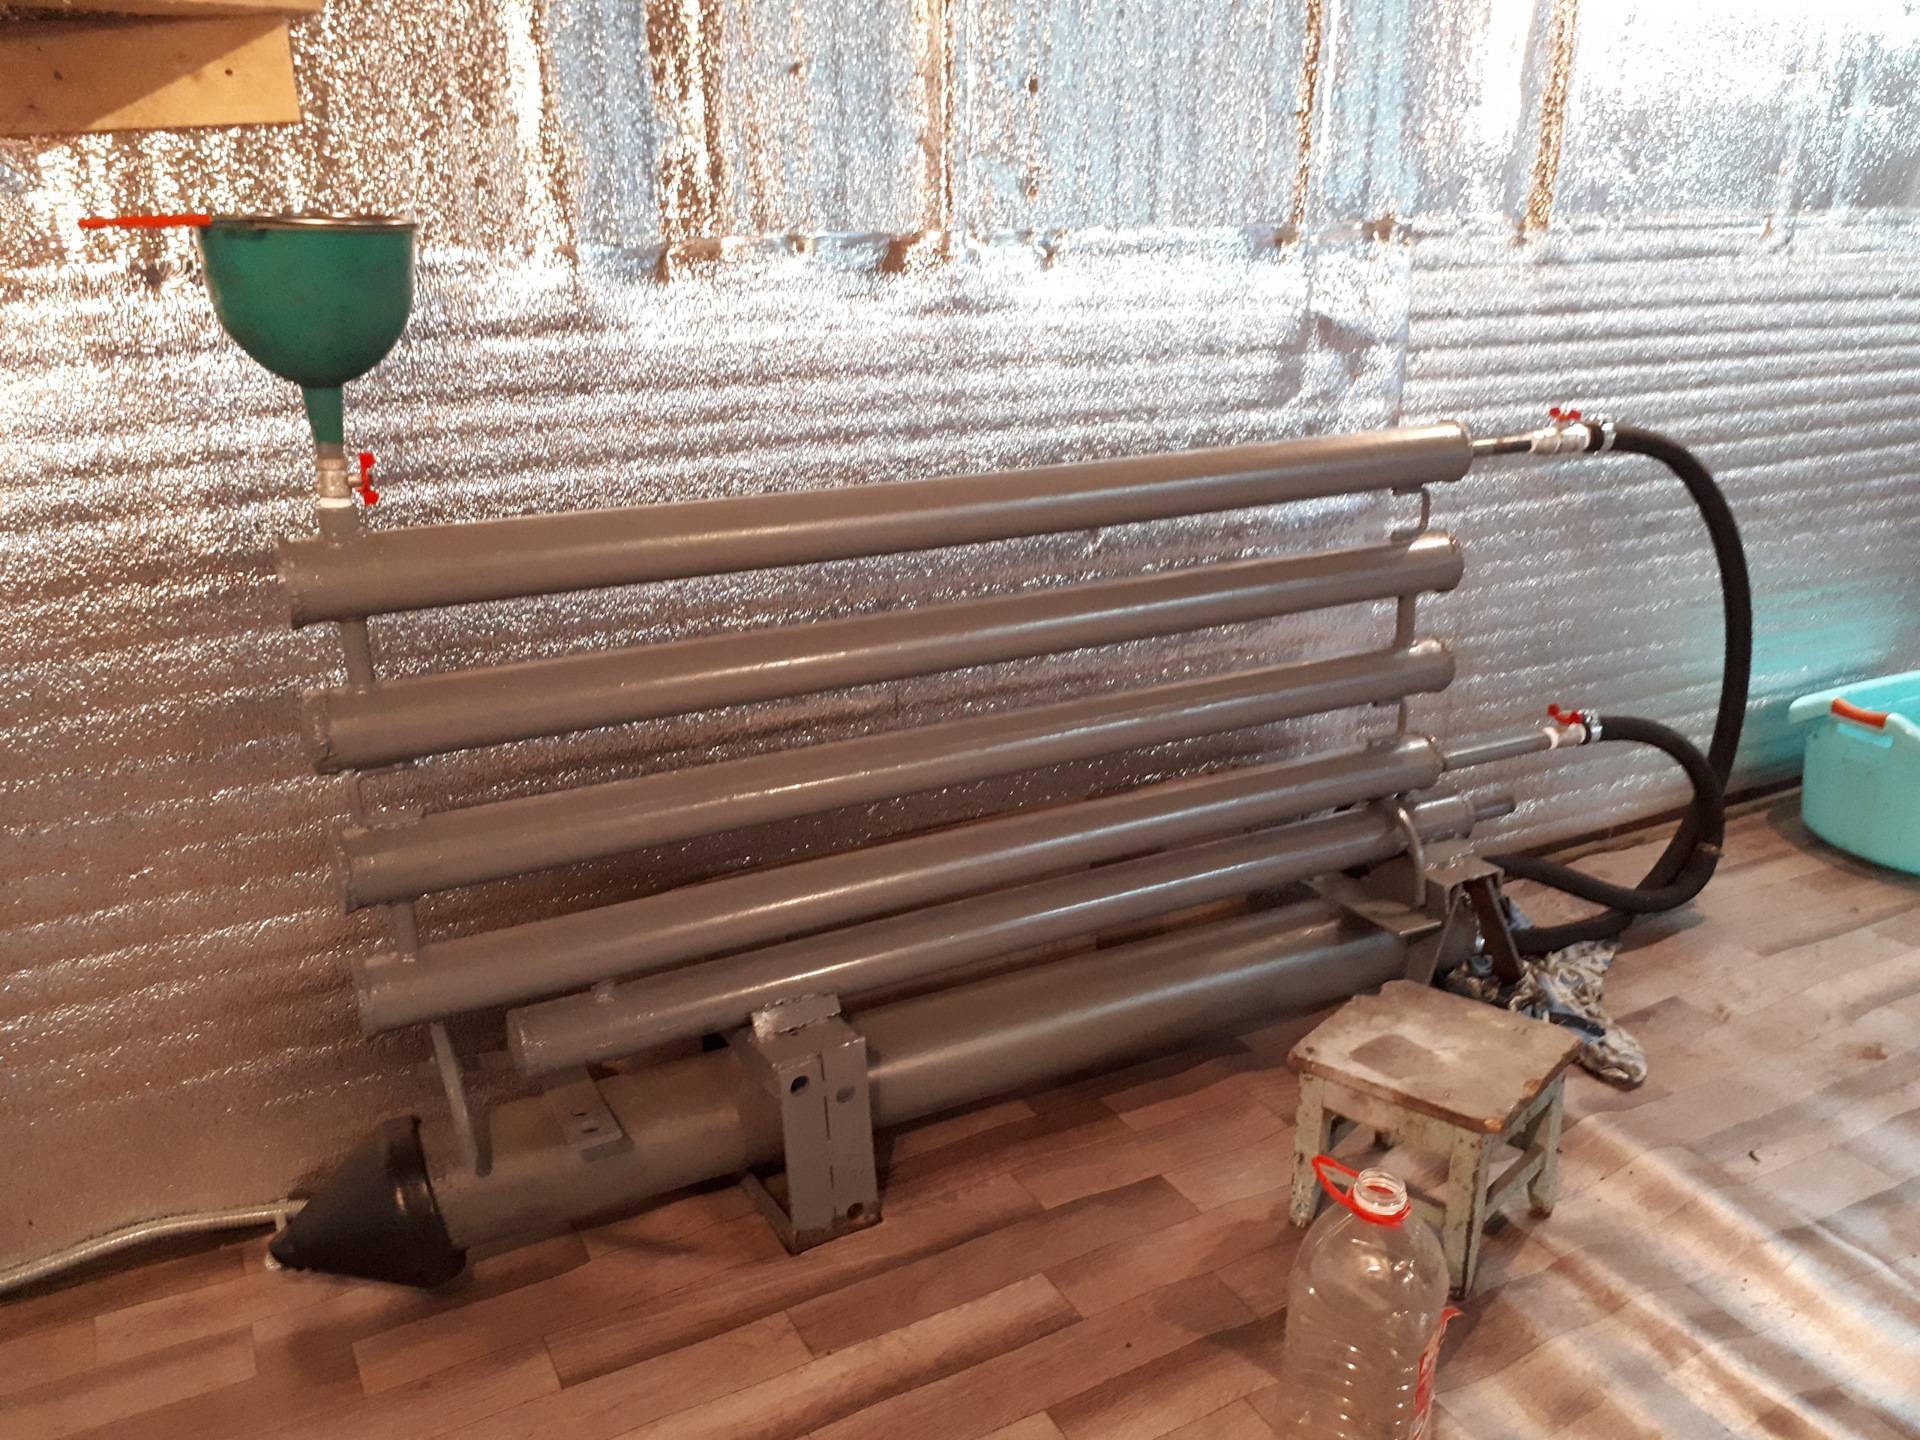
Garage water heating scheme and variations
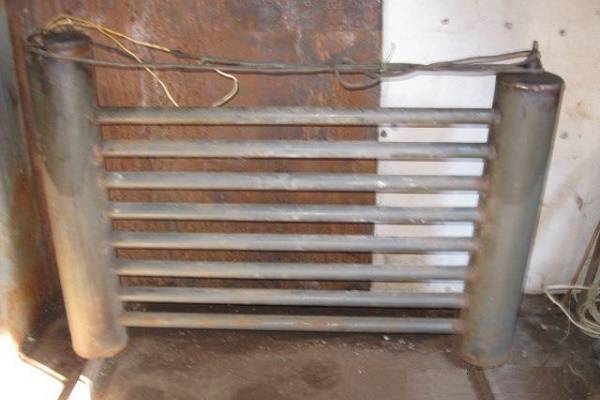
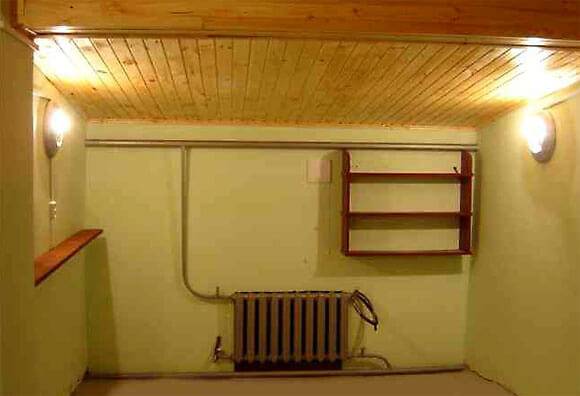
The garage water heating scheme consists of a boiler, metal radiators of a high degree of thermal conductivity and connecting pipes-risers (for more details: “Riser heating system - a device with examples”). The water heated in the boiler is supplied through the riser to the batteries, gradually warming them up. Heated batteries warm up the air in the garage. Further, the cooled water returns to the boiler for subsequent heating and further movement to the radiators in a closed system. A visual representation of the scheme of the water heating system of the garage is shown in the figures and photos (about the "Scheme of water heating of a private house - possible types of calculation").
The already existing central heating line, carried out in the house, will be the most convenient option for, as already mentioned, the garage adjacent to the main building (read: "Central heating is both pros and cons"). Also, this option is suitable for technical rooms located near the house, while the distance to the house from them should not exceed 40 meters.


As for an autonomous boiler house, its construction will be economically justified only if the garage building is located at a considerable distance from the central heating main. If the garage is located in a group consisting of several garages, the so-called garage cooperative, then an even more successful option would be the integrated equipment of an autonomous heating system for all premises.
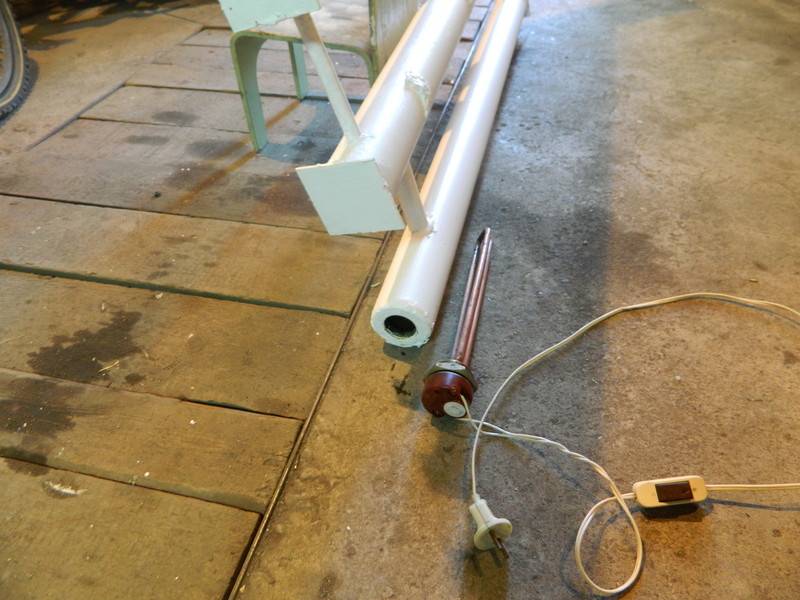
How to assemble an oil heater yourself?
Why do many decide to create an oil cooler with their own hands in the garage? They have gained their popularity due to their impeccable functionality, efficiency and excellent performance. They are completely safe, compact, easy to use, have a fairly high efficiency. The device of such devices is very simple: a sealed case, inside which there is oil, tubular electric heaters wrapped around it.
To build such a device, you need the following tools and materials:
- Absolutely sealed container - it can be a car radiator, aluminum or metal battery.
- Four heating elements.
- Technical or transformer oil.
- Low power pump or electric motor.
- Drill, drill set, welding machine, switches, electrodes.
An oil heater is made according to the following scenario:
Frame installation
It is important to make it easy to use and transportable. You also need to consider how it is stored in the summer.
With the help of a welding machine, the corners are connected to each other.
Hole for the installation of heating elements. You can make them by welding or grinder.
Motor or pump mount. You can install a pump or motor on the heater body itself or his frame. The main thing is to make sure that it does not come into contact with the heating elements.
Installation of heating elements. They are installed on an already prepared place using bolted connections.
Tightness. All holes must be welded to achieve tightness.For ease of use of the device and unforeseen oil drain, it is better to mount a cover that can be screwed to the body.
Connection of heating elements. This should be done in parallel for more efficient operation. It is convenient to select the temperature using the regulator.
The heater is almost ready, it remains only to assemble everything directly on the frame and ground it.
A reliable source of heat (heater) is needed to relax in the country in winter. It can be purchased in specialized stores. But there are summer residents who can easily design home-made home heaters, cottages and garages.
Not all summer residents and homeowners come to this decision, but only those who have special skills and abilities. Among them there are real self-taught engineers. They are able to calculate everything to the smallest detail, carefully process every detail, having mounted an original safe heater.
The cost of material for a home-made device for heating a room is minimal, since it can be found on the farm. Even if you buy material for money, then it will cost much cheaper than a device from a store, and the effect of the work is the same. Why then spend money on the purchase of finished equipment when you can mount it yourself. How to make a heater for the house with your own hands?
Wire and spiral electric heaters: scheme and principle of operation
It is even easier to assemble a heater made of nichrome wire with your own hands. For work you will need materials:
- fiberglass 50 * 50 cm;
- 24 meters of nichrome wire Ø 0.3 mm;
- epoxy glue 150 g.
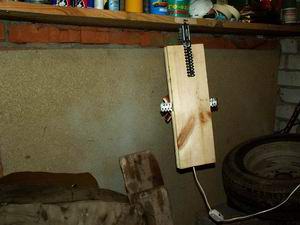
The manufacturing principle is as follows: the surface of a square fiberglass panel is evenly covered with nichrome wire, the ends of which are led to current-carrying elements. Then the entire area is filled with epoxy glue and covered with a second textolite panel. After the glue hardens, the finished “sandwich” is connected to a power source and can be used to heat the garage.
Step by step assembly. For fiberglass panels, the inner and outer faces are determined, the inner ones are sanded with sandpaper, cleaned.
On the bottom sheet, on the inside, the wire location is marked: it is not necessary to make an exact calculation of the length of the spiral on each turn, but it must be borne in mind that all 24 meters should fit on a square panel 50 * 50 cm. The wire should not reach the edges of the panel 2-3 cm along the entire perimeter, the distance between the turns is 8–15 mm.
Holes are drilled on the sides, into which nails or matches are inserted. A wire is wound around them, every five turns it is fixed with paper strips with glue. After winding and fixing the wire, the matches (nails) are removed.
Holes are drilled in the panel for the output of wires and metal rivets are inserted into them, around which the ends of the wire are wrapped.
Epoxy glue is evenly applied along the turns and covered with a second fiberglass panel.
You can check the performance of the device immediately, and then leave it for a day under load to dry completely.
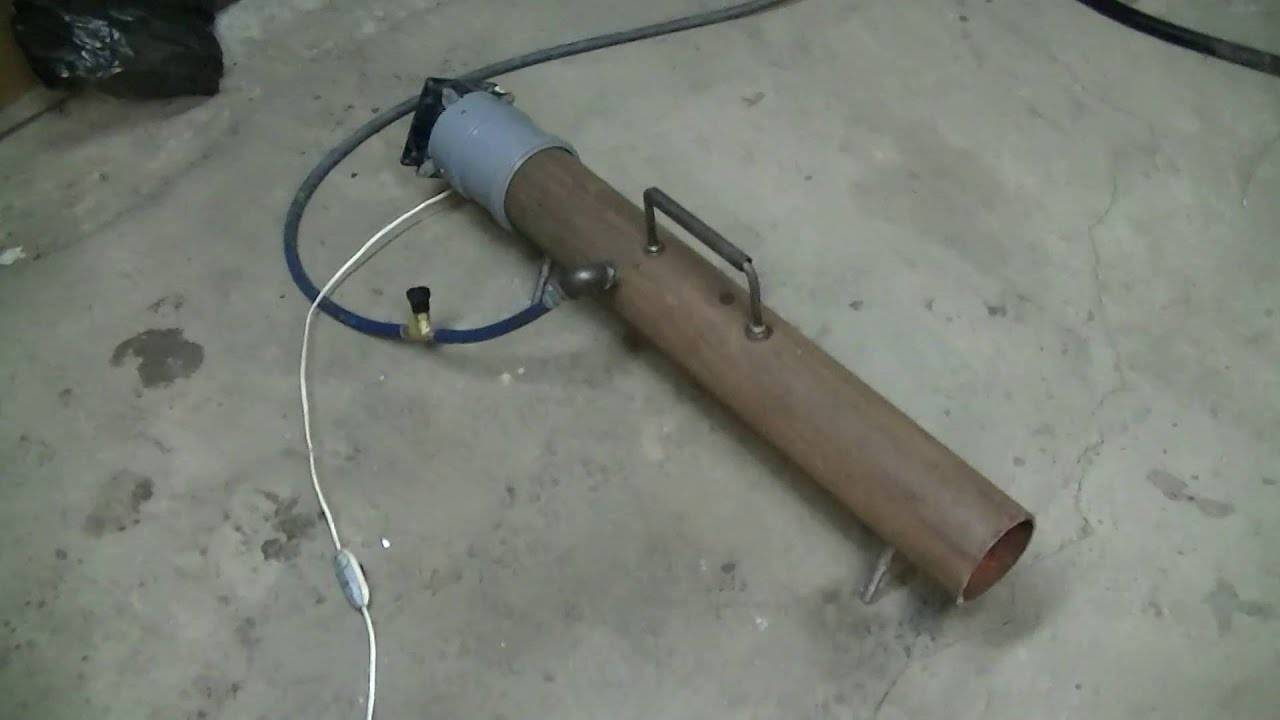
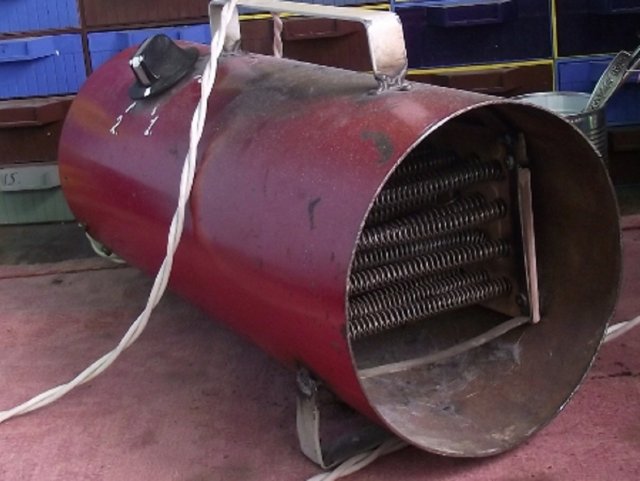
Spiral heating. You can make a garage heater using an asbestos pipe and an old nichrome coil from a broken heater.Equipped with a fan, a spiral heater made of asbestos pipe received the popular name "wind blower". For manufacturing you will need:
asbestos pipe cylinder;
spiral for a heater, divided into 6 equal pieces
It is important not to cut the element, as it burns out at the joints;
fan;
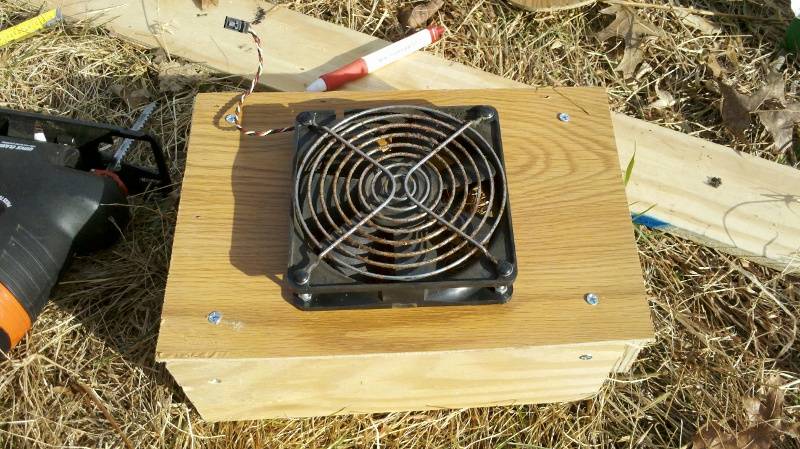
a box made of non-conductive material;
a switch selected for power so that the coil for the heater does not melt .. A nichrome coil is placed inside the asbestos pipe, divided into 6 equal pieces
It is necessary to calculate the spiral in equal segments, arrange it along and across, fix it on the pipe. The entrance and exit from the pipe is protected by a protective metal mesh. Disadvantages of this type of device:
A nichrome spiral is placed inside the asbestos pipe, divided into 6 equal pieces. It is necessary to calculate the spiral in equal segments, arrange it along and across, fix it on the pipe. The entrance and exit from the pipe is protected by a protective metal mesh. Disadvantages of this type of device:


- asbestos dust is harmful to inhale;
- the spiral inside is open, dust burns on it and a smell appears;
- the fan is noisy.
The advantage is that it heats up a large area in a short period of time, as it actively blows out heat. The power of such a device is 1.6 kW.
Do-it-yourself heating element can be made by every motorist. Subject to safety precautions, the device will be of help in the garage during the cold season. You can always make a garage heater with your own hands, this will save your budget.
Rarely, when building a garage, does it provide for the possibility of heating. Therefore, during operation, the premises have to be heated independently.Agree, buying heating appliances for occasional use is sometimes costly and impractical.
Some craftsmen make the unit with their own hands, using inexpensive materials. We invite you to familiarize yourself with the three most popular solutions for organizing individual heating.
Before you make a homemade heater for the garage, you need to understand the principle of operation of each unit, its structure and study the assembly procedure.