- Varieties of hydraulic pumps
- Piston hand pump
- Rod hand pump
- Gate (rotary-lamellar)
- Membrane
- Alteration of the Chinese pump
- 2 How to choose a hand pump?
- 2.1 What are the steps for manufacturing and connecting a hand pump?
- DIY hand pump
- Draining through the handle
- Side drain assembly
- Spiral hydraulic piston
- The device of a homemade piston pump for wells
- The case is being made
- Cap making
- Piston manufacturing
- suction pipe
- check valves
- Pump Assembly
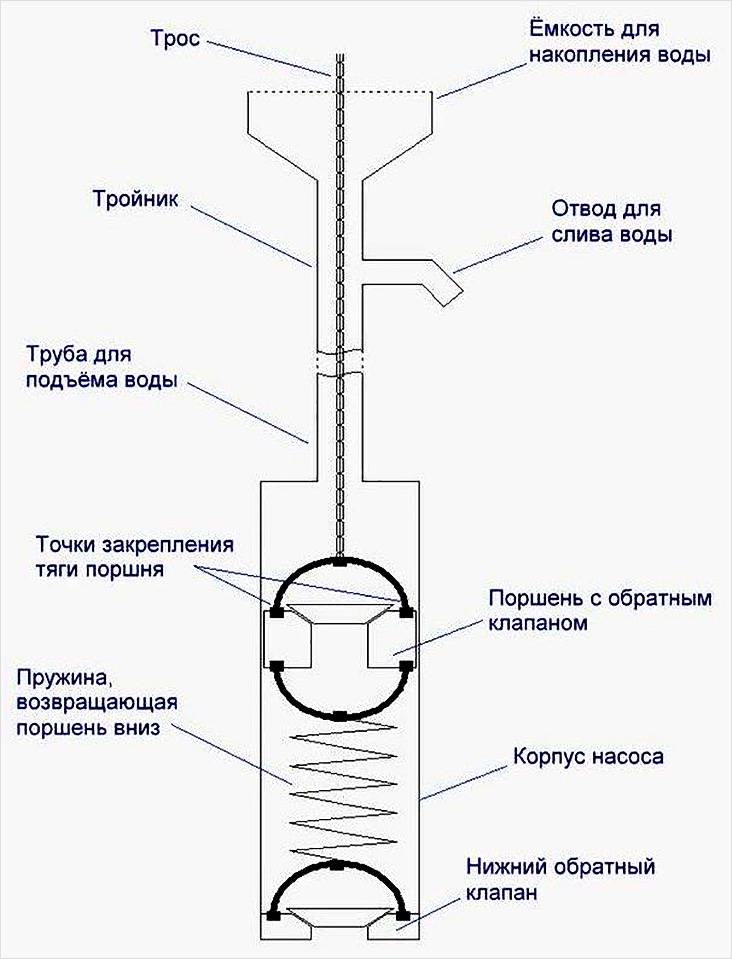
- Homemade hand pump for water. Scheme and principle of operation.
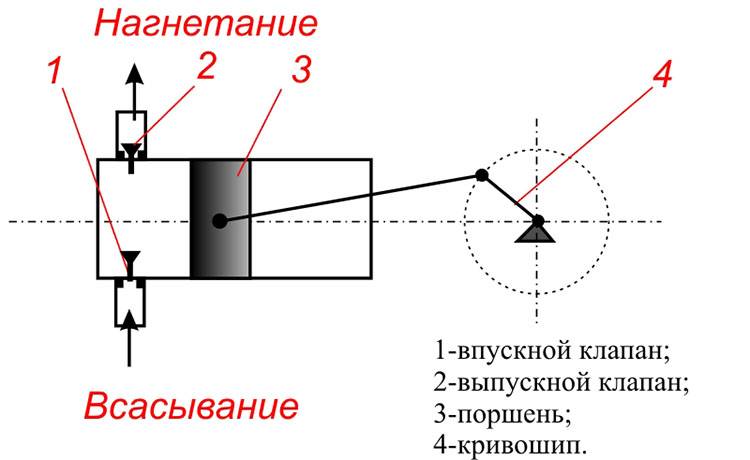
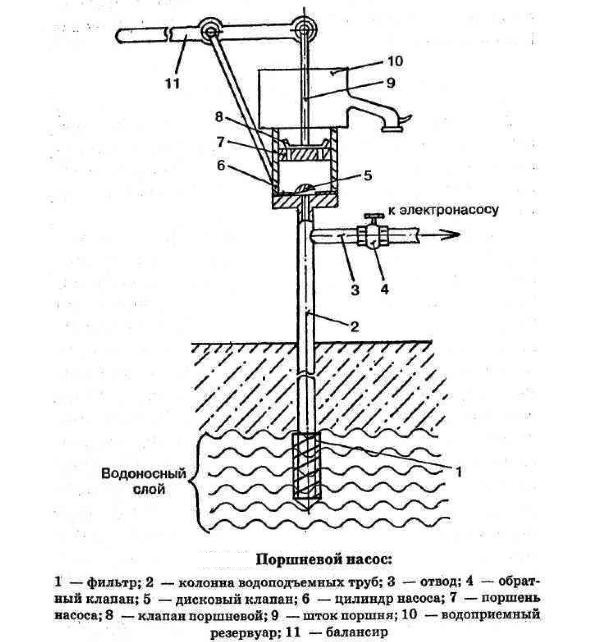
- Manual water pump diagram:
- Working principle of manual piston pump for water
- How to make your own pump?
- Step 1: Building the Case
- Step 2: Building the lids
- Step 3: Additional parts on the body
- Step 4: Piston Assembly
- Step 5: Installing the valves
- Step 6: Fitting the inlet pipe
- Step 7: Mounting the Handle, Stem and Bracket
- What are hand pumps for?
Varieties of hydraulic pumps
Manufacturers offer several types of devices for sampling water from aquifers:
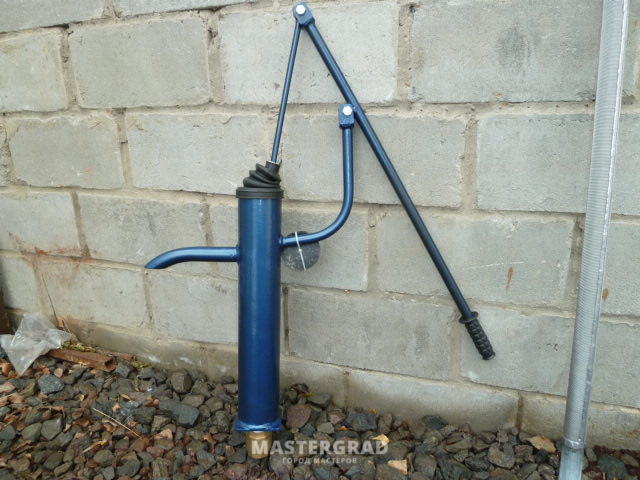
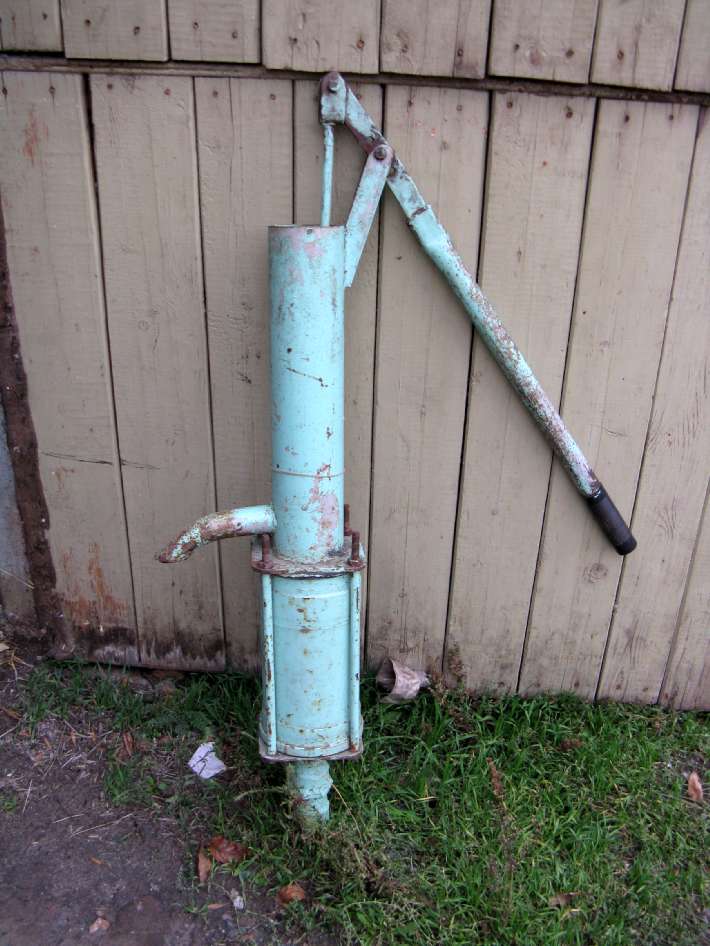
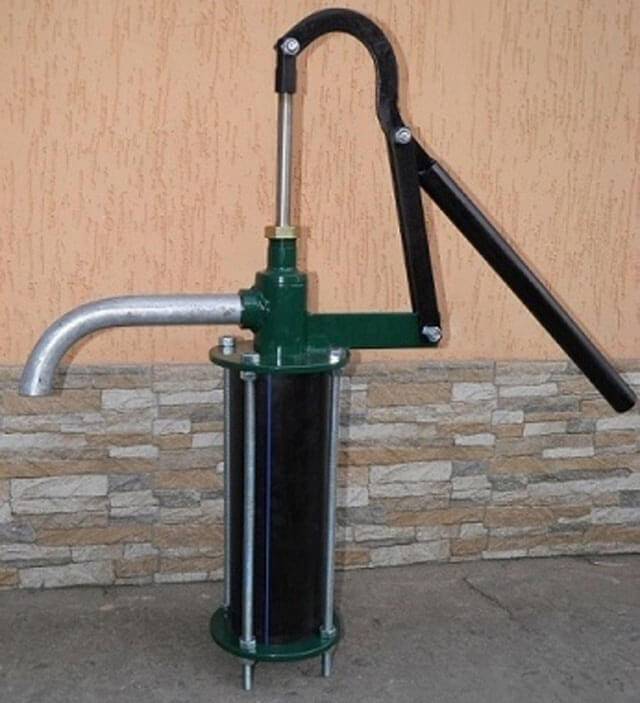
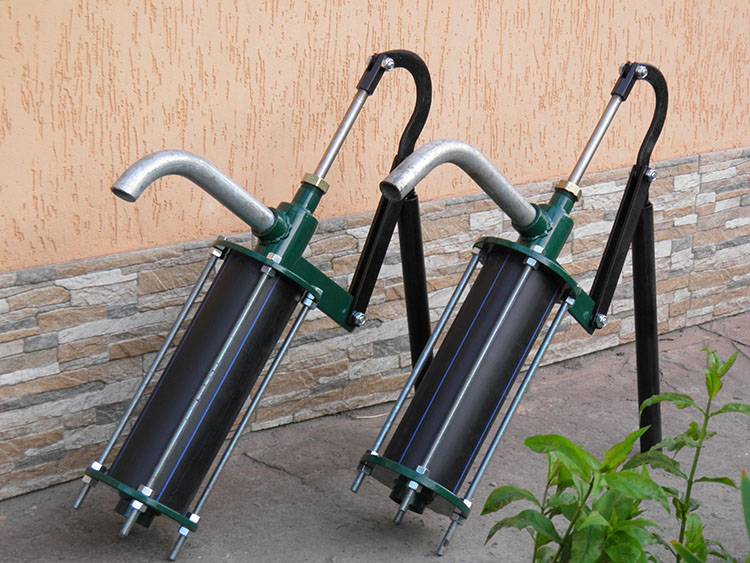
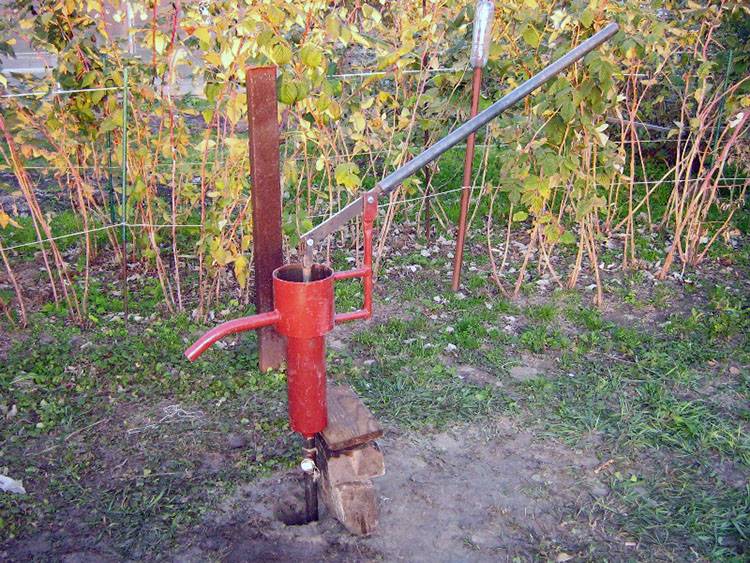
Piston hand pump
Traditionally, this device is found on the sites. It effectively copes with the task of extracting liquid from shallow depths up to 7-8 m. It is based on a working piston moving along the cylinder.
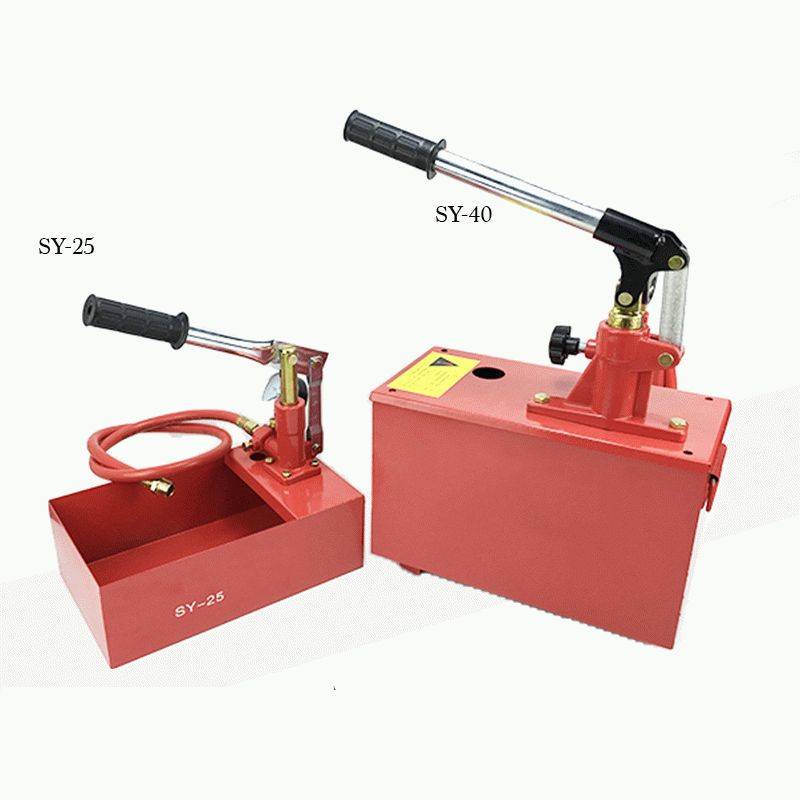
Its installation is carried out 1 m above ground level.Due to the mechanical control of the lever, the hand pump drives the piston. When moving in one direction, fluid is taken into the cavity, when moving back, a portion of water is sent up. Thus, the pumping occurs.
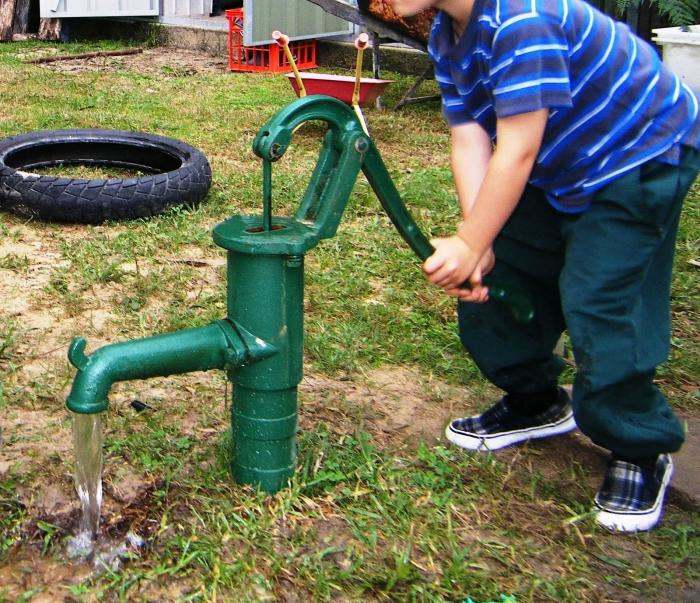
Rod hand pump
A manual water pump is used in areas for sampling from lower levels of 7-30 m. The principle is similar to the operation of a piston pump, but the length of the “piston” (plunger) is much larger and resembles a drill rod.
Due to the significant dimensions, the plunger apparatus creates a vacuum at a low depth and delivers liquid up through the inlet pipe.
Gate (rotary-lamellar)
It has little power and is often used to pump liquids out of barrels or open water. Outwardly, they resemble a tube, at the end of which a pump with a rotor is mounted. It has high mobility unlike other varieties.

If necessary, it can be used in various operations, as it has a low mass, and a regular hose is used for sampling.
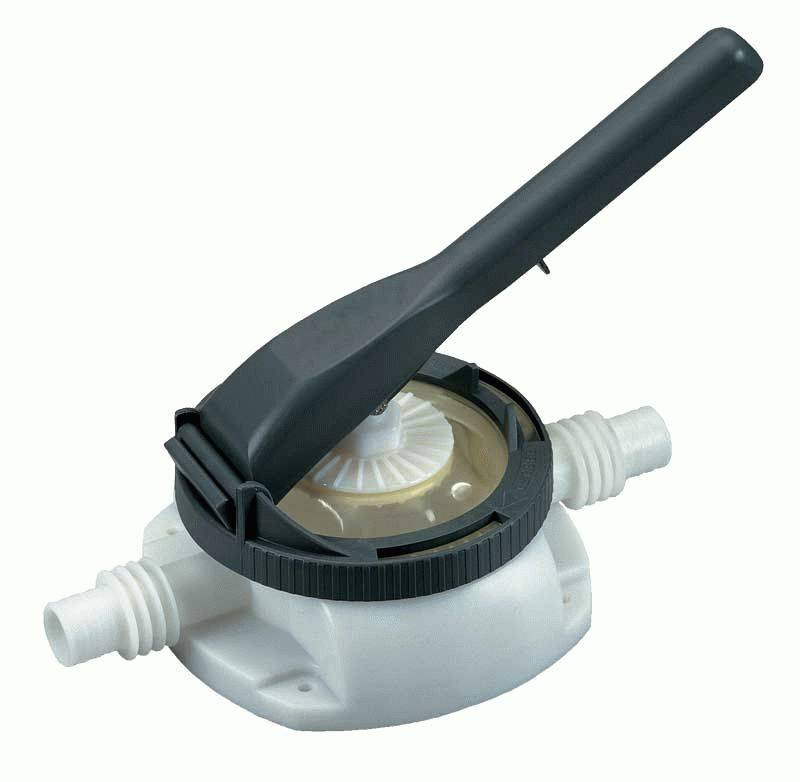
Membrane
The device is able to pump out even contaminated liquid. The design uses self-cleaning valves in the form of balls. This solution minimizes the possibility of jamming of the mechanism. A feature of such models is the absence of quickly wearing or rubbing parts. The body is made of gray cast iron.
When choosing a specific instance, you need to pay attention to the following models:
Hand pump for water to the cottage BSK

It is used without modernization on a horizon not lower than 6 m. When installing an additional check valve, it is capable of sampling from a 9-meter level. Aesthetic appearance allows you to become a decoration of any territory.For mounting in the structure there is a flange that allows you to fix the device on a pipe or platform. Possibility of installation to a vertical surface is provided. Estimated cost is 4800 rubles.
Hand pump for water to the cottage D-40
D40, Membrane (diaphragm)
Membrane device. Able to self-clean from possible contamination. Efficiently copes with the pumping of liquids of any type. The cost is 6300 rubles.
Hand pump for water to the cottage RNP 1.3/30
Used in liquid media, including contaminated liquid. Able to pass pollution up to 1 mm in diameter. The maximum limiting concentration of pollution should not exceed 30 g/m 3 . Works on the horizon up to 5 m. The body is made of cast iron. The type of stroke is two-sided, which increases the productivity of the device. The cost is 16200 rubles.


Hand pump for water to the cottage "K" (Vane)
It is used for depths up to 9 m. The design provides 4 valves and a wing. Operating the handle, the operator alternately opens and closes the valves through which the fluid is supplied. The cost of the product in a steel case is 3100 rubles.
A manual pump for pumping should be in any household. This small alternative device will successfully replace the pumping station in the event of an unauthorized power outage. It will also be useful in case of failure of pumping equipment. This will make it possible to pump up the volume, albeit in a limited amount, but not be left without it at all.
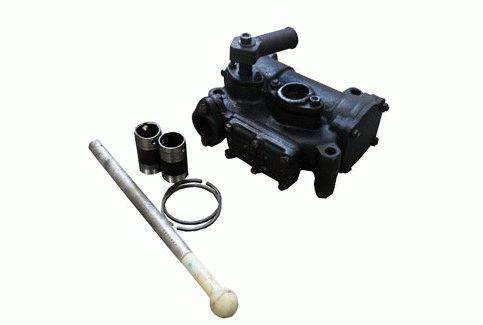
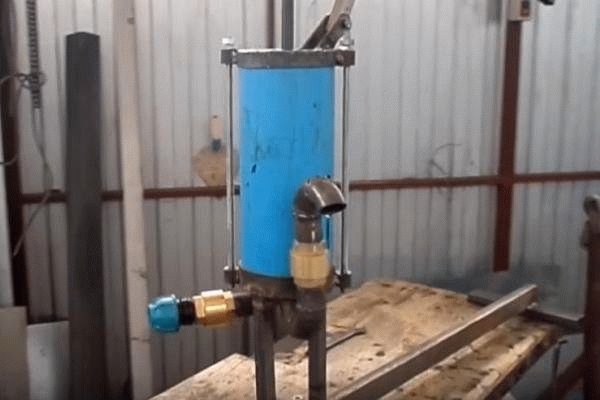
Alteration of the Chinese pump
Surely many have burned themselves on the purchase of Chinese-made brushless pumps.The devices are not bad, but they often break down: the stuffing of the pumps itself is covered - electronics filled with epoxy resin. The Chinese rocking chair serves a maximum of two weeks on a solar collector. Having a little knowledge of the principle of operation of the device, you can remake Chinese water pumps with your own hands. It will turn out, as in the saying "If you want it to work the way it should, do it yourself."
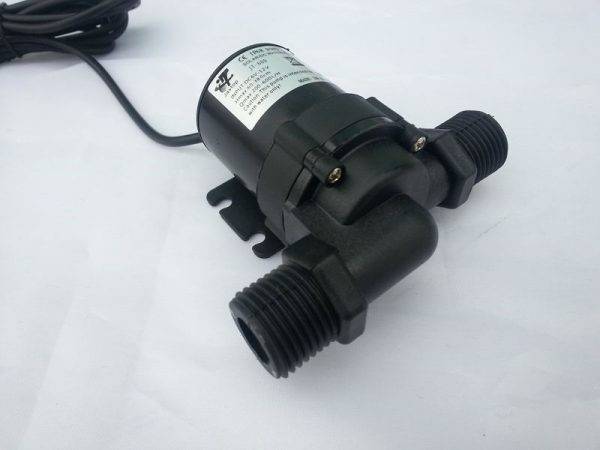
Chinese pump
How to make a water pump from a broken Chinese product? First of all, disassemble the pump, look at the assembly diagram. Of the parts for assembling a new device, an impeller is useful, it is difficult to make it yourself.
A new homemade water pump is assembled from a powerful Soviet-era engine, a coupling and a Chinese-made impeller. The creation is installed on a solar collector, and the issue with the pump disappears for a long time. It will work efficiently.
Important! A converted do-it-yourself pump for a well will need to be covered from dust, which is a common cause of breakdowns in motor equipment. The made unit is attached and tested in action.
Such a homemade pump perfectly pumps water from a two-meter depth. It will last for several years for reliable operation, given how it works cyclically
The made unit is attached and tested in action. Such a homemade pump perfectly pumps water from a two-meter depth. It will last for several years for reliable operation, given how it works cyclically.
For seasonal irrigation, devices with a minimum of wear parts are mainly used:
- do-it-yourself asynchronous centrifugal pump;
- three-phase brushless unit.
In terms of popularity, the design of the centrifugal electric pump for water surpasses many pumping devices of this purpose.
Making a pump for pumping water, if you figure it out, is not difficult at all. Do-it-yourself, it will become a reliable and effective tool for household needs: watering, drinking water intake from a well. Such a technically simple design will help reduce the consumption of electricity and water.
2 How to choose a hand pump?
The choice of a manual fluid transfer pump will depend on a number of factors:
Well depth.
The most important criterion when buying equipment or making it yourself. To lift water from a shallow depth (up to 10 m), you can use simple mechanisms with a piston system. If you have to pump liquid from an Abyssinian well with a depth of 10-30 m, you will have to choose a device with a rod system.
Well diameter.
Experts recommend drilling a well with a diameter of more than 4 inches - then any pump with a hand lever will work to supply water from depth.
Mounting method.
When selecting a device, you need to think in advance whether there is a need for its further movement to another object. Such a need often arises when liquid is taken from the river for household needs, and from a well for drinking.
period of use.
The main element of a hand pump is a piston in a pipe
On sale there are models designed for year-round use, as well as inexpensive options with a plastic case for use in the summer.
By considering every detail in advance, you can be sure that the hand pump for pumping water will meet the user's expectations.
2.1 What are the steps for manufacturing and connecting a hand pump?
Assemble the hand pump with your own hands from improvised means - a feasible task for every man. The main thing is to strictly follow the indicated instructions:
We make the body.
For the body of a homemade pump, you will need a metal cylinder - it can be a piece of an old pipe or an unnecessary sleeve from a diesel engine. The length of the segment should be about 60-80 cm, and the diameter should be over 8 cm.


To ensure the high-quality operation of future equipment, it is necessary to machine the inner surface of the pipe on the machine. By ridding the metal of unevenness, you will ease the effort that will be required to pump water.
Cut out the lid.
For its manufacture, you can use metal or plastic. In the cover, be sure to make a hole for the stem. When the design is ready, the piston is placed inside. After that, the bottom is closed with exactly the same lid with a valve. A pipe for water supply is welded on the side.
Piston installation.
The piston can be made of wood, plastic or metal, the main rule is that it must be sealed with a rubber ring. When installing this structural element, it is necessary to leave a minimum gap between the walls of the housing, then water will not seep through.
Connecting the inlet pipe to the well.
Elements for creating a hand pump with your own hands
The inlet pipe that supplies water to the inside of the device must be strong and durable. To ensure these characteristics, choose reinforced hoses, rigid plastic elements or steel pipes.
Valve installation.
Check valves are special holes that are created in the piston body and the bottom cover of the metal cylinder. They determine the performance of the entire system.Valves prevent fluid from returning back to the inlet pipe.
To create them, you can use thick rubber, which is fixed on the hole with rivets.
Decorative work.
A homemade hand pump should have a comfortable handle. Its shape can be any, the main thing is to securely attach the element to the stem. In addition, the pump itself must be fixed on the prepared site using a flange.
Having carried out the whole complex of works of the above works, you will ensure an uninterrupted supply of water on your own site.
DIY hand pump
The manual pumping system described below can be taken as the basis for creating a stationary water-lifting post in a well or well.
We need:
- PVC sewer pipe 50 mm with several outlets, plug, cuffs-seals - 1m.
- Check valve 1/2″ in the amount of 2 pcs, sewer pipe PPR 24 mm,
- Also rubber, bolts and nuts with 6-8 mm washers, several clamps, fitting clamps and other plumbing parts.
There are several ways to assemble such a pump.
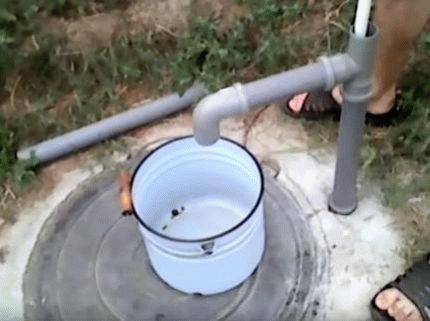
Draining through the handle
This model is the simplest of those that can be assembled at home: the stem is made of a PPR pipe, the water in it rises and pours out from above. The sleeve is made from a pipe with a diameter of 50 mm and a length of 650 mm. The pump turns out to be the simplest of the home ones - water rises along the piston rod, which is made of a PPR pipe and pours out from above.
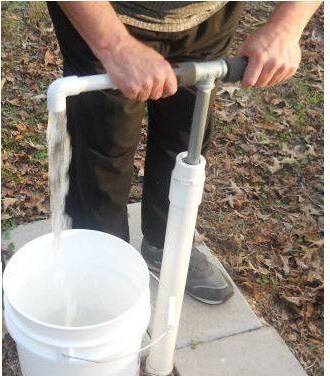
Draining water through the handle
So:
- We make a sleeve from a pipe with a diameter of 50 mm and a length of 650 mm. The valve should be annular petal: drill 10 holes with a diameter of 6 mm, cut out a round rubber flap in the amount of 3-4 pieces with a diameter of 50 mm.
- We fix the flap in the center of the plug using bolts or rivets (a self-tapping screw will not work). Thus, we get a petal valve. You can not make the valve yourself, but cut it into the factory end cap. In this case, the cost of the pump will increase by 30%.
- We install a plug into the sleeve, using sealant through the heaters, while additionally fixing it with self-tapping screws through the wall of the sleeve base.
- The next element of the pump is the piston. A check valve is installed in the PPR pipe.


- For the manufacture of the piston head, you can use the spent nose of the sealant 340 ml. The pipe is preheated and placed in the sleeve. Thus, the head will acquire the desired shape and size.
- Then it is cut and installed in series on the check valve using a coupling with an external thread, or a union nut is used.
- We insert the piston into the base of the pump and make an upper plug, which may not necessarily be airtight, but the rod must be kept even.
- We install the squeegee on the free end of the pipe, put a hose on it. A pump of this design is very reliable, but a little inconvenient - the water drain point is in constant motion and is located close to the operator. This type of pump can be slightly modified.
Side drain assembly
Everything is done as follows:
We include a tee-angle of 35 degrees in the sleeve. We make large holes in the rod pipe, while not violating rigidity, as an option, you can use a rod rod.
- The main advantage and advantage of the described pumps is the low price of the structure. A factory valve costs about $4, a pipe about a dollar per 1 meter. And all other parts in total will come out for 2-3 dollars.
- Get a pump that costs less than $10.Repair of such pumps will also cost a penny by replacing a few "other" cheap parts.
Spiral hydraulic piston
Do-it-yourself manual water pump in this design is a little more difficult to make. But it does have more performance. This type of piston is most often used when pumping water from reservoirs over a short distance.
So:
- The device is based on a carousel with blades, resembling a water mill wheel in appearance. The river flow just drives the wheel. And the pump in this case is a spiral from a flexible pipe 50-75 mm, which is fixed to the wheel with clamps.
- A bucket with a diameter of 150 mm is attached to the intake part. Water will enter the pipeline through the main assembly (pipe reducer). You can take it from both the factory pump and the sewer pump.
- The gearbox must be tightly fixed to the base, which is motionless, and located along the axis of the wheel.
The maximum rise of water is equal to the length of the pipe from the fence, which is in the water during operation. This distance is obtained from the point where the pump is immersed in water to the point where it exits. It is this distance that the pump intake bucket travels. - The system of operation of such a pump is simple: when it is immersed in water, a closed system with air sections is formed in the pipeline, water flows through the pipe to the center of the spiral. The only disadvantage of such a water pump is that we are a reservoir as an activator, so its use is not suitable for everyone.
This pump will serve as an excellent watering agent in the season. Its price depends on the material used.
The device of a homemade piston pump for wells
The piston type pump is the easiest to manufacture.Its working mechanism has already been described, it remains to clarify a couple of details:
- It is not the case-sleeve that should be lowered into the water, but the suction hose attached to its lower part.
- The rod should be attached to the lever - then it will be easier to raise the piston.
- A shut-off valve or check valve should be installed between the outlet pipe and the water pipe, which will prevent fluid from flowing back into the pump from the pipe when it is idle.
The device of a homemade piston pump for wells
Here is an example of the wizard's steps:
The case is being made
A pipe with a length of 600 - 800 is used as a workpiece mm with inner diameter 80 mm, the inner surface of which should be as smooth as possible. The ideal option is a cylinder from an internal combustion engine or a hydraulic cylinder. If an ordinary pipe is used, it should be treated with a scraper from the inside.
On the side of the upper part of the body, a hole should be cut and the outlet pipe welded.
Cap making
 Lids can be made from any available material - rolled steel, plastic and even wood.
The latter option is the simplest and at the same time effective: having been saturated with moisture, the wood swells and due to this it is securely fixed in the pipe.
It is best to make covers from larch or oak.
In one of them, which will be installed in the upper part of the pump, you need to drill a hole for the rod; at the bottom - install a check valve.
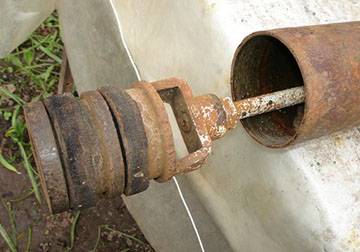
Piston manufacturing
The piston, like the covers, can be made from anything
It is important that it has a round shape and is equipped with an O-ring made of rubber. In the housing, the piston must move sufficiently tightly, but without excessive resistance.
A rod should be attached to the center of this part using a pin for this.
suction pipe
At the start of operation, the pump creates a vacuum in the suction pipe, so it must be rigid enough to withstand compression by the force of atmospheric pressure. This condition is met by metal and plastic pipes.
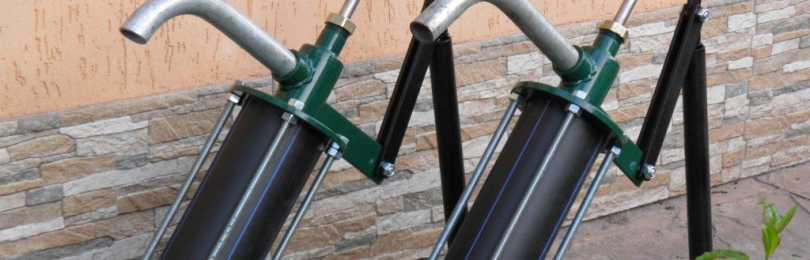
Simple hand pumps
If it is supposed to use a rubber hose, then it is necessary to take a reinforced one or reinforce it yourself with a steel spring.
check valves
The performance and efficiency of the pump depend on the tightness of the check valves. The simplest option is a diaphragm or petal valve. It is a disk tightly installed in the pump housing with a hole made in it, which is closed by a piece of rubber fixed on one side. When the water moves in the "correct" direction, it bends the rubber and flows through the valve unhindered.


Well with a hand pump at their summer cottage
In the case of counterflow, the rubber will press against the hole and the water path will be closed. A similar valve must be built into the piston.
Pump assembly
The piston with the rod is installed in the housing, which is then closed with covers. It remains to connect the lever to the rod, and from the bottom to the body - the suction pipe.
To make the pump more convenient to use, install a spring on the lever that returns it to its original position.
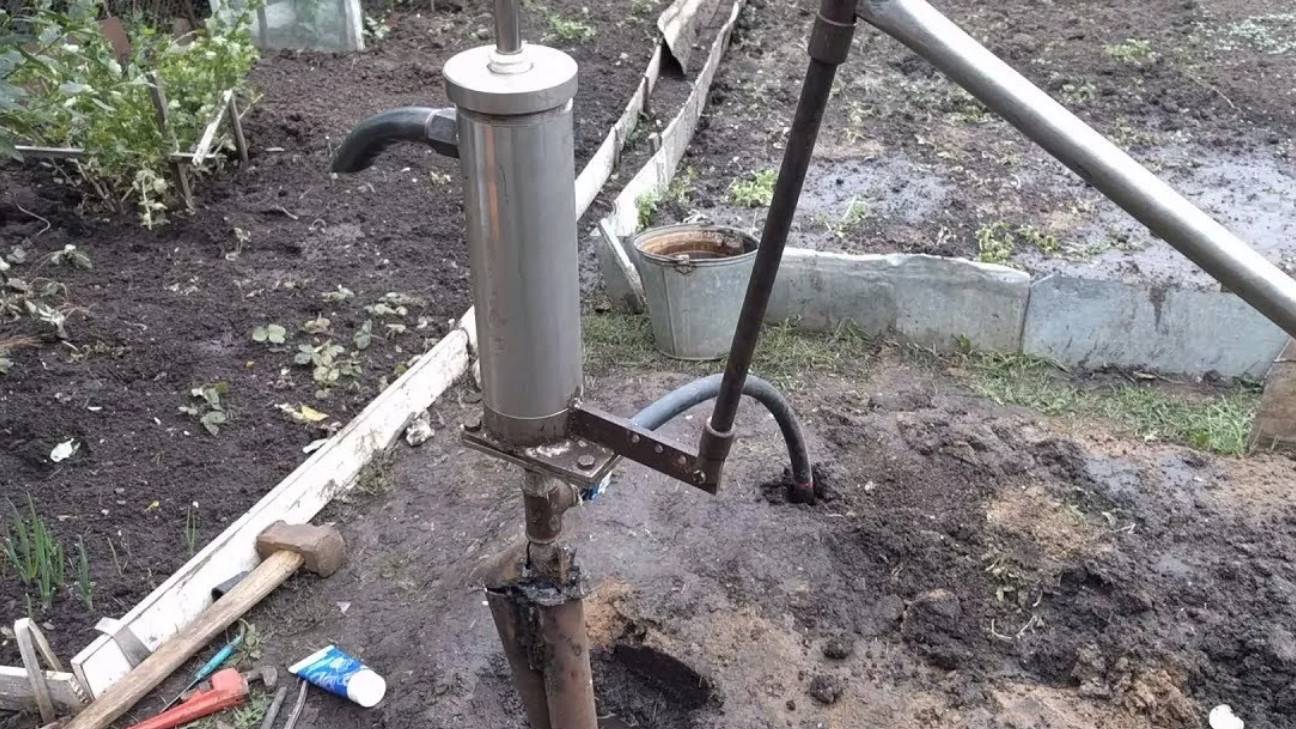
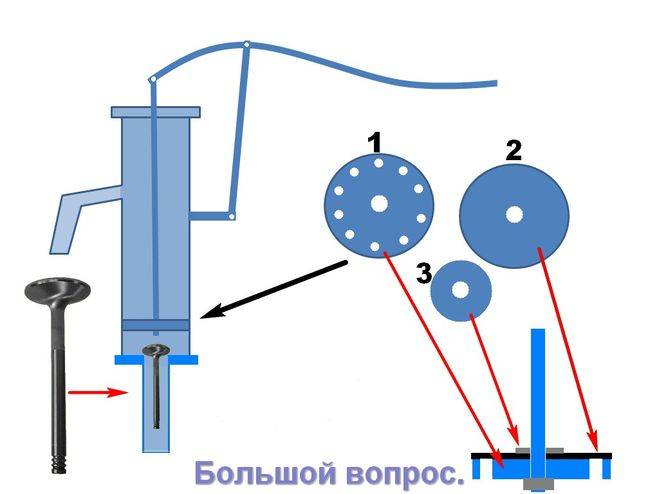
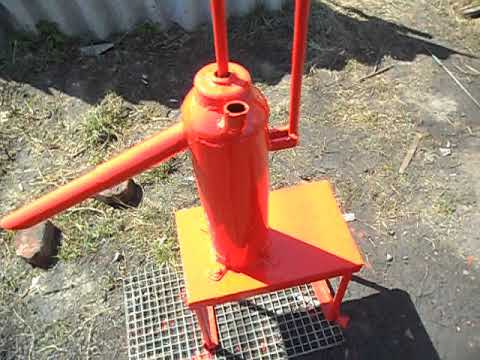
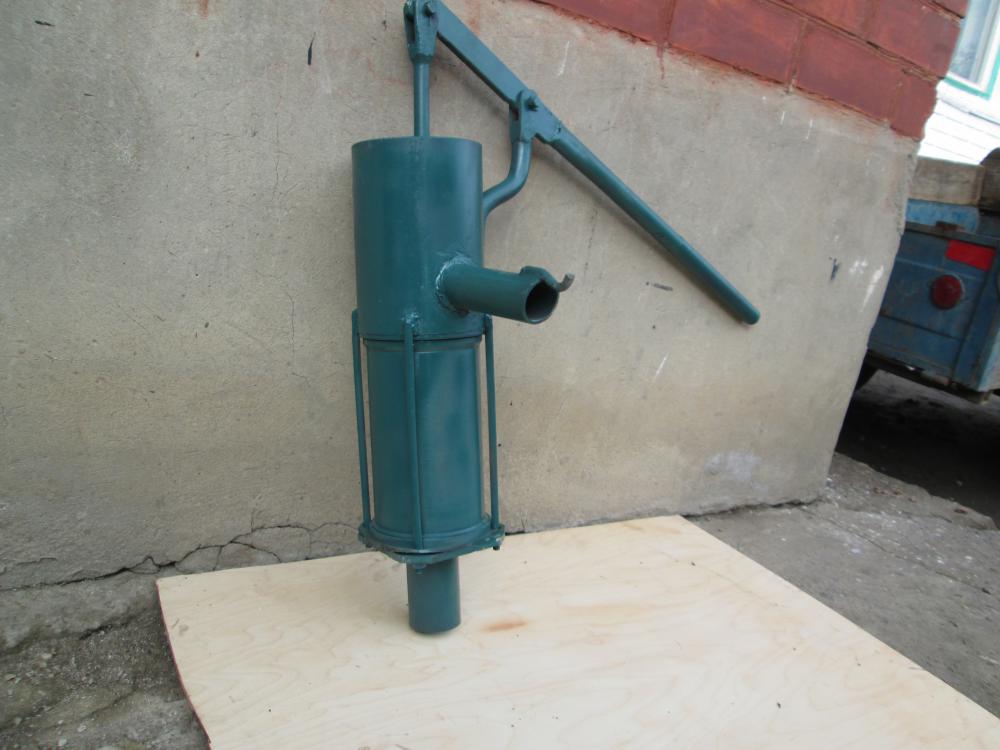
Homemade hand pump for water. Scheme and principle of operation.
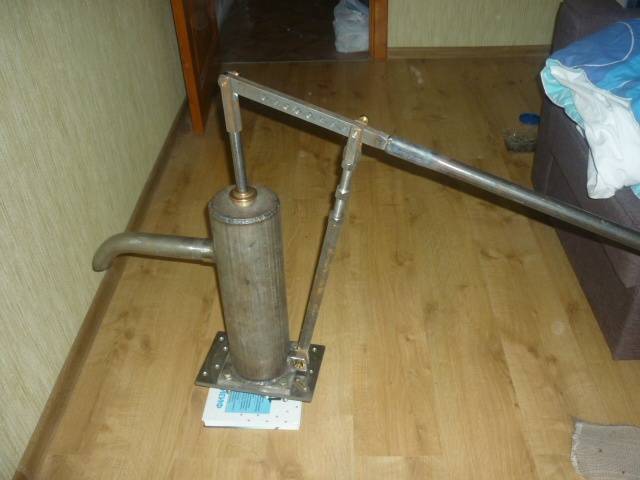
I will share the experience of making a homemade manual piston water pump, which I have been using for two years now and which anyone can easily do.
Usually, every novice gardener first of all feels the need for water to irrigate the site.After all, if it is far away, and besides, the summer is dry, it takes a lot of work to water the garden. It is a completely different matter when the site has a well and a pump that supplies water from it.
It is installed in my mine well and supplies water to a height of 4.5-5.0 meters. The distance from the water surface to the pump is 5.5-6.0 meters. It pumps water easily and does not require much physical effort: 8-10 piston movements - and the bucket is filled to the brim.
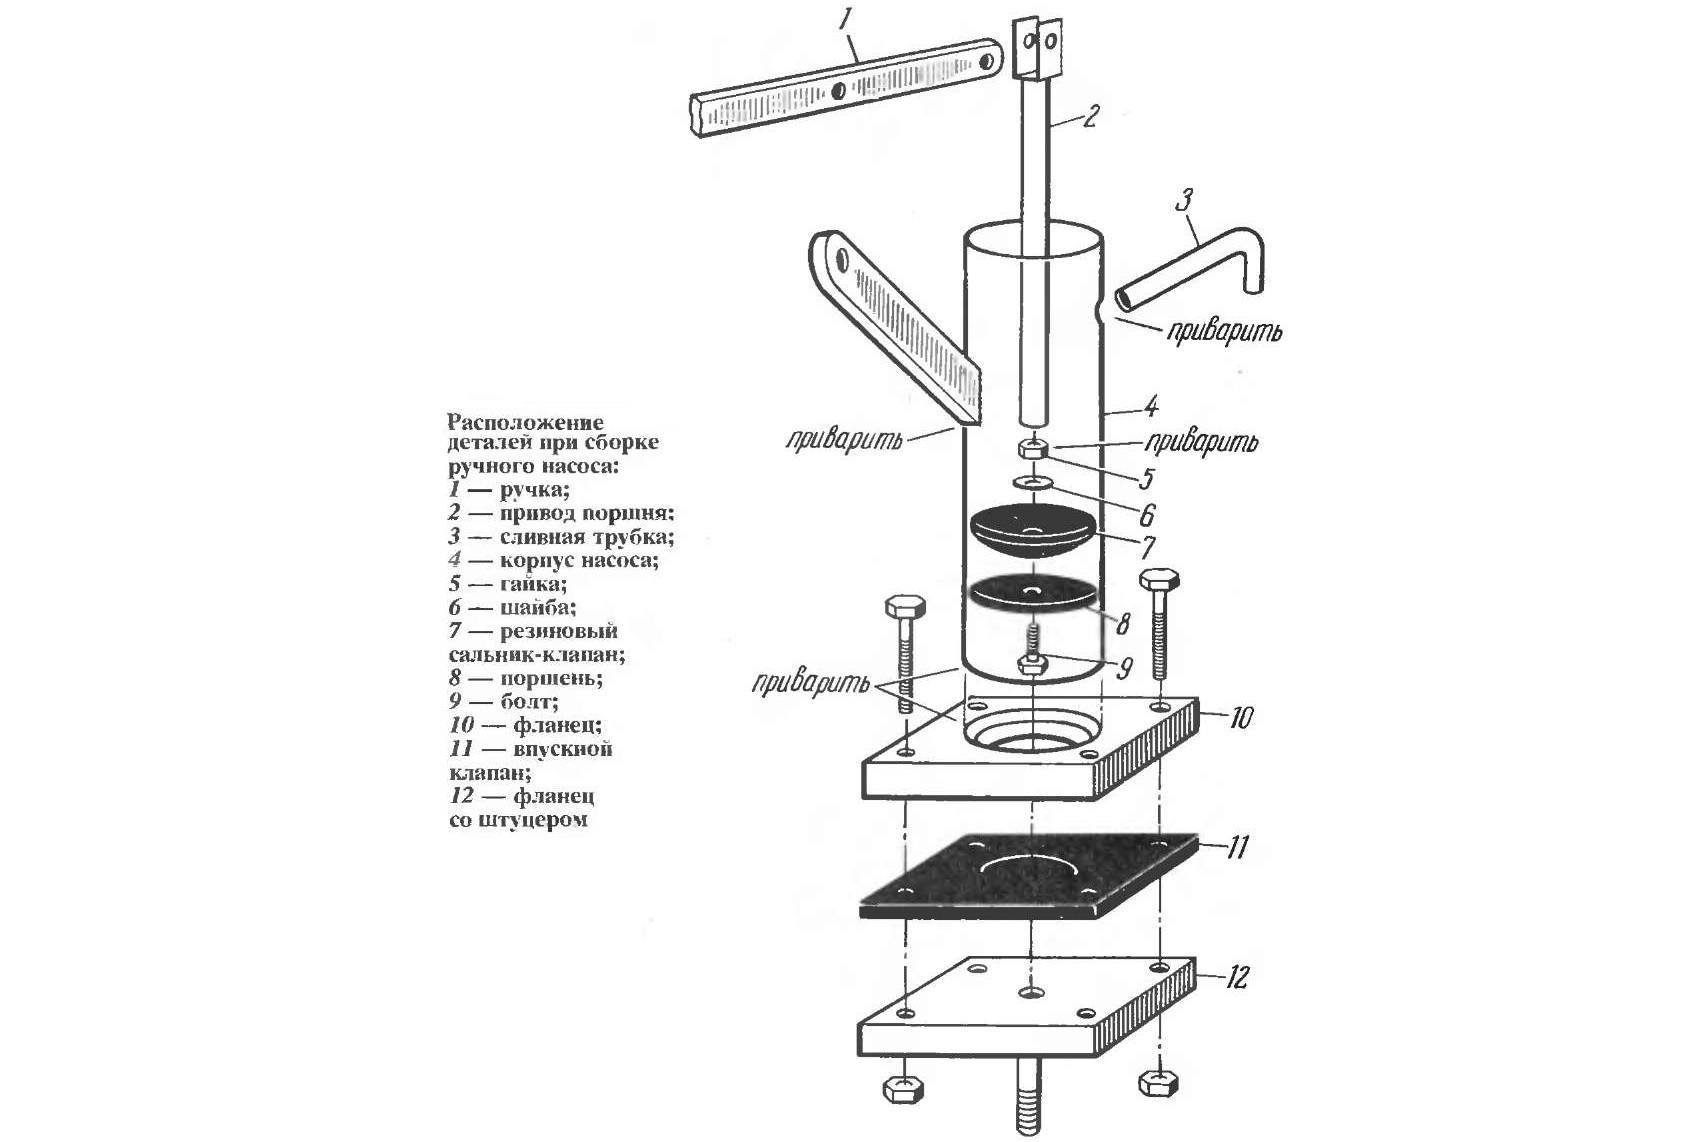
Manual water pump diagram:
The material needed for manufacturing: a metal seamless pipe with a diameter of 90 and a length of 450 millimeters, four flanges - two of which are welded to the cylinder (in extreme cases, you can do without them), three steel pipes, good rubber for valves, a piece of textolite, a little felt , a brass rod (rod) with a diameter of 16 and a length of 800 millimeters and a number of fasteners.
water hand pump device:
1, 12, 13, 17 - flanges; 2 - gland packing; 3 - stuffing box nut; 4 - branch pipe with a diameter of 1 inch; 5—pump cylinder; 6 - piston washer with a diameter of 30-35 mm; 7 — textolite piston washer; 8 - washer with a diameter of 45 mm; 9 - lower rubber valve; 10 - paranitic gasket; 11 - suction pipe with a diameter of 1.5 inches; 14 - felt pad; 15— top rubber gasket; 16 - rod with a diameter of 16 mm.
Working principle of manual piston pump for water
When the rod moves up, the upper rubber valve (assembly 14, 7, 15) fits snugly against the cylinder body 5, and the lower valve 9 opens and sucks in water. When the rod moves down, the bottom valve 9 is pressed tightly against the flange 12 and closes the hole for water inlet through the pipe 11.At this time, at the top valve, the edges of the felt 14 and rubber 15 gaskets are bent to the washer 6, and water passes through the holes of the textolite washer - 7.
With the next upward movement of the piston, the lower valve opens, and the upper rubber valve fits snugly against the walls of the cylinder, and water is pushed into the discharge pipe, and a new portion of water enters cylinder 5 from below. Before testing the pump, the cylinder must be filled with water. In addition, it must be taken into account that the operation of the piston largely depends on the quality of the rubber, so it is better to take one that contains more rubber.
The given drawings indicate the dimensions of individual parts, but there is no need to strictly adhere to them, especially since in practice it is not always possible to get just such a material during manufacture. Therefore, you can take, for example, a cylinder with a diameter of not 90, but 80 millimeters, a rod with a diameter of not 16, but 18 millimeters, respectively changing the dimensions of other parts.
How to make your own pump?
Every man who is at least a little familiar with the tool has the opportunity to save money and not purchase a commercial version of the pump, and in any household there are components for the simplest device. At first, drawings can cause difficulty, it will be easier to make them if we figure out in what order we will assemble a home-made unit.
Step 1: Building the Case
For the base, you will need a piece of metal pipe, the diameter of which should be at least 8 cm, and the length - 60–80 cm. In this case, the thickness of the cylinder walls can be any. The main condition is the smoothness of the inner surface and the absence of corrosion on it.It is best to do the processing on the machine. The presence of the slightest unevenness will affect the operation of the piston and its wear.
Step 2: Building the lids
The cylinder must be closed on both sides. To do this, it is necessary to cut out two “round pieces” from plastic or metal that can tightly cover the diameter of the pipe. Given that you will operate a home-made pump in the winter, it is preferable to use metal in order to avoid breaking the cover during icing. The presence of at least one (upper) threaded cover can be considered an absolutely ideal solution. This will greatly facilitate the operation of the pump in case of possible breakdowns. Holes must be made in the middle of the covers. At the top - for the stem, at the bottom - for the disc valve.
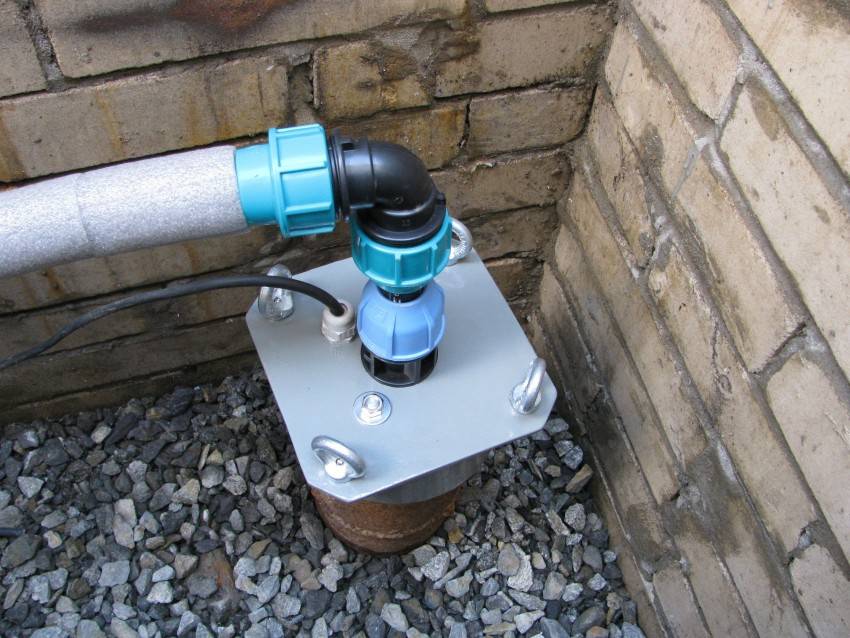
Step 3: Additional parts on the body
At a distance of about 20 cm from the upper edge of the cylinder, a drain “spout” should be made. It is usually made from a small piece of pipe, the diameter and length of which can be chosen independently at your discretion. It would also be useful to attach to the bottom of the flange, thanks to which it is possible to fix the assembled structure to the surface.
Step 4: Piston Assembly
The material for the manufacture of this part can be any. Wood, plastic, metal - it all depends on how the master himself sees the conditions for its operation. Just do not forget about the winter, as well as the properties of some materials to expand and swell when wet. Also, do not miss the need to make a hole for the piston valve. The next condition is that the diameter of the piston should be such that the edges adjoin the inner walls of the housing as tightly as possible.Be that as it may, it is necessary to additionally provide this part with one or two rubber rings that exclude this gap.
Step 5: Installing the valves
The production of these parts is possible both from rubber, silicone, and from metal and plastic. It all depends on the imagination of the designer. The main thing is the observance of the principle of movement "in one direction". So, a valve fixed at the bottom of the pump must freely let in water drawn from a well or well and at the same time reliably close the inlet and withstand the pressure of a piston moving down. And vice versa: the piston valve must work flawlessly, letting fluid into the top of the pump when the piston is lowered and reliably close the hole when it tends to the top position. A little hint: devices resembling riveting in shape do an excellent job with similar functions.


Step 6: Fitting the inlet pipe
This part of the pump must be welded to a hole drilled in the bottom of the device and equipped with an inlet valve. You can do it a little differently: cut a hole in the bottom of the unit corresponding to the diameter of the pipe and provide it with a screw thread. Then assemble the valve that blocks the outlet from the pipeline directly on it. It remains only to make a thread on the outside of the pipe and simply screw the pump housing onto it. A prerequisite for this part of the unit is the ability to endure significant temperature changes, corrosion resistance. The best material for pipes is hard plastic or steel.
Step 7: Mounting the Handle, Stem and Bracket
So we have almost assembled a water pump with our own hands. You need a comfortable handle, it is fixed on a bracket rigidly fixed on the outside of the case.The main thing is that the lever arm should be such that it is possible to raise the piston without much effort. The place that you have to take with your hand can be provided with a rubber or silicone pad. The rod must be securely fastened to the piston inside, and its outer end - with a hinge with the end of a long handle. Now it will be easy and convenient to operate your homemade pump.
What are hand pumps for?
In general, pumping equipment is designed to pump water from a water supply source to points of analysis, it can be a house, a bathhouse, a garage or a garden. Water in a suburban area in most cases is taken from a well, well, pond or other body of water.
Country buildings can be divided into several categories. These are houses where they live permanently, with a certain frequency or in a certain season. Of all the buildings, one can single out houses that do not have a permanent connection to the electrical network, and in some of them there is no connection at all.
In this regard, we can conclude:
- Permanently occupied houses almost always have access to electricity, which allows the use of an electric pump if necessary. In this case, the hand pump for the well is used as a backup unit.
- Seasonal houses with electricity supply also involve the installation and operation of electric pumping equipment. Hand pumps play a secondary role.
- In suburban areas without electricity, a mechanical water pump is indispensable and the only equipment for pumping water.
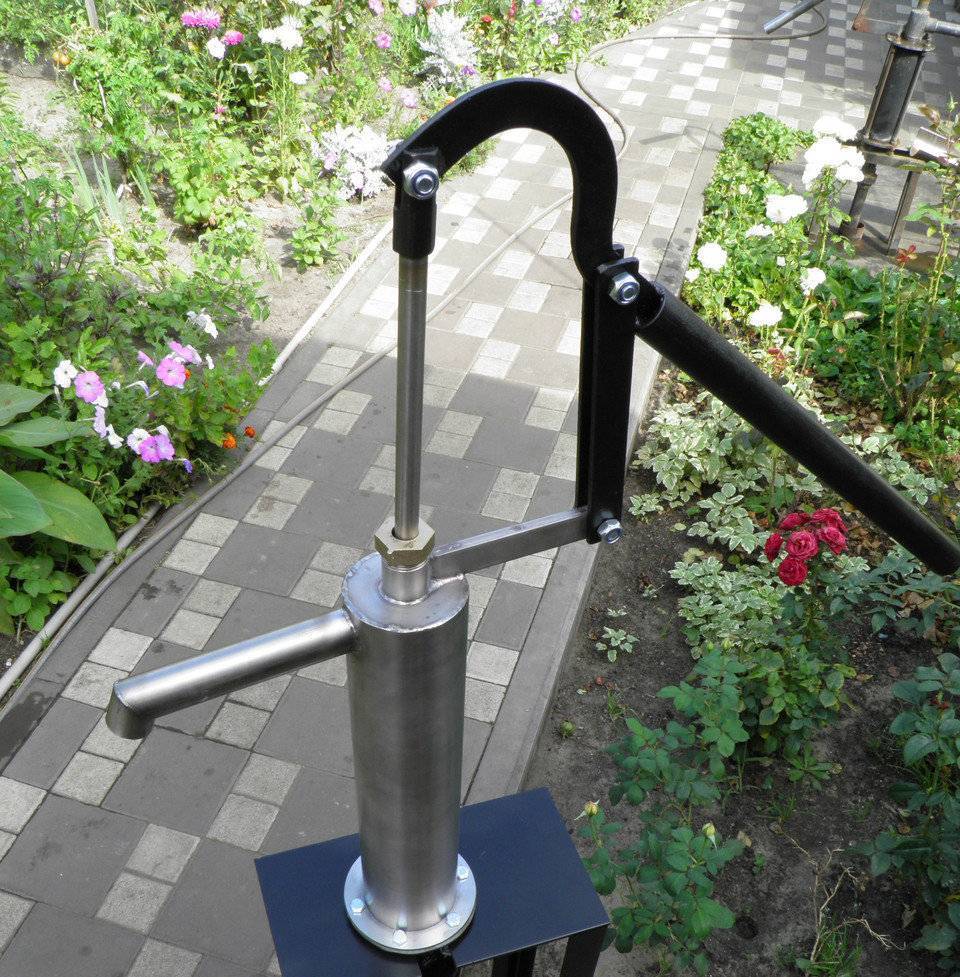
A simple home craftsman with skills in working with welding equipment and assembling metal or polymer parts can assemble the simplest version of a water intake column on their own. As a sample, you can take a factory-made product, which is assembled from durable steel parts and has a convenient handle for pumping water.


