- How to seal the tank of the washing machine?
- What damage could happen
- Diagnostics for vertical loading
- Front loading diagnostics
- Poor laundry wringing
- Do-it-yourself washing machine repair
- Potential problems and breakdowns
- Washing machine programmer repair
- Why do you have to glue?
- Bulgarian and circular saw
- Water problems
- Water is not coming
- Gaining very slowly
- Doesn't drain
- small leak
- strong leak
How to seal the tank of the washing machine?
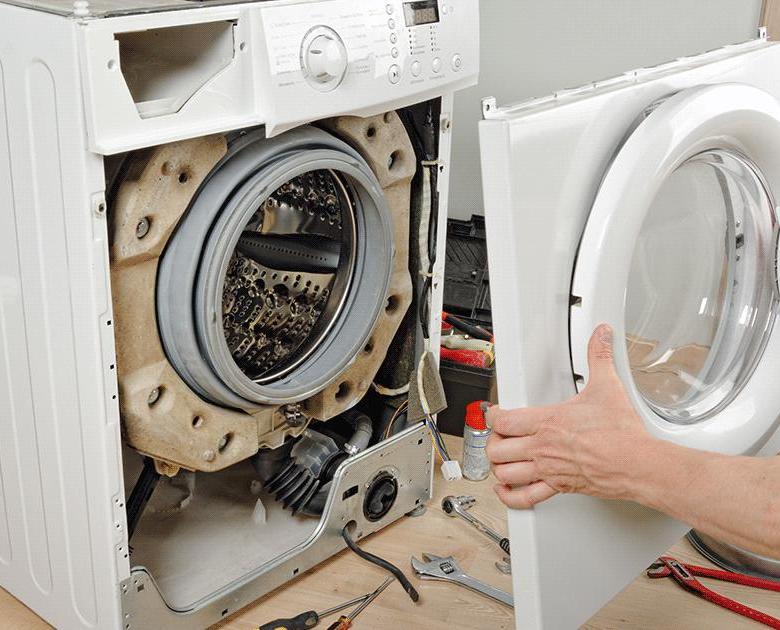
After repair and replacement of defective parts, it is necessary to assemble the tank in the reverse order:
- First of all, carefully process the joint surface of the halves of the tank. They should be smooth and without rough scratches that may remain from sawing. To clean the surface, use a clerical knife:
- set the blade at 90 degrees to the surface to be treated;
- grind off all the irregularities, bringing to perfect smoothness.
- Degrease the joint surface of the two halves of the tank.
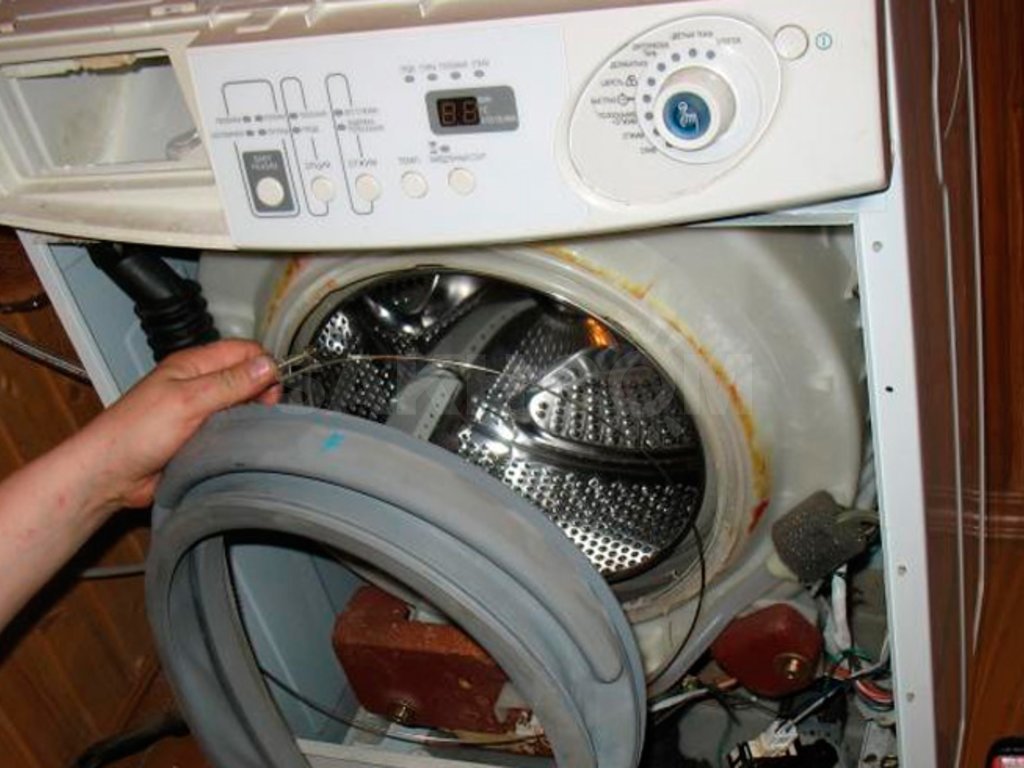
- Grease the stuffing box and shaft with stuffing box grease.
- Insert the drum axle into the bearings.
- Secure with a pulley.
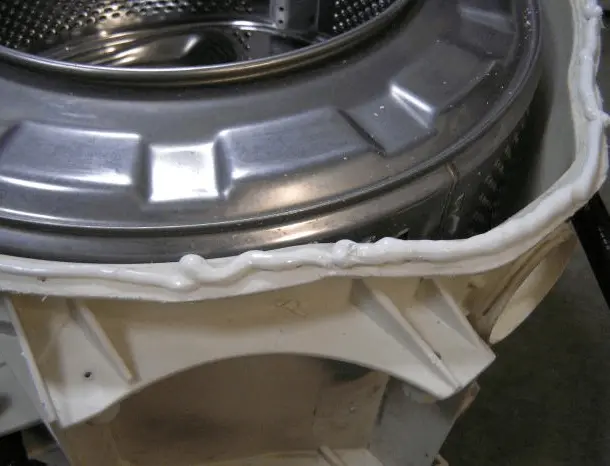
- Apply silicone adhesive (aquarium silicone sealant for a washing machine is ideal) to both halves of the tank.
- Spread the sealant layer to make it even.
- Lay the two halves of the tank on top of each other.
- Tighten the halves around the circumference with bolts until the silicone is dry.
- Let the glue dry.
- Assemble the washing machine in the reverse order: screw on the front weight, install the heating element, hang the tank, connect the pipes, engine, etc.
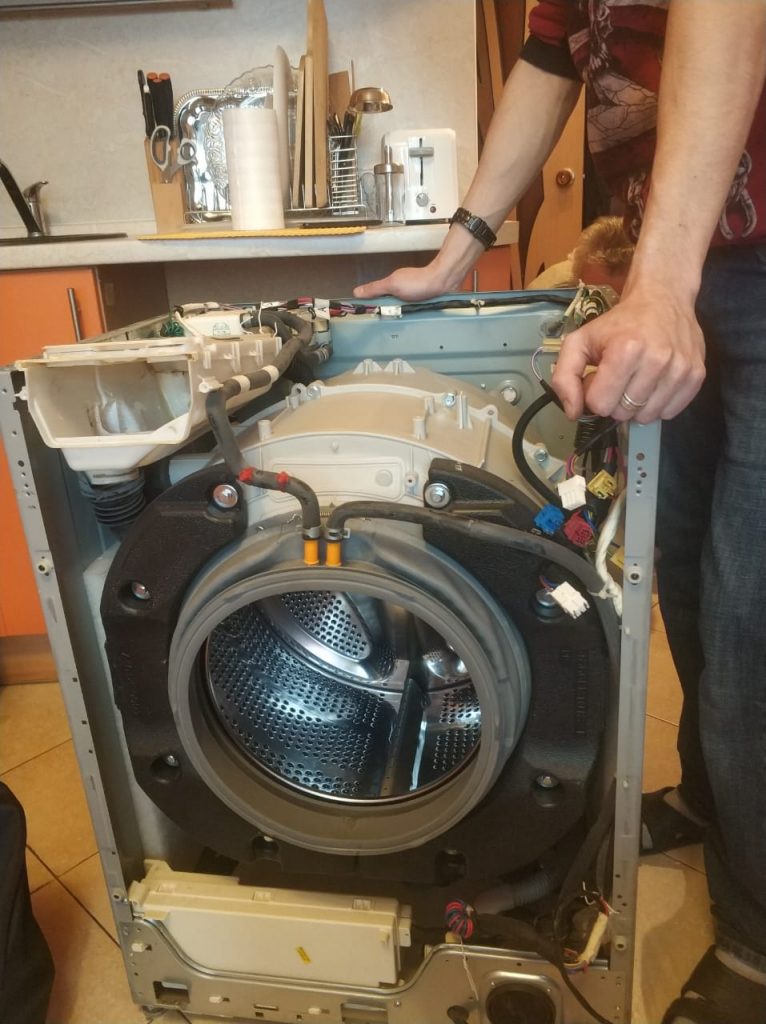
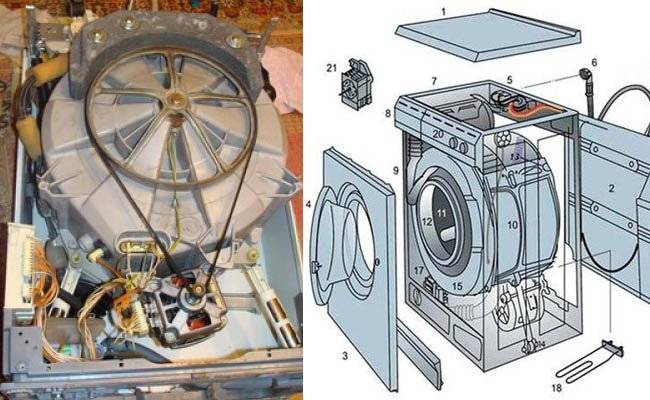
Repairing a washing machine tank is a rather complicated and lengthy business, because you need not only to properly disassemble the device, remove the tank, and disassemble it without errors (after all, not all washing machines have collapsible tanks) and only then proceed to repair. And it’s not a fact that this repair can be done at home - it all depends on the malfunction. We hope that the information provided in the article will help you at least a little to carry out your plans, and the washing machine will be grateful to you and will repay you with high-quality and long-term work.
When repairing the machine with your own hands, you need to think in advance about how to install the drum back, and at the same time choose a sealant.
In order for the machine to work as before after repair, it is necessary to connect the collapsible parts and glue the halves of the tank, and they must be glued so that the assembly is waterproof.
In addition, when repairing a tank, it is necessary not only to disassemble or cut the machine, determine where the damage is, replace worn bearings, gaskets and hoses, install all the parts back and assemble the equipment again. Repair at home requires the owner of the unit to have knowledge and skills that not everyone has, and therefore often even people with experience prefer to give the equipment to repair shops.
What damage could happen
What caused the malfunction:
- Worn gaskets due to frequent use.
- Defective parts, improper transportation of the machine.
- Malfunction of the rod that secures the shock absorber.
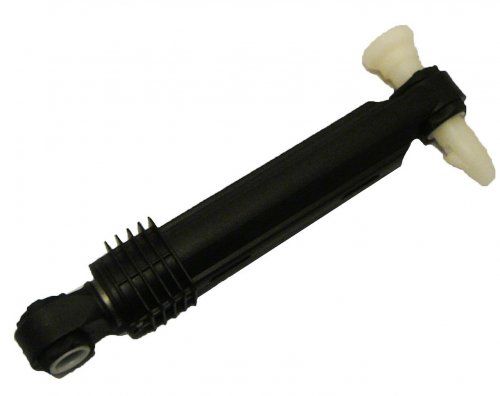
Whatever breakdown occurs, it is important to know how to repair it yourself shock absorber in washing machine
Diagnostics for vertical loading
If the shock absorbers or dampers are damaged, a specific noise is heard - a knock during washing, coming from the inside. There may be distortion of the housing or strong vibration.
Diagnostics for vertical loading is performed as follows.
- Press the top of the tank with your hand. If you feel that there is no resistance, and after you remove your hand, it continues to sway, then the time has come for repair.
- Watch the drum spin. If it is tight or creaking, it means that the parts are not lubricated at all.
- Disassemble the machine, remove the back cover. Press down on the tank again and force it down, then release it sharply. If the tank jumped up and no longer moves, then the shock absorbers are normal.
These simple diagnostic methods will help determine if the dampers of the washing machine need repair.
Front loading diagnostics
Diagnostics of the washing machine during front loading occurs in a different way.
- Press firmly on the tank at the top and look at the cuff of the hatch seal. If folds form on it, then repair is needed.
- Be sure to note how much the tank drops when pressed.
Normally, during pressing, no wrinkles should appear on the seal and the tank should not sag when it is loaded.
If all these shortcomings are found, the device should be repaired.
Poor laundry wringing
Diagnosis: At the final stage of washing, when drying the washed laundry, a weak wringing occurs, which does not occur completely.
Causes of occurrence:
- The simplest, and probably the most common, is when the user selects the wrong wash cycle.
- Another reason may be that too much laundry has been placed in the washing machine. This error occurred due to overload.
- The tachometer has failed. This resulted in push-ups being performed at too low RPM, which also resulted in poor quality push-ups.
- Problems arose that were caused by poor-quality operation of the motor brushes, which led to the malfunction considered here.
- Defects take place in the control board, which leads to incorrect execution of various actions by the washing machine.
- The water drain from the machine after washing does not work or does not work efficiently enough. This leads to the fact that the wrung out laundry again comes into contact with the water remaining in the tub and gets wet to some extent.
Not all types of existing malfunctions are equivalent in their complexity, in each case you need to act in your own way:
In the first of the cases described, obviously, the whole problem lies in insufficiently careful reading of the instructions for working with this model of washing machine.
If we talk about the second option, then here we are talking about a careful attitude to your household appliances. By asking her an unbearable load, over time, you can really spoil her. In this case, you just need to follow the existing rules for working with it.


The tachometer gives the machine information about how fast the drum with the washed clothes rotates.If the information is correct, then the machine can respond flexibly to the current situation, making appropriate adjustments as needed.
If the data is incorrect, then the rotation speed will not provide the desired degree of drying of the laundry. You can diagnose a breakdown by observing the execution of washing when setting various programs. If in this case the rotation speed does not change, then you can be sure that the tachometer is malfunctioning.
In this case, to repair the washing machine, you need to do the following:
- We remove the back wall of the washing machine.
- Remove the drive belt. To do this, you do not need to make serious efforts, but you just need to twist the pulley a little and remove the belt from it.
- The tachogenerator can be easily distinguished. It is mounted directly on the engine. It needs to be detached from the body.
- We put a new tachometer in place of the old one.
- We collect the car again.
If the brushes are worn out, repairs can also be done by hand. To do this, you need to purchase brushes specifically for the type of engine you have. Brushes are replaced if you are well versed in the design of electric motors.
Otherwise, it would be best to use the services of an appropriate specialist.
If the control board is faulty, it would be best if you invite a specialist. Repair here can be quite complicated.
With insufficient drainage of water, it is quite possible to carry out repairs yourself. Here we are talking about a malfunction of the drain. There may be several reasons.
It is necessary to check and eliminate each possible malfunction associated with this:
- First you need to clean the drain filter.
- Then you need to clean the drain hose.In order to do this, you need to disconnect it.
- If the problem is still not fixed, then you need to put the car on its side, remove the bottom, dismantle the drain pipe and clean it too. After that, we collect the car. That's it, this repair is over.
Video:
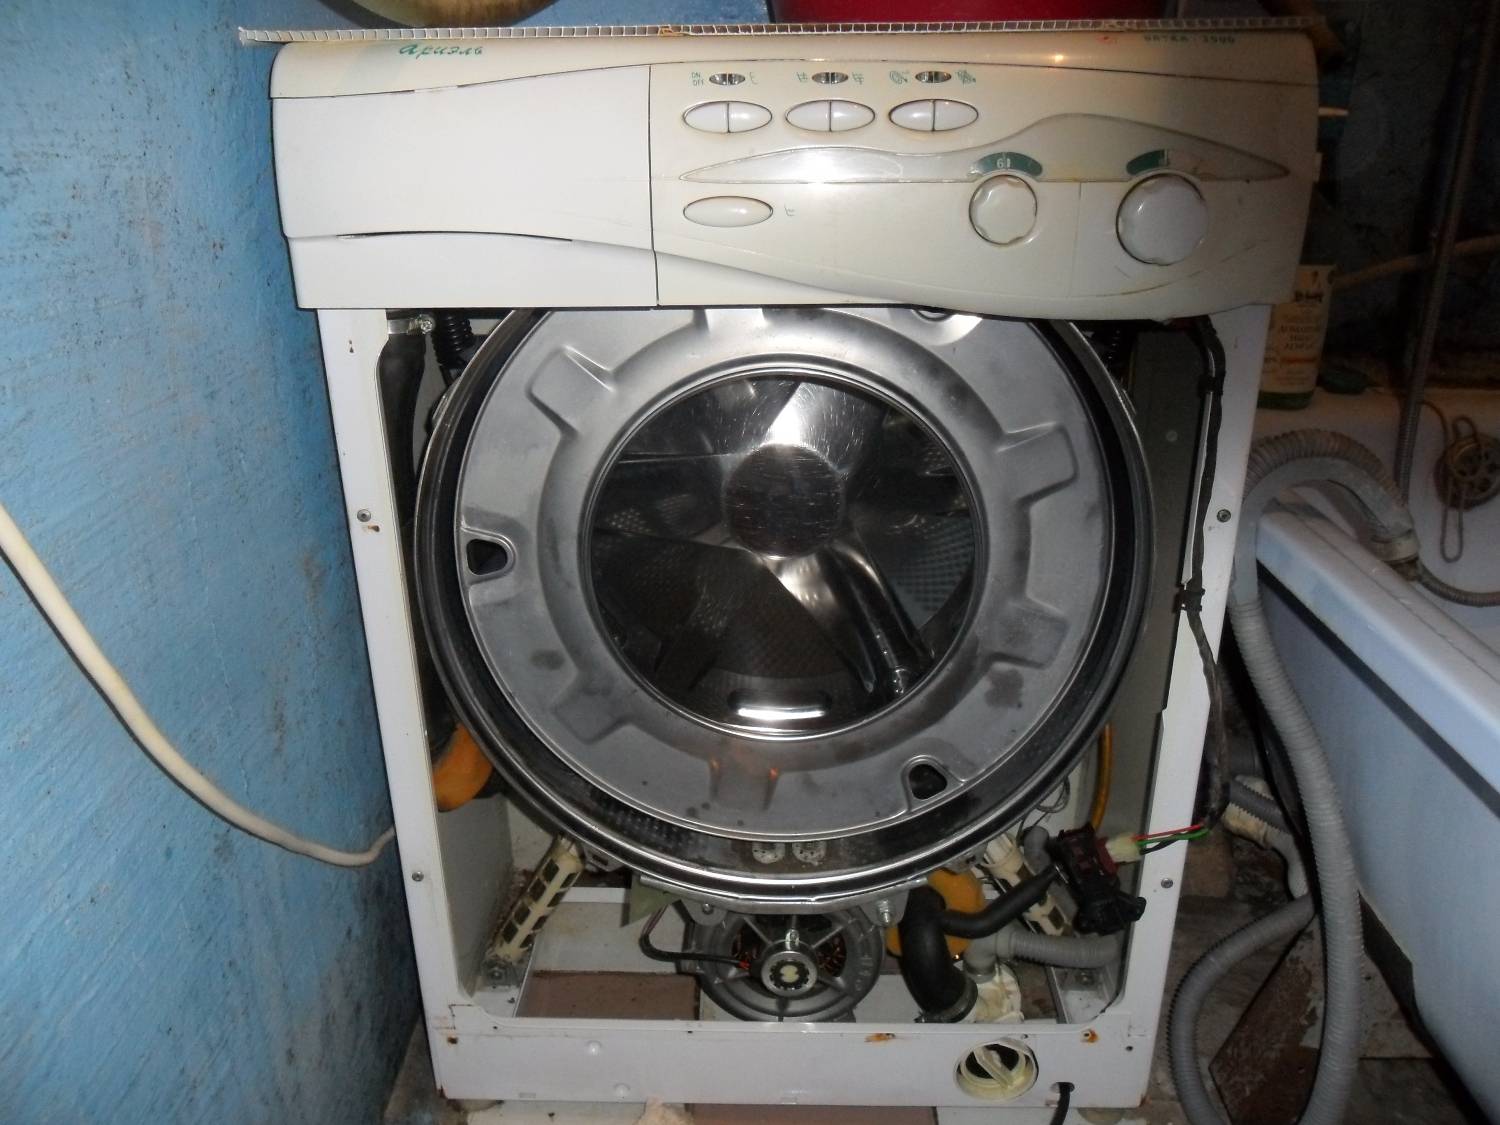
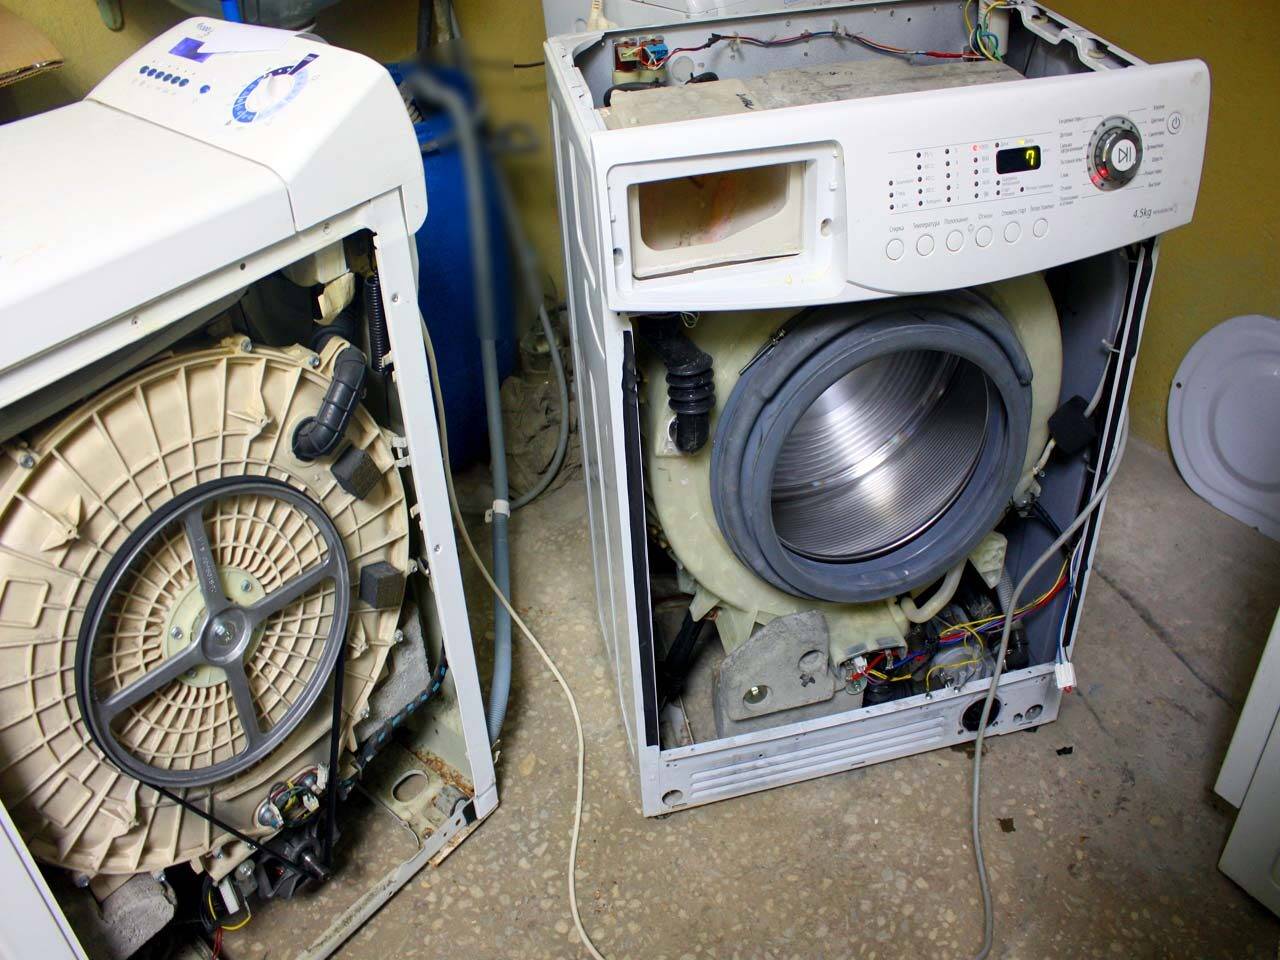
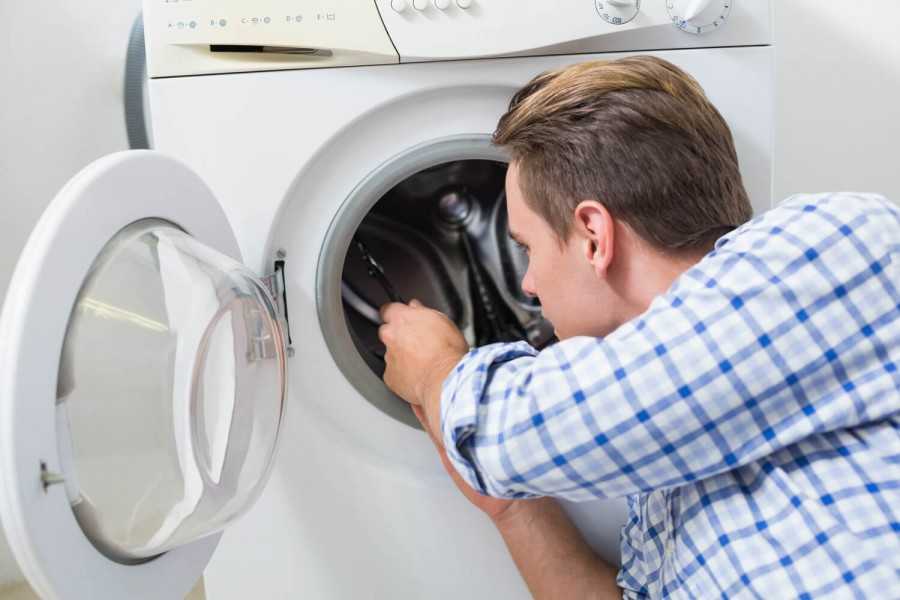
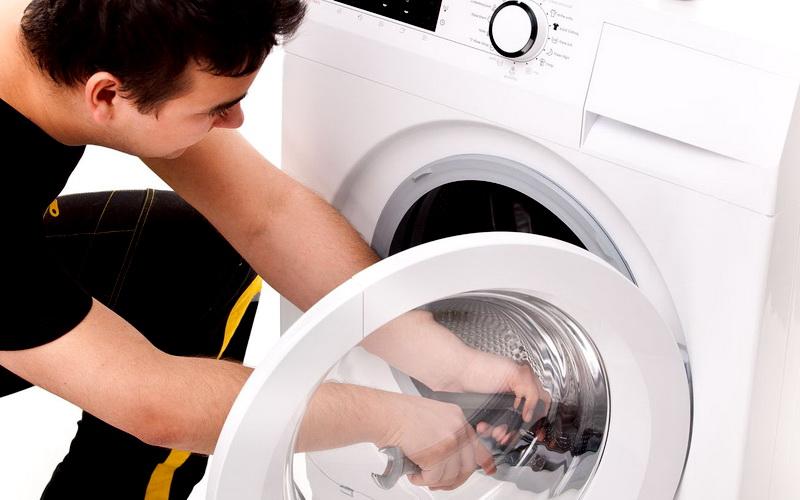
Do-it-yourself washing machine repair
Armed with the necessary baggage of knowledge and the causes of the most common malfunctions of your automatic washing machine, we will try to determine which of them you are able to repair with your own hands, and where there is a need to resort to the help of specialists.
 If the warranty has long ended, you can repair the washing machine yourself.
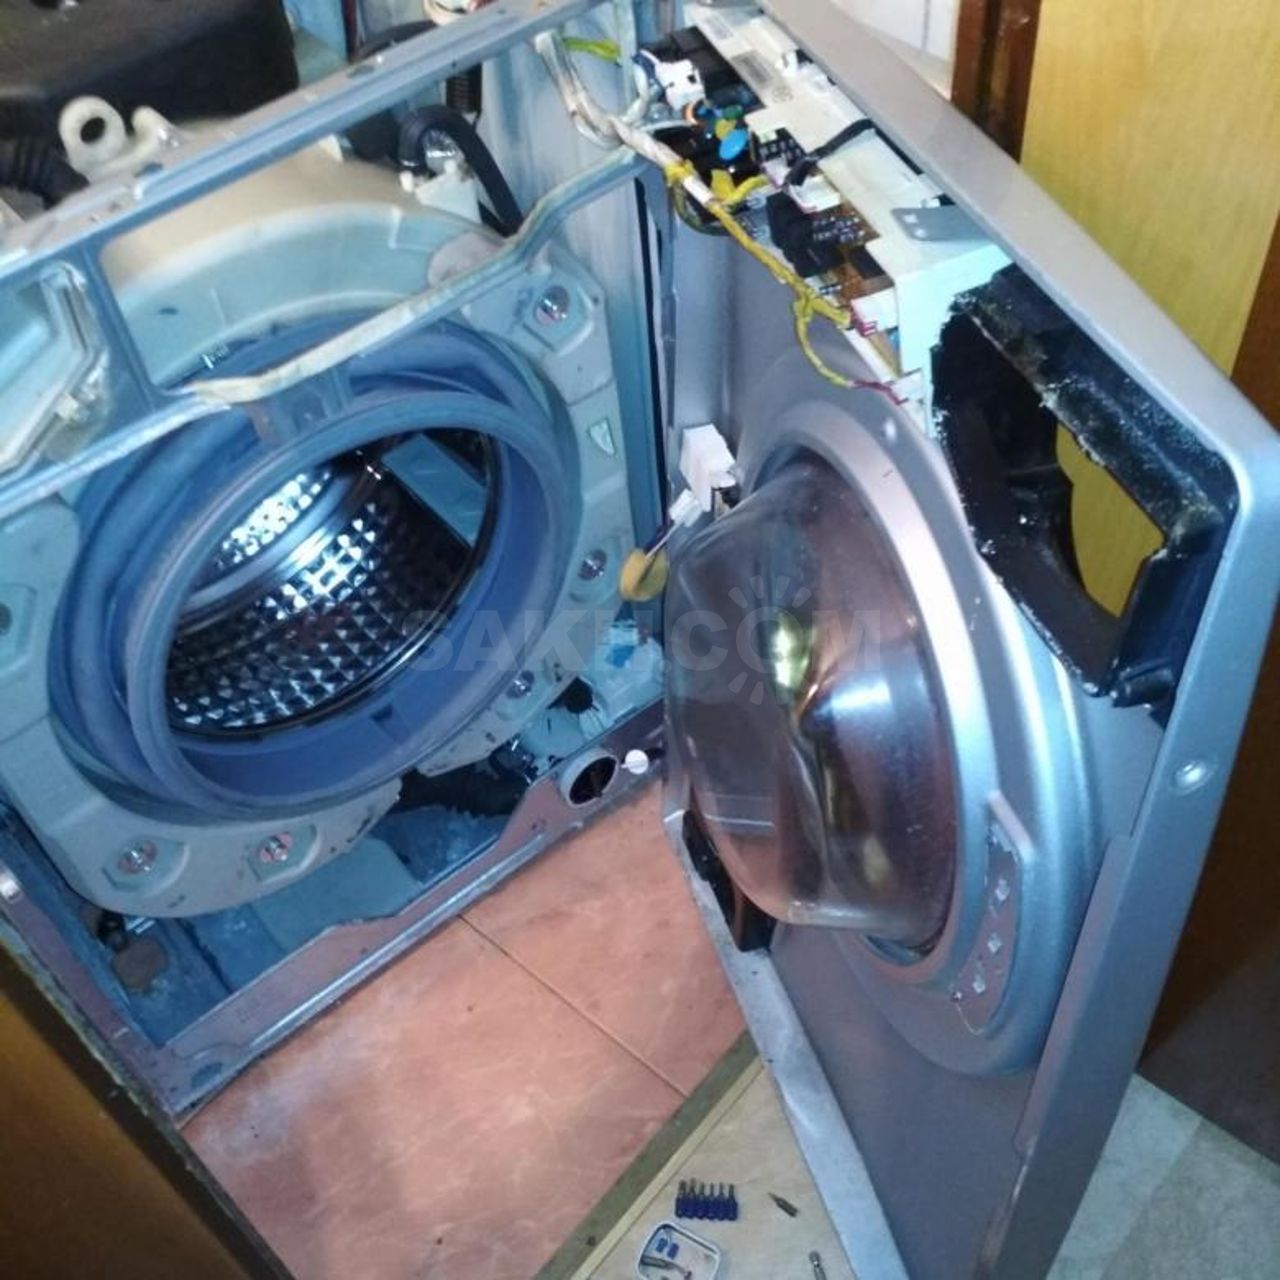
Remember that this unit consists of many assemblies and small parts, therefore, if you are starting this procedure for the first time, before any disassembly, take a picture of all the images or video pictures of joints and joints on your phone in order to return the device to its original state at the end of work.
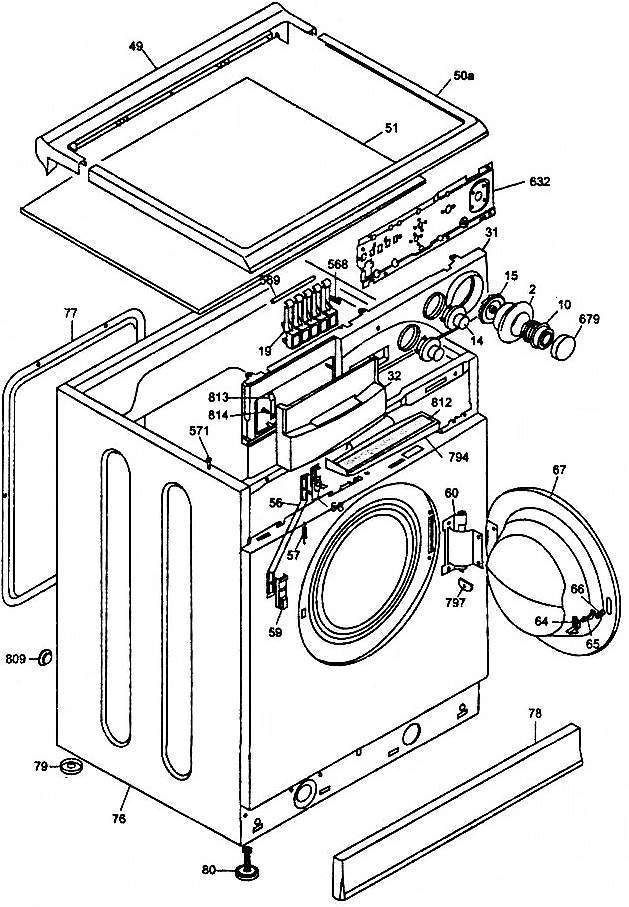
 Repairing a washing machine with your own hands is possible only when you know what it consists of, what role each part plays.
Another important factor is the correct draining of water from the tank, because. breakdown, basically, happens when the device is running and this procedure must be carried out first.


 When the principle of operation and the purpose of each part are clear to you, you can determine from a malfunction what the cause may be.
From the above, we highlight the area of work on the repair of washing machines with a photo, as a rule, this is a replacement for the following parts with new ones:
- cleaning or replacing the filter;
- replacement of a worn or broken drive belt;
- replacement of the pump of an automatic washing machine;
- temperature sensor;
- programmer repair;
- replacement of heating elements;
- installation of new shock absorbers
Do-it-yourself washing machine repair begins with disassembling the case.
For self-repair, you will need the following tools:
- flat screwdriver;
- curly screwdriver;
- pliers;
- several flat wrenches;
- pliers;
- phase indicator;
- LED flashlight;
- ticks;
- soldering iron;
- service hook;
- a hammer;
- long nose pliers.
 In order to repair the washing machine with your own hands, you need to disassemble the unit and perform diagnostics, and this will require tools.
Below, we give a video of replacing a drum or a programmer, procedures that are more complex and require extreme concentration and attention.
 For self-repair, you also need to know how the washing machine works. This will help determine the element that could lead to this breakdown.
The washing machine repair instructions above show that there are no particular difficulties in this process. All you need is a desire, knowledge of the principle of the structure and operation of the unit and a clear diagnosis. But remember that any breakdown is easier to prevent, so do not forget about preventive measures and respect.
 The most common breakdowns of washing machines are associated with improper operation. In order for the unit to serve for a long time, you need to follow simple rules.
Potential problems and breakdowns
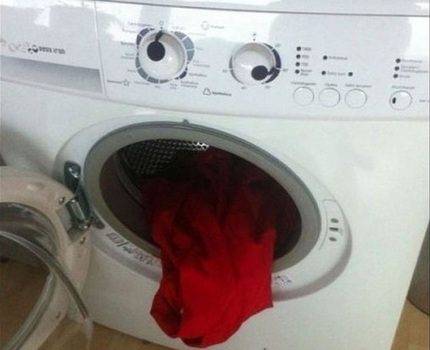
In order not to make excessive efforts, it is advisable to observe the technique and understand what exactly is the deterioration in performance. If the overall quality of the wash has fallen, an uncharacteristic noise has appeared during the spin cycle, and the laundry remains wet after the spin cycle, the problem is most likely to be sought in the pump.
These same unpleasant phenomena provoke clogging of communication hoses. It is better to get to all these nodes from the front of the unit or from below. If foam comes out of the machine during operation, you need to stop washing, set the “Drain without spinning” program and wait until the device completes all the necessary actions and opens the door.
Then you should remove the laundry, manually clean the inside of the foam and start the wash again without spinning. If this is not done, the foam will penetrate into the engine or onto the control board, and the repair of these components will cost the owners a substantial amount.
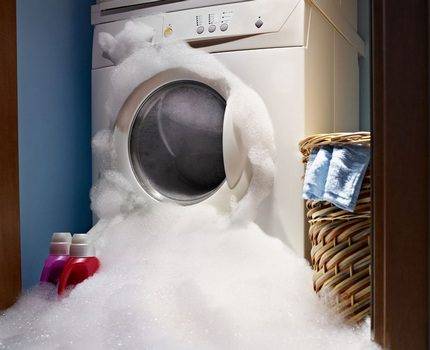
The reason for the appearance of abundant foam in the washing machine may not be a breakdown or malfunction of the unit itself, but the use of hand washing powder (it does not contain defoamers) or a significant excess of the standard dose of detergent
If the device does not gain temperature and does not warm up the water, it is most likely that the working heating element has failed. Its location is indicated in the accompanying technical documentation. Usually it is located at the back, but for some models, depending on the manufacturer and internal design features, it may also be in front.


It is possible that as a result of using hard water, scale has formed on it and will need to be cleaned. Or, if the element is burned out, you will need to replace it with a new heating element. The replacement process is described in detail in our recommended article.
If the machine washes for a long time, it is worth looking for a malfunction in the electronics. It will not be superfluous to check the performance of the water temperature sensor and other controls.The same problem can occur due to an incorrectly placed drain hose.
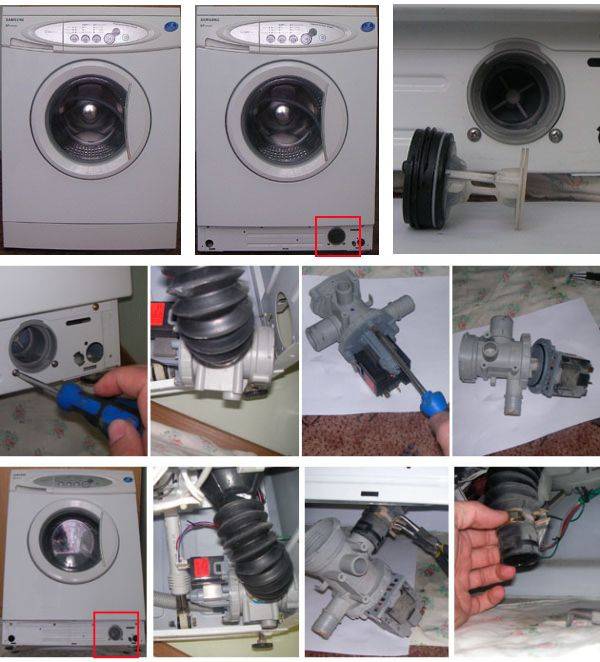
A pressure switch or pump is responsible for the uniform and rapid draining of the liquid from the washing container. Slowly pouring water clearly indicates that these elements have lost their functionality due to breakage or operational wear.
To repair them or replace them with new ones, you will have to dismantle the side wall and penetrate into the upper part located behind the rear panel.
When failures occur at the drum or bearings, you will have to disassemble the device completely, identify the problem, carry out repairs, and then assemble the machine and start it up. If the washing is in the usual mode, then the operation can be continued.
This is just a short list of the main breakdowns identified in the machines. It is relevant for all household washing appliances, regardless of the brand and design features of each individual appliance.
Electronics and software control problems are more complex problems and require professional intervention. To eliminate breakdowns of this level, regardless of whether the equipment is still under warranty or not, it is better to contact a specialized service center.
Certified craftsmen working there will diagnose, quickly identify the source of the malfunction and repair the damaged electronic assembly or replace it with a new one.
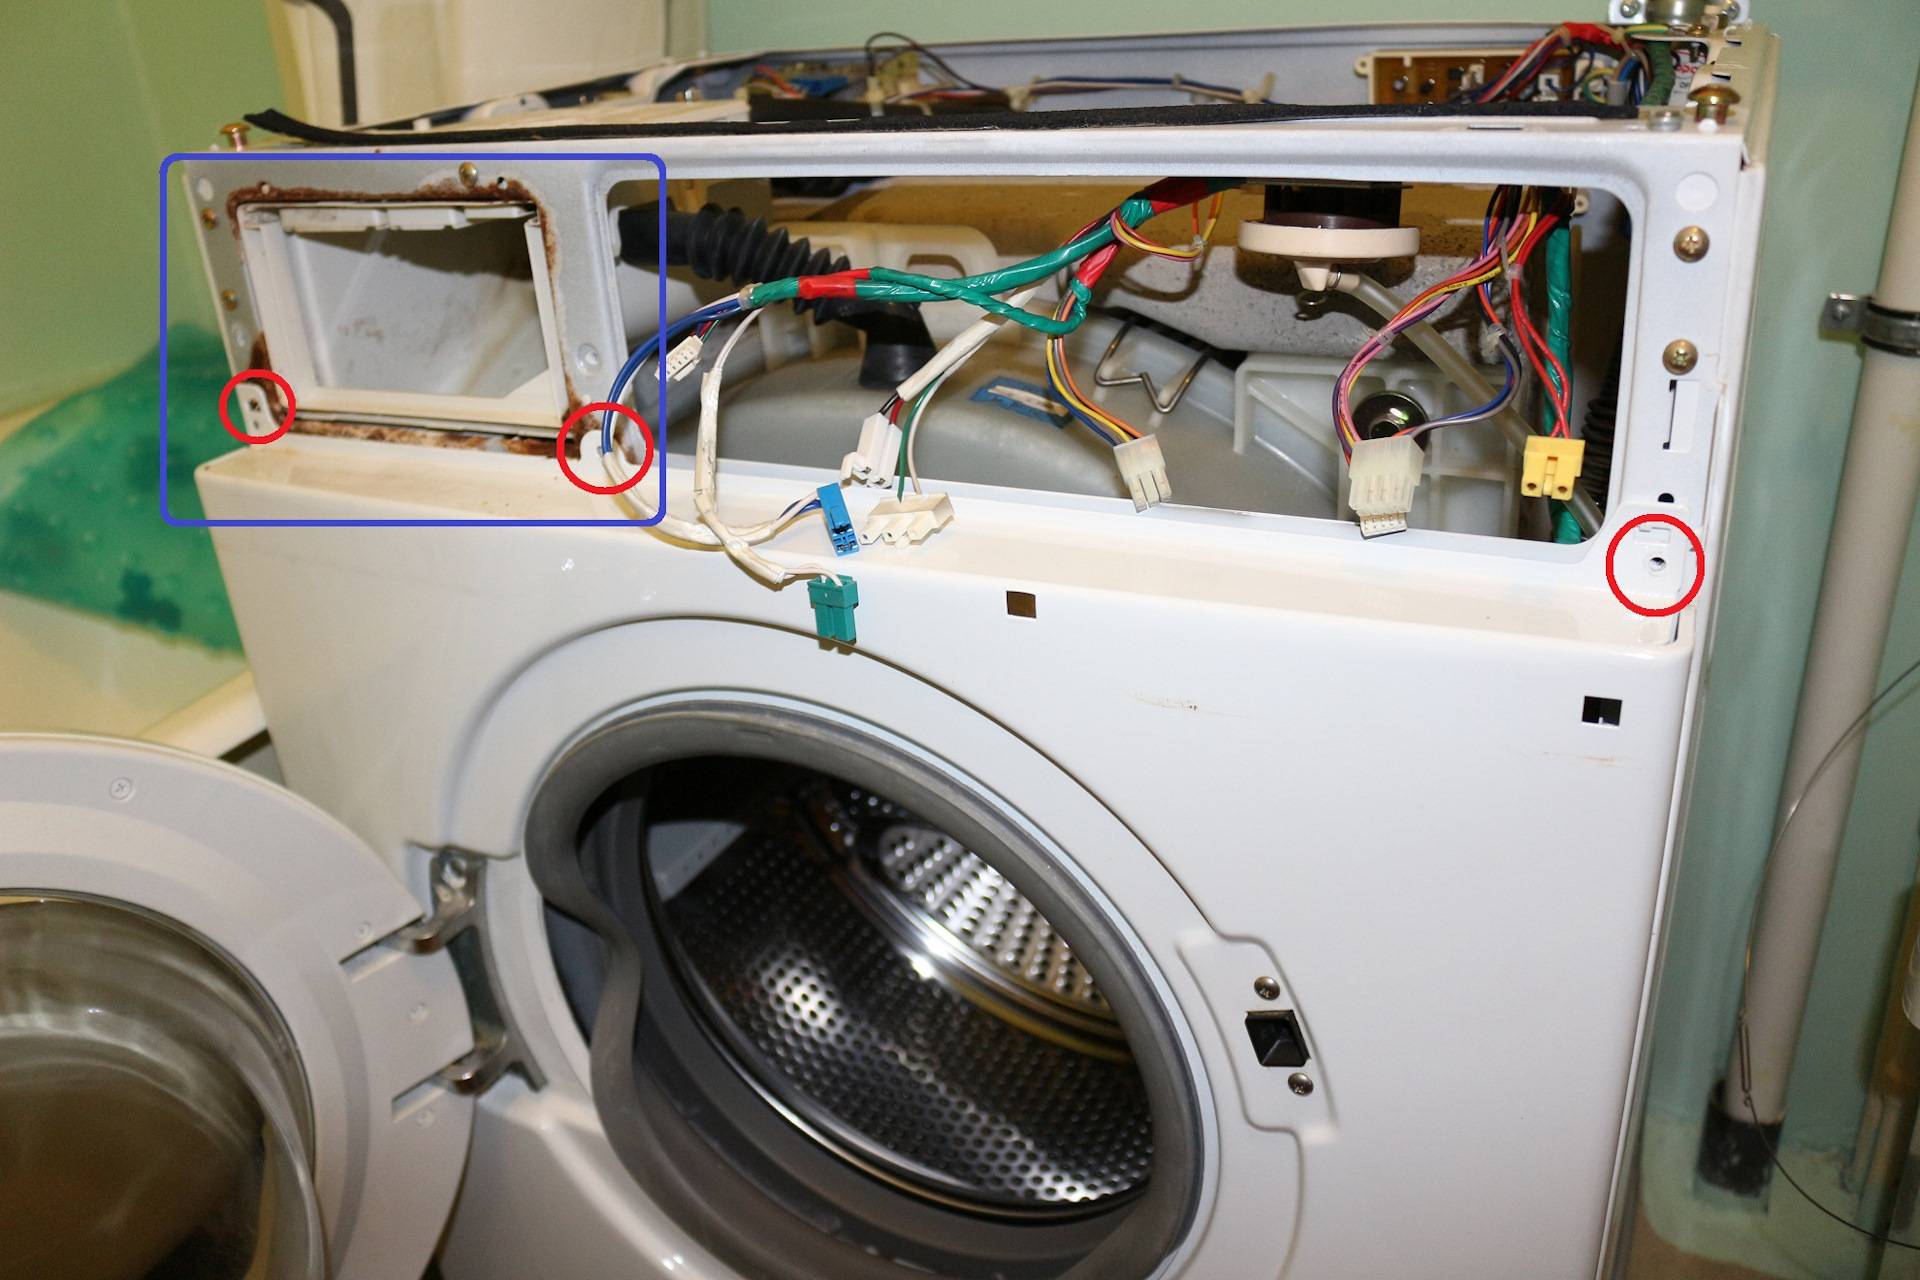
Washing machine programmer repair
 The programmer or timer of the washing machine is used to set the washing programs. It can break from time to time and from improper use. It looks like a protruding rotary knob on the front panel.
Signs of a broken washing machine programmer:
- The operating time does not correspond to the time specified in the instructions;
- The washing machine does not want to do anything;
- Unintended stop of the machine during the wash cycle;
- Flashing of all lights on the device panel;
- Corresponding error on the display.
Proper disassembly of the programmer is the key to its successful repair. Disassembly of the programmer:
- The programmer is removed from the washing machine;
- The top cover is removed from the latches and opens;
- The upper electronic board is removed;
- The central gear is taken out;
- Remove debris from auxiliary gears;
- The burnt tracks and elements are re-soldered on the board;
- All gears are removed one by one;
- The motor core is removed. The core winding could also be burned. It needs to be restored;
- All parts of the programmer are visually inspected for damage, wiped with alcohol;
- Assembly is in reverse order.
Repairing a washing machine on your own is a laborious and difficult task. Do not take it if you are not confident in your abilities. Complex mechanical and electrical components, such as an electric motor or a bearing mechanism, cannot be repaired at home. For high-quality repair of an automatic washing machine, the right choice is to turn to professionals.
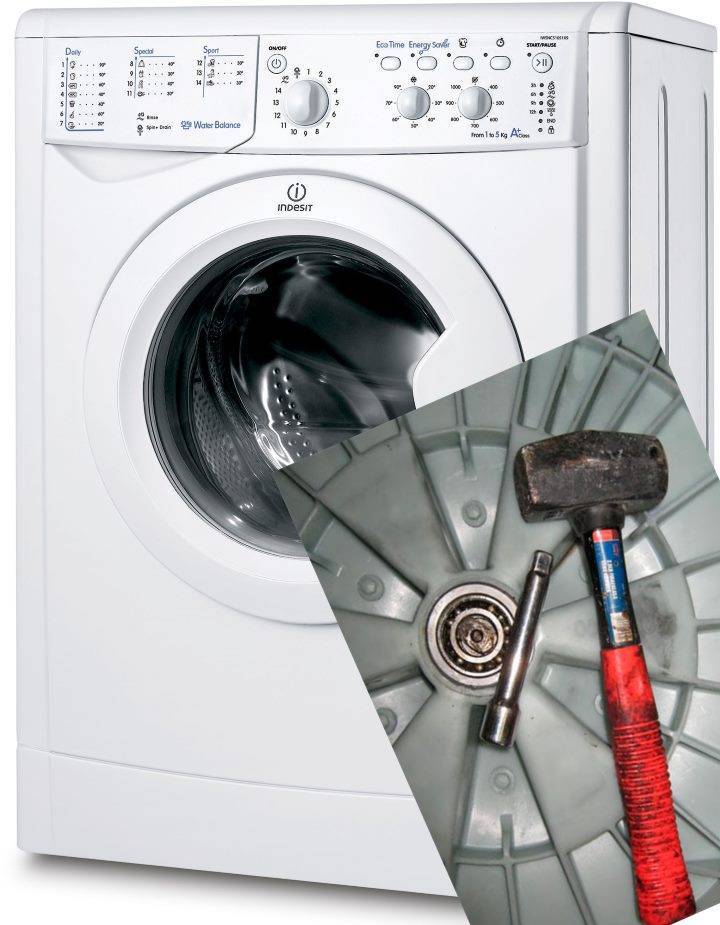
Why do you have to glue?
Sealing and gluing the washing machine tank is a forced process that owners of some SMA models have to face. Washers with a non-separable tank are offered, for example, by brands such as Ariston and Indesit. Manufacturers, making this element monolithic, do not intend to disassemble it. If the bearing breaks, then the assembly must be completely replaced.But such a replacement costs a lot of money and our people simply cannot agree with this order of things. As it turned out, you can split the drum, remove the bearing, change it to a new one, and then connect the halves


It is important to know how and how to seal the tank
Bulgarian and circular saw
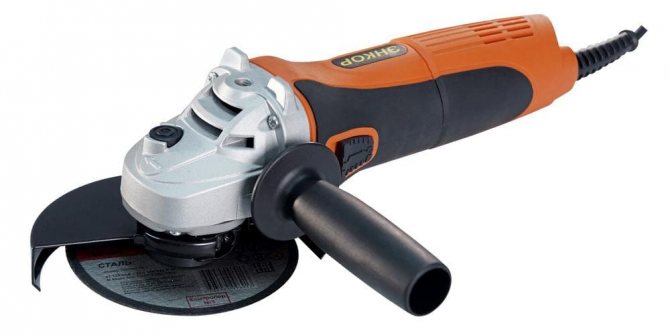
Not the best tool to cut the tub of a washing machine. The main problem of the grinder is that it does not saw, but melts plastic. As a result: torn, melted edges, a wide seam, a high probability of spoiling the surface. At the same time, the grinder is perfect for sawing stuck fasteners of a metal tank, for example, from those that are installed in Bosch machines of the upper price segment. The circular saw also has disadvantages. It saws well, but “walks”, you must constantly keep it on the cut line.
As you can easily see, there is no ideal tool, and it cannot be. To quickly and efficiently cut the tank of any washing machine, you need to choose the best option for each area. For example, on a smooth surface, you can use a jigsaw, and process places with protruding elements with a saw (edge or hacksaw).
Water problems
Water is not coming
| Cause | What to do |
| Water supply valves closed | Open the valves, making sure they are closed beforehand. |
| Inlet hose deformed | Look at the hose and if it is flattened, flush the part and bend it if necessary. |
| Inlet filter clogged | After closing the inlet cock, disconnect the inlet hose. Using pliers, remove the filter, then rinse the part under running water. Replace the filter and then the inlet valve, and then connect the inlet hose. |
| Inlet valve damaged | If the filter is unable to trap the dirt, it gets on the valve and causes it to malfunction. In this case, the valve will need to be replaced. After disconnecting the inlet pipes, find the valve and replace it. |
| The switch that closes the inlet valve has broken after the machine has filled the water to the desired level (the tube could be damaged or clogged) | Check the tubing that is on the switch - if it has a hardened end, cut it off and put the tubing back on the switch. Blow into the tube to see if the switch works - you should hear a click. Next, you need to loosen the clamp on the hose, which fixes the pressure chamber on the drum. Inspect the chamber, rinse it thoroughly until the inlet as well as the outlet are completely clean. Check if it is damaged. Verify that the switch is good using a multimeter. In case of breakage, replace the part with a new one. |
| Broken electric motor | Depending on the breakdown, you can repair it or replace it with a new one. |
Related article: Errors and malfunctions of the Siemens washing machine
If water is not poured into the washing machine, watch the video of the "Washing +" channel.
Gaining very slowly
| Cause | What to do |
| Inlet hose kinked | Check the hose and straighten the deformed area. |
| Inlet hose dirty | Flush the hose until the blockage is removed. |
| Water pressure is insufficient | Check if the water supply valve is fully open. Perhaps the cause is low pressure in the line. If such a situation is observed in a private house, the equipment of a pressure tank in the attic can help. |
Doesn't drain
| Cause | What to do |
| Wrong program selected | Make sure that you have not paused the machine, and also have not turned on the delayed wash. |
| Water level switch not working | After checking its operation, install a new switch if necessary. |
| Clogged or kinked exhaust hose | Assess the condition of the hose, then flush it and make sure that there are no foreign objects inside. |
| Clogged exhaust filter | Depending on the degree of clogging, the filter can be washed or replaced. |
| Clogged pump | Putting a rag under the machine, disconnect the clamps from the hoses that are fixed to the pump and make sure that there is no blockage in them. Using a pencil, evaluate the rotation of the impeller - if tight rotation is found, open the pump using suitable tools. Make an audit of the impeller chamber, flush it, and then assemble the pump and install it in place. |
| The pump broke | Replace it with a good part. |
| Electrical problems | After disconnecting the machine from the network, revise the contacts. If necessary, tighten them up and clean them. |
| The timer is broken | Replace this part with a good one. |
If during washing the washing machine stops and does not drain the water, watch the video of the “Wash +” channel.
small leak
| Cause | What to do |
| Hose clamp slightly loose | Carefully inspect the clamp, evaluating whether there are traces of water around it. First, loosen the clamp and move it slightly, then tighten it. |
| There is a crack in the hose | If cracks are found in any hose, it should be replaced with a new one. |
| The door seal has slipped | Replace the door seal with a new part. |
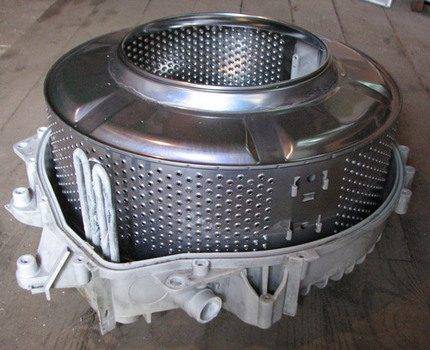
| Tank seal leaking | Completely disassemble the machine and replace the bearing. |
For information on how to replace a bearing in a washing machine, see the video by Vladimir Khatuntsev.
strong leak
| Cause | What to do |
| Exhaust hose slipped out of drain riser | Inspect the outlet hose and replace it. |
| Clogged sewer | Check the condition of the sewer, clean it and make sure that the drain is performed correctly. |
| Exhaust hose disconnected | Check the hose and reinstall it. |
Related article: Paint-enamel PF 115 and its consumption per 1 m2
For information on how to fix a leak in a washing machine, see V. Khatuntsev's video.
If the washing machine constantly drains water and does not collect it, watch the video of Vladimir Khatuntsev.


