- Pallet Damage Prevention
- Leaks in cabin construction joints
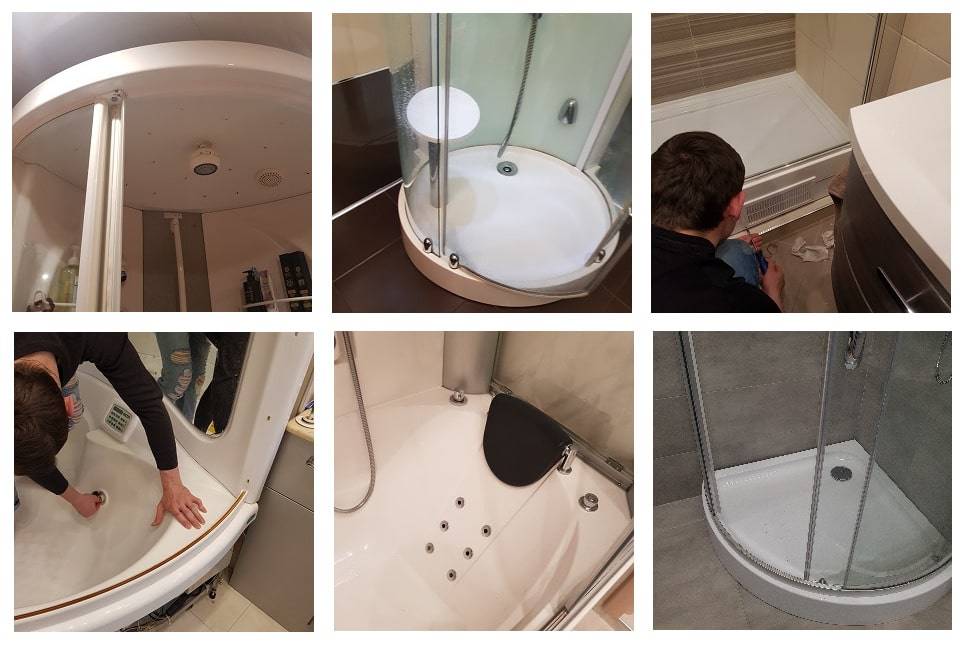
- Problems that only a specialist should solve
- How to replace?
- Repair the mode switch and control panel
- The main types of breakdowns
- Operating Instructions
- Light damage
- deep damage
- Do-it-yourself elimination of through holes
- How to replace glass in a shower
- Replacing the shower faucet cartridge
- Subscribe to us please!
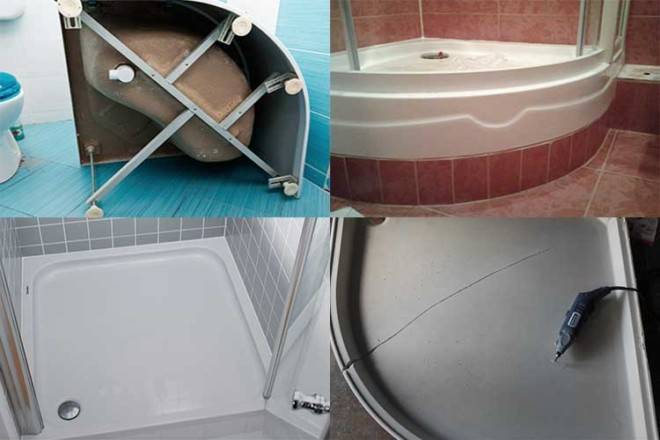
- Crack in the pan
- Causes of damage to pallets
- How to fix a shower faucet
- Troubleshooting
- Other home remedies for cleaning watering cans
Pallet Damage Prevention
Problems with the shower bowl can be easily avoided if you follow all the rules for using this product. First of all, it is necessary to exactly fulfill all the requirements for installing the pallet. When taking water procedures, you do not need to bounce on the sink and invite a companion with you. You should be very careful with a watering can made of metal and having sharp edges. When falling from a height, the watering can scratches, splits the bowl or pierces it through.
The pallet should be regularly inspected for damage. If they are identified, repairs should be carried out immediately. So the life of the pallet will be almost unlimited.
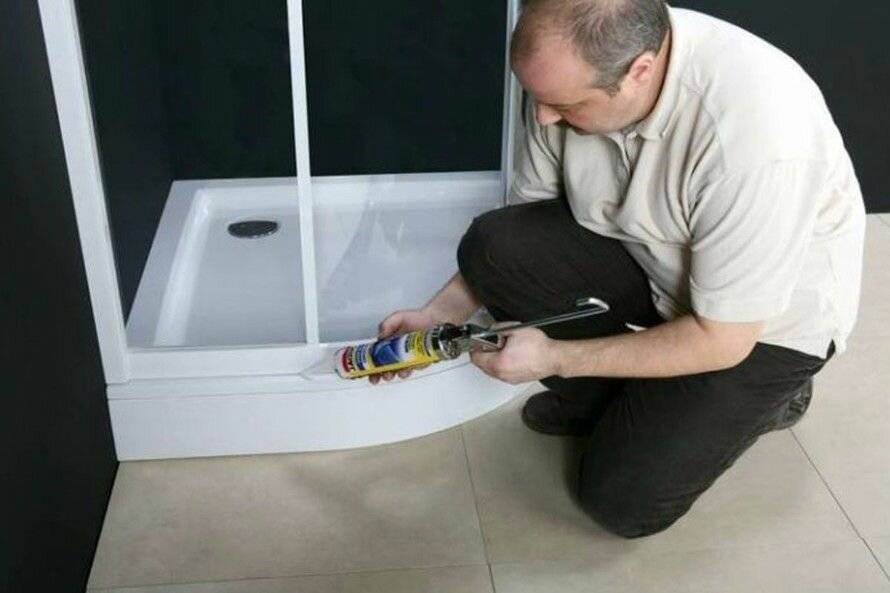
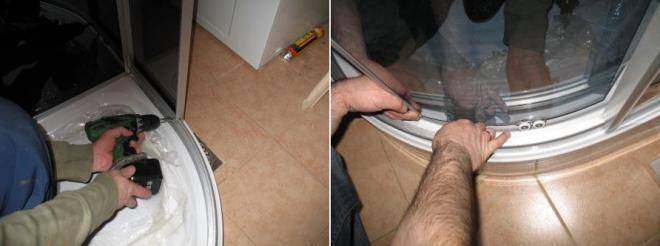
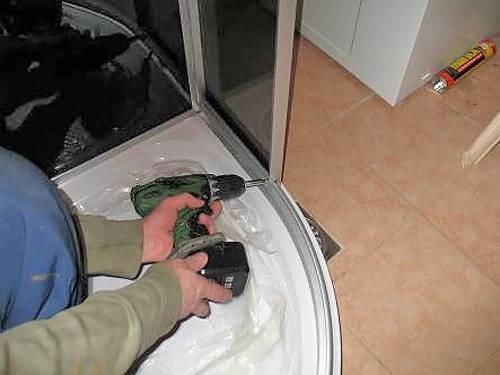
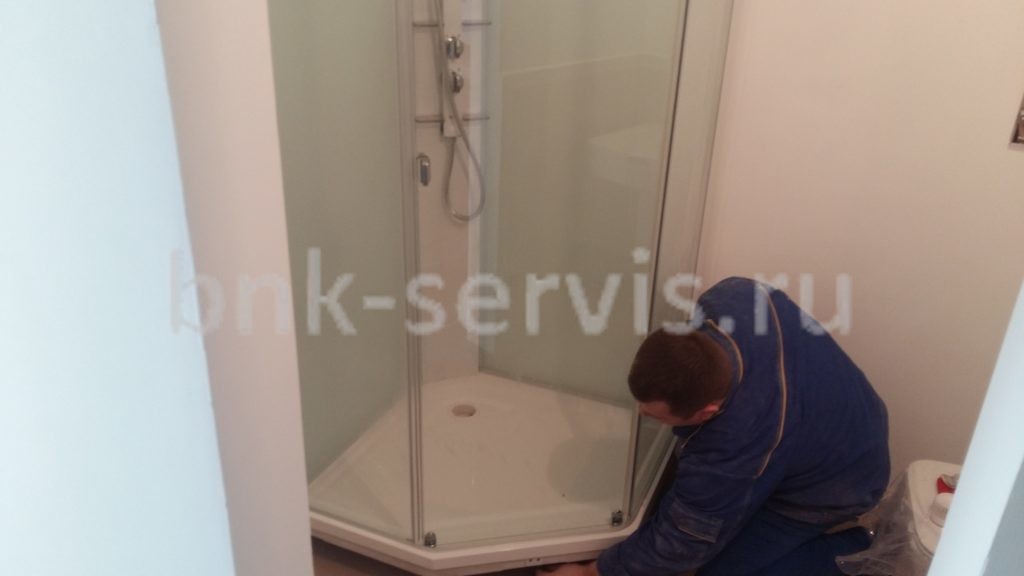
Leaks in cabin construction joints
This is just the case when you can’t do without dismantling the shower cabin, otherwise the result of the repair will be temporary, and after a week the traces of smudges will again make themselves felt. The first and main cause of leaks is improper assembly of the structure, leakage of its connections.
 Repair of a shower cabin connection from leaks
The essence of the repair is the disassembly and reassembly of the shower cabin in compliance with the basic rules:
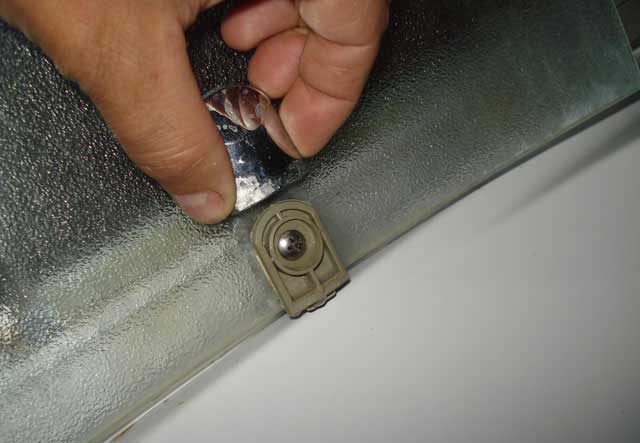
- the pallet should fit as tightly as possible to the wall, which ensures its rigid fixation. To do this, hooks are attached to it from below, which press it against the walls. After their installation, the pallet is slightly moved away from the walls, silicone is pumped into the resulting gap, and then the pallet is pressed tightly against the walls with the help of hooks. At the same stage, it is filled with water, which allows you to control its tightness. The final touch is the installation of decorative corners that can be fixed immediately;
- leaks can also appear at the joints of the walls with the cabin screen, and at the junctions of the screen with the pallet. To eliminate traces of leakage, the screen is removed, the joints with it are thoroughly cleaned of the remnants of the old silicone and filled with new, after which the screen is installed in its original place. All fasteners are securely clamped, and the structure is left until the sealant is completely dry (6-8 hours).
If you follow the basic rules of repair and use high-quality materials, you can forget about leaks for a long time. Your shower enclosure will now look and function like new.
Problems that only a specialist should solve
Despite the fact that many breakdowns can be fixed on your own, in some situations, repair and maintenance of shower cabins should be performed by a professional master.
Do not repair the shower electronics yourself. If problems are found in the operation of this node, it is better to invite a professional master. If the warranty period of the cabin, which is confirmed by the check and the package of attached documents, has not expired, then the repair will be free of charge. After the warranty period has expired, it is recommended to contact companies that specialize in the repair of sanitary equipment to troubleshoot the shower cabin.
A specialist should also change the glass parts of the booth, its pallet, as well as complete installation and dismantling of plumbing. Without relevant experience and knowledge in this area, you can spend a lot of time and effort.
If the shower cabin suddenly breaks down, then if a repair problem arises, first of all, you need to study the prices for problematic parts. There are situations when a complete replacement of an element is much cheaper than restoration work.
How to replace?
Of course, there are collapsible models of cartridges, but it is still much more efficient to replace the entire device than to select components for it.
First of all, you need to choose the right cartridge. It must correspond to the model and manufacturer of the faucet on which it will be installed. If you have a single-lever model in your shower room, a ball, hydroceramic or ceramic cartridge is suitable for it. Two-valve mixers are equipped with ceramic faucet boxes with paranitic and rubber gaskets.
In addition, such a cartridge may be damaged by water hammer. The service life of both the first and second types of switches depends on the degree of wear and reliability of the parts.
Having decided on the optimal product, you can proceed to its installation. To do this, you will need the following tools: a set of screwdrivers, pliers and a hex wrench.
- First of all, you need to turn off the water supply, that is, the valves on the pipes. A plug is removed from the front part and the screw hidden behind it is unscrewed, after which the lever can be removed. It happens that the accumulated scale does not allow this to be done, and then it is advisable to pour boiling water over the structure so that the material of the handle expands.
- Then you need to unscrew the clamping nut with which the old cartridge was fixed and remove it, after which a new one is installed in the same place. The most important thing is that the holes of the mixer and the new part completely match. In order to check the design in this regard, you need to place the cartridge in the structure without fixing and put the top of the mixer in place. If the appearance of the device has not changed in any way, then the cartridge is suitable.
- Before the final installation, it is advisable to clean the inside of the mixer from accumulated debris and scale, since there is such an opportunity. For the best effect, the surface can be treated with a “liquid” key, so that later it is easy to remove scale and the effects of corrosion. Do not forget to check the condition of the o-rings, because very often leaks occur due to improper installation.
- Next, you need to fix the cartridge with a clamping nut and install the upper part of the mixer by tightening the fixing screw.
-
The installation should be completed by checking the design for tightness and functionality.It is desirable to test the mixer in different positions and modes - if the flows of cold and hot water “listen”, then the installation was done correctly. The tightness of the fit can be checked by completely draining the faucet and closing the spout opening at the highest pressure. A visual inspection will be enough to make sure that the connection is not leaking.
-


In general, the process of replacing a cartridge is not particularly difficult if you choose the right model and carefully follow all the instructions. And to prevent rapid wear of the faucet and cartridge is possible only by prevention: professional installation, proper operation and installation of filters will help to significantly extend the "life" of the structure.
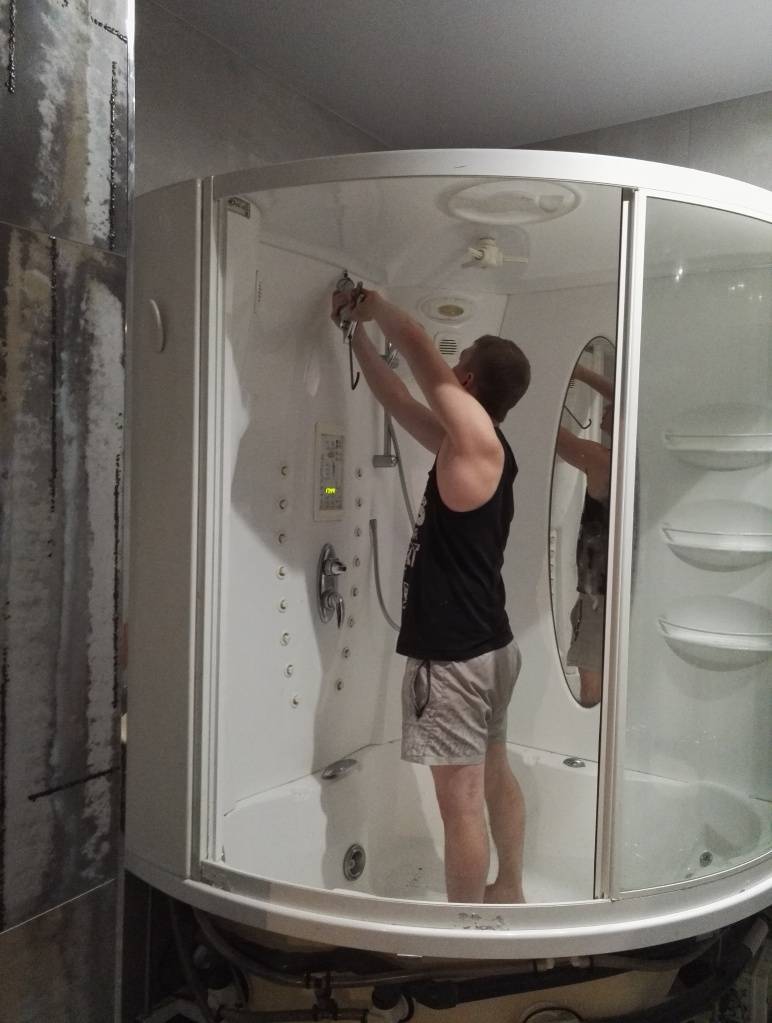
Repair the mode switch and control panel
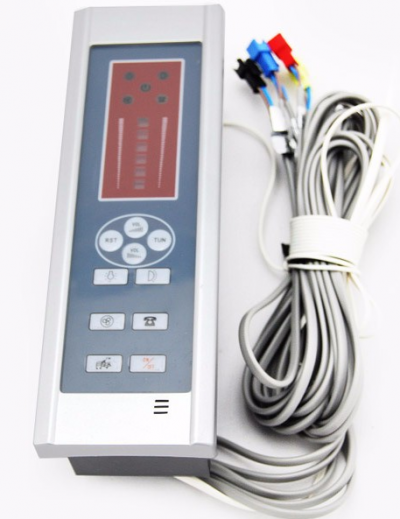
Shower switch problems can be related to the electronic control panel, or to the cartridge in the faucet. Instructions for replacing the cartridge are given above.
The most common reason for the failure of the shower chamber control panel is the destruction of the film with the buttons through which water enters the remote control.
To prevent water from entering the control panel circuit, it is necessary to lubricate the seat of the control panel with sealant, and also walk around it with silicone.
These manipulations will increase the life of the panel.
If, nevertheless, water got inside, you will have to change the remote control. First of all, you need to select the desired type of PU.
There are several types of them: oval, rectangular, push-button, touch.
Repair sequence:
- move the shower cabin;
- unscrew the fasteners of the remote control, disconnect the wires;
- install a new control panel;
- lubricate the seat with sealant and remove excess with a spatula.
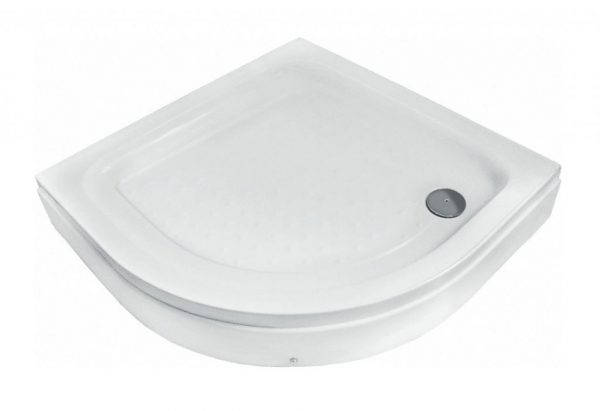
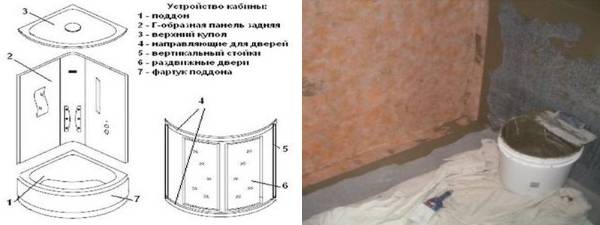
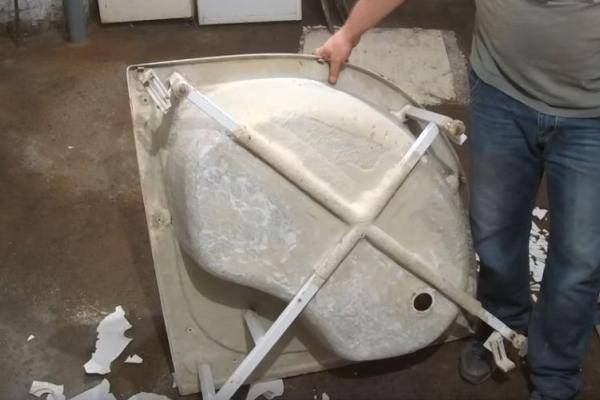
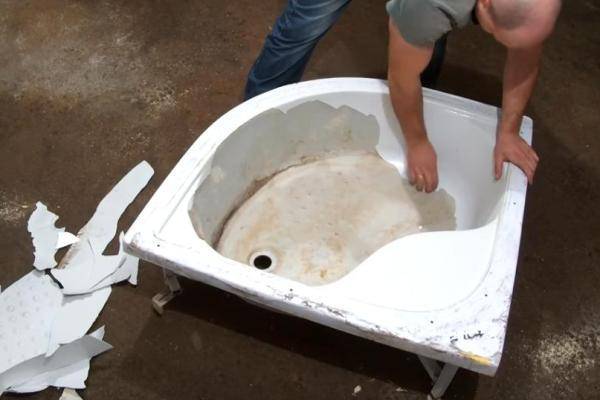
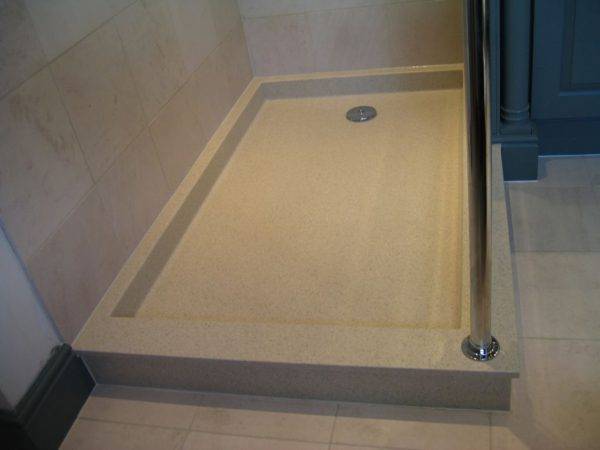
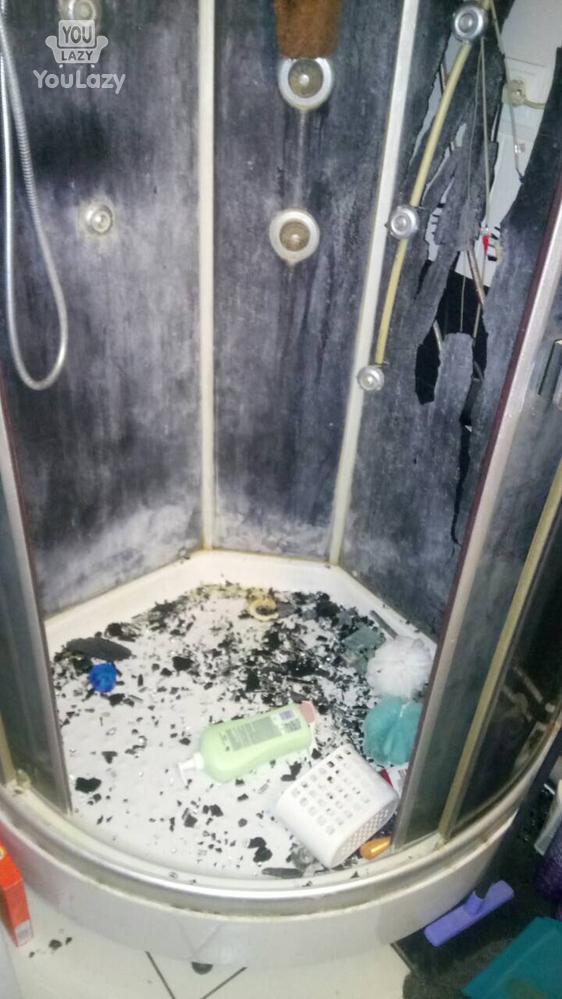
The main types of breakdowns
The susceptibility of shower trays to all kinds of mechanical damage is due to the significant loads that the structure experiences during operation. Most often, modern pallets are made of high-strength, but not sufficiently resistant to impact acrylics.
Less popular designs are also produced based on:
- expensive and heavy, very durable cast iron;
- light, inexpensive and durable steel;
- easy to operate and attractive ceramics;
- original and durable artificial stone;
- budget and non-toxic plastic.
The advantage of a material such as acrylic is not only a stylish and modern design, good hygienic properties, ease of washing and cleaning, light weight and low thermal conductivity, but also maintainability.
However, it is imperative to take into account not only the type, but also the complexity of the damage identified during the audit of the shower tray. The most common types of damage include chips and cracks that vary in size and depth.
Homogeneous and composite acrylic shower trays are popular with domestic consumers, but are not generally available due to the material cost and expensive manufacturing technology. Therefore, do-it-yourself repairs are currently very important.
Operating Instructions
Follow step by step instructions.
Light damage
If the pallet is slightly cracked, but there is no noticeable damage, it is recommended to repair the crack immediately.Otherwise, it will begin to spread and cause big problems. Step-by-step algorithm of actions in this case:


- Remove moisture from the pan, wipe with a clean cloth from the liquid and let dry - with minimal cracks, it is not necessary to remove it.
- Wipe the crack site and the crack itself with a cotton swab dipped in alcohol.
- Apply regular acrylic adhesive.
- Let dry for the required time.
- Apply a second layer.
Glue must be applied at each stage in a minimum amount, a few millimeter layers. At the same time, it is better that the composition stays for at least a day, and only after that apply the second and third layers. To polish the surface, if traces of the composition are visible on it, you can use fine sandpaper. But you should not try hard - sanding can cause new scratches that will lead to cracks.
deep damage
Gluing the pallet, if the damage is deep, is not as easy as it seems at first glance. You will need:
- Dismantle the plumbing fixture.
- Treat two surfaces with a cotton swab dipped in ethyl alcohol.
- Run a brush with glue over the most remote places.
- Gradually leveling the plane, ensure that the distance between the faces is the same on all sides.
- Fill the crack with adhesive.
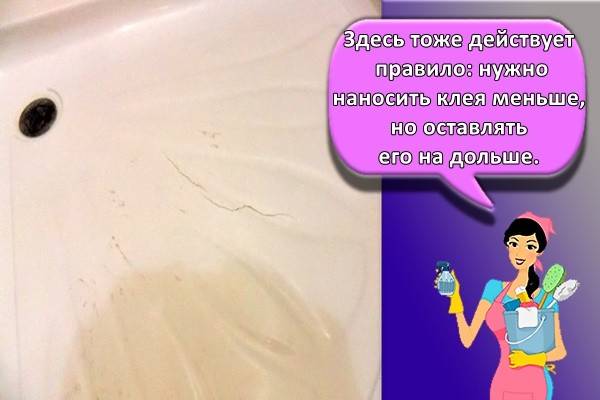
Here, too, the rule applies: you need to apply less glue, but leave it for longer. It will be great if a person who repairs the pallet with his own hands can not use it for at least one week.
Do-it-yourself elimination of through holes
Repairing the pallet, if a through hole has appeared on it, is the most difficult thing. But with due perseverance, it can be done. You will need:
- Dismantle the pallet, removing all devices that can be damaged if dropped or hit.
- Using a grinder or drill, chamfer to make the edge sharp.
- Wipe clean from dust and dirt, act with a cloth with alcohol to remove grease.
- Cut out fiberglass or acrylic patches.
- Impregnate the parts with resin.
- Attach them to the previously cleaned edges.
- Turn the pan over and fill the crack.
Of course, with a through hole, the pallet cannot be used. It is not always possible to achieve positive results even with repairs in the service. Therefore, in in many cases it will be easier buy a new pallet if it is not expensive than to do a long and expensive repair of the old one.
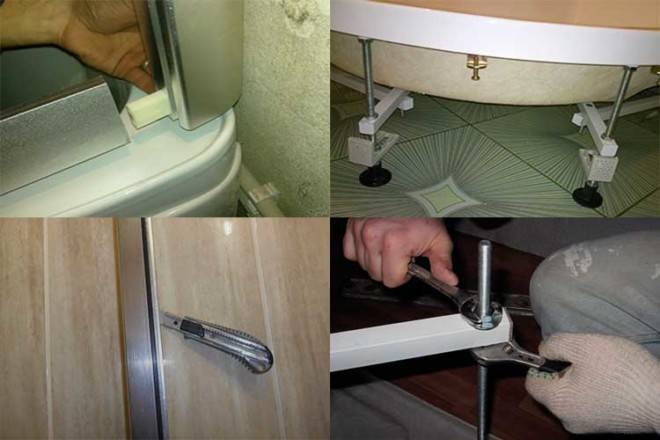
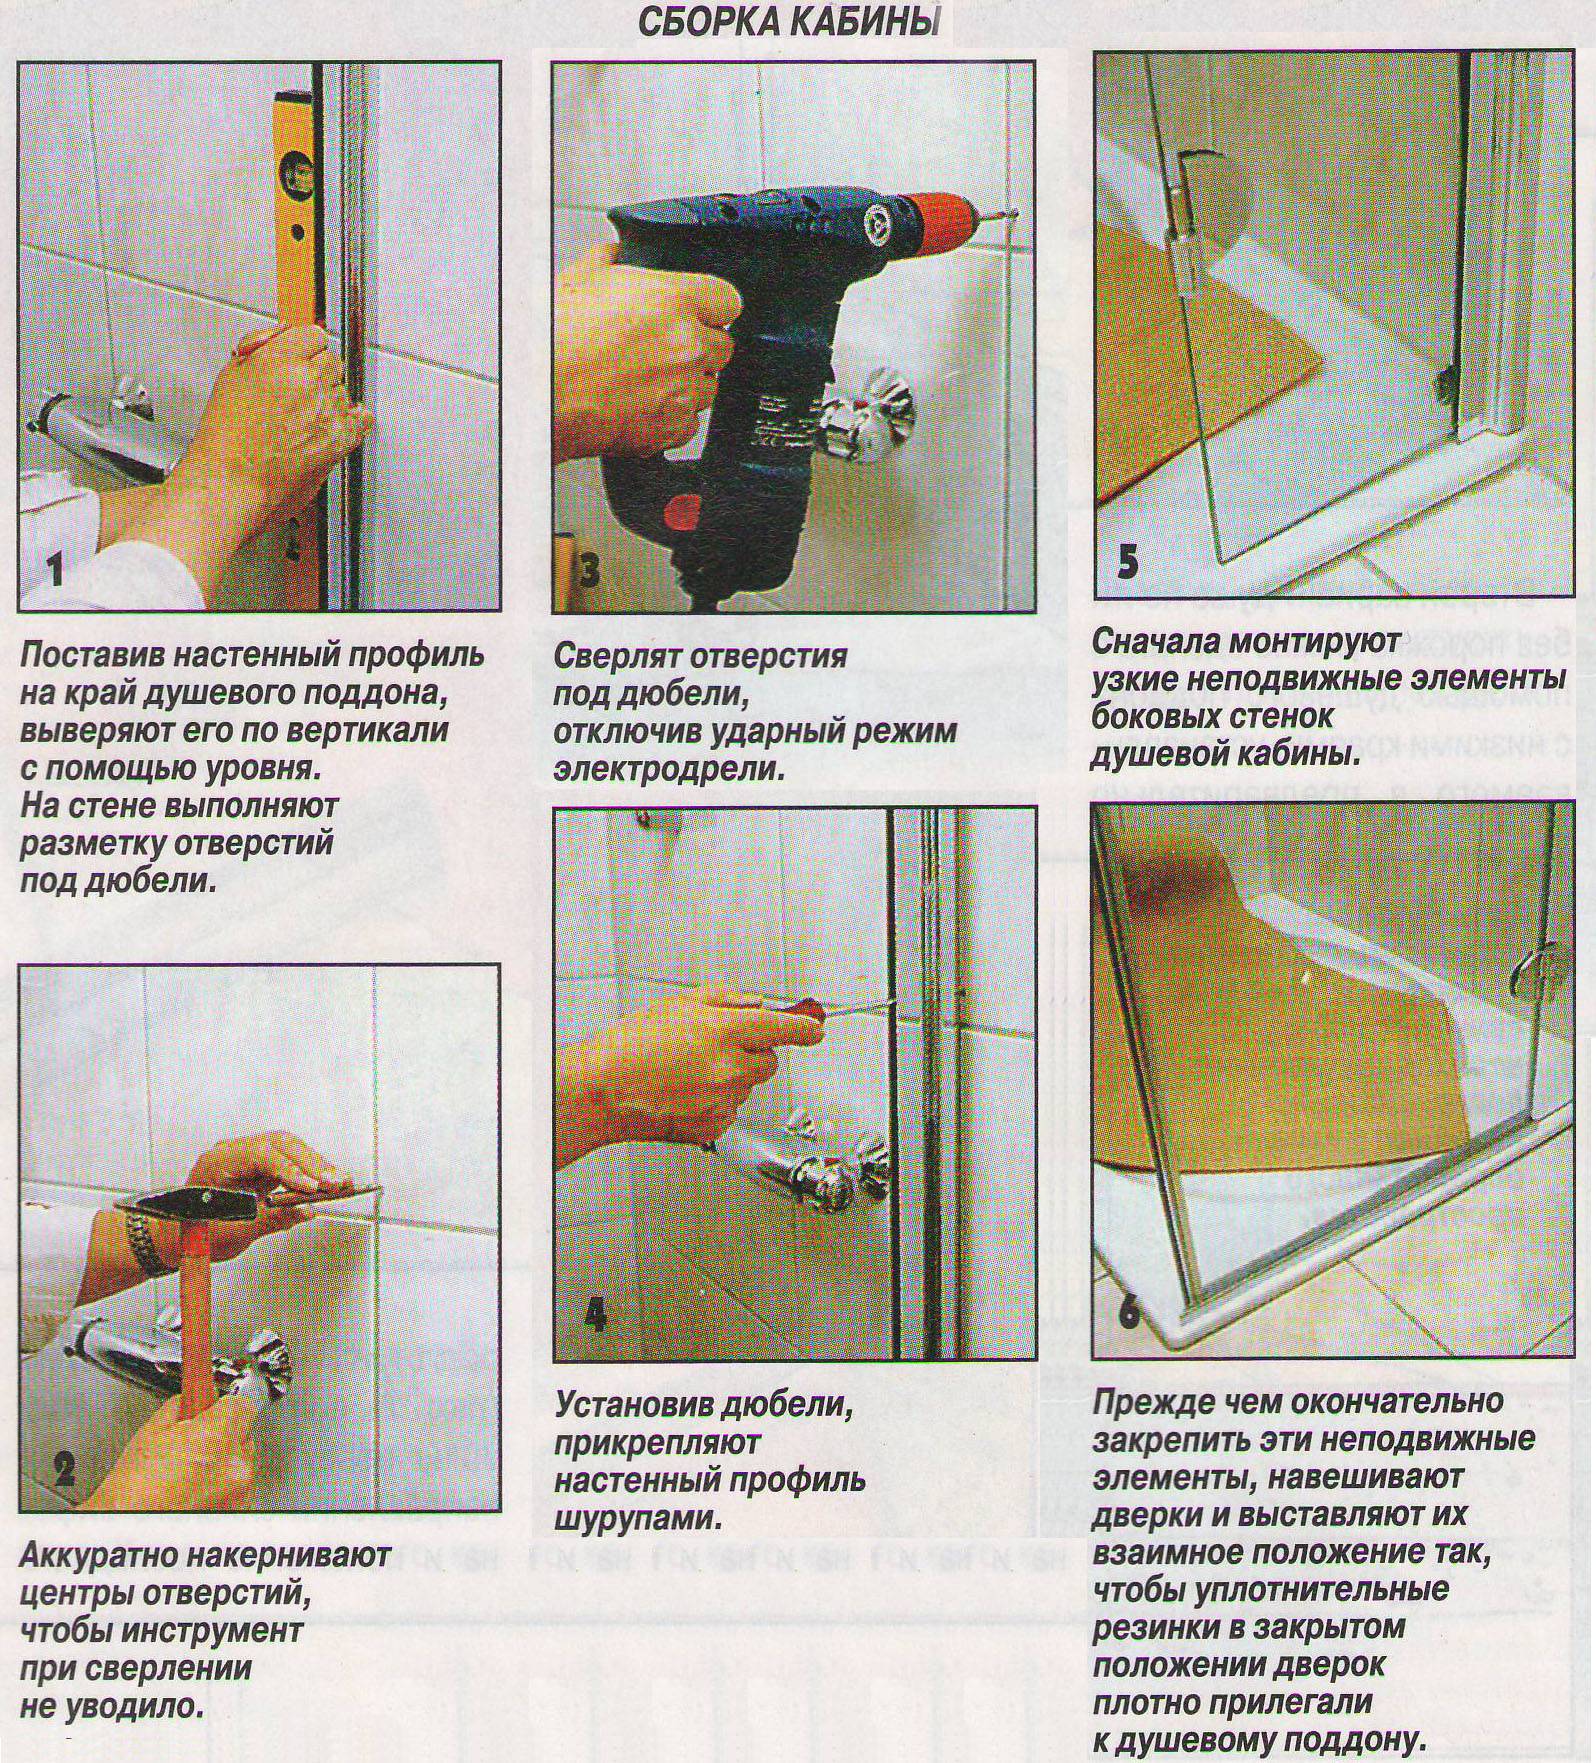
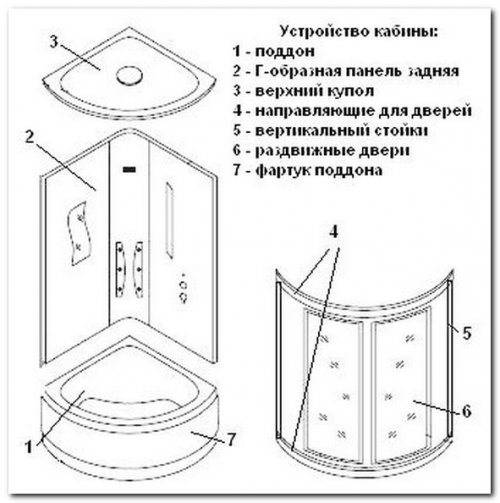
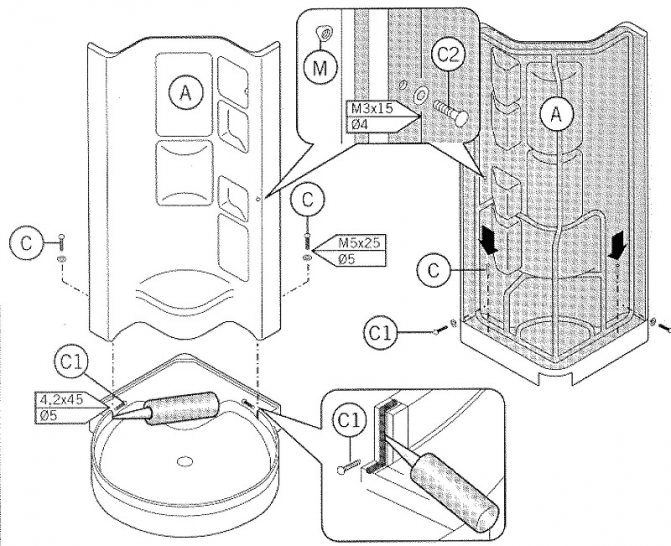
How to replace glass in a shower
Replacing glass in a shower cabin is a very simple process if it is doors, side and front glass. Replacing the back walls involves dismantling the top of the shower cabin completely, which complicates the process.
All glasses are installed using rubber seals. In order to remove the broken glass, it is necessary to remove one rack of the booth, remove the seal and remove the glass fragments. Install a new glass and do the same processes in reverse order.
In order to eliminate the possibility of subsequent glass breakage, it is recommended to protect them with an impact-resistant film. This method is suitable for ordinary non-tempered glasses.
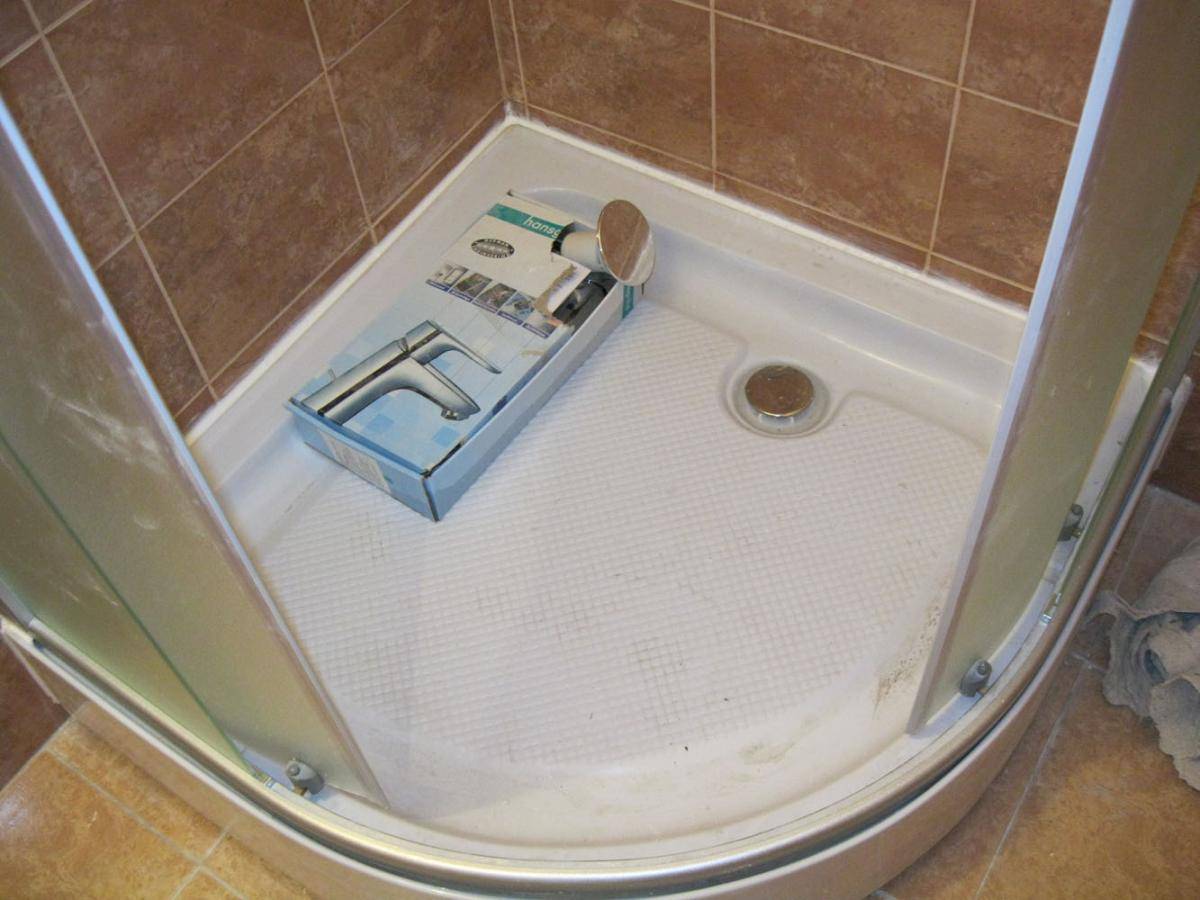
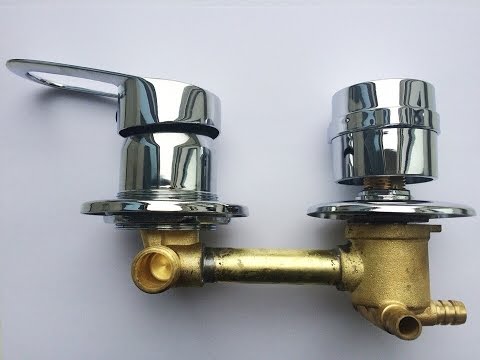
Replacing the shower faucet cartridge
Mixers can differ in the diameter of the holes, and in the design, and in the size of the clamps in the lower segment.If the repair is done by oneself and the person is not a professional plumber, when buying a replacement cartridge, it is recommended to take a broken element with you so that a consultant in the store can help you find a replacement.
The instructions for replacing the cartridge are as follows:
- Turn off the water supply in the apartment by turning the valve on the riser.
- Remove the cap that covers the bolt holding the cartridge handle. Using a hex wrench, unscrew the fastener. Then unscrew the screw, which is located in the hole, and remove the handle.
- To open access to the cassette, remove the decorative nut. To do this, twist the protective cover and remove the cartridge.
- Remove the nut holding the decorative trim, then unscrew the clamp.
- Carefully inspect the inside of the mechanism.
- After unscrewing the nut located on the rear panel of the cabin, the mixer can be removed together with the rubber sealing element.
- Clean the vacated space, dry thoroughly and treat with a silicone-based sealant.
- Insert the cartridge into the grooves intended for this and attach it to the cabin wall with special elements.
- Turn the faucet on and off to check that the installation is correct.
If the mixer is working properly after repair, there are no leaks, the cartridge must be closed with a decorative nut and the handle replaced. After reading the detailed troubleshooting instructions, even an inexperienced master will be able to repair the mixer.
</index>
Why the heated towel rail in the bathroom does not heat up How to change the drain in the bathroom with your own hands Replacing the gasket in the faucet in the bathroom
Subscribe to us please!
We won't spam, honestly!
Thank you very much, you have made us happy!
Some mistake, we apologize!
We kindly ask you to subscribe to our news!
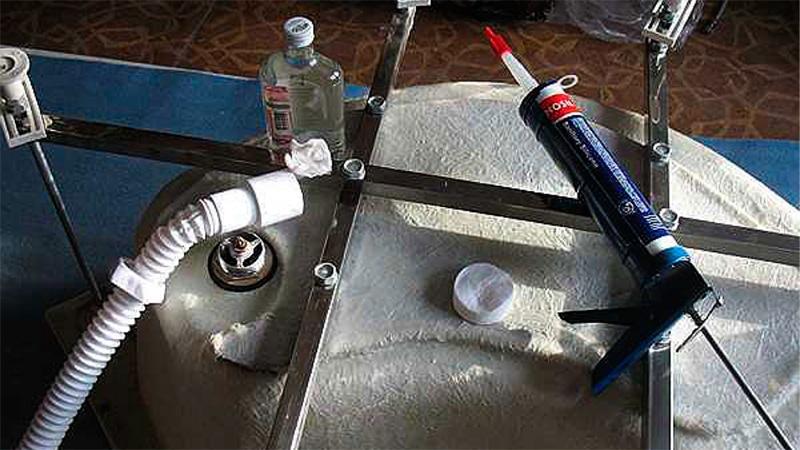
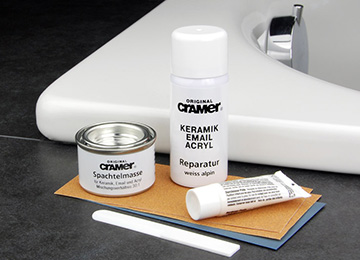
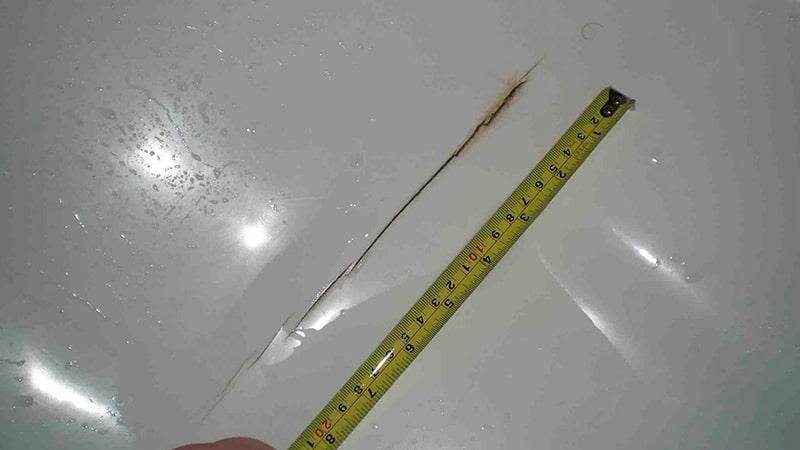
Crack in the pan
Eliminating cracks in the shower tray or partitions will require certain tools and materials:
- liquid acrylic;
- alcohol;
- rubber spatula;
- epoxy resin;
- drill with a special polishing nozzle.
Shower tray installation diagram.
If the crack is small and affects only the surface in the pallet, then it is enough to cover it with a special acrylic paint. Contact any building materials store and they will give you the right mixture. In such a situation, you only need acrylic paint and a special brush for application.


In some cases, in order to repair the pallet, it is enough to purchase an acrylic liner, which will need to be placed in a crack if it is deep and has already begun to creep. The only difficulty in this method of repairing the shower tray is the selection of the liner of the required size. All work in this case will come down to inserting the liner in the right place. It must enter firmly and be motionless.
This material is also suitable for repairing acrylic bathtubs. Liquid acrylic will allow you to easily repair surface cracks and make liners of the required size for deeper cracks. Before working on this material, it must be removed from the cab and thoroughly cleaned to remove all contamination. Care must be taken when choosing a cleanser, as this material is sensitive to chemicals. The best option would be an alcohol-based product. After that, the surface must be degreased, otherwise the material will peel off.Alcohol is also suitable for this (it is better to take pure alcohol, not a solution).
After working with the surface, it is necessary to prepare the material. It is necessary to make a solution of liquid acrylic and hardener. You can find out the proportions of the components from the instructions that are attached to the materials. The resulting solution must be poured into the cracks. Don't skimp on the material! The best result will be obtained when applied in excess. After the acrylic hardens, you will need to clean the surface. This is very easy to do with sandpaper. Use different sandpaper: with large and small grains. At each stage of stripping, the grain size should decrease.
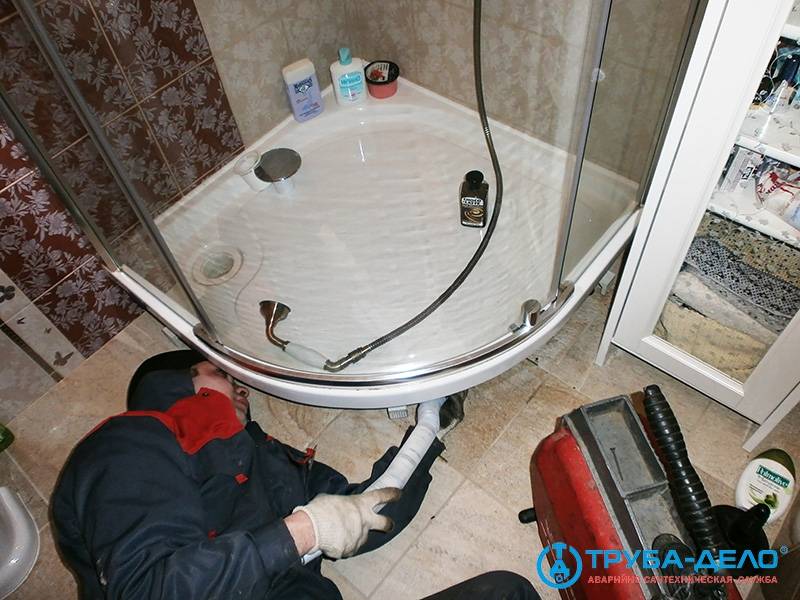
Water leakage in the shower can occur for various reasons, and at first this problem may not even be noticeable. But the leak itself is dangerous. It destroys the finishing material of the shower cabin, accumulating in any particular place. Most often, the shower tray is damaged. This can happen due to poor installation, too hard water, improper maintenance and use. In any case, today there is nothing eternal. Shower tray repair is inevitable. How to fix a leak, doing it quickly, correctly, and most importantly - on your own?
Causes of damage to pallets
Today, the market includes shower cabins manufactured at domestic enterprises in Europe and Asia. Almost all manufacturers give a multi-year warranty on their products. To avoid buying a low-quality fake, you need to check that the seller has a certificate and appropriate markings on all parts of the shower cabin. But even the most reliable documents will not protect the pallet from damage.
These products crack for the following reasons:
- Manufacturing defect. Unfortunately, this is a fairly common phenomenon that consumers have to deal with. Marriage is the presence of voids in the shell array, distortion or violation of its geometry. In some cases, if the production technology is violated, the strength of the material is significantly inferior to the declared parameters. If such a product is under warranty and there is a receipt, then it is better to take it to the store or replace it with another similar product.
- Mistakes made during installation. The most common mistake that inexperienced craftsmen make is installing a shower cabin on an uneven surface. This leads to an uneven distribution of the external load and the creation of internal stress in the material. Another mistake is over-tightening or under-tightening the fasteners.
- Violation of the rules for operating a shower cabin. These products must be handled very carefully. Cracks can form due to excessive pressure on the sink when several people are standing on it. Damage occurs after heavy and sharp objects fall onto the pallet.
So, the shower tray cracked, what should I do? Having dealt with the causes of cracks in the tank, it is necessary to carefully prepare for the repair work.
How to fix a shower faucet
The mixer in the shower has a more complex device than in other plumbing devices. The causes of breakdowns can be various factors, which makes this phenomenon frequent. Therefore, for normal operation, it is necessary to know how to repair a shower cabin in case of a faucet breakdown.
Video:
Often, many are faced with such a problem as a weak flow of water from the shower, this can be caused by a clogged aerator. To eliminate it, you need:
- Remove aerator.
- Rinse it under running water or blow it out.
- Set in place.
If a spout leaks, the sealing rings or rubber gaskets must be replaced. For this you should:
- Unscrew the nut holding the spout and remove it.
- Unscrew the sleeve inside the spout together with the nut using a hexagon.
- Remove the sleeve from the nut.
- Replace sealing rings that have become unusable with new ones.
- Reassemble the mixer by following the steps in reverse order.
In case of complex malfunctions that are difficult or impossible to eliminate, a complete replacement of the faucet in the shower cabin is recommended for normal operation.
When troubleshooting faucets, it is not recommended to use gas or adjustable wrenches. All work can be done by hand.
Troubleshooting
Repair depends on the type of breakdown, as well as on the causes of its occurrence. It is not enough just to fix or replace a damaged part, you also need to eliminate the root cause of the malfunction, otherwise repairs will have to be done regularly. Let us consider in more detail possible breakdowns, the causes of their occurrence and ways to deal with them.


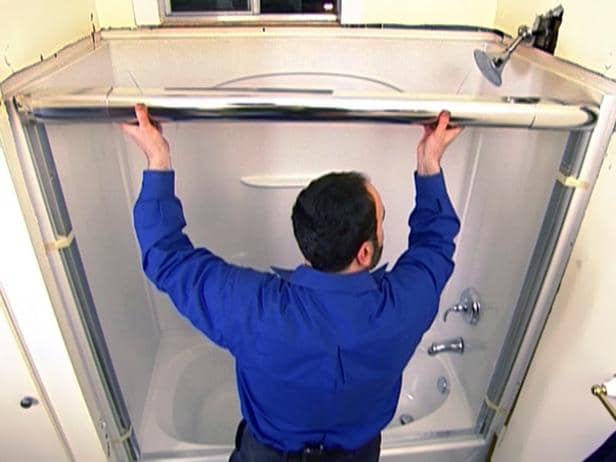
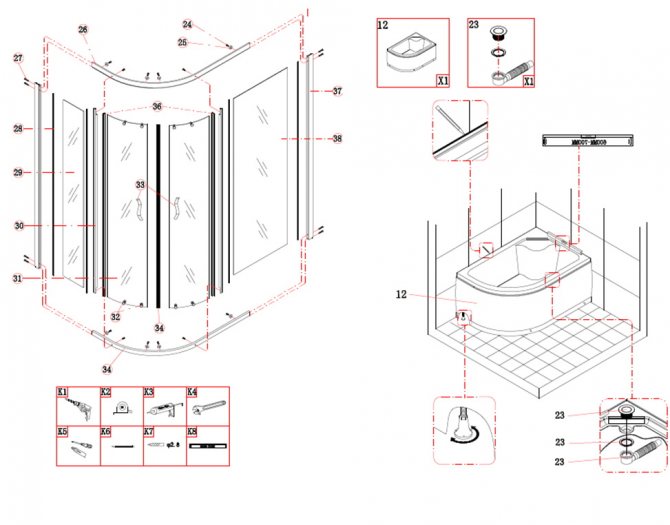
Broken glass is a common problem for those using regular, non-tempered glass. Replacing them with new ones will not be a problem, especially if the instructions for assembling the booth have been preserved or if it was originally assembled without the help of specialists
At the same time, it should be noted that only the front compartments and sliding doors can be locally replaced, while replacing the rear panel will require dismantling the top of the structure, and this is a more responsible and difficult task.
Cabin windows can be equipped with or without aluminum edging, but at the same time, all of them are fixed in the frame with rubber seals, which are responsible for the tightness and reliability of the connection. To replace the glass sheet, one or more racks are dismantled, the seal is removed, and fragments are removed. To install a new glass, you need to do the same steps in reverse order.
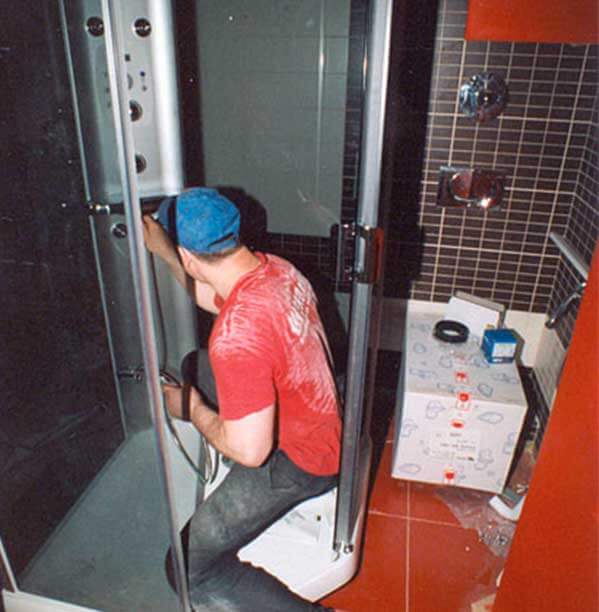
 Do-it-yourself shower cabin repair
Transparent impact-resistant films are often used to strengthen glass surfaces and increase their strength. They glue the entire surface, after which the canvases are not afraid of even strong blows, and in terms of characteristics they are close to hardened ones. Given the cost of glass, it is much cheaper to purchase a film once than to periodically change certain cracked walls of the booth. In addition, fragments can cause damage to health, so using glass "in its pure form" is also unsafe. Thus, do-it-yourself repair of a shower cabin in case of cracked or broken glass consists in replacing it.
A cracked pallet made of acrylic is a common phenomenon, and the point here is not even in the quality of the product, but in the features of its design and correct installation. The acrylic pallet is not reinforced in the center, where it takes the maximum load, as a result of which its surface gradually sags.Sometimes cracks appear when used carelessly or when exposed to mechanical shocks, but these are special cases. Do-it-yourself repair of an acrylic shower tray is carried out using liquid acrylic, which is poured into cracks, provided that their length does not exceed 35 cm. If there are holes on the surface, their dimensions should be within 100x100 mm. The repair material - liquid acrylic - is sold as a repair kit - a kit that includes all the necessary components. It consists of liquid acrylic itself, as well as a special hardener and abrasive skins for grouting the seam.
 Crack formation in the shower tray - repair
Sealing cracks in the shower tray is carried out according to the following technology:
- the crack is slightly expanded with the help of a grinder so that chamfers are obtained along the edges, forming a “bowl” for pouring;
- the surface of the edges is cleaned of dust and debris, treated with alcohol;
- liquid acrylic is mixed with a hardener in accordance with the instructions;
- the crack is filled with the finished mixture, its excess is removed with a rubber spatula;
- the place of filling is sealed with adhesive tape;
- after complete drying, the time of which is indicated in the repair kit instructions, the adhesive tape is removed, and the surface is polished with abrasive skins.
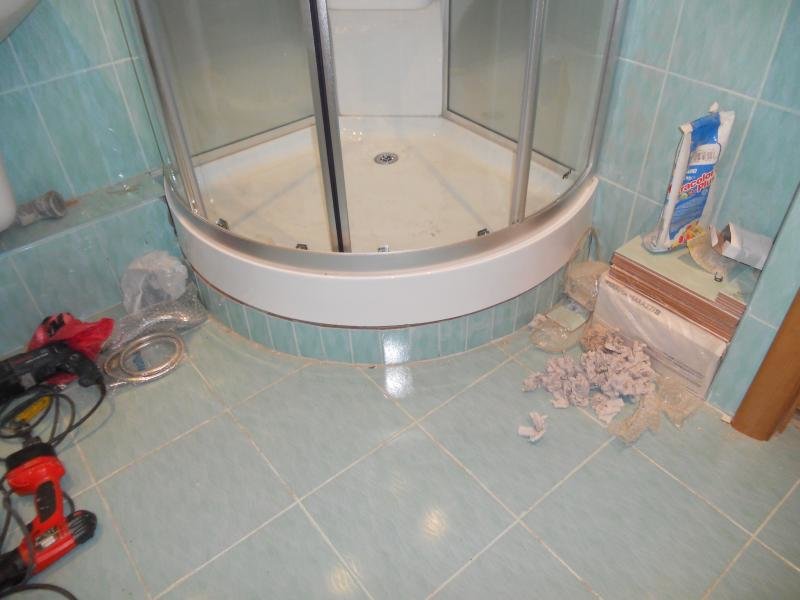
The technology is really very simple, but its effectiveness will be reduced to zero if measures are not taken to strengthen the structure of the pallet. Otherwise, new cracks will not keep you waiting. To strengthen the pallet, you will need bricks and polyurethane foam. The sequence is as follows:
- the front screen is dismantled;
- a “pillow” of bricks is laid out under the pallet, which are simply stacked on top of each other without the use of mortar;
- the distance between the bricks and the bottom is filled with Macroflex 65 mounting foam or another, which has a low expansion coefficient.
Other home remedies for cleaning watering cans
Not everyone knows how to clean the shower head from scale using the tools that are in every home, so you should familiarize yourself with the issue in more detail. Consider the components that can remove limescale:
Lemon. We have previously found that various formations are destroyed after contact with acid, including citric acid.
To prepare the mixture, we need 1 liter of water and 3 packets of citric acid (15 grams each), mix thoroughly
After dissolving the acid, the shower head can be lowered into the container, it is important that the liquid completely covers all the elements, it is advisable to immerse the watering can in disassembled form. In this case, it is better to put the rubber pad aside so that the acid does not destroy its structure.
Natural lemon has no less effective properties, so you can drip lemon juice on the surface
After some time (at least 20 minutes), the dissolved plaque should be removed and the watering can should be collected.
Baby oil. For some, it will be surprising to learn that baby oil contains ingredients that do an excellent job of removing limescale. To do this, we need to pour a certain amount on a piece of cloth, after which we wipe the surface with a coating. This must be done carefully, you can even pour a certain amount into the internal cavity, but for this you need to disassemble the device. After processing, we leave the watering can for several hours so that the active components penetrate deep into the structure and split the lime.Next, you can remove the residue with a brush, and then wash the device with a solution of warm water and soap. Such manipulations allow you to remove traces of fatty oil.
Oxalic acid. This tool has a rather aggressive environment, so it should only be used if other methods have not been effective.
Oxalic acid is sold in a pharmacy, you should work with the substance with extreme caution, using protective elements. To prepare the solution, you need 1 liter of water and 2 tbsp.
tablespoons of acid in powder form, these components are thoroughly mixed until dissolved. If the affected area is large, and the watering can has been cleaned for a long time, then you can increase the concentration of the product
Immerse the watering can in a container with a solution for a while, after which the surface is cleaned with a brush
It is important to pay attention to hard-to-reach places, so that even small deposits do not remain, otherwise cleaning will be ineffective.
Baking soda, vinegar, ammonia. This solution allows not only to remove limescale and other formations, but also to cope with pathogenic microorganisms, for example, fungus
For cooking, add 150 ml of ammonia, 0.5 cups of vinegar and 3 tbsp. to 1 liter of water. spoons of soda
This mixture is thoroughly mixed and heated to 60 degrees. The watering can must be lowered into this solution for at least 40 minutes. Then the plumbing is washed with warm water, and also wiped dry.


spoons of soda. This mixture is thoroughly mixed and heated to 60 degrees. The watering can must be lowered into this solution for at least 40 minutes. Then the plumbing is washed with warm water, and also wiped dry.
Regular cleaning of plumbing allows you to extend the life of its use, and this, in turn, saves money. Now you know how to properly clean your shower head using home remedies. Buying expensive household chemicals is not necessary at all, since they have the same efficiency as the components that are in every home, but much cheaper. It has been proven that some professional household chemicals cope with pollution worse than, for example, vinegar or oxalic acid.


