- How to close a crack with your own hands?
- What if the shower stall burst?
- A few painting rules
- How and how to fix a chip
- Application of automotive putty
- Painting single chips with enamel
- Complete enamel replacement by pouring
- Stakryl technology
- Liquid acrylic - a modern version
- Benefits of cast iron bathtubs
- Reasons for refurbishing cast iron bathtubs
- Preparation for repair
- Necessary materials
- Chip removal
- Ways to eliminate a chip in the bath
- Surface restoration
- Training
- How to restore enamel in the bathroom
- First way
- Enamel application
- Second way
- Third way
- Method number four
- Recommendations for using a refurbished bathtub
- Discussion: there is 1 comment
- Types of possible damage
- Grouting tiles
- How to fix an acrylic bathtub crack
How to close a crack with your own hands?
What to do if the acrylic bath coating cracked during operation, how to repair the crack? It is important to understand that it must be eliminated as quickly as possible in order to avoid further spread. Indeed, under the influence of a constant load and temperature difference, it can grow significantly
Such repairs are easy to do with your own hands using a special repair kit, according to the instructions below.
As a rule, a repair kit contains all the components necessary for restoration, in addition to it, you only need a drill or screwdriver, and molar tape.
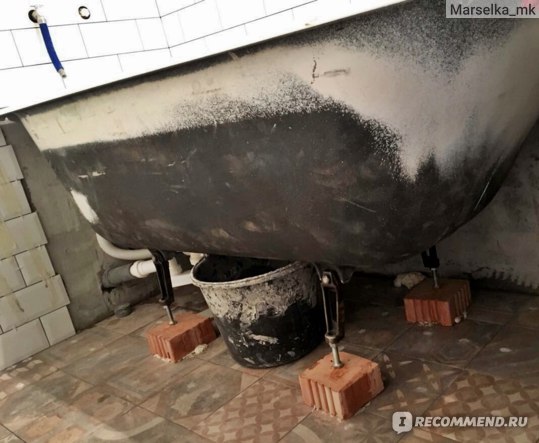
STEP 1. First you need to drill a crack around the edges, this will help it not grow in the future. Take a thin drill (5mm diameter is perfect) and at high speeds make small holes at the very ends of the crack.
It is very important not to drill too deep, you only need to dig 2-3 mm into the surface of the acrylic, this is usually enough. STEP 2
Next, you can proceed to the expansion of the crack. This is necessary so that the repair compound completely fills the damage. Run the same drill along the entire length of the crack, creating a recess of 1-2 mm
STEP 2. Next, you can proceed to the expansion of the crack. This is necessary so that the repair compound completely fills the damage. Run the same drill along the entire length of the crack, creating a recess of 1-2 mm.
STEP 3. Now you need to paste over the area around with molar tape in order not to damage the whole coating, and proceed to give a slight roughness. To do this, take sandpaper 1000 - 1200 and start "shorting" the coating in a circular motion. Remove all chips and carefully wipe the surface of the defect with a soapy solution.
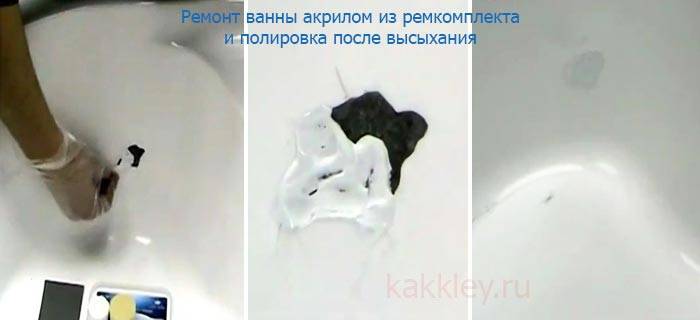
STEP 4. Mix liquid acrylic and hardener in the proportions recommended by the manufacturer.
Apply the mixture to the damage, smoothing with a plastic or rubber spatula. It will take about 24 hours to dry.
Acrylic bathtubs have completely different shades of white, and therefore, when repairing, it can be very problematic to get exactly the same tone.
Repair kit manufacturers produce acrylic for warm and cool whites, so it's important to know which one you need.
STEP 5. It's time for polishing. Tape the area around with molar tape. Take a set of sandpaper and, starting with the coarsest grit (the smaller the number on the back, the larger it is), “sand” the surface, gradually moving to a smaller one. After the acrylic tubercle has completely disappeared and the surface has become homogeneous to the touch, wipe it thoroughly with soapy water.
Next, you need to take the polish from the kit and apply it to the fleece. Rubbing the paste in a circular motion, bring the coating to a mirror shine.
What if the shower stall burst?
The bowl of shower cabins is created using exactly the same technologies as acrylic bathtubs. Therefore, all the above information about the restoration of acrylic bathtubs is also valid for shower cabins.


A few painting rules
It doesn’t matter what enamel the cast-iron bathtub requiring restoration will be painted with, the rules for painting are the same. The restored bathtub must dry with the windows open, therefore, before repairing the cast-iron bathtub, you need to choose the right season of the year (it is better to choose summer when it is warm)
If children live in the apartment, it is better to send them away from the place of repair. The smell of paint is harmful to health. Before starting repair work, it is necessary to acquire a professional respirator or gas mask. It is also necessary to buy several sets of rubber gloves and rubberized aprons.
How and how to fix a chip
How to fix a chip in a bathtub? Enamel restoration will be different depending on the area and depth of damage. You can do this repair yourself.In extreme cases, you can always resort to the services of specialists.
A repaired chip, if it is made according to the technology and taking into account all the recommendations of the manufacturers, will be barely visible on the surface of the bath. The most common and effective options for repairing chips in the bathroom are outlined below.
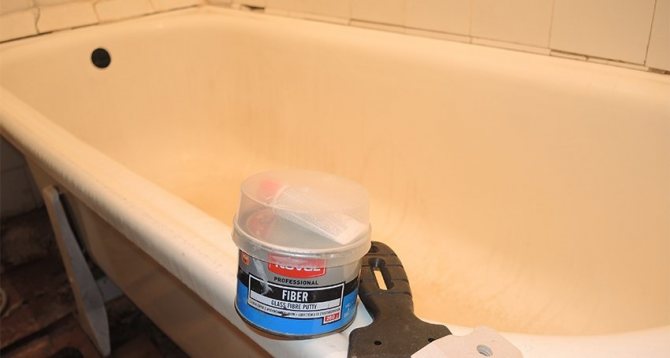
Application of automotive putty
Automotive putty is great for repairing chips and cracks due to its properties. The technology consists of five consecutive stages:
- Putty is kneaded and left to harden
- The chip is re-degreased
- A thin layer of putty is applied to the place where a piece of enamel has broken off.
- In place of the broken off enamel, a small elevation is formed, which will need to be carefully sanded off after the putty dries. Sanded putty will not chip off because it will not protrude and cannot be hit.
- Allow the putty to dry, remove excess putty, and carefully sand the chipped area.
On the video: painting chips with car enamel.
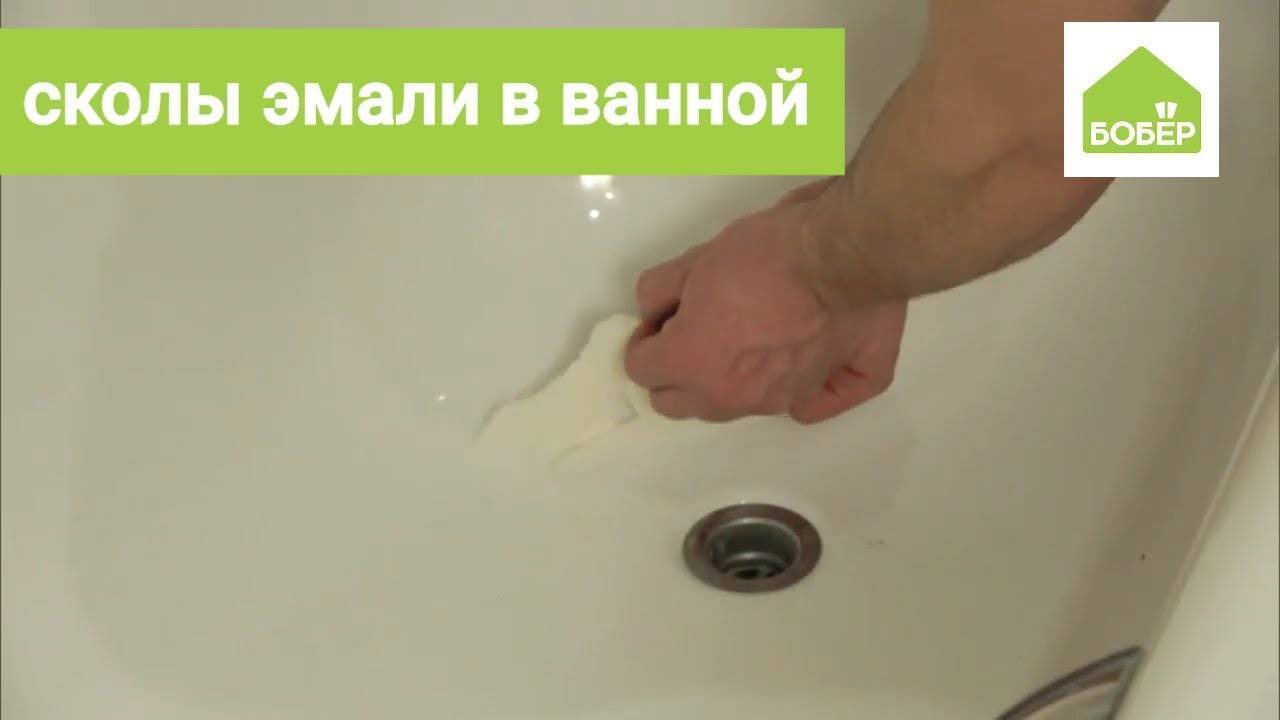
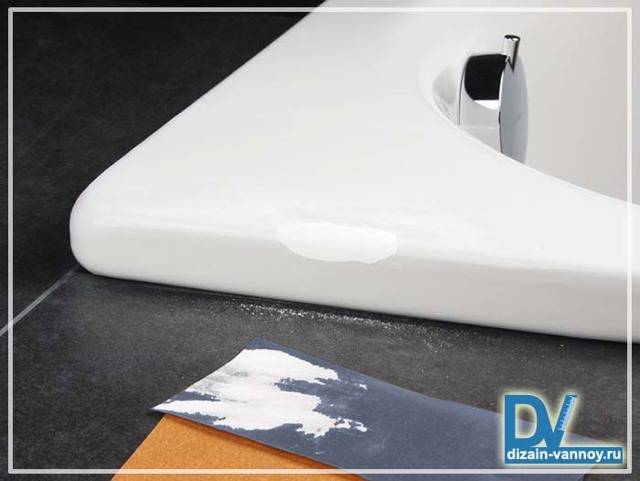
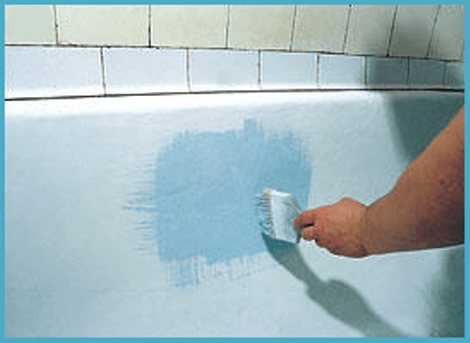
Painting single chips with enamel
With small and point chips in the enamel coating of the bath, it will be enough to paint and clean the chip with a brush. This way you can quickly and reliably restore the enamel. This method is not suitable for sealing cracks. Important components at work:
- The essence of the method is to carefully paint over the chip with a thin brush in several layers.
- Each layer of enamel must dry. Insufficiently dried layers will lead to the formation of sagging along the edges of the chip in place of the chipped enamel and a hollow in the center.
- Enamel is applied in thin layers in 3-4 layers. So the chip is sealed very neatly. After the last layer has dried, the enamel is polished until completely smooth.
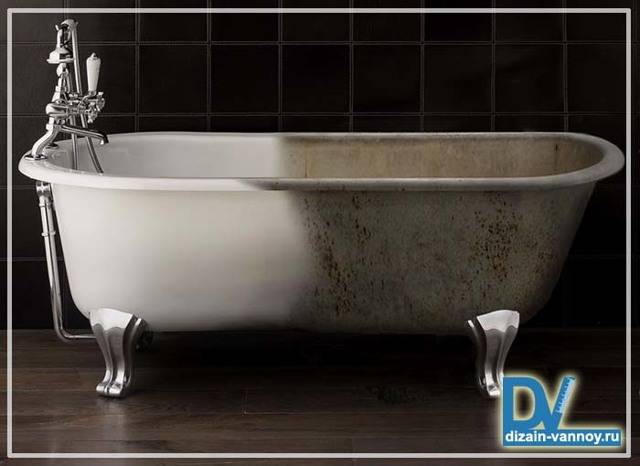
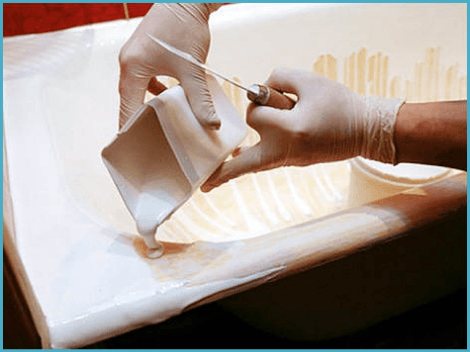
Complete enamel replacement by pouring
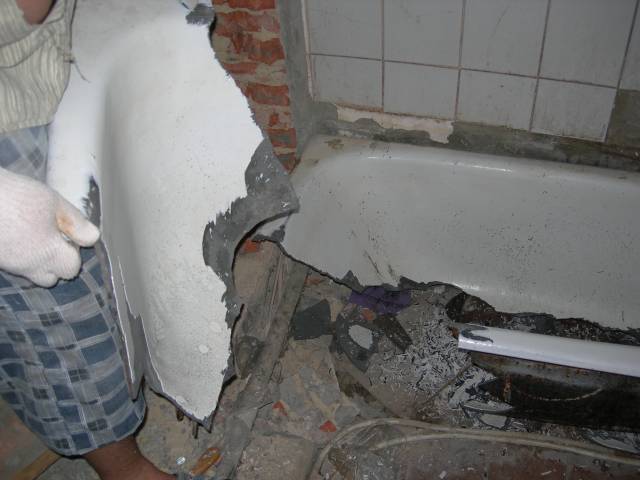
In case of serious damage to the enamel, there is no other choice but to repaint the bathtub. In especially neglected cases, the old enamel will have to be removed completely. Sometimes the cost of such work can exceed the cost of the bath itself. Therefore, before starting work, you need to weigh the pros and cons.
The plaque on the old iron bath eats in so deeply that it is practically not washed off by anything. If the enamel is not damaged (you just need to update the look of the bath), then you can use the pour bath technology. In this case, the old coating is not removed, but only degreased and sanded.
Stakryl technology
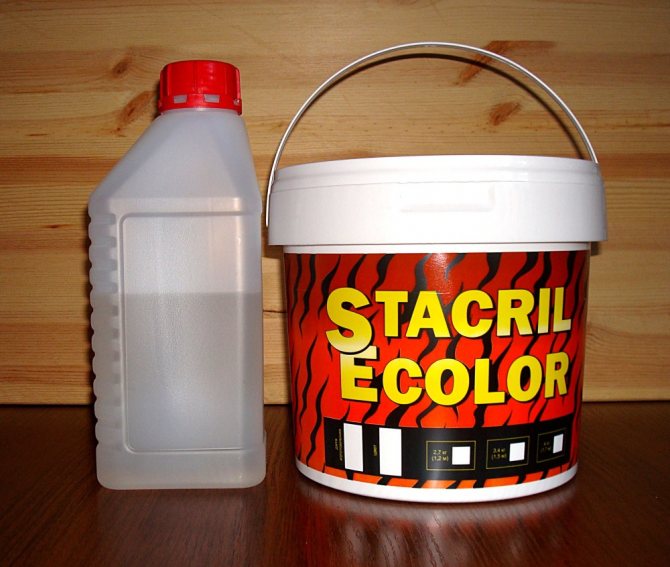
What else to fix a chip in the bathroom? Stakryl is a special restoring enamel based on polymer resin, which is poured onto the surface of the bath and gradually hardens. It turns out a "shell" of acrylic, which covers the entire area of \u200b\u200bthe bath. If earlier chips were covered in the bath and after that small irregularities remained, then a new thick layer of acrylic will completely hide them.
The quality of the finished coating is directly dependent on careful pre-treatment. On the Internet, you can find the consequences of glass marriage, which turned out due to a negligent attitude to work.
Liquid acrylic - a modern version
You can also restore the bath using a new method. It involves the use of not two-component enamel, but a more effective glass, which is a special acrylic composition created to return enameled metal structures to their former brilliance and beauty.
Stakryl has several important advantages, it:
- is able to independently (with minimal participation of the person performing the repair of the structure) lie down in an ideally even layer on the surface of the bowl and envelop it;
- characterized by an ideal viscosity index, providing a durable and reliable coating up to 6 millimeters thick.
Note that the impact and mechanical strength of the acrylic layer is much higher than that of standard enamel. With this in mind, it becomes clear why the self-restoration of cast iron and steel structures today is increasingly carried out using glass. When using liquid acrylic, the old enamel from the bowl is removed according to the scheme given above. There are no differences. After cleaning the bath, you only need to substitute a container under its drain to collect excess acrylic and turn off the siphon.
The restoration itself will be performed as follows:
- prepare the composition for restoration (strictly according to the recommendations of the glass manufacturer);
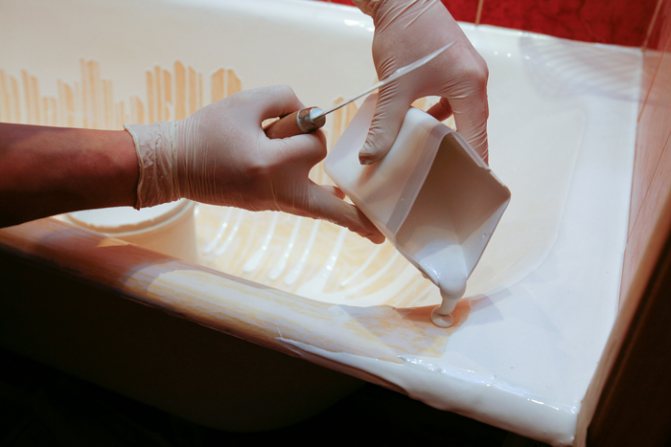
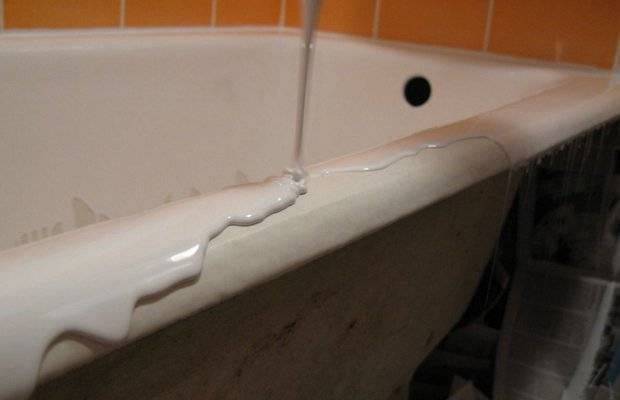
- start pouring it (very slowly) onto the top of the bowl;
- when the solution jet reaches the middle of the bath, you need to start moving it (as smoothly as possible) along the perimeter of the structure;
- after completing a full circle, you should re-apply stacryl according to the described method.
Such a restoration is called bulk. It should be done continuously. Therefore, for liquid acrylic, you always need to take a large enough container so that the composition in it is enough for the entire bath. Excess stakryl will go down the drain, under which you put another container. The process of complete polymerization of acrylic compositions is 24-96 hours. It all depends on what kind of mixture you buy.


Experts advise using formulations that have the longest drying time (3-4 days).They have been proven to provide a better, more durable surface that can last up to 18-20 years. Another subtlety. If you want to get a stacrylic coating of any particular color, it is allowed to add about 2-3% tinting paste to the composition.
It will provide the bath with a muted light shade.
Please note that more than 3% of the paste cannot be added, since the strength characteristics of the glass layer in this case will significantly decrease
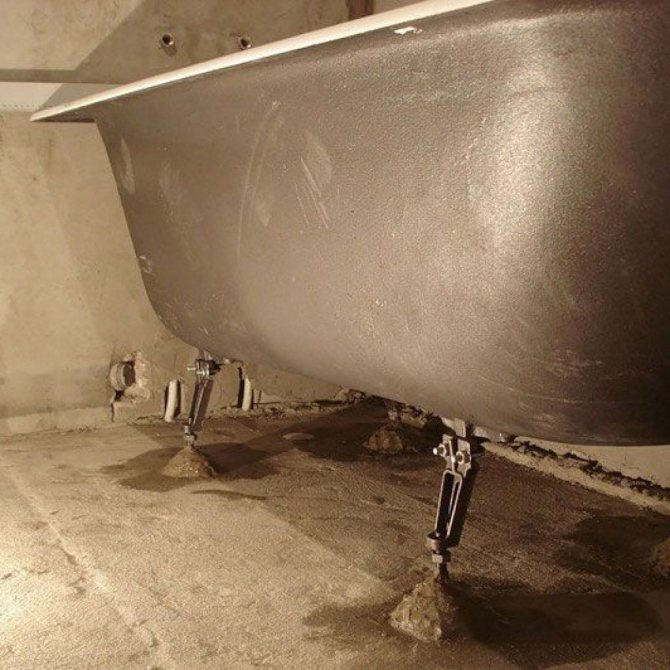
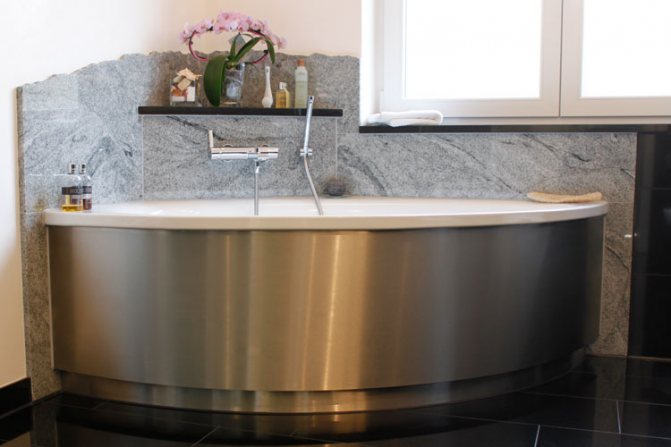
Benefits of cast iron bathtubs
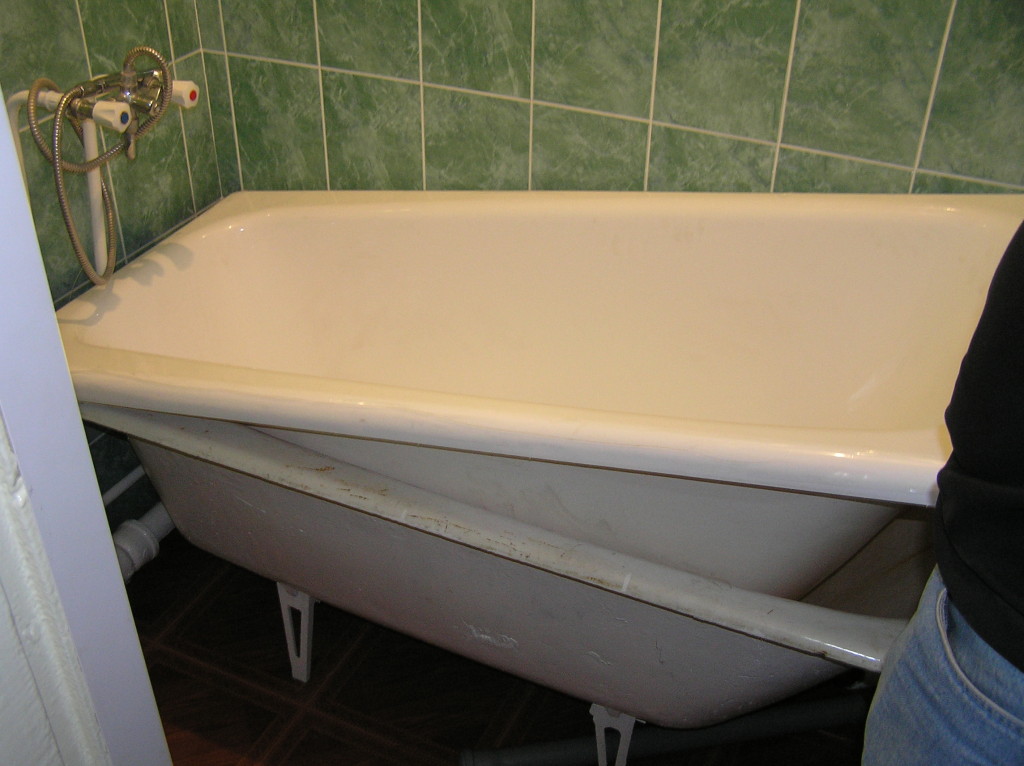
With old cast iron bathtubs, their owners are reluctant to part. They actually have enough advantages over more modern steel and acrylic models:
- these plumbing products are reliable and solid;
- they hold heat well and it is pleasant to take water procedures in them;
- cast iron bathtubs are characterized by impact strength and corrosion resistance;
- their thick walls do not vibrate and perfectly absorb the noise of water flowing from the tap.
Baths with such characteristics are practically no longer made, and those that can be found on sale at affordable prices do not differ in the above advantages.
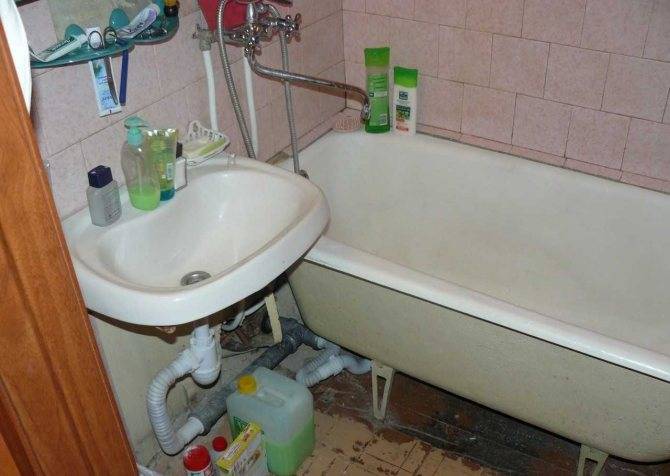
Reasons for refurbishing cast iron bathtubs
There is another reason why the owners of apartments and houses are looking on the Internet for ways to restore the coating of a cast-iron bath. The fact is that a complete replacement of the unit entails high costs.
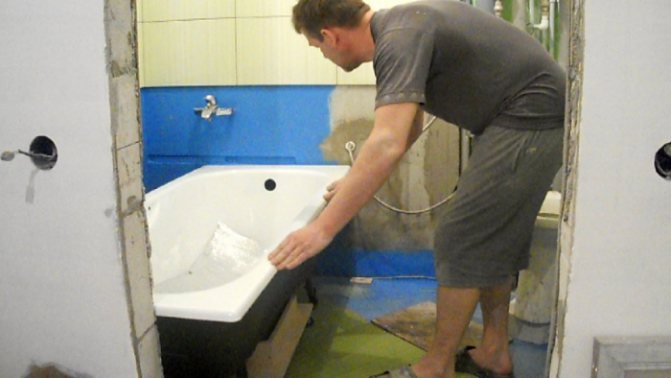
And the point here is not only in buying a new bath, although you will have to spend money seriously (including delivery). Few people are able to dismantle the old device and install a new one on their own - you will also have to pay for this.In addition, during all these works, the tile inevitably suffers and pipes have to be changed, and these are additional expenses for repairs in the bathroom or bathroom.
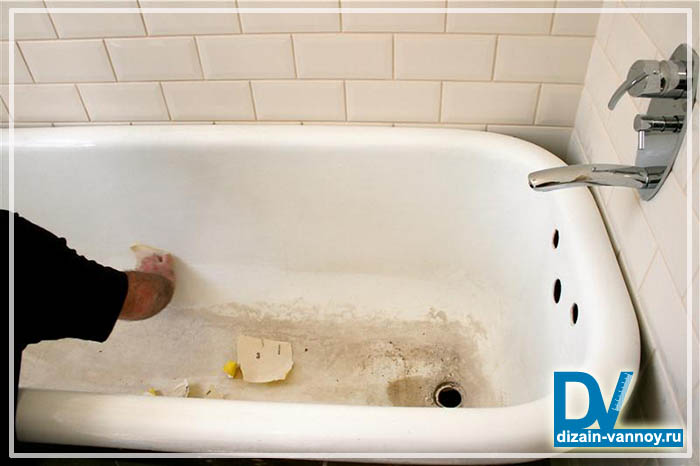
Preparation for repair
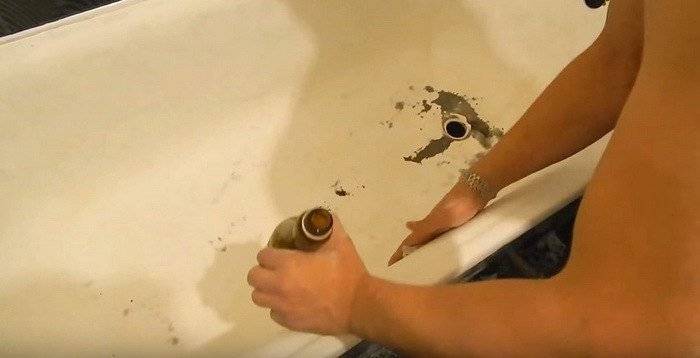
Preparation is a very important step that should not be missed. The quality of the repair and its service life will depend on its implementation. As mentioned earlier, the chip must be repaired immediately. If this is not done, rust may form and must be removed. If the chip is fresh, then this stage of preparation can be missed.
- Rust removal. To do this, you will need such improvised tools as a knife, needles, a screwdriver. They can be used to remove rust. You can also use a special tool to remove it, which is sold in household chemical stores. If it is not available, then a regular cleaning agent will do. After all the manipulations, the chip cleaned of rust must be rinsed well with water.
- Pollution can also be removed with the help of household chemicals. It must be remembered that such products should not contain abrasives.
- After complete cleaning, the repair site is well washed and thoroughly dried with a hair dryer. The surface must be perfectly clean and dry.
- Degreasing is a necessary procedure, without which the durability of the seal will significantly decrease. Degreasing is carried out with acetone, then dried again with a hairdryer.
On this preparation can be considered completed. All photos and the preparation process can be seen in this article or in the gallery of our website. After that, you can start repairing the chipped bath enamel. This can be done in several ways and using various materials, which will be described below.
Bathtub restoration - step-by-step work on removing chips from a bathtub
Necessary materials
- The main and most necessary material is auto-putty. It takes a little, and its color should be as light as possible. There is a special putty for fiberglass that will work just as well. Its advantage is heat resistance, but its price is higher.
- Sandpaper. It also needs a little, a maximum of 1-2 sheets. It should be small, you can take the cheapest one.
- Special aerosol designed for the direct repair of chips. Its color should match the color of the bath itself. The price category does not matter, but if it is possible to choose a better model, then it is better to choose an aerosol with heat and water resistance.
- Instead of an aerosol, you can use bath enamel. It will already have all the necessary characteristics.
- Abrasive polishing paste. Necessary for the final stage to mask the traces of repair.
In order not to buy all the components for repair separately, you can immediately purchase a ready-made kit for repairing chips. Such kits usually include the following components: putty, spatula, sandpaper, aerosol and / or enamel.
How to repair a chipped enamel in the bathroom - using a ready-made kit or individual materials - does not matter.
Chip removal
Putty preparation. To do this, you need to mix the resin and hardener, while the resin should be thirty times more. The mass is mixed with a spatula and immediately applied to the chip. At the same time, it must be well tamped. You can put a little more than you need: all the excess can be removed first with the same spatula, and after hardening, smooth out with grinding.If the quantity is not enough, then, most likely, the repair will have to be carried out again.
We eliminate chips in the bath
Ways to eliminate a chip in the bath
For the most high-quality solution to the issue of how to paint over a chipped bathtub, it is recommended to use the services of professional craftsmen. They do their job for a very affordable price.
If you decide to do the repair work yourself, you can use the following methods:
- Use porcelain chips.
- Cover the scratch with dry whitewash, after mixing them with glue.
- Apply spot enamel.
If the bathtub is very old and battered, then you can install an acrylic liner or use an acrylic mixture. These options allow you to quickly, efficiently and at no extra cost to repair an old bath.
Surface restoration
The foam must be applied evenly to the liner to avoid the formation of voids where the acrylic layer can sag. If the foam is not applied evenly, then cracks can quickly appear on the surface painted with acrylic.
This work does not take much time and does not require special skills. You can deal with it quickly and easily. Do not forget about the right choice of high quality material. A properly painted bathtub will last a long time.
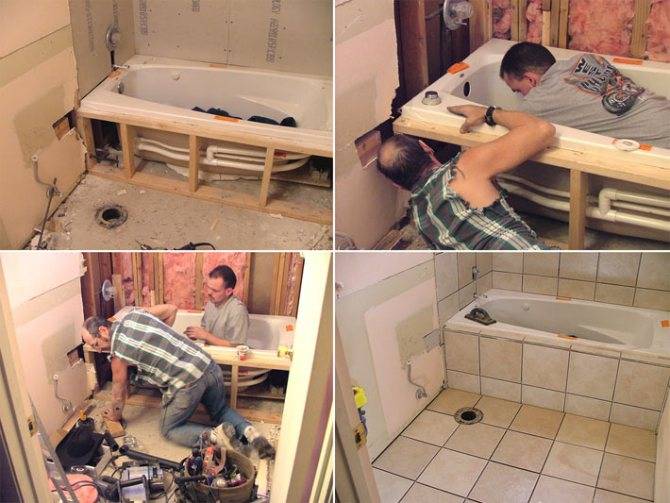
If the repair in the bathroom will be carried out completely, then it is better to paint the bath after the repair work as a whole. It is necessary to finish the walls and all the tiles around the perimeter, and then carry out restoration work.


Training
In order to properly restore the bath, you must carefully prepare for this process. To carry out this process, you need:
Benefits of a hot tub.
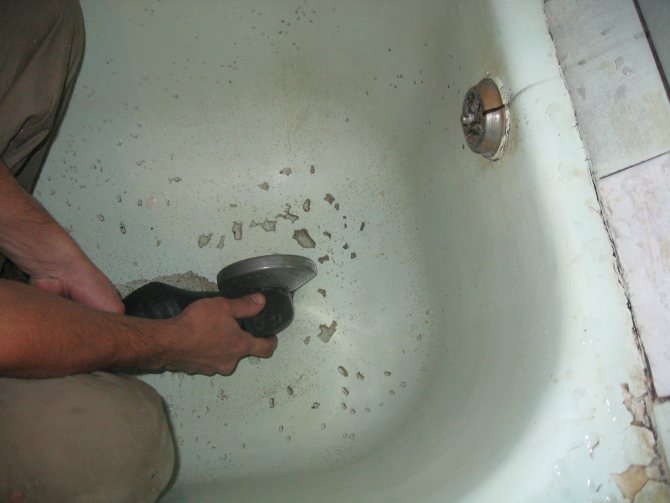
- Rinse thoroughly and degrease the surface. To do this, you need to use a strong detergent, for example, Pemolux.
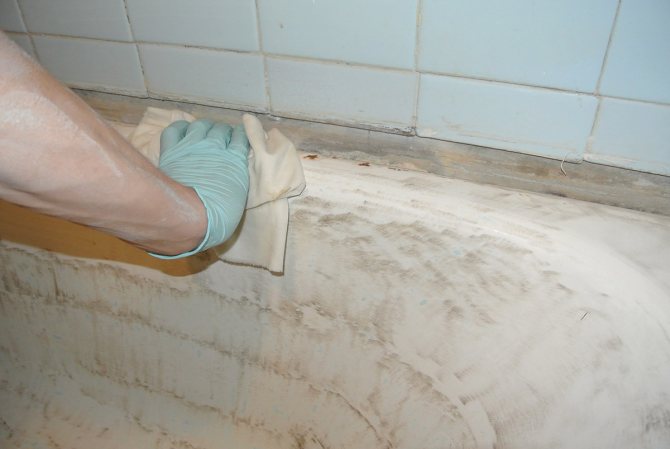
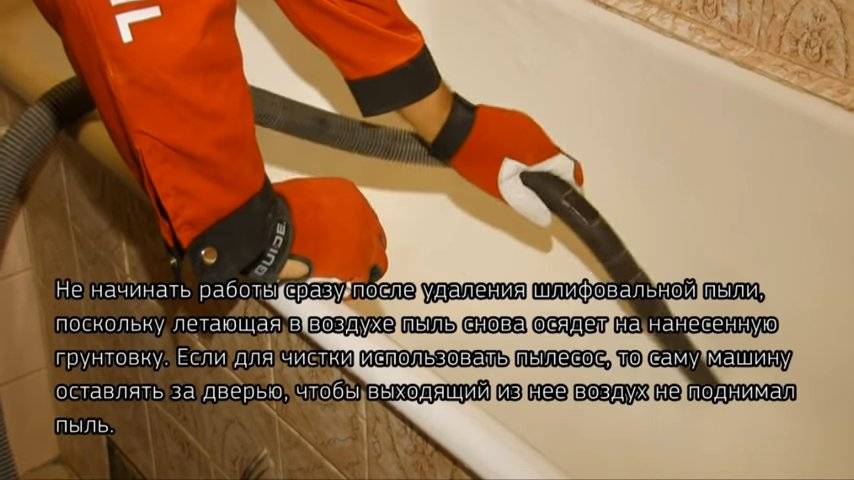
- Thoroughly clean the surface of the bath with a grinder, on which a special grinding wheel is put on. For this purpose, you can use a drill with nozzles. Grinding should be to such an extent that the entire surface becomes rough.
- Clean the bottom of the bath from mud deposits, which are probably there. To carry out this event, you will need the so-called cord brush and any detergent.
- After the entire surface of the bathtub has been cleaned, it is necessary to reapply the detergent to the bathtub.
- Next, you should check the surface. In particular, apply water to the bath and see how the latter behaves. If it is applied evenly, and drops are not formed, then everything is done correctly.
- Finally, it is necessary to thoroughly warm the bath with warm water, and after it dries, wipe it with a solvent. However, some substances, such as white spirit, for example, should be avoided, as they are quite greasy. After that, you need to warm up and dry the device again, and then wipe it with a special cloth that does not contain lint.
How to restore enamel in the bathroom
First way
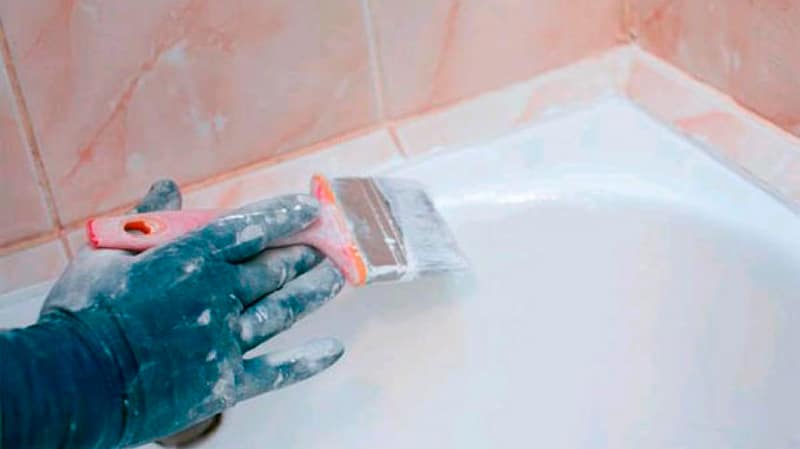
First, we apply a primer. There is one difficulty - an unbearable smell. Therefore, it is better to use the primer in an aerosol can (the smell is not so strong).
The primer is applied to the entire inner surface of the bath. After applying, wait until it dries well.
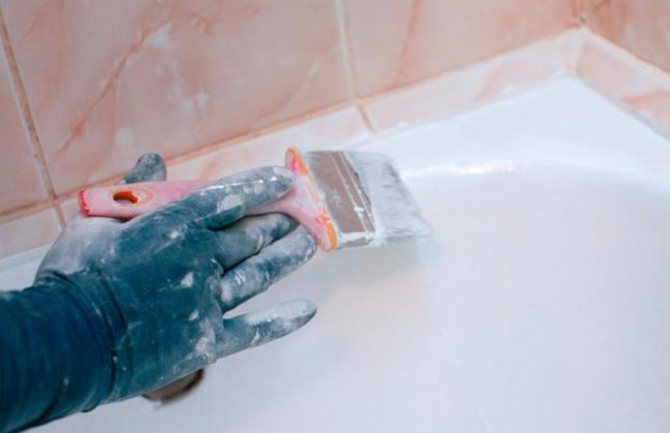
Enamel application
Enamel in an aerosol can contains a lot of solvent, so it's best to use a can.On the primed surface with a cloth swab or roller, apply it in 3 layers, before applying the next layer, let the previous one dry.
The room in which the work is carried out must be dry, with high humidity the surface may crack. It is recommended that after the enamel has been applied, turn on the heater.
In order for the surface to be even and glossy, it must be wiped with a solvent one to two hours after application. New enamel in a couple of days can be polished with GOI paste or any other means.
Second way
It is suitable if there are only a few cracks and small chips on the surface. A mixture of BF-2 glue with dry whitewash is applied to the problem area with a brush.
Apply several layers, each of them must dry. The last layer is applied flush with the main coating of the bath.
Third way
Suitable for restoration, with very deep chips. To do this, mix Supercement glue and nitro enamel (select by color) in a ratio of 1 to 1. Apply this mixture to the chipped areas several times. Application is carried out with an interval of one day.
You can also use a mixture prepared from epoxy resin and titanium white (or powdered fragments of porcelain dishes). The proportions are 2 to 1. We prepare the epoxy resin (we mix the base with the hardener), then add white (or crumbs).
After applying this mixture to the chip, we level it with a blade (for shaving). This mixture dries for about five days, during this period the bath cannot be used. If it is properly prepared and applied, it will last at least five years.
Method number four
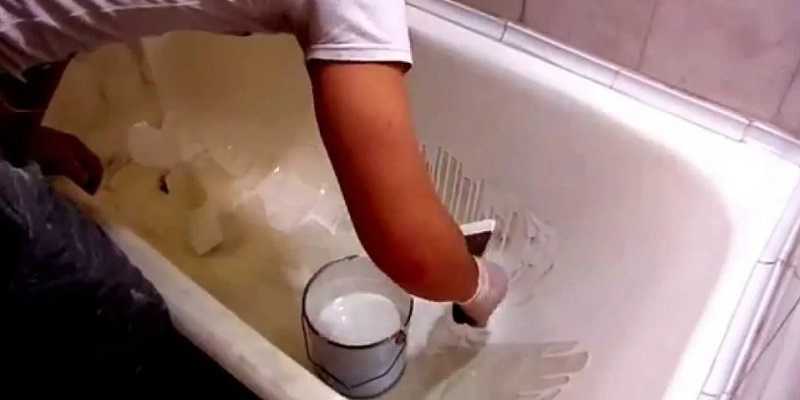
Enamel that has become porous can be restored using ordinary nitro paint.Pour a small amount of paint into the bath and rub it with force.
In this case, the enamel will fill the pores and scratches. This operation must be repeated several times, allowing each layer to dry. The paint remaining after rubbing can be removed with a swab dipped in solvent.
The use of spray paint is recommended as the last coat, it can be used to achieve a more even finish.
Recommendations for using a refurbished bathtub
A do-it-yourself enameled bathtub will certainly not last as many years as a new one. With proper use of the coating, the purchase of a new one can be delayed for three years.
It is only necessary to comply with some conditions:
- Do not use abrasive powders and pastes when washing the tub.
- Avoid contact with the repaired surface of acid or acid-containing products.
- When washing in the tub, do not use bleach.
- When buying any of the materials used, carefully read the recommendations for its use and safety instructions.
After all this, the question - how to restore the enamel, will become irrelevant for you.
Watch the video: Bathtub enamel restoration:
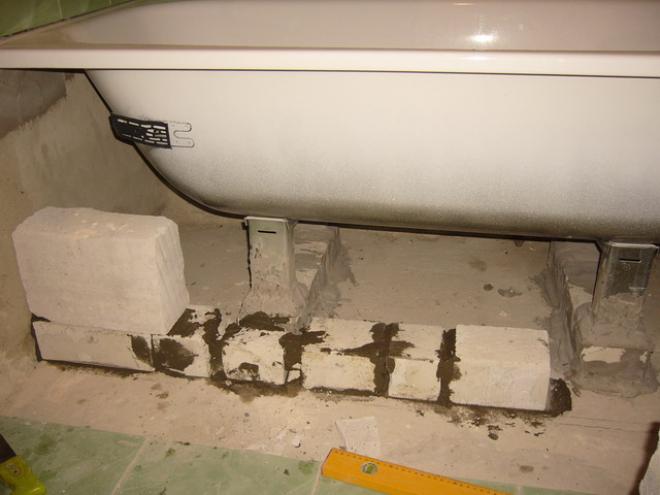
Masonry brick pillars
Previous post

Do-it-yourself block foundation
Next post
Discussion: there is 1 comment
- Sergey Vasilyev: 08/14/2015 at 12:42
I have been enameling baths since 1999, now liquid acrylic for baths is in use, I have tried all manufacturers, choose an eco-bath!
Types of possible damage
Depending on the type of bathroom and its material, damage can also be different. The most common are acrylic, cast iron and steel bathtubs.All of them can have similar damage that you can fix yourself. Glass, wooden and marble bathtubs cannot be repaired: such models are considered exclusive, and without the help of a specialist, everything can only get worse.


We close up the chips in the bath do it yourself
The most common possible damage:
- chipping is a fairly common type of damage. It is better to close it immediately and not wait for it to increase;
- scratches - this problem is most serious for acrylic bathtubs, as deep scratches can cause the bathtub to split;
- split - applies only to acrylic baths and may be the result of a deep scratch or too thin a bath;
- rust - can be present in almost any bath;
- a hole is a defect that is the most time-consuming to repair. Only a specialist or a special insert can help here.
Grouting tiles
Defects in the bathroom are formed not only on the surface of acrylic. Scratches often appear on tiles. She, like acrylic, does not tolerate mechanical stress.
It is not possible to answer the question about scratches on the tiles, how to remove them. Unlike acrylic, it cannot be completely repaired, regardless of the size of the defect. There are two ways to return the wall to its original appearance:
- replace the damaged tile with a new one;
- erase the defect.
The first option is less practical, as it requires complex work, during which you have to remove several tiles from the wall.
The second method involves the treatment of the damaged area with mastic or a special pencil. The material must dry completely, after which it is polished.
Removing defects from an acrylic bath is relatively easy.Most minor damage can be repaired and does not require the intervention of specialists.
How to fix an acrylic bathtub crack
Acrylic baths are much lighter and "warmer" than traditional steel and cast iron baths. It is thanks to these advantages and reasonable price that products made of polymeric materials are increasingly being installed in apartments and houses.
However, with all their advantages, lightweight acrylic bathtubs are sensitive to external influences.
The material tends to expand at high temperatures, it is easily scratched by abrasive detergents, and when heavy objects fall in such a bath, cracks or even holes can form.
Are acrylic baths repairable? What to do if the acrylic bath burst? Can it be glued?
Yes, bathtubs made of polymeric materials are maintainable, and you can fix the crack yourself, without asking for help from specialists.
However, ordinary universal glue is not suitable for these purposes.
Since acrylic has unsatisfactory adhesive properties, you will need a special moisture and heat resistant adhesive.
Theoretically, it is possible to block a crack or a small hole in an acrylic bath using any sealant, however, it should be noted that during operation the bath bowl will continue to be subjected to constant mechanical deformations, as well as exposure to high temperatures and aggressive liquids.
In this regard, the restoration repair must be carried out in 2 stages: from the outside and from the inside.
Accordingly, to seal the bath, you will need two completely different compositions: a two-component epoxy adhesive and acrylic putty.
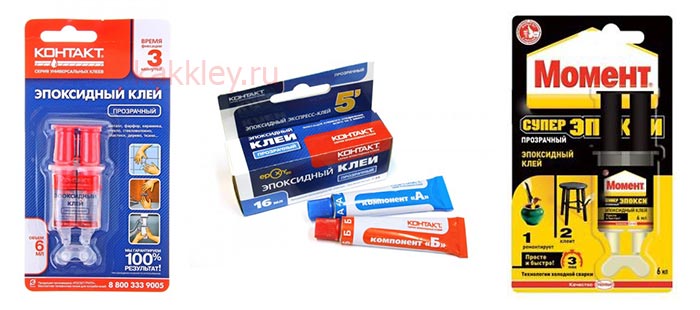
To reinforce a cracked bath from the outside, the simplest (inexpensive) brands of epoxy glue are suitable, for example:
"Contact" is a universal 2-component epoxy adhesive. The composition is colorless, not afraid of moisture, glued products can be used at high temperatures (up to 150 degrees).
The composition of the adhesive includes epoxy resin, composite hardener, modifying additives.
Glue "Contact" has increased fluidity, fills cracks and voids, restoring the shape of the product, does not shrink and does not expand during curing. It is sold in a package convenient for dosage (double syringe), it costs about 120 rubles;
Moment SUPER EPOXY is a universal two-component adhesive, supplied as a set of two combined tubes (epoxy + hardener).
The mixing ratio of the adhesive is 1:1, which simplifies the process of preparing the composition.
When curing, the epoxy adhesive from the brand "Moment" does not expand and does not shrink, it is not afraid of exposure to water and aggressive liquids. After application, the adhesive hardens after 5 minutes, and after an hour it finally sets.


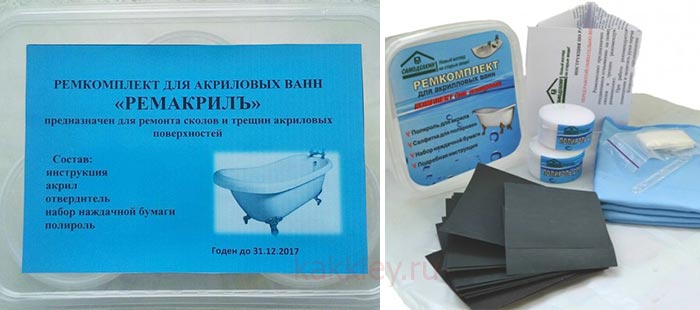
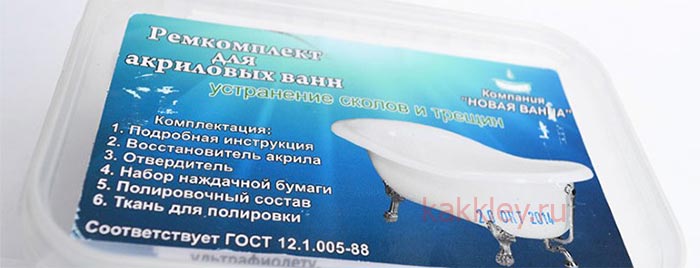
A special repair kit, which is sold in plumbing stores, will help to seal the crack on the outside of the acrylic bath. It includes everything you need:
- acrylic restorer (liquid acrylic);
- hardener;
- a set of sandpaper;
- putty knife;
- polishing compound and polishing cloth.
On sale today you can find repair kits from different manufacturers, they are sold under the trademarks "Remacril", "Samodelkin", "New Bath" and others, cost an average of about 500 rubles.
There are also more expensive imported analogues, but their composition differs little from Russian ones.
To seal a crack in an acrylic bath, you will need the following materials and tools:
- Epoxy adhesive;
- Reinforcing fiberglass;
- tassel;
- Acetone;
- Drill and drill with a diameter of 1-2 mm;
- Repair kit with liquid acrylic.
The crack repair process itself consists of several successive stages:
- To begin with, a further increase in the crack should be excluded. To do this, on each side, a few millimeters from the edges, drill holes with a diameter of 1-2 mm;
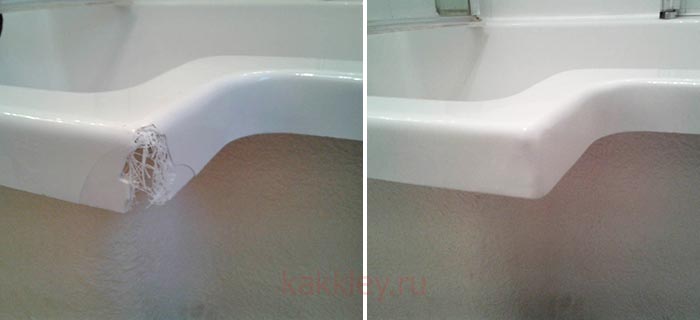
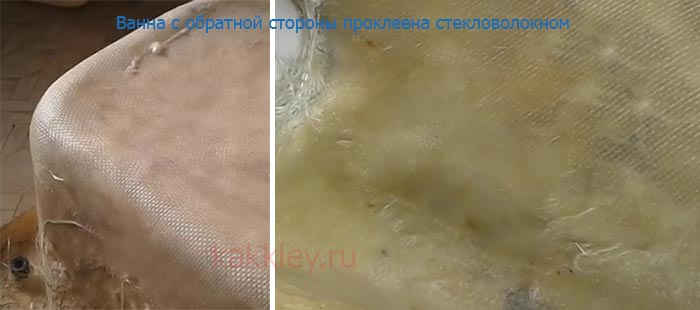
- Then it is necessary to strengthen the damaged area with a reinforcing patch on the back of the crack. Fiberglass patches should be glued in several layers on epoxy adhesive. This should be done only on a previously degreased and cleaned of dirt surface.
- The composition is applied in a uniform layer with a brush and laid with fiberglass. After the first layer has dried, glue the second layer. In most cases, 2-3 layers are enough to eliminate small cracks;
- After about an hour (see the instructions for the epoxy adhesive), you can begin to eliminate defects from the outside. To do this, the damage site is treated with fine sandpaper, degreased with acetone and covered with liquid acrylic from the repair kit. After the composition has dried, the surface is treated with a polishing paste.
VIDEO INSTRUCTION


