- Types and features of the device
- Types of regulators
- Adjustment of the fuel system of the walk-behind tractor
- Do-it-yourself device assembly
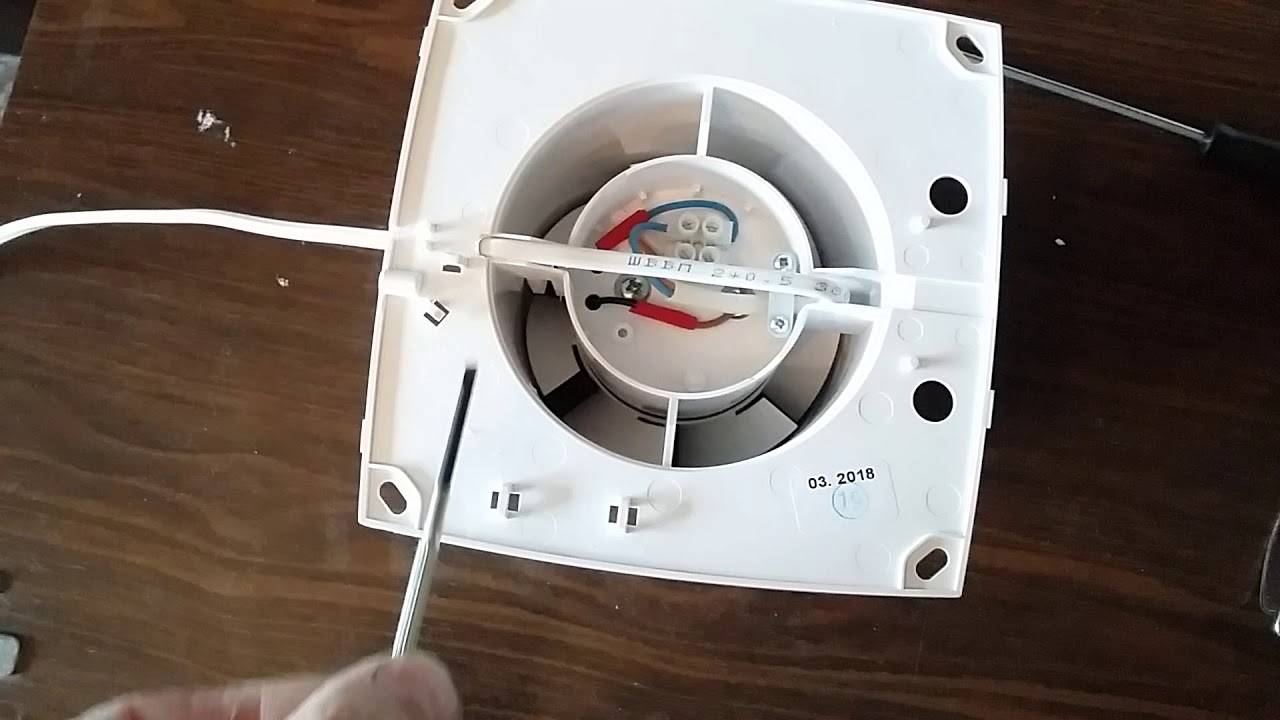
- Connecting the controller to the hood
- How to connect?
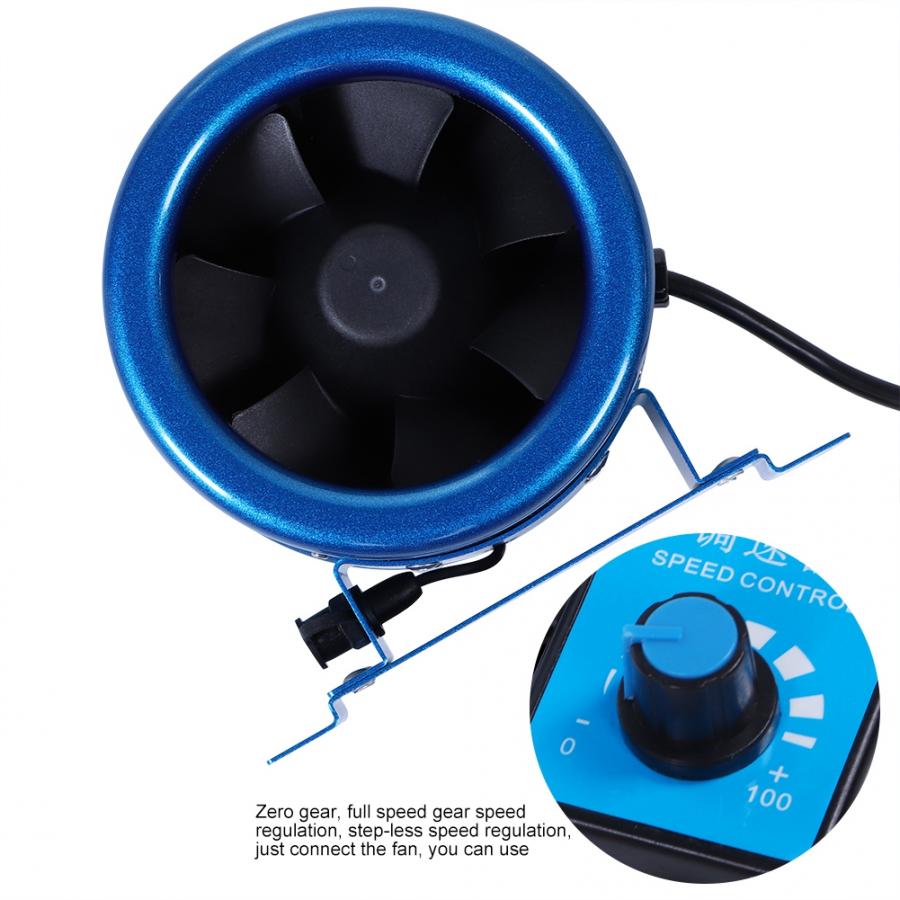
- What are fan speed controllers for?
- Varieties of regulators
- Do-it-yourself regulator assembly
- Purpose
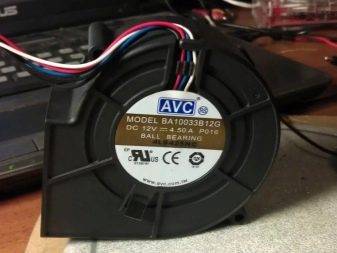
- CPU cooler speed control
- Wiring diagram for fan speed controller
- Ways to adjust the rotation speed of household fans
- Wiring diagram for a triac or thyristor fan speed controller
- Specifications
- Features of using devices
- Conclusions and useful video on the topic
Types and features of the device
According to the type of design, there are 2 types of fans:
- Axial. It has an external rotor motor. An impeller is attached to it. The movement of air masses coincides with the axis of the rotor. This type of fan has the advantage of being compact. Its performance is average. Suitable for small and medium rooms. That is, the place of installation of the fan should not be further than 2 meters from the ventilation outlet.
- Radial (centrifugal). Here the plates are attached to a special ring.Air enters the device from the front and exits from the side at a right angle. Unlike an axial fan, a radial fan is more efficient. Mounted in large rooms with an area of more than 12 cubic meters.
Types of exhaust fans
For the bathroom, they mainly choose the axial view, because few people can boast of a spacious area in this room. The cost of such devices is low. The fan does its job well if the distance to the ventilation outlet is chosen correctly. But if it exceeds the maximum value - 2 meters, then it is worth considering the radial version of the device.
Exhaust fans are also classified according to how the design was installed. Installation can be done:
- on the wall;
- on the ceiling;
- both on the wall and on the ceiling (you need to choose where);
- into the ventilation duct.
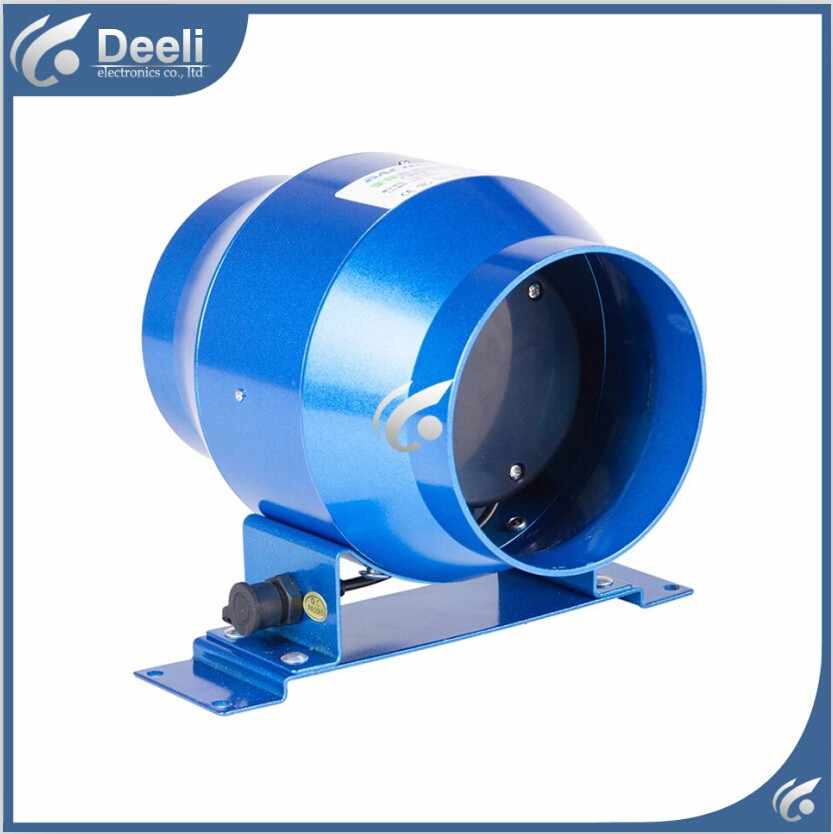
The characteristic of the channel type requires special attention. Such devices are mounted in the gap of the ventilation duct. It is used when there is only one channel, and more rooms need to be connected to it. However, this does not mean that it cannot be purchased when connecting one room.
Inline exhaust fan
The choice towards a duct fan is made in rare cases, because the process is longer, and further maintenance (cleaning, replacement) is difficult. This does not apply to private houses, because there it can be laid in the attic, which makes the task much easier.
Types of regulators
Single-phase and three-phase devices are distinguished by the principle of speed control:
- thyristor;
- triac;
- frequency;
- transformer.
Thyristor fan speed controller is effective for single-phase equipment with overheating protection, which initially provides for speed change by adjusting the applied voltage.
The triac controller can simultaneously control several AC and DC motors, provided that the total value of the current consumed does not exceed the limit value. This is one of the most common ways to control the speed from the lowest possible voltage, at which the operation of the fan will be stable, up to 220 V. Due to the simple design of the functional board, they are small in size and provide smooth speed control over a wide range. Three-phase models have a more precise degree of regulation and are additionally supplied with a fuse, and an additional smoothing capacitor is installed to reduce engine noise effects at low speeds. Many manufacturers offer a choice of flush or surface mount regulators.
Frequency controllers can be used to obtain a supply voltage in the range from 0 to 480 V at the output, and the speed control circuit is carried out at the expense of the supplied electric power. For economical use of the frequency controller, it is used with three-phase fan motors with a power of up to 75 kW, therefore they are used in air conditioning and ventilation systems.
For powerful fans, single-phase or three-phase transformer speed controllers are used. They allow you to adjust the speed in steps, while the engine at low speeds has a reduced noise level.One transformer can regulate several fans, and switching from low to high speeds can be done automatically by installing temperature sensors, humidity or using a timer.
Adjustment of the fuel system of the walk-behind tractor
If fuel is not supplied to the cylinder, then, first of all, it is necessary to check whether enough fuel is poured into the tank. You also need to check whether it goes to the carburetor. To do this, a hose is removed from the inlet fitting of the device. If we are talking about a K45 type carburetor, you should press on its booster so that the fuel begins to pour out through the drainage hole.
If fuel does not enter the carburetor, then you need to unscrew the fuel supply valve, completely disassemble it and remove accumulations of dirt from the mechanical filter. To achieve maximum purity, all constituent elements must be treated with gasoline. The fuel valve is assembled and returned to its original place.
If fuel enters the carburetor, but is not supplied to the cylinders, it is necessary to check the correct operation of the fuel valve, as well as the presence of dirt on the jets.
Do-it-yourself device assembly
The fan speed controller can be assembled on your own. To do this, you need the simplest components, a soldering iron and some free time.
To make a controller with your own hands, you can use various components, choosing the most suitable option for yourself.
So, to make a simple controller, you have to take:
- resistor;
- variable resistor;
- transistor.
The base of the transistor is to be soldered to the central contact of the variable resistor, and the collector to its extreme terminal.To the other end of the variable resistor, you need to solder a resistor with a resistance of 1 kOhm. The second terminal of the resistor should be soldered to the emitter of the transistor.


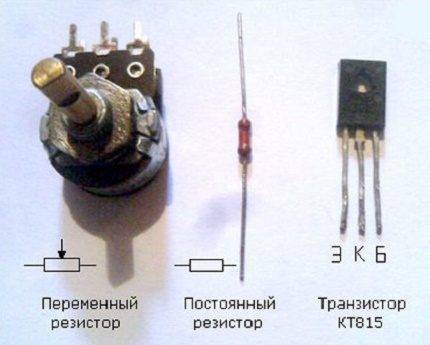
The scheme for manufacturing a regulator, consisting of 3 elements, is the simplest and safest
Now it remains to solder the input voltage wire to the collector of the transistor, which is already fastened to the extreme terminal of the variable resistor, and the “positive” output to its emitter.
To test the homemade product in action, you will need any working fan. To evaluate a homemade reobas, you have to connect the wire coming from the emitter to the fan wire with the “+” sign. The homemade output voltage wire coming from the collector is connected to the power supply.
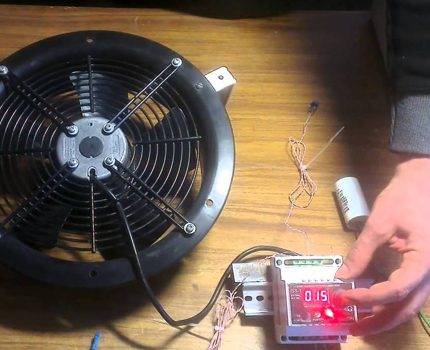
Having finished assembling a home-made device for adjusting speed, be sure to check it in operation.
The wire with the “-” sign is connected directly, bypassing the homemade regulator. Now it remains to check the soldered device in action.
To decrease/increase the speed of rotation of the cooler blades, you need to turn the variable resistor wheel and observe the change in the number of revolutions.
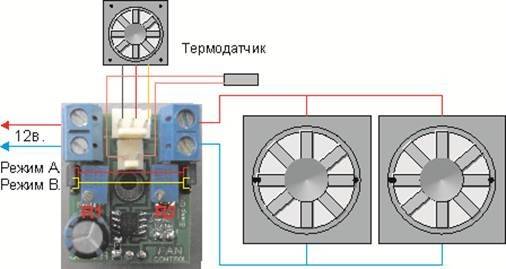
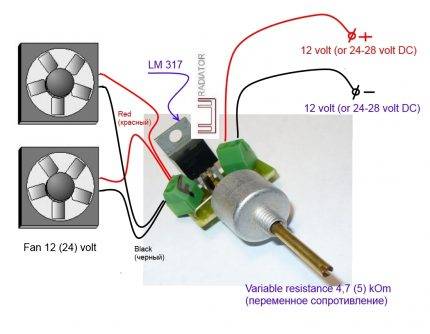 If you wish, you can create a controller with your own hands that controls 2 fans at once
This homemade device is safe to use, because the wire with the “-” sign goes directly. Therefore, the fan is not afraid if something suddenly closes in the soldered regulator.
Such a controller can be used to adjust the speed of the cooler, exhaust fan, and others.
Connecting the controller to the hood
The device is installed indoors.It is produced taking into account the recirculation of air masses for cooling internal circuits.
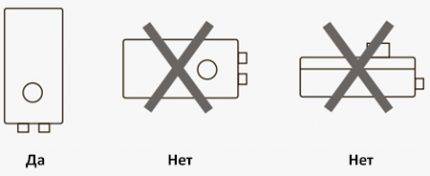 It is forbidden to place the regulator in an area with poor air convection, direct sunlight, above the heater. The working position of the device is strictly vertical, so the generated heat will be dissipated
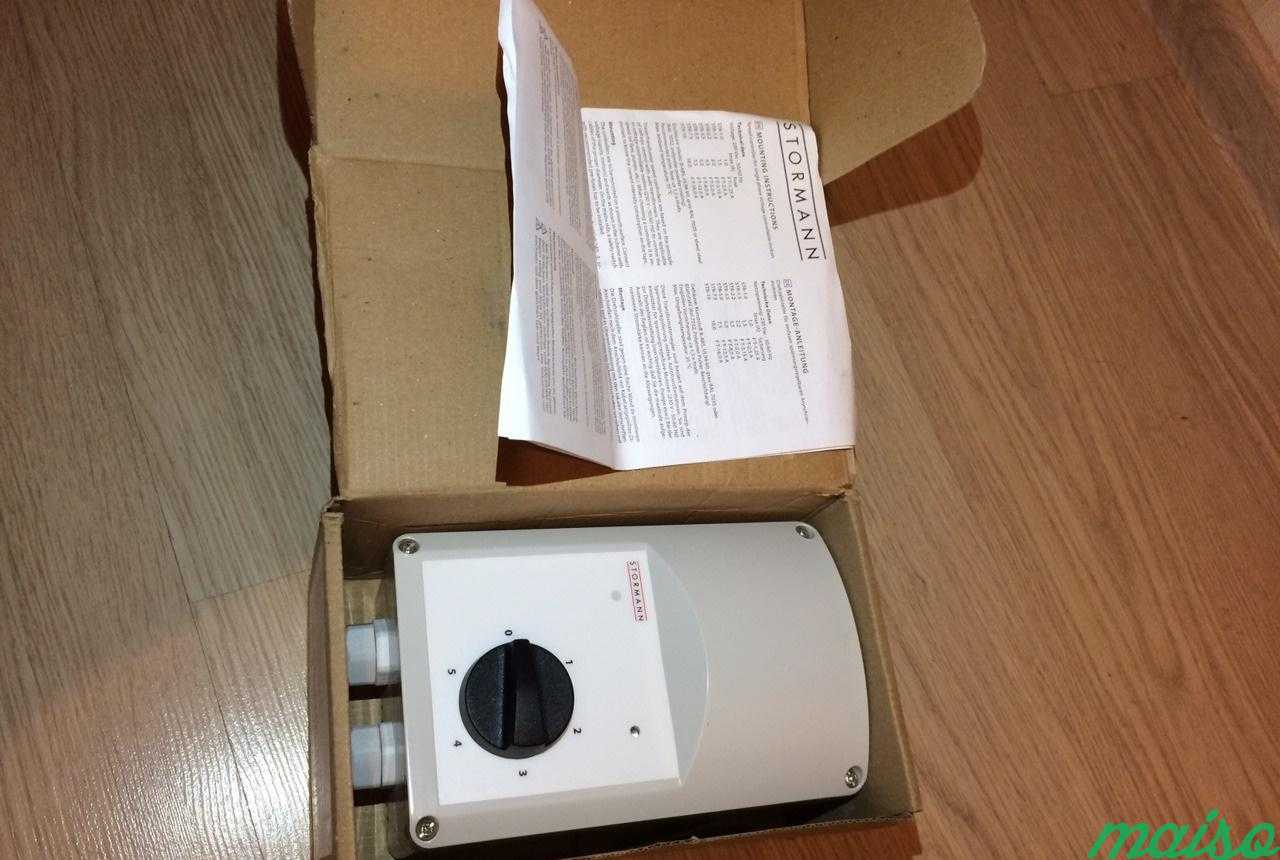
To properly install the regulator, you must carefully read the instructions for the device.
Most models are designed for self-assembly by the user and do not require special knowledge.
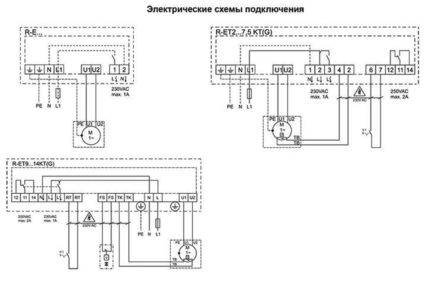 Contacts on branded products are marked, and are included in the delivery set connection recommendations, operation, maintenance of the device. Schemes for different devices are different
Installation of wall and in-wall devices is carried out with screws and dowels, which are selected in accordance with the dimensions and weight of the device. Fasteners are usually supplied in the kit, as is the wiring diagram for the fan controller.
The general pattern and sequence of actions is as follows:
The regulator is first mounted, then connected to a cable that supplies current to the fan.
The wires are divided into "phase", "zero", "ground" and cut, connected to the input and output terminals
It is important not to confuse them and make all connections according to the instructions.
The last step is to check the size of the cross-section of the supply cable and the connection for compliance with the maximum permitted voltage of the device. The process of installing wall regulators is similar to the principle of connecting sockets, light switches
You can use the old fan switch seat to mount the controller. In this case, the switch must be removed
The process of installing wall regulators is similar to the principle of connecting sockets, light switches. You can use the old fan switch seat to mount the controller. In this case, the switch must be removed.


 When the control module and the regulator itself are placed in different housings, the installation of devices is complicated. The control unit is powered from the electrical panel, and the executive module is connected via a low-current wire
If the controller is equipped with thermal contacts, it is recommended to connect it to motors with remote thermal protection contacts connected to the controller's TK terminals. Such a scheme will reliably protect the main device.
When the thermal contacts open in case of overheating, the controller circuit breaks, the engine stops immediately and the emergency light comes on.
A motor without thermal contacts requires a separate thermal protection. Additionally, a jumper on the TC can be added to the circuit, but the rated current of the regulator must be 20% more than the maximum motor current.
How to connect?
You can connect the speed controller to the fan with your own hands. To do this, you must carefully read the instructions and follow a number of safety measures when working with electrical appliances. Depending on the type of construction and the type of fans being serviced, the controllers can be installed on the wall, inside the wall, inside the ventilation unit or in a stand-alone cabinet of the "smart home" system. Wall and in-wall regulators are fixed with screws or dowels, depending on the dimensions and weight of the device. Fasteners are usually included in the kit along with the device connection diagram.
Connection schemes for models may differ, however, there are still general patterns and sequence of actions. First, the controller must be connected to a cable that supplies current to the fan. The main purpose of this stage is to separate the wires "phase", "zero" and "ground". Then the wires are connected to the input and output terminals. The main thing in this case is not to confuse the wires in places and connect according to the instructions. In addition, you should check that the size of the cross section of the power cable and connection corresponds to the maximum permitted voltage of the connected device.
When connecting the speed controller to 12 volt laptop fans, you need to find out the maximum allowable temperatures of the device parts. Otherwise, you can lose your computer, in which the processor, motherboard and graphics card will fail from overheating. When connecting the controller to office equipment, you must also strictly follow the instructions. If you need to connect several fans at once, it is better to purchase a multi-channel controller, since some models are able to serve up to four fans at the same time.
Fan speed controllers are an important multifunctional device. They protect equipment from overheating, extend the life of electric fan motors, save energy and significantly reduce the noise level in the premises. Due to their efficiency and practicality, devices are gaining more and more popularity and growing consumer demand.

About how to do it yourself fan speed controller, see below.
What are fan speed controllers for?

Some owners of private houses and apartments have a question about how to reduce the speed of the hood fan. First, let's figure out why this is needed. Usually, the rotation speed is reduced to reduce the noise from the device and save energy. But it is worth remembering that such actions will lead to a decrease in productivity, which will not have the best effect on the microclimate in the room.
If the fan is constantly running at maximum speed, it quickly exhausts its resource. To extend the service life, save energy and reduce noise, special equipment is installed that allows you to adjust the speed.
Varieties of regulators
There are several types of regulators:
- The thyristor controller is used in single-phase equipment. Its advantage is additional protection of the case from overheating.
- For powerful fans, a transformer regulator is chosen. On sale there are single-phase and three-phase varieties. The main advantage is the ability to simultaneously adjust the power of several devices at once. Another plus is a smooth decrease in speed.
- Some home masters use frequency or electronic controllers.
- The triac regulator is used more often because it is suitable for simultaneously adjusting the power of several motors at once. Its advantage is silent operation.
- A frequency controller is suitable for operation in the range from 0 to 480 Volts. It is used in combination with a three-phase motor with a power of no more than 75 thousand watts.
Do-it-yourself regulator assembly

For self-manufacturing of the regulator, you will need a conventional and variable resistors, as well as a transistor.
Manufacturing sequence:
- To begin with, the base of the transistor is soldered to the middle contact of the variable type resistor. Its collector is attached to the external outlet.
- A second conventional resistor is soldered to the second edge of the variable variety resistor. Masters take a model with a resistance of 1 thousand ohms.
- The second output of the resistor is connected by soldering to the transistor emitter.
- The wire through which the voltage is applied is soldered to the transistor. Its positive output is attached to the emitter of a variable type resistor.
- A home-made device is attached to a fan to check its performance. To do this, the positive wire of the device is connected to the wiring coming from the emitter. The voltage supply cables are connected to the power supply.
- The negative wire is connected directly. To check the efficiency of the wheel, the variable resistor is turned by hand and the change in the speed of the blades is monitored.
- If required, one controller is synchronized with the operation of two duct fans at once.


The efficiency of exhaust ventilation largely depends on the correct choice of duct ventilation equipment. When selecting a suitable model, regulatory requirements, operating conditions, required performance, dimensions and material of manufacture are taken into account.
Purpose
Technically, the electric motor speed controller is designed to change the amount of shaft rotation per unit of time. During the acceleration phase, frequency adjustment provides a smoother procedure, lower currents, etc.In some technological processes, it is necessary to reduce the speed of the equipment, change the supply or injection of raw materials, etc.
However, in practice, this option can also serve other purposes:
- Saving energy costs - allows you to reduce losses at the moments of starting and stopping the rotation of the motor, switching speeds or adjusting traction characteristics. This is especially true for frequently started electric motors that use short-term operating modes.
- Control of temperature conditions, pressure values without establishing feedback with a working element or with that in asynchronous electric motors.
- Soft start - prevents the surge of current at the moment of switching on, especially important for asynchronous motors with a large load on the shaft. It leads to a significant reduction in current loads on the network and eliminates false alarms of protective equipment.
- Maintaining the speed of three-phase electric motors at the required level. Actual for precise technological operations, where due to fluctuations in the supply voltage, the quality of production may be impaired or a different force occurs on the shaft.
- Motor speed adjustment from 0 to maximum or from another base speed.
- Ensuring sufficient torque at low speeds of the electric machine.
The possibility of implementing certain functions in speed controllers determines both the principle of their operation and the schematic design.
CPU cooler speed control
As you know, several fans are most often mounted in a computer case. Let's first look at the main cooling - the CPU cooler.Such a fan provides not only air circulation, but also reduces the temperature due to copper tubes, if any, of course. There are special programs and firmware on the motherboard that allow you to increase the speed of rotation. In addition, this process can also be performed through the BIOS. For detailed instructions on this topic, read our other material.

Read more: Increasing the speed of the cooler on the processor
If an increase in speed is required with insufficient cooling, then a decrease allows you to reduce power consumption and noise coming from the system unit. Such regulation occurs in a similar way as promotion. We advise you to turn to our separate article for help. There you will find a detailed guide on reducing the speed of the CPU cooler blades.
Read more: How to reduce the rotation speed of the cooler on the processor
There is also a number of specialized software. Of course, SpeedFan is one of the most popular options, but we recommend that you check out the list of other fan speed control programs.
Read more: Programs for managing coolers
In the case when you still observe problems with the temperature regime, it may not be the cooler at all, but, for example, dried thermal paste. Read on for an analysis of this and other causes of CPU overheating.
Wiring diagram for fan speed controller
It is not uncommon for households to require the installation of a fan speed controller. It should be noted right away that a conventional dimmer to adjust the brightness lighting is not suitable for fan
It is important for a modern electric motor, especially an asynchronous one, to have a sine wave at the input of the correct form, but conventional lighting dimmers distort it quite strongly. For effective and correct organization of fan speed control, it is necessary to:
- Use special controllers designed for fans.
- Keep in mind that only special models of asynchronous electric motors can be effectively and safely adjusted, so before buying, find out from the technical specifications about the possibility of adjusting the speed by lowering the voltage.
Ways to adjust the rotation speed of household fans
There are quite a few different ways to adjust the fan speed, but only two of them are practically used at home. In any case, you can only reduce the number of revolutions of the engine only below the maximum possible according to the passport to the device.
It is possible to disperse the electric motor only using a frequency controller, but it is not used in everyday life, because it has a high cost both in its own right and in the price of the installation and commissioning service. All this makes the use of a frequency controller not rational at home.


It is allowed to connect several fans to one regulator, if only their total power does not exceed the nominal current of the regulator. Consider when choosing a regulator that the starting current of the electric motor is several times higher than the operating one.
Ways to adjust fans in everyday life:
- Using a triac fan speed controller is the most common way, allowing you to gradually increase or decrease the speed of rotation in the range from 0 to 100%.
- If the 220 Volt fan motor is equipped with thermal protection (protection against overheating), then a thyristor regulator is used to control the speed.
- The most effective method of adjusting the speed of rotation of an electric motor is to use motors with multiple winding leads. But I have not yet seen multi-speed electric motors in household fans. But on the Internet you can find wiring diagrams for them.
Very often the electric motor buzzes at low speeds when using the first two methods of adjustment - try not to operate the fan for a long time in this mode. If you remove the cover, then with the help of a special regulator located under it, you can rotate it to set the lower limit of the engine speed.
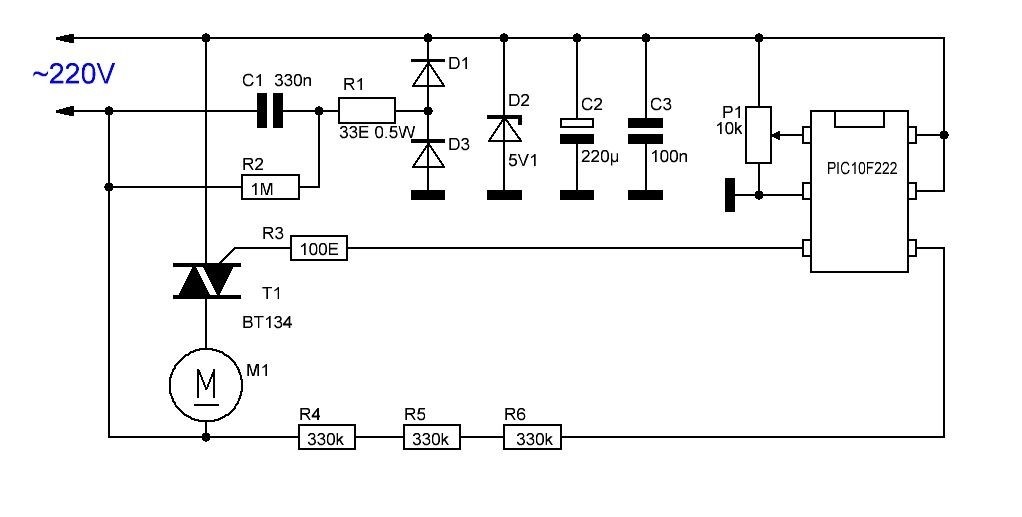
Wiring diagram for a triac or thyristor fan speed controller
Almost all regulators have fuses inside that protect them from overload or short circuit currents, in the event of which it burns out. To restore functionality, it will be necessary to replace or repair the fuse.
The controller is connected quite simply, like a regular switch. On the first contact (with the image of an arrow), a phase is connected from the electrical wiring of the apartment. On the second (with the image of an arrow in the opposite direction), if necessary, a direct phase output without adjustment is connected. It is used to turn on, for example, additional lighting when the fan is turned on.The fifth contact (with the image of an inclined arrow and a sinusoid) is connected to the phase that goes to the fan. When using such a scheme, it is necessary to use a junction box to connect, from which Zero and, if necessary, Earth are connected directly to the fan, bypassing the regulator itself, which requires only 2 wires to connect.
But if the electrical wiring junction box is far away, and the regulator itself is next to the fan, then I recommend using the second circuit. A power cable comes to the regulator, and then it goes directly to the fan. Phase wires are connected in the same way. And 2 zeros sit on contacts No. 3 and No. 4 in any sequence.
Connecting a fan speed controller is quite simple to do with your own hands, without calling specialists. Be sure to study and always follow the rules of electrical safety - work only on a de-energized section of electrical wiring.
Specifications
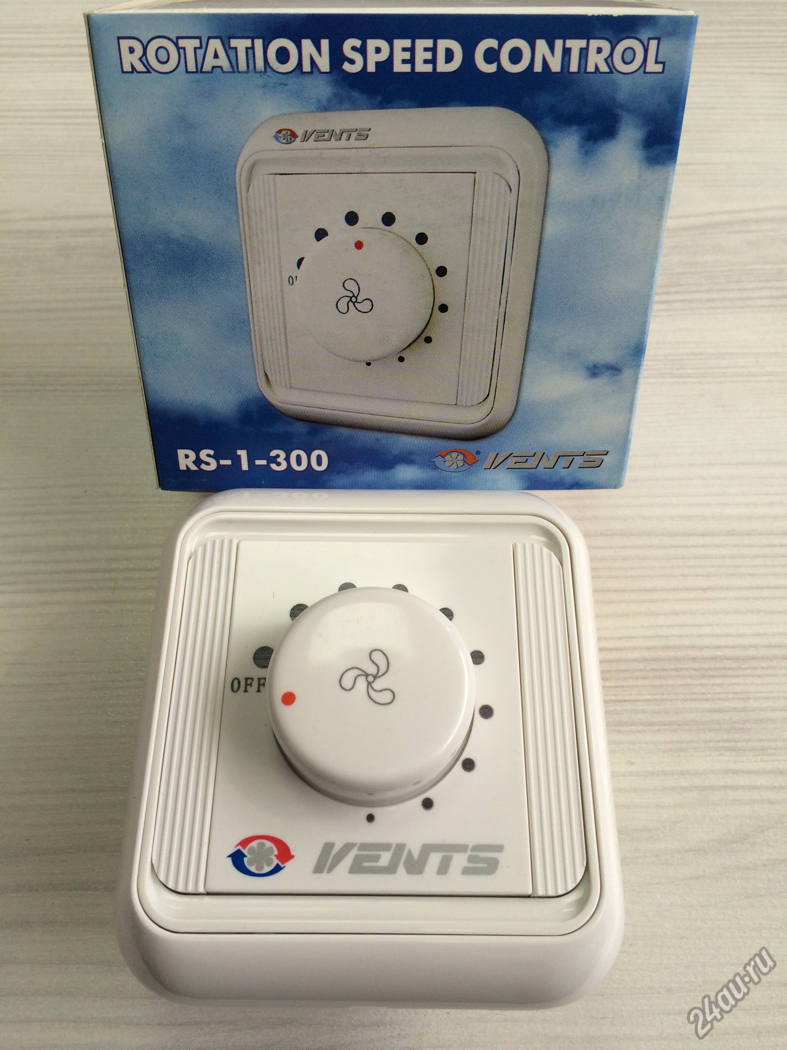
A fan speed controller is a small device that can reduce or increase the speed of rotation of the working shaft. The controllers are connected to the fans according to a certain scheme and are controlled using a manual method or automation. Automatic models are closely interconnected with other devices of the ventilation unit, for example, with sensors that determine temperature, pressure, movement, as well as photo sensors and devices that determine humidity. Data from these devices is transmitted to the controller, which, based on them, selects the appropriate speed mode.
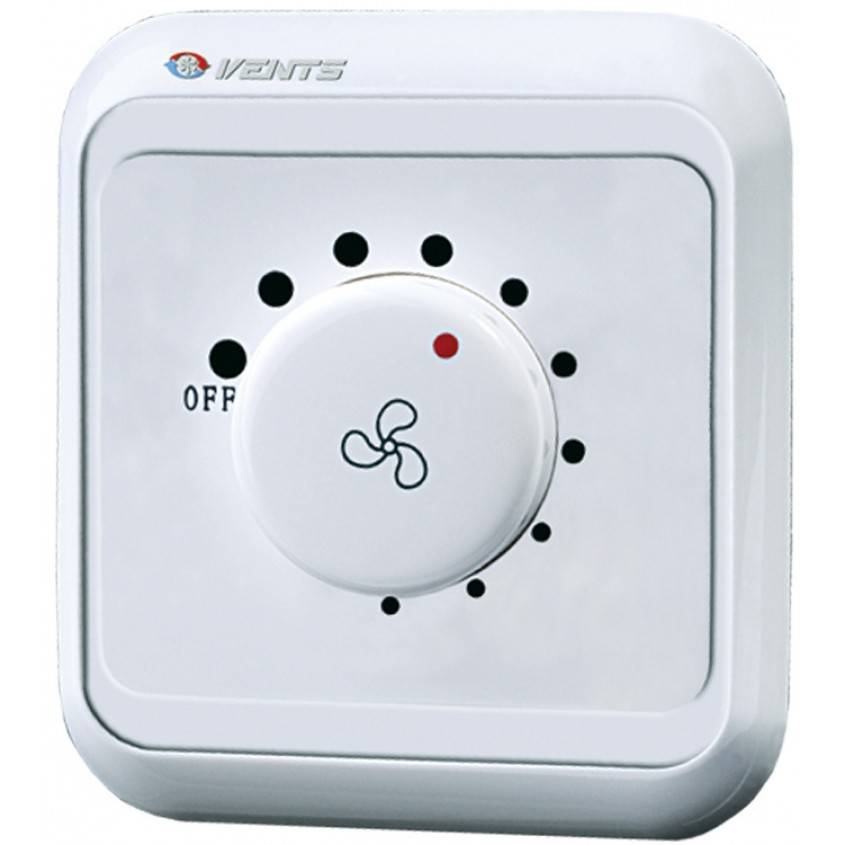
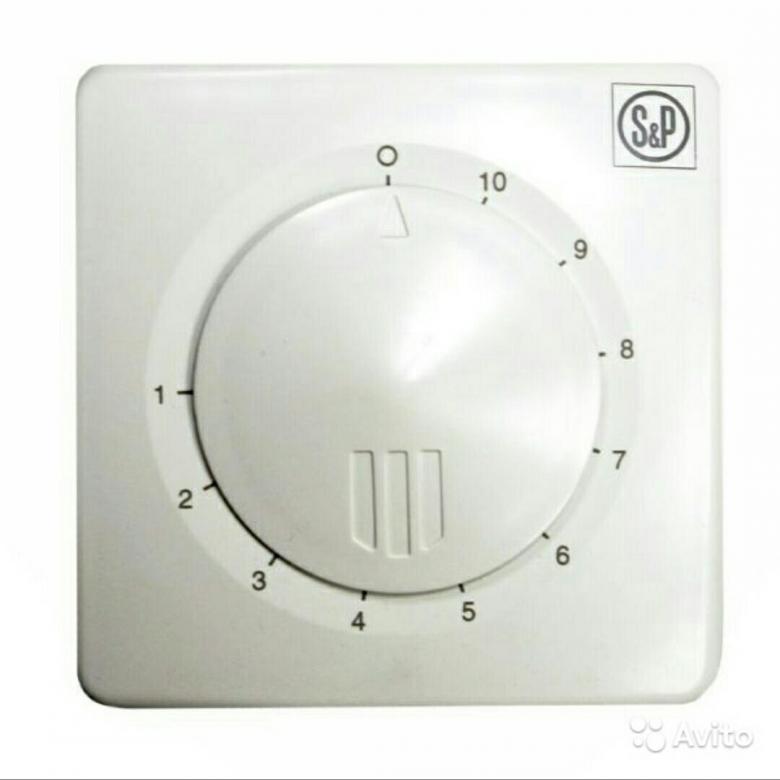
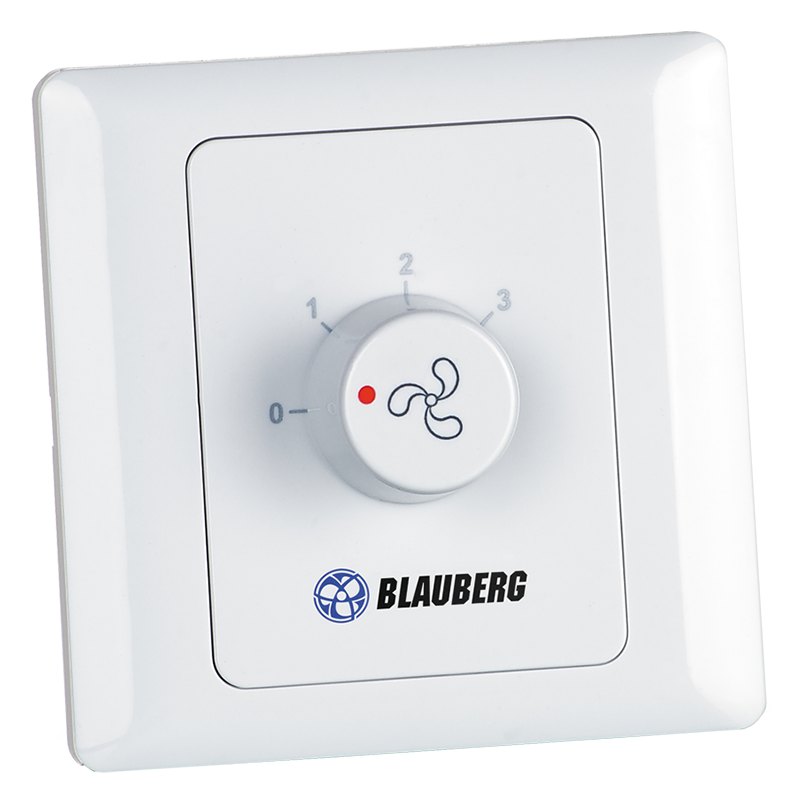
Mechanical models are controlled manually.Regulation of the rotation speed is carried out using a wheel mounted on the body of the device. Often, controllers are wall-mounted according to the principle of a switch, which makes their use convenient, and allows you to smoothly change the number of revolutions at any time. The devices are produced in a wide range of power and are able to operate on voltages of both 220 and 380 V.
Features of using devices
First you need to understand the general principle of work. It is aimed at changing the power of the air flow and affects the air exchange in general. Speed control is achieved in one of the following ways:
- change in the voltage supplied to the winding;
- changing the frequency of the current.
In practice, devices of the first type are always used, because a frequency-based regulator sometimes costs more than the fan itself. Such an acquisition in the future is not justified by any advantages.
Oddly enough, but the use of controllers is very wide: industrial equipment, public places (restaurants, gyms, office). Wherever intensive ventilation and its regulation are needed.
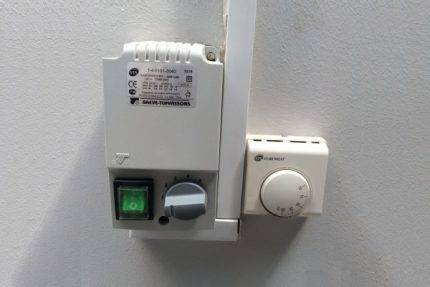
Management can be mechanical and automatic. Mechanical control is carried out using a special wheel, which allows both stepwise and smoothly reducing the speed of the hood fan. This control method is typical for triac models.
Conclusions and useful video on the topic
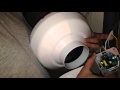
How to connect the controller to the fan. The example shows a thyristor controller, but the principle of connection will help to understand the algorithm for working with a step device:
Features of connecting a duct fan through a speed controller + two more ways are discussed in the following video:
Stepped fan speed control makes the system less power-hungry, quieter, more precisely controlled. The controller ensures the safety of the main equipment, increases its service life. This is facilitated by a safe start, protection against short circuit, current overload, overvoltage, open-phase mode.


The cost of purchasing the device pays off by saving money on the cost of consumed energy
It is only important to choose the parameters of the controller for the serviced fan. Most manufacturers have model matching tables that you can use when buying on your own.
Does not fit and consultation with the manager of the store.
Do you have any questions about the topic of the article? Ask them to our experts and other site visitors - the feedback block is located below. Also here you can share your own experience and theoretical knowledge, participate in discussions.


