- Types and features of bath screens
- Features of manufacturing a screen for a corner bath
- Benefits of using
- Aesthetics
- Functionality
- What are screens for?
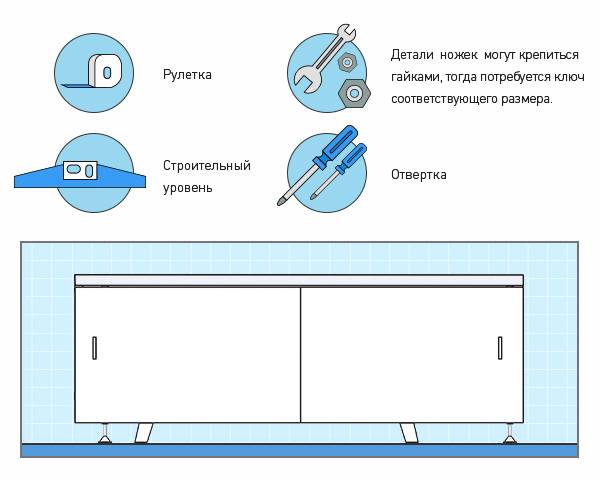
- What will be required?
- How to install on corner models?
- The main types of screens for the bath
- Choice of sizes and materials
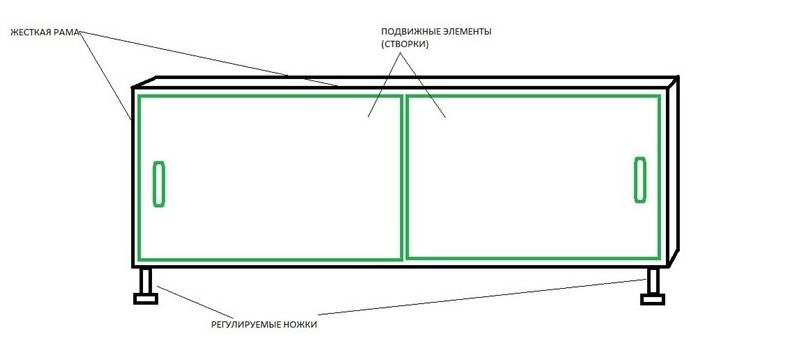
- Sliding bath screen: components and main design functions
Types and features of bath screens
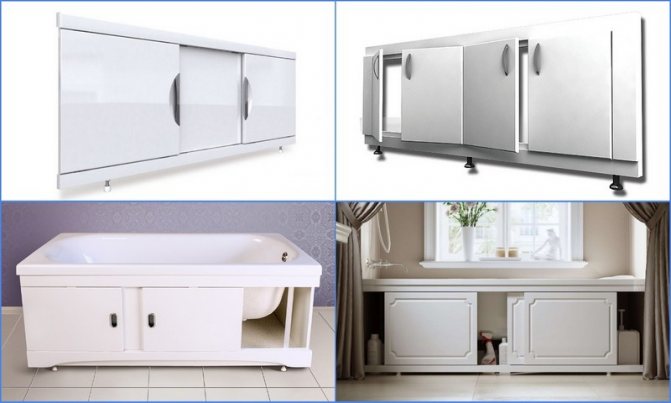
The future design can perform several functions: be a decorative element, serve as a place to store things, or both at the same time. Depending on the purpose, there are types:
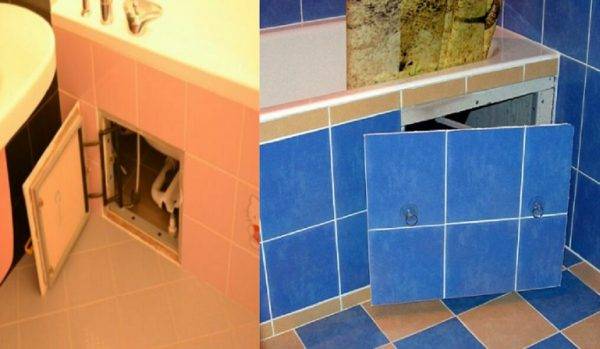
- 1. Stationary - the simplest and fastest solution. The disadvantage is the monolithic structure. For repairs, small hatches are provided, which is not very convenient. The corner screen is mainly made in this design.
- 2. Removable - the space under the bathroom is not used, but there is access to communications. If necessary, the casing can be easily dismantled and reinstalled.
- 3. Sliding - all pipes are hidden, takes up little space. Allows easy access to sewers.
- 4. Swing - has doors that open towards the room. Convenient to use, but more suitable for spacious rooms.
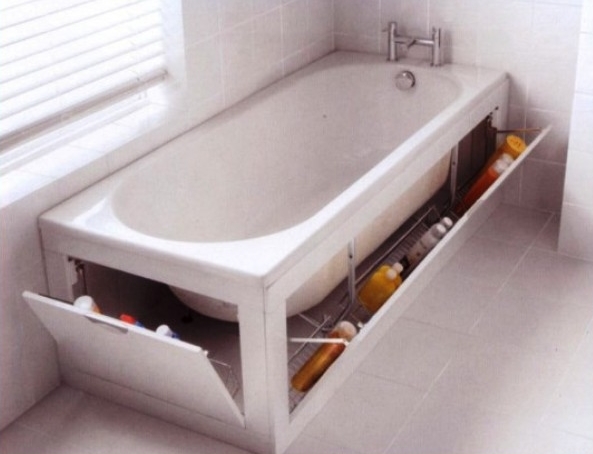
- 5.Folding - has sashes that open in a horizontal position. Every little thing is stored behind them, but in a small room it takes up a lot of space.
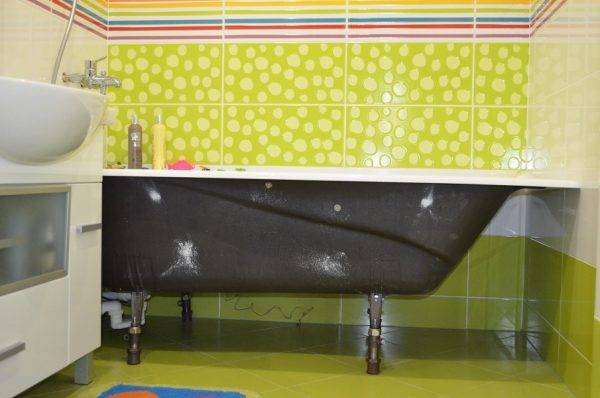
A modern acrylic bath is purchased with ready-made plastic screens. They are made exactly to size, easy to assemble and install. Owners of old steel and cast iron are forced to make them with their own hands or leave the space open and contemplate sewer pipes. To close the place under the bathroom or not is a matter of taste of the owners.
Screen made of plastic panels with hinged doors
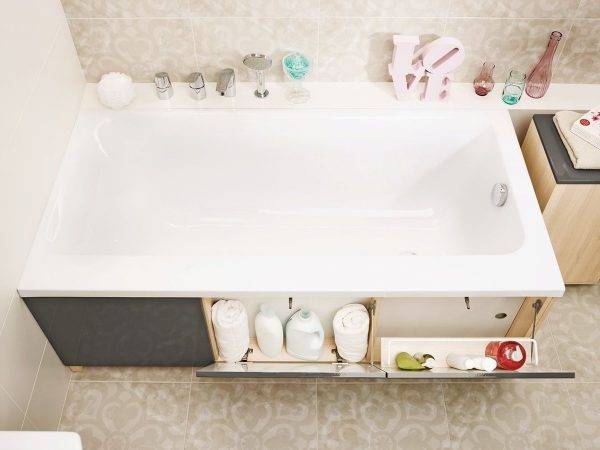
The bathroom with a screen is transformed, aesthetics and finishing are given to it. But there is another reason to get involved in the fabrication of the structure: the space can be exploited to good use. Place under the bath is perfect for storage of small things: the door opens, and behind it - shelves.
To make a screen yourself, you will need quite a few inexpensive materials of the owner's choice:
- any bricks;
- moisture resistant drywall;
- plastic panels;
- MDF or OSB.
With the exception of plastic, everything else requires subsequent finishing. It costs little, is practical, biologically neutral, stable in a humid environment, easy to clean. Despite the low strength, this drawback does not pose a big problem. If any element is damaged, it is easy to replace it without disassembling the entire structure. Using popular MDF panels, they must be treated with special compounds, because they are afraid of moisture.
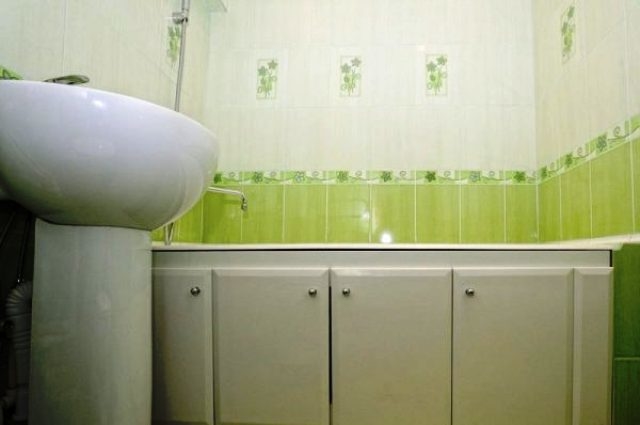
Hinged door model
There are other options left. With design, it is easier here: finishes for every taste are allowed to match the style of the bathroom. The brick is faced with decorative plaster or ceramic tiles.Drywall and panels (not plastic) are painted, painted, pasted over with wallpaper, tiles. The possibilities for imagination are endless, the main thing is that after decorating the screen does not lose functionality.
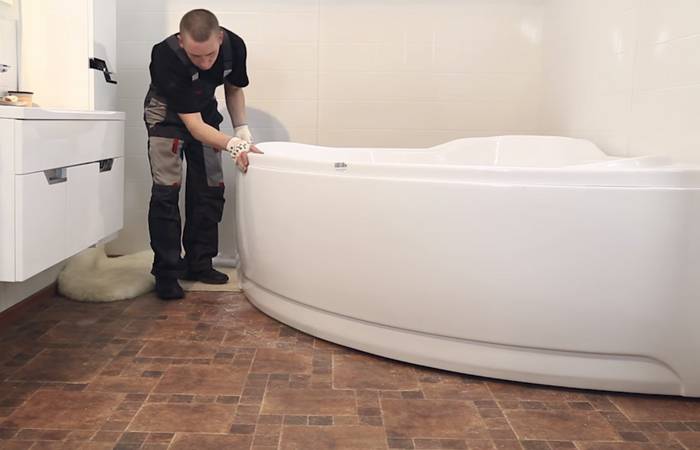
Features of manufacturing a screen for a corner bath

For a corner bath, plastic or drywall shielding is suitable. And as a front finish, a mosaic that emphasizes the contour of the bowl will look perfect. The installation process is not much different from installing a conventional screen. It begins with the manufacture of the base, and then the lining is made, which must be adjusted according to the shape and curves of the bowl.


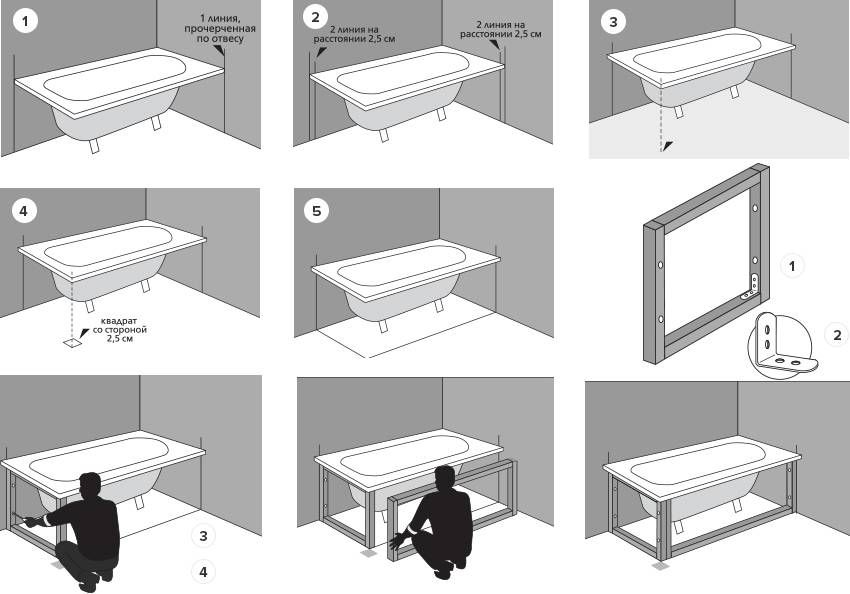

Action algorithm:
- Measure the distance from the top profile of the frame to the bottom.
- Measure the desired height of the plastic panels, cut them to the desired size.
- On the first panel, which will be attached from the edge, apply a layer of glue and fix the starting strip of the same length.
- Insert each subsequent plastic element into the grooves of the previous one, attaching it at the top with glue or a stapler, and at the bottom with self-tapping screws.
- Install the last panel. To do this, accurately determine the dimensions of the remaining recess, make marks on the plastic panel, cut out the last structural element.
- On the side of the panel that adjoins the wall, attach the starter strip with glue. Carefully insert the element into the upper and lower grooves.
- Trim the lower part of the screen with a plastic plinth that matches the color and design.
Making a screen with your own hands is a fairly simple task that even a beginner in the construction business can handle.It is enough to follow the instructions clearly and comply with the basic requirements for the design: the screen should not be a support for the bowl, and an inspection hole should be made in it to access the main sewer and water units.
Benefits of using
Installing panels that close the space under the bath bowl helps to solve several problems:
- create a single space in the bathroom;
- hide household chemicals;
- cover communication pipes;
- reduce the likelihood of water and objects penetrating into hard-to-reach places under the bath bowl.
The solution of these problems is facilitated by a variety of both designs and design of screens.
Aesthetics
The screen allows not only to hide the legs of the bathtub and pipes for water supply and sewerage, but also to decorate the bathtub. Such products made of plastic look especially attractive. Such panels are often decorated with various patterns that are applied using photo printing technology.
Functionality
Screens perform several functions. The main one is to hide engineering communications. However, not only this task is performed by such structures. Screens prevent the penetration of water under the bath, thereby creating additional protection against leaks. In addition, these products hide household chemicals from pets and children.
What are screens for?
Sliding models allow you to make the most efficient use of the usable area in the shower room. Conventional panels or doors are not very convenient to use, as they take up a lot of space. In order to make a screen under the bath with your own hands, you need to purchase an ordinary bathroom with attractive supports.The sides of the product must be finished with a special material, which makes it possible for the bath to have a presentable appearance.
Based on the location of communications in the shower room, it is necessary to select one or another screen model, product profile, as well as the size of the panels. Otherwise, there is a possibility that the selected frame will not fit. Water pipes are always unpleasantly striking, so the structure should be assembled only after careful measurements. Otherwise, it is possible to spoil the overall design of the bathroom, because ugly ledges do not look very aesthetically pleasing.
However, there is another way out - to buy a standard fence, and do the paneling with your own hands. Usually, when purchasing acrylic products, plumbing installation is carried out with ready-made doors. They allow you to close the basement, taking into account space savings, i.e. rational use, which eliminates the appearance of large voids, unlike cast iron or steel products.
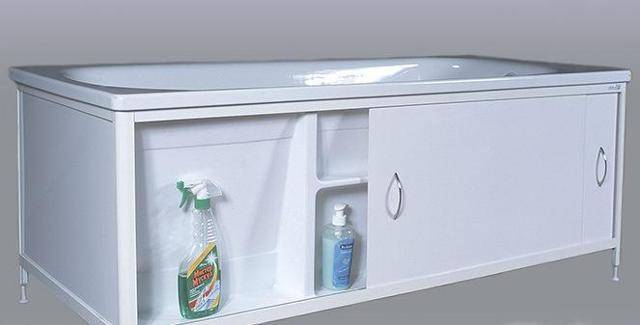
In addition, there is another good reason - the possibility of using this space for domestic needs. Often, household items, cleaning products or tools are stored in these niches. Here you can make wooden or plastic shelves for convenience.
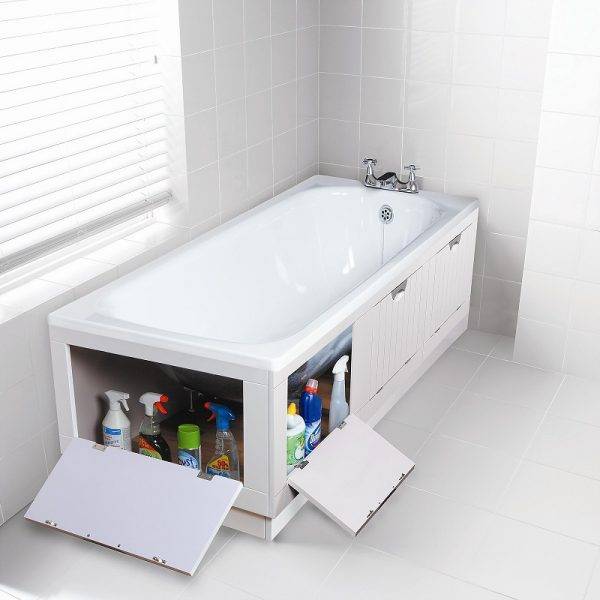 Screens can hide cleaning products
Thus, the panels help to get rid of various negative effects caused by unsanitary conditions. The indisputable advantages of these products include their attractive appearance, carefully designed by designers.Modern technologies make it possible not only to put sliding doors under the bathroom, but also to decorate them stylishly, colorfully and uniquely. This gives the shower room its own personality, which distinguishes it from other rooms in the apartment.


What will be required?
How to make a screen for a bath, more precisely, from what materials? For the manufacture of sliding panels, you will need a supporting structure in the form of a profile, as well as the main raw material from which the composition will be created. In order to determine the choice of material, you need to proceed from the operating conditions of the bathroom, as well as personal preferences. You can carefully consider the image, starting from the available tools.
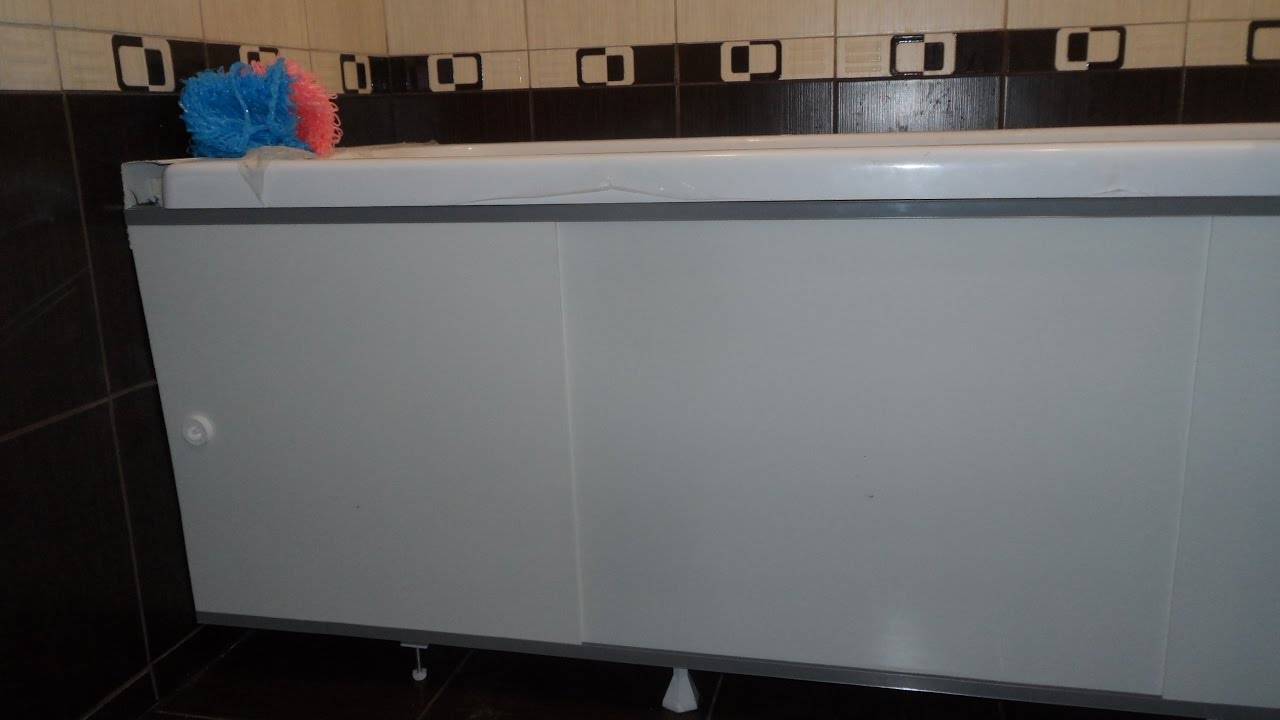
 Sliding screen
Recommended finishing materials:
- MDF panels;
- drywall;
- plastic;
- ceramics;
- acrylic.
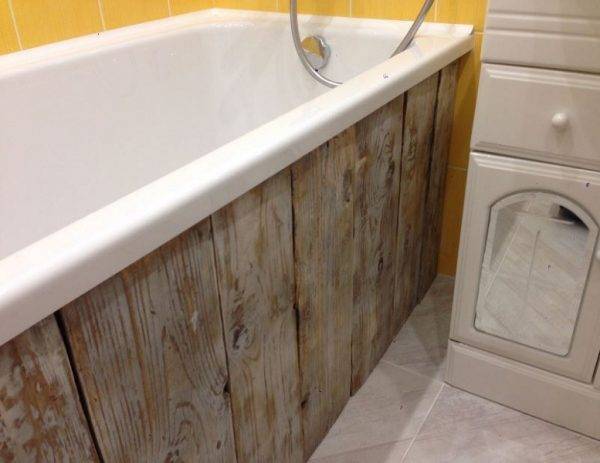
Separately, it is worth noting that wooden elements are sometimes allowed, but they must be moisture resistant, for example, beech or bog oak. In addition, you should decide on the type of valves, i.e. the structure itself. Screens come with sliding elements, with only one door, tightly closed, and also with a special niche for legs. All these parameters are very individual and suitable for different shower rooms and directly depend on the taste of the owner or his financial capabilities.
How to install on corner models?
For corner baths, most often, fastening is provided not with self-tapping screws, but with special magnets and metal plates. Such magnets are initially attached to the legs of the font.
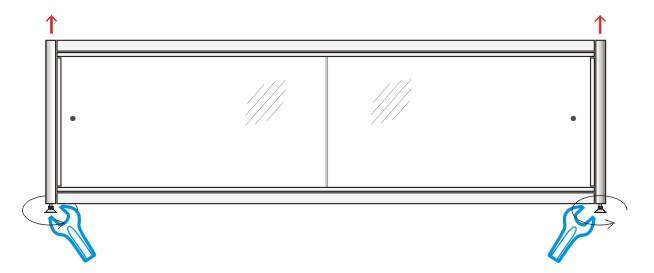
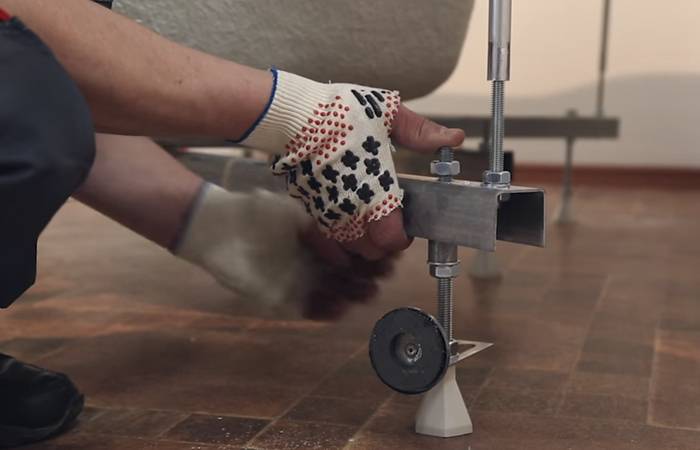
STEP 1. Height adjustment. Just as in the case of a rectangular model, we adjust the height of the legs based on the screen parameters.
STEP 2.How to fix the plates? On the reverse side of the panel, in places where the magnets will abut, we glue the metal plates from the kit onto double-sided tape or silicone sealant. During drying, you can fix them with ordinary tape.
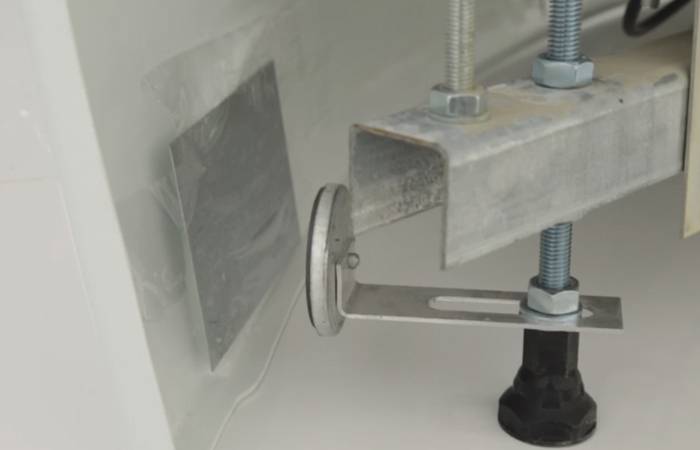
STEP 3. Installation. We attach the front panel and check that the magnets grab the metal plates.
This mounting option is convenient in that the question: how to remove the screen and then put it back on does not arise. Everything is extremely simple, you need to make a little effort, pulling the panel towards you, you can just as easily return it to its place. The previous method is not so simple, there you will first need to unscrew the screws.


The main types of screens for the bath
There are screens according to the degree of isolation of the space under the bathroom, design and materials. So, there are options with an inspection hatch and without it. Solid overlap is often installed along the outer side of the bath, repeating its shape. After filling the voids with sealant, the interior space will not be threatened by dust and moisture. But pipe maintenance will be impossible without disassembling the structure.
Such a screen is placed at a right angle or tilted. For convenience, sometimes a recess is made in the plane. Dirt can accumulate in the corners and the grout can darken, but the feet do not rest against the partition, and it will be more difficult to slip.
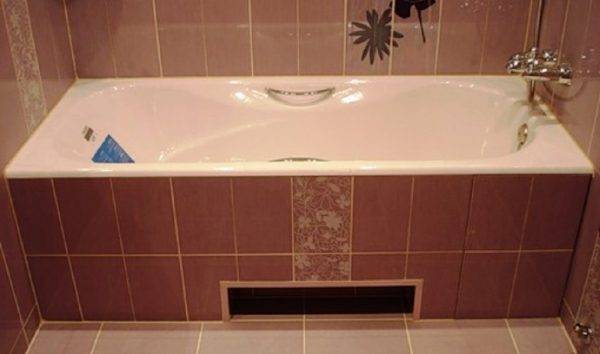
The inspection hatch is built into areas of pipes that can become clogged or fail. Then you will need access to clean or replace the gaskets, siphon or revision. The simplest hatches are made of plastic and hung on the frame through hinges.More complex designs are equipped with rotary mechanisms. They are especially relevant for tight spaces. But they are much more expensive than plastic hatches.
Its functionality also depends on the design of the screen. So, there may be floors with built-in shelves without sashes. Shelves are convenient and beautiful, but towels will gather dust next to the floor, detergents will not fit into such decor, and it is better not to put fragile items for beauty. An alternative option would be a hinged door, to which you can attach a shelf for storing powders and detergents from the inside. It is both practical and does not spoil the aesthetics.
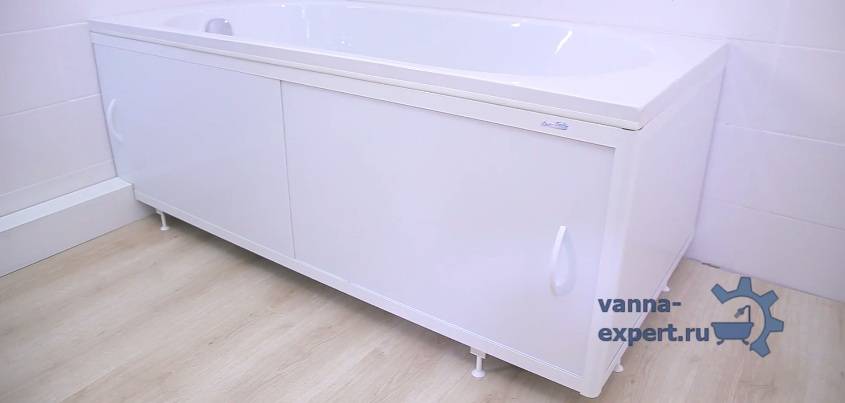
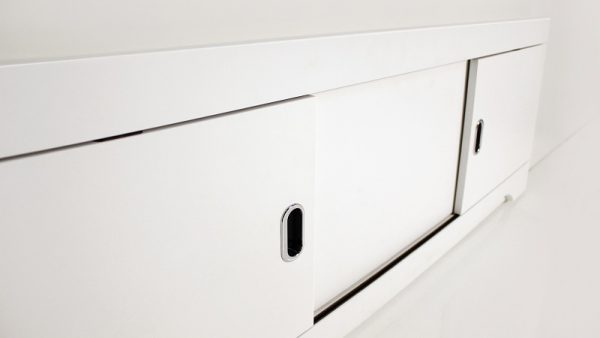
One of the most common screen options is considered to be a model with sliding doors. This design consists of legs (they are also stiffeners and transverse crossbars), skids (they are also a frame) and a covering part. The convenience is that the space behind the screen can be used along the entire bath
If you do this daily, then you should pay attention to the materials from which the screen is made. For example, plastic panels on the edges wear out relatively quickly, while mirror and glass ones get dirty.

Choice of sizes and materials
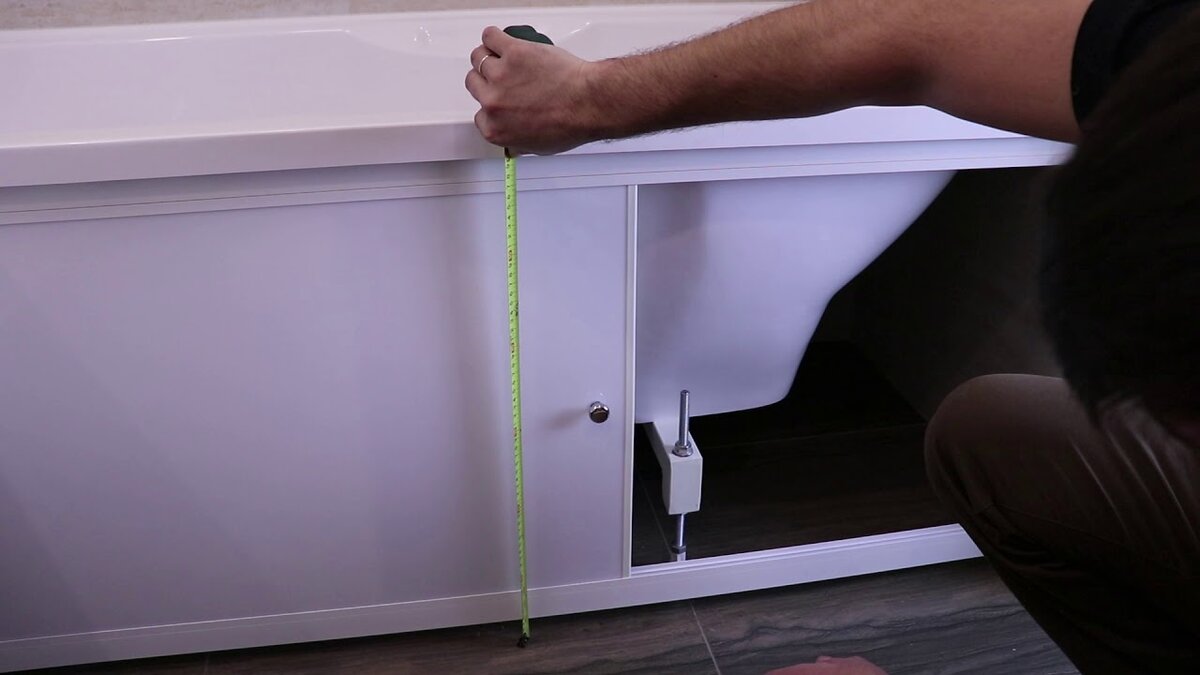
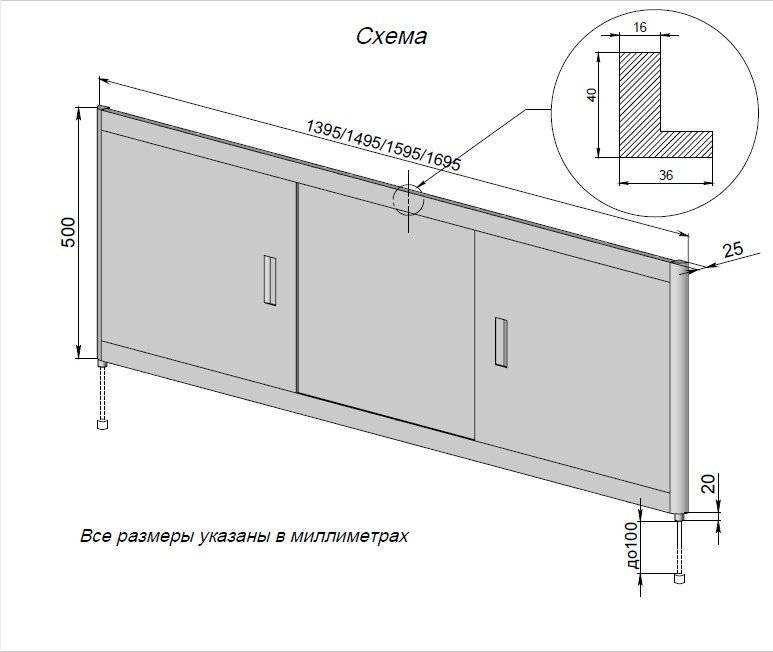
As a rule, the length of the screen for the bathroom is the same as the length of the plumbing fixture. So, if the equipment is selected for a bath with a length of 160 centimeters, then the structure should be purchased with a length of 160 cm. Compliance with the ratio of parameters will allow you to avoid hassle in the future, for example, such as fitting or trimming an extra section of the structure.


Almost all popular MDF screen models equipped with additional legs, which allows you to adjust their height when installed under the bath.The buyer himself chooses what height of the structure is most convenient for him. Most often, it is 54 cm as a minimum and 62 cm as a maximum. The gap formed between the screen and the floor is easily eliminated with the help of a thin plinth, which is included in the equipment kit.
Sliding bath screen: components and main design functions
Sliding type screens often include the following structural elements:
- panels or sashes, the frame of which is made of plastic, aluminum, as well as other metals;
- accessories;
- installation instructions.
Experts recommend using mirror-coated models only as a last resort. For example, when you need to visually expand the bathroom space.

When buying a screen, it is important to pay attention to the quality of mounts, legs, screws and guides, since the life of the entire structure depends on these elements.
The simplicity of design and practicality of such models do not affect their functionality in any way. Consider their main functions:
- protection of communications from water ingress;
- hiding communications and other items (plunger, household chemicals) that look inorganic in the interior of the bathroom;
- decorative.
You can buy a sliding screen for a bath in any building hypermarket, as well as in the market. A variety of models allows you to choose the right option for any interior.


