- How to make your own?
- What you need to install a sink
- What materials are used for production
- Benefits of installing a mortise sink over a consignment note
- Where is the best place to install a sink
- Features of the choice and installation of washbasins
- Forms and sizes of overhead sinks
- Features of choosing a sink on the countertop
- Demonstration instructions for inserting a sink into a countertop
- Prices for popular drill models
- Video - How to embed an oval sink
- Features of mounting embedded models
- Foundation preparation
- Structure fastening
- Algorithms for self-assembly
- On the wall
- For cabinet without countertop
- Into the countertop
- Mortise fastening method
- How to fix corner, round and granite sinks
- Fixture round model
- Installation of a granite model (video example of installing a black granite sink)
- Conclusions and useful video on the topic
How to make your own?
Not all types of countertops can be made independently. The surface of any stone and glass requires processing on special equipment and the use of certain skills and knowledge. To date, the countertop under the sink for the bathroom can be made independently from wood and drywall.
In the manufacture of wood countertops, we need a wooden plate to fit the size of the countertop, moisture-resistant impregnation for wood coatings, seam sealant, and tools. To begin with, we remove all dimensions in the place where the countertop will be installed, think over the method of fastening. Using an electric jigsaw, we cut out the countertop from a wooden blank, using the dimensions and shapes taken in advance in the bathroom.

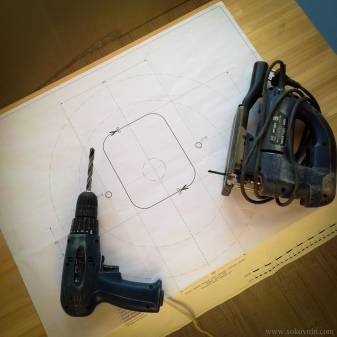
After that, in the resulting countertop we make a hole for the siphon, if the sink is overhead, or we cut a hole for the sink, if it is built-in. A hole is also made for the faucet according to its diameter, if it will be mounted on the countertop, and not on the wall. If the countertop will have two or more sinks, then cut out holes for all the elements. Along with this, it is necessary to pre-make all the necessary holes for attaching the countertop to the wall and / or floor, depending on its design.
When the shape of the countertop is ready and all the necessary holes are made, we proceed to the processing of the edges. To do this, we need sandpaper and a special machine. The entire surface of the worktop to be treated after processing must be smooth and even. Having finished processing the edges and holes, we proceed to cover the wood and all its ends with a moisture-resistant composition in accordance with the instructions on the package. The next step is varnishing, also according to the manufacturer's instructions. It is advisable to apply a moisture-resistant composition and varnish in several layers.
Do not forget about the ends, edges and holes. There, too, everything needs to be processed qualitatively. After the applied products have completely dried, the countertop is ready for assembly.At the same time, all joints adjacent to the countertop, the walls of the sink and the faucet must be treated with a sealant. This will prevent the ingress and stagnation of moisture in hard-to-reach places.
The technology of self-manufacturing countertops from MDF or chipboard is practically no different from the option with wood. You do not need varnish, moisture-resistant composition and sandpaper processing. But if the tabletop project has rounded corners, then after cutting the ends of such corners, it will be necessary to seal them with a special film. You won't be able to do it on your own.
Making a drywall countertop is a more complex process, but it also gives you more opportunities to make curved, rounded, and other unusual design shapes. We need moisture resistant drywall. It is sold in sheets. We calculate their number from the dimensions of the planned countertop and multiply by two, since the base is made in two layers.
We also need a profile, always galvanized. It will be used in all the supporting structures of the planned countertop, and drywall will be attached to it. Accordingly, the number of profiles depends on the size and configuration of the project. If bends are planned on the surface of the product, then it is best to purchase flexible drywall for arches. You will also need self-tapping screws for metal, glue for gluing drywall sheets, glue for tiles, tiles or mosaics, moisture-resistant sealant, sealant for joints.
When everything is ready for work, then we proceed to the manufacture of the product. Having decided on the height at which the countertop will be located, we draw a horizontal line and fasten the cut profile to the wall.If the design will have several levels in height, then we fasten the profiles to the wall in accordance with the intended design. After that, we also assemble the frame of our future table from the profiles. This type of countertop cannot be suspended, so do not forget to make supports. When the frame is assembled, we sheathe it with sheets of drywall.
After the frame is sheathed with drywall and all the necessary holes are cut out, we begin tiling or mosaics. The technology for laying tiles is the same as for walls and floors. When the tile or mosaic is laid, and all seams are treated with sealant, we mount the sink, faucet and siphon, connect all communications.
How to make a countertop under the drywall sink, see the following video.
What you need to install a sink
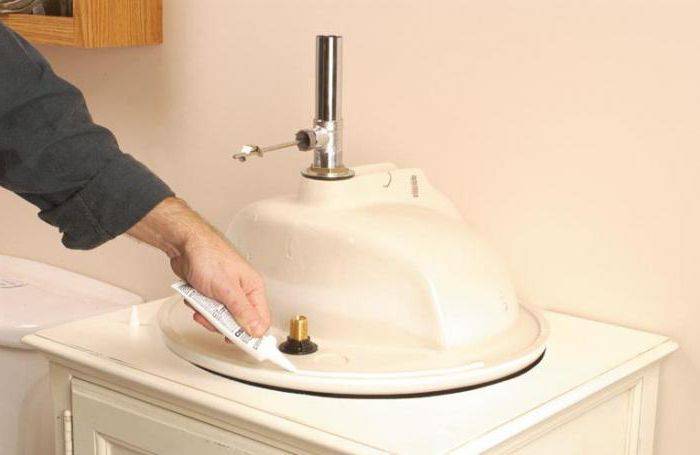
To attach the sink correctly, you need to assemble a minimum set of tools. To seal the seams, you need a silicone sealant that will protect the surface of the furniture from moisture.
Installation accessories:
- electric drill or screwdriver;
- a set of drills with a diameter for fastening;
- self-tapping screws and other products for fasteners;
- screwdrivers in a set with different sections;
- masking tape to protect furniture;
- ruler and level measuring device;
- joint sealant.
Before installation, it is recommended to clean the space and remove excess. For convenience, all communications should be fixed on the cabinet in advance. After fixing the sink, this step will be problematic. The installation location will depend on the location of the water pipes and sewerage. If space permits, then the cabinet is not recommended to be placed next to the refrigerator and heating appliances.
What materials are used for production
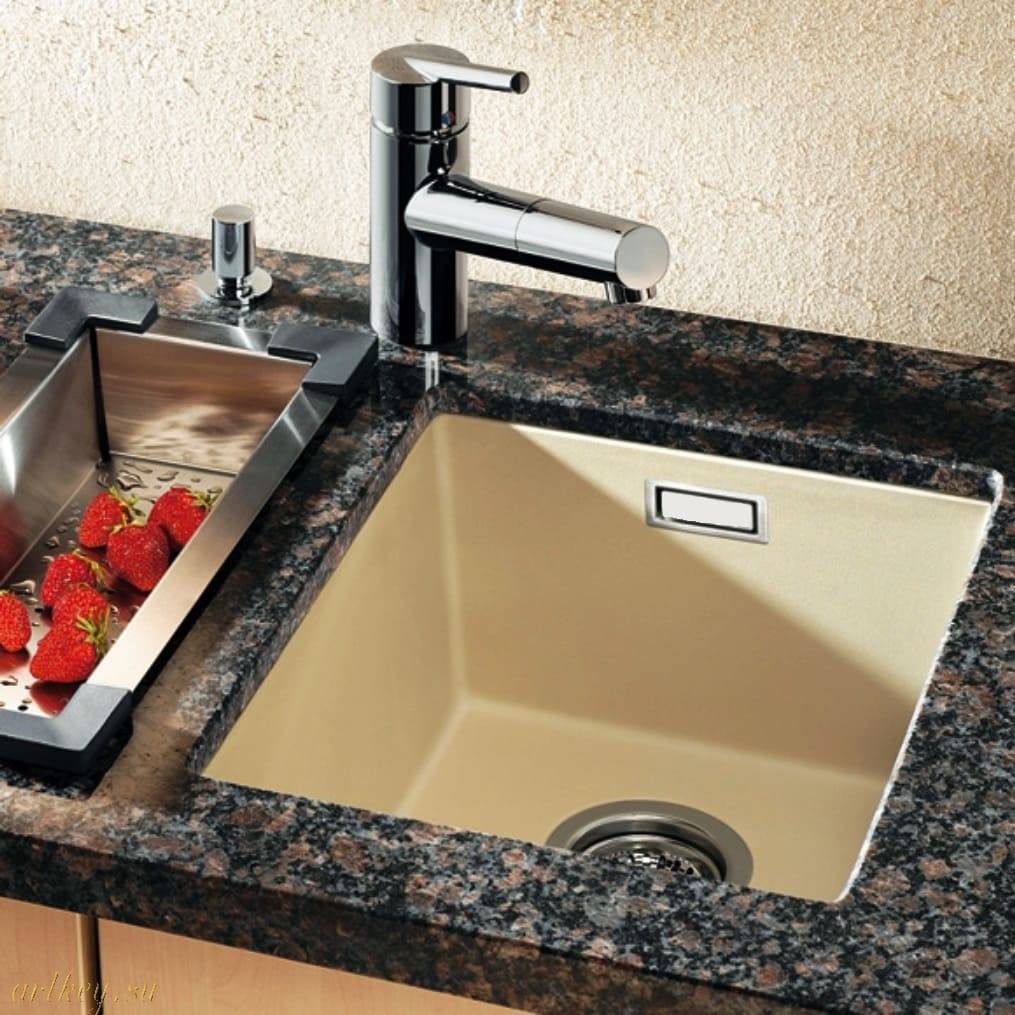
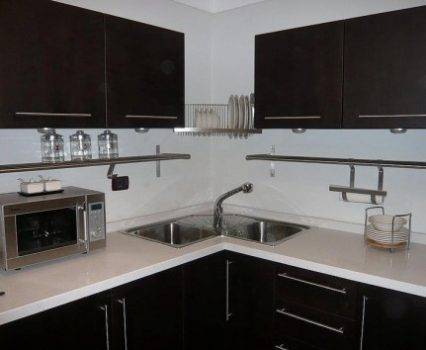
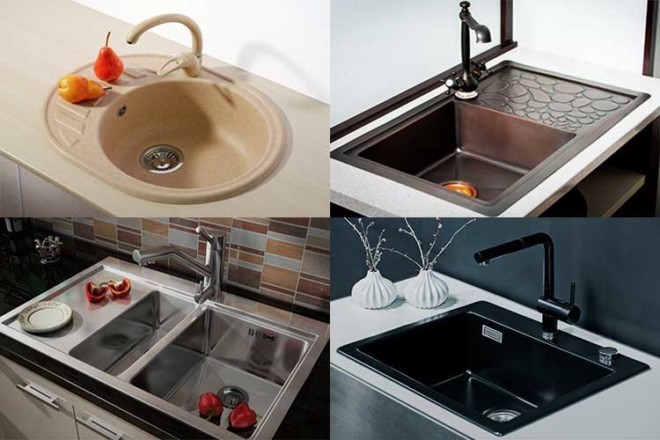
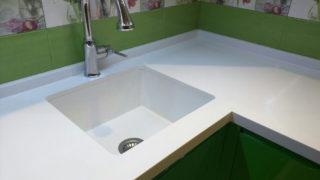 Kitchen sink made of artificial stone in the countertop
Kitchen sinks made of artificial granite are represented on the plumbing market by both domestic and foreign manufacturers. Such equipment will be an excellent addition to any kitchen due to not only its functionality, but also its aesthetic appearance. In fact, manufacturers only imitate that the structure is made of natural stone. The following materials are used in production:


- granite chips or finely dispersed powder of other rocks;
- purified quartz sand;
- acrylic compounds.
In any case, special resins, thickeners and a certain amount of colorants are included in the composition to give the structure the desired shade and the effect of a “stone pattern”.
Benefits of installing a mortise sink over a consignment note
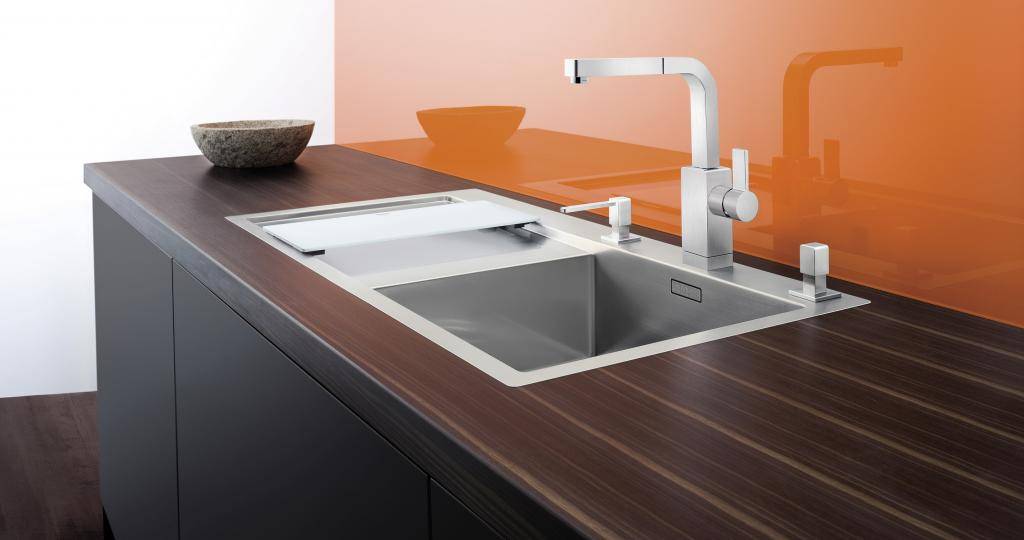
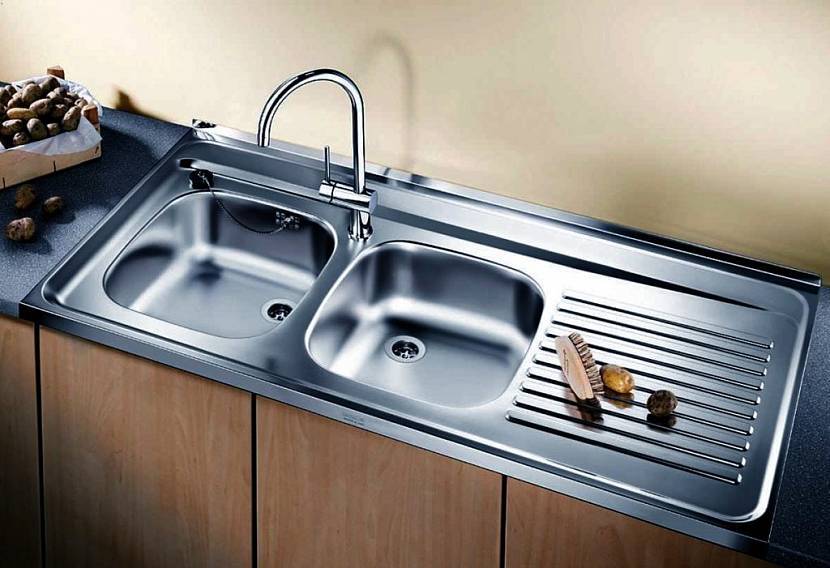
Installation of the sink in the kitchen can be carried out overhead and mortise. Giving preference to the first option, in addition to the bowl for washing dishes, it is possible to additionally purchase a pedestal or cabinet on which it is installed. Installation of a mortise sink is carried out directly in the countertop of the kitchen set. The second method is preferred much more often, even though it is an order of magnitude more difficult to implement, but against the background of many advantages, this drawback becomes less significant.
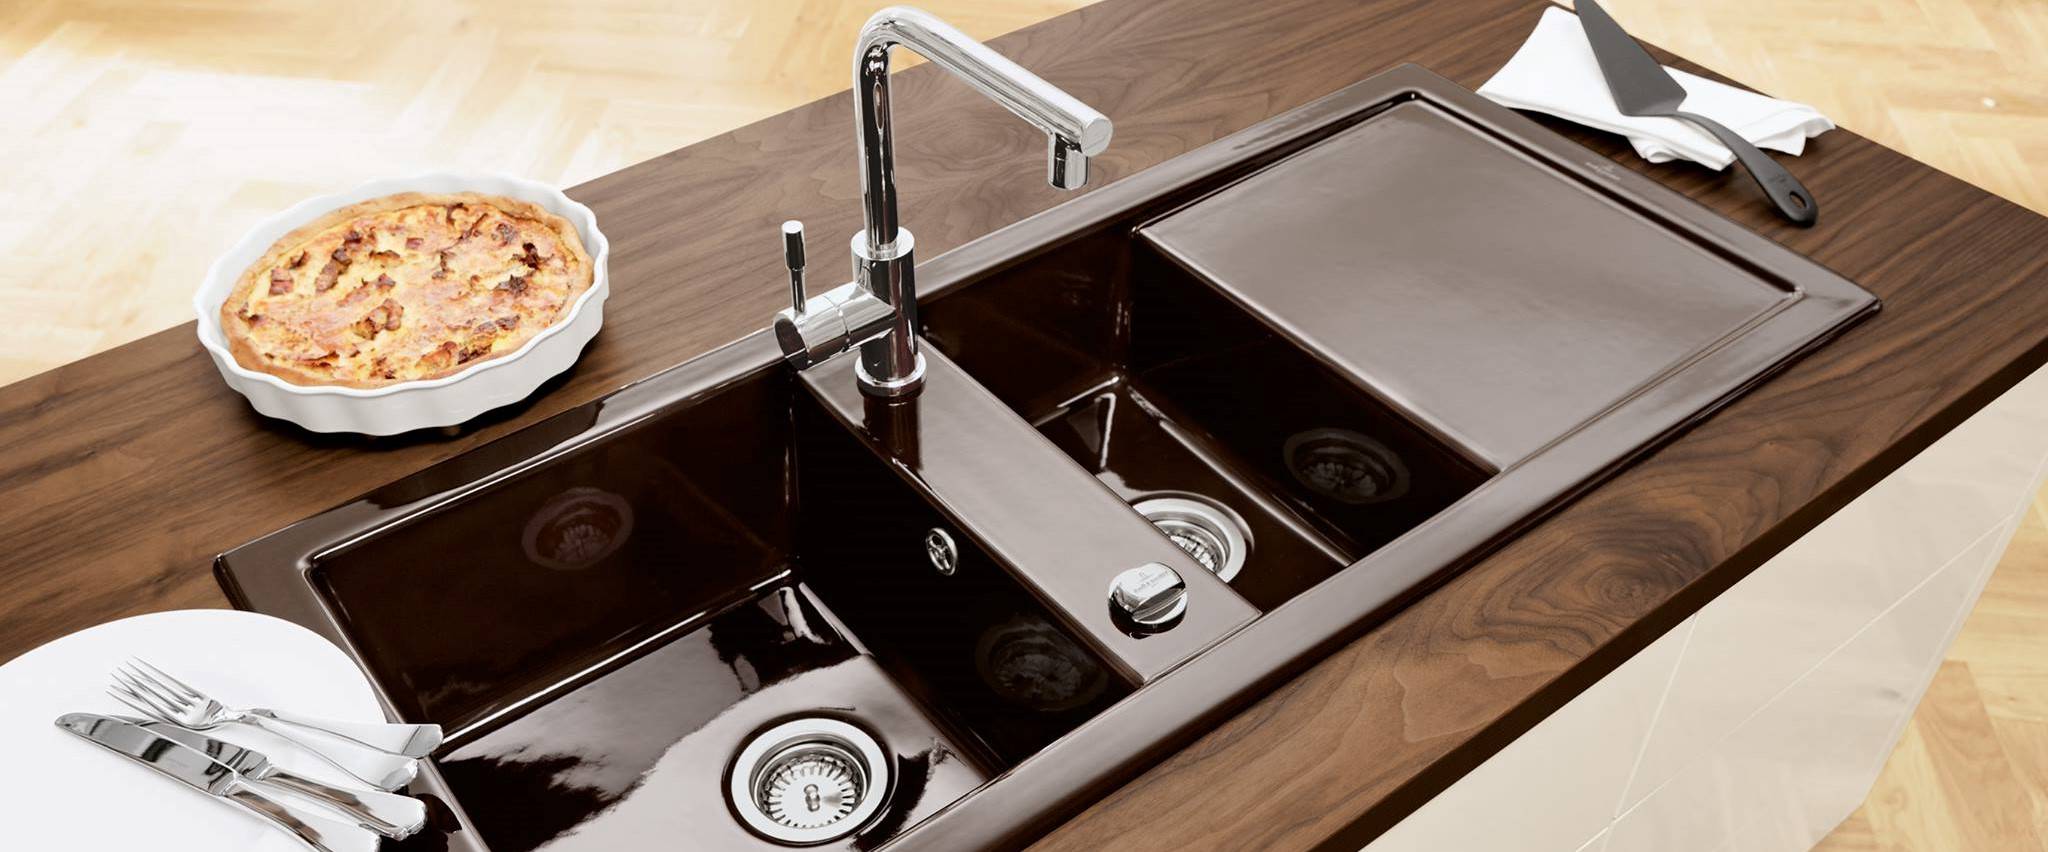
First of all, overhead sinks are the reason for the constant presence of moisture in the room, which is formed between the cabinets, which are located near the unit with it.One of the main positive aspects of mortise products lies in a wider variety of assortment, from which it is much easier to choose a sink, taking into account all personal preferences and needs. They are made from a wide variety of materials and some of them have shapes that countertop sinks are not made in. Mortise kitchen sinks are made of ceramic, stone, copper, plastic, porcelain stoneware, bronze and stainless steel. Outwardly, they can have a round, rectangular, angular, and one of the many asymmetric shapes.
The sink can be installed in 3 ways: exactly at the level of the countertop, slightly below or above it. It depends not only on personal preferences, but also on the configuration of the purchased kit, therefore, at the time of purchase, you should find out how the bowl should be placed and what fasteners must be used during installation.
The choice of fasteners also requires special attention, since the level of strength of these components directly affects the period of their operation.
Where is the best place to install a sink
Before installation, you need to take into account a few simple rules that will make the operation process more ergonomic. It is customary to arrange the kitchen interior in a certain order to facilitate the workflow: a refrigerator, a sink, a dishwasher, a stove and work surfaces located between them.
For convenience, the minimum distance between objects should be as follows:
- 40 cm between stove and refrigerator;
- 40 cm between sink and refrigerator/stove.
Do not install the sink near the hob. Water splashes can extinguish flames and cause gas leaks.Near the sink, there must be a working area where you can cut, cut and clean food.
If you carry the same vegetables and fruits through several tables, then soon everything around will be splashed with drops of flowing water.
Choose the right place for installation. Consider the size and shape of the bowls, as well as the additional surface for drying
With the help of a sink, the kitchen can be divided into two zones, for example, for dirty work and serving.
Features of the choice and installation of washbasins
When you start to get interested in the existing types of washbasin overlays, you get the impression that the designers' fantasies have finally given free rein after many decades of forced creative abstinence.
Indeed, it is the overhead options, due to their original design, that allow you to create such a variety of forms.
Forms and sizes of overhead sinks
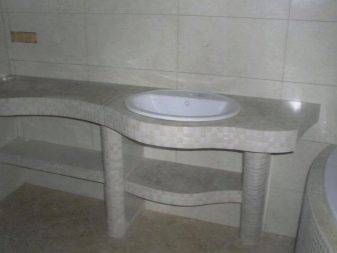
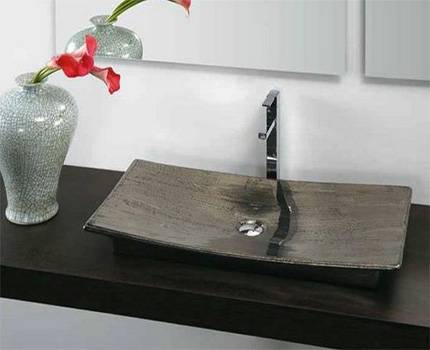
There are models so unusual that it is simply impossible to install them in the first bathroom that comes across, you need to create an interior based on the design of this very sink. Manufacturers produce them in the form of a cup, an open flower bud, a flowing stream of water.
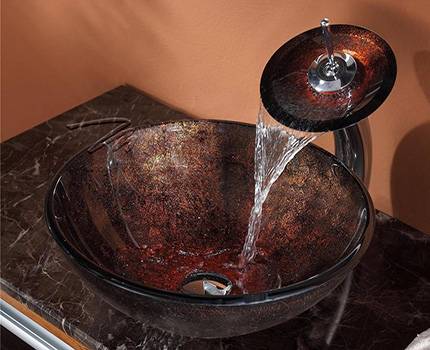
Finding the right washbasin is no problem at all, even for steampunk interiors.
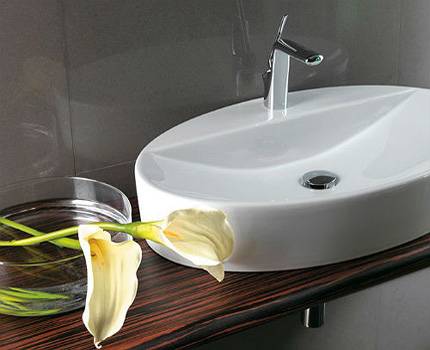
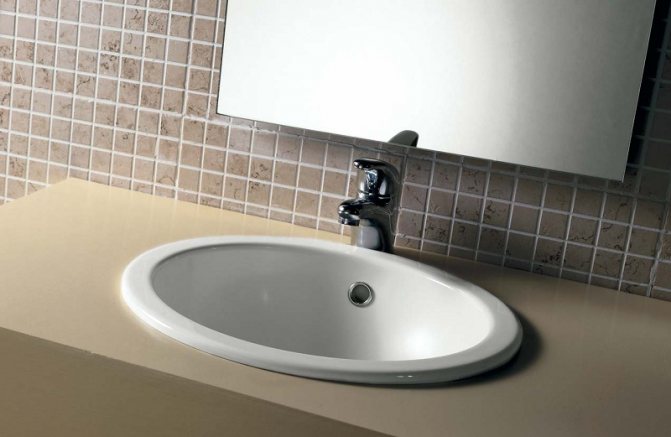
But when choosing an overhead sink for a bathroom countertop, you need to evaluate not only the design, but also the convenience of subsequent operation.
For example, small washbasins can be used only for washing hands, while even washing a child in them is inconvenient, since water is sprayed outside the bowl. It is out of the question to wash your hair or freshen up large things when cleaning.
Small overhead sinks are more of an option for a guest bedroom in a large house, plumbing that won't need to be used often.
Washbasins come in oval, round, triangular, rectangular shapes. Overhead shells of unusual, abstract forms, in the form of a drop, a boat, a stone with a recess, a flower, are also common. All of them come in different depths and widths - everyone chooses the appropriate size individually.


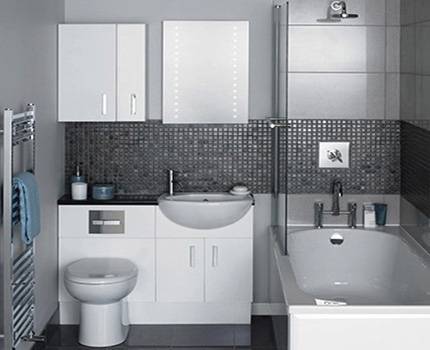
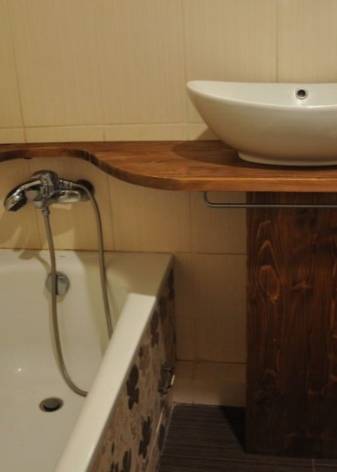
In small bathrooms, rational use of space can be achieved through several tricks: a functional cabinet is placed under the washbasin, not too wide so that the sink protrudes, but there is room to move. A toilet flush is built into the cabinet
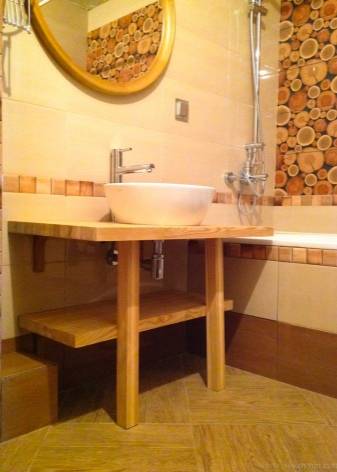
Bowl-shaped countertop sinks have gained wide popularity. It is small models that are not very convenient; it is unlikely that it will be possible to wash in them without wetting the countertop. But large washbasins are both beautiful and practical.
The size and depth of the sink is especially important if you use a countertop made of materials that do not tolerate contact with water - from MDF or wood
Features of choosing a sink on the countertop
The first thing you need to pay attention to when buying is the presence of a tap hole. It is not always necessary, because the faucet can be used in common - for a bathtub and a sink
But most often, in the case of a countertop sink, they install a free-standing faucet on the countertop or connect a tap built into the wall.

If you really liked the model, and it has a hole for the mixer, which is not necessary to install, then in this case it can be closed with a decorative cover, colored or chrome
Another important point in choosing a countertop sink is the presence of an overflow hole, which prevents flooding when using a sink with a closed drain. The overflow can be through or built into the sink, which will connect inside it with a common outlet to the siphon.
If the overflow hole is through, then a special siphon is connected to it with separate water outlets from the overflow and drain, which are then connected to one outlet.
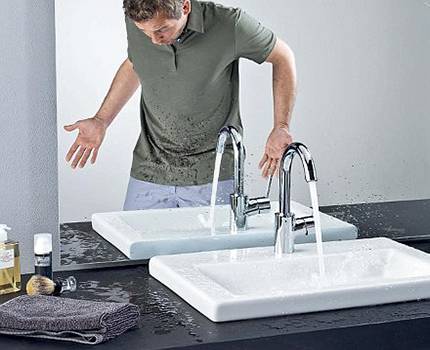
The smaller the sink is selected, the lower the mixer must be, otherwise the water will spray past the bowl
Before purchasing, it is necessary to carefully measure the installation site of the sink so as not to make a mistake with the size, and when buying a product, make sure that there are no cracks or chips.
Demonstration instructions for inserting a sink into a countertop
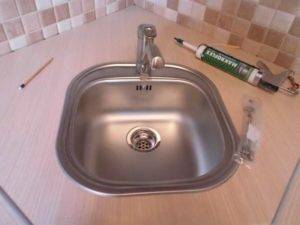
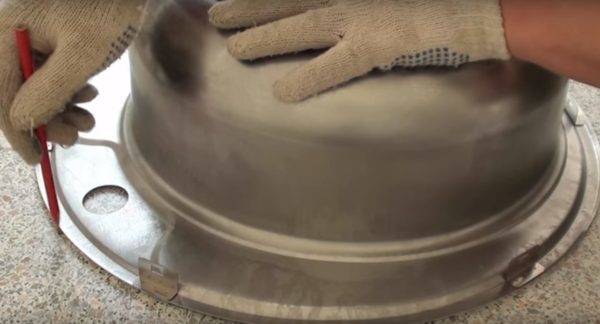
Let's look at an example of how an ordinary round-shaped kitchen sink is inserted into a countertop. The sink is made of stainless steel.
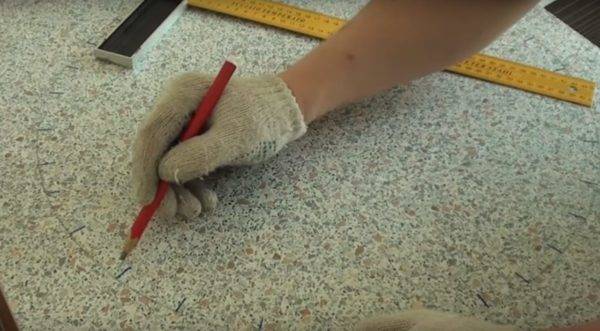
Step 1. The first step is to make markings on the countertop, which is necessary to properly install the sink. To begin with, you need to turn the sink upside down and determine its location on the countertop, taking into account the orientation of how it will stand in the future, that is, the place where the mixer is supplied and its outer edge.
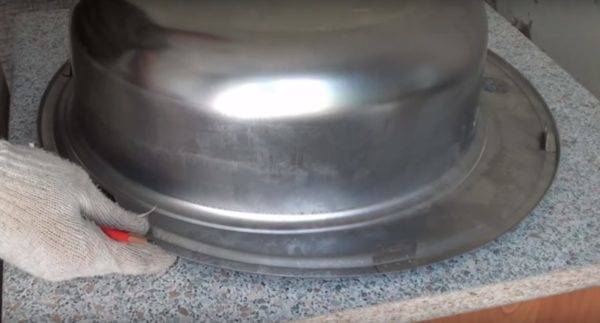 First, the countertop is marked
Step 2. Next, using a pencil, you need to circle the sink along the outer contour. It is necessary to use a pencil when drawing this line, since traces of it can then be easily erased
When drawing the outline, it is important to ensure that the sink does not move.
 The sink is outlined in pencil
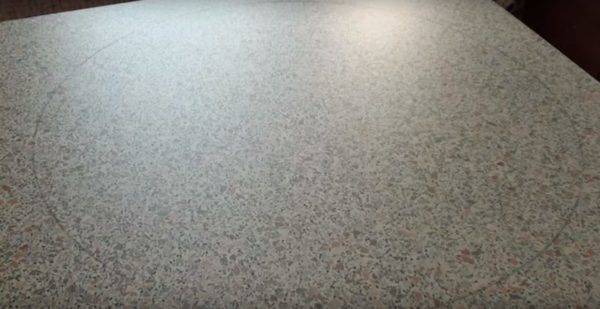 Marking applied
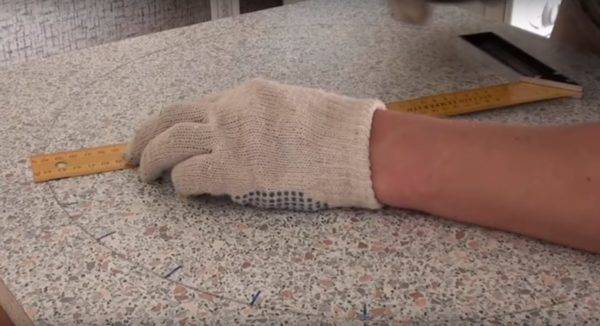
Step 3Now you need to take a ruler and make small marks along the line of the applied contour with a pencil 12-14 mm long. It is necessary to draw lines of this length extending from the edge of the contour to the center of the drawn circle. By the way, here you can already draw with a marker for better visibility of the lines. They will no longer be noticeable on the countertop after the work is completed.
 Small outlines are created
Step 4. Now the ends of these short lines need to be connected. You will get a single circle of smaller diameter than previously drawn.


 Connecting line ends
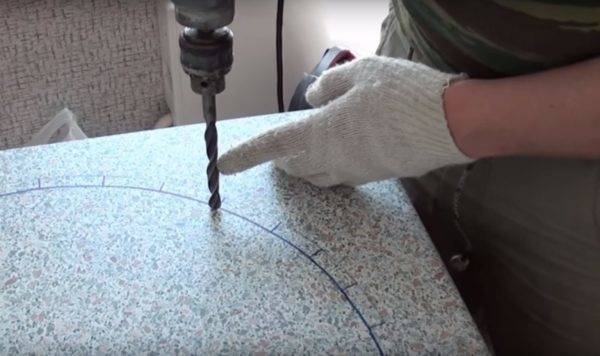
Step 5. Next, you need to make an entrance for the jigsaw blade. You need to take a thick or pen drill, install it on a drill and drill a hole through the inner contour.
 Drilling a hole
Prices for popular drill models
Drill
 Entry for jigsaw blade
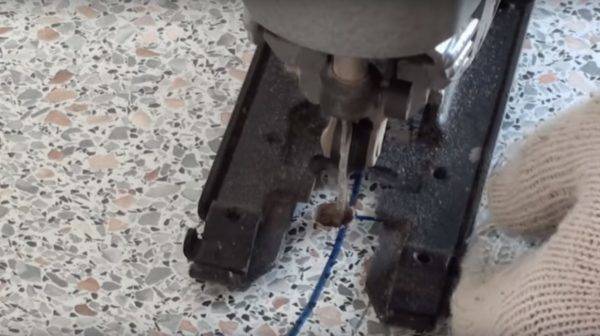
Step 6. Now you can arm yourself with a jigsaw, insert its blade into the previously made hole and simply cut out the cutout for the sink.
 Saw cut for sink
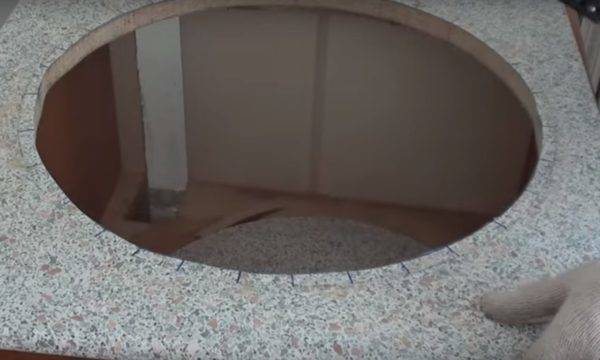 The result of the work
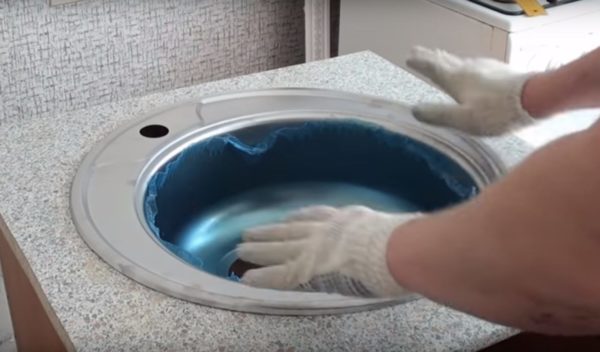
Step 7. Next, the sink must be tried on into the hole - it is required that it is easily inserted into it. After that, the inner edge of the hole must be smeared with sealant, put a sink in the cutout, align and secure it with fasteners. It is better to tighten the fasteners with a screwdriver, and not with a screwdriver, so as not to damage the sink. After that, you can connect communications and start using the sink.
 Washing trying on
 Fasteners are best tightened with a screwdriver
Video - How to embed an oval sink
This is how the sink is inserted into the countertop. In appearance, the procedure is quite simple, and it is, but only with proper experience.
And for a beginner, it is important not to rush and do everything accurately and accurately, then everything will definitely work out!
Features of mounting embedded models
Installing a built-in sink, or rather connecting it to plumbing and sewage systems, is not much different from the process of installing another type of washbasin. The difference is observed only at the stage of installation of the bowl itself. Installation of a sink built into the bathroom countertop is carried out in several stages.
Foundation preparation
Having dismantled the old washbasin, they check whether the new sink fits in size. The main thing when installing a mortise sink is to ensure that the dimensions of the bowl match the hole in the countertop as accurately as possible. If yes, then you just need to insert the bowl into the hole. To prevent slipping and turning of the bowl during operation, a rubber edging is glued along the perimeter of the cutout in the countertop.
If the bowl does not match the size of the hole left after the previous plumbing, you will have to purchase a new countertop. If the cutout is smaller than the size of the bowl, in order to save an expense item, you can simply “expand” the boundaries of the hole in the old countertop. The easiest way to do this is to outline the contours with a pencil, attaching the bowl to the surface and outlining it.
 To prevent the bowl from completely “falling through” into the hole, stepping back to the inner side of the intended contour of 10 mm, a new contour is drawn along its entire outline, along which a cut is subsequently made
At the same stage, mark the installation site of the mixer
When placing the bowl, it is important to observe two conditions:
- It should not be located close to the wall.
- It should not be at the very edge of the countertop.
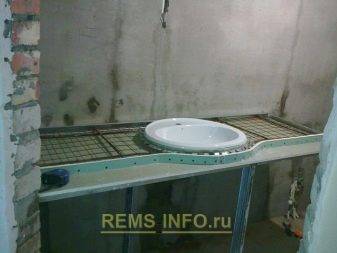
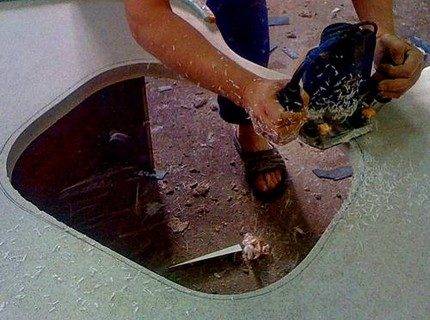
Using a jigsaw, cut out the inner niche. To do this, first drill a hole on the border of the niche.A jigsaw blade is inserted into it and then it is already cut out along the contour.
Structure fastening
After the cut-out niche of the countertop is removed, you need to remove sawdust from the cut and remove dust. The end surface of the cut hole is ground with sandpaper or a file.


 You can fine-tune the edges of the cut hole in the worktop with files equipped with medium and large teeth.
The cut points are covered with a thin layer of silicone sealant. A sealing tape made of polyethylene foam or thin rubber is “planted” on the sealant. The edges of the sealing tape protruding more than 1 mm above the surface of the tabletop are carefully cut off with scissors or a knife.
After that, the tape is degreased with alcohol and re-coated with a layer of sealant.
The bowl is placed on the cut, ensuring the closest possible contact with the edge of the surface. To ensure a tight fit, the bowl should be rotated slightly.
Files will be required to adjust the contours of the countertop relative to the dimensions of the bowl.
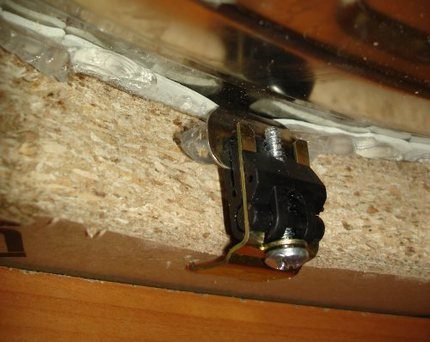 Built-in bath sinks are mounted on the inside of the countertop with special brackets or self-tapping screws that come with the product
It is better to tighten the screws with a screwdriver, because working with a screwdriver, you can only do harm by accidentally pulling and breaking the fasteners. All cracks and gaps between the bowl and the countertop are treated with a sealing compound.
The same actions are performed by processing the places of contact of the mixer with the countertop. Silicone that has squeezed out of the cut when planting the sink should be removed with a damp cloth.
At the final stage, the built-in sink is connected to the water main and sewer drain. The connection technology is similar to that used for the installation of conventional sinks.
Installing a built-in sink in a countertop is a simple but painstaking process. With strict adherence to the installation technology, you will create a reliable and durable design that will delight you with a presentable appearance and excellent performance.
Video review of built-in washbasin options:
Algorithms for self-assembly
On the wall
Wall mounting is carried out as follows:
At the selected level, we drill holes (at least 8 mm) for installing brackets.
- We hammer plastic dowels of the appropriate diameter into the holes.
- In the dowels we twist the brackets themselves, making sure that they are on the same level.
- We put the sink on the brackets, align it (the design of the mounting eyes for most models allows this) and fix it with fixing nuts.
- We attach a drain siphon and install a mixer for water supply.
- If necessary, we apply a moisture-resistant sealant to the junction of the sink and the wall.
For cabinet without countertop
The instruction on how to attach the overhead sink to the cabinet is also quite simple:
- From the inside, we install plastic mounting brackets, or we fasten wooden bars with metal corners.
- We apply silicone sealant to the ends of the side walls.
- We lay the sink on top, making sure that it does not move relative to the underframe.
- From the inside, we fix the sides of the sink (or special protrusions on them) with brackets. In the absence of brackets, we snap on the sides with metal corners.
- Using a screwdriver, turn the adjusting screws, securely clamping the brackets.
- Silicone that has come out from under the edge of the sink is removed with a wet hand or a clean rag.
Into the countertop
The price of sinks that are mounted in a mortise way is usually quite high. And the countertops themselves are not cheap, so inexperienced craftsmen should not take up work without preparation.
If you are confident in your abilities, then the installation should be carried out according to the following scheme:
Before attaching the sink to the countertop, we prepare a hole for installation. To do this, either the sink itself or the template that comes with it is laid on the surface. We mark the template using a marker.
- At several points on the marking line, we make holes using a wood drill. Then we connect these holes by sawing the grooves with a jigsaw.
- We process the edges of the resulting hole with a rasp, removing large burrs. After that, we apply a sealant to the cut, which will prevent the wood or MDF from swelling upon contact with moisture.
- If previously dismantled, then return the countertop to its place. Glue sealing butyl tape around the perimeter of the hole.
- We install the sink, arranging it in such a way that at least 10 mm of the side enters the entire area of \u200b\u200bthe table.
- Using regular fasteners, we fix the sink from the wrong side. For mounting on thin worktops, additional wooden blocks are usually attached.
- Additionally, we seal all joints with silicone.
Mortise fastening method
How to attach a sink sink to a countertop? With the help of clamps, the sink is attached to the table. These elements are usually included in the sink kit. Excess sealant is carefully removed.At the end, connect communications.
How to fix corner, round and granite sinks
Sinks come in different colors and are made from different materials. In addition, their shape is also varied. They can be round, square, unusual design. The method of attaching them is somewhat different from each other.


Fixture round model
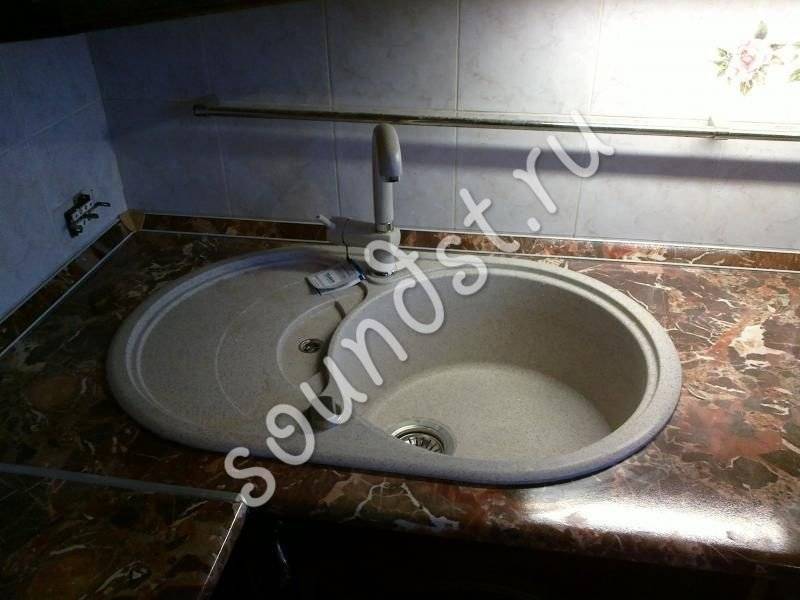
Installing a round sink in the kitchen is recommended if the area of \u200b\u200bthe room is small. The round model will save space and increase its functionality. Such products mainly have a deep and large thicket. Washbasins in the shape of a circle fit perfectly into modern furniture and corner kitchen sets. The installation of a round sink is usually done in a mortise way.
How to embed a sink in a round kitchen? It is done like this:
- The sink is placed on the table
- Draw around the edges with a pencil
- Cut along the lines
- Edges are sealed
- The sink is installed and fixed
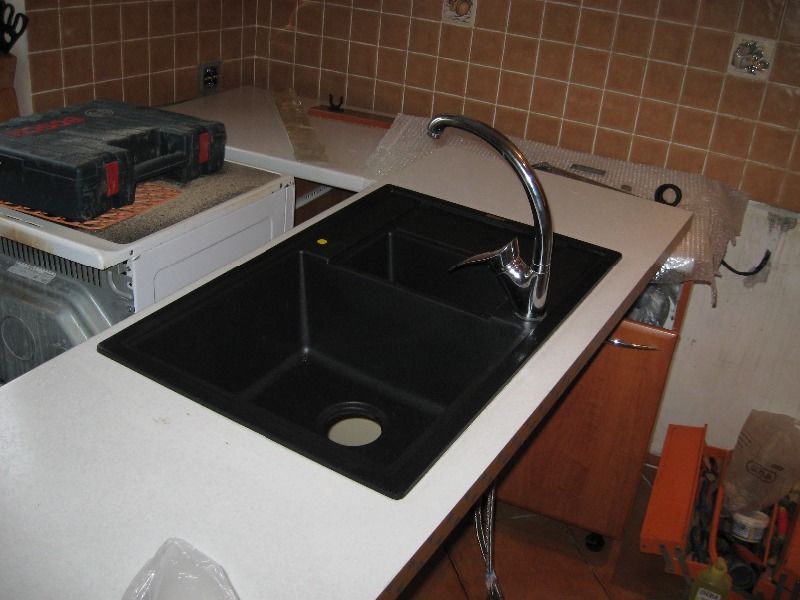
Installation of a granite model (video example of installing a black granite sink)
Granite products can be of various shapes and colors. They also differ in size. It is recommended to take into account the dimensions of the kitchen furniture and the sink, so that the overall picture creates a beautiful and harmonious look. The placement of the corner sink is no different from the round model. Granite sinks are installed in three ways, including:
- Overhead
- mortise
- Integrated
With the overhead method, the sink is installed on top of the table and secured with special clips. The mortise method is cutting a hole into which a granite product is placed. In the latter method, the countertop and sink are one.
Thus, the sink can be placed in the countertop independently in several ways. Some models are difficult to install without the help of a professional.
Conclusions and useful video on the topic
This video visualizes the process of installing the sink and will help you see some of the subtleties of the wizard.
Mounting the mortise model:
The installation of a sink is a responsible task, on which the functionality of the workspace and reliability depend. Improper installation can lead to the rapid destruction of the countertop if water begins to penetrate under the sink.
The main thing in installation is high-quality sealing of the joint between the sink and the ends of kitchen furniture.
If you have experience installing a sink, please share the information with our readers. Leave comments on the article and ask questions. The feedback form is located below.