- How to choose a sink over a washing machine?
- The design of a combined sink with a washing machine
- Choosing a washer
- Sink
- table top
- Sink above the washing machine: types
- Side and rear drain
- Drain at the back
- with worktop
- Pros and cons of combining
- Choosing a washing machine
- Step by step installation instructions
- Step #1 - Installing the Brackets
- Step # 2 - siphon installation
- Step #3 – Finishing the sink
- Choosing a washing machine under the sink
- Pros and cons of this type of installation
- Subtleties of installation and care
- What are water lily shells?
- Types of shells
- Installation sequence
- Preparatory activities
- Faucet installation
- Assembly and installation of the siphon
- Instructions for installation and connection of the sink
- Video: How to install a sink over a washing machine
- Algorithm for installing the structure as a whole
How to choose a sink over a washing machine?
When choosing a compact device that is designed to be mounted above a washing machine, you must definitely pay attention to a number of important parameters. Here are the main ones
- The size. The size of the sink should be such that it is convenient to wash hands and perform other work.At the same time, it should easily fit above the washing machine so that the water pipes are freely located in the gap between the washbasin and the household appliance. Also, there should be enough space for the parts of the water tap protruding from below - they should not rest against anything.
- Material. The most common materials for the manufacture of compact sinks are ceramic and stainless steel. Each of them has its pros and cons. Ceramic sinks look nicer and are easier to clean. Steel is lighter and more reliable, but harder to clean. Another disadvantage of steel devices is that they can be easily scratched. In this case, damage to their surface will be very clearly visible. Defects can only be removed by grinding the surface with GOYA paste or other similar abrasives.
- Design. The shape of the sink plays primarily an aesthetic role, so its choice depends solely on your preferences. However, do not forget that it will be better if the outlines of the device follow the contour of the machine. This will protect the equipment from getting small splashes of water on it, which can cause a short circuit in the control unit.
- Type and location of the drain. Currently, on the shelves of stores there are sinks with various types of drain. But not all of them are easy to assemble and use. The ideal option is a drain pipe located at the back of the bottom of the washbasin closer to the faucet. This design solution allows you to build it into the wall without putting pressure on the machine, and then lay it either inside the wall or behind a household appliance. If you purchase a device with a drain located closer to the center, it will be much more difficult to install it.
Also, before buying, you will have to decide on the type of sink. Depending on the features of the installation and location, they are divided into the following varieties:
- standard;
- with lateral location;
- embedded.
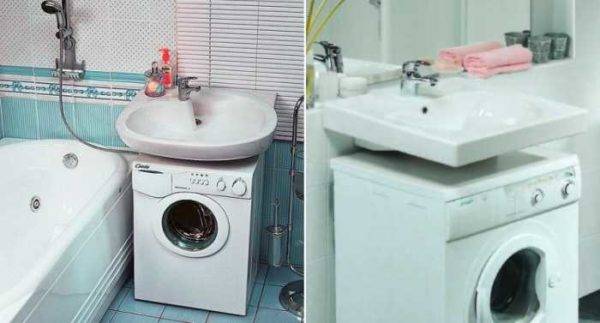
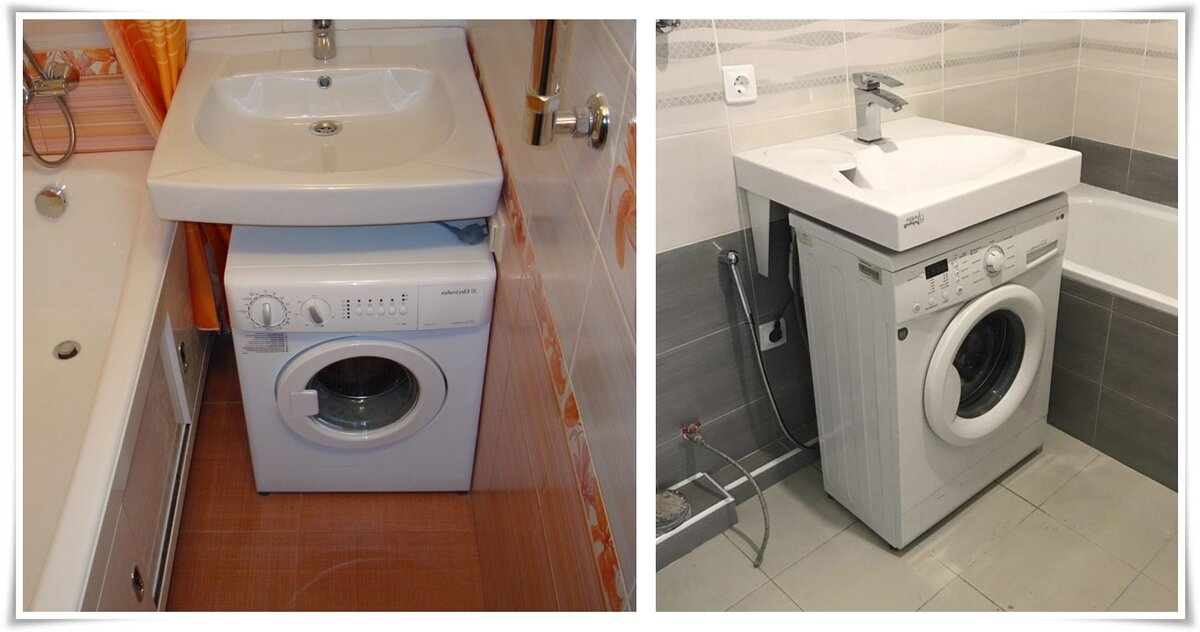
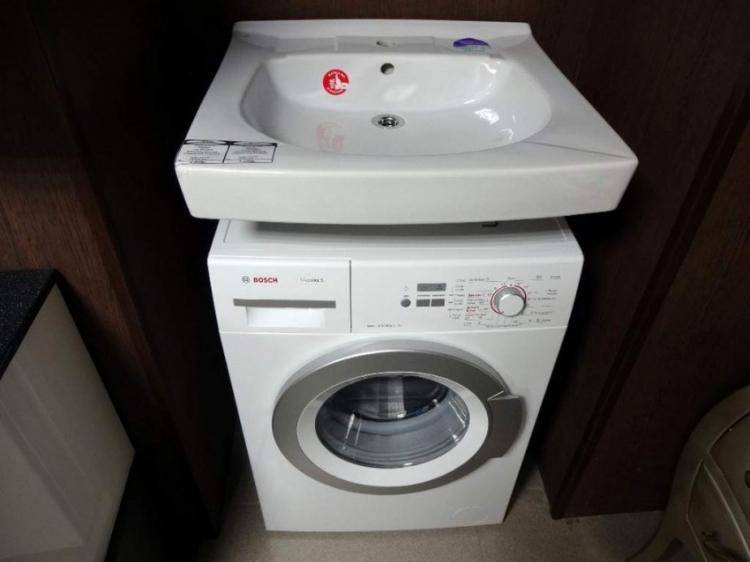
Standard devices are located above the appliance. At the same time, there is a small gap between them, in which there is a drain pipe and other structural elements. The gap is not covered by anything. This is the cheapest and easiest option to install.
Devices with a side arrangement, as you might guess from the name, are mounted on the side of the machine. As a rule, they have an additional support panel, which is located on the top of the appliance and makes the sink more stable. Suitable only if the bathroom has a large area and a lot of free space.
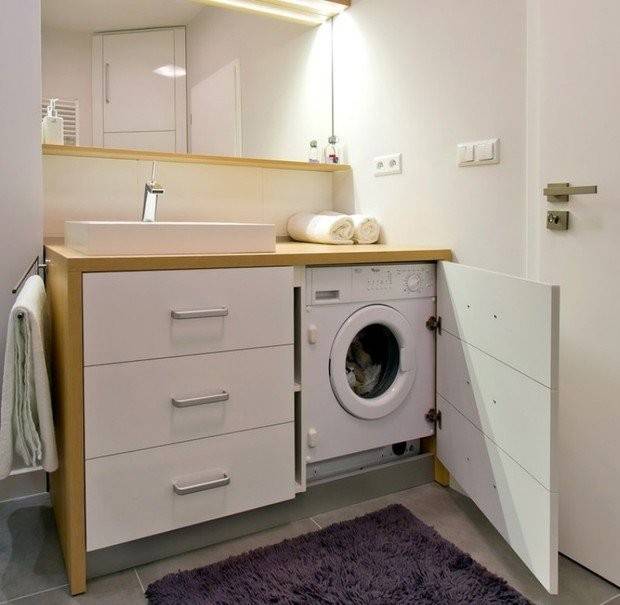
Built-in washbasins are very similar to standard ones. But here the gap between the washbasin and the electrical appliance is covered with panels. This visually turns the two devices into a single unit.
It must be remembered that ordinary kitchen sinks are not designed and are not suitable for mounting above a washing machine. This is due to the fact that they are very deep and there is a large ledge in their lower part. Of course, in most cases it is possible to mount them above the device. However, it will be very inconvenient to use such a sink in the future due to the fact that it will be too high. Difficult during installation and drainage of the drain, which in the end is sandwiched between two devices.
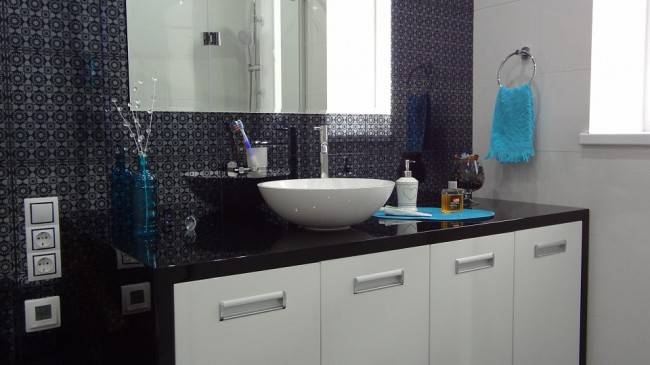
The design of a combined sink with a washing machine
The project may provide for two options for placing a washbasin with a washing machine.
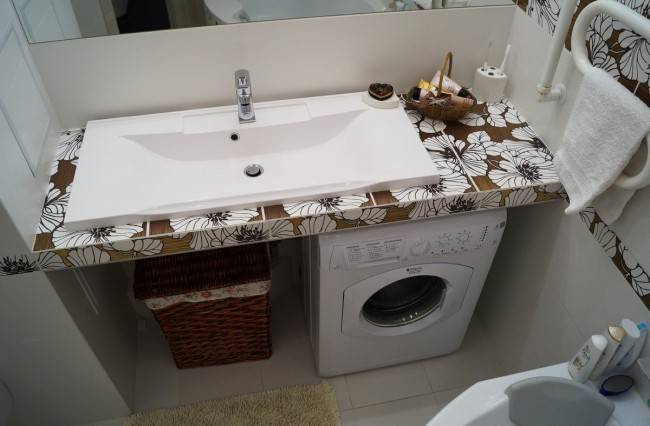
The first option is a sink with a machine under a single countertop.
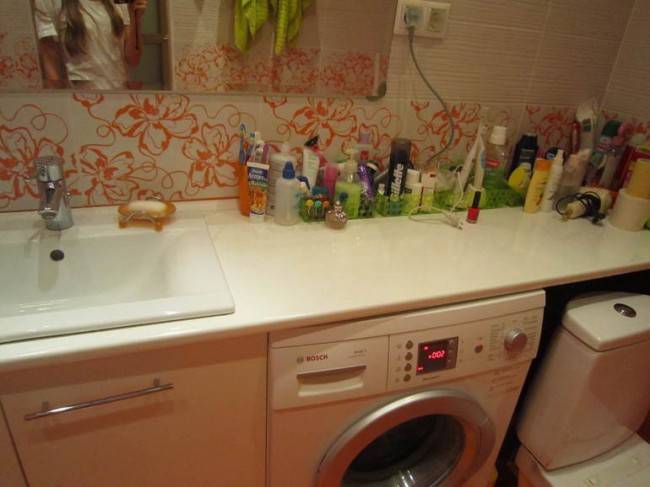
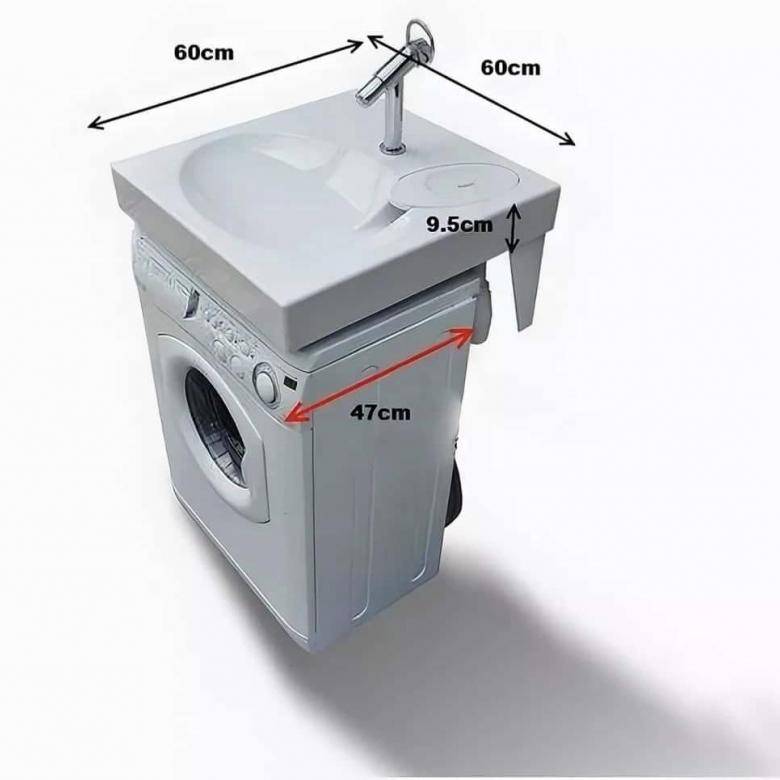
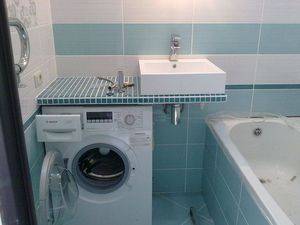
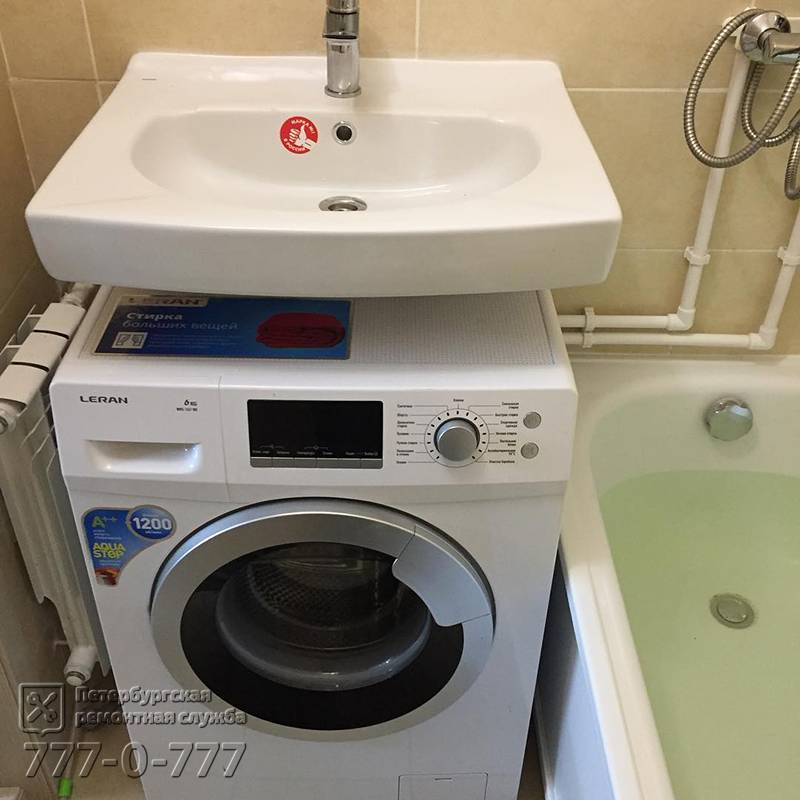
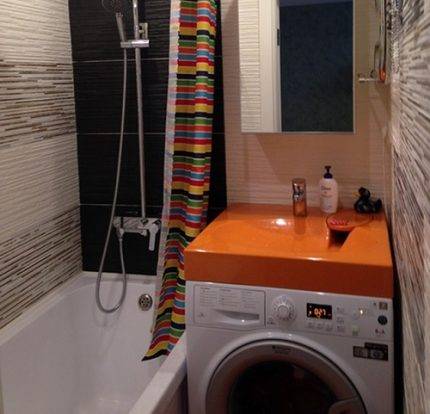
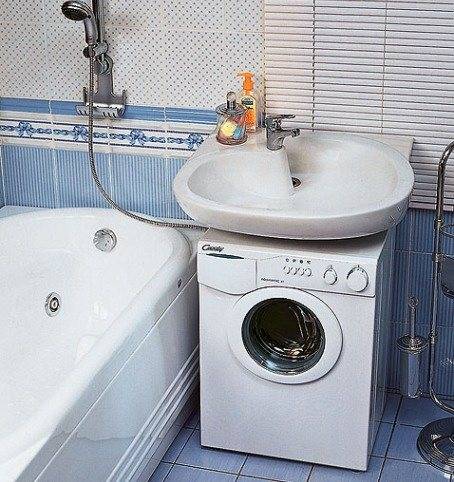
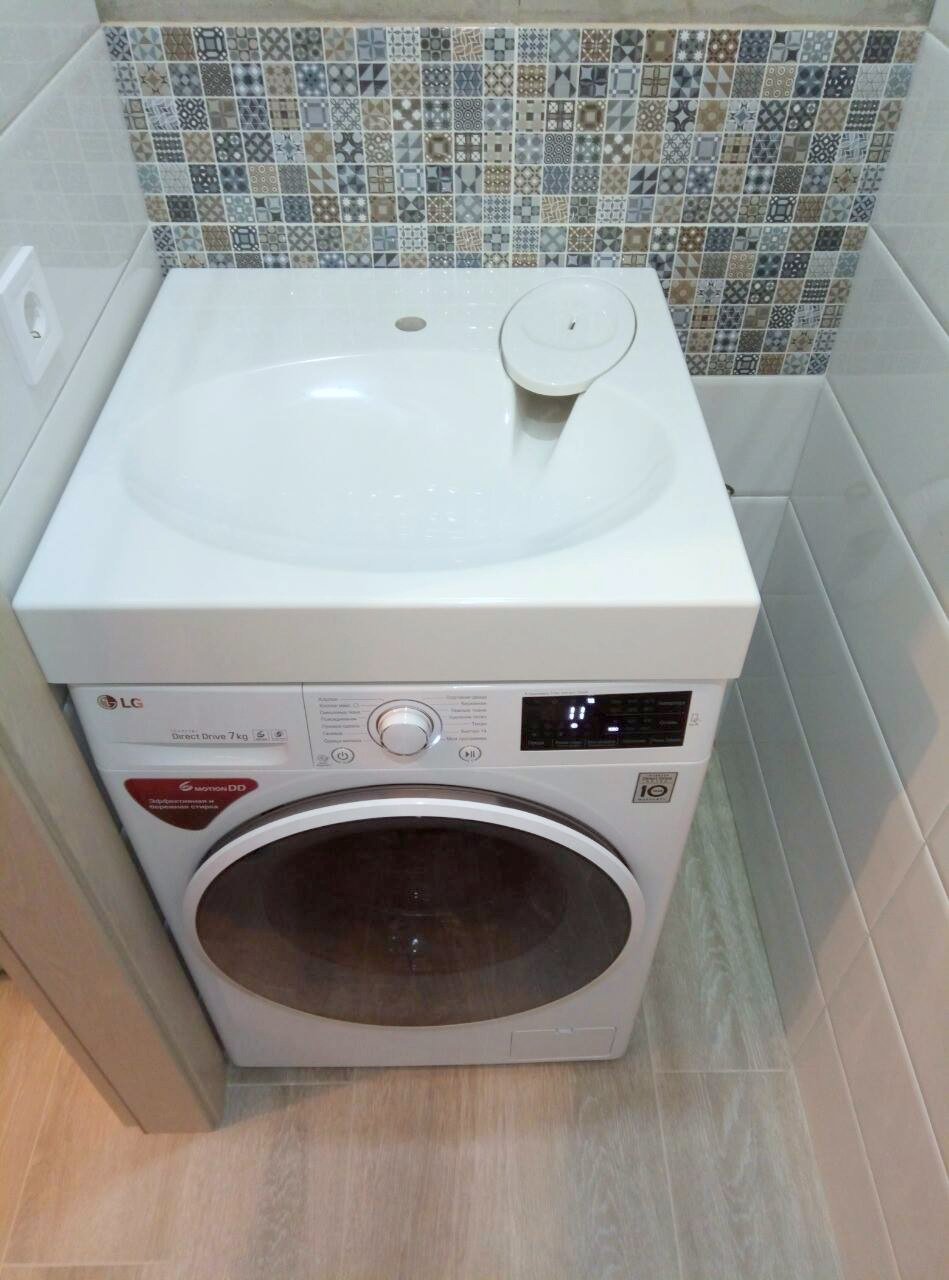
The second type of design is more compact.The sink is located directly above the washing machine. If the sink and sink are barely 100 cm wide, this is the only solution.
A separate sink has the usual way of connecting pipes. The drain from the washer is mounted according to the standard scheme in the knee under the sink. The inlet hose with a valve is installed using an adapter in the cold water pipe. This project is more suitable for a spacious bathroom.
If the availability of space is important to you, pay attention to the two-tier design of the washer and sink. Here you have to sweat with connecting the sewage system to the sink and washing machine, masking the pipes
But free centimeters will please.
Choosing a washer
Carefully select the dimensions of appliances, sinks with cabinets, inlets and drains.
Compact, narrow machines are optimal for combining with a cabinet. Miniature options up to 50-60 cm wide, unlike typical 100 cm, will be the first assistants in saving space. Typical parameters of a compact washing machine are as follows:
- height - from 68 to 70;
- depth 43-45;
- loading - from 3 to 4 kg.
The height of this product, located directly under the sink, will allow you to comfortably use the sink.
For a front-loading washer, you need enough space to open the door.
If children live in your house, you will probably need a more powerful washing machine. There is a way out. You can buy an ultra-thin machine with a depth of only 30-35 cm.
A height of 80 cm will create the need for a high sink location, which will bring discomfort to low apartment residents. In this case, it is optimal to consider the side placement of the sink next to the washer under one countertop.


Sink
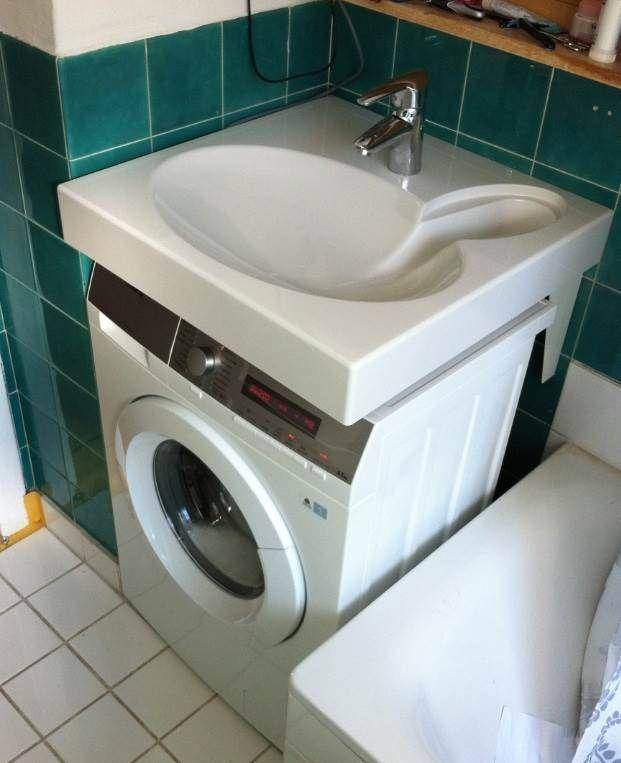
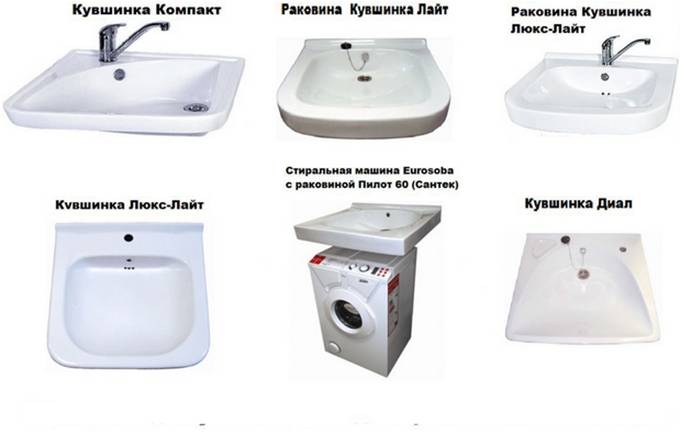
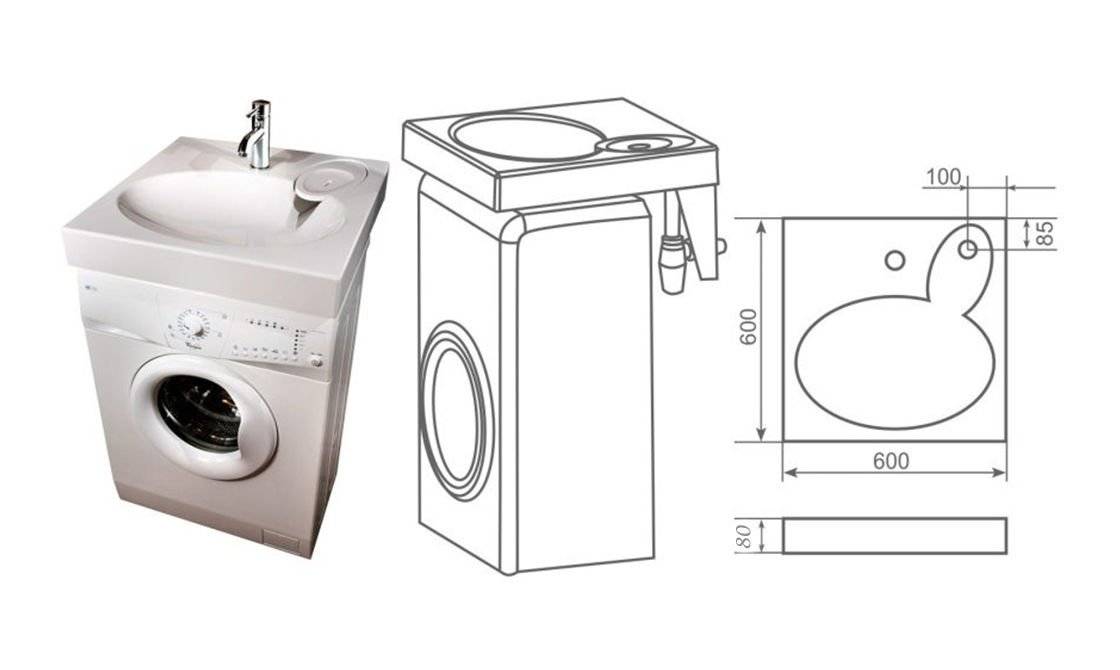
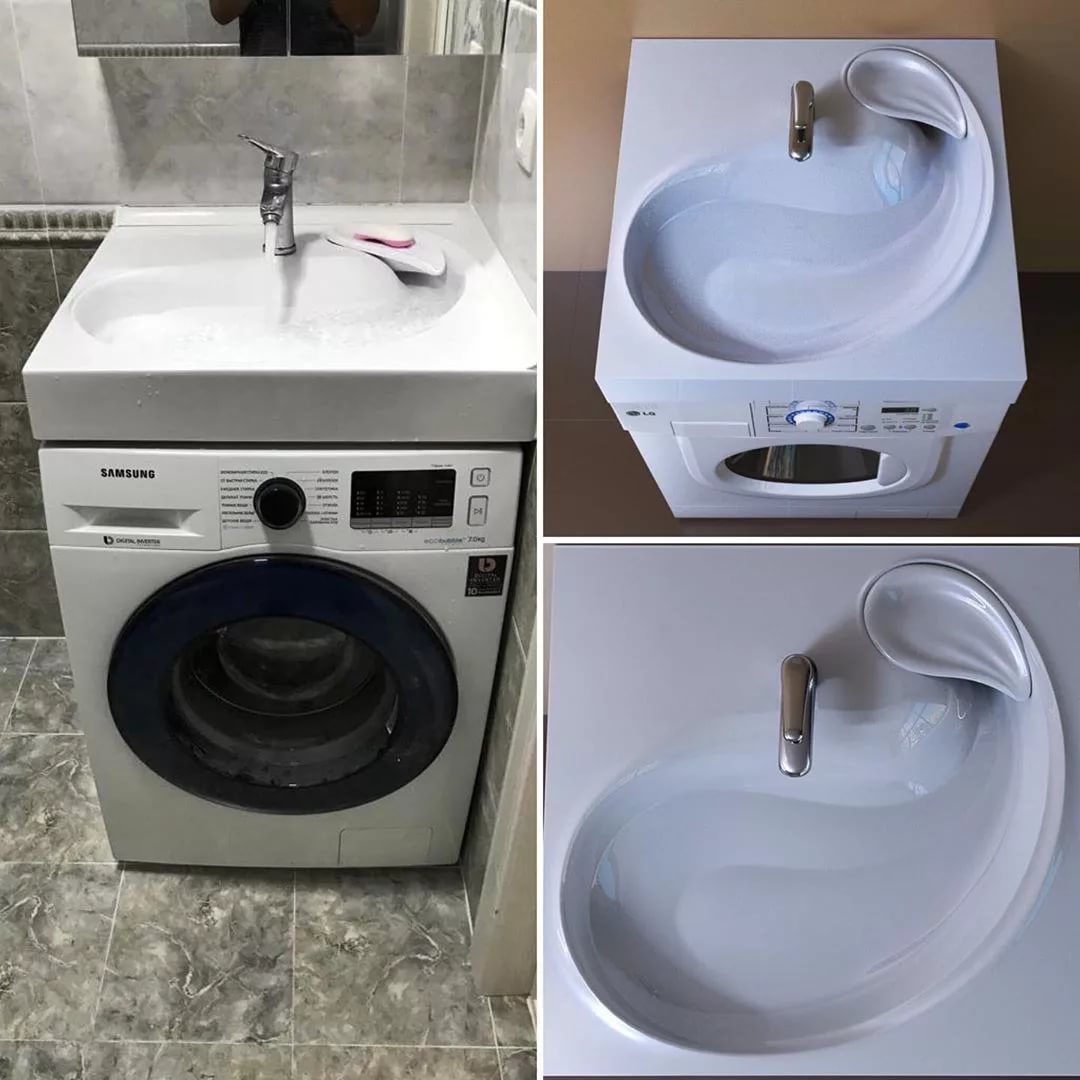
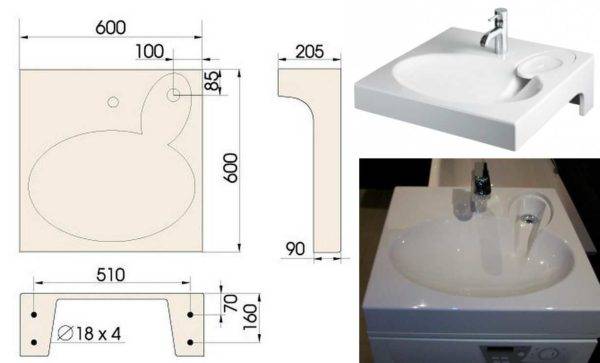
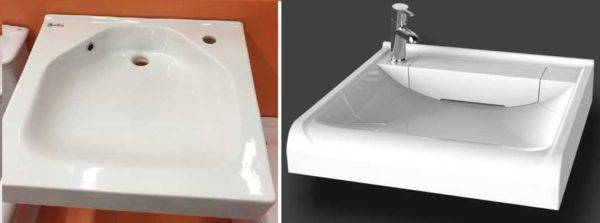
When designing a combined washing machine with a sink cabinet, a water lily sink is usually chosen. This is a hanging model with a hidden drain system. The main advantage of this product is the hanging method of fastening, many options for placing the drain hole.
There are also restrictions. For example, a non-standard form of a siphon. It is better to choose such a product as a set. Horizontal drain increases the likelihood of blockages.
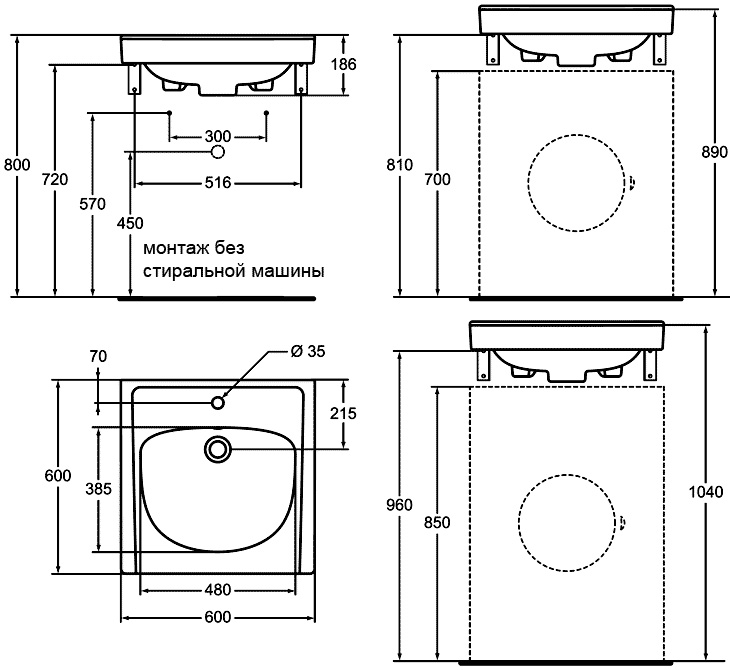
The water lily sink must be at least 58 cm wide if the drain to the sewer is placed directly behind it on the wall. If there is no drain in the wall, the minimum width is 50 cm.
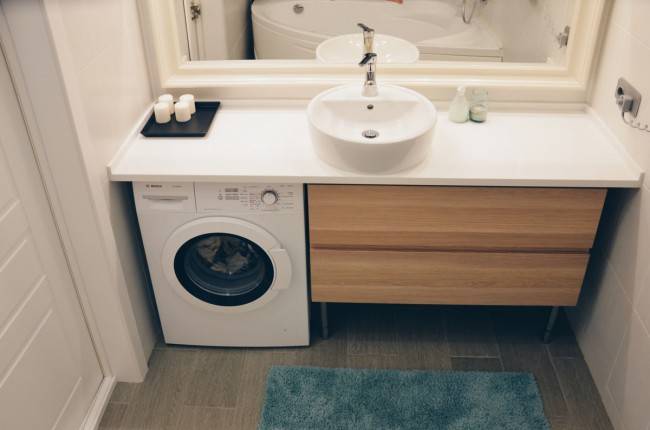
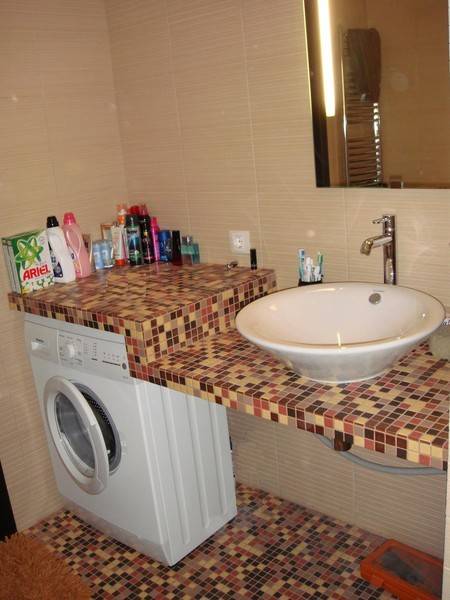
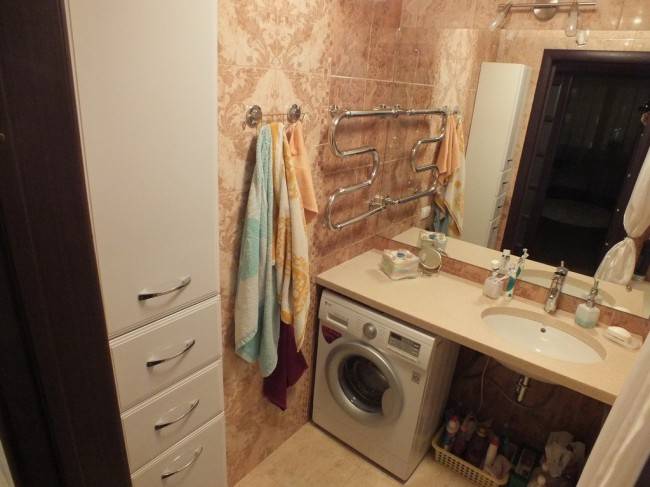
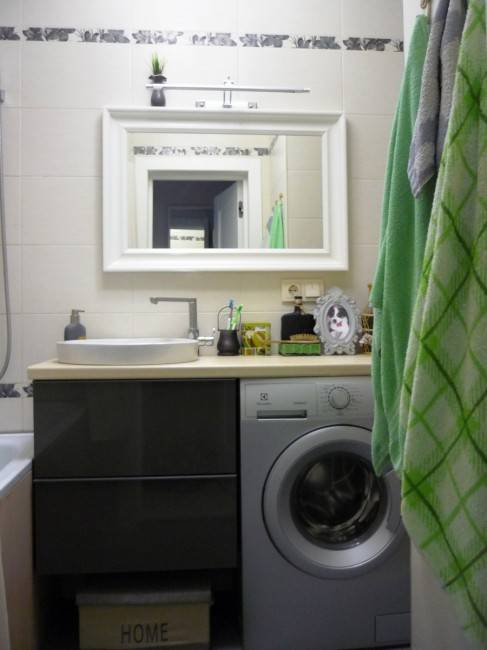
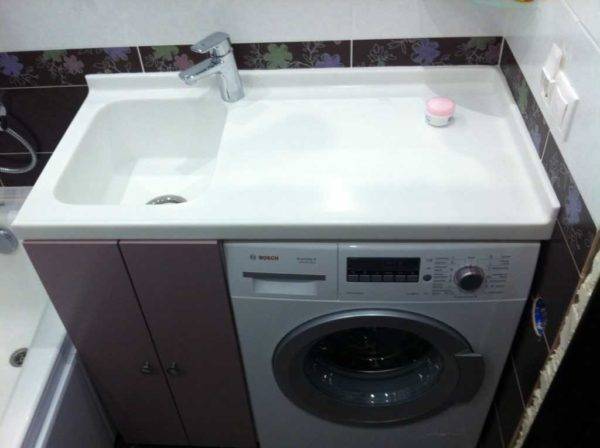
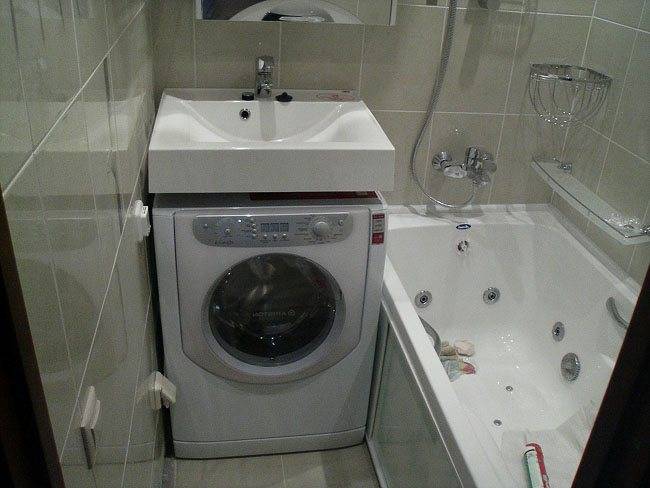
A classically shaped sink is optimal when appliances and washbasin are arranged in a linear fashion.
The equal arrangement of the edges of the washer and sink will look more harmonious.
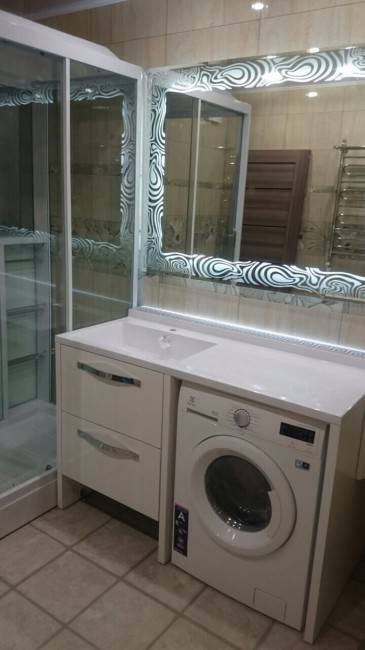
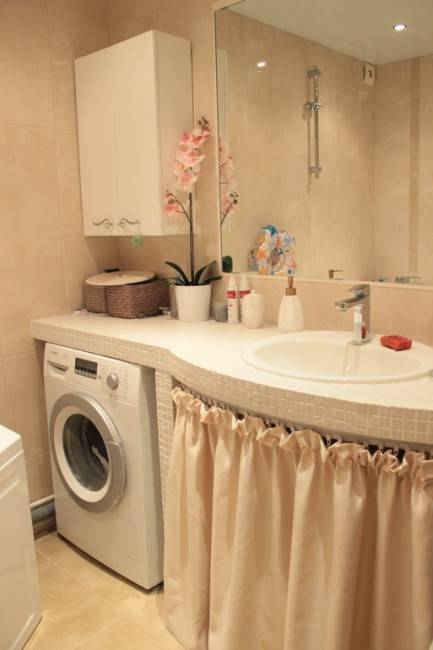
table top
A joint sink with a washing machine can be built into a cabinet, combined with a storage system, as shown in the photo below.
If you decide to use a countertop under the sink and washing machine, choose options from waterproof materials.
Today you can order a cabinet equipped with a table made of wood, natural and artificial stone. Acrylic finish is also great for bathroom design.

There are cheaper models of laminated chipboard surfaces.
If you often use the bath, the best material for bath furniture will be acrylic or artificial stone.
Designers offer a stationary cabinet for a sink and a washing machine that matches the design of the room - walls and floors. This is a design solution for a more spacious bathroom. The podium can be tiled to match the interior.
It is strong, durable, moisture resistant material. It should be borne in mind that the acrylic countertop has a lot of weight. It must be installed by professionals.
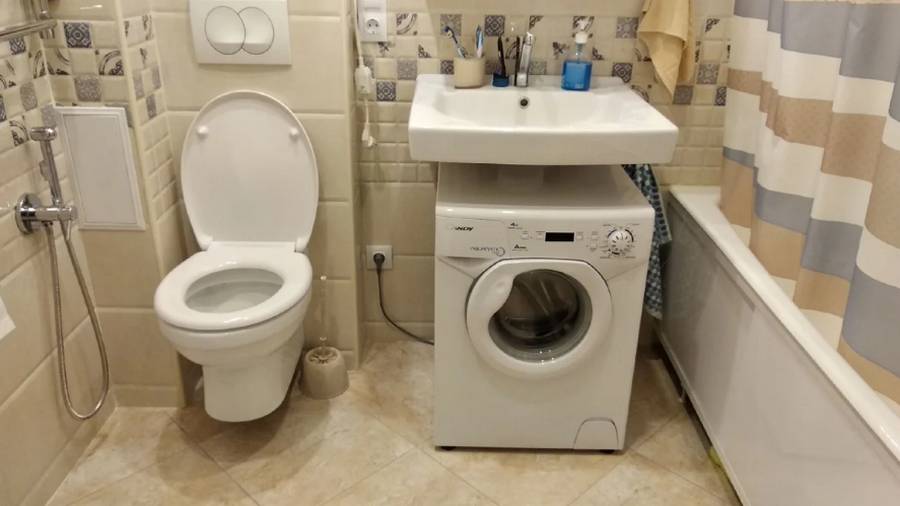
Sink above the washing machine: types
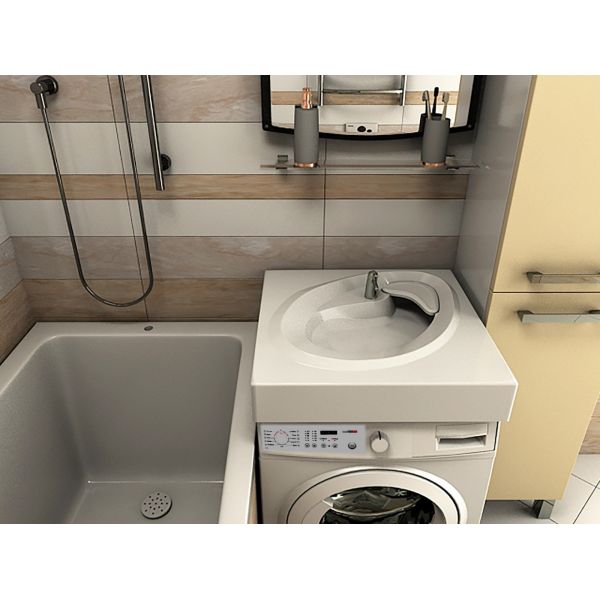
The water lily shell can have a drain hole in the center or on the side. Center drain models have a greater depth - the outlet requires space. On average, the depth of such a water lily shell is 18-20 cm. When installed, there is a significant gap between the bottom and the top cover of the machine. On the one hand, you can store small things there, on the other hand, it is not very convenient to clean it. But there are a majority of such models, since with such a structure less requirements are placed on balancing (stability) of the washing machine - the gap allows you not to worry about vibration during operation.
gap remains
From the point of view of electrical safety, this option is not the best - if the siphon leaks, water will pour onto the machine. At the same time, it is highly likely that it will fall on live parts, which will cause a breakdown of the machine.
So when installing the washing machine, pay special attention to sealing. Perhaps, in addition to gaskets and seals, it makes sense to use a sealant
Just take not acrylic, but silicone, and better - for aquariums. It definitely lasts a long time.


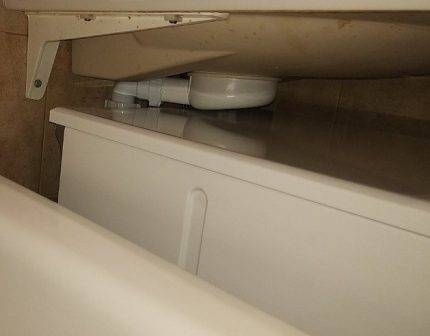
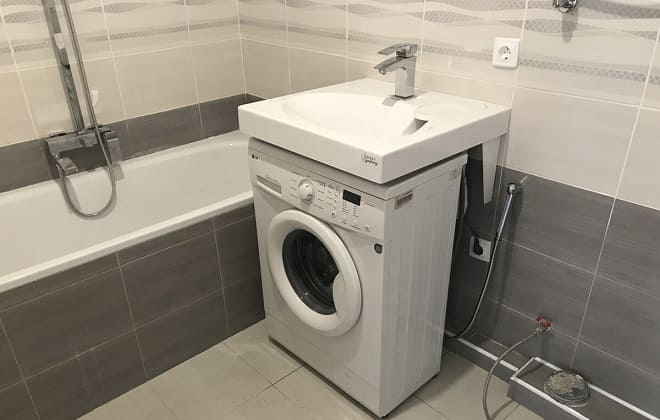
Side and rear drain
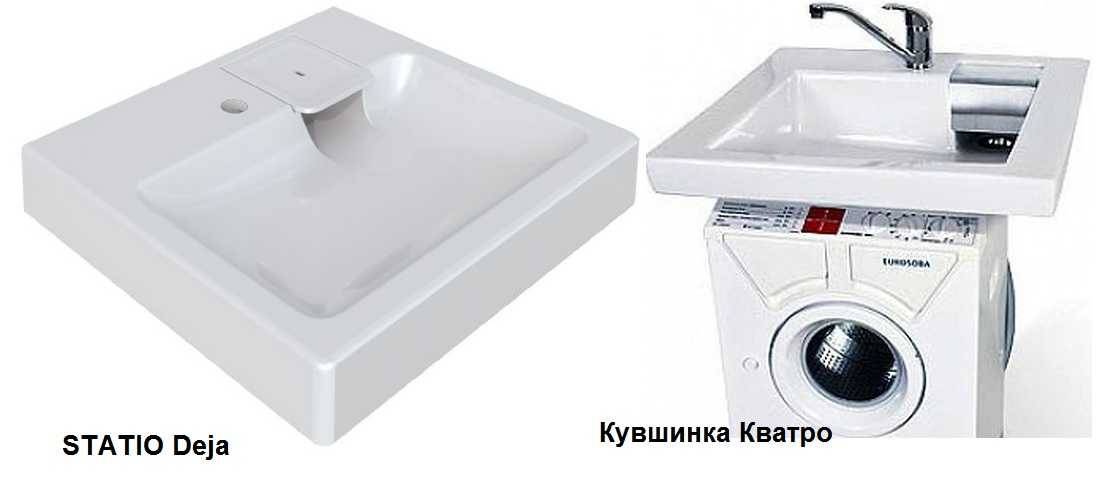
Side drain is less common. In this case, the nozzle is shifted back and sideways and is located behind the machine body. With this structure, the sink can practically be laid on the top cover. The bottom is almost flat, the sides are flush with it or may even be slightly higher. The depth of such models in the front is less - about 10-15 cm, and the back, where the drain pipe is located, also has a height of about 20 cm.
Sink over washing machine with side and rear drain - PAA CLARO
There is a clone of it - the Belarusian model Belux Idea. The difference in price, I must say, is not too big - $ 234 for the Baltic version and $ 211 for the Belarusian one.
There are several more options in Latvian stores: STATIO Deja, POLYCERS izlietne Compactino. These are also products of local firms. A similar model is available in Russia - Water Lily Quattro.

Variants of water lily sinks with side drain
What is good about this type of sink? The drain is shifted back, which means that even if a leak occurs, water will not get on the machine, which means it will not bring harm to it.
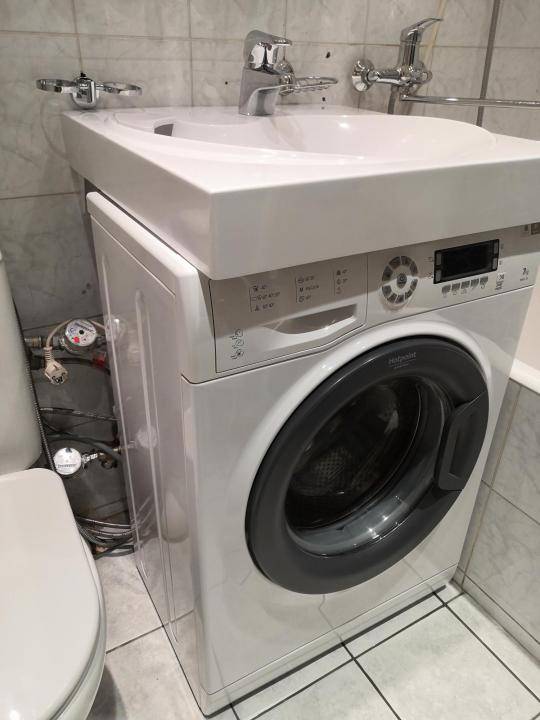
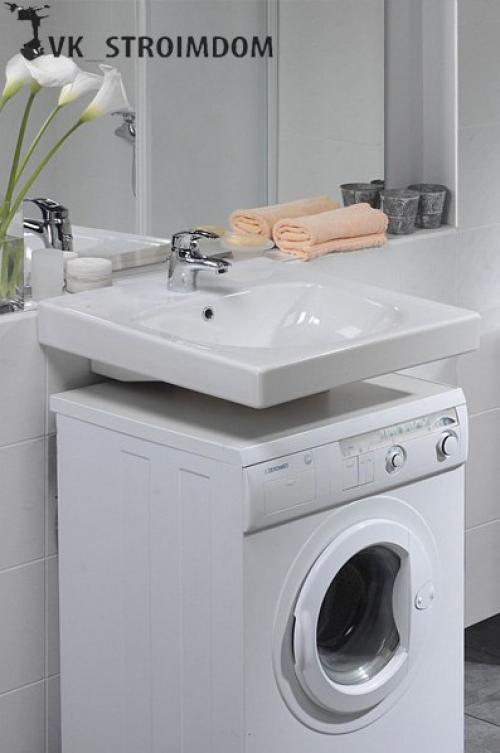
Drain at the back
There is a slightly more familiar variety - the drain is shifted back, but without shifts to the side. All the advantages of this design are the same, the category is slightly more numerous - they do not look so unusual. There is also a non-standard option in this group - the BELUX EUREKA model (made in Belarus). In Eureka (pictured on the right), the mixer is shifted to the side, since the part covering the drain is removable - for the possibility of cleaning.
Sink above washing machine with drain hole set back
There are many more of these sink models. There are about the same number of them as with plums in the center, so there is a choice. The spread in prices is quite decent - from the Russian Suntec Pilot 50 (size 60 * 50 cm) for $ 36 to the Finnish Ido Aniara 1116601101 for $ 230 (size 60 * 59 cm). If you search, you can probably find both cheaper and more expensive.
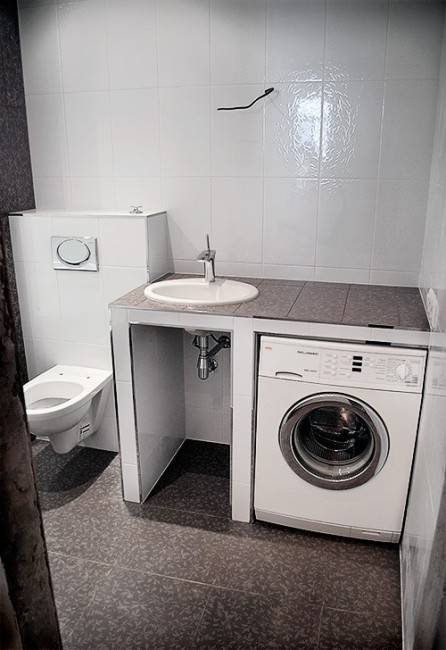
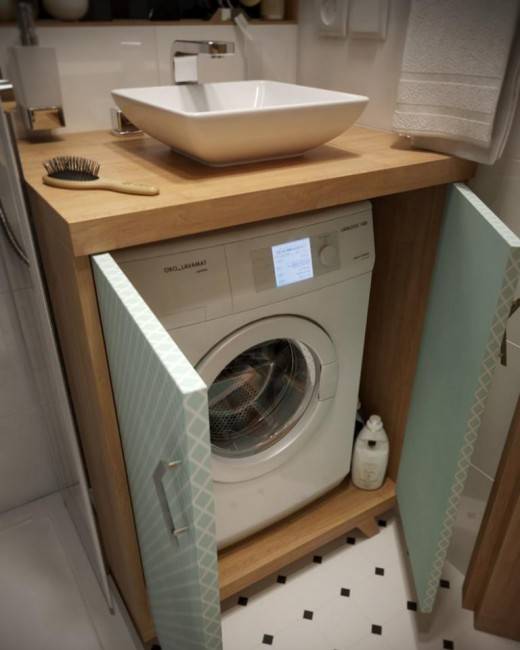
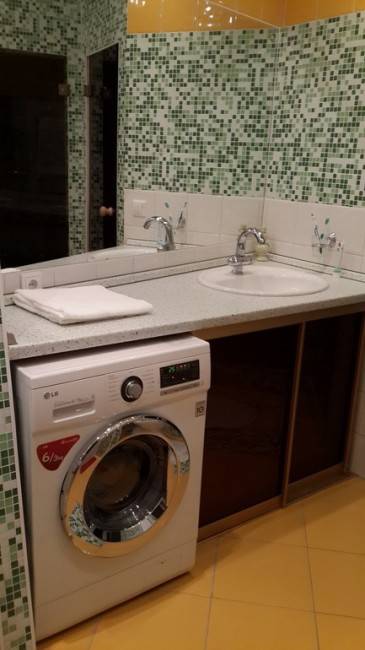
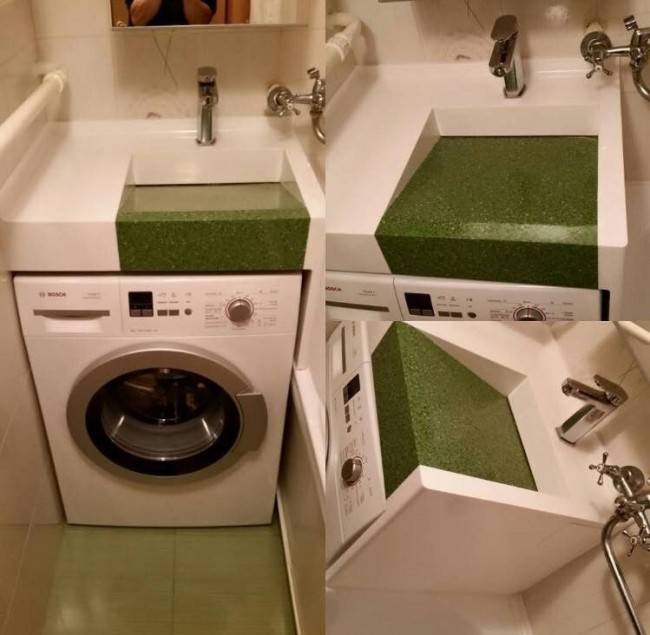
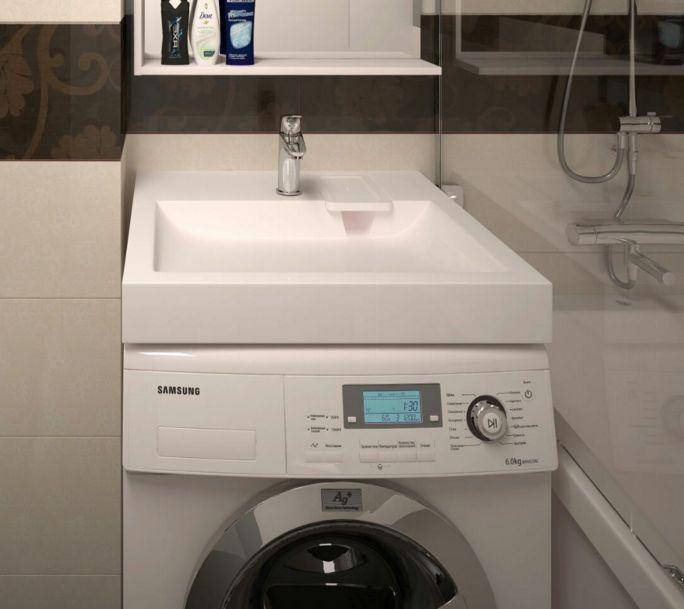
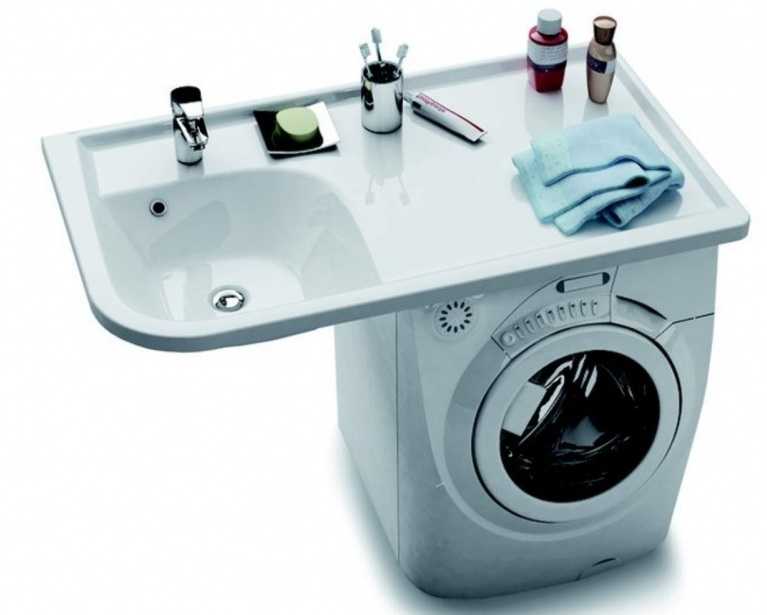
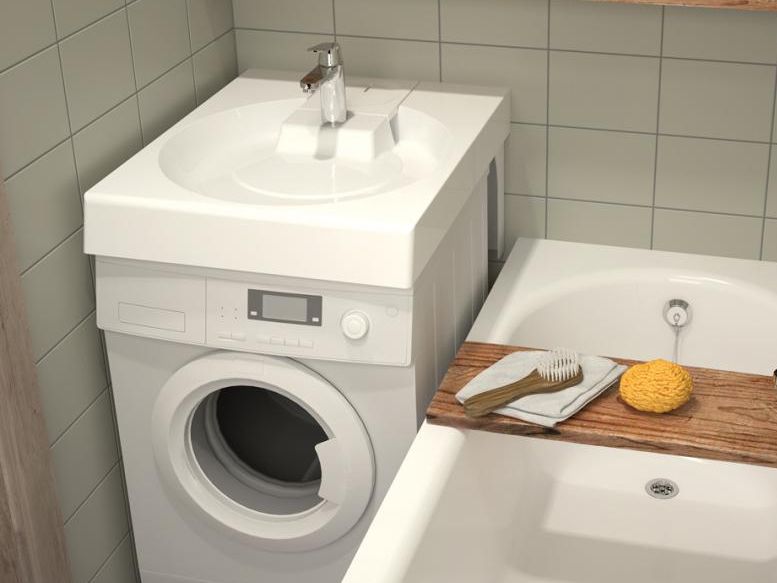
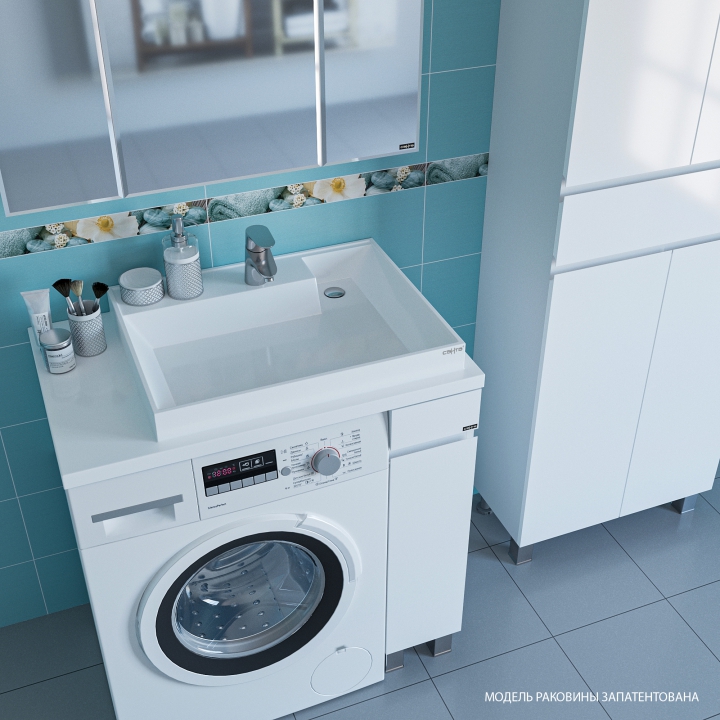
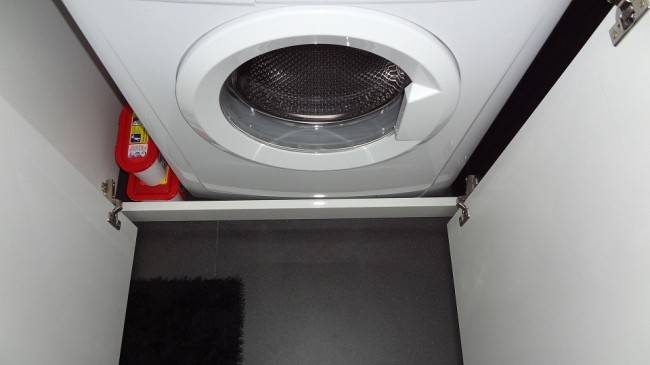
with worktop
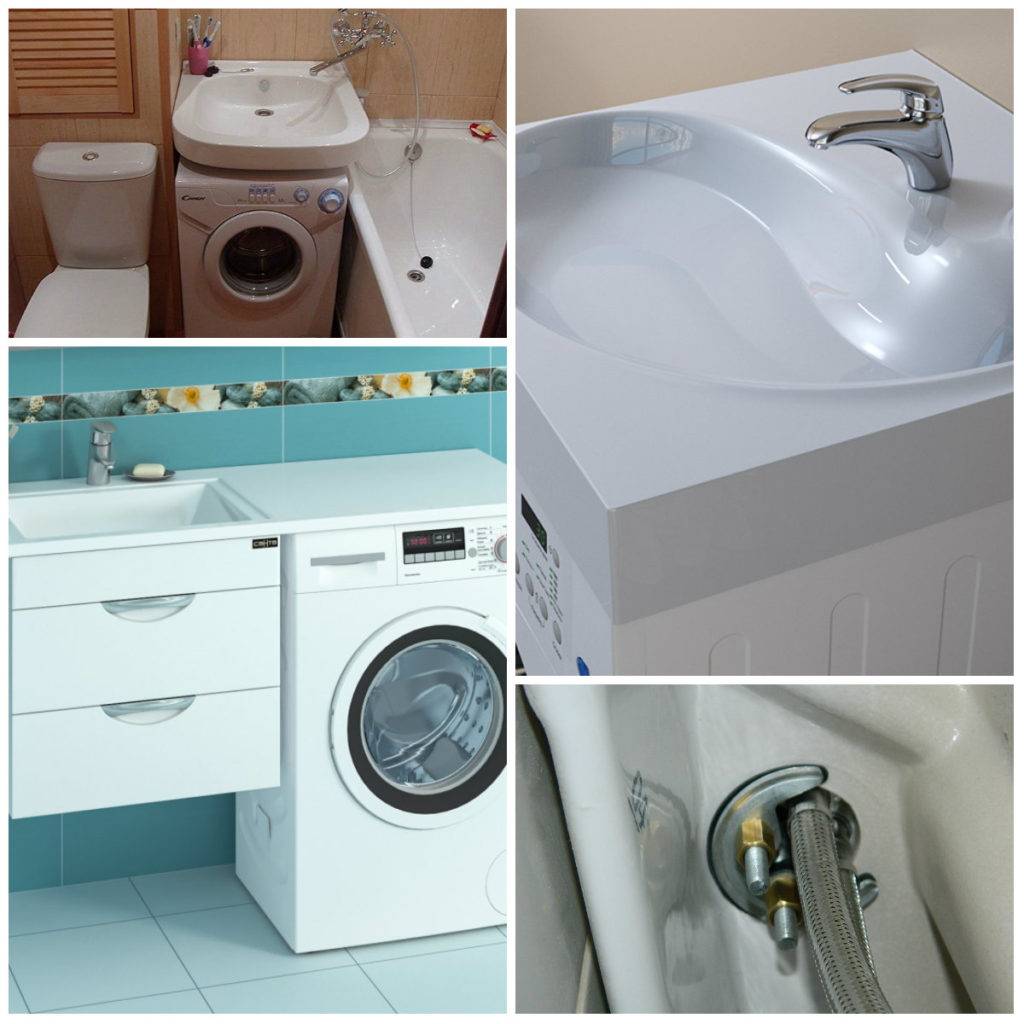
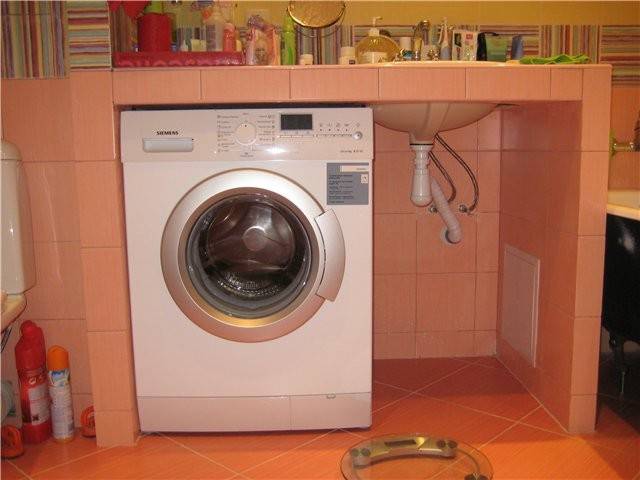
If the situation with the place in the bathroom or bathroom is not so critical, you can install the sink above the washing machine with a countertop. The machine is installed under the countertop. This option is the most preferable from the point of view of electrical safety.There is one drawback - countertop sinks are expensive.
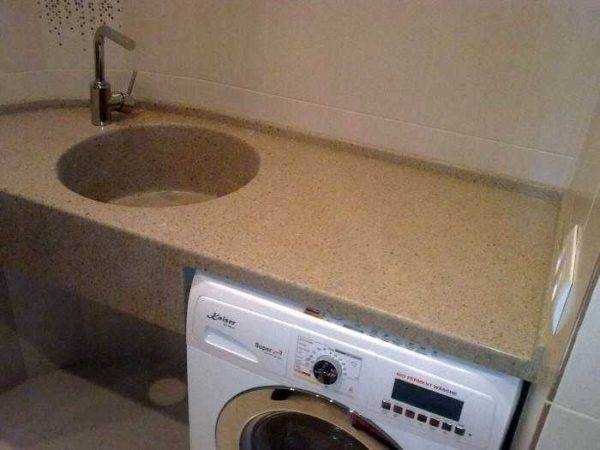
Washer can be placed under the countertop
To remove the dissonance between the part occupied by the body and the empty space under the sink, doors are attached to the second part, and inside you can make shelves or drawers for storing chemicals or other things.
Sink over washing machine with countertop
There are other models - angular, rounded, etc. They must be selected for each specific interior with its own dimensions.
Pros and cons of combining
 The sink is successfully placed on the washing machine, only a special model is selected for this purpose. The car also needs to be selected, the first one that comes across is not good. There are certain subtleties of such a combination.
Like every technical solution, combining a sink and a washing unit has positive and negative sides.
- The main advantage is the significant space savings. Fans of sitting in the bath can install it instead of a shower cabin, and the freed up space will allow you to feel more free in the expanded interior.
- The washbasin for placement above the washing unit has an unusually rich variety of design solutions, which will allow you to create a unique style of the bathroom.
Possible inconvenience:
- The difficulties lie in the selection of a siphon for such a washbasin connection. This is a non-standard solution, and in order to find stock items in stores, you will have to visit a considerable number of them.
- The sewer drain device is located horizontally, and not down, which in itself contributes to the deposition of salts on the walls of the pipeline.
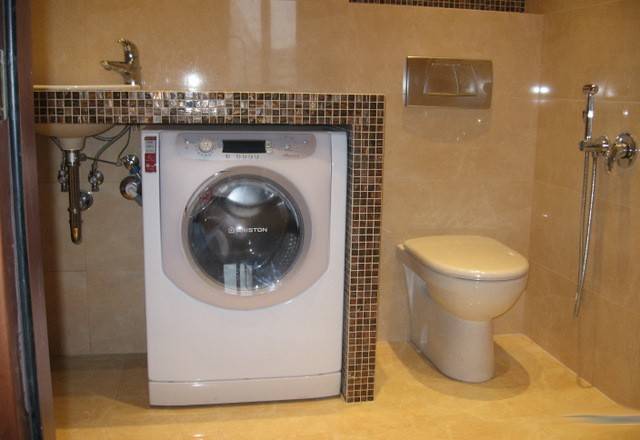
- The washing machine usually has sufficient dimensions and right angles that will protrude from under the sink and interfere with movement around the room.
Choosing a washing machine
Only front-loading machines are suitable under the washbasin. Vertical a priori make joint installation impossible. Now there are special models that are sold ready for simultaneous installation. If you want to buy a regular typewriter or leave your own, carefully calculate all the dimensions. Especially the height.
The recommended height is up to 70 cm. In this case, a medium-depth washbasin is just right to use. The width of the machine is 40-45 cm. There are enough mini-models in stores with a load of a couple of kilograms. Do not forget that there should be a distance between the sink and the surface of the equipment - at least a few centimeters. There is one more trick: the accompanying documentation for washbasins for joint installation indicates which models of washing machines they can be combined with.


Step by step installation instructions
Having chosen the optimal water lily model that suits your washing machine, you can think about installing it yourself. This process is not as complicated as it might seem at first glance.
In order for the installation of a water lily type hinged sink to be successful, you will have to carefully study the recommendations supplied by the manufacturer. As a visual aid, below we will consider a step-by-step installation, generously provided with a photo.
Step #1 - Installing the Brackets
First you need to determine the location of the household washer and sink
At this stage, it is important to carefully take measurements by installing the machine, but not connecting it.
 The manufacturer recommends during installation to maintain a distance of 2-3 cm between the upper part of the washer body and the lower part of the bowl
You need to place the sink on top - here you will need an assistant to hold the product while you measure everything and put marks on the wall for installing the brackets.
First, holes are made in the wall for the brackets, which are mounted in accordance with the markings made on the bolts supplied in the kit.
It is important here not to overtighten the connection, leaving a small gap of up to 7 mm.
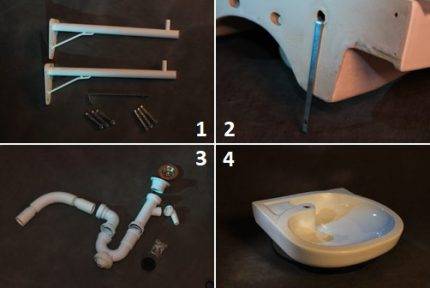 A typical sink set includes: 1 – brackets with bolts; 2 - hook; 3 - siphon; 4 - the sink itself. But there is no self-tapping screw and dowel for fixing the hook, you will have to buy them yourself
If the installation is carried out in a Soviet-built apartment, where there are still brackets in the bathroom wall that were installed during the construction of the house, then the Kuvshinka trademark sink can be safely mounted on them.
These holders are strong and reliable, and their size is quite suitable. But this rule does not apply to products from other manufacturers.
Step # 2 - siphon installation
The next step is to install the siphon. Its design and components may differ from typical ones. Therefore, you must first carefully study the instructions, and then assemble according to the scheme that comes with the kit.
It is important not to forget to put a cone gasket under each threaded connection
 A vertical drain is more convenient in terms of the speed of water removal, but the location of the siphon directly above the body of the machine is highly undesirable and even dangerous. After all, any leak can result in a breakdown of the programmer
The siphon is assembled, it remains to install it on the sink.Why do the following:
- place the assembled structure under the drain hole at the bottom of the bowl;
- place a thick rubber gasket over the siphon;
- put a rubber seal on the inside of the sink;
- place a decorative grill on top of the seal, which will cover the drain hole;
- fasten the assembled connection with the bolt included in the kit.
Most often, a siphon to this type of sink has a pipe for connection with a washer. This connection is also made using a rubber seal - valve gasket.
In the design of the siphon, there can be an S-shaped or flask-shaped shutter. Immediately after it, a corrugated section of the pipe is connected, which is to be connected to the sewer, then check the tightness of this connection
Step #3 – Finishing the sink
After attaching the siphon, you can proceed to fixing the washbasin. To do this, you first need to insert the hook into any hole on the back wall of the sink (right or left). It is attached to the wall with a screw and a dowel.
Then you have to tighten the bolts of the brackets until they stop.
 For reliability, experts and the manufacturer recommend applying a silicone-based sealant to the places of contact between the sink and the wall and brackets.
At this stage, it is advisable to install a mixer if it is common for the bath and sink or is mounted on the wall above the washbasin. It is necessary to assemble the structure and carry out installation in accordance with the instructions that go to it.


If your model has a hole for the mixer, then it is advisable to install it strictly according to the instructions, not forgetting to put a sealant at the joints.
It remains to check the quality of the installation by turning on the water. If everything is tight, you can put a washer under the sink and connect it to communications.
Choosing a washing machine under the sink
A washing machine is an expensive purchase, especially when it comes to a non-standard model. It is with this purchase that you need to start, since in the future it will be much easier to choose a sink for the purchased equipment than vice versa.
Washing machine selection criteria:
- Width. Narrow, up to 43 cm wide models are recommended. Otherwise, it will be problematic to pick up a sink and install the machine close to the wall. The protruding corners of the car will interfere with movement and comfort.
- Height. The standard dimensions of the machine will not allow you to install the sink at the usual level. It will find it much higher, and its use will be inconvenient. This option is suitable only for those whose height is above average. In other cases, it is better to adhere to the recommended standards - the sink is located at a height of 80 cm. The height of the machine suitable for these parameters should be in the range of 60-70 cm. Many manufacturers produce equipment with such dimensions.
- How to load laundry. The very idea of combining a sink and a washing machine involves the presence of a side door and a horizontal load of laundry.
Modern manufacturers of household appliances quickly respond to market demands. Therefore, each of them boasts small-sized models, although their prices are slightly higher. Which brand to prefer is up to you.
Pros and cons of this type of installation
This installation of the washing machine relative to the sink has several advantages:
- the ability to gain some amount of space (especially in apartments with a small footage);
- rational use of space under the sink, sometimes "idle" in vain. If accessories were stored under the sink, then you can move them to a hanging mirror cabinet;
- the ability to highlight the bathroom stylistically with the help of non-standard design solutions.
The disadvantages of such an installation include:
- additional hassle associated with the non-standard shape of the siphon: such a part is quite difficult to find and pick up to the sink, and in case of failure, you will have to make much more effort than when replacing a conventional siphon;
- increased likelihood of drain clogging due to the horizontal direction of water flow;
- creating inconvenience when moving due to the angular shape of the washing machine;
- the built-in washing machine is not very convenient to use due to being too tight to the sink.
But most of the disadvantages are offset by space savings, because such an arrangement of bathroom interior items is very compact.
Subtleties of installation and care
It is really possible to carry out installation work in one day, even with your own hands. An exception will be a tiled stationary concrete worktop. It all depends on the duration of the tile work.
When planning a joint construction, arrange communications so as to avoid direct contact of electricity with water.
If the sink is shallow, make sure that the top of the washer is covered with at least minimal splash protection. The bowl itself should protrude 4 cm or more.
Drain pipes, siphons must not touch the washing machine. Fasteners can loosen from vibration when washing with a spin cycle. They should not be located directly above the body of the washer. Options for correct placement: on the side (if the sink bowl is on the side); behind the wall.
After installing the siphon and connections, it is worth checking the tightness properly. Cleaning leaked water in the space behind the washer is difficult. The connections from the washing machine should be additionally secured with a clamp.
In the process of using the washing machine, you should regularly check the integrity of the wires, the tightness of the connections, hoses, pipes.
At the installation stage, free access should be provided for cleaning and inspection of the connections. No matter how much you want to install everything as compactly as possible, you should not push it tightly against the wall. Firstly, condensation can form on the inlet hose, which can lead to mold when it touches the wall. The second reason to freely place all the modules is the vibration of the operating equipment, which can lead to a violation of the integrity of the tile, loosen the pipe connections.
Competent calculation of each element and reliable installation guarantee the uninterrupted service of this design, which perfectly organizes the interior of even the smallest bathroom.
What are water lily shells?
Although these sinks look quite simple, they can still be divided into several types depending on the shape and configuration. Thanks to this, the buyer can find a washbasin set that can successfully fit into the design of his bathroom.
Types of shells
If you are not satisfied with the standard set, which has a square shape, then you can consider models made in the form of a rectangle. First of all, such water lilies will come to a place in bathrooms, where there is very little free space.
A special type is formed by semicircular water lily shells, with the help of which you can also rationally dispose of the available area. And there is no need to bring evidence in favor of these designs, since even a person who does not have serious knowledge in the field of design knows that with the help of rounded knots, you can visually give the room more volume.


Among other varieties, it is worth highlighting sets of water lily shells, which are equipped with a side table top. The latter can be adapted to store hygiene items, including soap, shampoos, toothbrushes, etc.
Installation sequence
Preparatory activities
At the first stage, a washing machine is installed in the place freed from unnecessary items and the sink is fitted to the wall. If it is not possible to install the bowl on the old brackets, then they are dismantled and the places for new mounts are marked. We remind you that in doing so, a distance of 2–3 cm must be maintained between the lid of the washing unit and the bottom surface of the sink. If a vertical drain is used, then this gap is measured from the siphon.
In addition, if necessary, a hidden location of the wiring of engineering communications, mark the places of their laying. After that, the washing machine is moved aside, a hole is prepared in the wall for dowel fasteners, if necessary, the channels are gated and the pipelines are installed.
Faucet installation
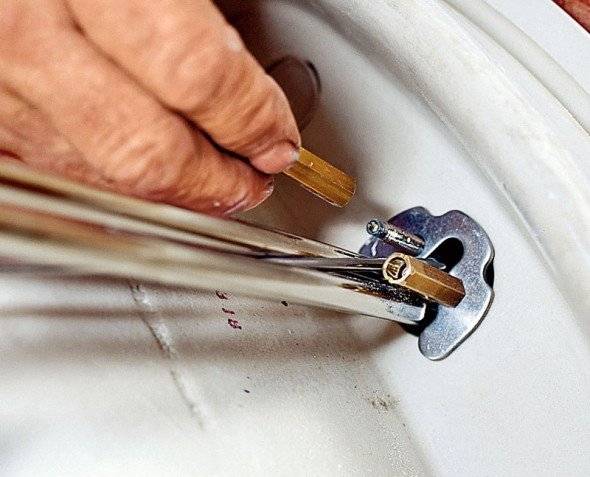
The installation of the mixer is carried out using copper fasteners from the kit. Subsequently, this will allow you to easily dismantle the device for repair or replacement.
If the design of the sink provides for a mixer, then it is mounted before the product is installed in place. Beforehand, flexible supply hoses are connected to the valve, making sure that their rubber sealing rings are intact. After that, the device is installed in a special hole in the bowl, after placing a fluoroplastic gasket from the delivery set under it. Thanks to it, a snug fit of the bottom of the faucet to the sink is ensured, as well as protecting the smooth surface from scratches. On the reverse side, a segment washer is installed on the fixing screw and, with the help of copper nuts from the set, the tap is securely fixed to the bowl.
Assembly and installation of the siphon
When assembling the siphon, follow the manufacturer's instructions.
It is important to ensure a secure fit of all parts of the part and good tightness. It will not be superfluous to lubricate all sealing gaskets with silicone sealant before installation.
After assembly, the siphon is installed on the sink, after which the overflow system is mounted, if it is provided for by the design. The last step is to connect the corrugated hose to the drain system. It is best to secure it using a threaded type clamp.
Instructions for installation and connection of the sink
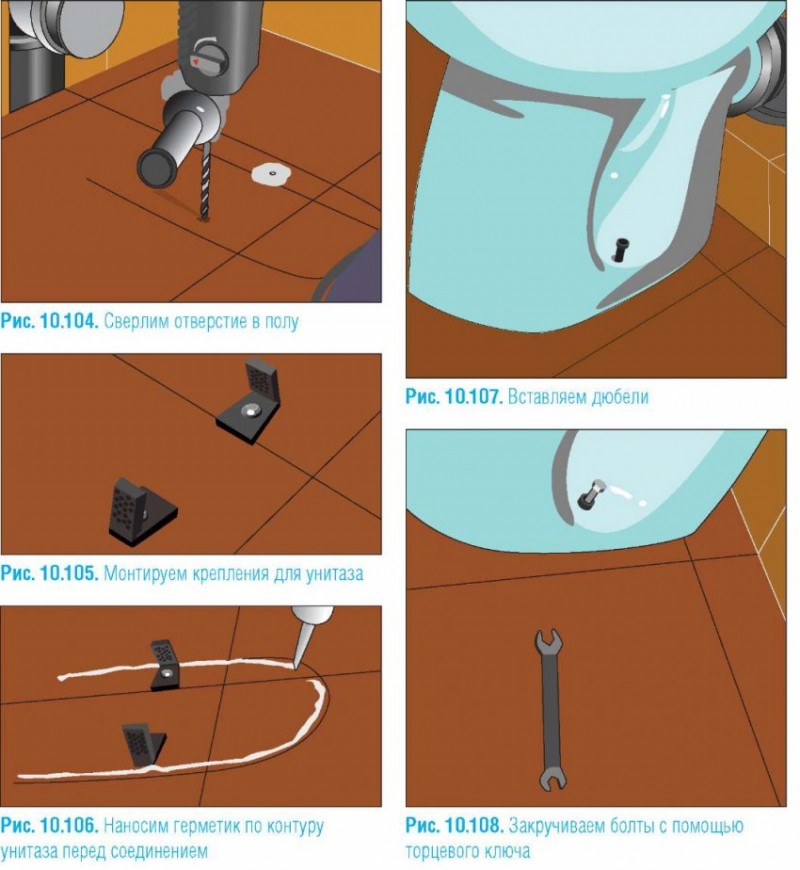
Dowels are driven into the prepared holes and the brackets from the delivery set are mounted.
It is important not to tighten the fasteners until the washbasin is properly adjusted.
Having installed the sink in place, control and, if necessary, correct its horizontal level.If the longitudinal displacement of the structure is prevented by a special hook, then a corresponding mark is made on the wall.
The washbasin is removed and the nuts securing the brackets to the wall are tightened.
A layer of sealant is applied to the metal surfaces of the parts to protect the sanitary ware from damage.
According to the mark on the wall, a hole is drilled into which an anchor or dowel is installed and a mounting hook is mounted.
A layer of silicone sealant is applied at the place where the back surface of the bowl is attached to the wall.
A sink is installed on the prepared brackets
At the same time, it is important to monitor its fixation on the hook.
The sink drain is connected to the sewer pipe, and the flexible connection is connected to pipelines with hot and cold water.
After checking the performance of the mixer and the absence of leaks in the drain system, the washing machine is moved closer to the sink and connected to the water supply and sewer pipe. After that, the equipment is installed in place, not forgetting to adjust the horizontal position.
Video: How to install a sink over a washing machine
For practical and safe operation, it is important to ensure that the parameters of plumbing and electrical equipment are correctly matched. Do not lose sight of the factor of aesthetic perception of the design.
A wide range of models allows you to provide a holistic, harmonious picture. That is why the design is easy to fit into the interior, getting a bathroom that will delight with convenience and appearance.
Algorithm for installing the structure as a whole
The work is carried out in a strict sequence:
- before installing the mixer on the cabinet, it is connected to hot and cold water supply lines;
- after the hoses are inserted into the furniture, the mixer is fixed on its surface;
- eyeliners are connected to the plumbing system;
- drain-overflow is connected for full-fledged work;
- a siphon of the drain system is connected under the washbasin;
- the sewer is connected to the drain;
- appliances are mounted under the washbasin inside the model;
- work is underway to connect the drain of the machine;
- the washing machine is connected to the water supply;
- the equipment is provided with a power supply.