- How to fix the toilet to the floor: 3 ways to install the toilet
- Toilet installation instructions, a complete guide to action
- Toilet installation instructions
- Do-it-yourself toilet installation
- Features of the design of the wooden floor in the bath and toilet
- How to choose a toilet
- Errors and how to prevent them
- Features of installing plumbing
- Painless dismantling
- Briefly - about how to install a toilet bowl on a tiled floor
- Facing the floor surface around the installed toilet
- Preparatory work before installing the toilet
- Installation on ceramic tiles
- Device Features
- Tank shape
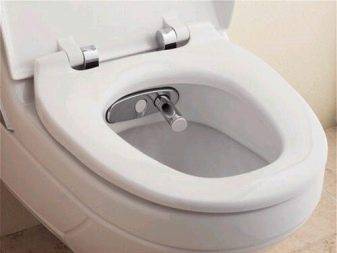
- bowl shape
- Drain angle
- Taffeta fastening
- How to properly install and fix the toilet
- How to attach a toilet to a tiled floor
- Materials and tools
- What can you attach
- How is the toilet attached to the floor?
- Installation Features
How to fix the toilet to the floor: 3 ways to install the toilet
The installation of any plumbing equipment must be carried out taking into account certain building rules and regulations. For most people, it seems too difficult to carry out such an operation on their own. Firms that offer their services for the installation of various plumbing for quite a lot of money play on this.
Although installing a toilet is one of the simplest operations.For its correct implementation, you need to know some of the subtleties of the process. This article will discuss how to properly fix the toilet to the floor so that it does not stagger by several methods.
Regardless of which method you decide to use to install the toilet, all work should begin with the assembly of the cistern. The drain mechanism is assembled according to the instructions attached to the toilet, after which it must be installed in a specific place.
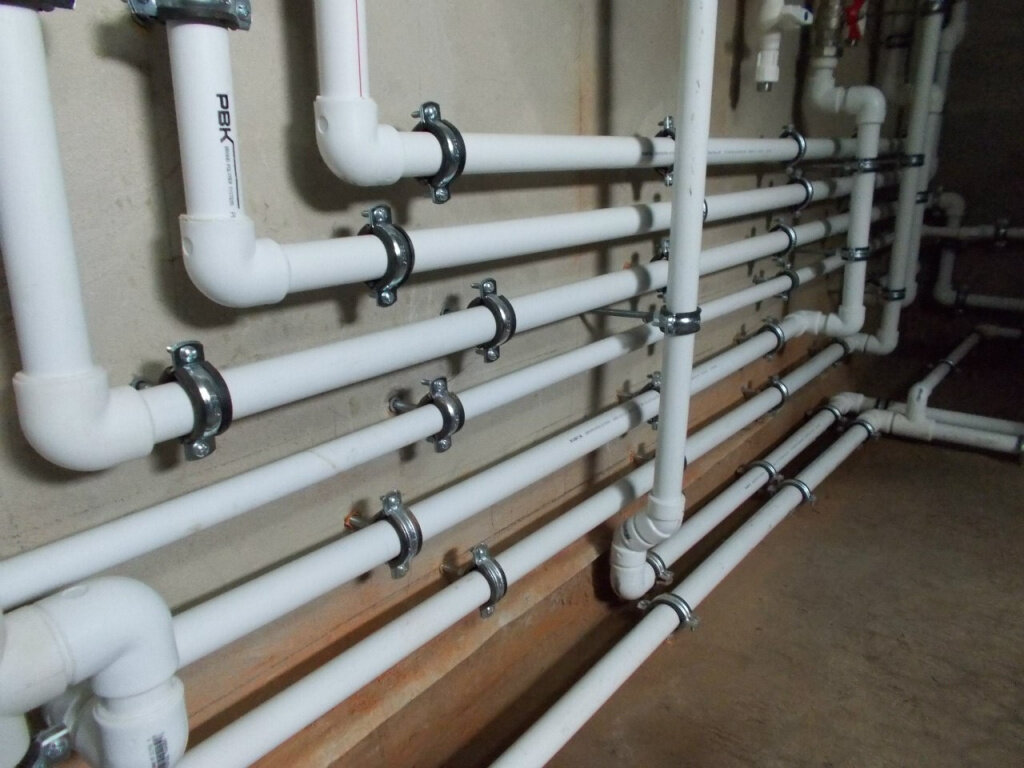
The preparatory stage also includes the arrangement of the water and sewer mains. As mentioned above, there is more than one way to fix plumbing. Its choice directly depends on the material with which the floor is finished.
Toilet installation instructions, a complete guide to action
Toilet installation instructions
Deciding to install a toilet, you can not do without guidance, preferably visual. Detailed installation instructions toilet bowl will help you to carry out this procedure.
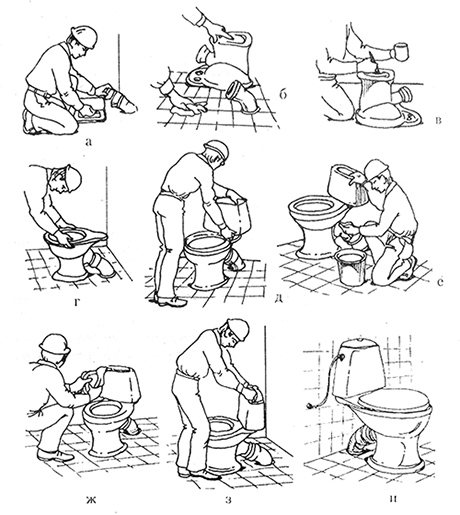
Before starting the installation of a new toilet, it is necessary to dismantle the old one.
The rules for dismantling the toilet are simple:
shut off the water; unscrew the cold water supply; unscrew or beat off the toilet bowl to the floor; tilt the toilet back harder so that the remaining water pours out; detach the toilet from the socket.
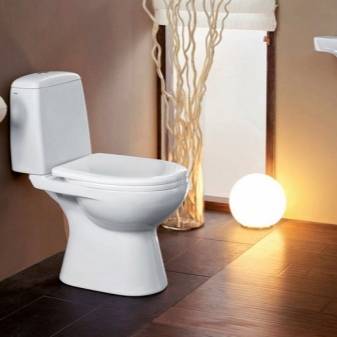
Choosing a new plumbing item is not a problem; with today's variety of toilet bowls, you can find any type and price. In the average pricing policy, for example, a good manufacturer is the Spanish company Roca, which produces sanitary ware under the jika and roca brands.
Do-it-yourself toilet installation
Published: 12 Nov 2011, 22:02
The installation of the toilet must be approached responsibly.As a rule, installing a toilet bowl with your own hands takes a little more time than if it were done by specialists. So, the desired toilet model is purchased. Turn off the water and dismantle the old toilet
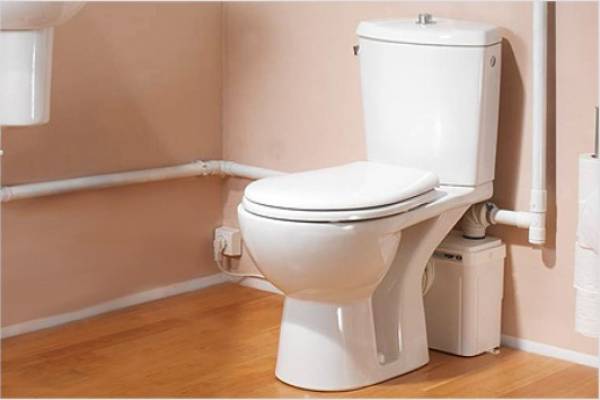
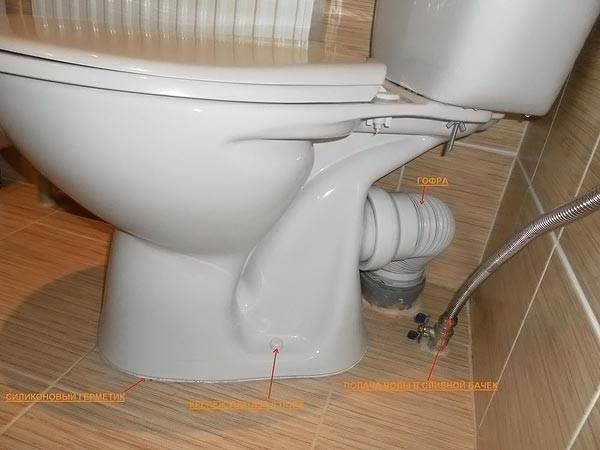
On site of the old toilet a new one will be installed, therefore, it is important to make a correct fit, namely, to make sure that the toilet drain is connected to the vent pipe. In case of non-docking, you can build up the floor under the toilet, and the problem will be solved. There are several ways to fix the toilet bowl to the floor - this is fastening the toilet bowl with screws, fastening to a wooden board previously recessed into the floor, or fastening using a cement-sand fill
After fixing, we connect the place of the toilet sleeve with the entrance to the fan pipe. Do not forget about fixing the cistern, this is no less important work than installing a toilet bowl. A properly installed tank should not leak, so if a defect occurs, it will be immediately detected. At the end, you need to bring the hose to the supply and check the functionality of the toilet
There are several ways to fix the toilet bowl to the floor - this is fastening the toilet bowl with screws, fastening to a wooden board previously recessed into the floor, or fastening with a cement-sand fill. After fixing, we connect the place of the toilet sleeve with the entrance to the fan pipe. Do not forget about fixing the cistern, this is no less important work than installing a toilet bowl. A properly installed tank should not leak, so if a defect occurs, it will be immediately detected. At the end, you need to bring the hose to the supply and check the functionality of the toilet.
Keep your new toilet clean and clogged won't cause you any trouble, but if it does, you need to know how to clear the drain. What do you think about installing a toilet? Maybe there are some other nuances that need to be taken into account?
do-it-yourself toilet installation.jpg
Features of the design of the wooden floor in the bath and toilet
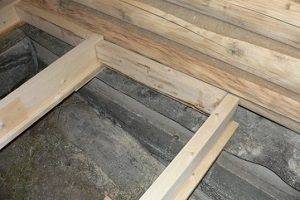
In those places where the plumbing units will be located, it is necessary to make additional strengthening of the floor: attach logs, fix the subfloor with metal corners, make a solid platform from the bars.
Expert advice: when installing the lag, make the fastener step more often - this will strengthen the structure and give it strength.
If you plan to lay a warm floor, then you should consider the size of the highways and their number. Distribute the underfloor heating channels in advance in such a way that they cannot be damaged during the repair. Mark on the floorboards with a pencil or stick marks under future drilling locations.
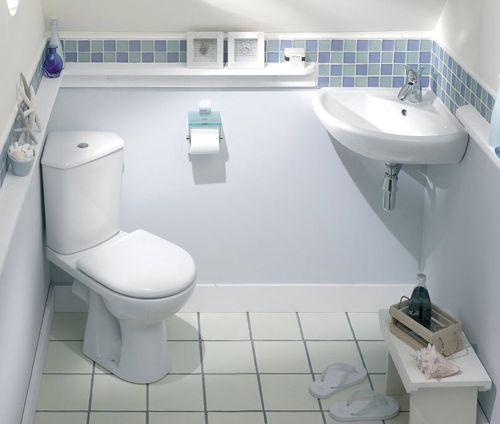
How to choose a toilet
Do-it-yourself installation of a toilet bowl in a private house is associated with certain costs and I want them to pay off in terms of convenience.
- Economy class;
- middle class;
- luxury plumbing.
Parts of elite plumbing are designed for a long service life and will not break just like that. Buying an expensive item, you can be sure that it will last a long time.


Another option is color spectrum. In large supermarkets, you can pick up any shade and embody the most daring design decisions.
Models available for sale:
- from natural stone durable and reliable, service life is unlimited;
- glass - completely transparent or with a pattern;
- faience;
- ceramic;
- metal;
- porcelain, which can reach up to 50 years;
- plastic.
When buying, you need to carefully look at what is included in the equipment kit. It may happen that the bowl and tank sold separately.
In addition to external characteristics, you need to pay attention to:
- to the height of the equipment;
- type of construction - suspended, floor, wall floor;
- what type of flush - reverse or direct;
- the method of draining from the tank is one or two-button.
It will cost more, but the structural elements will be hidden in the wall, which will save some space in the room. The reverse flush is better because it washes the bowl completely. allows save water.
Important!
When choosing a design, it is worth checking it for cracks, chips
Errors and how to prevent them
Keep the surface clean. Irregularities, dust, oil stains have anti-adhesive properties and prevent adhesive adhesion. Chips in the holes interfere with the installation of fasteners.
Use only sanitary silicone or polymer sealant. Do not buy products of dubious production and do not save on quality.
Curve installation of plumbing will lead to uneven loads, rapid wear and tear of the product.
Before drilling tiles, make sure that the drill does not slip on the tiles. Start with low speed, otherwise the tile may crack.
Tighten the screws until the toilet is in a stable position. Excessive efforts will lead to an increase in plumbing pressure on the tiles and cracking.
Mix the glue in the proportions indicated in the instructions. An excess or deficiency of a component makes the composition brittle and affects the setting time.
Fastening toilet to the floor on tiles the process is simple. But if you do not plan to update the repair every three years, take care of the plumbing.
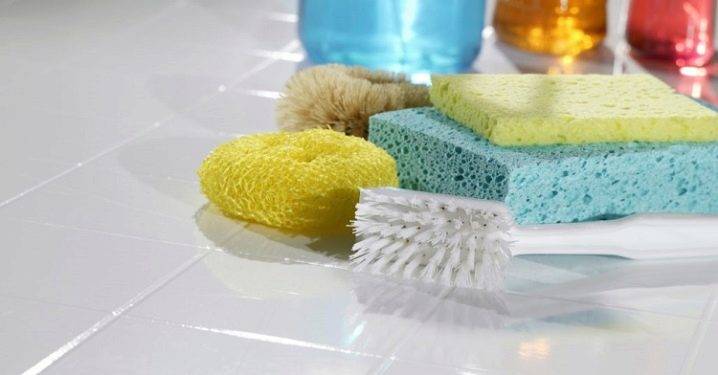
Wash the sink weekly with mild detergents, remove limescale with a warm 95% vinegar solution. Use pills for drain tankso that the reinforcement is not covered with salt deposits.
Features of installing plumbing

Plumbing fixtures are installed based on the installation instructions attached to them. During construction or major repairs, this work is performed by professional plumbers. In the future, after settling in, many residents independently make their own adjustments to the bathroom device and change the device to another one.


For the qualitative performance of such work, it is important to know what methods of fixing the device on the floor covering exist and how to perform them correctly. Installation features are directly related to the plumbing configuration
Typically, in household bathrooms, compact models are used that are installed on the floor. The fastening of such plumbing fixtures is different.
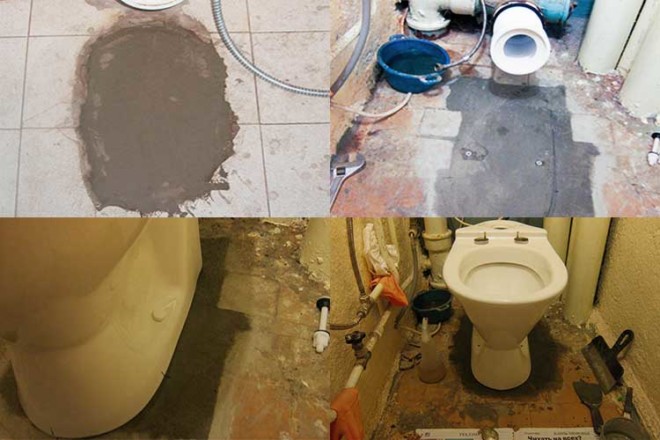
Painless dismantling
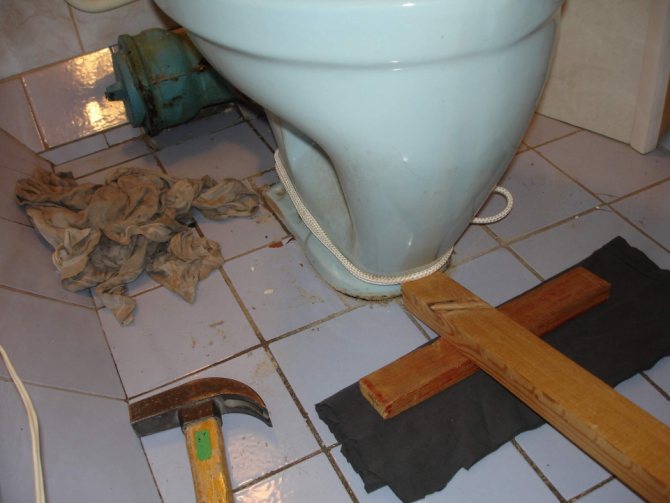
For this procedure, we need a simple set of four tools: 1) Crowbar (or nail puller); 2) Hammer; 3) Chisel or chisel; 4) Pliers. Before you get started - wash and disinfect the old toilet. Over the years of service, dirt, germs and limescale could accumulate here. Prepare a rag and a bucket of water. Wear rubber gloves and, if possible, goggles. This will protect you from the undesirable influence of antiseptics, as well as from fragments and ceramic chips. To remove a toilet bowl that has served its time, keeping it intact, is not possible for everyone.If during installation it was screwed with metal screws into a wooden board, which was subsequently concreted, then physical force will have to be used here, practically uprooting it from the sewer pipe. The remaining fragments are removed with a chisel and pliers.
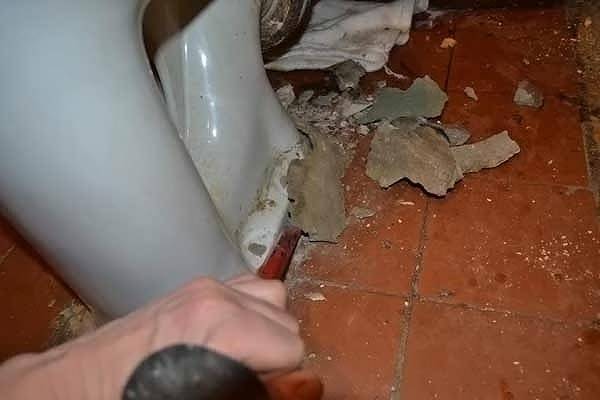
Dismantling an old toilet can sometimes be a real problem.
If the toilet was installed using plastic screws screwed directly to the floor, then here you have to be the most careful and accurate, otherwise you can injure yourself or damage the floor. In the future, remove the toilet bowl from the tee of the sewer pipe. Here, you don't have to put in much effort. It is also recommended to clean the sewer socket joint in the area where the toilet will stand. This is usually done with sandpaper or special cards.
Connecting the toilet to the sewer
Briefly - about how to install a toilet bowl on a tiled floor
Which installation method should I choose? This, of course, depends to a greater extent on the characteristics of the room - how ready it is, whether there is a cladding on the floor. Well, from the skill and instrumental equipment of the owner of the apartment (house) - too.
Let's explain this "verbosity":
The "classic" installation of a toilet bowl is its installation on a floor already fully tiled with ceramic tiles. It is clear that this becomes possible only taking into account the design features of the toilet bowl, since some models involve the supply of a sewer pipe from below. But this is a special case of installation, for the implementation of which it is better to invite an experienced craftsman.
The whole cycle of supplying communications, preparation and installation toilet with vertical outlet is a rather large-scale task, and for its implementation it is better to use the services of specialists.
The installation of a conventional toilet bowl directly on the tile can be divided into two more "subspecies":
— Mounting with fixation to the floor on standard fasteners. The most correct approach, which should be used.
- Mortar mounting, if it is not possible to drill holes in the floor for standard fasteners. It is difficult to call this method successful, but it is also practiced from time to time. By the way, a lot of toilet bowls in old high-rise buildings were “sculpted” in this way.
The diametrically opposite approach - first toilet installed on the floor (one of the methods mentioned above), and only then is the floor tiled with ceramic tiles.
This option can be called almost "force majeure", but it also has, as they say, the right to exist.
Well, now, about all these installation methods - step by step, with details.
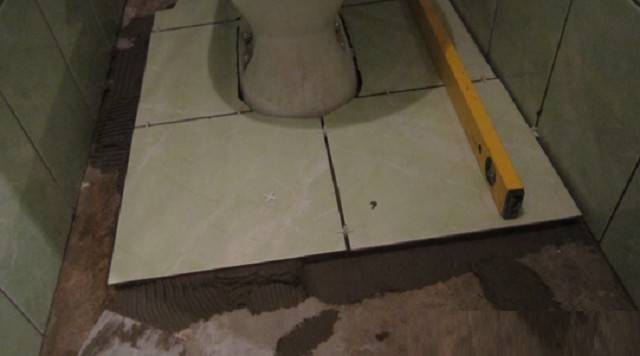
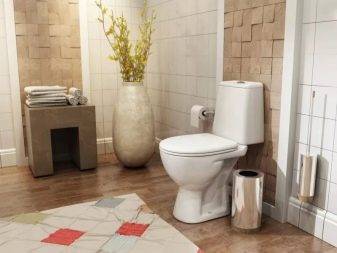
Facing the floor surface around the installed toilet
Sometimes circumstances develop in such a way that the toilet was installed before the flooring was done. For example, there are no funds to purchase high-quality tiles, or the desired option has not yet been found in the assortment of stores. But it is impossible to live in an apartment normally without a toilet bowl, it was installed, the decoration was left for the future. Another option is cosmetic repairs, with laying new tiles directly on the old one (there are such technologies), but it was decided not to change the toilet bowl.
Those owners who plan to follow this path should immediately be warned - they will face many difficulties. These are difficulties with curvilinear cutting of tiles, and problems with fitting fragments.Moreover, you will have to work in very cramped conditions.
One more nuance.
If the new lining is laid on top of the old one, without dismantling it, then the previously standing toilet bowl will be slightly lower relative to the resulting floor surface. It seems to be not much, but it can bring serious inconvenience to some family members, at least at first.


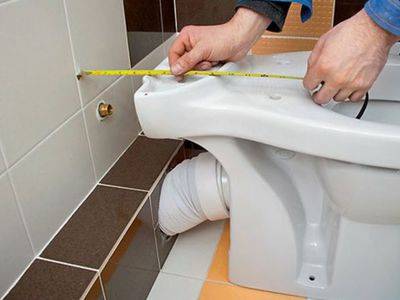
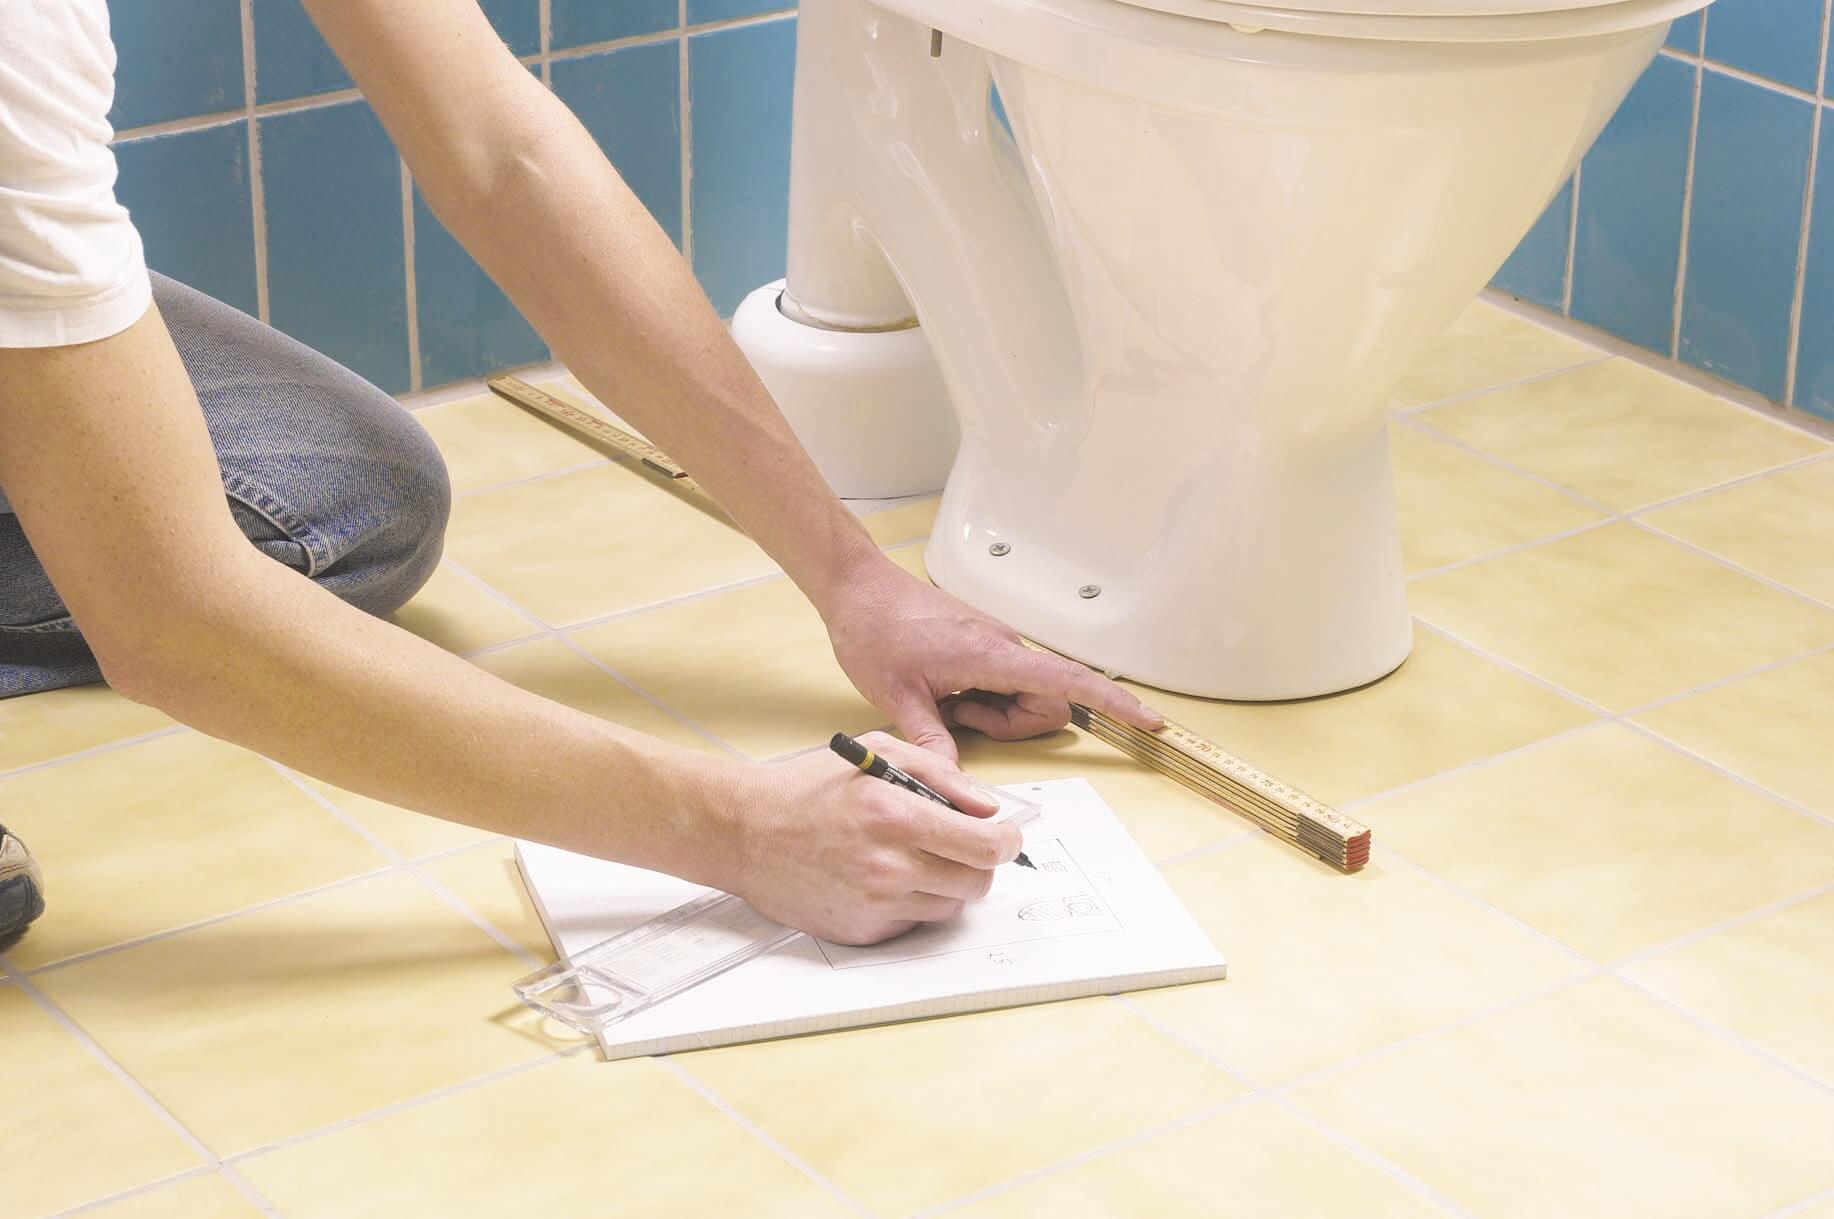
Preparatory work before installing the toilet
 Achieve a comfortable toilet pipe length
The drain sink is installed when the wall and floor tiling work is completed.
If you install the plumbing first, and then proceed with the ceramic flooring, you will have to deal with a rather complex cut in the slabs to bypass the base of the pedestal of the plumbing fixture.
 This will cause the risk of damage to the cladding if the selection of cut tiles is unsuccessful.
When facing walls and floors with ceramic tiles, you need to achieve a convenient protrusion length from the wall of the water pipe.
The outlet of the water pipe must be such that a stopcock can be installed.
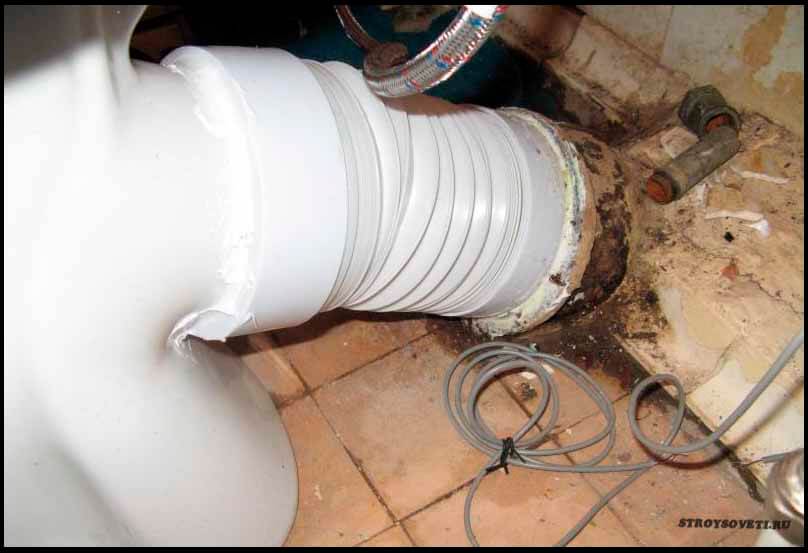
The sewer drain can protrude from both the wall and the floor. The sewer socket must provide a tight connection with the corrugation.
Installation on ceramic tiles

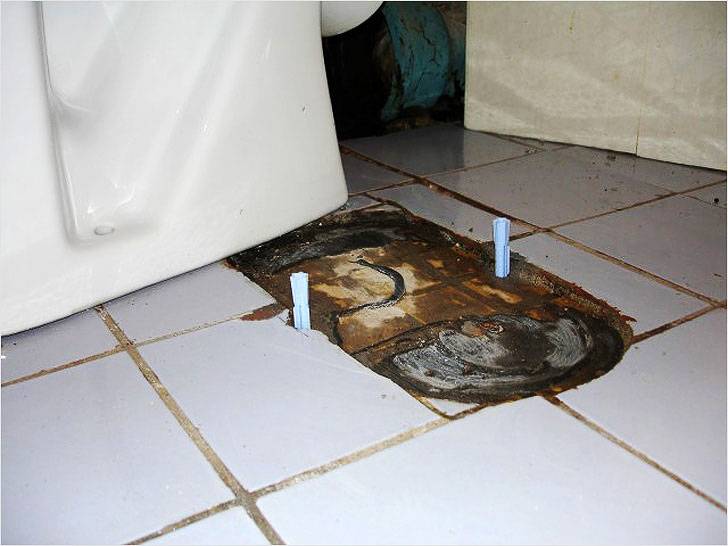
In modern apartments, the floor in the bathroom is usually made of tiles. Then the plumbing has a backlash in the case when the tiles are not laid by level and has differences. Correcting such a defect is the most difficult. Indeed, in order to get rid of the staggering plumbing fixture, you must first eliminate the unevenness of the floor. It is impossible to do this without dismantling the tiles.
Therefore, to begin with, the problem is eliminated by placing a plastic gasket under the base of the plumbing fixture. Such devices are sold in hardware stores and are quite inexpensive. If this option does not bring the desired result and the shakiness persists, the tiles are dismantled and the coating is laid again.
Important!
Silicone sealant is sometimes used as a gasket. They coat the area of the tiled floor where the device should stand. When the material is completely dry, install it. This method helps to temporarily solve the problem of a staggering device.
Device Features
Before proceeding with direct installation, it is worth getting acquainted with the varieties of toilet bowls. They can be conditionally divided according to such features as the shape of the tank, the shape of the bowl and the tank, the material of manufacture, as well as the angle of the drain.
Tank shape
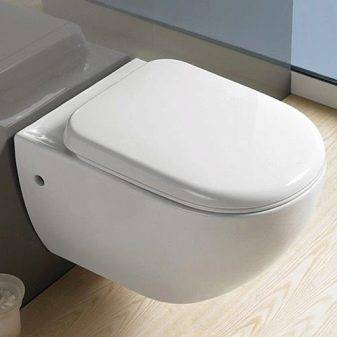
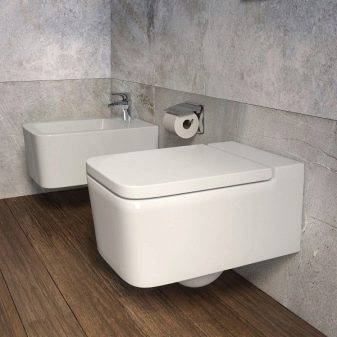
- Compact - this type is in the toilet of each of us. It is easy to maintain, and washes water more quietly than other types. But it has little pressure. The tank is mounted on a special ledge, bolted to the back of the toilet and adjoins close to the wall.
- The monoblock is a single whole, a bowl and a tank. They cannot leak at the joints. But if the tank or bowl is damaged, the device must be completely replaced, because you cannot disassemble them into separate parts. In addition, the model requires more space than a compact or mounted.
- Separate - occasionally found in old houses. The barrel is attached almost under the ceiling. Connects to the bowl with a long pipe. This design has a powerful water pressure when draining. Takes up less space due to the high location of the tank. It is still produced, but it costs a lot, because it comes as an exclusive product in retro style.

bowl shape
- Visor - the most commonly used. The water leaves smoothly, at an angle, so unpleasant odors do not linger, just like the contents. The name comes from the ledge, which prevents water from splashing during flushing, and provides the right slope for flushing from the walls of the toilet.
- Funnel-shaped - there is a funnel in the center of the bowl, which is why flushing occurs very quickly and thoroughly, but it protects against a splash worse than a visor.
- Dish-shaped - an outdated look that is no longer available. Inside the bowl there is a flat shelf for the accumulation of defecation products. Although this design was splash-free, it was only cleaned under running water. Another disadvantage of the species is the rapid spread of the smell.

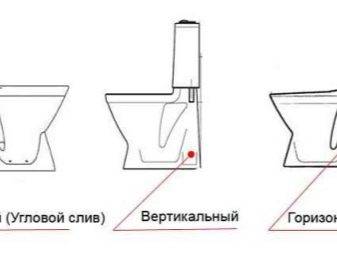
Drain angle
- Oblique - suitable if the sewer outlet is at floor level or slightly higher. The angle of inclination can be different - 30, 40, 60, 75 degrees. Pick one that fits well.
- Horizontal - convenient if the drain pipe is hidden behind the wall. It looks like if the sewer outlet is 10-15 cm above the floor.
- Vertical - was common in houses with sewerage in floors. If the sewer outlet is directed upwards, and it is hidden in the floor.
Regardless of how you are going to fix the toilet to the floor, you need to do some preparations first:
- Prepare the installation site. Clean and degrease the tiles or remove the old toilet and level the surface.
- Assemble the cistern before installing the toilet bowl (refers to the compact). Follow the manufacturer's instructions that come with the model.
- If you are connecting to an old cast iron riser, dry and clean it first in order to avoid leakage problems in the future.
- Prepare in advance all the tools for assembly and installation.
Taffeta fastening
This method is usually used if the floor is bathroom wooden. Taffeta is a substrate made of wood about 3 cm thick, plumbing fixtures are attached to it. Since the bathroom is a room with high humidity, the wooden stand must be treated with drying oil.


Taffeta is mounted using anchors. Usually they are driven in in a checkerboard pattern so that they protrude a couple of centimeters.
The recess for the toilet is filled with cement and then taffeta is installed there so that the anchors are at the bottom. It turns out that the surface of the taffeta should practically not protrude above the floor, but be flush with it.
The solution should harden well, for this the toilet is left alone for twelve hours. After that, the installation can be continued. The equipment is additionally fixed with screws. In this case, it is imperative to use rubber washers. Then the surface of the device will not be damaged when fixing the screws, that is, when they are tightened.
Experienced craftsmen recommend lubricating the screws with graphite or grease before installation. Then, if necessary, it will be very easy to take them out. Instead of a piece of wood for taffeta, you can use rubber with a thickness of 0.5-1.5 cm. A rubber rug is ideal for this. The substrate, made in this way, should be a couple of centimeters smaller than the toilet support.
How to properly install and fix the toilet
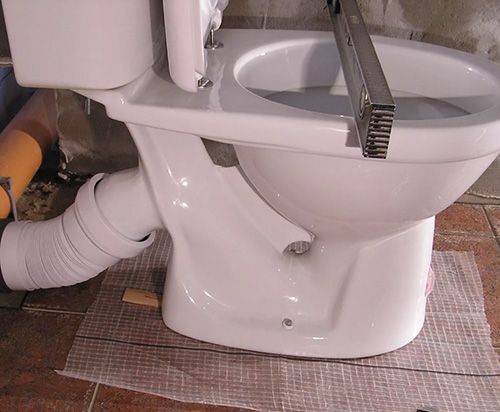
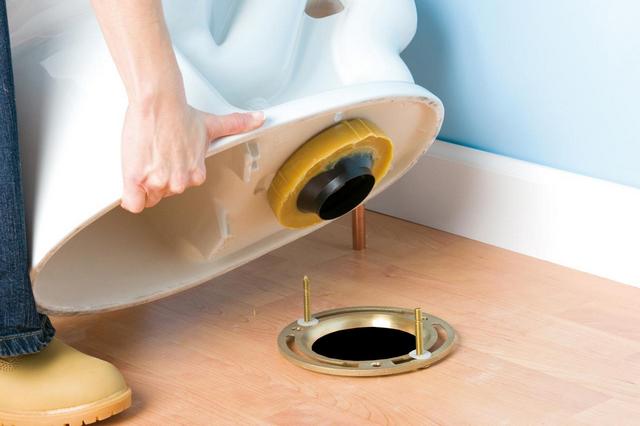
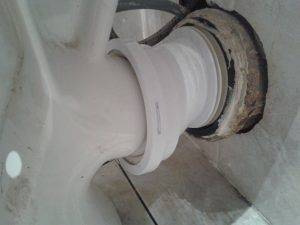
Before proceeding with the installation, you need to make sure that the connecting link between the toilet bowl and the sewer pipes allows you to mount it in the right place. If a flexible corrugation is used, there will be no problems.If a rigid pipe or elbow is used, then it is necessary to first put them in the working position, and, if necessary, adjust them to size, cutting off the excess. This adjustment is carried out with any method of fastening.
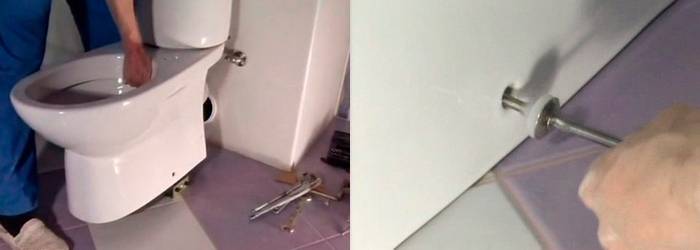
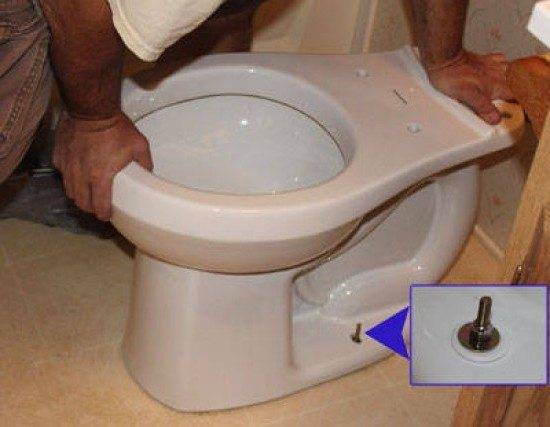
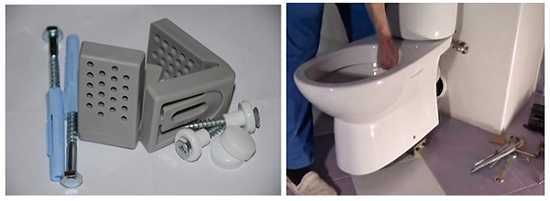
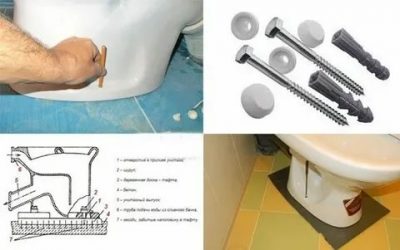
When buying, make sure that bolts are included with it. for fixing a toilet. Otherwise, you need to purchase the kit yourself.
Check that the diameter of the dowels and bolts matches the hole in the base of the toilet. The bolts must be provided with a rubber gasket under its head.
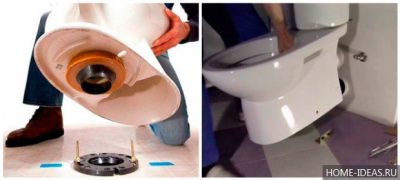
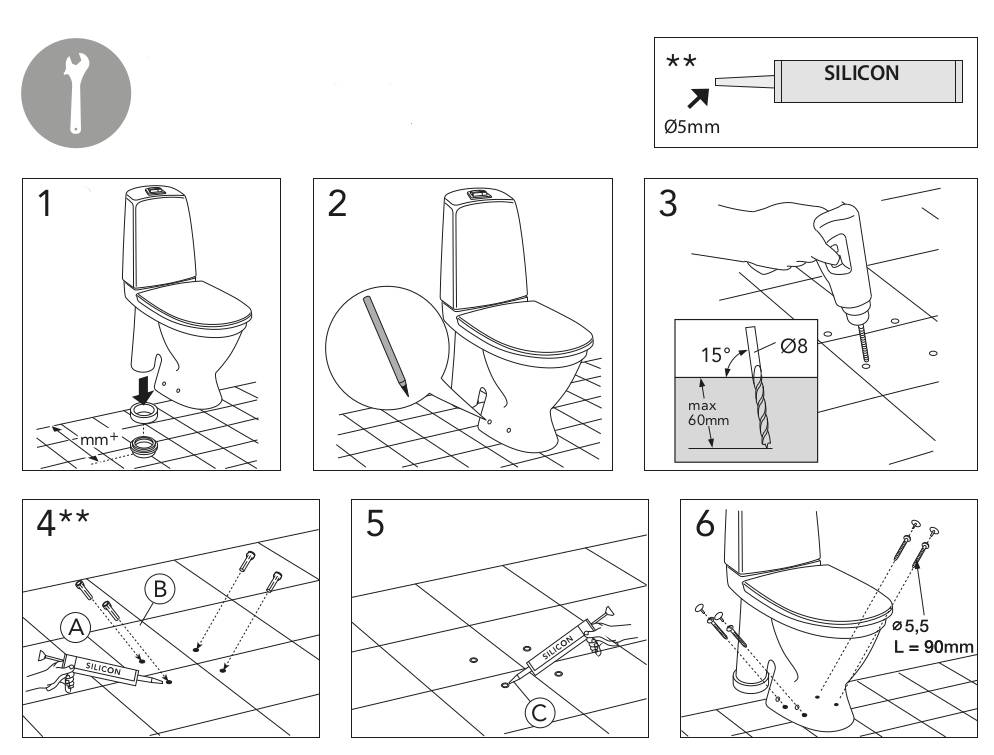
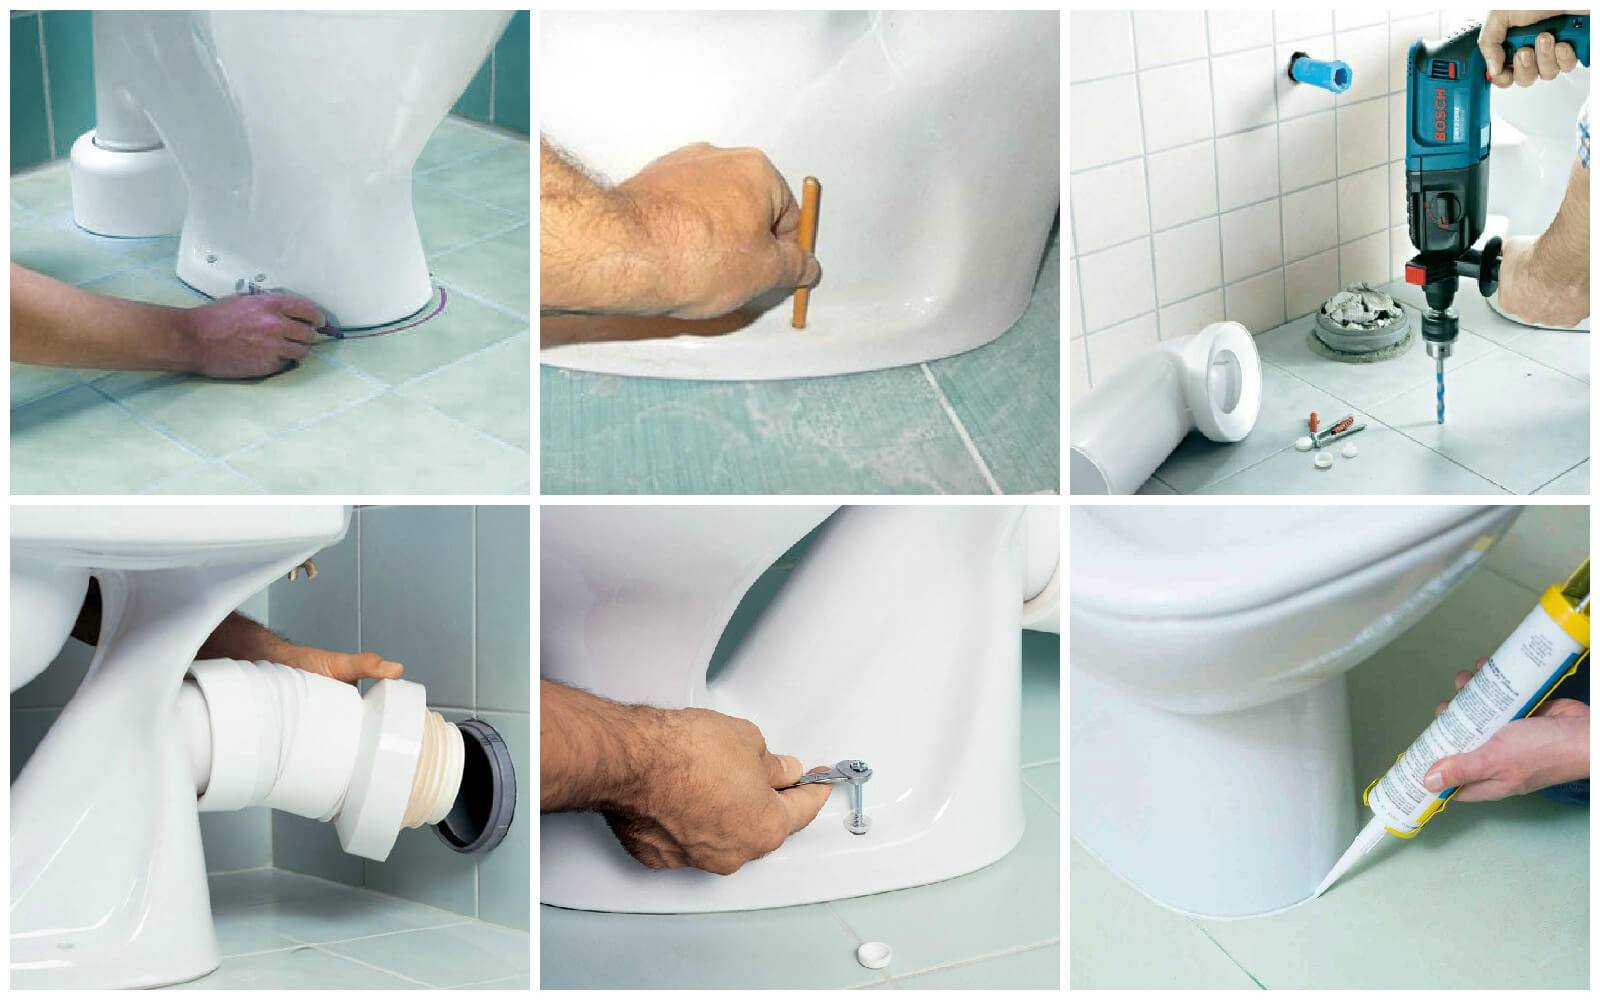
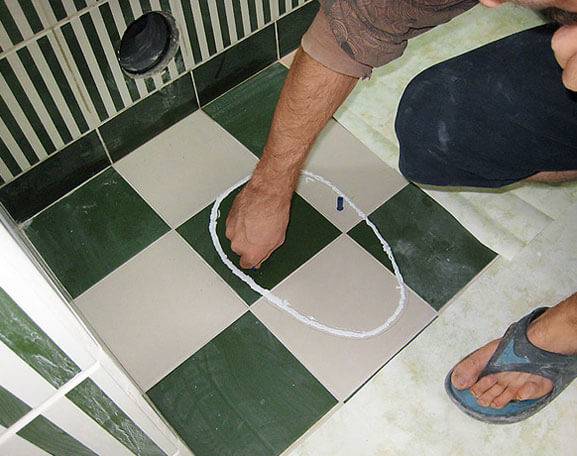
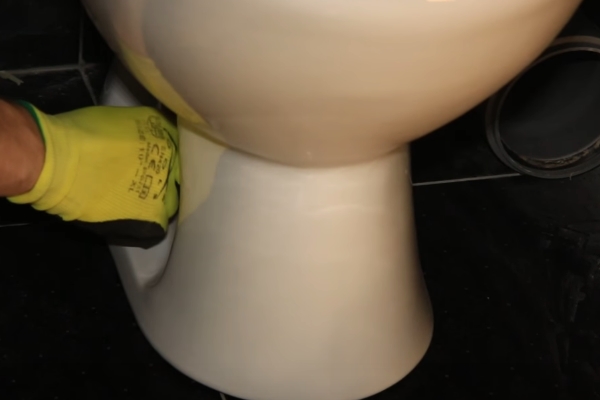
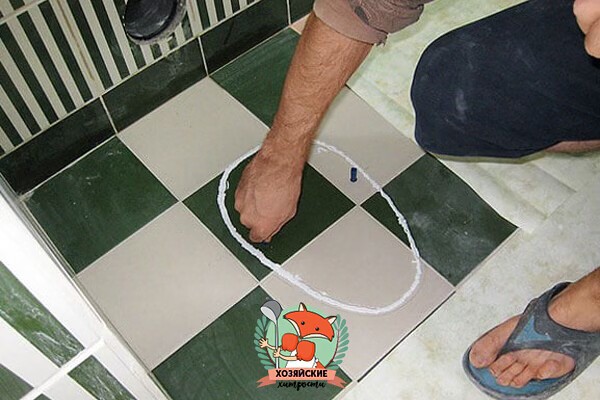
To fix the toilet on the tiled floor, it is installed in the required position and the future holes are marked. The toilet bowl is removed, then with a drill in the normal drilling mode, holes are drilled with a diameter indicated on the dowel, to a depth not less than the length of the dowel.
It is necessary to drill holes in concrete (not in tiles) at a slight angle with the drill moving inward, since the shelf on the toilet leg, for which it will be attracted, also has a certain slope.
- Drilling tiles. For drilling tiles, drills with special soldering for tiles are used. Do not use drills for an impact drill or hammer drill. After the tile has been drilled, concrete drilling can be continued in the hammer drill mode with a concrete drill bit. If the drilling depth is large, it is necessary to allow the drill to cool down.
- Drilling porcelain stoneware. For drilling porcelain tiles, use porcelain stoneware bits. Because small diameter bits do not have a center drill, a jig is used to hold the bit in place. It is made from a piece of board by drilling holes in it with a diameter corresponding to the crown.The conductor is placed over the marked hole, a drill with a crown is inserted and a small recess is drilled. After that, the conductor is no longer needed.
- Cooling of the crown is carried out by pouring a small amount of water directly onto the drilled recess and around the future hole.
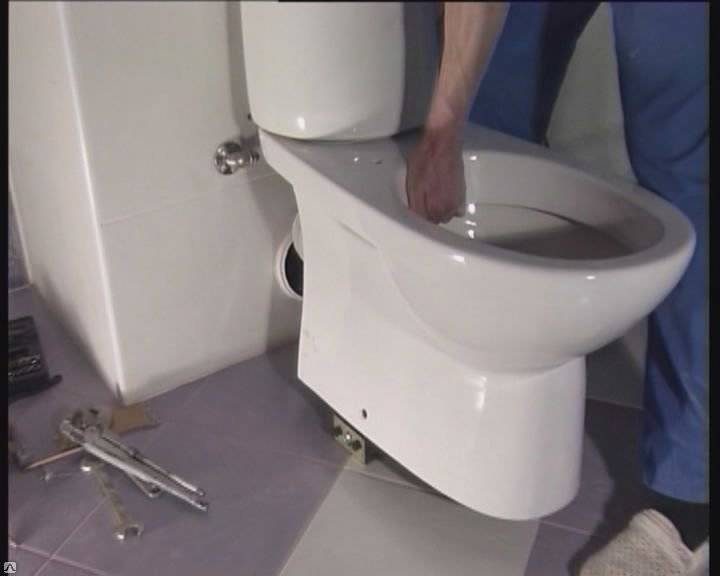
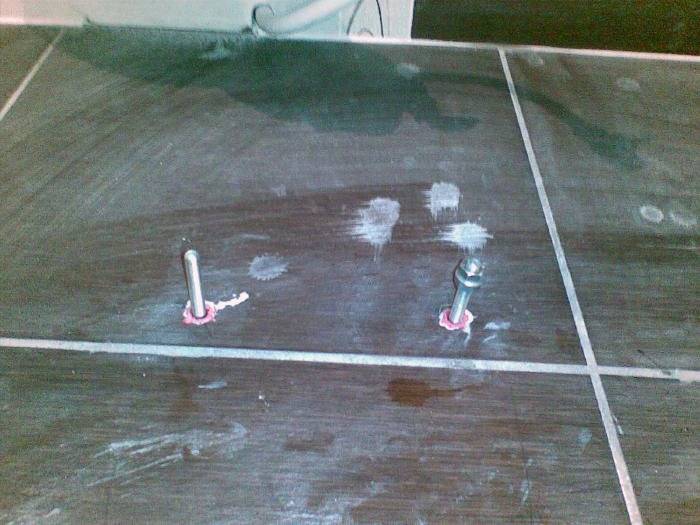
When the holes are ready, dowels are inserted into them, a toilet bowl is placed on top and bolted to the floor.
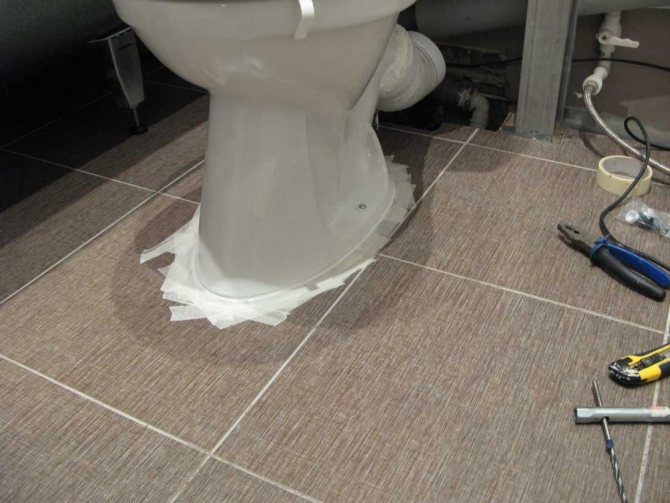
Some experts advise using a rubber gasket between the tile and the toilet. It will serve as a kind of damper, which will ensure a more uniform fit of the toilet bowl to the tile and close possible gaps. This gasket must be cut exactly to the shape of the mounting surface.
Clear sealant can also be used to seal gaps. It is pre-applied to the bottom of the toilet, or they pass along the bypass after installation.
Now it remains (if necessary) to ensure the tightness of the outlet element at the junctions with the toilet bowl and the receiving sewer pipe with ferrules, connect the water supply, set up the drain and the product can be used.
How to attach a toilet to a tiled floor
There are 2 ways to fix the toilet to the floor:
- Open. Installations are reliable and installation is simple. But inferior in aesthetic appearance, such a toilet installation design is clearly visible. The advantage is that it takes less time and effort to install the structure.
- Closed. Here the installation will be inside, so it is not visible. When buying a product, you need to specify in advance whether it is possible to install such mounts. The installation process is very similar to the open model.

Materials and tools
For fastening you will need the following tools:
- Drill and drills.
- Screwdriver Set.
- Marker.
- Sealant.
- Staple.
- Wrench.
- Kern.
- A hammer.
- Pipe to drain water.
- Hose for water intake.
What can you attach
Types of installations will differ from the selected method (open or closed). But the material that covers the floor in the toilet also plays an important role. Most often it is a tile, under which there is concrete. Therefore, the best elements will be:
- Dowel. There are a lot of product varieties. The most common is the dowel-nail. It is most suitable when working with concrete or brick. It can be unthreaded (like a regular nail) or threaded.
- Anchor. Also a great selection of products. Like dowels, they are suitable for brick and concrete. The anchor is mechanical and chemical (the latter involves filling the hole with glue for durable installation).
- Self-tapping screw More suitable for wood. But it can also be used for concrete. It is necessary to choose steel, coated with zinc.
For the closed mounting method, the basic settings are the same. But if for some reason the surface cannot be drilled, the following elements are suitable as fasteners:
- Silicone adhesive.
- Liquid Nails.
- Epoxy resin.
How is the toilet attached to the floor?
If you decide to install the toilet with your own hands, it is important to understand how it is attached to the floor. After all, as a rule, the installation of this product is already done when the floor is actually ready for use.
This means that during installation there is a risk that the floor may be damaged.
Therefore, it makes sense to consider existing methods that allow you to fix the toilet bowl on the floor with your own hands.However, it should be borne in mind that the choice must be made, given the material from which this floor is made. And here it should be remembered that it is possible to fix the product if there is already a connection to the sewer, and the pipeline has also been prepared.


There are three methods.
Installation Features
Scheme of installing a toilet bowl in an open way.
Before fixing the toilet, it is important to read some recommendations so that the work does not entail the need to dismantle the device to reinstall it. Experts recommend using screws when installing the toilet, as they are considered the safest.
This will reduce the risk of various kinds of problems associated, for example, with high humidity.
Instead of a pencil, you can use a regular marker, but the technology for using it is no different from working with a pencil. In the process of drilling tiles, you need to monitor the temperature of the drill, not allowing it to heat up excessively. During the installation work, it is necessary to exclude the possibility of water entering the holes with glue, since the impact of these components can cause a violation of the properties of the glue.
Before starting work, you need to study the installation instructions that come with the new plumbing. If you violate the installation rules, this can lead to premature breakdowns or failure of various elements of plumbing equipment.
The cost of installation depends on the diameter of the pipes to be installed. Some home craftsmen are trying to save on installation due to this feature.However, it is worth considering that if you use pipes with a smaller diameter than expected, then they will let water through much more slowly than required, this will lead to a disruption in the normal operation of the toilet bowl. These circumstances contribute to an increase in the risk of blockages, when flushing, water can even overflow over the edge of the toilet bowl. That is why, before installing the device, you need to take into account the recommended size and diameter of pipes for a particular model.
Problems during operation may be caused by the uneven location of the device, for this reason, the installation must be accompanied by the alignment of the equipment horizontally and vertically, which applies not only to the toilet itself, but also to the flush tank.
If the installation of equipment in the space of the bathroom is supposed to be carried out on its own, then you need to make sure that the cement screed is strong. If the floor strength is insufficient, it is recommended to dismantle it and refill it. This guarantees high-quality fastening of the toilet bowl to the floor surface. If the device is installed on the surface of a cement pedestal, then all joints on it are recommended to be properly sealed. If these works are carried out correctly, then the fasteners of the system will be preserved for a long time. In this case, the product will be able to serve the allotted time without the need to resort to repairs.
The sealing process must be accompanied by a particularly careful connection of the sleeve with the fan pipe. This area will have to be treated with red lead, and then compacted using a resin strand. Such a barrier will create an obstacle to the appearance of foreign odors. The success of the installation of the toilet bowl depends not only on compliance with the technology, but also on the quality of the product.


![[instruction] do-it-yourself toilet installation | video](https://fix.housecope.com/wp-content/uploads/e/0/5/e05c3aaa569c15a65a76abf551b1139c.jpg)