- Float systems
- Water pipes
- Drain mechanism
- Fastening depressurization
- Possible malfunctions and their elimination
- float gets stuck
- Reinforcement with conventional float
- Adjustments
- Recommendations
- Level control
- Features of adjusting various types of float valves
- Float on the lever
- Float on vertical rails
- Installation
- Finally
Float systems
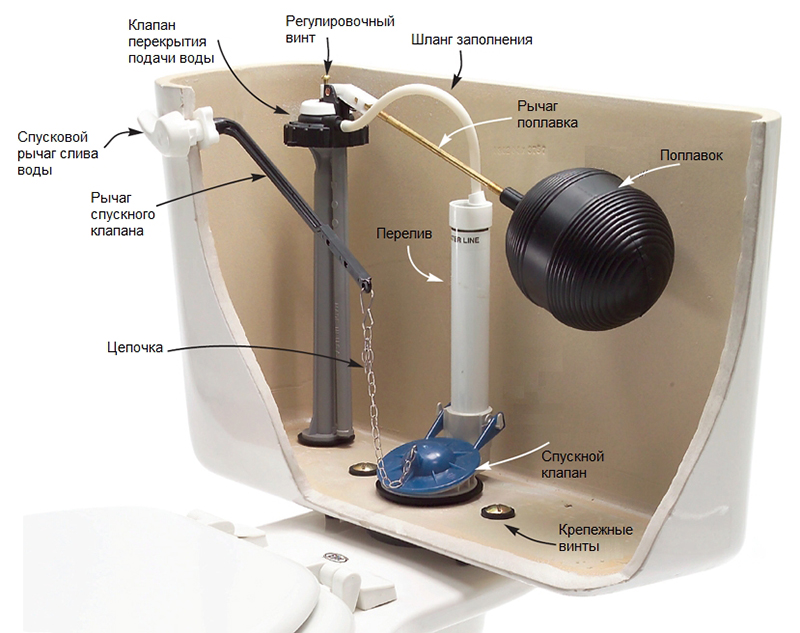
The principle on which the armature works for toilet cisternis the same for all models. The design has a non-sinking part that can move in a vertical plane. This part is attached to the water supply point. When its level in the tank drops, the element lowers and turns on the tap. As the tank fills, the float rises and blocks the water supply.
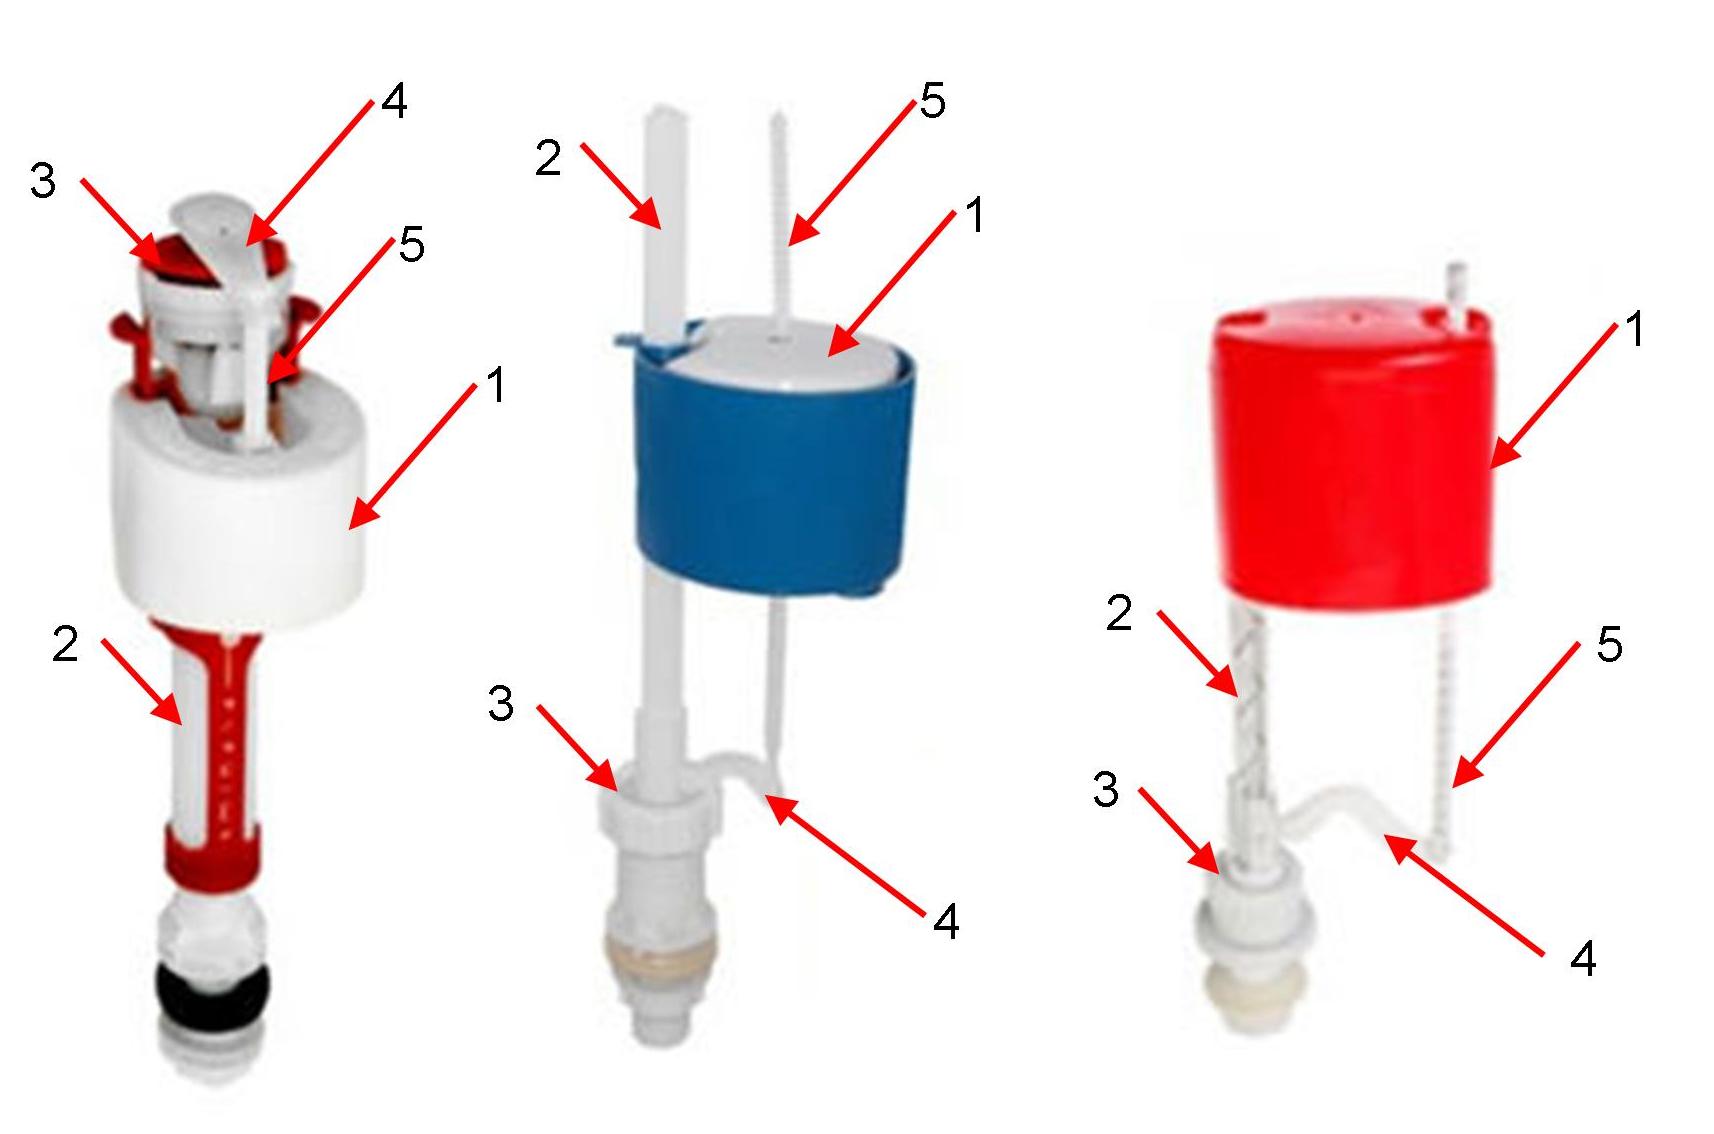
There are three main types of structures:
- Croydon is the oldest model of fittings used on toilets. There are present:
- opening valve
- there is also a float that measures the level of water in the tank
- lever connecting, construction with plumbing
- in the design of the crane itself there is a vertical piston. When moving up, it blocks the flow.
This type of reinforcement has not been produced for a long time, however, it can be found at old facilities.The advantage of this design is that urgent repairs can be made with the help of improvised items - lace, elastic bands and much more.
2. Piston. Here, the area responsible directly for the flow of fluid is located horizontally. The hole that fills the tank is blocked by a piston and a sealing gasket. The most common failure in such a mechanism is the wear of the soft sealing part. Because of this, the fittings cease to fully fulfill their functions and water constantly oozes into the toilet.
3. The most modern is the locking mechanism with a diaphragm valve. The essence of his work is that the water hole is closed by a membrane, on which the float lever exerts pressure. Such a device helps to protect the toilet bowl and tank from all kinds of deposits due to dirty water. However, the membrane that acts as a filter quickly wears out and fails.
“A miser pays twice” is the proverb. This expression is absolutely accurate to fittings for tanks. Often on sale you can find all-inclusive kits with the cheapest parts.
Therefore, when purchasing something, you should pay attention to the manufacturer and the general price category. So, in a system of two elements of valves, problems may arise with each of them.
Water pipes
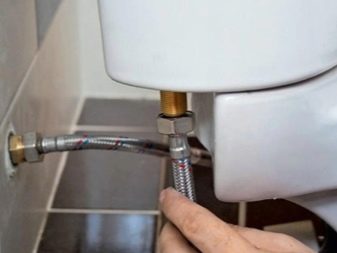
Gaskets and membranes deteriorate in the fluid supply kit. To replace, you need to disconnect the tank from the main pipe, unscrew the plug and remove the lid from the tank. Then disconnect the float lever, unscrew the fixing part. After the piston is removed, the gasket or membrane is replaced. Next, put everything back together in reverse order.
Often there are cases of the need to completely replace the float valve. In this case, the tank should be freed from water. After disconnecting from the float, unscrew the outer and inner fixing nuts. If the liner is lower, then this may not be very convenient due to the tight fit of the toilet bowl to the wall.
Drain mechanism
- Part of the structure may leak. In this case, you should check the water supply - no excess liquid enters the tank, and subsequently overflows into the drain pipe.
- The pear does not fit snugly against the outlet. This occurs when the material is deformed, contaminated or temporarily worn. With an external examination of the element, it is easy to find out what exactly the problem of the drain point is.
- The button is pressed hard or the water does not work. With such a problem, it will be necessary to replace the flap valve in the drain siphon or to strengthen the fixation of the moving lever. Also, the drain structure in the tank can be deformed and have friction of various parts. Check it this way - you need to put the reinforcement on a flat surface, holding the button in the attachment points, press and release the button. The move must be absolutely free and easy.
Fastening depressurization
Often there are leaks due to wear of the gasket between the tank and the toilet. In this case, water will seep onto the floor. The process of dismantling plumbing is laborious, so before starting work, you should make sure that this particular breakdown is present, and not problems with fittings. First you need to dry the joint of the tank and the toilet. Then rinse with water several times. If moisture has appeared in the area of \u200b\u200bthe seam, then the reinforcement has nothing to do with the gasket.
The work should be carried out in the following order:
- Shut off the water supply and disconnect the external hose from the tank.
- Unscrew, if necessary, the valve start button and remove the cap from the tank.
- Disassemble the siphon. In some models, it is divided into parts without the use of rigid clamps.
- Unscrew the bolts that secure the container to the toilet.
- Remove the remnants of the gasket from the joint, clean it, degrease it, wipe it dry.
- Then you should put a new sealing part and assemble the toilet and fittings in reverse order.
Sobolev Yury Alekseevich
Possible malfunctions and their elimination
Float system malfunctions are the most common causes of toilet inoperability.
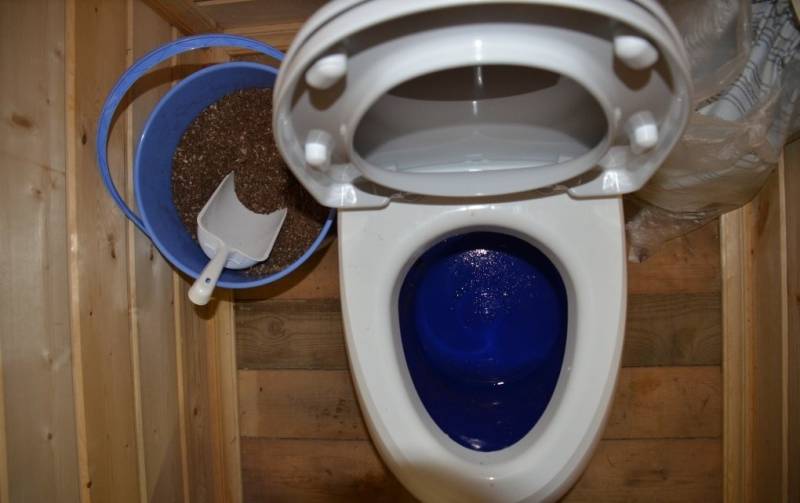
Especially often, such breakdowns are caused by the use of water from a well, which is not purified and fed into the toilet flush tank.
Among the most common faults are the following:
Float adjustment scheme
- Leakage of the spherical element. With such a malfunction, there is a constant outflow of water from the drain tank into the toilet bowl. If such a malfunction is not noticed in time, then the cold water meter during such a leak will not miss the opportunity to update all the numbers in the row. Therefore, in the event of a breakdown, you should turn off the water supply to the toilet:
- Remove float.
- Determine the location of the leak.
- Dry the float.
- Treat the leaky place with silicone sealant so that part of the substance gets inside the float.
- Keep at room temperature for at least 4 hours.
- Install the float in place.
- If it is possible to replace the damaged float with a new one, then this will be the best option. You can buy a new float to replace it at a plumbing store.
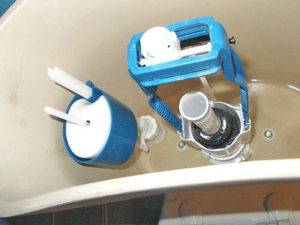
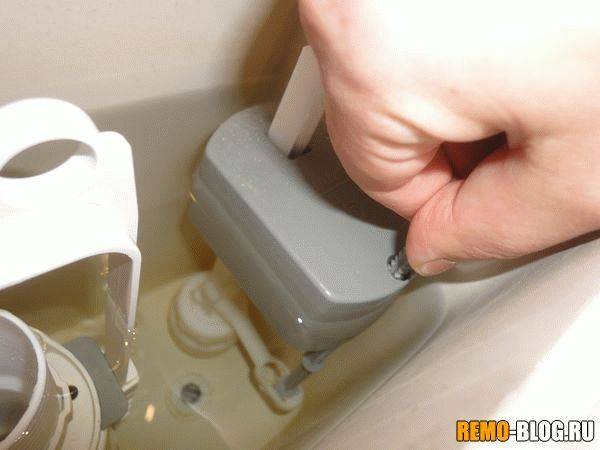
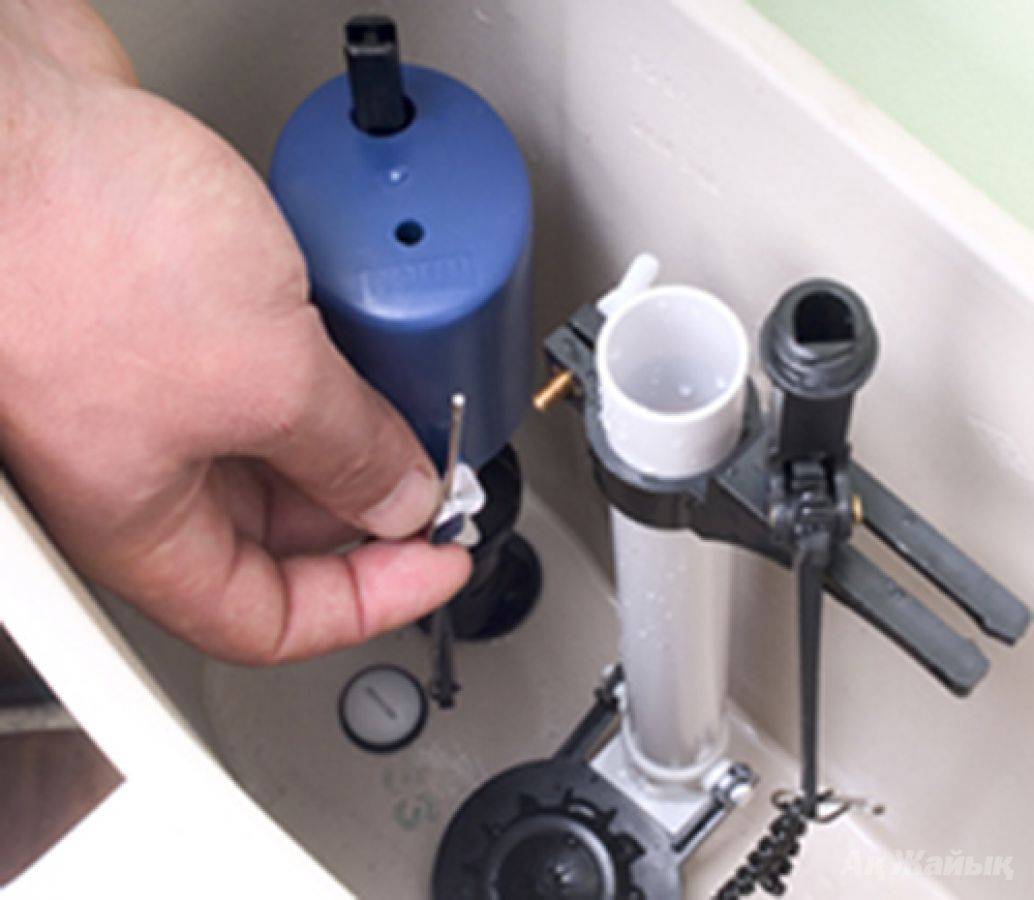
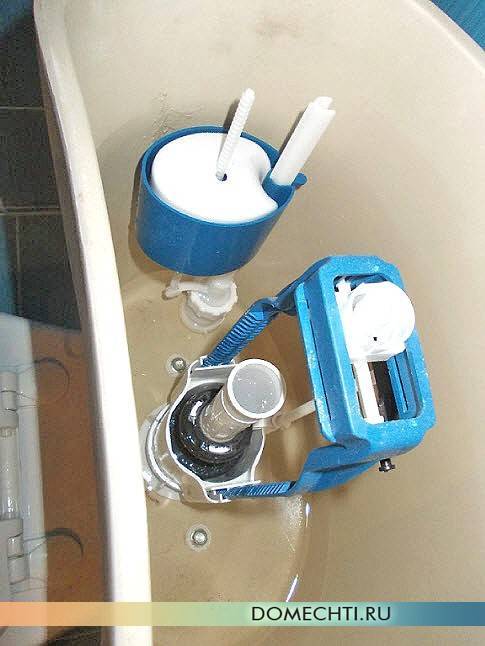
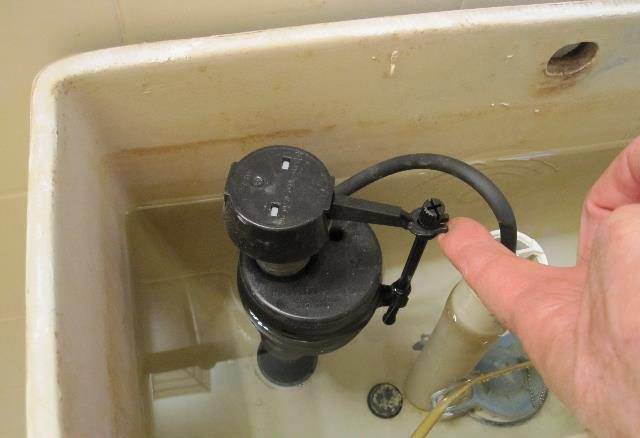
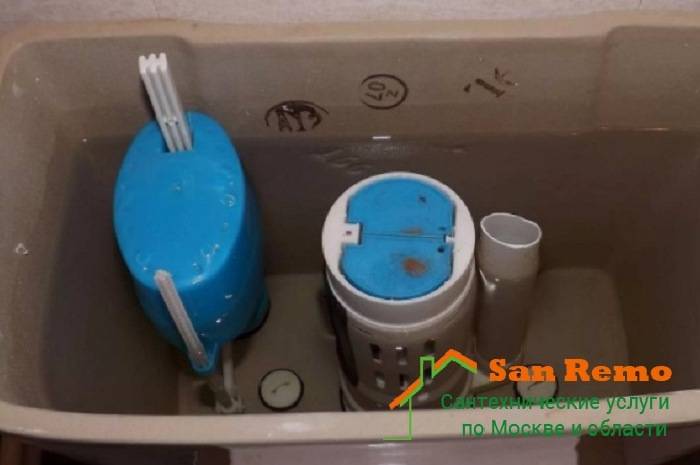
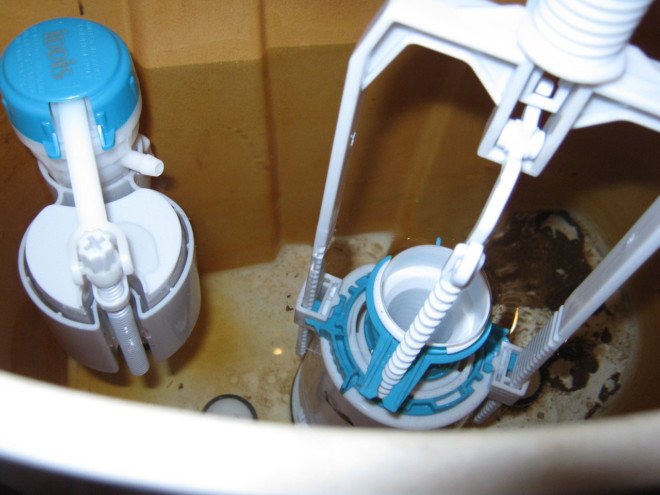
- If the float is intact, and water enters the toilet, then this malfunction may be caused by a malfunction of the spool. This breakdown is more often observed in devices with a glass-shaped float. To eliminate the malfunction, it is necessary to dismantle the float mechanism, for which you should:
- Remove the cover by first unscrewing the threaded washer that holds the drain button.
- Disconnect the water hose, making sure to turn off the water supply to the domestic plumbing system before doing so.
- Unscrew the nut holding the fitting and remove the mechanism.
The valve part of the float mechanism must be inspected. Often, debris and dirt can be the cause of a malfunction.
Such a malfunction is eliminated very simply. Simply clean the valve parts and seat with a sponge.
If the leak is caused by mechanical destruction of valve parts, then the entire valve-float mechanism must be replaced as an assembly.
Replacement is carried out in the reverse order of removal, while being careful when tightening the float mechanism nut
If you apply too much force at the same time, you can easily damage the ceramics of the tank, which will cause even more repair troubles.
After installing the tank lid and connecting the hose, water is supplied and a leak test is carried out at the installation site of the float mechanism. and also check the performance of the drain mechanism of the tank.


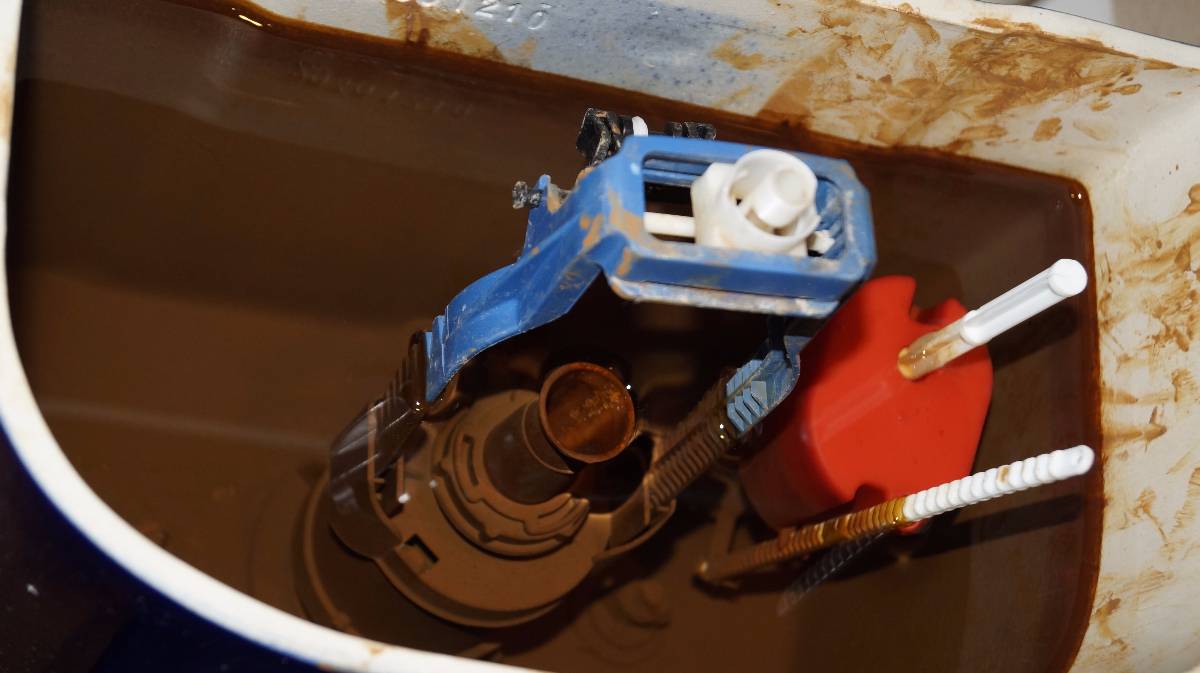
float gets stuck
Good day to all. The problem is this: after the descent of the water, the float does not go down with the water. This does not open the mechanism for launching water into the tank. To fill it, you have to hit the tank a little.The system is as follows: the float is placed on a bracket along which it moves up and down. After inspection revealed the following reason, the water is hard, from this plaque forms on the surface of the bracket, the gap between the float decreases. Question: since replacing the system will help for a short time, tell me what to do so that each time you do not drum on the tank?
Register to vote!
If your water is so hard that deposits form on the surfaces, this threatens not only the mechanism in the tank. There are also mixers, ball valves, valves of other devices (column, washing machine, boiler). The way out of this situation is pragmatic. Put coarse filters at the water inlet to the apartment. Or pick up other fittings in the tank, not picky. Lots of designs.
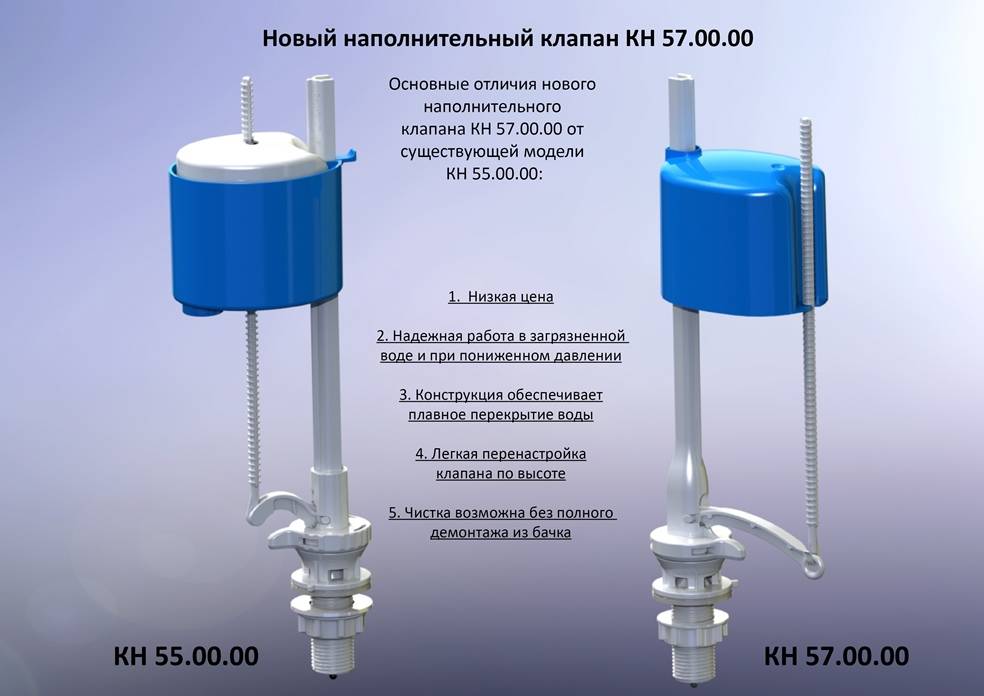
In this case, I would still advise you to pick up a tank with a different mechanism. If pretty good barrels, in which the float is placed on a thick wire. At the same time, the weight of the mechanism is above the water, which significantly reduces its wear.
I also had a problem with the tank. The valve stopped shutting off the water after flushing. And I have counters and I had to turn off the tap on the tank. And not only hard water is to blame, but also the rust that comes with water after it is often turned off. What only the husband did not do to fix it, and the plumber advised me to buy not a new tank, but a filling for it. The old one worked for me for about 8 years. The filling is inexpensive - within $ 10. Husband measured everything to fit. Now the tank is running like clockwork. I advise you to also buy a new filling, because you probably have the old one for a long time and where is the guarantee that something will not fail again.
Awaiting moderation 12.01.2013 02:17
Plumbing is a delicate matter, it would seem a trifling problem, but it can do a lot of trouble. Howl, for example, your float does not close the valve and water constantly flows into the toilet, and this is money. There may be several reasons: - the counter nut of the float valve device is not clamped and the float unrolled, a foreign body got on the valve mechanism membrane, as a result of which the membrane is not completely closes the inlet of the valve mechanism, the large length of the float karamyl, as a result of which the float touches the wall of the toilet barrel and does not fall to the bottom. from a foreign body in front of the tank, put a filter, in all other respects, carefully sort out and eliminate the malfunction.
There was a problem at work. They just sprinkled the stem and float with WD-40, having previously cleaned it of plaque. In general, now you can buy separately a good filling valve of another system like a lever.
Awaiting moderation 18.04.2017 11:20
We have the same problem. And it's not about the water. The fact is that the rod along which the float moves is not in the middle of the float, but on the side. Therefore, when the water lifts the float up and presses on it, the float on the stem is skewed. Here he wedges. I think that this is a flaw in the system, and the way out is to replace the filling system (float).
Awaiting moderation 16.06.2017 11:46
Absolutely agree with the previous adviser. I myself have the same problem, the float simply warps due to the fact that the stick (bracket) on which it rests and rides up and down is simply not long enough and presses its end on the float.There are three ways out: replacement of the float system; extension stick bracket; lubrication of the system with a moisture-resistant substance such as WD after removing rust or plaque (the latter option does not give a 100% guarantee).
Awaiting moderation 05.08.2017 09:57
We change the 3rd tank and the same situation, the float gets stuck on top. We unscrew the cover and shift its side. We touch the float and it immediately falls down. and the water starts to rise. We bought a new toilet bowl with a tank again and after 2 weeks, the same situation. What can be done. I can't buy all the toilets
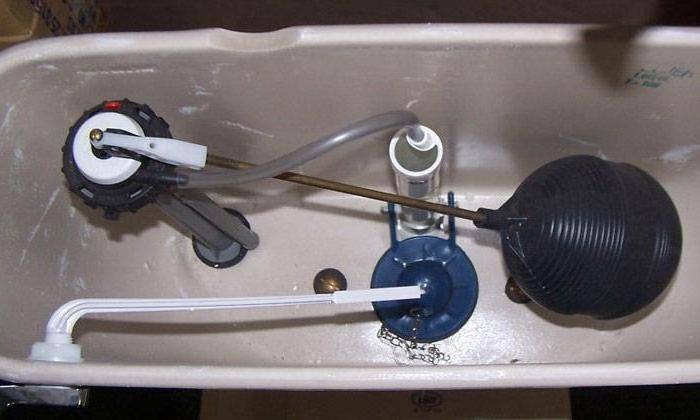
Reinforcement with conventional float
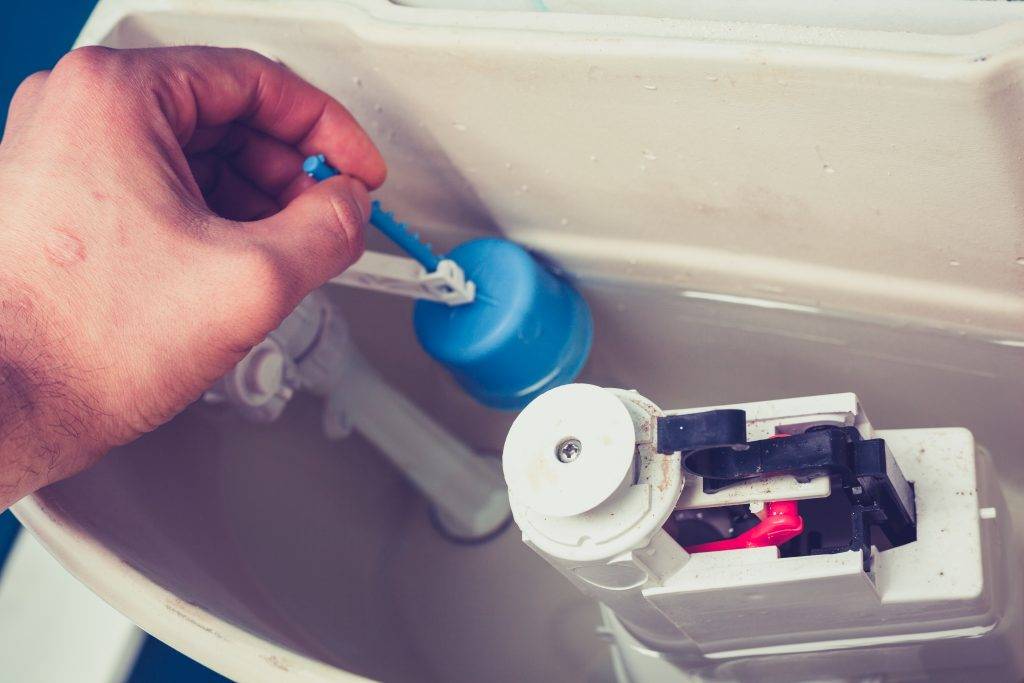
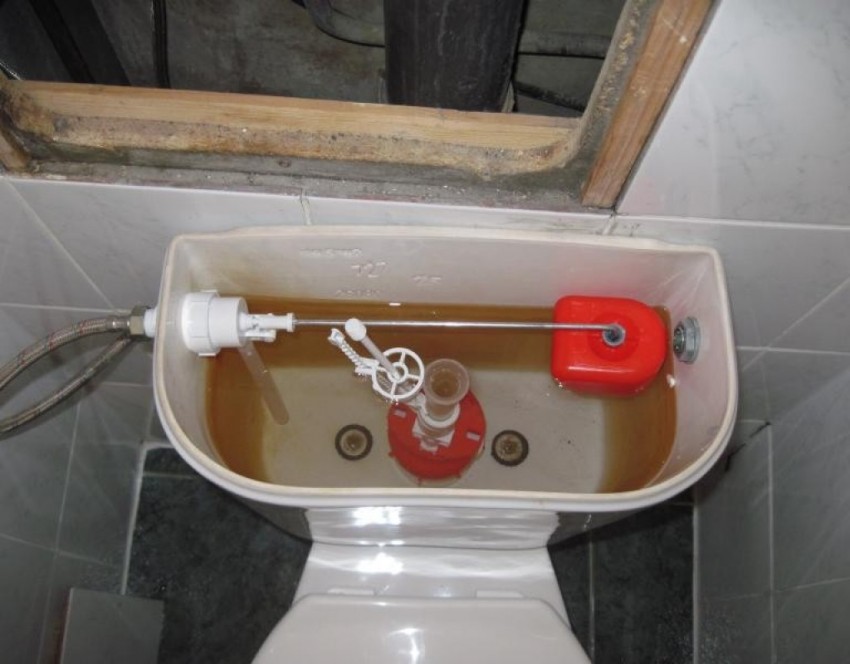
Another common version of the armature has a more familiar float on a long or short leg.
In this case, the adjustment of the water level in the tank of your toilet bowl is carried out according to a similar principle - the float should go lower.
As in the first case, let's start by shutting off the water supply and draining the one that was in the tank. Then unscrew the drain plug and remove the cover.
Further, depending on the material of the foot to which the float is attached, there are several options:
- If the mount is made of brass, it is enough to bend it a little;
- On the plastic mount there may be an adjusting screw or a ratchet: both are designed to change the water level.
Be careful when working with plastic tank fittings. They are often fragile, and if the tank is old, then worn
Remember that new fittings are not cheap, and in parts they are sold very rarely.
This does not mean that you should call a professional plumber to work with plastic: it is unlikely that he will treat your property more carefully than you yourself. In addition, the call will cost as much as new fittings.


The filling of the tank made of stainless metal is more durable, reliable and can survive more than one repair. If for some reason you have to change the fittings, choose a metal one and ask the seller what parts for it can be sold separately.
Adjustments
Most toilet problems can be solved with a simple adjustment of the mechanism. Let's see how to adjust the float in the toilet.
To begin with, the float should be brought into the desired position. It depends on the material from which the part is made. The brass lever can be bent. And the desired position is adjusted by raising or lowering the lever. If the latter is made of plastic, then it is equipped with a special adjusting screw or plastic ratchet. The screw allows you to change the bend of the lever. And with the help of a ratchet, the lever is fixed in the desired position. The toilet float on more modern models is adjusted by turning the screw. With it, you can raise or lower the part to the desired level. The higher this element is installed, the more liquid will enter the tank.
Recommendations
Summing up, it should be noted that the problems associated with the leakage of the tank or insufficient water supply to it are practically solved by referring only to the float and valve.
The main problems in the water supply or drainage of the cistern occur due to a malfunction of the float, valve or membrane (gasket).
It is likely to repair the failed part
In cases where this is not possible, it is necessary to replace the spare part with a new one.
When buying a valve, you should pay attention to a number of nuances so as not to make a mistake with the choice. First of all, you need to find out how water is supplied to the tank: the system is installed with a side or bottom connection. The next issue is the flush system itself: push-button (piston), lever or lifting.
Be sure to remember that if there is even the slightest uncertainty in your actions, do not take risks.
Contact a specialist who can make your life easier by solving a plumbing problem quickly and easily.
The next issue is the flush system itself: push-button (piston), lever or lifting.
Be sure to remember that if there is even the slightest uncertainty in your actions, do not take risks. Contact a specialist who can make your life easier by solving a plumbing problem quickly and easily.
I would also like to return to the question of the types of floats: “ball” and “glass”. In the first group, this type of breakdown often occurs, such as the ingress of water into a sealed container. This happens when a crack forms in the ball. The way out of the situation is to drain the water from the tank and seal the hole. Most often, hot molten plastic is used for this, which is applied to the crack. Thus, the ball is “sewn up” and can still last for some time. But, unfortunately, it should be understood that such a measure is not lifelong. Subsequently, you will still have to replace either the ball or the drain system as a whole.
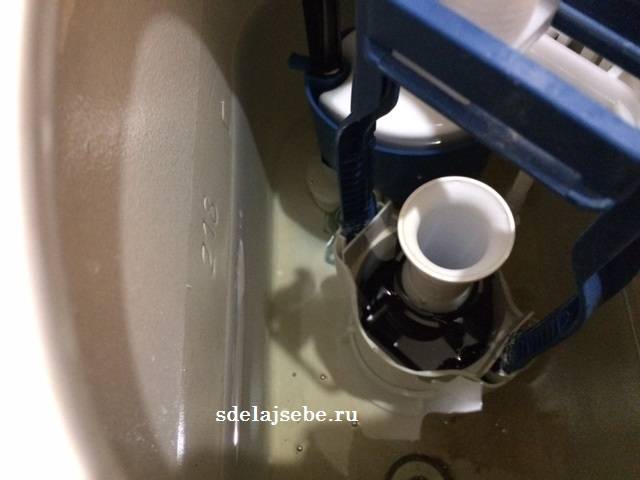
Very often, during operation, the volume of water entering the drain tank exceeds all conceivable limits. Sometimes the problem is associated with an increase in the pressure of the fluid supply to the system.In another case, the plastic tube located inside the tank is to blame, through which water does not flow like a waterfall, but calmly descends down an additional chute, making almost no sound
Thus, if there is a sudden increase in the sound of water intake, pay attention to this small tube
To reduce the risk of leakage through the mounting bolts connecting the tank to the toilet shelf, experts advise treating these places with silicone sealant immediately after assembling the structure. Thus, you will extend the life of these fasteners.
The internal filling and principle of operation of flush tanks of hidden structures is practically no different from the described stationary ones. In addition, their body is always made of high-strength plastic without a single seam.
For this reason, special precautions must be taken
In order for the flush valve in concealed structures to last longer, it is best to ensure that the tap fluid is completely filtered throughout the dwelling, and for flushing the toilet too. Check the water level in the tank several times a year. Despite their high strength, even these designs can leak. And the closed type of installation does not allow timely detection of a breakdown. Also check the tightness of the connection of the tank with the downpipe.


Be sure to have scheduled inspections of your drain a few times a year. Since the quality of our tap water leaves much to be desired, parts can get dirty very quickly. This factor is at the heart of most breakdowns.In order for the float, valve and all their components to serve you as long as possible, wash and clean them at least twice a year. Then you can not only prevent rubbing of the membrane or gasket, but also clogging or mechanical failure of the valve.
A detailed study of the device of the drain tank, the causes of breakdowns and ways to eliminate them allow you to get by with minimal sacrifices in the process of repairing a plumbing device. To do this, it is absolutely not necessary to call a specialized specialist or completely change the drain system - the toilet bowl. You can easily fix such a malfunction with your own hands, without waiting for the arrival of the master.
From the following video you will learn how to adjust the water pressure in the toilet bowl.
Level control
The required water level in the cistern is adjusted by adjusting the float valve.
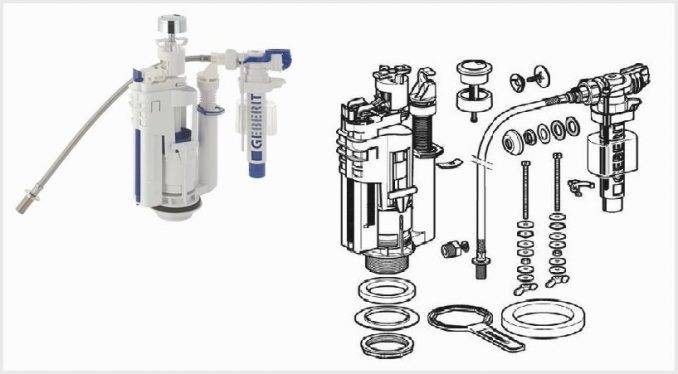
First you need to figure out what a float valve is. This is a device that automatically maintains the water in the tank at a given level. Consists of 3 main parts:
- the actual valve that supplies water to the flush tank;
- a float that controls the state of the valve;
- a system of levers / rods / pushers / guides, with the help of which the float is connected to the valve and controls its state.
Valve adjustment scheme (if necessary). Table for adjusting the height of the valve for discharging water.
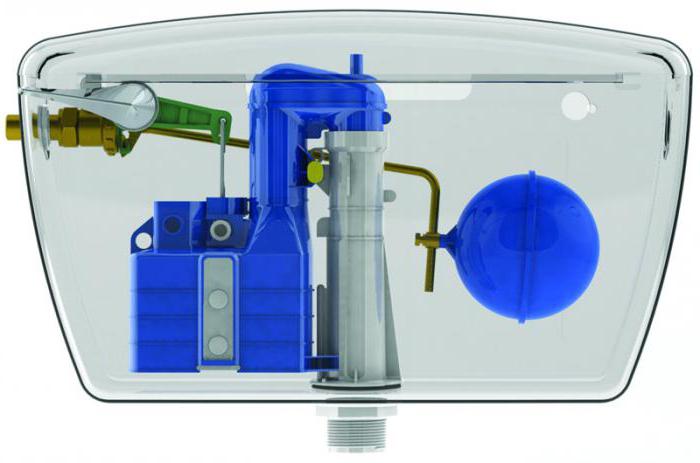
The valve is rigidly fixed to the tank. The float relative to the valve can move freely up and down. They are interconnected in such a way that the valve is closed in the highest position of the float. In all other float positions, the valve is open.To shut off the water supply to the flush tank, you need to raise the float to the upper limit of its free play. For this, the buoyancy force of the water is used.
Tank cycle:
- The tank is empty, the float is down, the valve is open, water flows freely into the tank.
- Filling. The water rises, the float rises, but the valve is still open.
- The float is raised by water to the upper limit of its stroke, the valve is closed. The water supply to the tank is stopped. The float, supported by the force of Archimedes, cannot go down and keeps the valve closed. The flush tank will remain full until someone uses the flush button.
- Drain. Water flows out, the float goes down, the valve opens. After that, the cycle starts over.
In order for the water supply to stop when it reaches the required level, it is necessary to fix the upper limit of the float free play at the same level. This can be done by changing the geometric parameters (dimensions and angles) of the float-valve connection system.
All of the above was of a general nature and applied to all types of float valves. Specific adjustment methods will depend on the design features of the reinforcement.
Features of adjusting various types of float valves
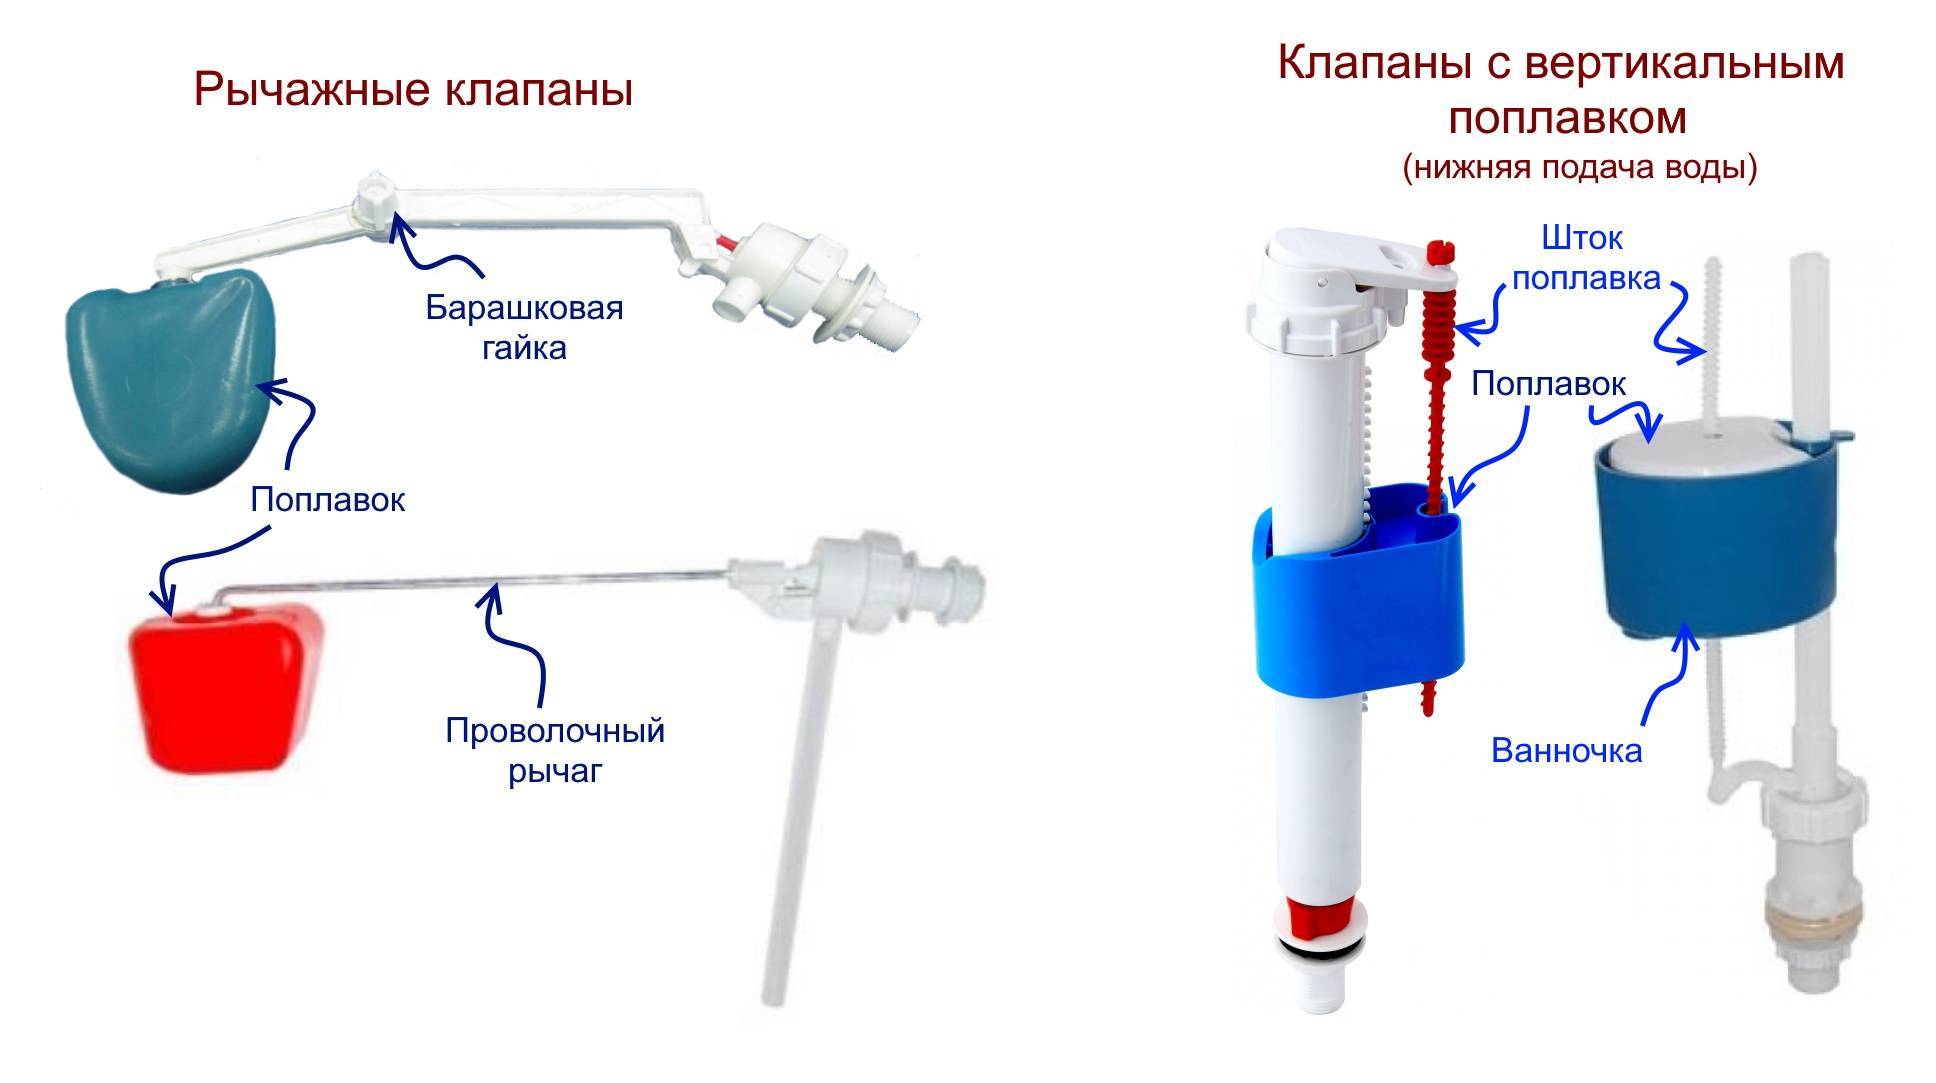
With all the variety of existing PCs, two main types of connection between a float and a valve can be distinguished:
- float on the lever;
- float on vertical guides.
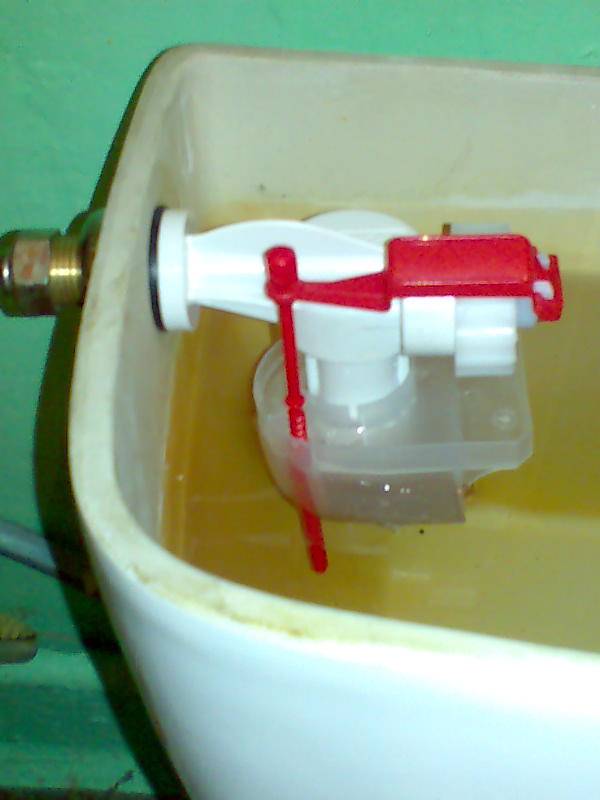
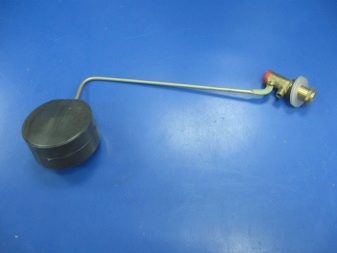
Float on the lever
Regarding the valve the float moves on the lever along the arc. At the top of the stroke, the lever should be nearly horizontal for proper valve actuation. The designs of such levers can also differ from each other.
Float on the lever (photo 1)
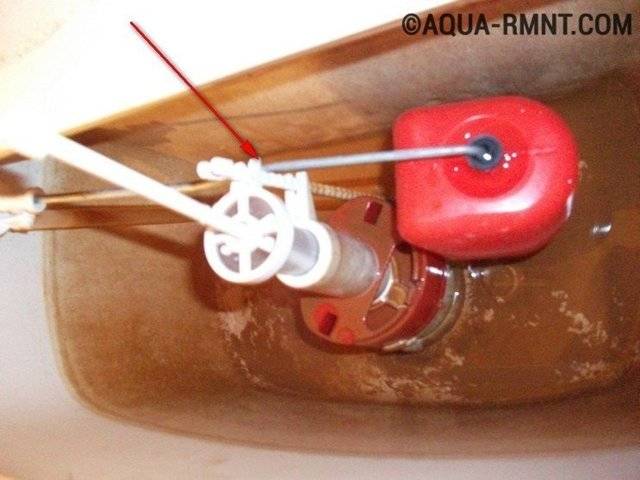
In the simplest version, such a PC looks like this (photo 1):
Adjusting the water level consists in roughly bending the wire lever. To increase the water level in the tank, the lever must be bent up, to lower it - down.
Advantages: simplicity, reliability, low price.
Disadvantages: inconvenience and inaccuracy of adjustment, large dimensions.
Adjustable lever (photo 2)
Adjustment of the water level: the necessary break of the lever is fixed with a screw.
Advantages: simplified adjustment, low price.
Disadvantage: the fragility of plastic (compared to wire) during aging, all the same large dimensions.
Adjusting device with the ability to move the float along the length of the lever. This allows you to more conveniently position the float among other fittings. The water level is adjusted by changing the tilt of the entire lever.


Float on vertical rails
Adjustable lever (photo 2)
In such devices, the float moves vertically along guides and is usually located directly above/below the valve.
This design increases the compactness, but complicates the product, which, of course, affects its cost. The disadvantages include possible jamming when the float slides along the guides. The accuracy of the work is highly dependent on the quality of the product.
If the tank is equipped with a similar PC, then adjusting the water level is reduced to changing the length of the rod / pusher that connects the float to the valve locking mechanism. Adjustment can be threaded (the most convenient and accurate), on a latch, ratchet, etc.
Well, that's, perhaps, all that could be said about regulating the water level in the toilet cistern.without affecting rare types of fittings and unlikely cases of its failure. Don't let the amount of information presented scare you - if you understand the essence of the process and there are no breakdowns, there will be nothing complicated in adjusting the water level, and it will not take more than 5 minutes.
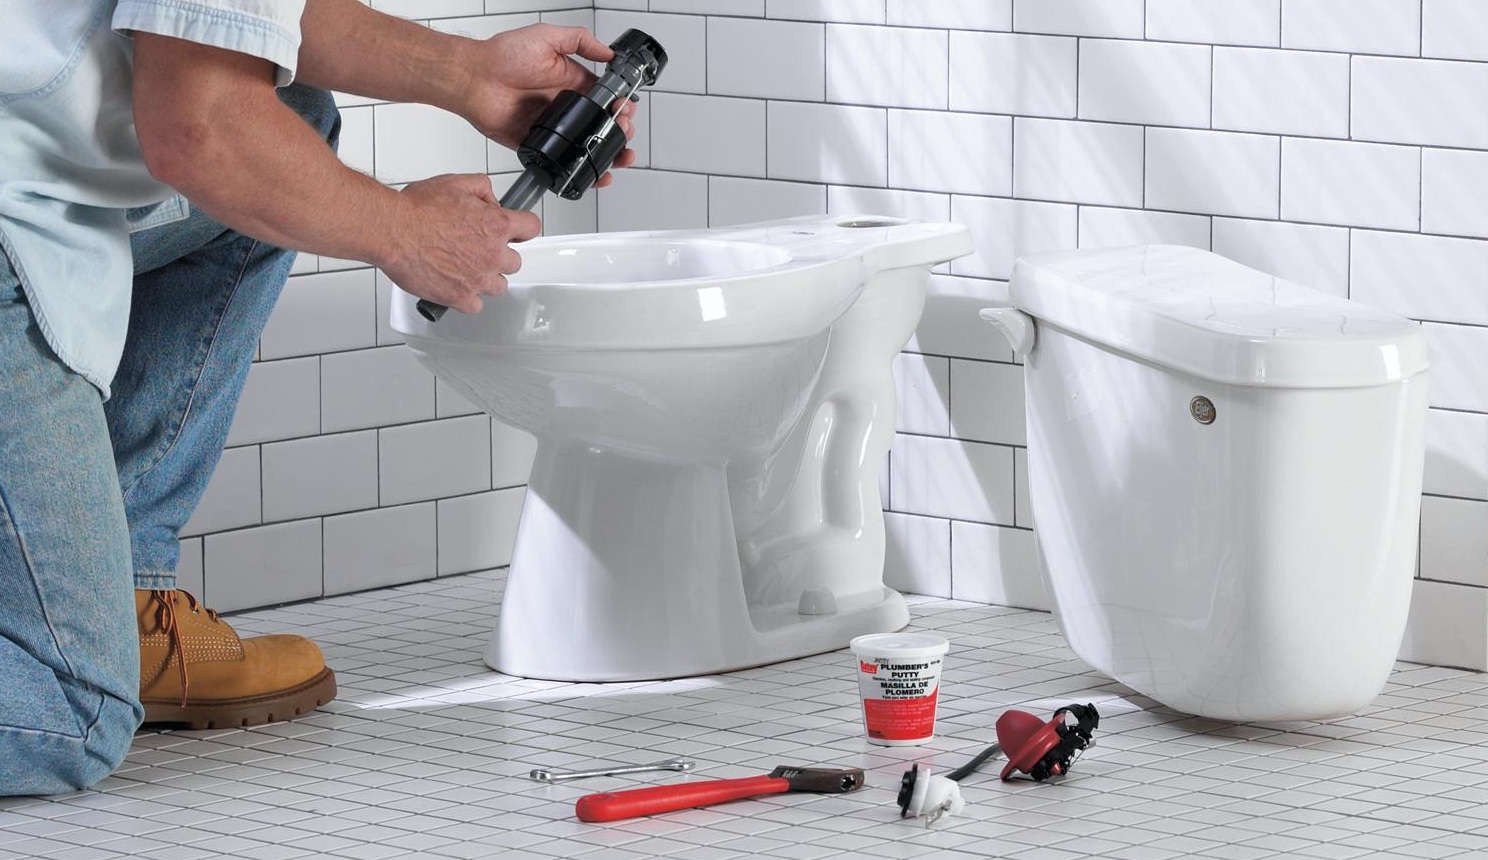
Installation
When buying new plumbing equipment, each person must call the master. After all, the installation of a simple design requires special knowledge and skills. The call of a highly qualified specialist is also carried out if the toilet bowl or some of its parts are out of order. In principle, you can cope with the problem and fix the mechanism yourself. The main thing is to understand the design of the tank, the filling and draining system.
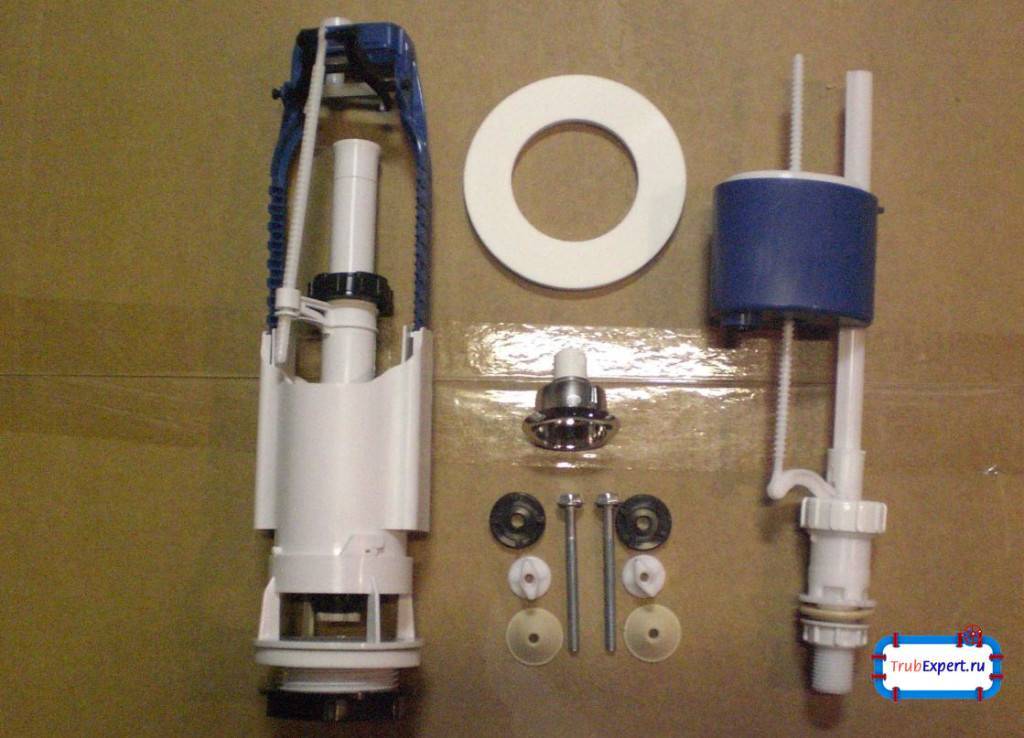
According to plumbers, the simplest job in installing or repairing a toilet is to dismantle and install a ball-shaped float with an extended thrust. But first you need to understand the problem, or rather, determine which part is to be replaced. Today, at the point of sale of plumbing equipment, a wide variety of spherical plastic floats are presented in an individual version or in an assembly, where the float itself, rod and valve are present.

Well, now it is proposed to consider the algorithm of actions:
- it is necessary to close the water supply valve;
- the tank must be completely emptied;
- the hose is disconnected;
- the old valve and float are removed;
- the seat is cleaned, a new mechanism is being installed.
The last stage of work involves connecting the water supply hose and test draining the liquid. After the test operation, you need to see how the new mechanism works, check the tank attachment points and the fluid regulator connections.If water does not leak, all that remains is to adjust the valve. This completes the installation of a spherical float with an extended rod.
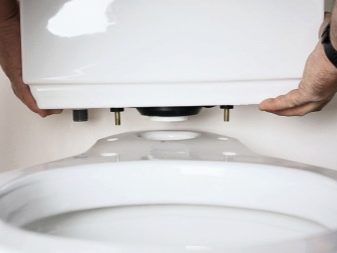
But the installation of a glass float is characterized by high complexity. The reason for this is the need to remove the toilet bowl. It should be noted that this work must be treated very scrupulously. If the float mechanism is installed incorrectly, it is likely that after connecting the tank to the toilet bowl, drain defects may occur, which can be eliminated by removing the upper part of the toilet bowl again.
Masters recommend changing the valve and the drain system in the process of replacing the glass-shaped float mechanism. On the one hand, this approach is very correct, for a long time the owner of the toilet will not have to deal with the replacement of individual parts of the internal mechanism.

The work of replacing and installing a glass float is as follows.
- You need to check the availability of accessories.
- It is required to turn off the water supply tap, drain the liquid from the tank and dismantle it.
- The damaged mechanism is dismantled, a new one is installed, with obligatory alignment along the axis of the container. On the adjacent side, clamping is carried out with a nut.
- A filling valve with a float is being installed. It must stand vertically without touching the elements of the drain system.
- The tank is assembled, after which it is mounted above the toilet bowl.
When working with the details of the glass-shaped float mechanism, special care must be taken. Many elements are made of plastic and can burst with great effort.
Finally
If we talk about the toilet bowl, then this is not at all a complicated bathroom accessory and it simply does not make sense to consider it separately from the cistern. When they say that the toilet does not work well, they first of all mean the filling that is “hidden” in the drain tank. Whatever the dimensions or external shape of the toilet bowl along with the drain tank, the principle of operation is the same for all of them. They can differ in which side the water is supplied from and on which side the drain handle is installed, connected to the drain mechanism. Despite the prices of toilet bowls, and they can differ, and significantly, the filling inside the cistern is almost the same, although it can be produced by various companies with minor modifications to individual elements. The quality of the product may depend on the materials from which the individual elements are made. This is especially true in relation to gaskets: the better they are, the more durable the product, since it depends on them how quickly the toilet begins to leak.
Equally important is the fact who installs (assembles) the toilet bowl: it can be a master, or maybe an amateur who not only does not know how to do it correctly and efficiently, but sees the toilet bowl for the first time in his life. Despite the simplicity of the design, even in this case there are subtleties
If the toilet is assembled and mounted by a specialist, then it will immediately start working, without any problems, and if a non-specialist does this, it is rare that the first time it is possible to assemble everything so that not a single drop hangs anywhere. Even the presence of one drop is undesirable, since drop by drop can create high humidity in the bathroom, which leads to mold and mildew.


Therefore, you should not save on your comfort, relying on your strengths and skills. In addition, the master will do everything much faster and better. As life shows, such savings in the future translates into a round sum.