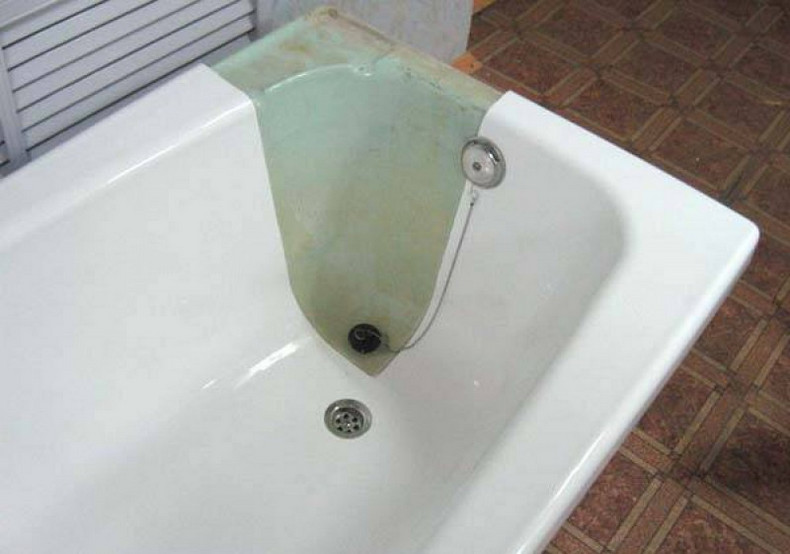
- Acrylic liner as a failed attempt
- Preparation for repair
- Necessary materials
- Chip removal
- Proper preparation of the bath for painting with acrylic tips for the master
- Helpful Tips
- Training
- Enamel restoration: work options
- Option one
- Option two
- Option three
- Option four
- Types of paints
- Resin
- Acrylic dye (enamel)
- Epoxy dye
- Spray
- Required Tools
- Characteristics
- Composition and technical characteristics of enamel and acrylic
- Consumption per 1m2
- What do you need to work?
- Enamel compositions - an overview of brands
- Epoxyn 51 or Epoxyn 51C
- Sets from Random House
- Reflex 50
- Acrylic: another option for restoring the inner surface of the bath
- Causes of enamel damage
Acrylic liner as a failed attempt
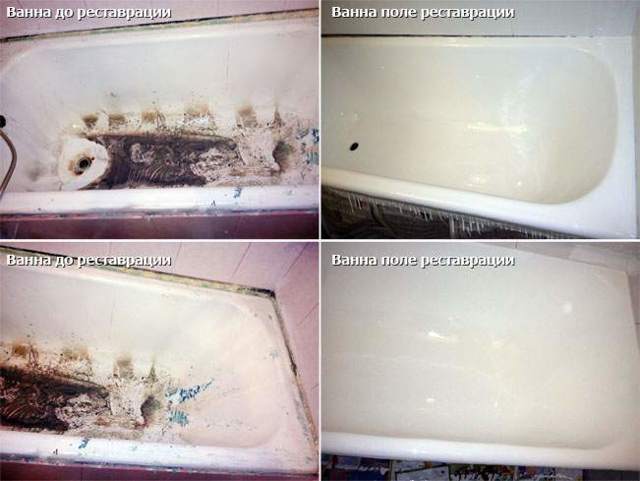
Bathroom enamel finish
Vadik suggested that I install acrylic liners in the bathtub. This is temporary and not ideal. It is impossible to buy an insert exactly in size. It is necessary to call a team that will create an insert by dismantling the bath and taking it to him for a few days. When hot water is poured, the liner may stretch. It is quickly erased and again the problem arises of removing it and how to paint the bath or enamel it.
You can reanimate with acrylic in the form of an insert baths, the basis of which is steel and aluminum.The liner does not conduct heat and will protect against rapidly heating and cooling metal. In size, they are usually smaller than cast iron and standard molds.
Preparation for repair
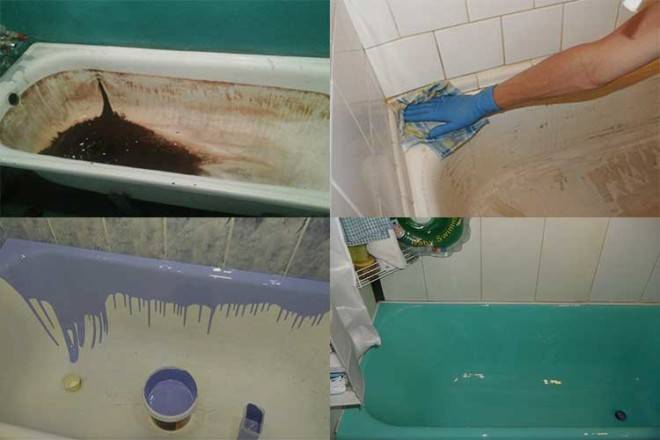
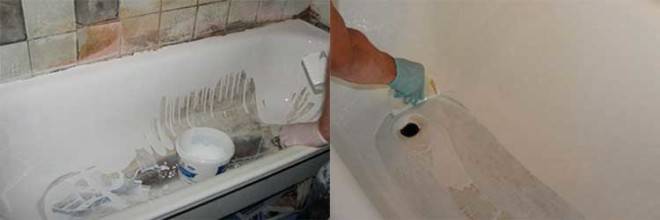
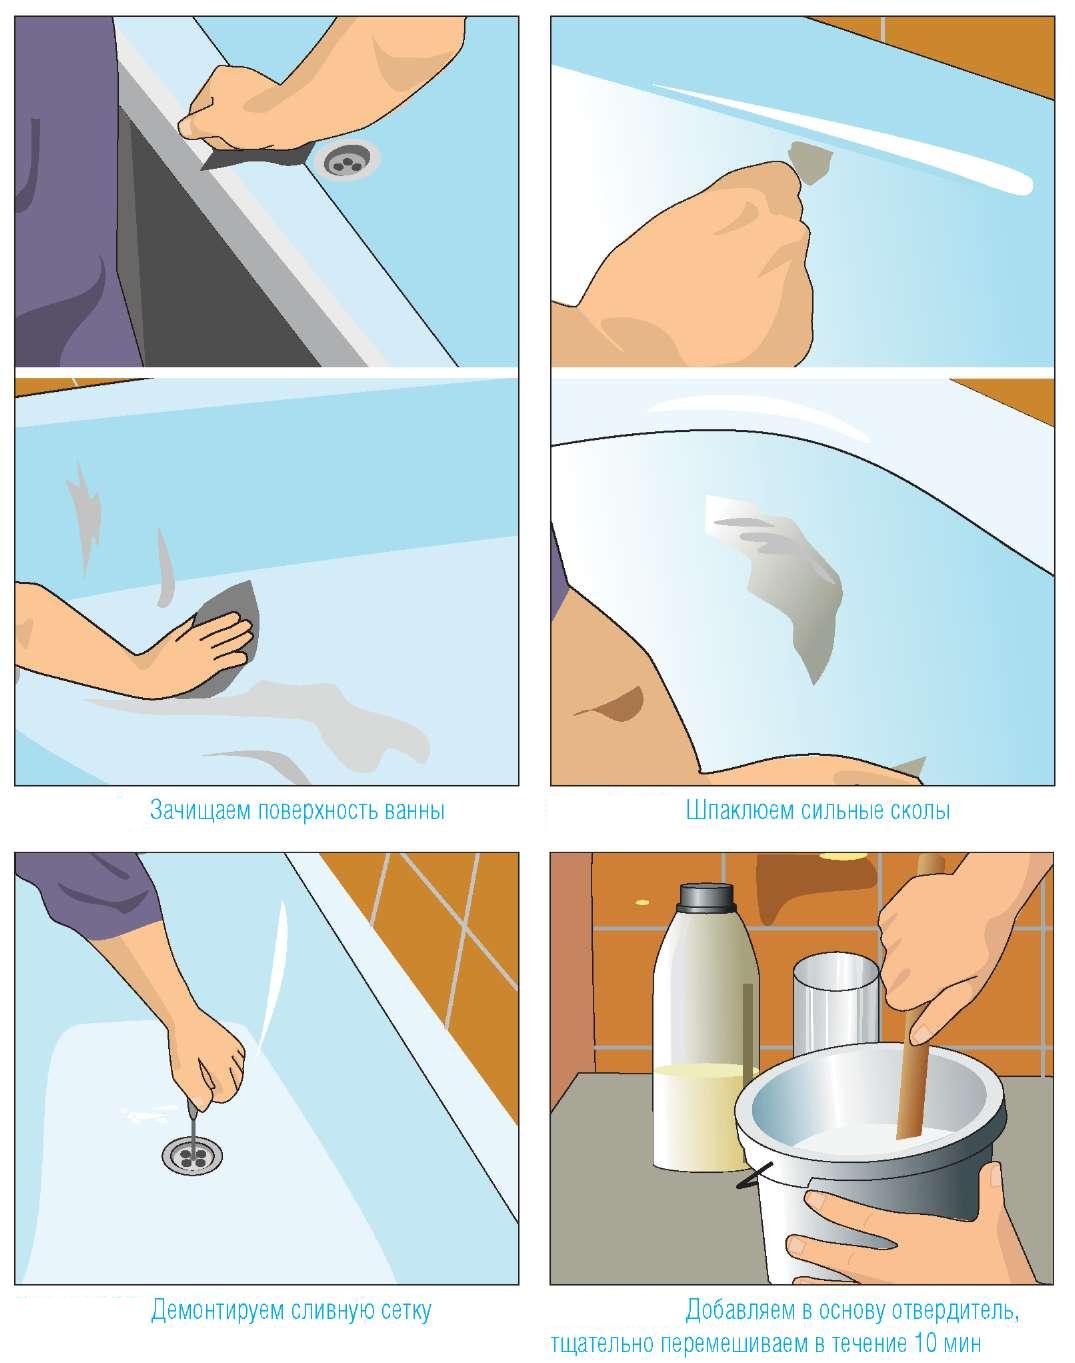
Preparation is a very important step that should not be missed. The quality of the repair and its service life will depend on its implementation. As mentioned earlier, the chip must be repaired immediately. If this is not done, rust may form and must be removed. If the chip is fresh, then this stage of preparation can be missed.
- Rust removal. To do this, you will need such improvised tools as a knife, needles, a screwdriver. They can be used to remove rust. You can also use a special tool to remove it, which is sold in household chemical stores. If it is not available, then a regular cleaning agent will do. After all the manipulations, the chip cleaned of rust must be rinsed well with water.
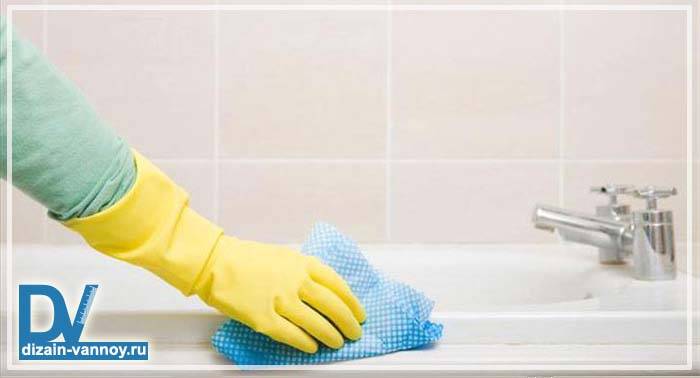
- You can also remove dirt with the help of household chemicals. It must be remembered that such products should not contain abrasives.
- After complete cleaning, the repair site is well washed and thoroughly dried with a hair dryer. The surface must be perfectly clean and dry.
- Degreasing is a necessary procedure, without which the durability of the seal will significantly decrease. Degreasing is carried out with acetone, then dried again with a hairdryer.
On this preparation can be considered completed. All photos and videos of the preparation process can be seen in this article or in the gallery of our website. After that, you can start repairing the chipped bath enamel. This can be done in several ways and using various materials, which will be described below.
 Bathtub restoration - step-by-step work on removing chips from a bathtub
Necessary materials
- The main and most necessary material is auto-putty. It takes a little, and its color should be as light as possible. There is a special putty for fiberglass that will work just as well. Its advantage is heat resistance, but its price is higher.
- Sandpaper. It also needs a little, a maximum of 1-2 sheets. It should be small, you can take the cheapest one.
- Special aerosol designed for the direct repair of chips. Its color should match the color of the bath itself. The price category does not matter, but if it is possible to choose a better model, then it is better to choose an aerosol with heat and water resistance.
- Instead of an aerosol, you can use bath enamel. It will already have all the necessary characteristics.
- Abrasive polishing paste. Necessary for the final stage to mask the traces of repair.
In order not to buy all the components for repair separately, you can immediately purchase a ready-made kit for repairing chips. Such kits usually include the following components: putty, spatula, sandpaper, aerosol and / or enamel.
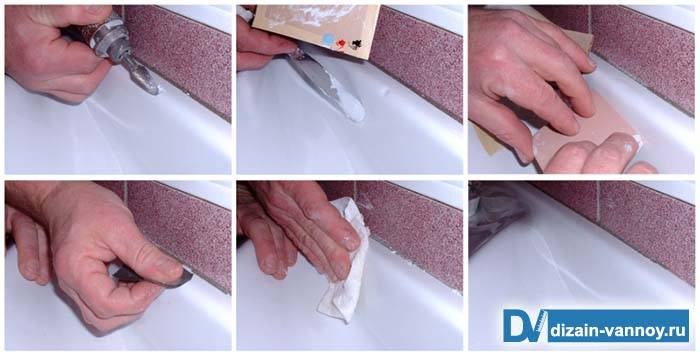
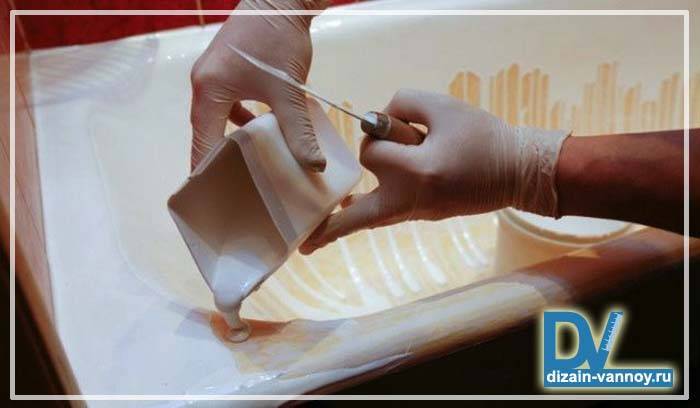
Chip removal
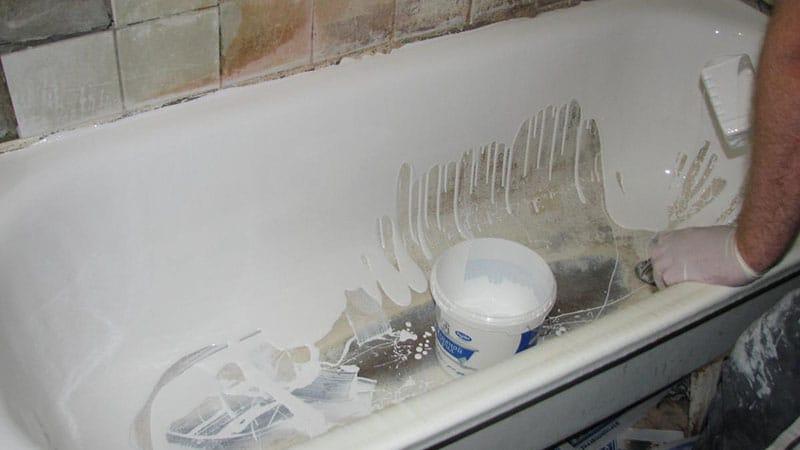
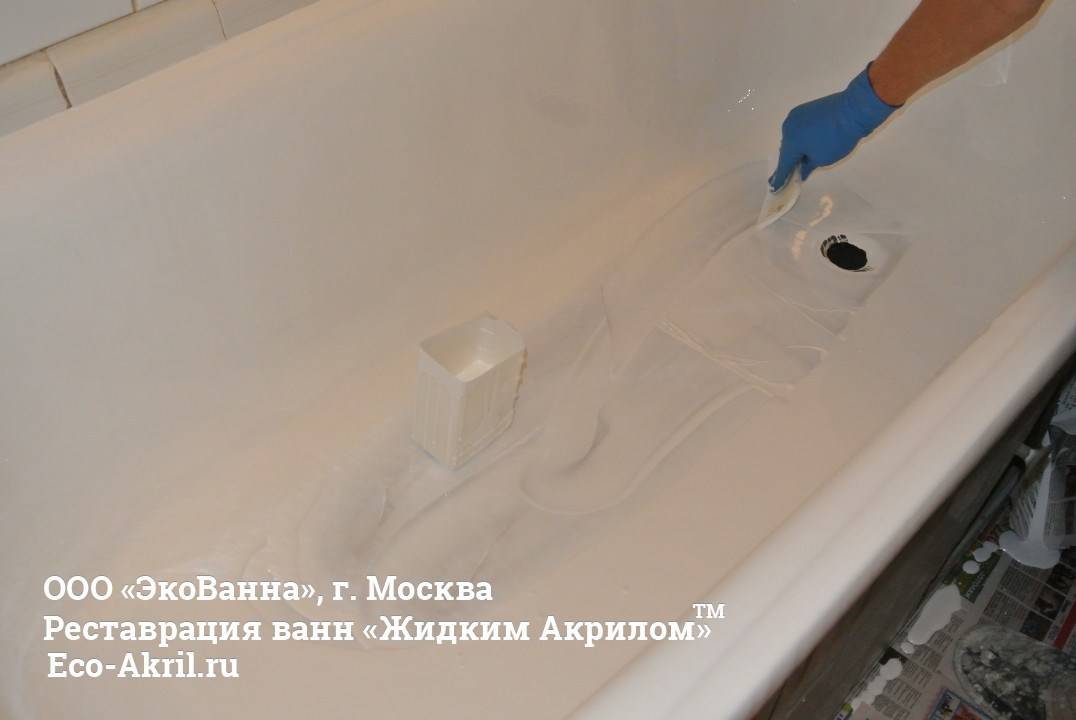
Putty preparation. To do this, you need to mix the resin and hardener, while the resin should be thirty times more. The mass is mixed with a spatula and immediately applied to the chip. At the same time, it must be well tamped. You can put a little more than you need: all the excess can be removed first with the same spatula, and after hardening, smooth out with grinding. If the quantity is not enough, then, most likely, the repair will have to be carried out again.
 We eliminate chips in the bath
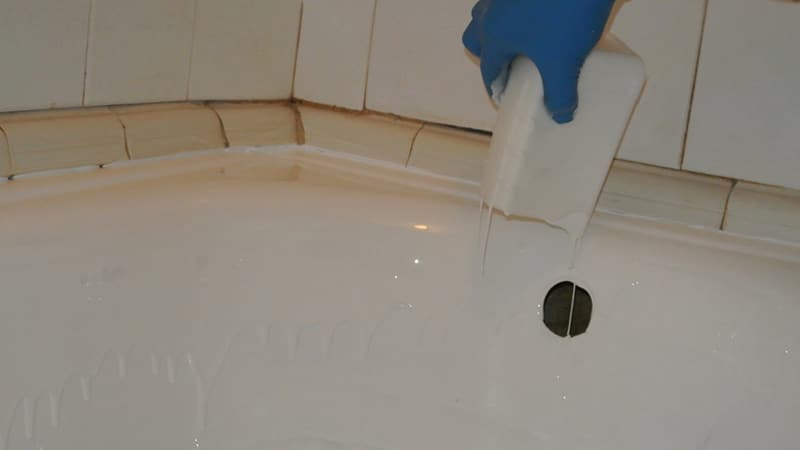
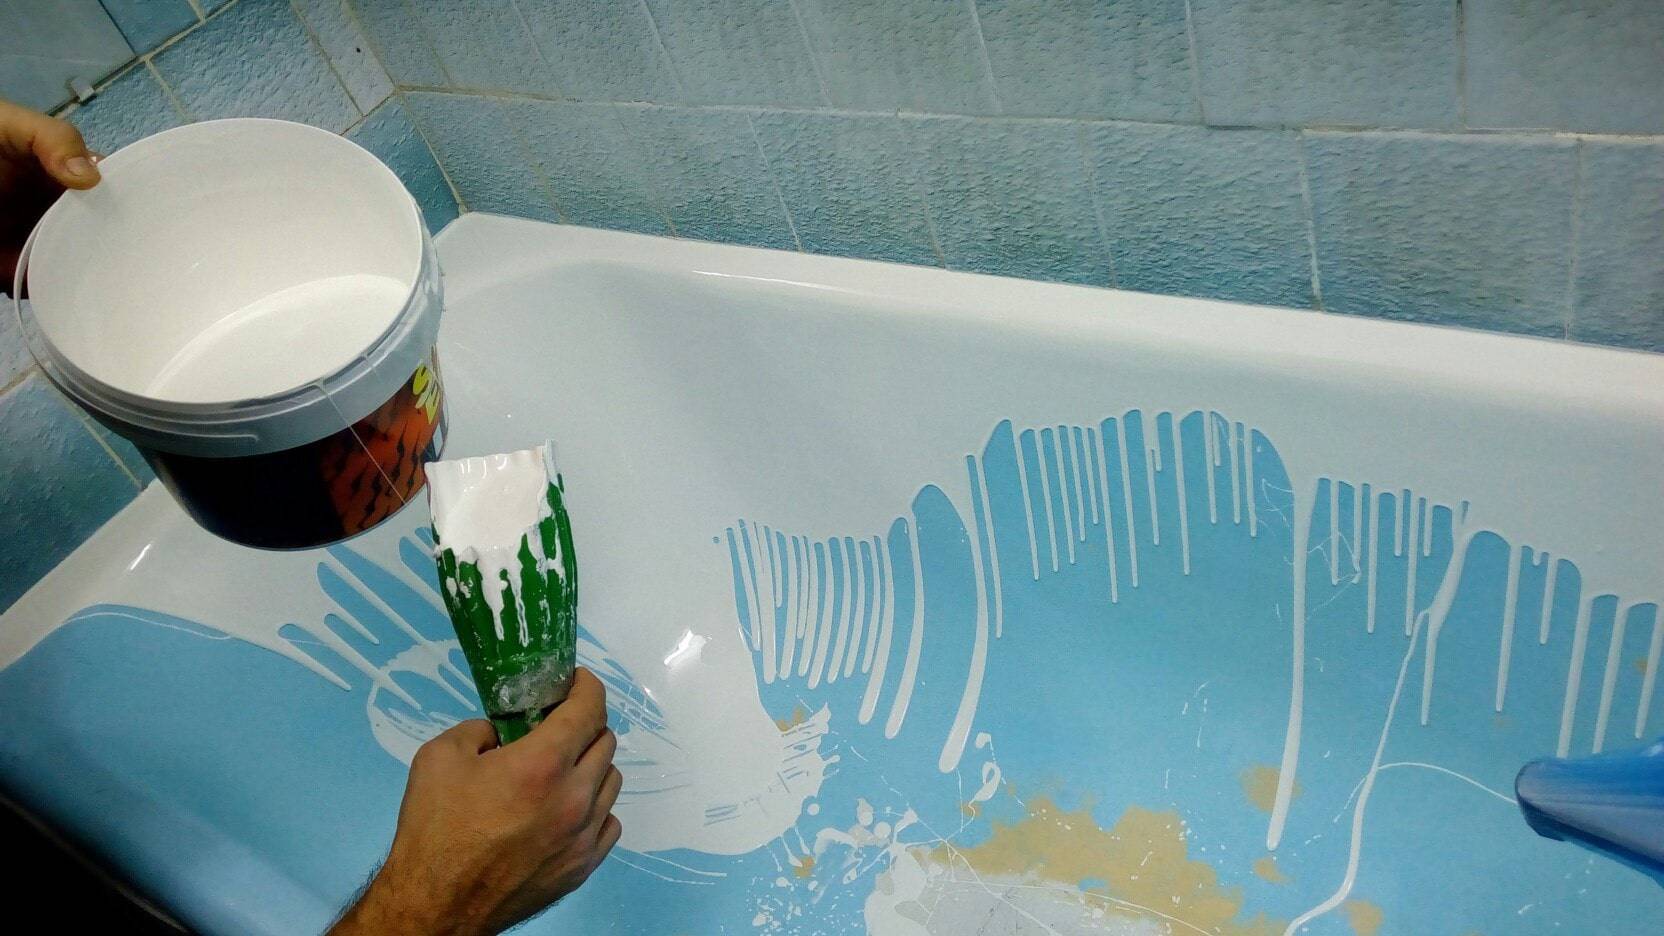
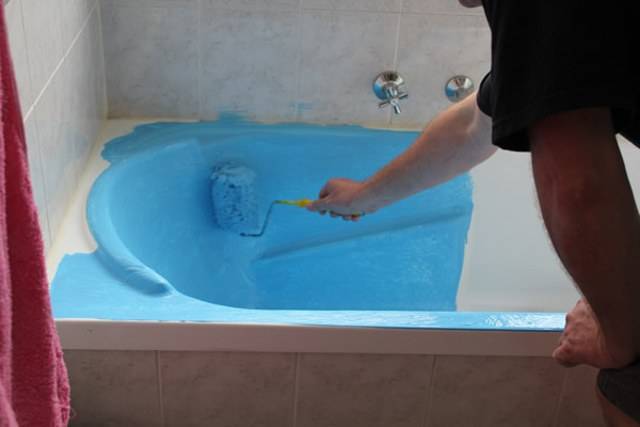
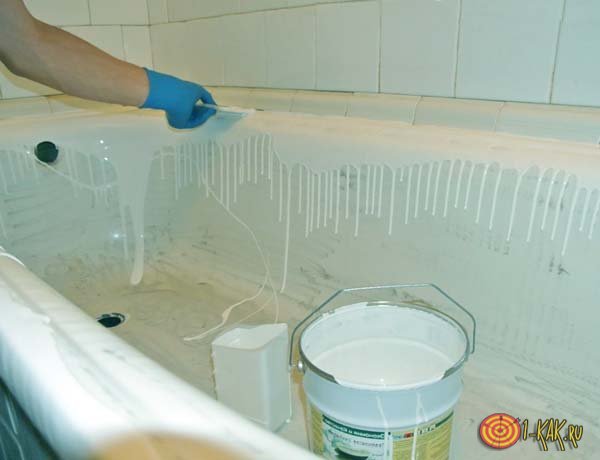
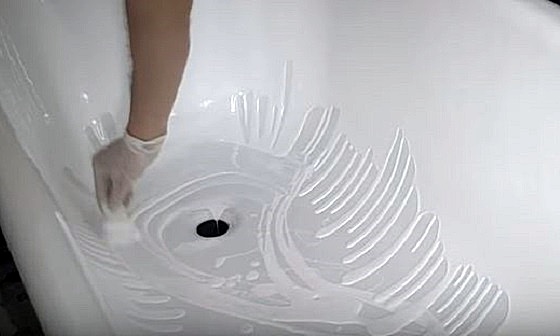
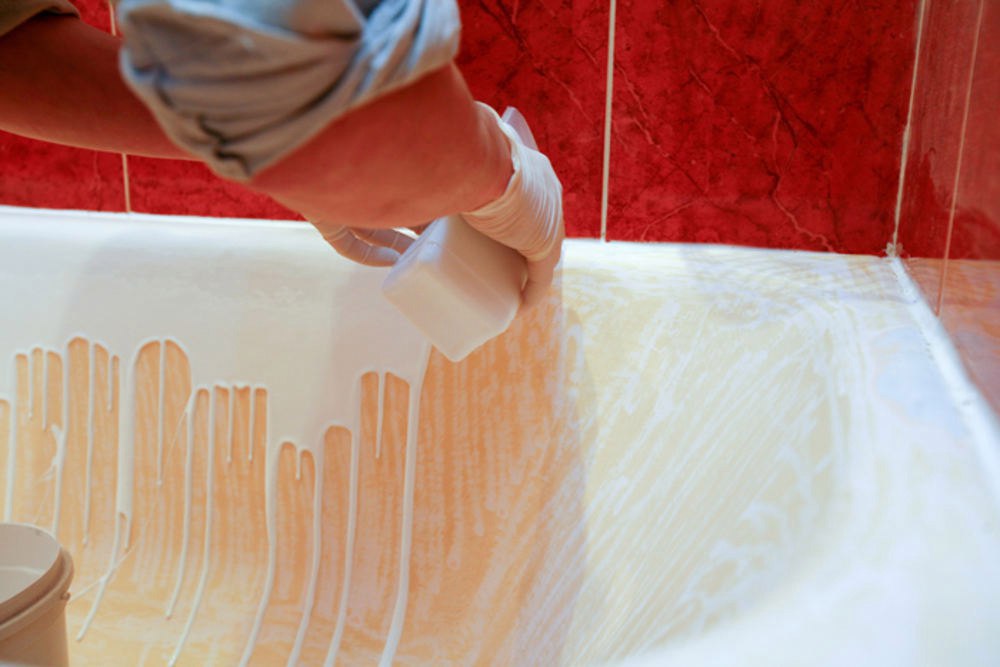
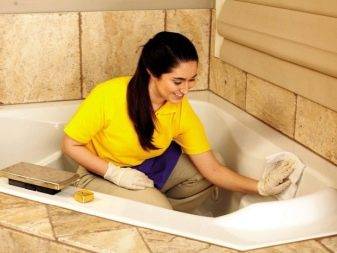
Proper preparation of the bath for painting with acrylic tips for the master
The main task at this stage is to ensure good adhesion (adhesion) of the paintwork and the metal base. With proper surface preparation, painting a bathtub with liquid acrylic gives excellent results. First of all, the bath must be thoroughly cleaned with any abrasive powder. Suitable for this purpose is the usual "Pemolux", trisodium phosphate or "Komet" (consumption - about 400 g per standard bath). cleaning no rinse agent required. You can clean the surface by powder.
If there are deep chips, use automotive putty or epoxy to seal them. The drying time of the composition is indicated in the instructions.
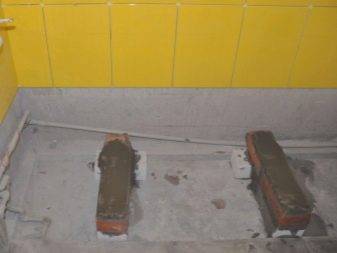
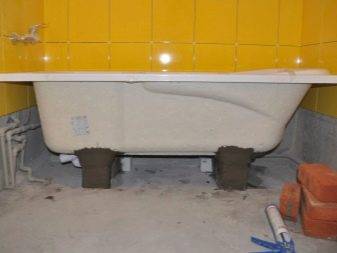
Before proceeding with the coating, it is necessary to dismantle the drains, since it is under it that the greatest amount of dirt accumulates. Besides, in the future, they still have to be changed.
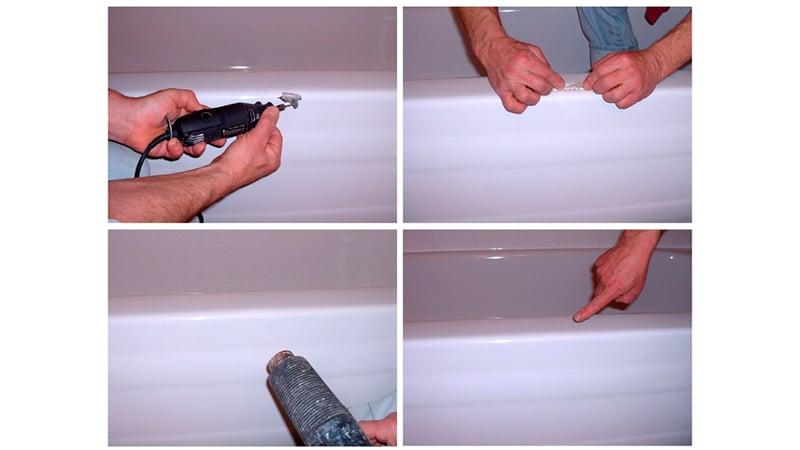
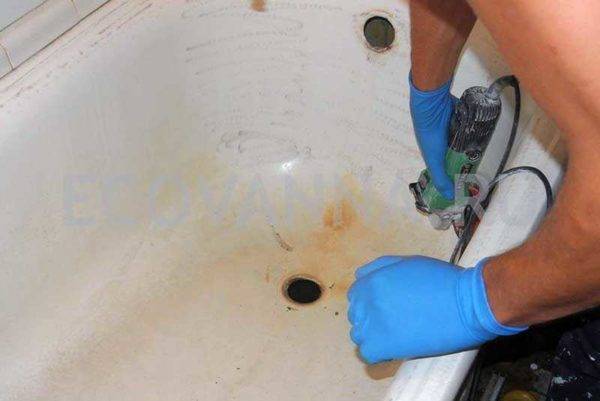
Effective Preparing a bathtub for acrylic painting implies that the surface for applying enamel should be rough, with noticeable irregularities. To make it like this you need a special tool. It is best to use a drill with a nozzle made of waterproof sandpaper number 24 for this purpose. You can also use a grinder, but it produces too much dust, which is then difficult to remove. The risk of injury with this method increases markedly. In addition, there were cases when the masters thus damaged the body of the bath.
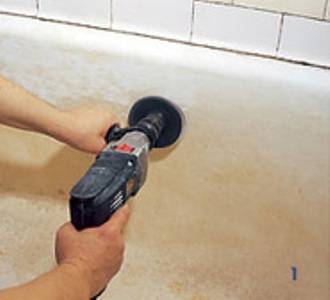
To remove the smallest particles of enamel formed during stripping, an ordinary household vacuum cleaner without attachments will help.
Note to the master: you can determine the degree of readiness of the surface simply by running your fingernail over it. Well-prepared enamel leaves a scratchy feeling.If the nail glides well, it is better to work with sandpaper.


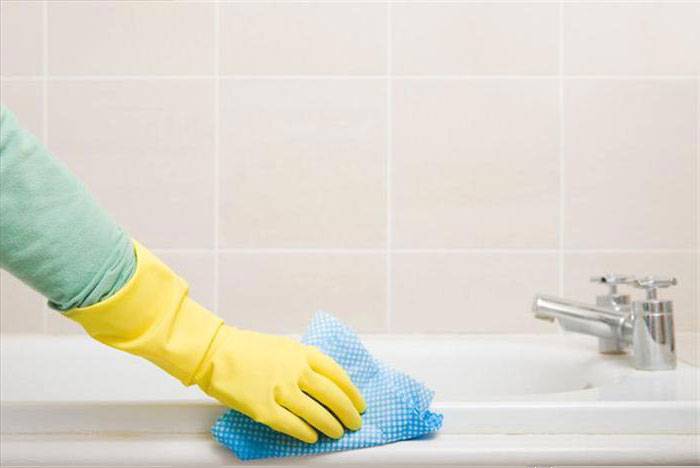
After the surface of the bath is treated with an abrasive material, it must be degreased again. Here you can already use liquid detergents: "Sanita", "Toilet Duck" or their analogues.
Rinse off the detergent with hot water. Please note that alkaline solutions containing surfactants take longer to rinse off than scouring powders.
Before applying enamel, the surface must be thoroughly dried. Use a conventional or building hair dryer for this, a breeze-type heater will do just fine.
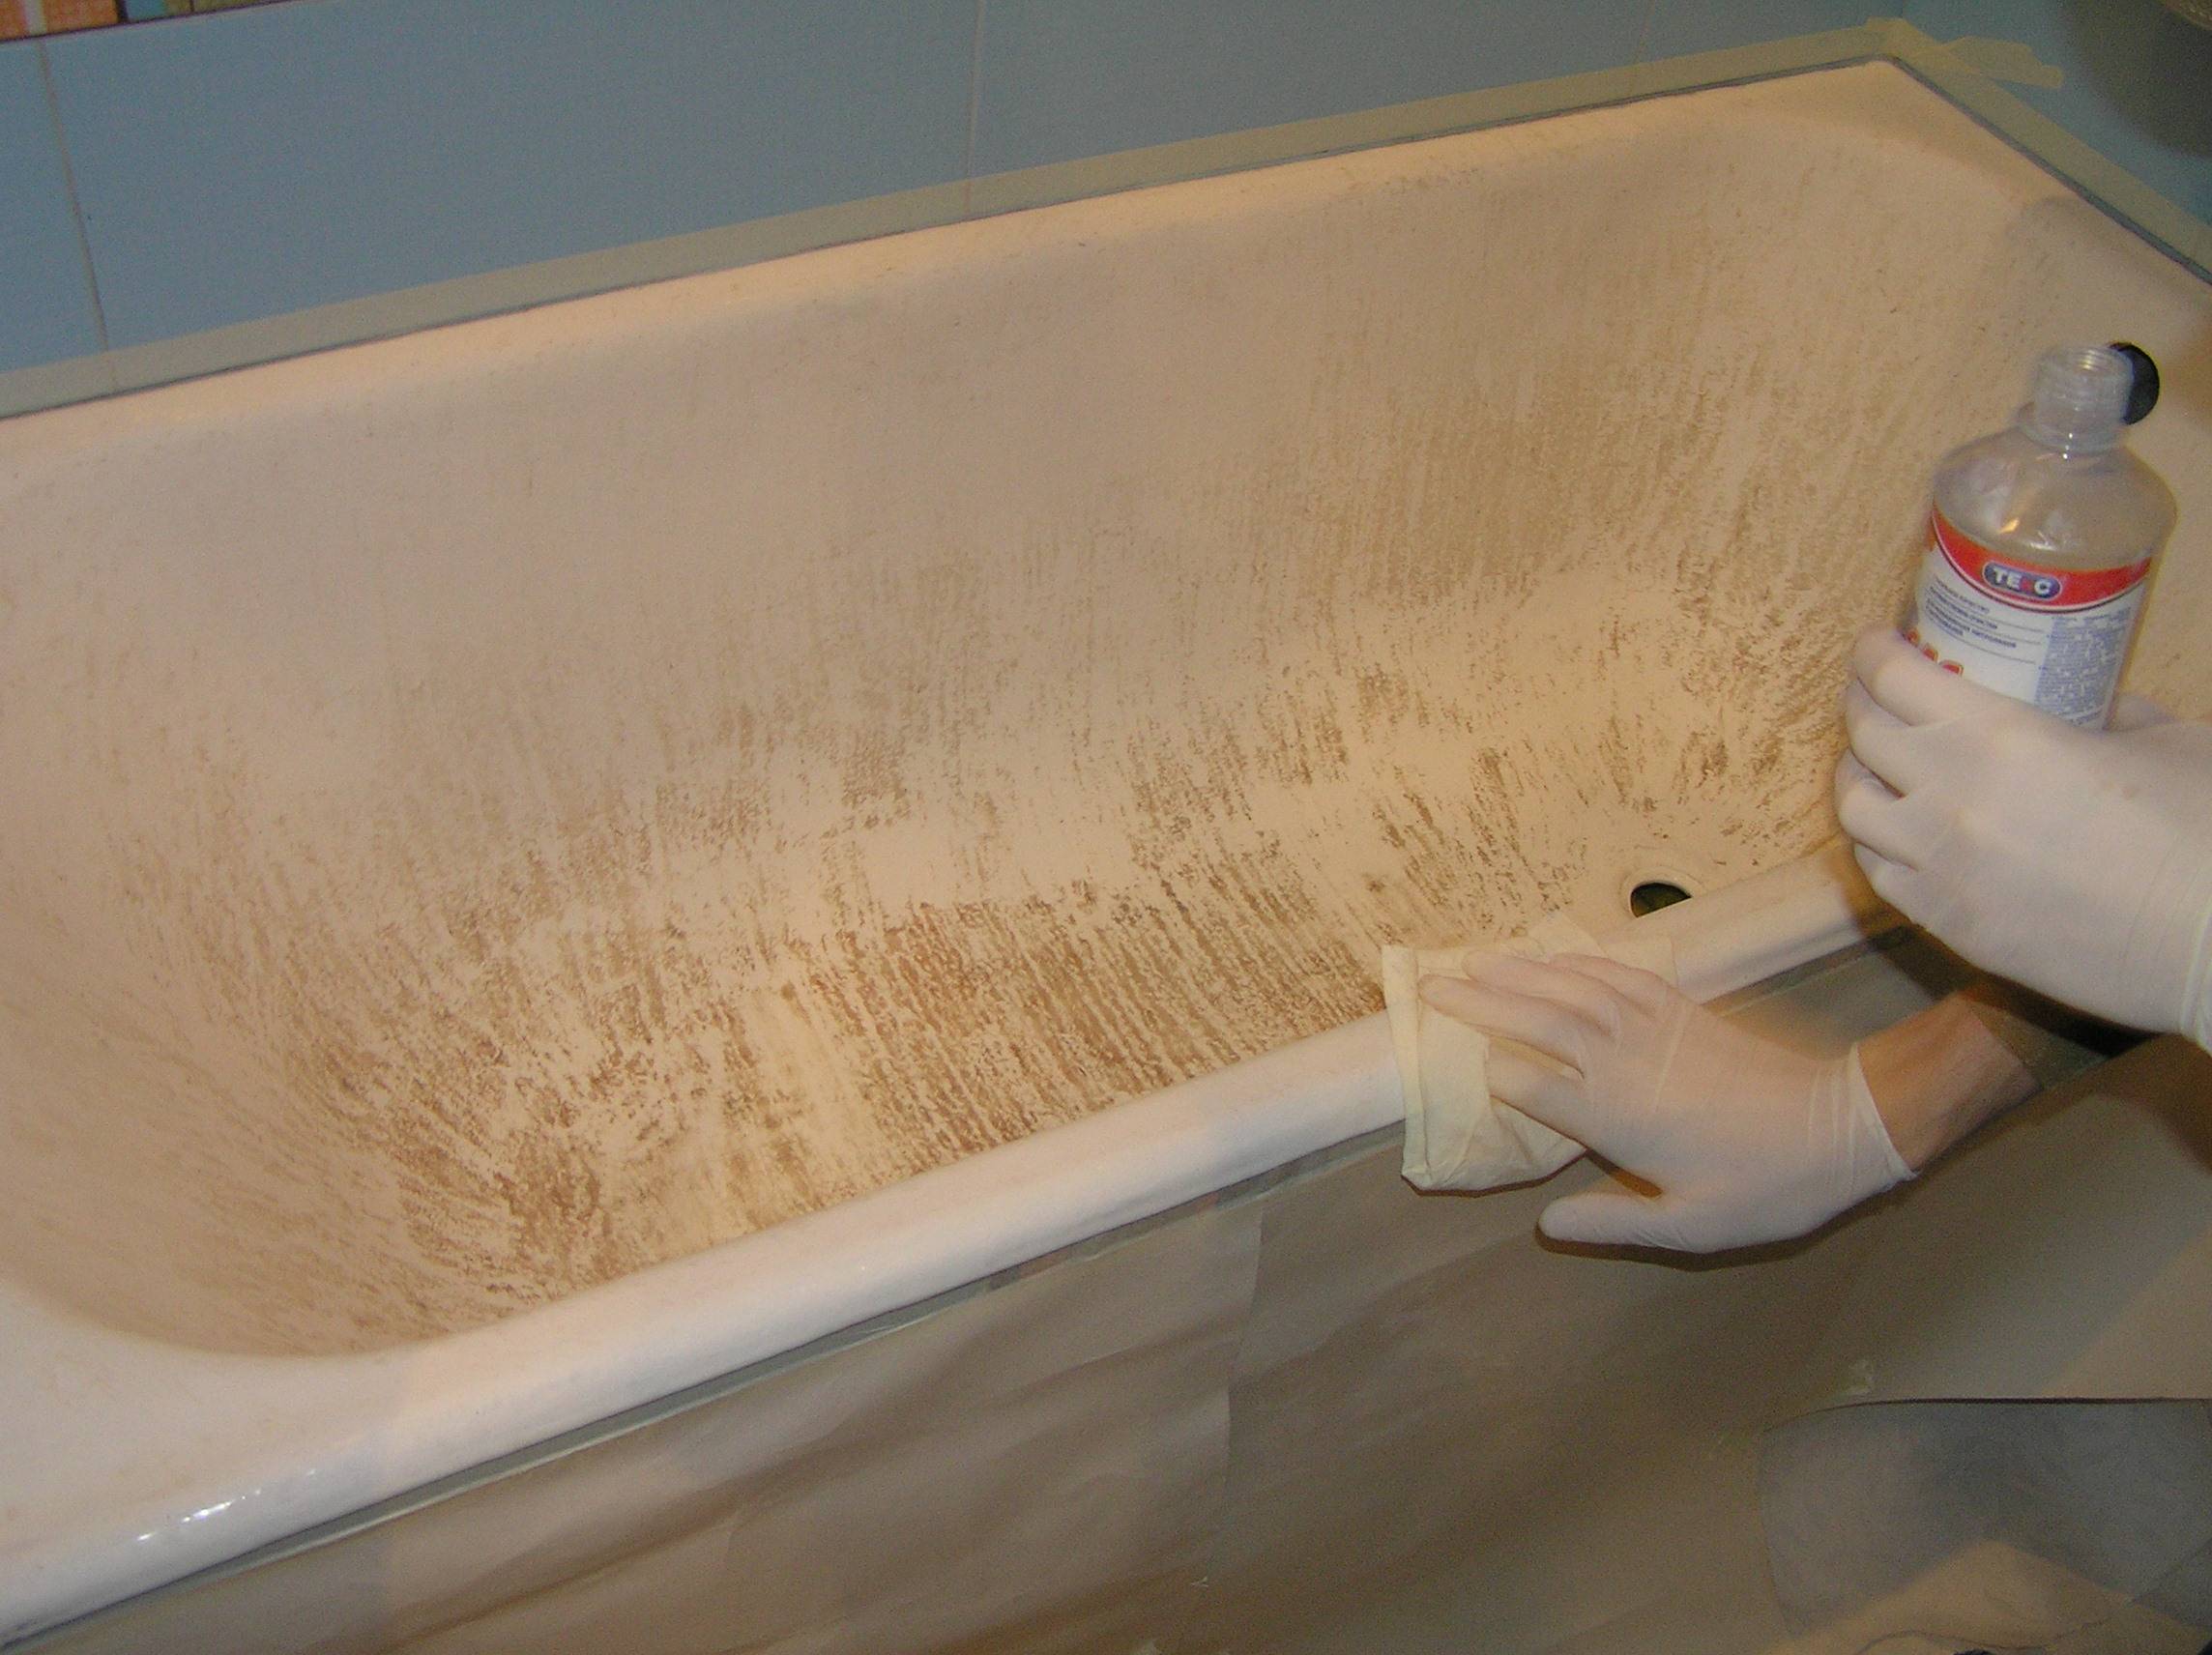
In the instructions for enamels, it is recommended to degrease the surface with solvents. It is best to use acetone for this purpose. Do not use white spirit for degreasing, it has an oily texture. Apply the liquid with a piece of cotton (or any other lint-free) cloth.
Please note that careful preparation of the bath for painting with acrylic guarantees a long service life of the finished enamel. For more information on preparing the surface of the bath, see the video:
Helpful Tips
There are some recommendations, adhering to which you can qualitatively paint the bathtub and extend its life. So what to consider:
- when performing preparatory work, it is forbidden to use chlorine-containing products to clean the bath from pollution;
- it is desirable to stain in the summer, so that you can ventilate the room;
- it is advisable to prepare several brushes for applying paint and, if a pile is found on the surface, replace the tool with a new one;
- do not touch the dry coating with your hands;
- when using a one-component composition, it is recommended to apply at least 2 layers of paint up to 0.5 mm thick;
- it is forbidden to soak laundry in the renovated bath;
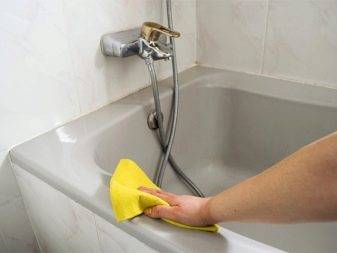
- the new coating should be washed only with laundry soap; powder and other aggressive detergents should not be used;
- it is not recommended to leave the bath with water for a long time, and also to fill it with too hot water.
Thus, in order to return an attractive appearance to the old bath, you can paint it yourself with enamel. However, to obtain a high-quality coating, it is necessary to initially carry out preparatory work, and only then proceed to painting. Otherwise, the paint will peel off soon.
Training
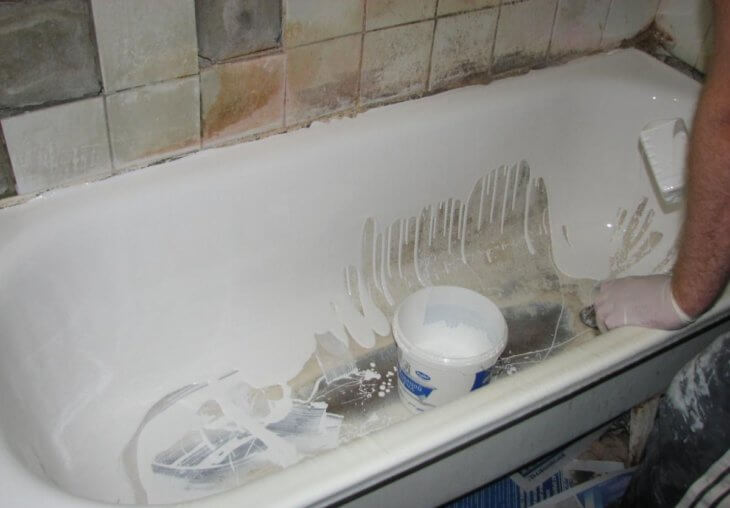
Preparing a bathtub for restoration is important in any case. Even if you are going to put an insert. Good adhesion (adhesion) with foam is also necessary there. And in the case of using enamel or acrylic, preparation plays a very important role.
If you look at the description of the work of companies involved in the restoration of bathtubs, then they have a preparatory stage - this is to remove the drain and overflow, walk well over the entire surface with sandpaper with abrasive powder, wash and dry. If there is, repair the chips with automotive putty. Sometimes they add that it is necessary to degrease the surface with a solvent. That's all, then enamel is applied or acrylic is poured. All work takes a maximum of 3-4 hours.
When studying reviews of self-restoration, a different picture emerges - there are much more stages and preparation is often delayed for a day. There are two ways. The first is to remove the top layer with a grinder and petal sandpaper (remove the top layer of enamel, and not clean to the metal).After removal of dust it is possible to paint.
Often the enamel is cleaned with a grinder with an abrasive nozzle.
The second way is to remove contaminants with acids, alkalis, solvents. Both methods have been tried and work equally well. You choose what is best - dust and sound when processed with a grinder, or smells when processed with chemistry.


Here's what to do before restoring enamel using a chemical cleaning method:
- Remove the overflow and siphon, remove the dirt that is being removed.
- If the bath has already been restored before, all the material is removed up to the enamel.
- We remove dust and debris with a brush with a soft bristle (sweep into the drain hole). You can use a vacuum cleaner.
- We take the acid composition, coat it, keep it for a while according to the instructions, rinse off (put a basin under the bath - the siphon has already been removed).
-
We take an alkaline detergent, you can just baking soda, we carefully coat it with it, rubbing it into the surface. Wash off (do not forget about the basin).
- We dry.
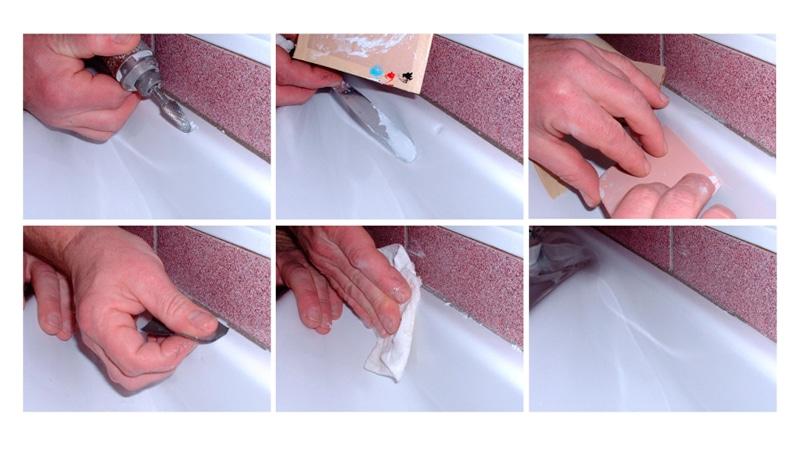
- If there are places where the metal is exposed and rust has appeared, we clean it to bare metal, process it with a rust converter, and wait for the prescribed amount of time. Then we align flush with the enamel using putty.
- We close up chips and large cracks with putty. Novol putty, universal or with fiberglass, is well suited. It has a gray color, it is not visible from under the coating. It hardens in 10-15 minutes, after which it can be cleaned with sandpaper so that a smooth surface is obtained.
- Once again we remove dust, dirt. If necessary, you can wash and dry again. If there are cracks in the enamel, they must be dried very carefully - even a small amount of moisture will lead to the appearance of bubbles that will soon burst.Instead of a flat smooth surface that is easy to clean, get a lot of holes in which dirt clogs.
It's all. Next, enamel or acrylic is applied, the liner is installed.
Enamel restoration: work options
Whether you're refurbishing a steel bath or cast iron, the job is no different.
Option one
 Restoration with enamel and primer
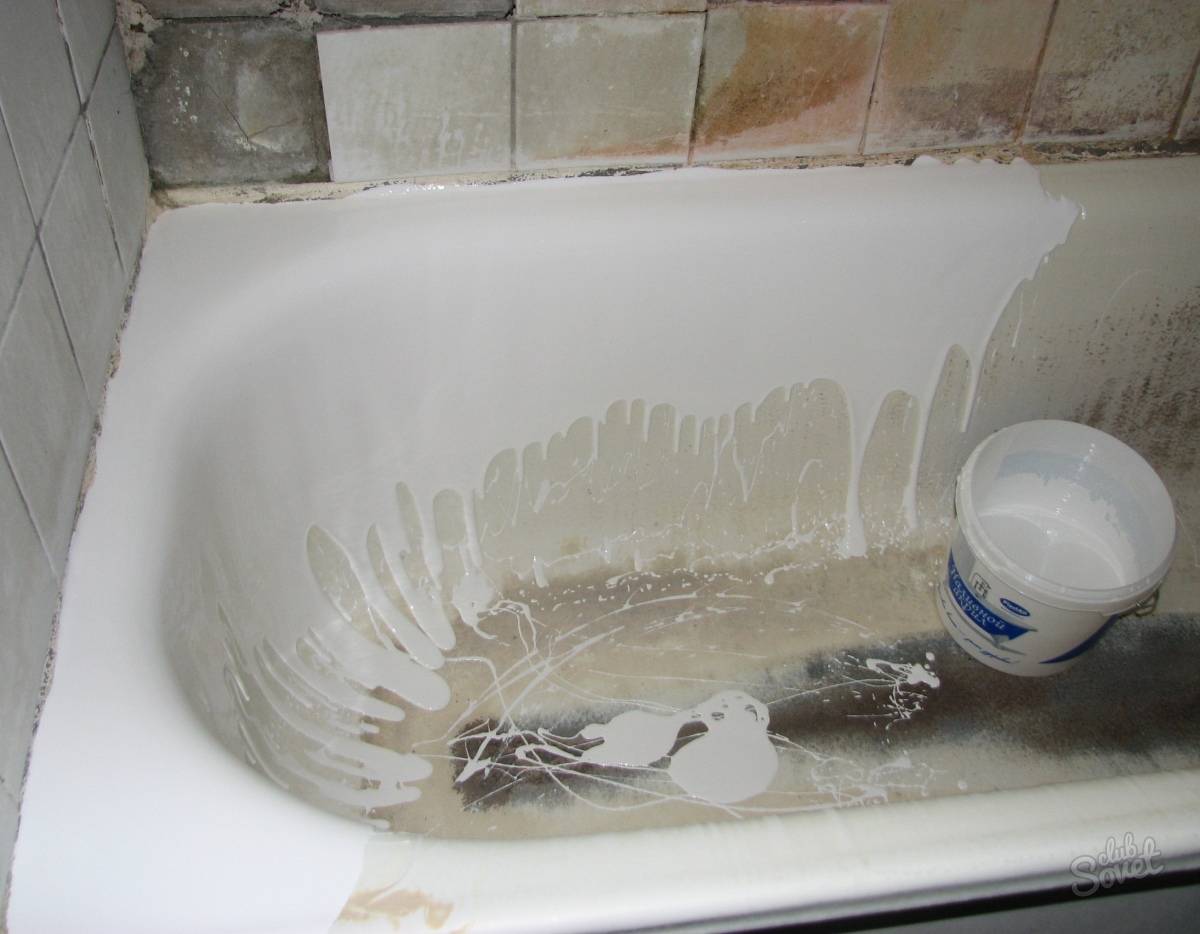
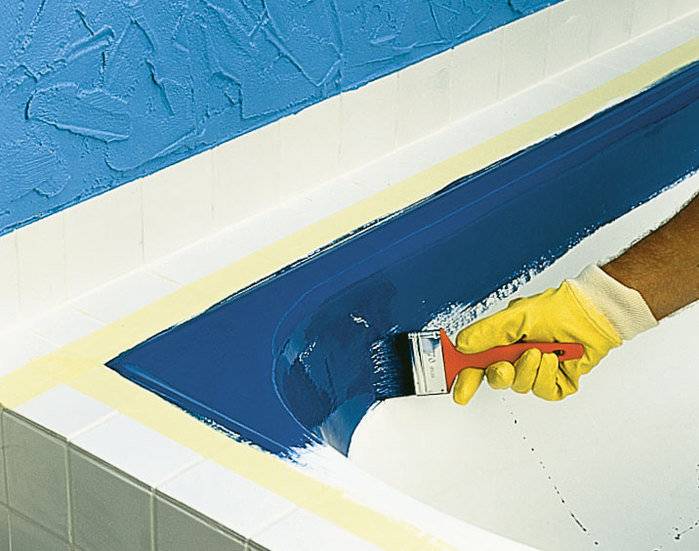
- Apply primer. It smells, but if you choose an aerosol, then the aroma is quite tolerable. But remember: you need to shake the balloon until the knock of the ball becomes constant, uniform and distinct. The primer is applied to the entire surface inside the bowl. After coating, you need to give the primer time to dry well.
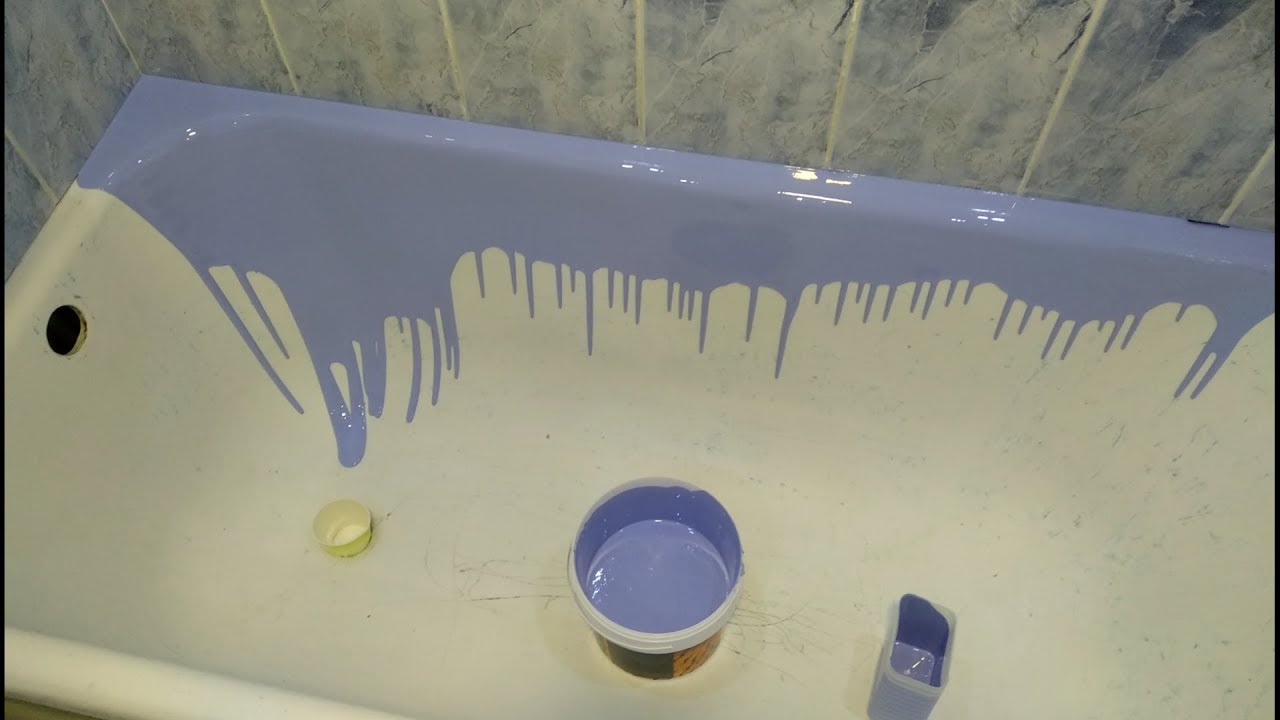
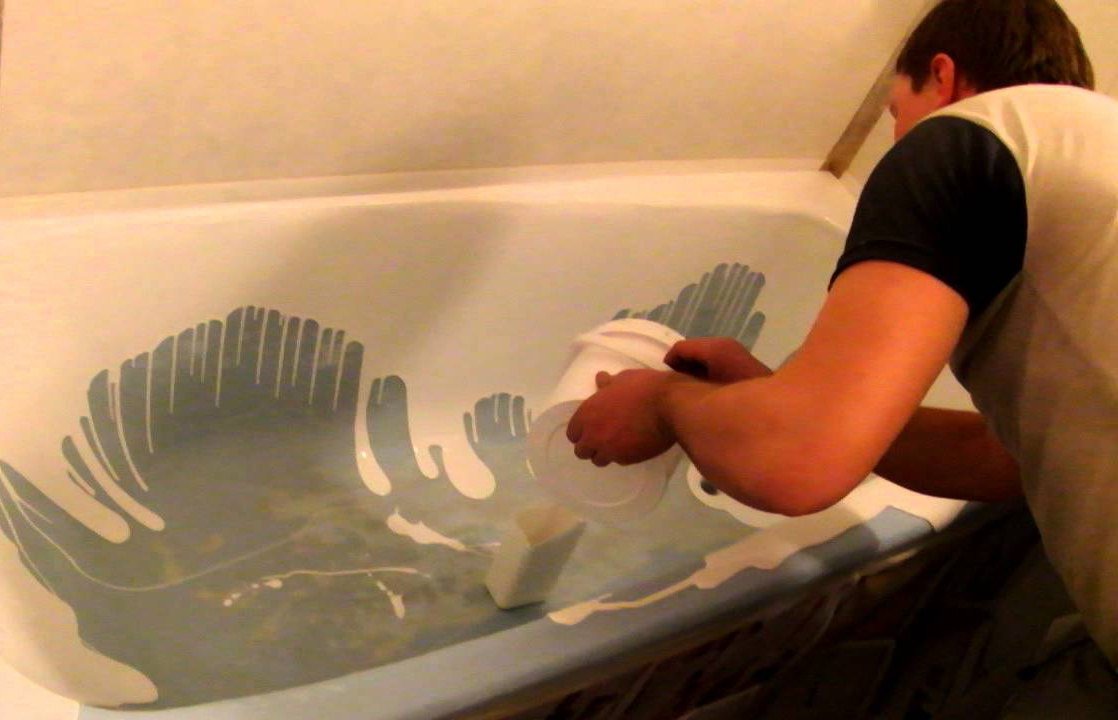
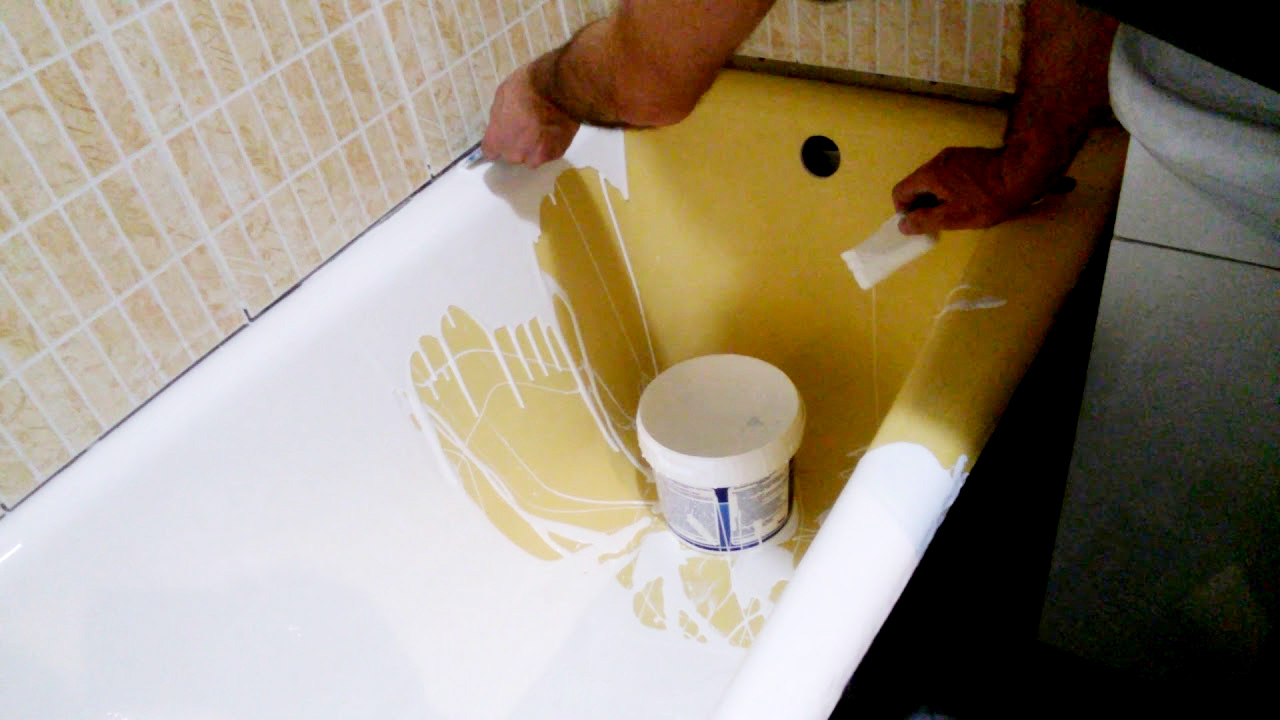
- Enamel. You can take funds to restore the enamel of the bath, or you can buy ordinary canned enamel. Stir or combine the components in accordance with the instructions and with a small swab (can be replaced with a small roller), apply a bathroom enamel restorer or the enamel itself.
But how to restore the shine of the bath? Everything is quite simple: 1-2 hours after applying the last layer of enamel and drying, the surface must be wiped with a solvent so that the top level becomes smooth and pleases with gloss. It is also a good idea to polish the new surface with GOI paste, but this can only be done after 2-3 days.
Option two
 Elimination of small chips with glue and whitewash
This method is suitable for removing small chips. Mix BF-2 glue and dry whitewash, arm yourself with a brush and apply the composition in several layers, after drying the previous one
Importantly, such repair and restoration of bathtubs is as simple as it is operational.But remember: the last layer of the overlay should be flush with the enamel coating of the entire part of the bath, no pits or bumps.
Option three
 Repair of large chips with supercement and enamel
This is a restoration of enameled bathtubs with deeper scratches. You need to stock up on Supercement glue and nitro enamel of the same color as the inner surface of the bath bowl.
- Mix the ingredients in equal proportions.
- Apply the mixture to the chip with a small brush.
- There should be as many layers as needed to level the level.
- If there is no glue at hand, but there is epoxy resin, take it and whitewash. By the way, they can also be replaced with powdered remains of real porcelain (mug, plate). The components are mixed in a ratio of 2/1. First resin, then porcelain powder. The advantage of this composition is its excellent strength after drying and it can be applied by collecting it in a lump, and then removing the excess with a blade. Such a mass dries for at least 5 days, but with a properly made composition, it lasts 5-6 years.
Option four
 Repair by rubbing paint into damaged enamel
Restoration of enameled bathtubs with increased enamel porosity is the most popular question. Regular nitro paint will help to cope with this. Pour a few drops of paint onto the bottom of the bath and rub the composition into the surface with a very good effort. The composition will perfectly fill all the pores and microcracks. You need to repeat this procedure 4-5 times, applying each subsequent layer to the completely dried previous one.
Types of paints
The dye is divided into four types:
- Epoxy resin (two-component);
- Acrylic (liquid base);
- Epoxy;
- Aerosol - well suited for long products.
Resin
For painting cast iron baths with severe surface corrosion (chips, deep cracks). Epoxy enamel is applied in a thick layer, even without preliminary ground surface treatment.
The resin is diluted with solvents to a thick consistency, applied to the chips, and then to the entire surface.
Acrylic dye (enamel)
How to paint, process a cast-iron bath inside at home? Acrylic. Do-it-yourself resurfacing of cast iron is a simple, easy method of resurfacing.


Acrylic is liquid in consistency, which makes it easier to work with its distribution over the coating. After drying, the acrylic composition becomes glossy, which is why this paintwork is popular today. The service life of an acrylic film is from 7 to 20 years with proper care, so it will be beneficial to paint the product with such a composition.
Epoxy dye
Epoxy paint is resistant to mechanical influences. It is a synthetic resin-based oligomer. Durable, durable coating for metal and industrial equipment. Paint with a glossy effect, hydrophobic in nature. You can paint with any convenient tool: roller, brush, spray gun.
Spray
Cast iron bath paint is an aerosol, namely a dye for cast iron products.

It is applied after surface treatment with grinding equipment and a primer. This is a topcoat with a large assortment - from a bright varied palette to the manufacturer. The paint is quick-drying, it can be processed in hard-to-reach places.
Required Tools
Before painting the bathtub with enamel, it is necessary to prepare the tools necessary for the job.They are used to clean rust stains, as well as to protect adjacent surfaces from paint. For work you will need:
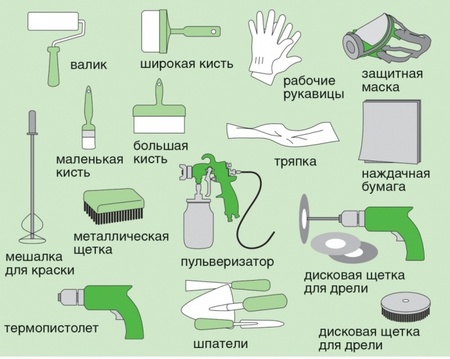
- Electric drill. It is needed to clean surfaces from solid deposits. It is recommended to give preference to a drill that is light in weight, since it is more convenient to hold it in your hands.
- Sandpaper (sanding paper). Both large and fine-grained will come in handy. Coarse-grained is used to remove various contaminants, and fine-grained - for grinding scratches from an abrasive product.
- Rubber grinding wheel. Needed to remove deposits in hard-to-reach places.
- Degreasers. Helps improve adhesion and avoid peeling paint. You can use acetone or solvent.
- Paint brushes. It is worth buying high-quality brushes that do not crumble pile.
- Respirator. This mask will protect the respiratory system from the toxic substances emitted by paints.
- Rubber gloves. They are needed to protect the hands.
- Masking tape. Helps protect surfaces from paint ingress.
- Mixer. With it, you can qualitatively mix the enamel.
- Dye. Care must be taken that its quantity is sufficient to stain the entire restored surface.
Characteristics
Each container for washing in the production process undergoes an enameling procedure, that is, it is covered with a layer of resistant paint that gives the surface color, glossy shine and smoothness. In modern models, bathroom enamel in the form of a powder is applied by an electrostatic method, and then “baked” at a high temperature, so the coating is durable and strong. You can paint the bowl at home with acrylic or epoxy enamel with roller, brush or pouring method.
 Bath enamel
These compounds are used because they have the following qualities:
- Water resistant. The top layer of paint is in constant contact with water, so it should not collapse and crack under its influence.
- Resistant to temperature changes. Hot water is used for washing and washing, so bathroom enamel must withstand high temperatures, as well as its differences, without deforming.
- Resistant to strong detergents. To maintain the cleanliness of the product, aggressive household chemicals are used, the impact of which the paint used to paint the bathtub must withstand.
- Resistance to mechanical stress and shock. During the operation of the bath, falling objects and high loads cannot be avoided, therefore the paint used for enameling must provide a durable coating.
Composition and technical characteristics of enamel and acrylic
Before considering how to cover the bath with acrylic or enamel, and which is the best of these two components, it is necessary to disassemble the main components of the substances, and in addition, the characteristics of the compositions:
- It should be understood that acrylic enamel is on sale, which includes acrylic directly.
- Separately, each composition contains auxiliary components in the form of hardeners and synthetic additives.
- Often, special components are used in the composition of substances, which impart viscosity to the composition and subsequent hardening.
If restoration or painting of the bath is required during restoration, then it is better to use enamel than another two-component composition for the bath. All this is due to the fact that, unlike acrylic, enamel is much cheaper, even though it contains acrylic components.In addition, the method of restoring bathtubs with acrylic involves the use of a special liner, the choice of which is significantly complicated by finding the appropriate size, and also a suitable shape.
Comparing these methods of bath restoration, it is important to take into account that acrylic, unlike enamel, dries much faster. Additionally, when selecting material for reconstruction, it is necessary to rely on the fact that the compositions differ significantly in consumption per square meter of bathing tank area

Consumption per 1m2
When choosing enamel or acrylic for a bath, and distinguishing which is better, it is important to consider the material consumption per square meter. Consider the main points associated with the use of a certain amount of material:
- on average, when using a sprayer, about 150-250 grams of enamel is spent to cover a square meter;
- if enameling is carried out with a brush, then the consumption of the component can increase to 300-500 grams per square meter;
- if acrylic is used, then the average consumption is 400-600 grams per square meter of space;
- when using a ready-made acrylic liner, these parameters are not taken into account, since a one-piece liner is used here.
Given all these points, you can choose for yourself the best reconstruction option for a metal or cast-iron bath, depending on which design option is used.
This is interesting: Technologies for galvanizing metals at home
What do you need to work?
First of all, prepare protective equipment. You will need:
- respirator. The usual "petal" for such work is not suitable. Buy a good respirator with a built-in organic absorber cartridge;
- rubber gloves;
- apron;
- flute brush. The tool must be exclusively made of natural bristles. The optimal brush size is 7-10 cm. It is impossible for the brushes to come into contact with anything greasy before starting work, including hands;
- grinding nozzle for electric drill and electric drill;
- tweezers;
- paint knife;
- acetone. Instead of cetone, you can use the 646th solvent. The use of white spirit is unacceptable, as well as other solvents containing saturated hydrocarbons;
- rag. Any fabric that does not leave a lint, for example, cotton, will do. Microfiber cloths are also great. These are usually used for wiping glasses glasses.
Enamel compositions - an overview of brands
The choice of enamels on store shelves is quite wide. Most often, for self-enamelling, the following compositions are chosen:
Epoxyn 51 or Epoxyn 51C
Two-component extra thick formulations that are applied with a brush only. The special consistency of the enamel allows you to get a smooth smooth coating without streaks. A thick mortar well fills small defects in the base: scratches and cracks.


The composition completely hardens within two days. Subject to proper application, the manufacturer gives a guarantee for at least 9 years of operation.
Sets from Random House
Popular compositions produced under the names "Fantasy" and "Svetlana". They differ only in configuration. The two-component enamel included in the kits is the same. It can be applied to the surface of the bowl with a brush or roller. It is used only for self-enamelling, specialists do not work with these solutions.
Reflex 50
The composition, produced by Tikkurila, is intended for professional work. Two-component epoxy enamel differs from analogues in a liquid consistency, which complicates the work with this material. To obtain a high-quality coating, at least four layers of this enamel are successively applied to the surface of the bowl.
In this case, the previous layer must be completely dry. Thus, it takes at least seven days to enamel the bath with Reaflex. However, the result is worth it.
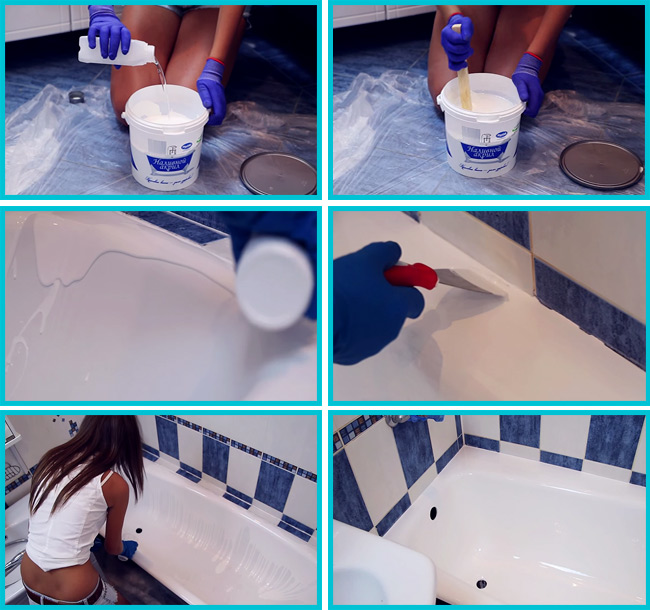
Acrylic: another option for restoring the inner surface of the bath
Bath coloring at home can be done using the Stakryl enamel composition or an acrylic mixture. Before starting work, the bath bowl must first be prepared as described above, and then the compositions must be applied to the sides.
Before you paint the bathtub with enamel with your own hands, think over and estimate both options. The second one is much easier and more convenient. But there is one caveat: the acrylic mixture does not “adhere” to the rough surface of the bowl as well as enamel paint. And it is worth slightly scratching the acrylic layer, the process of further destruction will no longer be stopped, the water will gradually wash away the coating, tearing off entire layers.
As you can see, painting a bathroom with your own hands is a fairly simple matter and does not require much knowledge, skills or possession of special tools. What do you need? Just read the instructions, watch the tips and videos, and prepare for the fact that the bath will be unavailable for some time. But it all pays off if you compare the prices for a new bowl, dismantling the old one, installing a font and a complete bathroom renovation on one side and restoration work carried out by oneself on the other!
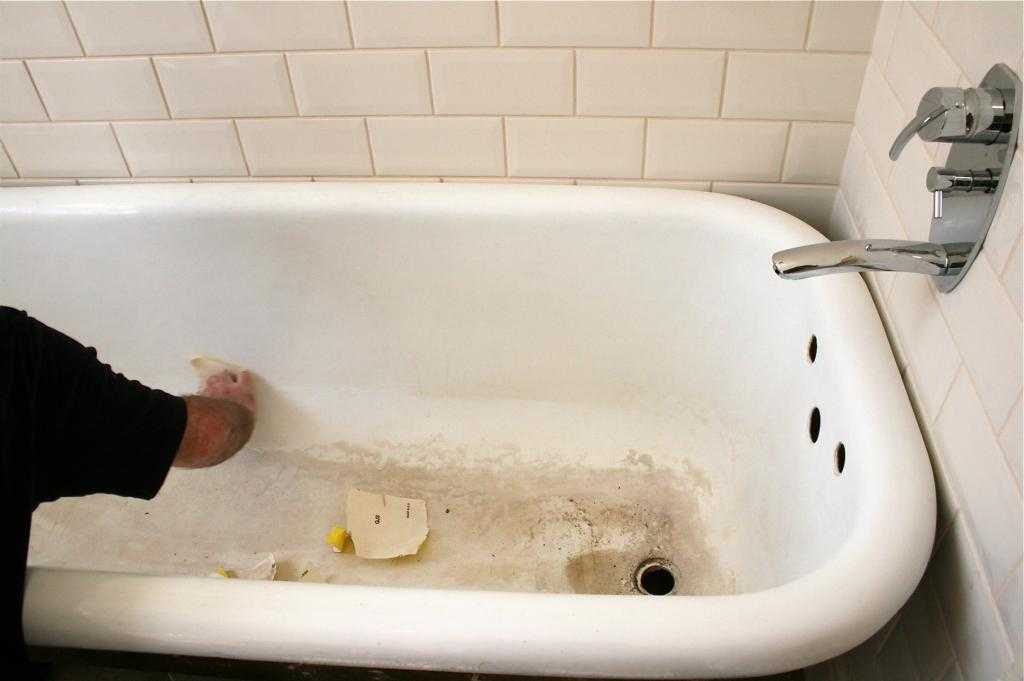
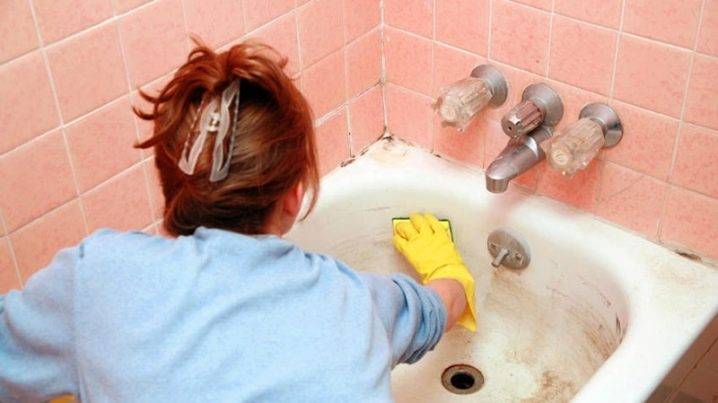
Causes of enamel damage
The rate of wear of the bathtub surface depends on many factors. The first of these is improper cleaning of the surface. This is the most common cause of rapid enamel wear. The use of steel wool or abrasives when cleaning causes immediate damage to most of the surface.
Enamel is quickly damaged when acids or other chemicals are used to clean drains. It is also affected by chlorine, bleach, vinegar and lemon juice. Many use these products to try to remove stains. In fact, this only wears out the enamel more. After the bath was rubbed with abrasive substances, scratches formed on it, into which dirt particles then gradually fall.
Bathroom enamel wear is also affected by many factors.
Water quality. Sometimes the water contains an unacceptably high proportion of additional particles that either stain or scratch the surface over time. Contaminants such as plant colloids and iron oxide will stain the surface. Even new bath surfaces are often painted. In areas where the water contains a lot of lime, sediment forms around drains and faucets.
It is important to ensure that dripping faucets are turned off and water does not remain in the bathroom.
Dripping mixers. Regular dripping of water causes serious damage to the surface of the tub
The first sign of damage is the staining of the enamel surface. This spot is usually green or slightly brown. Dripping faucets leave rust around the drain. Even if you replace the bathtub, but leave the faucet dripping, rust will reappear.
Water temperature. Extremely hot water causes the metal to expand and contract.Sudden temperature changes can cause cracks and other damage. It is recommended to periodically check the hot water temperature. The recommended temperature should not exceed 65 degrees.
Correct installation. Poor bath installation can result in water collection. If water remains on the surface for a long time, it will damage the enamel. High levels of various particles in the water will only add to the problem. Another reason for rust around the drain is that water cannot drain because the drain is above the surface of the tub. Proper installation of acrylic, fiberglass and marble tubs is critical as curvature leads to cracking.
- Non-slip mats. Many people leave rubber mats in the bathroom to drain water. By cleaning them regularly, mold and soap deposits can be avoided.
- Soaking clothes. Bath-soaked clothing dyes can stain the surface of all types of baths. They are difficult to remove from acrylic bath surfaces because the stains are deeply saturated. Strong detergents in laundry detergents can also damage the enamel.
- Hair dyes. Hair dyes contain strong chemicals that easily stain the surface of the tub. It is highly discouraged to use hair dyes in any bath.
- Soap. Many soaps contain caustic soda, which will bleach many enamel pigments over time. Soap should not remain on the exposed surface of the enamel for a long time.
- Other reasons. Frequent use of various bath bombs and oils also spoils the surface.The constant use of colored disinfectants and soaps in the bath water leads to stains that can only be removed by polishing. In some cases, the stain penetrates the surface and is not removed.
- unavoidable factors. If the above reasons can be reduced to a minimum, then some of them are inevitable. For example, using water with iron, which leaves yellowish-brown stains.


